bisc63
-
Posts
4,171 -
Joined
-
Last visited
Content Type
Profiles
Forums
Events
Gallery
Everything posted by bisc63
-
Good looking model, and a cool concept. Nice job!
-
Agree with all the above! That body makes a very handsome rag-top, and a gorgeous shade of red with white interior is icing on the cake. Well done.
-

RAT TRIKE . . .
bisc63 replied to Chappy's topic in WIP: All The Rest: Motorcycles, Aviation, Military, Sci-Fi, Figures
Off to a great start! Very nice rusty metal work. Will be watching... -
Progressing nicely; good to see you back on it. Digging that interior!
-
Painting interior tin(in a drag car)?
bisc63 replied to crowe-t's topic in Model Building Questions and Answers
Just a bit of additional info should anyone encounter a webp image they might want to save for reference, but in a more cross-platform friendly form, there is s nice free image converter call XnConverter that will let you convert webp images to any kind of image file you can think of. I use it on Windows, and it's from a reputable company, and there's no strings attached to the free version. -
le couronne
bisc63 replied to Bronzekeg's topic in WIP: All The Rest: Motorcycles, Aviation, Military, Sci-Fi, Figures
Nice. Let's see 'em! I really love the sculptural qualities of the tall ships; the lines, rigging, and the rest is purely an aesthetic experience for me, as I know practically nothing about them. I'm from inland (Ky) so they were never a part of local history or personal experience for me, and yet they are extremely facinating. The wooden models can be incredibly complex and beautiful. -
VERY nice looking build. It has a very authentic and real appearance. Well done.
-
Very nice color, I like how the red came out!
-
Supposed to be top notch, weather resistant stuff. Mural artists use it, and you usually find it sold by art supply sources.
-
There's a good YouTube video of a buildup of this kit if you want to see how it looks.
-
le couronne
bisc63 replied to Bronzekeg's topic in WIP: All The Rest: Motorcycles, Aviation, Military, Sci-Fi, Figures
Beautiful finishing work, and the naturally contrasting woods are striking. Should be quite impressive when finished! Keep us posted. -
Very impressive build, I like the concept and the execution! Going to look great in that color, or some variation of it.
-
Makes me want to dig mine out, but..must...finish...others...
-
Heller mercedes 170 lieferwagen
bisc63 replied to happy grumpy's topic in Model Trucks: Pickups, Vans, SUVs, Light Commercial
Very attractive model, I especially like the color scheme. Very classy looking! Well done. -
You need to make a new thread for this one so more people will see it. You did a great job on it. Amazing how good simple kits can look with some imagination and a skilled builder.
-
I love funky cars like this. Is this kit 1/24 or 1/43?
-
Very nice. Beautiful replica, and that color is SO nice on this. Very well done.
-
"These aren't the beers you're looking for..."
-
That's the curse of building models!
-
Thanks for the encouraging words, fellas. As I said, this one will unfold somewhat slowly but surely. Working on interior mods right now. Doing some mild custom work inside, just don't want the Fury panels, so reworking those and adding pleated inserts to seats. Replacing front bench with junkyard buckets from 69 Olds. Also working on engine, which will be a 440/4-speed combo, with maybe an aluminum intake, single 4-barrel, and headers if I find some to fit without much fuss. Are there any good 1/25 intakes for a 440 that mimic an aftermarket unit? Will post photos when there's something more interesting to see! Just need to move a little further along. Am I the only one that thinks these look like entirely different automobiles once you remove the side trim?!
-
Very cool stuff. Really digging the frame, but why not go high-boy style to actually show off the frame!? Good looking build, at any rate. Will be watching!
-
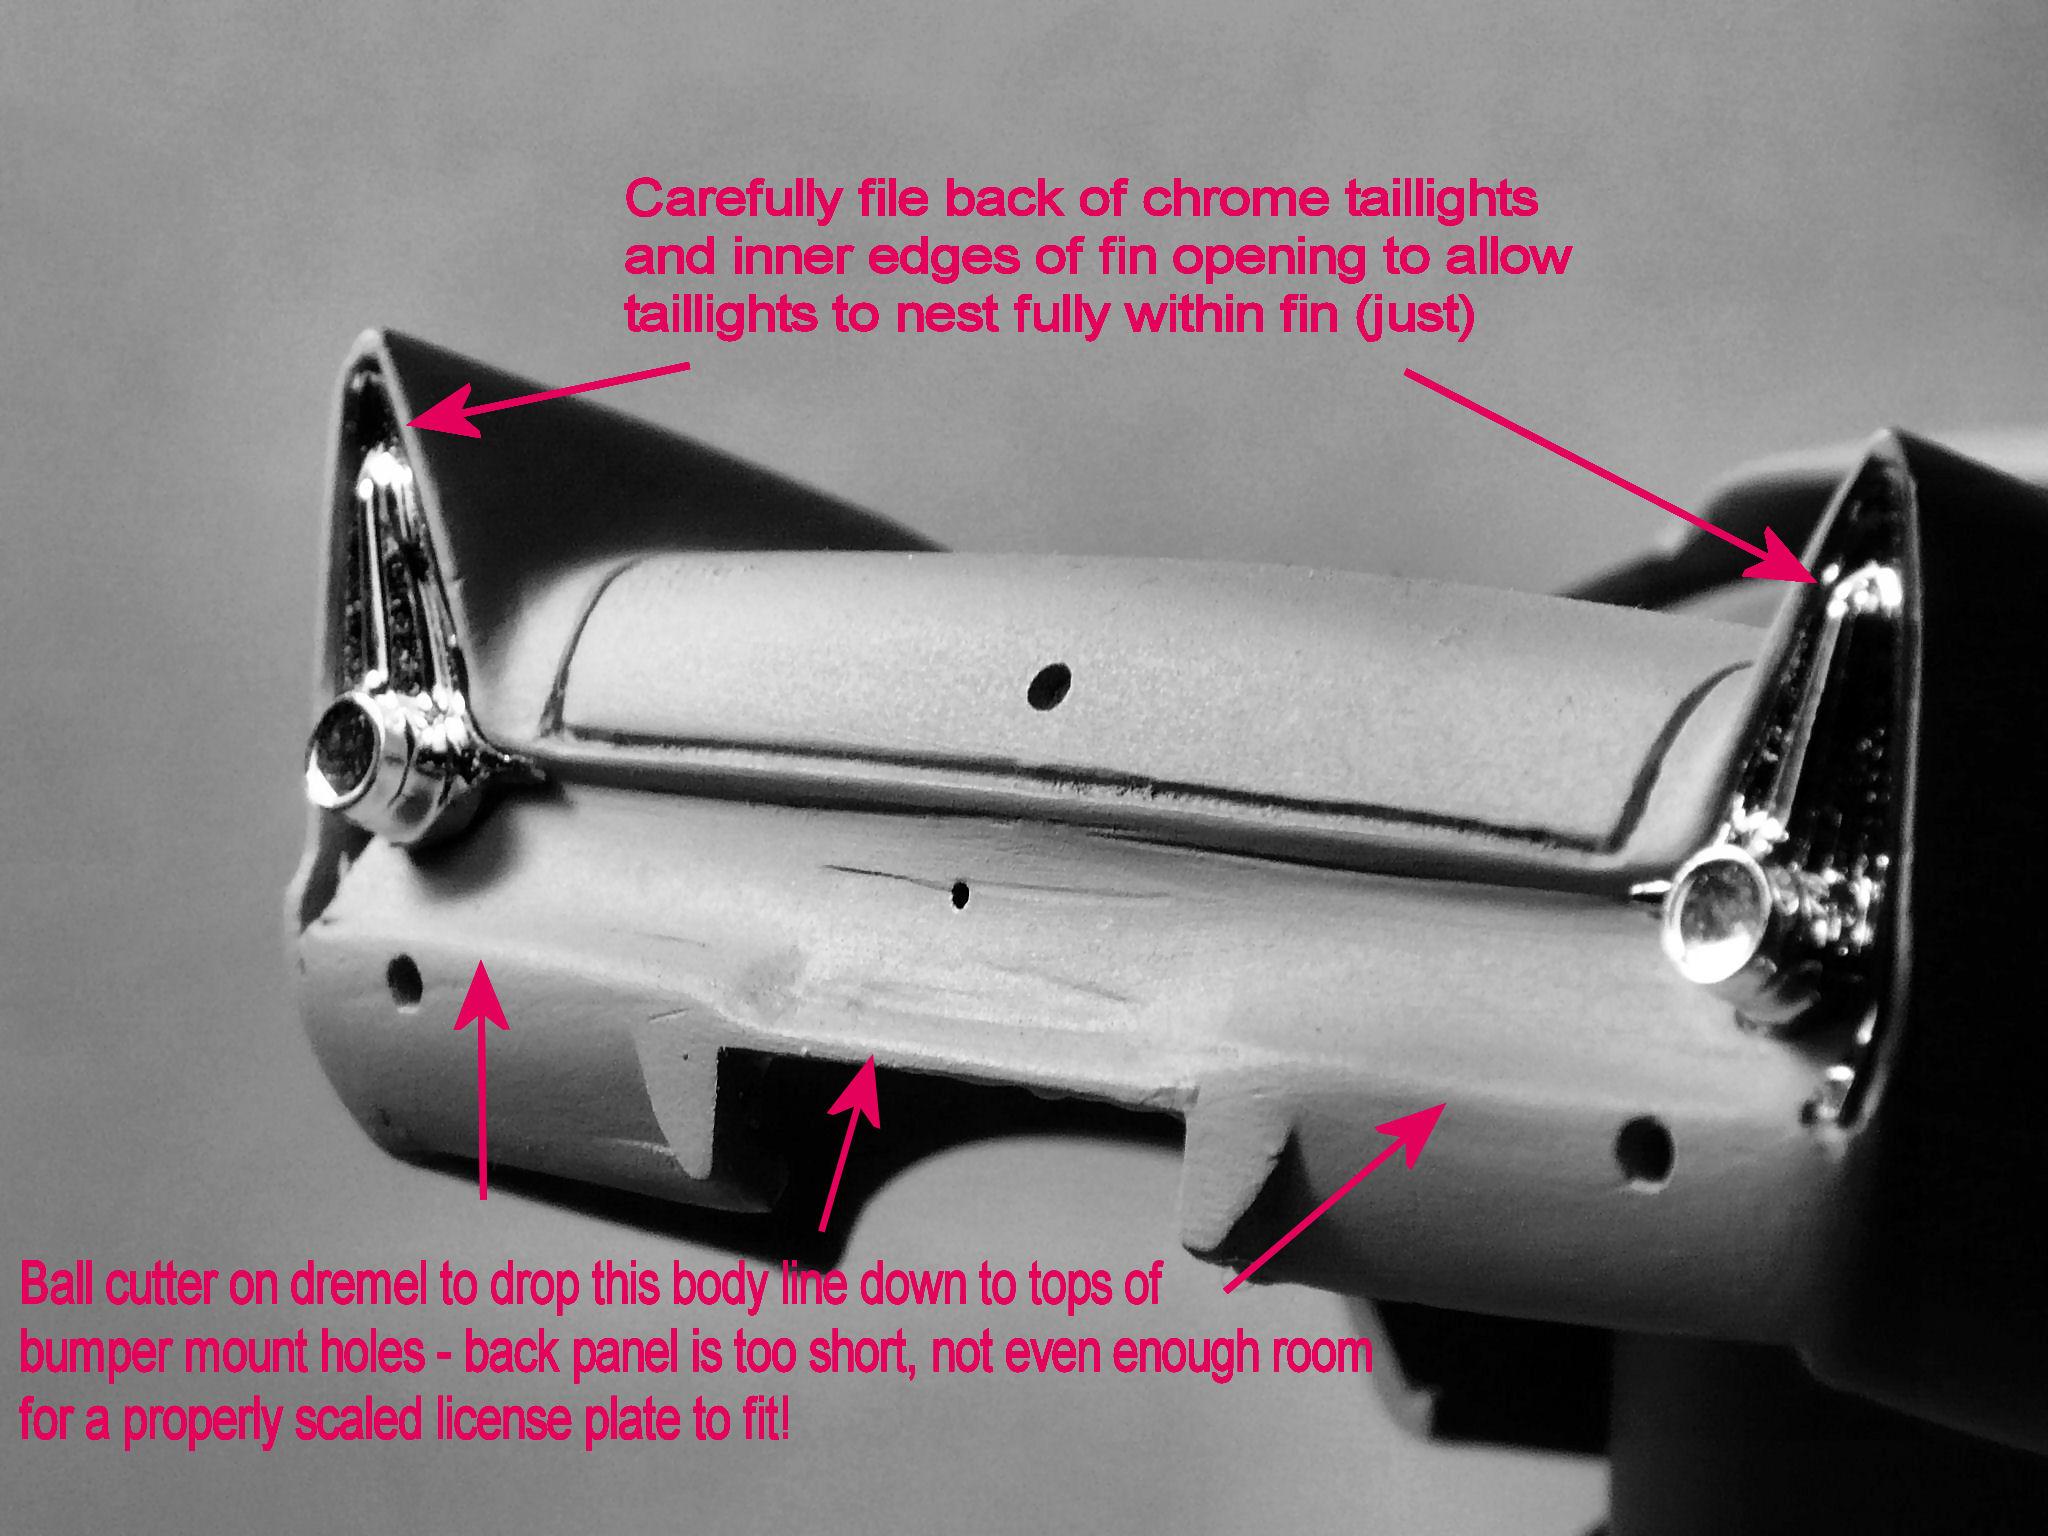
The tail end needs some attention, too. The tail lights don't fit correctly out of the box, but it's not immediately noticeable if you haven't seen the real thing. Most cars have a bright housing surrounding the lens, sitting ON the outer surface of the sheet metal. These Plymouths have the bright housing tucked IN the opening on the back of the quarter panel. You can actually see body-colored narrow ends of the fin surrounding the taillight when viewed from the rear. Slow work with a fine file and sanding sticks lets you gain a very precise fit. Once again, there's plenty of plastic inside that opening, and I actually began with an Exacto knife. Another sore point is the panel below the trunk lid; it's too short. It looked off to me, so I did a little measuring, and found that a 1/25 plate wouldn't even fit as it should. The kit plate fits because it is too small! For this one, I just started filing and cutting with a Dremel tool to drop the lower lines down, adjusting the bumper down a little as needed (not much at all). I also filed the undercut just below the trunk lid a little deeper and more sharply defined.

-
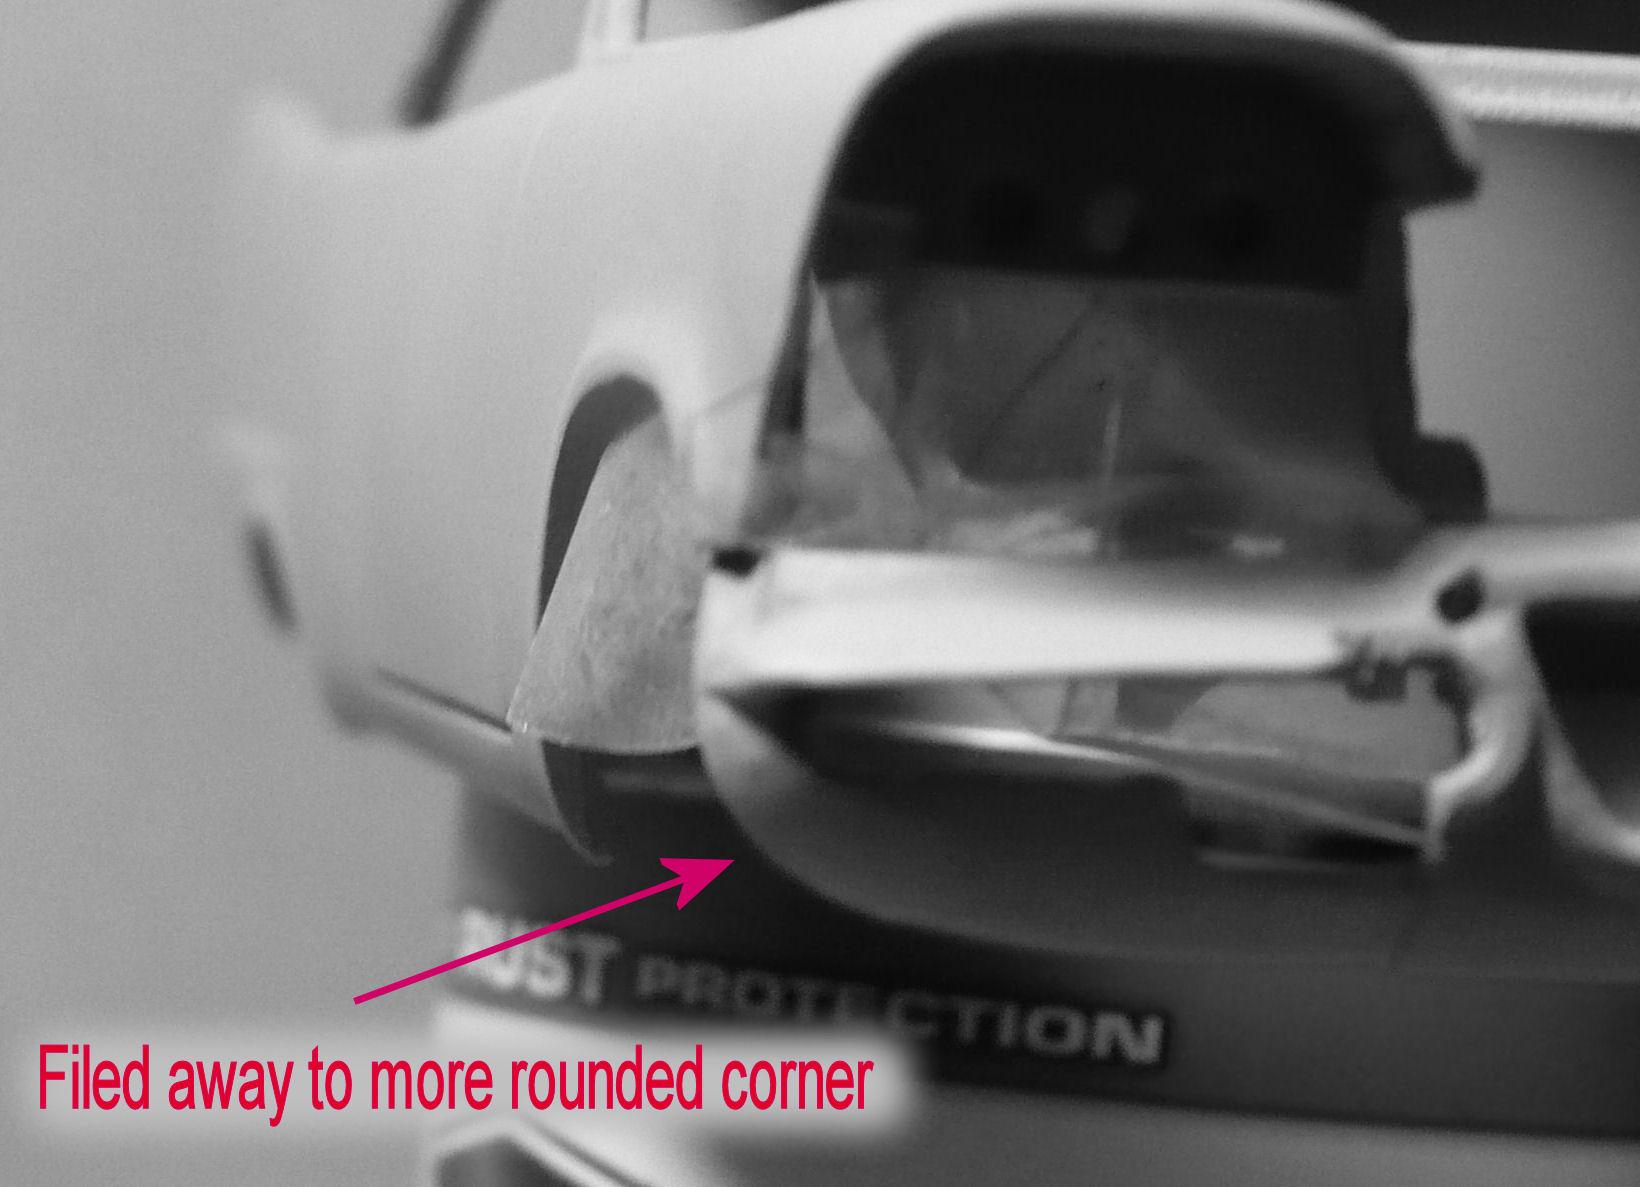
Another area that needs some material removed (IMHO). The outer corners of that lower valance up front looks too squared to my eye, compared to pics of the real thing. I backed up the inside of the piece with some epoxy, and then took a big file to it. I think it's better...
-
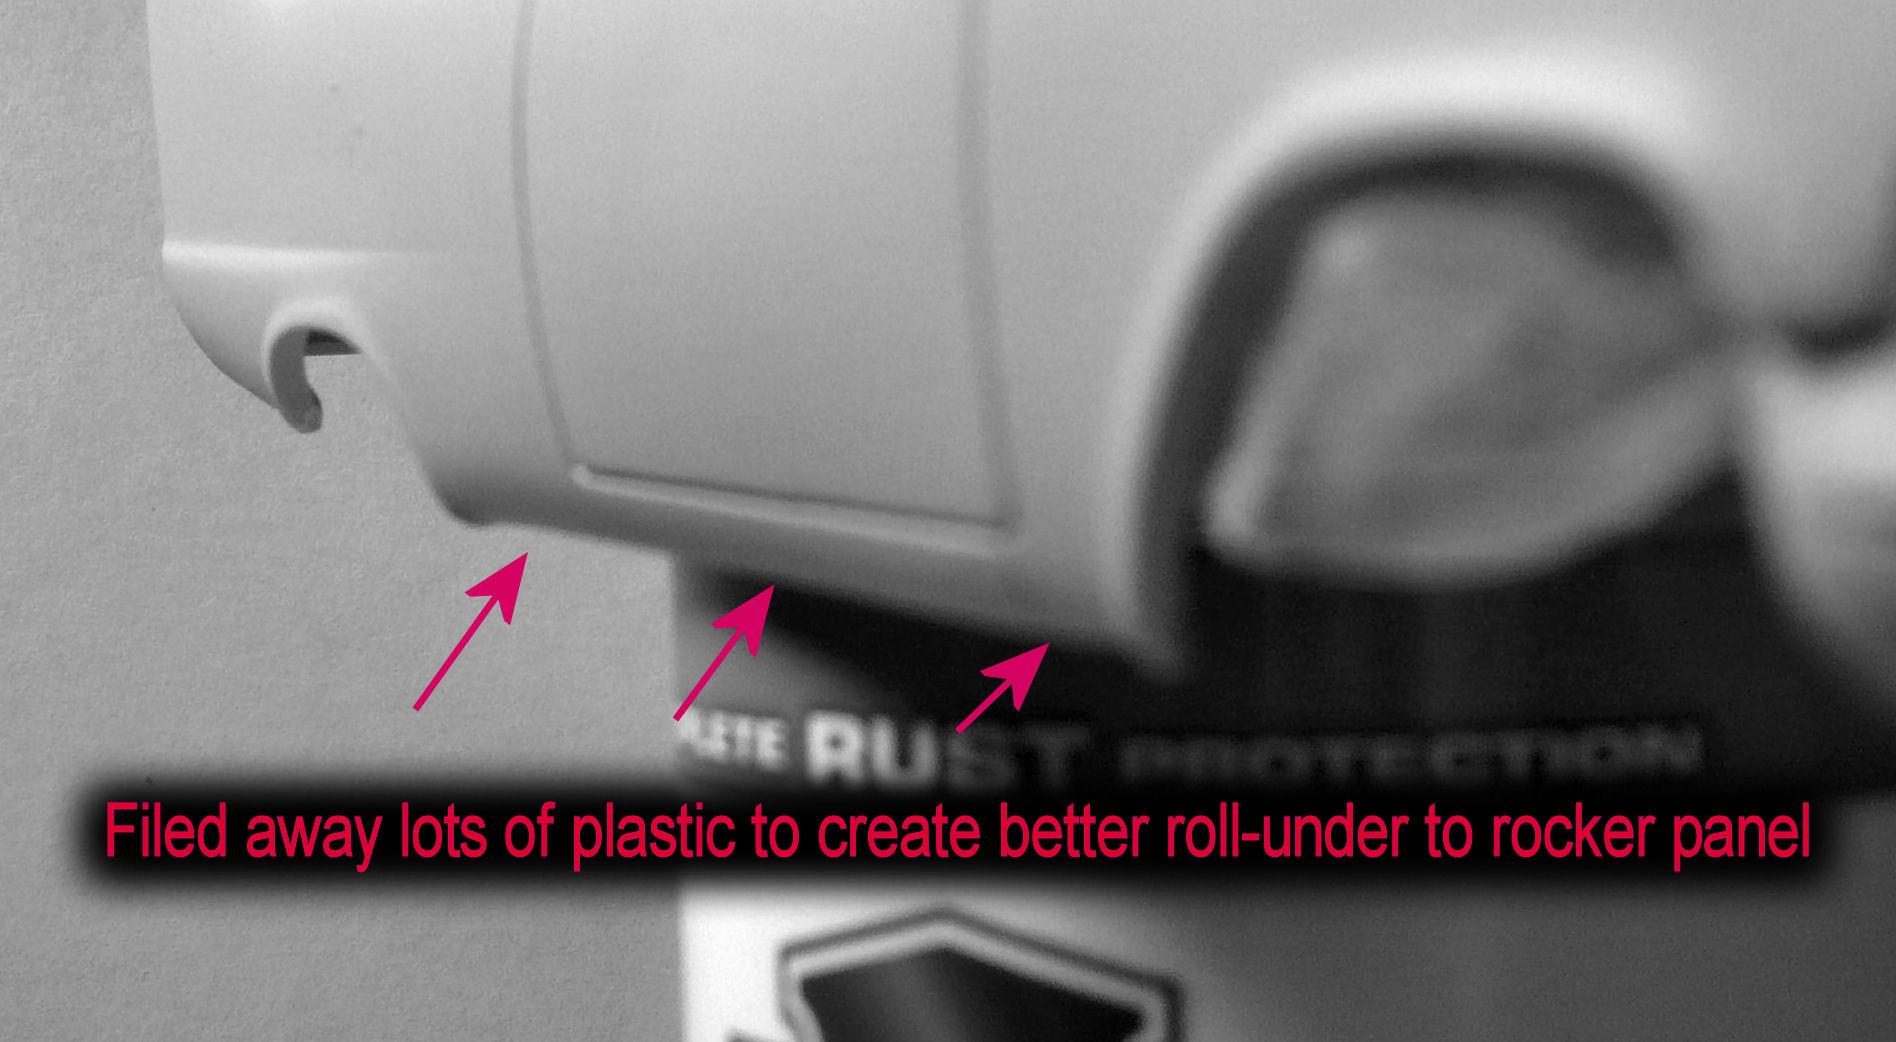
There should be a serious roll under of the rocker panels, but AMT made them near vertical. No problem, though, as the kit plastic is thick enough to let you scrape, file, and sand to a much better contour. Use a small round file near the wheel opening lips to roll them under as well. Patience is key keeping those shapes right!
-
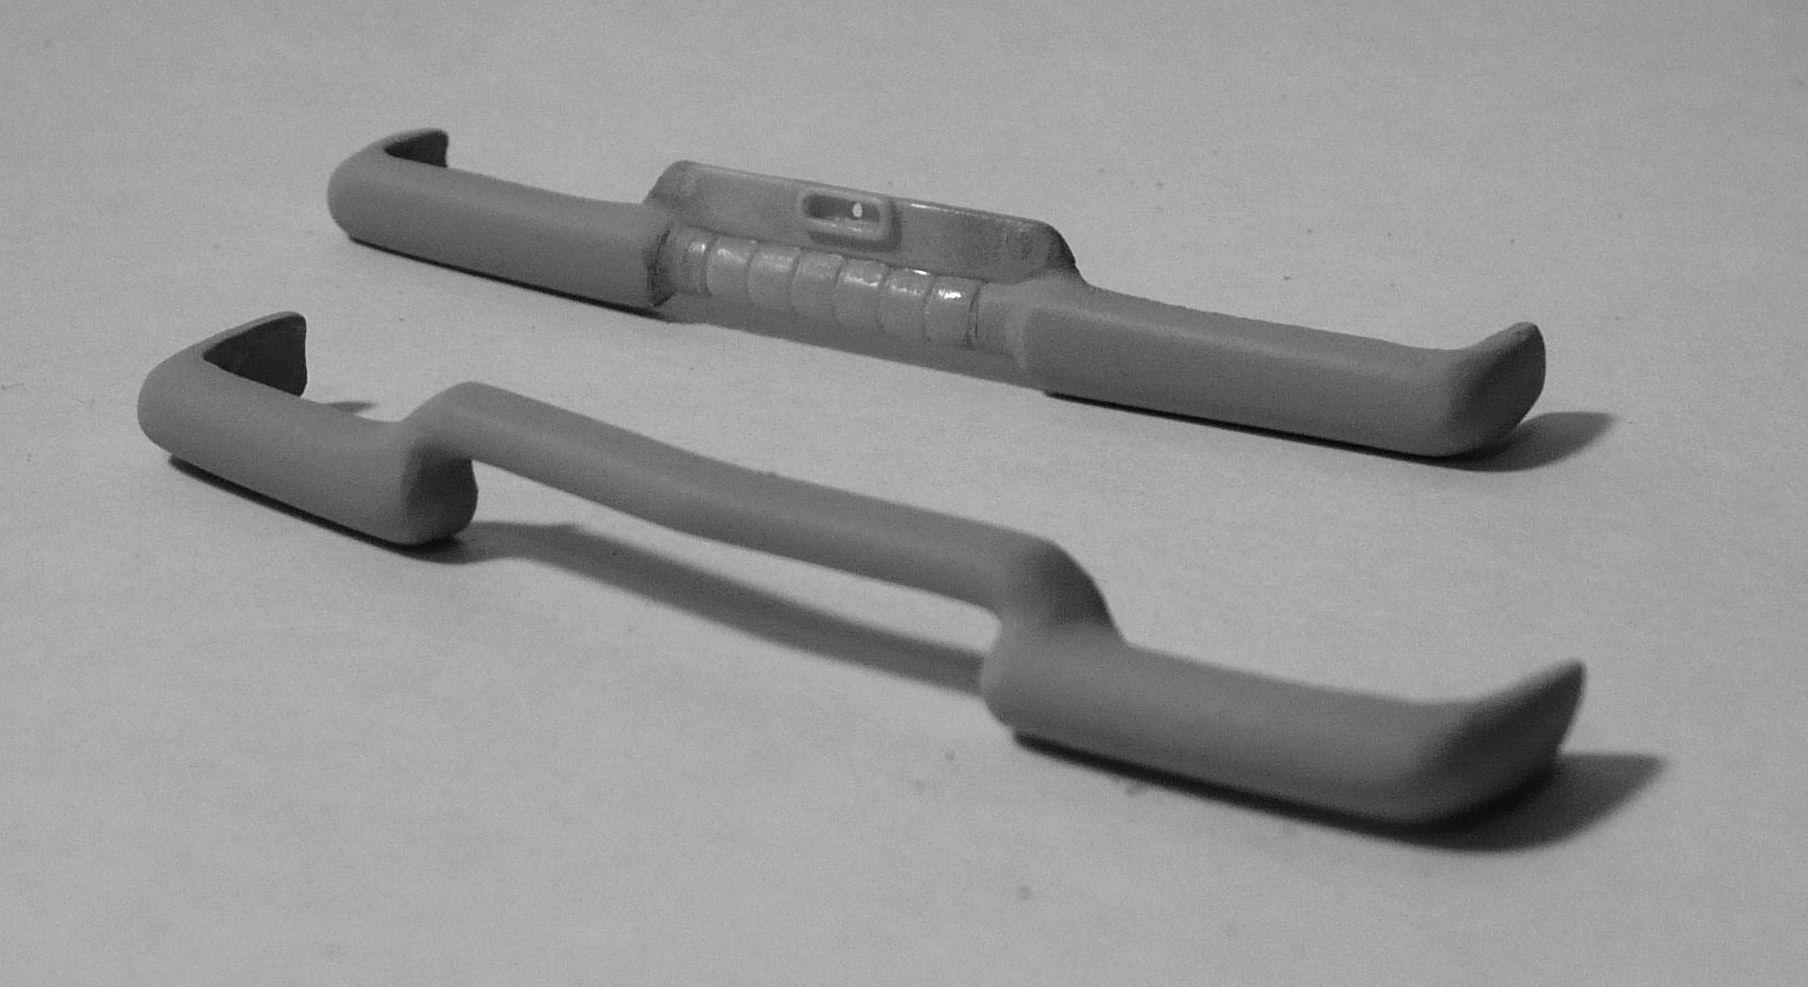
My bumpers, once I did away with their "wings". I prefer this cleaner look, as was used on the cheaper body styles.