gtx6970
-
Posts
7,936 -
Joined
-
Last visited
Content Type
Profiles
Forums
Events
Gallery
Everything posted by gtx6970
-
 Rare? Not really. Desirable? Yes. Its a great kit Expensive? All depends on the buyer. Most I've seen actually sell are in the $40-50 range I sold 2 of them last year. One molded white. The other that blue green color Neither one brought over $60 and I had aftermkt decals in both One each Mickey Thompson and Keeling Clayton sheets
 -
1960 Mercury Park Lane two door hardtop
gtx6970 replied to RACINE ISHRAQUR RAZA's topic in Model Cars
nice,'' I have this same kit , only convertible I started the redo a few months back. But Im not happy with the paint result . SO it sits until I either decide to strip or. Or just suck it up and push it across the finish line -
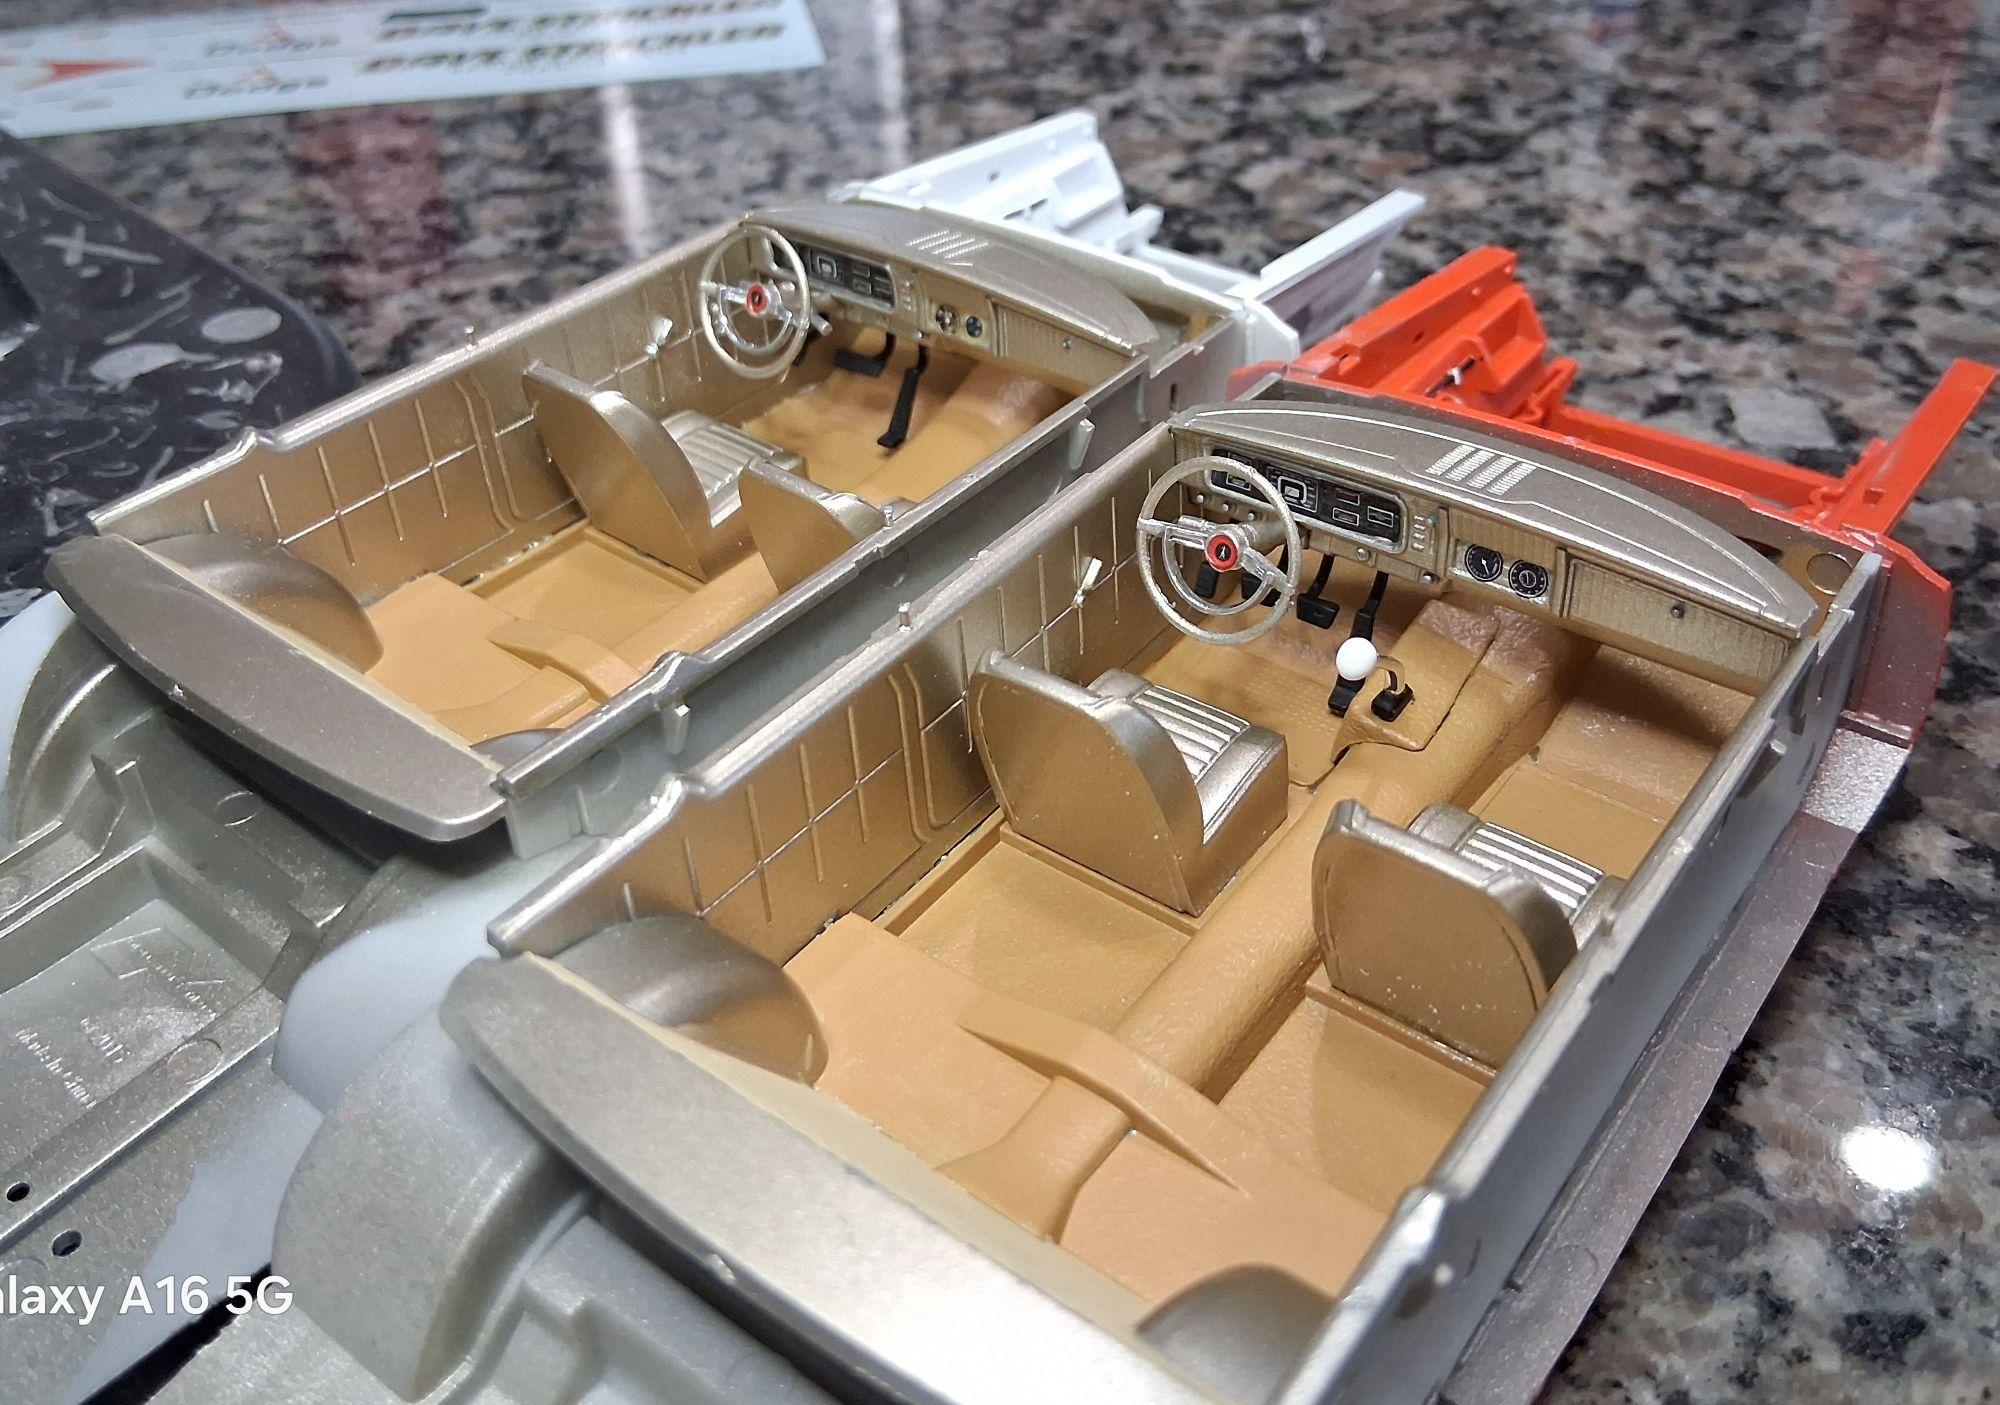
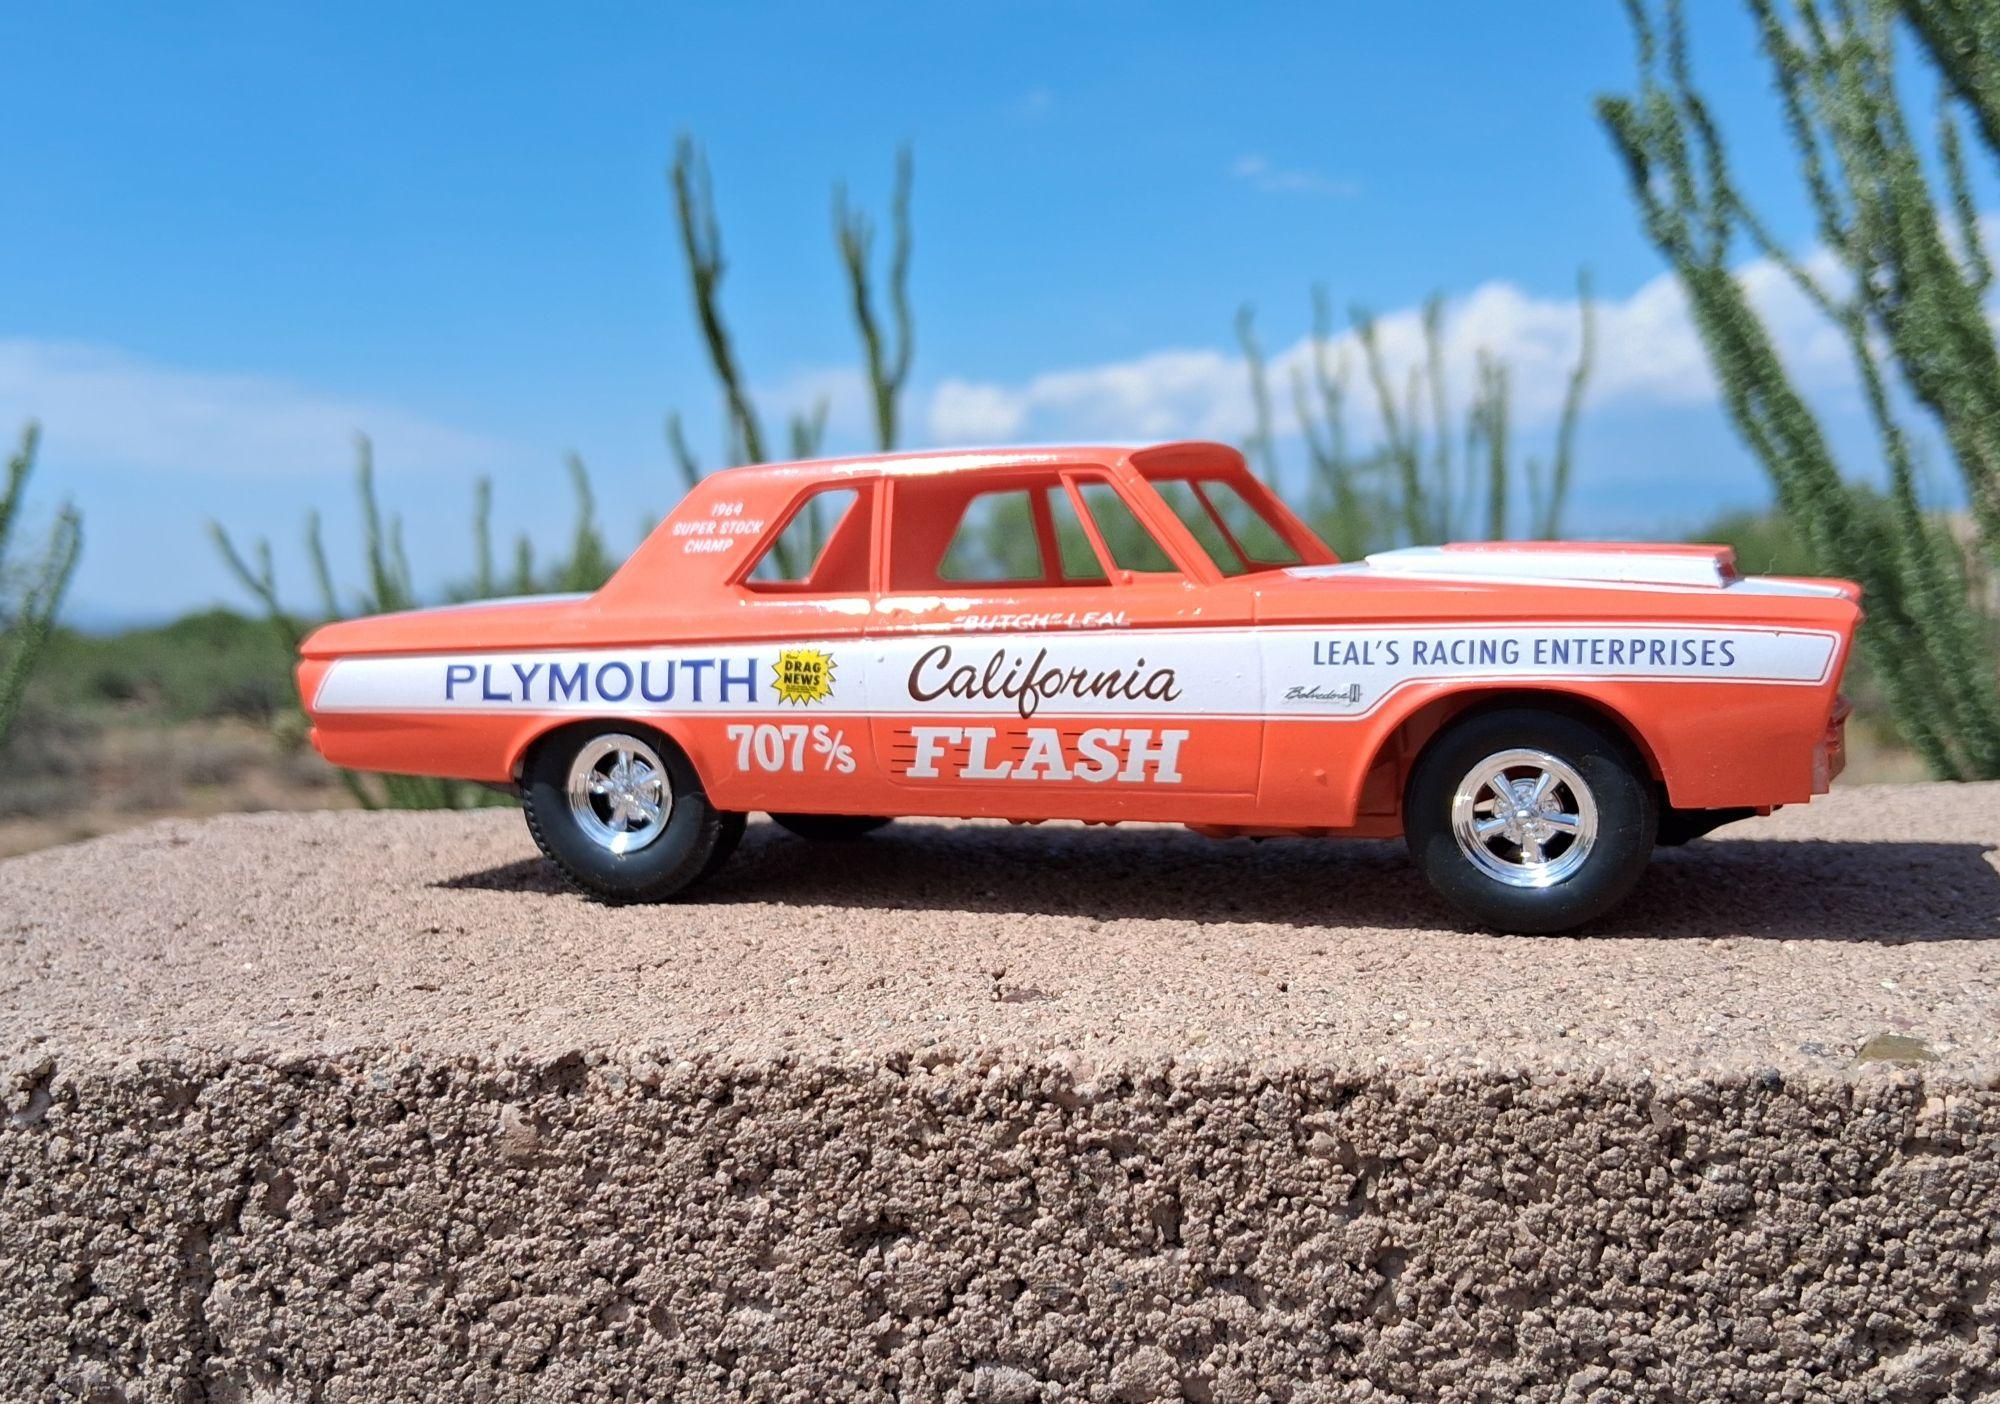
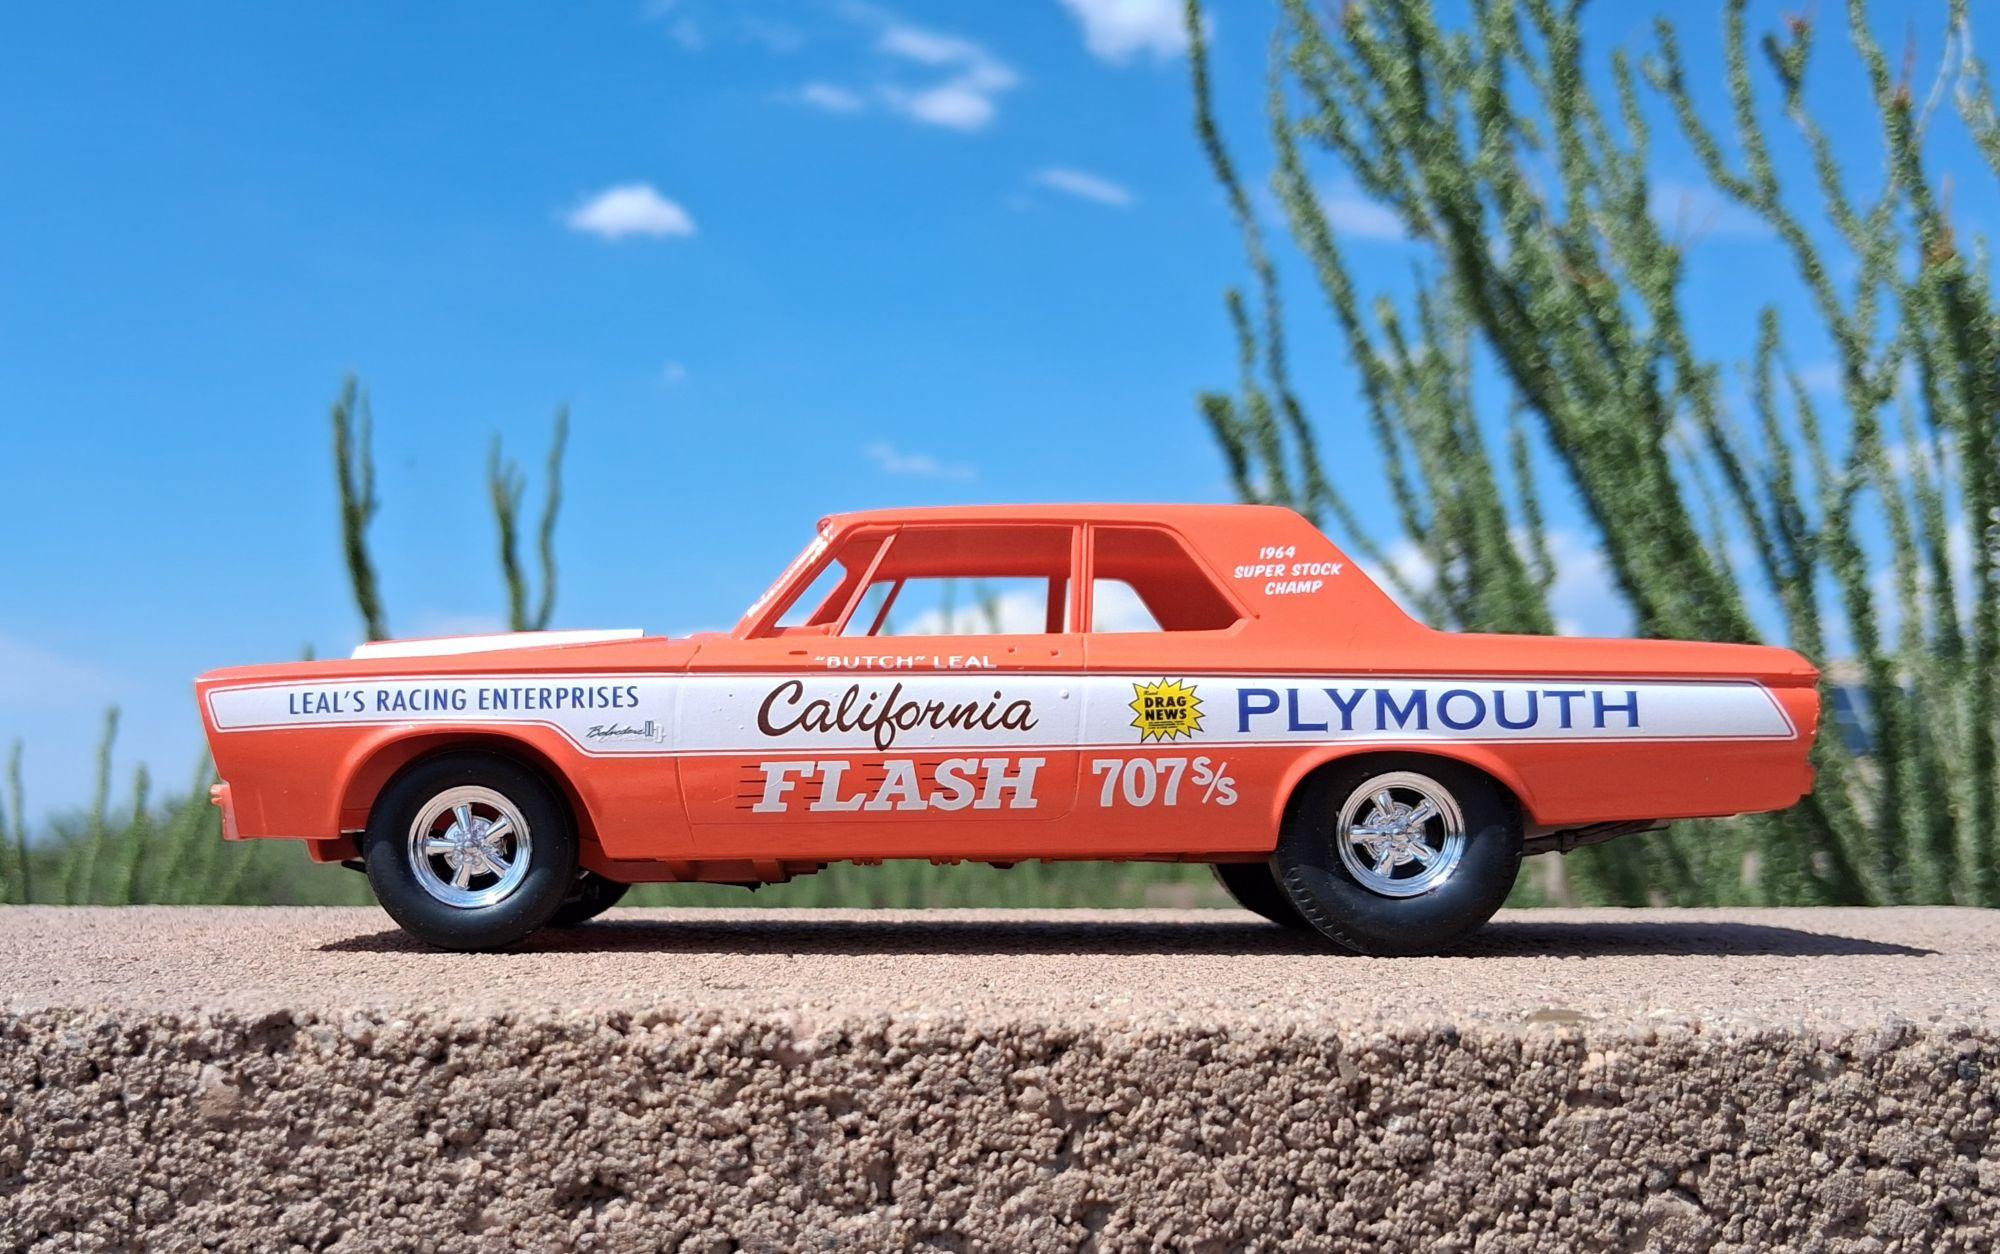
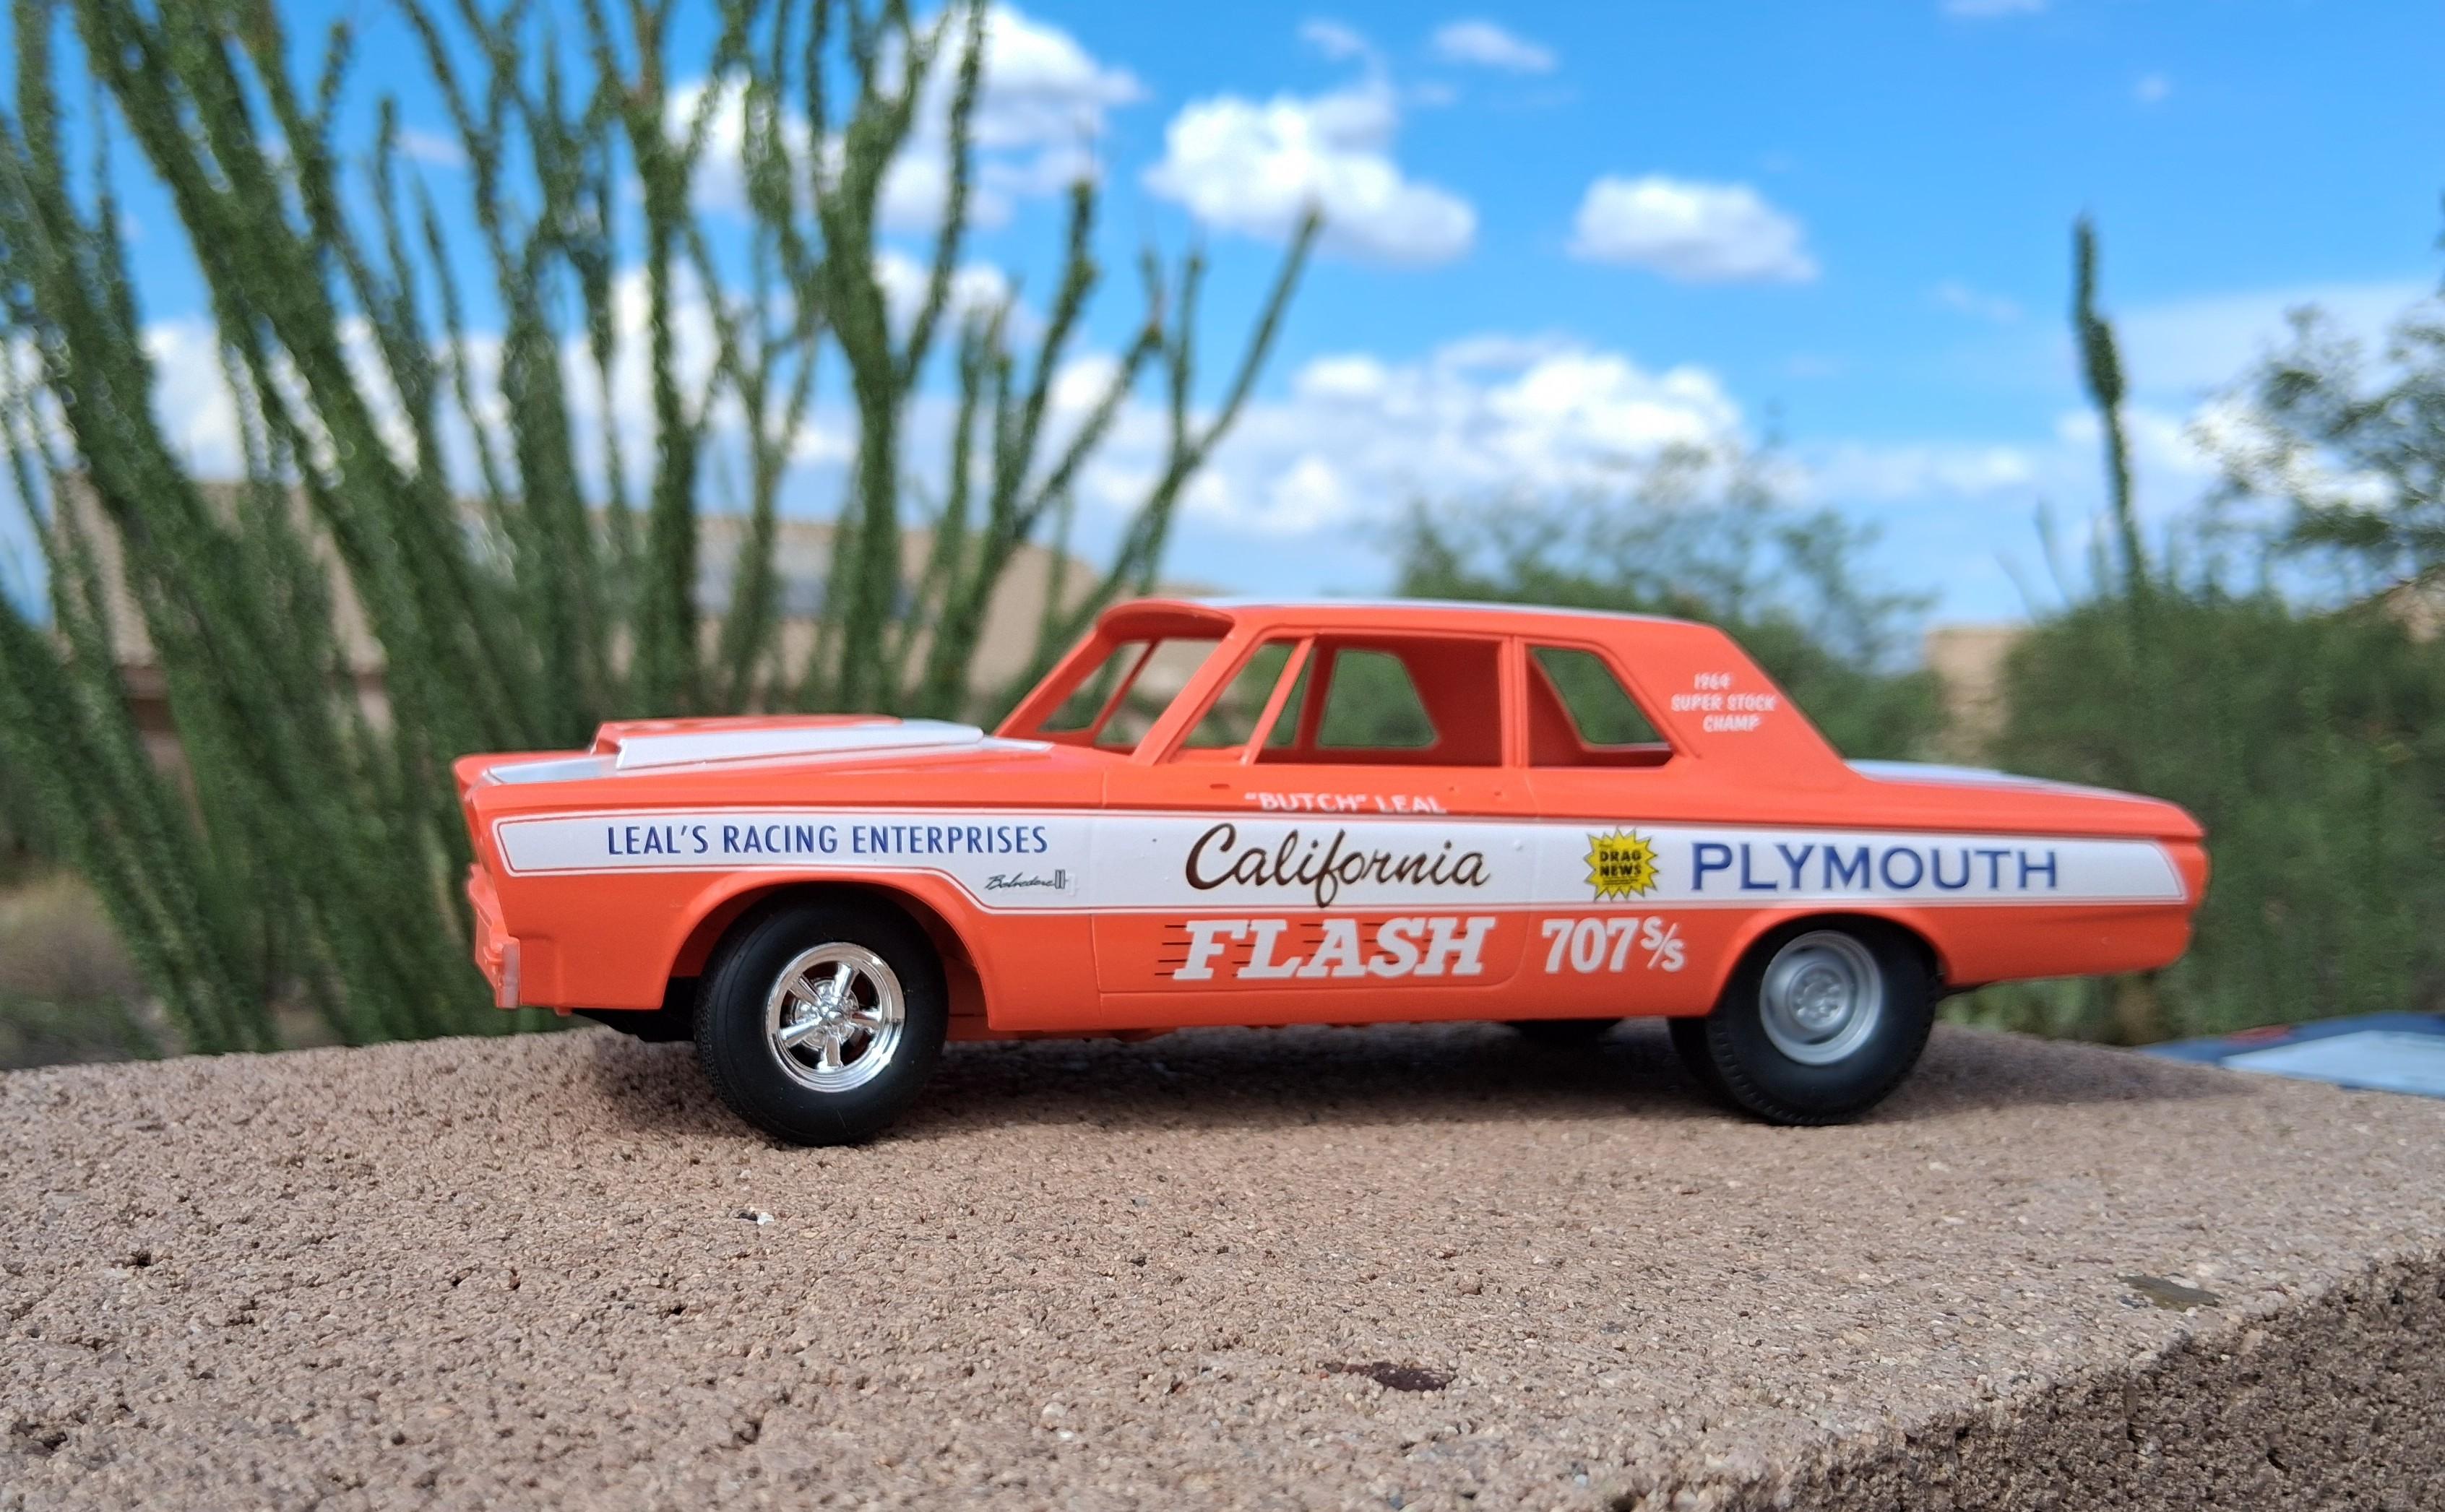
Had some time this morning so finished off the 2 interiors. Sanded the molded in radio out and put some aftermkt gauge decals in there place. Column auto for the Burgess car on the left 4spd for the Leal car on the right

-
“ BUILDING THE COVERS “ vol # 113 BOB HARROP’S 1965 A/FX AWB DODGE
gtx6970 replied to M W Elky's topic in Drag Racing
Nice list. great cars btw -
Found, Thanks to Jeff, AKA Altered Ego
-
“ BUILDING THE COVERS “ vol # 113 BOB HARROP’S 1965 A/FX AWB DODGE
gtx6970 replied to M W Elky's topic in Drag Racing
Nice,' I just got these very decals a few weeks ago . So i have this very same build on my short list. Very short list -
Same here. This is one kit where a stock version doesn't interest me at all Drag car and Im all in
-
All the decals are all one piece None are multi layer The side decals are 2 pieces. The ft fender sections are one. and from ft door seam back is 2nd piece When or where I bought them I dont remember,,,, as I've had them for years The comp was Performance Detail Products and are long gone as far as I know Chris Walsh makes a set today,,,,, for either the original car OR the restored modern version Items for sale by rpols6 | eBay
-
Just an FYI, ( in case it matters ) but the exhaust in this kit is wrong. They never had an H pipe. ( crossover in between the 2 head pipes )
-
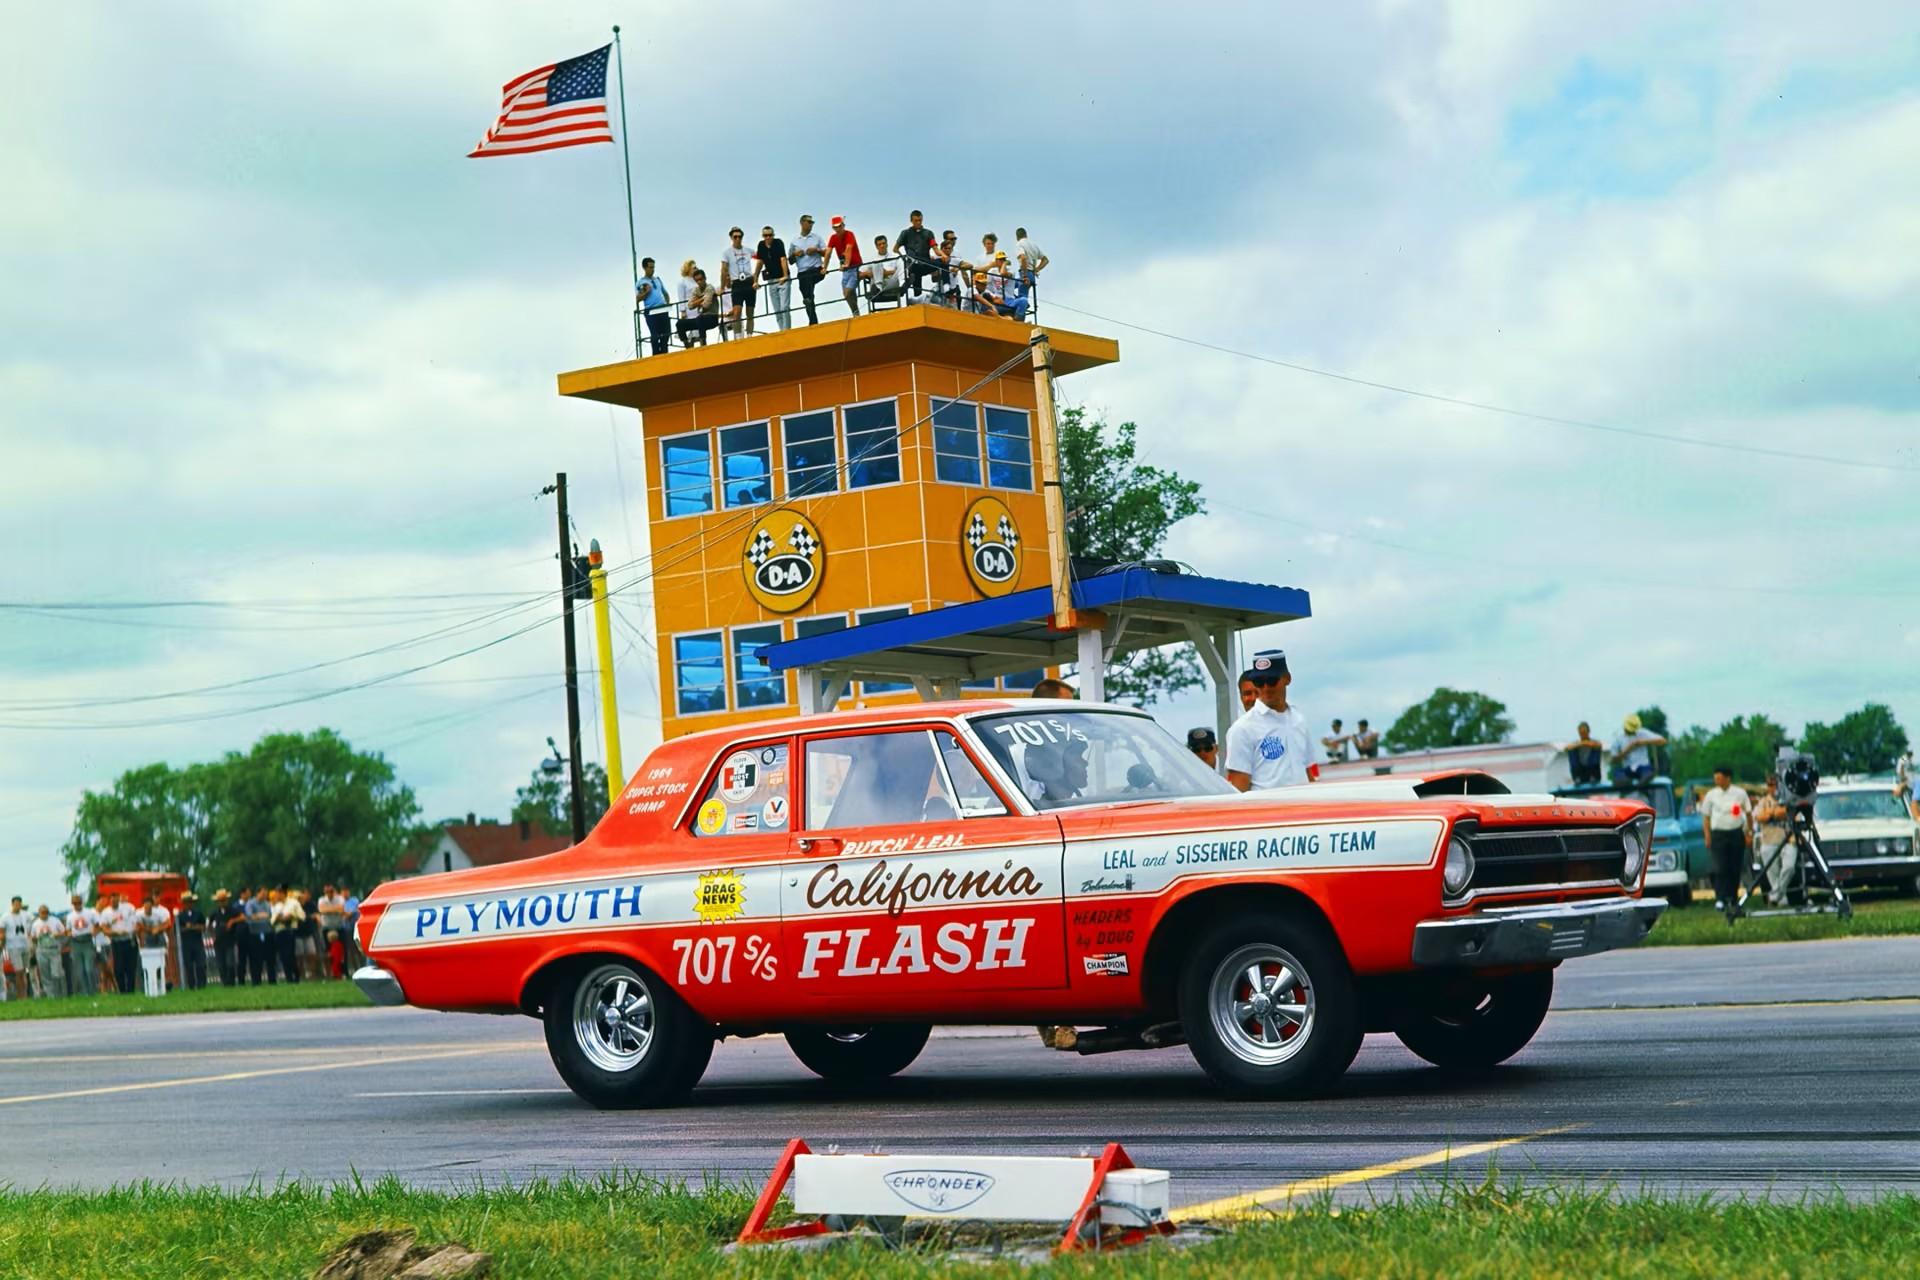
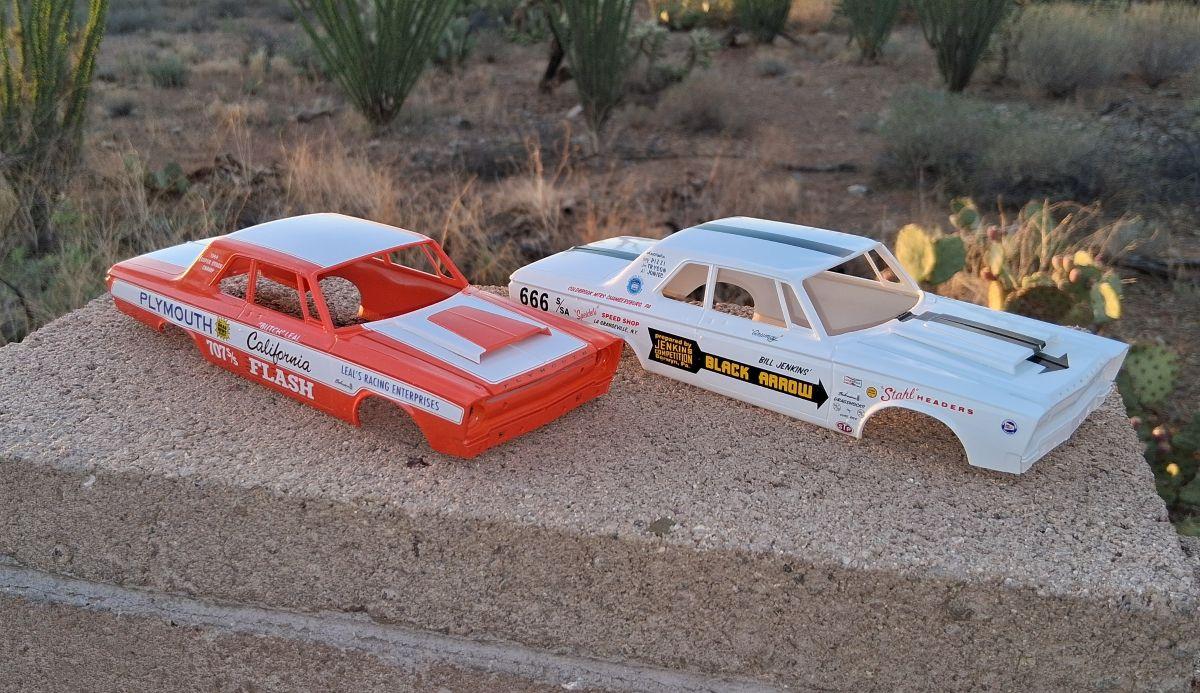
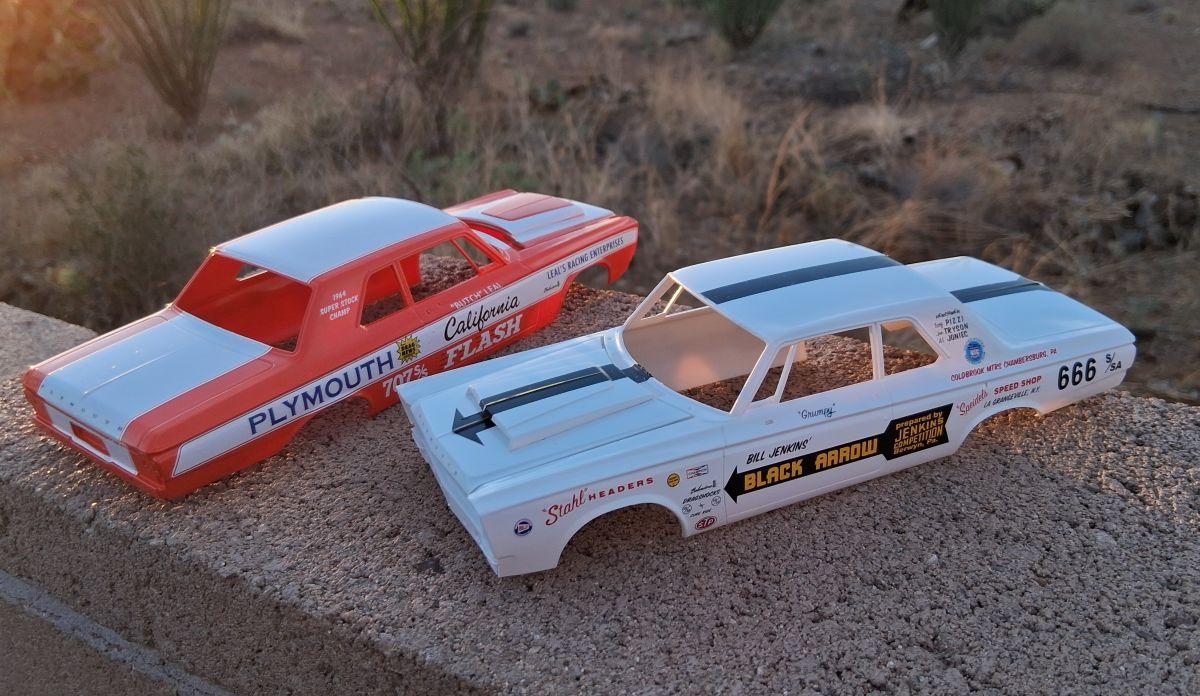
Thanks Tim I had it mocked up per the instructions and Not sure I cared for the look Gives it an at speed look And If I were doing a diorama. I might be more inclined to build it that way, Same goes for the Burgess car Like so ps, Im also leaning towards just using the kits chrome wheels, even though they are not "correct' for the Leal car Seems most of his car had bling so to speak. pss, Seems the Burgess car ran a roll bar. Whereas the Leal car did not.
-
Yes I believe i have one coming
-
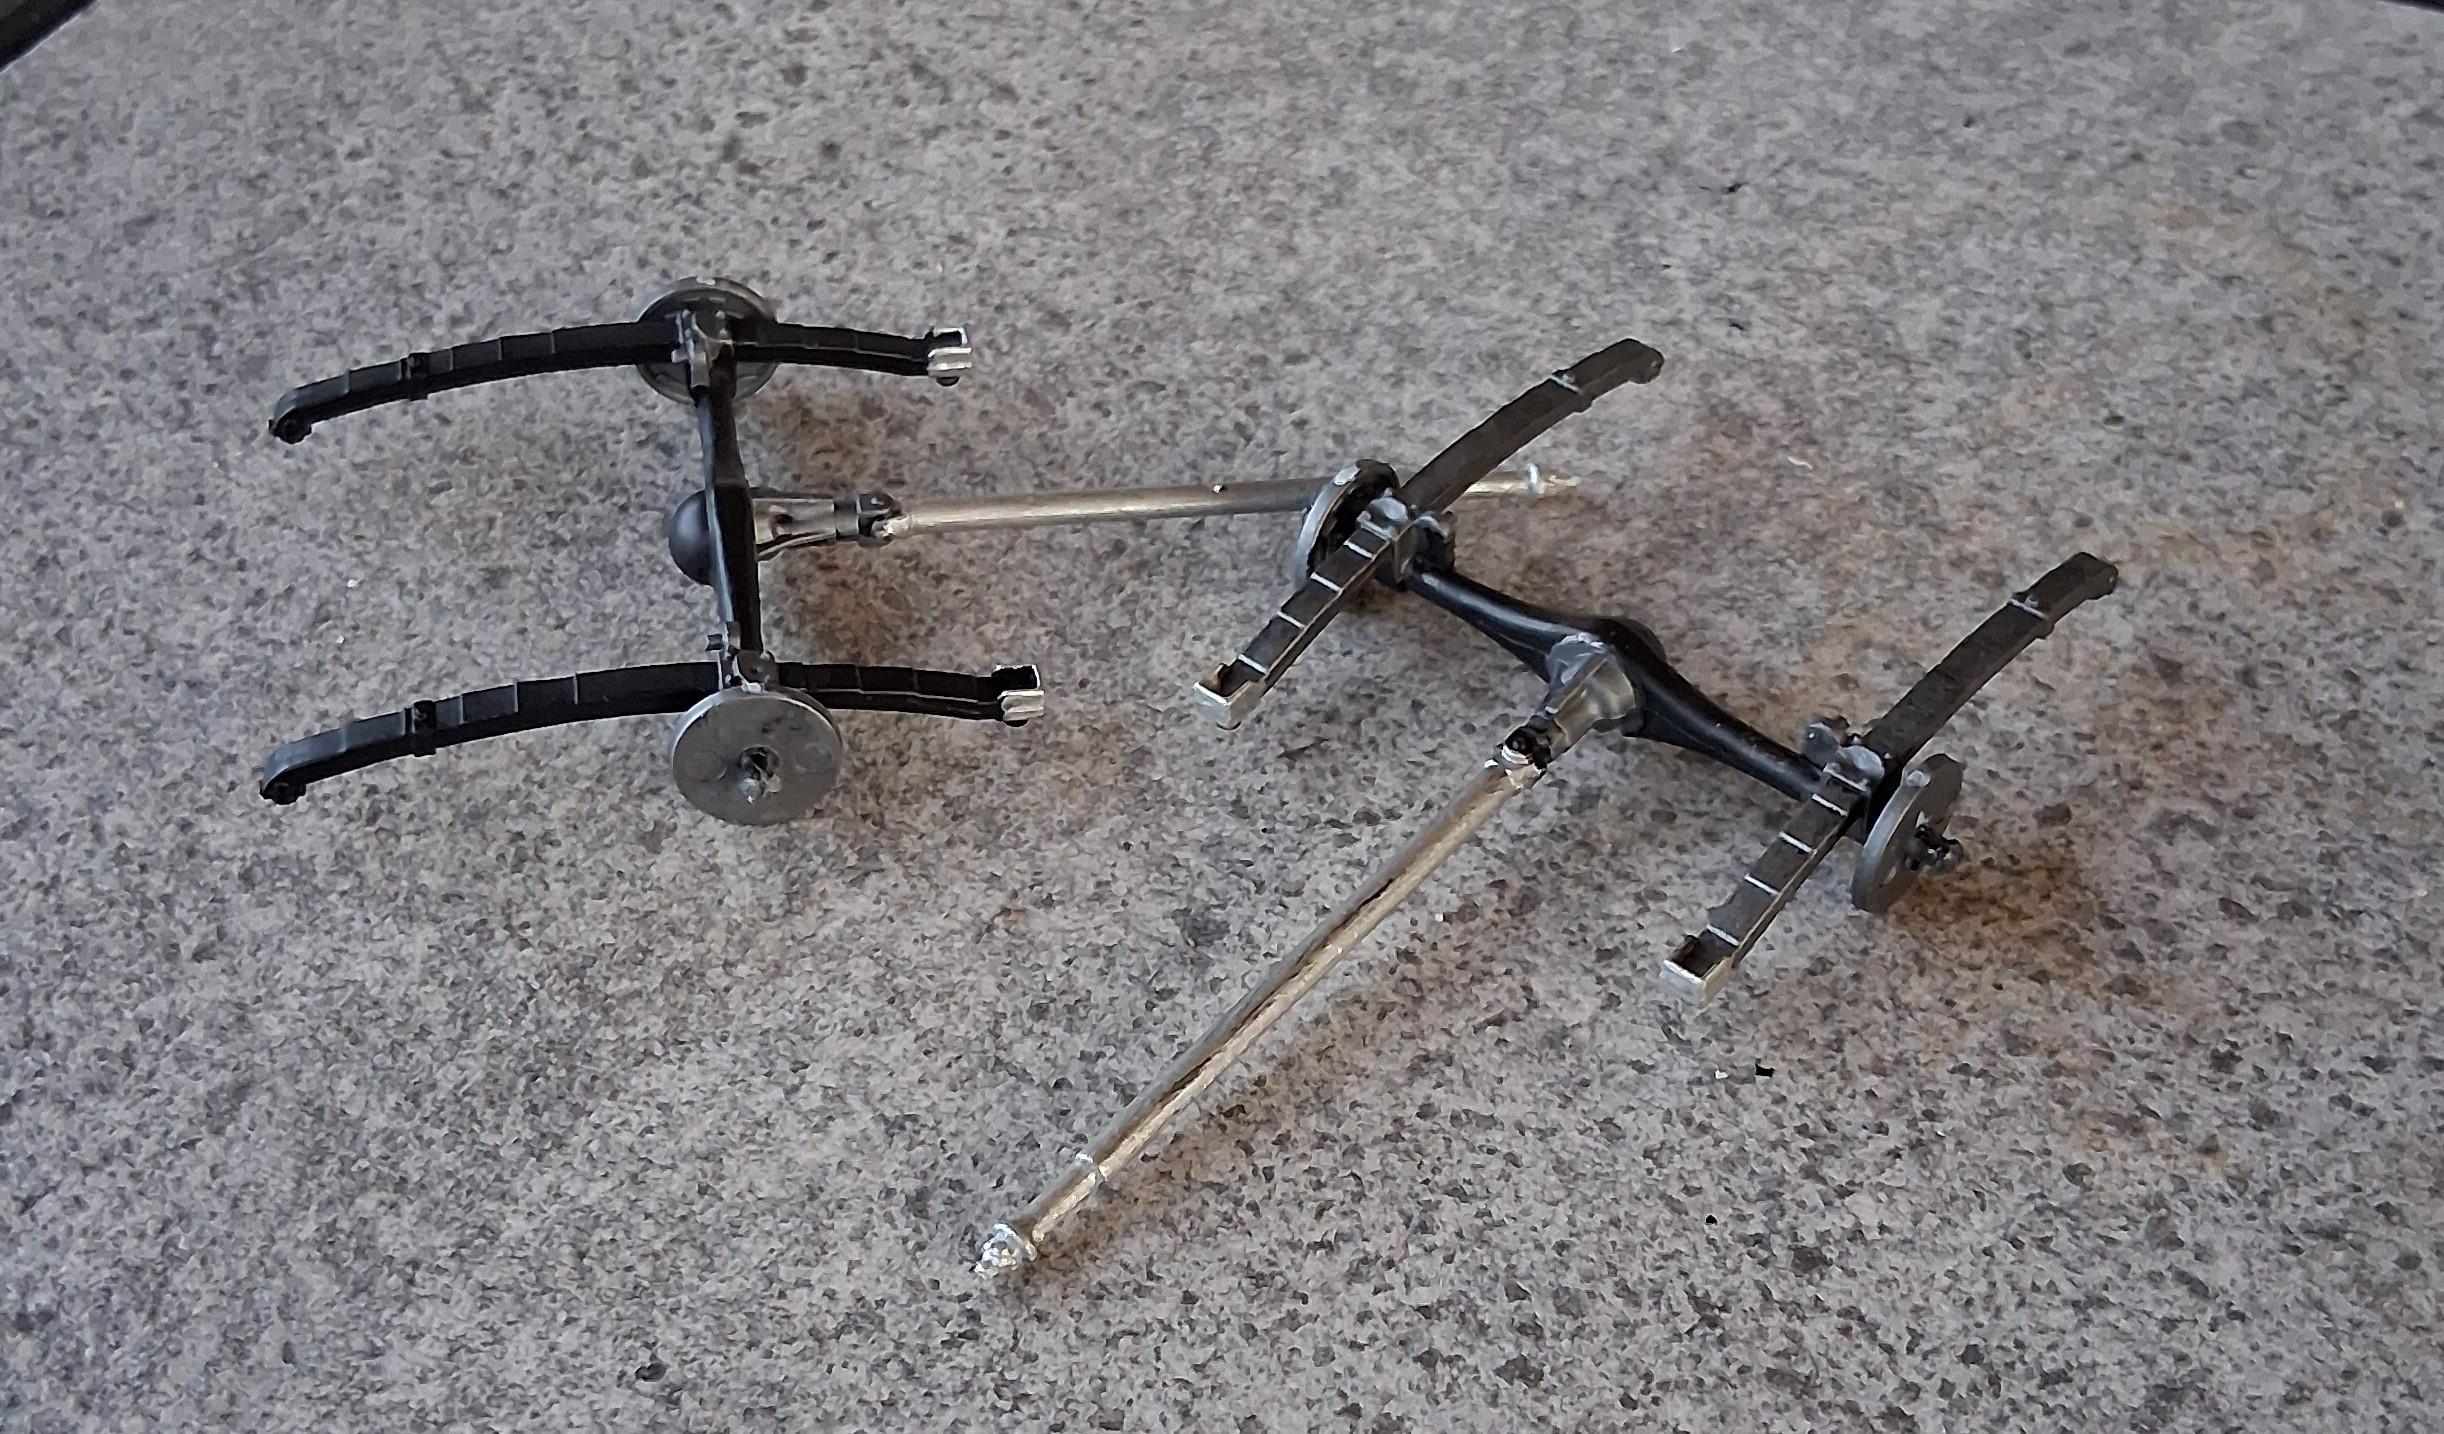
A dry assemble to ck the stance and wheel choice Im undecided if I'm going to use these wheels Or not ...... This is 'opposite' of how the instructions say to install the ft spindles . and It lowers the ft end a good bit I think I like this better. More of an 'at rest' photo so to speak. Anyone else completed this car to show it both ways ?
-
Minor update 4spd for the Leal car Auto version robbed from the Golden Commandos version for the Doc Burgess car Undecided if I'm going to do spark plug wiring.....or not.
-
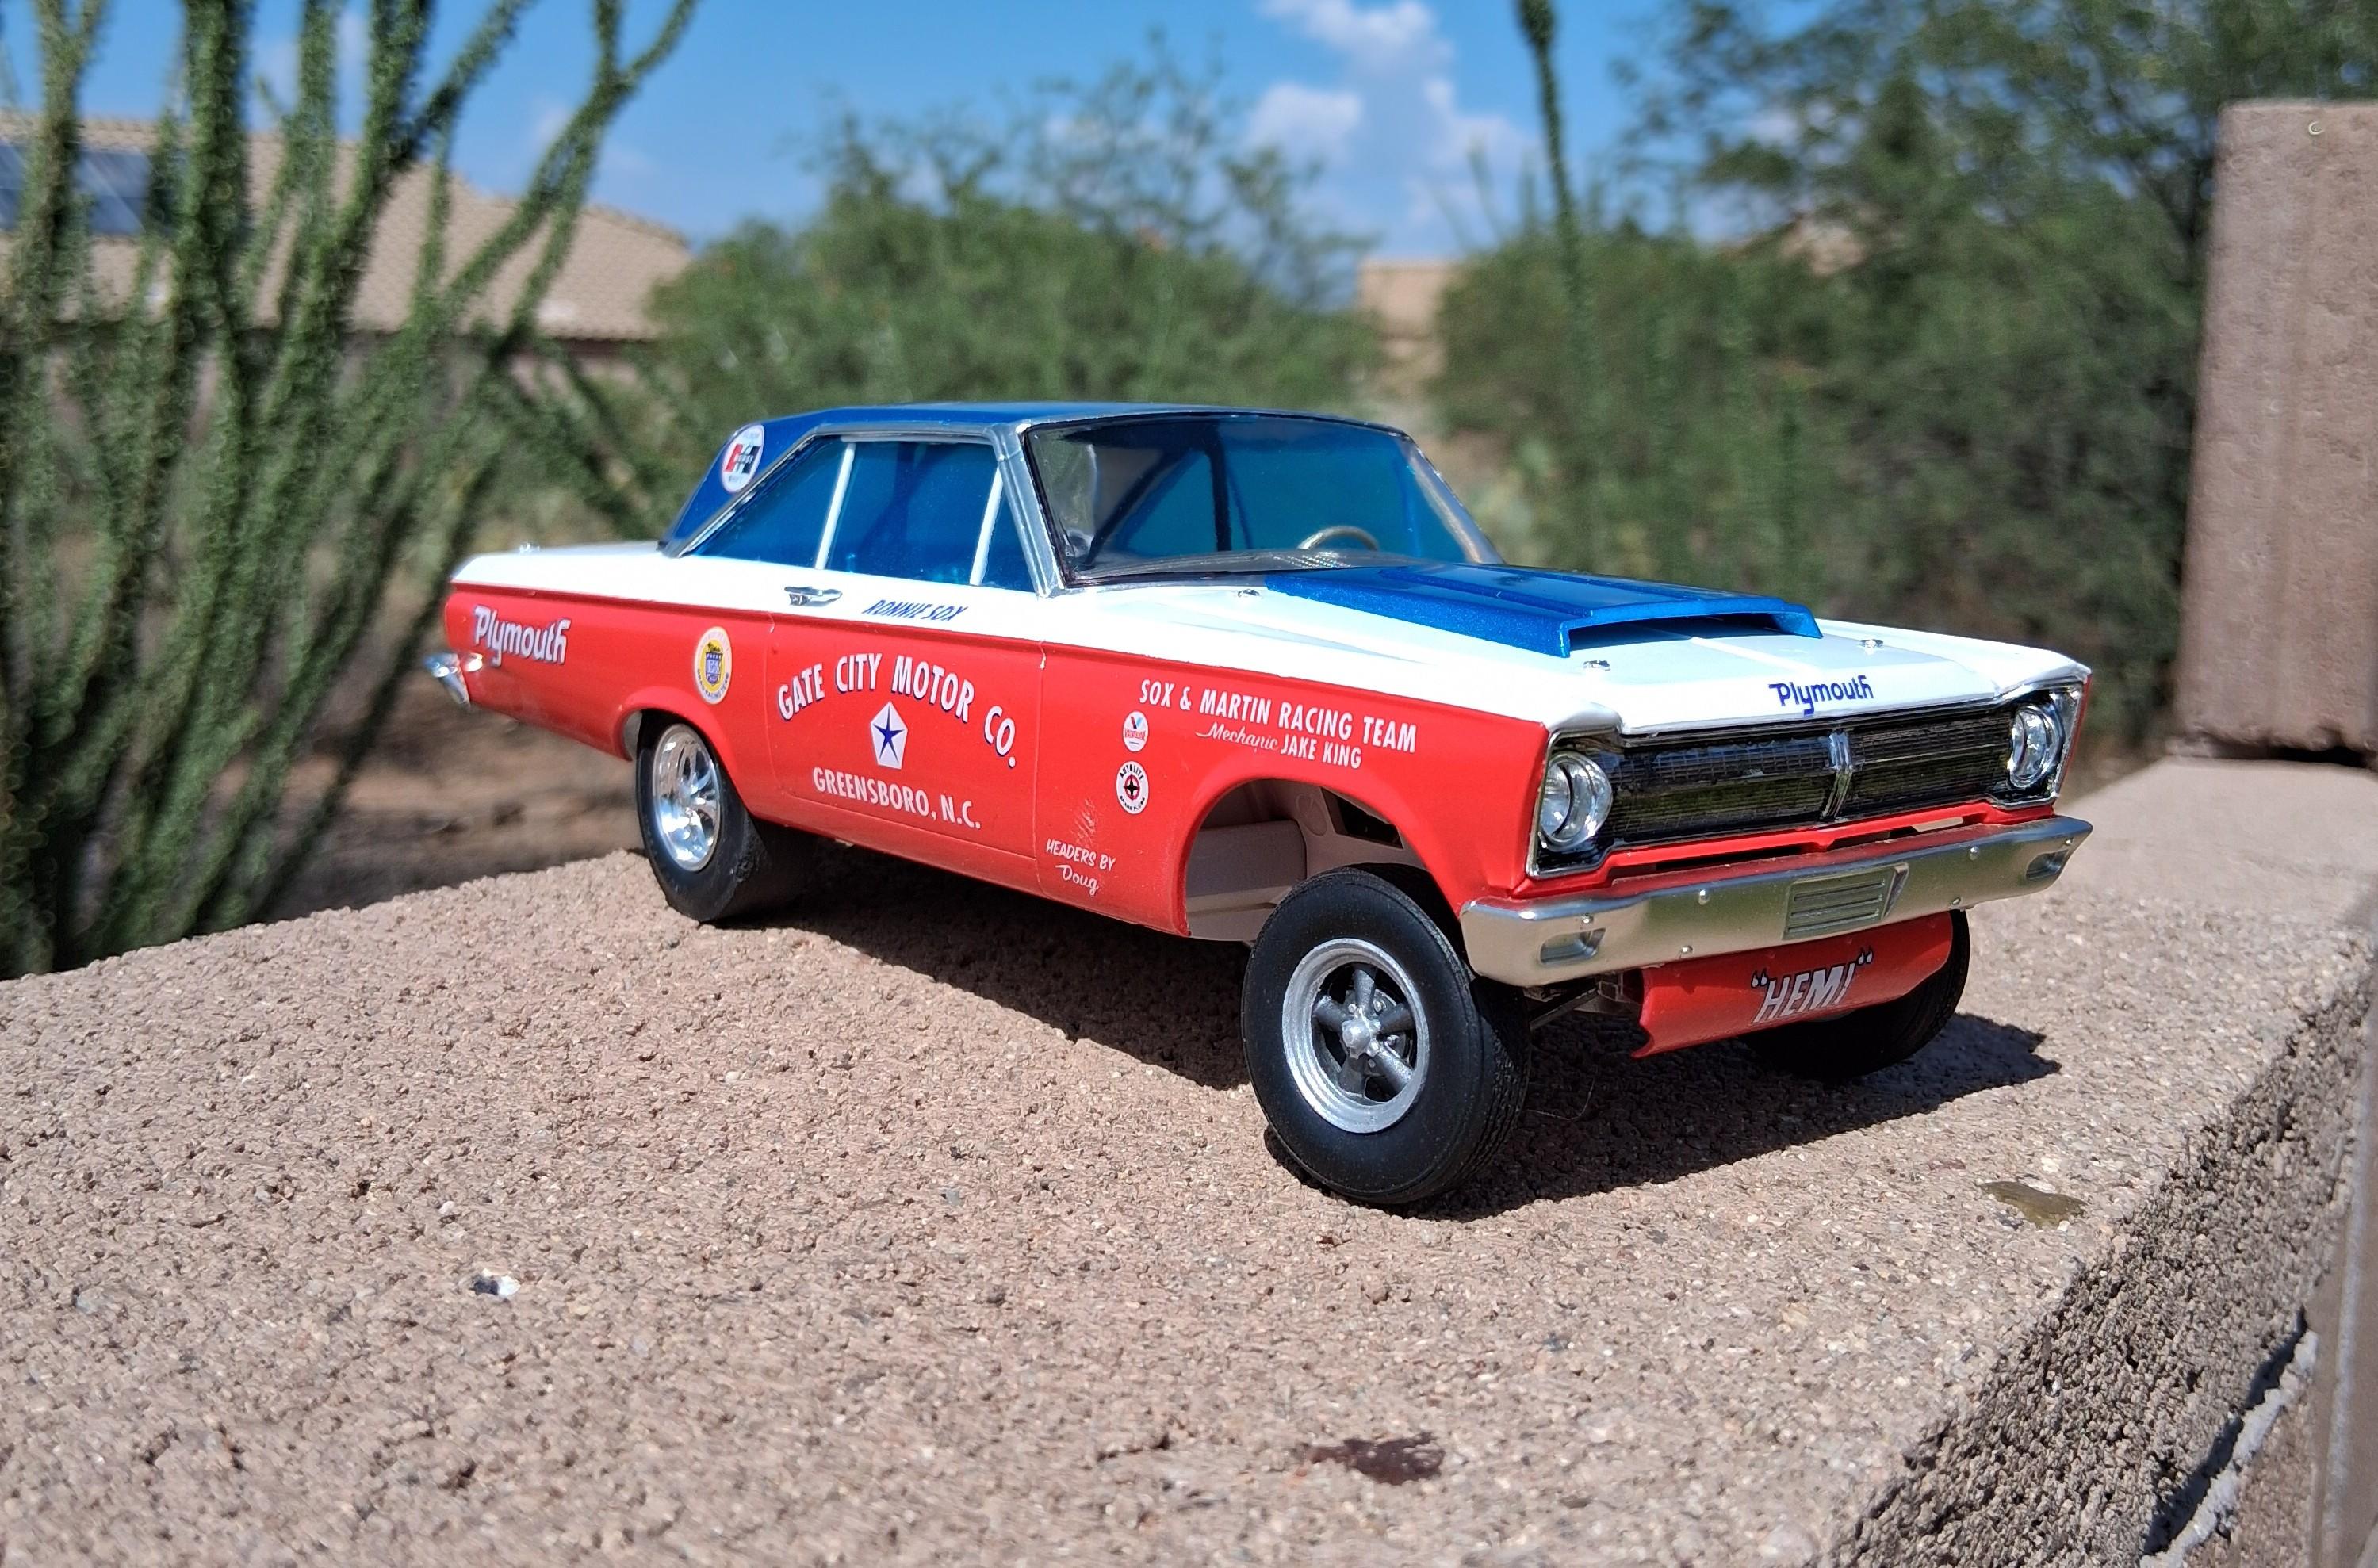
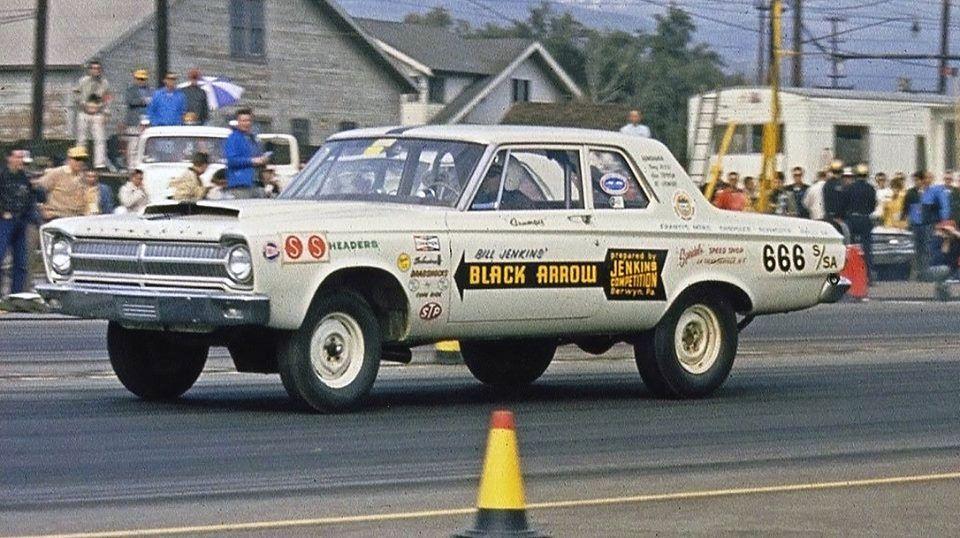
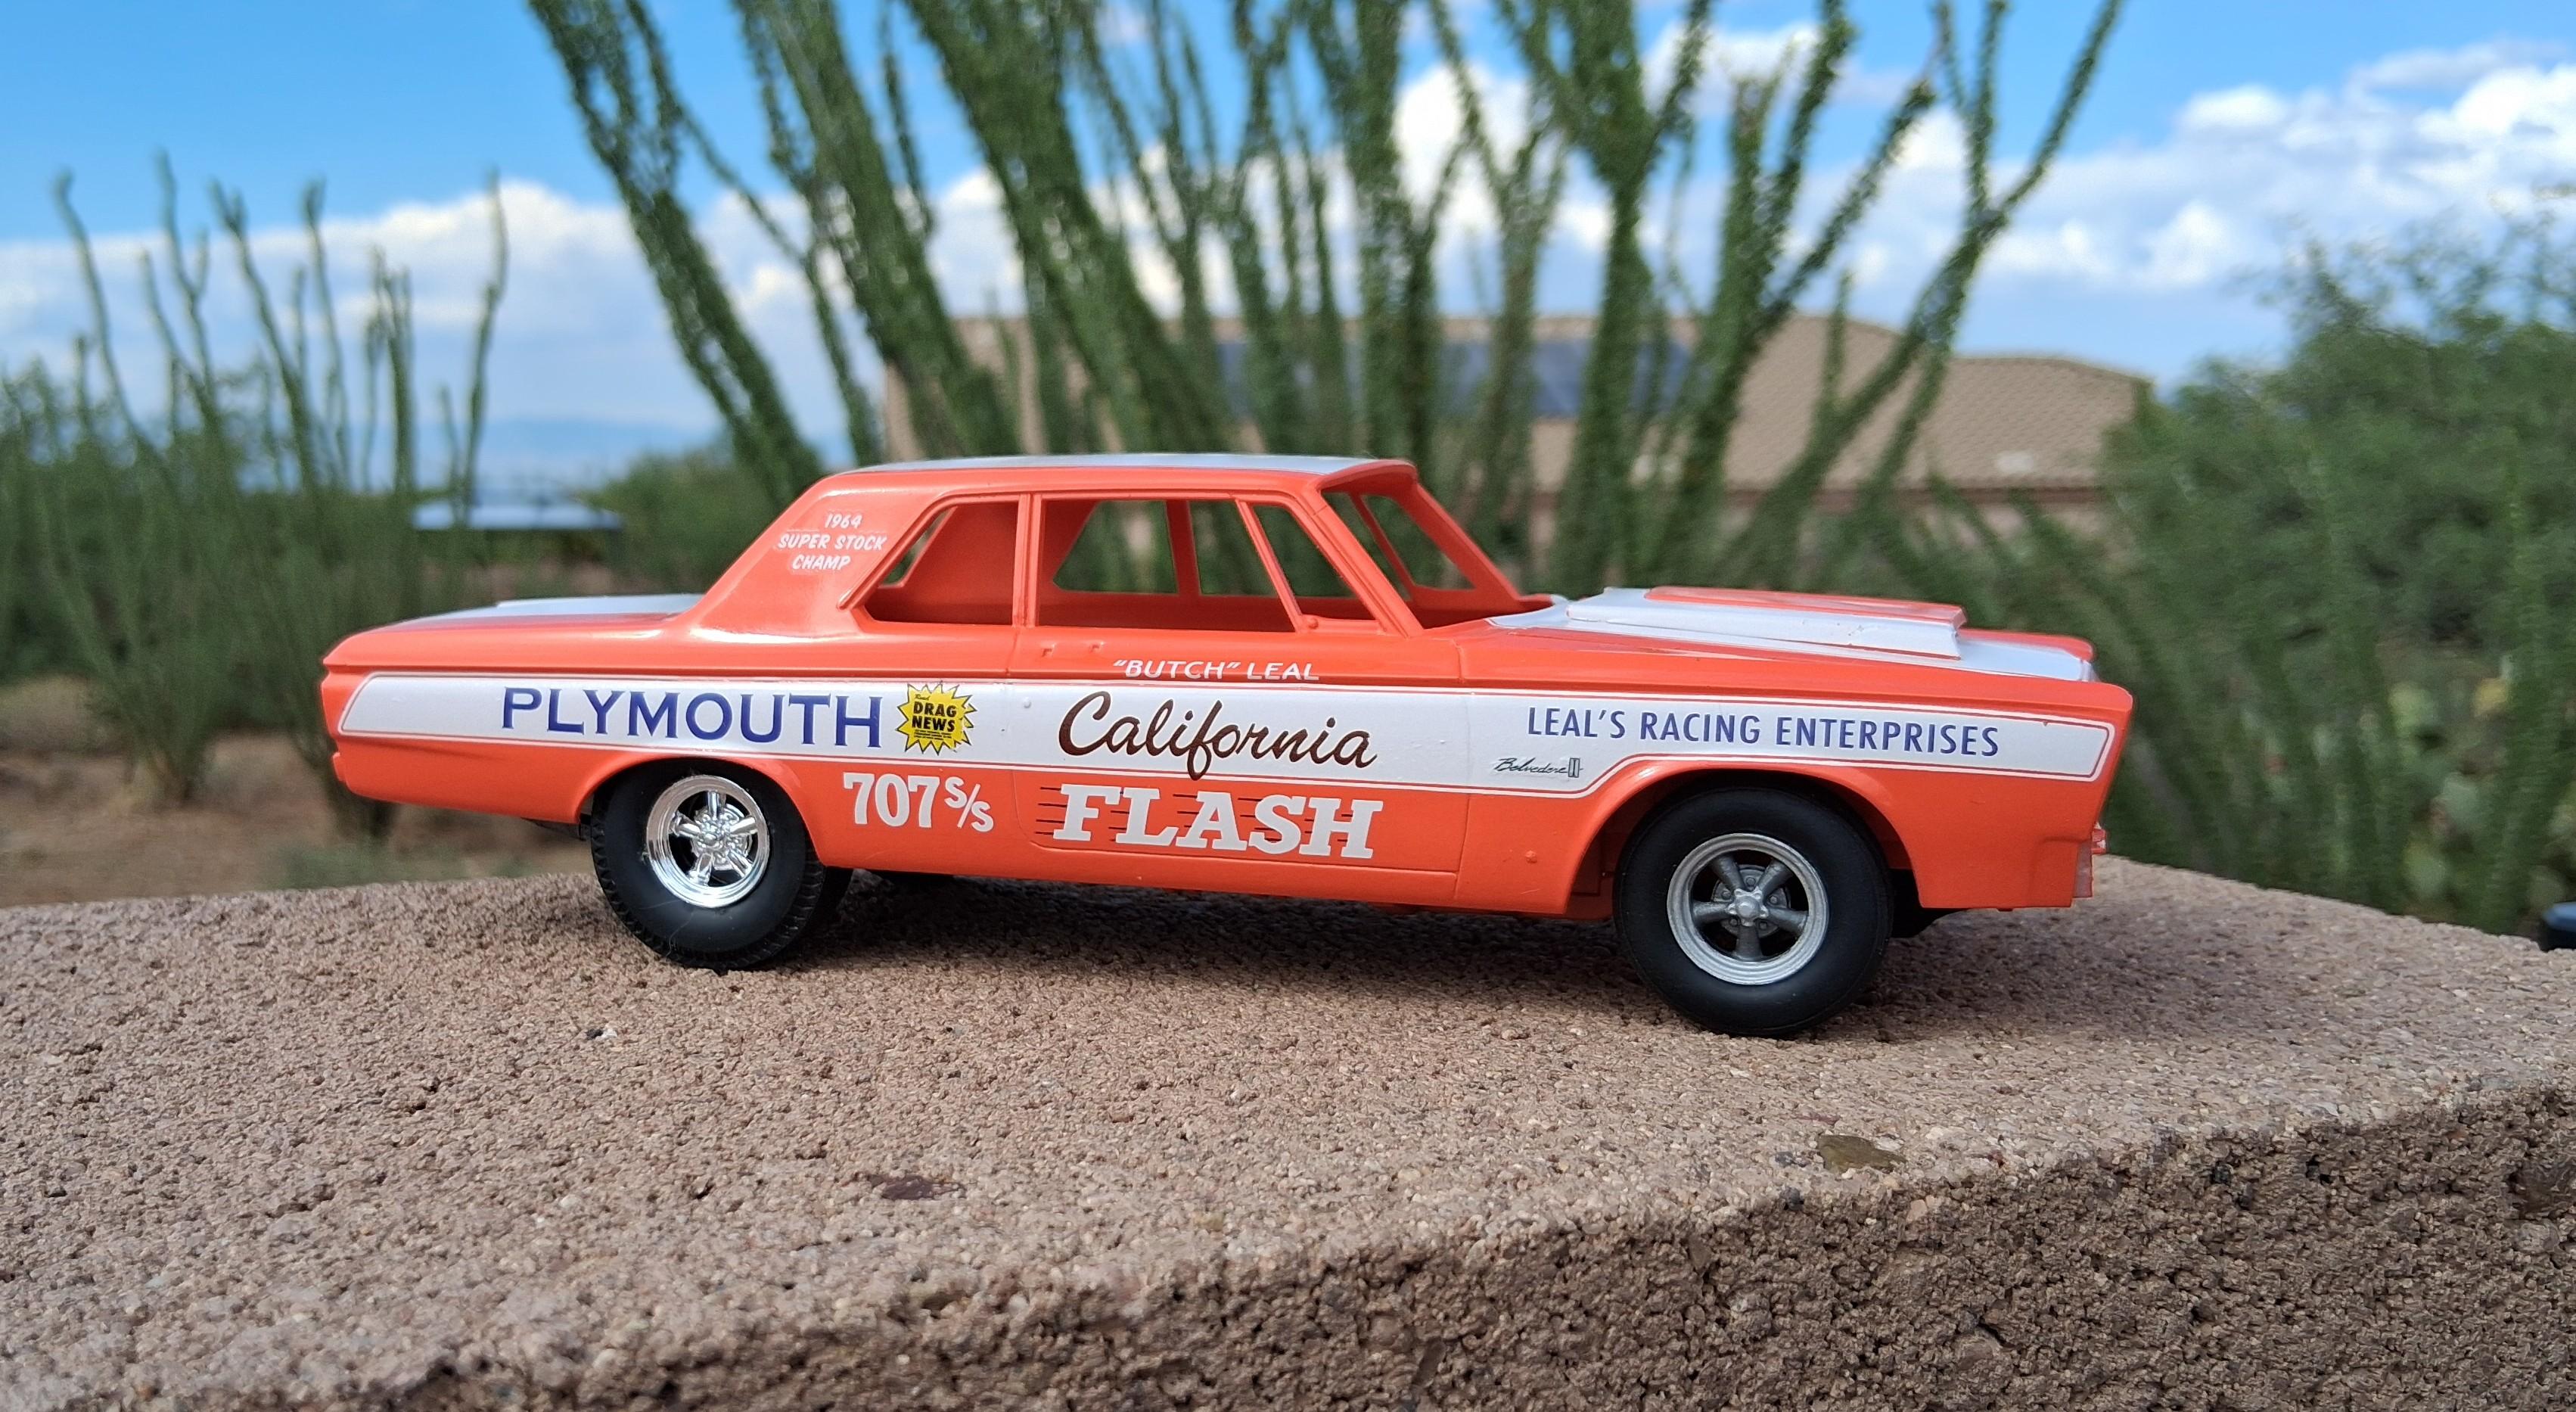
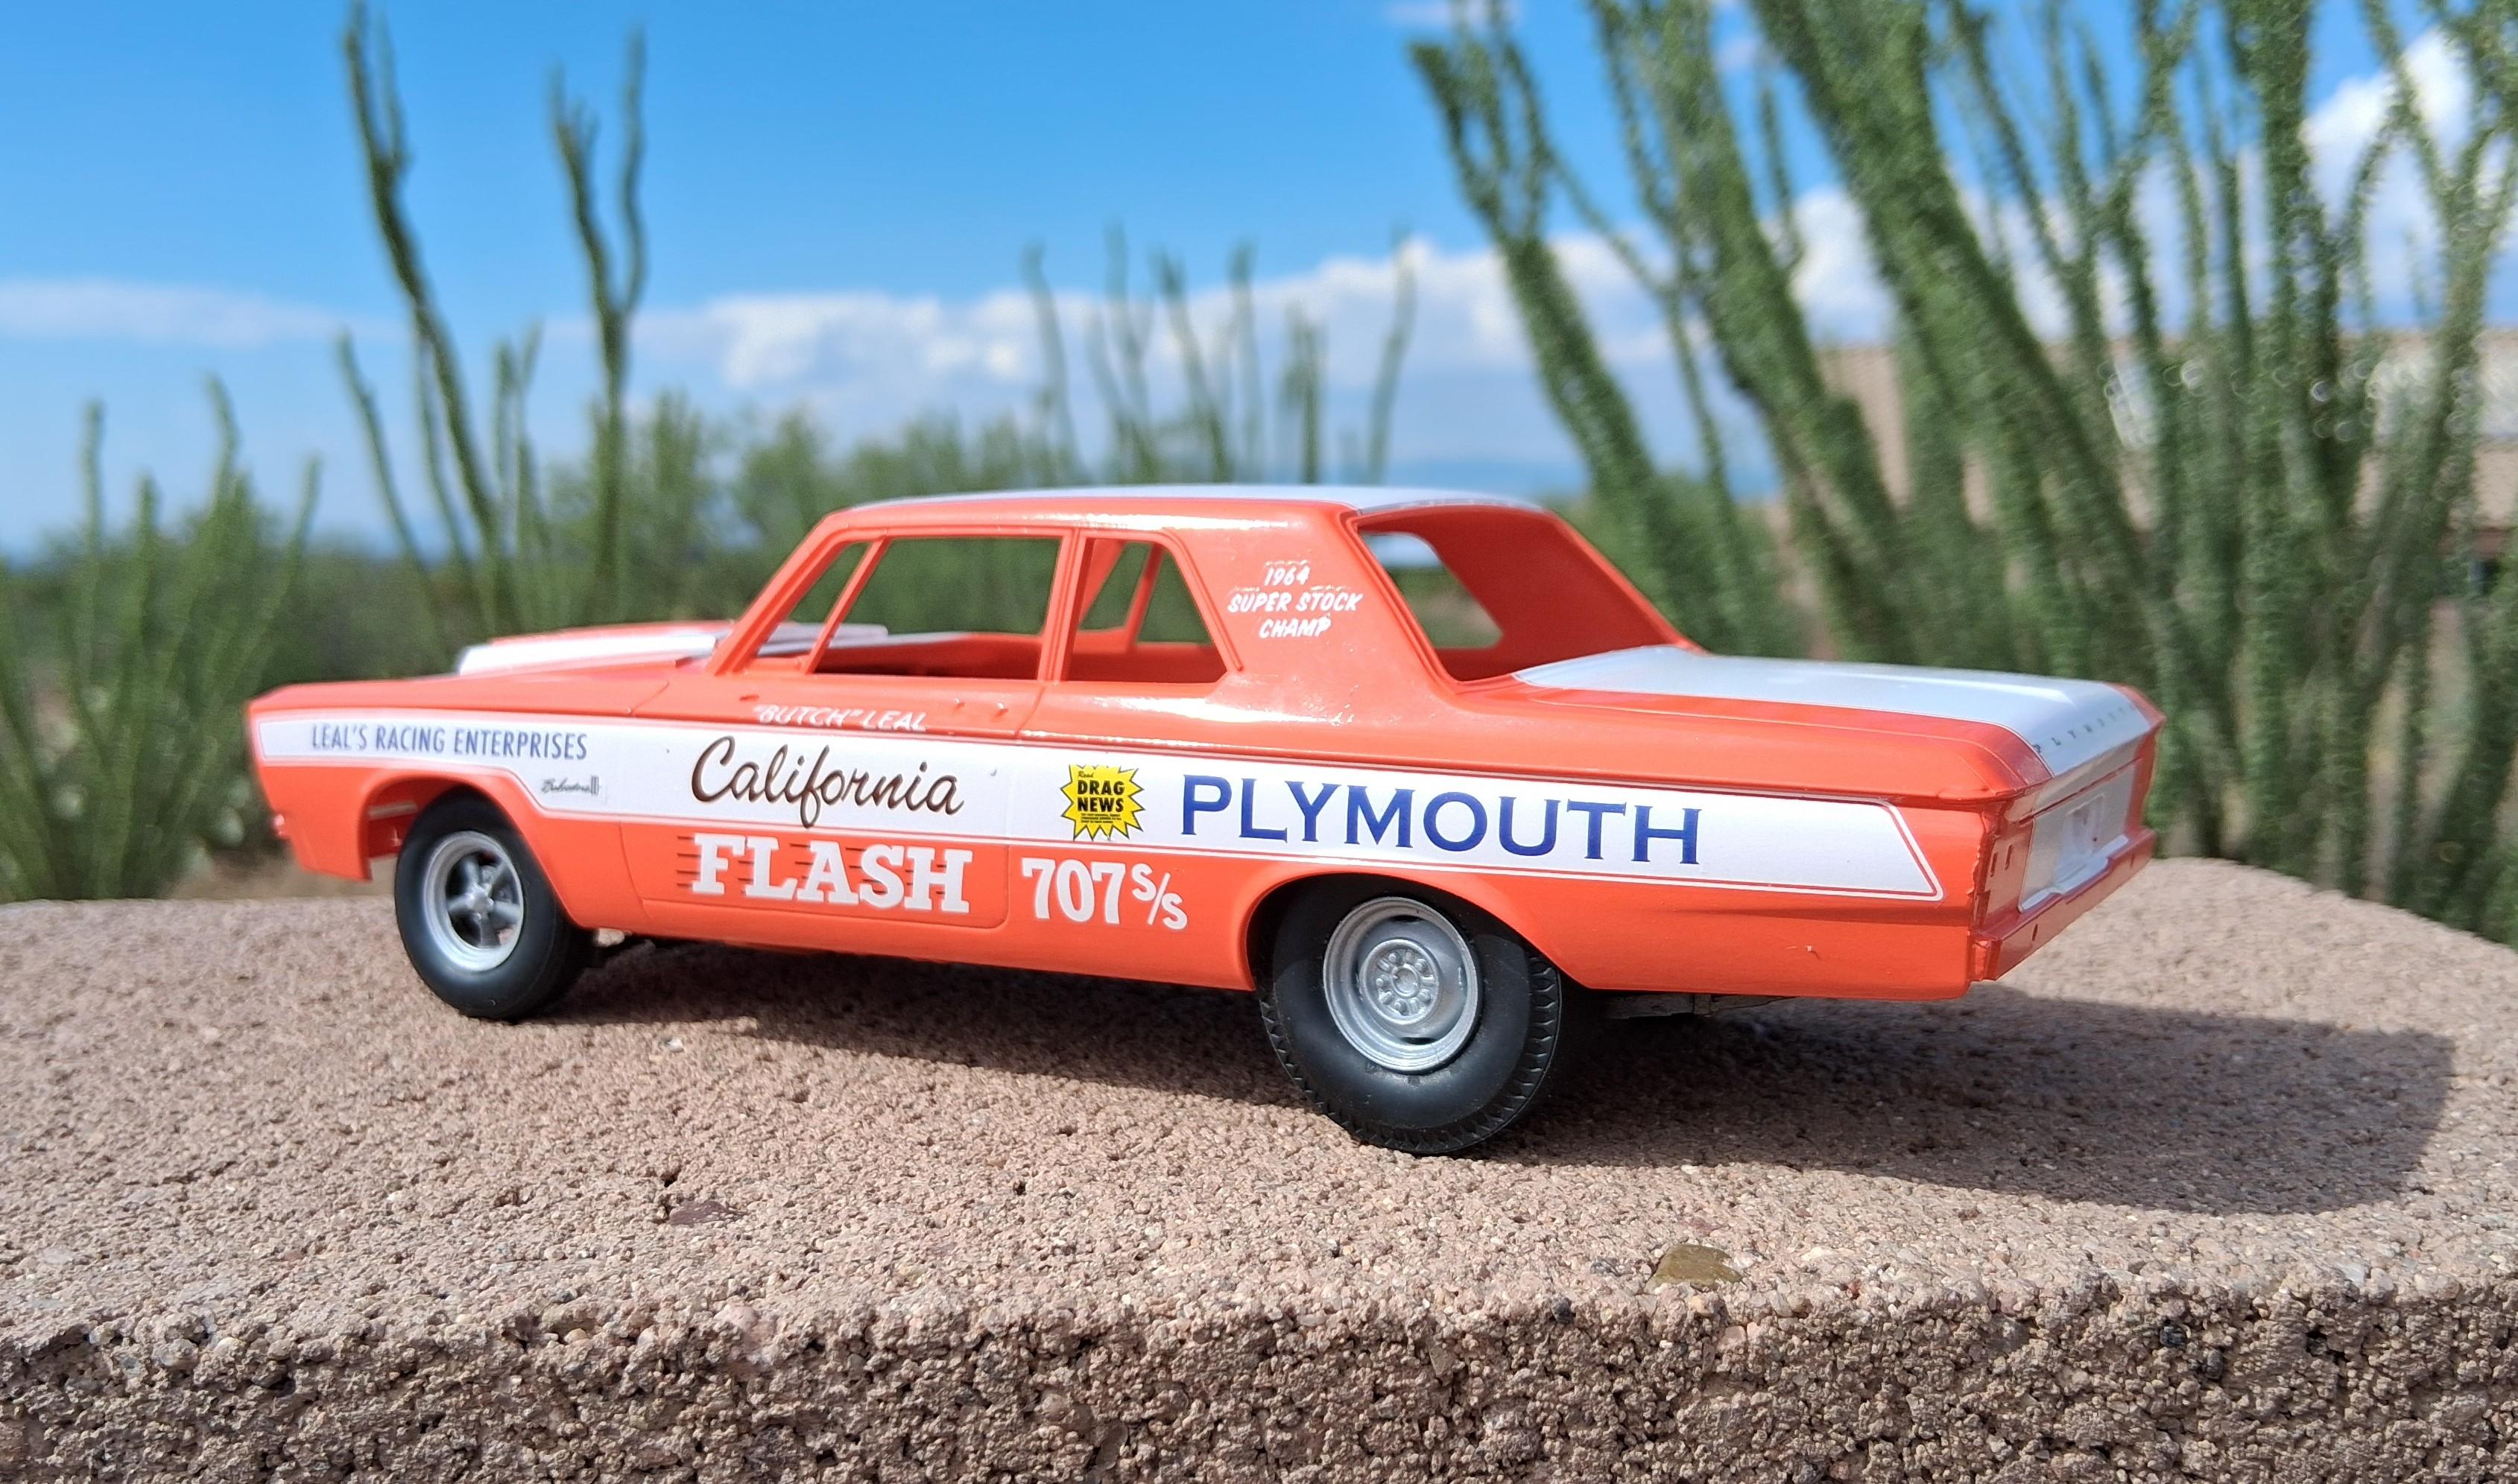
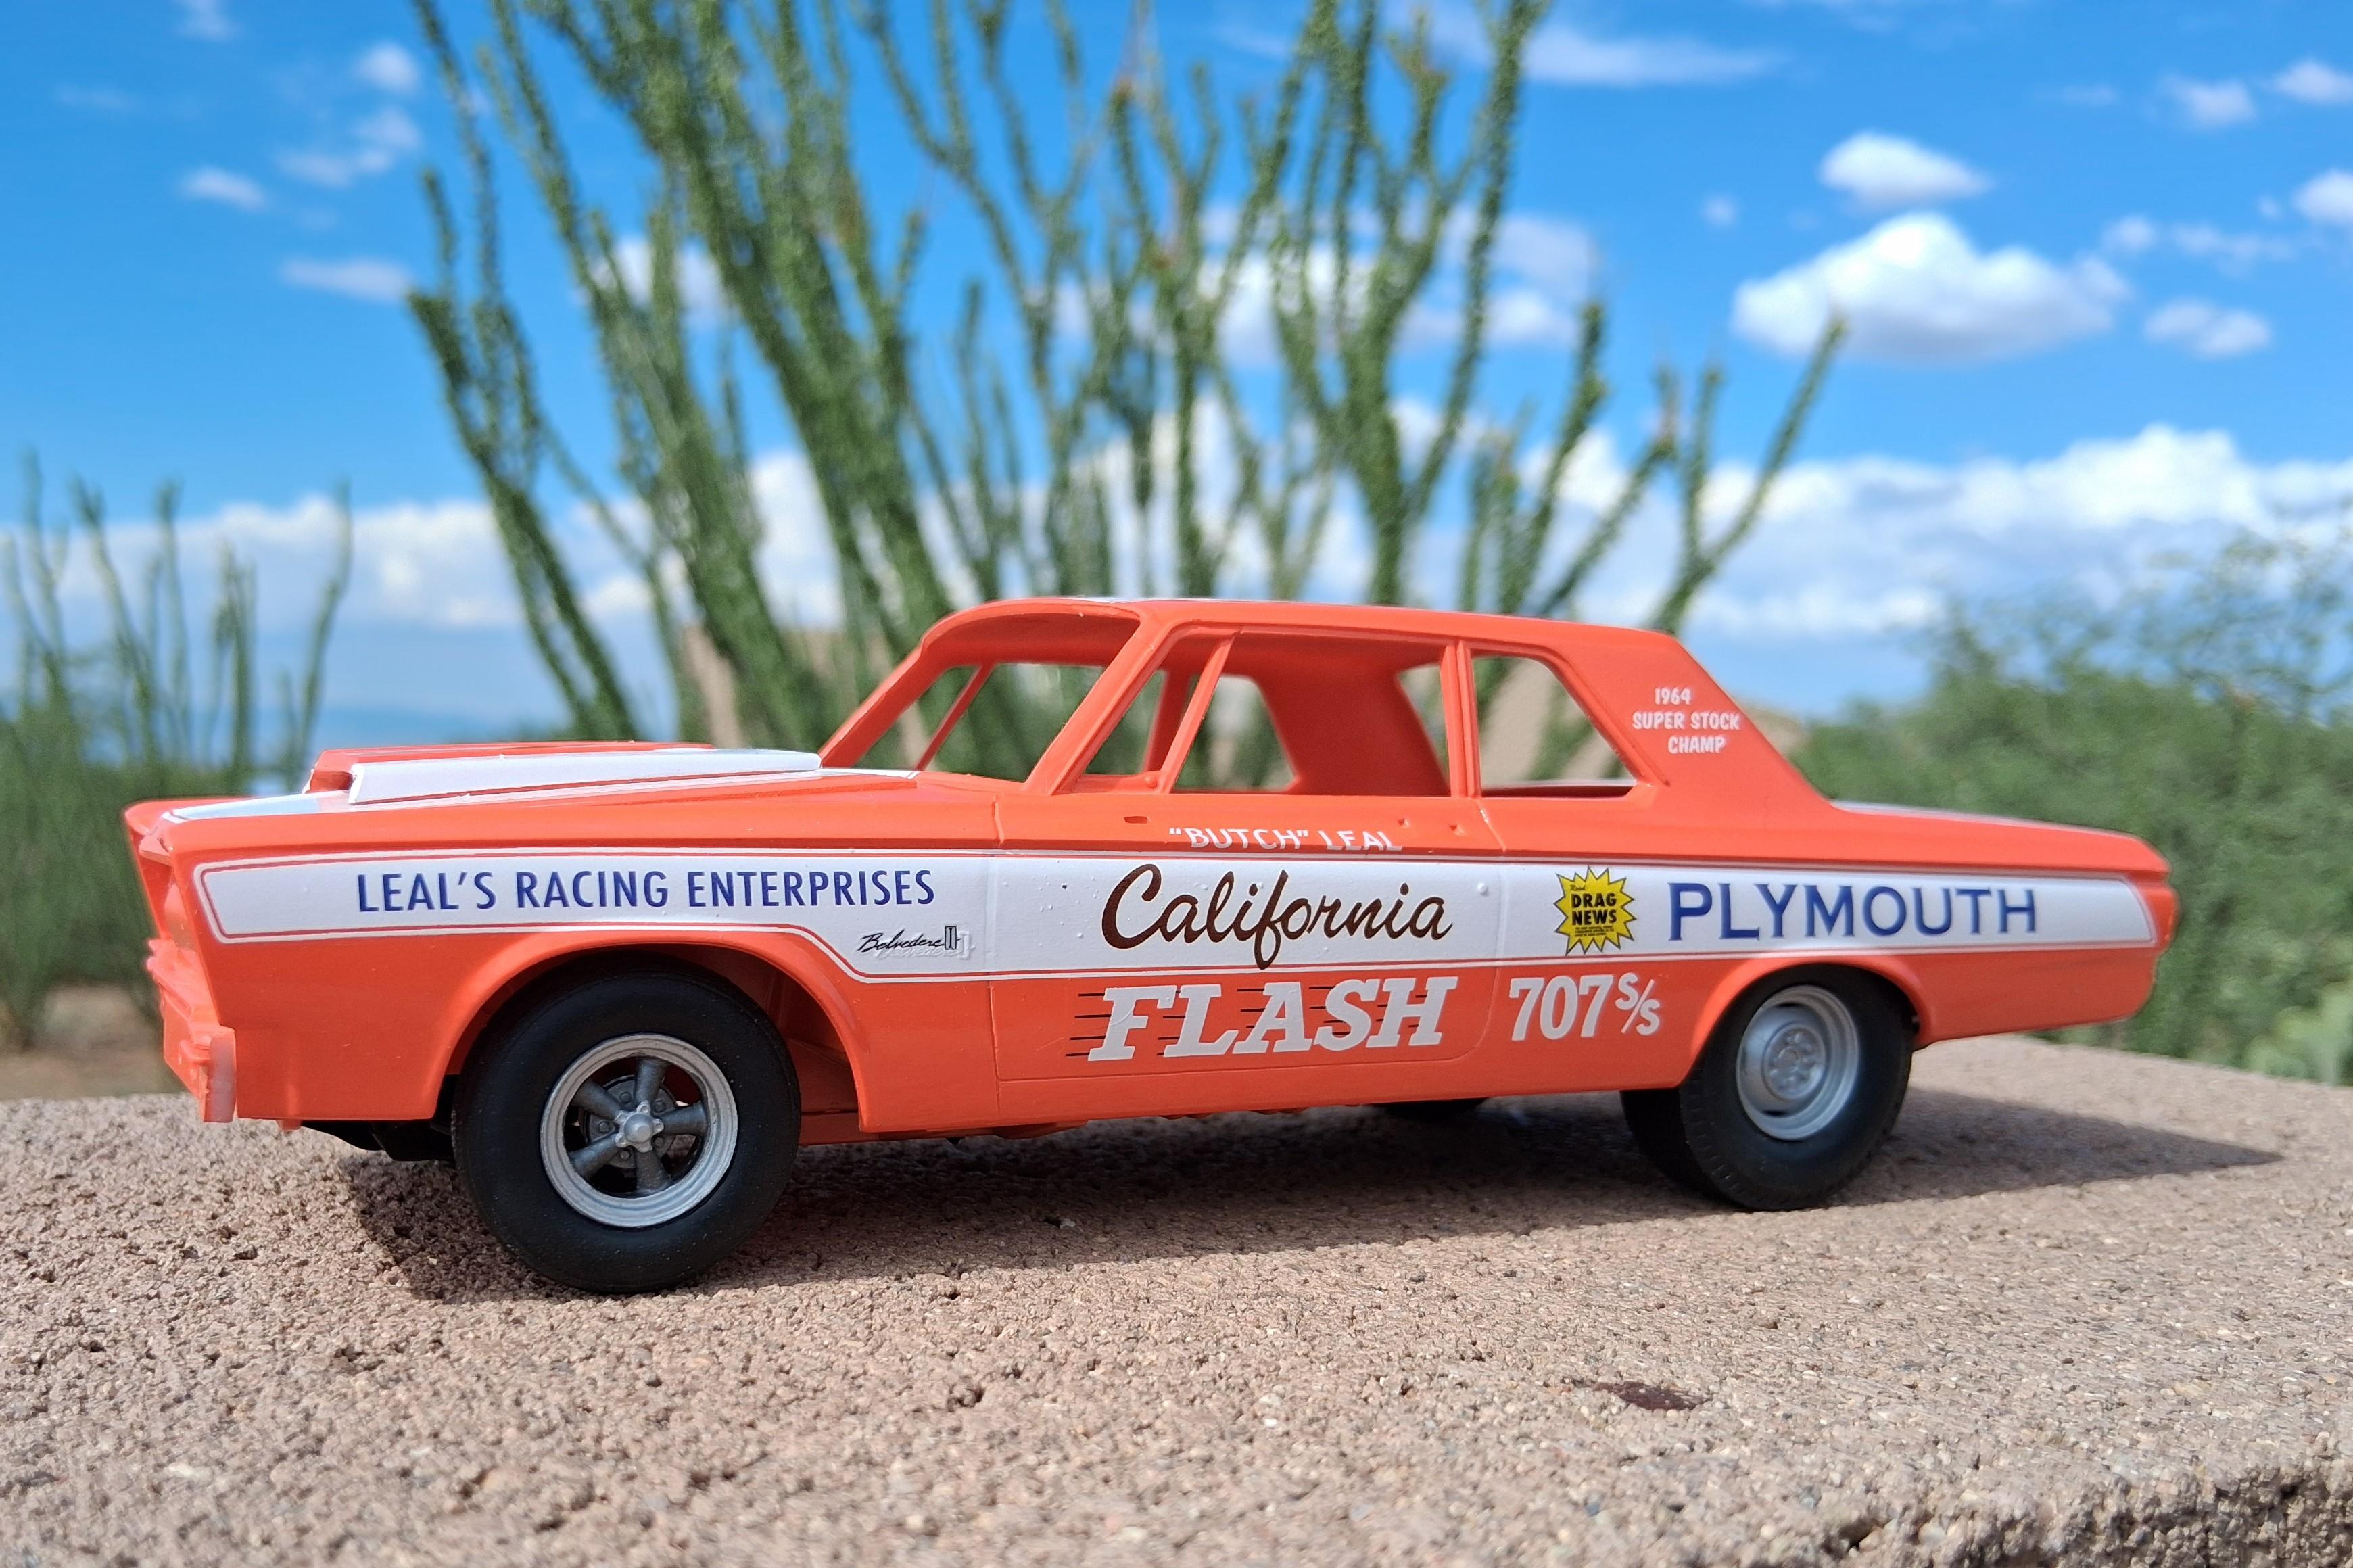
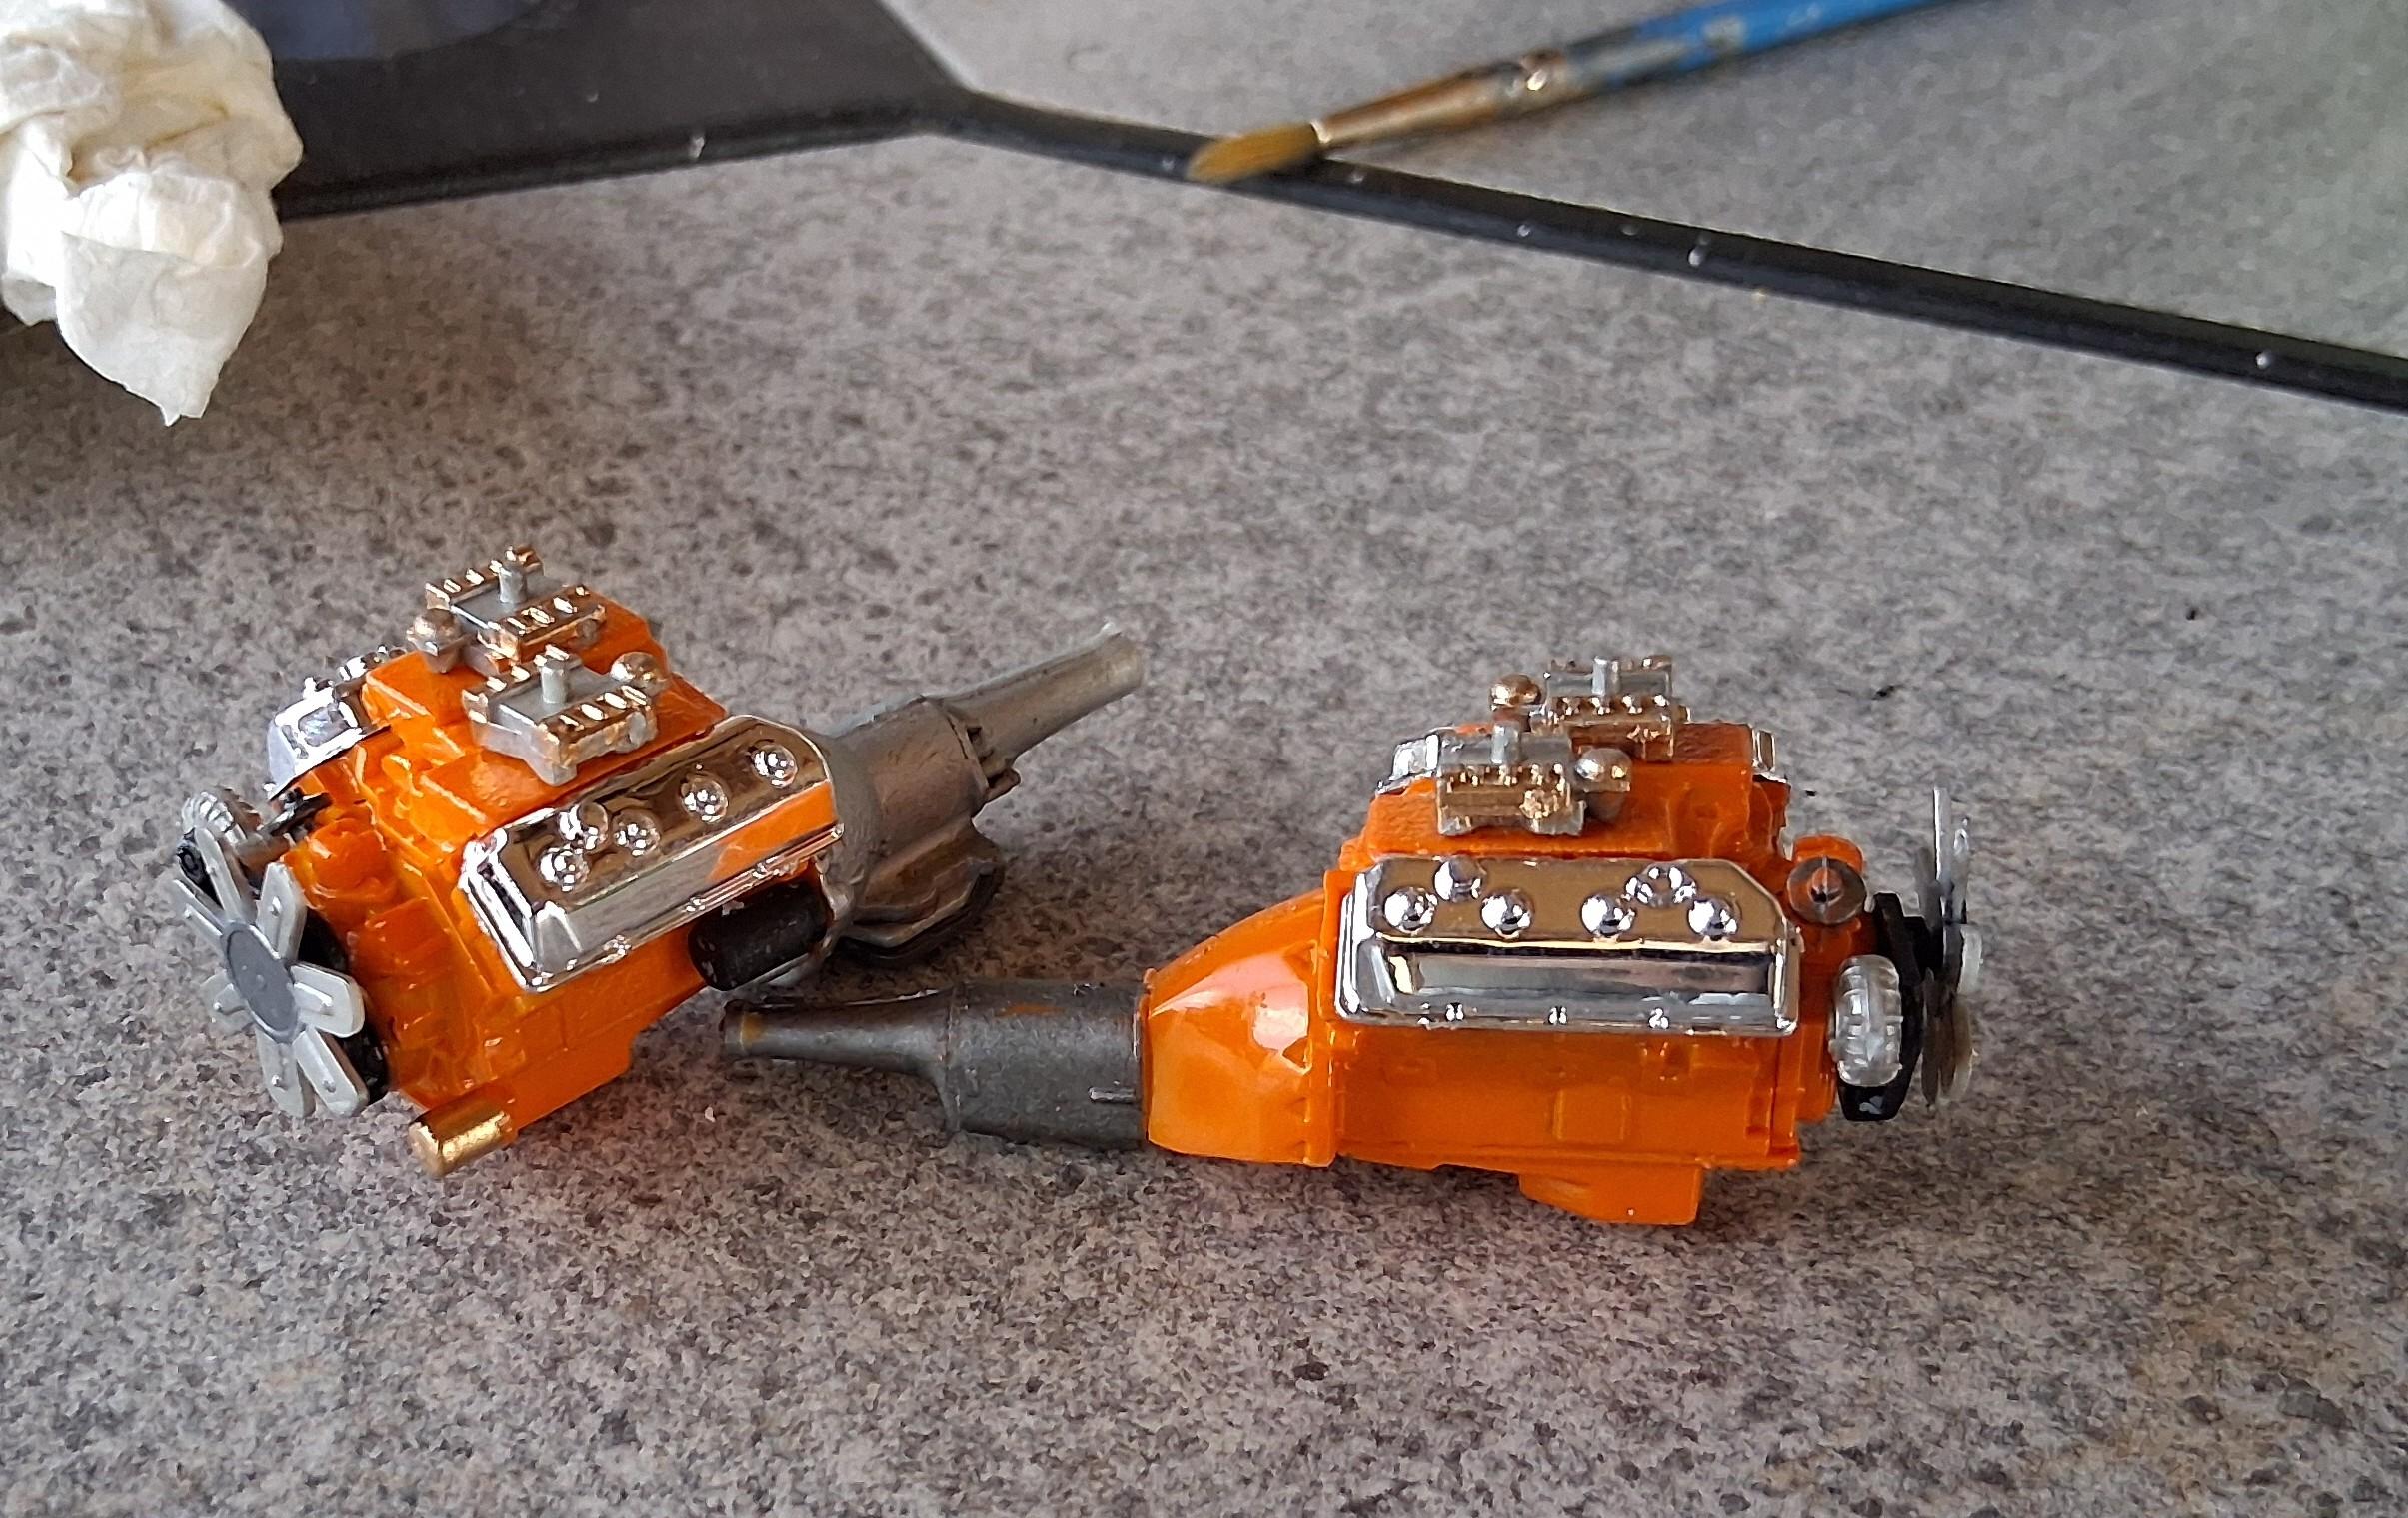
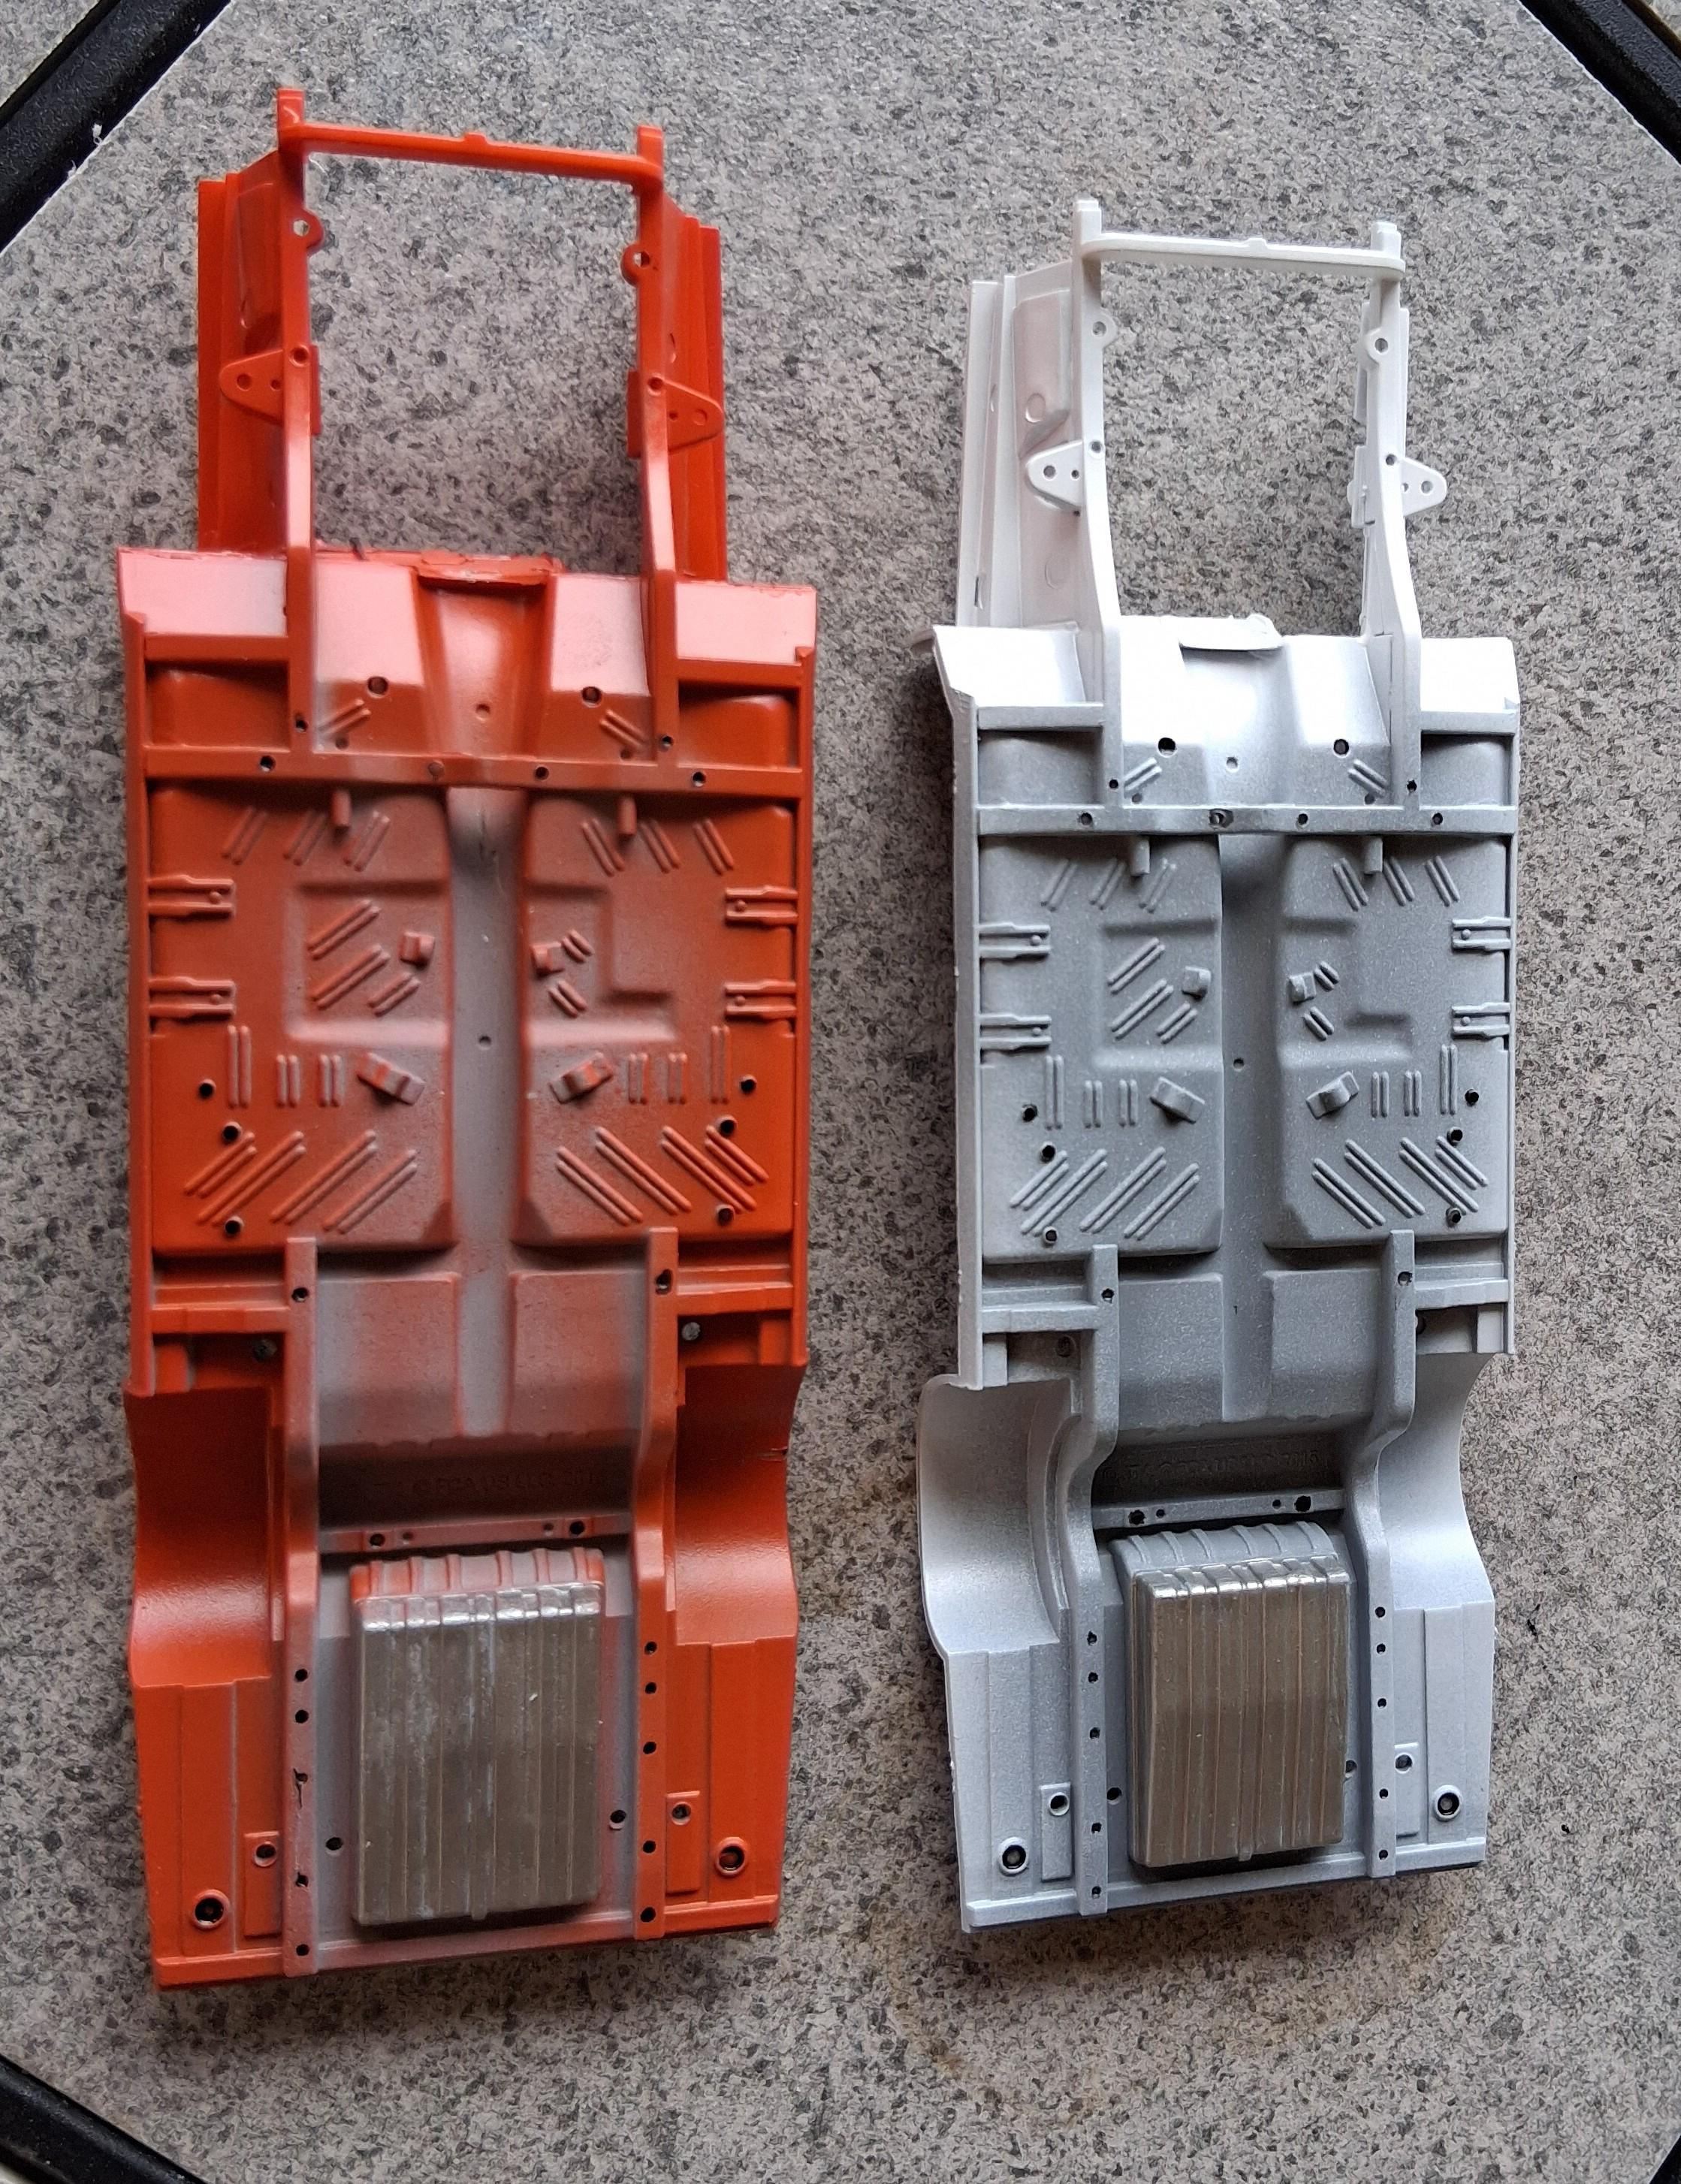
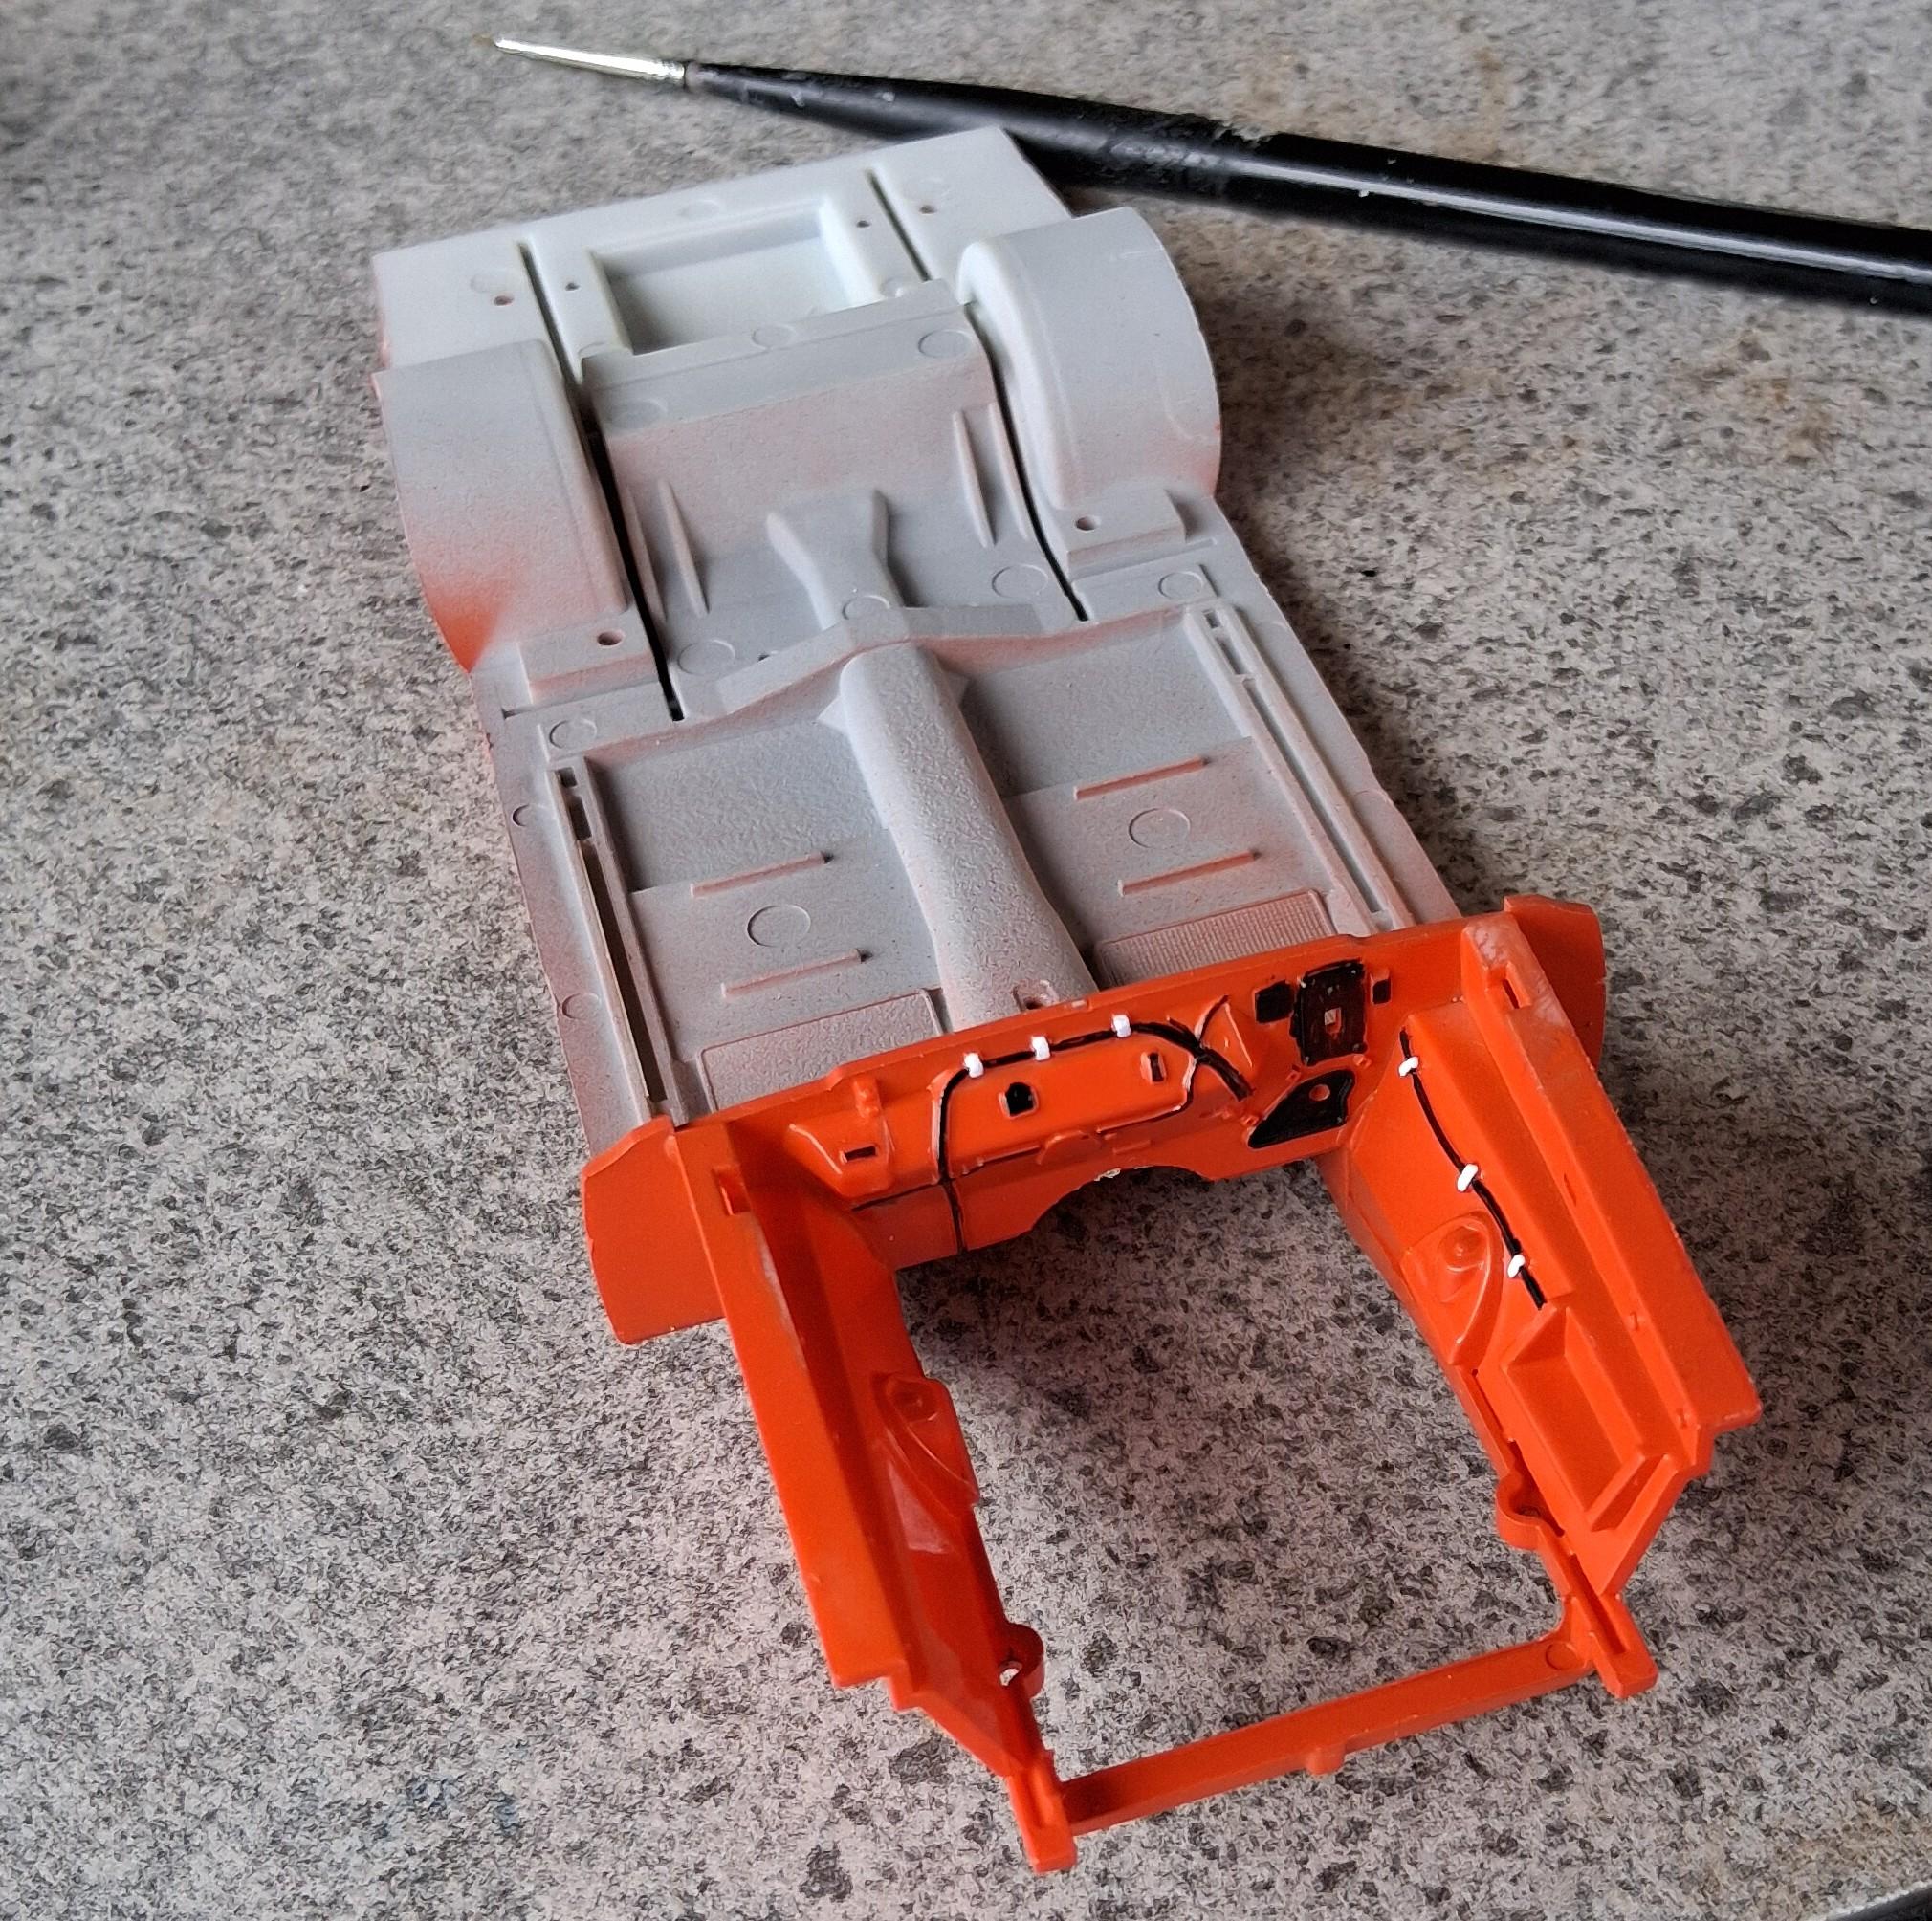
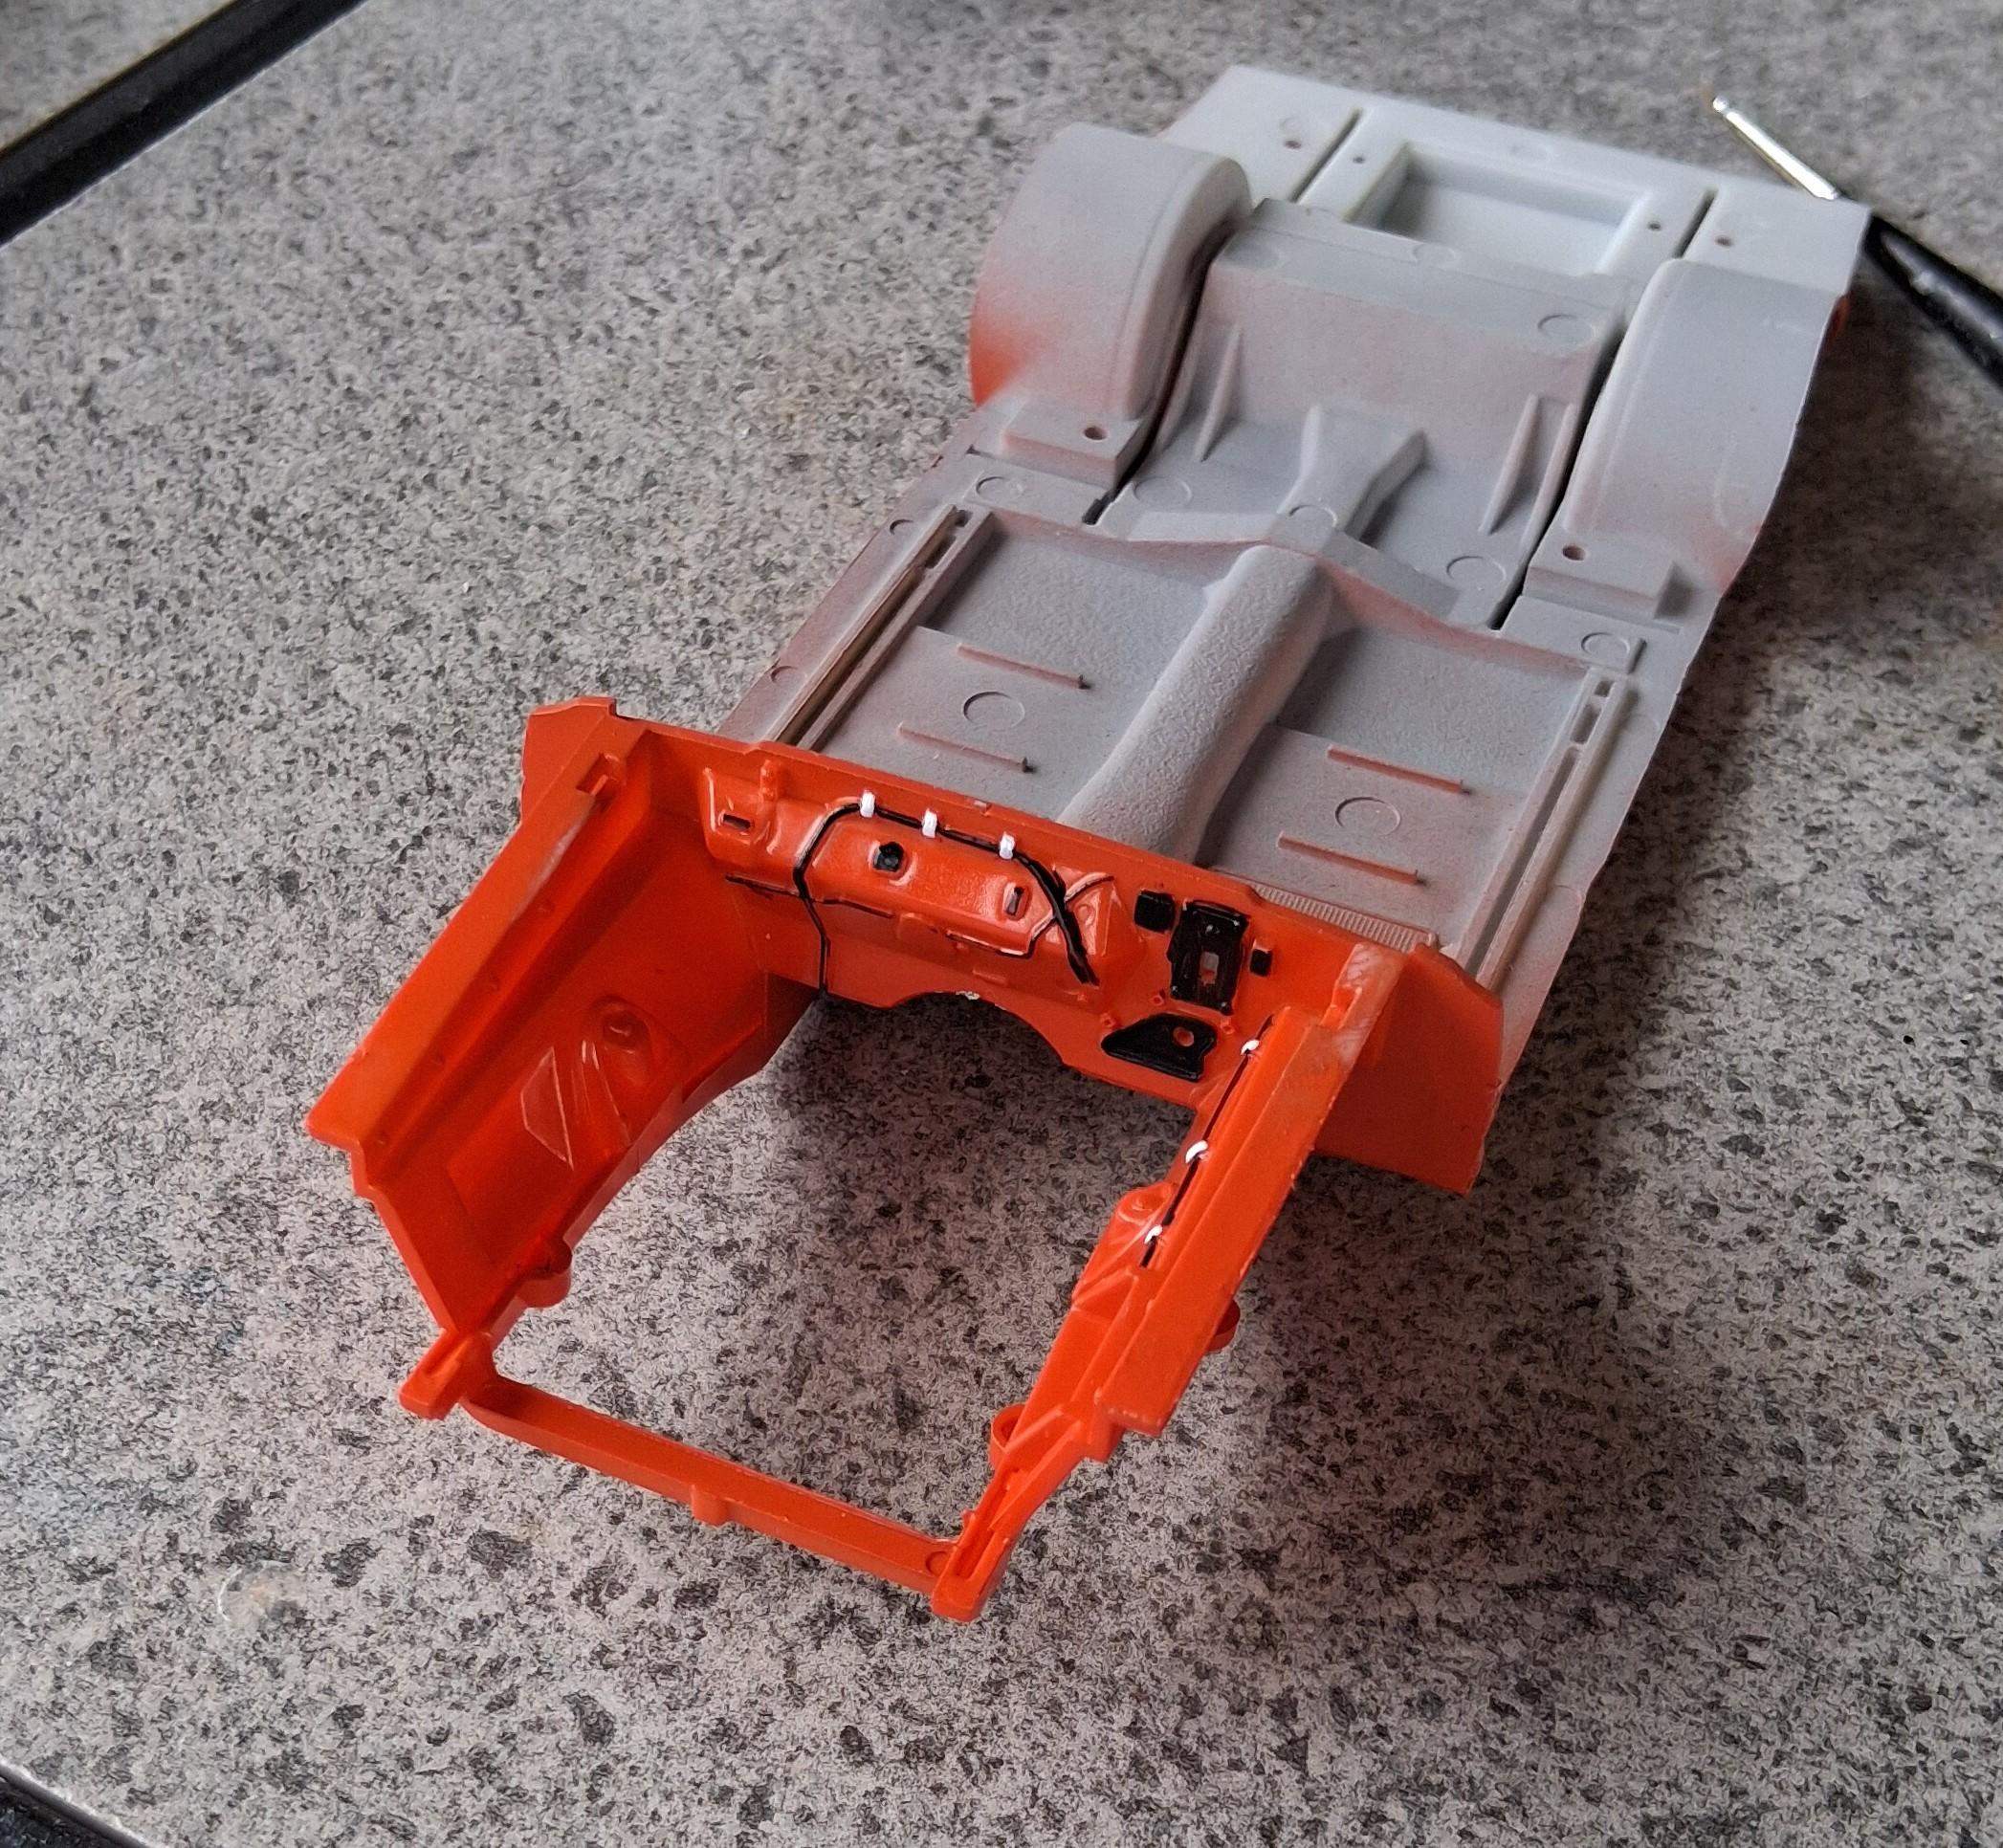
A tandem build as both cars essentially the same exact kit ( Im using the Butch Leal kit for both cars ) Leal car is all kit decals. The Jenkins driven Dox Burgess car has Slixx decals. They were at least 10 years old , So i had my fingers crossed they were still good. The Doc Burgess car will get an auto transmission conversion . Otherwise they will be basically straight out of the box builds. A lot of the major components for both cars were painted a few weeks ago when we had basically zero % humidity ( Gotta love southern AZ weather ) First up the Butch Leal car , Tamiya orange , kit decals Race hemi orange for the engine
- 19 replies
-
- 12
-

-
If , ( Key word ) I go so far as to wire a build The only ones I use come from MAD Distributors - Morgan Automotive Detail I have several of them on hand right now They actually look like a dist cap as opposed to most just look like an aluminum tube with wires hanging out of it ( My opinion )
-
I have a lot of the 50-60s annuals And if you take out the goofy custom stuff in the kits The actual build has what maybe total of 10 parts ? Give or take depending on the actual kit Body, chassis , interior, dash, steering wheel. ft - rear bumper and glass, wheels / hubcaps and tires
-
Kris Morgan at MAD automotive 8 Cylinder Tan Cap - Morgan Automotive Detail Same goes for the spark plug wiring photo etch stuff
-
I like it . Well done sir Its a shame the screwed the pooch on the roof line with that kit
-
Nailed it. I like this one , A LOT !!!!!! I have these decals and a kit in the stash for a someday build. And was wondering what was wrong with the interior. So pulled it and noticed its a convertible tub . Now I'll have to decide if I want to get that far into a conversion . But I REALLLLLLLY like the Bostrom seats you did . I need to get a few pairs from Missing LInk maybe I think
-
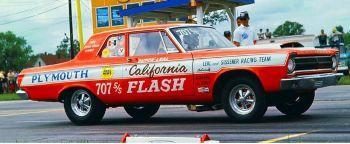
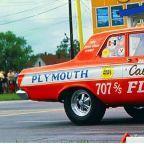
To the best of My knowledge. SM never ran a 1969 GTX , in any form or class
-
Street Hemi stock exhaust manifolds 1/25
gtx6970 replied to jmk0303's topic in Car Aftermarket / Resin / 3D Printed
Far to many kits produced that have them for a resin caster to offer them IMO To me the best versions available are in the Revell series of mopar kits They are also avail in the AMT Mopar B. Body series kits. I have several sets from the AMT kits. If they will work for you.... Pm me -
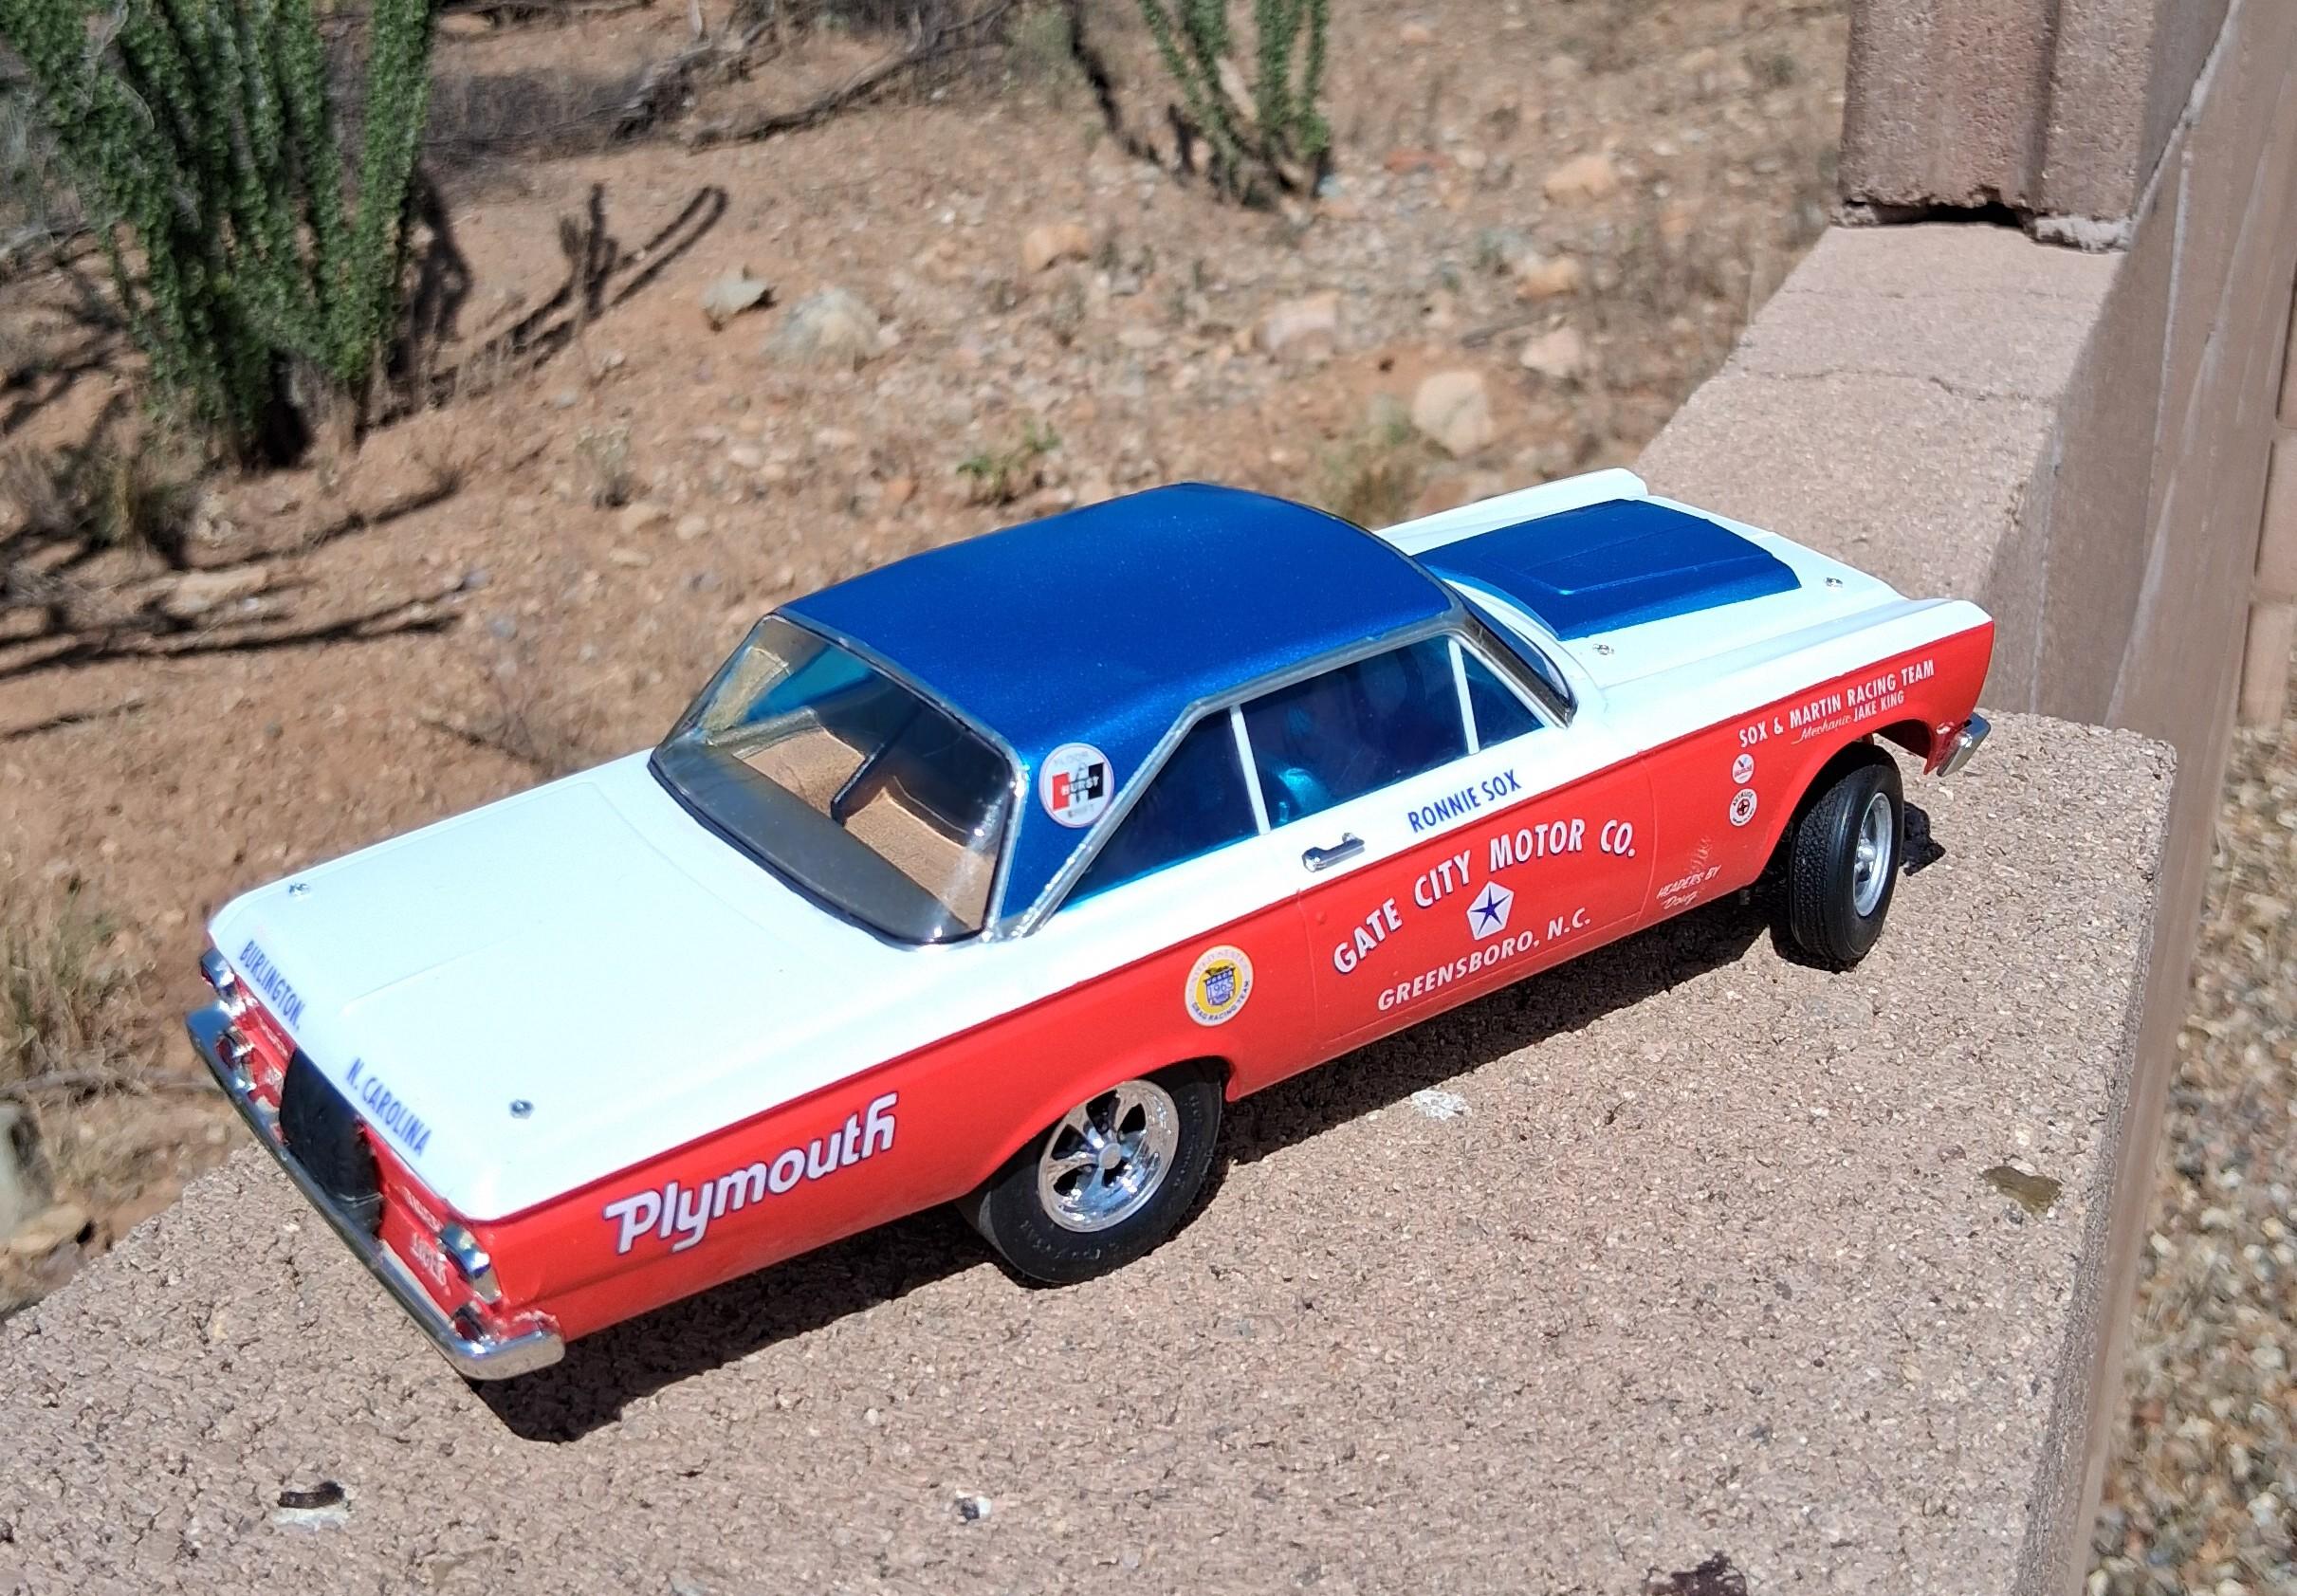
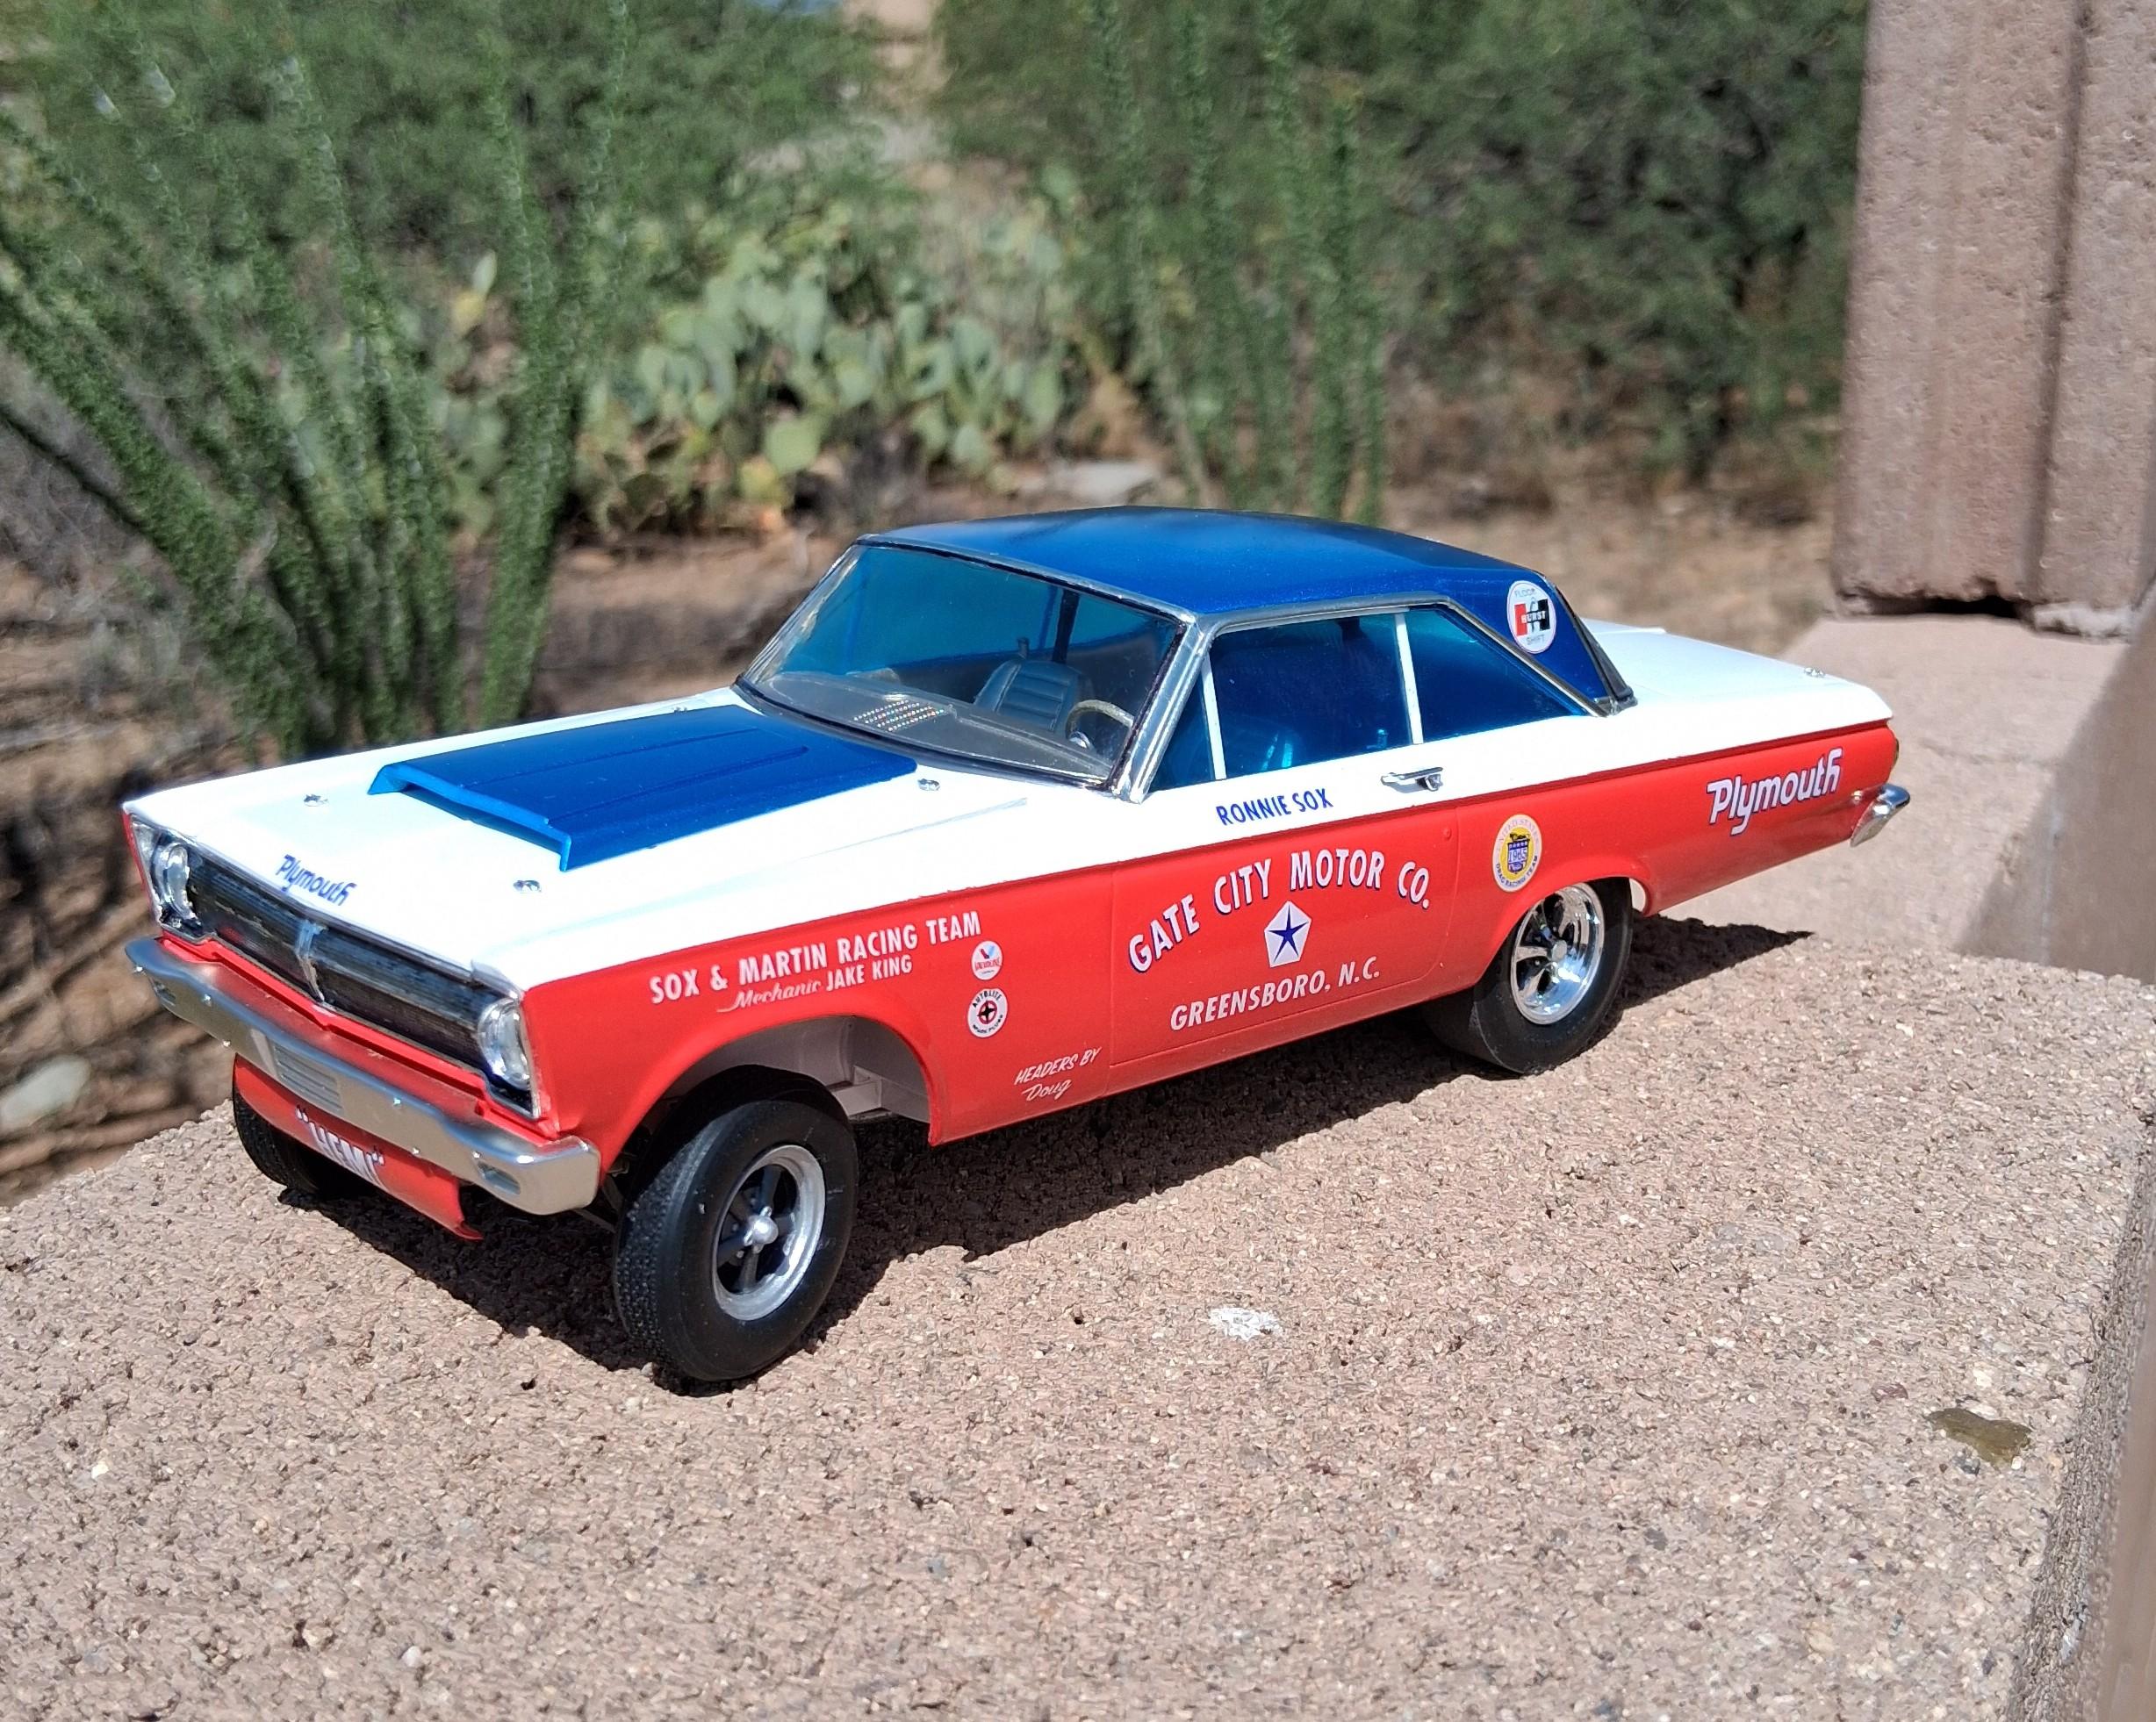
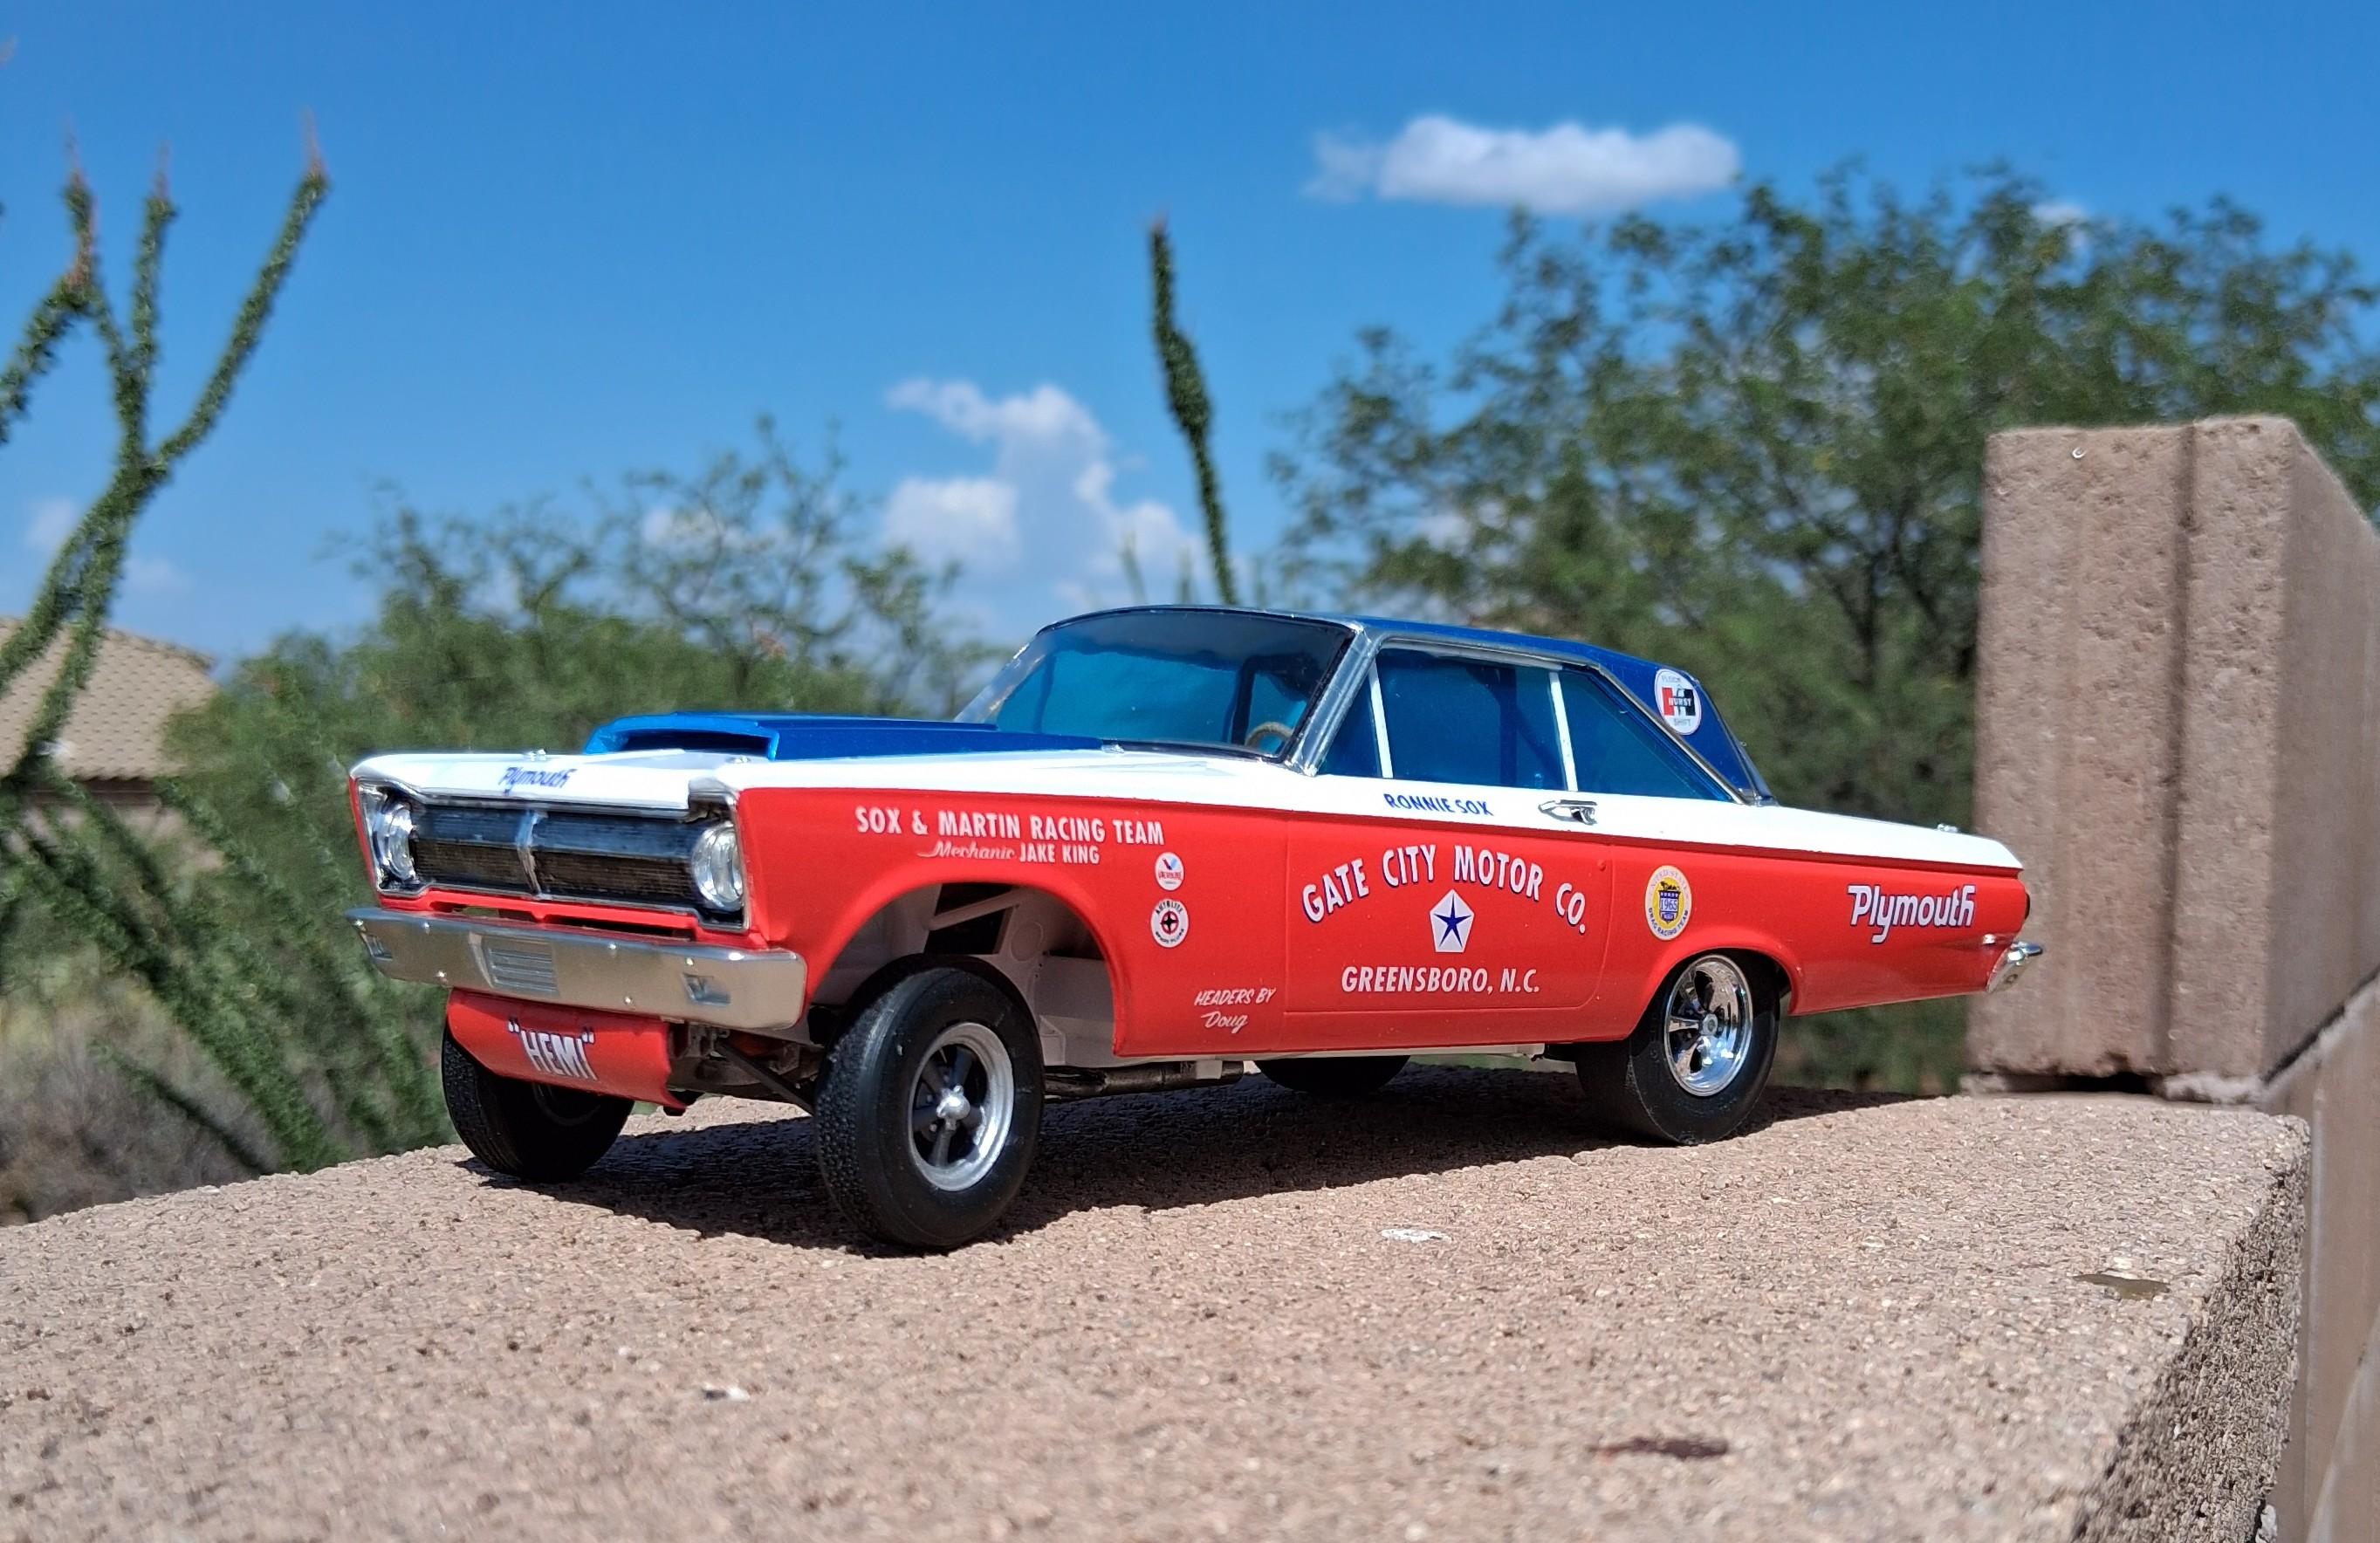
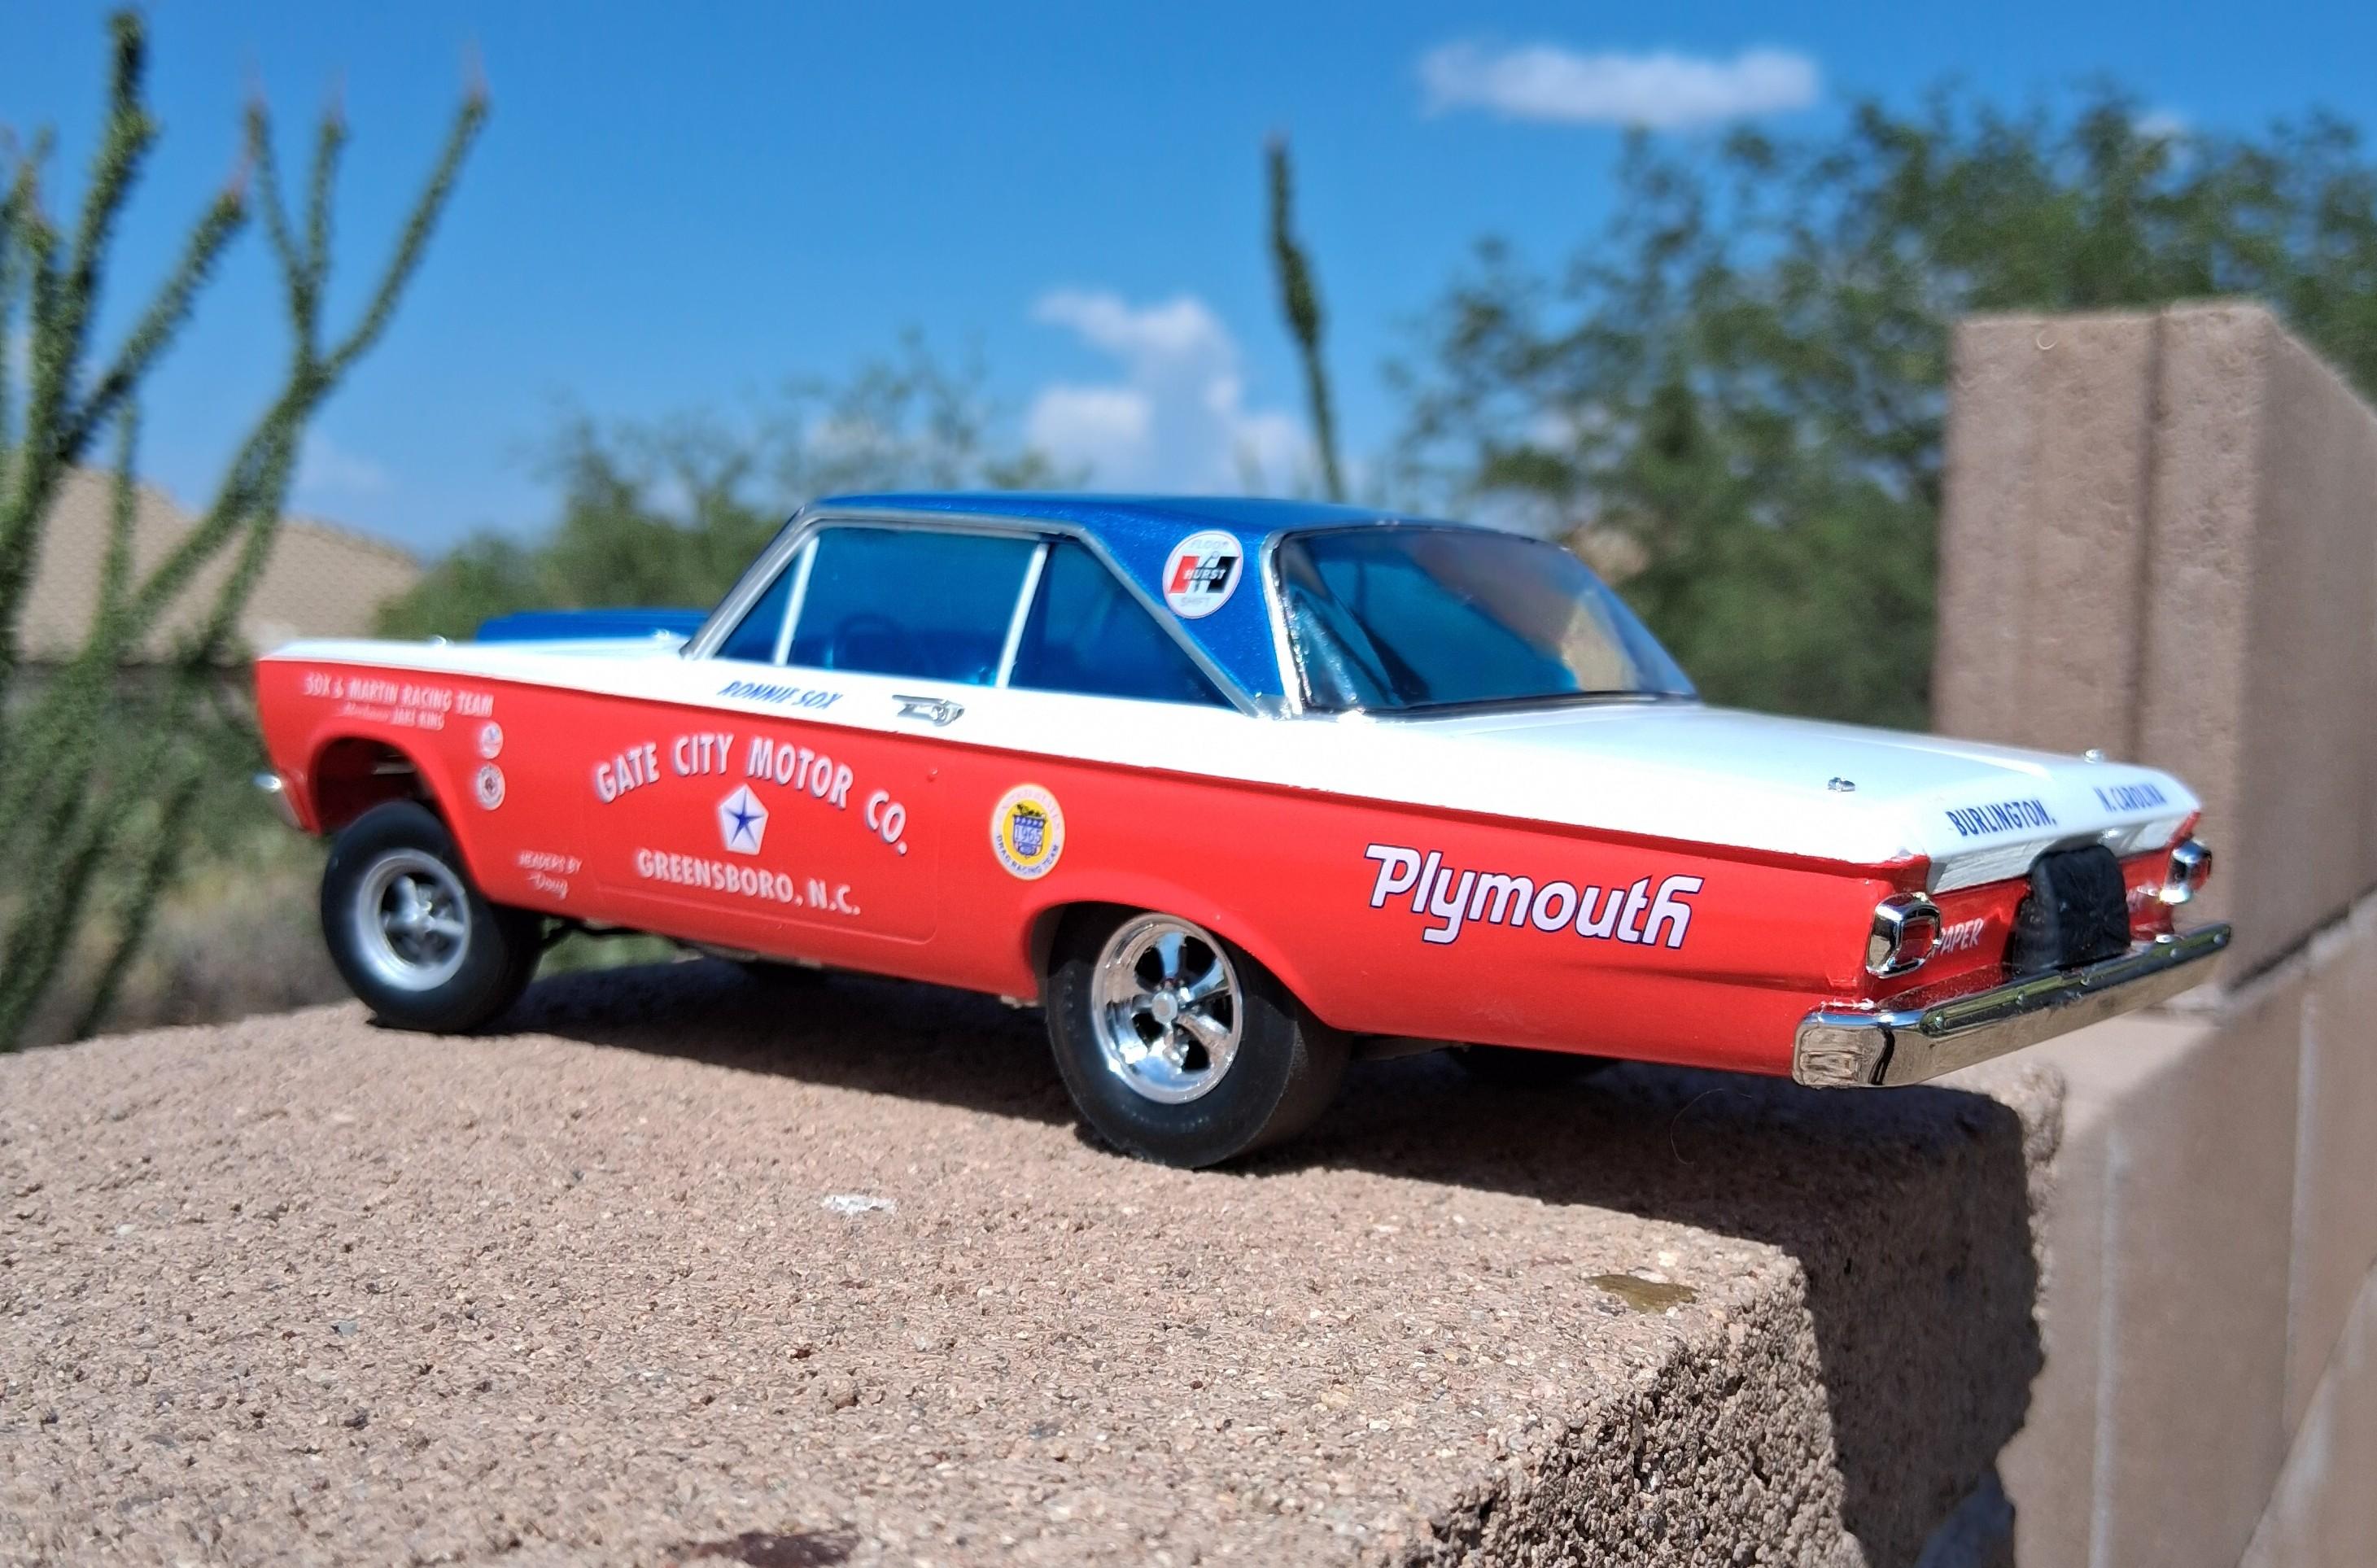
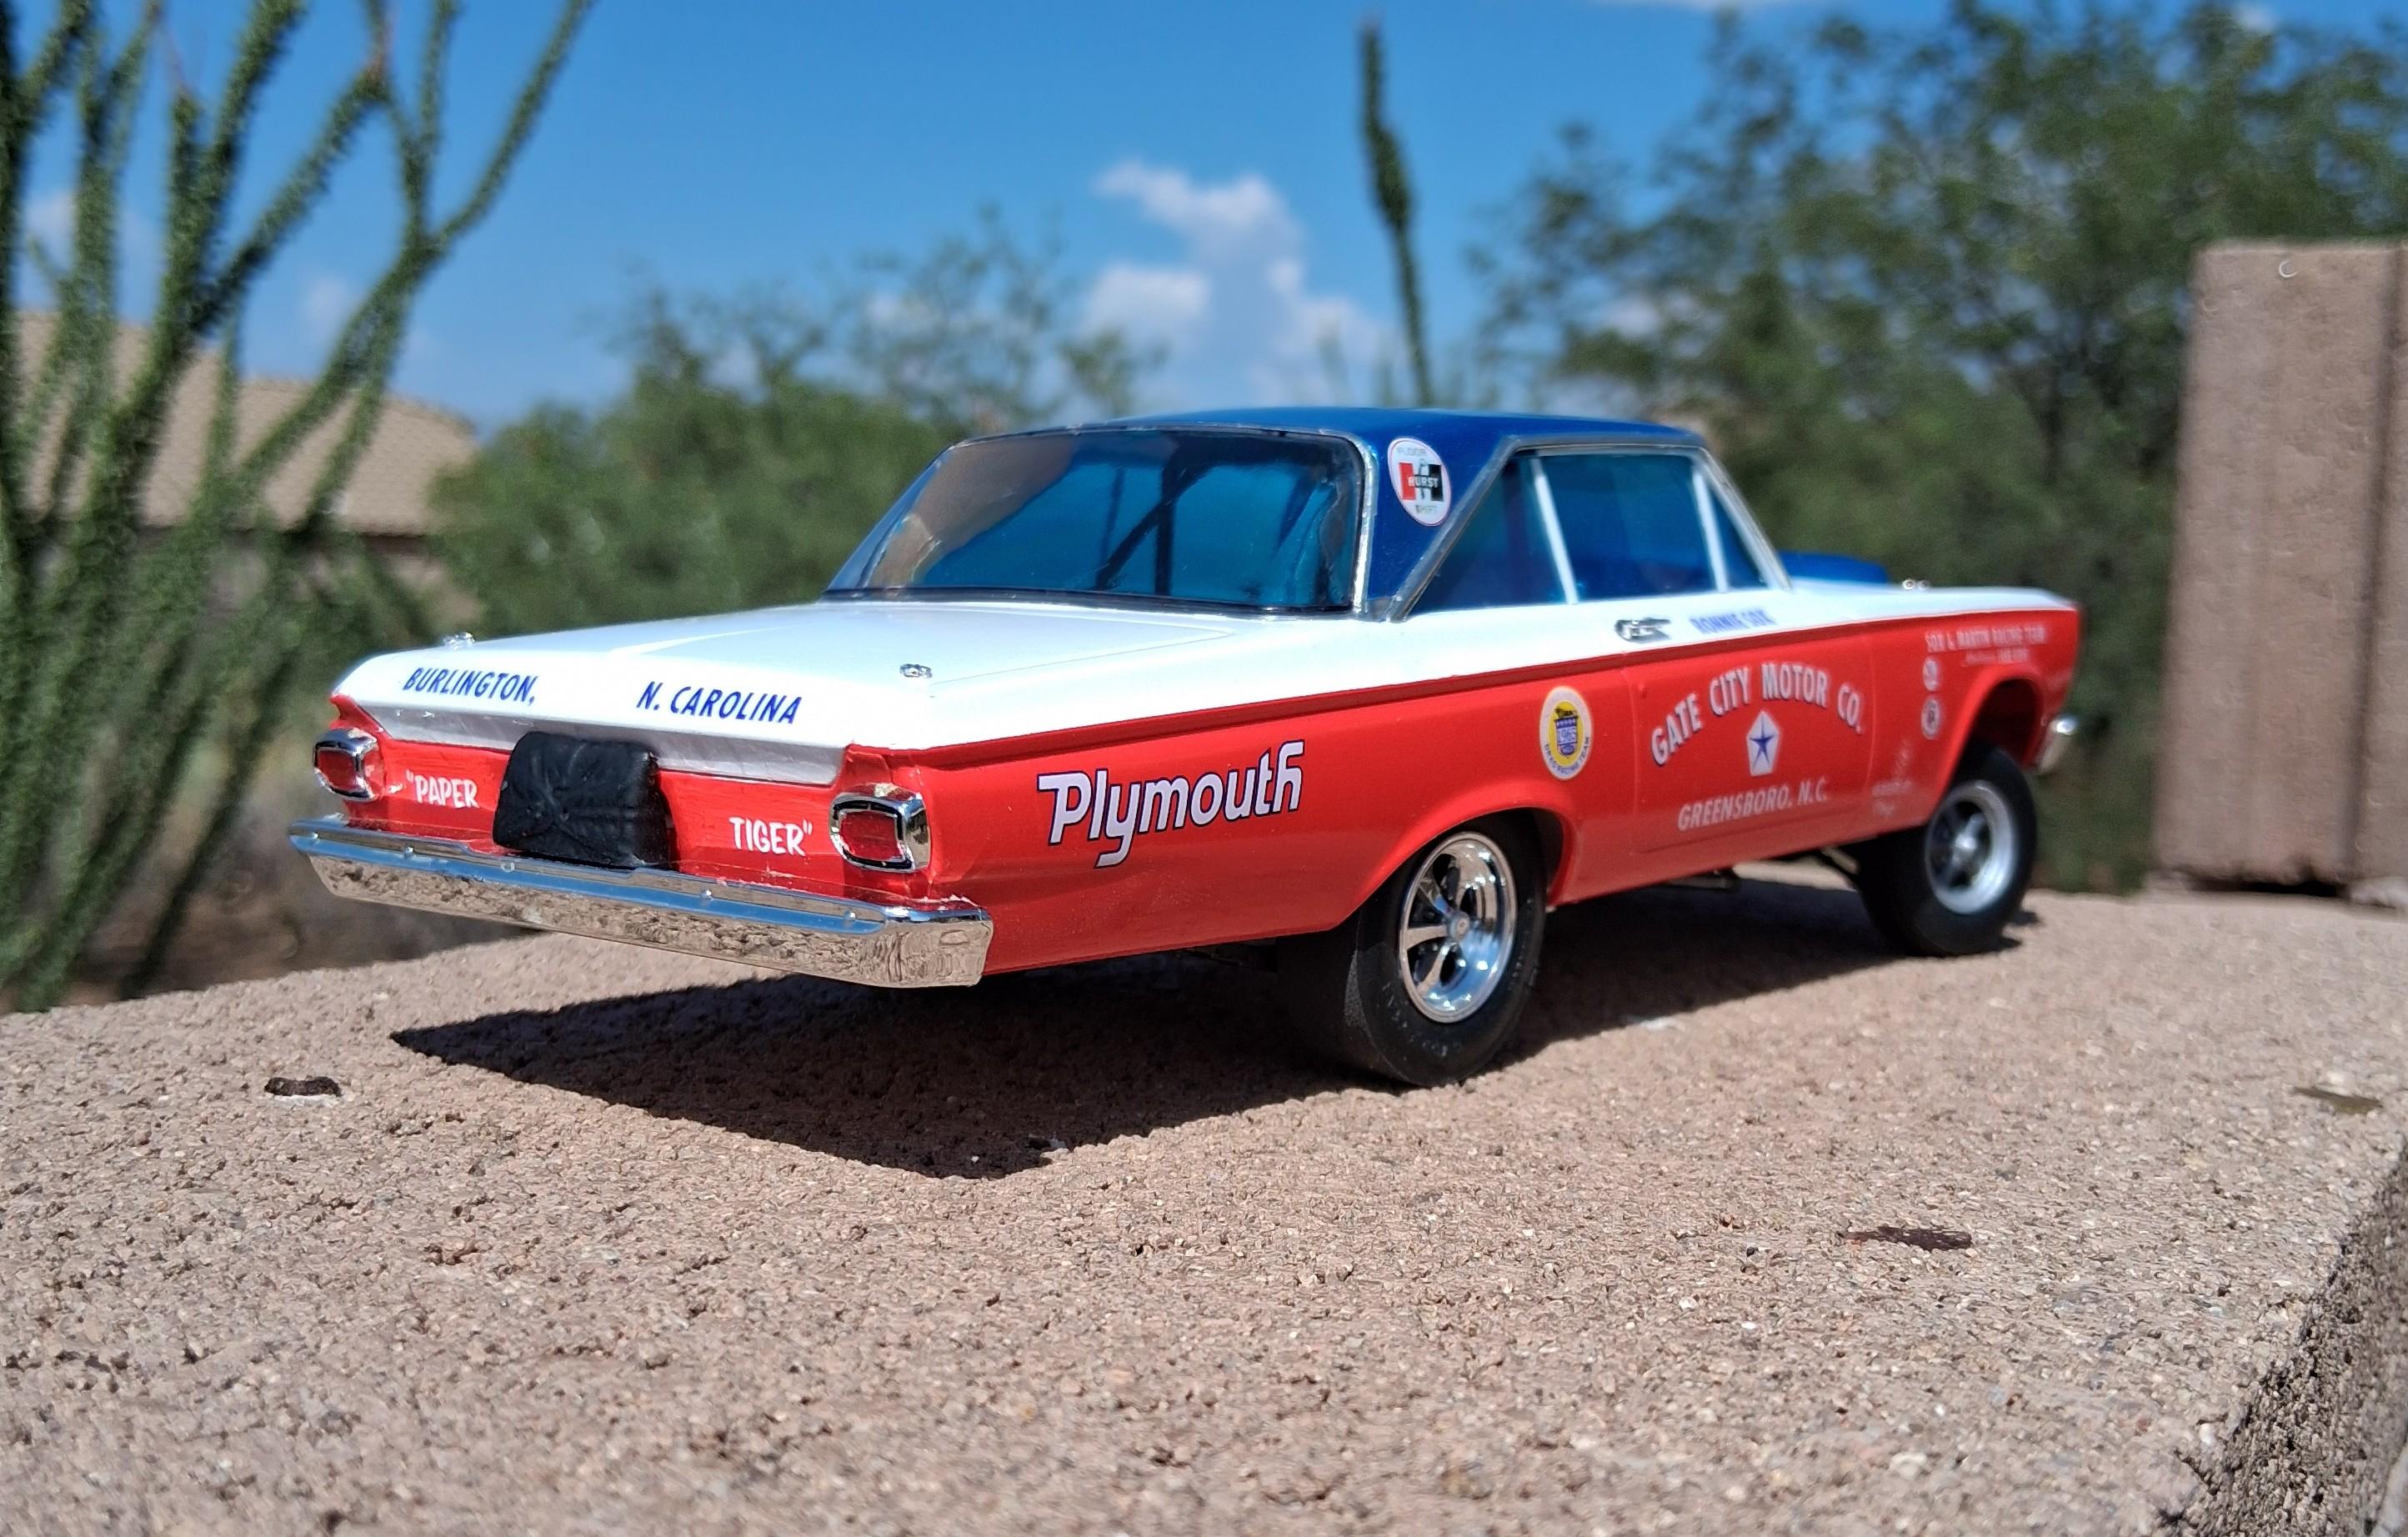
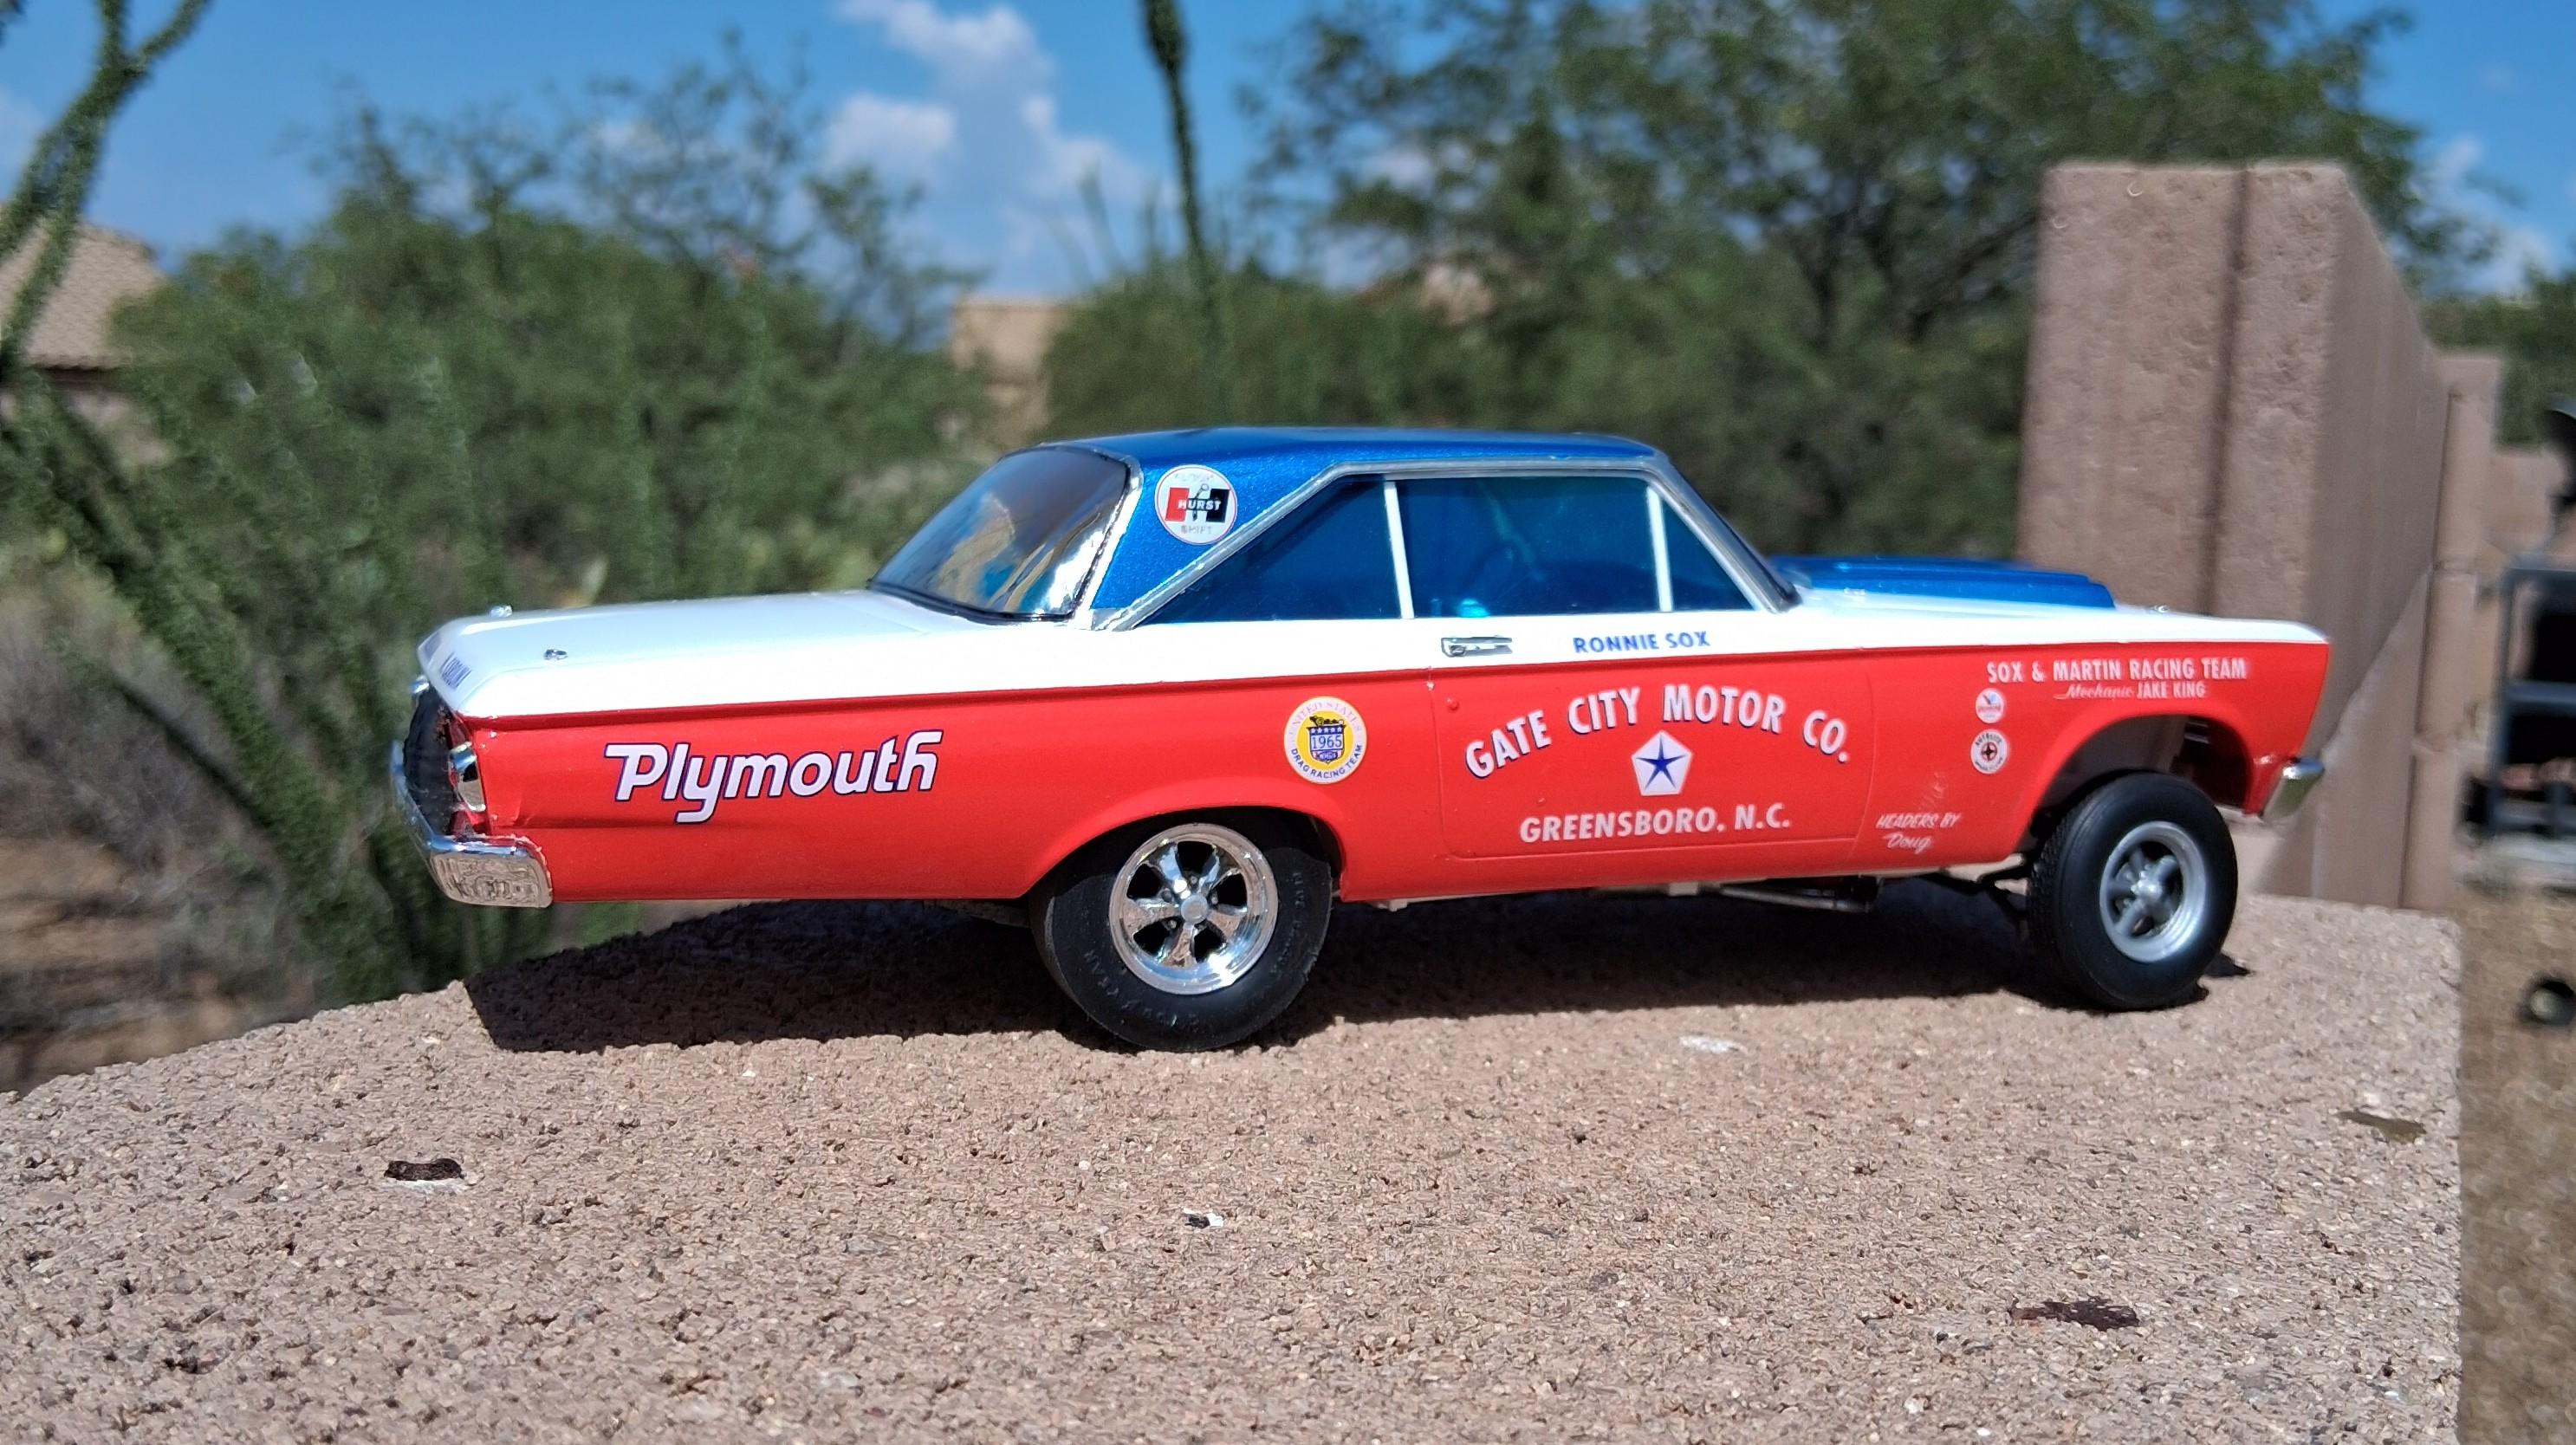
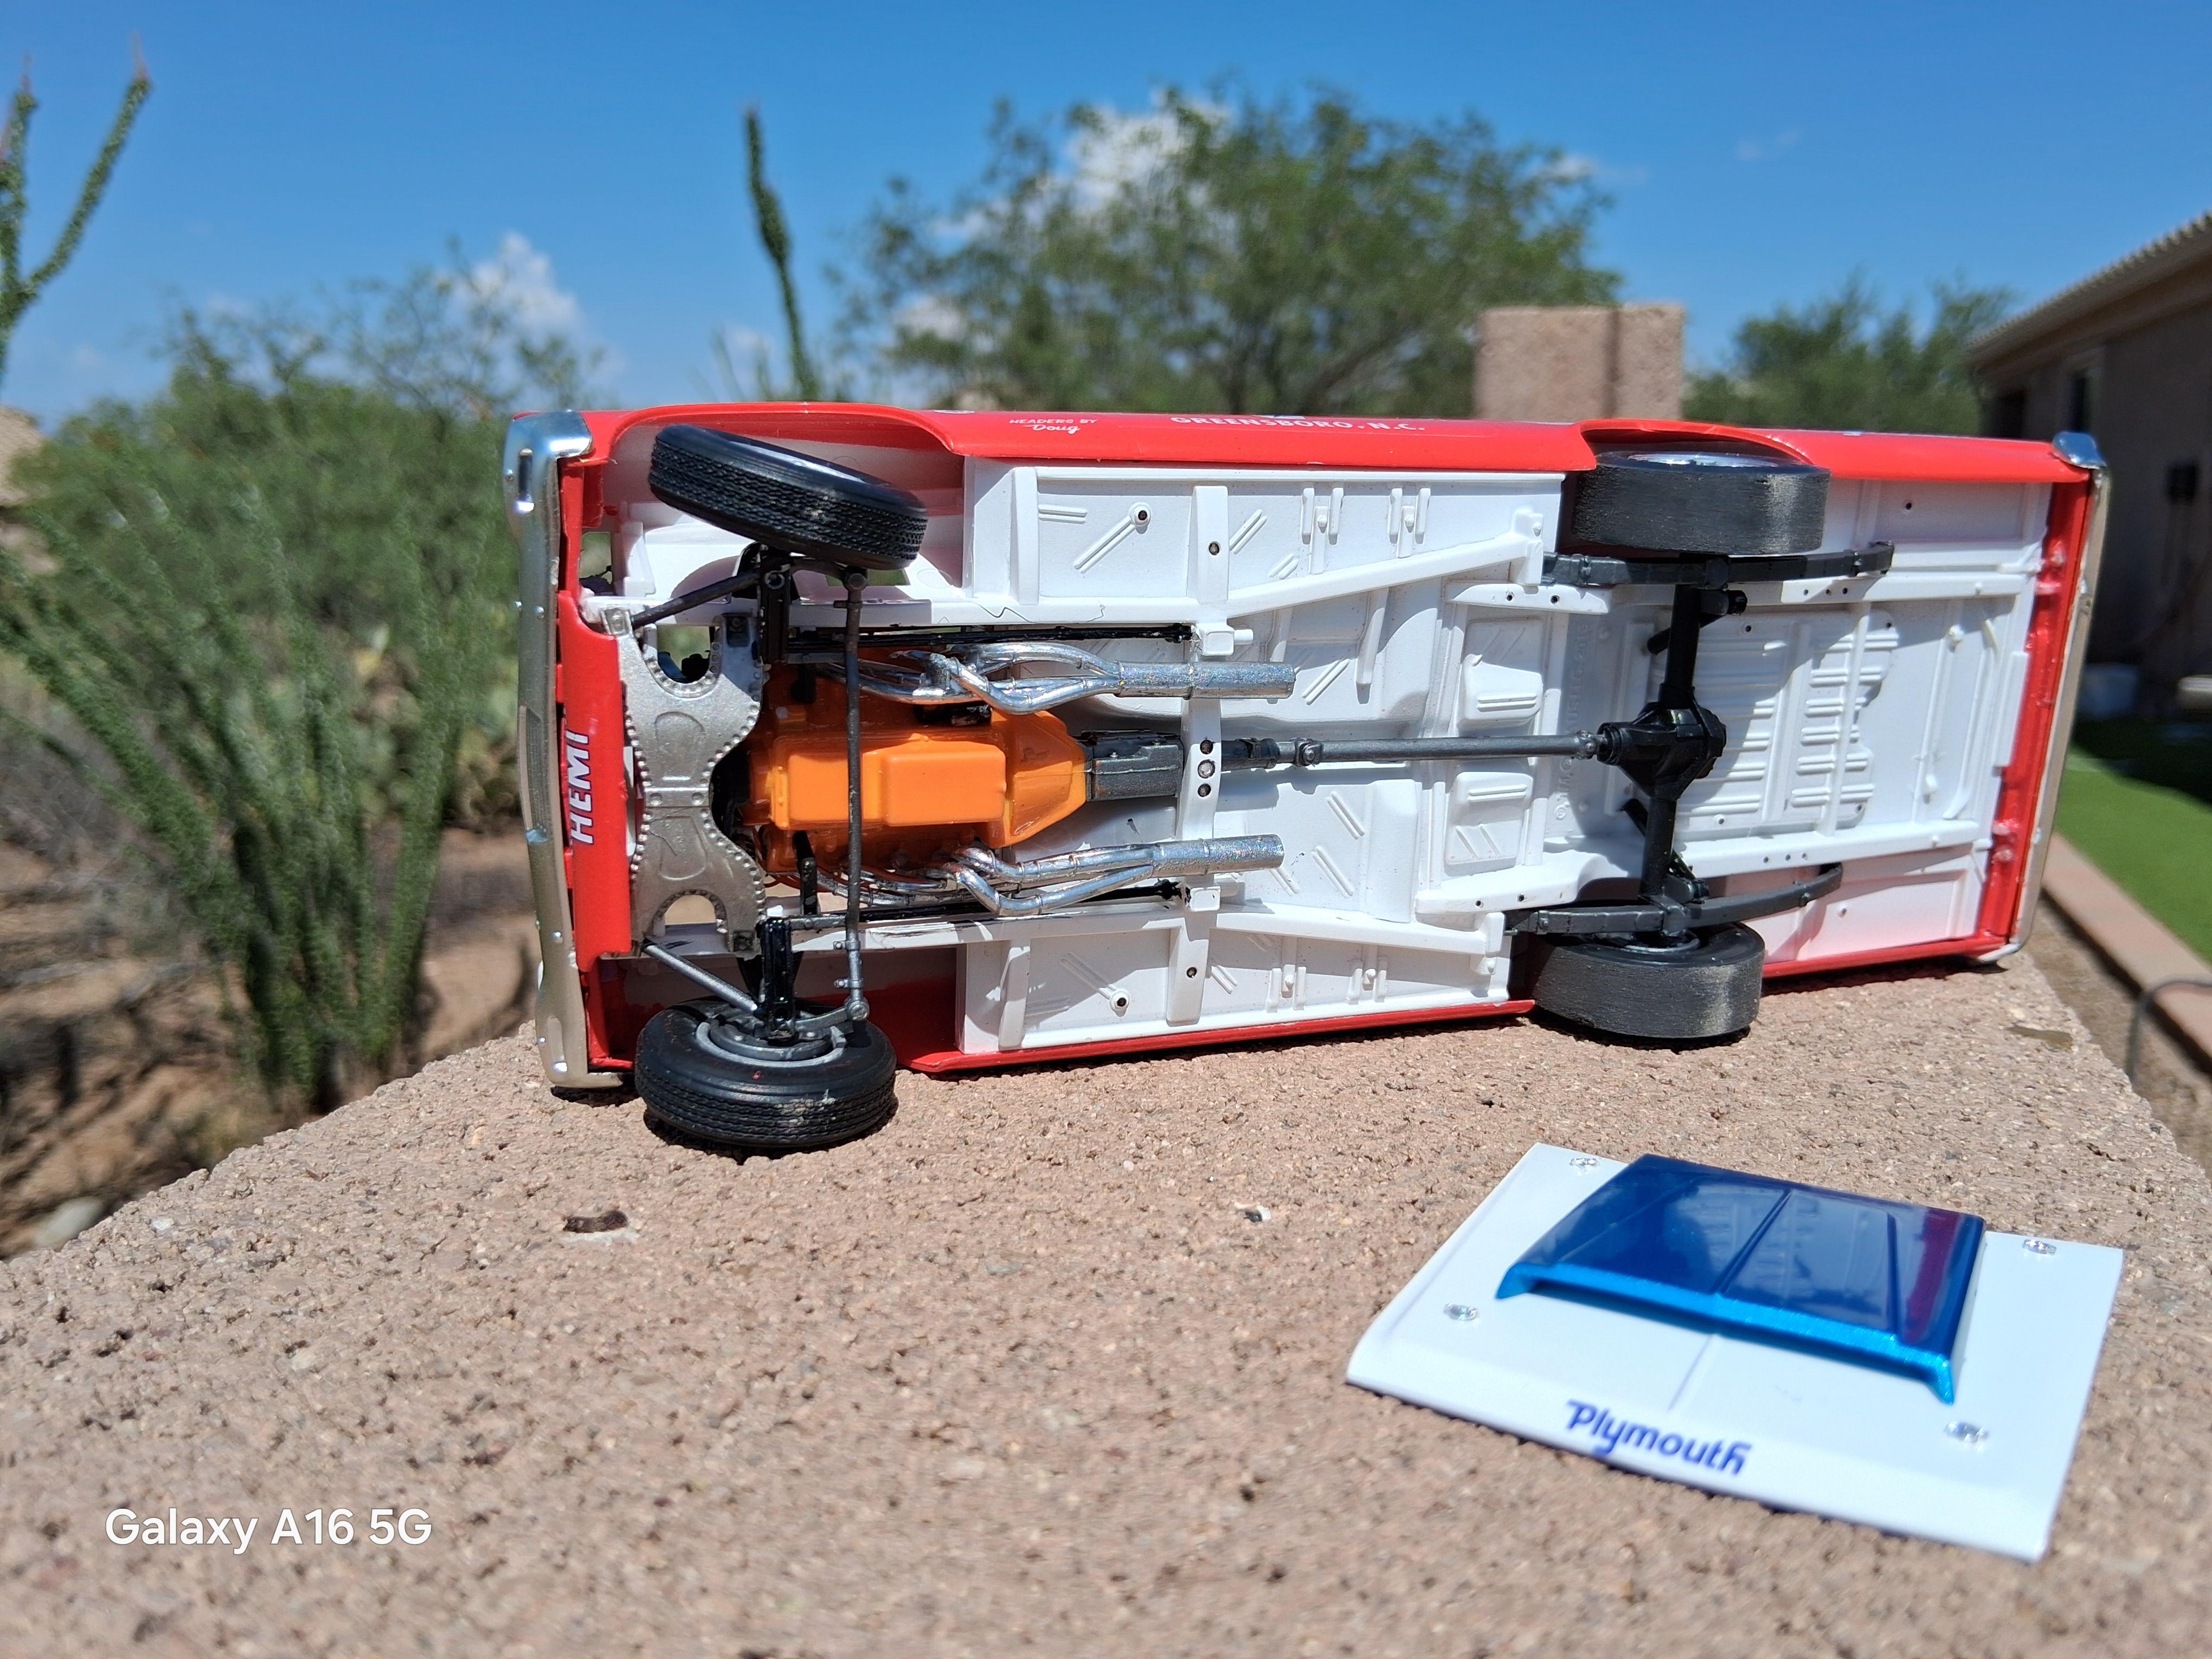
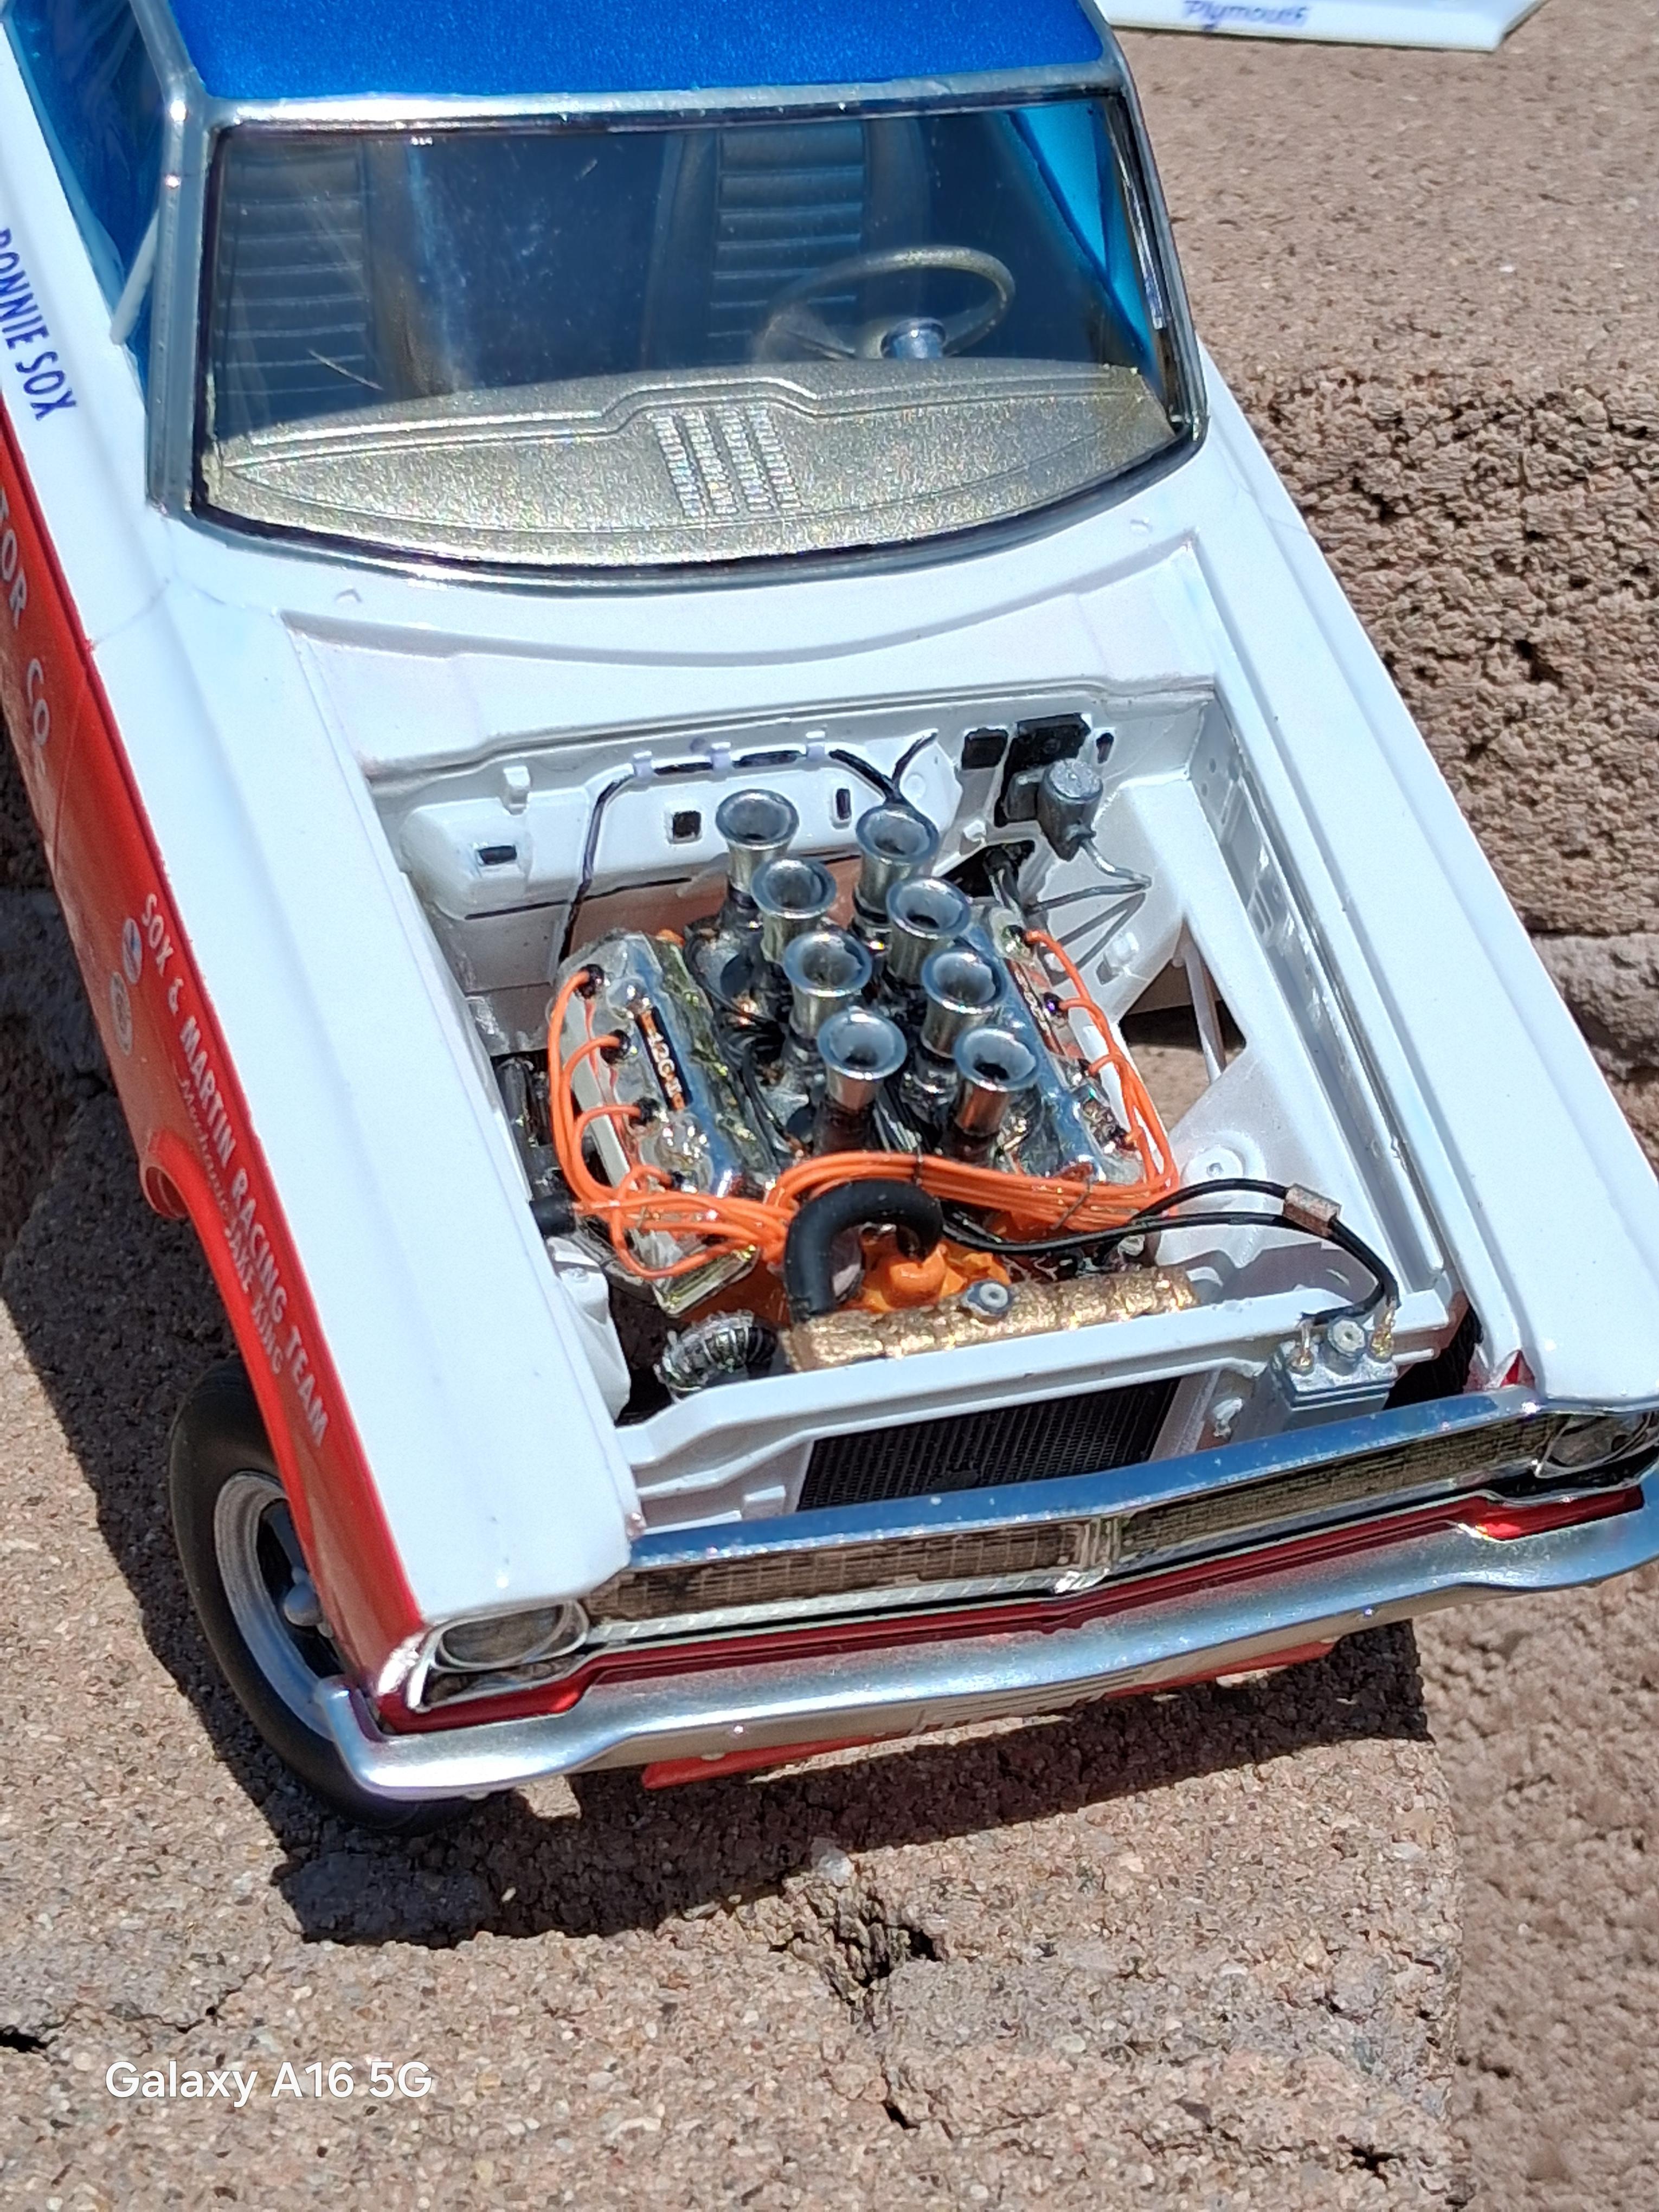
Finally have my all time favorite drag car in the case. Added spark plug wiring and fuel injection lines from the tank to the pump. All Tamiya Paints except duplicolor acrylic clear lacquer. Slixx for the decals Rear wheels and tires from the Revell 1967 GTX Swapped the 4spd engine halves with the Dodge version of the kit to make this one a 4spd A satin clear on the kits chrome ft bumper to replicate polished aluminum Blue tinted acetate file folder sheet used for the side glass I made my own window frames using some plastistruc strips This is the 1st one of these kits I've left the front spindles so the wheels were posable, And I like it much better Im really happy with how this one turned out * On a side note The tires / Keystone rims from the Revell 1967 GTX are a near perfect fit for this kit like they were made for it
-
So far I am liking this stuff I did a set of headers and so far, so good BUT, once coated . Do not handle them for a few days I did the next day and it and it takes the shine off them Not a big issue for me as the effect is still the same. All this said, my impression so far is all good. Would I use it to coat a bumper as an example? No But builds where you may want a chrome real axle or suspension parts, it would be perfect
-
Any upcoming shows in the area here soon ? I have some kits I have decided I want to thin down, Way down
-
Like title says I need just a windshield for one of them I dont think it matters which version pm me and we will work out details

.jpg.f9479cae2df8940613f12f44b638b1e8.jpg)
.jpg.282d0e6da112f3b32621400a3bc24145.jpg)
.jpg.e924e18b2e7cf075d035b344514fd4e1.jpg)
.jpg.d247c571933df845290fa85782869fd8.jpg)
.jpg.a9a21419c15f052edaaa741f211e2cf1.jpg)