Search the Community
Showing results for tags 'revell'.
-
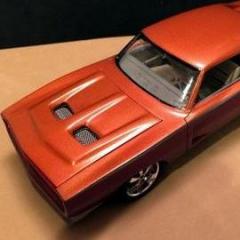
Probably my most ambitious bodywork project, to date. a tribute to the 1:1 I saw at a show Revell kit, with parts box engine, Pegasus wheels. Flocked, wired & foiled. Thanks for looking
-
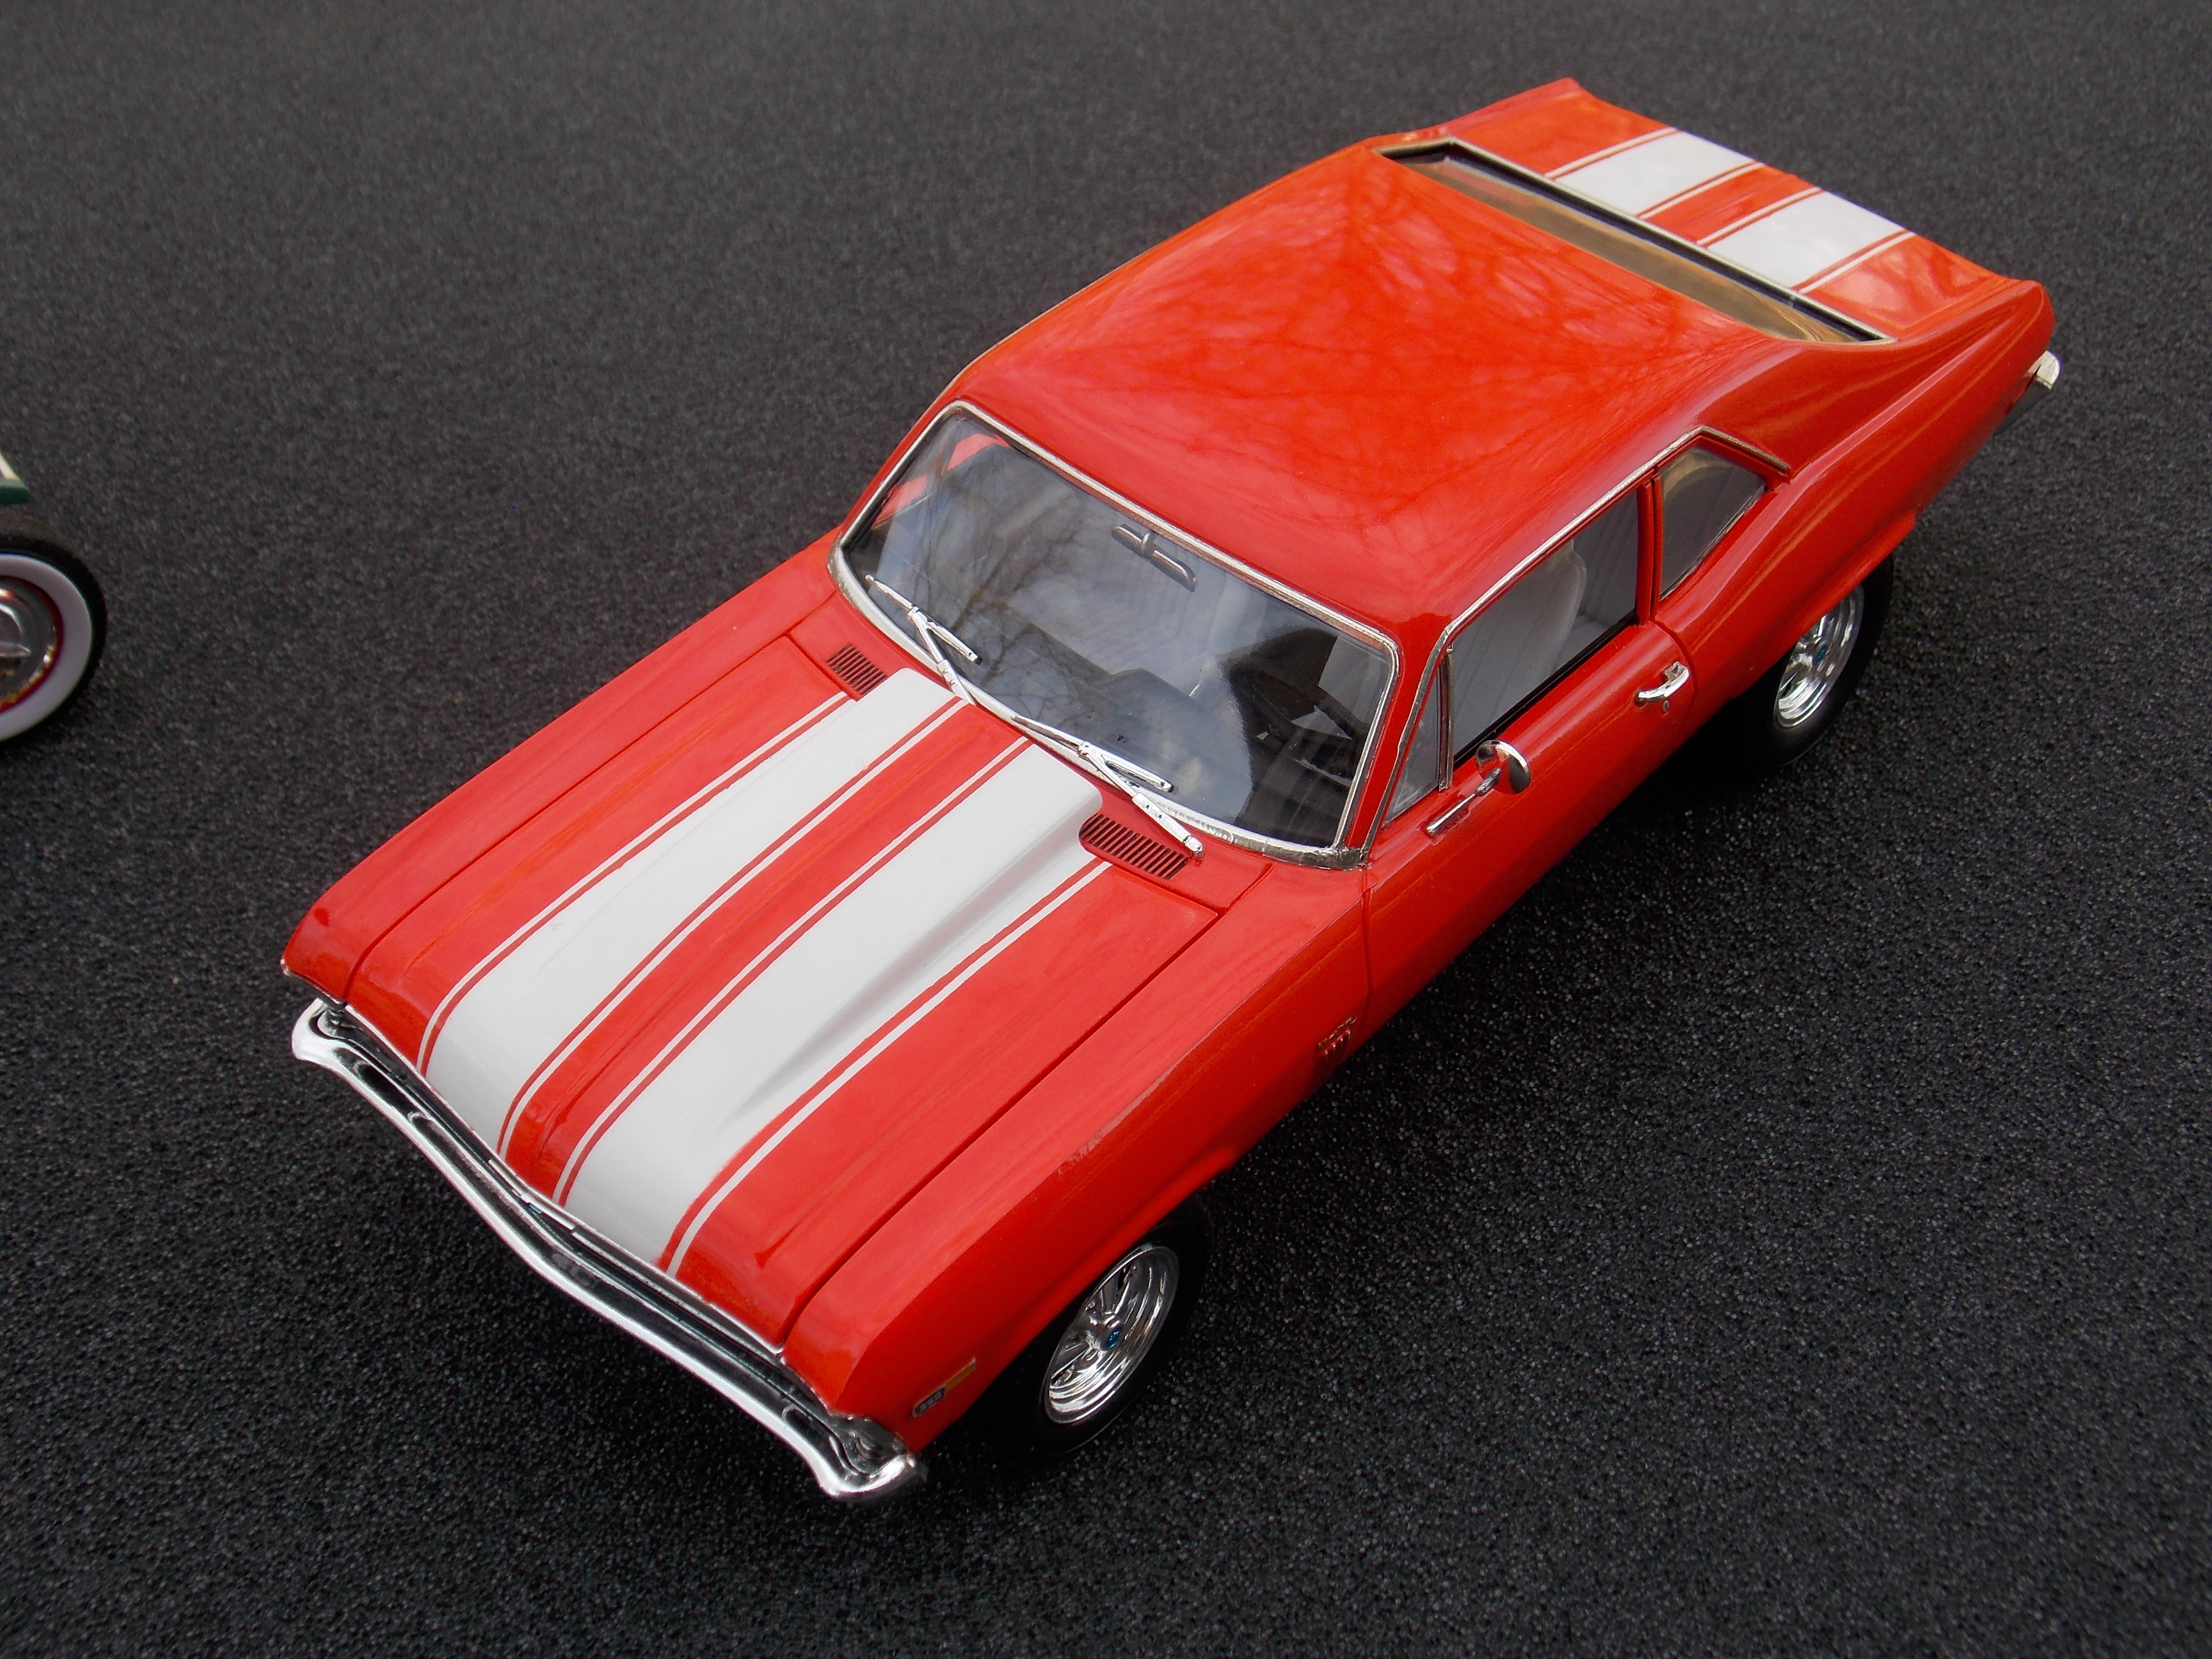
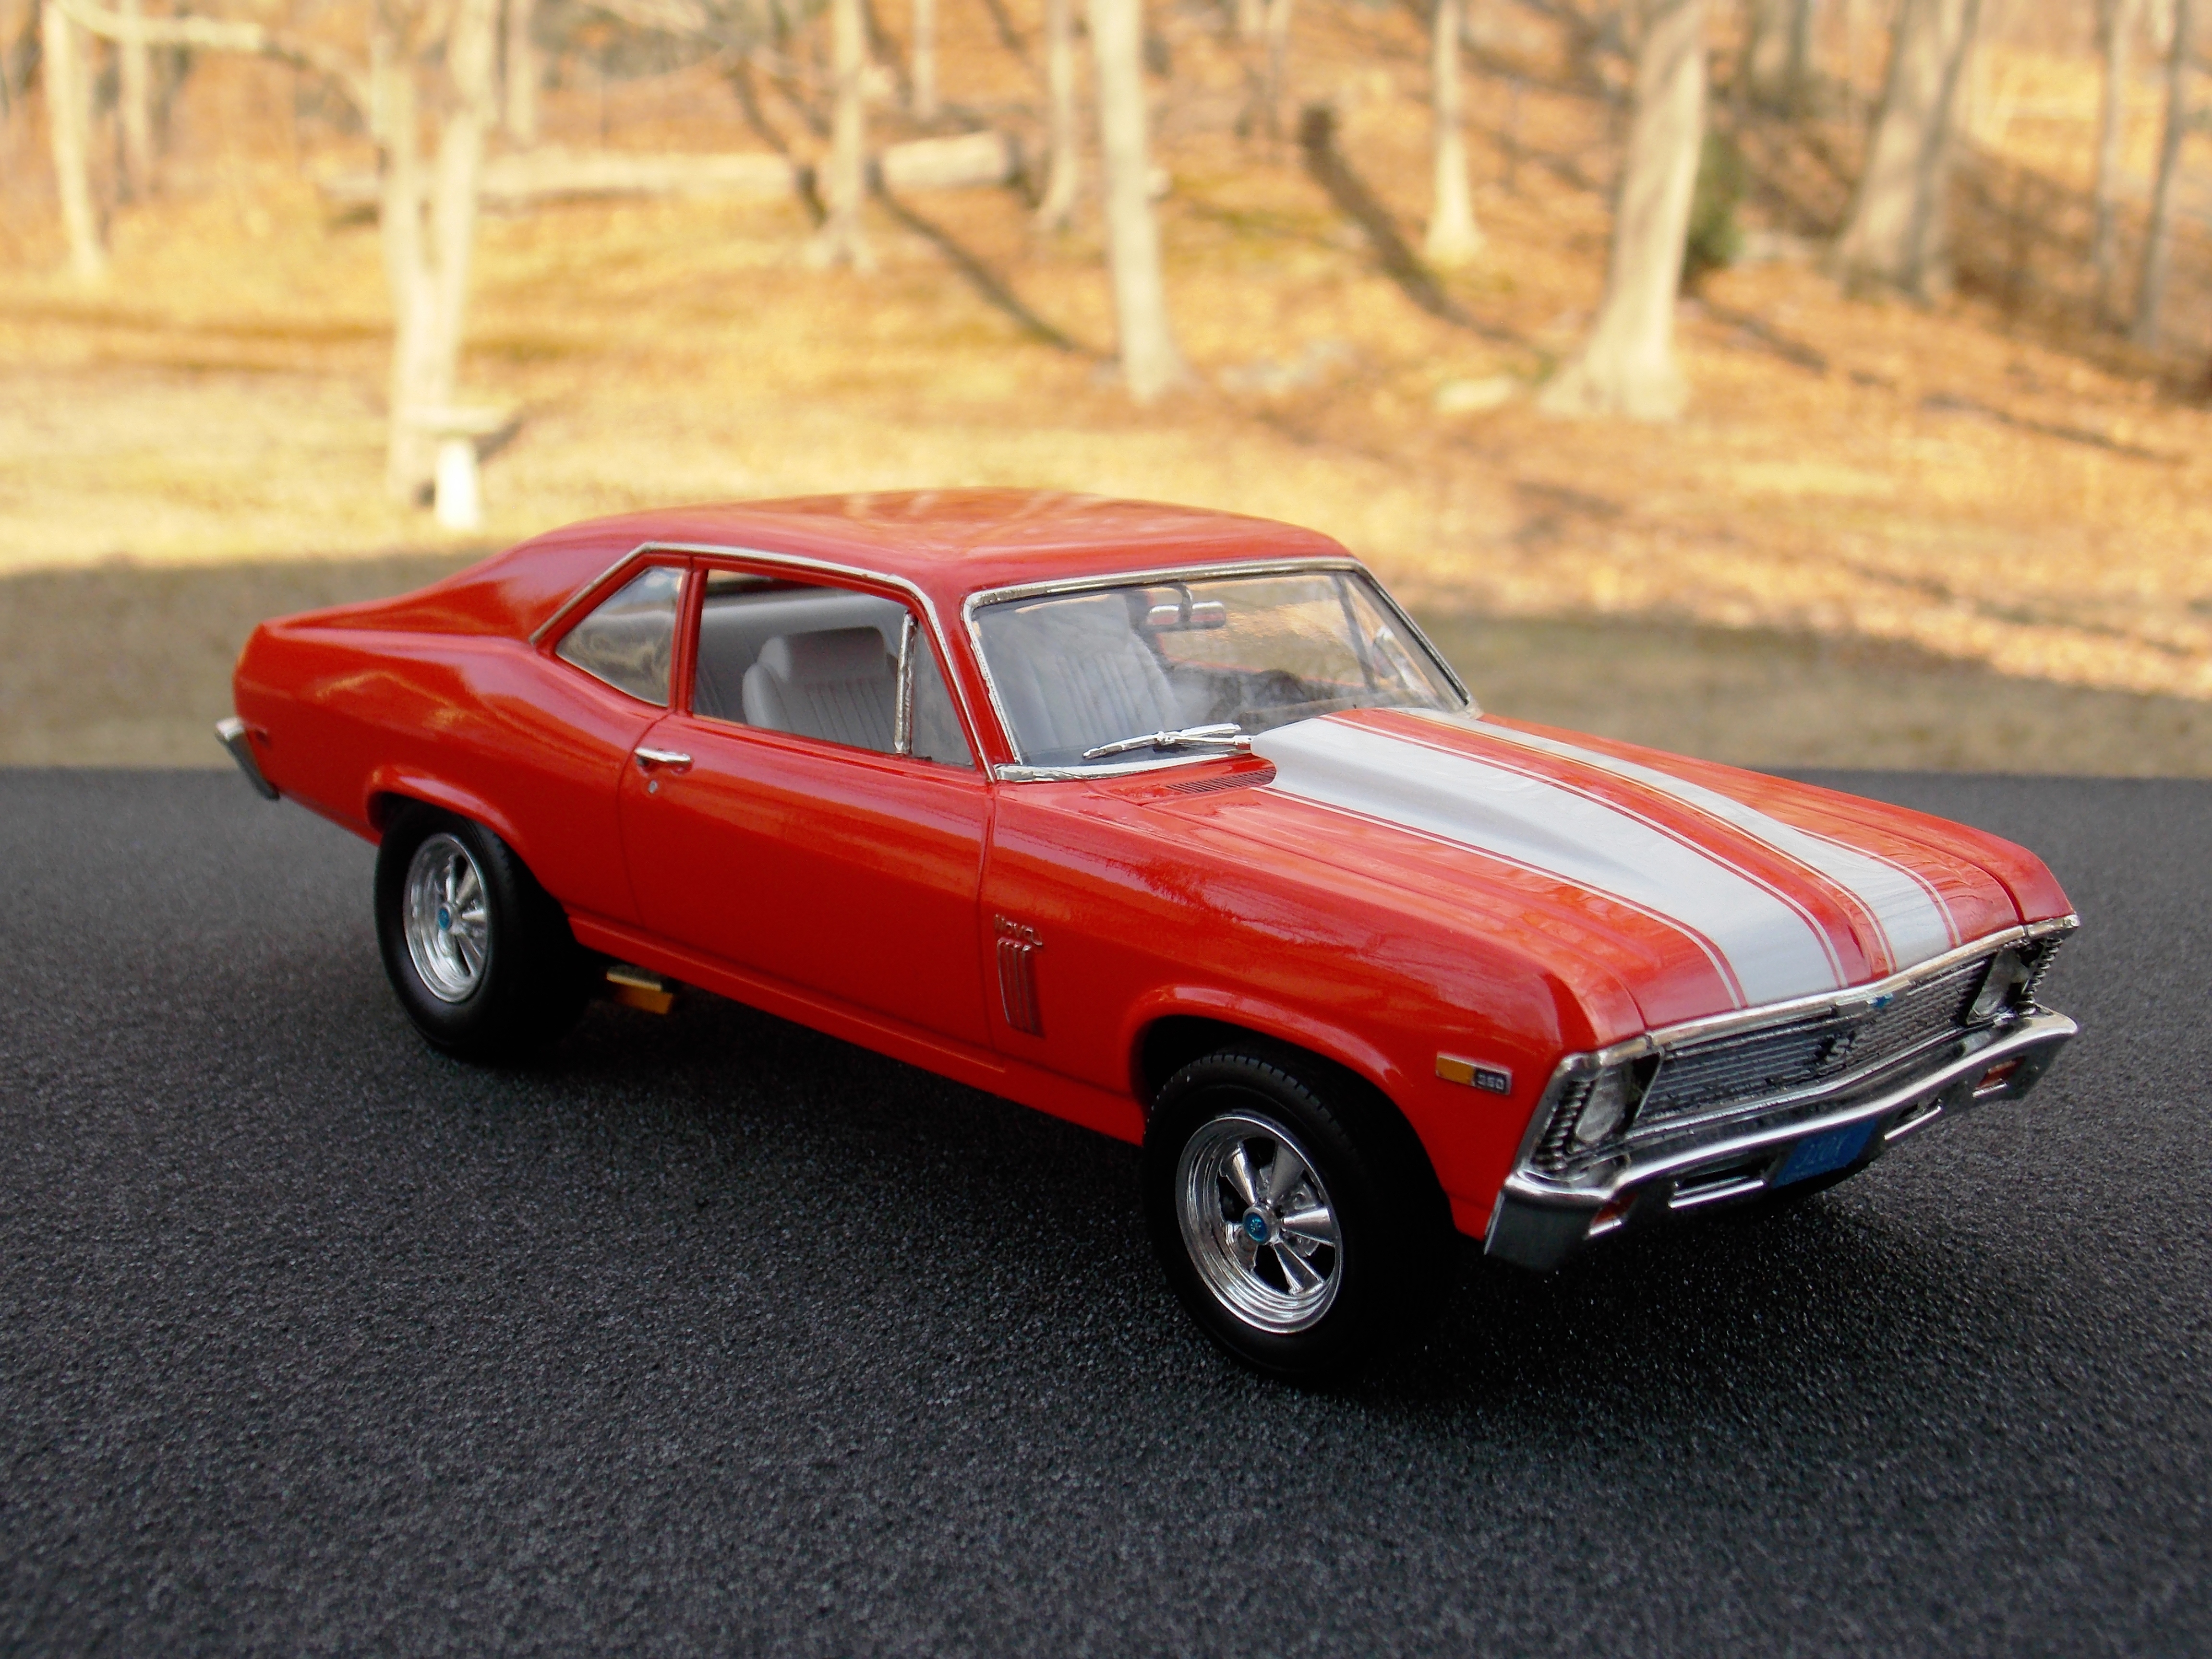
Got this finished up the other day. Loved building it. And, it was my first time actually spraying the rally stripes. I have tried decals in the past with major failures. I used Dupli-Color for the first primer coat to see and body work that was needed. after wet sanding and drying I shot it with Tamiya primer followed with Tamiya's Bright White. After sitting for a few days I masked off and shot the Tamiya Bright Orange color coat followed by Testors Wet Look Clear. I built it pretty much out of the box with the exception of the wheels. I wanted to go with a more period look. Anyway, enough babbling...

-
Help! I'm trying to finish up Revell's '68 Dodge Charger R/T "special edition", but the front stance is too high. I'm about to pull it apart, but wondered if anyone else had this issue?
-
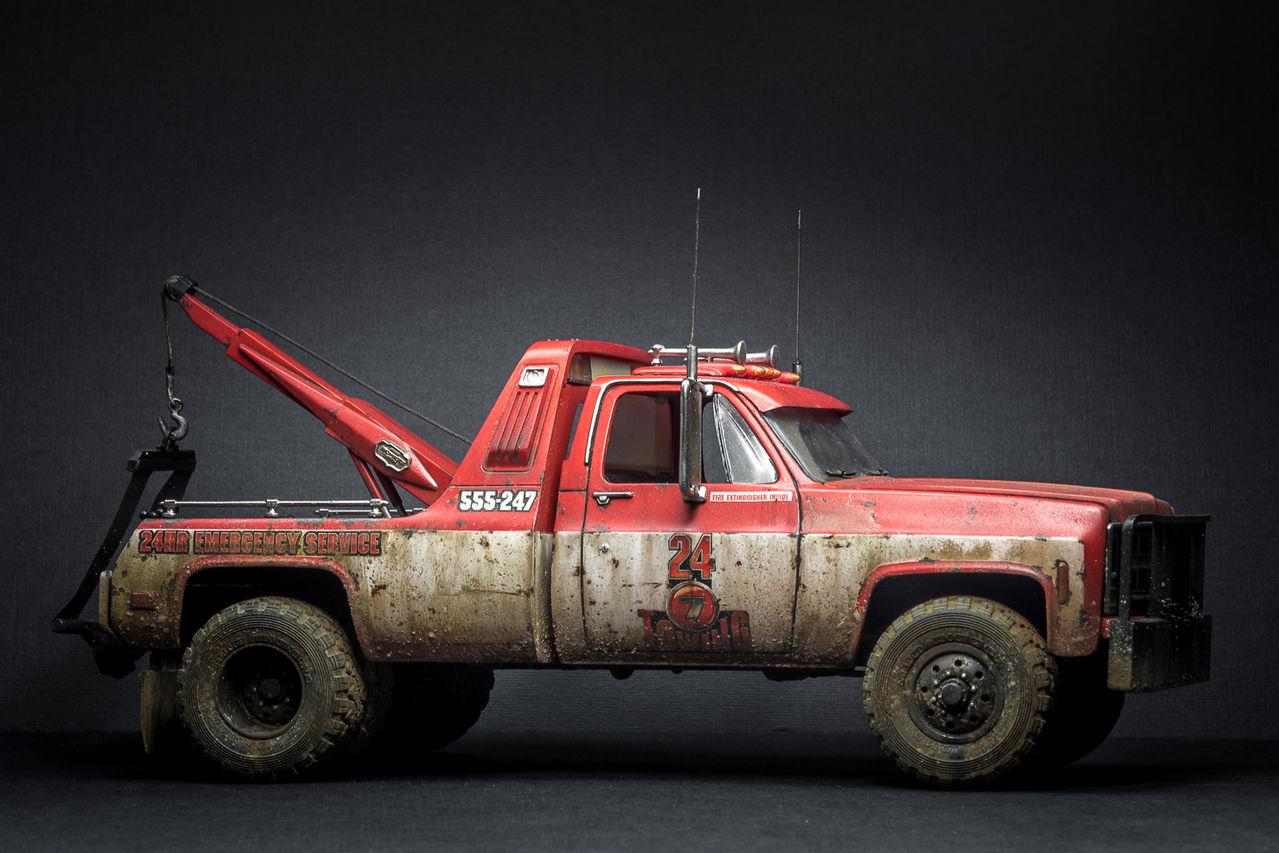
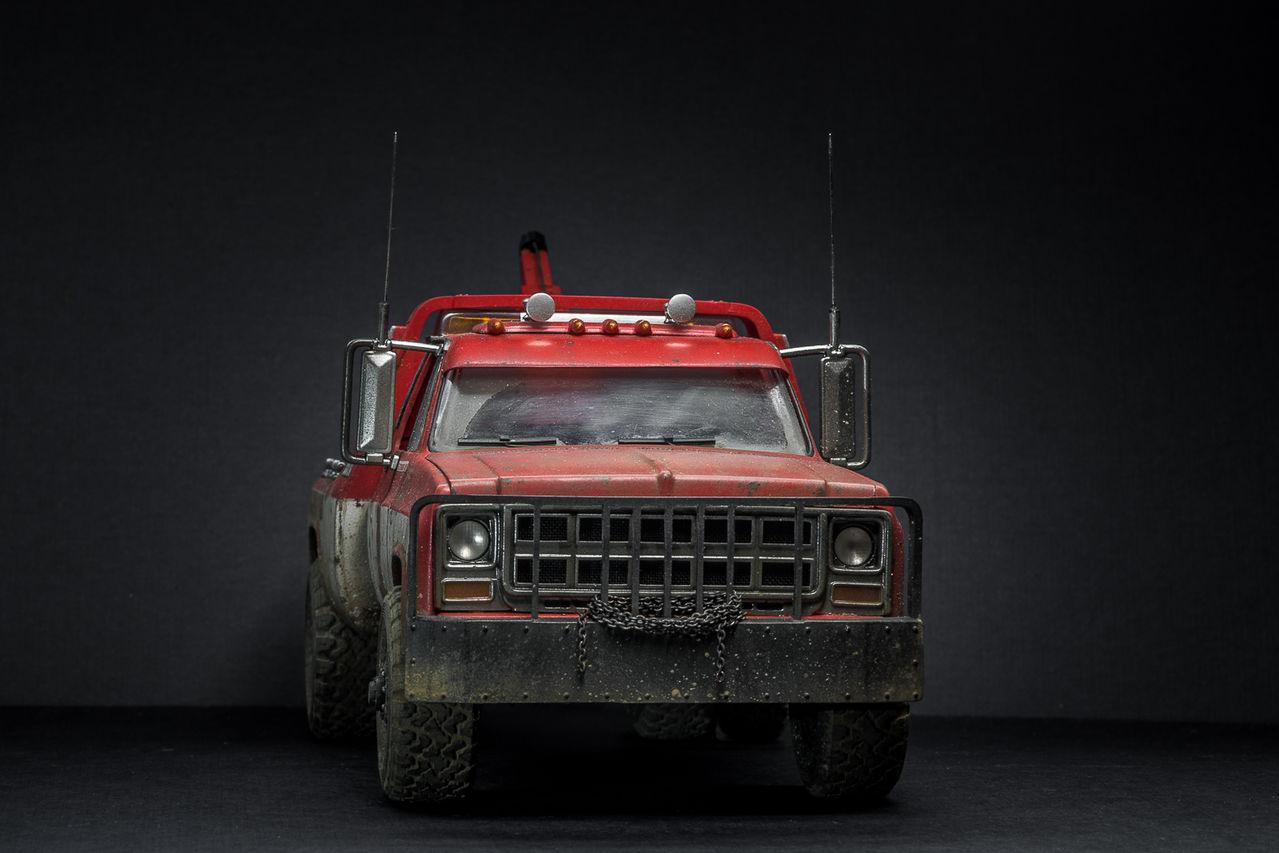
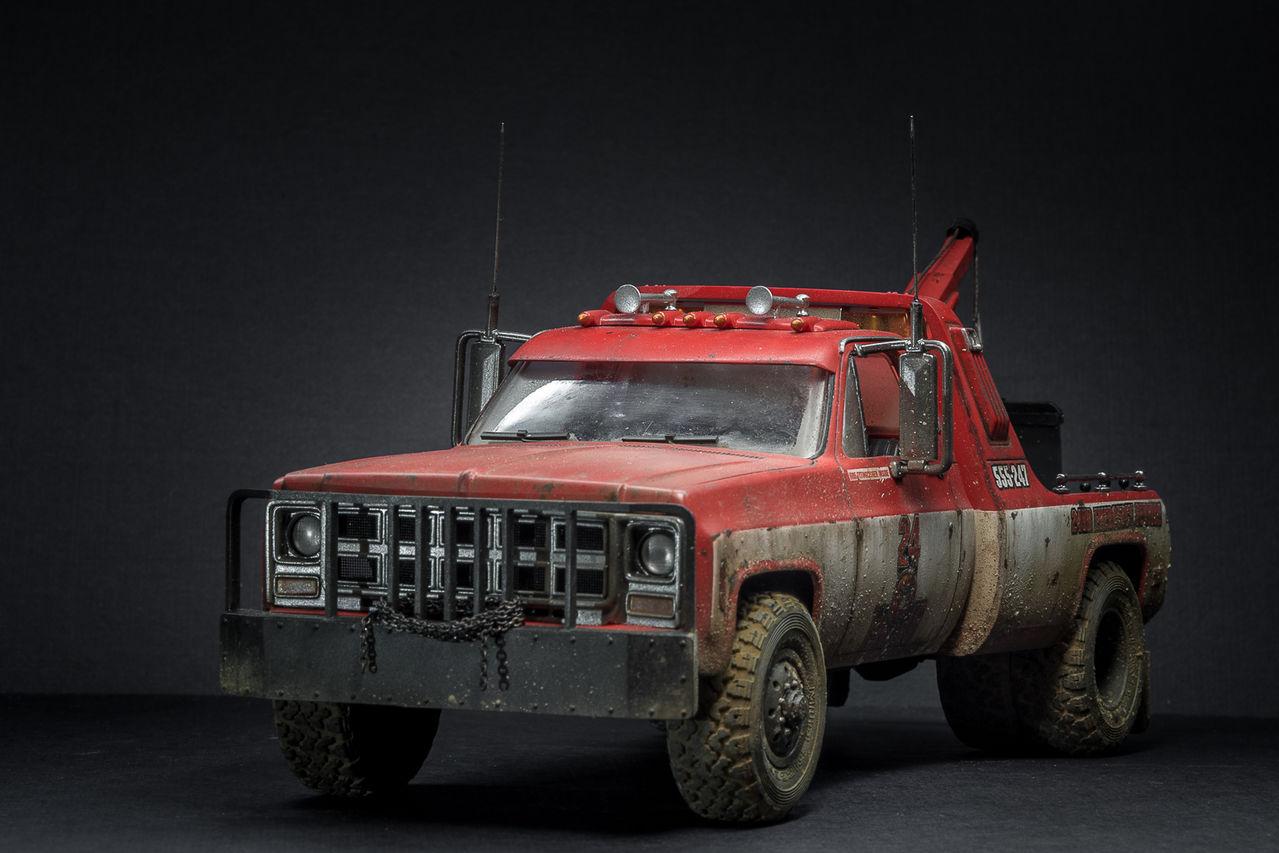
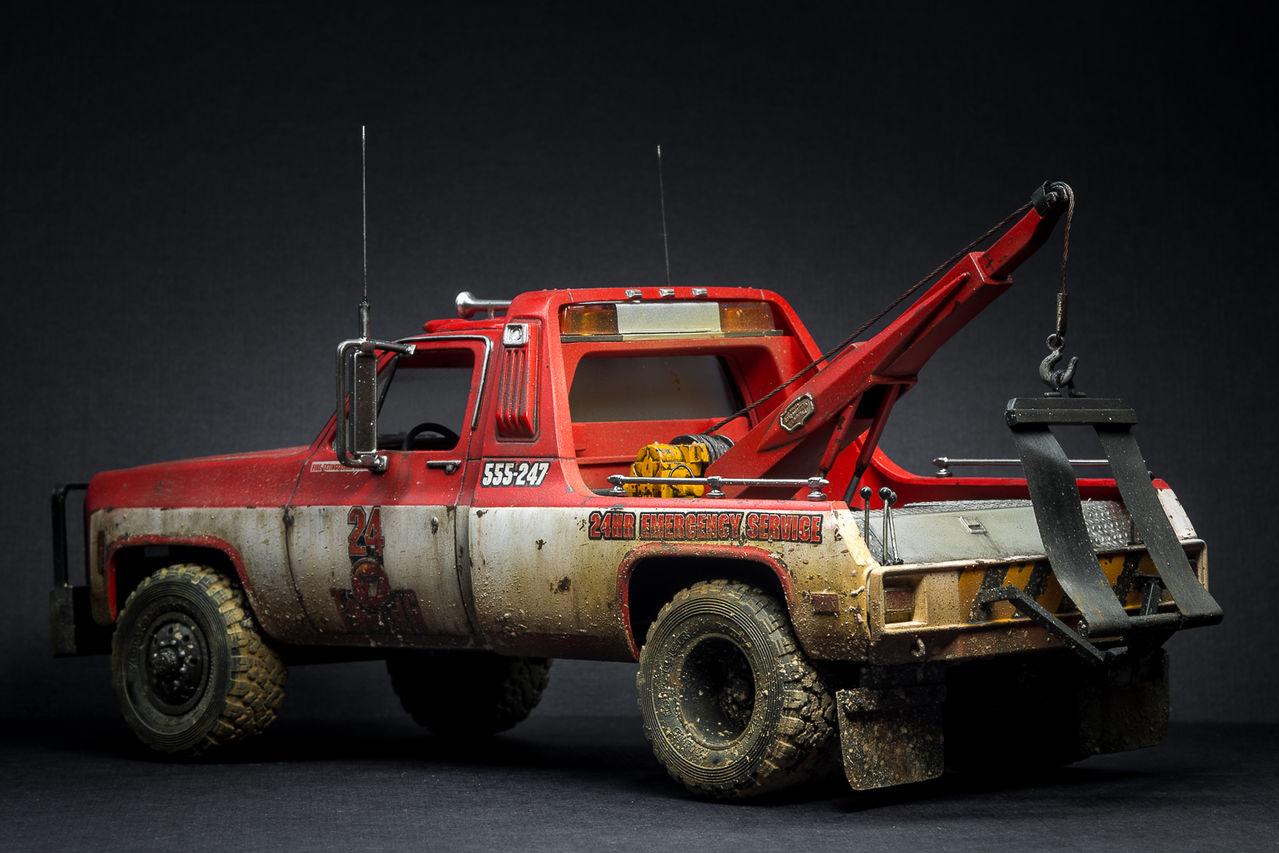
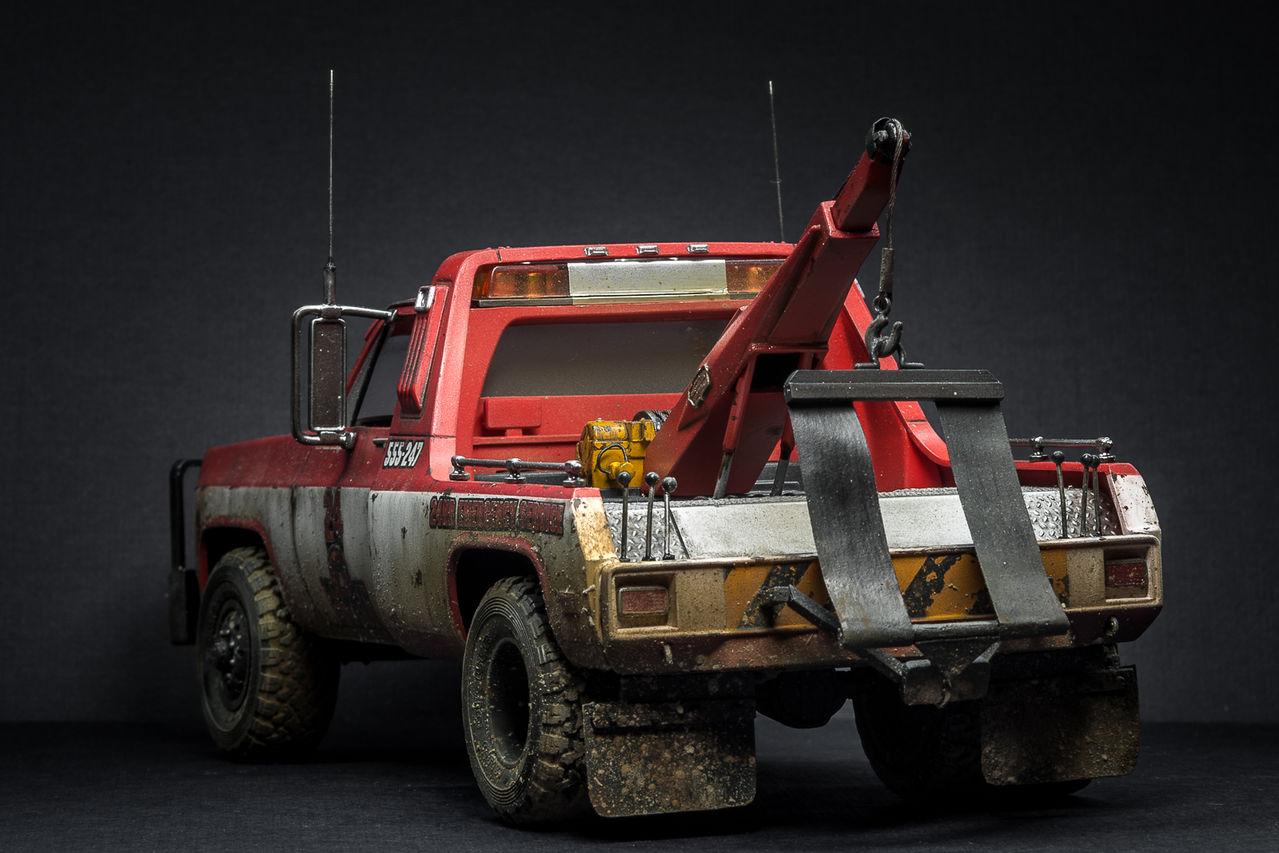
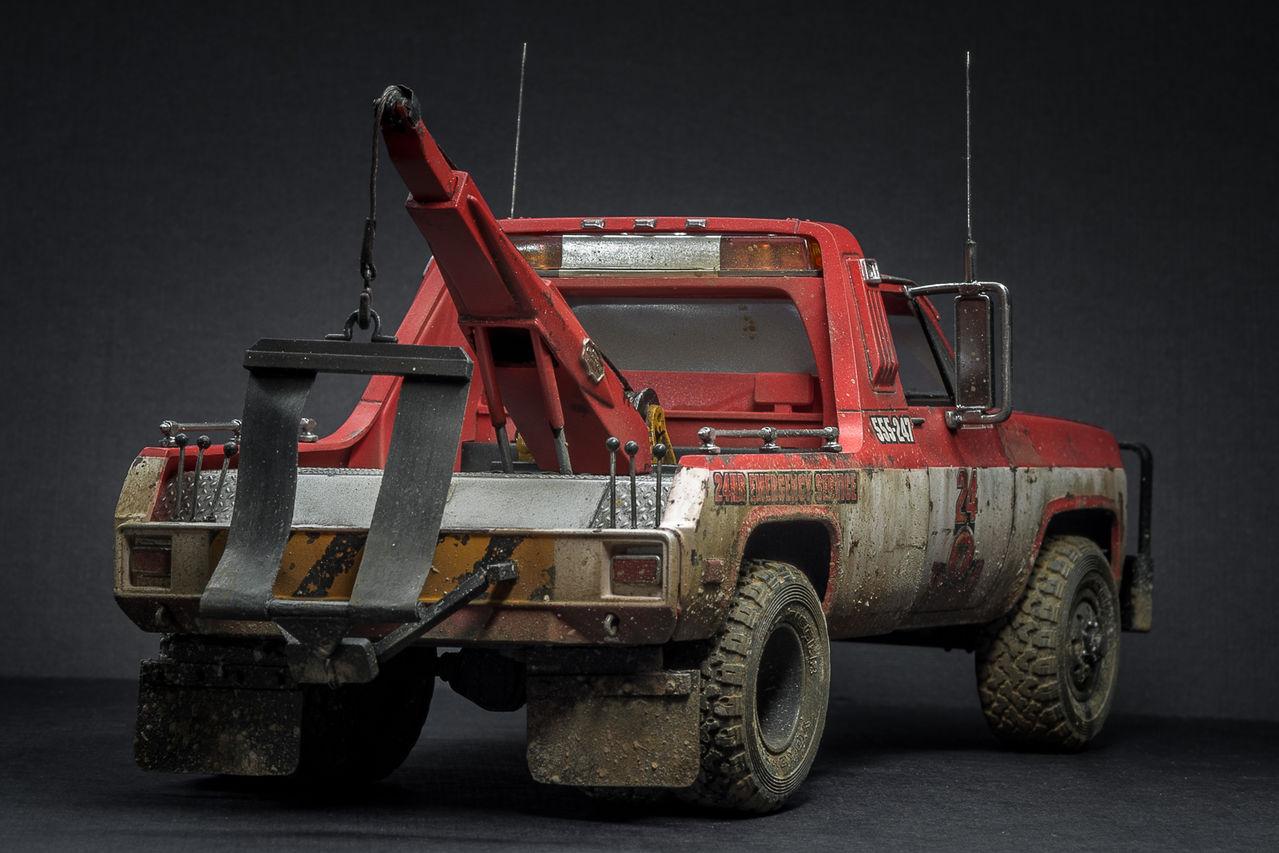
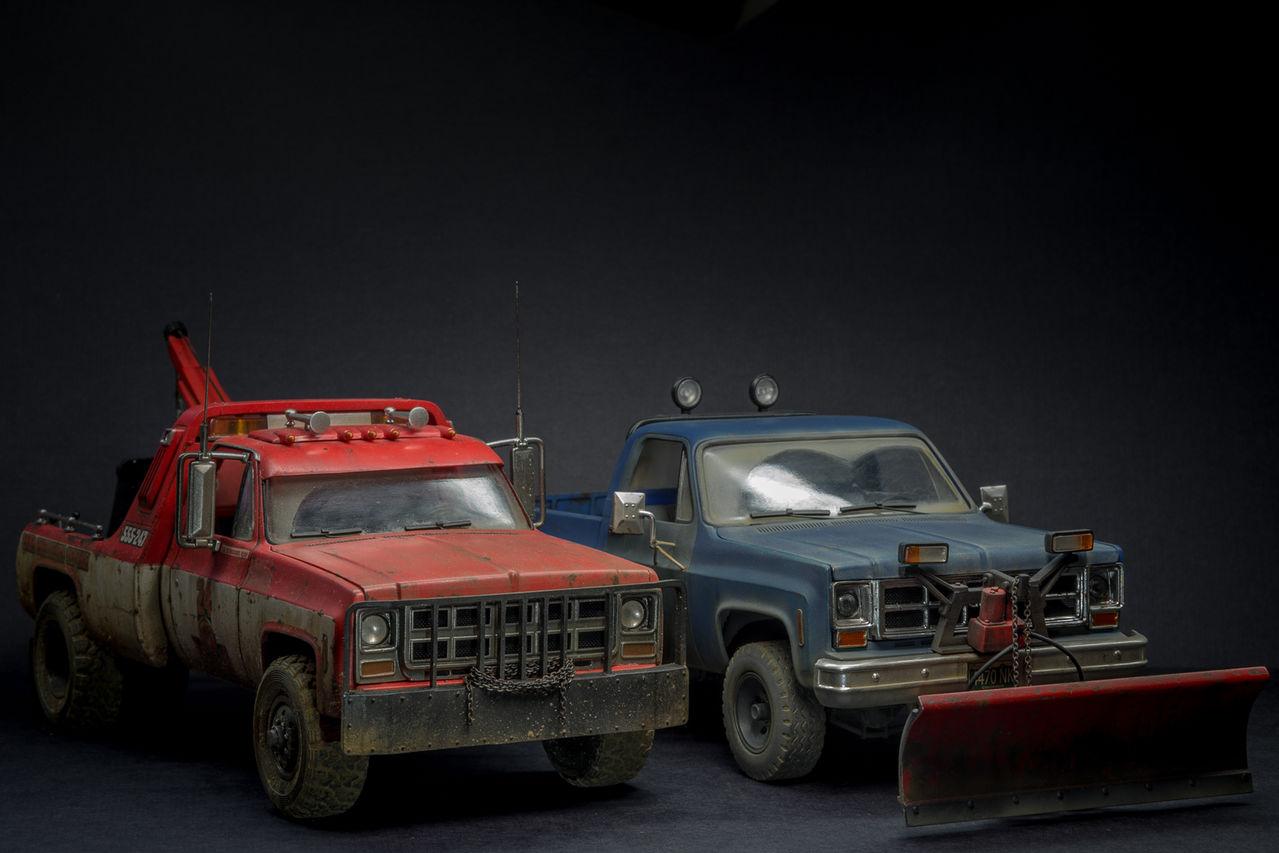
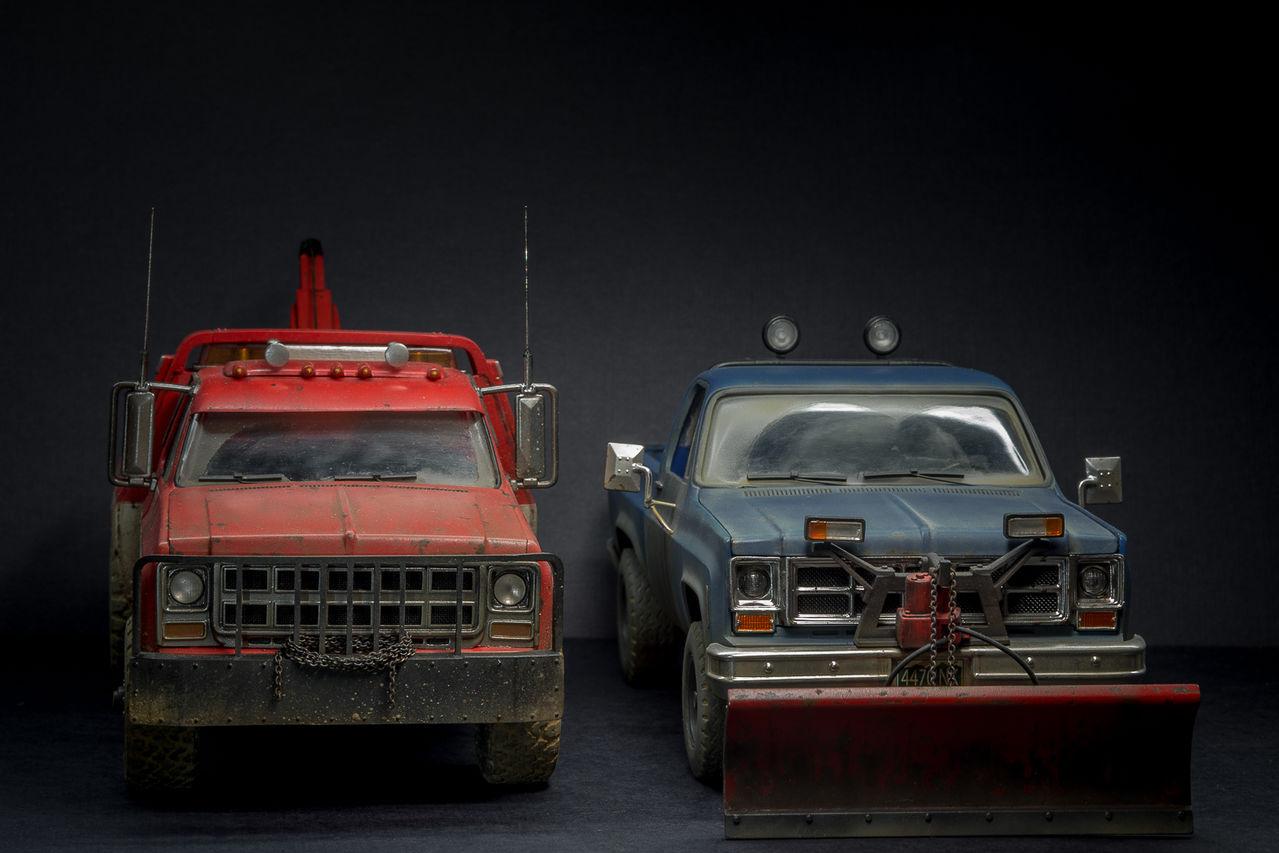
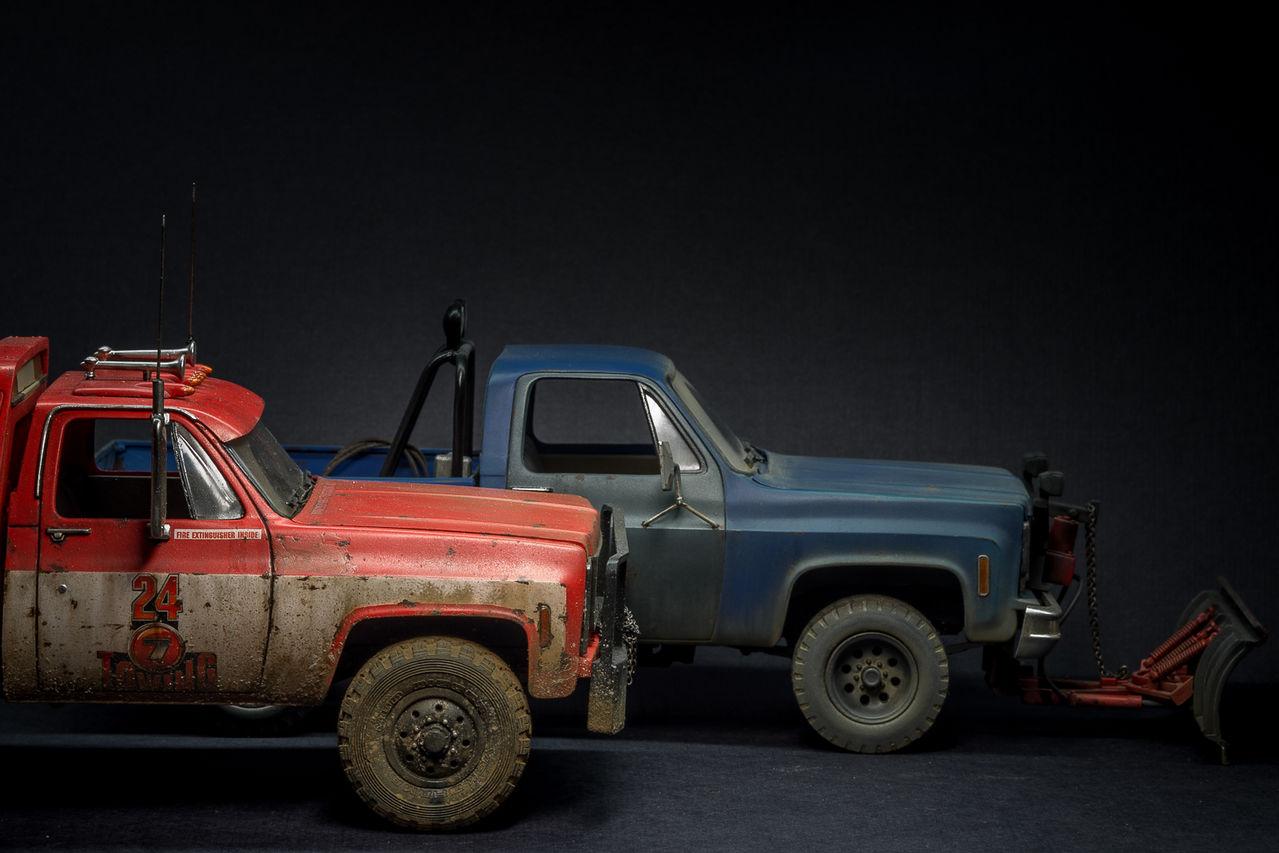
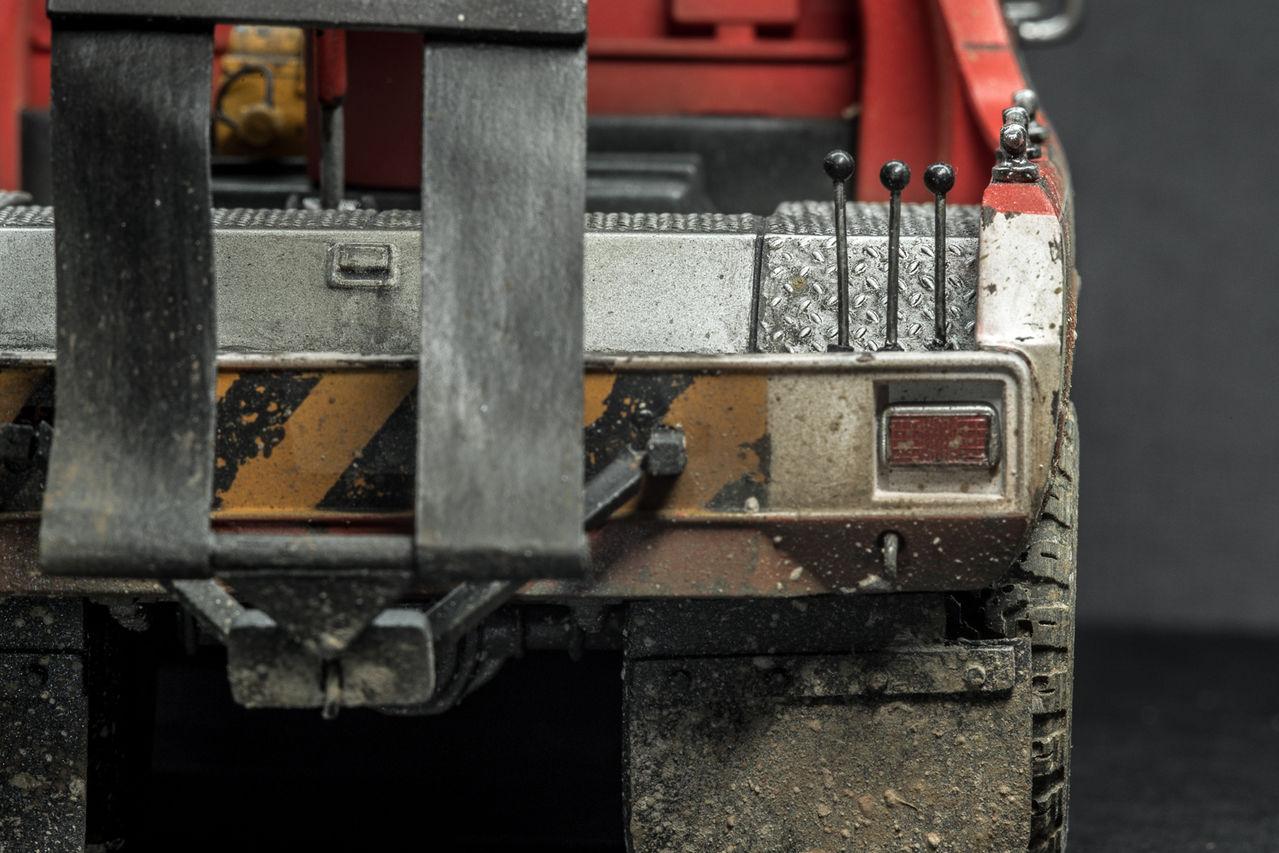
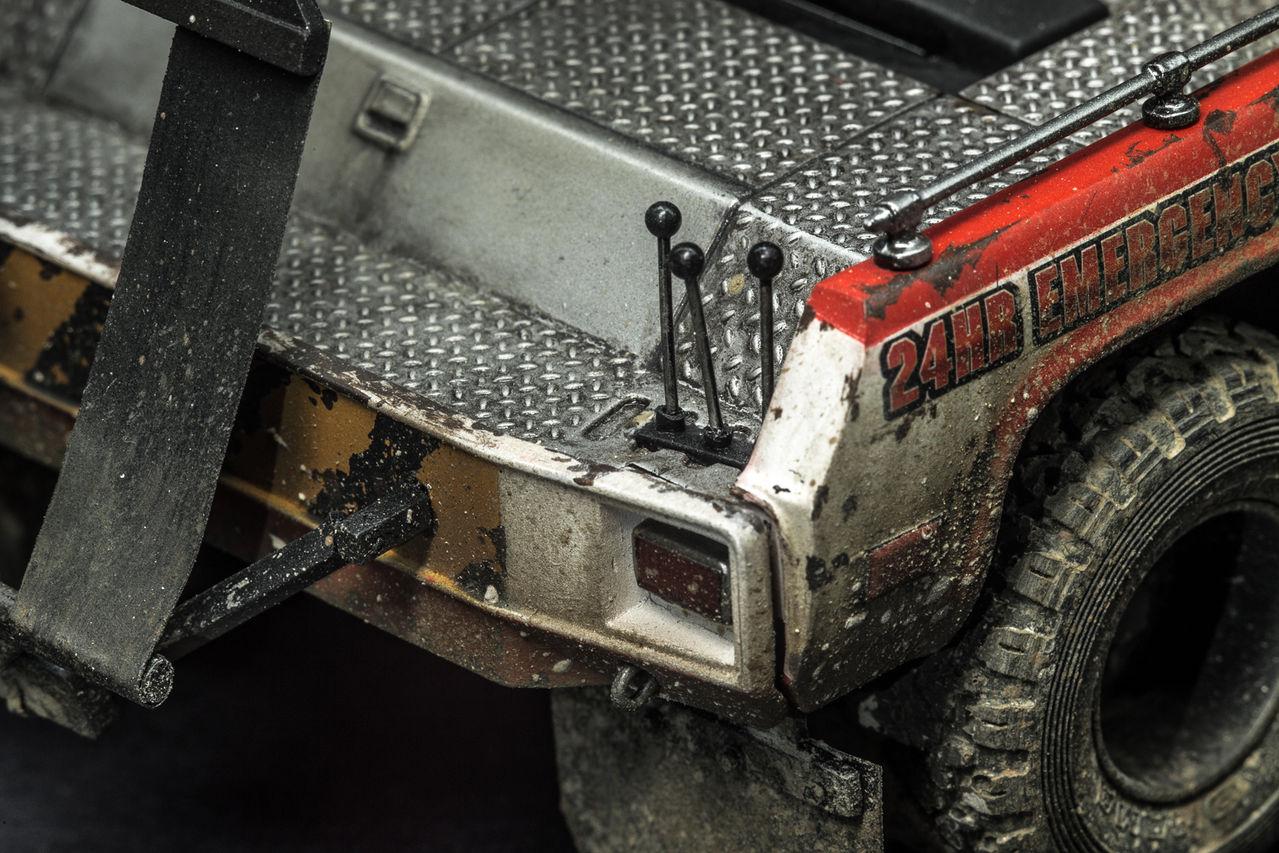
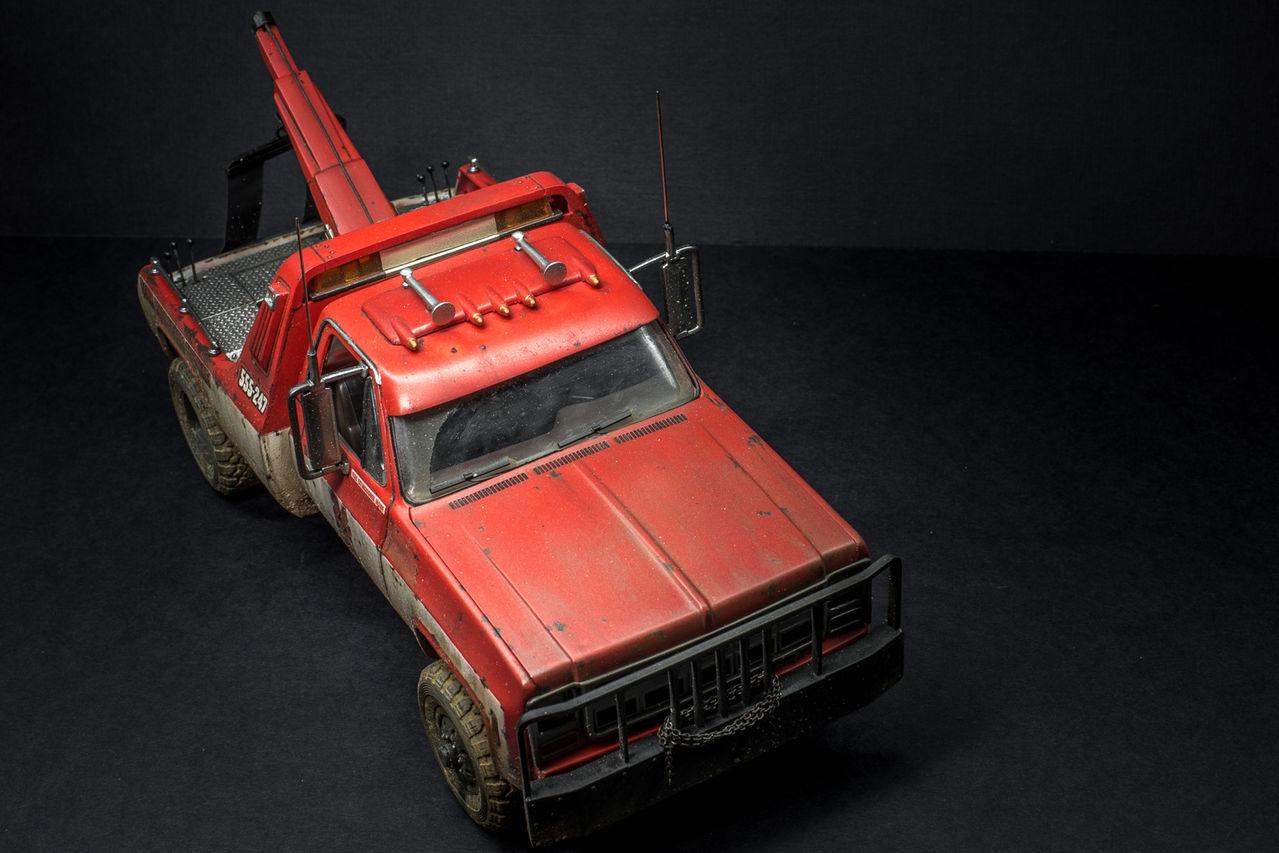
Hello everyone! I'd like to introduce you a modelcar build from Russia. I finished it a year ago. That was a 1/25 scale snap-kit by Revell with quite poor detailization. I just added some details as resin tires, mud flaps from sandpaper, antennas, steel rope on a winch, chain on a front bumper. Also carried some work on the winch itself. Headlights were replaced by new ones. I used decals from the box, but they were cut on my demand. Weathering effects were made using plaster and enamel paints. By the way there's another truck featuring on some photos - GMC plow truck by Revell, 1/24 scale, that was my previous build. Hope you'll enjoy this one! Best regards, Dmitry.
-
 I was doing some window shopping online and ran across several mentions of the Revell 1958 Chevrolet Impala. I never knew this kit existed. I knew about the AMT 1958 Impala, but not the Revell. Does anyone know if there was ever a head-to-head comparison of the two models? That would be interesting. Are they both good kits? Which is better? Is one more accurate than the other? Etc, etc. Thoughts?
 -
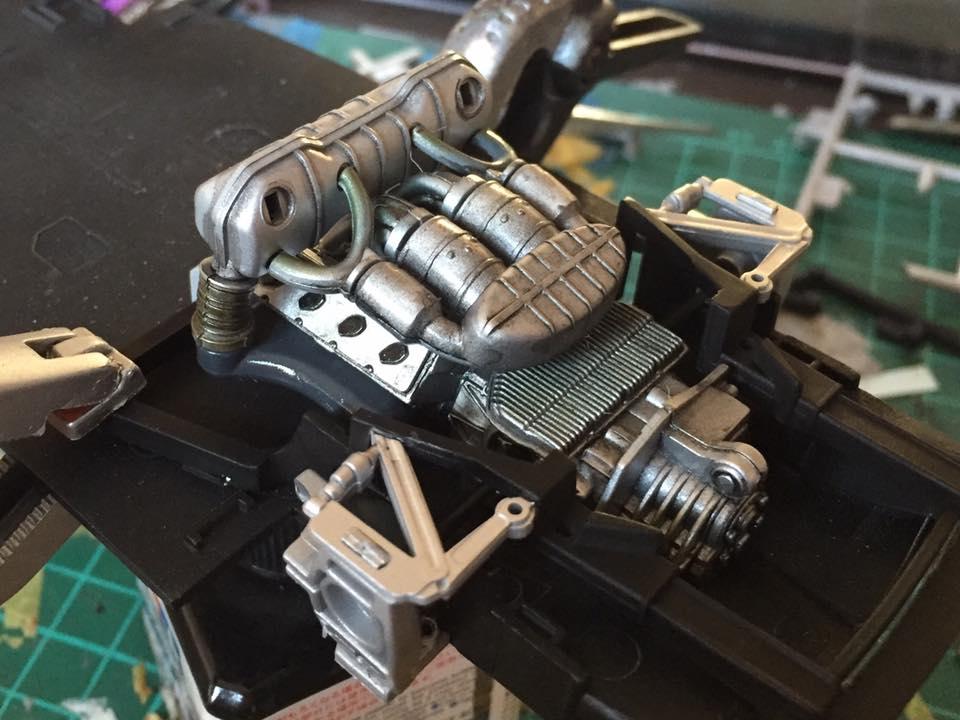
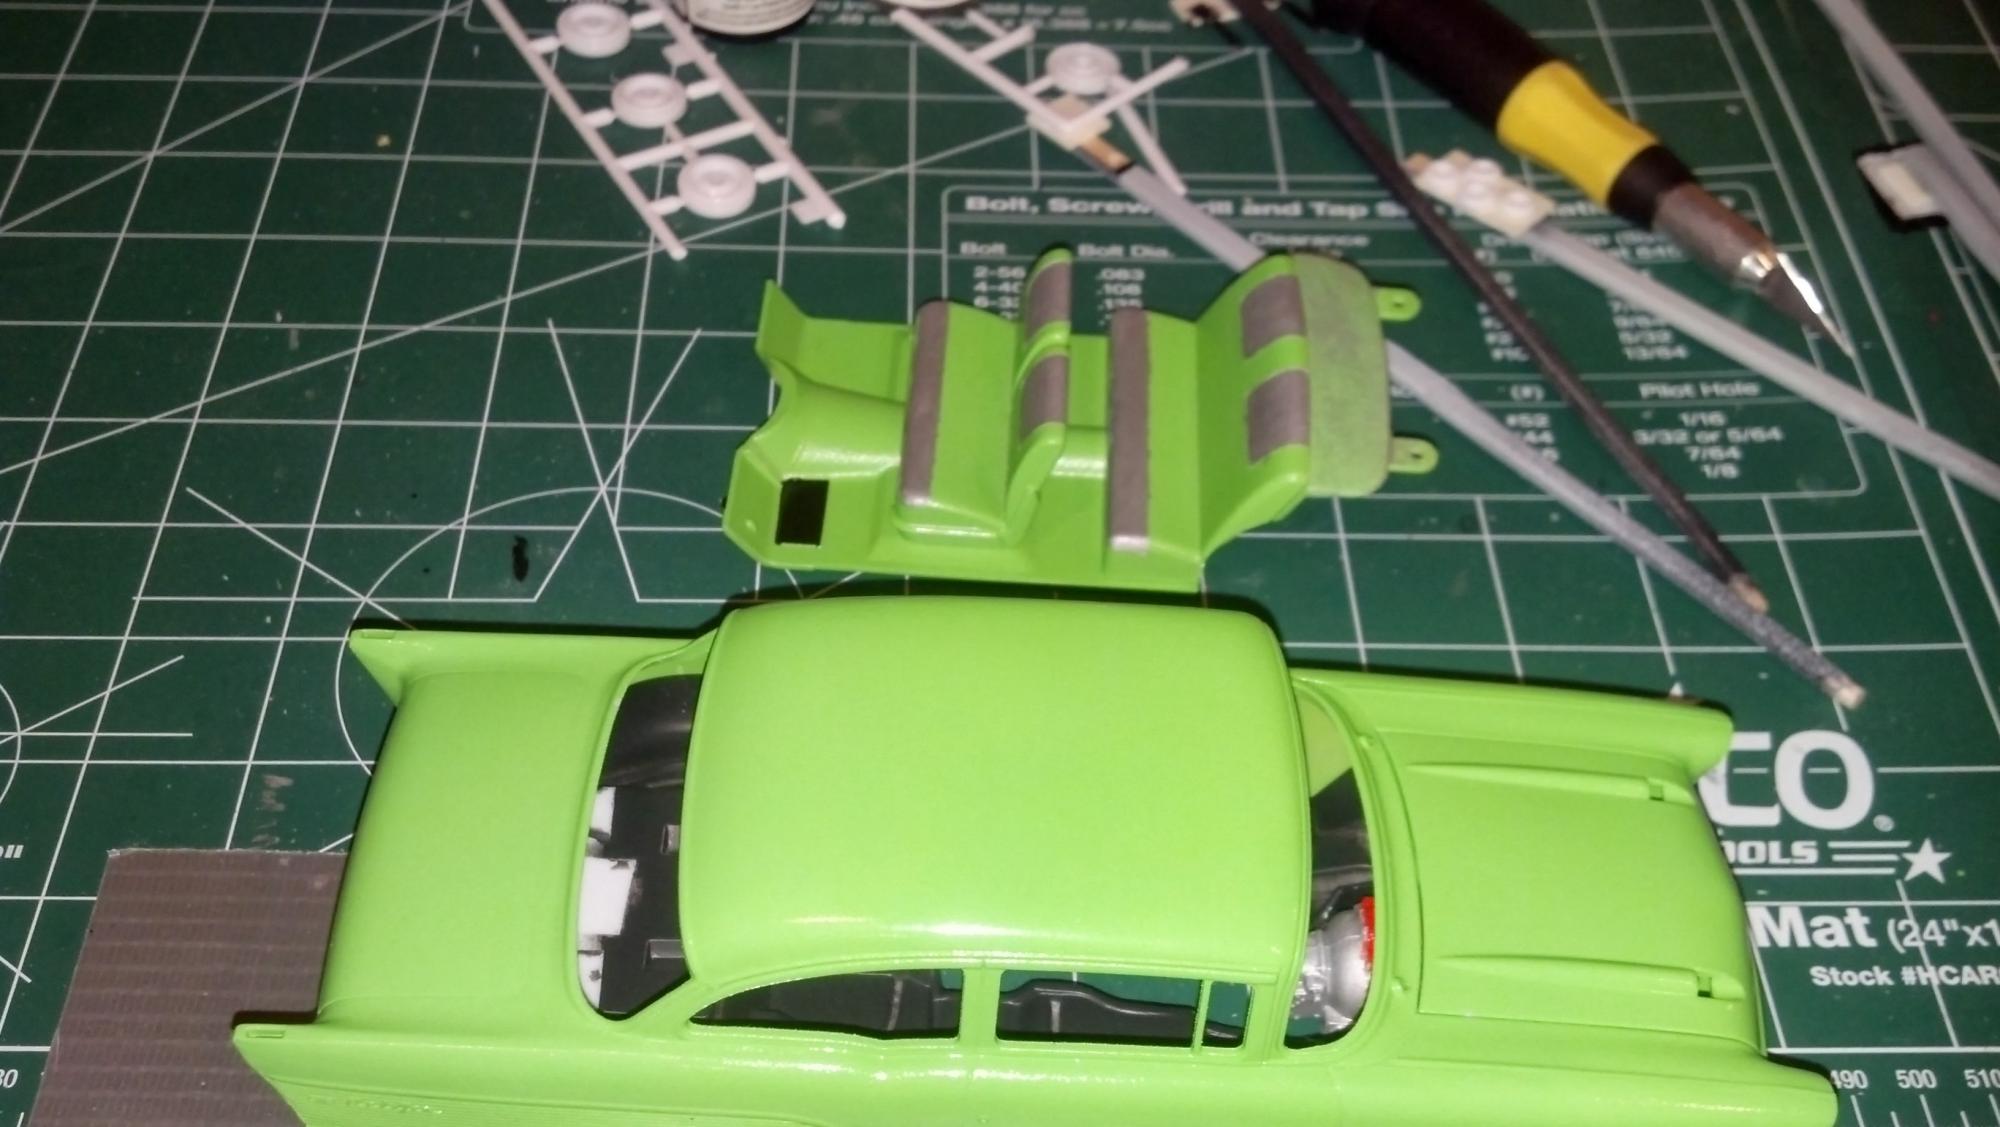
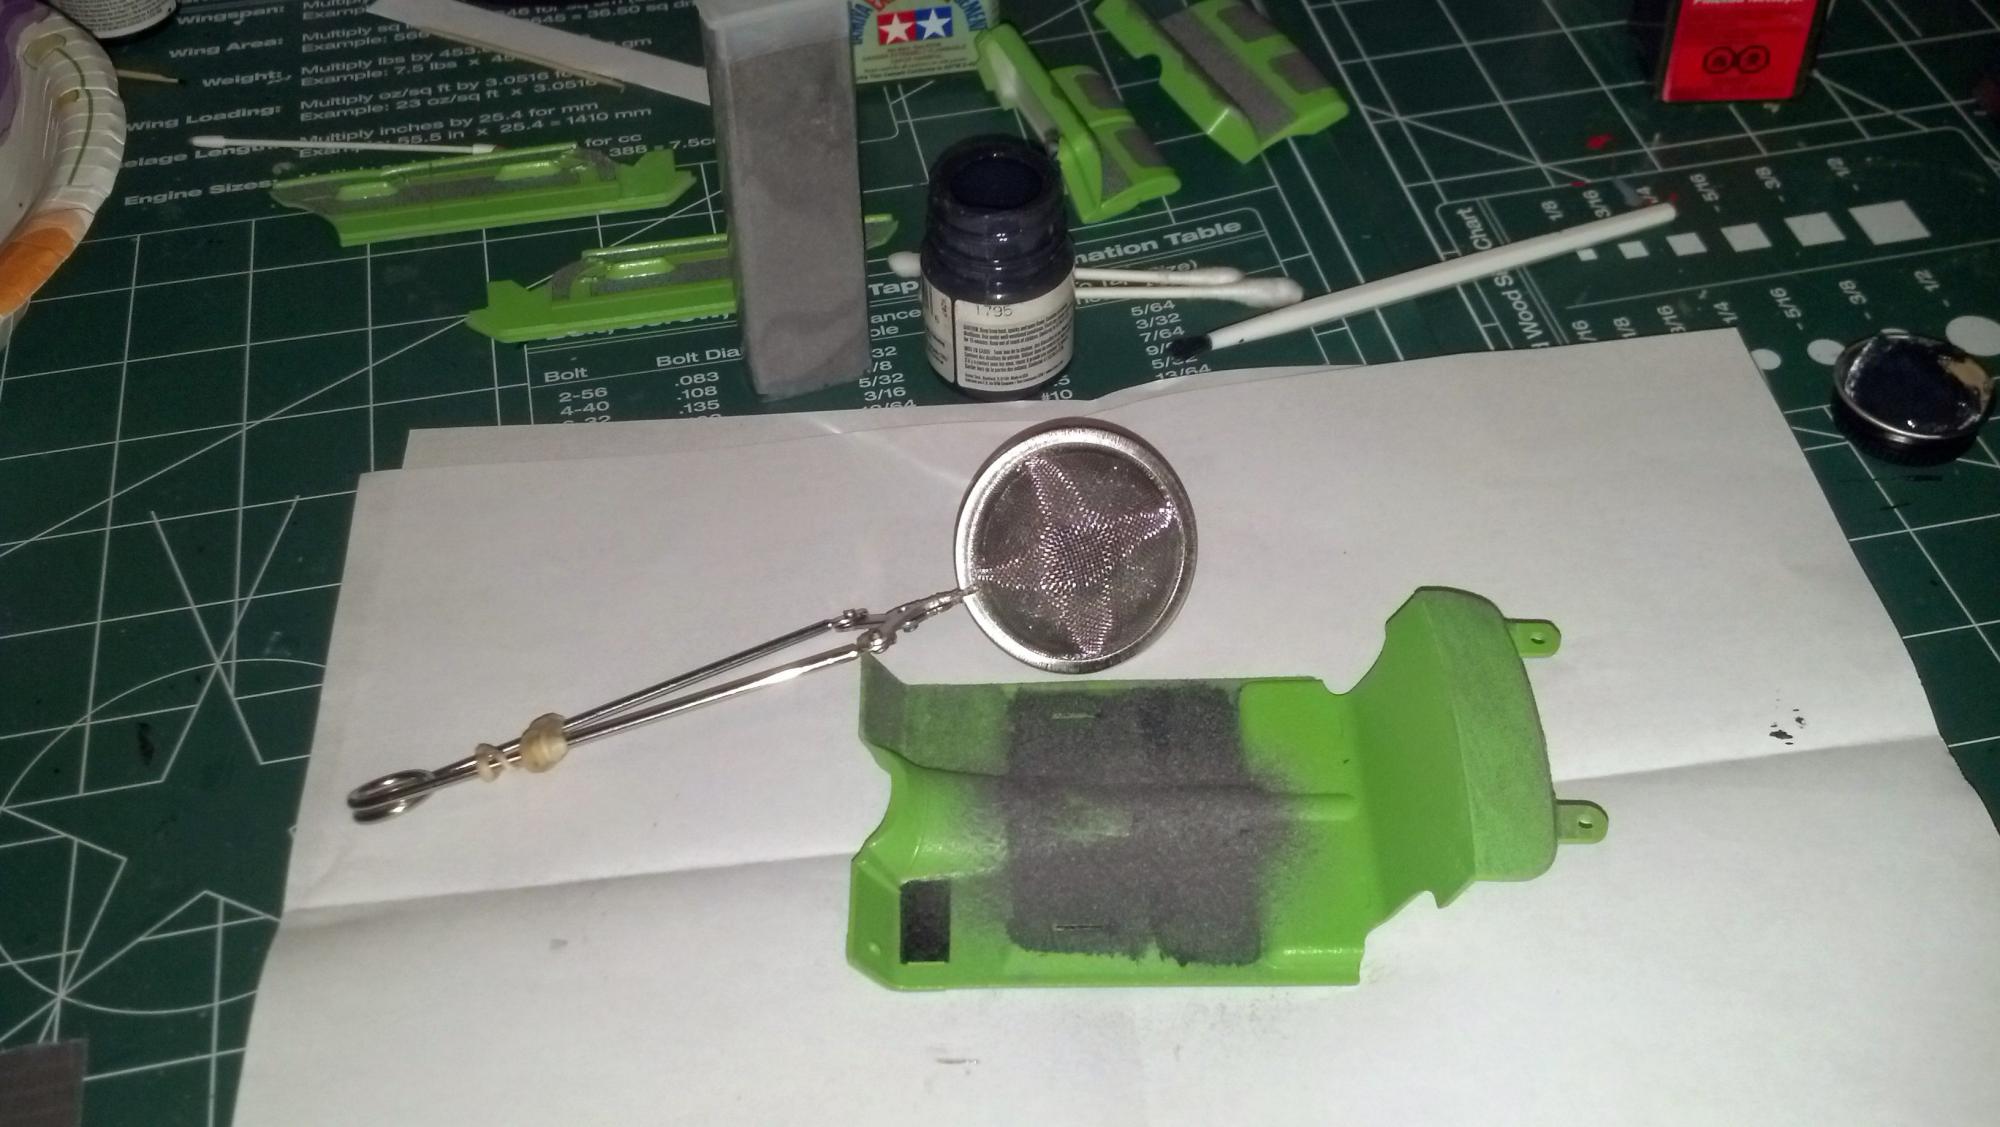
Hello everyone! Started my first build of the year and wanted to share my progress thus far. I am taking my time and attempting some different tricks for this build, like panel scribing, flocking and BMF. I used Model Master Ford Engine Blue, aluminum, steel and Testors flat bronze, flat black and gloss red on the engine components. The interior was sprayed with Testors flat black out of a rattle can and detailed with a silver paint marker that I puddled it's paint onto a plate and used a tooth pick to apply to the trim. In hindsight, I should used BMF for the trim, but you learn from your mistakes. I applied Elmer's glue and sprinkled black embossing powder over the carpet and rear deck lid. So far, the interior, chassis and engine are complete. I sanded down the tire tread to remove the mold lines and add realism. Another first for me in building model cars. The body is currently in it's second coat of Tamiya primer. I had to sand down the door panels on each side of the vehicle due to me rushing the process and the paint pooling up. I need to putty the few marks where my panel scriber skipped and scratched the plastic. Then I'll add some Vallejo acrylic black wash before I spray the color coats. Here's the body so far! This is the first "modern" tooling kit that I've built since my return to the hobby last year. I can say that overall, I'm impressed with the quality and ease of this kit. Only complaint so far would be wanting a more detailed engine. I have tried my hand at wiring and other detailing tricks for engines, but decided to build this OOB. Thanks for looking and please give me some feedback! Stay tuned! - Mike
-
LOOKIT DAT, LOOK AT THAT!!!!!
-
First and only completed kit of the year. It was a rush job to kinda build up confidence in the skill that I'm slacking. The body color is Testors One Coat Lacquer Mythical Maroon. I'll throw the decals on tomorrow. Hopefully it only gets better from here.
-
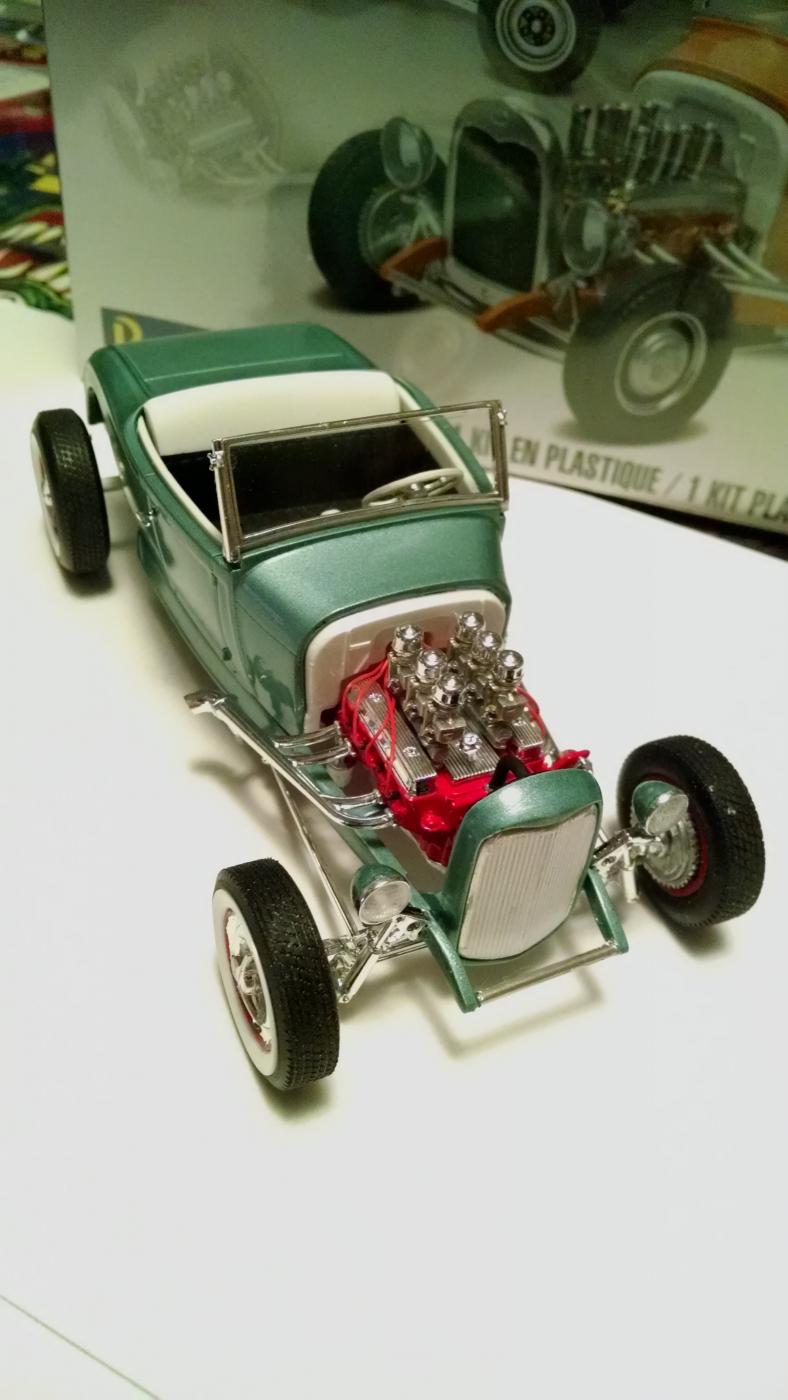
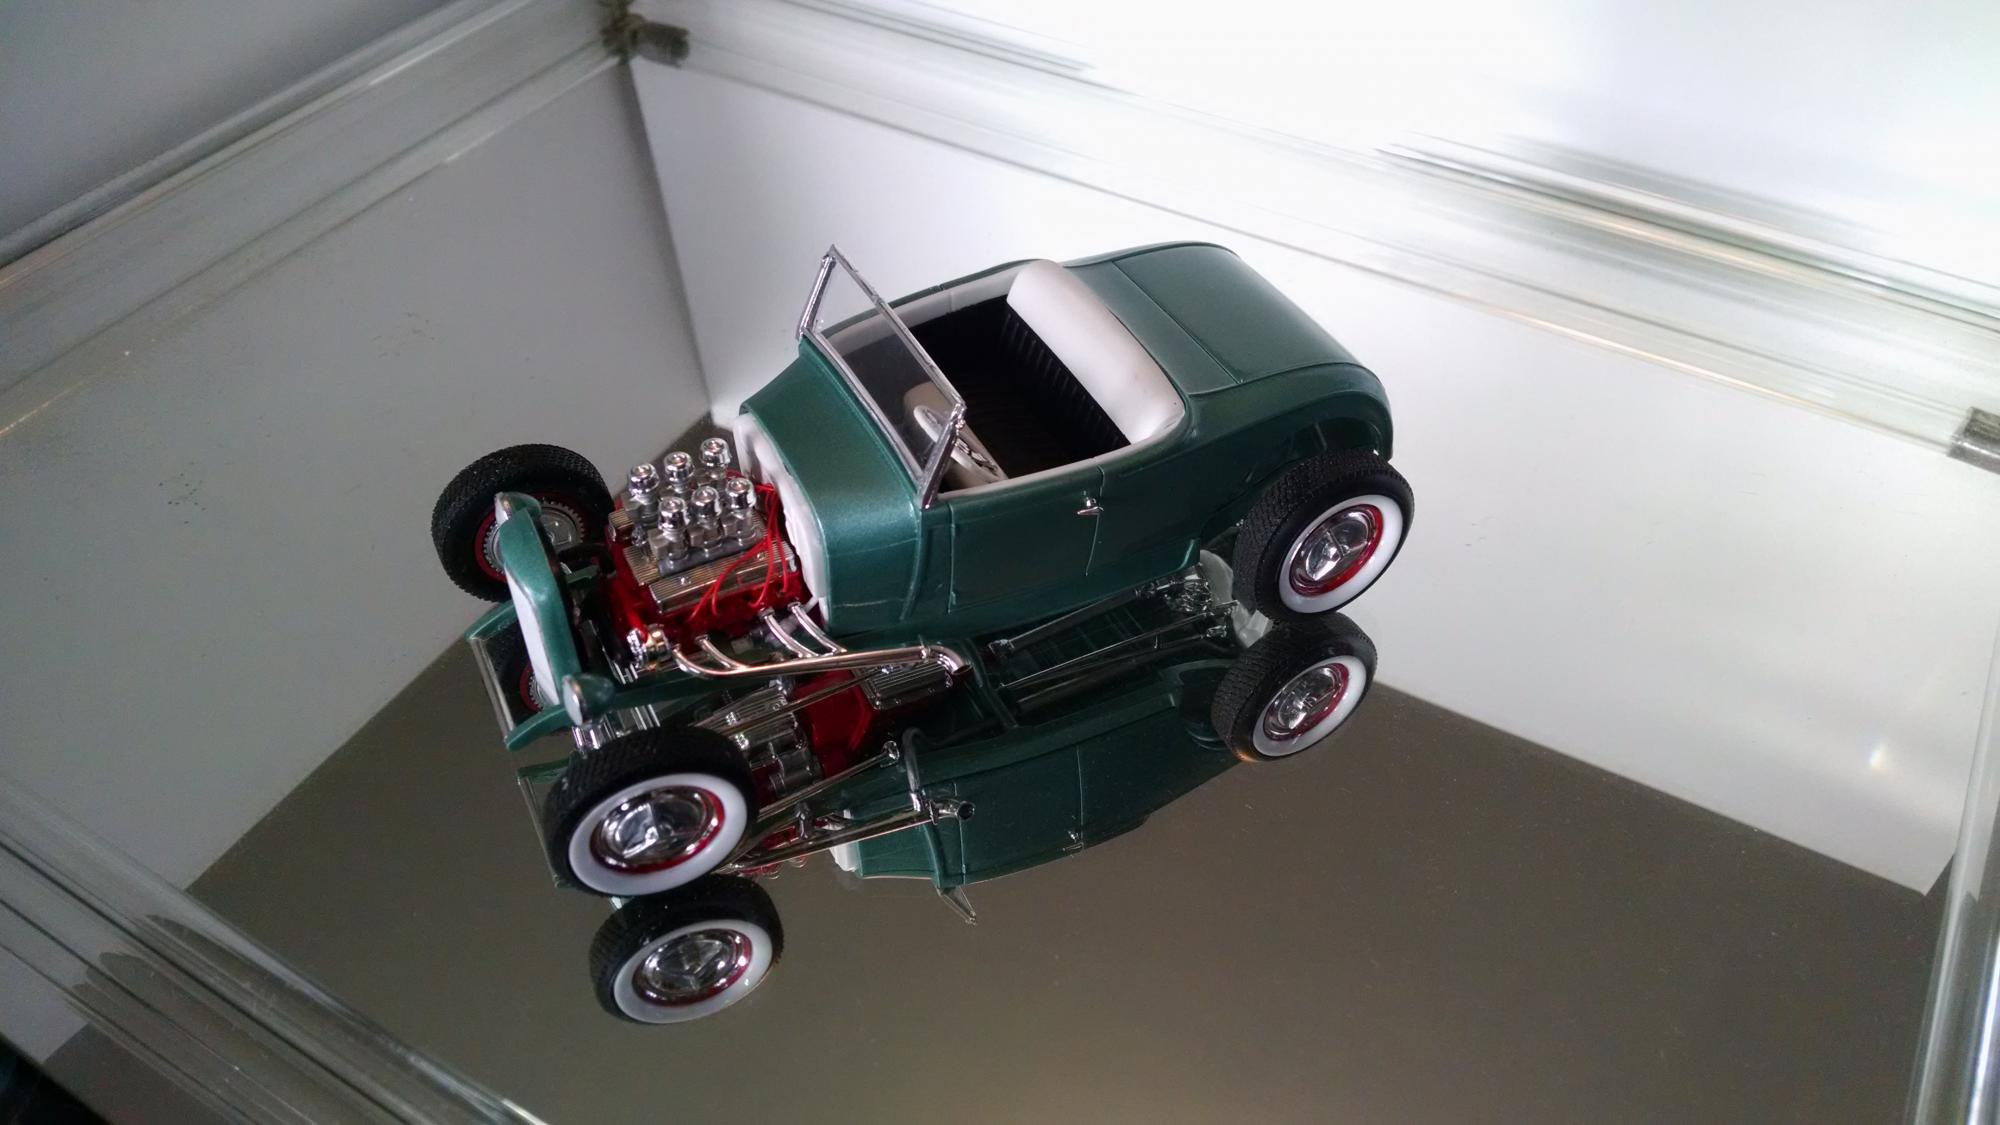
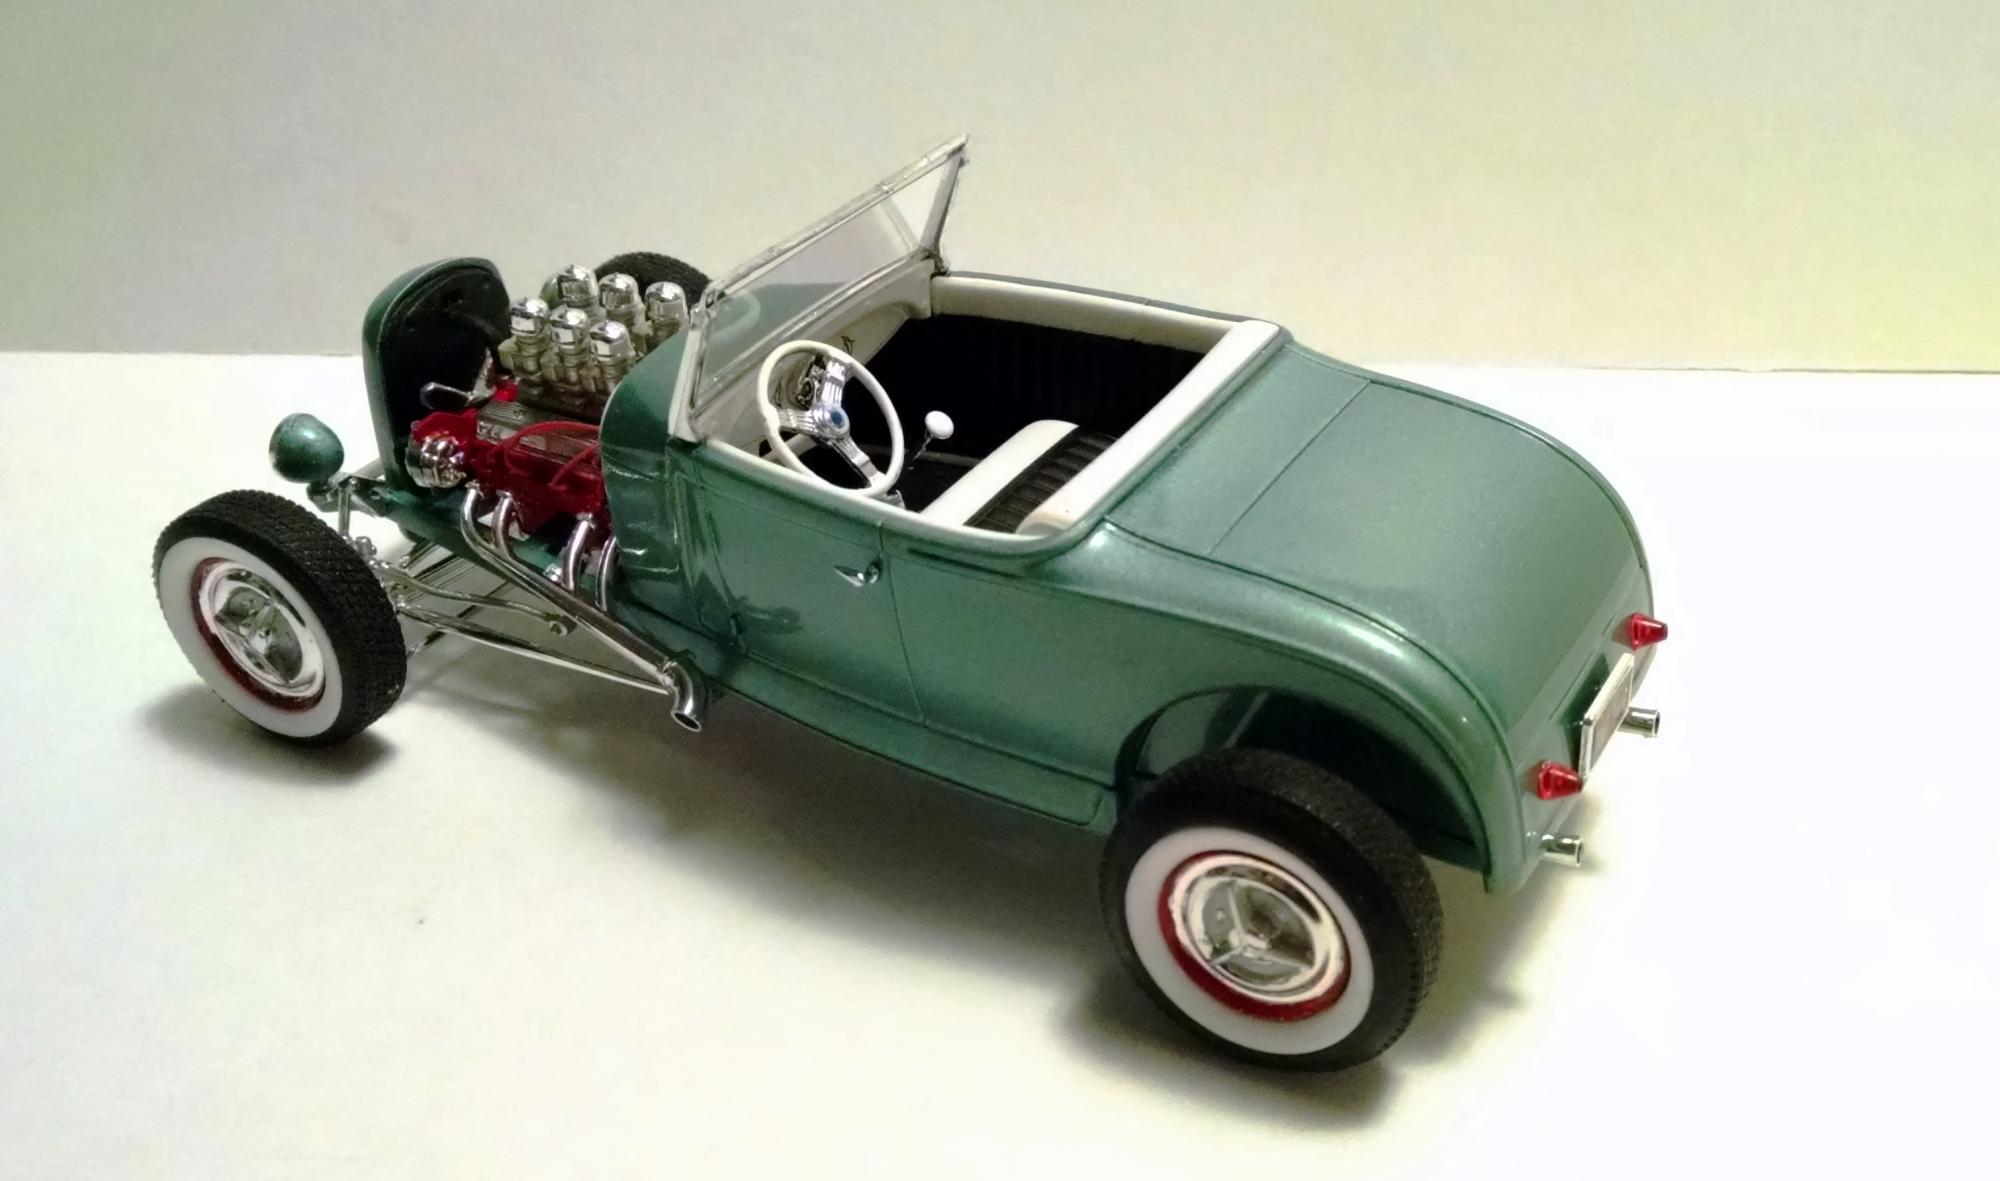
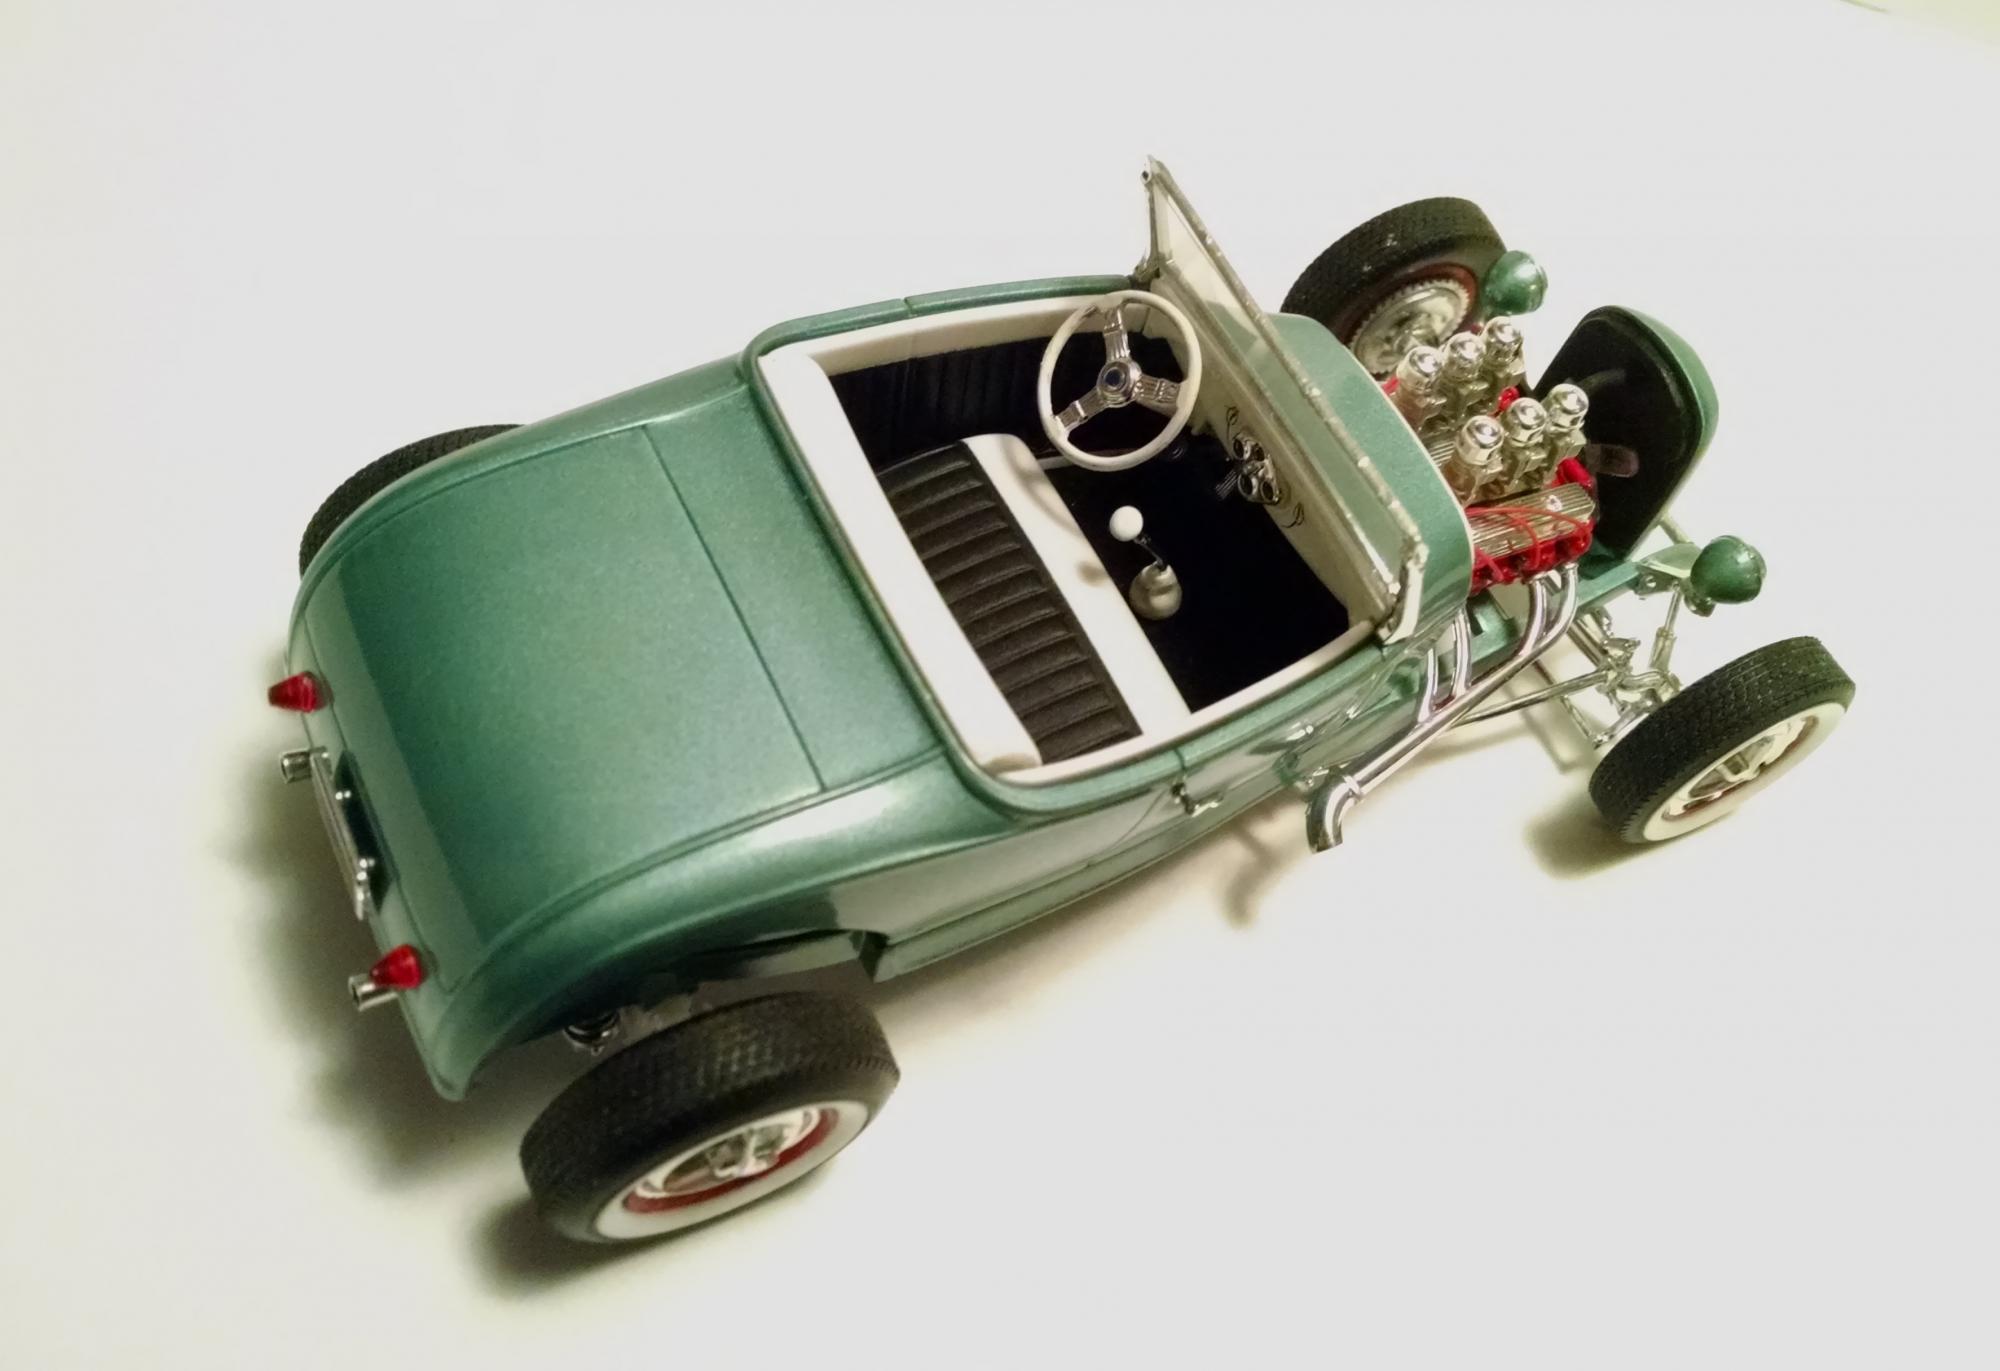
Found this kit to be real fun to build. I made a few changes to bring out the 50's feel such as, the spinner caps mounted on wide whitewall tires and a duece grill. I also added some parts box taillights and wired the motor..
-
My 1st woody! Revell did a good job on this kit. It's really nice to build. Lowered and riding on Pegasus chrome reverse wheels. The nose decal doesn't fit the raised letters, as it's too short. So I cut up the decal and applied the letters one at a time: I put an Aloha garland in there,,, nearly forgot the chassis: I hope you like it Comments appreciated + or -
-
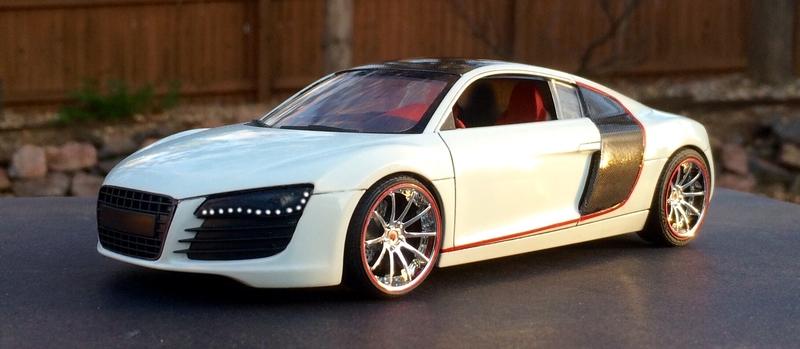
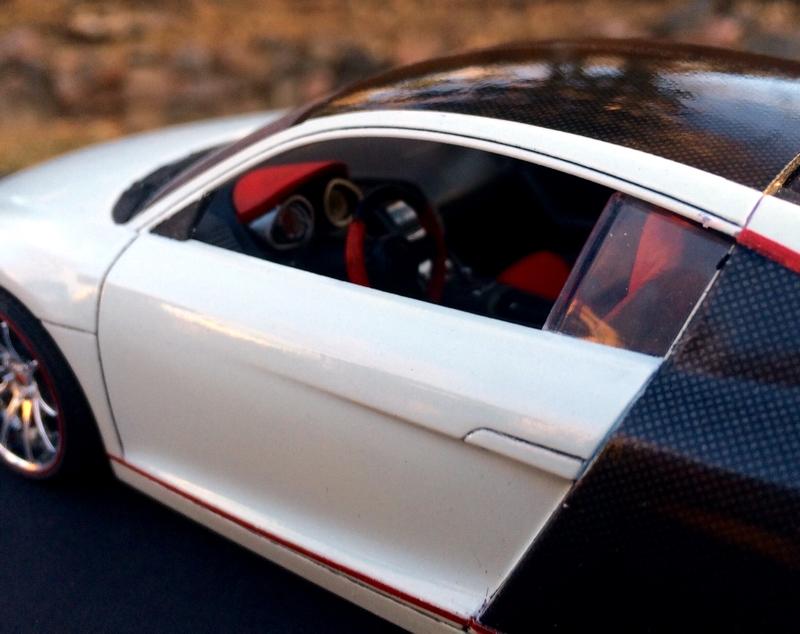
Just an easy quickie 2-day build. Audi R8 Snaptite- detailed a little... Painted Duplicolor Universal White with clear. Carbon-fiber side sails and roof. Added red accent stripe, red accent interior Ashoima wheels with red edge accent. This is the BASIC Snaptite kit with silver painted headlights, I scraped that off and detailed behind the "glass" bezel with painted spots and Evergreen tubing for the HID
-
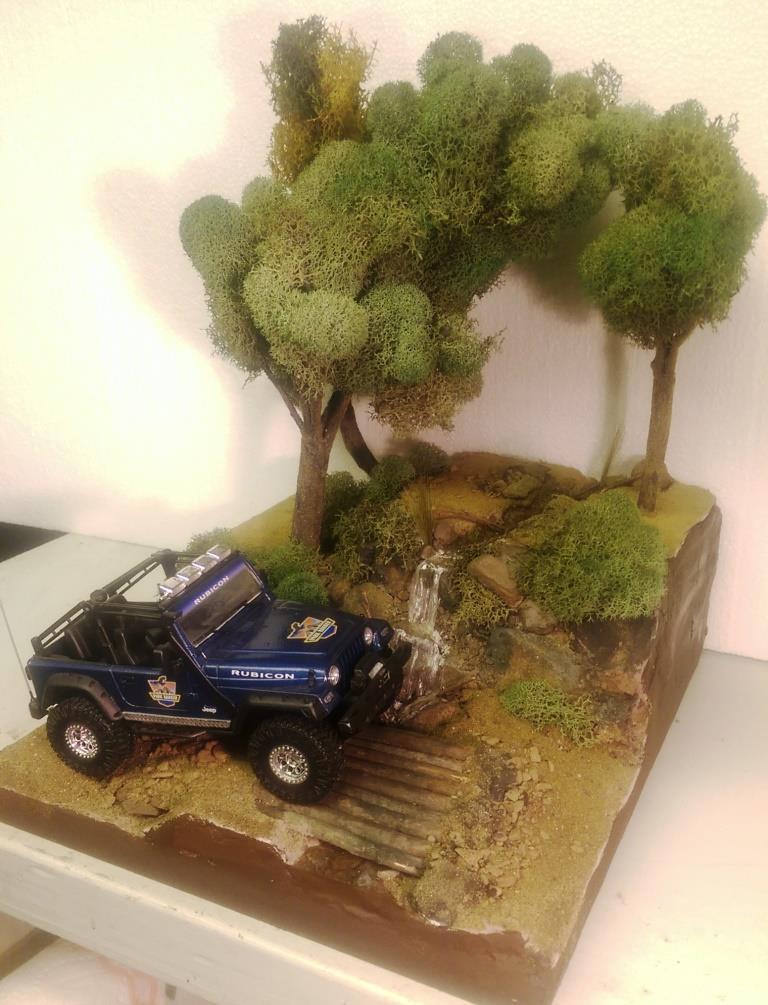
I was looking at the 1/25 Jeep Wrangler Rubicon that I put together sometime ago and had a great idea for a diorama. I started out with the idea of making a desert scene and have the jeep climbing a hill. However I got a little carried away and built it up too tall. So I decided to make a stream and waterfall instead. I started with a wood base, sealed it and glued 2 layers of that pink styrofoam on top of each other. I then covered the entire thing in tinted joint compound. Some rock gathering at a local park proved to work out well. I painted the rocks and dusted the entire thing with sand and blended turf for model railroading. The bridge is made out of similar sized maple branches I found in the back of my property. I used Scene A Rama Ripplin' Water Kit for the stream and waterfall. The three trees turned out the best. I used a thick wire I had, attached several tree branches found laying around the property to the wire using florist tape. Then I "painted" a couple of thin layers of joint compound on the trunks to blend them together. Once it was dry I painted the entire tree the same color, then added some variations in coloring with washes. I then took some stuff I got from my local craft store called Reindeer Moss and glued it to the branches. The final step in making the trees involved spraying them with diluted white glue the help hold them together and sprinkling some blended turf on the trunks to make then look like moss. The trees were then attached in holes with some foam-safe CA glue.
-
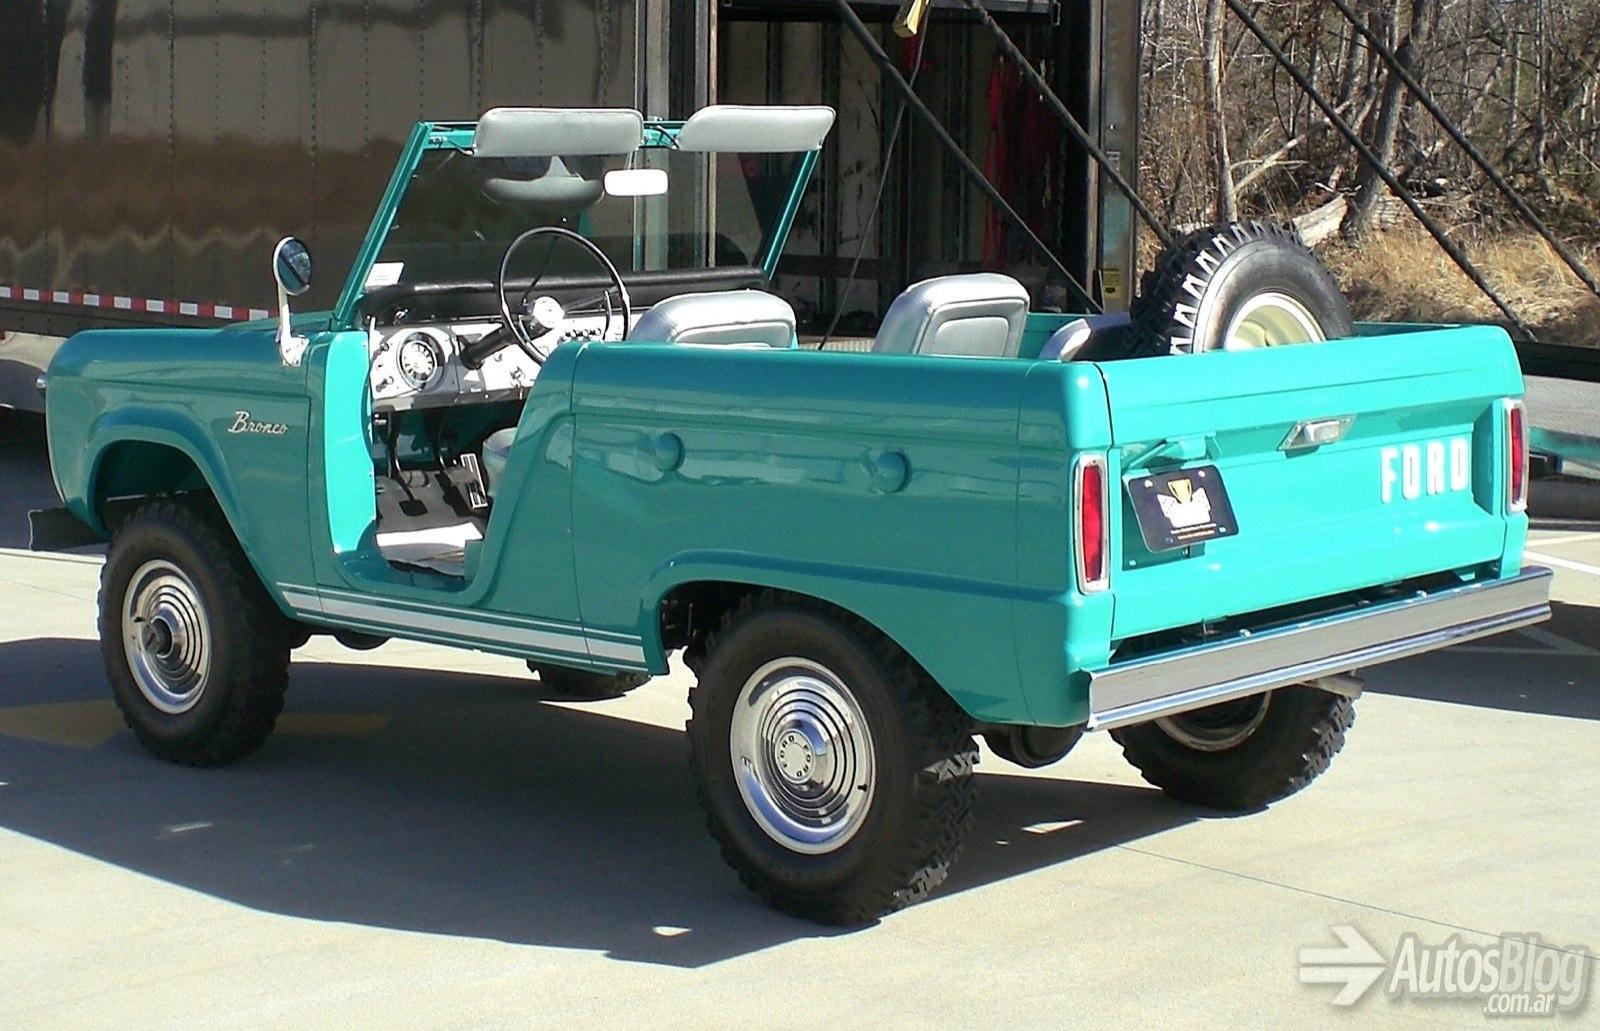
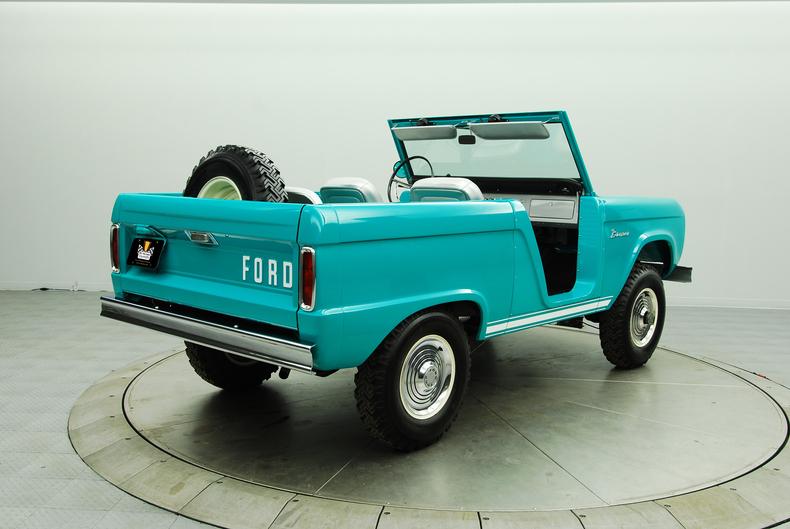
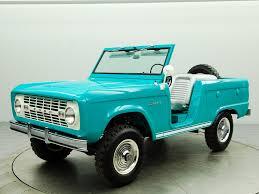
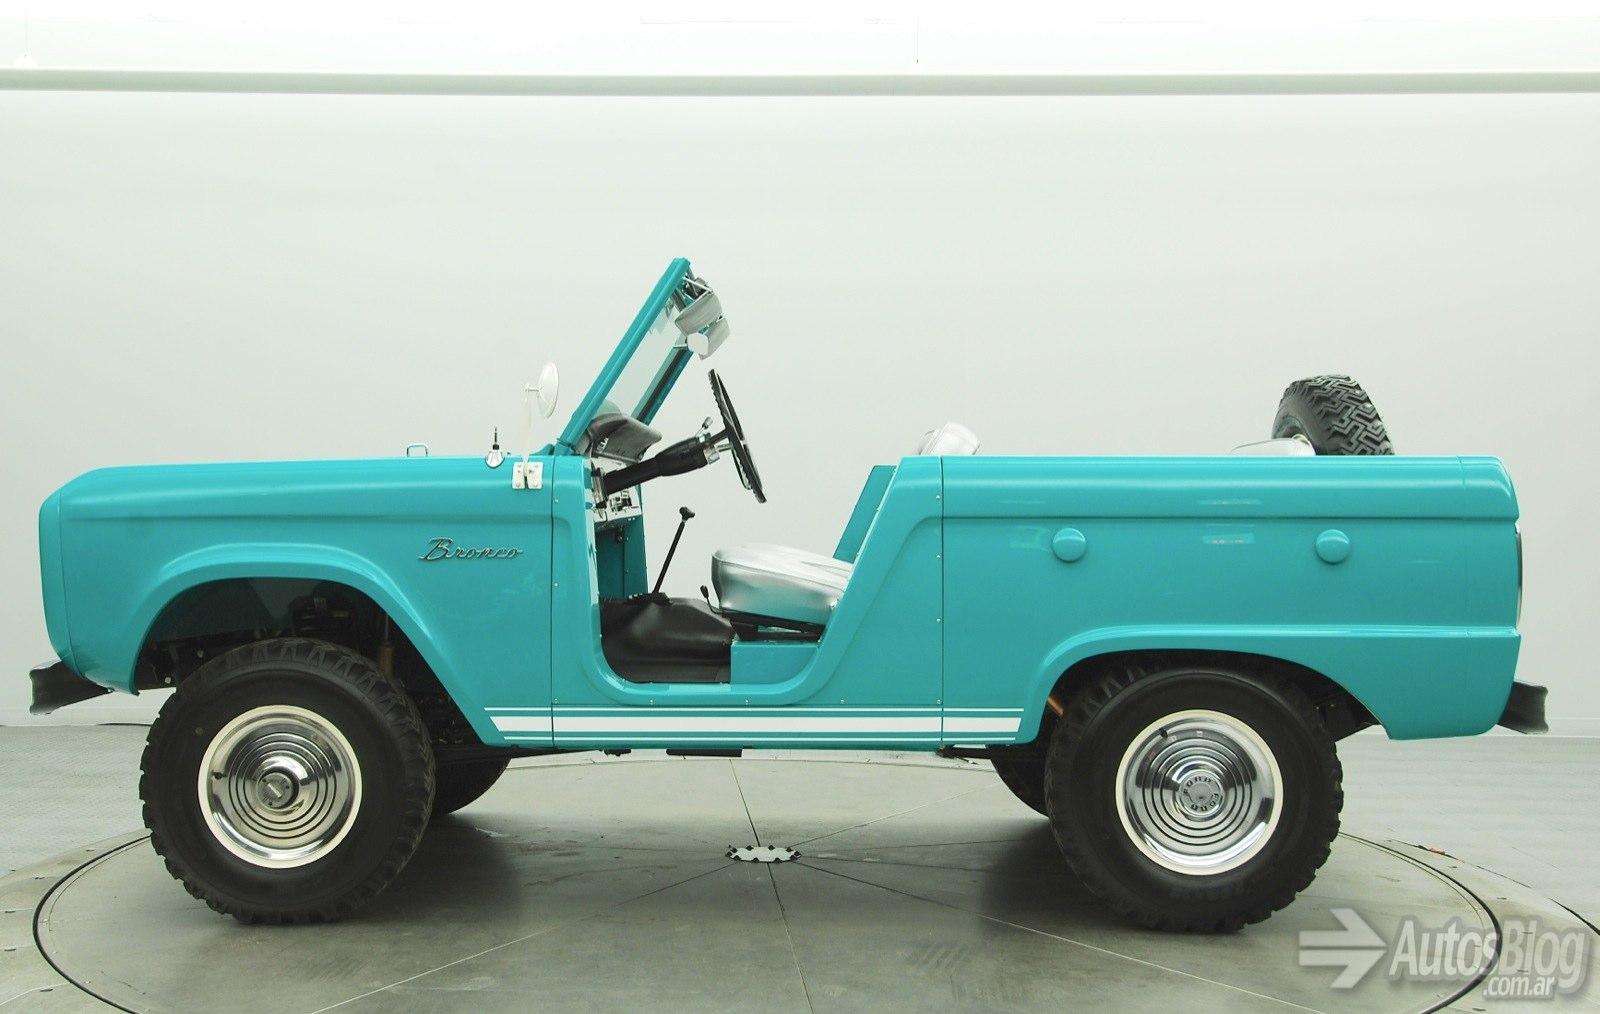
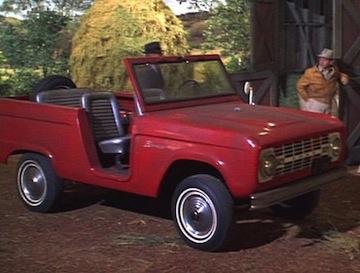
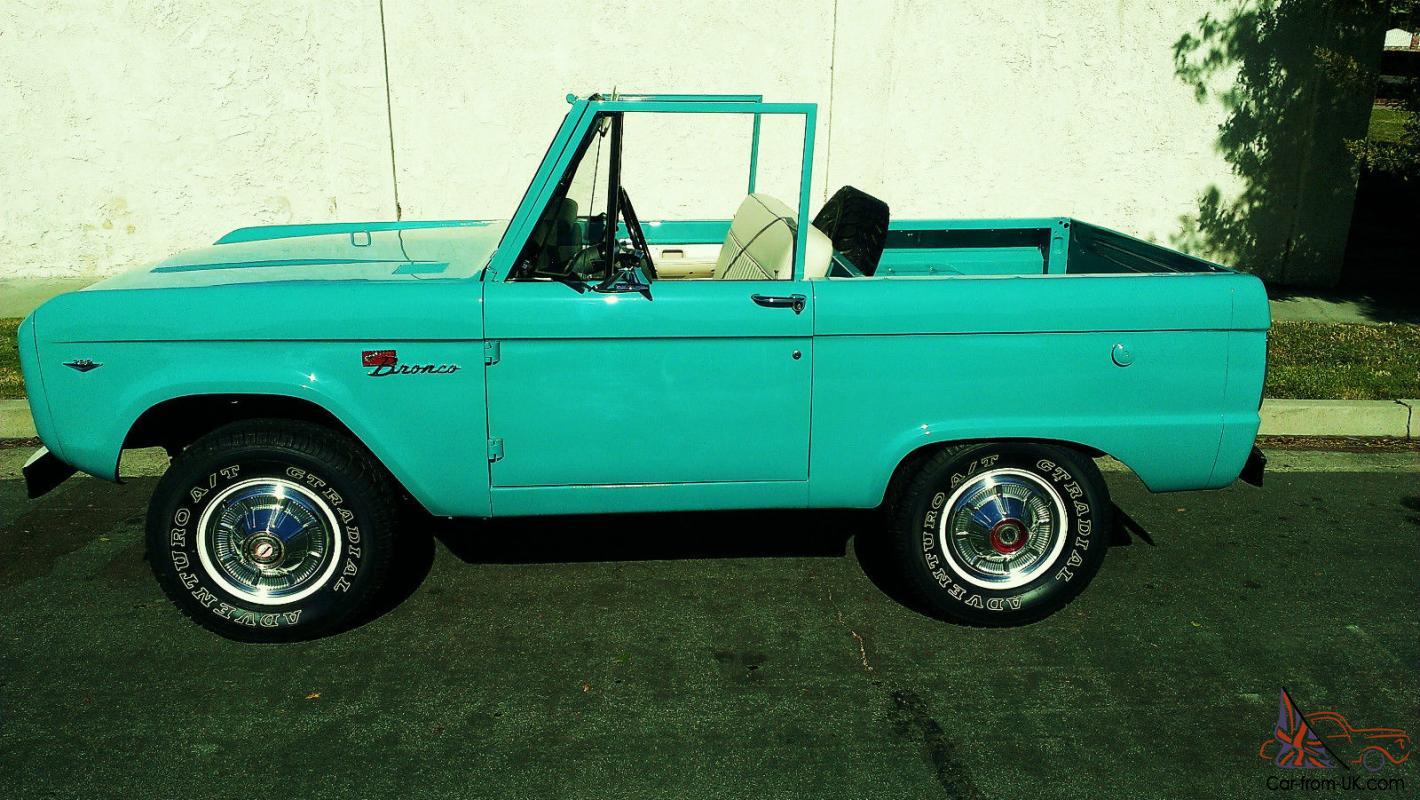
 I was inspired when I got this new kit and started to look for some possible famous first Gen Broncos. I remembered that Mr. Kimble from Green Acres had a '66 Bronco Roadster. So my search went on for reference pics. I saw the other reviews so far and agree with the wheels are too small. I don't mind the tires, the rim size really is a bummer. I also agree with the sides being too flat / straight. I have attached some of my references. Mr. Kimble's Bronco Roadster with street tires. Note the turn signals Note the front fender badges. Note the top of the tailgate.
-
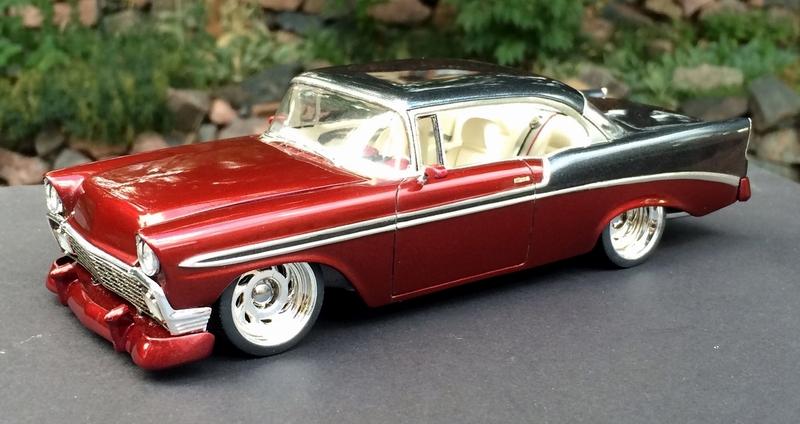
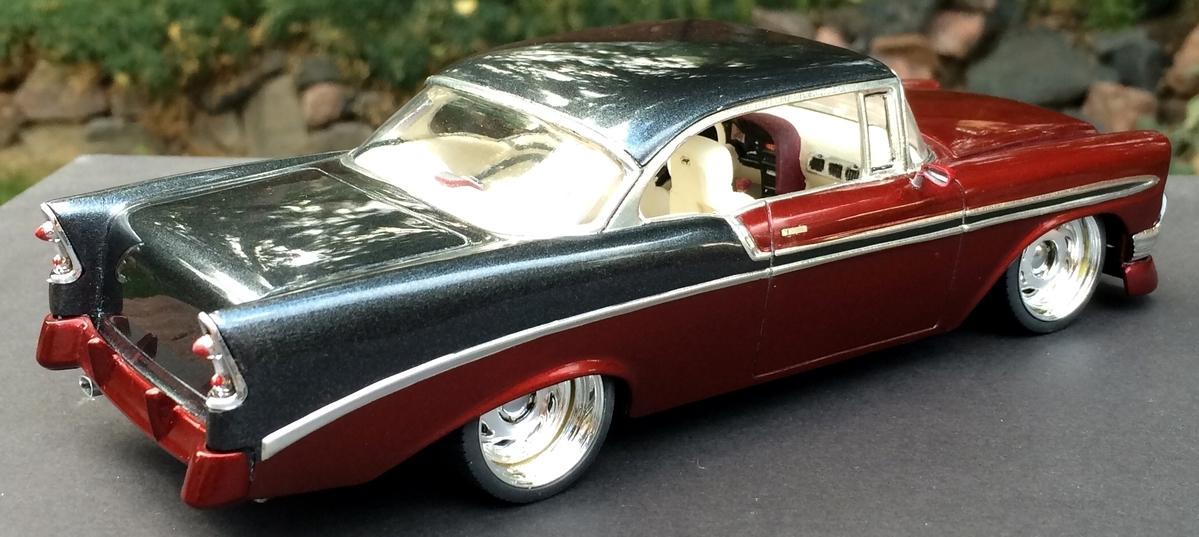
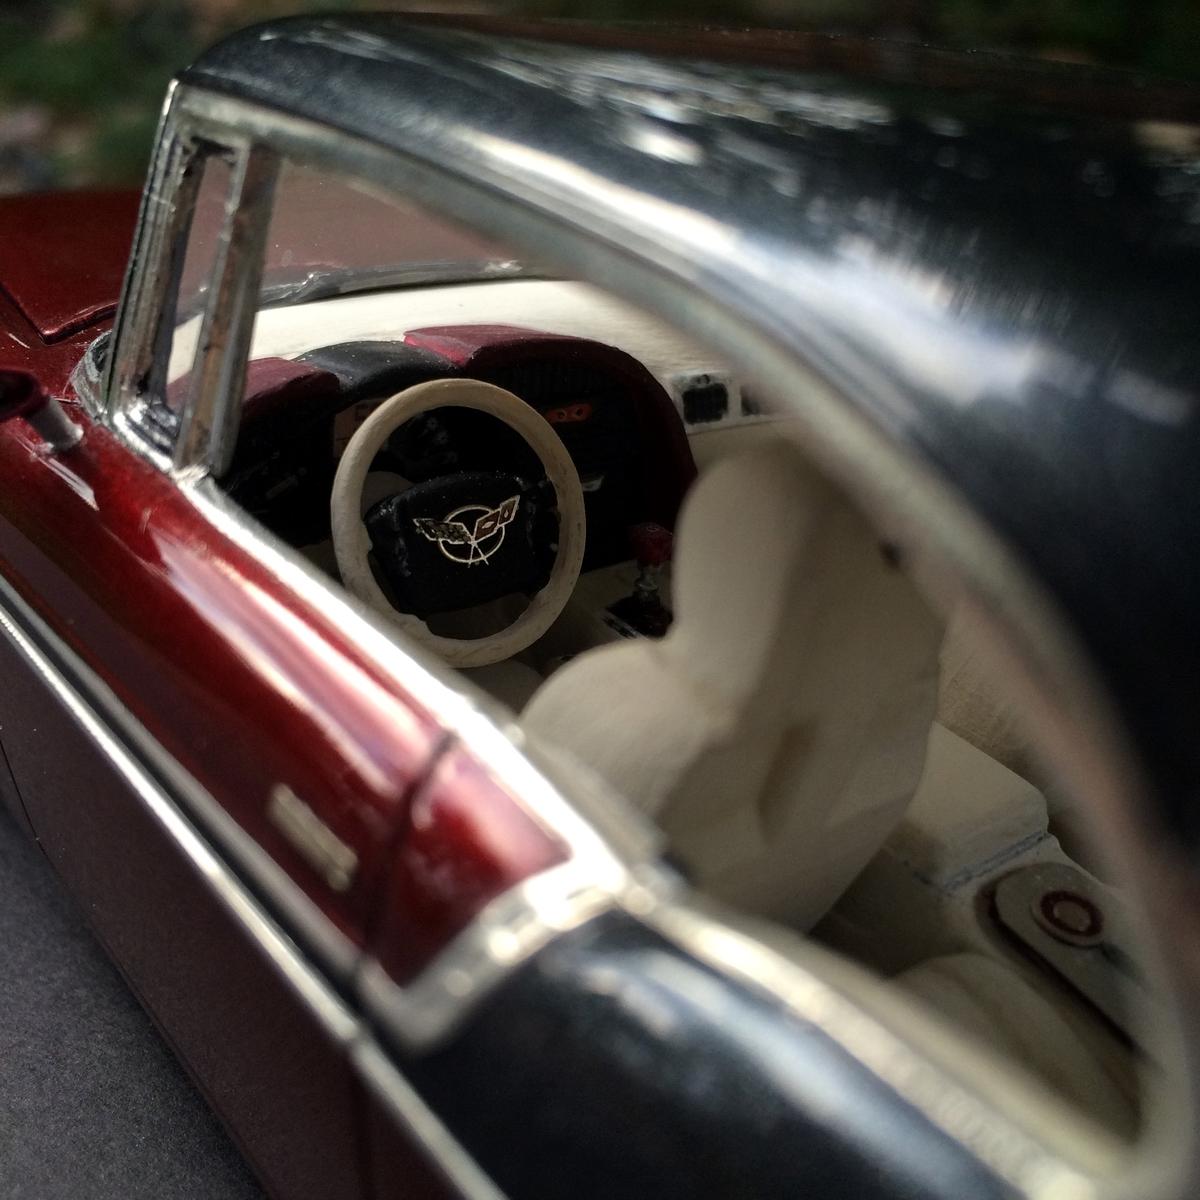
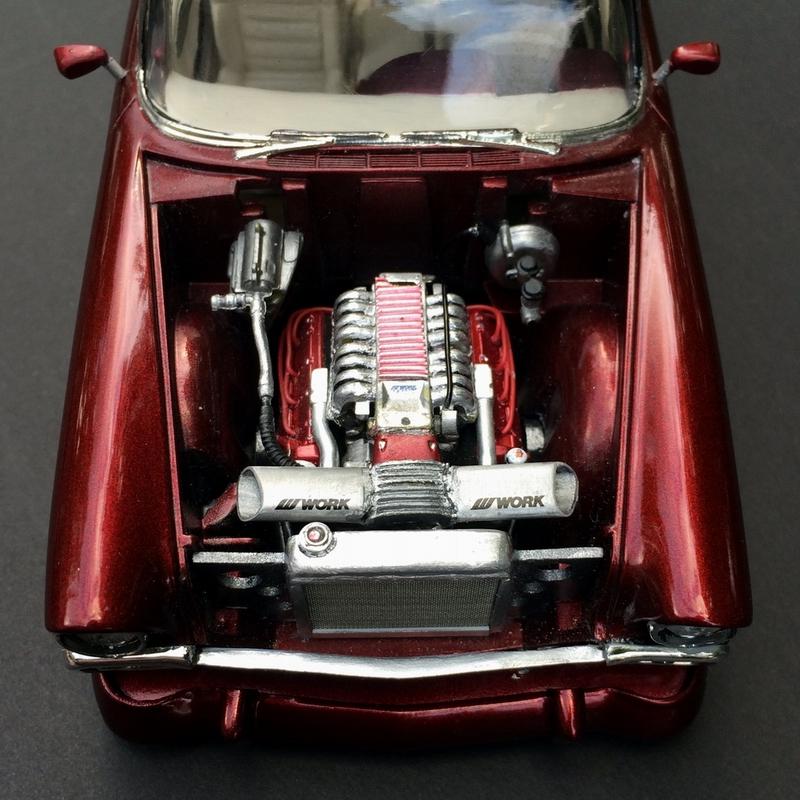
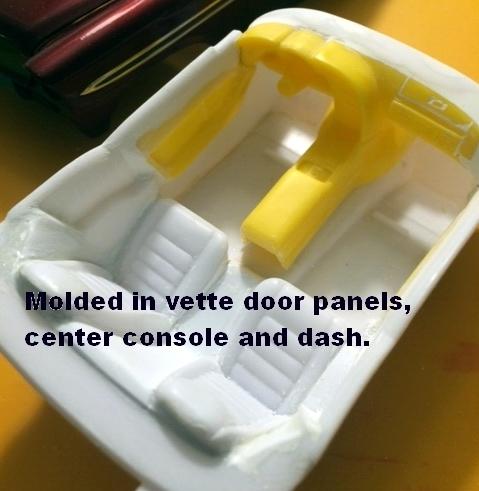
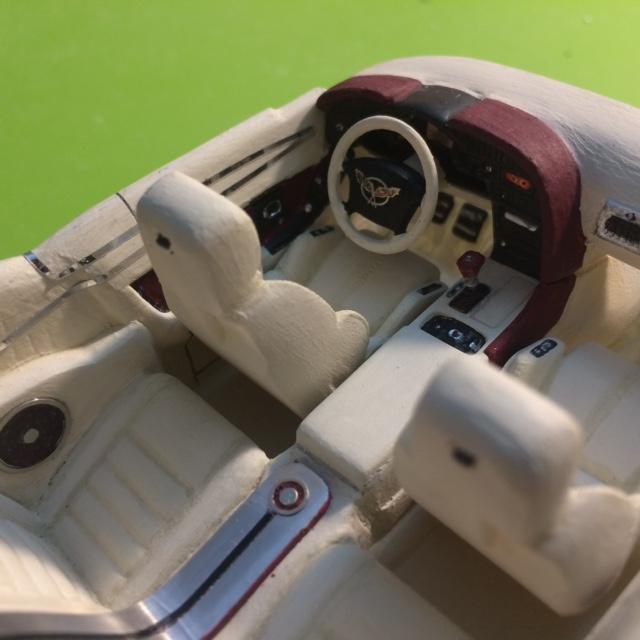
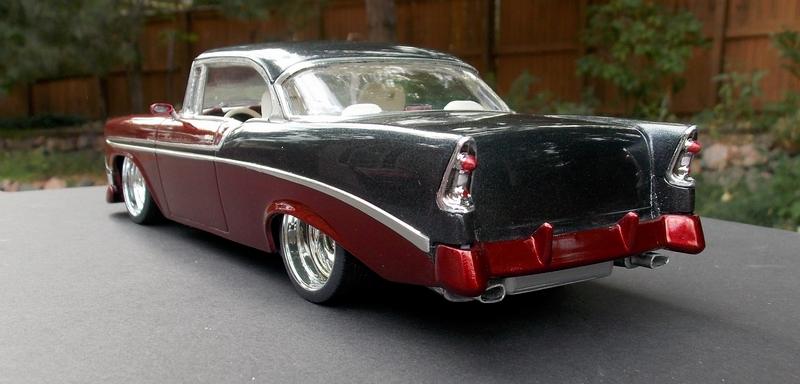
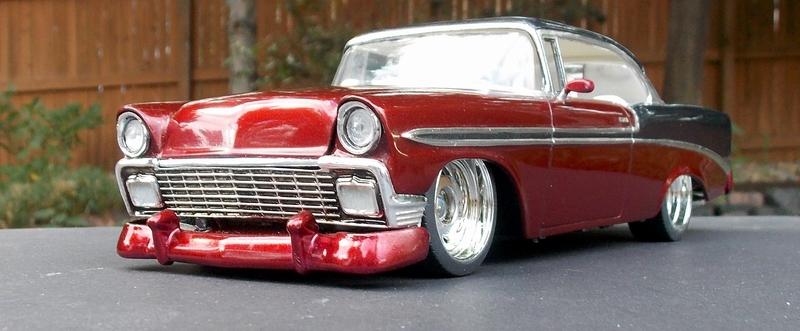
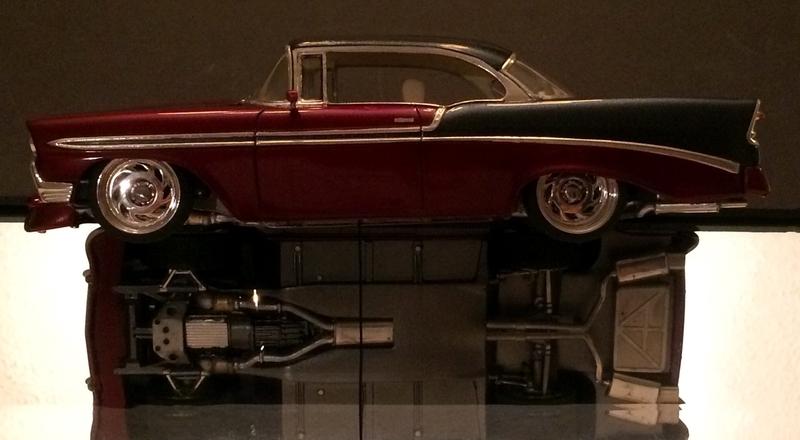
My first Tri-Five build. This is the old Revell kit with the crummy molded chassis. I did a lot of mods to this version of a Pro-Touring restomod. Left the body stock - Paint is Duplicolor Graphite top and tail and spear. Front is Duplicolor Gun Metal Gray with Tamiya Clear Red over that. 6-coats of Wet Clear all polished and buffed. Lot's of BMF where chrome needed to be. Hand made custom side mirrors from tear-drop aluminum stock. PE door handles. Completely custom made interior. I used the stock tub, molded in a 1991 C4 Vette dash, center console and door panels. Molded in rear buckets with molded console and C4 front buckets. Made my own suede color mix paint for the interior. Chassis, I built a custom pan and installed the IRS from a C4 rear and front suspension, along with C4 exhaust and custom aluminum tips from tear-drop aluminum stock. Wheels are stock C4 ZR1 wheel I inserted into Pegasus chrome sleeves, I think it gives it a "stock-custom appearance. Engine is C4 ZR1 with custom made dual-horn aluminum cold air intake. hand made radiator. I think I gave this old kit a fresh updated restomod appearance. Before After Build pic chassis Custom pan, exhaust, fuel tank and C4 IRS
-
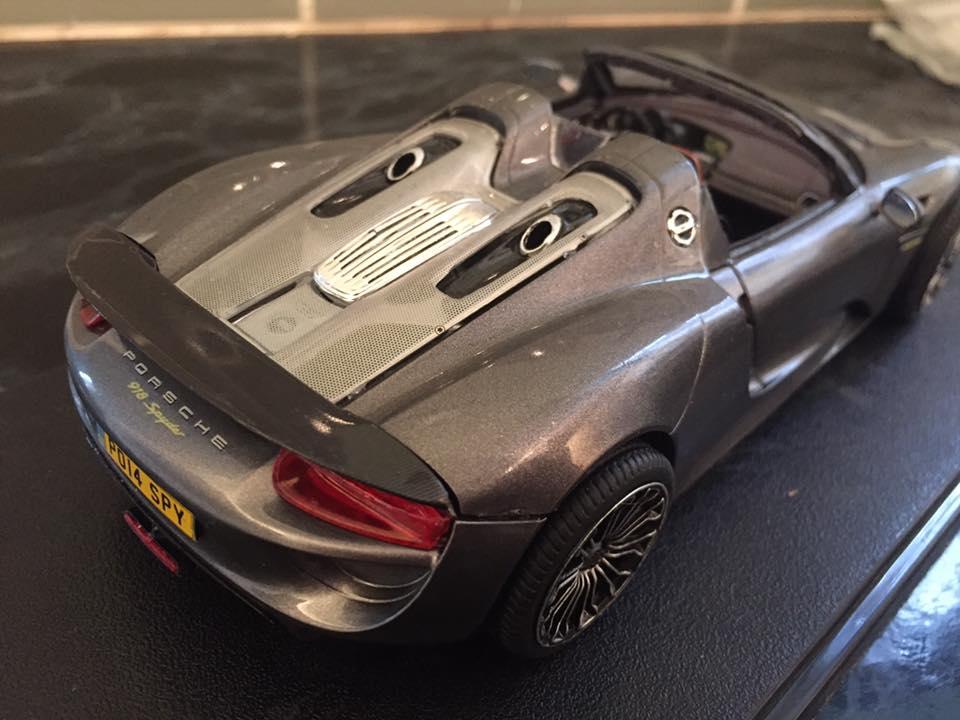
Hi this is my 4th model the Revell 918 Spyder. I have used some scal carbon fibre and Plamoz wheels which was not from the Kit, Gravity and Zero colors for paint. I like the final result i am happy with it unfortunately it was rushed as i had a due date to finish but there arnt really many imperfections to be seen by the eye. any feed back is appreciated i may build another one of these in the future as a very enjoyable detailed model.
-
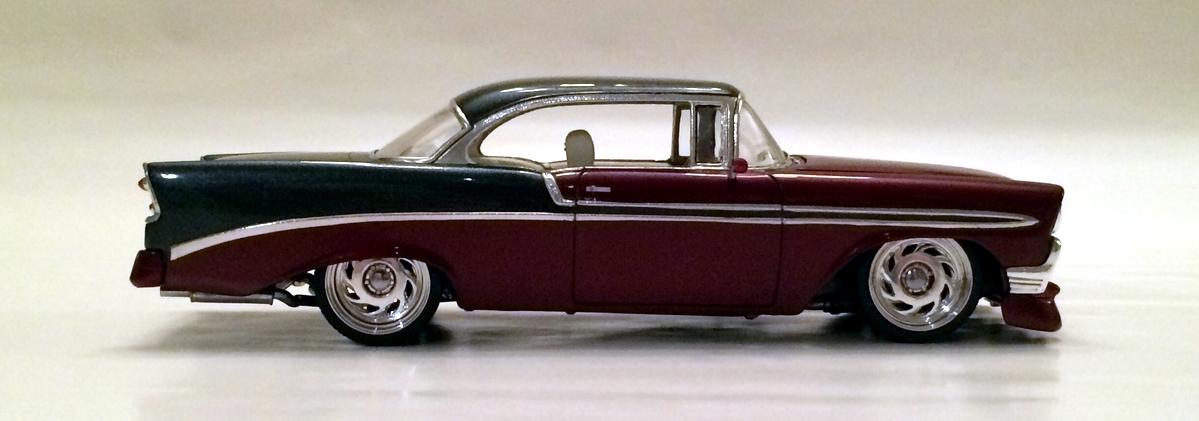
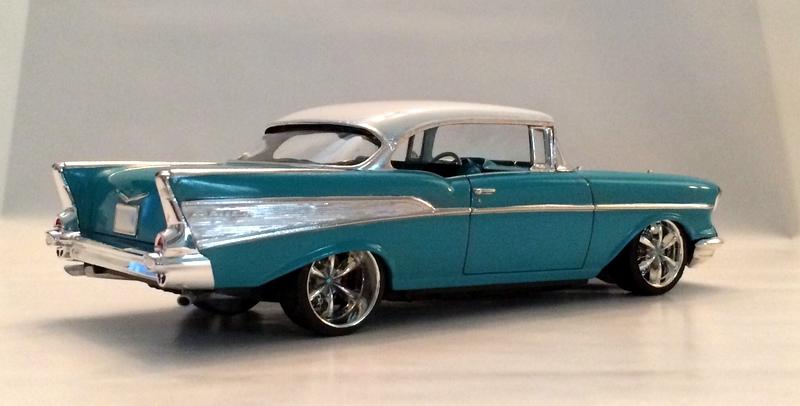
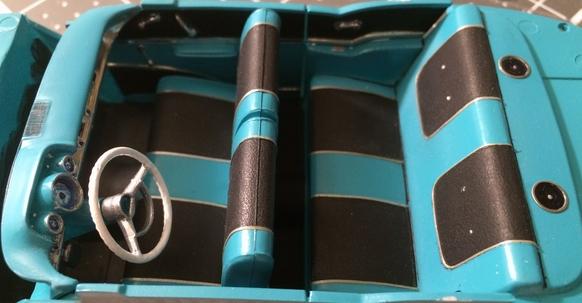
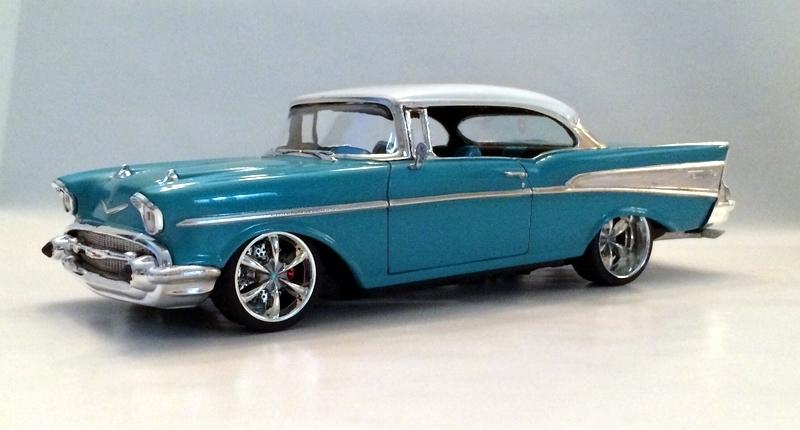
This was a fun couple of days quickie build of a 57 Belair I just finished. Traditional colors, lot's of BMF, detailed the interior with tape-piping, deep dish staggered custom wheels and handmade side mirror, as I understand mirrors make a model more realistic..
-
Anyone have the dish on this one yet?
-
'57 Chevy Bel Air Tamiya Rattle Can Interior Flocking Bare Metal Foil
-
So, in anticipation of the Revell '30 kit I had saved up some parts to build a highboy with hemi power, but I just wasn't feelin' it once the parts were mocked up. The Revell '30 sort of wants to be either a modern neo-traditional hot rod, the kind of thing you might see competing for the Ridler or America's Most Beautiful trophies, or a rat rod. The custom top insert and chromed suspension components do suggest a third route, however: a late 50s/early 60s show rod. I'd been wanting to build a chrome-laden show car for some time, and have a bunch of kits to rob parts from, so here goes: -Revell '30 body with cowl band removed, channeled over the "A" style frame. I'll probably make some other adjustments too. -Frame Z'd in front and back...rear will probably get a transverse leaf spring adapted to the kit axle. -Ala Kart front axle -Revell '29 roadster channeled interior panels, modified to fit the coupe. -Monogram '30 Woody dash (fits perfectly) -Monogram '30 Woody chrome firewall (fits perfectly but had to be trimmed for frame/engine clearance because of the channel job) -MPC deuce grille hollowed out and filled with drawer-pull panel from Aurora Custom Grilles Parts Pack. -AMT '57 Ford V8 with parts box "thunderbird" logo valve covers, chrome pulleys from Revell Ford 427 parts pack, and 6x2 carbs from either the Tweedy Pie or Lil Coffin. -Revell '30 Tudor seats, cut down. -AMT '57 chrysler rear tires and hubcaps all 'round...Revell-Monogram tires up front (from '50 Ford pickup, or '59 Chevy Impala..probably other kits too) -going to tunnel metal exhaust tips from Monogram '30 Touring into the kit's taillight locations, and slide in bullet-shaped lenses made from sprue.
-
Finished this kit tonight. I really liked how this one went together, no fit issues at all, very good detail throughout. I picked a 50's themed color scheme but reversed what you would normally see (black roof, black on bottom). I think it came out pretty well. Comments welcome, thanks for looking.
-
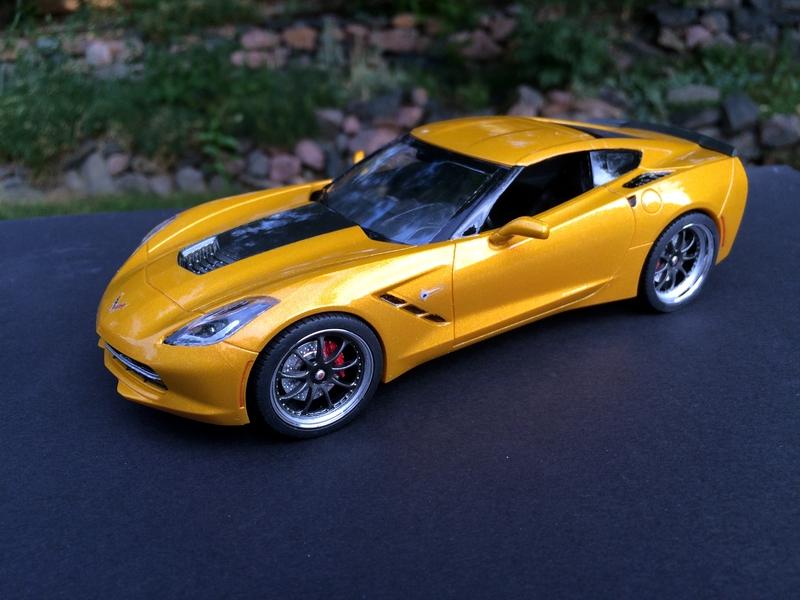
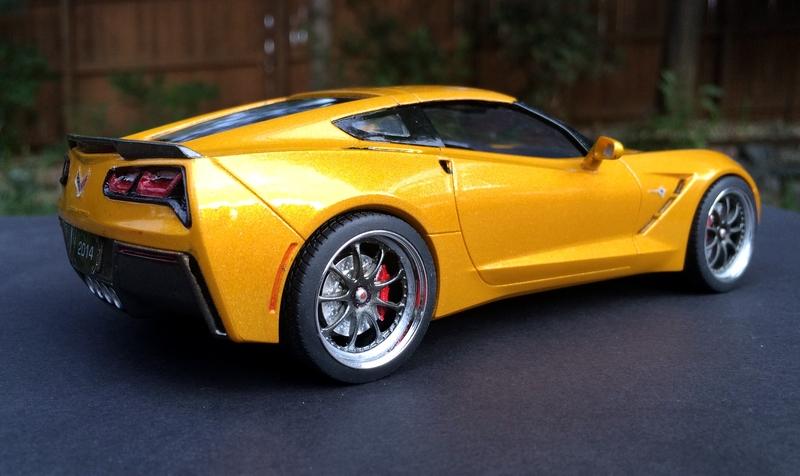
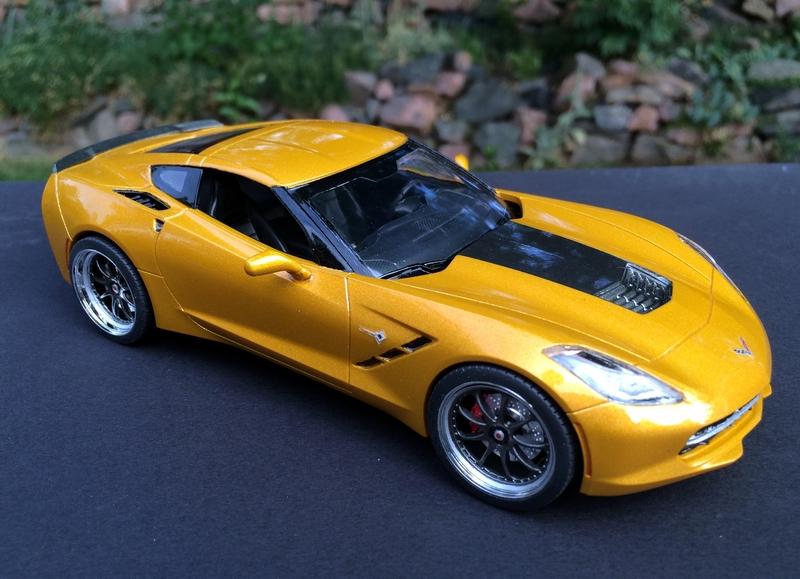
Actually built this last Fall but with gold center Pegasus wheels. Didn't like how those looked and decided to color change to dark gray, and added some more offset to the rear wheels. Now I think it looks more like the C7 Z06. Painted with Model Master Aztec Gold with Tamiya Pearl Clear BEFORE with Gold wheels AFTER
-
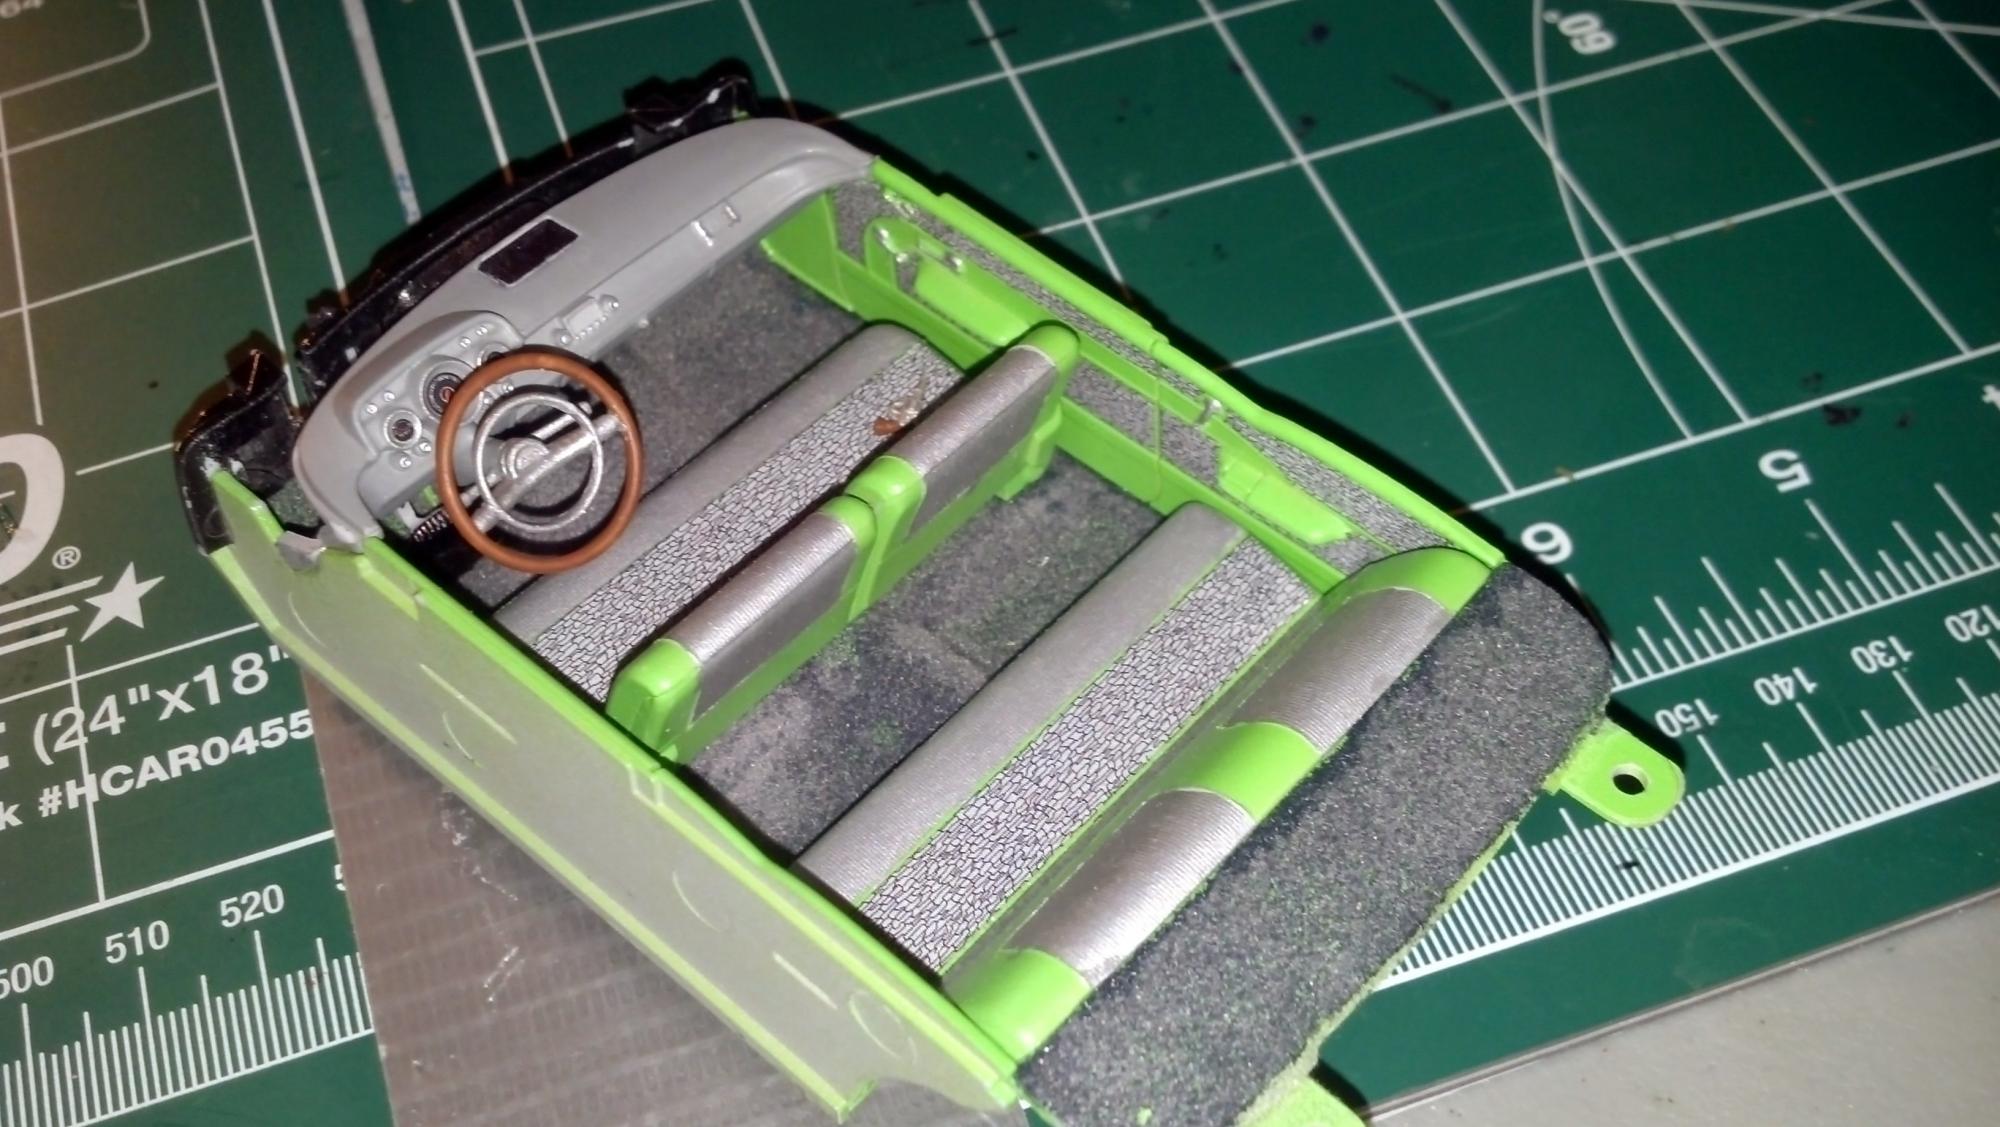
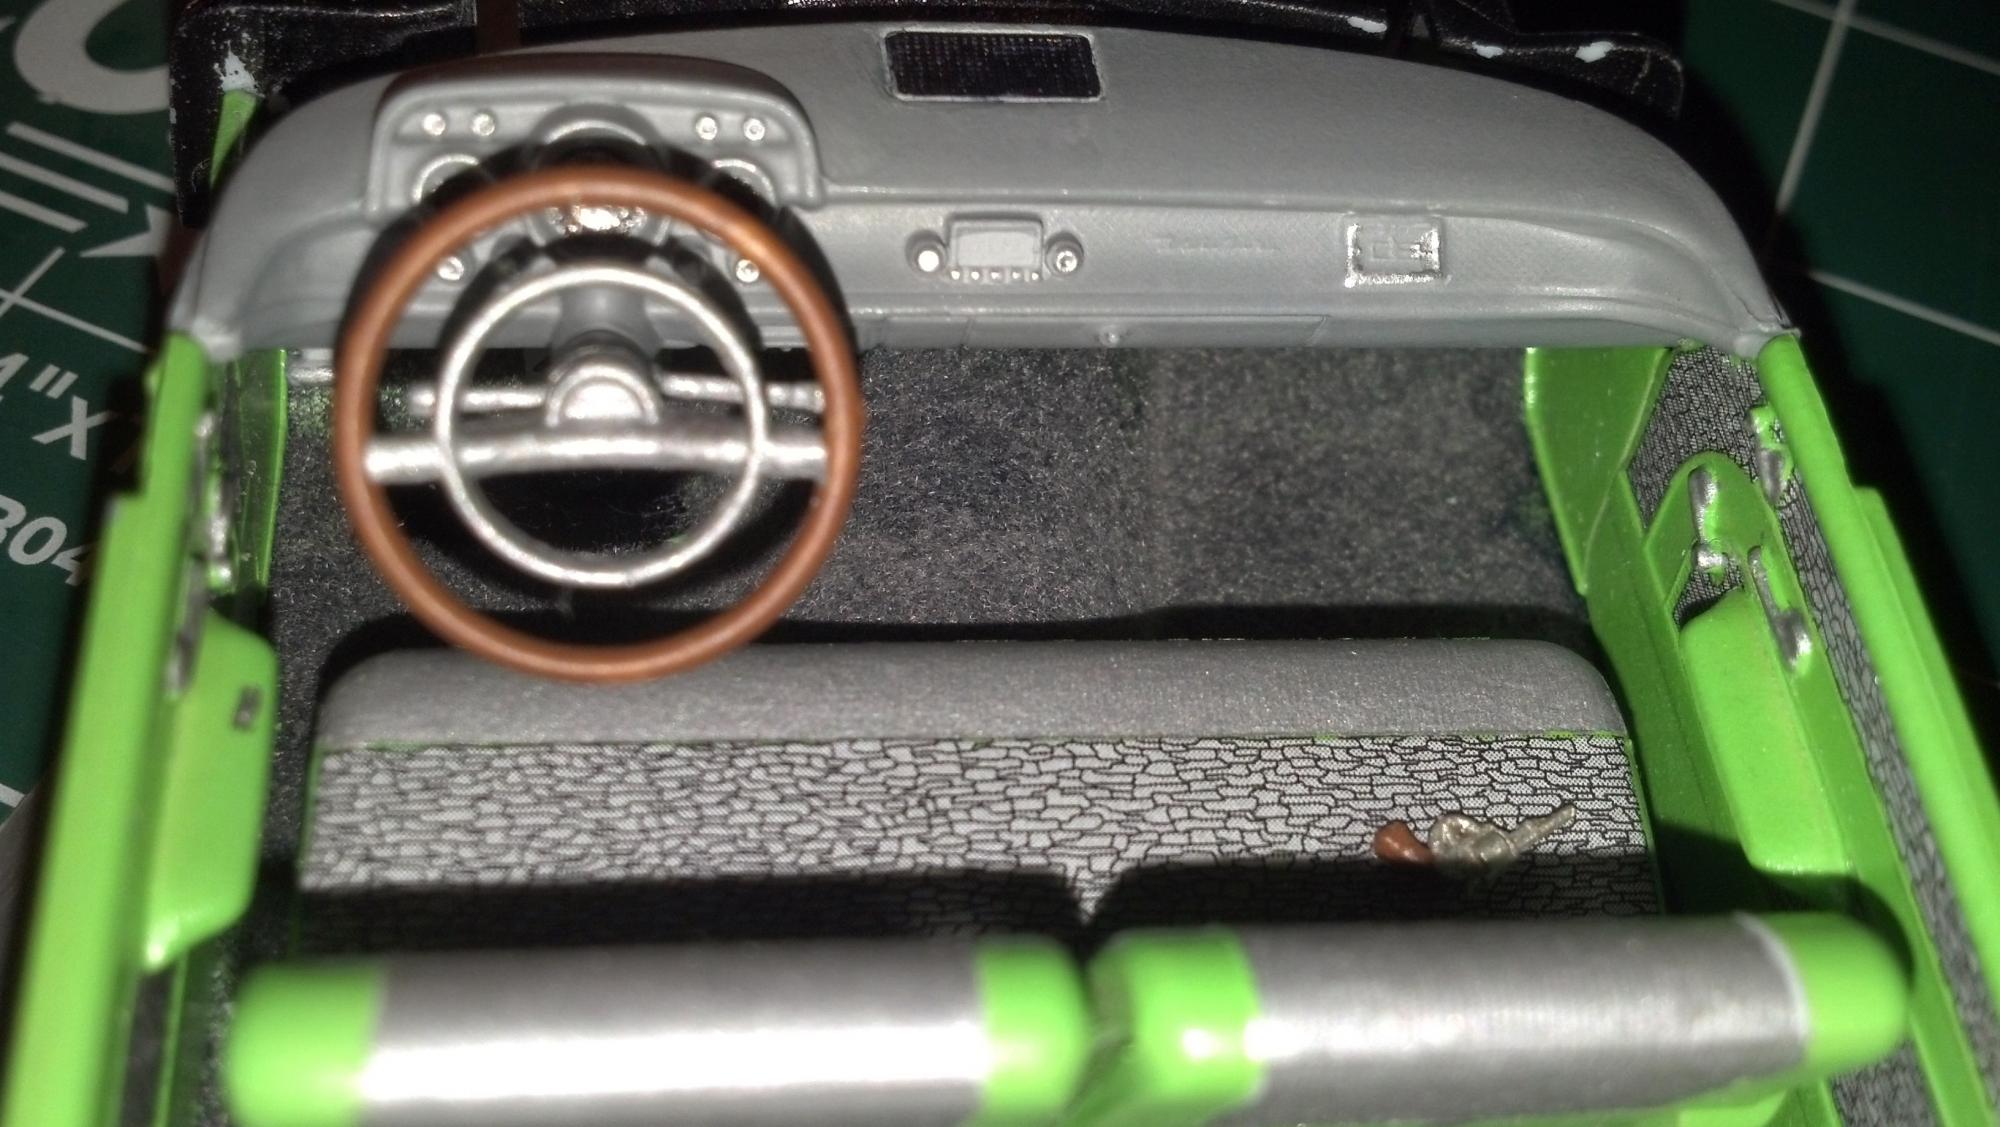
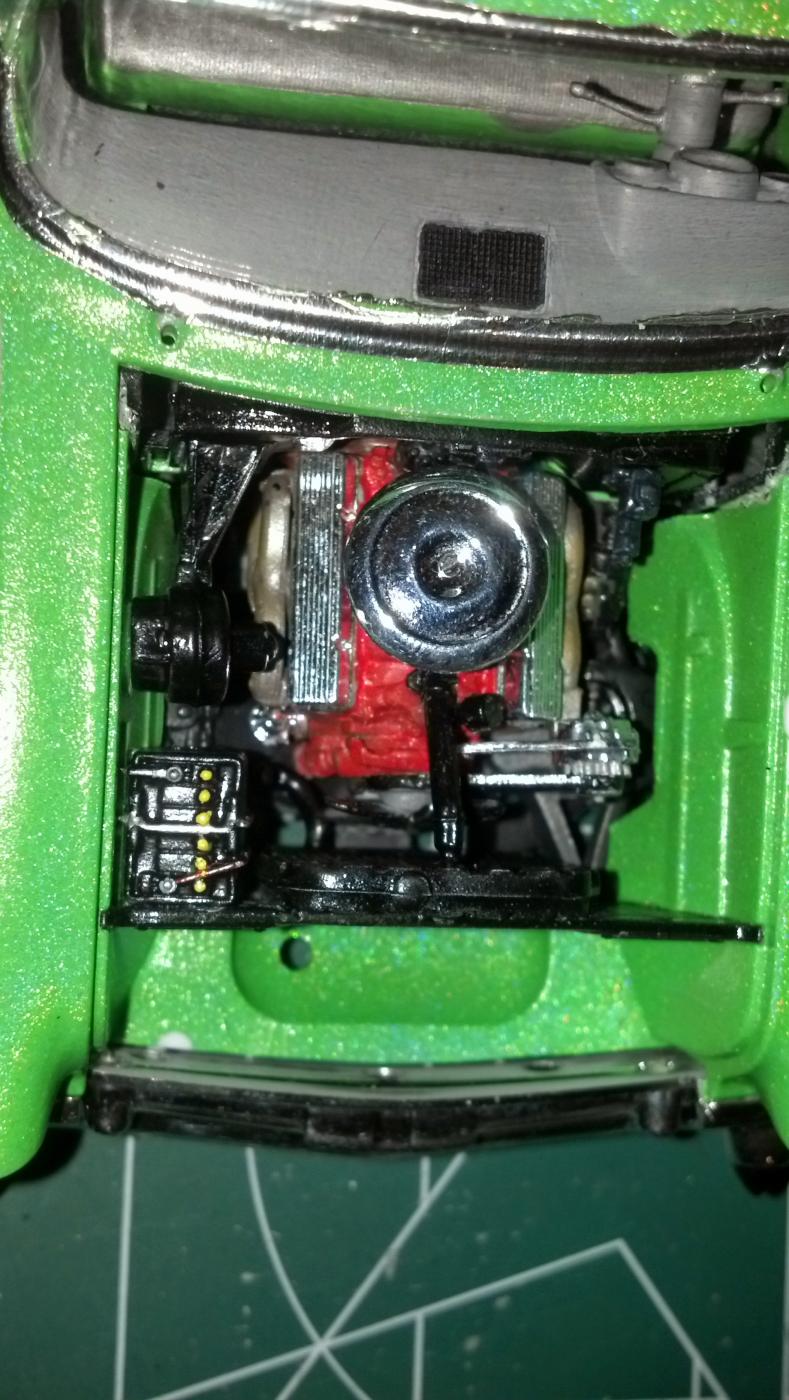
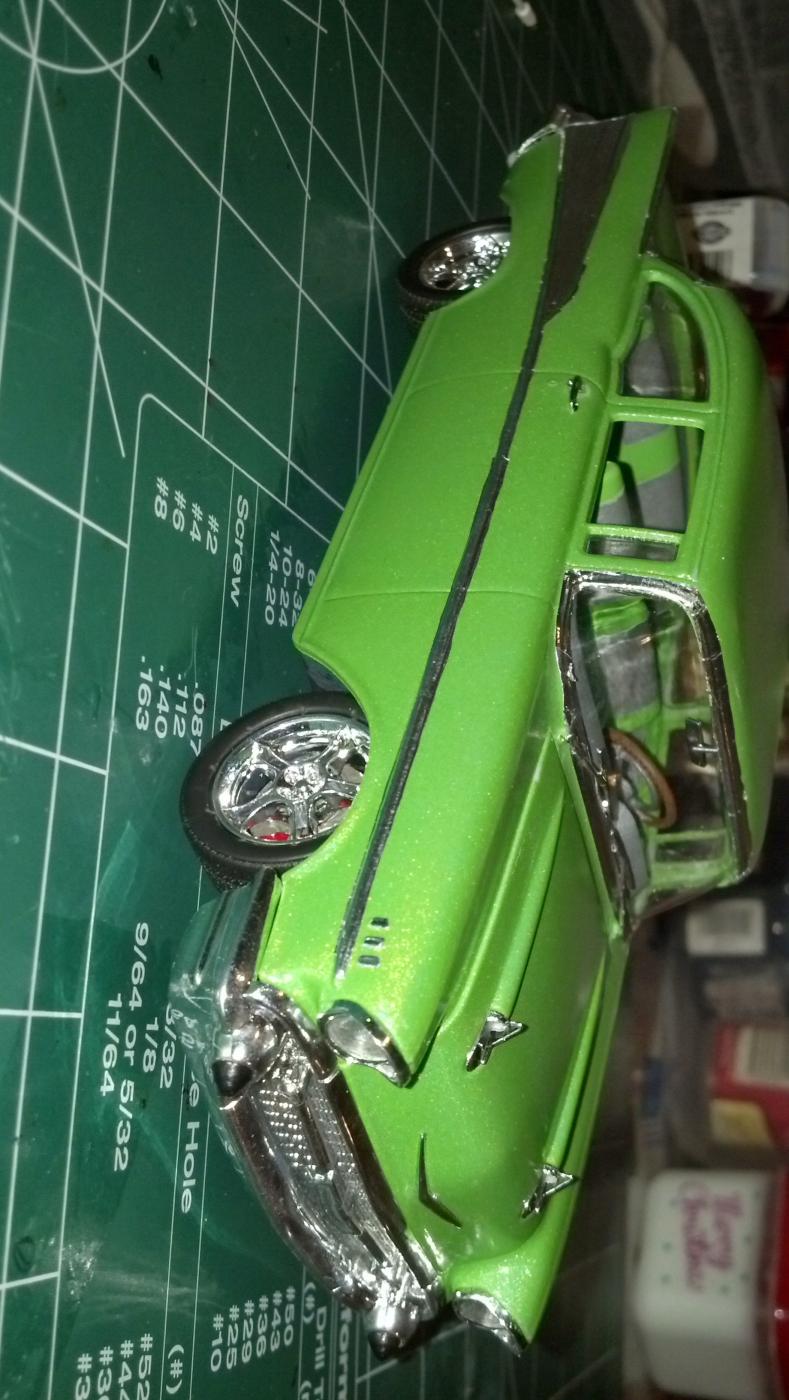
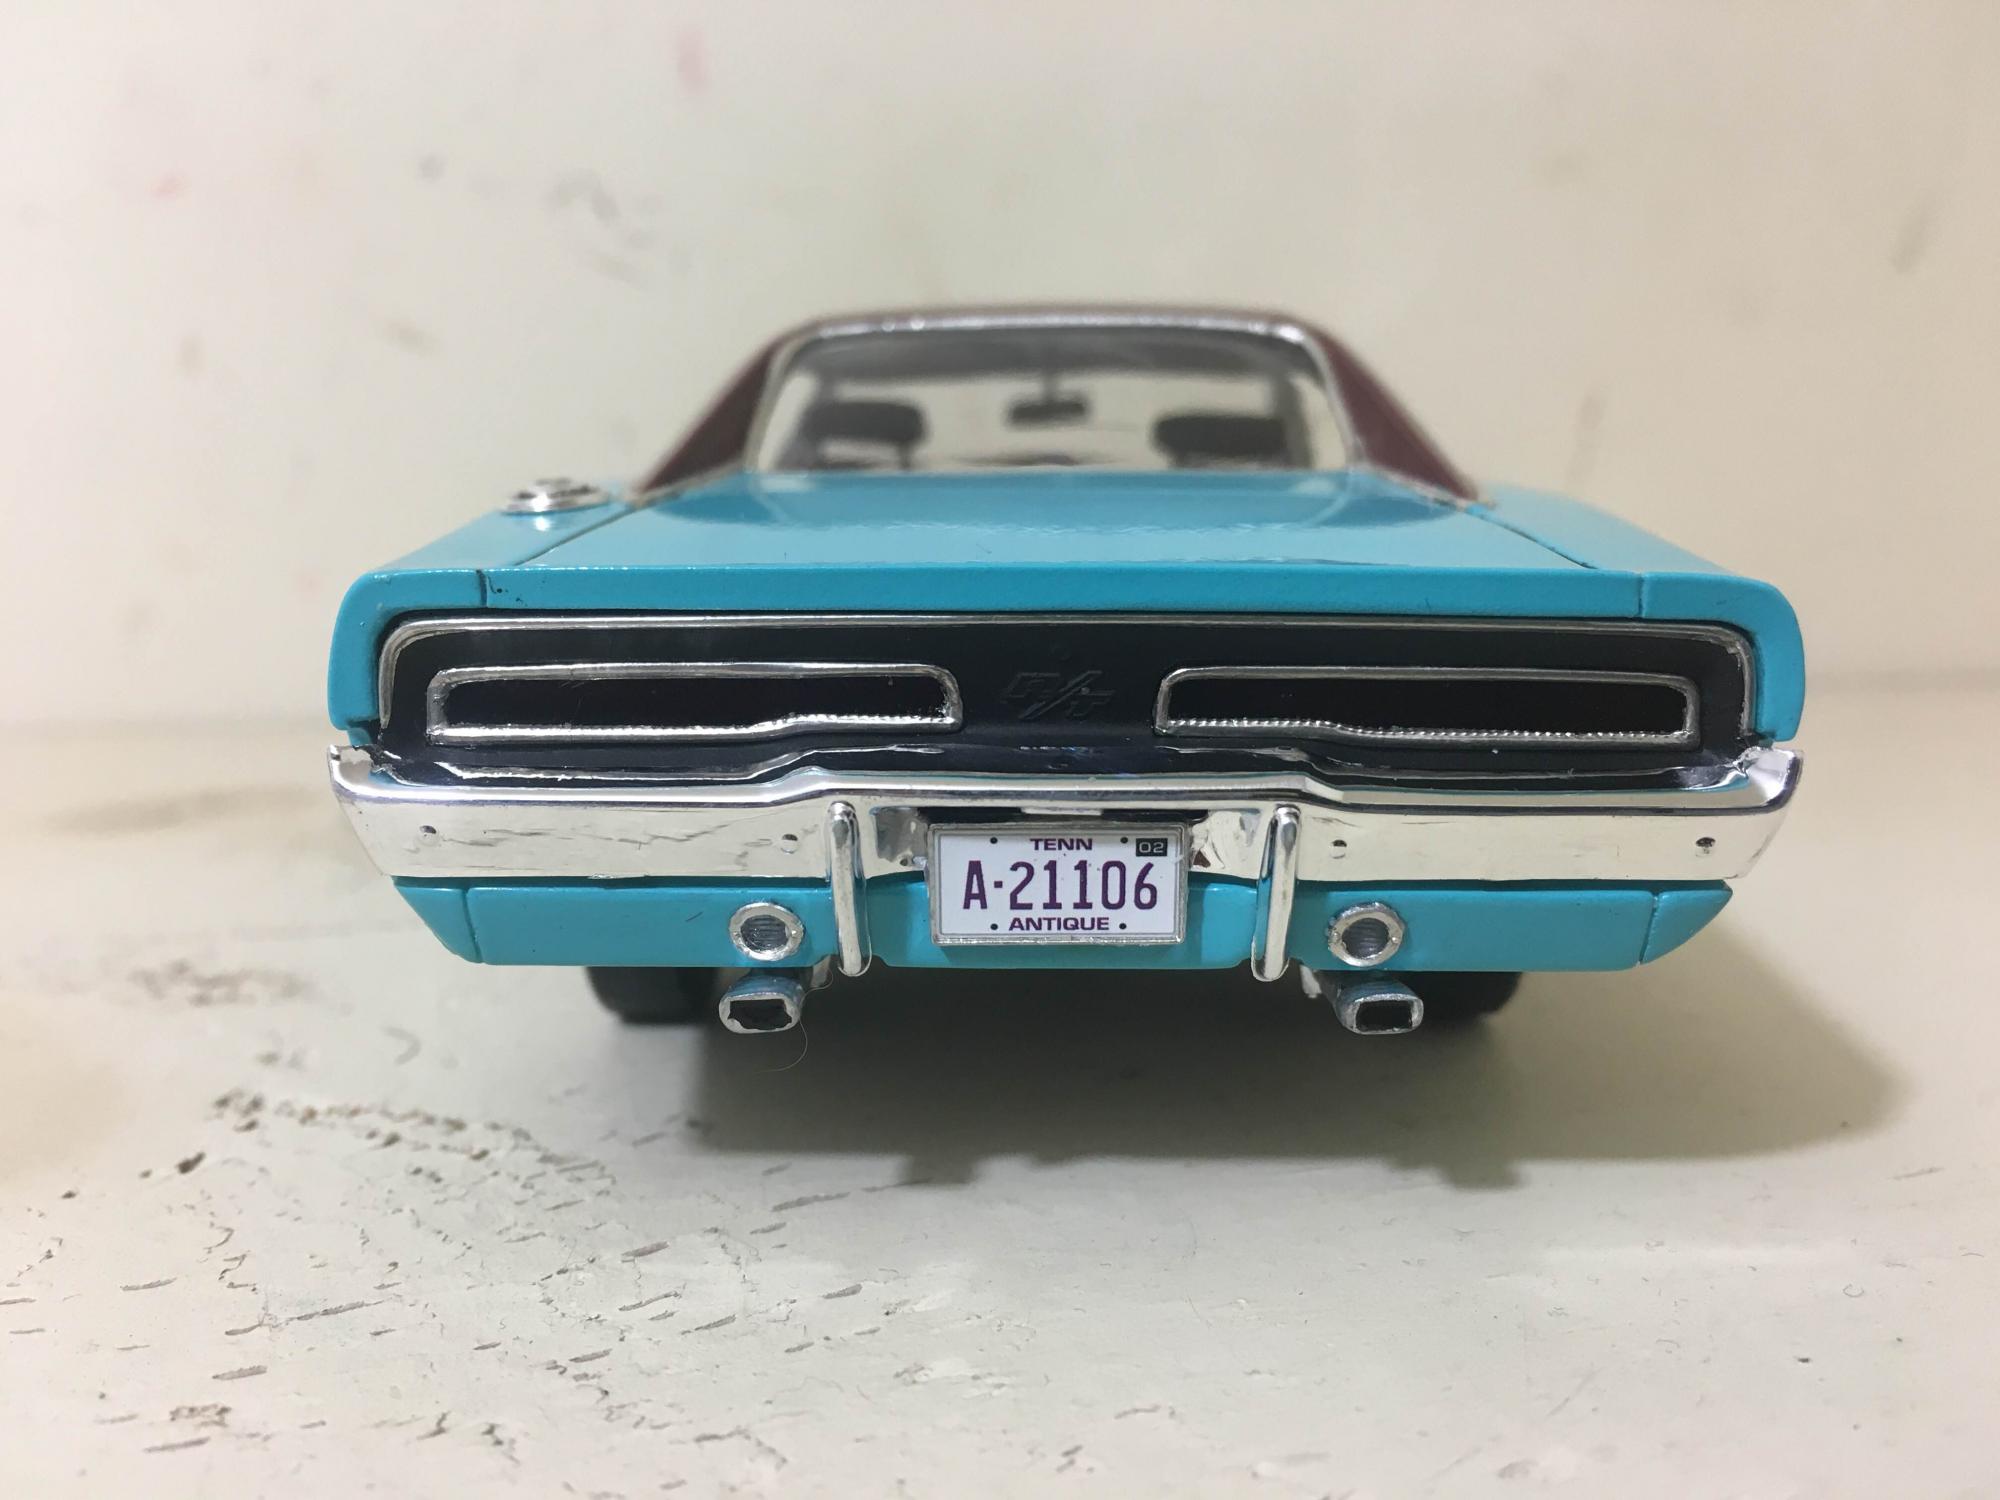
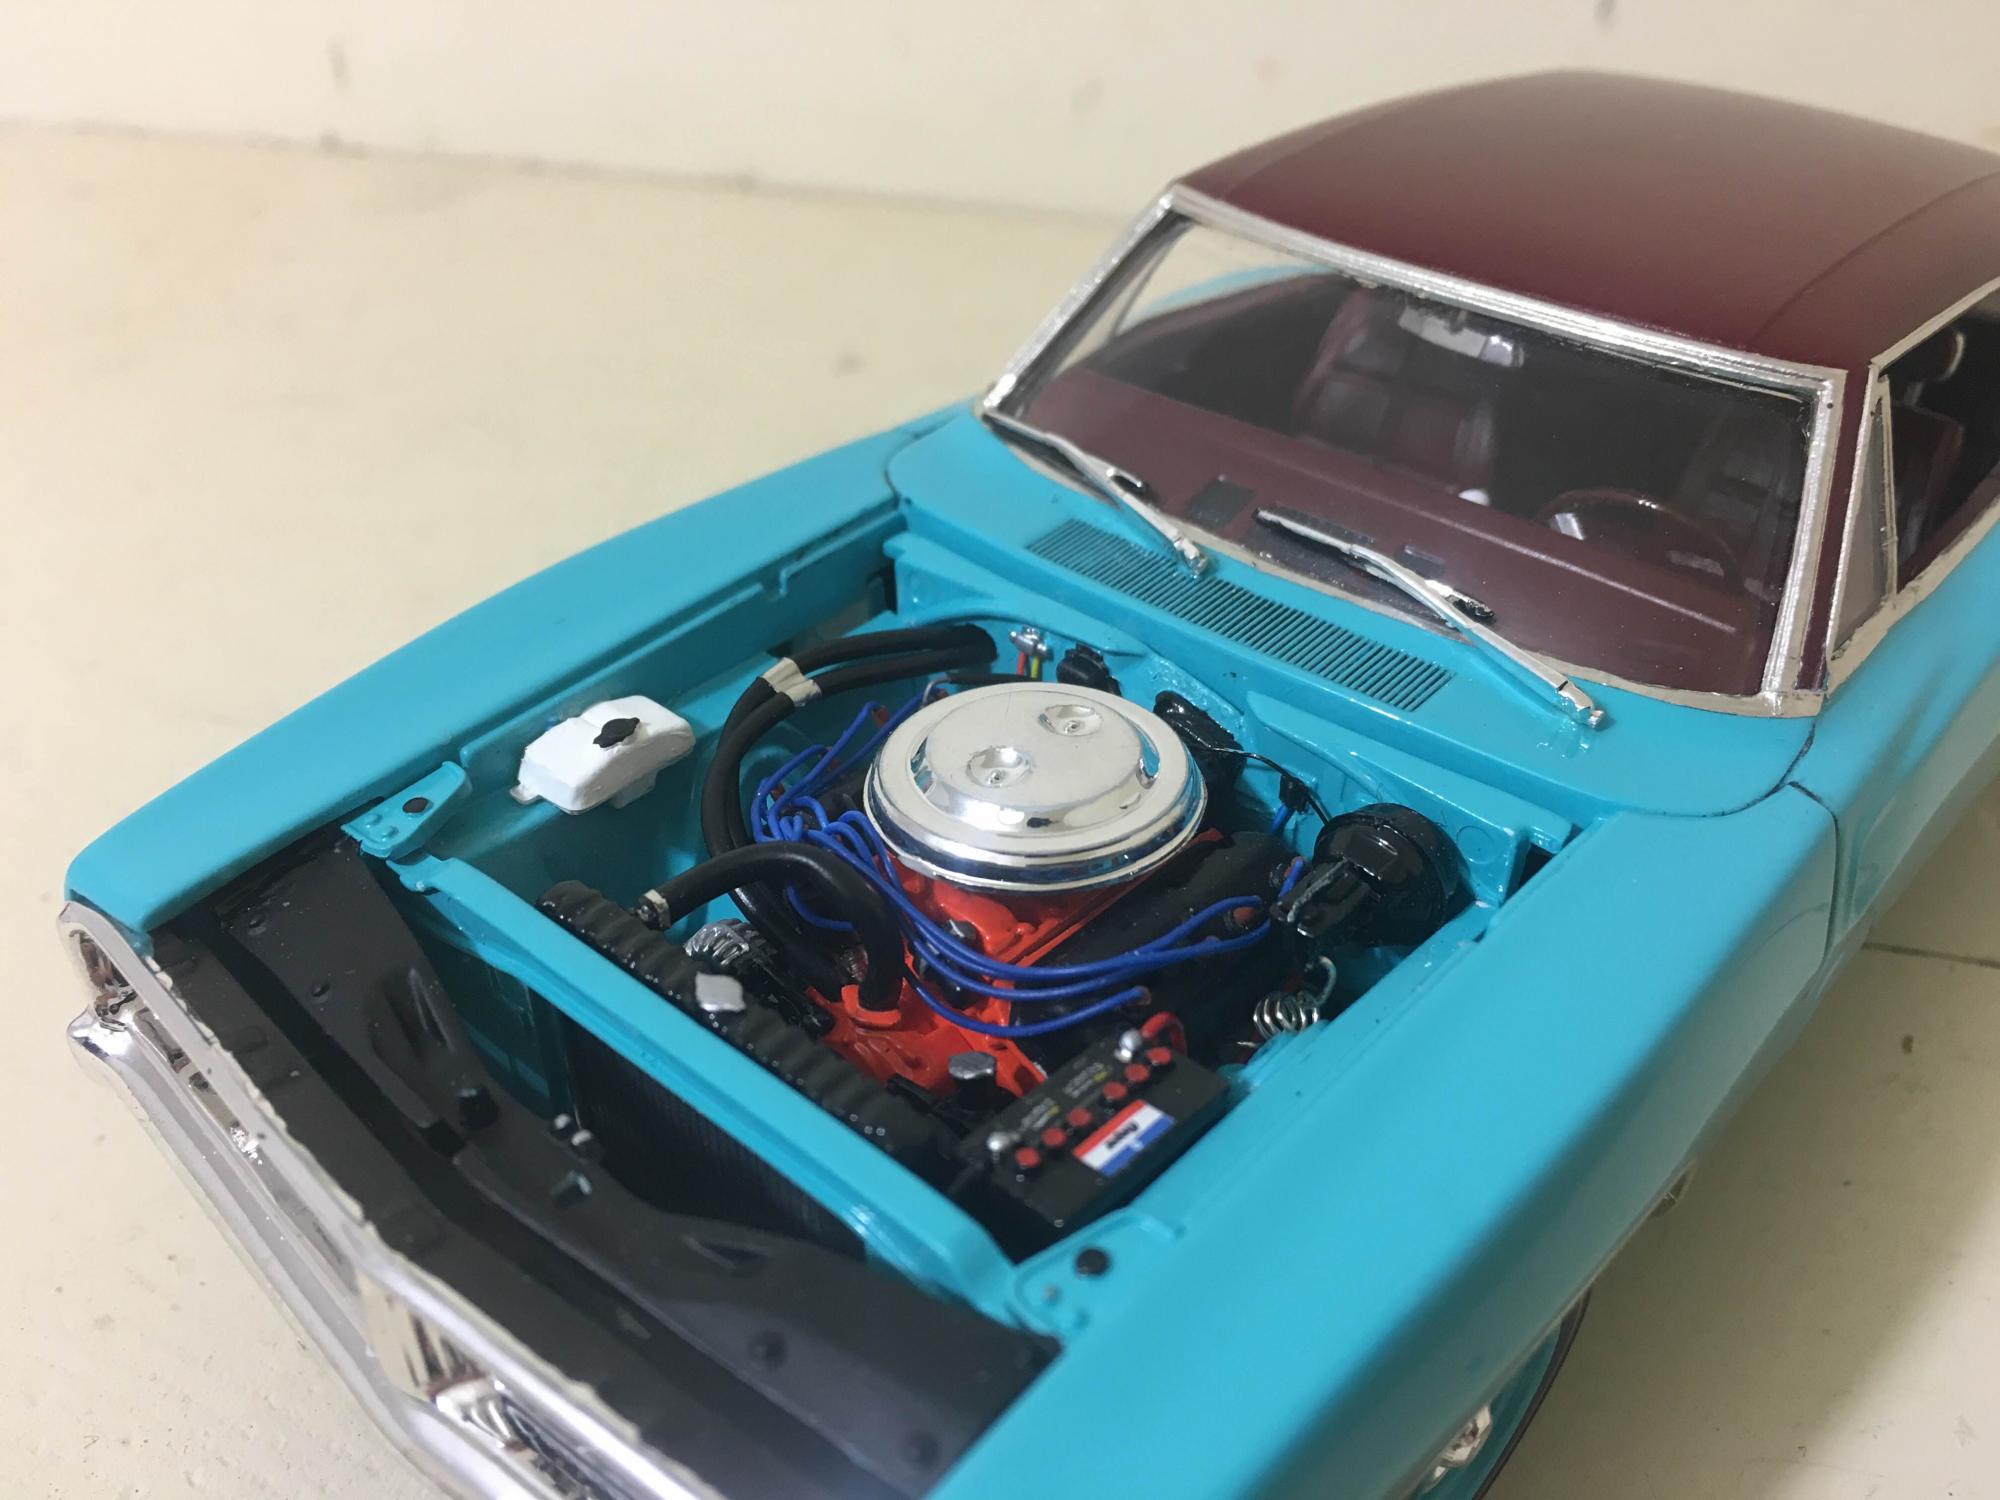
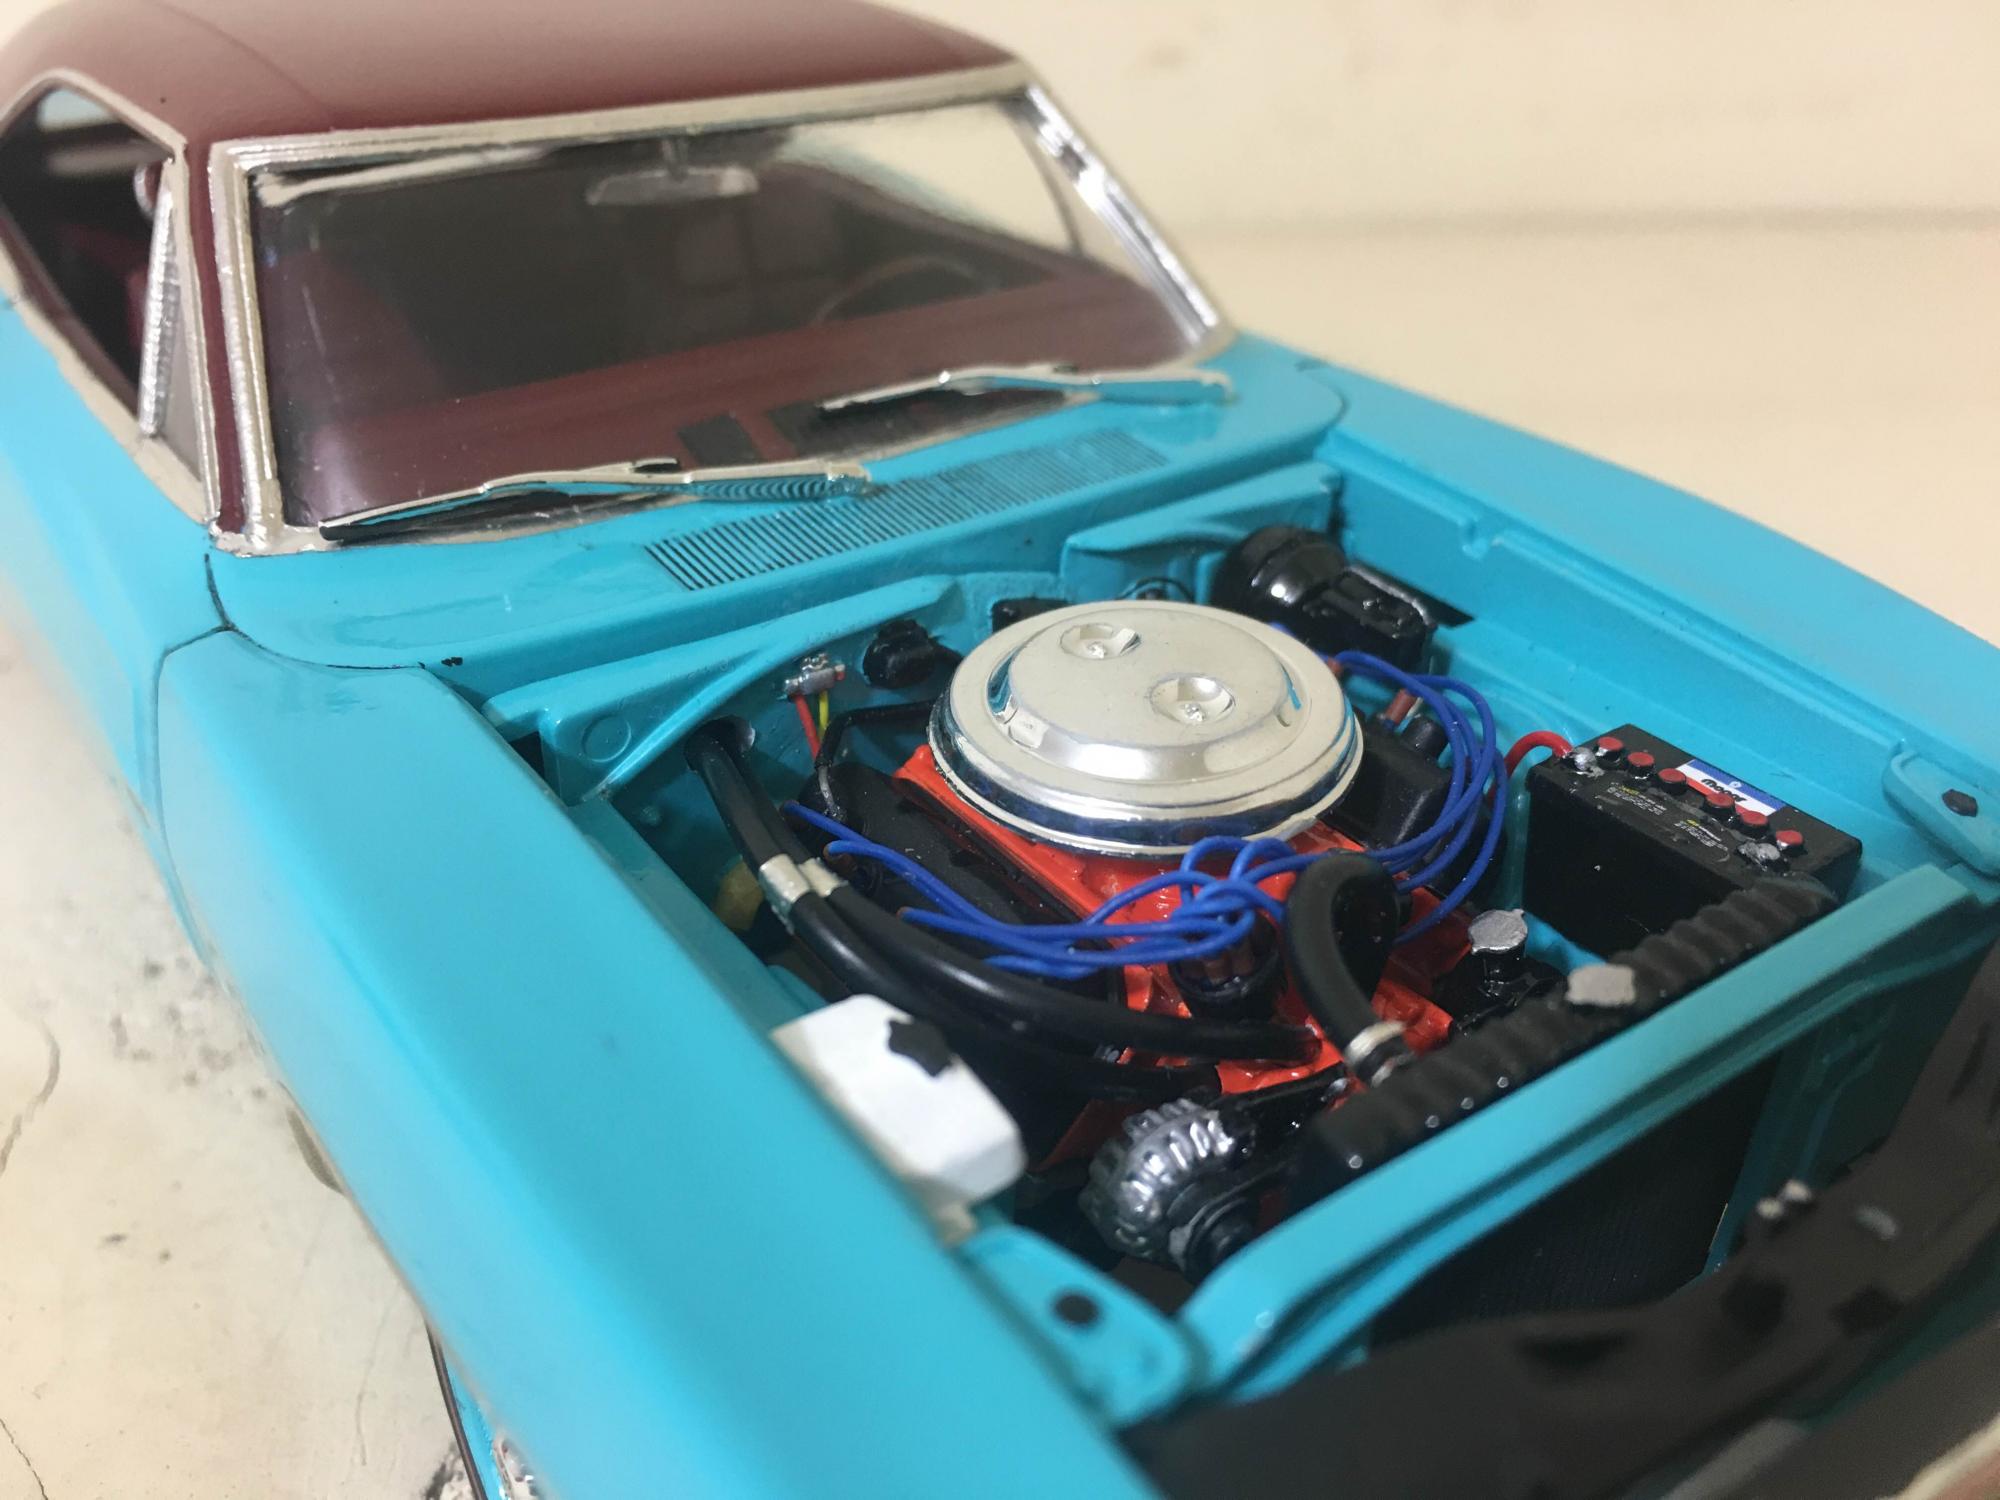
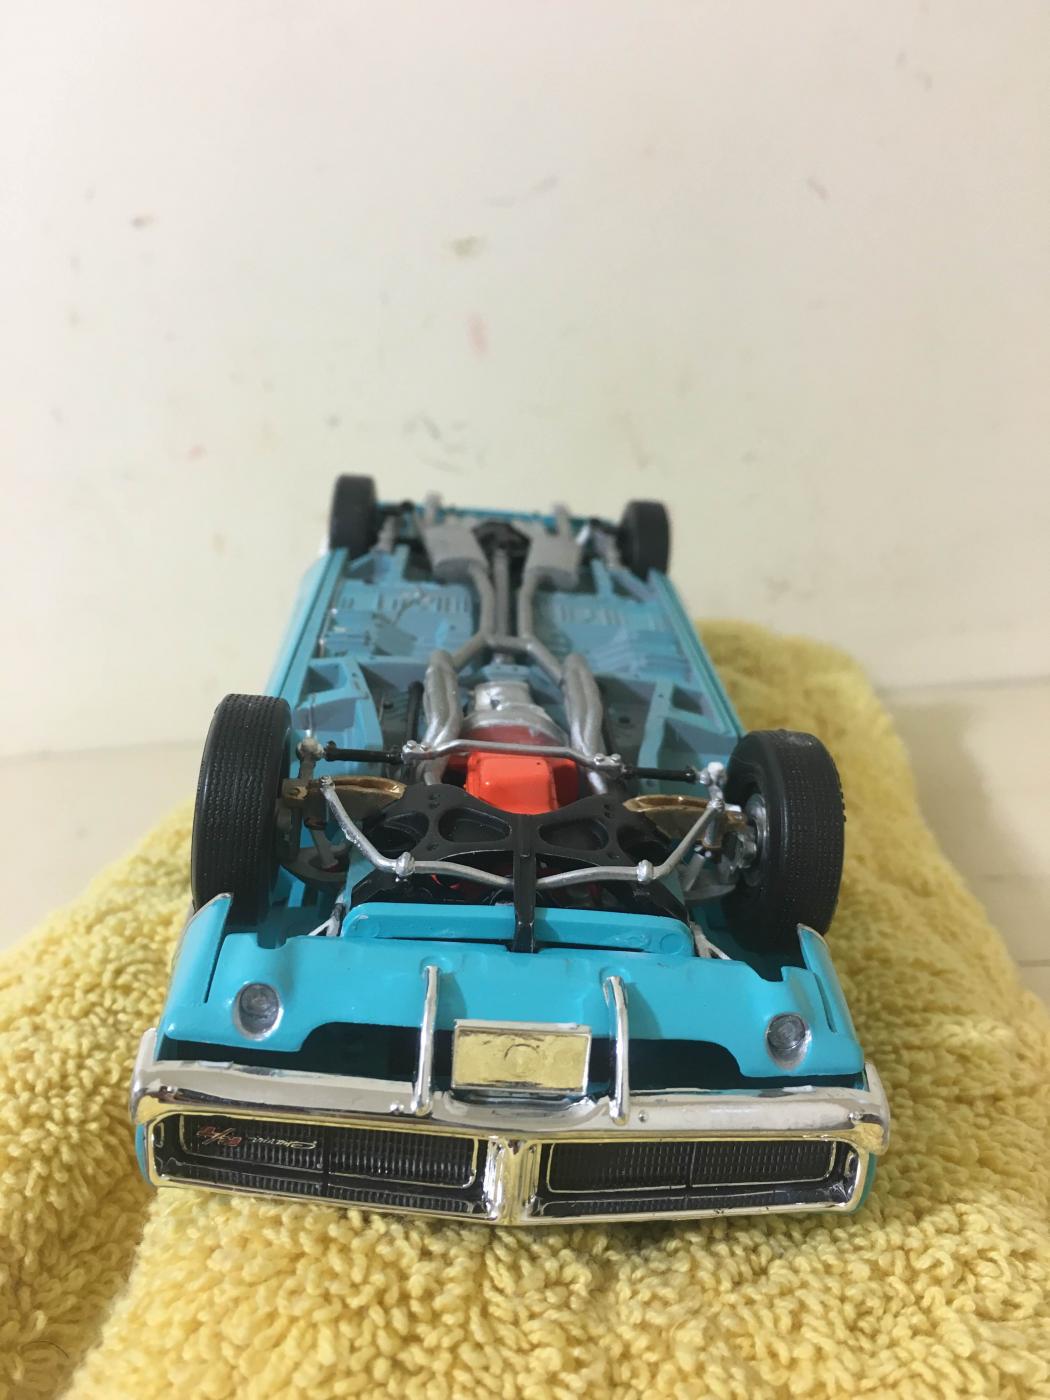
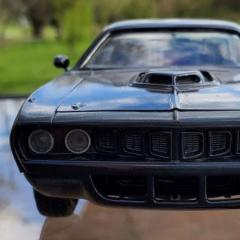
What's up guys and girls? I have another Charger for you! This is the yellow labeled pro modeler 1969 Dodge Charger. Did not do any body modifications other than cutting the motor mounts to make the massive Hemi sit right in the bay. The wheels may not be the right year for the car but it is what i had on hand and they where free! They came from the 1968 Charger kit. Details include wired spark plugs, battery, firewall, and brake booster. I added real rubber hoses for the heater and radiator. Interior came out to be my best yet! Made seat belts using craft ribbon and BMF. The floor board was flocked using nail flocking (really cheap on eBay, $10 for an assortment of 10 colors). Center console also has a little BMF added. The chassis is pretty simple, just some painted on details. First time trying the over spray look, probably went a little over board. Pint is all rustoleum rattle can with the vinyl top being one of their satin finishes. Can not remember the exact colors but can find out if needed. Don't be scared to point any flaws, only makes me better. Hope ya'll like it! Thanks!
-
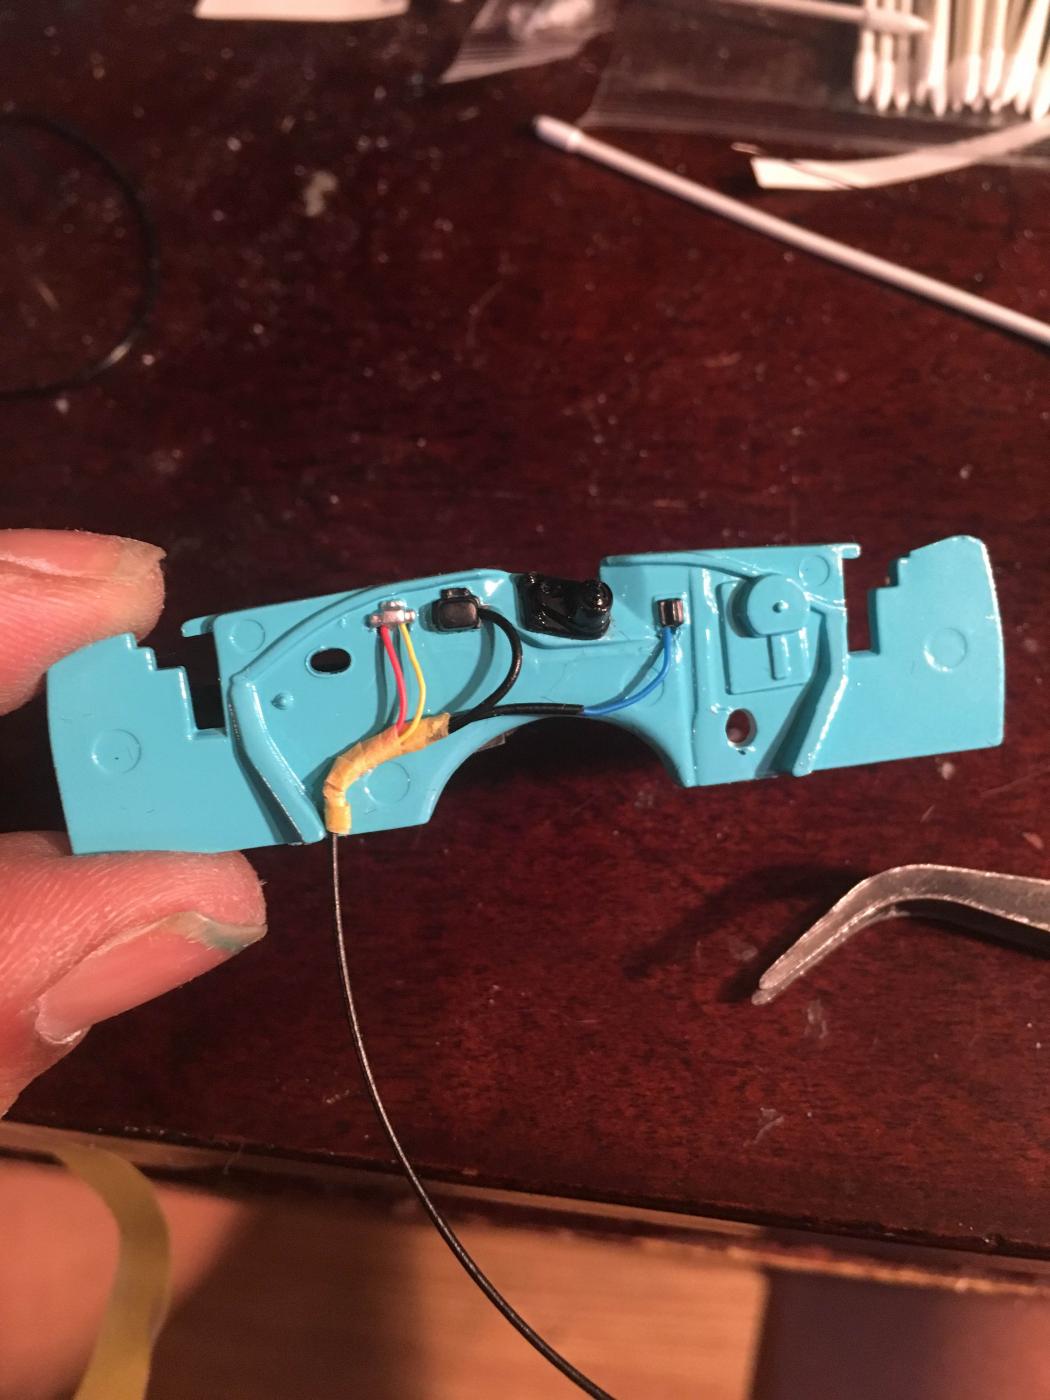
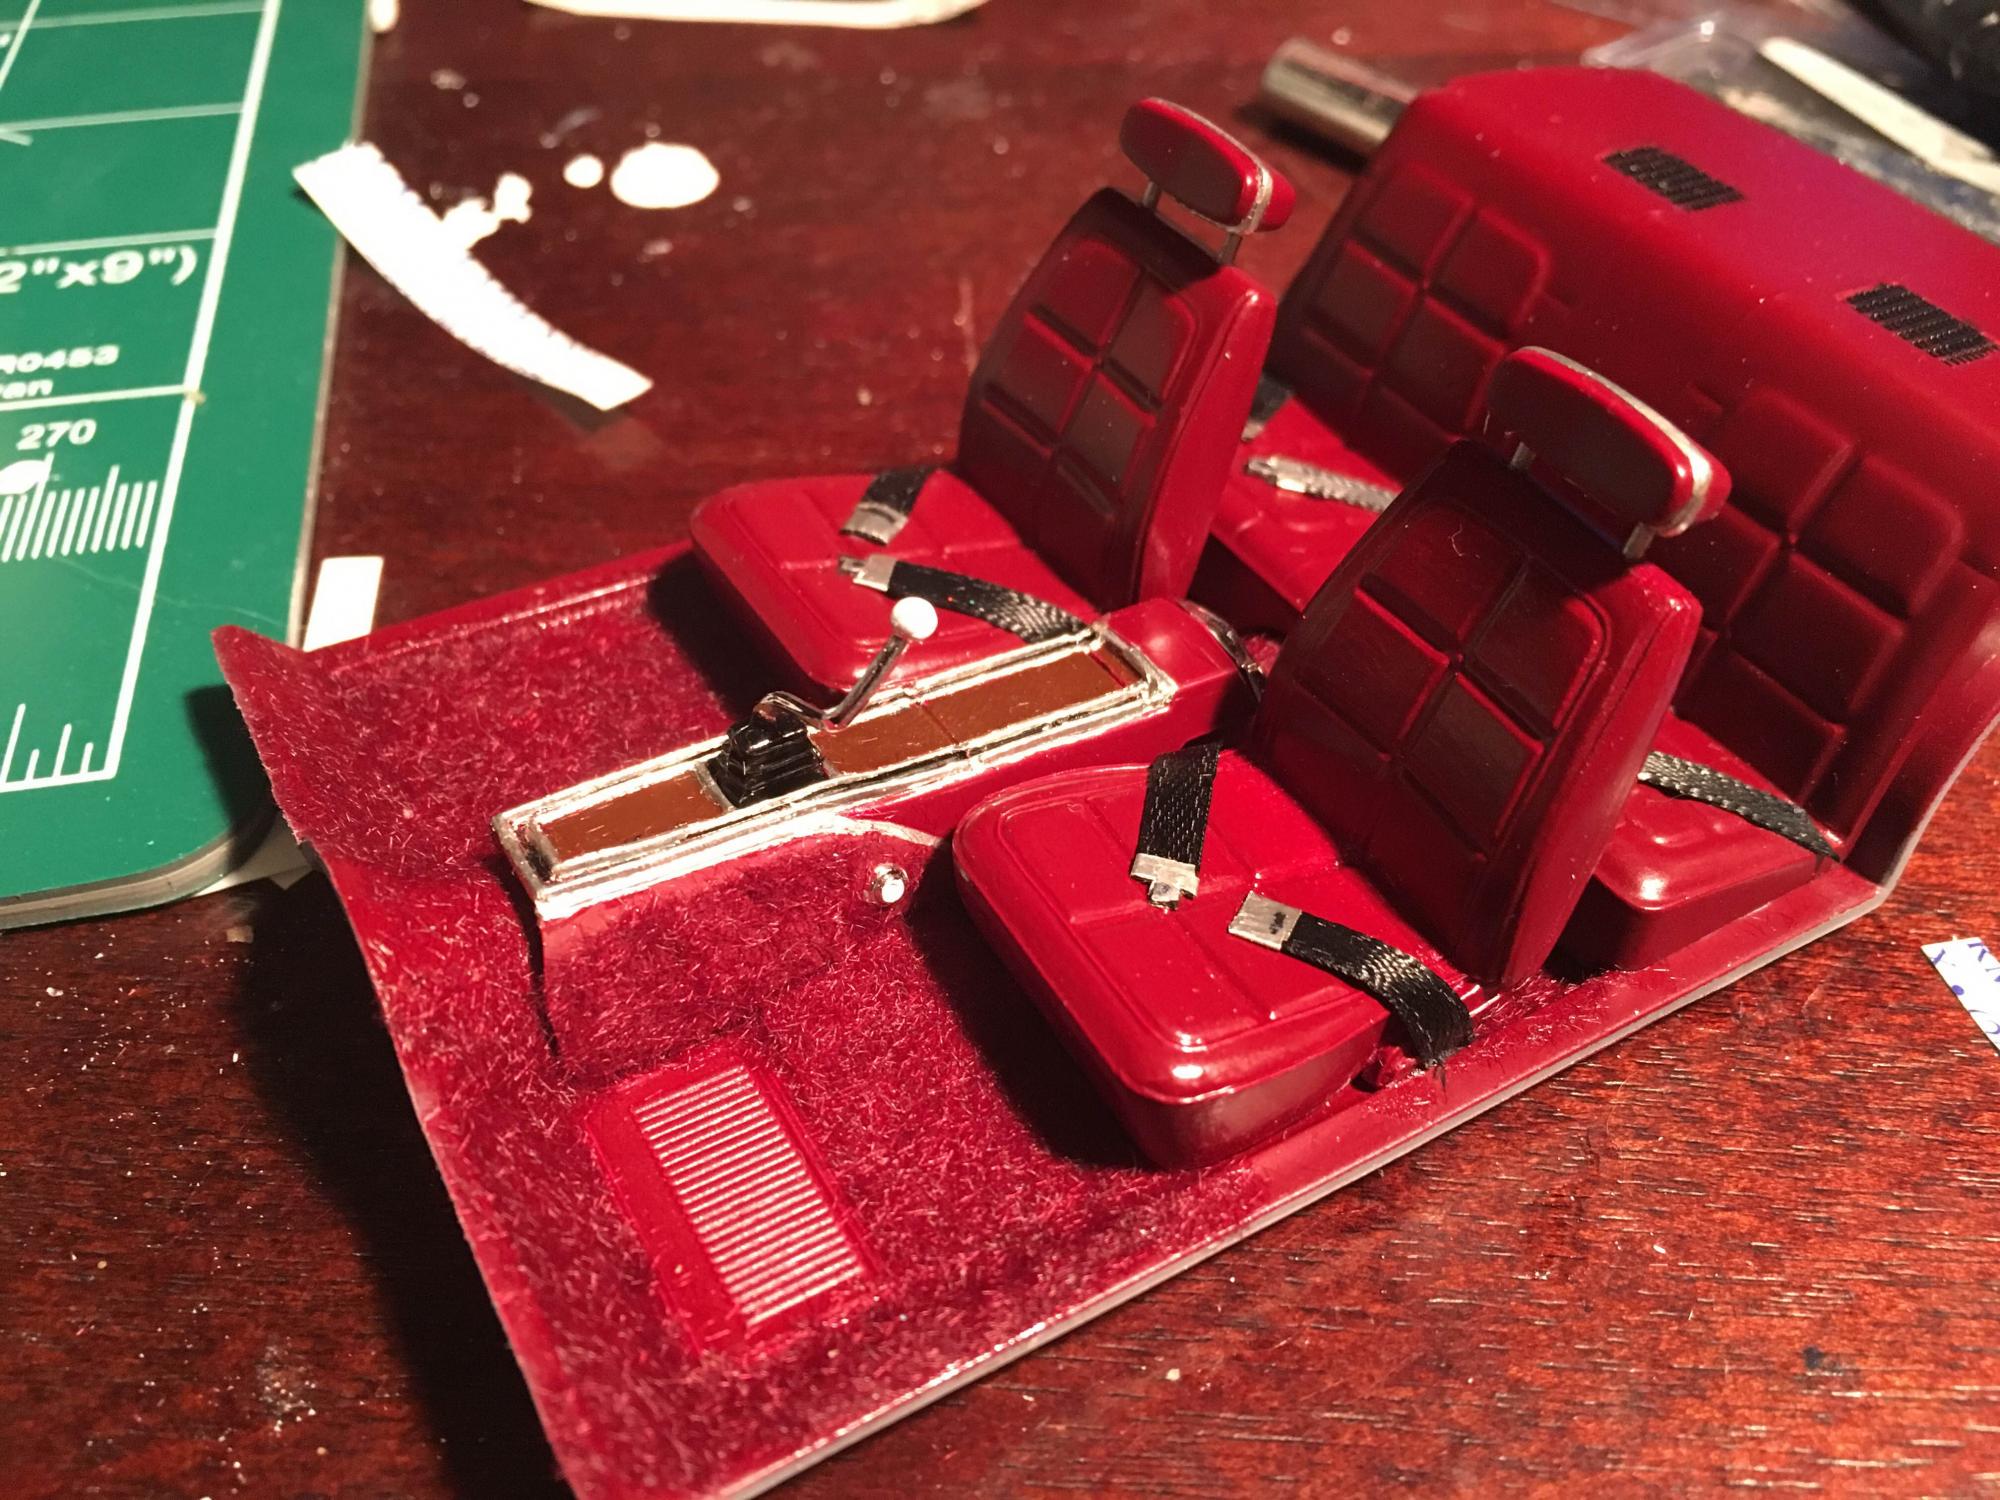
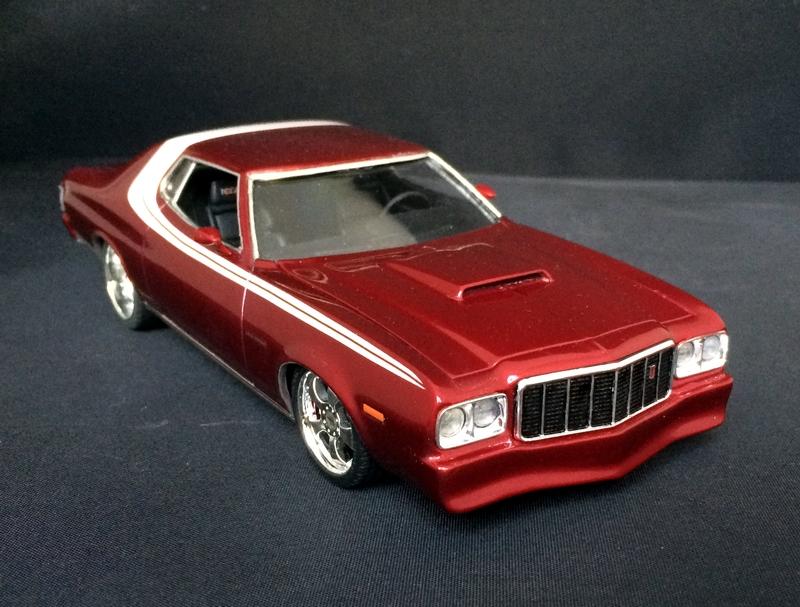
My idea of what a new Striped Tomato might look like if the Starsky and Hutch cop TV show was to come back today. Of course started with the Revell kit, which I will say is an excellent kit, very detailed, little flash, really none, and fitment was excellent throughout the build. I of course made several mods to this build, first was tucking and narrowing the huge front and rear stock bumpers. Added a air-dam effect to the front with plastic and putty. added the Eliminator hood scoop to keep Starsky from sliding across the hood, which of course drove Hutch crazy, you're welcome Hutch... Gave the boys new RECARO seats instead of the cozy bench seat, again you're both welcome... I think... Ha... Did minor engine detail, wires and hoses and basic chassis. Added some different exhaust tips to exit the corners. Stayed with the overall theme but I honestly never liked the look of the huge stripe, it never seemed to fit the lines of the car to me, so redesigned and painted my own. Decided to keep the chrome look, but shaved door handles. Paint is Duplicolor Electric Current Metallic Pearl Red with Tamiya Pearl White for the stripe and lot's of Testors Wet Look Clear cut and polished several times. Updated the wheels to a newer version "5-slot" style, and custom deep-dished the rears for a staggered resto-mod look, and gave them huge disc brakes. Had a lot of fun building this one, thanks for looking
-
Hello Everyone, this is my Revell Ferrari California OpenTop, first one this 2016...Revell paints, funny kit, hope you like it! thanks for watching!!
-
....just wondered if the Revel Model King BAD NOOZE 53/54 Chevy gasser issued in 2006,,,,,then reissued again in 2013 have any differences in kit mold quality, chrome, basically anything........I ask because I may buy the lastest one, but seem to recall checking out a 2006 issue a few years ago and not thinking the overall quality of the kit was very nice, being quite rough generally...... any thoughts here from our members would be welcomed....thanks, the Ace...


.jpg.09da9f3bdd53d5da88fdfcc25d59bb2d.jpg)
.jpg.5256e49494001418f0c4f3615fb9937e.jpg)
.jpg.0102054160bff33c8690d2492989583f.jpg)
.jpg.316f72d53c5548c19c873d578ab5600c.jpg)


.jpg.114d3f3e45322af422ba2da4c8ab3f78.jpg)


.jpg.de44cf9adde4dbf07ed36339b072de87.jpg)

.jpg.cb3cedfb01304422aba553d83c878974.jpg)
.jpg.5be90f8252ccff7e86adc032efc7988d.jpg)
.jpg.f6778fee6b92acf89a3aa4d18876caa7.jpg)

.jpg.2503520cb7ff1ee60af2fff52d168758.jpg)