Search the Community
Showing results for tags 'SS'.
-
I see (in someone's avatar...you know who you are ) the 1/25 Lindberg '66 Chevelle Super Sport kit is about to be reissued very soon, so until Round2 puts something up on their 'site, super-hobby has some very shots of the included parts from the last go 'round: http://www.super-hobby.com/products/1966-Chevy-Chevelle-Super-Sport.html IIRC this one one of Lindberg best offerings during their brief renaissance back in the '90s, so I'm looking forward to seeing how Round2 packages this kit this time around.
-
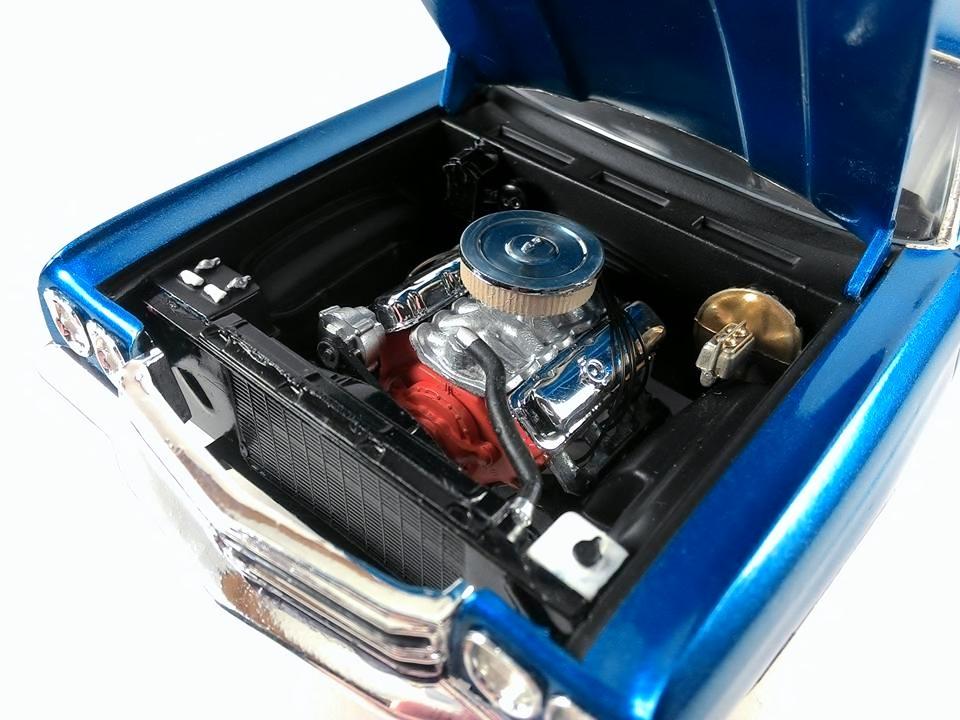
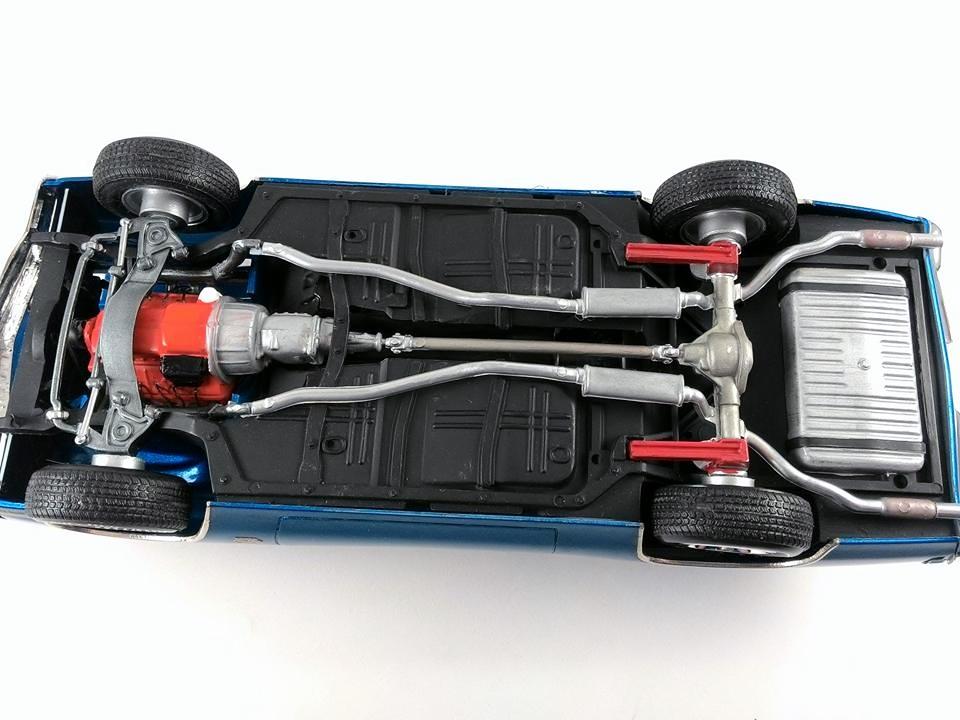
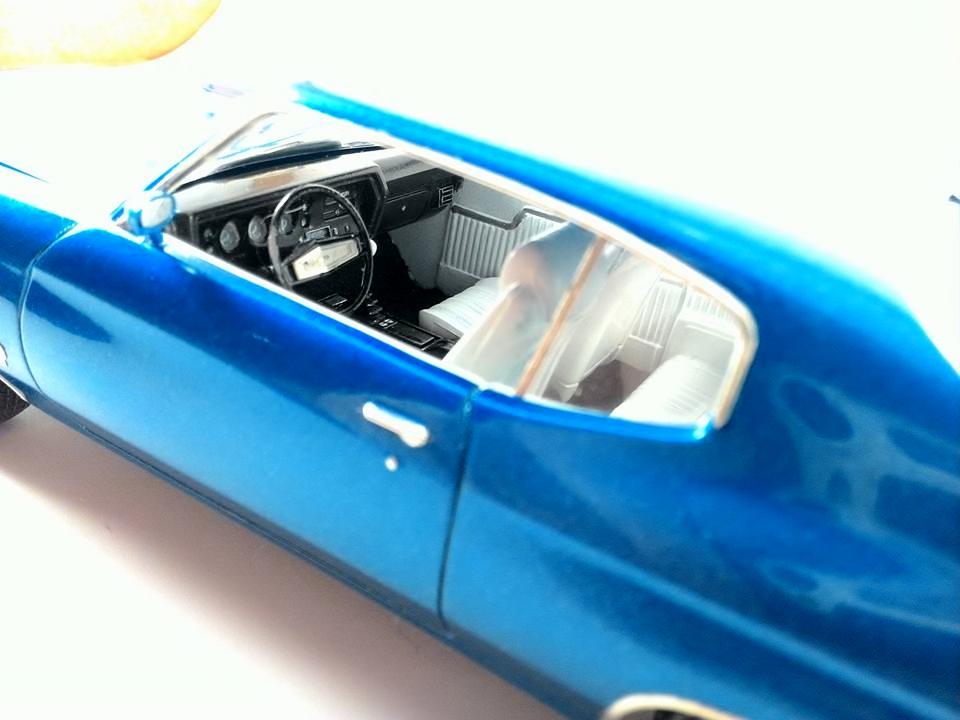
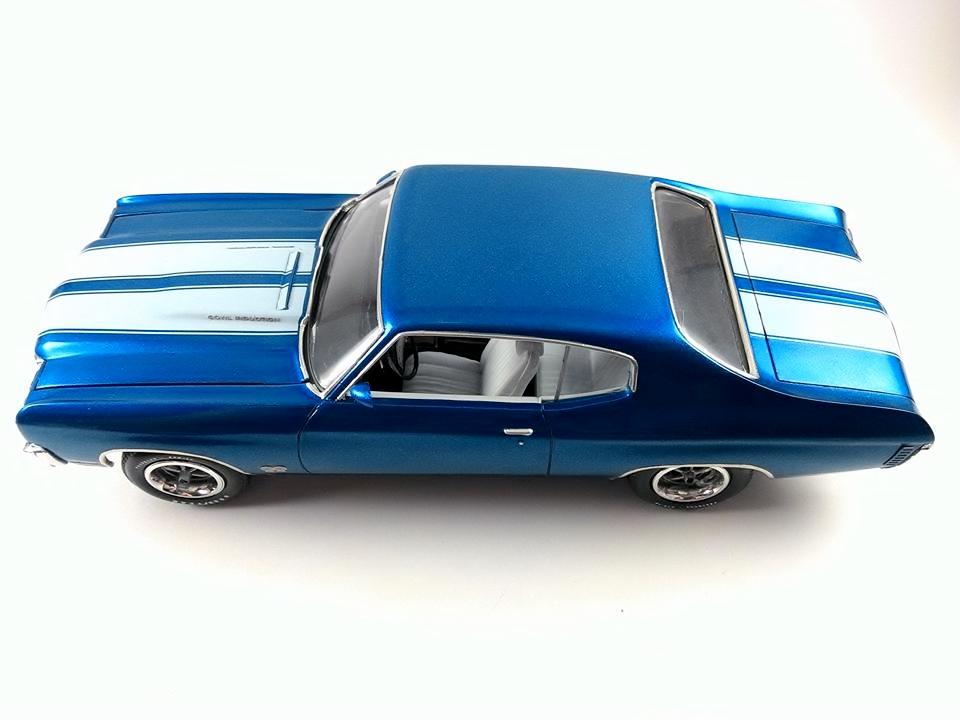
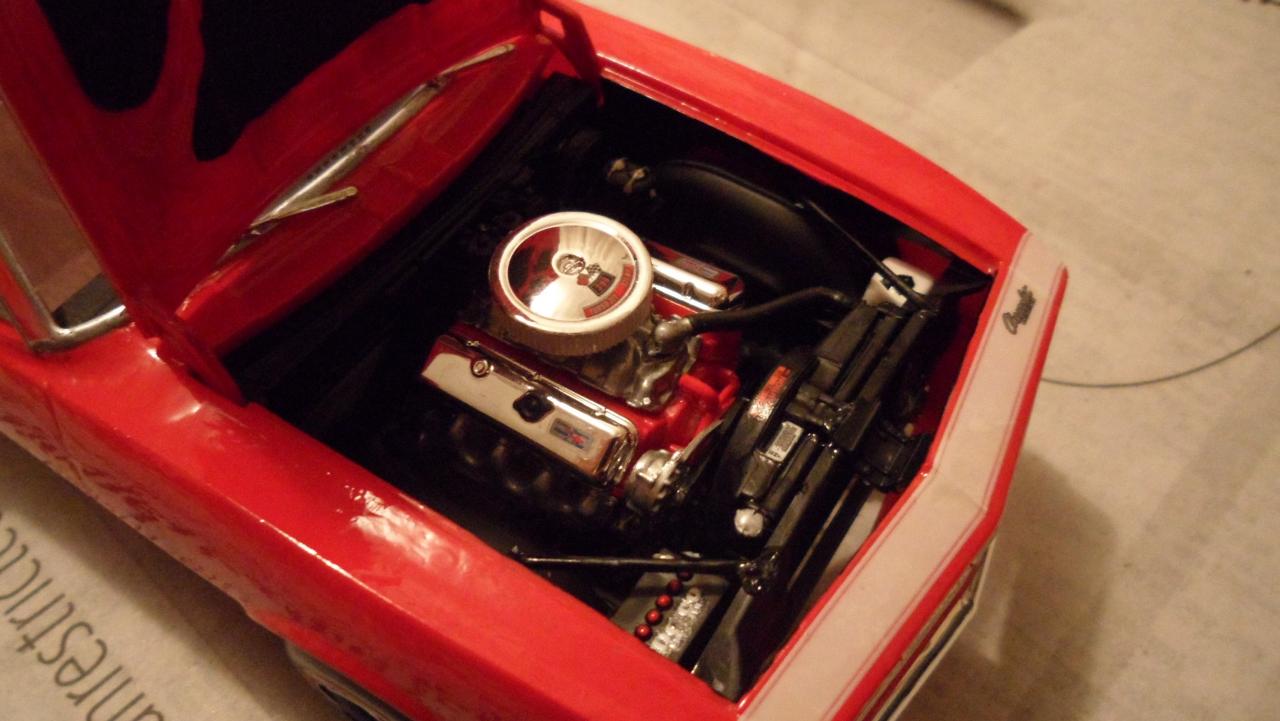
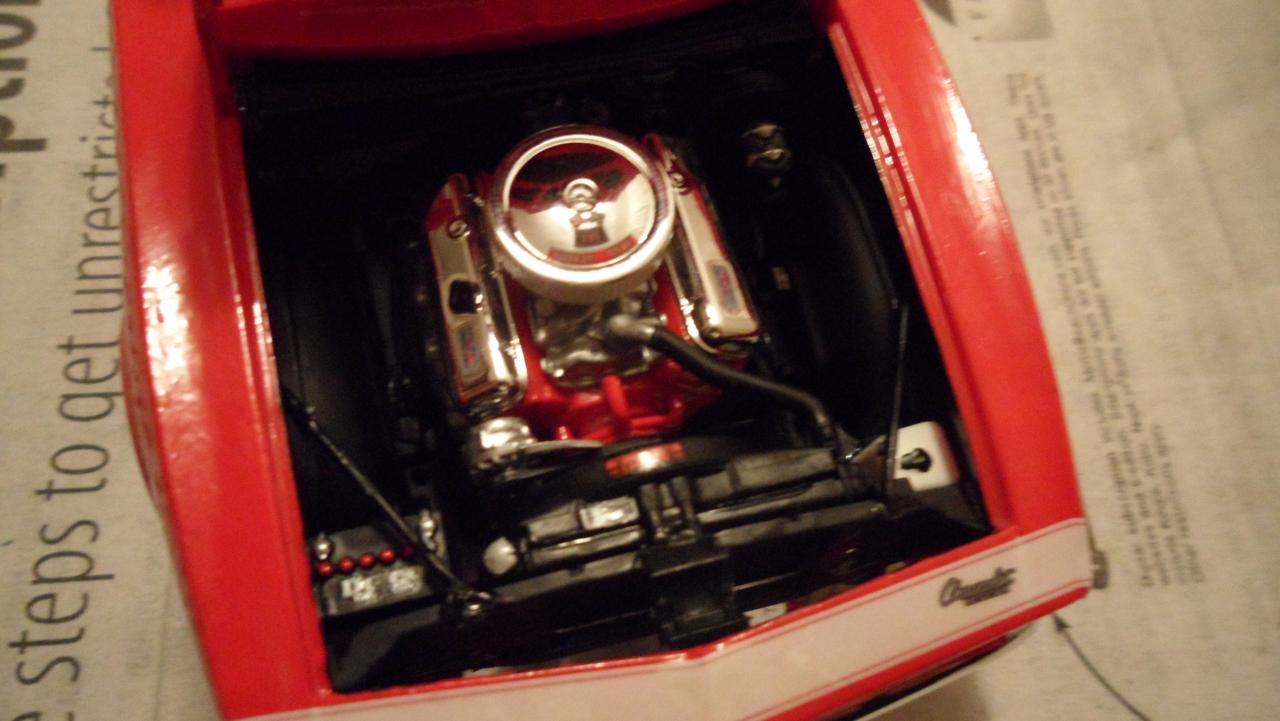
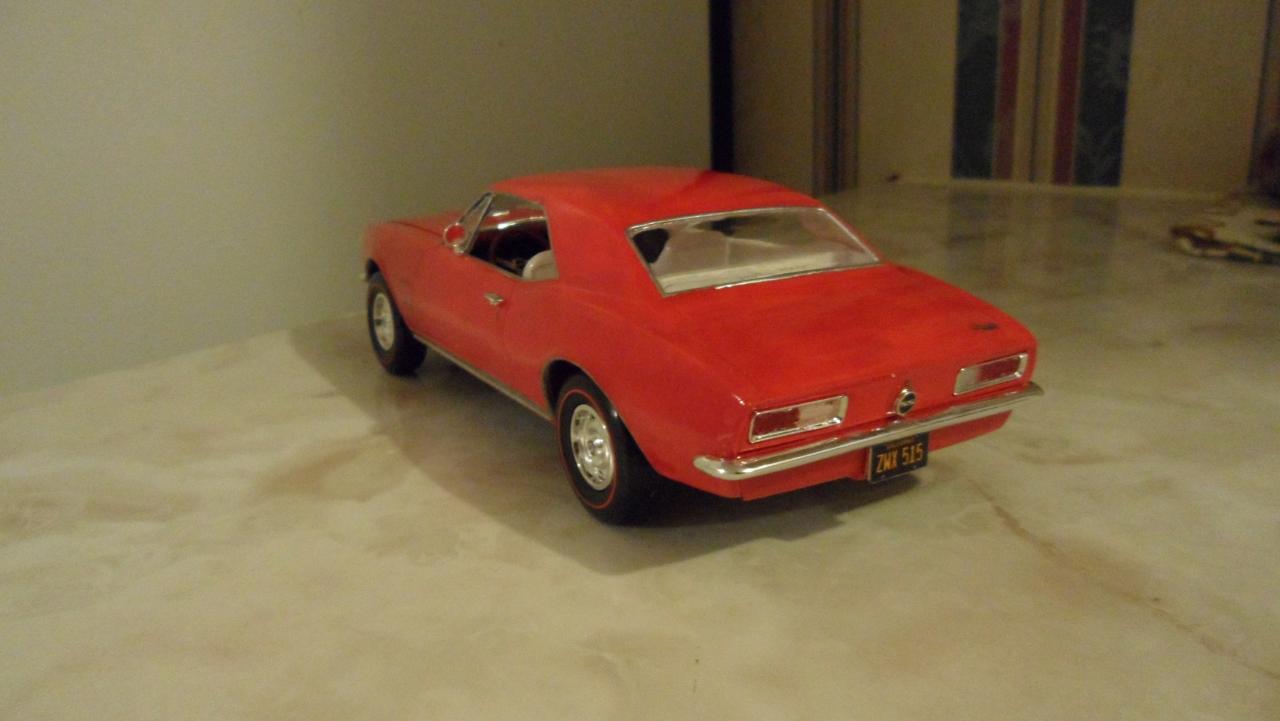
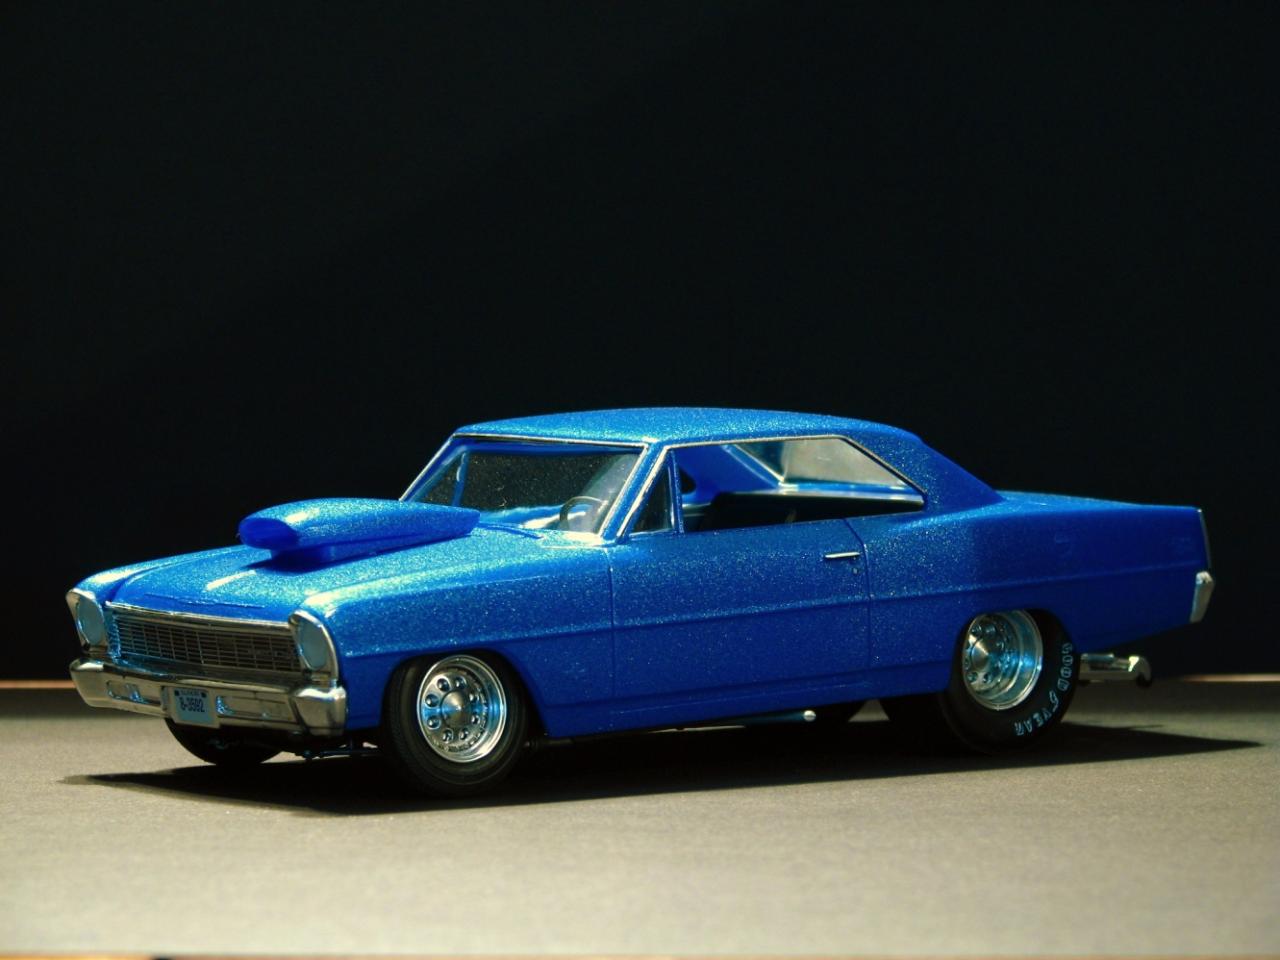
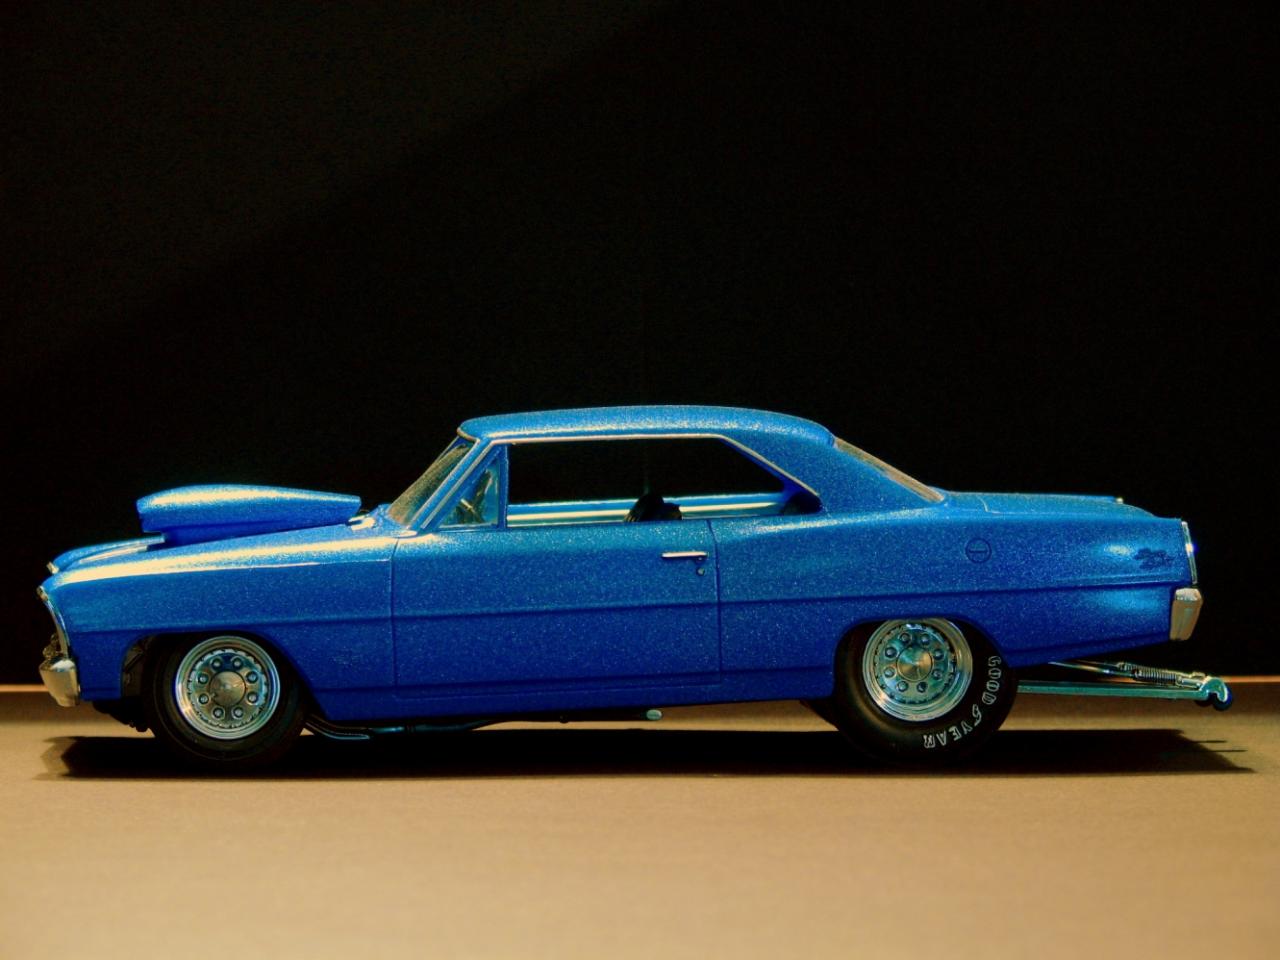
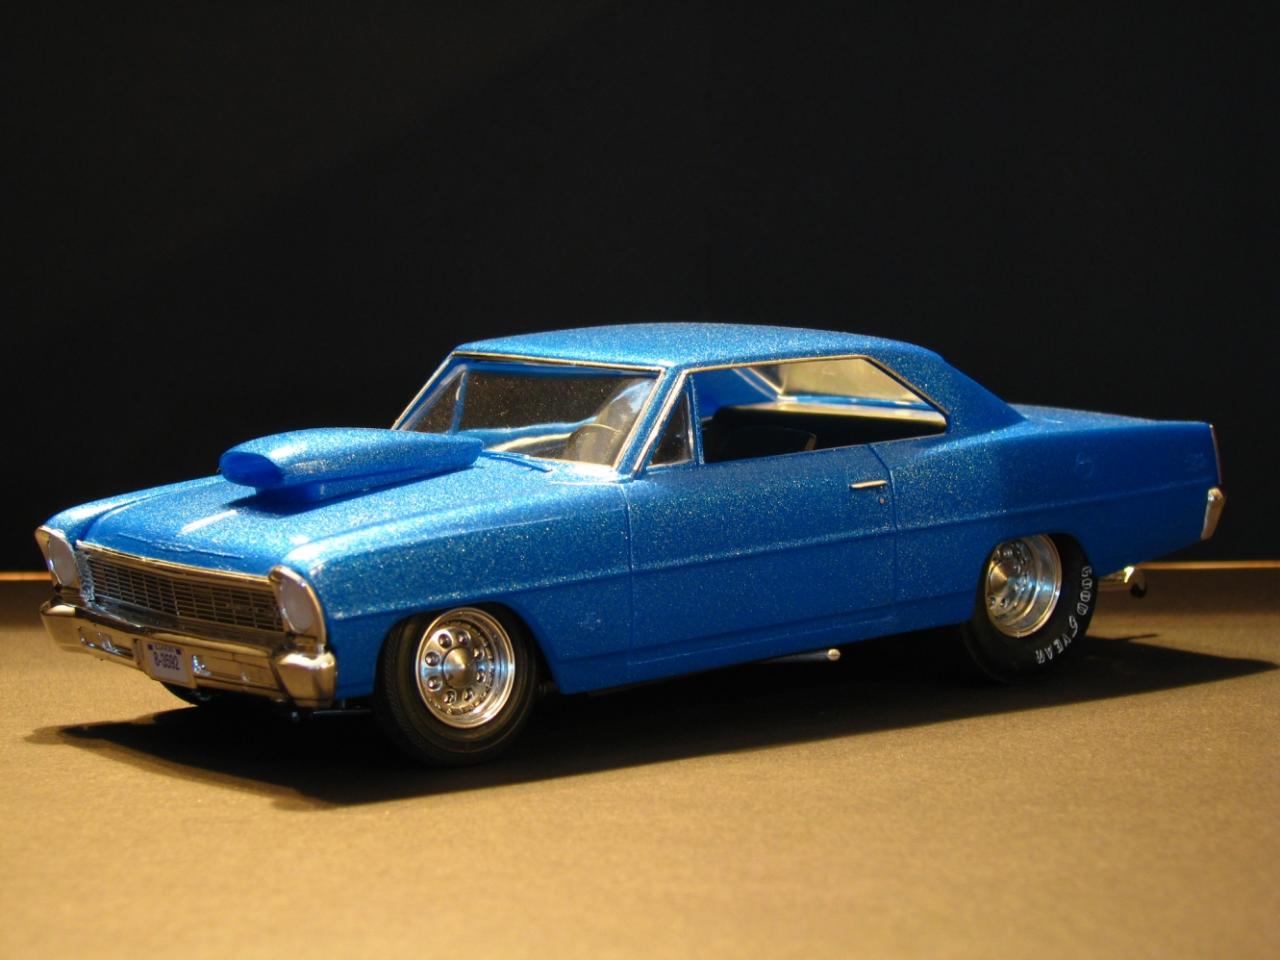
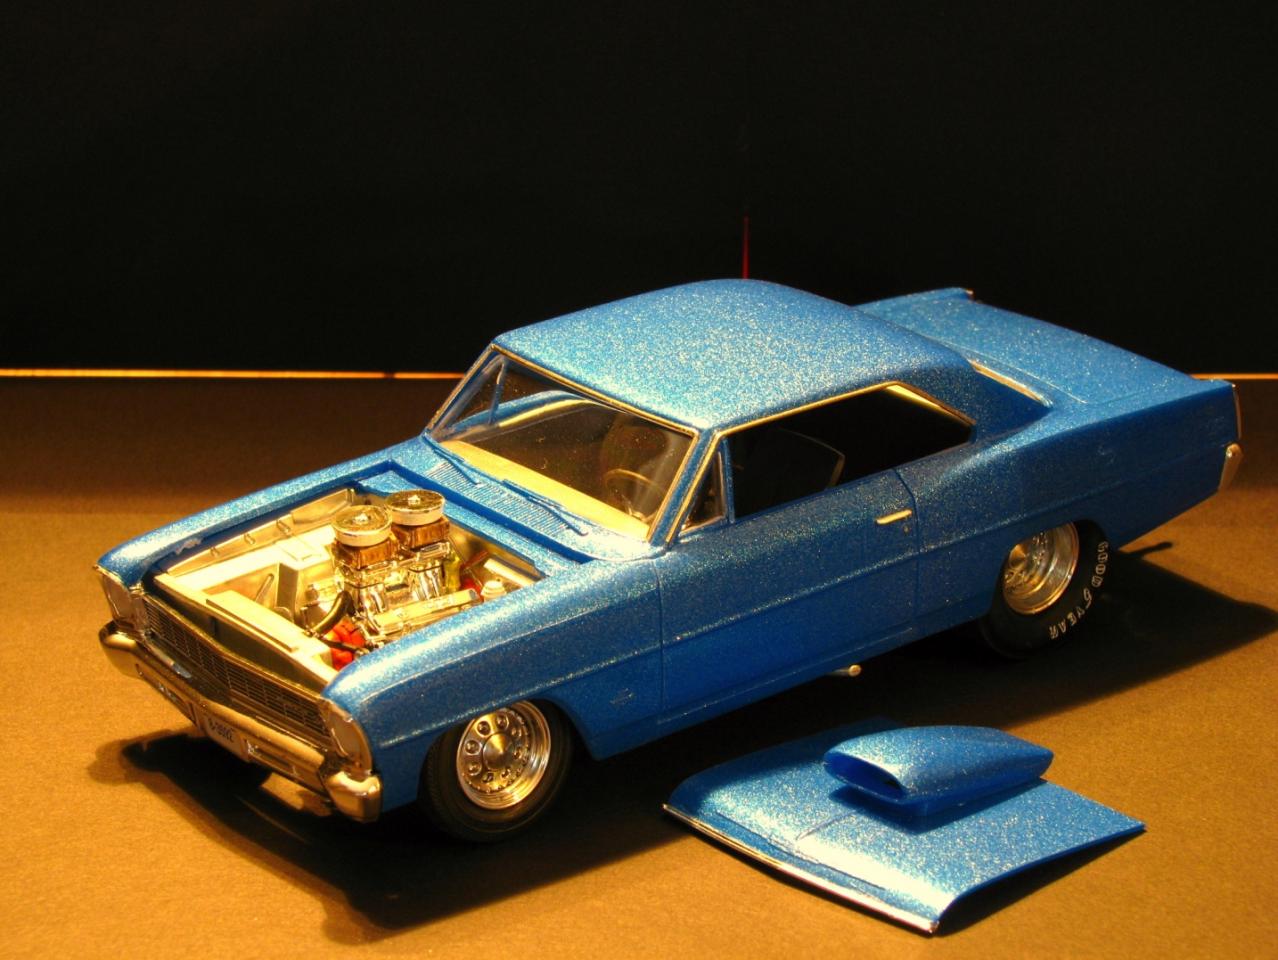
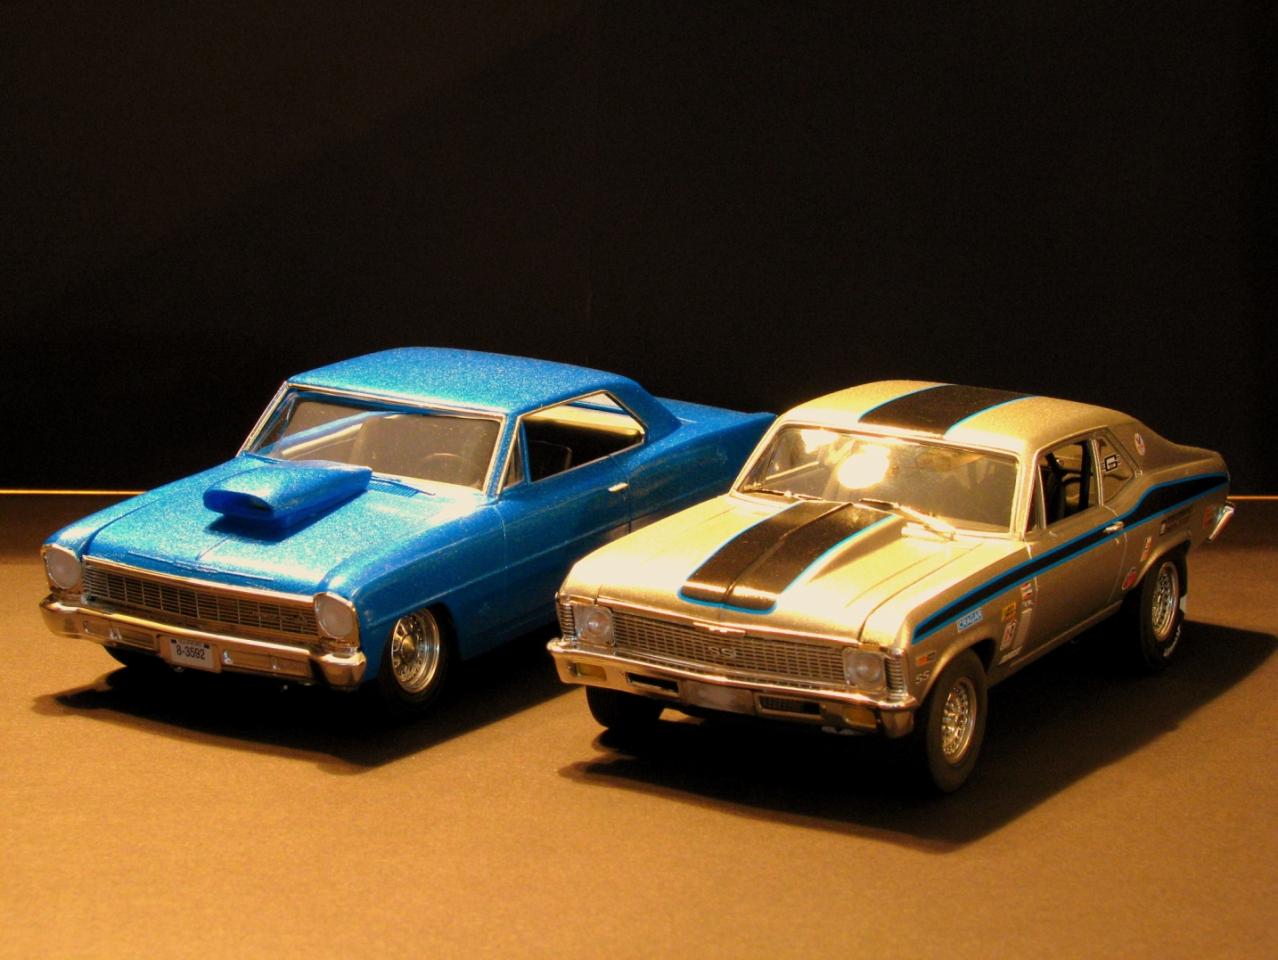
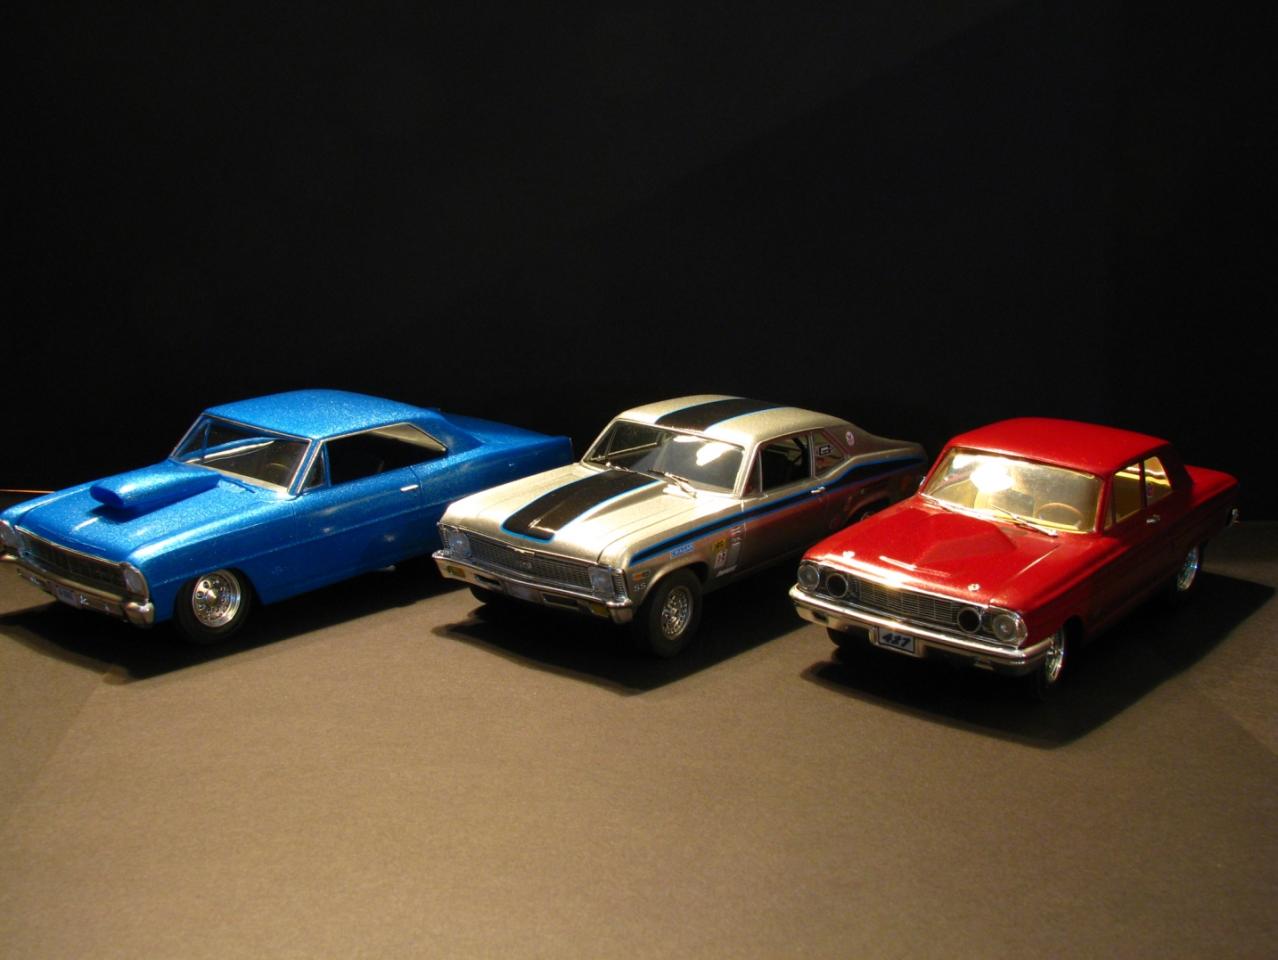
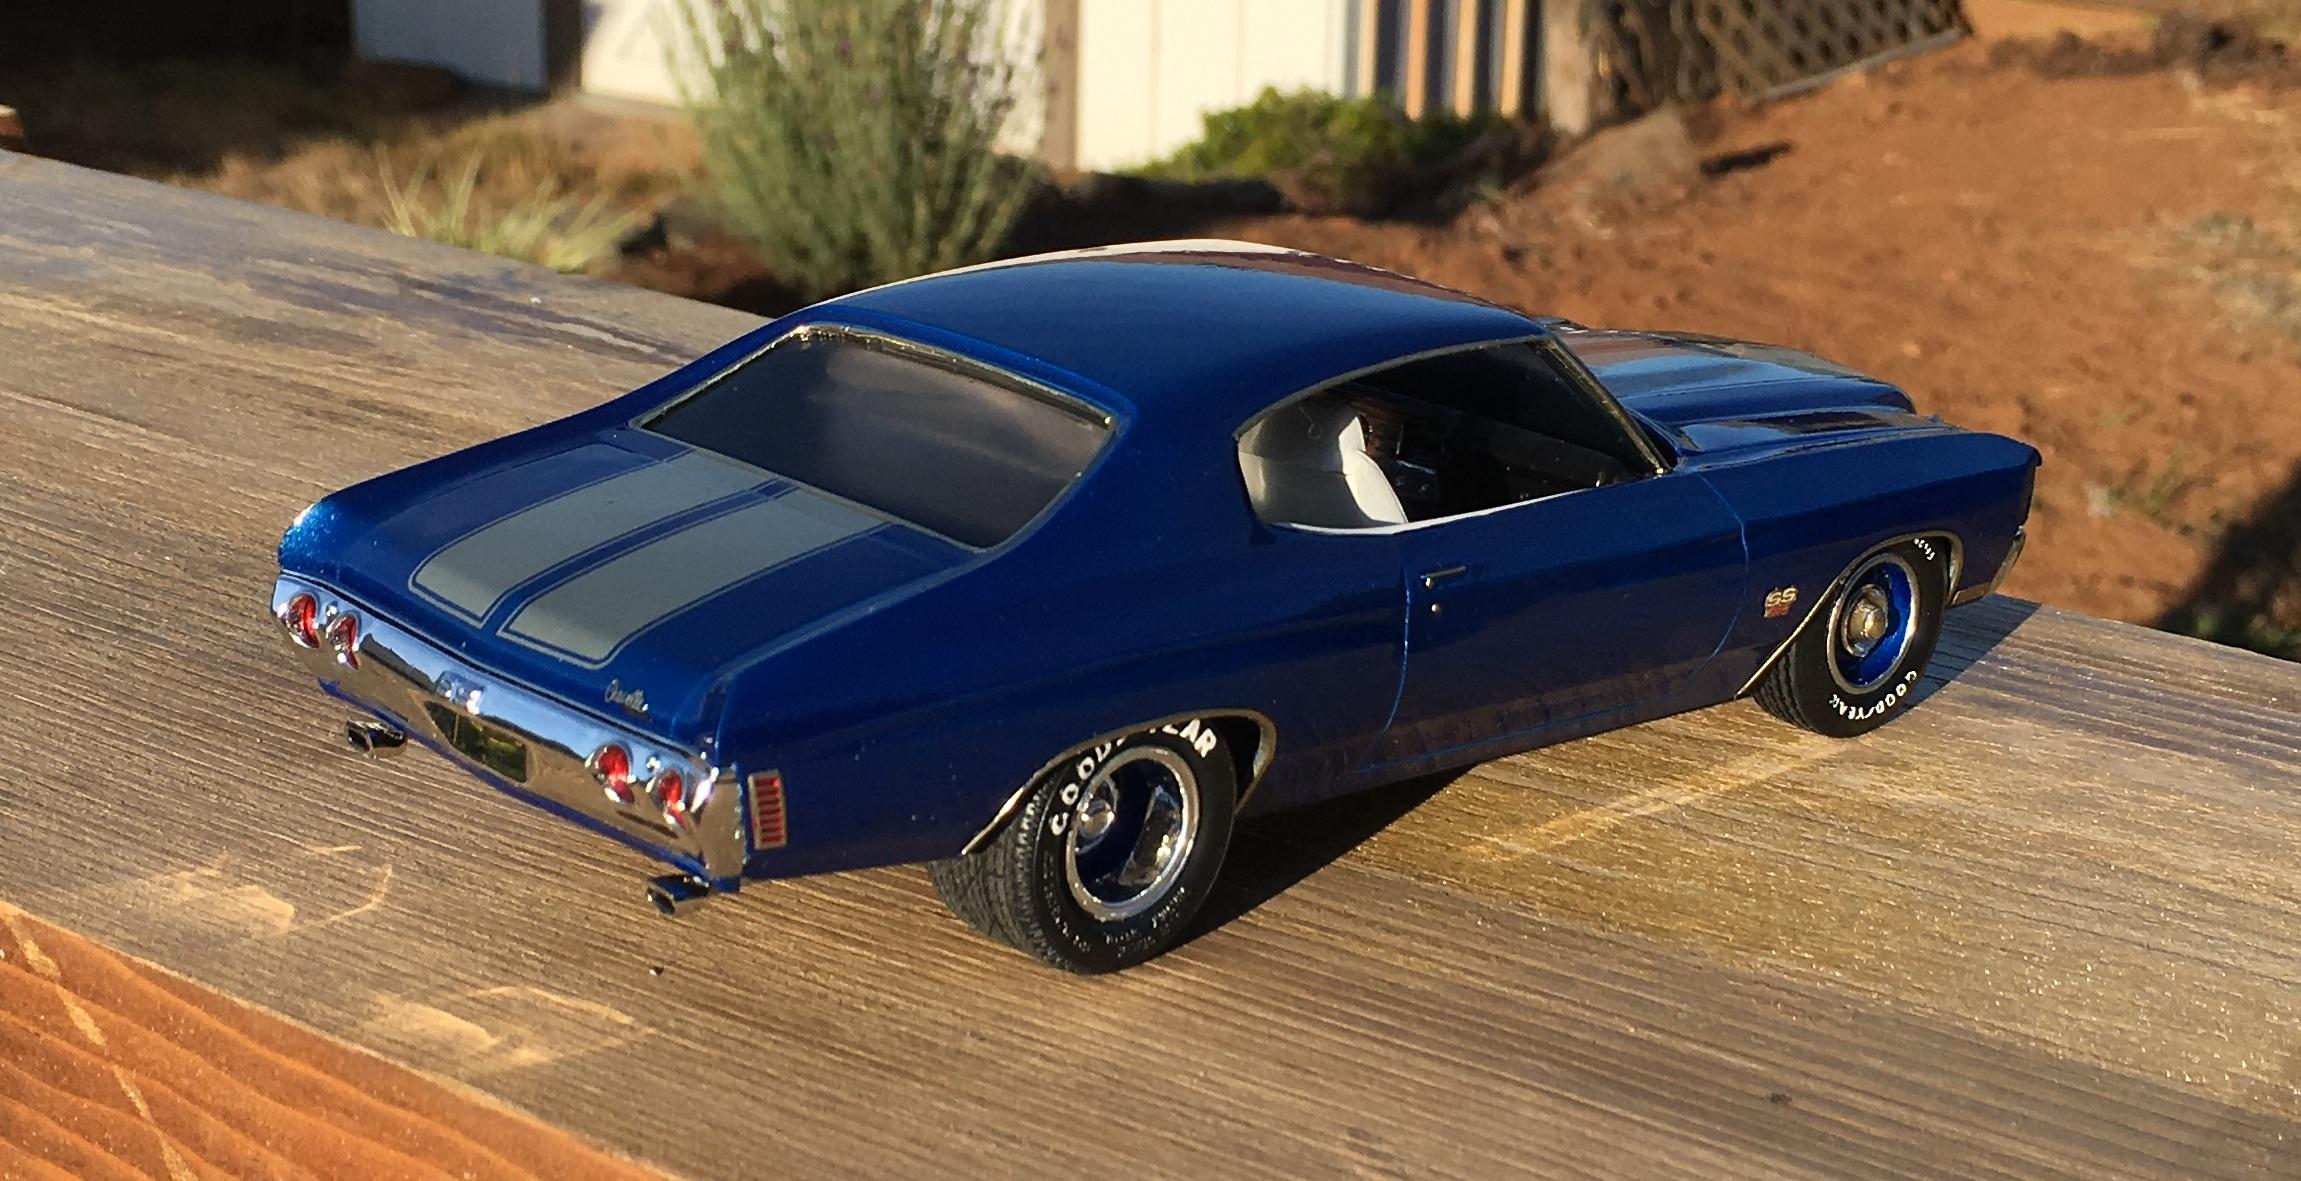
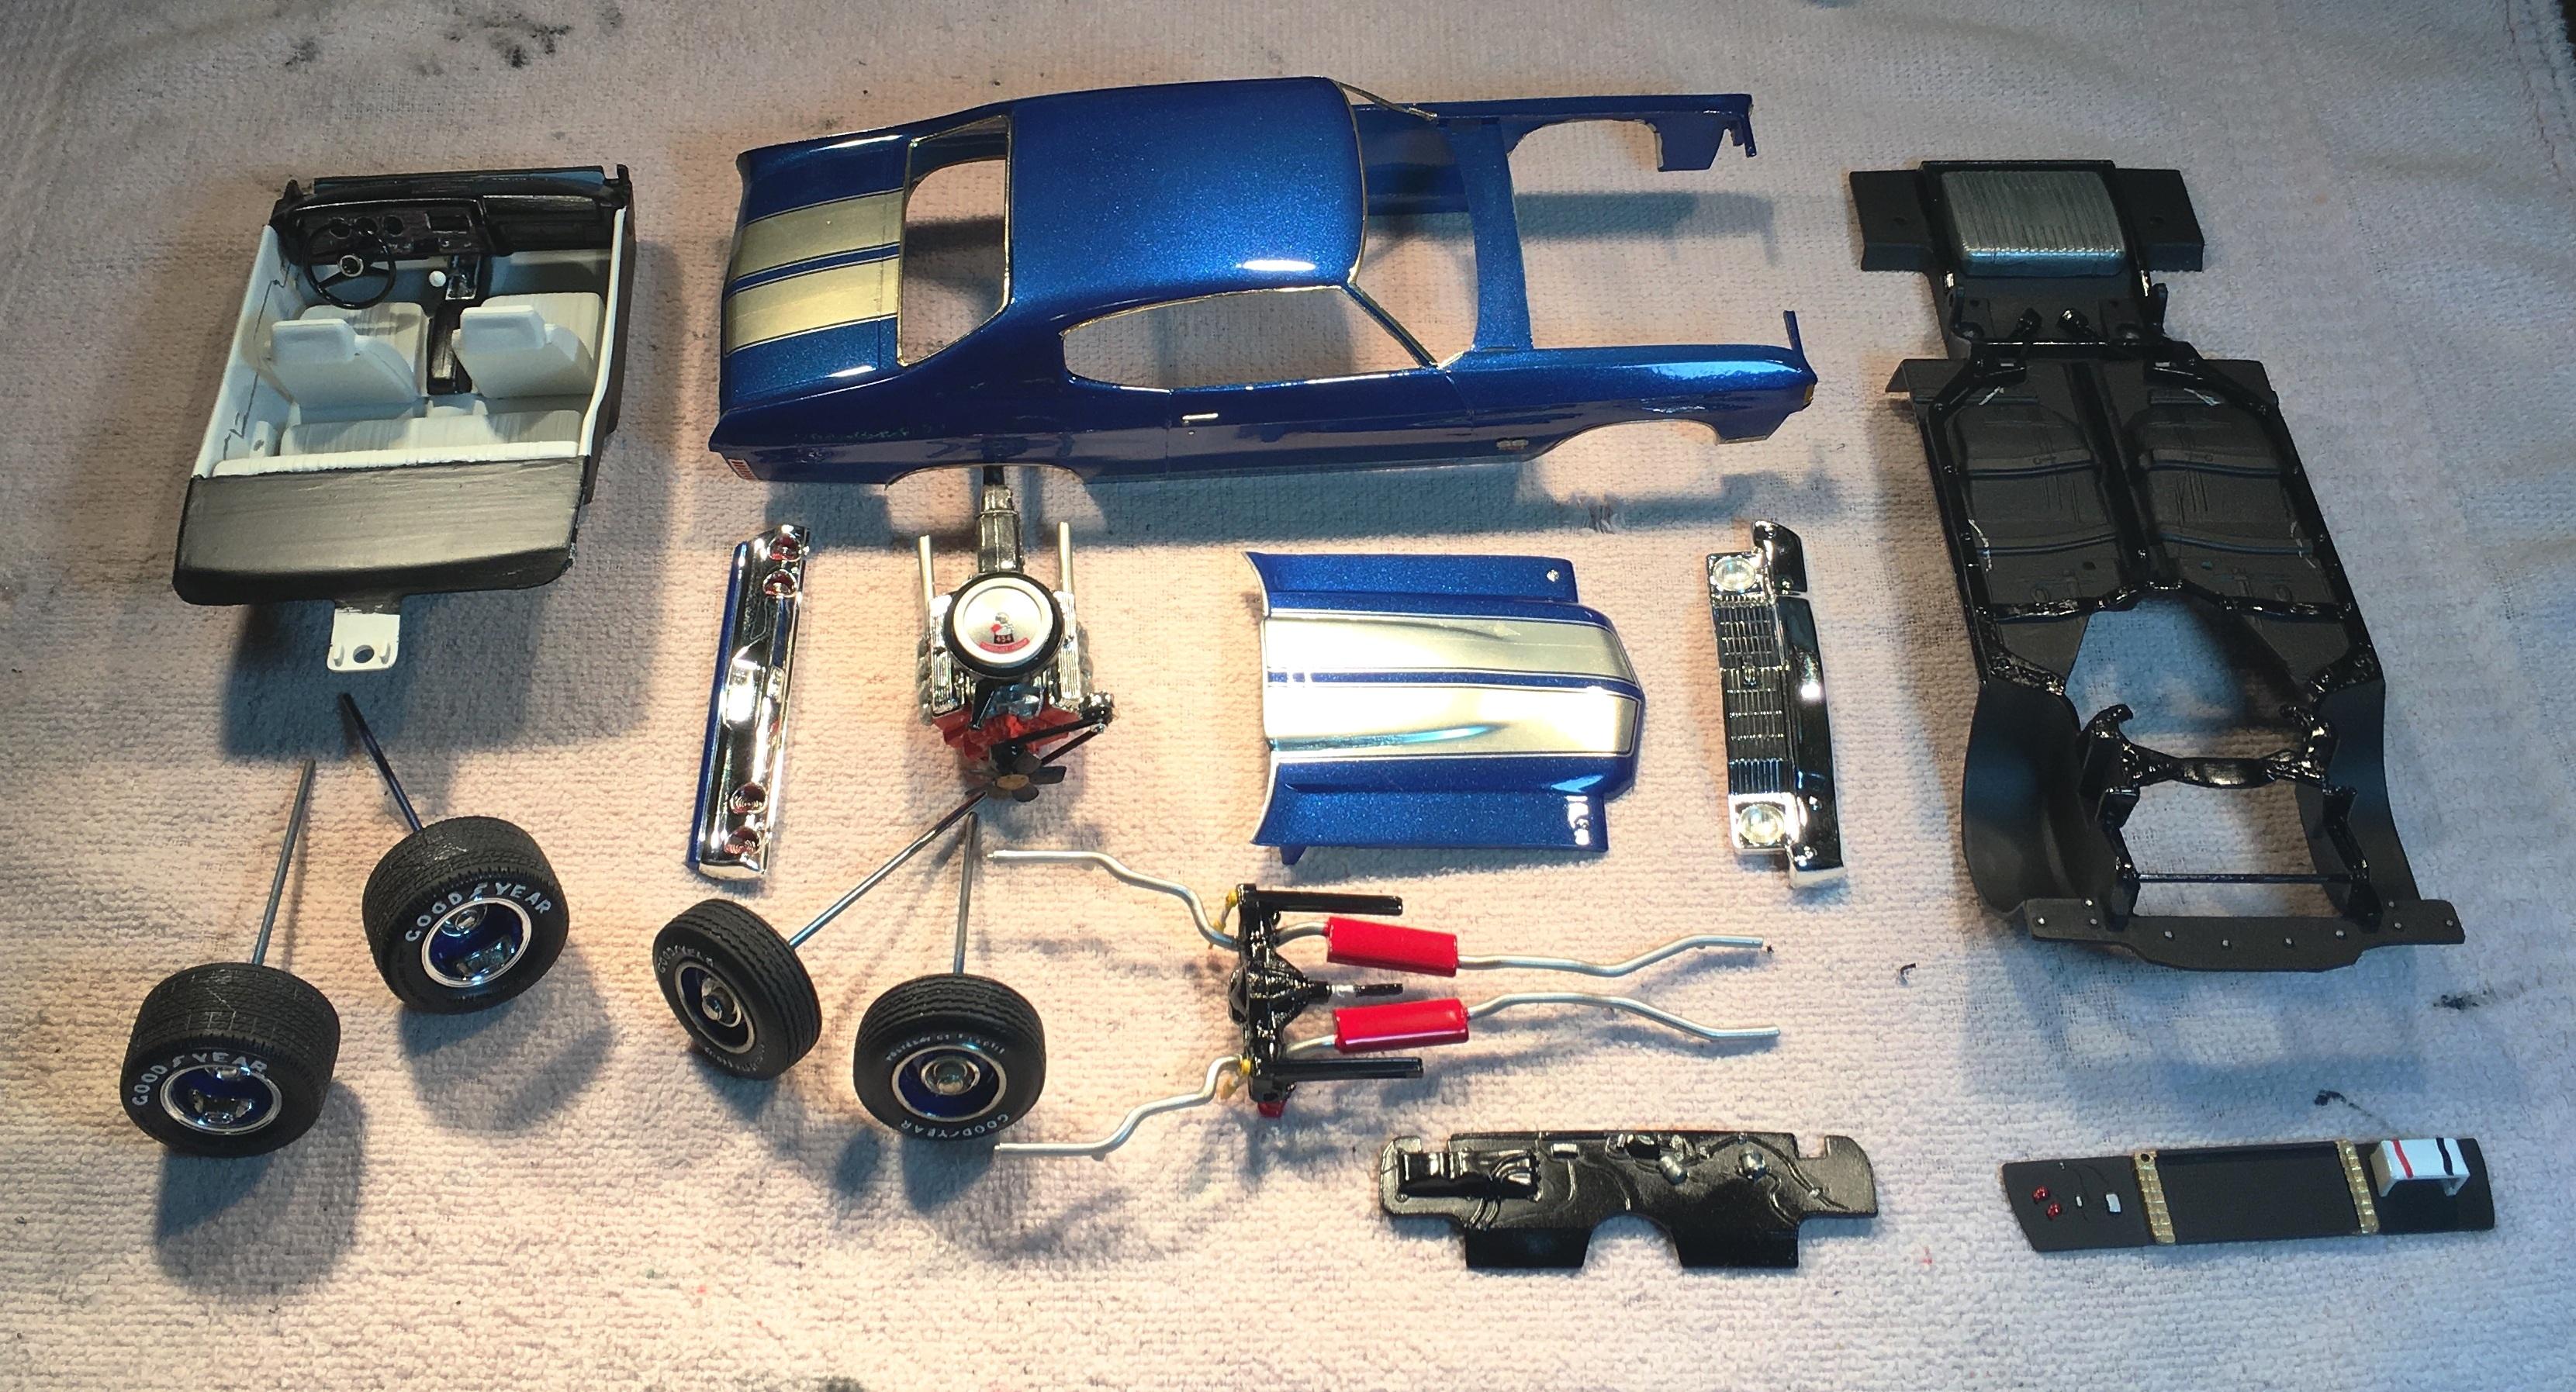
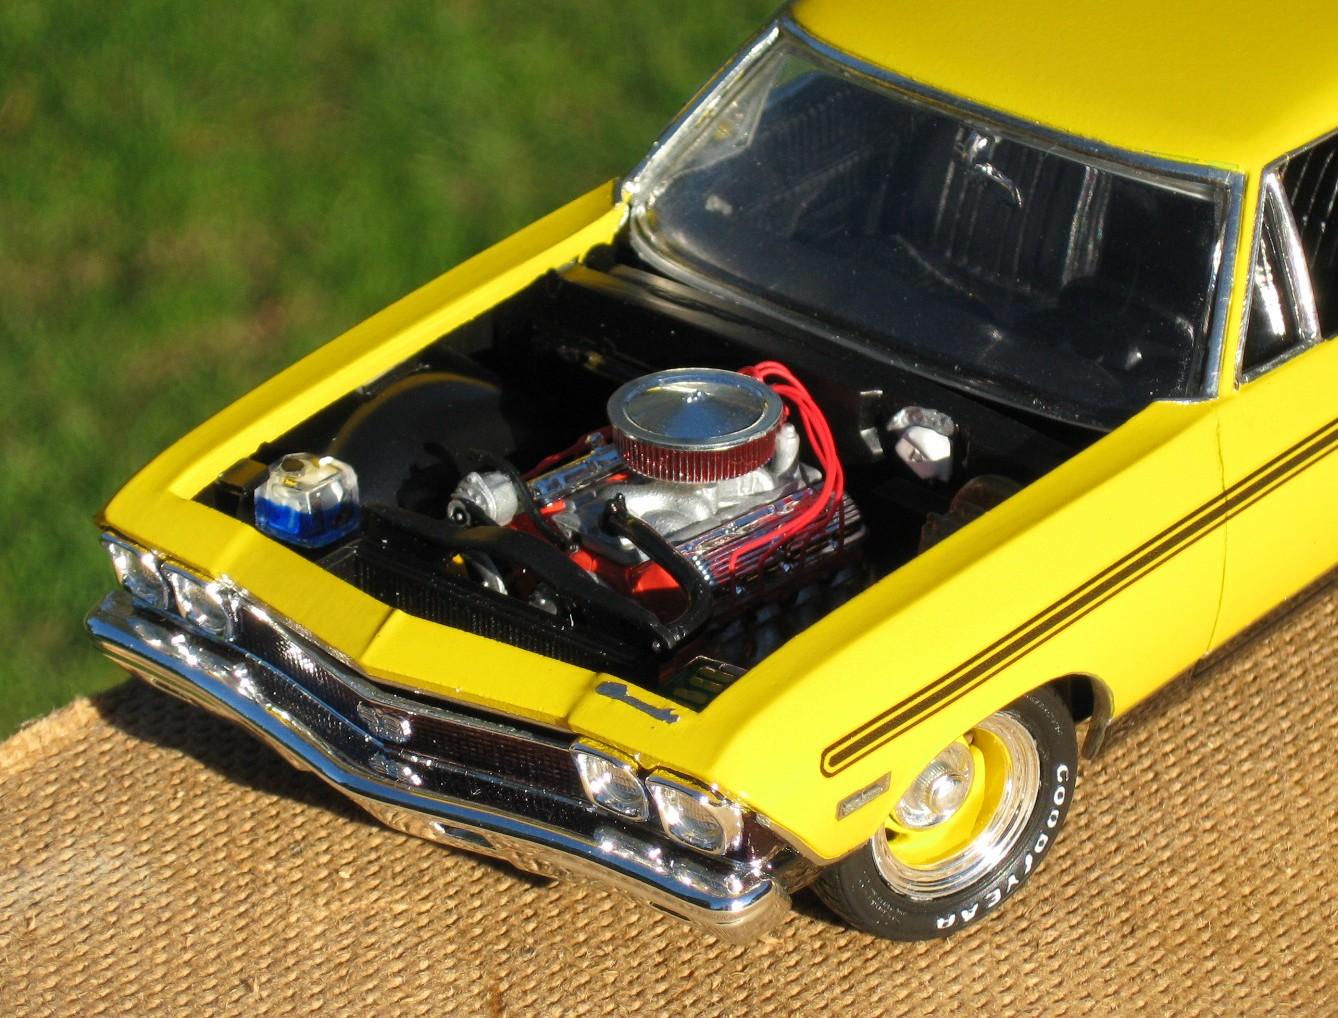
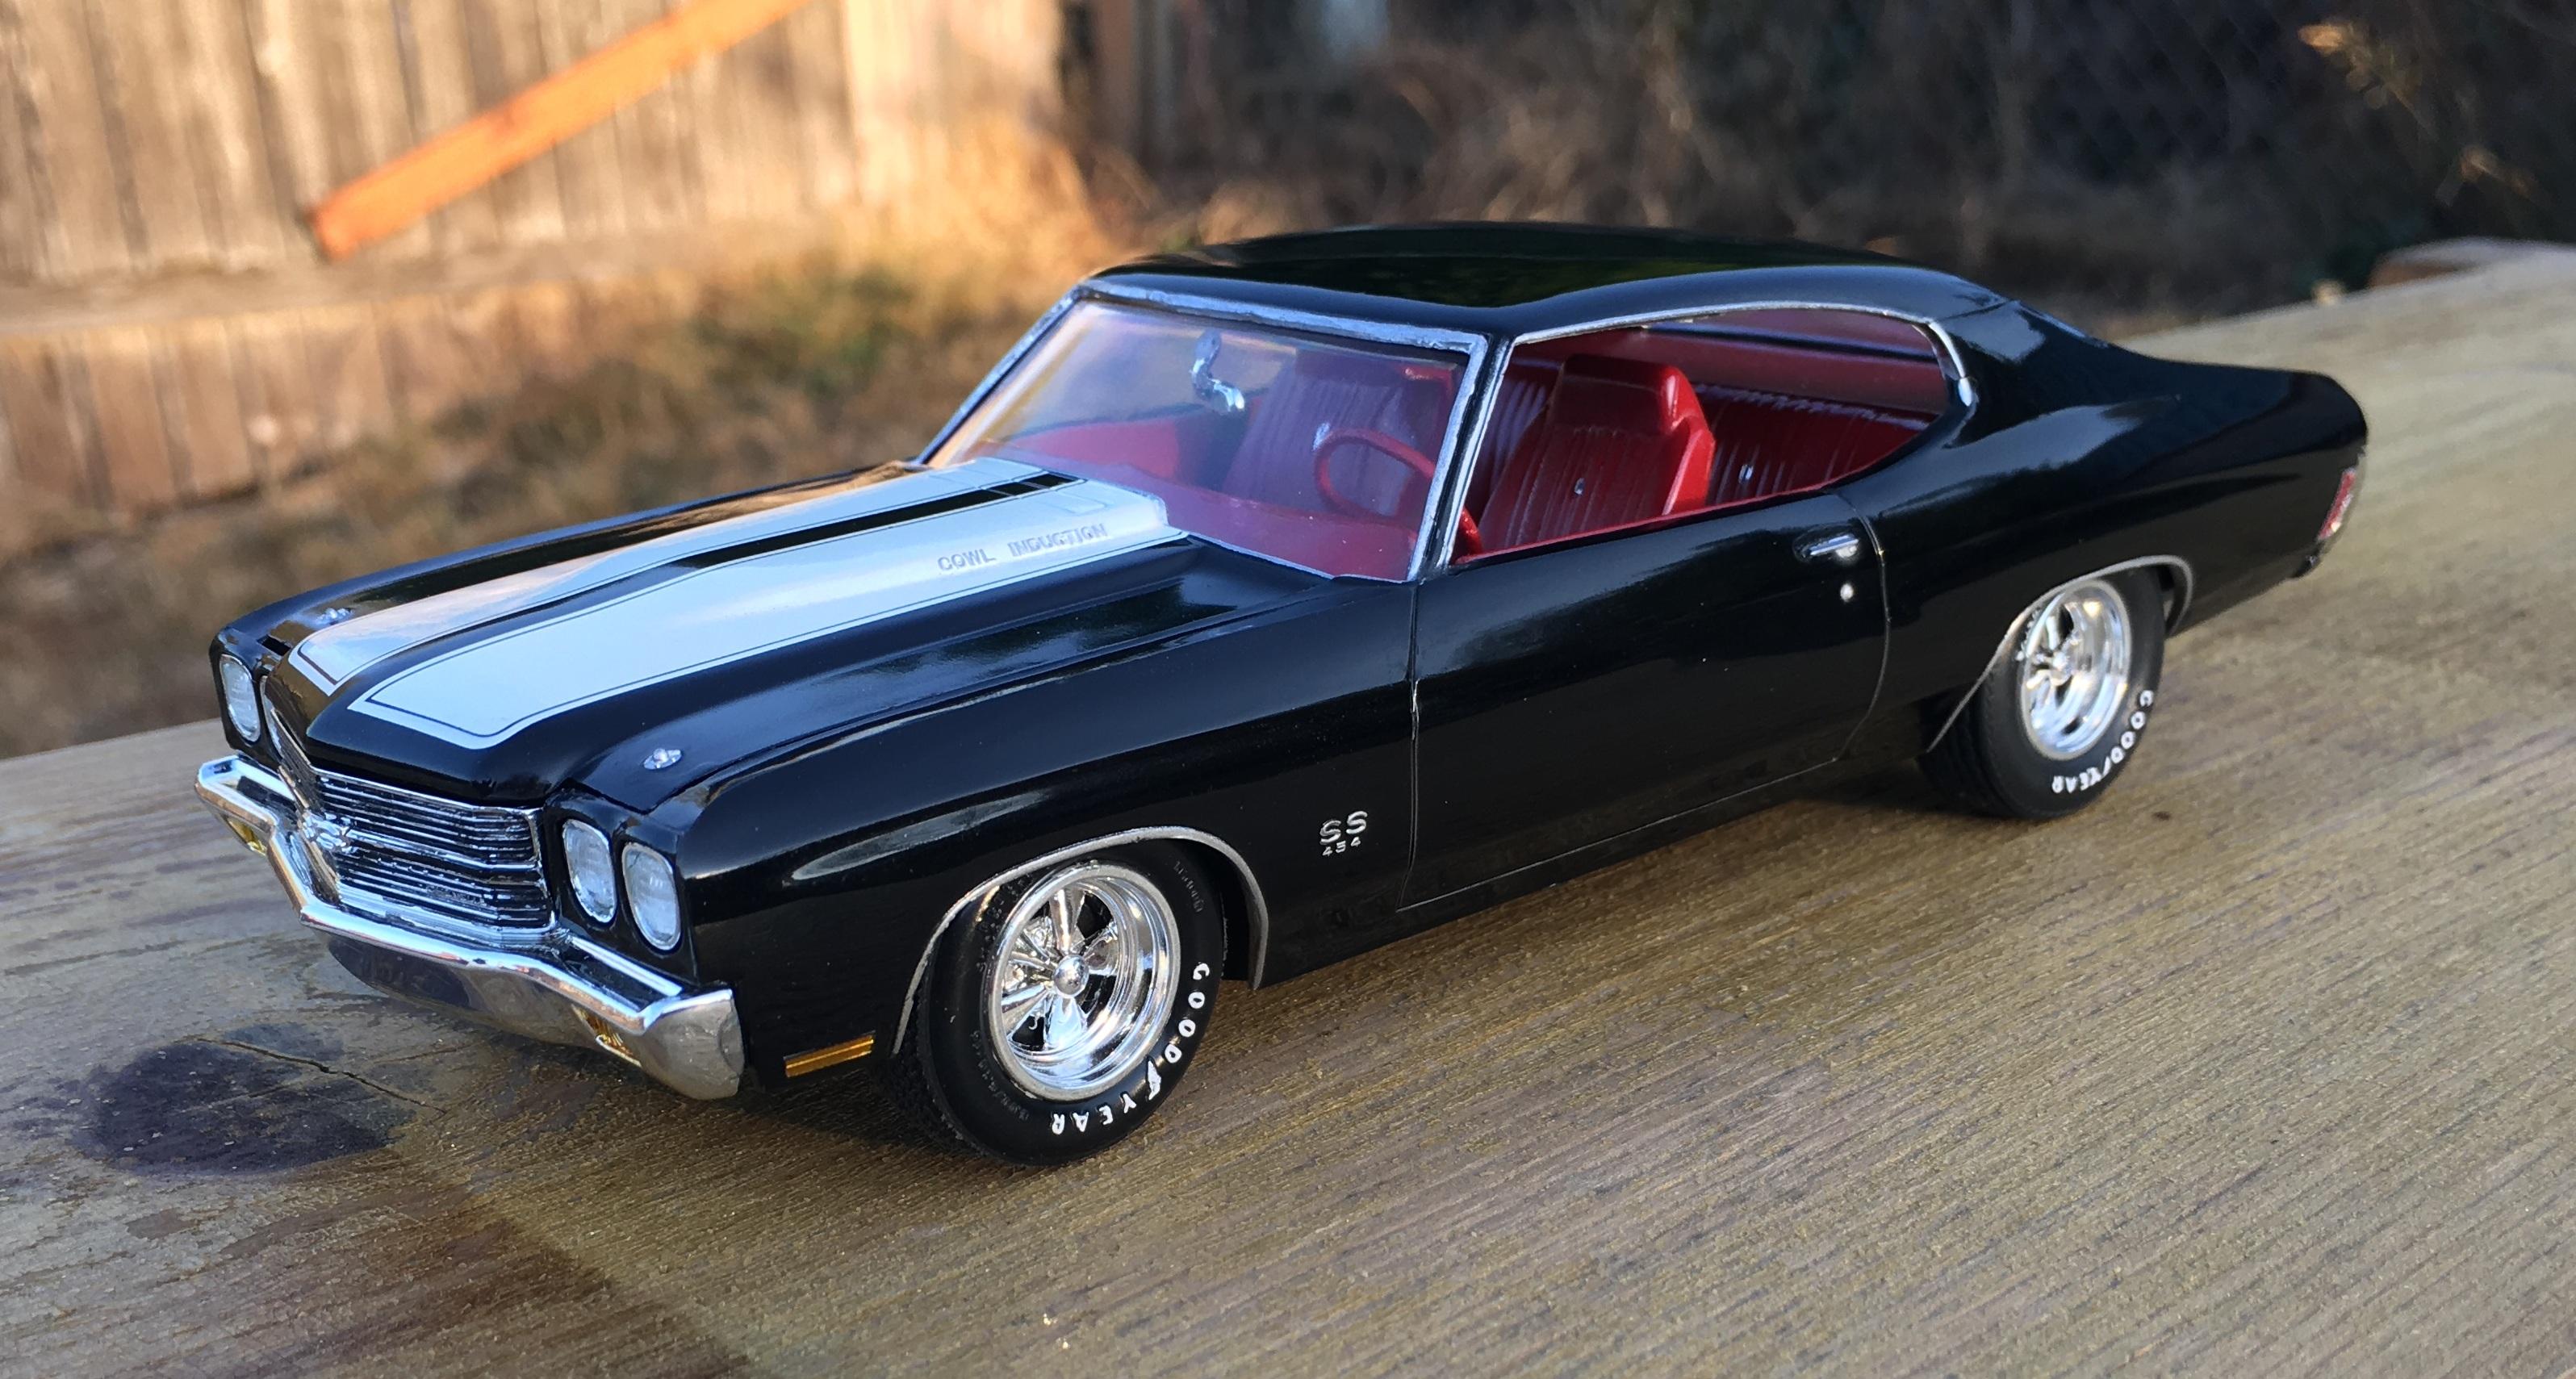
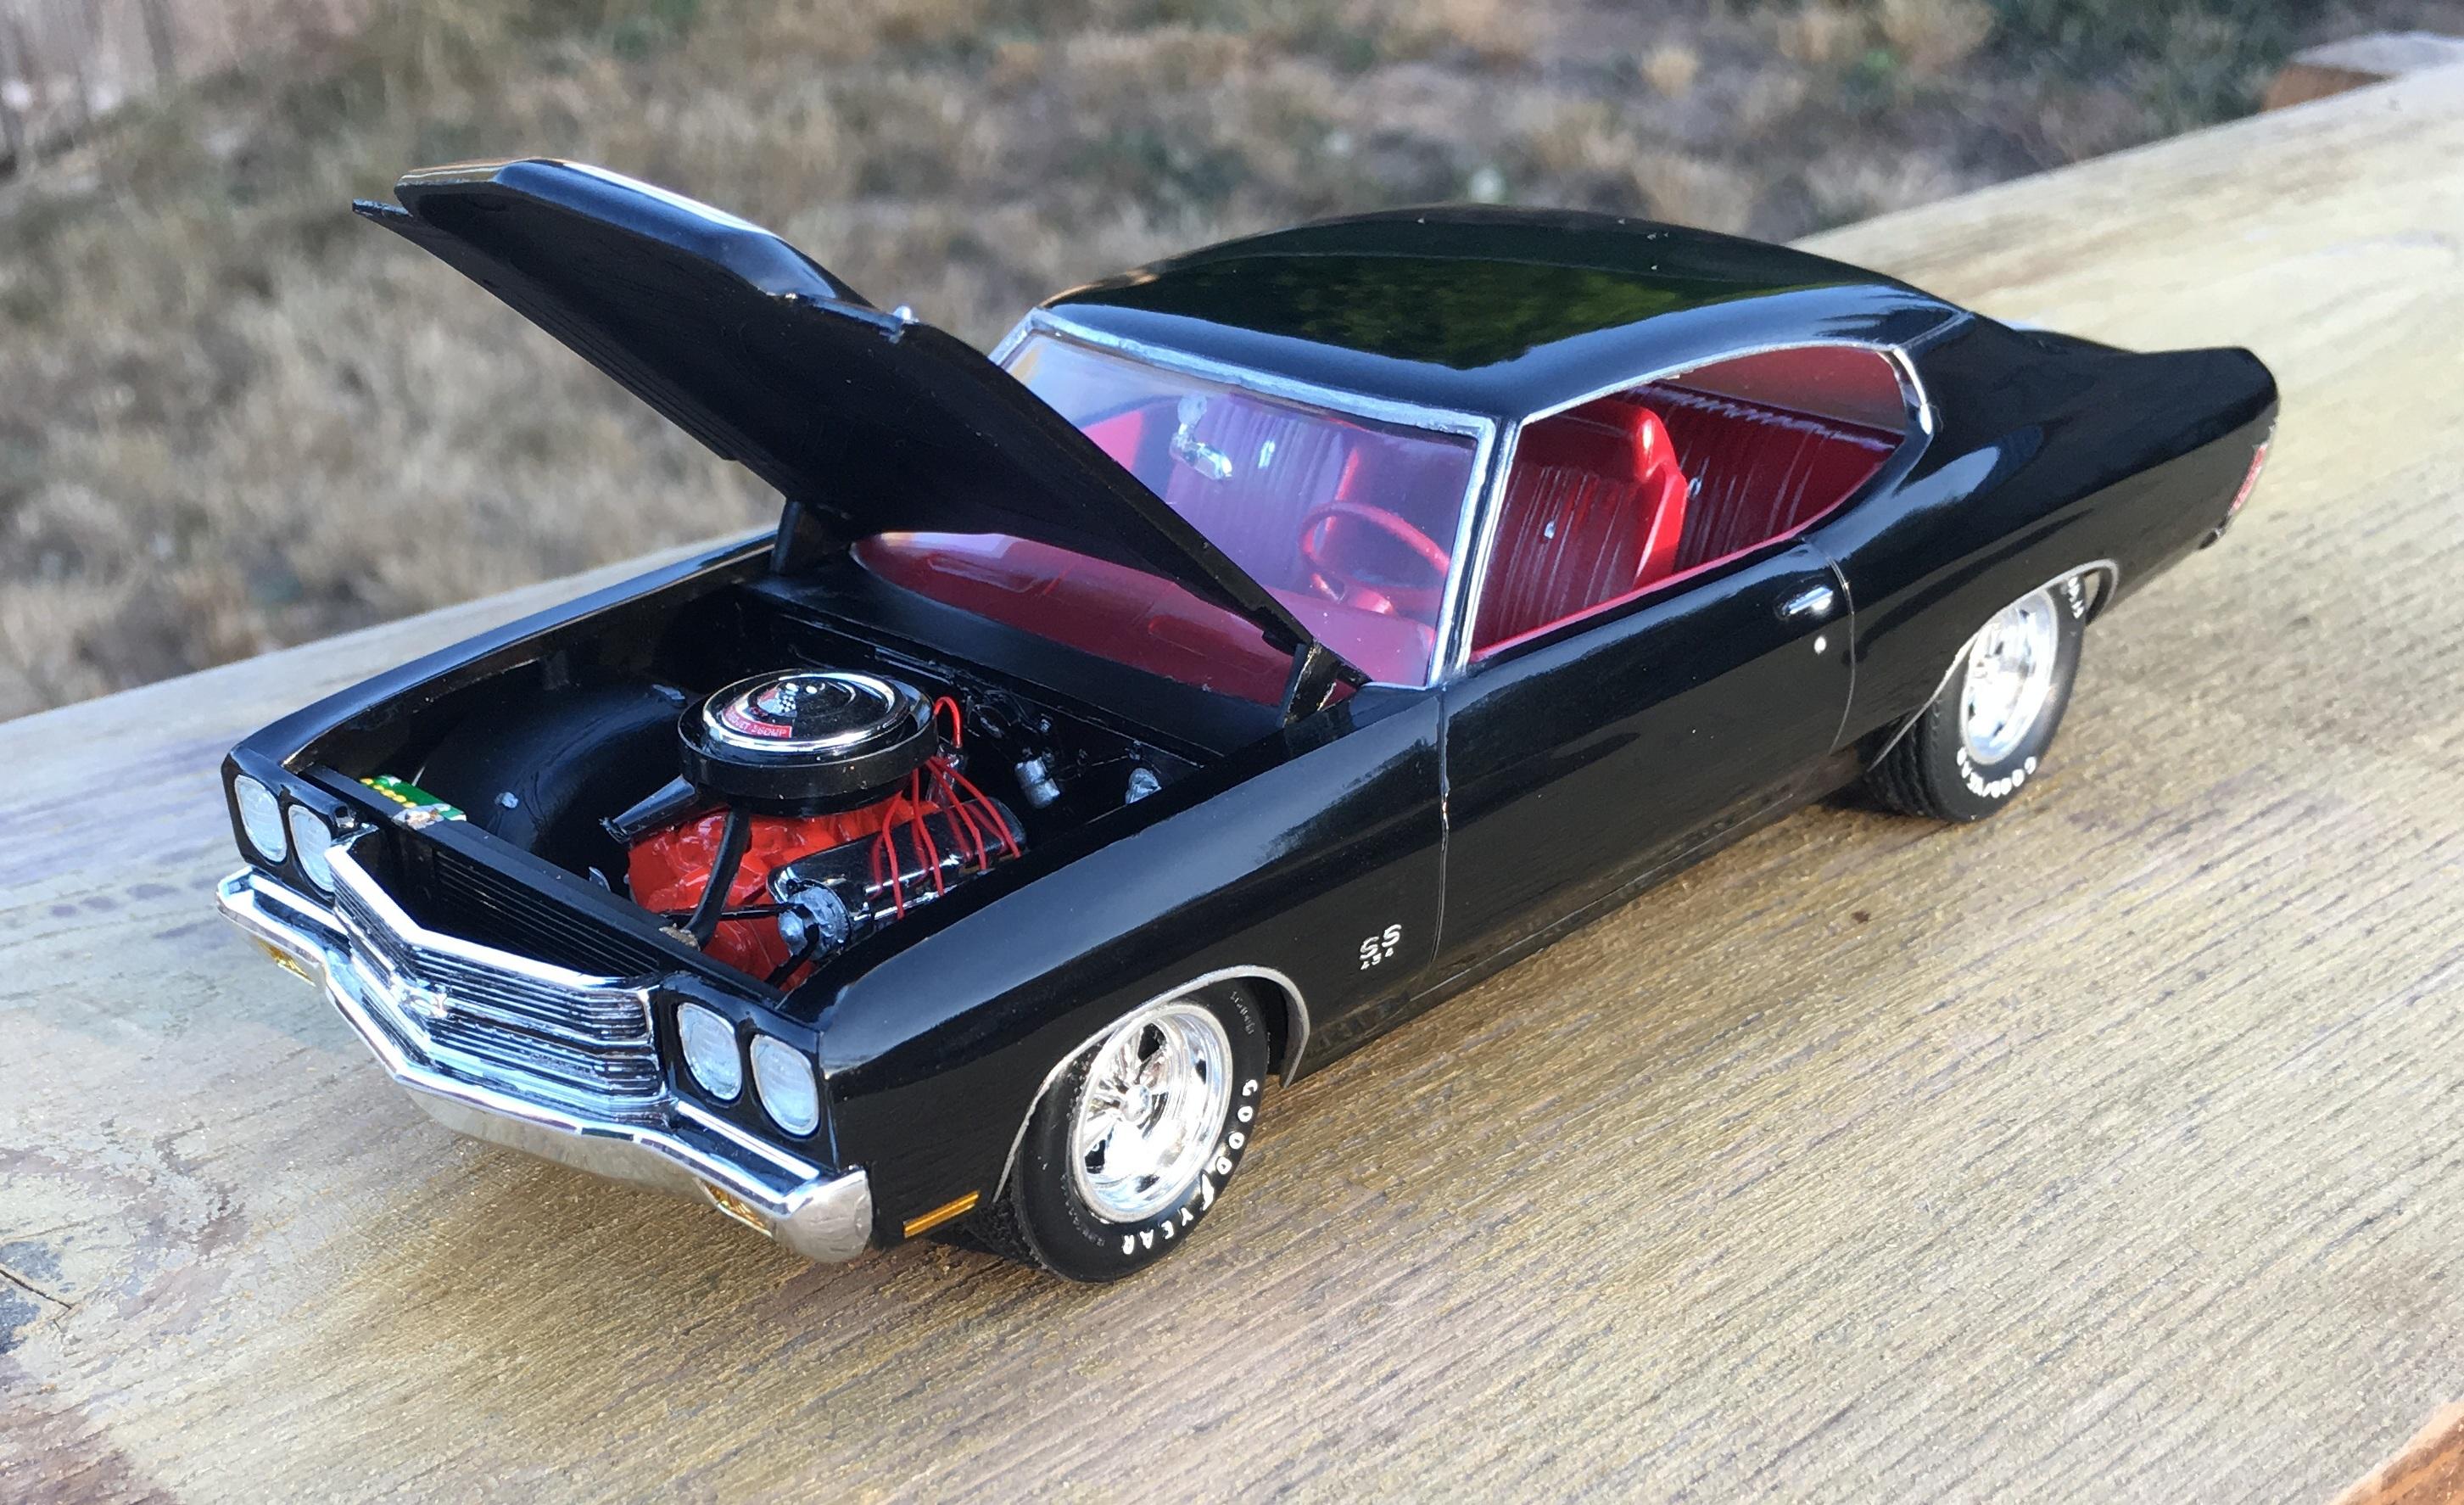
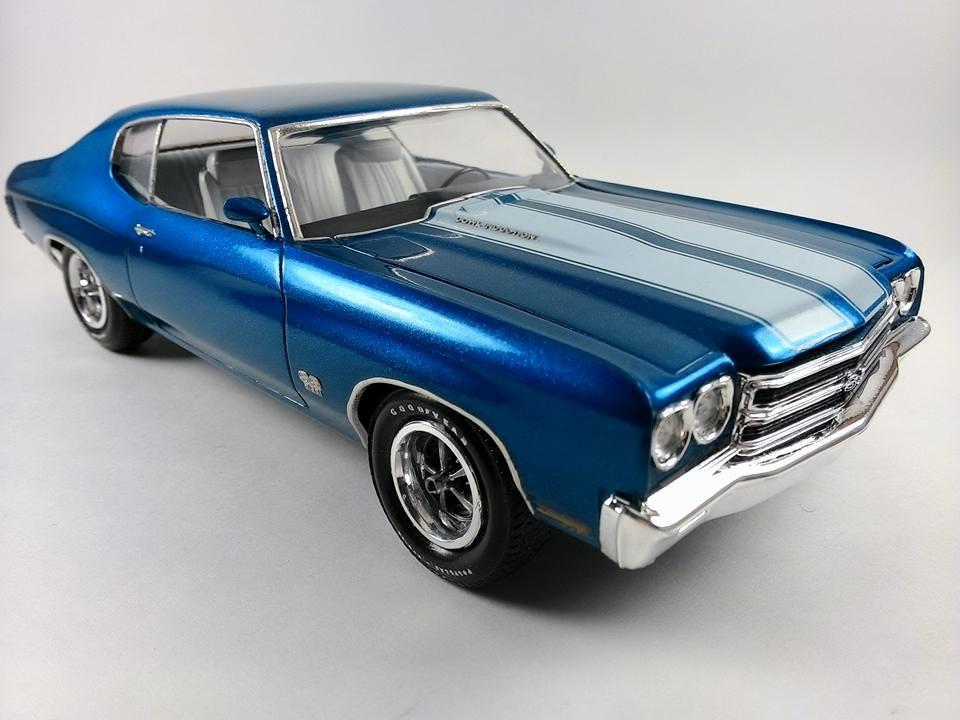
This was an open box purchase from a friend who wanted me to build a replica of the 1:1 car he is building. Unfortunately this kit was not appropriate for his build. So instead I built it for me. It is Testors Star Spangled Blue and has been top coated with Testors Wet look clear. I have only used rattle cans and this is the best paint job I have EVER done. The silver SS stripes are from Keith Marks. The rear window took some fine sanding and Future clear to remove the glue smears. The engine is a BBC mixed and matched with parts box pieces. The side emblems are photo etch and the wheels and tires are parts box pieces. (I wish I had more) Be advised the grille is NOT for ANY year Chevelle. It looks like is was adapted from a Monte Carlo. This is definitely one of my top 3 builds (so far).

-
Never cared to much for the 66 from the design stand point. Saw someone else's build the other day and thought it looked OK, so I decided to get one for the collection. The model came out real well, and the car doesn't look too bad in black. I believe someone had an issue with the windshield and rear window not having much room to glue in, and that was a major issue I had as well. Over all though, it's a good kit. SAM_0070 by Eric Lucas, on Flickr SAM_0071 by Eric Lucas, on Flickr SAM_0072 by Eric Lucas, on Flickr SAM_0073 by Eric Lucas, on Flickr SAM_0074 by Eric Lucas, on Flickr SAM_0075 by Eric Lucas, on Flickr SAM_0076 by Eric Lucas, on Flickr SAM_0077 by Eric Lucas, on Flickr
-
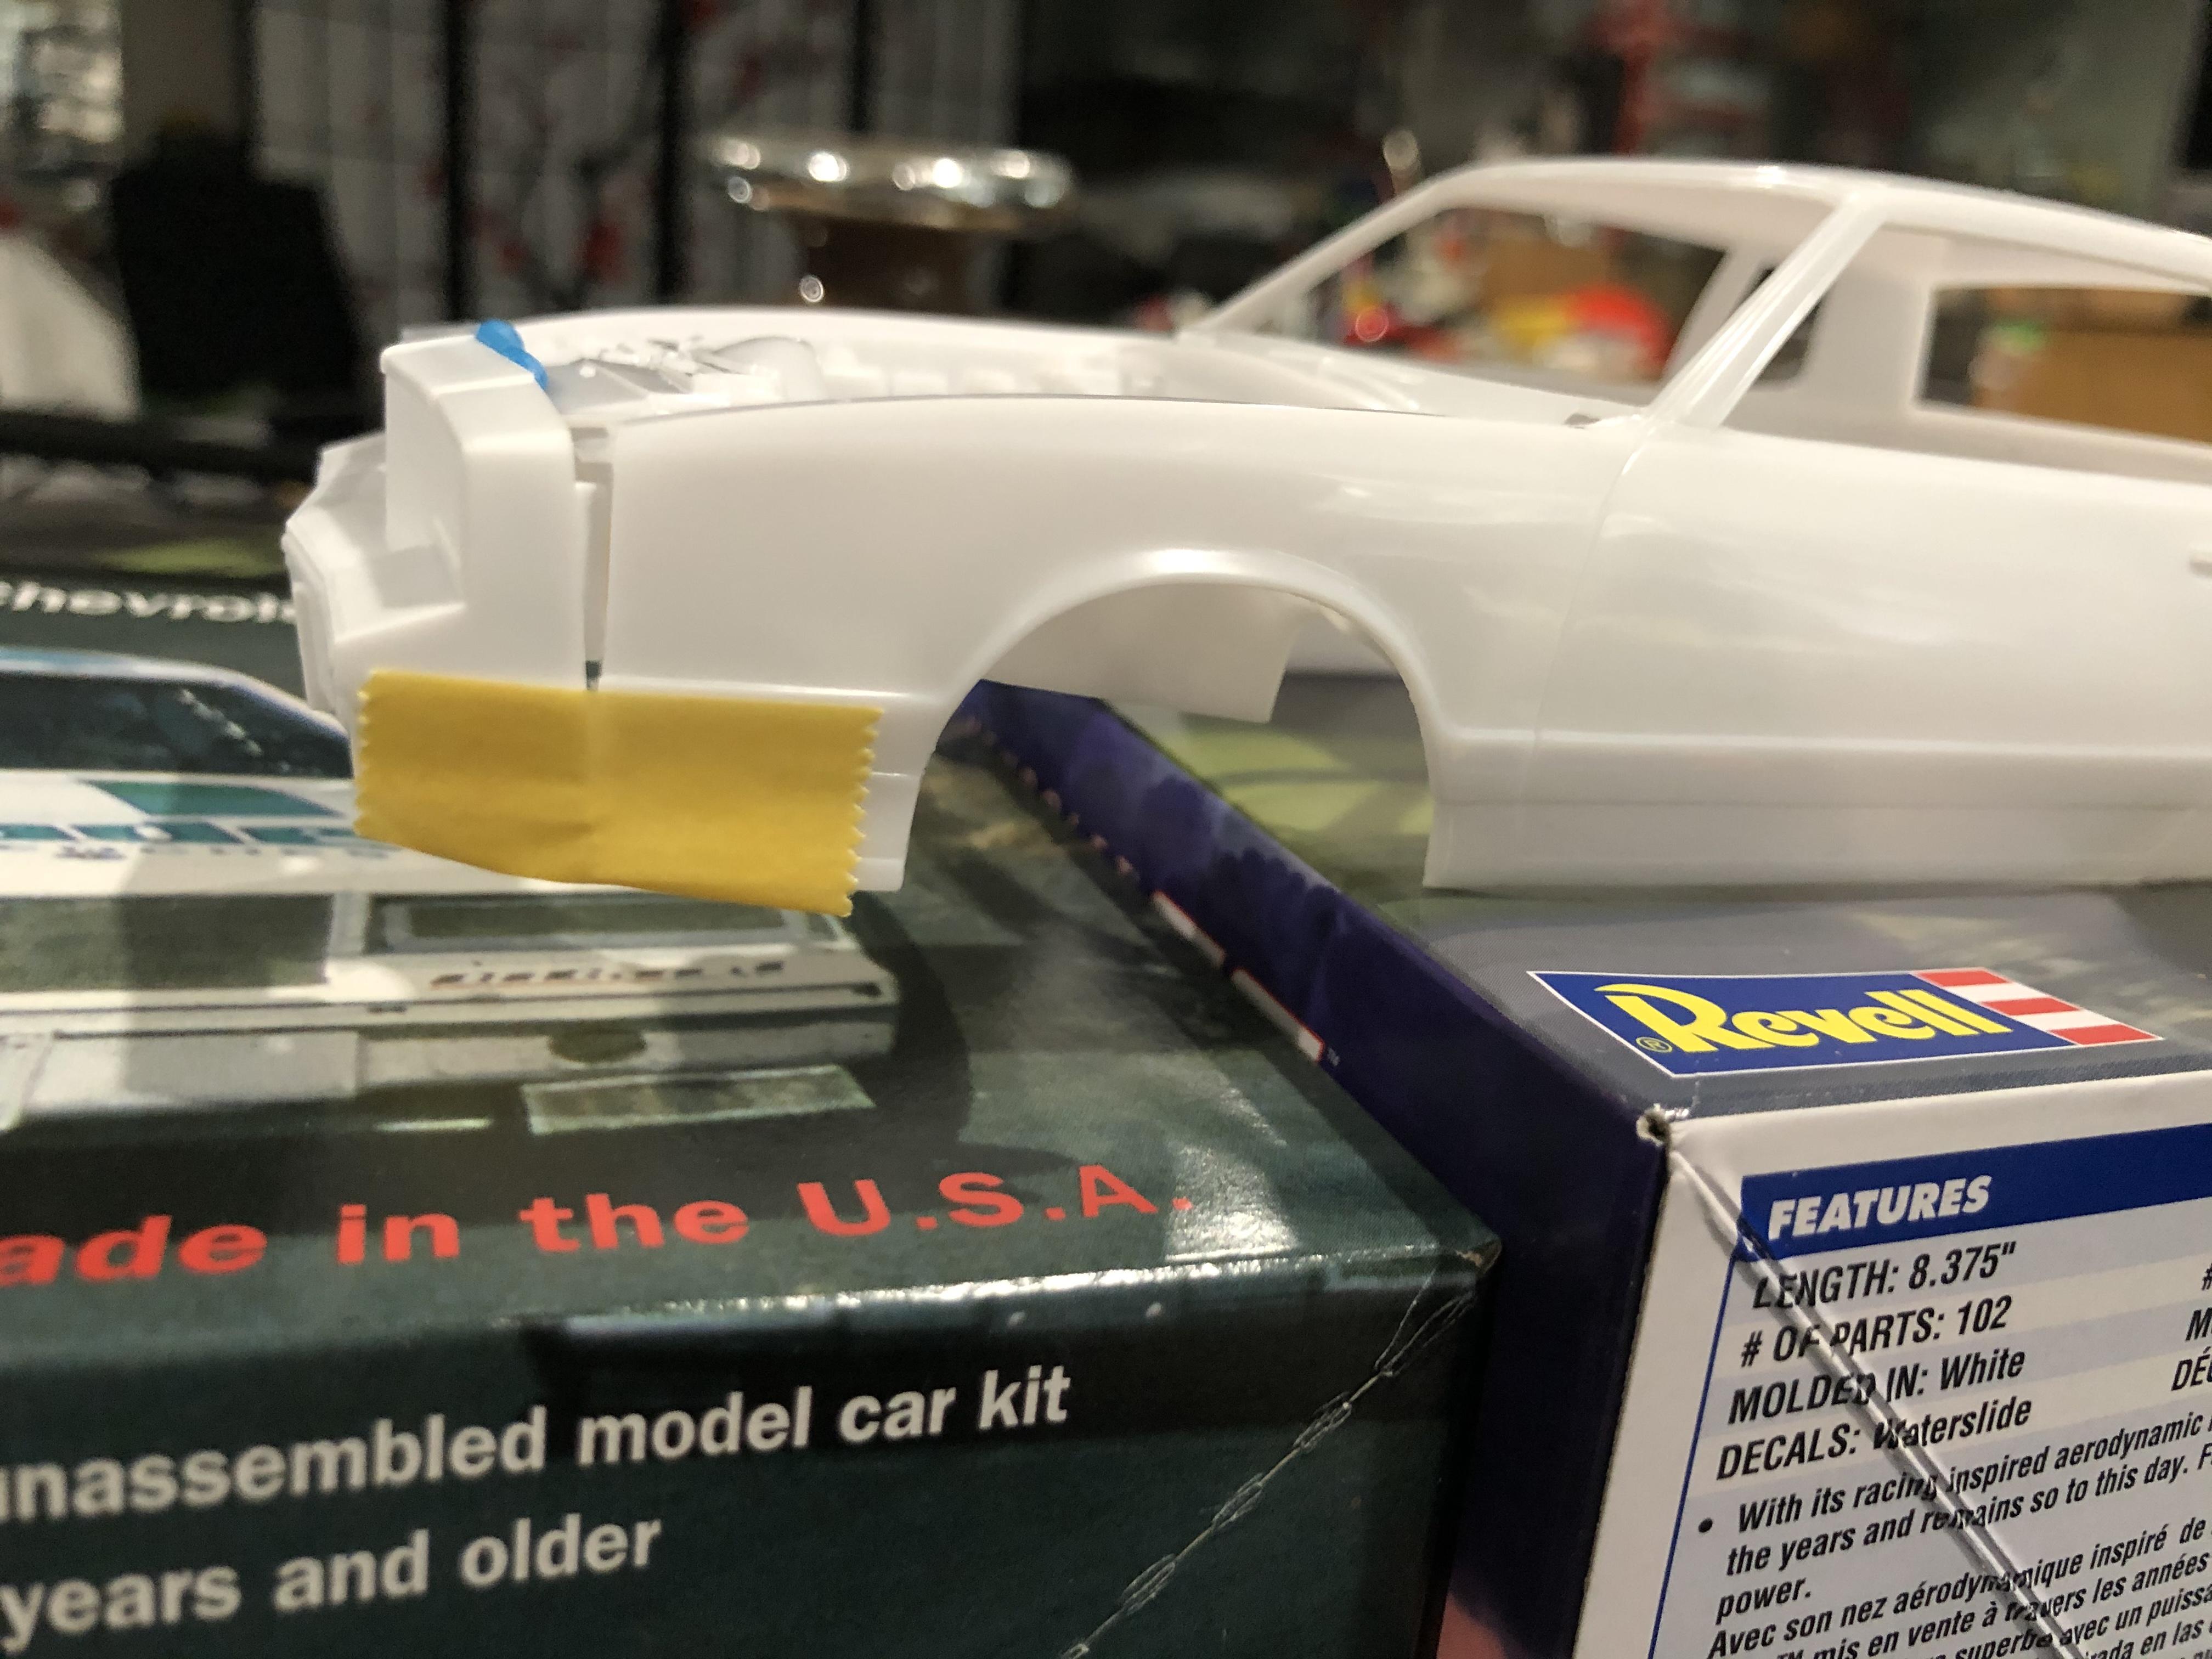
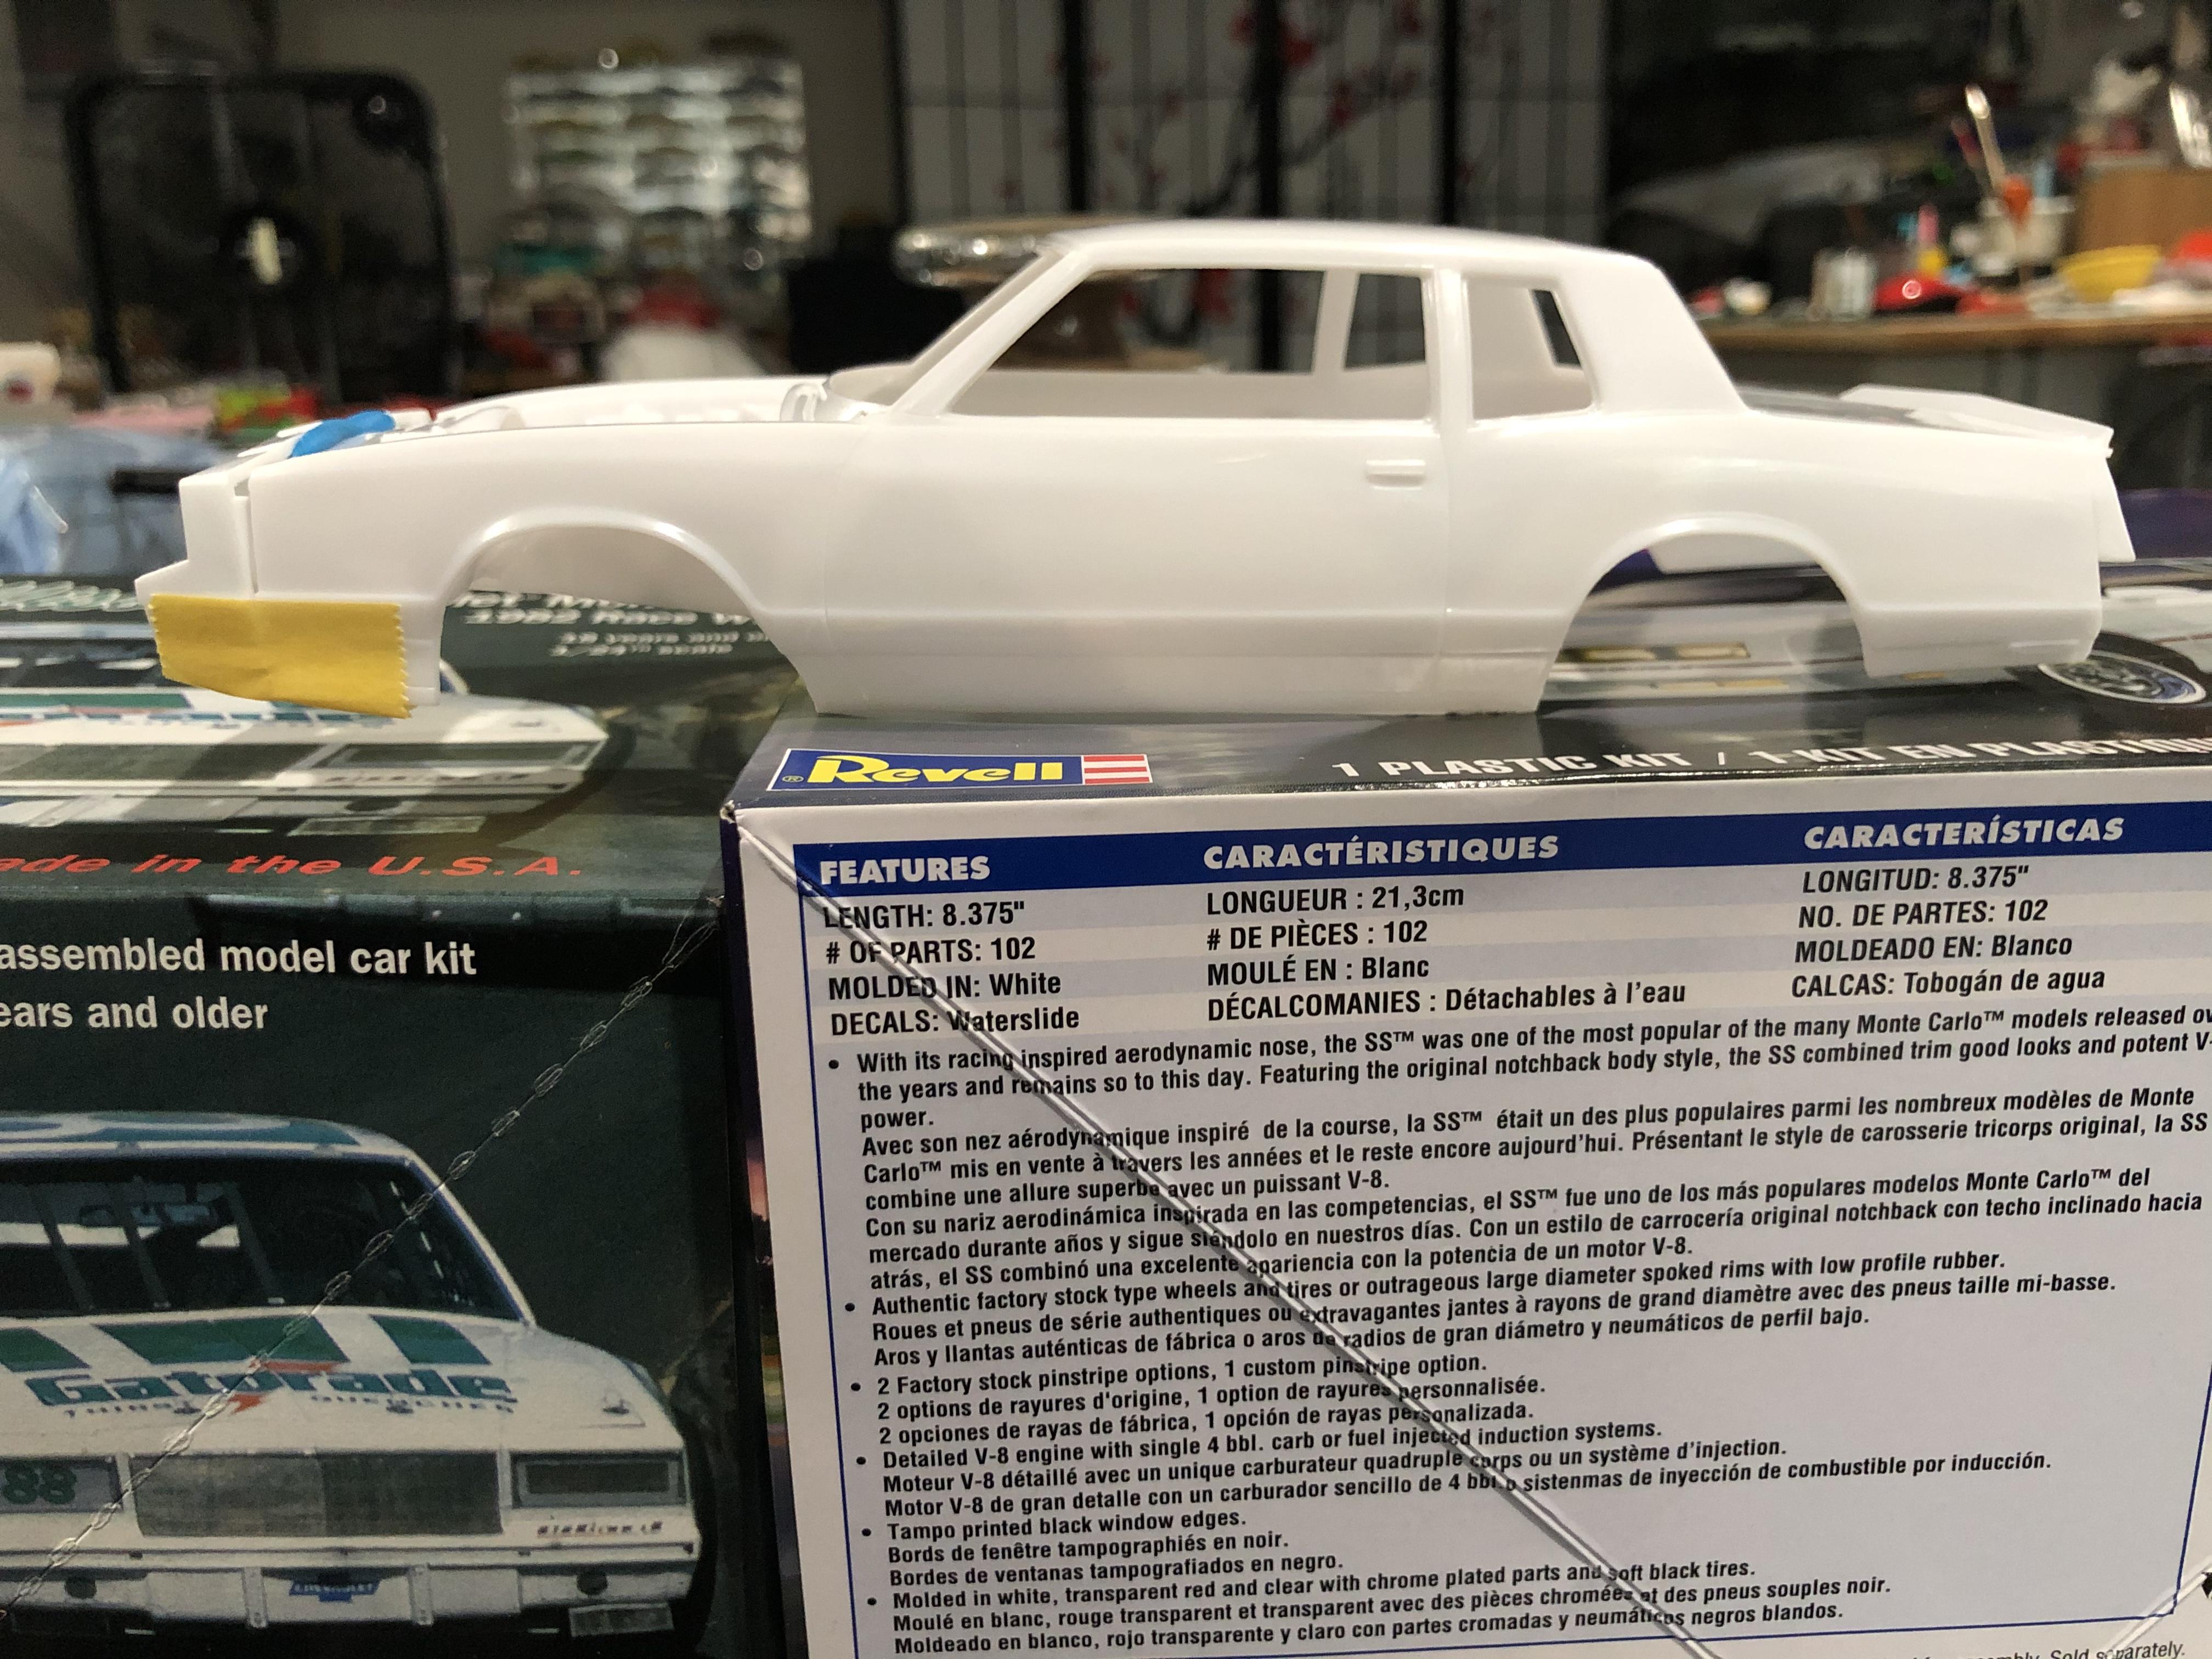
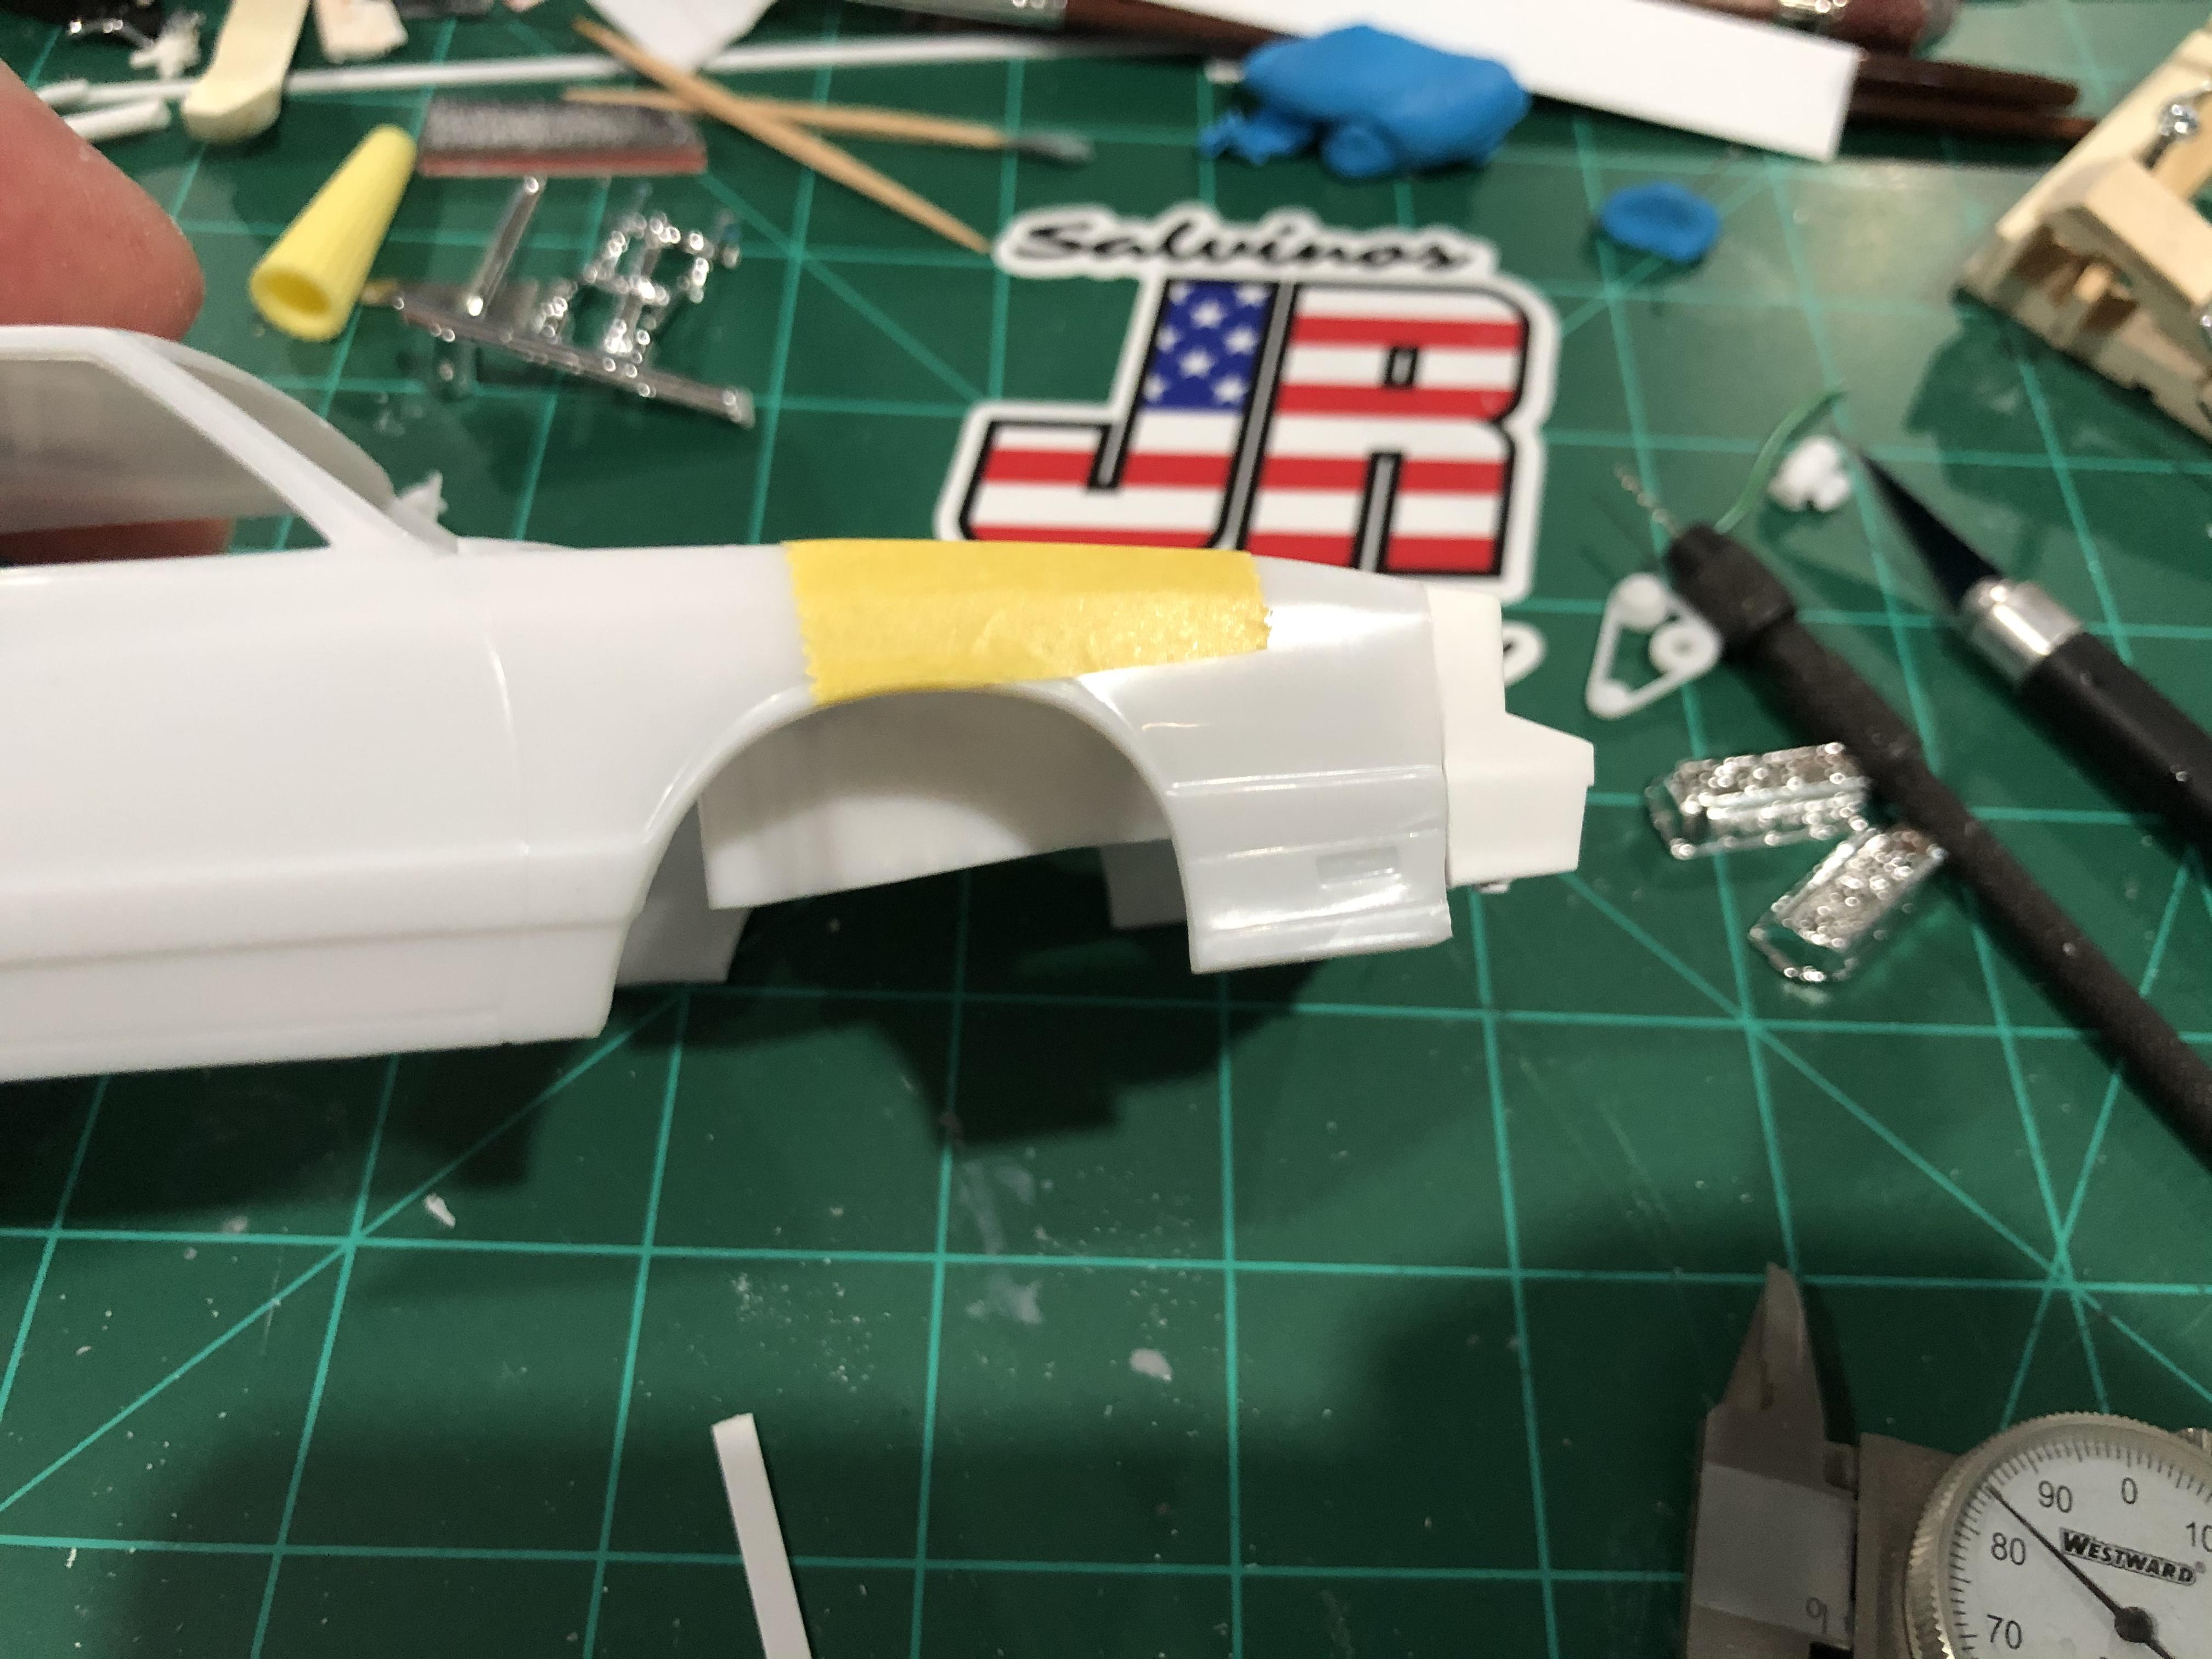
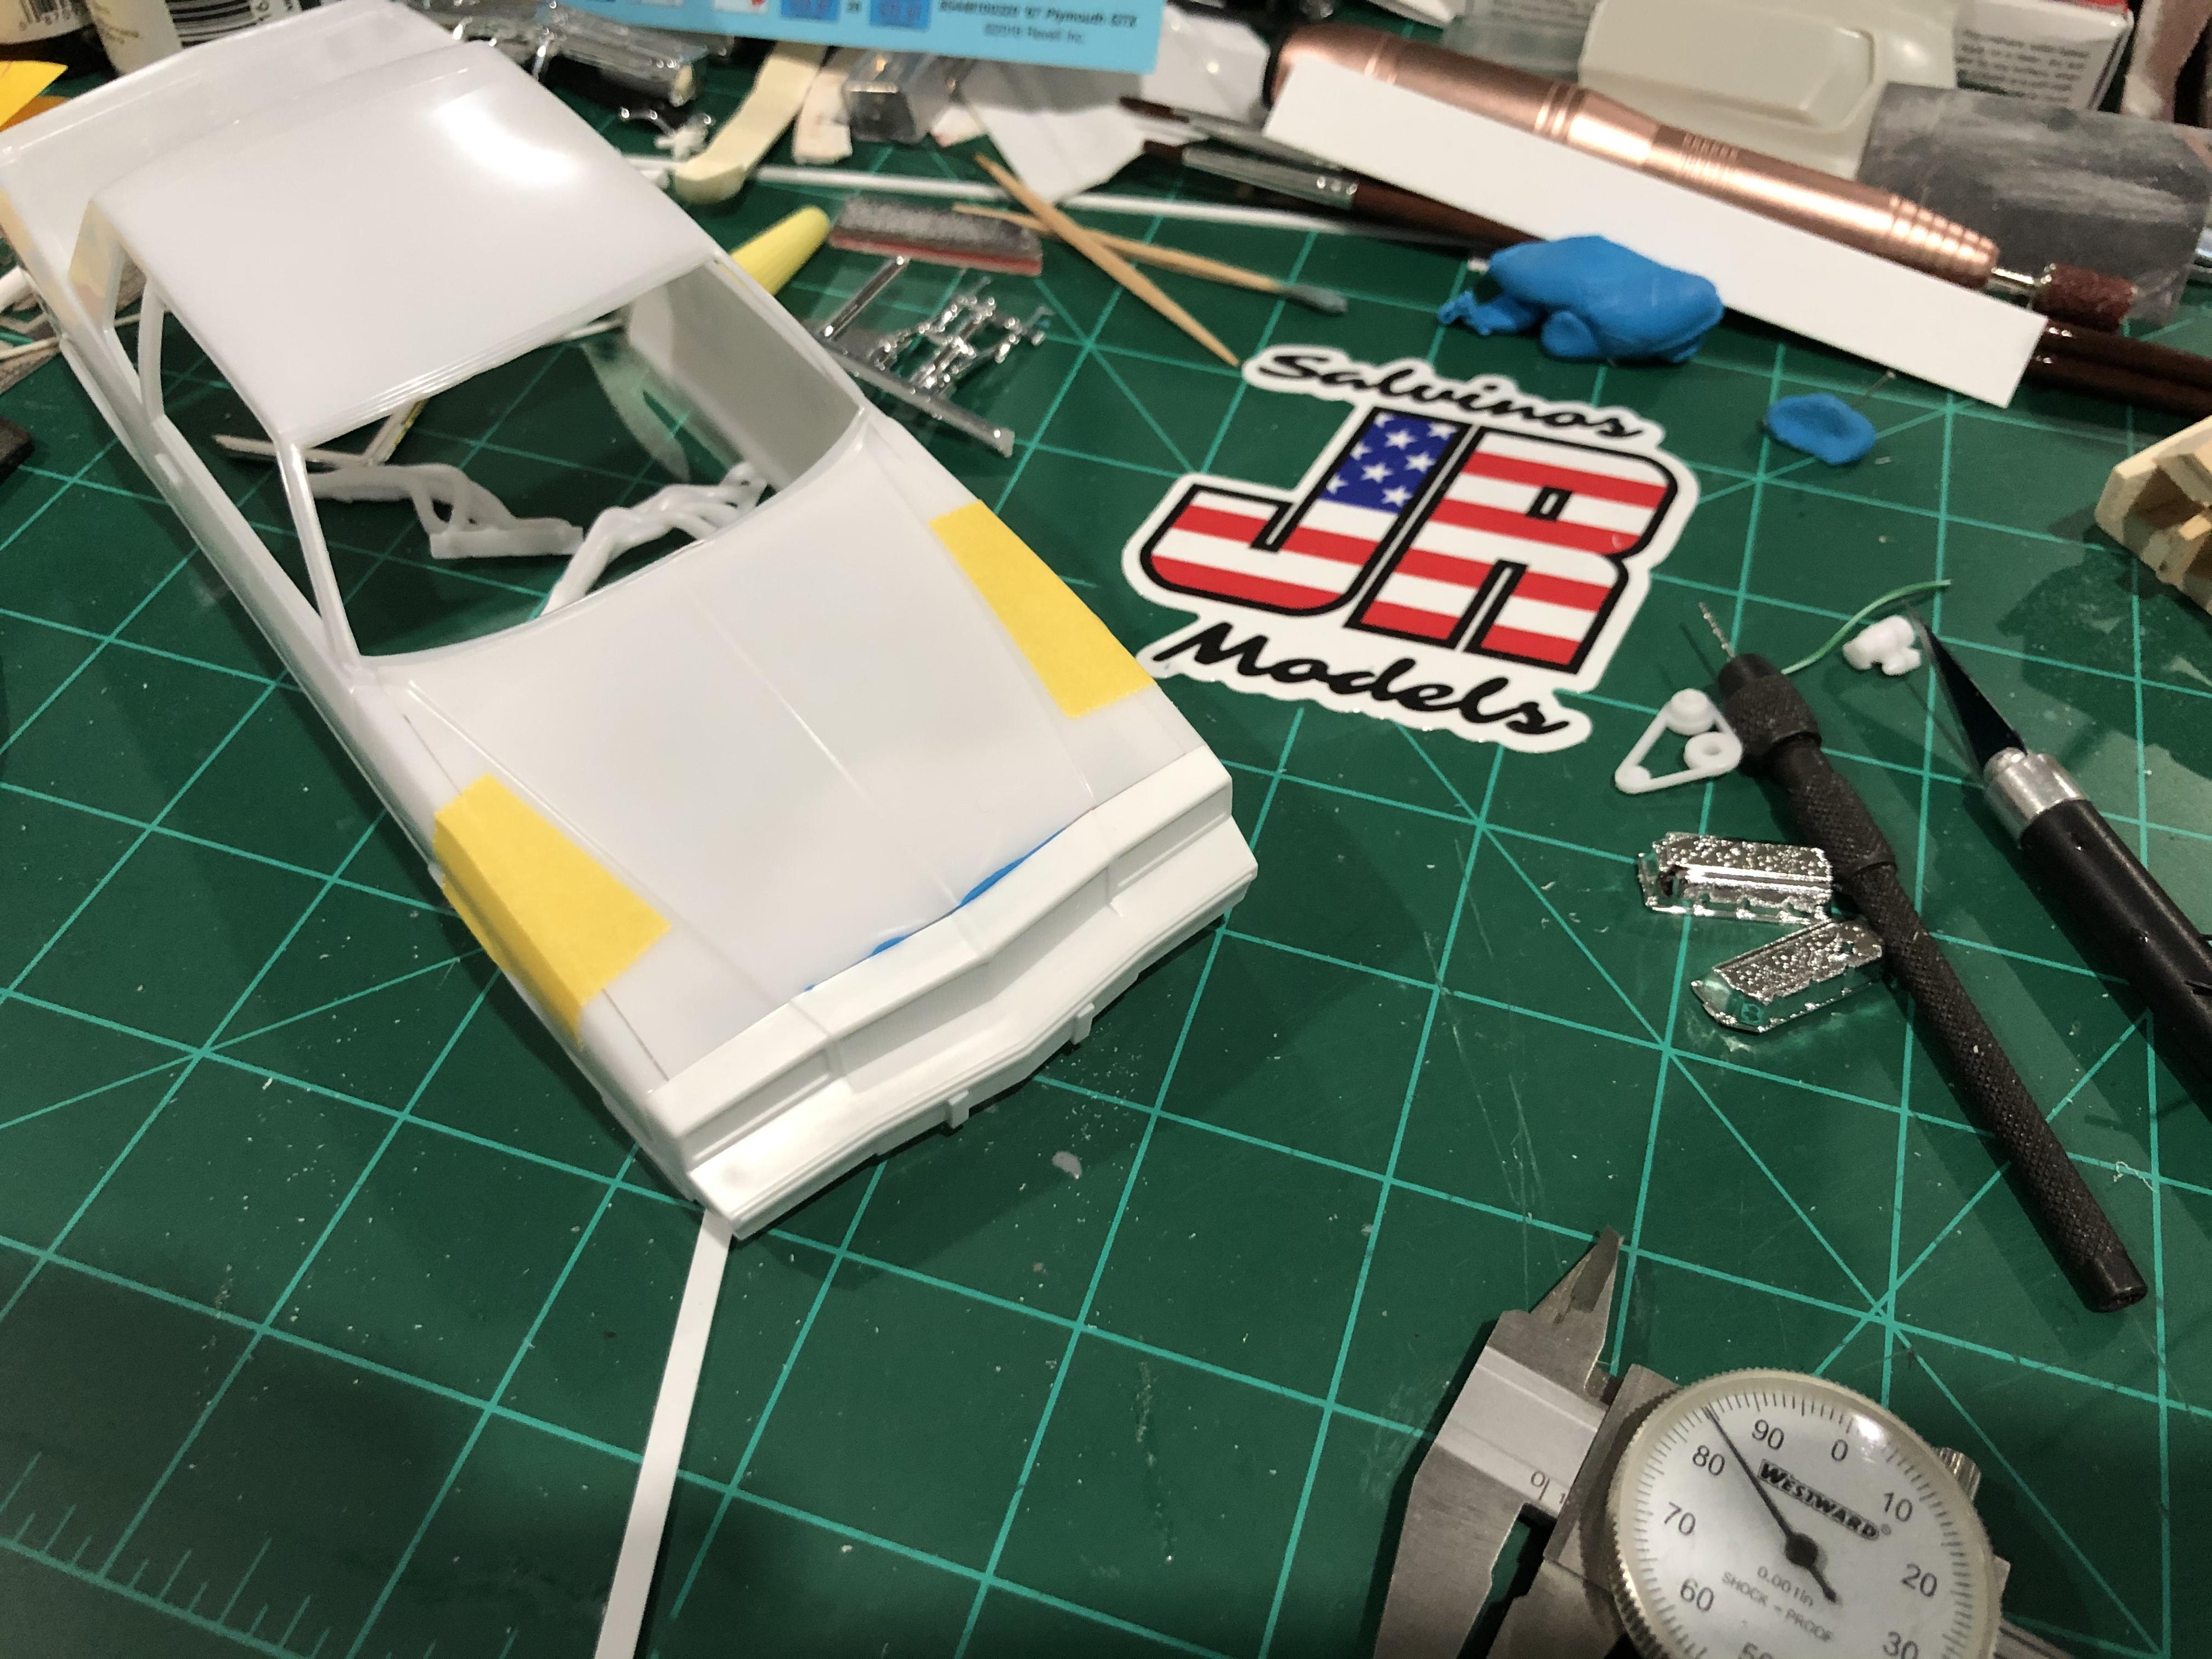
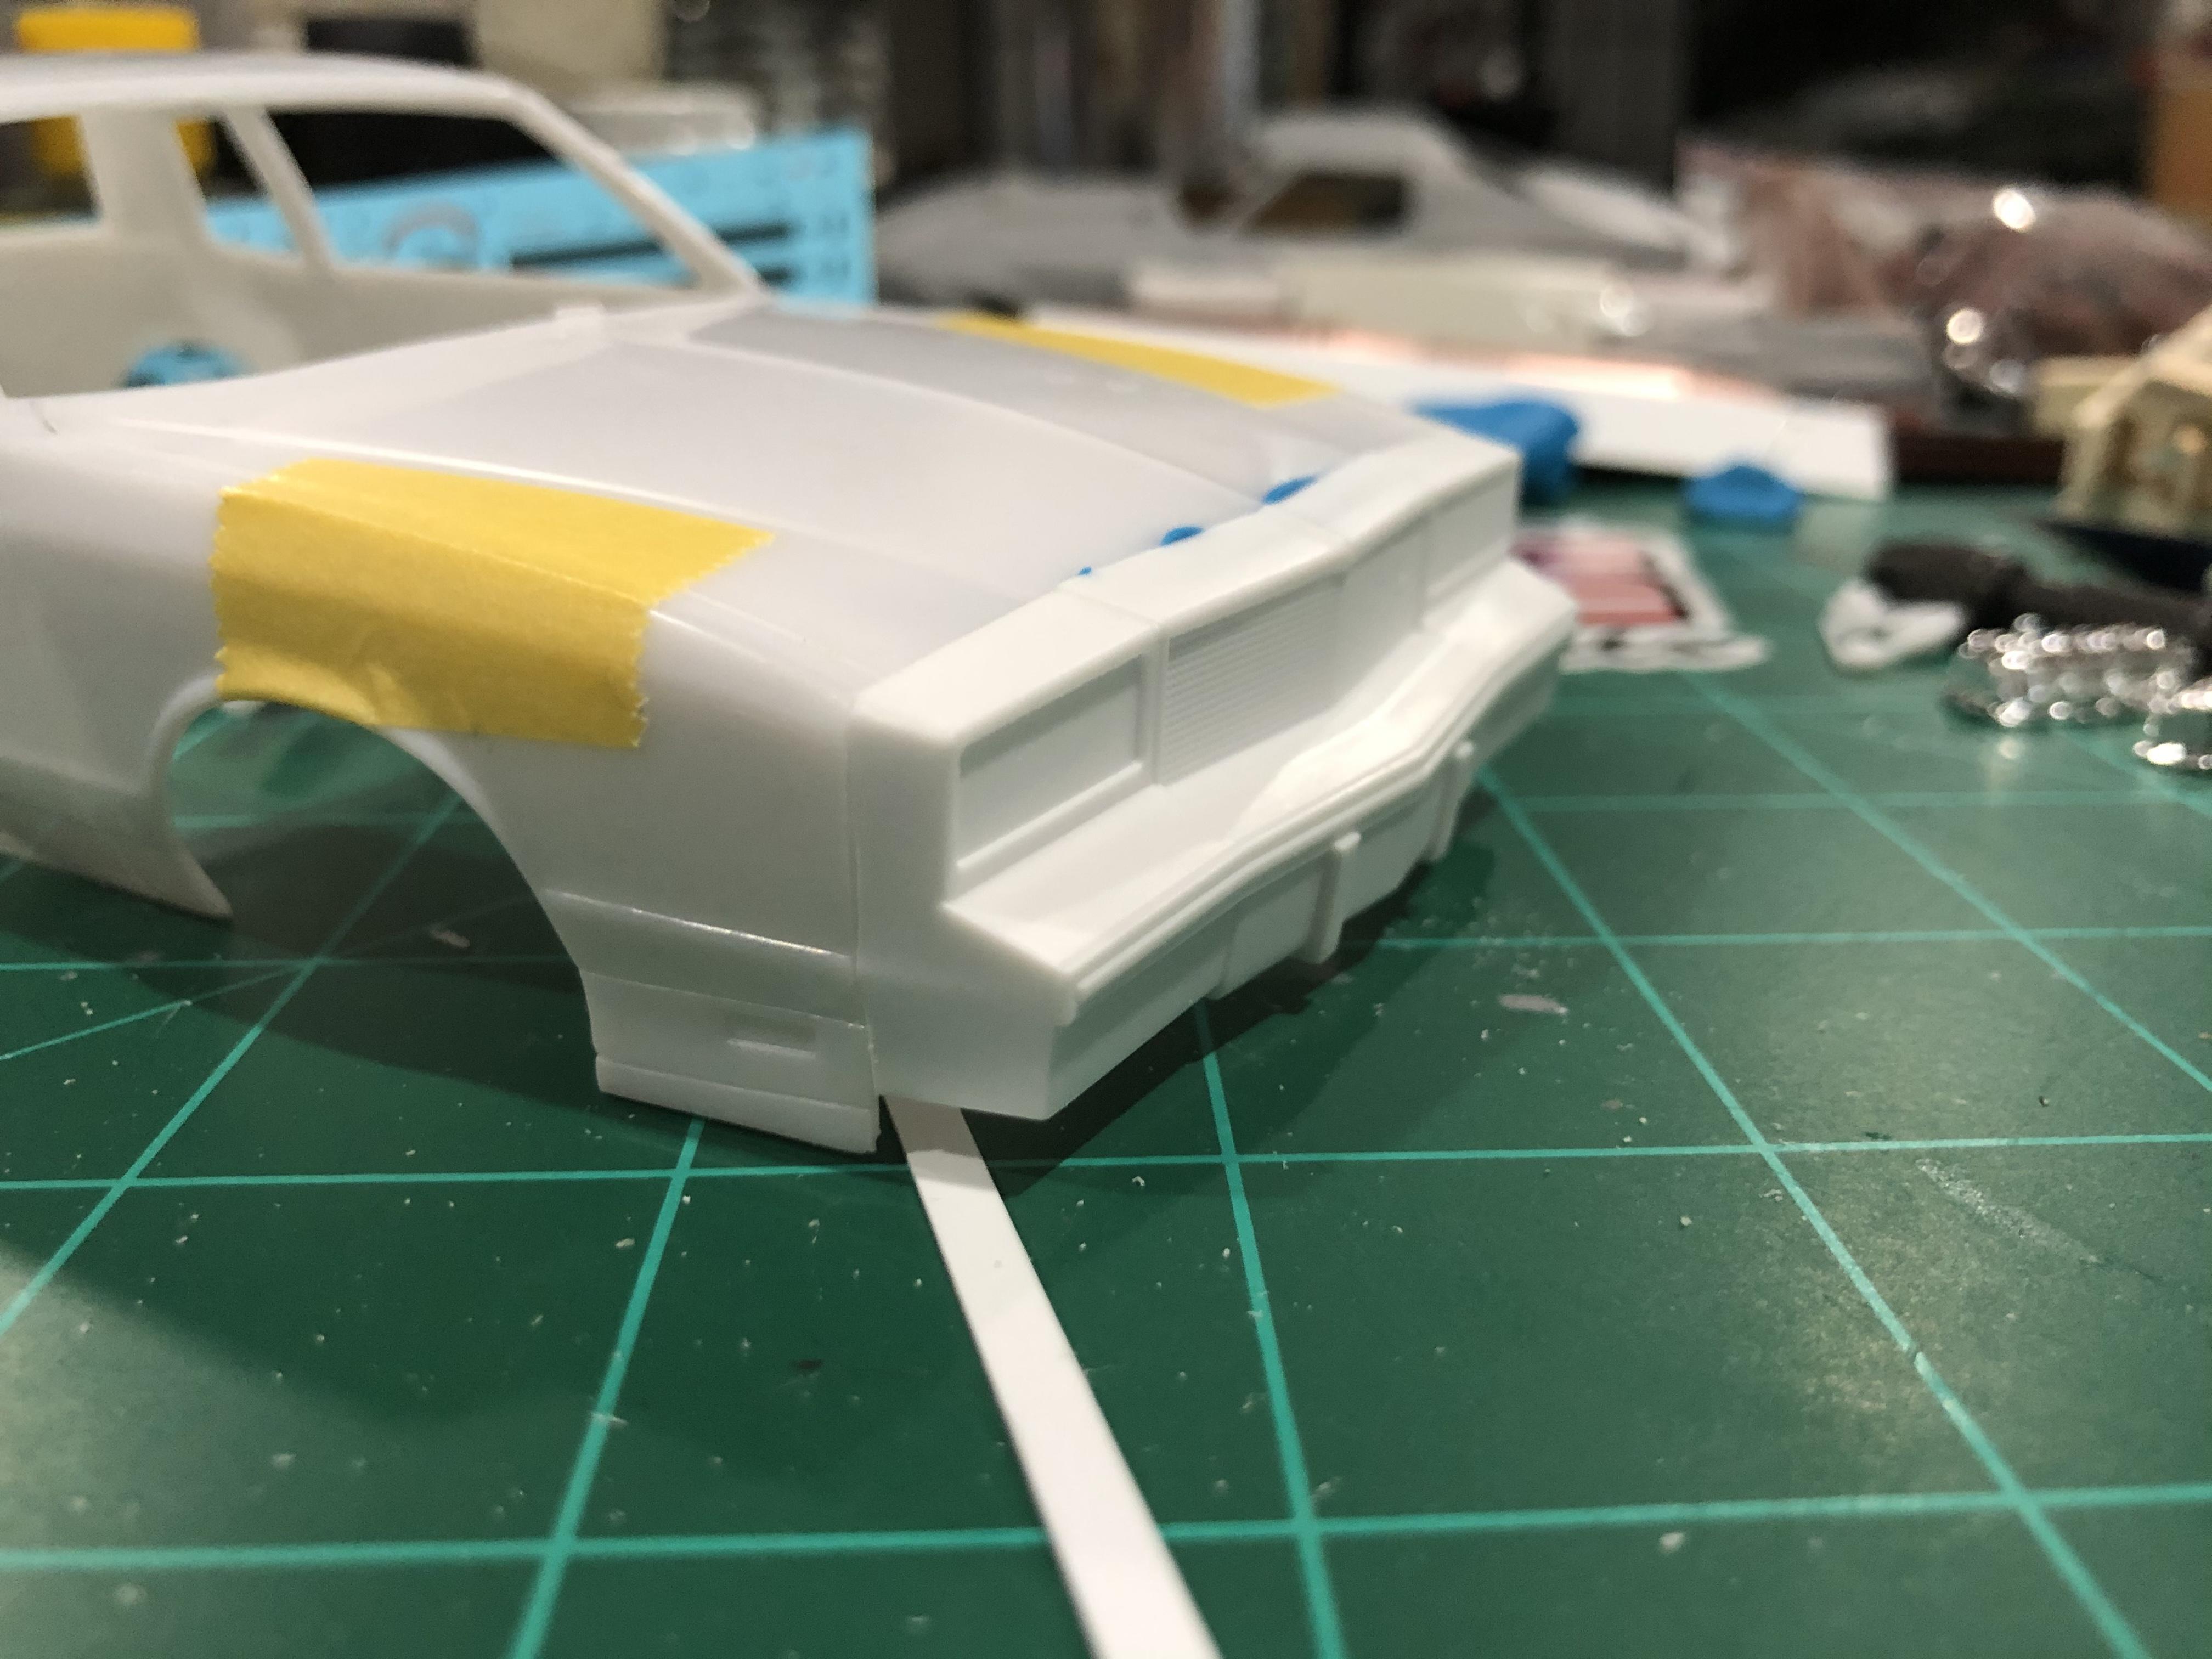
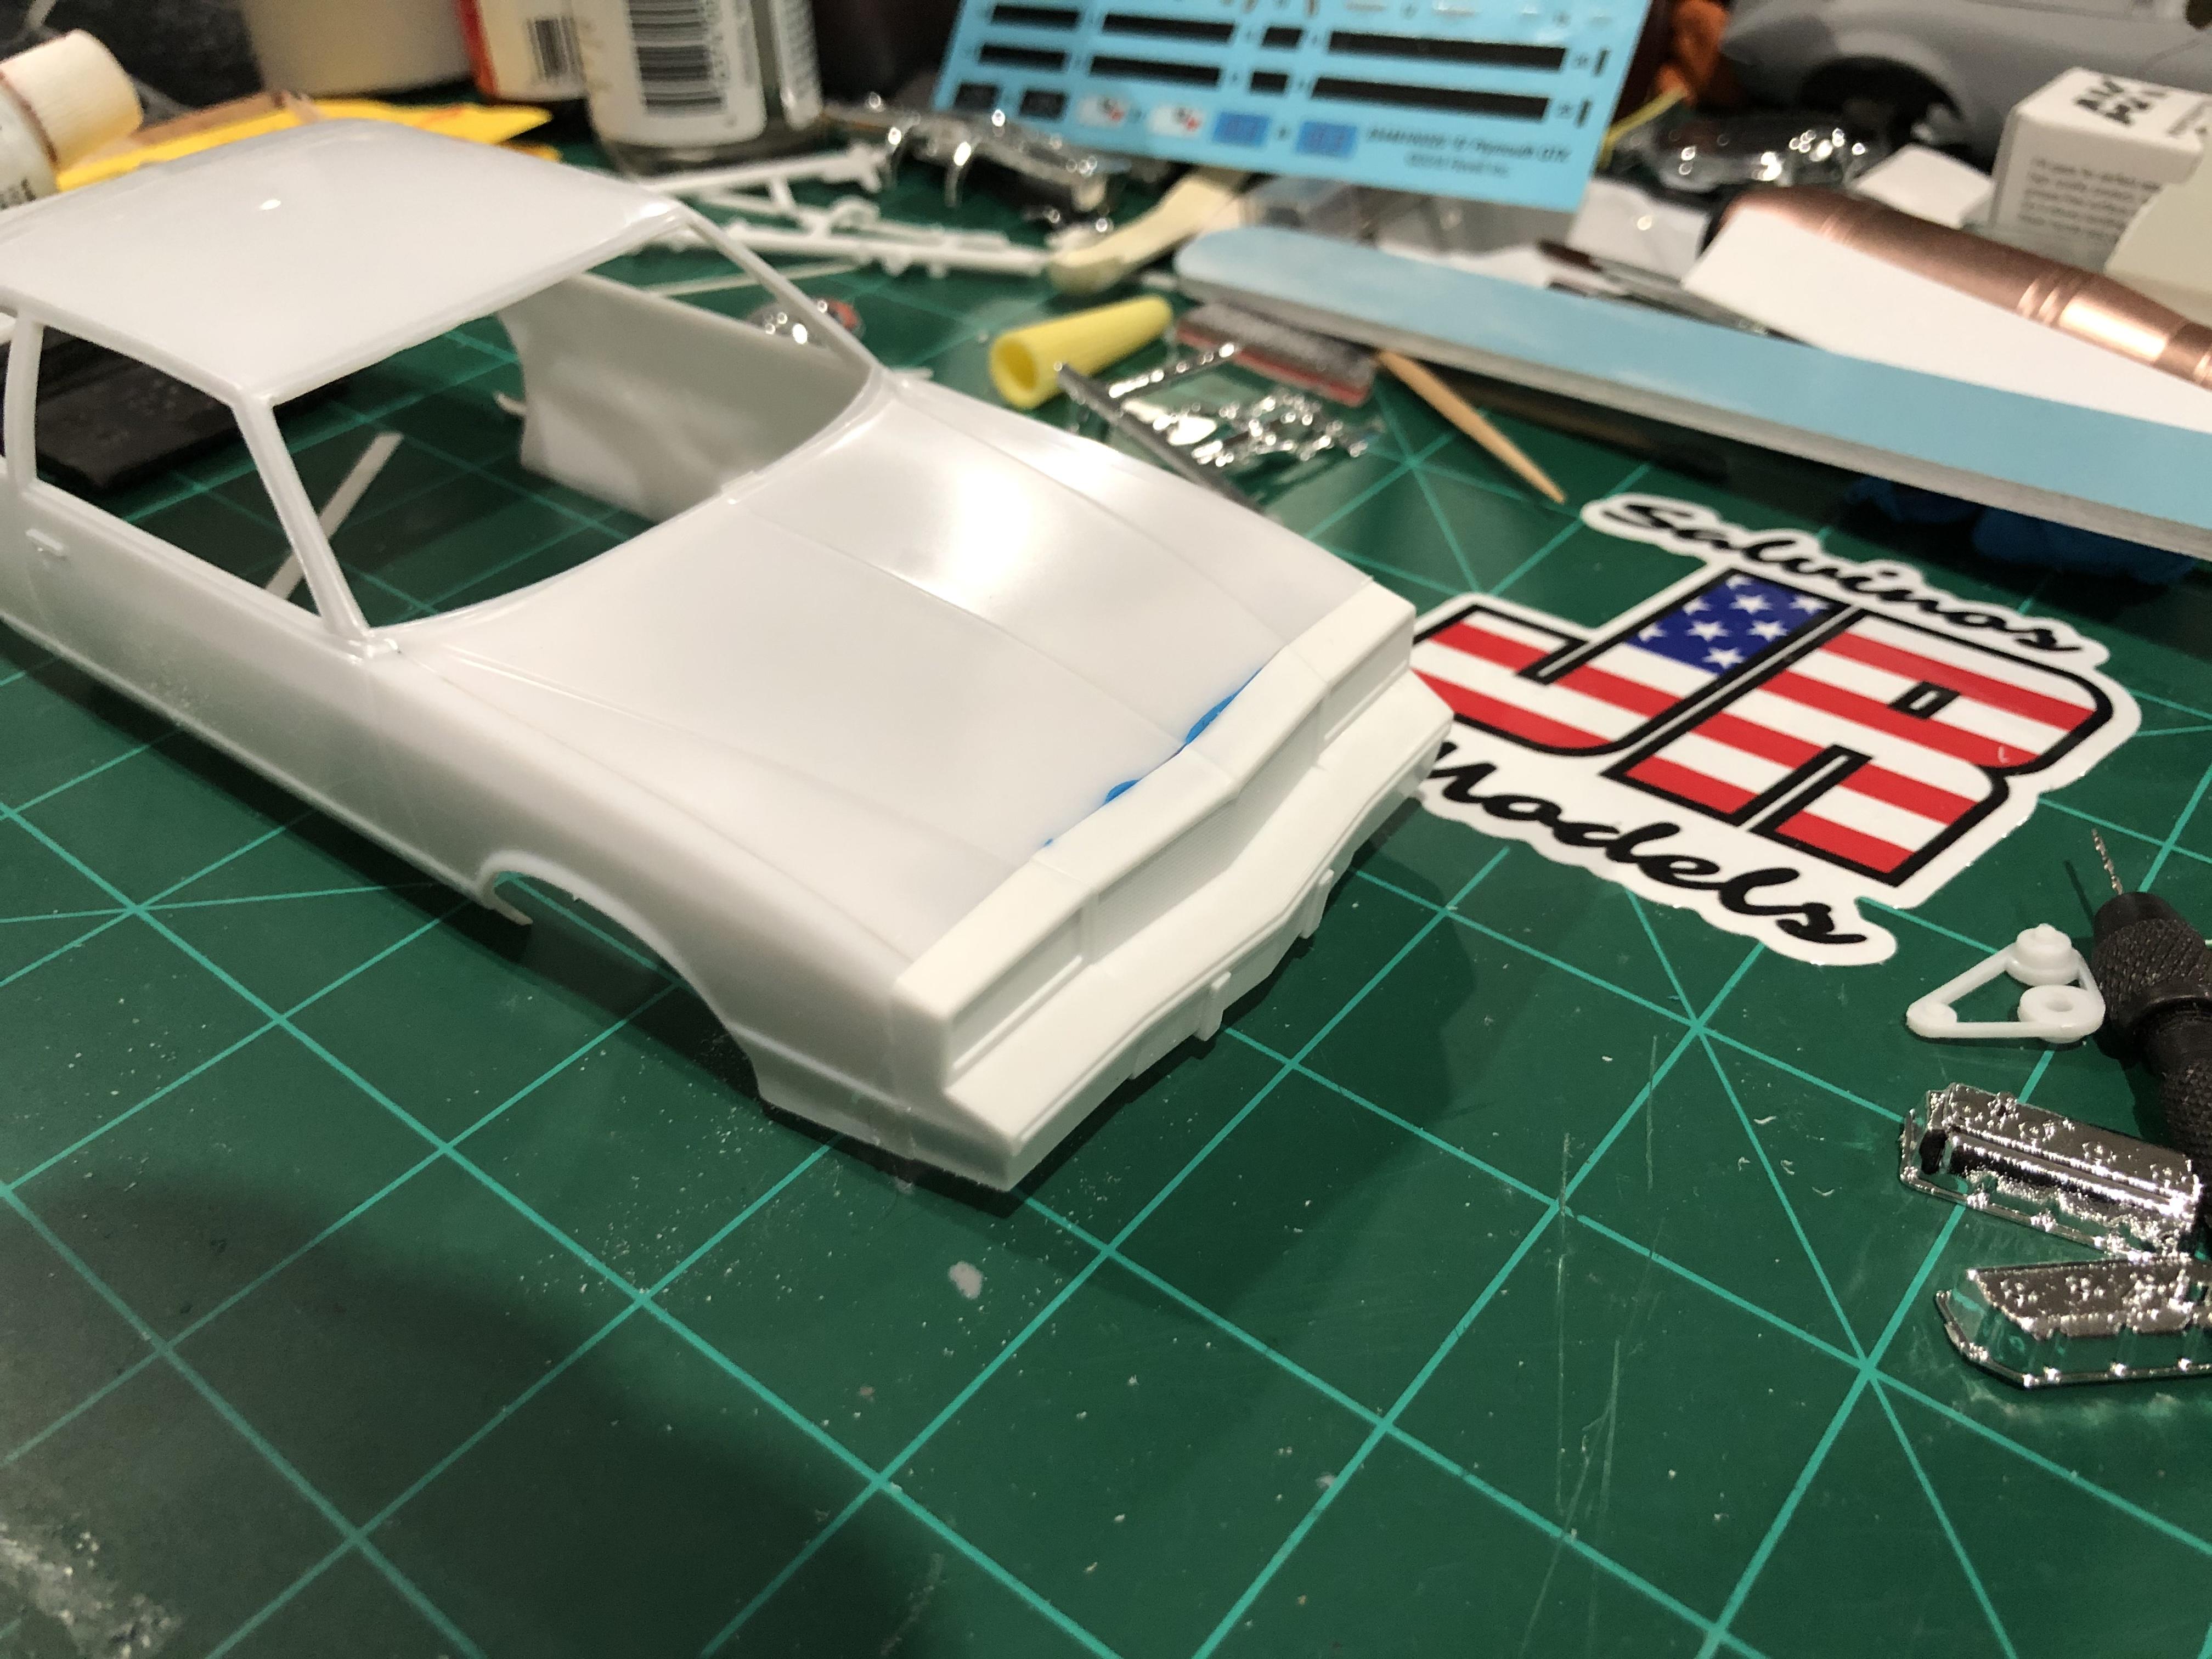
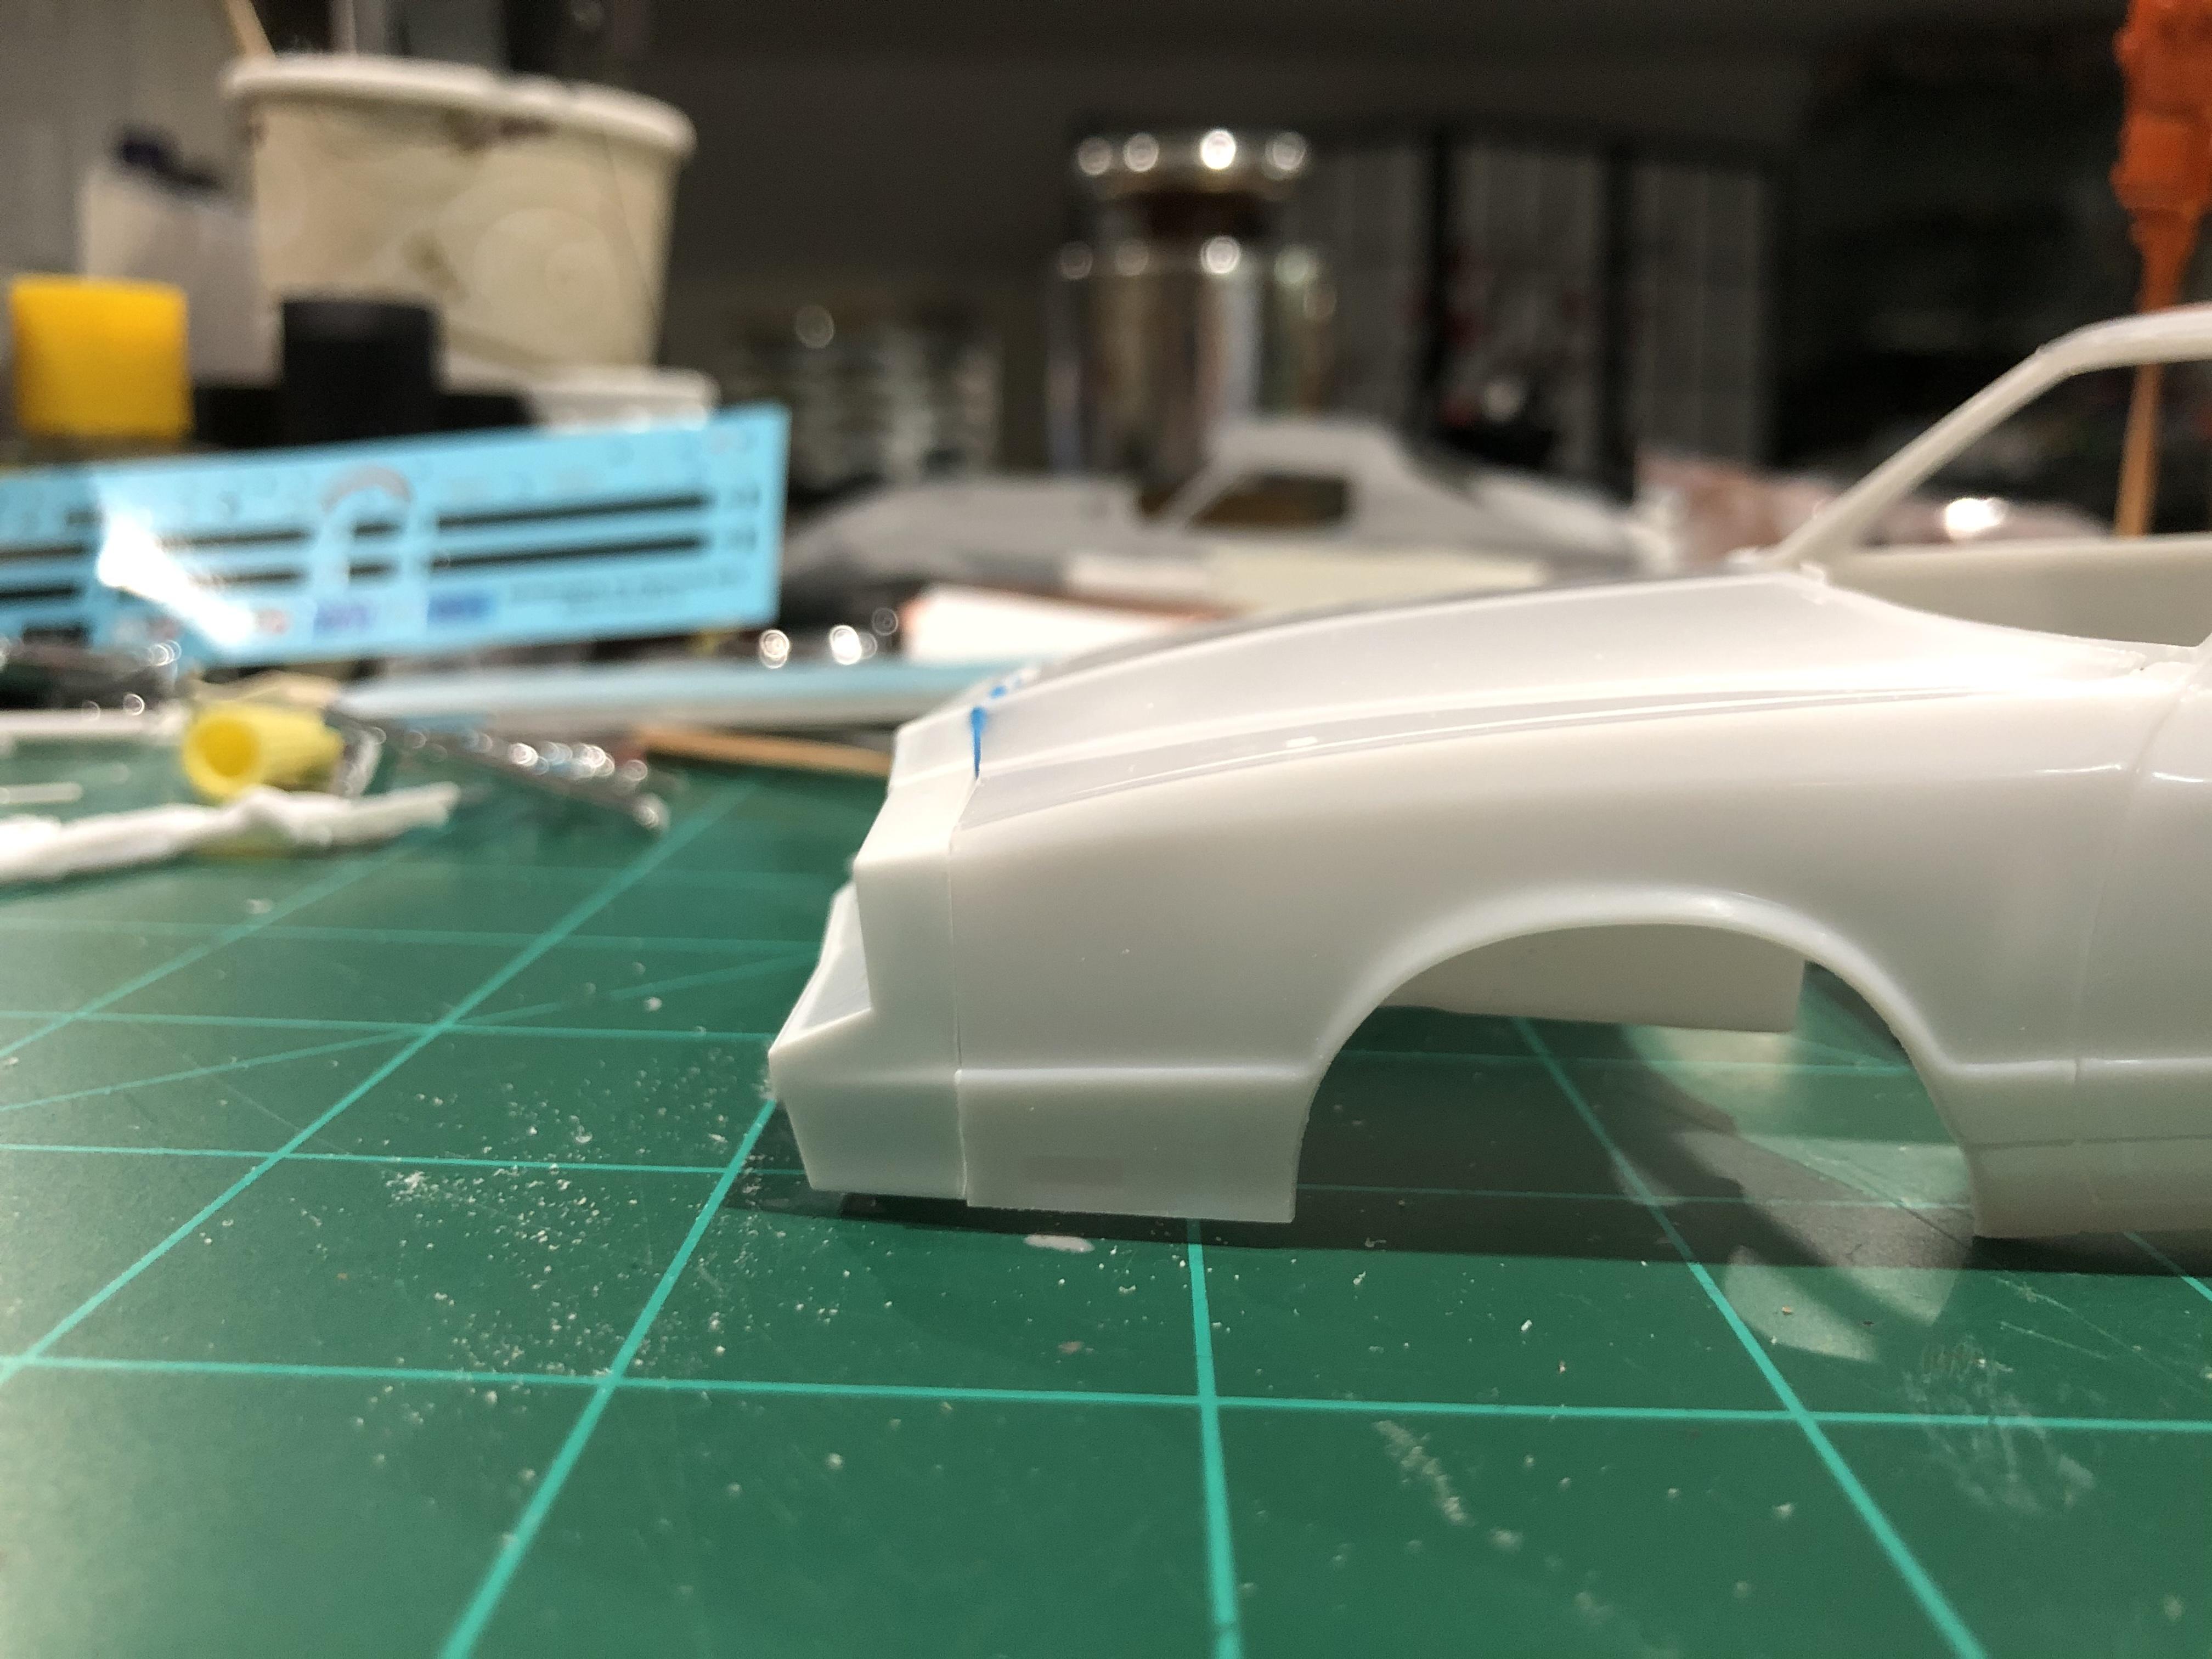
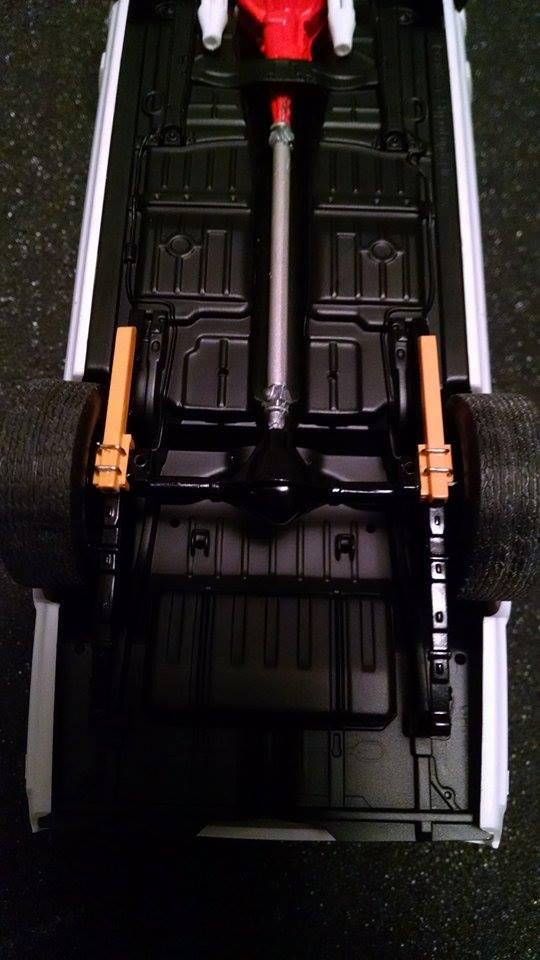
Recently, Salvinos J R Tooled up an LS nose for the NASCAR Monte Carlo kits. Since Stock Cars in the 80s hadn’t gotten completely away from their production counterparts yet, I thought I would test fit this nose on the most recent release of the Monte Carlo SS. Mounting it directly to the front fenders resulted in a nose pointing up. So I pulled the top away from the hood until the lower body line leveled out. I measured the gap at the top and transferred that measurement to the bottom. I placed a piece of tape from the measurement to the top corner and cut out a pie slice from each side. That pulled the whole nose into the fenders. The result matched what I found in the dealership brochure. I think this is going to work pretty well. I will have to scratch build a grill and headlights right now.
-
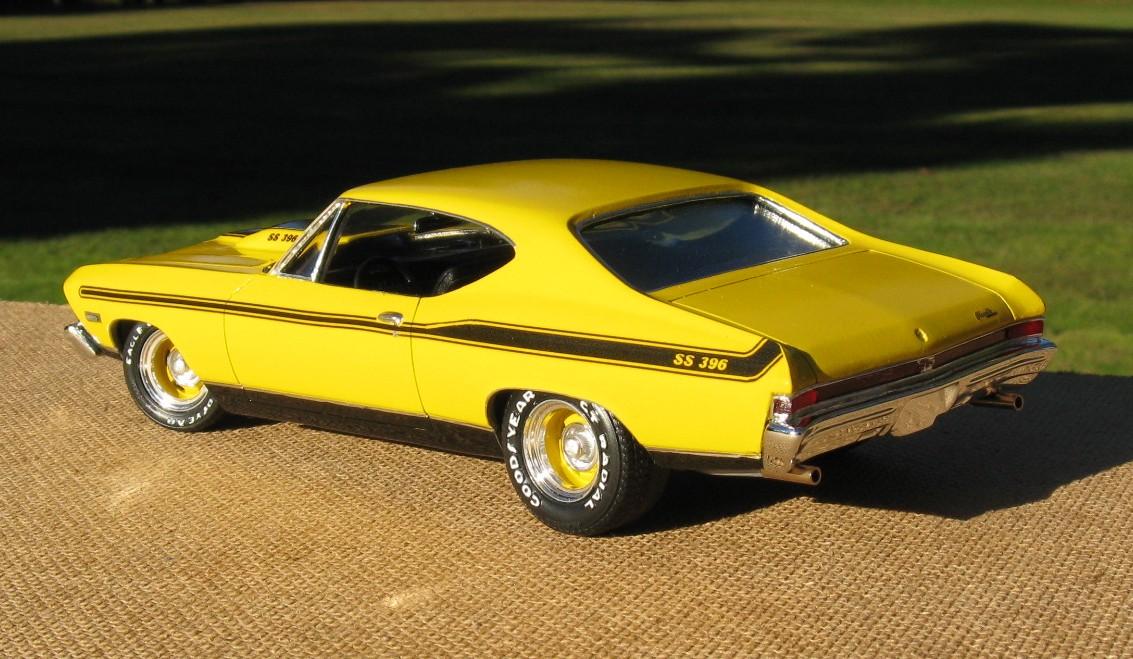
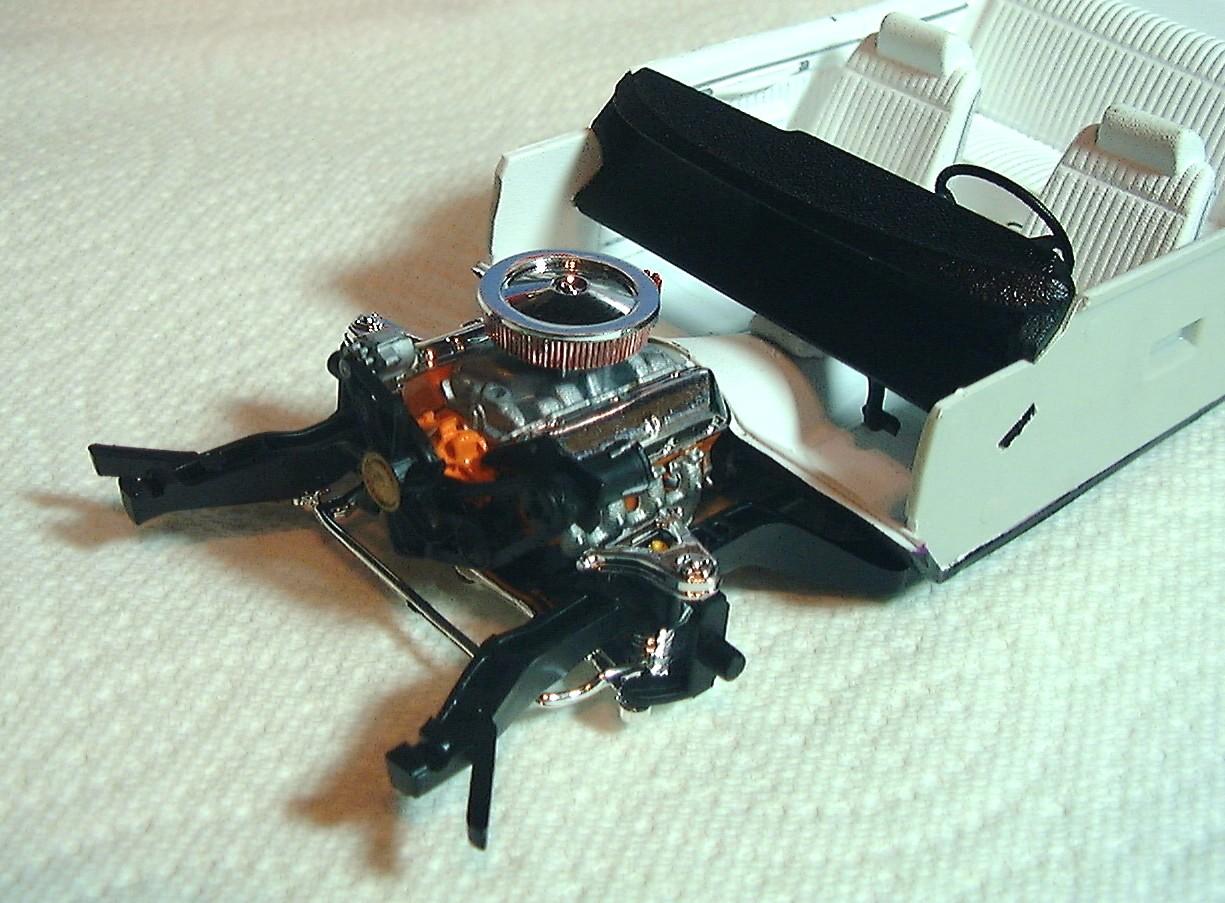
This model is the first full resin body conversion I have ever attempted. It is a 1968 Chevelle SS casted by Ed Fluck of Drag City Castings http://www.dragcitycasting.com . It was pretty easy to work with, which is nice, since I do not have any body work skills. I simply removed the flashing and thinned areas as needed. A couple of donor kits were used in this build. The first was an AMT 68 El Camino. From that I took the windshield, dash, steering wheel, front seats and console. The interior tub and complete chassis were donated by an AMT 69 Olds 442. It has a very detailed chassis with multi-piece suspension and working steering. Floor pan-wise, it took very minor trimming to fit nicely under the Chevelle body. The rear glass is from a 69 Chevelle. I originally wanted to do it up as a Yenko Super Chevy. However, after doing some research I found out that Yenko did not modify any Chevelles in 1968. Besides that, the Drag City Castings “Stinger” hood wouldn’t accept the YSC decal format. Since I had already purchased the Yenko decal set from Keith Marks http://public.fotki.com/mofobow/chevy/chevelle/ I scanned them in my PC and modified the side stripes to read “SS 396”. The hood decal artwork I designed from scratch in MS Paint as a .bmp. I used my inkjet printer and Testors decal paper to produce them. The yellow color, which I like to refer as “Magazine Cover Yellow”, is some craft store rattle can my wife got awhile back. The paint and decals are clear coated with Future. As you can obviously see, I used BMF as there is a lot of trim. If I had to do it over I might have added a black vinyl top. The wheels are multi-piece Corvette rally wheels that have been widened in the rear. I also widened the rear tires and lettered them with a Gelly Roll pen. The exhaust tips are nickel plated ‘crimp’ tubes (for RC planes) I picked up at my LHS. The big block Chevy engine came from the parts box and is a basic High Performance 4-BBL with ribbed valve covers. The wired distributor I made myself from scratch. The K&N air cleaner is high enough to be visible in the hood scoop opening. The front and rear bumpers including red tail light lenses are Modelhaus items http://www.modelhaus.com .
-
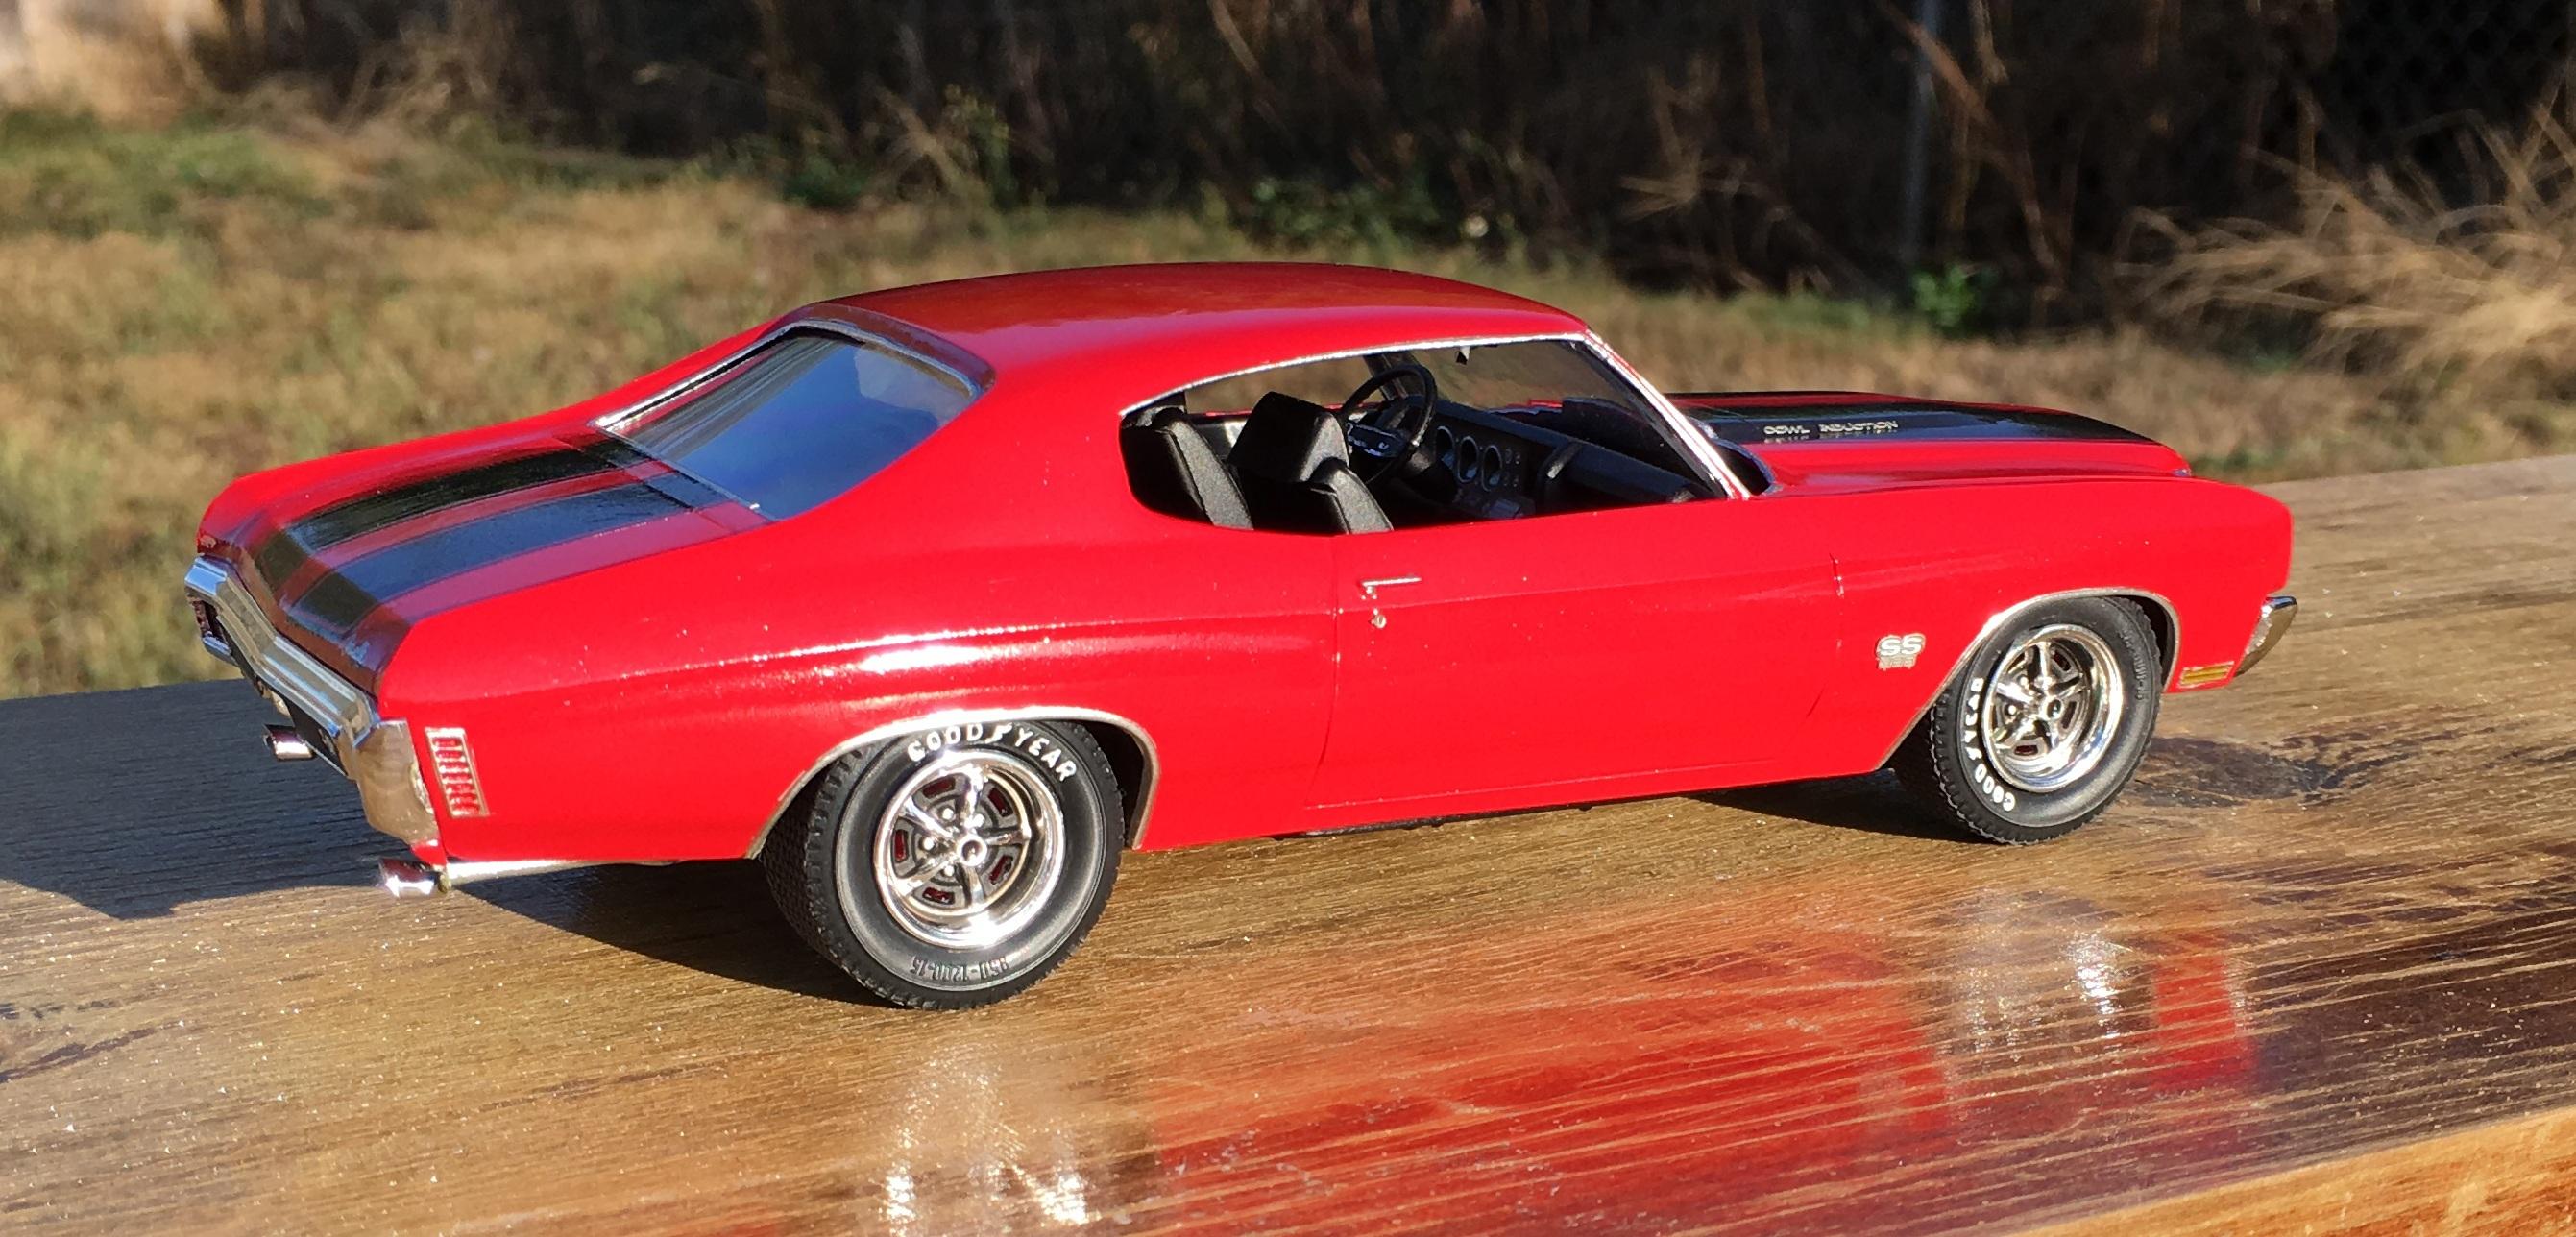
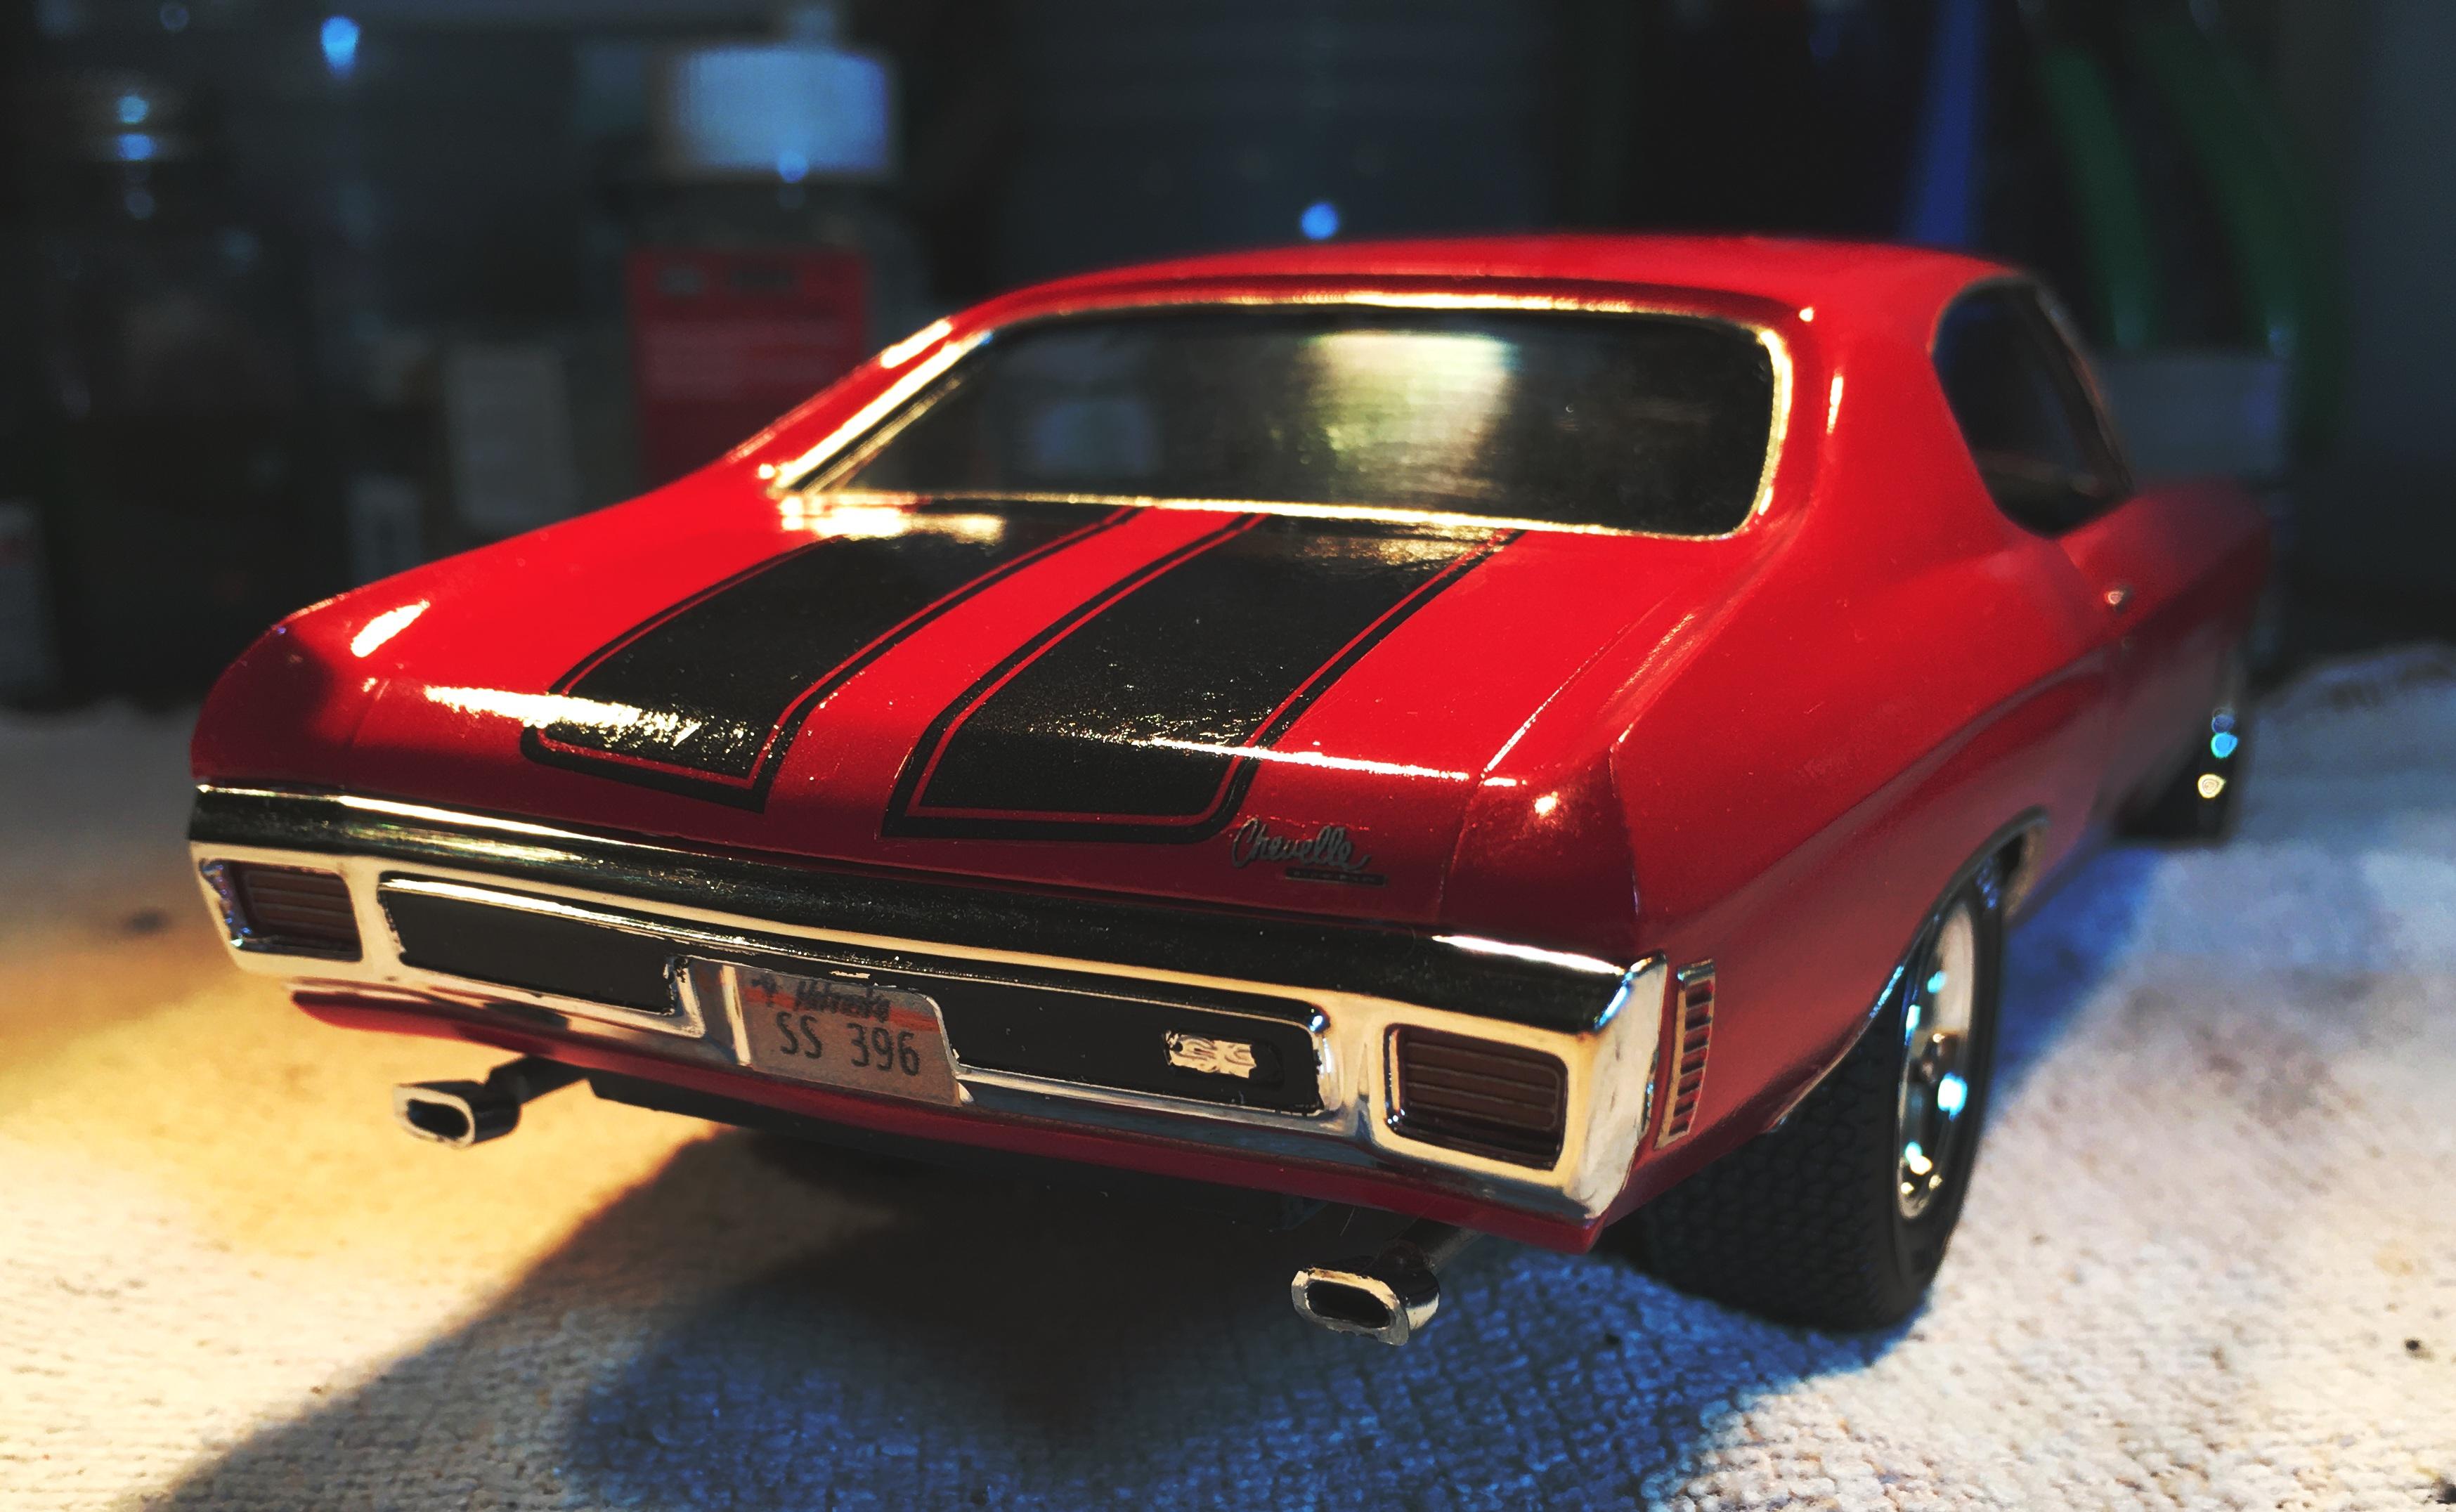
This model is an approximation of the real Chevelle my friend Mike M. had right after we graduated high school. It was a true SS 396 in red with black stripes, black interior and black vinyl top. It was a 4-speed and the engine was built up with Holley, Edelbrock and Hooker parts. The thing was bad fast too. We had to go WAY out to the country to look at it which helped as they only wanted $1000 for it. If it wasn't, it would have been snatched up long before we got there. This model is the closest to box stock as I have ever built. I did add some photo etch emblems. I am about 70% happy with the paint and 95% happy with all the details.
-
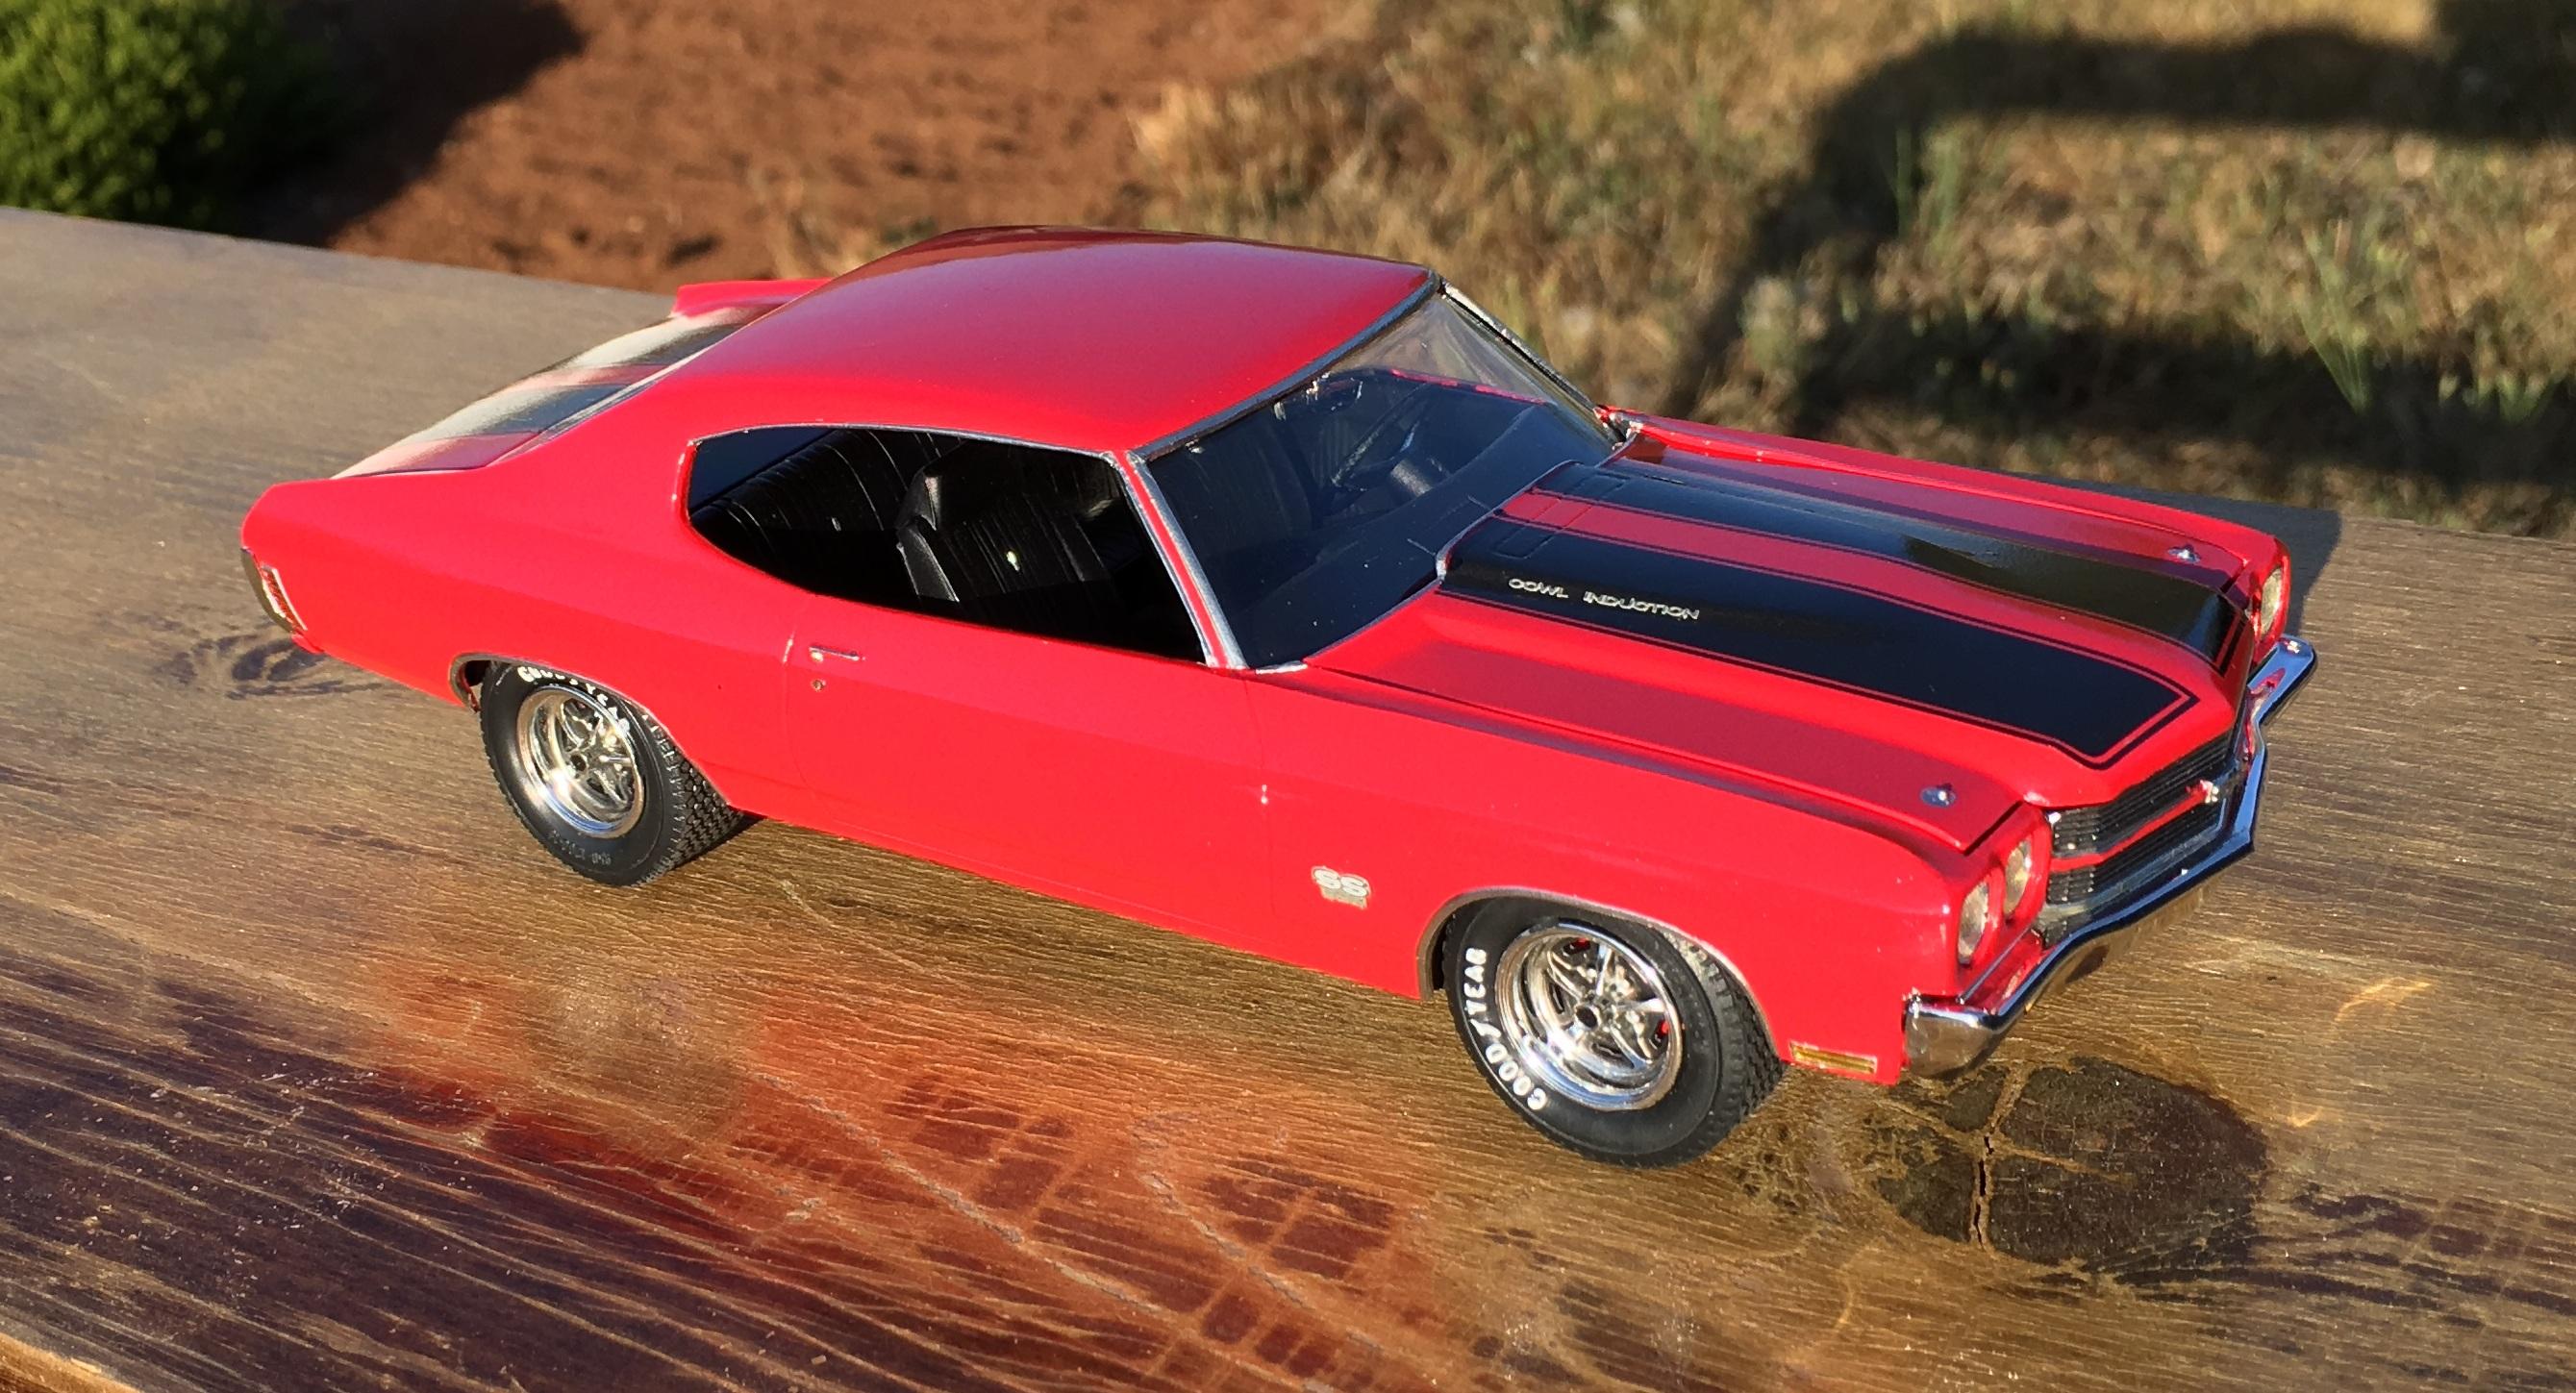
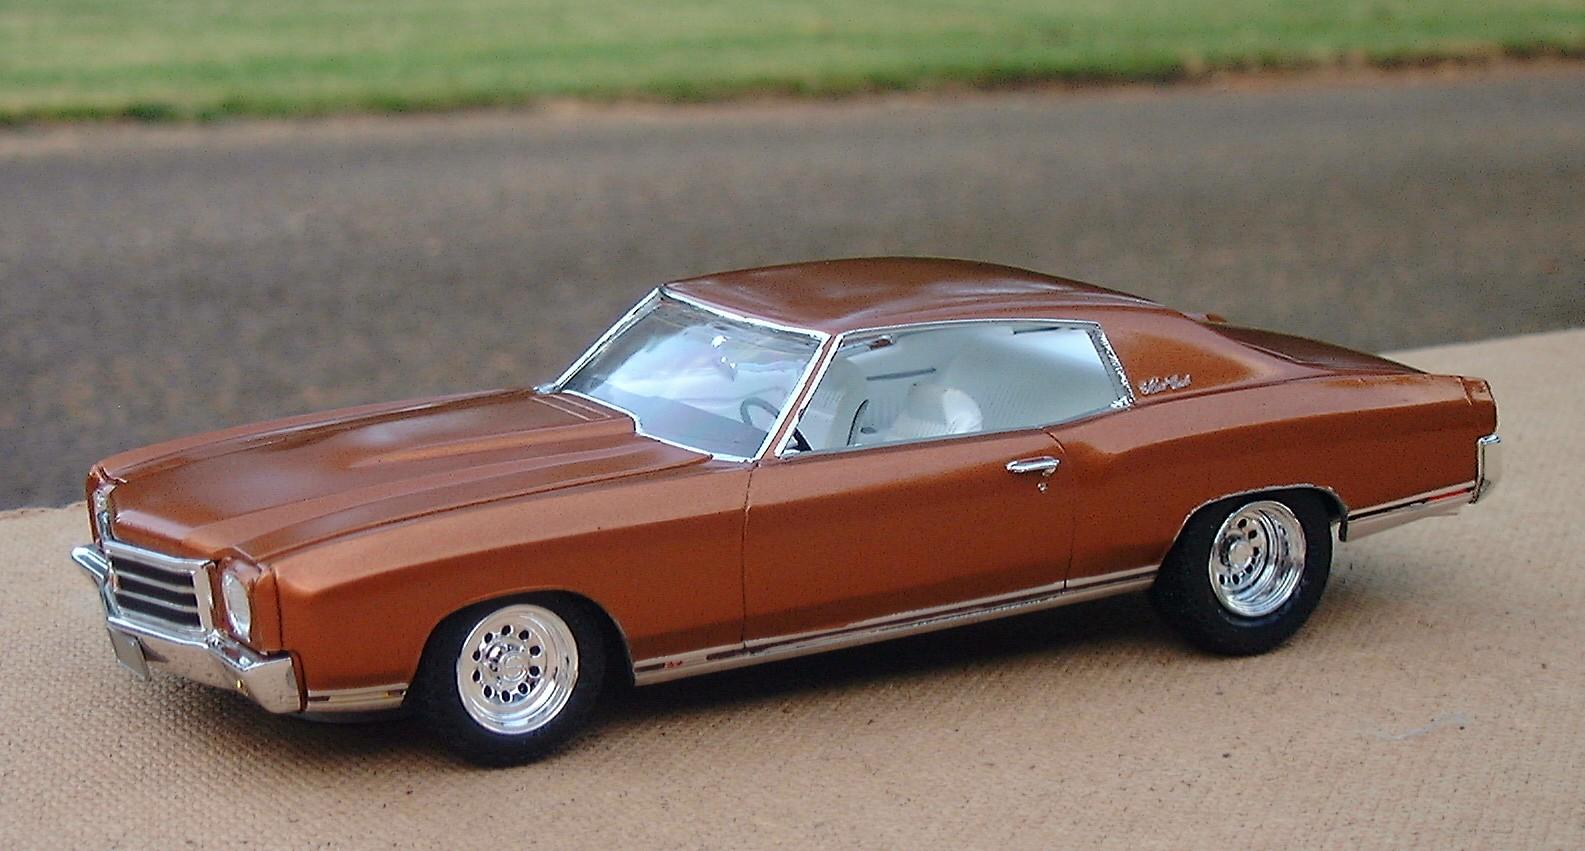
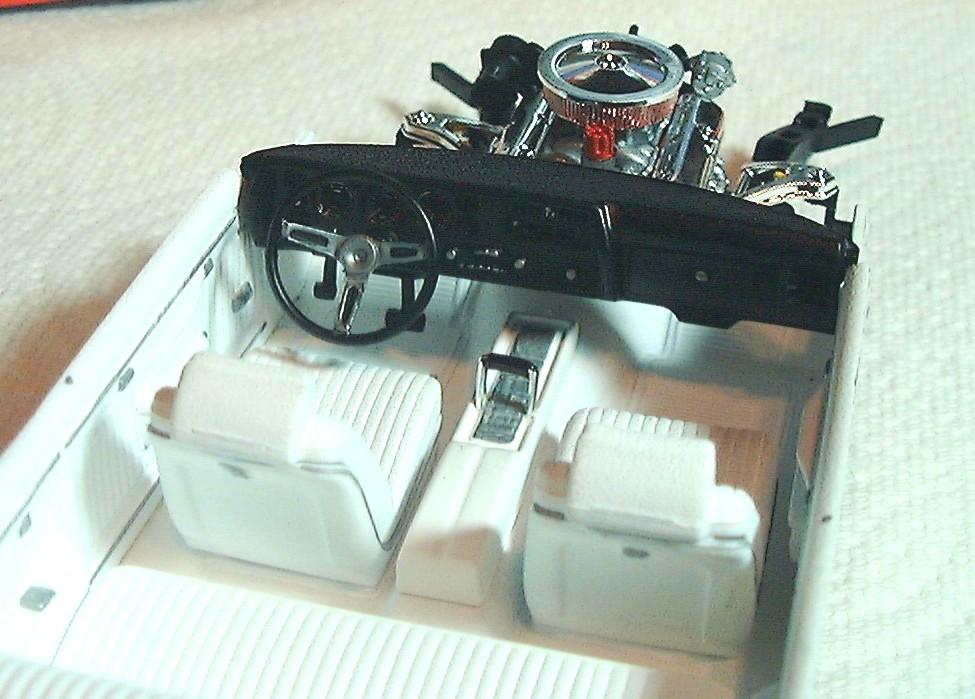
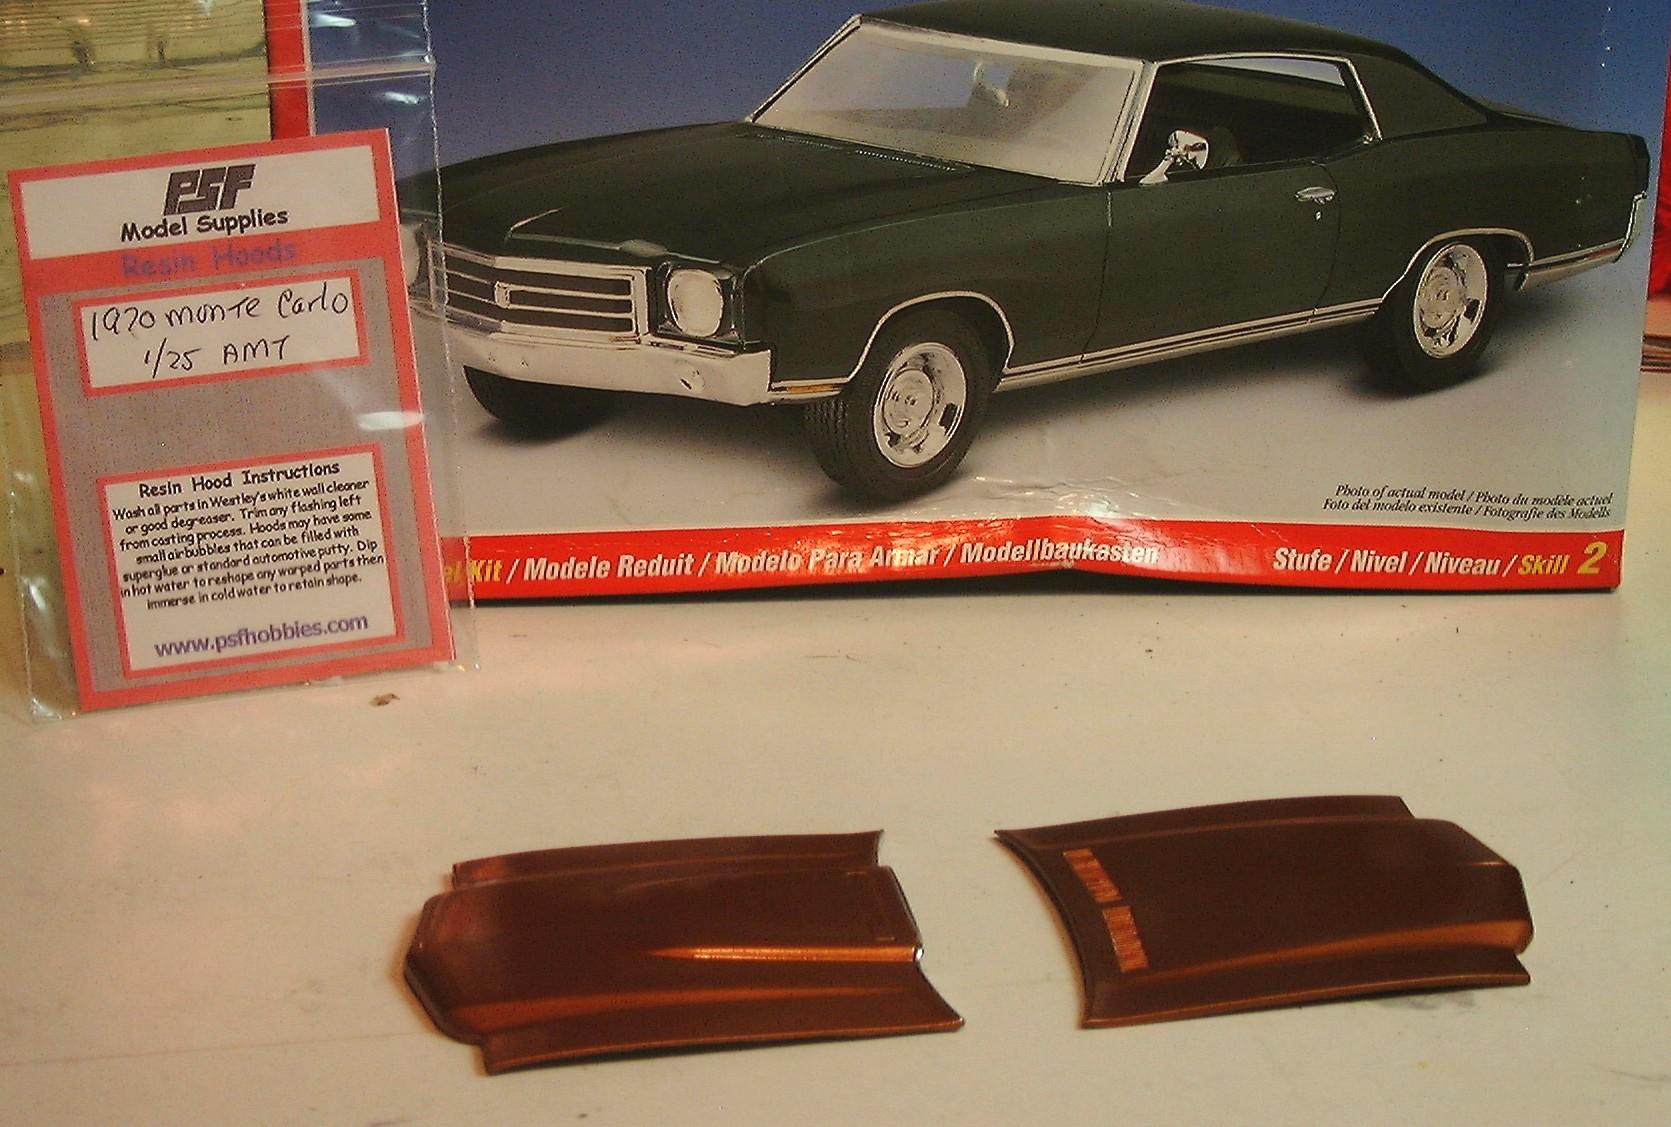
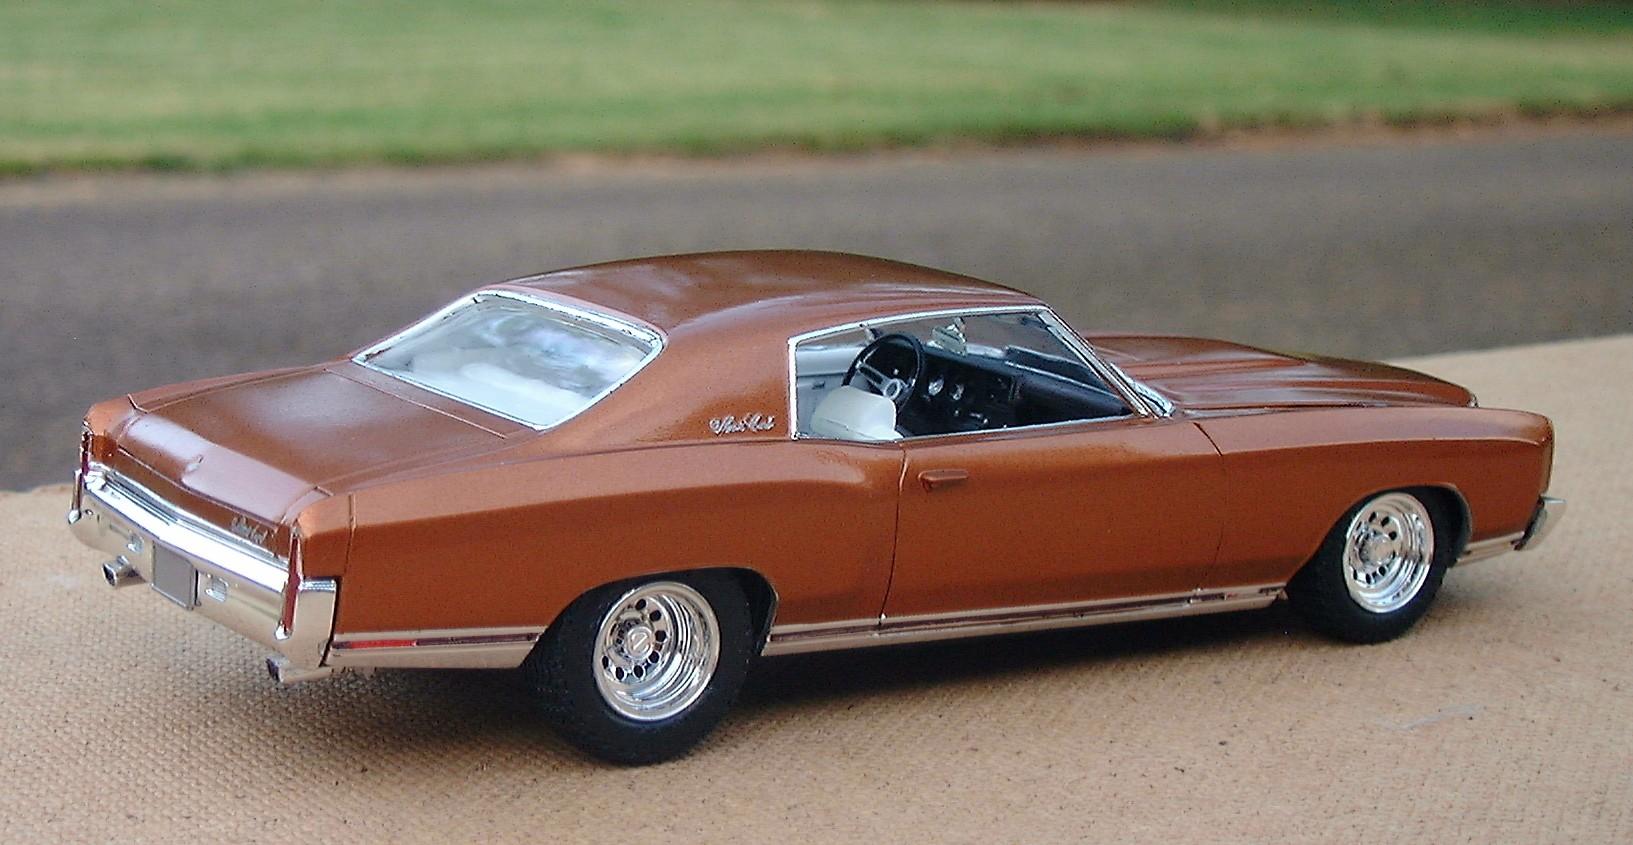
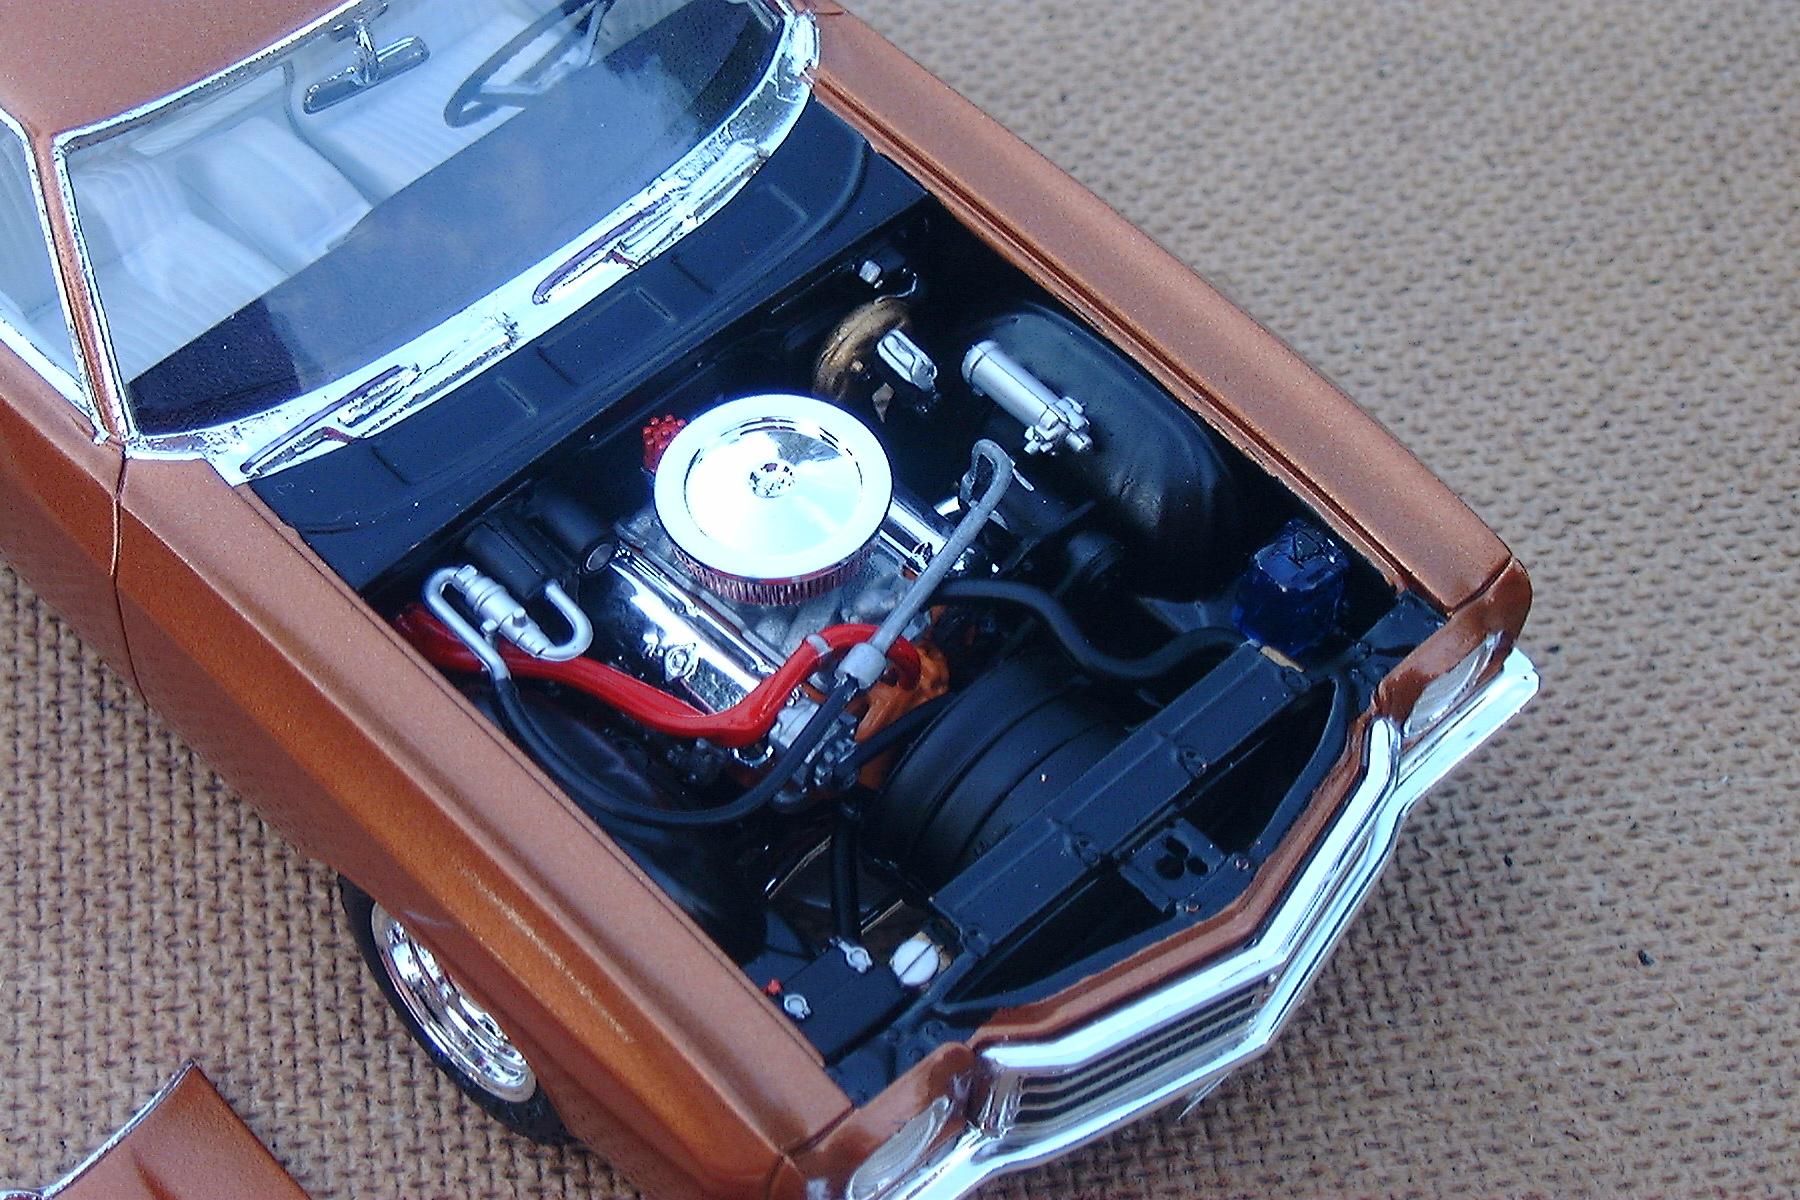
This Monte Carlo was built as a vague recreation of the copper Monte Carlo my dad had when I was a teenager. (Oh the stories that back seat could tell, LOL!) Anyway, this was an open, pre-painted kit I got on ebay. I didn’t like the purple, so I repainted it metallic copper. I usually build my models with the factory “High Performance” option which usually includes a special hood. Unfortunately, Monte Carlos were never offered from the factory with any hood other than flat. However, I learned that PSF Hobbies offers a custom 70 Chevelle Cowl Induction hood for this kit, so I got it. During the build, I had progressed about a third of the way through before discovering that the suspension pieces were missing. Fortunately, members of the DMPCC came through and gave me the missing parts I needed. The kit is surprisingly detailed for an AMT offering. It has details such as separate control arms for the 4-link rear and a complete multi-piece A/C system in the engine compartment. I also added chrome valve covers and air cleaner from my parts box. The gage faces have been decaled from a Keith Marks decal set.
-
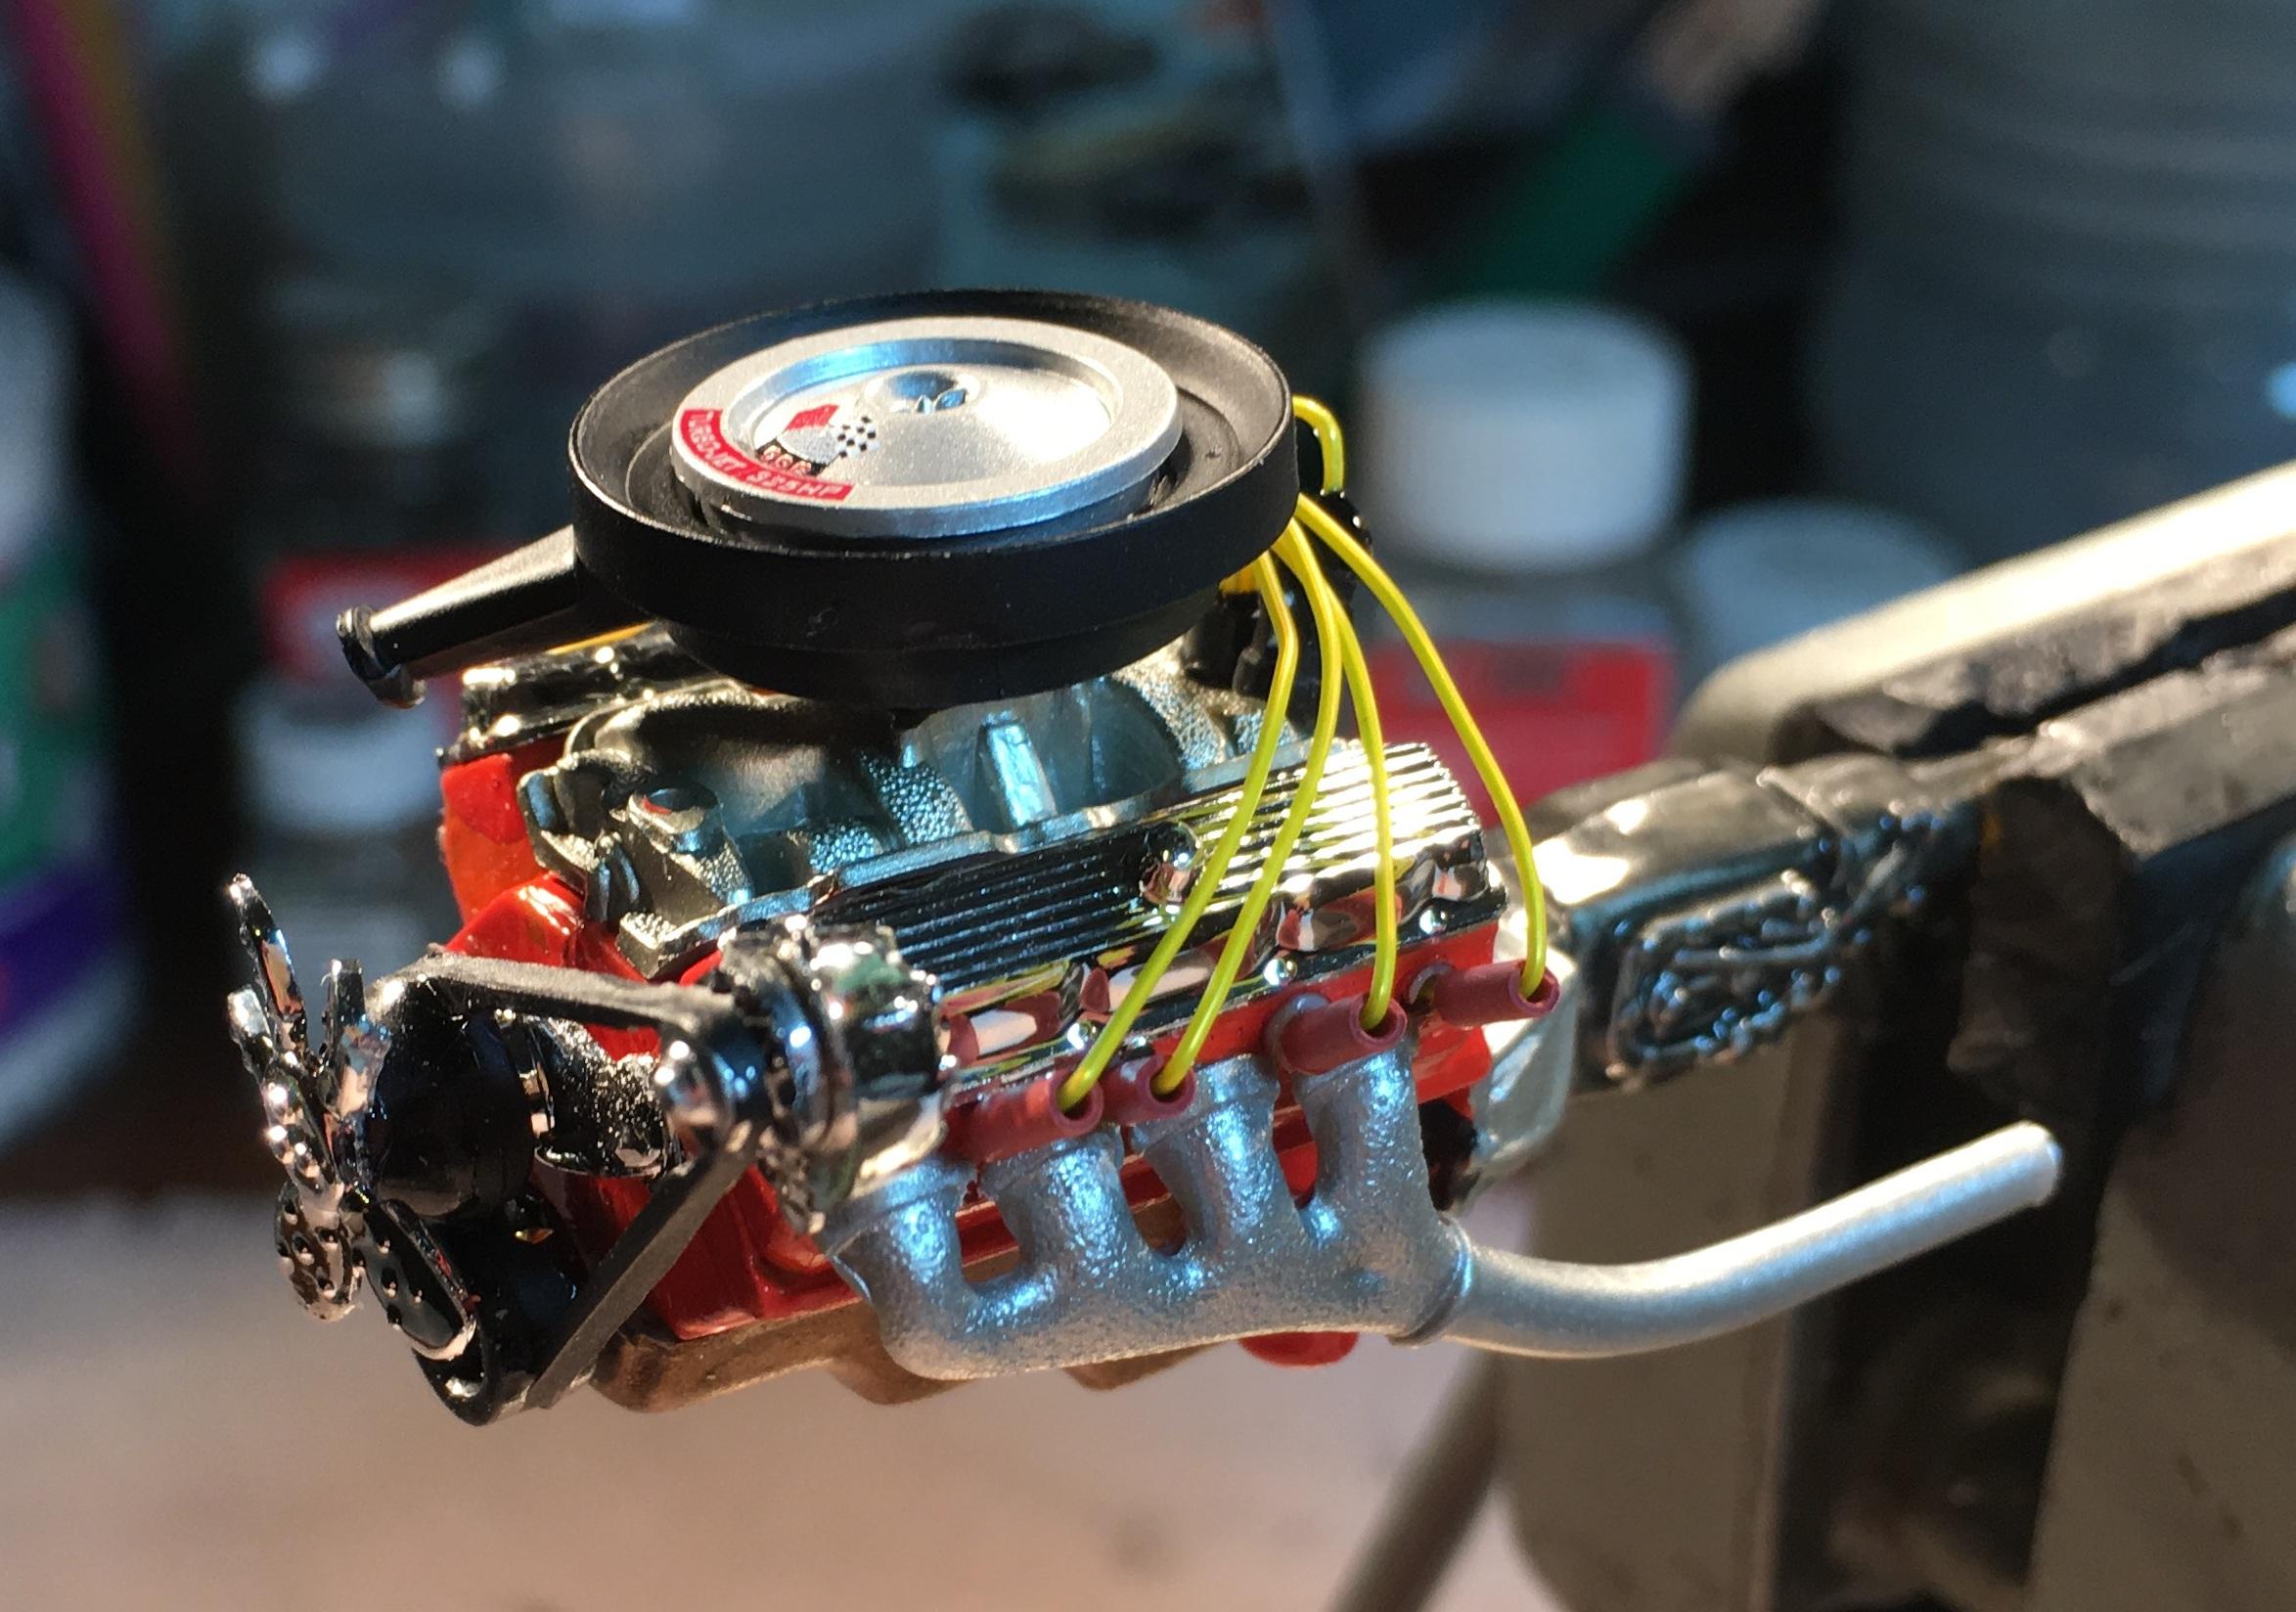
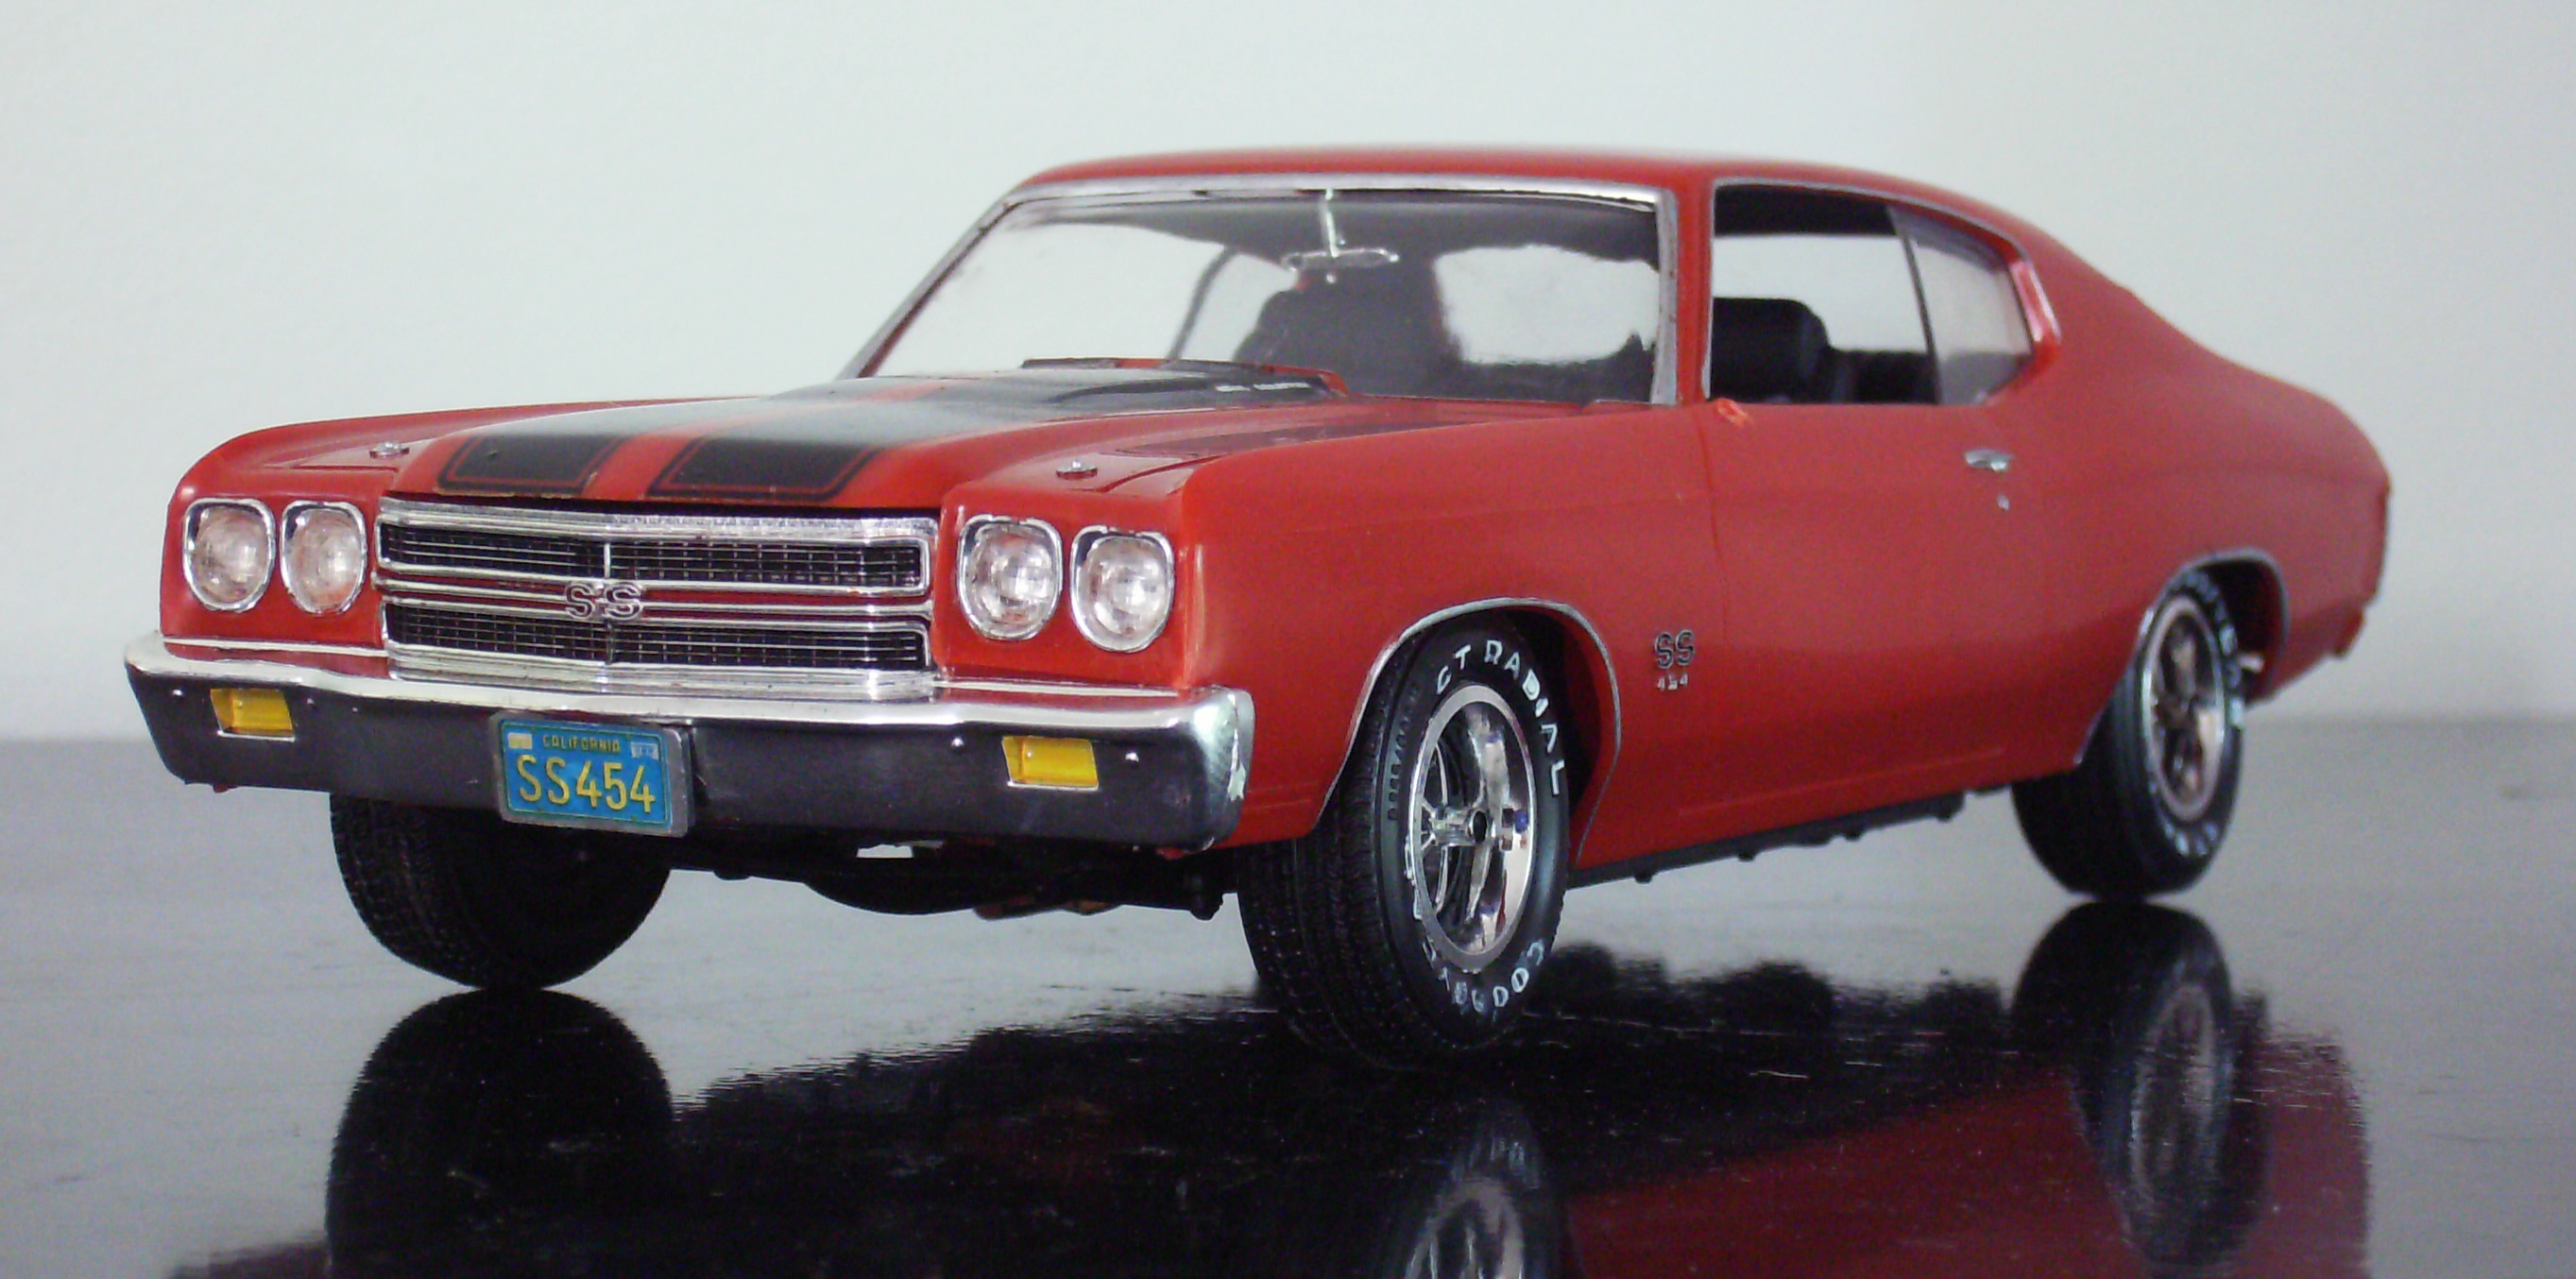
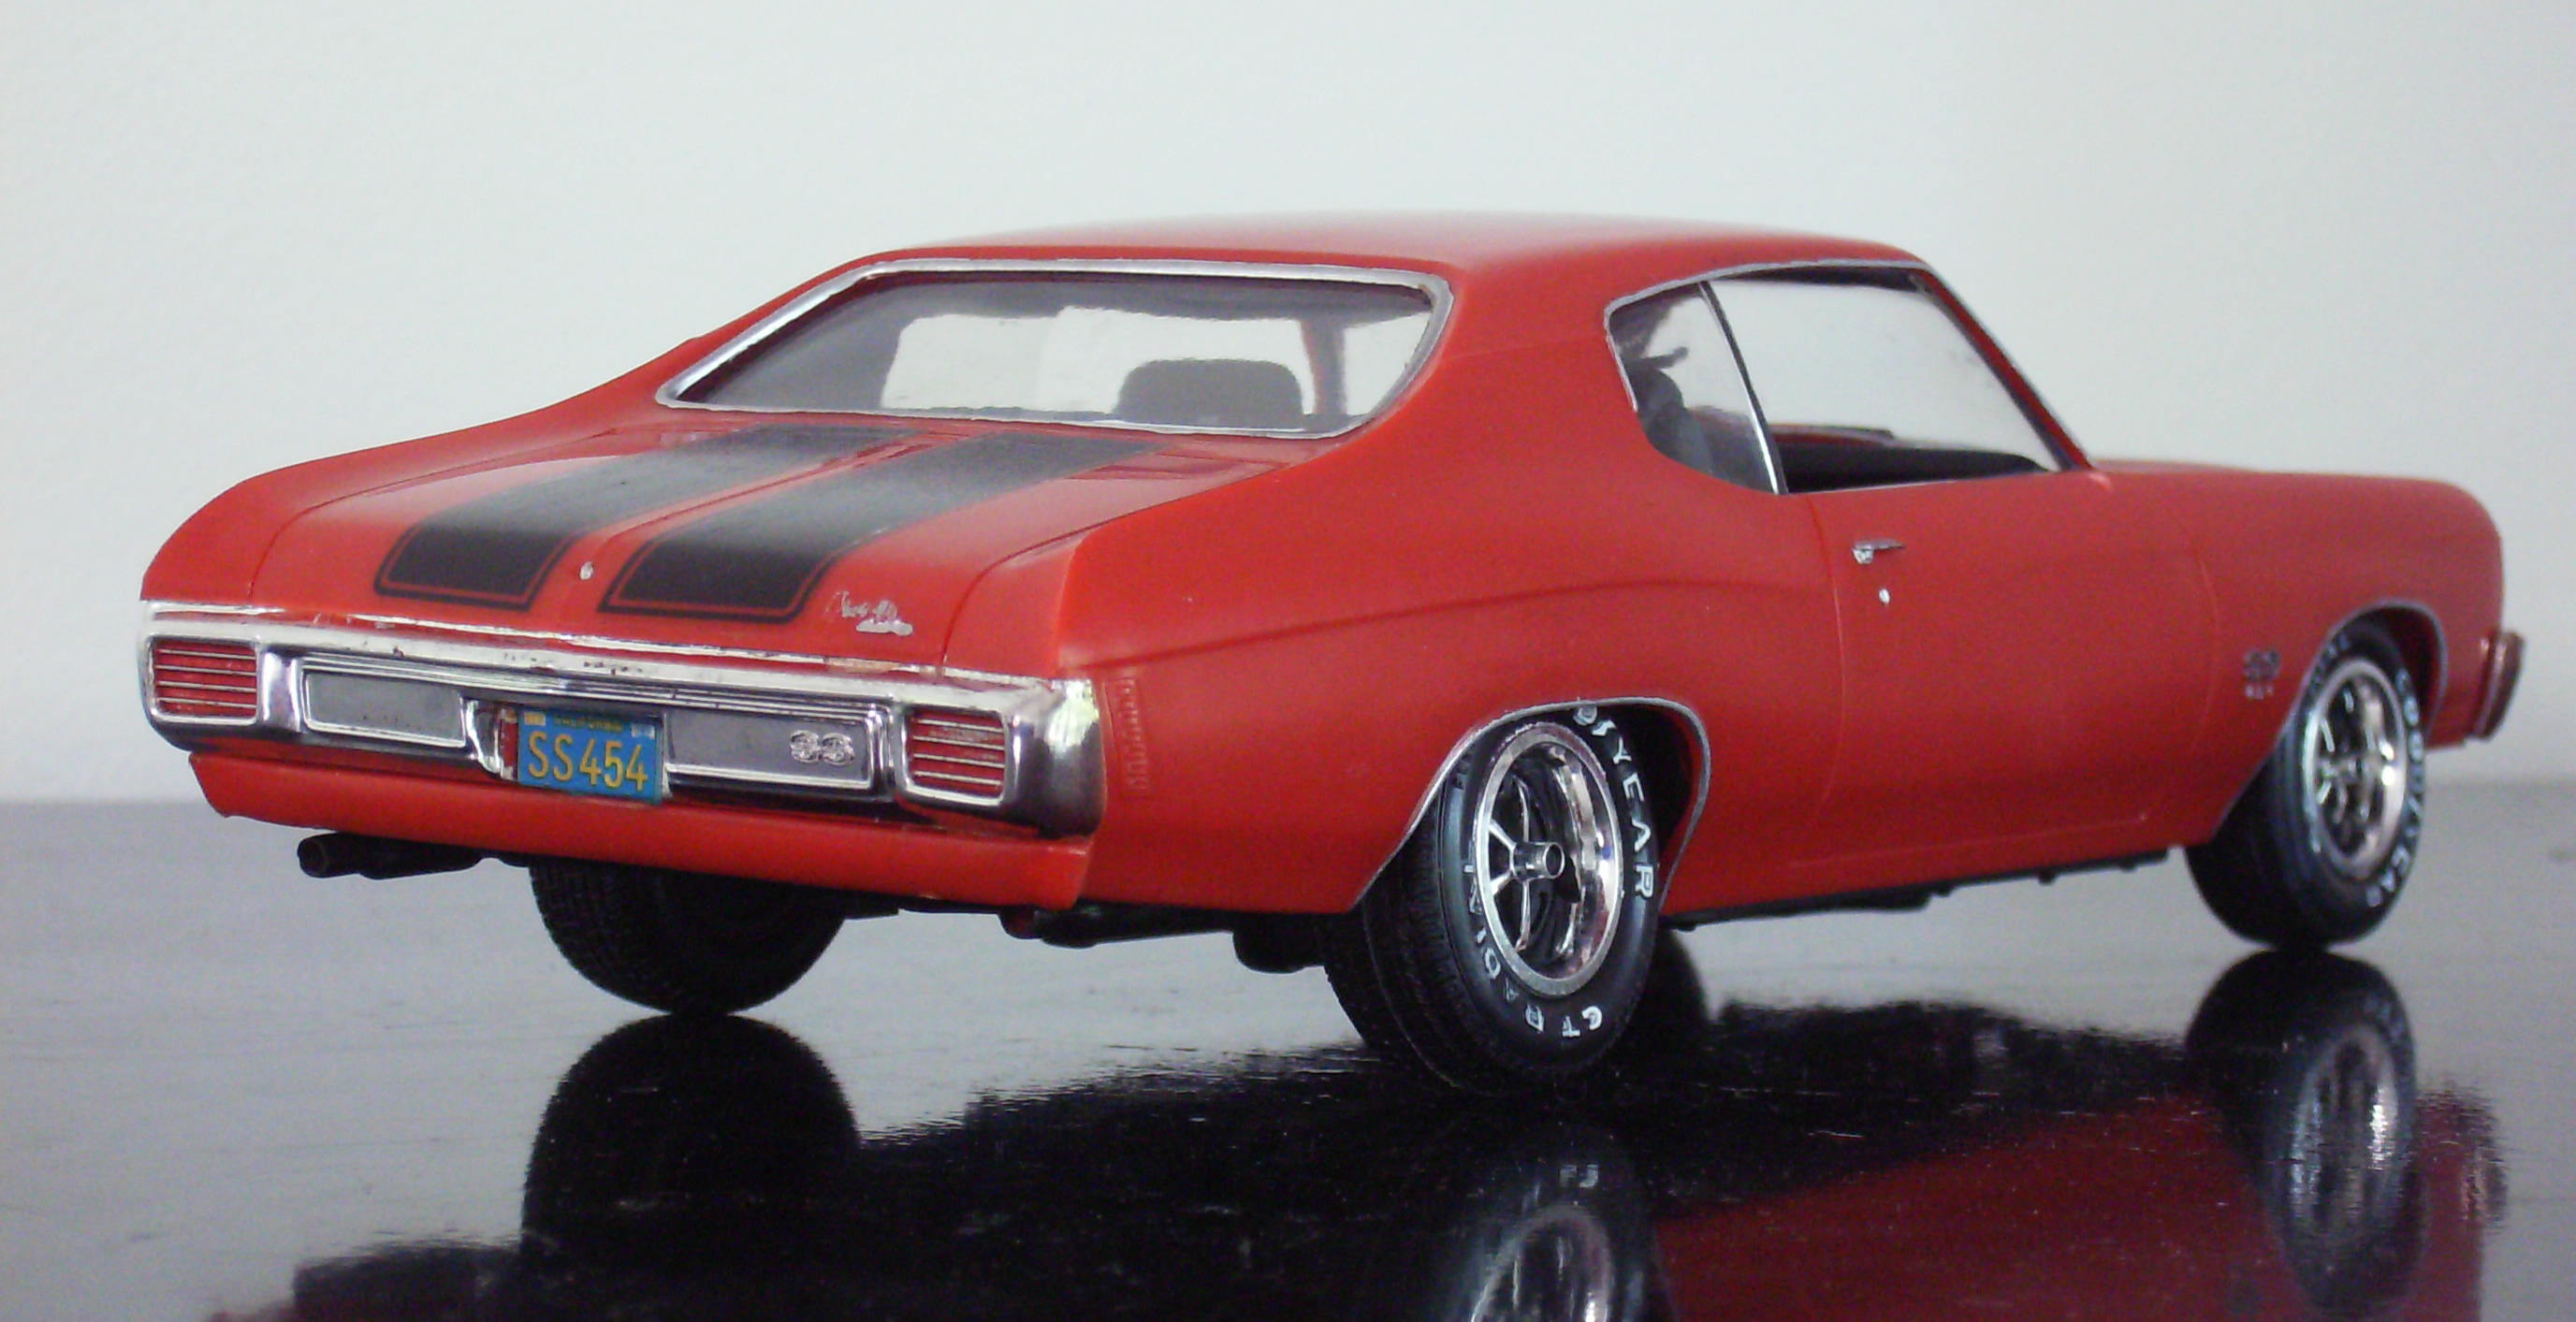
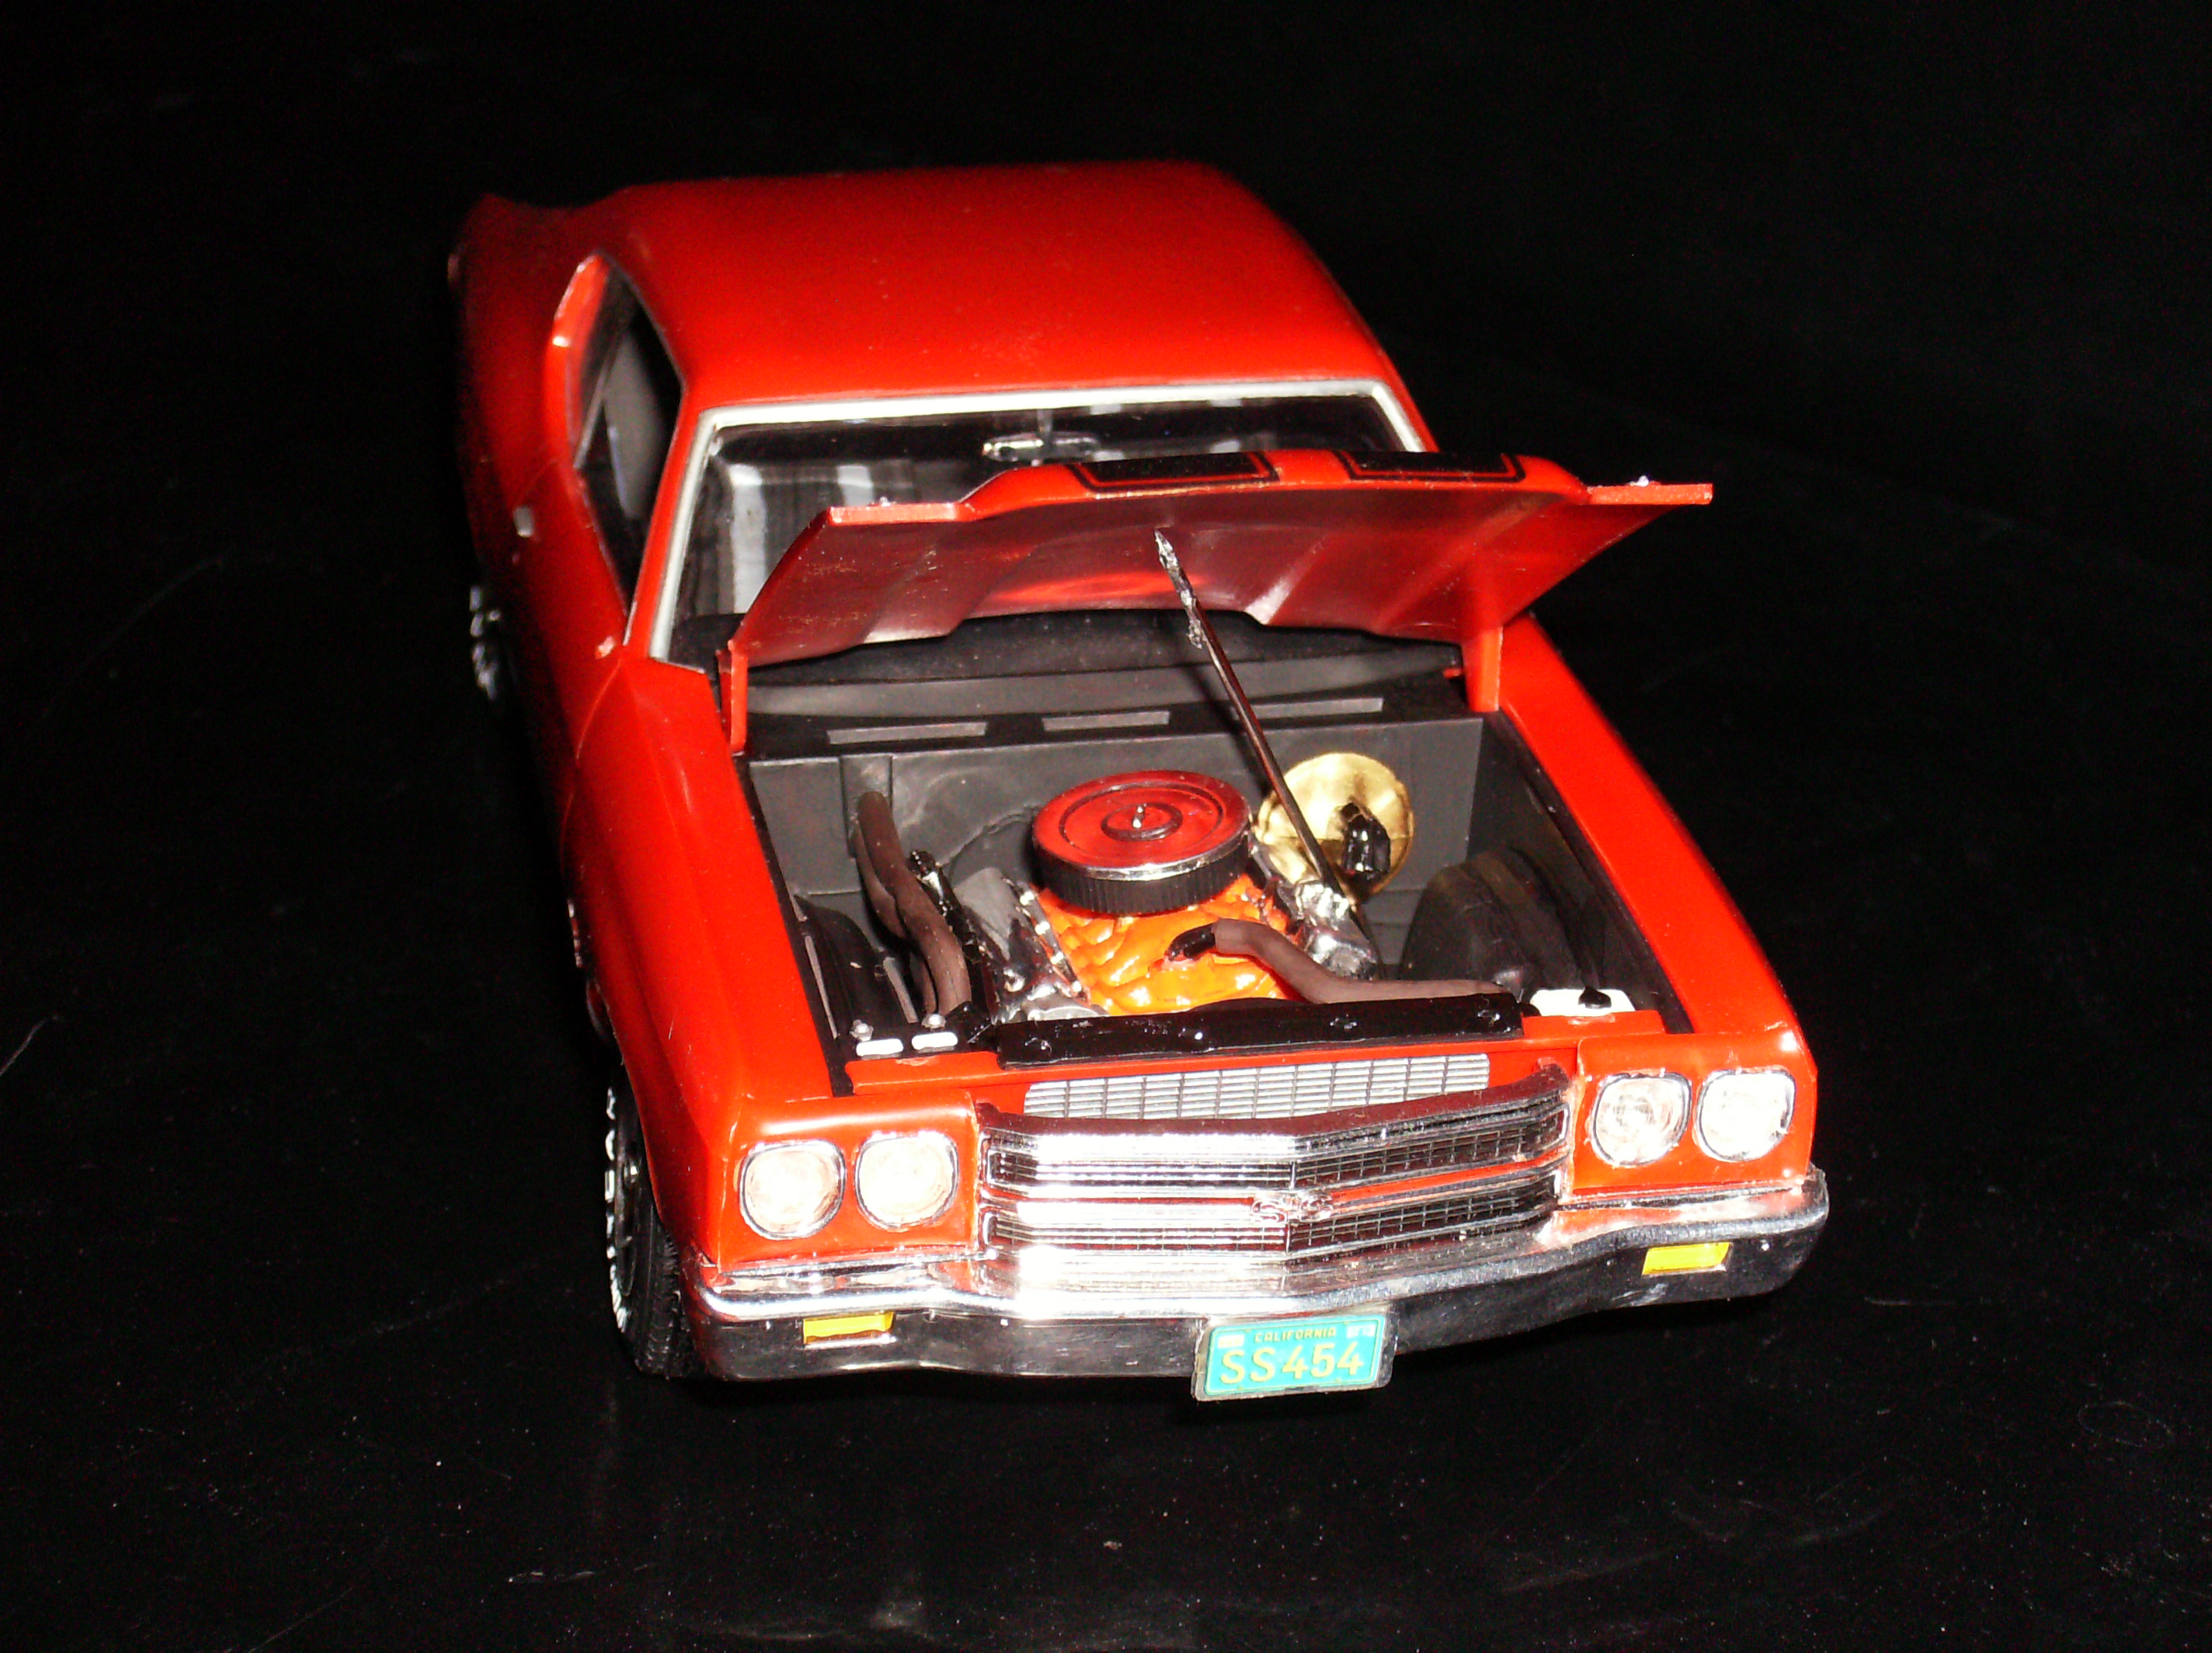
This is a ProShop pre-painted kit with mixing and matching of parts from my other Chevelles. Overall it turned out pretty well. I picked the Cragar S/S wheels because they look good on Chevys. I went with a red interior just to spice it up. The engine is a 454 Big Block with ignition wires added. Except for the side marker lights, no BMF was used. Just a touch of Molotow chrome here and there.
-
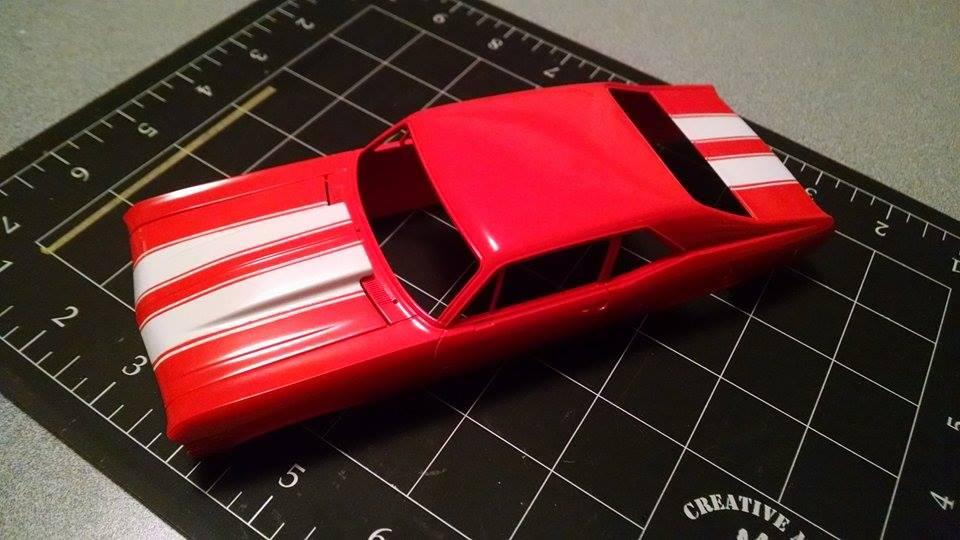
Started this a while back hope to finish by the end of the month. Basically it is an out of the box build other than the Crager SS wheels. I decided to go with rally stripes and surprisingly being my first time painting them, I feel pretty good as to how they came out. I used Tamiya White primer as my base then Tamiya Bright White for the first top coat once that dried for a few days I masked off the stripes and sprayed Tamiya Bright Orange for my color coat. And last but not least once that set up, I shot it with a few coats of Testors Wet Coat Clear. After the paint is gassed out a bit I will polish and chrome what I need to. I did do some chrome prior to paint and polished the spots lightly. I also decided to chrome the edges of the fender gills just to break up the area a bit (still needs work). I hope to post more as I go along. if not, I will definetly post when finished.
-
Did I post this one before? I forget. My memory ain't too good these days, but then it never was. Love me some Chevelles. I think this was a Monogram kit. Been so long ago, I don't remember. I graduated high school that year. Dang, I'm getting old!
-
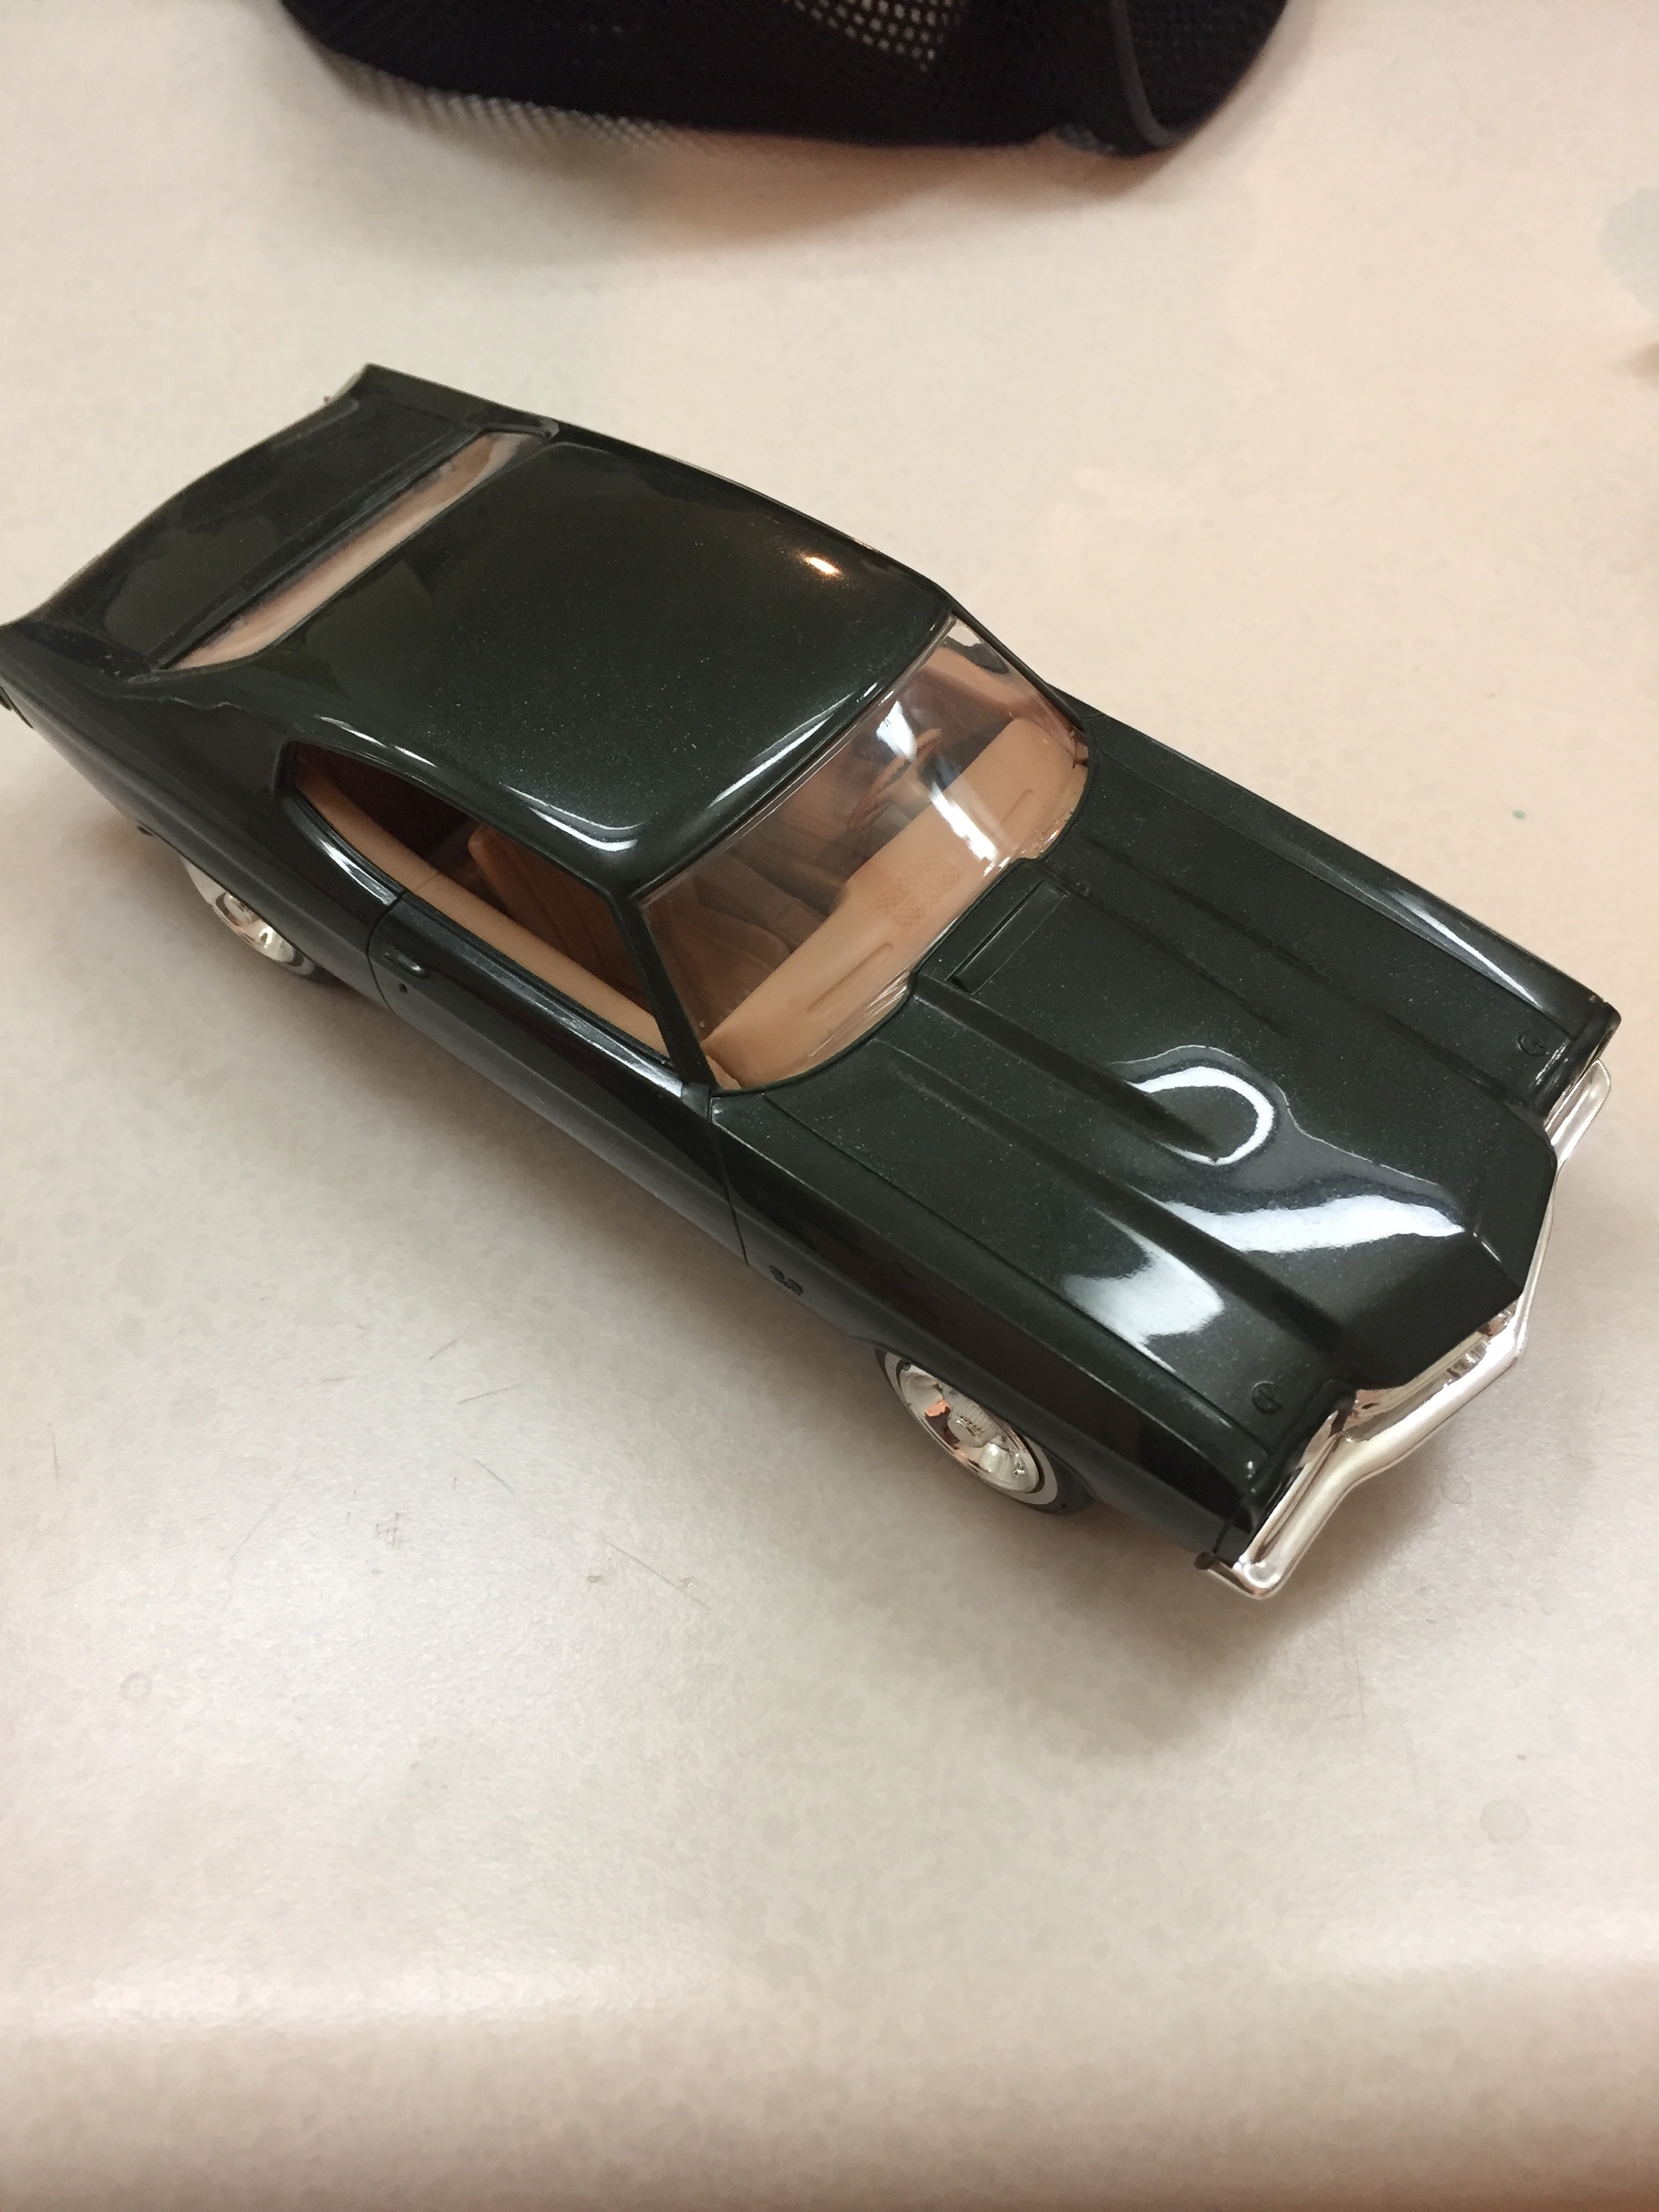
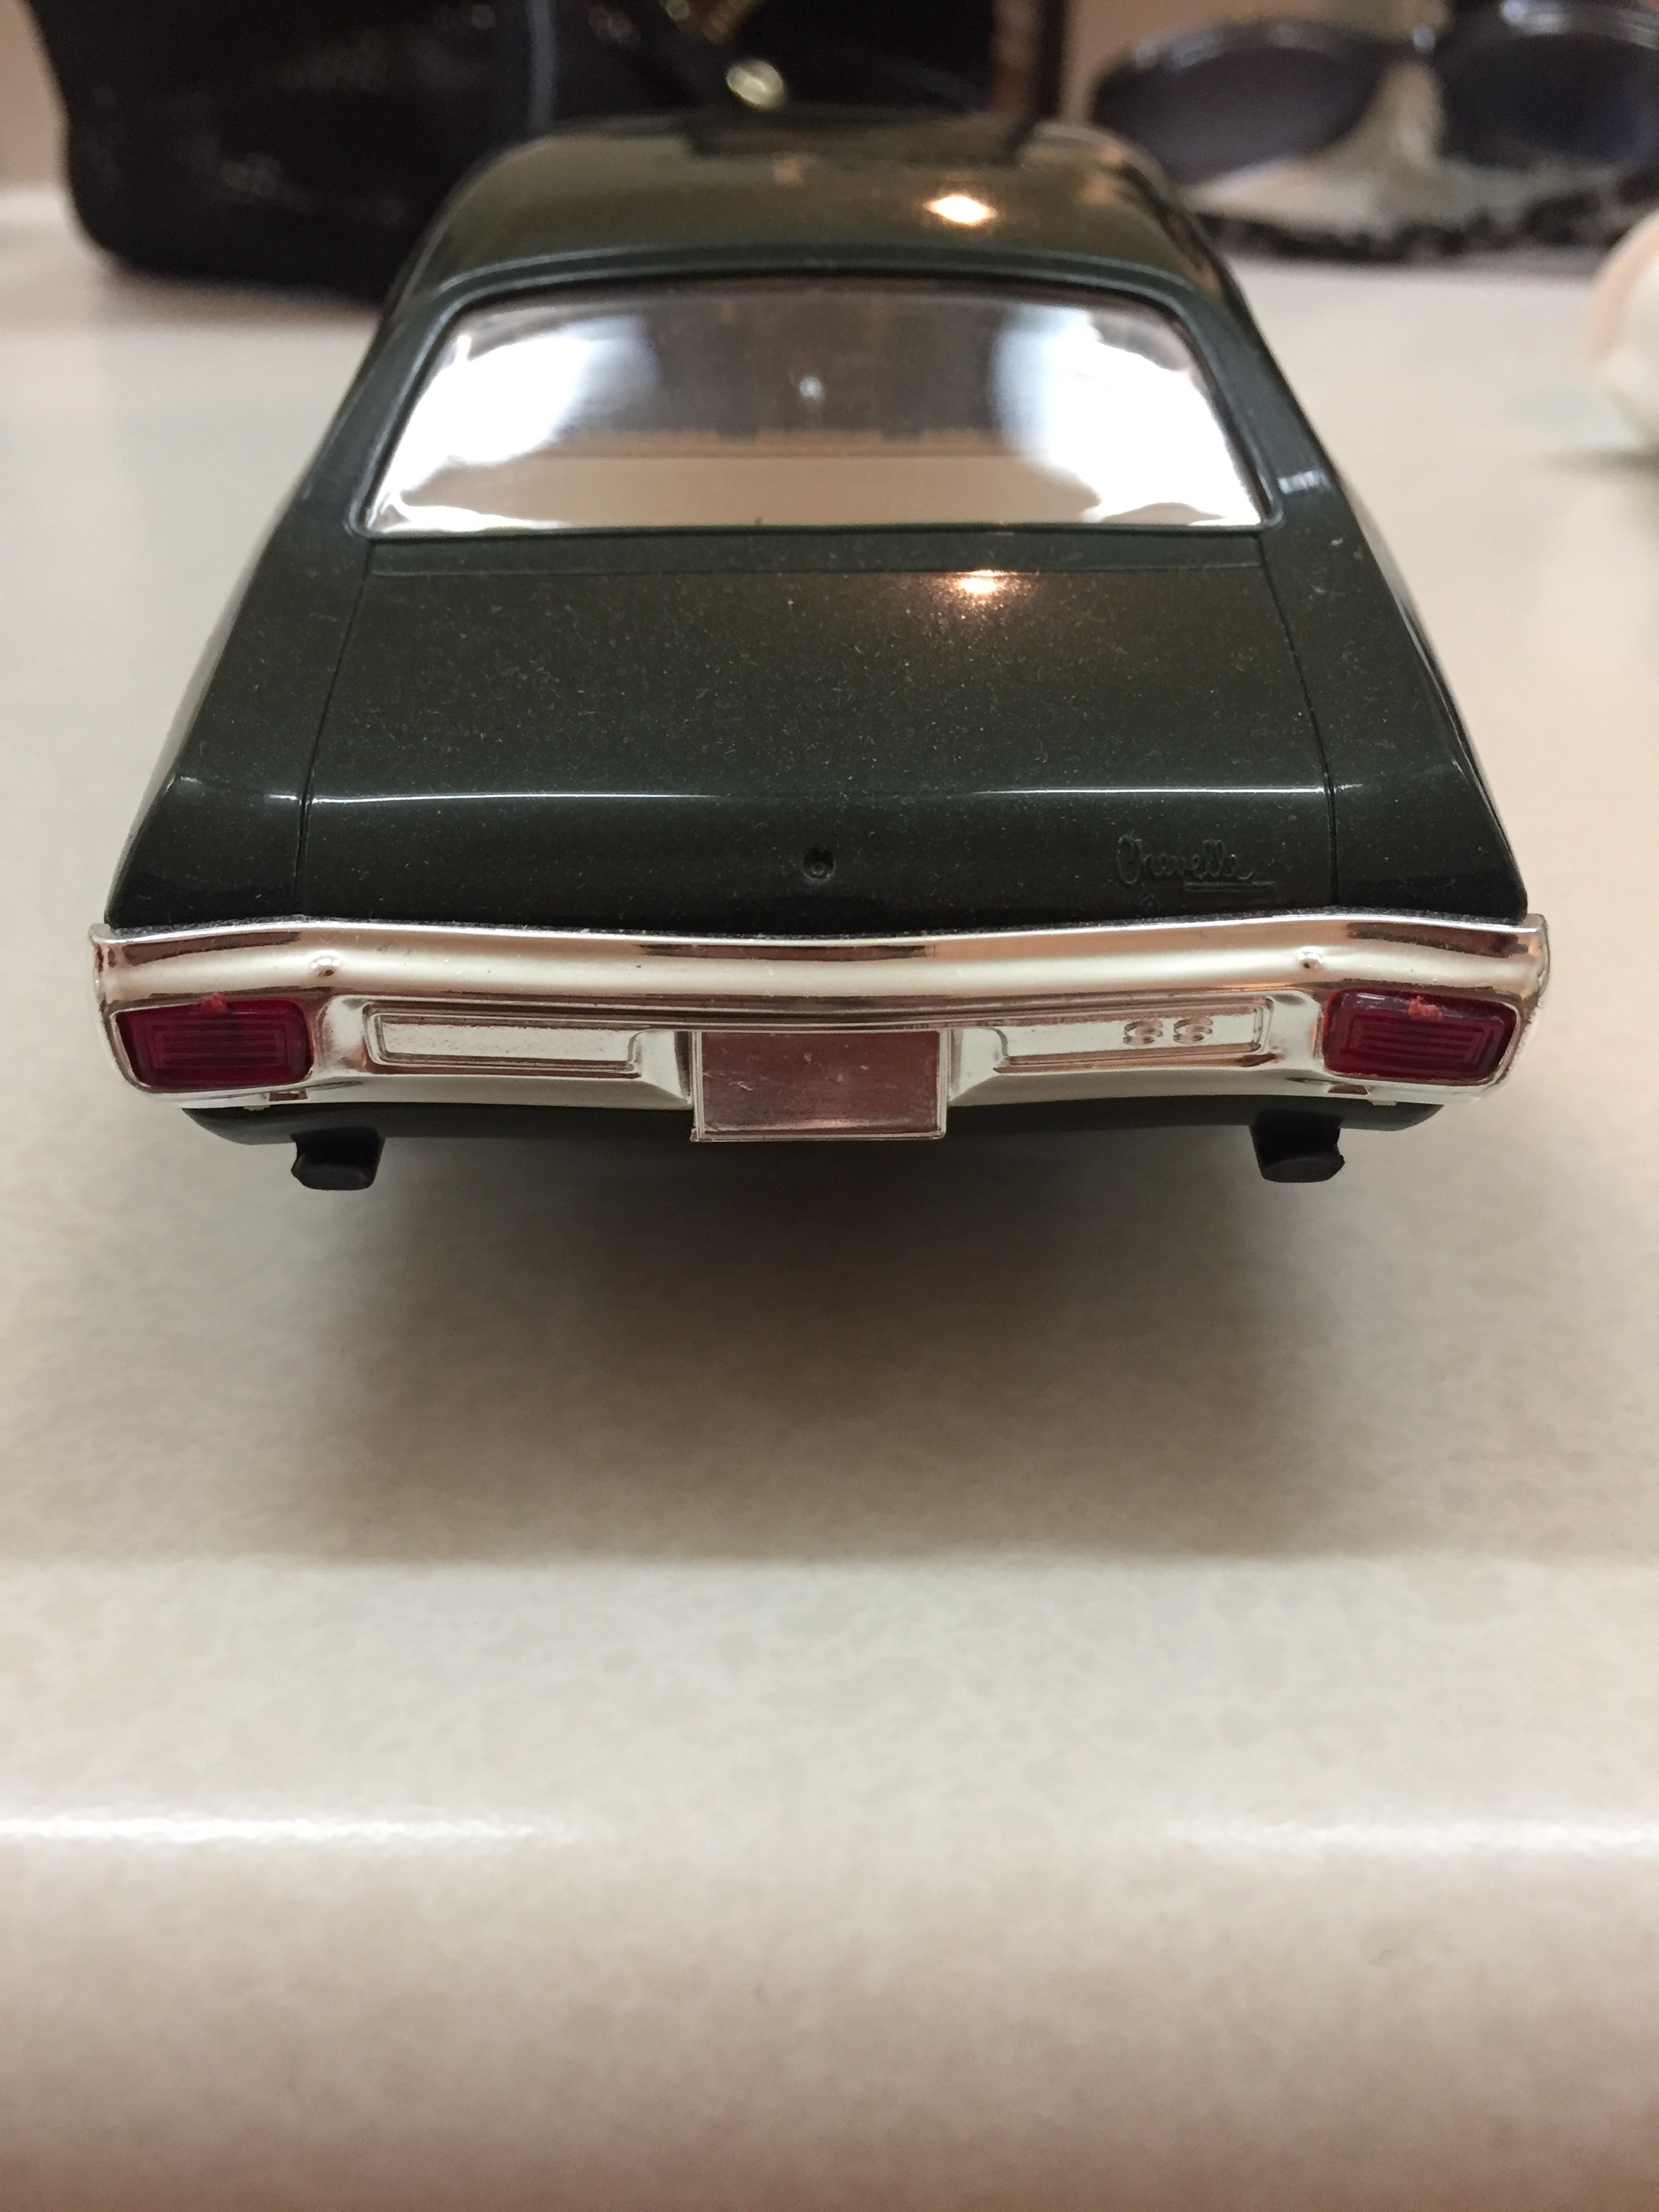
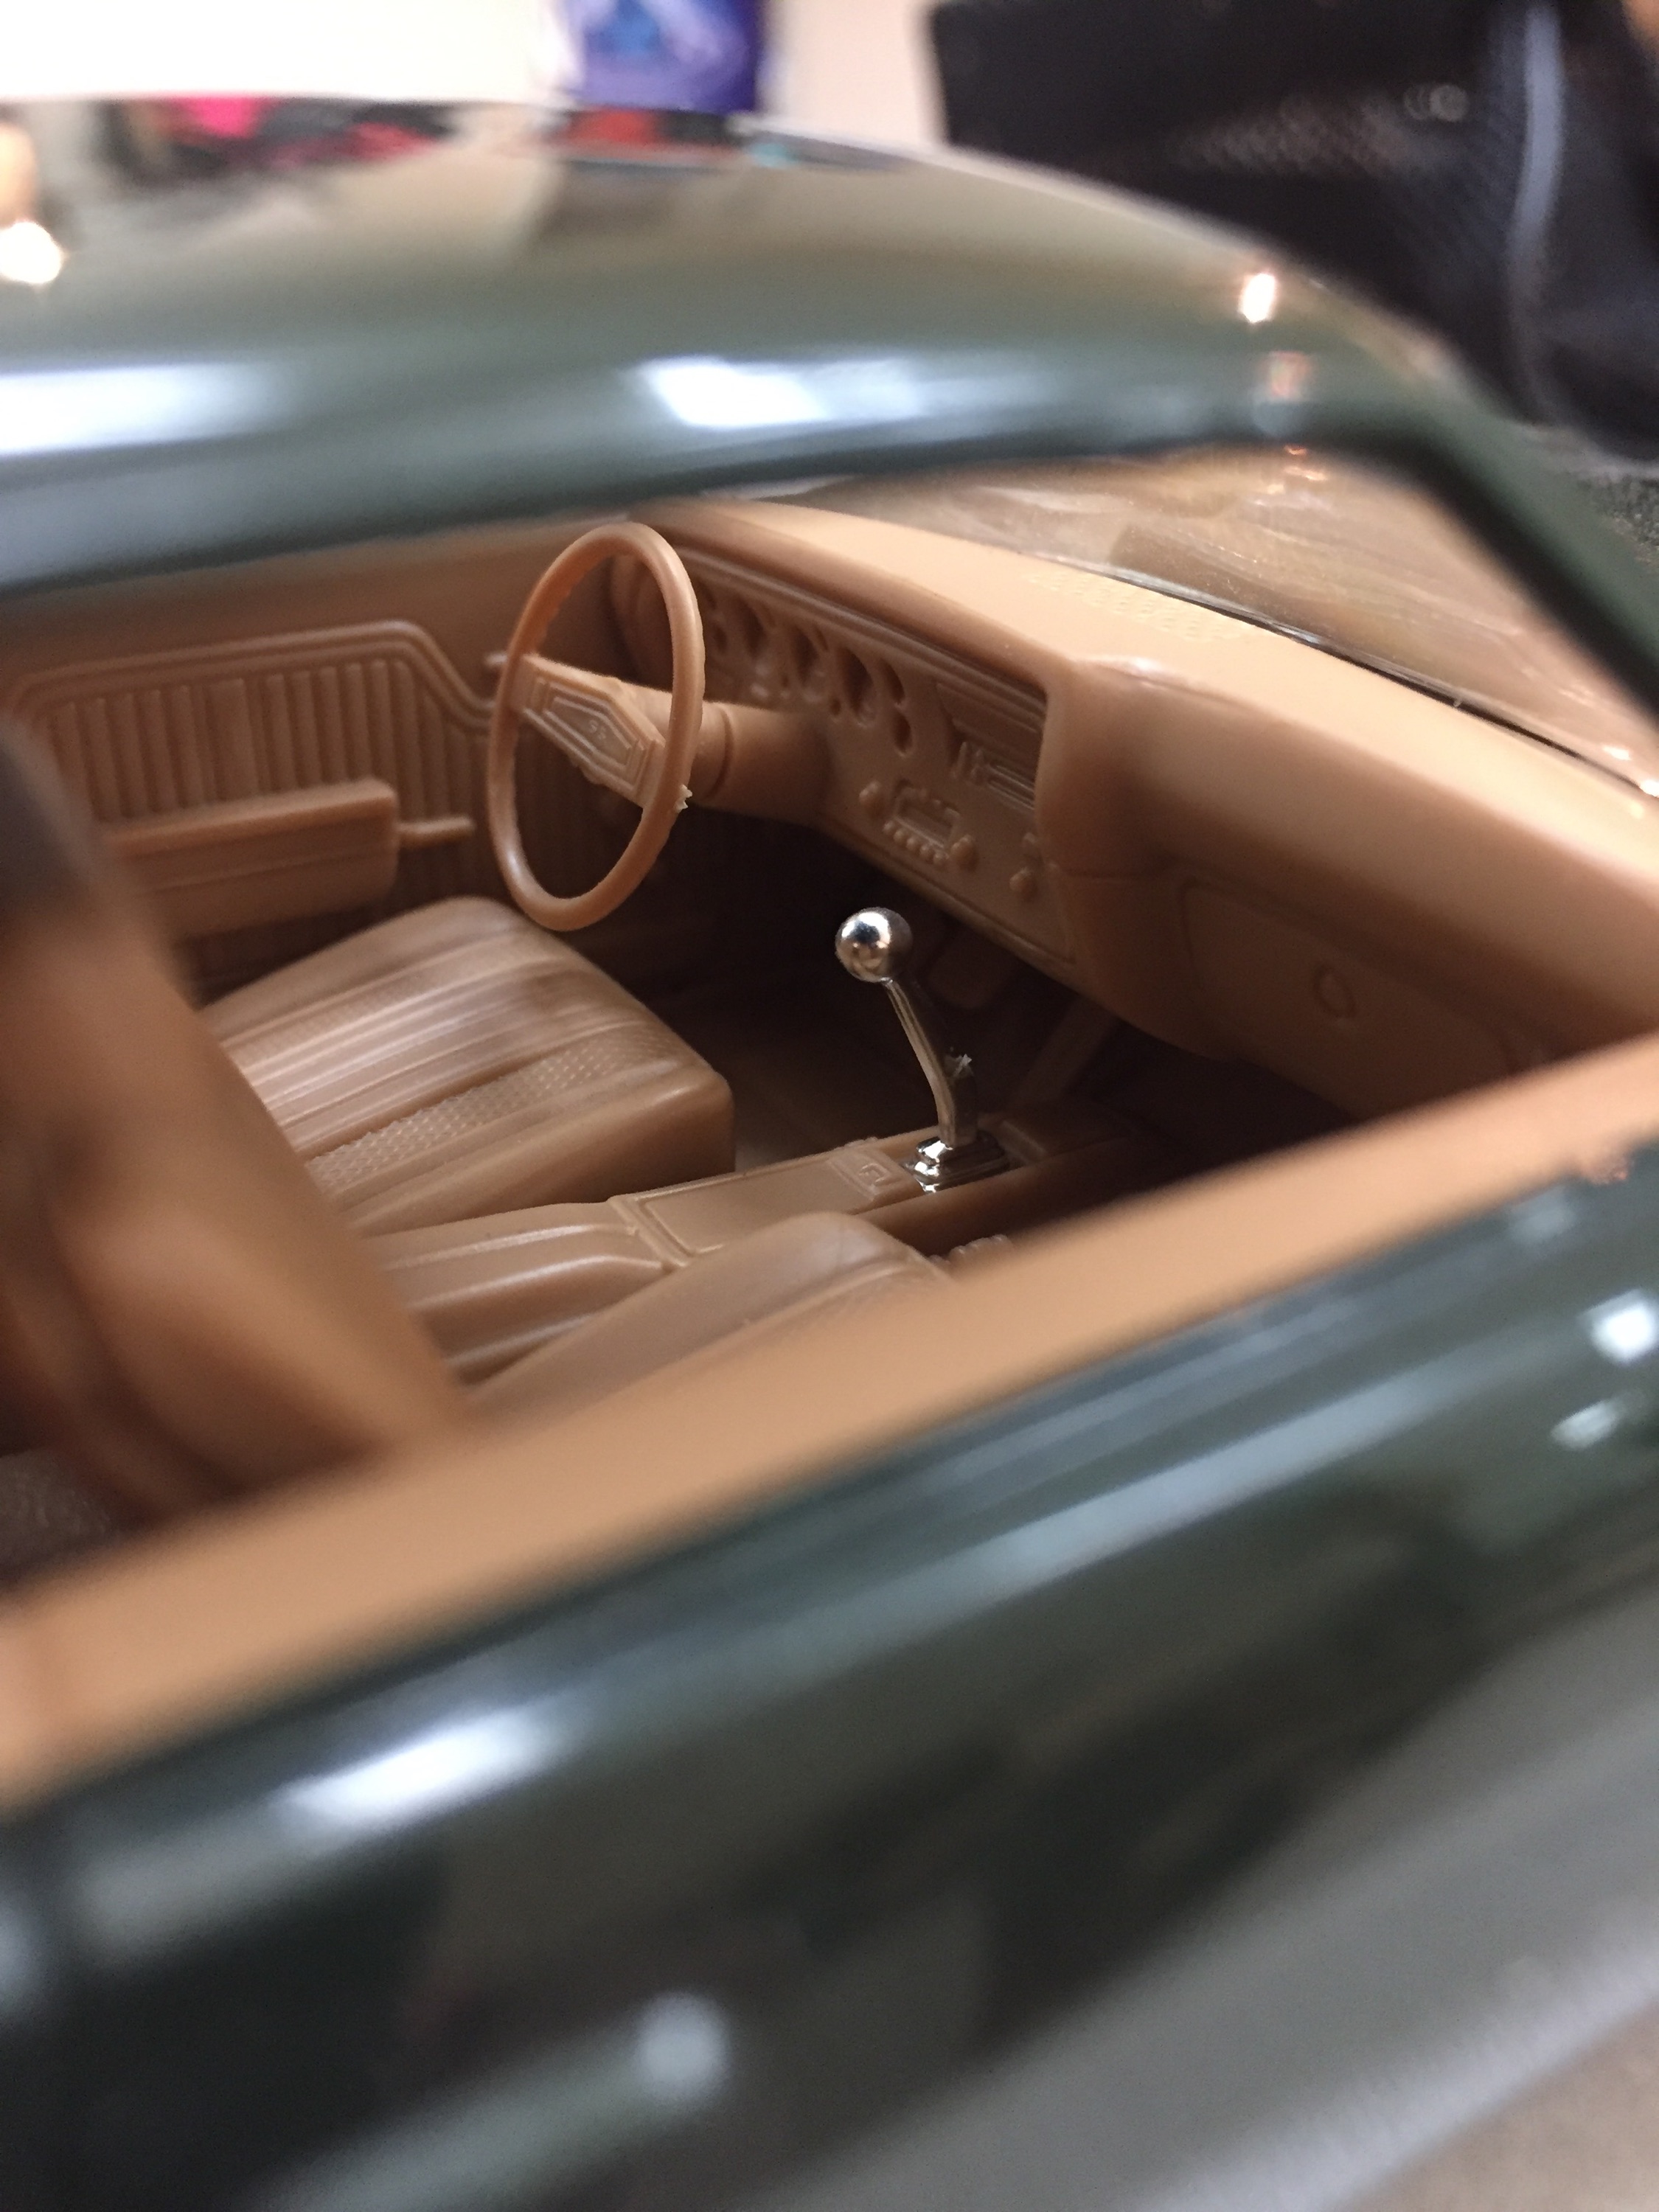
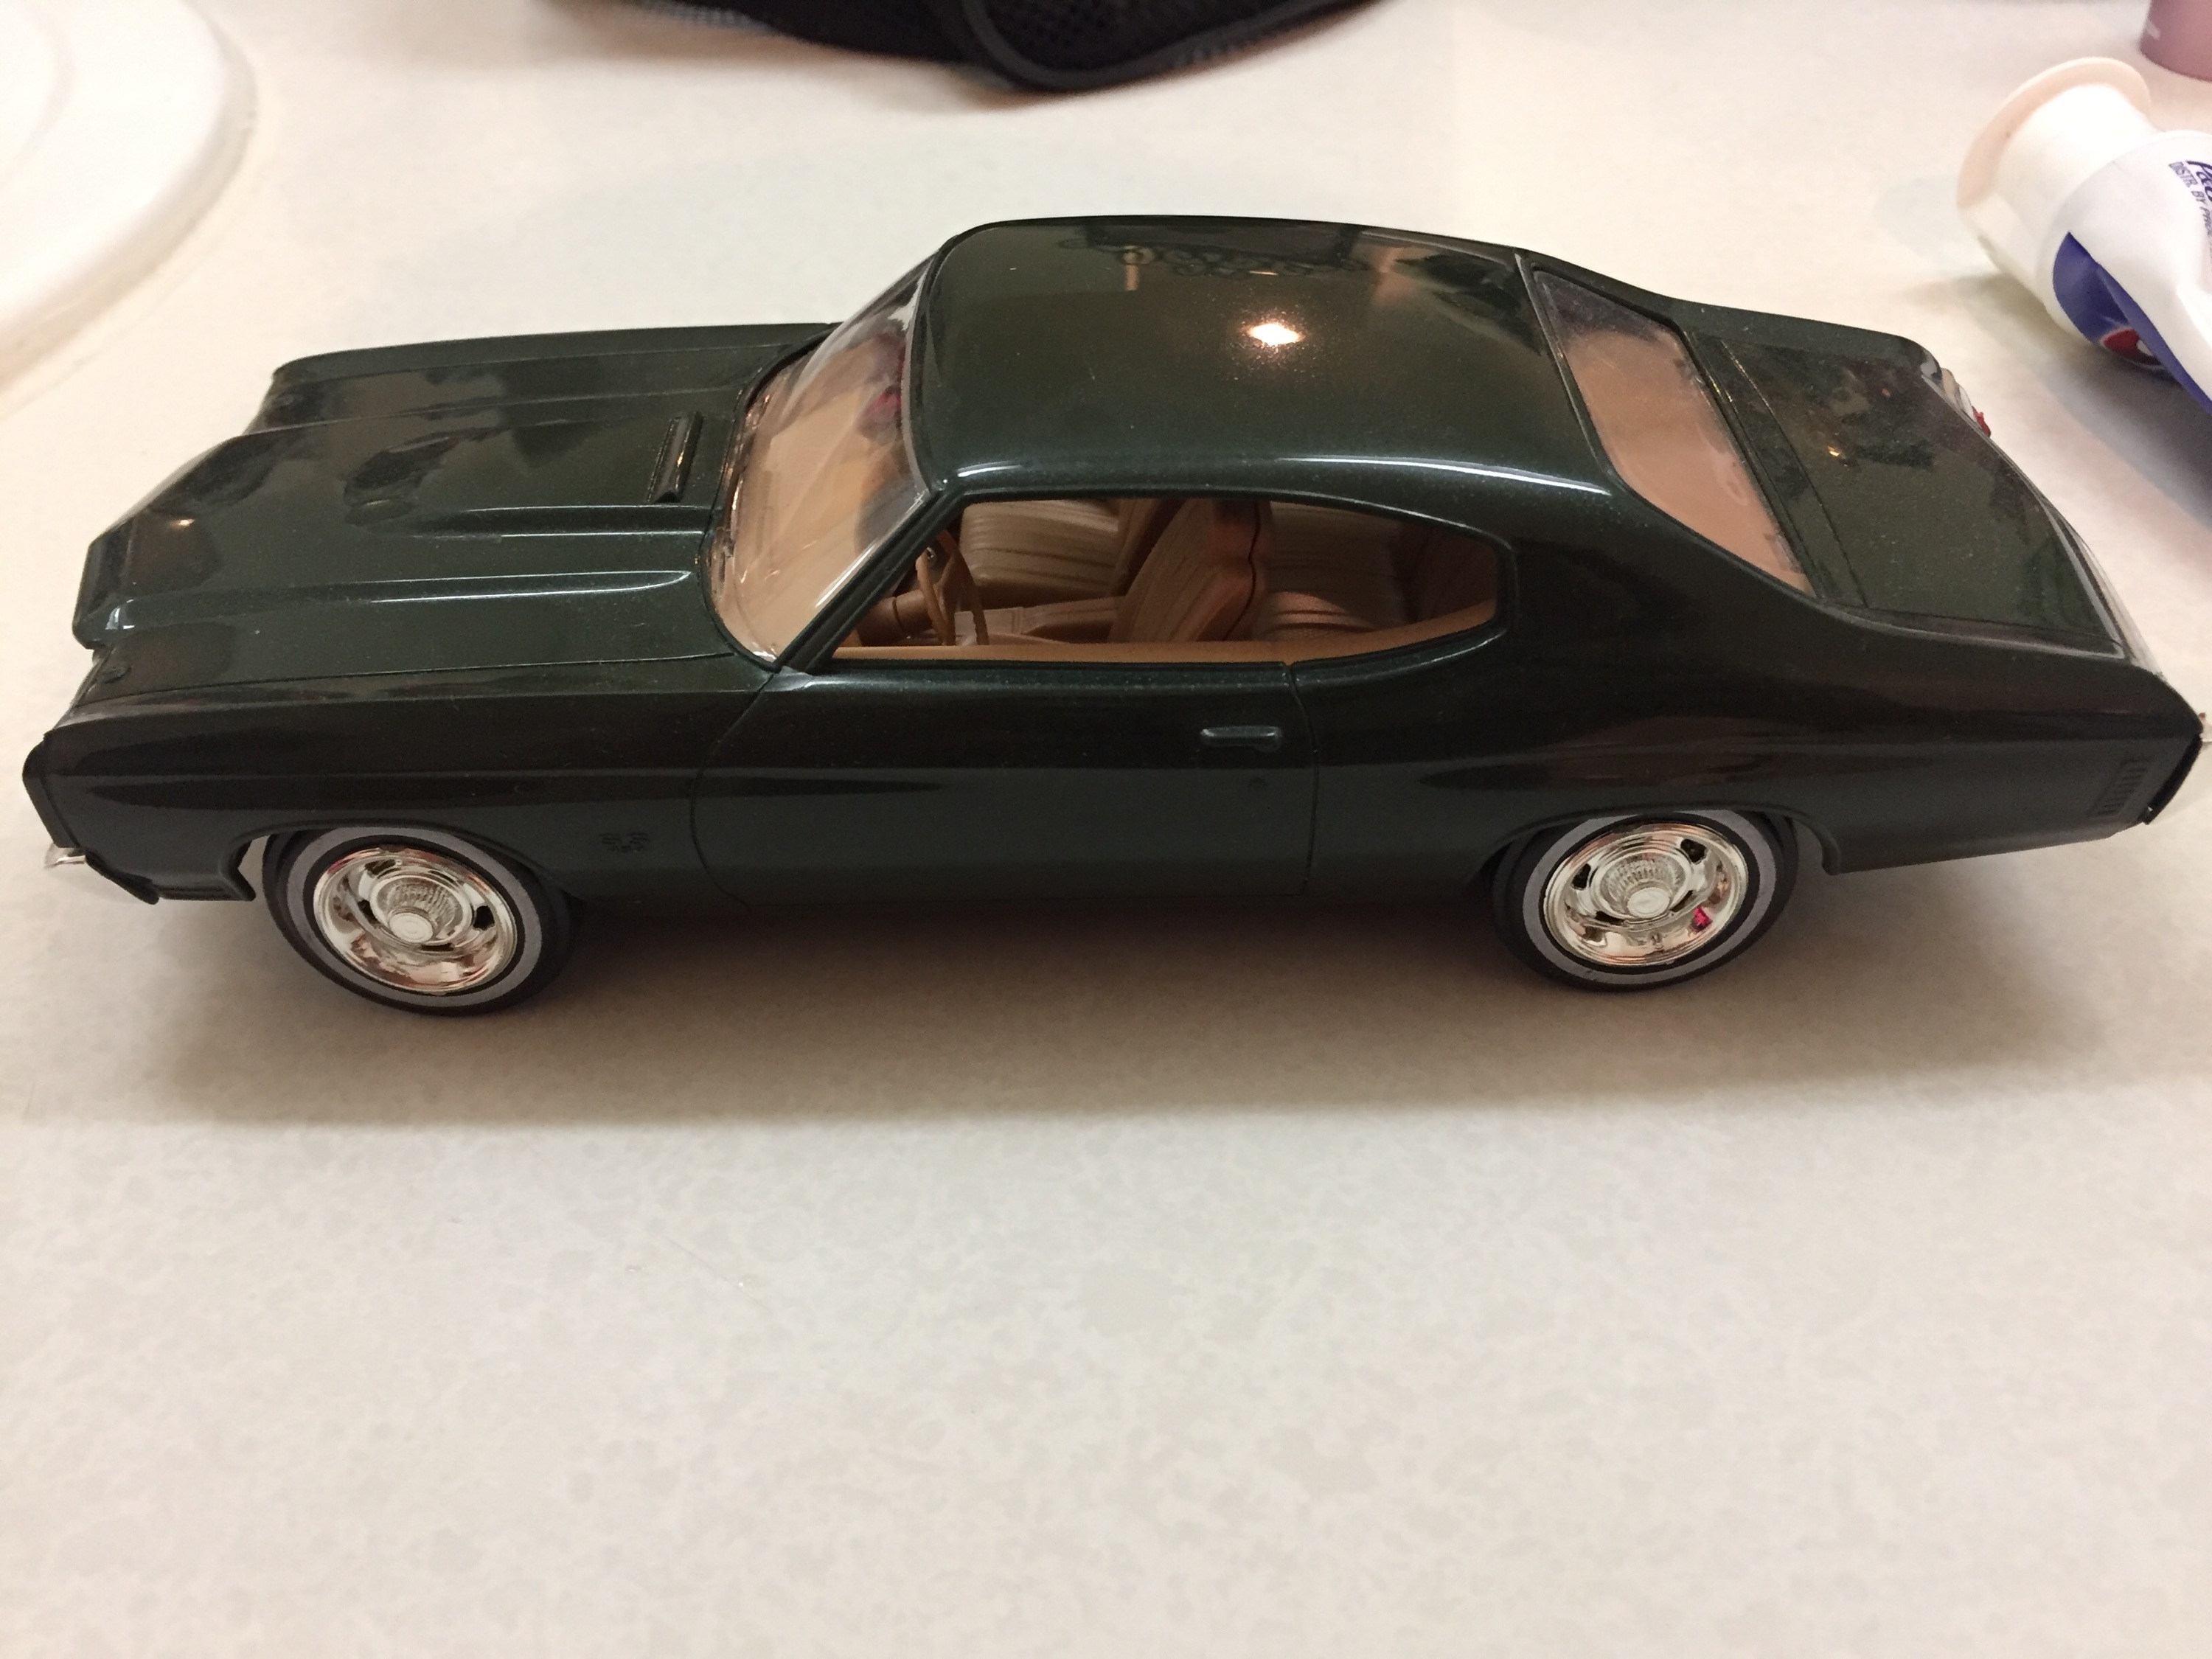
Finished after 8 years, painted Testors Emerald Green with clear coat.
-
Well, if you haven't noticed by my profile pic, I'm a Chevelle guy. When I saw this kit coming out I knew I had to have it. This is the Chevelle I always wanted. I wanted to be the first to post, but because of work wasn't able to get the job done, so I got beat by a couple days. SAM_0435 by Eric Lucas, on Flickr SAM_0436 by Eric Lucas, on Flickr SAM_0438 by Eric Lucas, on Flickr SAM_0440 by Eric Lucas, on Flickr SAM_0442 by Eric Lucas, on Flickr
-
So i got some stuff from a good buddy of mine and he passed me on this what looks like a PROMO kit but i'm not too sure cause i've searched on ebay and can't seem to find one close enough promo wise to it. Can anyone help me out here and let me know what this actually is? It's a really nice clean car, well kept.
-
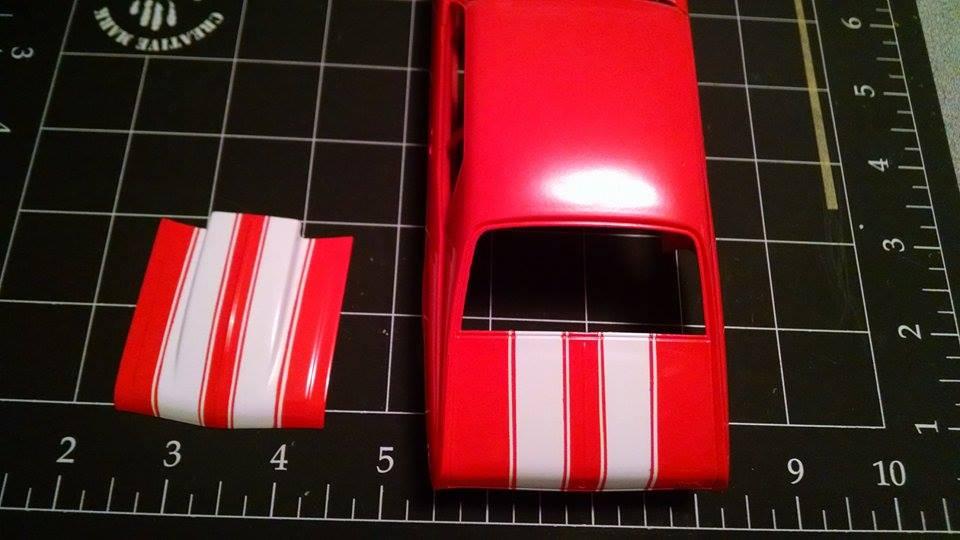
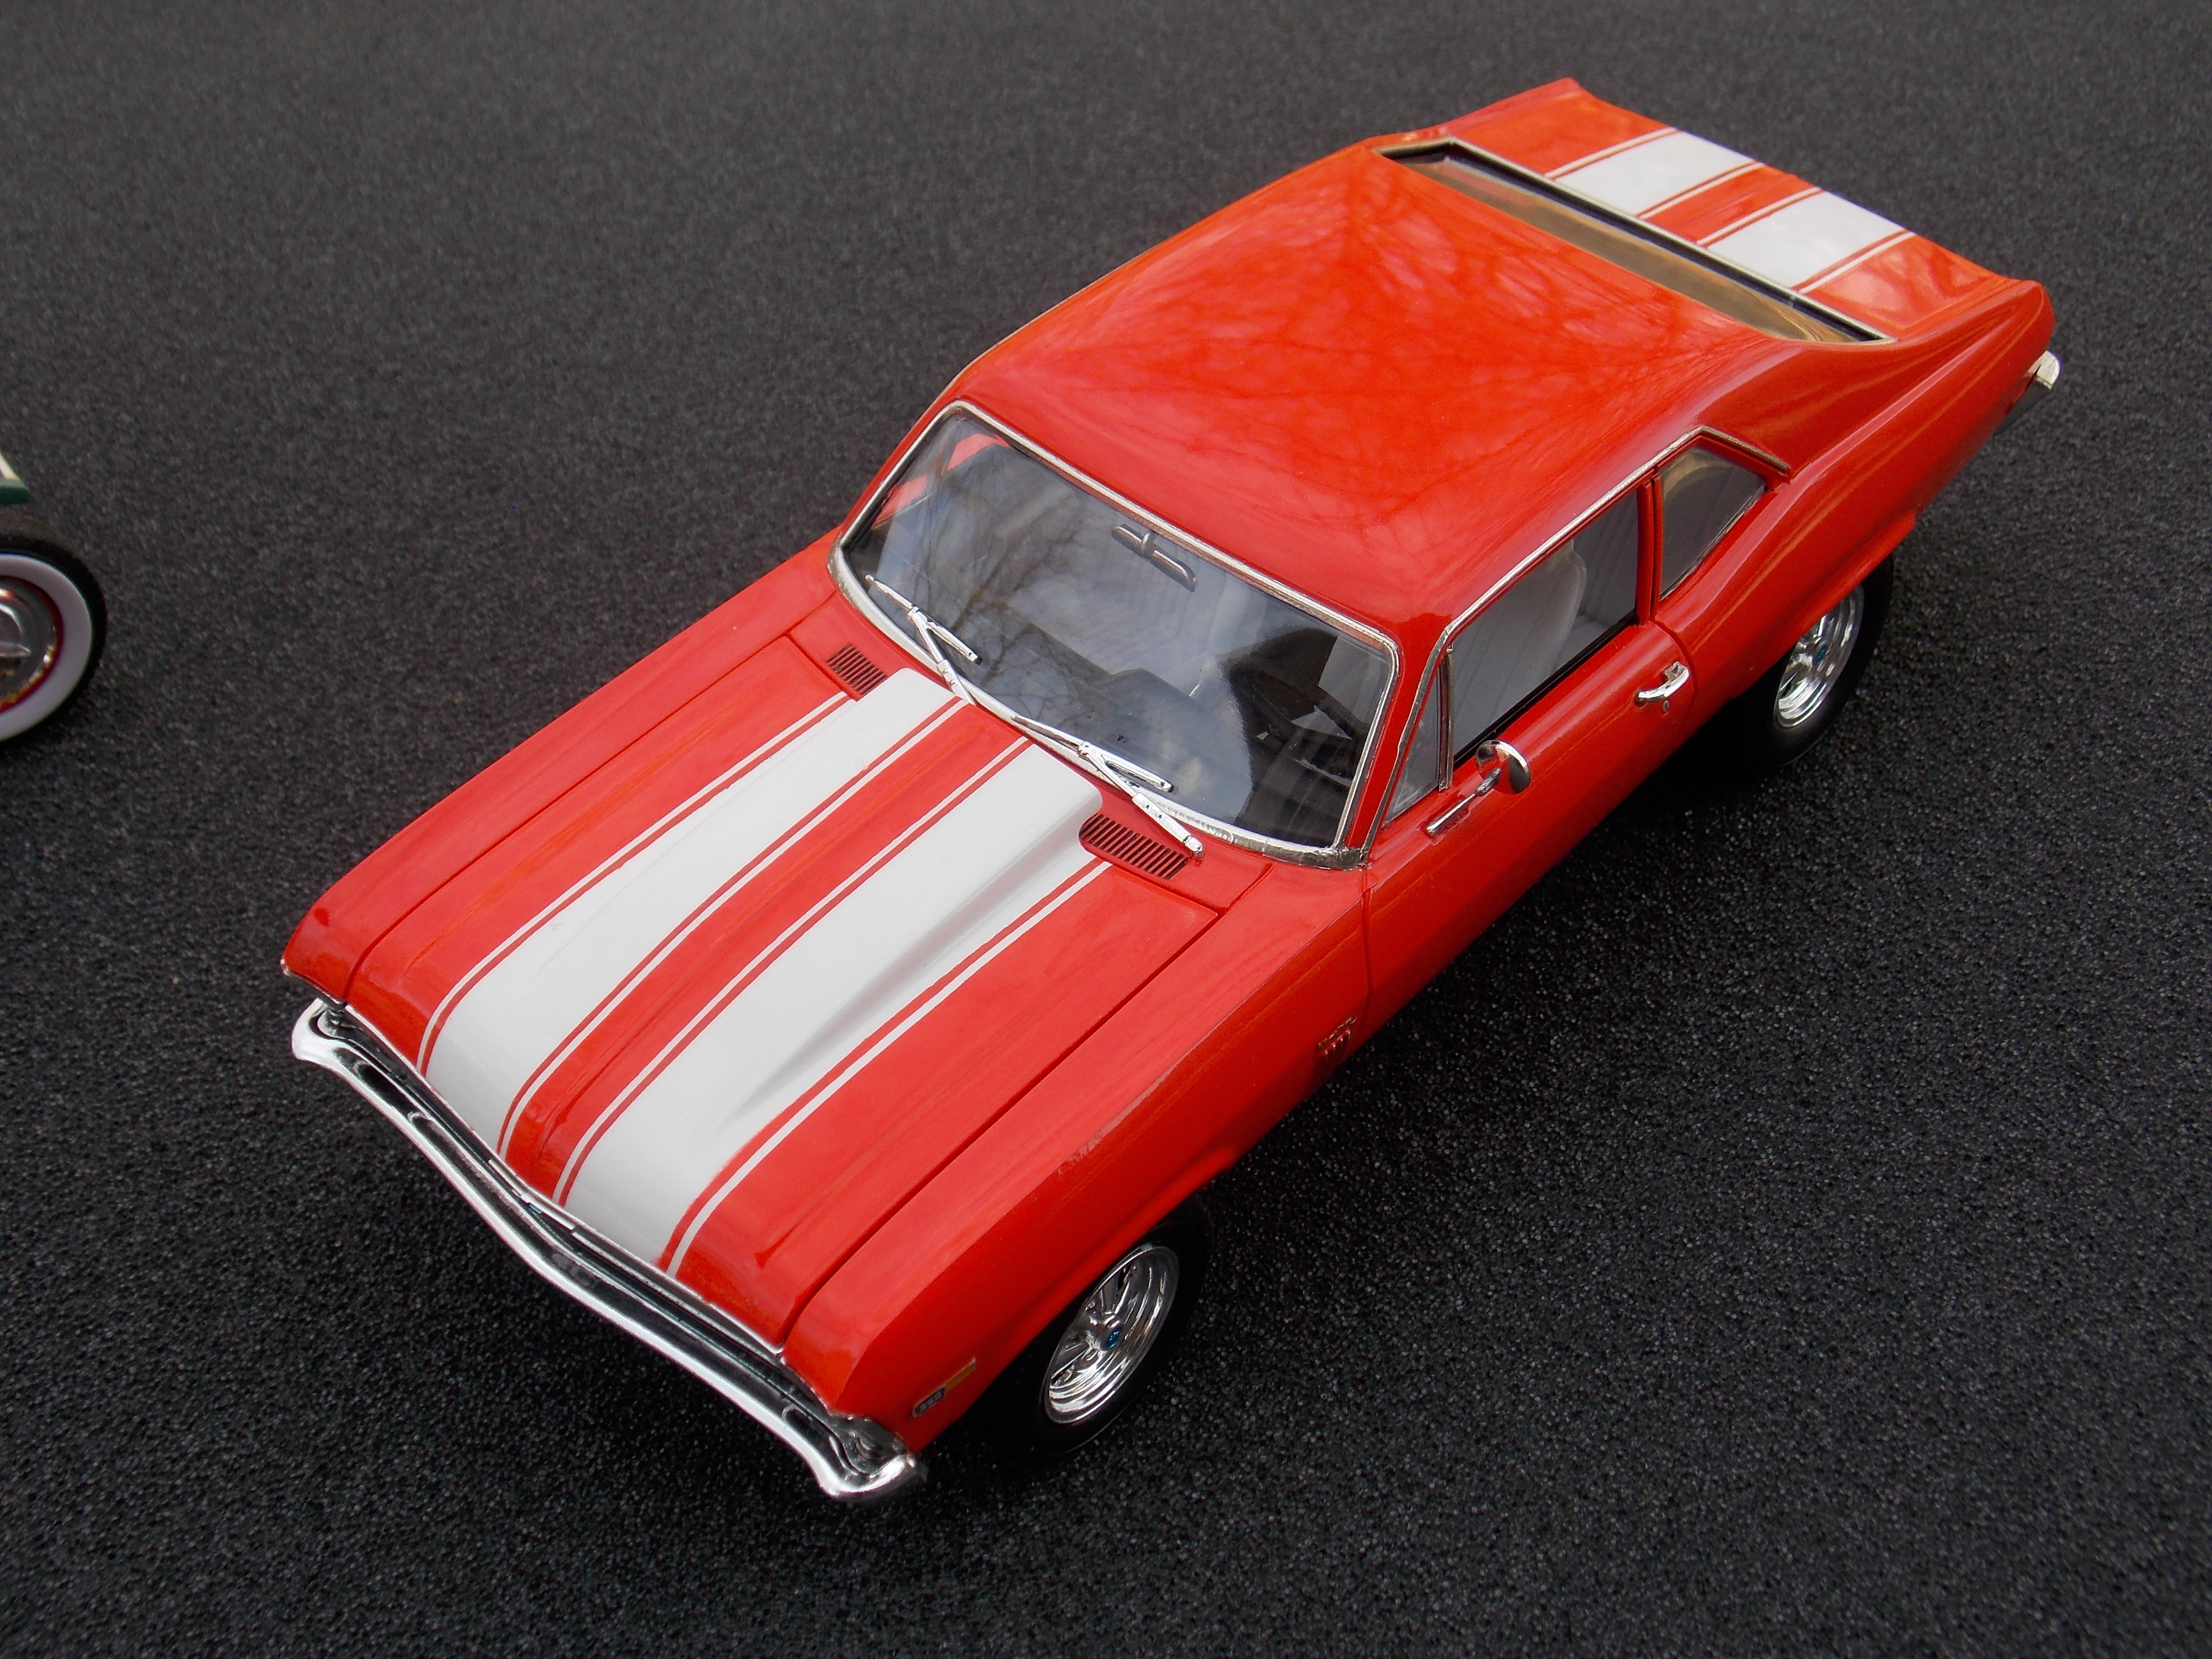
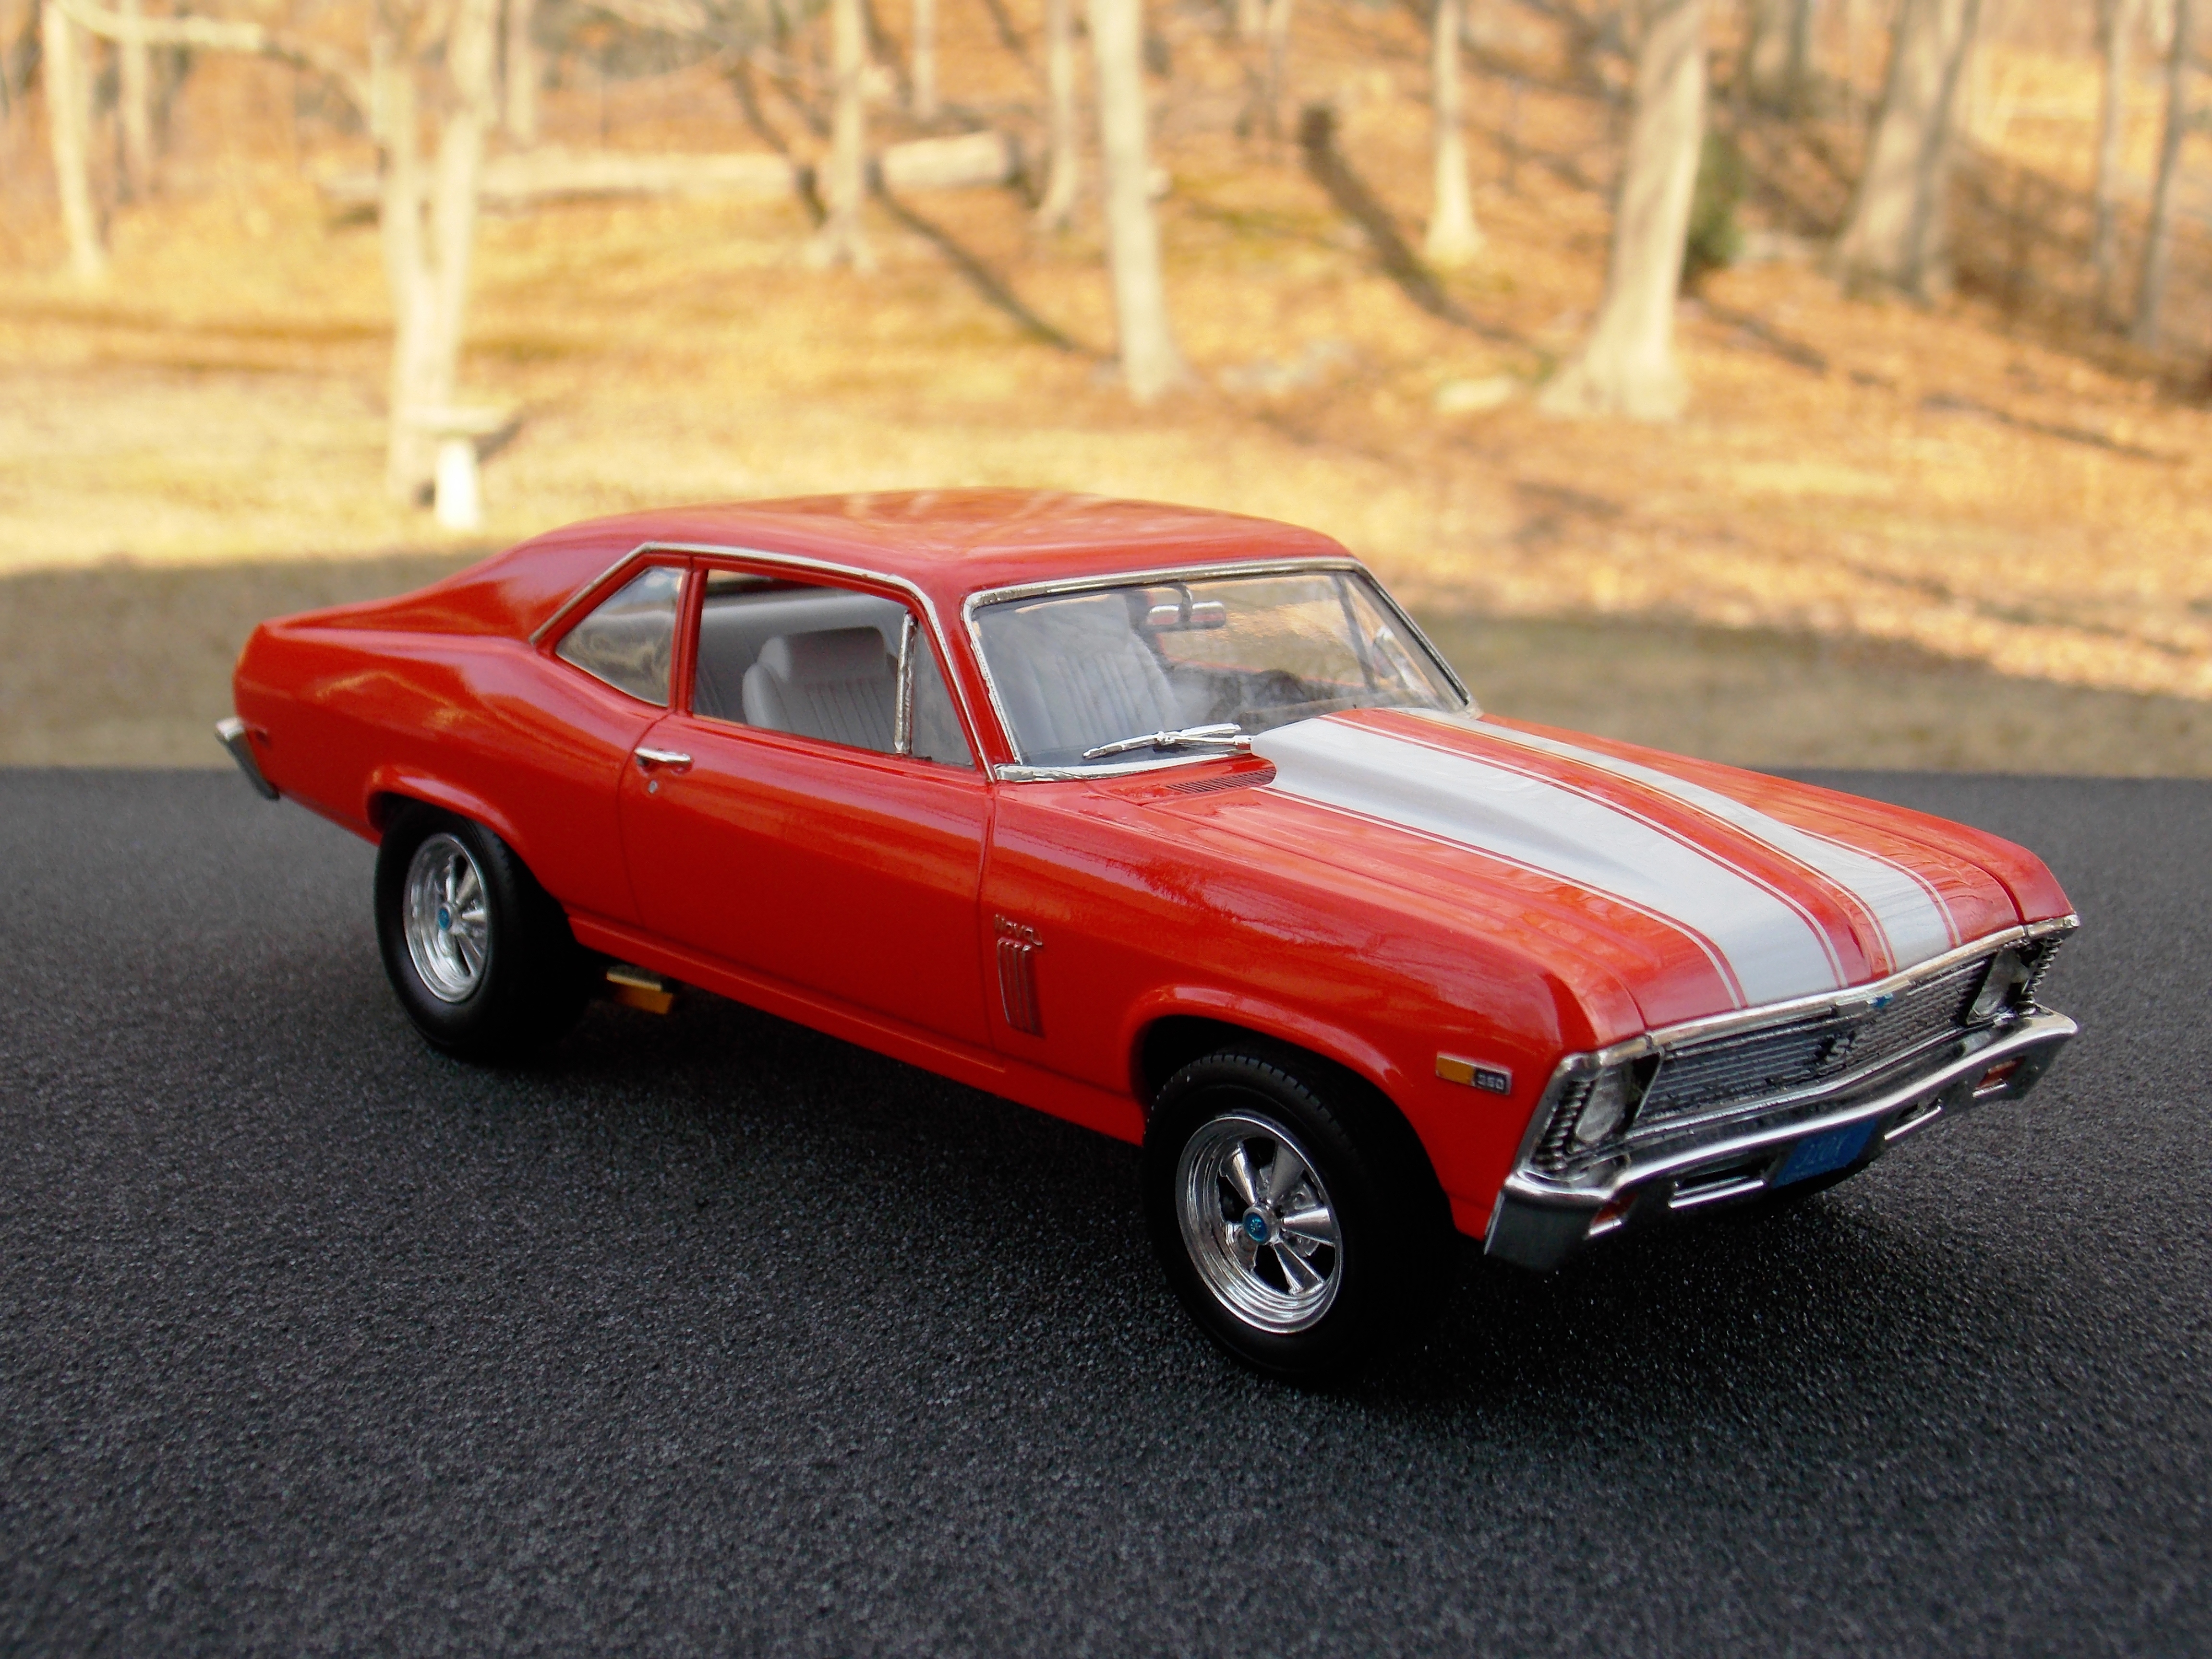
Got this finished up the other day. Loved building it. And, it was my first time actually spraying the rally stripes. I have tried decals in the past with major failures. I used Dupli-Color for the first primer coat to see and body work that was needed. after wet sanding and drying I shot it with Tamiya primer followed with Tamiya's Bright White. After sitting for a few days I masked off and shot the Tamiya Bright Orange color coat followed by Testors Wet Look Clear. I built it pretty much out of the box with the exception of the wheels. I wanted to go with a more period look. Anyway, enough babbling...
-
-
-
 Just completed! SS badging from the Monte Carlo SS kit... (hard to see) Trim - Gloss Black, Body - Inca Gold, Top - Black Vinyl... Hood stripes - '69 Camaro... "CHEVROLET" lettering - Chevy Pickup kit....
 -
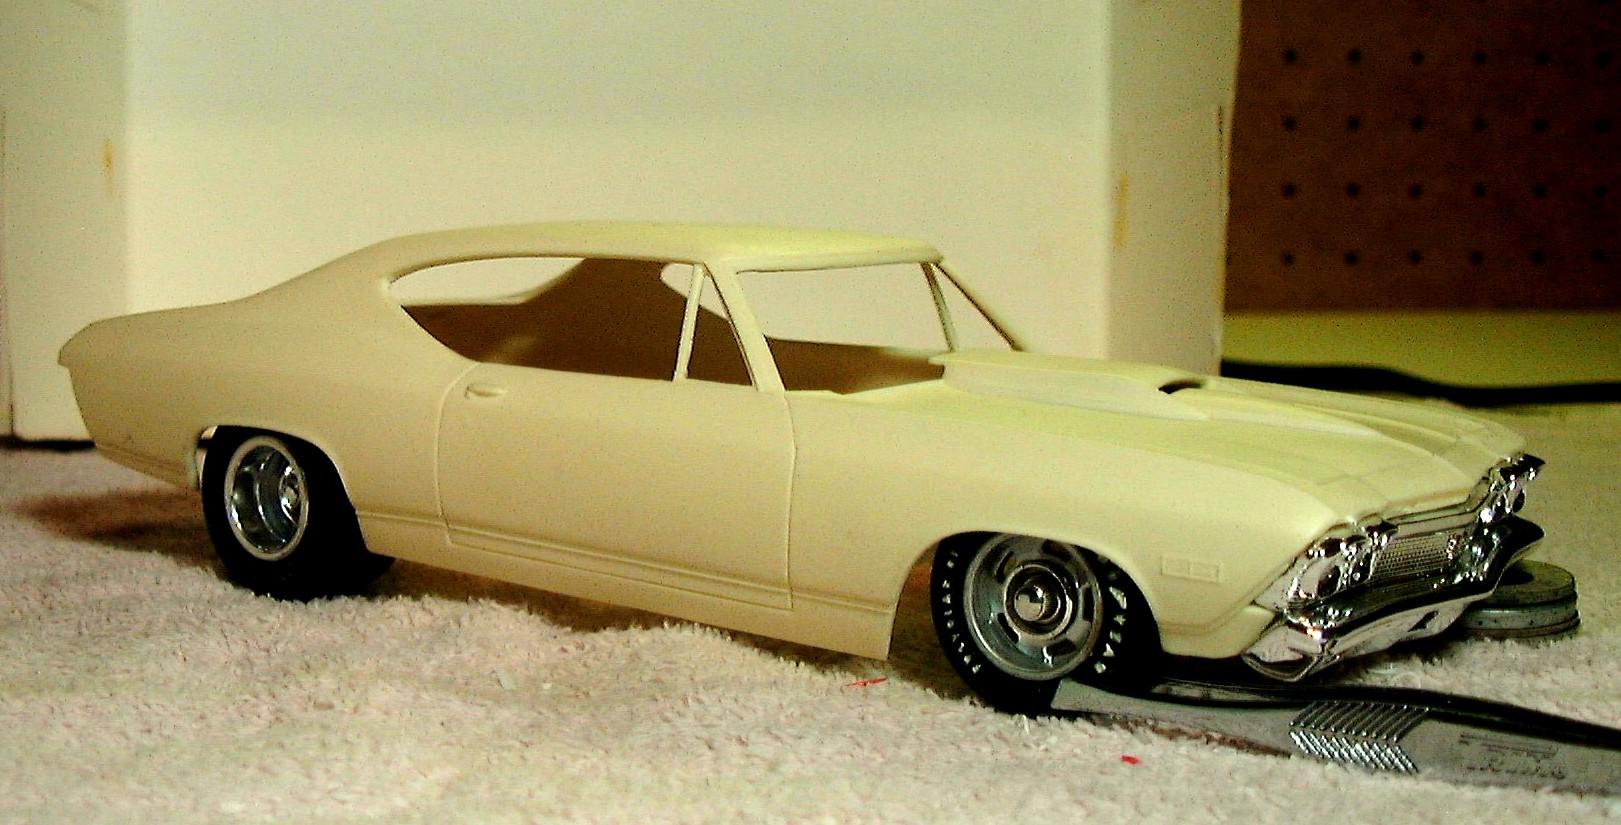
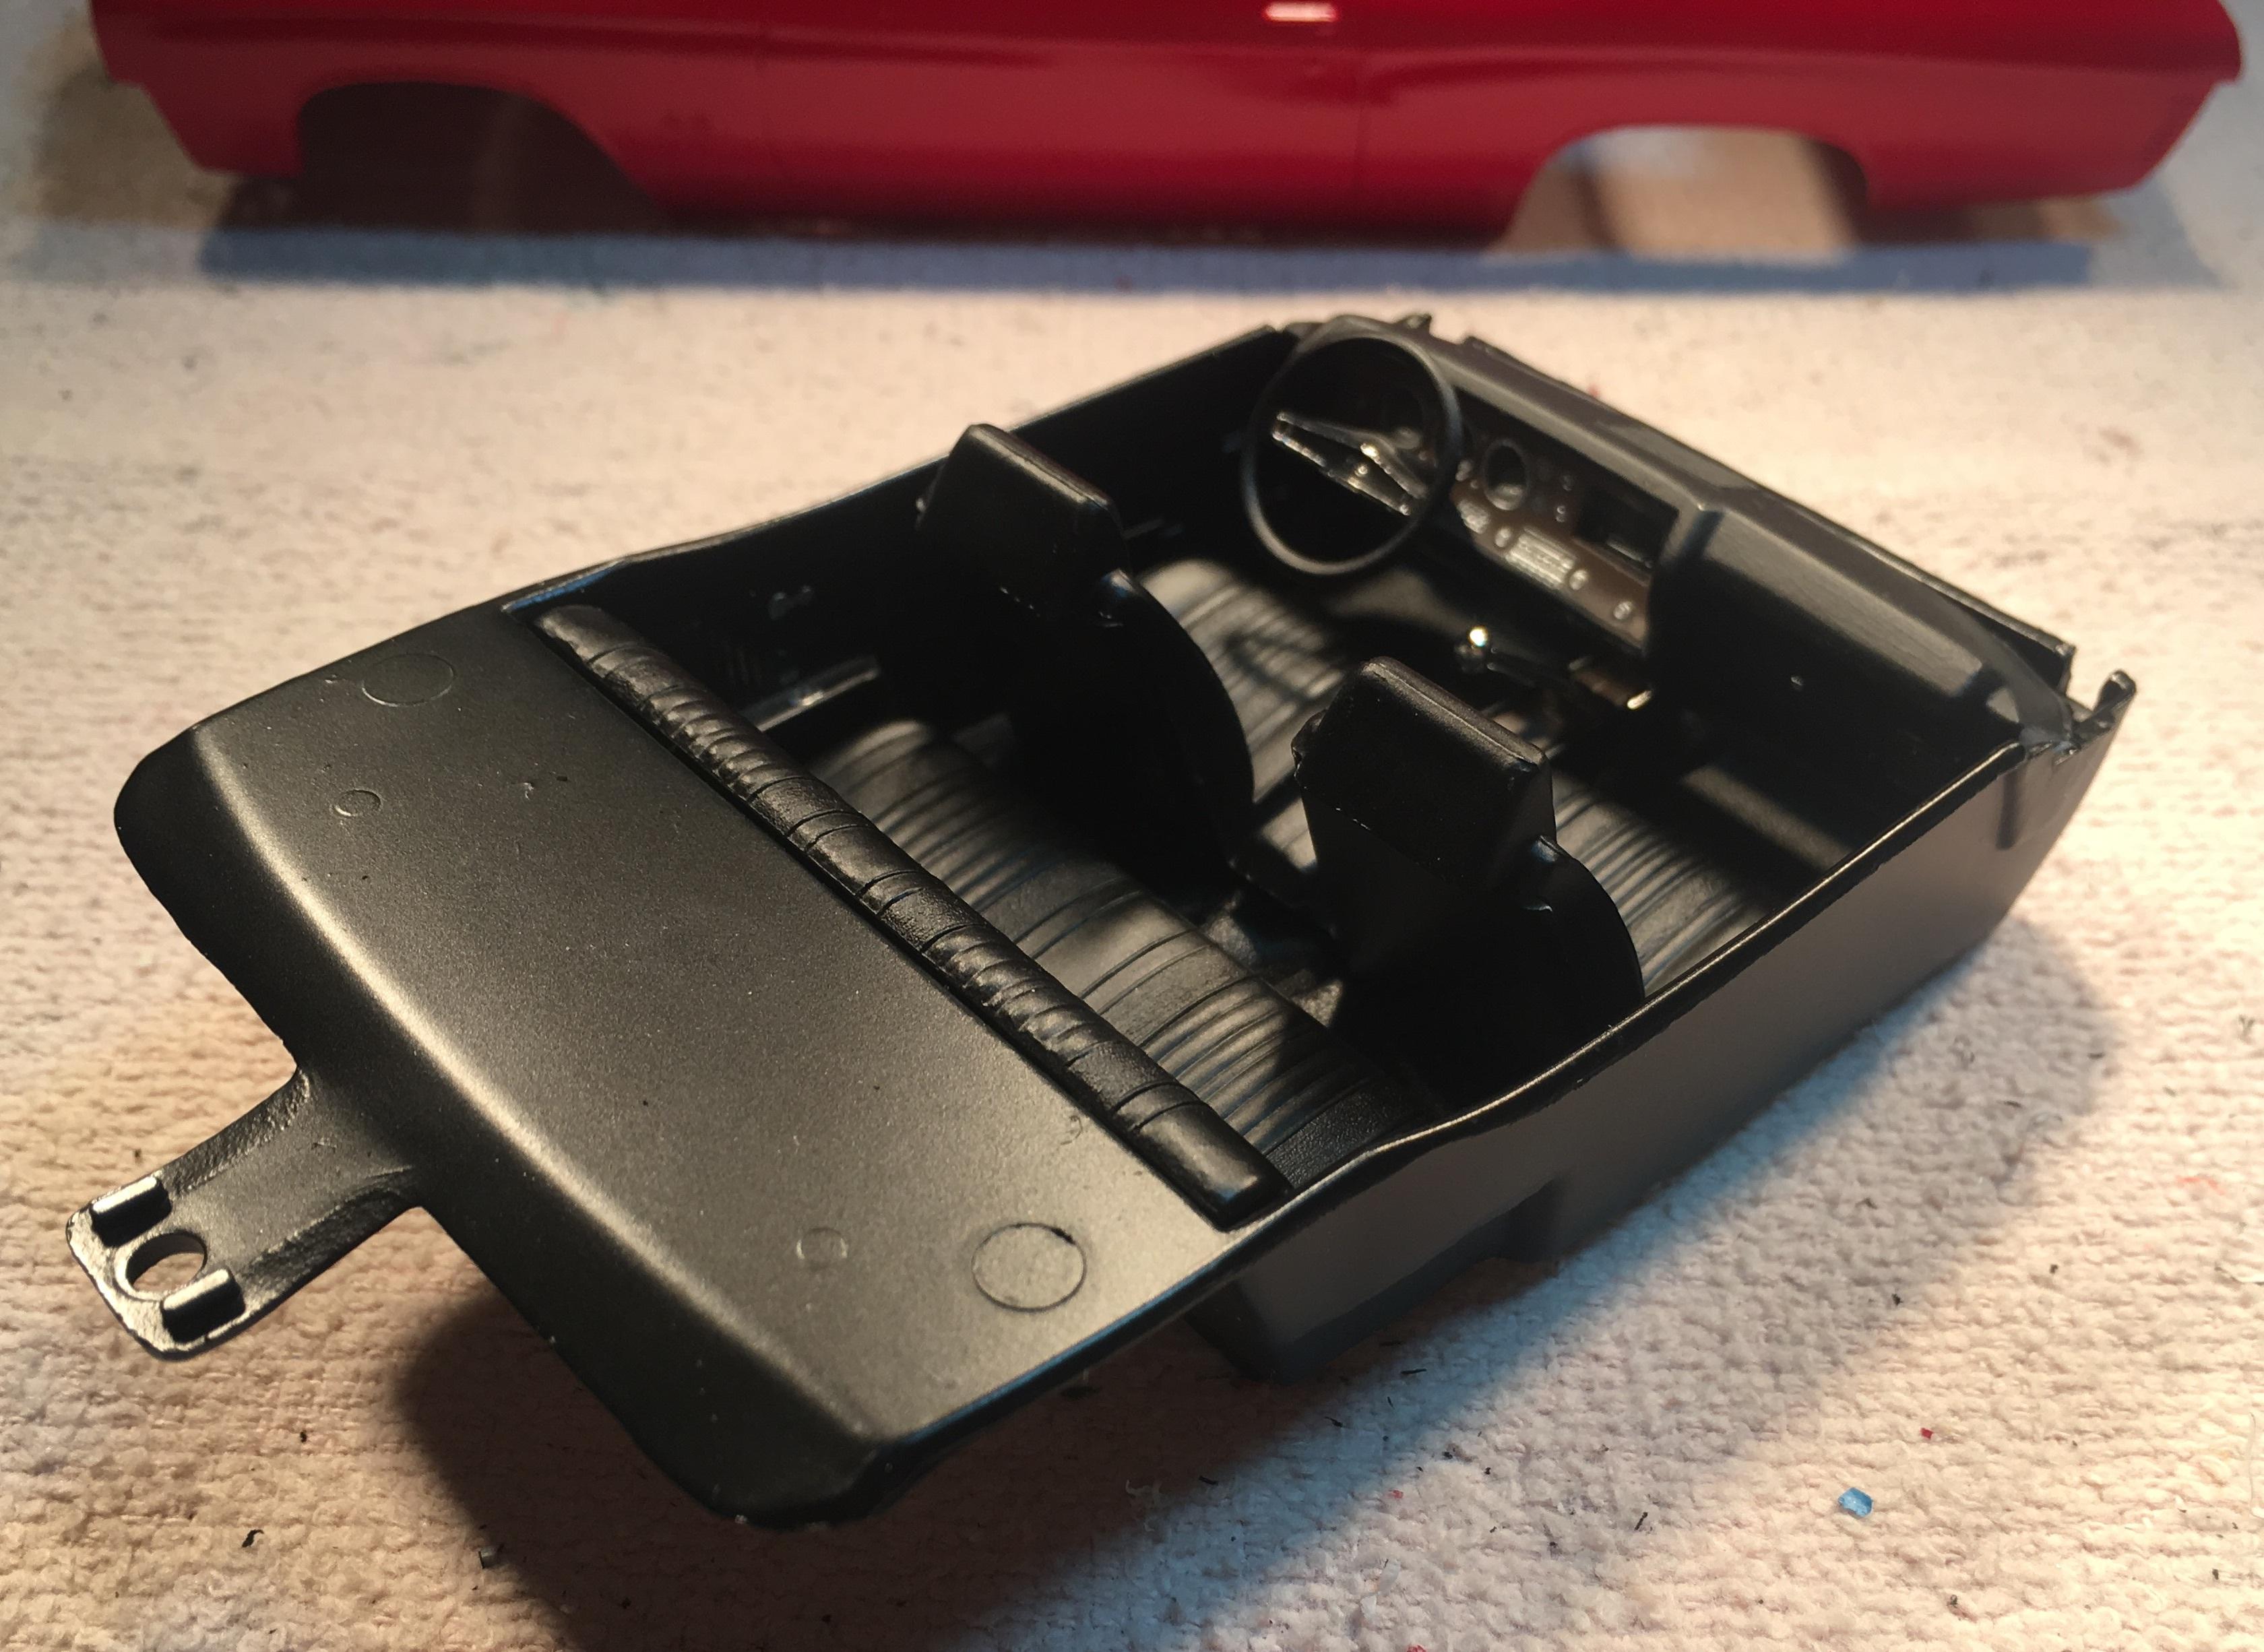
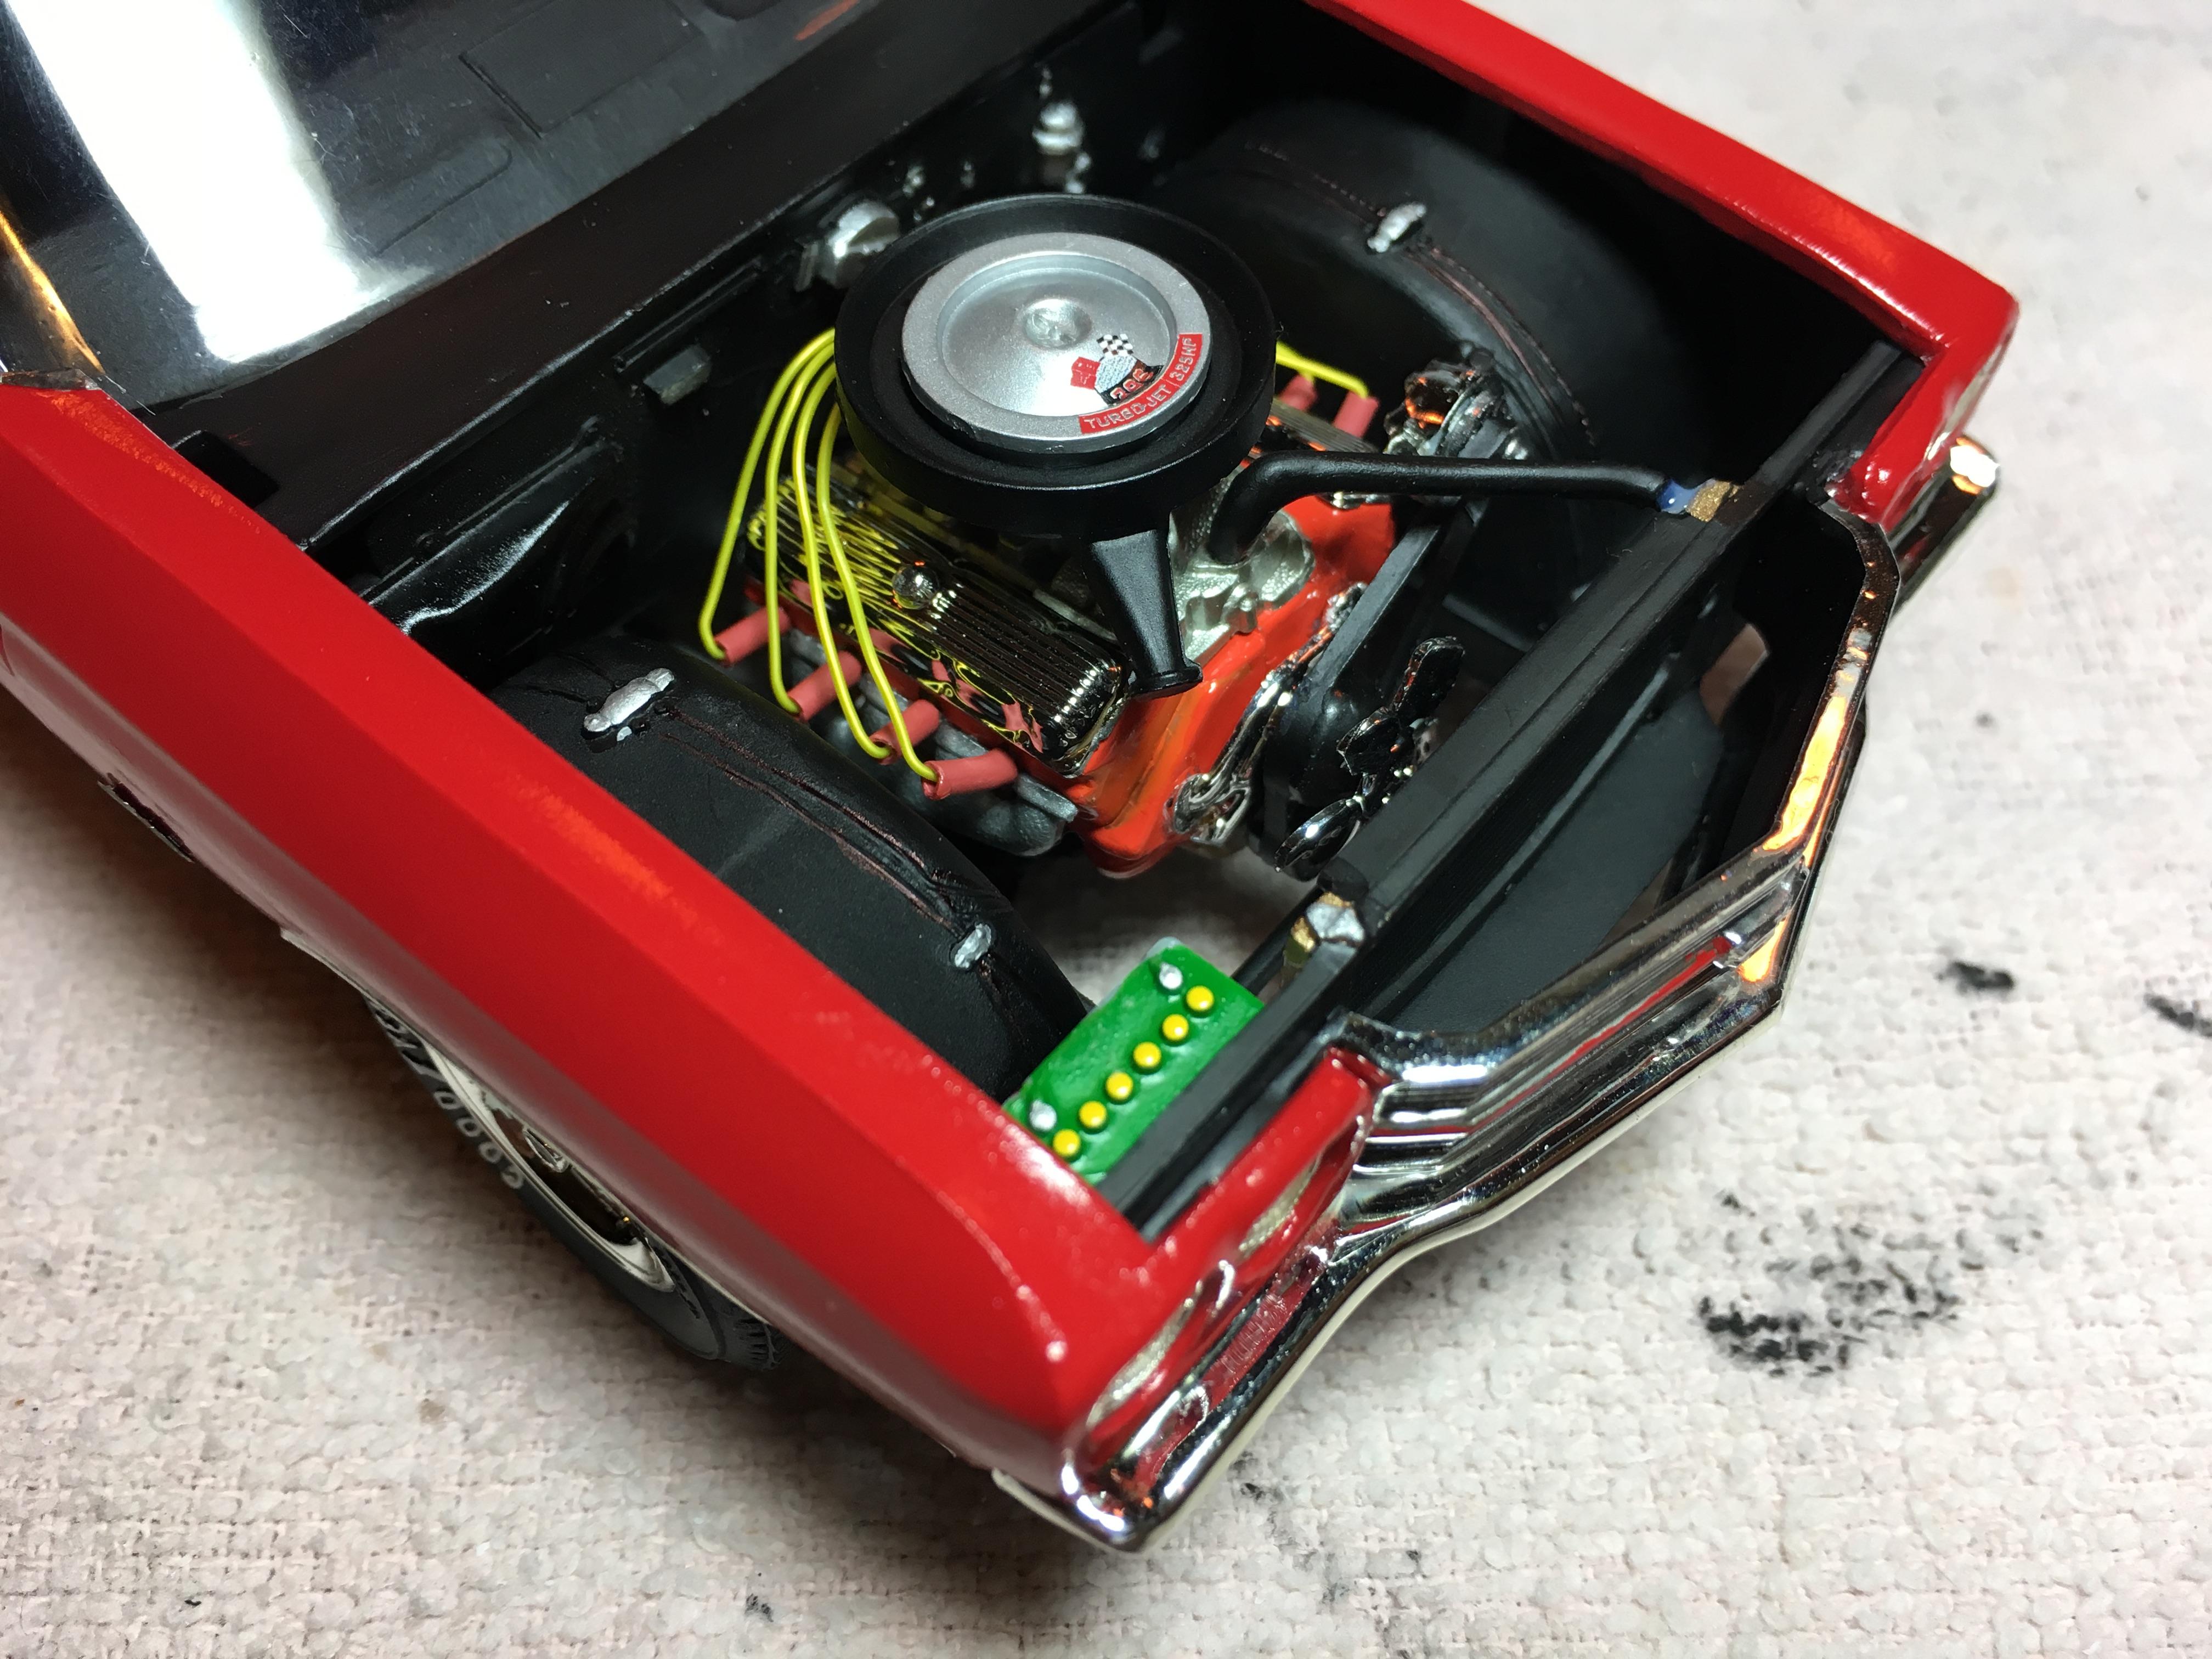
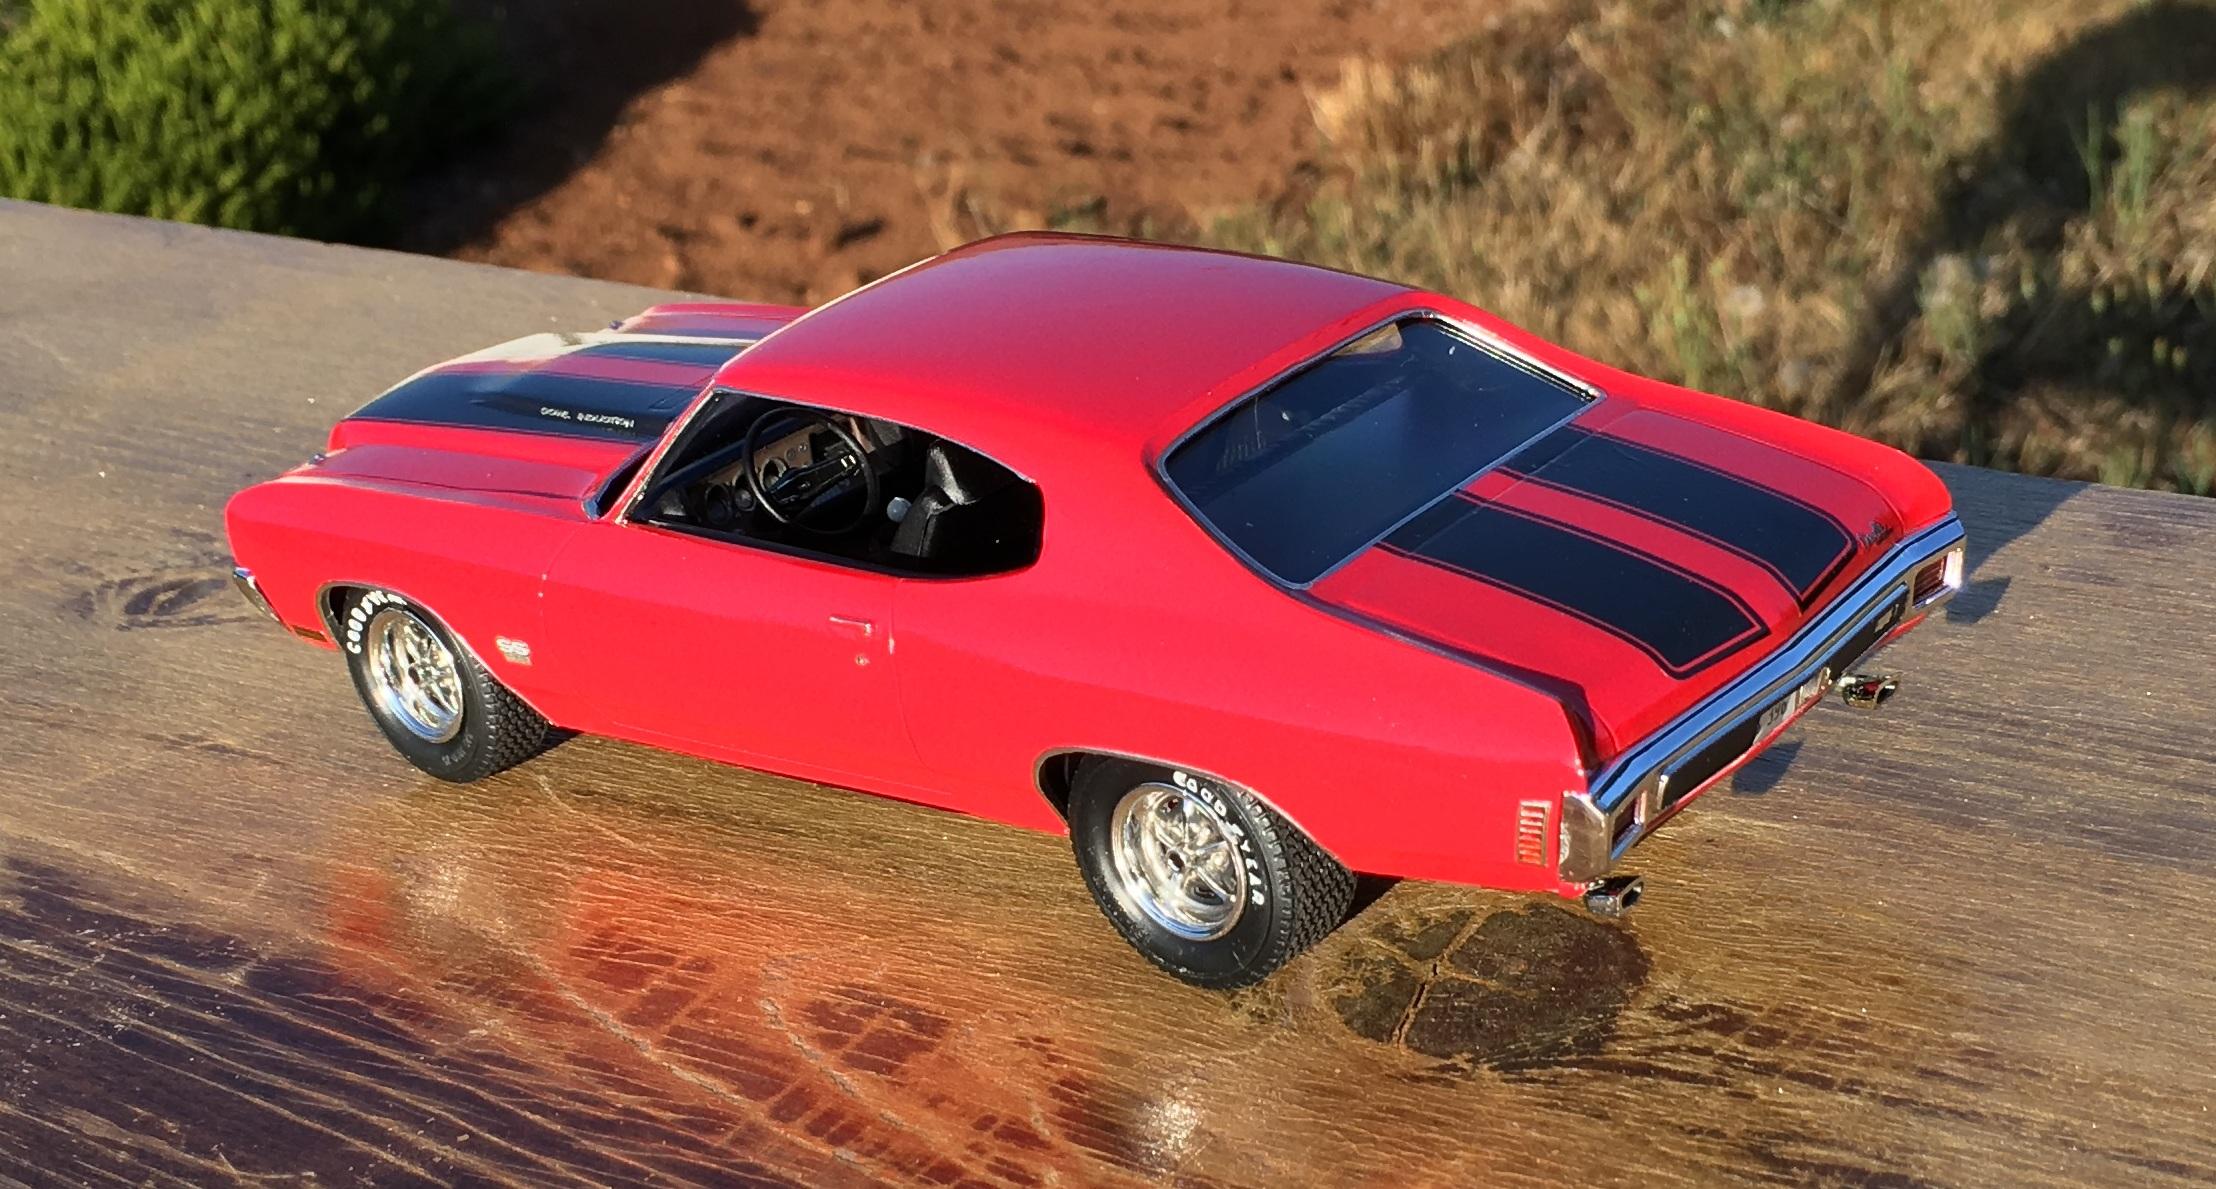
Hello, I just finished this model car. Took about a month total, which is the longest I have ever taken to build a model (usually takes me a week to do ). The kit is an AMT 1970 Chevelle SS (Jack Reacher Issue). I used colors from Testor's Special Value Acrylic Paint set. It has the LS6 motor in it. Had a lot of trouble putting on the front bumper, needed to shave headlight openings like instructions suggested but did not go all way due to fear of breaking it. Hood doesn't not fit on properly because I cut it into thirds and glued it back to make hole so the engine could be seen. Scratch-built Modifications include: custom roll cage, side exit exhausts, side view mirrors (kit does not come with any ), windshield decal, and rear spoiler. I had a lot of fun building it, learned a lot. On a scale of "shelf of doom" to "completely awesome" I rate it an overall "meh". Could be much better but I'm really happy with they way it turned out. Thanks for reading! Beep Beep! Here comes the pictures... Non-staged photos: wait there's more...
-
Ever since I found out they were making the model, I've been excited for it. I think this is the best year for the Camaro from a styling stand point. This was one of the best kits I've ever built. The pieces fit good and everything is there. There were plenty of decals as well. I only had two issues with the kit: 1. While there was a hole in the transmition for the drive shaft, there was not one in the axle of my model. So I drew some blood trying to put one in for it. I don't know if something went wrong with the molding of mine or not. But it was an issue. 2. The other issue was the tires. They have pins which have to be inserted into them. They didn't fit onto the rimes right and it took a lot of playing with it so the tires would be straight. Over all though, I was happy with the kit.
-
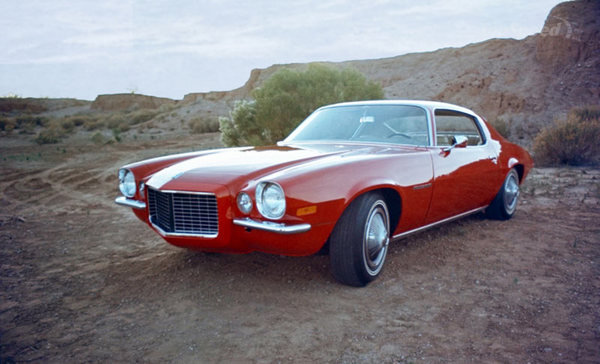
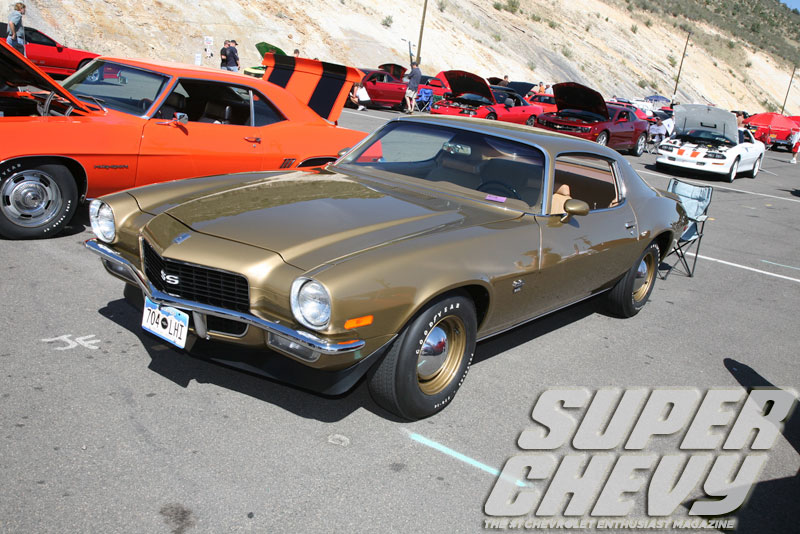
 I'm wanting to build a replica 1970 SS-RS 396 Camaro , but with a 'catch' : I want for it to have either the base model hub caps or deluxe wheel covers . See photos below ... Deluxe Wheel Covers Hub Caps (14" wheels on an SS model)
-
I love this car, wish I would have plumbed it but this was one of my first real builds years ago. Im 30 years old but did not really start building till about 06ish
-
Revell's 1963 Chev Impala SS. Box stock build, lots of fun go fast parts in this kit. Did my best to do a "Richard" quality interior. The ride height and stance are right out the kit. Looking forward to the comments.
-
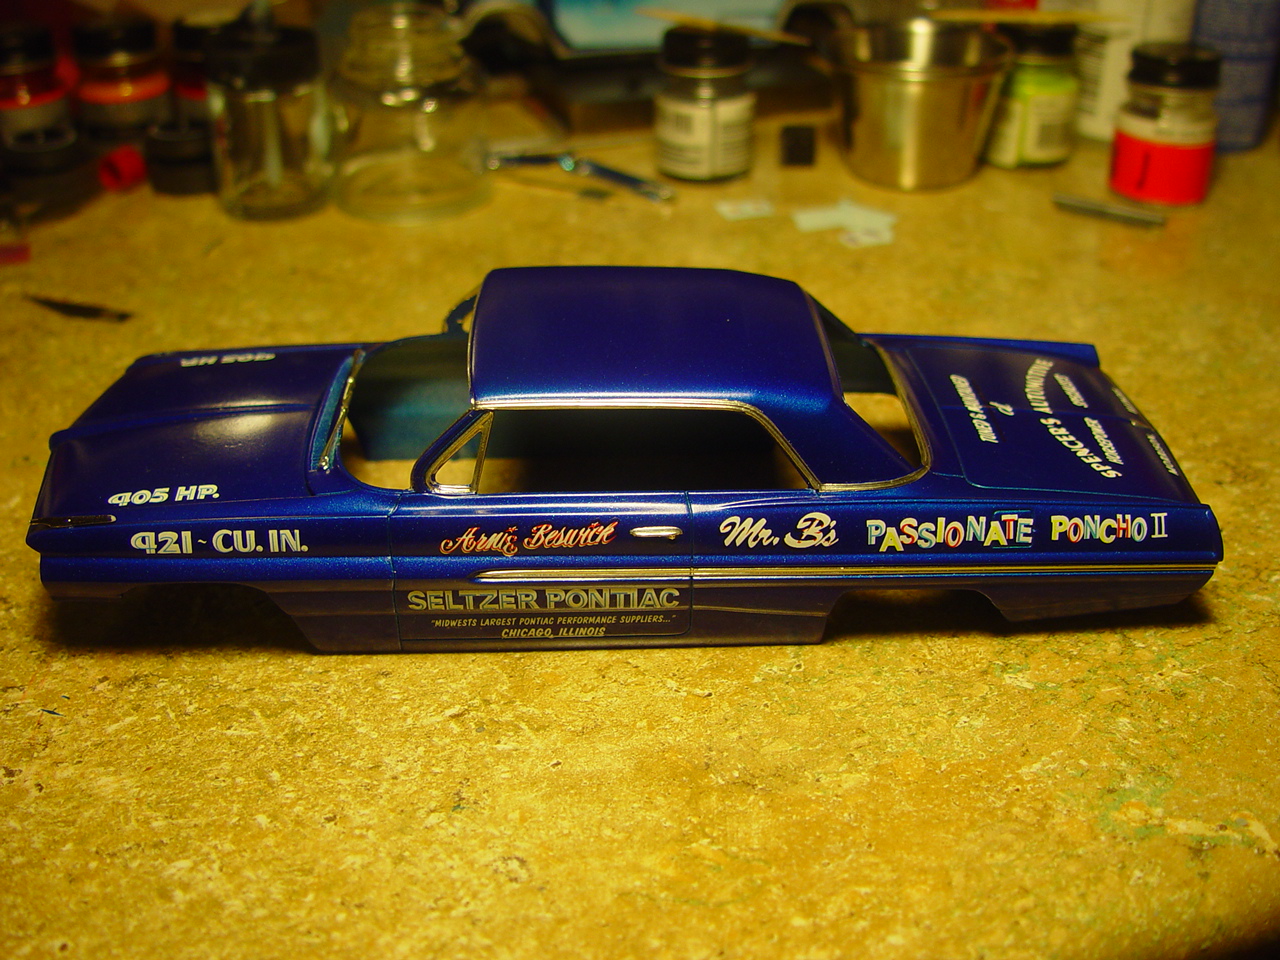
Here is Arnie Beswick's '62 Catalina SS drag car. I really enjoyed building this kit, it is well made and comes together nicely. I did bmf and decals on body today, and should have this one under glass by the weekend. I am unemployed , so it leaves me a lot of time at the workbench. This will look great on the shelf, and be a good start to my '60s super stock collection. Think Thunderbolts, Hemi Darts, Cobra Jet Mustangs, it will be fun. Stay tuned
-
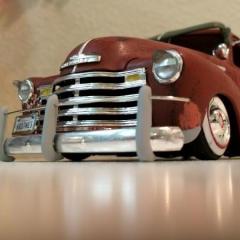
Well here I have a all factory looking 72 chevelle.
-
Hey. I built this a few years ago when the kit was widely available and forgot about it until I visited my old Geocities website. I remember the paint & clear were both from Duplicolor, brakes were XSTuning items, wheels, mufflers, and tires are Fujimi. I believe I got the rally stripes from Marc Nellis. Thanks for lookin'.


.jpg.7cd706354e0f409f78d2c96e6a274f60.jpg)