adamelvis Posted December 21, 2020 Author Posted December 21, 2020 Scratch building the Total Control Products front rack & pinion steering
adamelvis Posted December 21, 2020 Author Posted December 21, 2020 This was my first attempt to make my own headers. Aluminum tubing and electrical solder. It was exciting and the drivers side took about 45 min. However, the passenger side took 2 days. I had to keep bending the solder to fit over the starter. Eventually, I broke one tube off !! That’s why it took 2 days. Would I make them again...... depends on the next project. LOL.
Tortuga Kustomz Posted December 21, 2020 Posted December 21, 2020 Awesome, looking forward to see this one finished, always love this car and wanted to build one some day in the future
adamelvis Posted January 21, 2021 Author Posted January 21, 2021 Not sure if I created this low spot in the front window trim, but I know it would definitely be noticed as it is dead smack in the middle and with painting those black stripes on either side, it would be noticed by me ... Glued down a thin strip of styrene and now I will sand and level it out.
adamelvis Posted January 21, 2021 Author Posted January 21, 2021 I had a Optima battery from VCG Resin, but it seems the scale is too big for this engine bay. It was simple enough to make my own from styrene tube & sheet. However, I’m now debating if this battery will go under the hood, or placed in the back trunk. Opening up the trunk will give me the opportunity to also add a fuel cell and NOS bottle. Go Baby Go !!
adamelvis Posted January 21, 2021 Author Posted January 21, 2021 Added a bottom plate to the air cleaner. Ever notice how many kits don’t have one on the parts tree, or molded into it? lol.
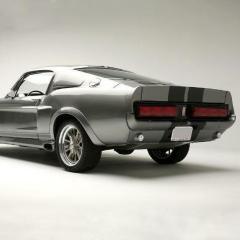
adamelvis Posted January 21, 2021 Author Posted January 21, 2021 Work on the Total Control strut tower bracing with steel tubing, rod ends and bolts from RB Motion. Top photo is the “Hero Car” Eleanor that sold at Meccum Auction.
beeRS Posted January 23, 2021 Posted January 23, 2021 Superb skills. Love the fabrication work. Those headers look ace!
adamelvis Posted January 23, 2021 Author Posted January 23, 2021 6 hours ago, beeRS said: Superb skills. Love the fabrication work. Those headers look ace! Thanks !
TransAmMike Posted January 23, 2021 Posted January 23, 2021 Coming along very nicely Adam, great scratch building components. Thise headers a superb.
adamelvis Posted February 1, 2021 Author Posted February 1, 2021 Going to have to remove the FoMoCo bag as my front brace will not clear the top. Haven’t decided if I will leave it bare or install one from my parts box.
adamelvis Posted February 5, 2021 Author Posted February 5, 2021 More fabrication work ... I cut out the stock gas tank and going to make a nice bed out of styrene for this to sit in. Also need to make a finished bottom to this fuel cell. Probably put a 45 degree slant cut on the bottom. Guys, if you open up the trunk in models, you gotta fill it up with goodies !! TCB, Adam
adamelvis Posted February 12, 2021 Author Posted February 12, 2021 On 2/1/2021 at 3:06 PM, adamelvis said: Going to have to remove the FoMoCo bag as my front brace will not clear the top. Haven’t decided if I will leave it bare or install one from my parts box. Worked out ok. Will look fine once primed & painted.
adamelvis Posted February 12, 2021 Author Posted February 12, 2021 On 2/5/2021 at 3:21 PM, adamelvis said: More fabrication work ... I cut out the stock gas tank and going to make a nice bed out of styrene for this to sit in. Also need to make a finished bottom to this fuel cell. Probably put a 45 degree slant cut on the bottom. Guys, if you open up the trunk in models, you gotta fill it up with goodies !! TCB, Adam Gas tank work completed. Made a new trunk floor and a battery box needs to be made. Will probably wrap it with aluminum foil, for better detail. That is Detail Master’s (DM3219) Nitrous Bottle 2 pcs. kit that I will be using.
adamelvis Posted February 16, 2021 Author Posted February 16, 2021 Aluminum battery box turned out well. Will have the wires plug in from behind and run out to the passenger side back seat.
Mattilacken Posted February 16, 2021 Posted February 16, 2021 Looking great! Details look really good!
Kromolly Posted March 14, 2021 Posted March 14, 2021 The quality of workmanship here is stunning. Amazing attention to detail.
NOBLNG Posted March 14, 2021 Posted March 14, 2021 Looking good! Love those headers and the optima battery.
adamelvis Posted March 15, 2021 Author Posted March 15, 2021 Thank you for the positive comments guys. Adam
Dann Tier Posted March 15, 2021 Posted March 15, 2021 FANTASTIC!!!!......LOADS of awesome SB parts!!!!
Recommended Posts
Create an account or sign in to comment
You need to be a member in order to leave a comment
Create an account
Sign up for a new account in our community. It's easy!
Register a new accountSign in
Already have an account? Sign in here.
Sign In Now