Kit Basher Posted October 15, 2020 Share Posted October 15, 2020 (edited) I'm working on a Fujimi GT 40, and I would like to paint the rivets that hold the glass in. There are tiny nibs molded into the plastic windows, but I can't figure out how to paint them without slathering paint all over the glass. Any suggestions? Edited October 17, 2020 by Kit Basher Quote Link to comment Share on other sites More sharing options...
GeeBee Posted October 15, 2020 Share Posted October 15, 2020 Wooden cocktail stick, dip the end into some silver paint and dab it onto the rivet head. Quote Link to comment Share on other sites More sharing options...
Kit Basher Posted October 16, 2020 Author Share Posted October 16, 2020 (edited) 4 hours ago, GeeBee said: Wooden cocktail stick, dip the end into some silver paint and dab it onto the rivet head. That sounds worth a try. I hope my hands are steady enough. Edited October 16, 2020 by Kit Basher Quote Link to comment Share on other sites More sharing options...
StevenGuthmiller Posted October 16, 2020 Share Posted October 16, 2020 For small details, I use what you might call a "semi dry brush" technique. I dip a small pointed brush in the paint and then "roll" it over a paper towel. The rolling serves the purpose of not only removing a good portion of the paint from the brush, but it also rolls it into a fine point. I can do some pretty small details this way with a fairly large brush. I basically use one brush for the vast majority of my detail painting and let the paint do the work, not the brush.......if that makes any sense to you. Steve Quote Link to comment Share on other sites More sharing options...
Kit Basher Posted October 16, 2020 Author Share Posted October 16, 2020 (edited) 18 minutes ago, StevenGuthmiller said: For small details, I use what you might call a "semi dry brush" technique. I dip a small pointed brush in the paint and then "roll" it over a paper towel. The rolling serves the purpose of not only removing a good portion of the paint from the brush, but it also rolls it into a fine point. I can do some pretty small details this way with a fairly large brush. I basically use one brush for the vast majority of my detail painting and let the paint do the work, not the brush.......if that makes any sense to you. Steve It does make sense to me. There are a lot of cases where it's better to let the paint flow, instead of brushing it on. In this case, I might still be limited by a steady hand. There are a bunch of these rivets, I only have to slip once to cause a problem. I thought about masking the whole window, sanding thru the tape where the nibs are, painting the nibs, and removing the tape. Does that make sense? Edited October 16, 2020 by Kit Basher Quote Link to comment Share on other sites More sharing options...
StevenGuthmiller Posted October 16, 2020 Share Posted October 16, 2020 56 minutes ago, Kit Basher said: It does make sense to me. There are a lot of cases where it's better to let the paint flow, instead of brushing it on. In this case, I might still be limited by a steady hand. There are a bunch of these rivets, I only have to slip once to cause a problem. I thought about masking the whole window, sanding thru the tape where the nibs are, painting the nibs, and removing the tape. Does that make sense? Another thing to remember is that it's relatively simple to remove any goofs with a little thinner. If you use enamel, a sharpened tooth pick dipped in mineral spirits will take the paint off of any areas where you get a little crazy and it won't hurt the clear plastic. If using acrylic, I would imagine that water would do the same, although it would probably need to be removed more quickly. The enamel goofs can be cleaned up at any time. This is another technique that I often use and it works great for any detailing where you are using enamels over lacquer paints as well. The mineral spirits will remove the enamel without damaging the lacquer underneath. Steve Quote Link to comment Share on other sites More sharing options...
NOBLNG Posted October 16, 2020 Share Posted October 16, 2020 How about Dabbing them with a brand new sharpie? Quote Link to comment Share on other sites More sharing options...
89AKurt Posted October 16, 2020 Share Posted October 16, 2020 3 hours ago, Kit Basher said: [...] I thought about masking the whole window, sanding thru the tape where the nibs are, painting the nibs, and removing the tape. Does that make sense? NOOooooo! ? That would leave a fuzzy edge, and paint would capillary under and really make a mess. Toothpick, sand the tip to the size of the rivets, dip in the upside-down lid of the paint, and take a deep breath and do the Ohmmmmmmm (yoga if you ever tried it). Clean after a few dabs with paper towel. Good luck! An alternate idea, if you want. I use a .5mm mechanical pencil, and aluminum tape (for ductwork). Retract the lead, punch the tape, click the lead out and press the little rivet into place. If you don't like it, easy to remove. Quote Link to comment Share on other sites More sharing options...
Kit Basher Posted October 16, 2020 Author Share Posted October 16, 2020 6 hours ago, StevenGuthmiller said: Another thing to remember is that it's relatively simple to remove any goofs with a little thinner. 3 hours ago, 89AKurt said: NOOooooo! ? That would leave a fuzzy edge, and paint would capillary under and really make a mess. Toothpick, sand the tip to the size of the rivets, dip in the upside-down lid of the paint, and take a deep breath and do the Ohmmmmmmm (yoga if you ever tried it). Clean after a few dabs with paper towel. Good luck! An alternate idea, if you want. I use a .5mm mechanical pencil, and aluminum tape (for ductwork). Retract the lead, punch the tape, click the lead out and press the little rivet into place. If you don't like it, easy to remove. Thanks, everyone! So it sounds like there's no foolproof way to do this. (I could use foolproof, I'm a fool!) Just be careful and be prepared to clean up my mistakes. I think I would use enamel, my experience with acrylics is they dry too fast to clean up completely. The mechanical pencil idea is interesting, I may give that a try. Quote Link to comment Share on other sites More sharing options...
Tom Geiger Posted October 16, 2020 Share Posted October 16, 2020 I don’t know the part you are working with, I’m assuming the background would be clear. If the back ground was say black, you could paint it silver first, then black and then polish the black off the rivets. But if background is indeed clear, I like the idea of flattening the tip of a toothpick to match the rivet, then pretty much stamping the color onto the rivets. I would tape the windshield to something stable and as a good working height. I’d stabilize my hand against something. A guy who did hand lettering used a bean bag, or the large bag of M&Ms to rest the ball of his hand against. These are good since they take the shape of your hand. Good Luck! Post what worked for you! Quote Link to comment Share on other sites More sharing options...
Kit Basher Posted October 16, 2020 Author Share Posted October 16, 2020 2 hours ago, Tom Geiger said: I don’t know the part you are working with, I’m assuming the background would be clear. If the back ground was say black, you could paint it silver first, then black and then polish the black off the rivets. But if background is indeed clear, I like the idea of flattening the tip of a toothpick to match the rivet, then pretty much stamping the color onto the rivets. I would tape the windshield to something stable and as a good working height. I’d stabilize my hand against something. A guy who did hand lettering used a bean bag, or the large bag of M&Ms to rest the ball of his hand against. These are good since they take the shape of your hand. Good Luck! Post what worked for you! Thanks, Tom. Yes, the parts are clear. As far as flattening a toothpick, did I mention these nibs are tiny? I mean, they are TINY! The point of a round toothpick is bigger than those nibs. I agree with you and the others that a toothpick is probably the way to go, but I think I'm going to need a whole lot of luck! Quote Link to comment Share on other sites More sharing options...
DiscoRover007 Posted October 16, 2020 Share Posted October 16, 2020 Take a toothpick and shave it down to a fine point with a razor blade. Use that to apply tiny details. Works great for dashboards too. Quote Link to comment Share on other sites More sharing options...
SfanGoch Posted October 16, 2020 Share Posted October 16, 2020 You can also try Positive Rivets from HGW Models. Quote Link to comment Share on other sites More sharing options...
Kit Basher Posted October 16, 2020 Author Share Posted October 16, 2020 2 hours ago, SfanGoch said: You can also try Positive Rivets from HGW Models. Thanks, Joe. The rivets are already there, I just need to paint them. I tried the toothpick method, and it seems like it is going to work. I will need to refine my technique and practice, but I might get there. Many thanks to all who chimed in to help! I only have to do the side windows, rear glass, and headlight covers, maybe 50 rivets. (Where is the "pulling out your hair" emoji?) If I succeed, I will post pics of the results. Thanks again! Quote Link to comment Share on other sites More sharing options...
SfanGoch Posted October 16, 2020 Share Posted October 16, 2020 I know that the rivets are molded onto the glass, Hugh. I suggested using these because you can place them directly on the existing rivets and not have to paint the existing ones. Quote Link to comment Share on other sites More sharing options...
Kit Basher Posted October 16, 2020 Author Share Posted October 16, 2020 31 minutes ago, SfanGoch said: I know that the rivets are molded onto the glass, Hugh. I suggested using these because you can place them directly on the existing rivets and not have to paint the existing ones. Sorry, Joe. I must have misunderstood the website. I thought those rivets were for adding rivets where they did not exist, sort of like a 3D decal. Are they more like a colored decal to go on existing rivets? Quote Link to comment Share on other sites More sharing options...
SfanGoch Posted October 16, 2020 Share Posted October 16, 2020 The rivets are silver. Watch this video to see how they are applied. Quote Link to comment Share on other sites More sharing options...
Khils Posted October 16, 2020 Share Posted October 16, 2020 6 minutes ago, SfanGoch said: Watch this video to see how they are applied. DANG Joe! I have never seen such a product.. I like that! ...and have a ton of places I can use that! Thank You for sharing that! Quote Link to comment Share on other sites More sharing options...
misterNNL Posted October 16, 2020 Share Posted October 16, 2020 Try using a sewing needle as your applicator. I would of course practice before hand. Good luck with whatever method you choose. Quote Link to comment Share on other sites More sharing options...
Curt Posted October 17, 2020 Share Posted October 17, 2020 22 hours ago, DiscoRover007 said: Take a toothpick and shave it down to a fine point with a razor blade. Use that to apply tiny details. Works great for dashboards too. I second that! I always use a sharpened toothpick to pick out fine details. The sharp point doesn’t hold much paint so it’s very easy to control where you are applying it. Quote Link to comment Share on other sites More sharing options...
89AKurt Posted October 17, 2020 Share Posted October 17, 2020 23 hours ago, SfanGoch said: You can also try Positive Rivets from HGW Models. First time I have seen that product. I tried Micro Mark HO scale decal rivets, they are not silver. Good way to go insane. Quote Link to comment Share on other sites More sharing options...
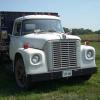
Kit Basher Posted October 17, 2020 Author Share Posted October 17, 2020 So, I've been doing the toothpick thing. I tried shaping a toothpick to a sort of "chisel tip", and touching the nibs at an angle. I had better control after sanding a toothpick square across, leaving a flat end about 1/32", and touching straight down onto the nibs. Because I'm working on clear parts, I had to put blue tape on the back side to help me see the rivets. I still had to move the parts around quite a bit because the rivets are really only visible when the light hits them at a certain angle. The hardest part has been getting just the right amount of paint on the toothpick. Thanks to all you kind gentlemen, I may get this task accomplished, at least to my satisfaction. Here are some pics, what do you guys think? Quote Link to comment Share on other sites More sharing options...
Recommended Posts
Join the conversation
You can post now and register later. If you have an account, sign in now to post with your account.
Note: Your post will require moderator approval before it will be visible.