Nacho Z
-
Posts
2,931 -
Joined
-
Last visited
Content Type
Profiles
Forums
Events
Gallery
Everything posted by Nacho Z
-

Spirit of America Porsche 956
Nacho Z replied to Nacho Z's topic in WIP: Other Racing: Road Racing, Land Speed Racers
Josh, I appreciate it! -
Fantastic! Great looking model, Dan!
-
This is just so nice! I watched the video and it was very well done. I liked the explanations of what you were doing. Thanks for sharing this beautiful model!
-
Spirit of America Porsche 956
Nacho Z replied to Nacho Z's topic in WIP: Other Racing: Road Racing, Land Speed Racers
For tonight's update I will show show the work that I did on the interior. As I stated in my first post, I am not an expert on these cars and I deviated from the 1:1. If anyone can explain which one is correct, I would gladly listen. I have seen pics of these cars with one and with two seats. If I was a betting man I would bet the two seats are correct for a race version and one seat is correct for a restored or vintage style race version. I like the one seat version and that is how I built my model. This required a bit of plastic surgery which was a big deal for me because although I like scratch building things I don't really care to modify things, (if that makes sense). Here is the original Tamiya part. Removal of the passenger seat. Making the blank space from sheet styrene. Not perfect but not too bad either! There are 29 separate PE pieces in this Eduard racing harness set. I'm not a huge fan of these pre-decorated harnesses. I have yet to have one that the paint did not flake off on some of the tight bends. I am skipping a lot of work that I did on this model but I don't want to bore anyone with too many little details. Here is the finished cockpit. There are PE grills installed. I used some spares to spruce up the interior. I installed some tiny PE bits on the steering wheel. I had a hard time capturing the completed dash. I took this picture and brightened it so that some of the details would show up. So, to the naked eye, the colors are much richer and not as washed out as in the picture. That pretty well covers the interior. There is detail on the other side of the bulkhead that I will show when I post updates on the drivetrain. Let me know if you have any questions or comments. They are always appreciated! -
Tangelo chopper
Nacho Z replied to crazyjim's topic in All The Rest: Motorcycles, Aviation, Military, Sci-Fi, Figures
Really nice, Jim! I like everything about it! -
Spirit of America Porsche 956
Nacho Z replied to Nacho Z's topic in WIP: Other Racing: Road Racing, Land Speed Racers
In between working on the body I would work on the interior and the drivetrain. My updates will not necessarily be chronologically how I actually built the model. So with that being said let's take a look at those gorgeous Studio 27 wheels! The wheel centers are white metal. I panted them gold. This car ran Goodyears. The Tamiya kit did not have Goodyear decals so I used some from my stash. The valve stems are watch parts from a friends stash. I had a heck of a time drilling out the rims for the valve stems. The finished product. I am very happy with how they turned out. And here are the rotors. There were no caliper decals and truth be told you wouldn't see them anyhow. No flashy colors on the calipers either. Actually, mine are a little too shiny. -
Spirit of America Porsche 956
Nacho Z replied to Nacho Z's topic in WIP: Other Racing: Road Racing, Land Speed Racers
Josh, that one is Testors Extreme Lacquer Star Spangled Blue. It was the only metallic paint out of the six. It was one of my favorites but unfortunately the 1:1 was not painted in a metallic, (at least the best I could tell). -
Spirit of America Porsche 956
Nacho Z replied to Nacho Z's topic in WIP: Other Racing: Road Racing, Land Speed Racers
I made a set of PE door hinges. These actually could be functional but I did not go that route. As I pointed out in my last post, I had trouble with the yellow plastic. I have read many times on this site, people arguing about whether or not the color from styrene can leach out. I'm no chemist or styrene guru so I'll leave the arguments up to those guys. What I do know and can prove is that yellow came through Tamiya White Primer. It wasn't immediate. There are several ways to remedy this and I chose the old standby, silver paint. -
Spirit of America Porsche 956
Nacho Z replied to Nacho Z's topic in WIP: Other Racing: Road Racing, Land Speed Racers
I started this model back in 2019 and ran into some problems with it. It was set aside until this year when I decided to pull it back out and finish it. In 2019 I had not yet started to airbrush so everything I did was done with rattle cans. I did not know what the true shade of blue that was used on the nose. You just can't tell from pictures on a computer screen. I basically bought every hobby spray can color of blue that looked close. I shot Tamiya White Primer on some spoons to test. I often times take pictures of the unmolested body to note where certain details are located. This is useful when replacing molded in detail with PE, for example. Note the molded in vents on the lower portion of the main body. These will be opened by sanding from the backside. Because this model is meant to be entered in contests I had to deal with all of the sink marks on the inside of the rear cowl. What a pain that was! Here are the major exterior components ready for paint. Anyone who has painted colored plastic knows that it can cause problems. In my case it did. -
Spirit of America Porsche 956
Nacho Z replied to Nacho Z's topic in WIP: Other Racing: Road Racing, Land Speed Racers
Yeah, guys, this Hayne's Manual was a mixed bag. It states that it covers a number of years and the 956 & 962, so they are packing a lot of things into one book. So on one hand you get a lot of general info about these cars but on the other hand you don't get a lot of specific info about any one car or item. There were some good reference photos but probably nothing you couldn't find on the internet. I do have a number of their books on different race cars. Some are better than others. -
I thought I would share another build with all of you. I am going to build the Spirit of America liveried Porsche 956. I will be using the following items on this build: Tamiya Newman Porsche 956 Studio 27 Spirit of America decals Studio 27 wheels Scale Motorsport PE set Eduard 6 point racing harness Various Detail Master and Pro Tech items Now for a couple of notes. I am no expert on these types of race cars. I just happen to like them, I think they are absolutely gorgeous machines. I do not expect my model to be an exact replica. I will try to explain why I did what I did if I deviated from the prototype. I appreciate all comments and suggestions that you may offer. The truth is, like most of my WIP threads that I have done in the past, this model is already complete. I still think this WIP could be beneficial to someone thinking of building a similar model. The following pics are of the car that I'm building. I got them from the Internet. I would give credit to the photographer if I knew who they were. Here are a few pics of what I am starting with.
-
Thank you, Rick! If I understand it right, that is the origins of this model, it was a slot car. I’m not 100% positive about that. It is a very simplified kit which is why I chose it for a 24 hour build project.
-
Seeing that you are the OP and asked this question, I will chime in. I’m 56. I have a lot of models. A lot. I went through phases of genres that interested me, one of them being supercars. I have a good number of supercars in my stash. Tamiya, Fujimi, Aoshima, Revell, RoG are the main brands. I also have a good number of race cars based off of supercars in my stash. Why? Because I like them. Although I never actually had the poster of the Lamborghini Contach that was so popular back in the day, I always liked it. For me, that was probably one of my first exposures to a supercar. As I’m typing this response I am asking myself what it is about these cars that I like? I don’t know how to answer that, I just like them. I also like a good hot rod. I love the muscle cars. I don’t care for rat rods and I’m not particularly fond of fat fendered cars. I like the old classic luxury cars from the teens and 20s. I’m not a fan of the plain jane Japanese cars. So with that incoherent rambling, did I answer your question? Probably not. I’ve only had one cup of coffee so I’m not too focused yet…lol.
-
I’ll play!

-
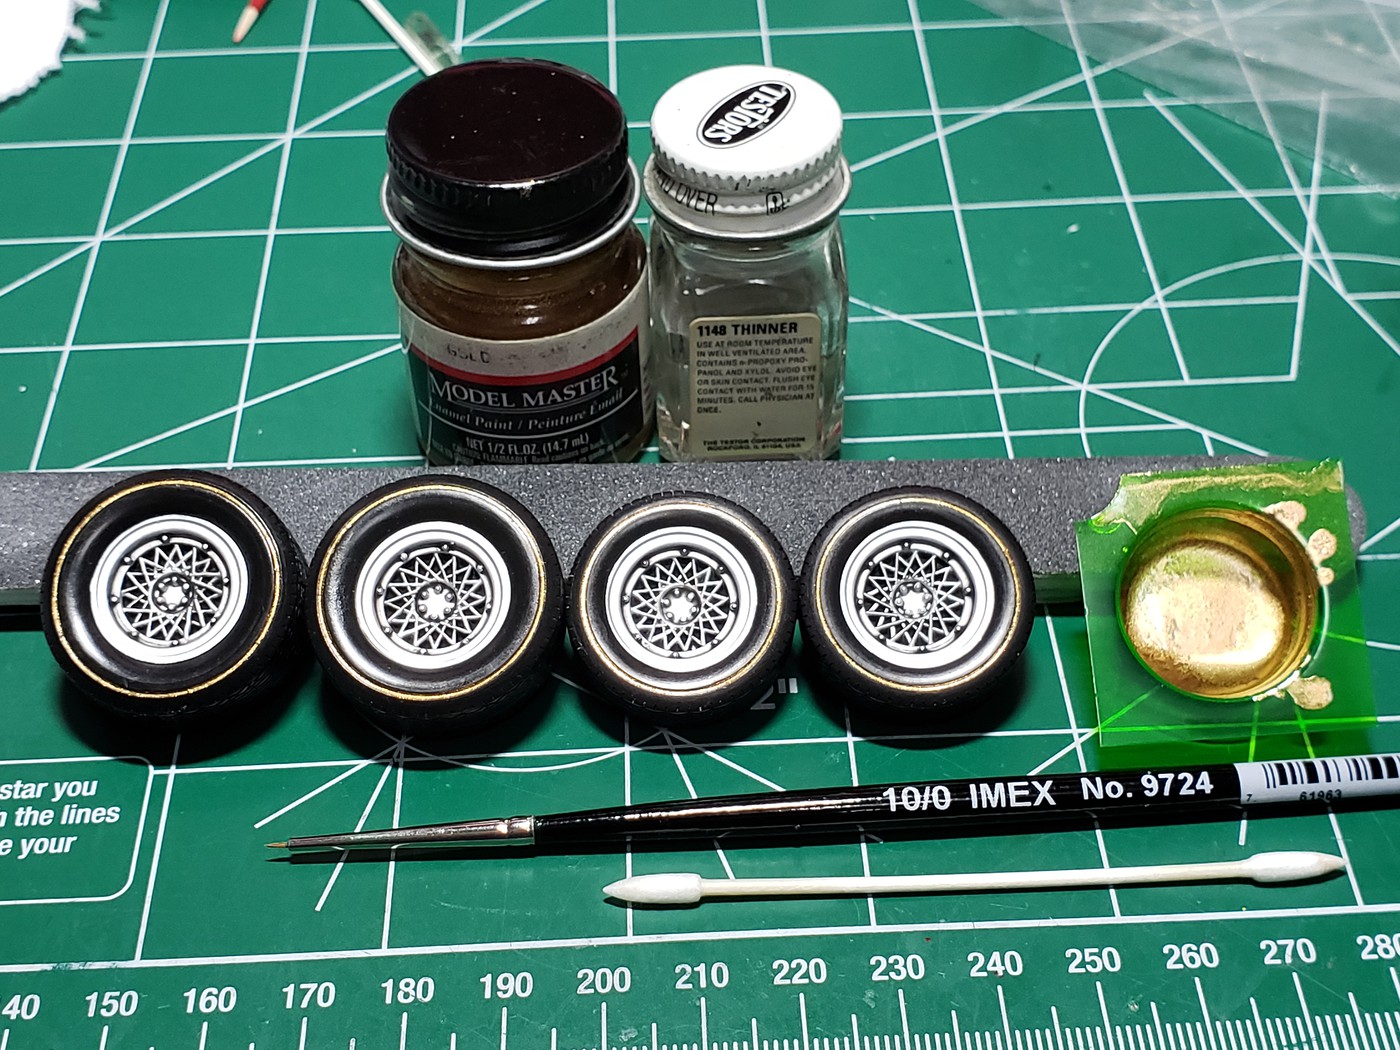
Thank you, Bob! One side of the tire is flat and one side has a small groove, for the gold ring, I presume. I just thinned some gold paint and flowed it into the groove much like a panel liner. When it dried it used a Tamiya swab to clean up any excess.
-
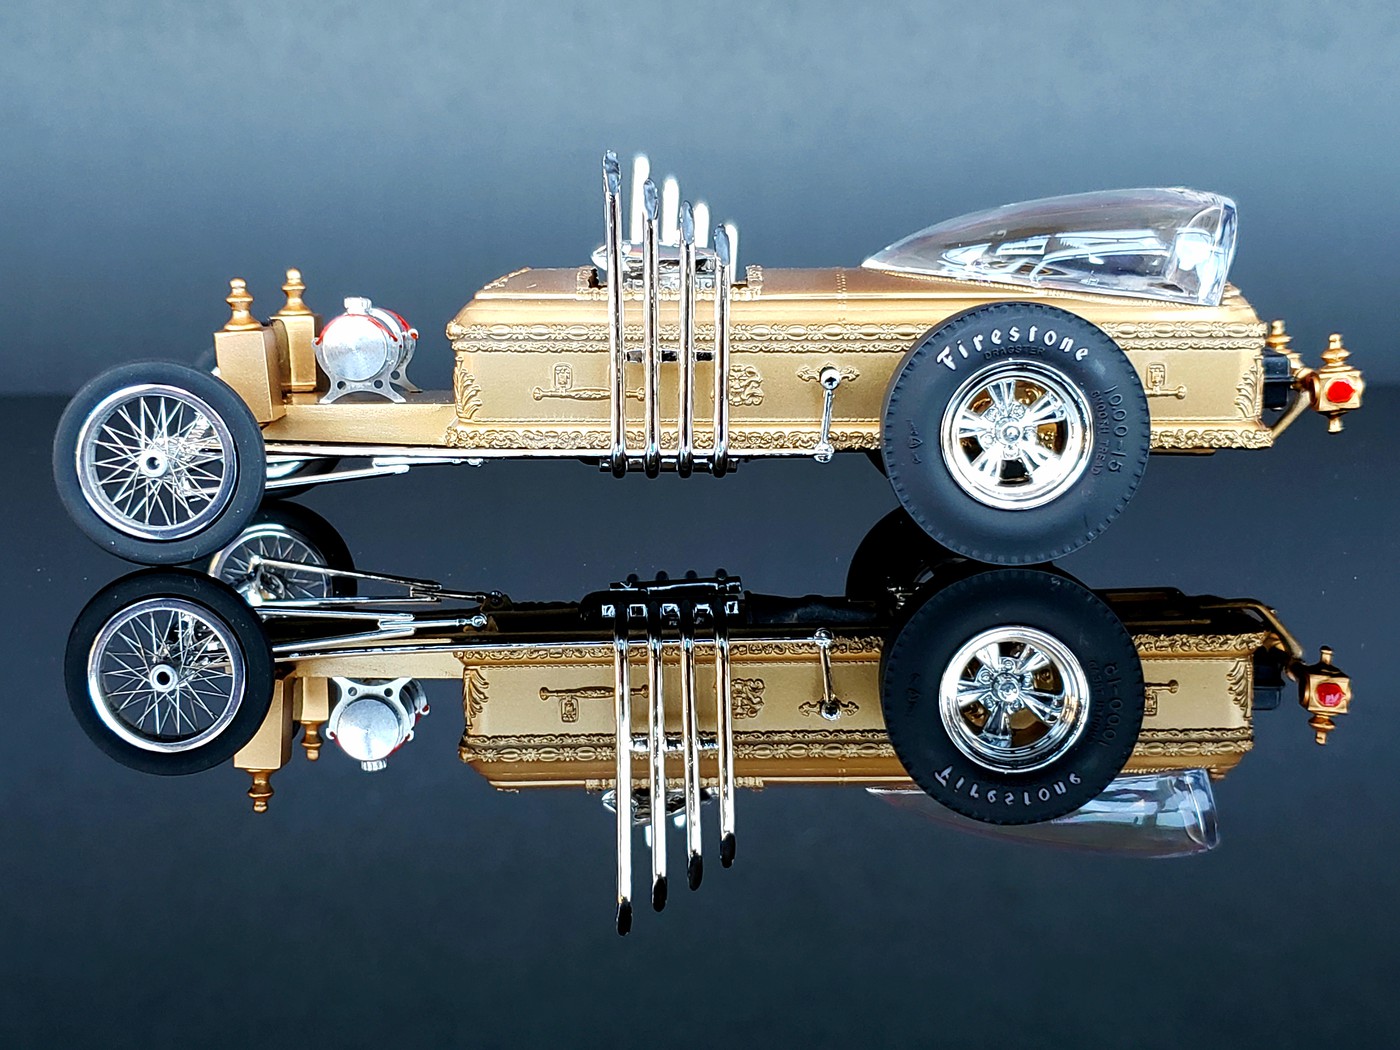
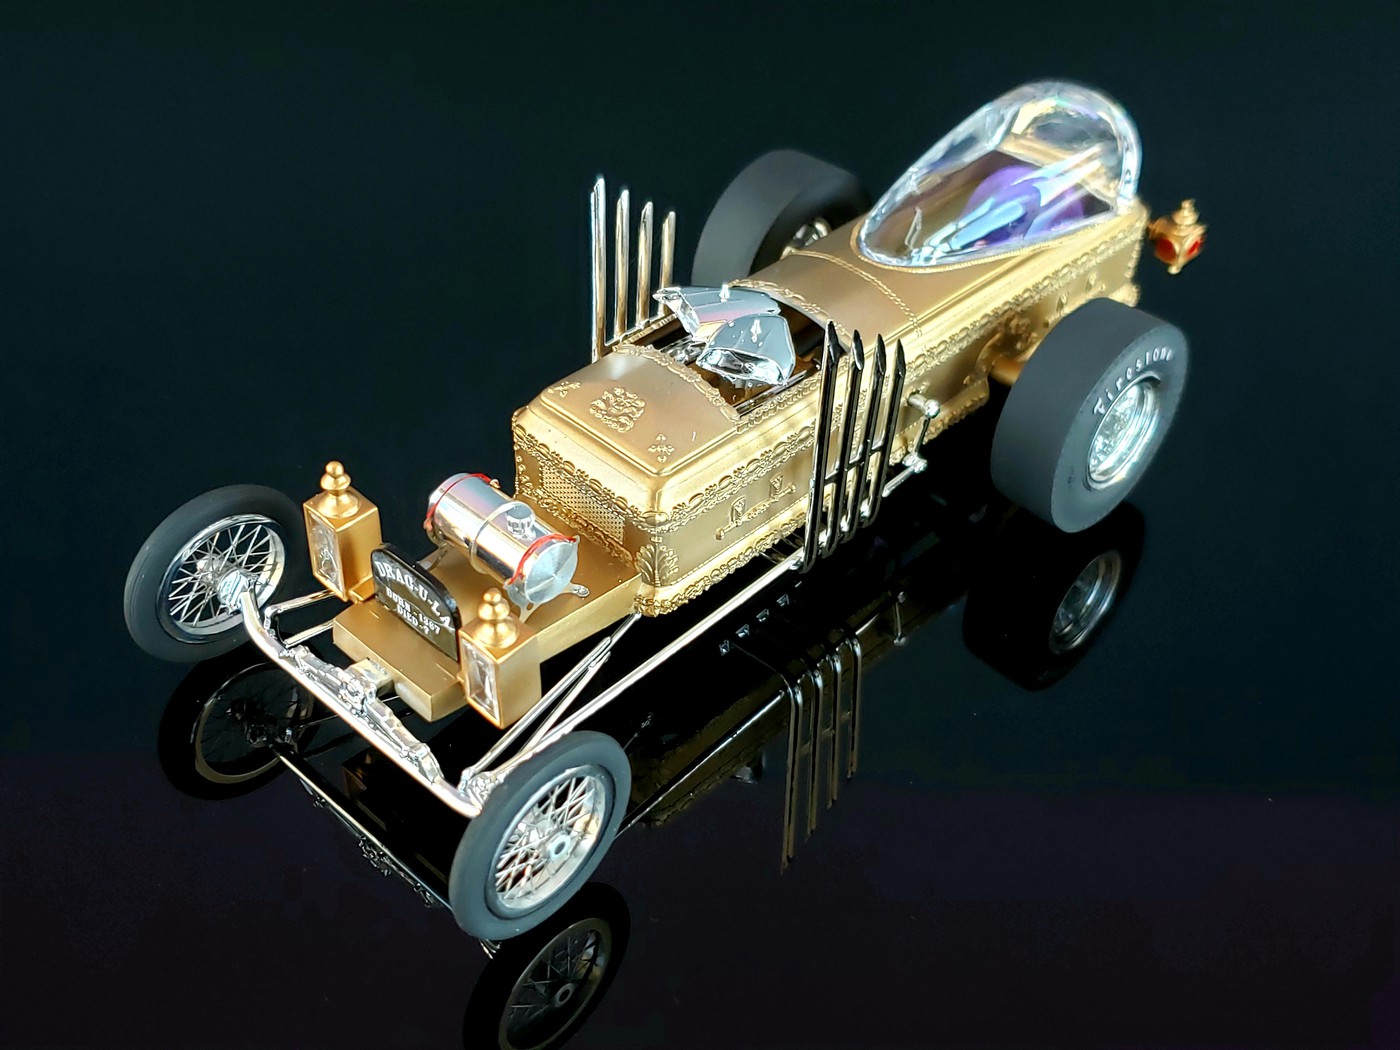
It has been a long time since I have posted any of my work here. This was my entry into the 2021 Annual 24 Hour Build. It took me a little over the allotted 24 hours. I think I clocked in a total of around 30 hours. I would have finished it but decided to open the rear end by removing the molded in screen and replacing it with PE mesh. This pushed me into overtime. Once I was over I decided to replace the intake stacks. Lastly, I had issues with the gold ring tire decals so I hand painted the gold ring.
-
Fantastic model!!
-
I love it! You really did a fantastic job on this!
-
Fantastic!
-
AMT 1970 Chevelle SS454. Yes it's Red w/Black Stripes and Interior.
Nacho Z replied to Dragonhawk1066's topic in Model Cars
Nailed it!! -
The Ugliest Corvette Ever?
Nacho Z replied to stavanzer's topic in General Automotive Talk (Trucks and Cars)
Dave, there is, or at least was, a resin model of the Corvette Summer car. I looked into it a few years ago and if I remember correctly it was around $100. Don’t quote me on that price but I remember it wasn’t cheap. -
Metalizers Alternative
Nacho Z replied to Evil Appetite's topic in Model Building Questions and Answers
I’m a big fan of AK Interactive Xtreme Metals. -
Nu Nu Audi GT3
Nacho Z replied to Silver Foxx's topic in Other Racing: Road Racing, Salt Flat Racers
Very cool Audi! I’m not sure how I missed this one when you posted it. I only have one of these kits and I am going to do the white KFC livery. Your Audi looks sooooo good! Thanks for sharing it. -
Just to add my 2 cents on AK Interactive Xtreme Metals, they are very, very nice paints. I have had good results with all of them including their chrome. I have shot a good bit of Alclad as well EXCEPT for their chrome. I could never find it in stock when I was looking for it. Alclad probably stills holds the edge for metalizers.
-
I think she is stunning! Very cleanly built! I really like the whole package. The color combo is so nice, the engine compartment looks good and the wheels and stance are spot on in my book. You really have done a super nice job on this one, bravo!