Pete J.
-
Posts
3,981 -
Joined
-
Last visited
Content Type
Profiles
Forums
Events
Gallery
Everything posted by Pete J.
-

Is finishing your goal?
Pete J. replied to Psychographic's topic in General Automotive Talk (Trucks and Cars)
David, I have said this for years. The fun is over when the model is done. What pleasure is there is looking at a built model? Yes, you can have pride in sharing it online, or at a contest or show, but that lasts for a few moments compared to the fun of creation. The shear thrill of holding a part in your hand that started out as a lump of plastic or metal is beyond any of that. Why else would we spend hours at the work bench? How great is it to spend time creating? It is what we do. It is not wrong in any aspect. It is our form of fun. Why would you rush it? -
Tim, I just caught up on this build. What a great piece of machine work for the rear end! I've been studying it a bit trying to see how you made your cuts. I think I have it figured out and it is some really nice work. I love the mental gymnastics it takes to imagine all the different setups. There are probably only a few machinists here who truly appreciate the work. I happen to be one of them. Thanks for sharing it.
-
Inside of a Tamiya rattle can(photo)
Pete J. replied to Pete J.'s topic in Tips, Tricks, and Tutorials
Douglas, Great, glad you were able to do this. I have had a number of folks ask me to make them, but due the the inherent dangers dealing with highly flammable fluids and the fear that no matter how great the instructions are that I provide, someone will find a unique method to injuring themselves,I have refused. I like the idea of Teflon. I used aluminum. If I do another one, I may use teflon or some other plastic. -
Jamie, congratulation to your Hubby for marrying a wonderful partner! It is great to see someone encouraging their partner in our hobby. A lot of good suggestions here and I agree with most of them. I think I might have been a bit like the husband. Like many here and your husband, I came back to the hobby after many years of family raising. I have made my share of mistakes with airbrushes. I have purchased and discarded a few cheap airbrushes and have four that I have kept and use all the time. If I were to suggest a starter kit it would be my old work horse a Badger Crescendo 175. I have had mine for well over 20 years and it taught me more about airbrushing than I can possible share. The important thing here is that it gives you a lot of stuff to experiment with to find out how to use it. Most importantly, it comes with three size tips. Different size tips are required for different types and manufacturers of paint. This one can handle all of them. Most of the other suggested brushes are single tip, so you are stuck with a single size tip and if hubby decides to try a different paint, it may not work of it. The quality of this brush is good but not top of the line and has one thing missing that would be nice to have. That is an adjustable stop for the needle, but that is something you don't absolutely need. As I said, this is my old work horse and I have a lot of respect for it. I have used the heck out of it and have had it recently rebuilt. I am going to suggest a site for you to go to as they are local to me here in SoCal. That is Coast Air Brush. They specialize in airbrushes and did the rebuild on my brush and got it back to great working condition. I am not suggesting that they are the only place to buy, but I have been acquainted with them for years and they have never treated me poorly. This is the link to the brush I suggest and they have a very reasonable price on it. http://www.coastairbrush.com/proddetail.asp?prod=Badger_175_Crescendo_Airbrush_Set When you order it, I would also suggest a set of cleaner brushes. http://www.coastairbrush.com/proddetail.asp?prod=5_Piece_Brush_Cleaning_Set These are only a few dollars and are necessary to keep the brush in good working condition. If you call one of the airbrush companies like Coast Airbrush I would also have them add a small tube of needle lube. This keeps the seal in good condition. I will not suggest a compressor because there are a ton of options. Everything from a high end professional to canned air. There are even people that have an adapter that hooks up to a spare tire from a car. I would not suggest those but hubby will need to get something that fits both the room and your budget so I will leave that up to him. One last thought. You mentioned that you wanted to give him part of your art room. Airbrushing in a closed room is not recommended especially if you have other crafts in the room. Airbrushing can put some seriously toxic fumes in the air and over spray can get dust on things you don't want it on. Painting with this will need to be done in a garage or outdoors. The assembly and prep work can be done in the room with you but the spraying needs to be somewhere else, unless you are prepared to spend money on a spray booth, which for someone getting back into the hobby is probably too much of a commitment. Good luck and I hope the husband appreciates what you are doing for him!
-
Wow, that is a lot of filler needed to get the body right!
-
Tim, I talked about the penny because I am a casual coin collector as well as model maker and a '55 plain is worth a couple of dollars. Not much but certainly more that $.01. Just a bit of humor!
-
Wow, a 1955 wheat penny in nice shape! better put that one aside. Great looking machine work! Never thought of using a slitting tool that way. I'm going to borrow that idea for sure!
-
$30+ kits - hows it affect you?
Pete J. replied to Jantrix's topic in General Automotive Talk (Trucks and Cars)
Every time the subject of price comes around and a bunch of folks start griping about how much the hobby cost, someone like me has to come along and point out that it isn't what you put into a kit, it is what you get out of it. Now frankly, I'm a slow builder. I know that. I only get two or three done a year and if I put less than 30 hours into one, then that is pretty quick for me. Having said that, I build because the process gives me pleasure. If I just wanted something to throw up on the shelf, there are a whole ####pot full of diecasts out there that I could buy. No, I love the pleasure of making something I can be proud of. So let me break it down. Let's say I pay $30 for a kit and it only takes me 15 hours to build it. I have dropped $2 an hour for my fun. Do you know any place else that you can get that much fun for that price? Heck, I went to Disneyland a couple of weeks ago and went midweek for a cheap entry and only got into Disneyland and skipped California adventure. I was there for 12 hours and with food it cost me $130 a person. That is just under $11 an hour and when I was done I had some pictures on my cell phone. Now don't get me wrong, I enjoyed the time spent with family and the whole Disneyland thing, but that was five times what I spend on modeling fun per hour. To be fair, I was stunned a month ago when I went to Brookhurst hobby and found that Tamiya's Enzo was on the shelf for $90?? It is a great kit and I have 6 of them in my stash, but $90. But then that kit would take me a lot longer than 30 hours to build the way I do, so my entry fee per hour still would not be unreasonable. And it is still cheaper and less painful than an evening at a bar. It is all a matter of perspective! -
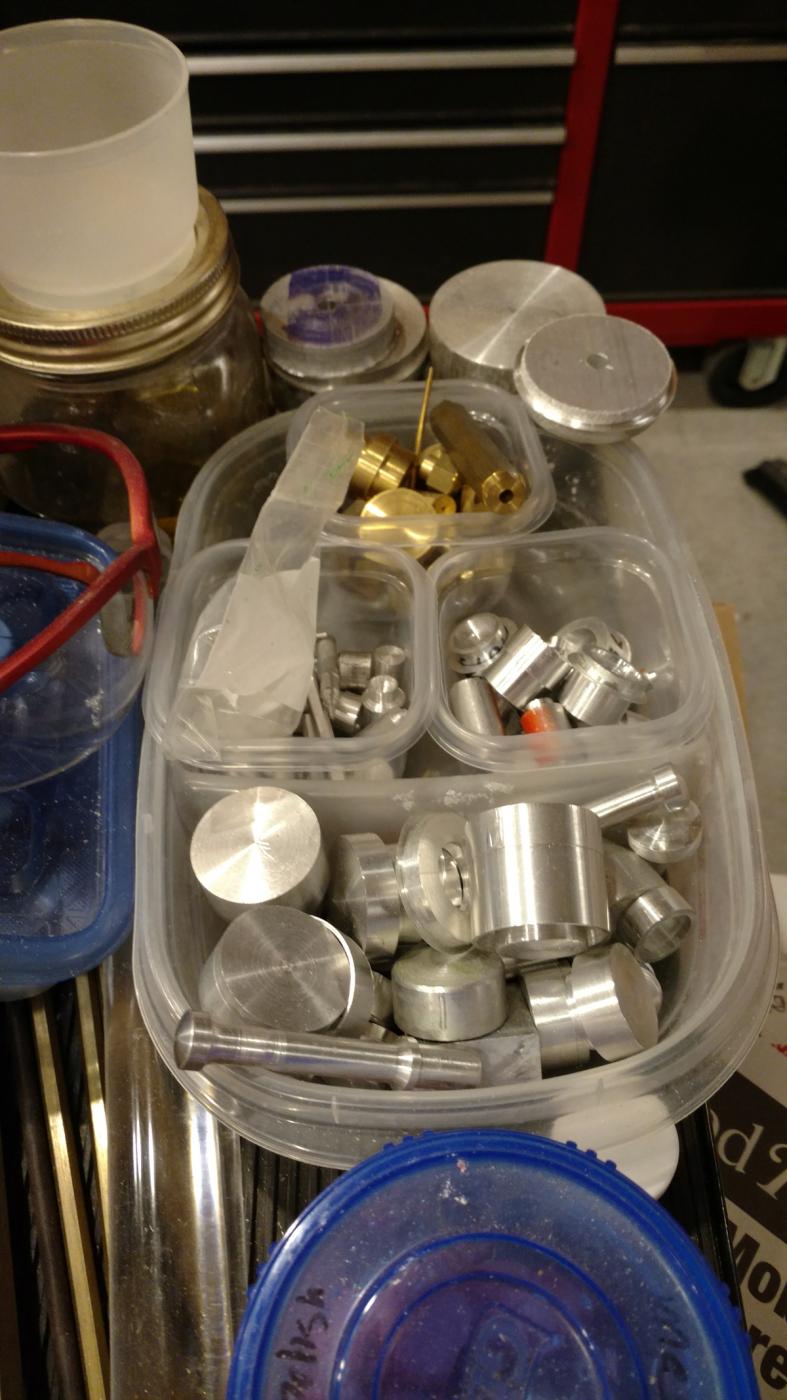
Tim, I'm with you man! Here's a shot of just the stuff sitting next to my lathe. You never know just when you will really need that special piece.

-
I will follow along on this one. I've done a couple of the Tamiya version and will be interested to see the difference.
-
Will Tamiya clear melt the basecoat ?
Pete J. replied to Timonator's topic in Model Building Questions and Answers
Good read Art. Worth the time! -
Tim, this is going to sound weird, but I like seeing all the ways you have used scraps for stands and props. I don't feel so bad about having Tupperware full of bits and pieces from other projects. Thank man!
-
Looks like you got some mounting points along the top of the rail also Tim. Really nice brass work!
-
Will Tamiya clear melt the basecoat ?
Pete J. replied to Timonator's topic in Model Building Questions and Answers
Yup! -
Will Tamiya clear melt the basecoat ?
Pete J. replied to Timonator's topic in Model Building Questions and Answers
-
Will Tamiya clear melt the basecoat ?
Pete J. replied to Timonator's topic in Model Building Questions and Answers
Tim, I should have noted something here that is in the article. All of this is dependent on temperature and humidity. The hotter and dryer it is the quicker paint cures. This is why I like the food dehydrator. It is designed to maintain a constant temperature of around 110 degrees and move air through the machine. This aids the curing time. As I said it is dependent on how thick you spray the paint on. Tamiya paints polish out very nicely so a lot of mist coats with time in between, will polish out as well as a couple of thick coats and cure much quicker. This paint doesn't create layers. Each slightly dissolves the layer below and it becomes a single layer. -
Will Tamiya clear melt the basecoat ?
Pete J. replied to Timonator's topic in Model Building Questions and Answers
Overnight for room temperature. A couple of hours in a food dehydrator. -
Will Tamiya clear melt the basecoat ?
Pete J. replied to Timonator's topic in Model Building Questions and Answers
I assume you are using Tamiya rattle cans. All Tamiya rattle cans are synthetic lacquers. All lacquers melt the under coat to some degree or other. That is just the way they work. If you could see them in cross section they are one continuous layer. Your big mistake was trying to correct orange peel with more paint. This is what is causing your problem. Always, ALWAYS lay lacquers on in thin coats with some flash time between coats. Lacquer solvents dry exponentially. What that means is that if you double the thickness of the paint layer you quadruple the time it takes for the solvents to evaporate. The fact that you have the unevaporated solvent in contact with the lower layer longer, the more likely it is that you will have problems with the lower layer. If you get orange peel in lacquer, stop painting immediately. Let is dry for a couple of hours in a food dehydrator or overnight at room temperature and sand it flat and then respray. The real beauty of lacquers is that they are easy to polish to a high gloss. Light coats only. I noticed that you were spraying red. A word of warning. Reds and yellows are translucent. When laying down the color coat, it may take 3 or 4 coats to get good coverage. Don't get carried away with trying to lay down too much on each pass. With rattle cans you can get too much in the creases and as the propellants off gas you may get bubbles underneath. Then when you spray the clear it can melt the top of the bubble and cause the primer to show through. I can't tell from the pictures but that my be what is happening here. If that is the case, strip it and start over. It will be way too much work to try and sand down the problem areas. Keep in mind, more paint never solves the problem. Good luck! By the way, you may find this interesting. http://www.tamiyausa.com/articles/painting-with-tamiya-synthetic-lacquers-35?category_id=8#.WDsy-oWcGMo I wrote this many years ago when Tamiya first introduced their paints to the US. -
Harry, I am going to use some blunt language but bare with me. I am sure you are feeling somewhat embarrassed by having to take public assistance. Many in our society would have us believe that anyone on public assistance of any sort is a lazy freeloader who refuses to work for a living. I am sure there are a few of those people out there, but my experience is that they are few and far between. The vast majority are just like you. Good people who paid their taxes and worked hard but have had some circumstance beyond their control that took their life and would not give it back. This is the type of person these programs are created for. To help those who have been a contributing member of our society and now need help. It should not be an embarrassment except to those who would say derogatory things about those in your situation. We all pay into these programs through our taxes or social security or health insurance premiums or have earned them through our service to the country. They were set up for our rainy day. This is your rainy day! Use them with your head held high. You earned them and don't let anyone tell you different! I wish you the best!
-
Harry, as I am sure you are abundantly aware at this point, life is a journey, not a destination. I am sad that you are hit by a turn in that road that you didn't expect, but glad you have the friends and family to help you along this part of the journey. My best wishes for you and your loved ones!
-
Randy, great work! The real problem with railroad stuff is that it is very hard to share with others. It just isn't portable like a model car or aircraft. Love the pictures.
-
I am in the hospital
Pete J. replied to Harry P.'s topic in General Automotive Talk (Trucks and Cars)
Harry, just one thought. The best surgeon I know(and I know way the heck too many) said that doctors and hospitals don't heal anyone. They only give the body the best chance to heal itself. The body listens to the mind. A great attitude does as much as the medications. Keep the chin up and give it the great fight you have all your life! I will be sending good vib's your way! -
Welcome Paul! It is good to have you on the forum. I have been working on your Bugatti 100P. Love the kit. Lots of work but it will be worth it in the end.
-
"Spaz Stix" chrome paint, is this a bad joke?
Pete J. replied to fiatboy's topic in Model Building Questions and Answers
I think Harry will agree with me on this one. There are a lot of "chrome" paints out there and most work with proper technique. None of them is just a "blast it " with a coat of paint. All require a very very smooth surface and a delicate touch with the amount of paint you put on. To little and the base shows through. To much and you don't get the bright reflectivity. You can give generalizations but you can't give a step by step instruction with out the builder experimenting to develop an eye and technique that works. The one piece that needs to be done to prevent failure is surface prep. All chrome paints will magnify any defects in the surface. The better the substrate the better the result. A perfectly polished surface is a must before painting the chrome. I strongly suggest that you experiment on the back of plastic spoons until you can get it perfect every time. Then move on to your parts. Good luck! -
For BMF I use a #23 blade. The other thing that I learned is that I push it rather than pulling it. By pushing it and holding like a pencil you can guide it very precisely by following the tip. I like the #23 because of it's curve. When I get to the end of a push stroke, I can end it precisely by rocking the blade up to the tip.