Straightliner59
-
Posts
5,811 -
Joined
-
Last visited
Content Type
Profiles
Forums
Events
Gallery
Everything posted by Straightliner59
-

1/8 Ford Cosworth DFV engine
Straightliner59 replied to mad mike's topic in WIP: Other Racing: Road Racing, Land Speed Racers
Mein Gott im Himmel!? Very nice work. As someone else mentioned, the textures are beautiful. -
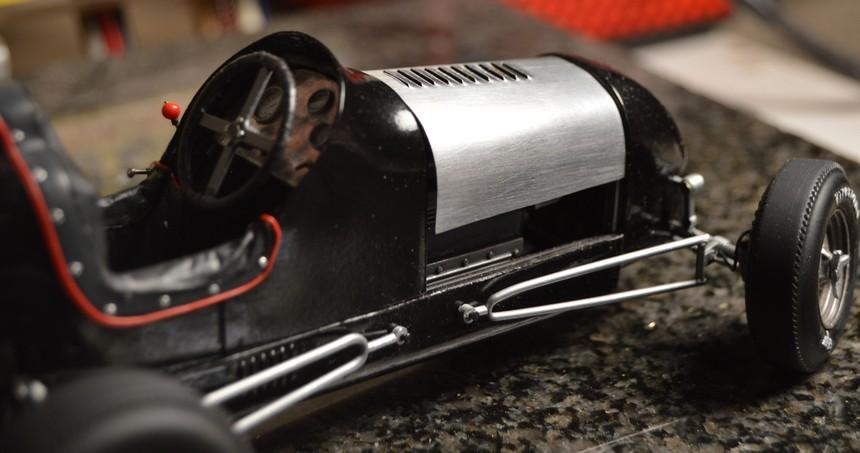
I think we all must have at least a little bit of that, in us! ? F'rinstance, I just spent a few hours making a piano hinge for the hood of my "Indy Car".
-
Louvers. Possible solution?
Straightliner59 replied to Straightliner59's topic in Tips, Tricks, and Tutorials
Well, one can dream, I reckon! -
Looks like a challenging project. Your work looks great, Kurt!
-
You sure did! I agree with Jim--definitely worth it!
-
1964 Pontiac GTO NHRA B stock competitor
Straightliner59 replied to MarkJ's topic in WIP: Drag Racing Models
That, sir, is ambitious! Most of us would have set the entire project aside, until we came up with the parts. Much respect, to you. -
Nice work on that winch! Way better!
-
That is awesome! I'm kinda' figuring this stuff out, on the fly. I intend to try something with more complex panels, one of these days. So far, I have this hood, a scoop I formed for a '34 Ford coupe, and a dragster body. I really do enjoy working with sheet metal. Thank you very much, Scott. Please do use it! I post this stuff, in hopes that someone can use it. Modeling isn't about keeping secrets, as far as I am concerned.
-
Louvers. Possible solution?
Straightliner59 replied to Straightliner59's topic in Tips, Tricks, and Tutorials
Thank you, very much, Charlie! It's probably easier, in these smaller scales, than it is, for you! Still, the process should be similar. -
Yes, you did, my friend! Thank you so kindly,sir. It's pretty satisfying, when things work out! Thanks, Bruce. Very much appreciated!
-
I would guess with dollhouse stuff? Do they carry that?
-
I use Krylon Crystal Clear. Lacquer works, as well..
-
Louvers. Possible solution?
Straightliner59 replied to Straightliner59's topic in Tips, Tricks, and Tutorials
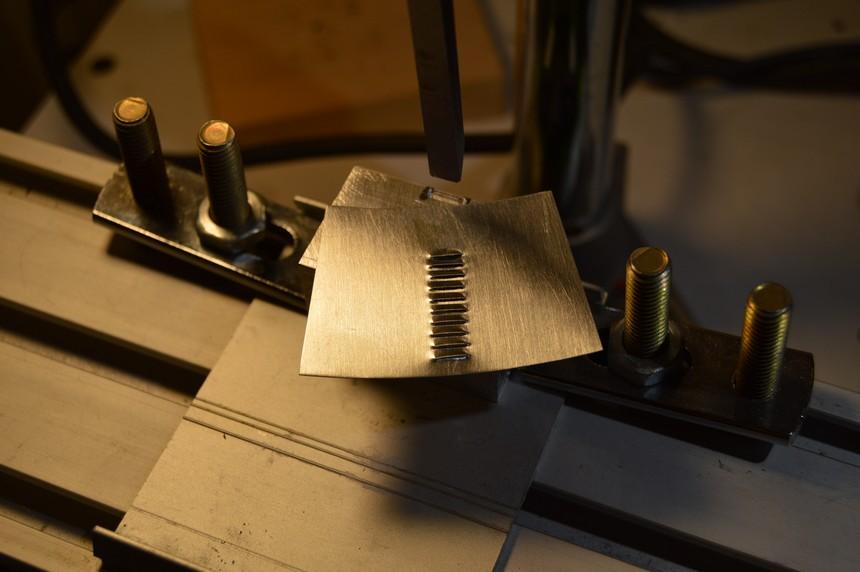
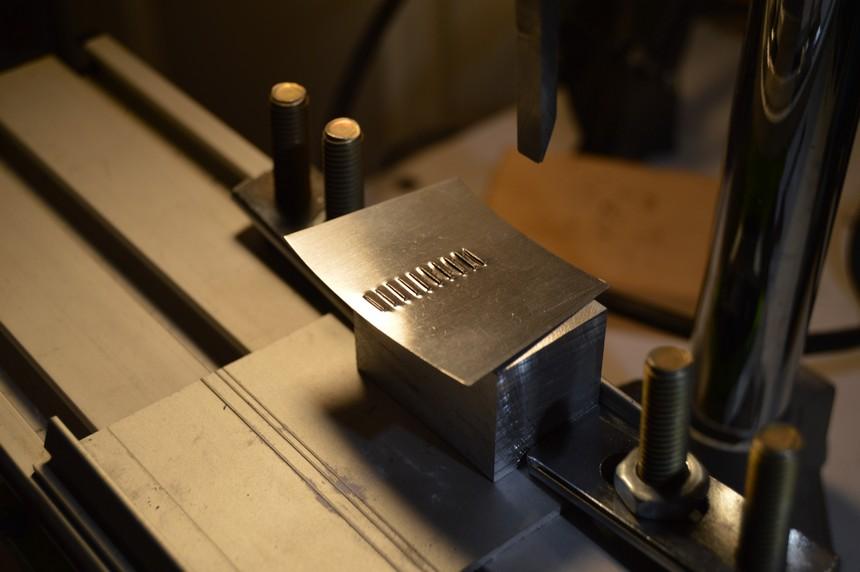
Actually, Kurt, I discovered that this method works best (makes cleaner, crisper cuts) prior to annealing the metal. It absolutely must be annealed, however, when creating complex curves, because, then, like you say, it's too brittle, maybe rigid is a better term. Then, if it doesn't break, it tends to fold, rather than curve, if that makes sense. I really love working with the stuff! Thank you, Ray! It is true. As I worked toward this solution, each attempt got closer and closer to an actual die press. I reckon if it works 1:1, then, it should work, in scale. ? That "meh" is what got me here! ? Thank you, everyone! I'm pretty proud of those! Thank you, Trevor. Since that's pretty much how they're done, in the "real world", I guess it must be the best way! ? -
Thank you, Jim. I truly appreciate that. You have those skills, too, my friend! I believe that, more than anything, doing this crazy stuff is more a matter of just wanting to, than anything else.
-
Louvers. Possible solution?
Straightliner59 replied to Straightliner59's topic in Tips, Tricks, and Tutorials
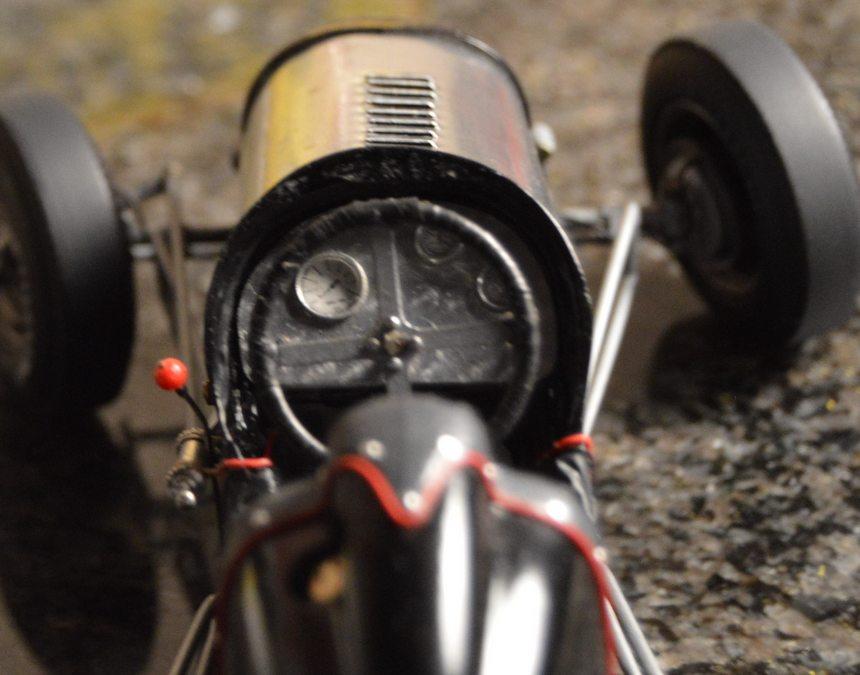
Since I finally solved this whole dilemma on Wednesday, I thought I would post some pictures of what I did, and the results. I am very, very happy with these! I bumped this, because there may be folks interested, who haven't seen my "Indy" car thread. The metal is aluminum step flashing. Any questions or comments, fire away!
-
Thank you, very much, Steve! I was a little nervous, to mess with my drill press, like that, but, I am happy that I did!
-
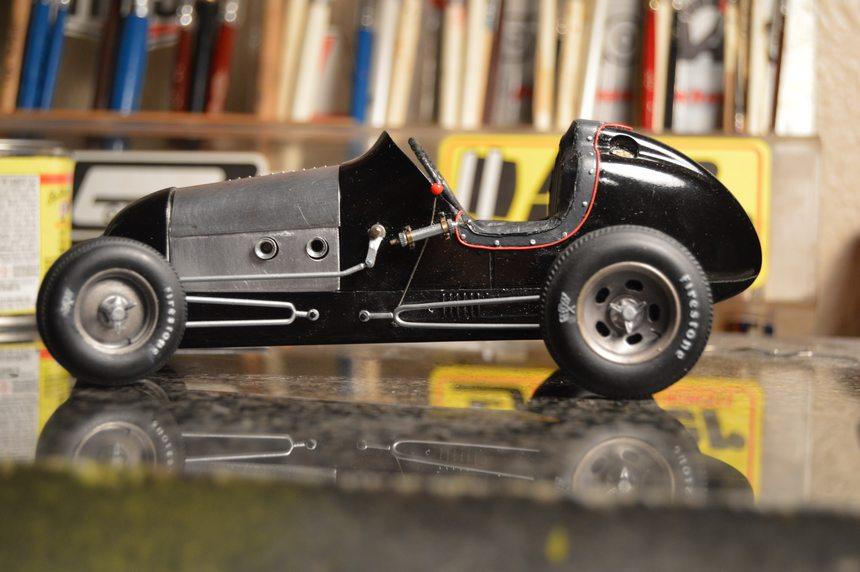
It's very cool. It captures the era, perfectly!
-
Not to mention that unsanctioned local tracks could and would create their own class designations. You're right, those guys were slick!
-
Thanks, JC. I am thrilled with the way they worked out!
-
I'm not exaggerating when I say that, I think this is my proudest day as a modeler. When I got home from work, at the end of last night's shift, I had a workable idea about creating louvers. I began solving problems until I ended up with this. A long day's journey, but, oh, so satisfying! It probably sounds dumb, but, I had tears in my eyes. A bit of fine tuning, and creation of a hinge, and it'll be almost ready for paint!
-
Well, yes, but, as a sub class. Comp coupes and roadsters were also in "Competition", but weren't subjected to the 25% engine setback rule. That's why you see many of those built on dragster chassis.
-
The reward of persistence! One take, no dubs! I haven't even cleaned these up. Man, am I happy with this!
-
I believe all three of these are Comp coupes. You can go from wrong to correct, just by changing the class designation. ?
-
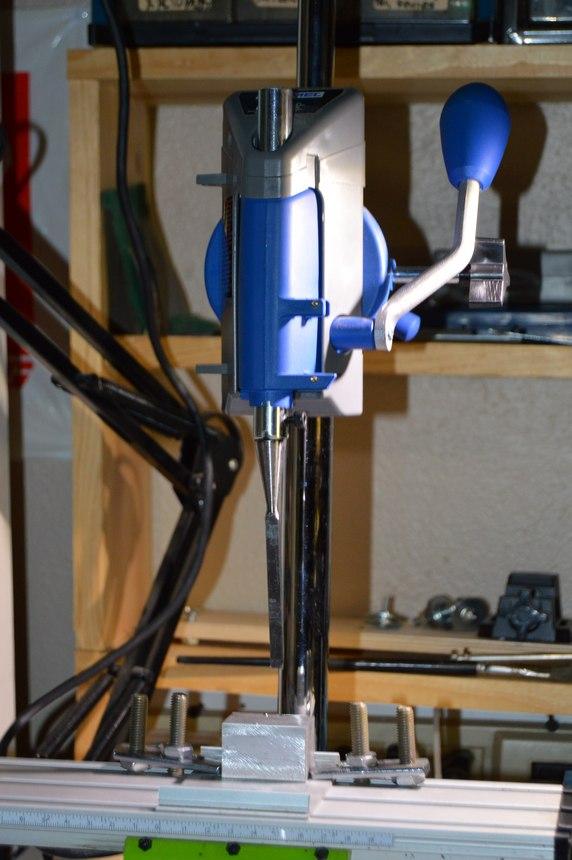
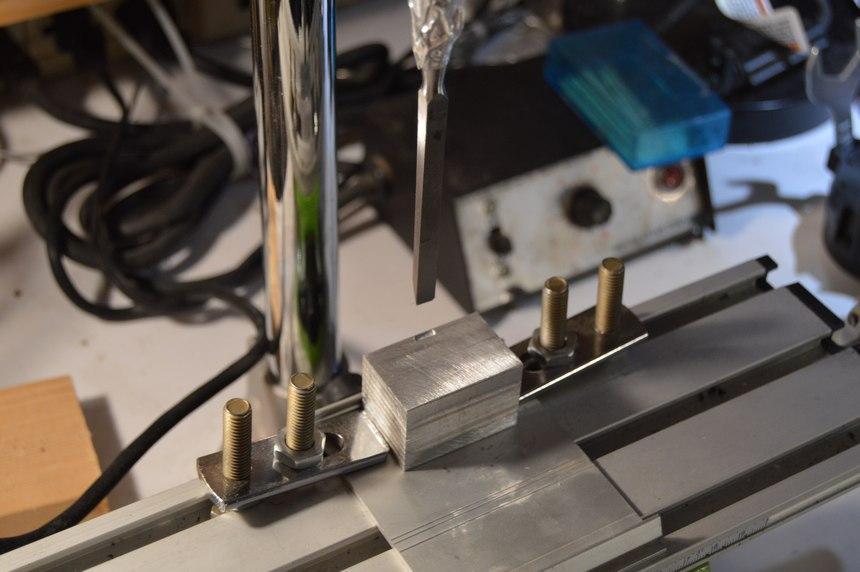
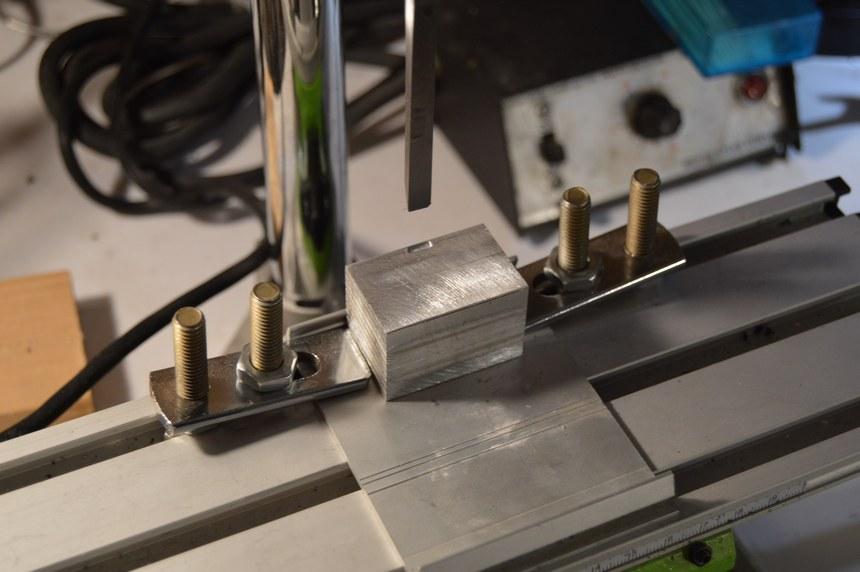
A final improvement to the press. I was reluctant to take the drill press apart, at first. Once I had done that, and tested the validity of my hypothesis, I realized that, to make it viable, the chisel had to be mounted more solidly. A drill, a tap and an allen screw later, and we're good to go!
-
Now, we're talkin'! I cut the handle from the chisel, then turned the tang(?) down, until it would fit into the plunge shaft of my Dremel drill press. Until I come up with something better, I simply mounted it with aluminum duct tape. I milled a slot into a chunk of aluminum as a receiver and stop, to keep the size of every louver (louvre--Hi, Steve! ?) uniform. Preliminary tests are even better than prior efforts, and much easier. One noticeable difference is that the press/die method prefers un-annealed sheet. Still...