Straightliner59
-
Posts
5,813 -
Joined
-
Last visited
Content Type
Profiles
Forums
Events
Gallery
Everything posted by Straightliner59
-
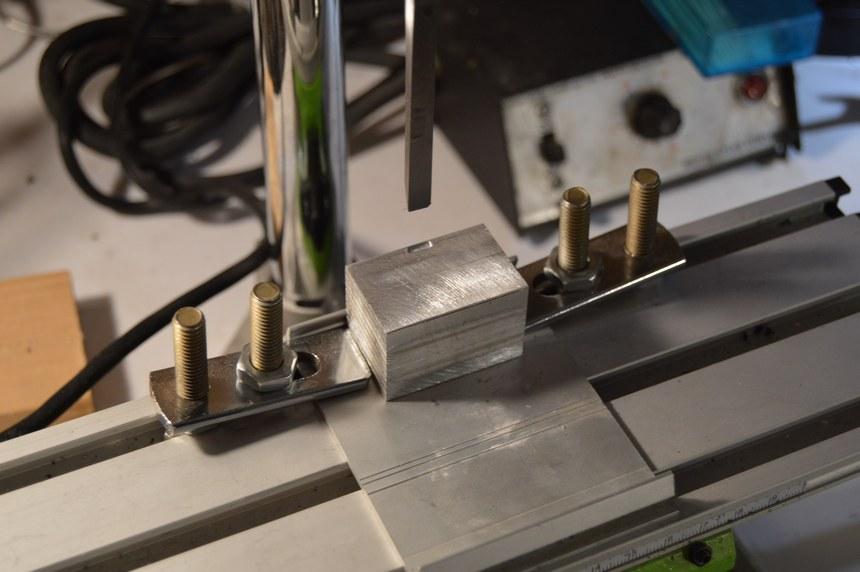
 A final improvement to the press. I was reluctant to take the drill press apart, at first. Once I had done that, and tested the validity of my hypothesis, I realized that, to make it viable, the chisel had to be mounted more solidly. A drill, a tap and an allen screw later, and we're good to go!
-
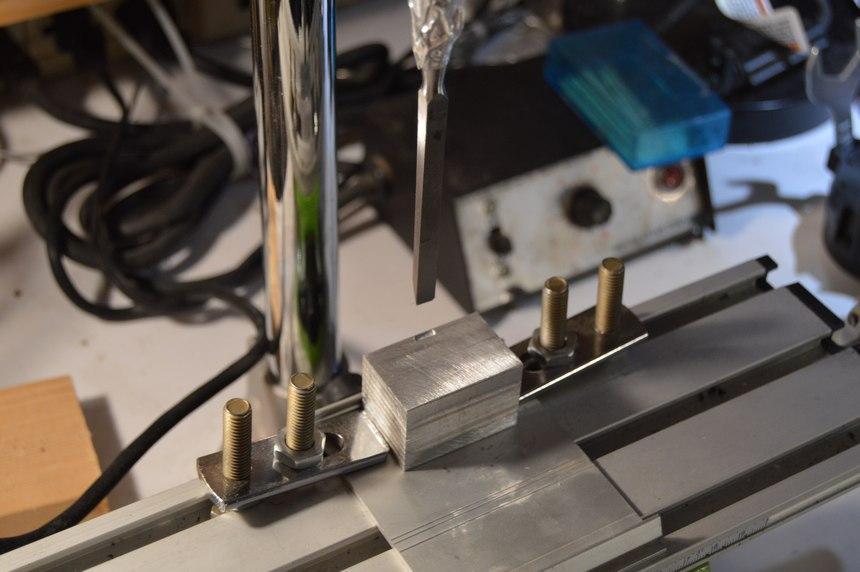
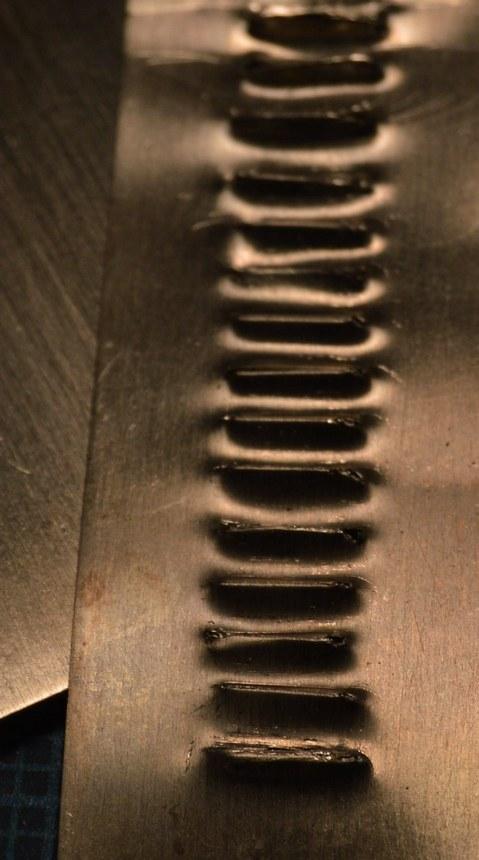
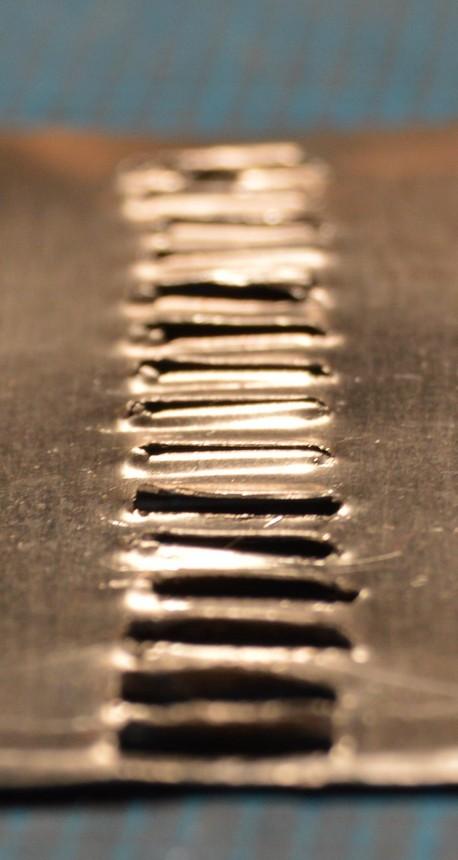
Now, we're talkin'! I cut the handle from the chisel, then turned the tang(?) down, until it would fit into the plunge shaft of my Dremel drill press. Until I come up with something better, I simply mounted it with aluminum duct tape. I milled a slot into a chunk of aluminum as a receiver and stop, to keep the size of every louver (louvre--Hi, Steve! ?) uniform. Preliminary tests are even better than prior efforts, and much easier. One noticeable difference is that the press/die method prefers un-annealed sheet. Still...
-
I bought some by Blingasm, on Amazon. I've had very good luck, with it. I use both white and transparent. The decals on these cars were all printed on it. On the Chevy II, only the door decals were printed on it. The others were printed on Testors paper.
-
Thanks, Steve! Hahaha! I see what you did, there. It's good "louvre" wasn't at the beginning of the sentence. I'd have been left wondering what an art museum in Paris had to do with this! Thank you, Francis! For no more than I am going to do, for this project, it will work, just fine. Once I have a little money, again, I want to by a punch press. I think, given that, that I would be able to create them, fairly quickly!
-
My go-to for vinyl stuff is typically contact cement. It's messy, too, but, it sticks stuff!
-
Thank you, JC and Ray. I appreciate that!
-
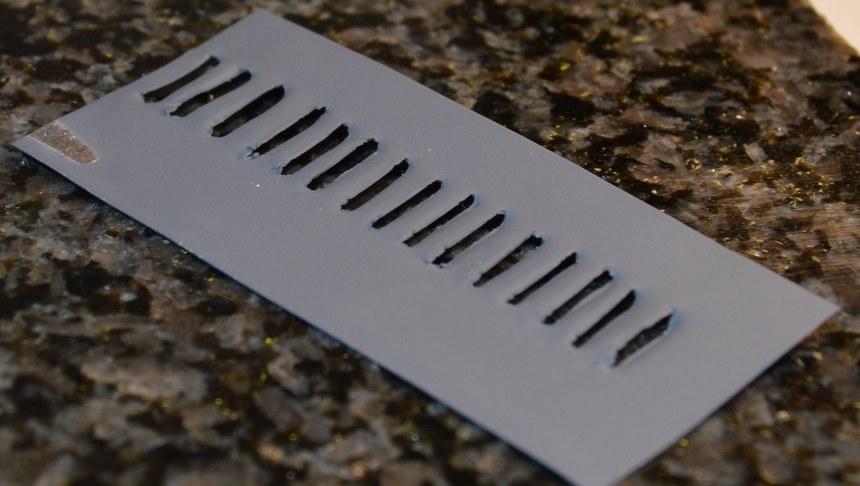
I did a bit of cleanup on the test sheet, and shot some primer on it. Just another couple of changes, involving alignment, and--well, I am confident that I can make these happen for this project! I just want a few near the rear of the hood, like the kit has.
-
I think I am getting closer to figuring this out. It takes some time to clean them up, as the technique is pretty crude, but, it's showing some promise. Still a couple of tweaks I want to try...
-
It has! Welcome back to the bench, sir!
-
64 Dodge D100 Pickup Pro Street
Straightliner59 replied to AmericanMuscleFan's topic in WIP: Drag Racing Models
Excellent work, as always, Francis! You have a resistance soldering unit, too? I love mine! -
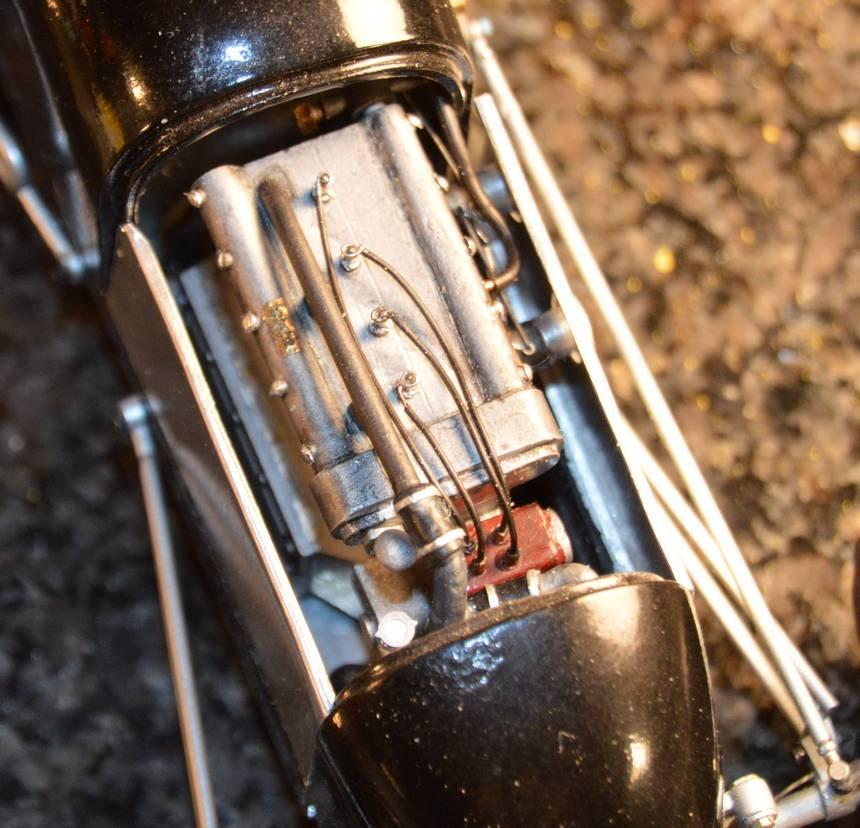
I have the side engine panels roughed-out. I wanted to see what it looks like, down between them.
-
Looks nice, Mike! Do I remember you from a certain Yahoo group, years ago?
-
Francis, thank you, again! I truly appreciate your kind words, my friend. Here is a short thread showing the results of my experimentation. I really think I can make this work, with a slot milled into a piece of metal (I think even aluminum will be fine, given the light nature of the work.).
-
Thanks, Steve! Thank you, as well, for your continued encouragement. It is very much appreciated. It will be finished before the end of the year!
-
That is exactly what I intend to use. I've played around with it, some. Wood works okay, but leaves something to be desired. I am thinking of milling a simple, angled slot in a 1/4"X1/2" piece of aluminum, just to accept the tip of the chisel, and keep the depth, and, therefore the shape, uniform. I'm thinking that'll work pretty slick! Meantime, here's the other side panel. It will need to be cut for exhaust clearance.
-
One hood side panel is well on its way...
-
Francis, thanks, so much, for your kind words! I am truly humbled by your comments. Glad you found it! I got the plastic coating removed from the aluminum flashing. I am excited to build the hood. I have a couple of different approaches I can take with the hinge. I am going to see if I can mill a simple die, so that I can punch some louvers--we'll have to see how that works out. ? And, no--you can never spend too much time at the bench! I enjoy watching your projects coming along.
-
Excellent work, as always, Mr. Sapiro! I like the technique you used for the pedals. Everything just looks right.
-
"Bring Out Your Dead" Completion Build--ROUND 2 Is On!
Straightliner59 replied to Snake45's topic in WIP: Model Cars
Thanks, Rob. I appreciate that! -
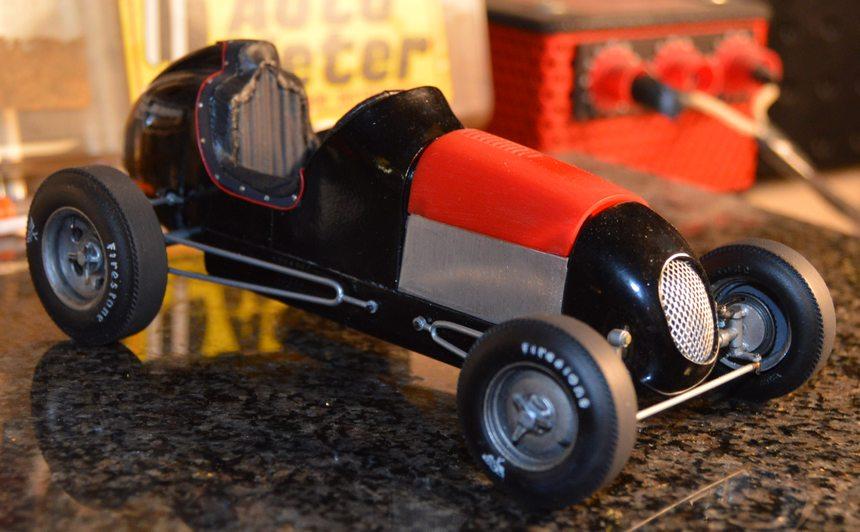
It's on the wheels! I think I got everything done that needed to be, before mounting them. We'll see, I reckon! Next up is sanding the film from a sheet of flashing, so that it can be cut and annealed, and work on the hood can commence. Critiques, questions and comments are always welcome! Thanks for looking...
-
"Bring Out Your Dead" Completion Build--ROUND 2 Is On!
Straightliner59 replied to Snake45's topic in WIP: Model Cars
Well, this thread has been quiet for so long, I had to dig five pages into the archives, to find it! Wake up, B.O.Y.D.! I got this thing on the wheels. All that's left is the hood--which I am going to attempt to make from aluminum. Three pieces and hinged! Oh. And the markings. I've got this!
-
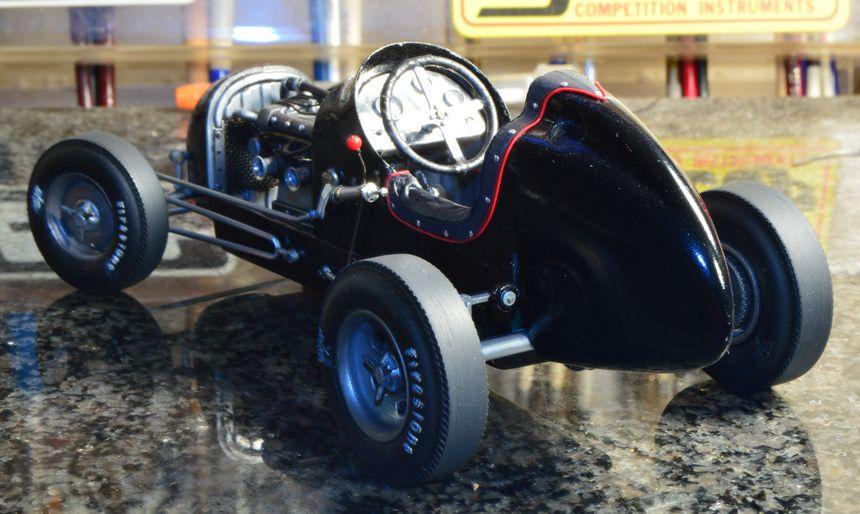
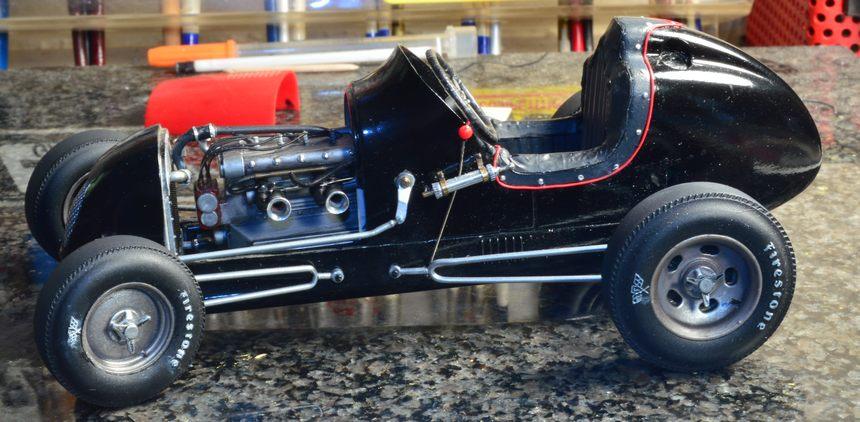
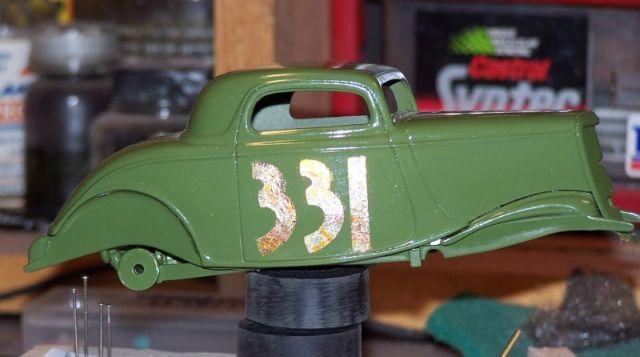
I got a Speedball metal leafing kit. I am going to see if I can use it on my Indy car. I used some years ago on this Revell '34 snapper, but, the sizing/adhesive had dried up. I am going to outline these numbers in red One-Shot, one of these days, soon. I may make this one my next BOYD entry, if there's a round, after the current one.
-
Without a doubt!
-
Only the first couple of times! ?
-
Check out Fireball. http://www.fireballmodels.info/ Joseph's got a lot of off road wheels and tires, and his work is beautiful!