Straightliner59
-
Posts
5,814 -
Joined
-
Last visited
Content Type
Profiles
Forums
Events
Gallery
Everything posted by Straightliner59
-

A Use For Those Holiday Popcorn Cans
Straightliner59 replied to Straightliner59's topic in Tips, Tricks, and Tutorials
That's what I used to do. Sounds like maybe I just ought to go back to that! ? -
Finally got a copy of this. I've been wanting (needing!) it, for long while.
-
'65 Impala Stocker
Straightliner59 replied to Straightliner59's topic in Stock Cars (NASCAR, Super Stock, Late Model, etc.)
You're so right, JC. It would look much better, in either or, ideally, both instances. Maybe I'll get it out, and see how difficult it would be to accomplish those things. Thank you, sir! Thanks, Tom. Yeah, not too bad, considering! ? -
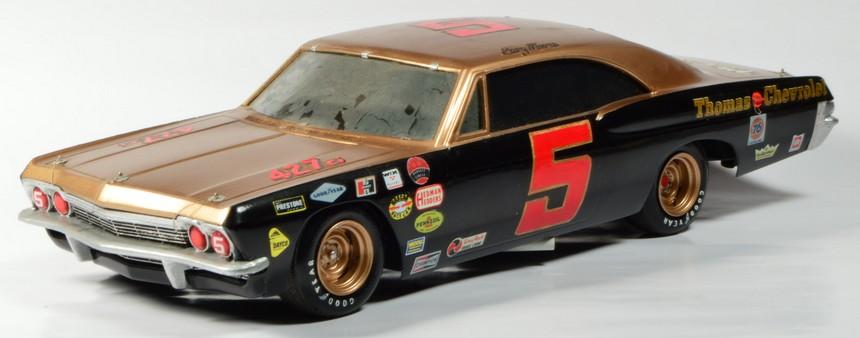
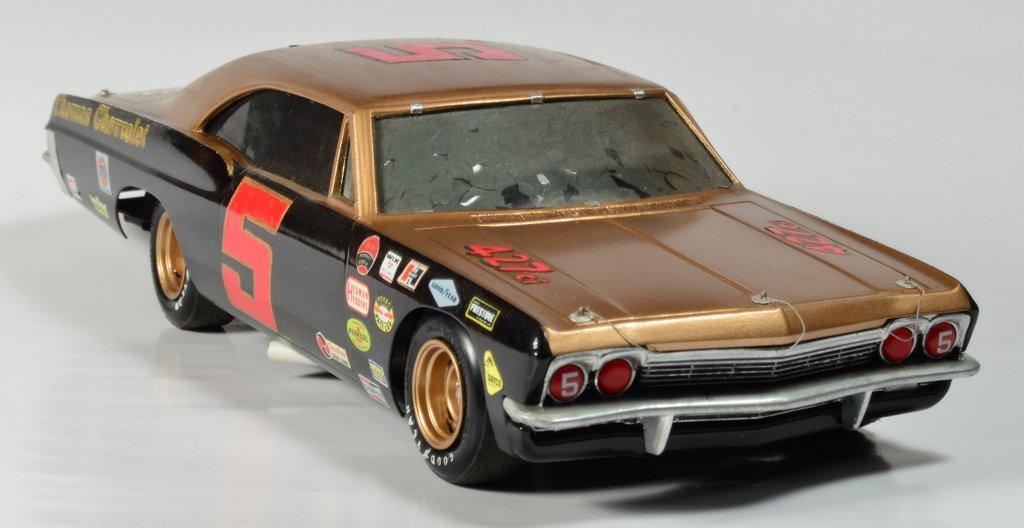
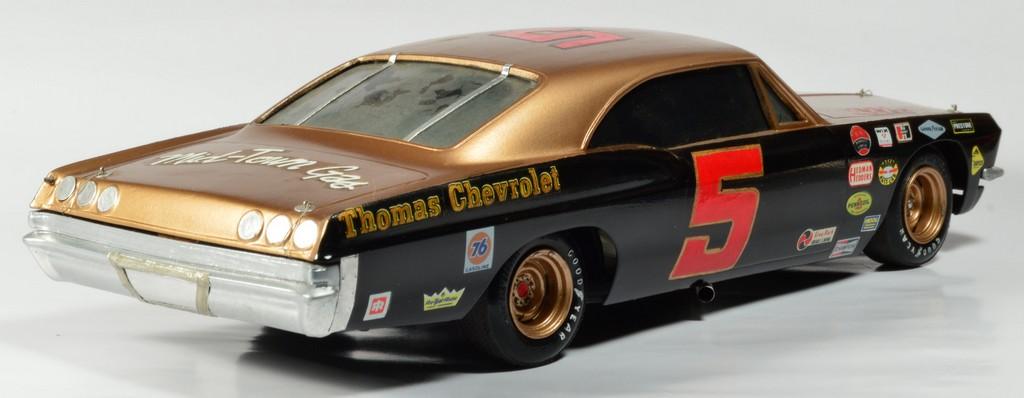
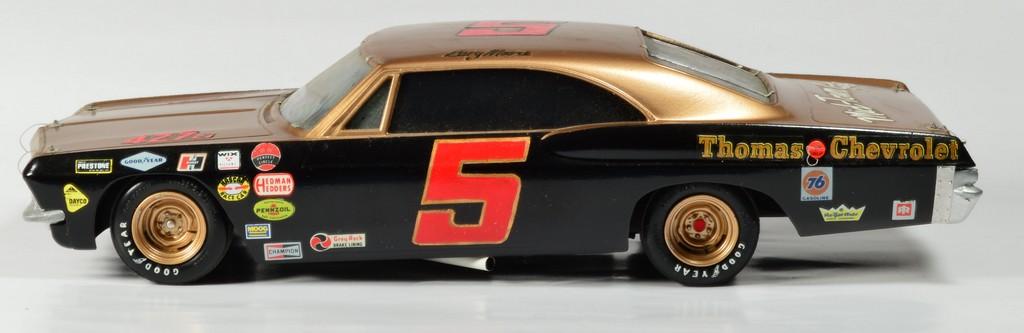
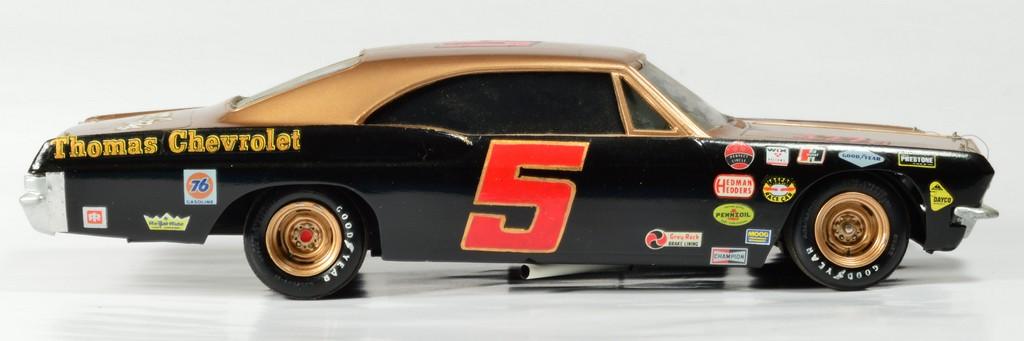
I had one of the Hasegawa '65 Impalas lying around, years ago. I wasn't sure what to do with it. I decided to build a stock car, with it. Because there have recently been a few on the WIP board, I decided to get it out of the display case and spruce it up. While it was out, I decided to take some new photos of it. It's a simple "slammer"--no interior, engine or chassis detail. Decklid graphics are hand painted. Suspension was lowered. The wheels are from the parts box. I wish I'd used MPC tires. Since they're a bit larger, I think they might look better. As you can see, the paint is flaking from the inside of the windshield and backlight. Anyway...Questions, comments and critiques are always welcome, at my place! Thanks for looking!

-
I was cleaning up some stuff with lacquer thinner, the other day, using some blue shop towels. After I tossed the towels, I noticed they were reeking, pretty seriously. I had an empty popcorn can sitting around, and thought it would make a good, mostly airtight container for solvent-laden cleaning rags. I tossed them in, closed the lid, and voila! No more fumes in the room!
-
Monogram 1926 Mack
Straightliner59 replied to Straightliner59's topic in WIP: Model Trucks: Big Rigs and Heavy Equipment
Thank you, Pat. Excellent! Thank you, Charles. Thank you, Trevor. I hope to succeed at the endeavor I set out on. That's my focus, on this project--that, and shading and highlighting. -
Monogram 1926 Mack
Straightliner59 replied to Straightliner59's topic in WIP: Model Trucks: Big Rigs and Heavy Equipment
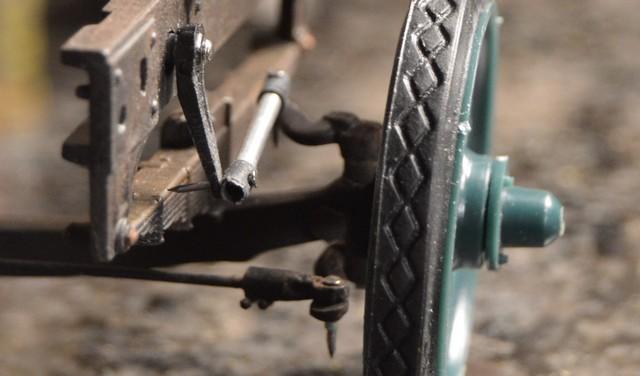
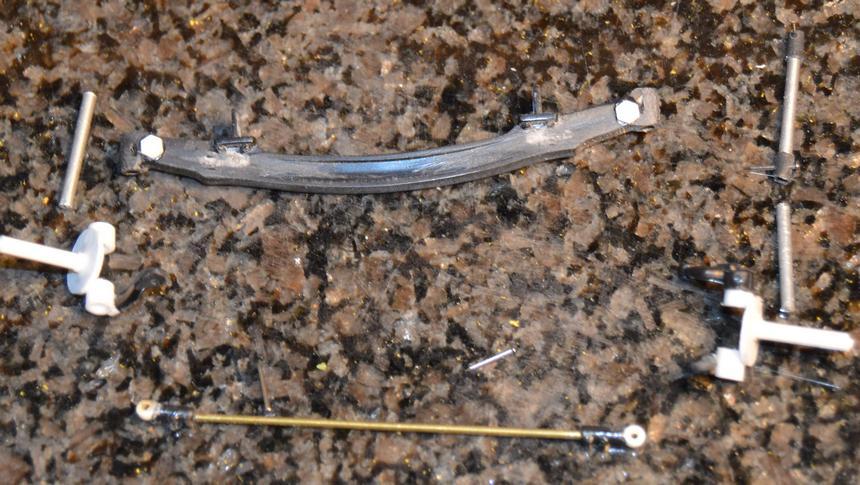
Got more work done to the steering. I have some detail painting and a tad more weathering to do to it. I completely rebuilt the tierod. It looks tons better, now. Here are a few shots. As always, questions, critiques and comments are welcome. Thanks for looking!
-
Monogram 1926 Mack
Straightliner59 replied to Straightliner59's topic in WIP: Model Trucks: Big Rigs and Heavy Equipment
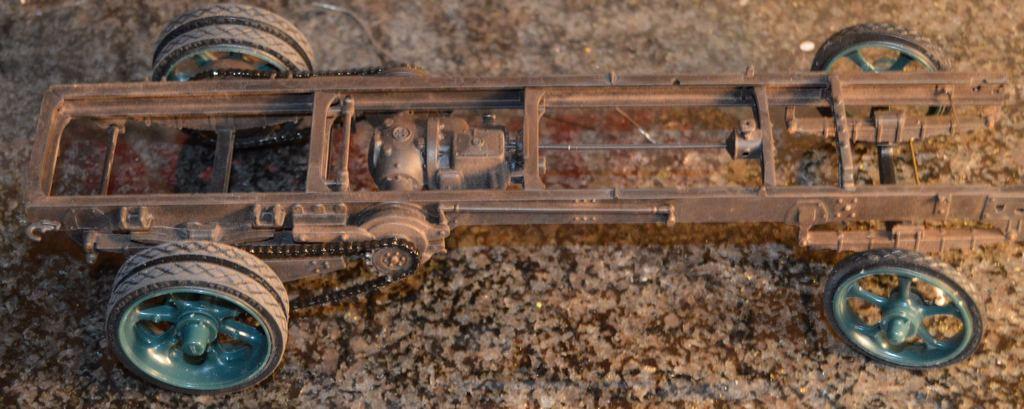
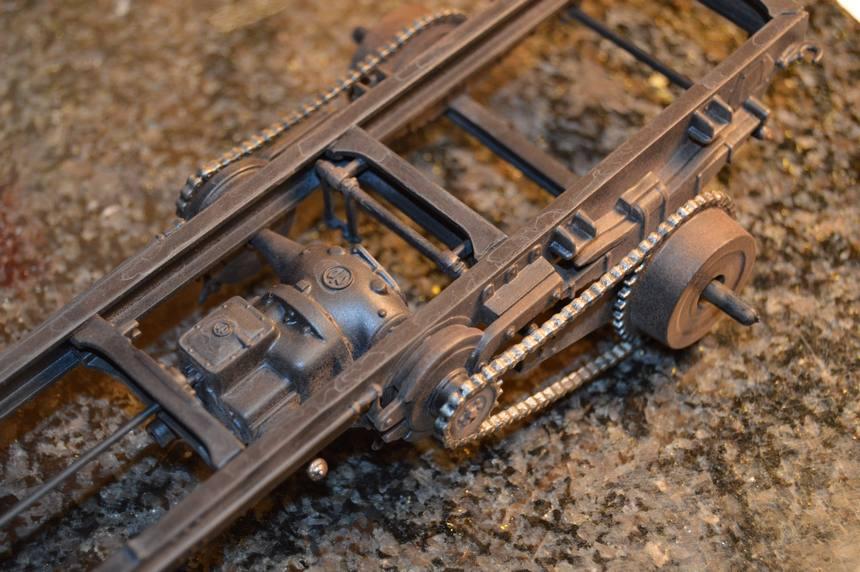
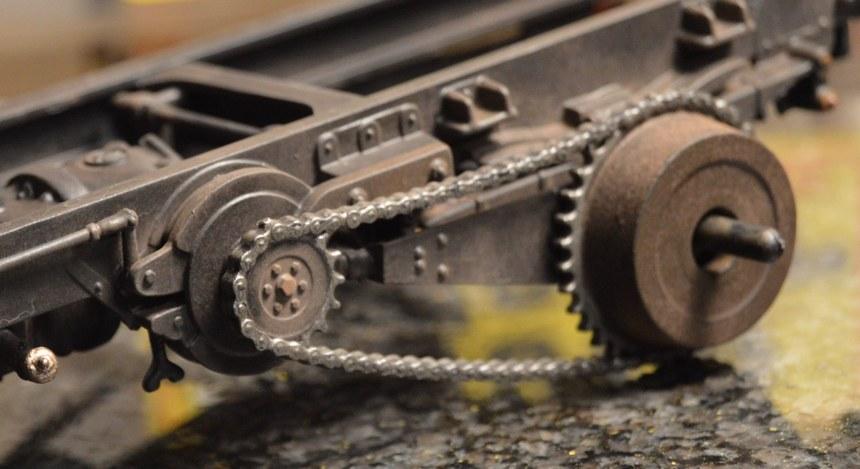
First, thank you for your comments, Charles. I appreciate them, especially coming from a builder of your ability. Second, the first mixture of oils I used to paint the chain with was a mixture of permasol black and raw umber oil paints,and (obviously too much!) Testors steel. Today, I finally got around to mixing a new finish for the chain. This time, simply the permasol black and the raw umber. I think it looks better. I got the steering built, as well. I can set it on the wheels!
-
This came today. Arrived very quickly! I have other stuff that's been sitting in the same location for five or six days, now.
-
Glad this popped up in another thread, so that I could revisit it. Great attention to the details, here, Bill. The tiny things you've given attention to--way too many to list, here--make the overall concept more refined, and more complete. Excellent work, sir!
-
Thank you, Kurt. I appreciate it! I enjoy your work, as well. That "Bring Out Your Dead" thing has prompted four completions, for me! It's nice to get some of these ancient projects off the bench.
-
Thank you, Carl.
-
Chrome blueing -- how to simulate?
Straightliner59 replied to chepp's topic in Tips, Tricks, and Tutorials
I suspect that the powders are nothing more than ground pastel chalks. It does work great, and look beautiful applied to flat or semi-gloss paint, but, it definitely needs some "teeth" to stick to. Then, it needs to be set with a clear coat. Many people use hair spray, to set it. This chassis is pastels over semi-matte black, dry-brushed with a mixture of oils and enamels. Finally, working in sections, I applied a mixture of ground pastels. and set it with Dullcote. I need to coat the chain with something oily-looking.
-
Chrome blueing -- how to simulate?
Straightliner59 replied to chepp's topic in Tips, Tricks, and Tutorials
I did this with one of the Tamiya weathering kits.
-
Online hobby shop recommendations
Straightliner59 replied to bbowser's topic in Model Building Questions and Answers
I just got a tin of Humbrol 33 Flat Black from them, the other day! -
1934 Ford 5-Window Early 60's Altered
Straightliner59 replied to Dennis Lacy's topic in WIP: Drag Racing Models
Glad he made the acknowledgement! About the only thing it's missing are the markings (Except the Clay Smith Cams logo) and the engine setback. The done good, with that one, for sure. -
To your point, I'd venture that you can probably find a Johan one cheaper, hard as that might be to believe!
-
1934 Ford 5-Window Early 60's Altered
Straightliner59 replied to Dennis Lacy's topic in WIP: Drag Racing Models
That Gas Monkey car is very derivative of the 554 coupe. -
Online hobby shop recommendations
Straightliner59 replied to bbowser's topic in Model Building Questions and Answers
I've had very good experiences with them. Also Burbank's House Of Hobbies is an excellent vendor, in my experience. -
64 Dodge D100 Pickup Pro Street
Straightliner59 replied to AmericanMuscleFan's topic in WIP: Drag Racing Models
Take off, eh! -
I think in FX, 2% of WB was acceptable, for moving the wheels forward. Yep! Four lug wheels. My first car was a '63 Chevy II, and it had four lug wheels. Dyno clearly has a beefier rear axle than stock!
-
You've got some very cool, iconic cars, there! Nice work.
-
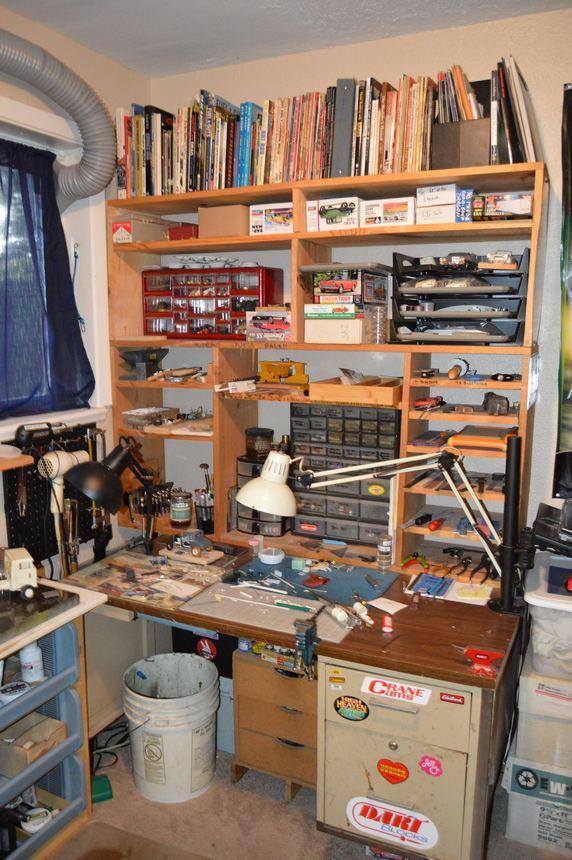
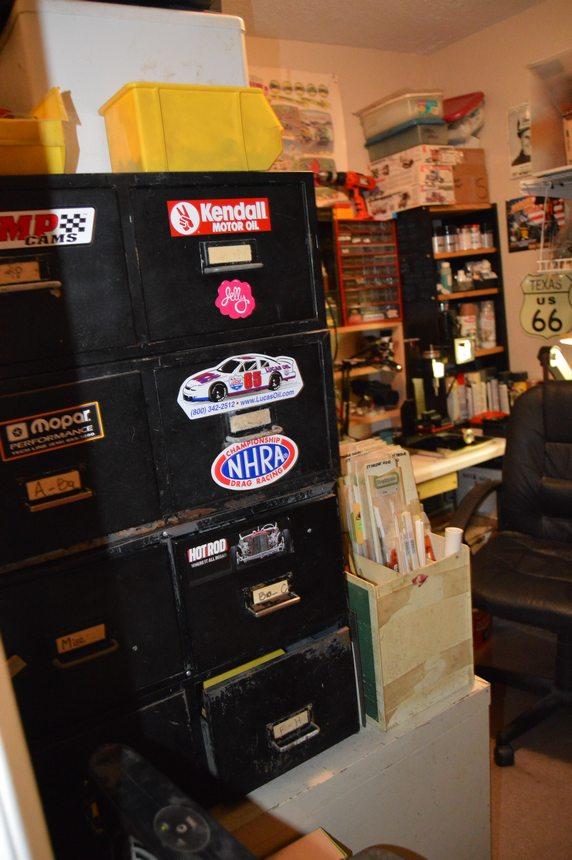
The advantages of shelves far outweigh their disadvantages. They create space. You'll soon find you need all of that you can get! ? Here's my setup. It's taken me many years to put my shop together. It's small, but everything is easy to access, based on frequency of use.
-
I don't think that's pedantic, at all. You're right that most folks won't know the difference, but, why excuse it, when research is so easy to come by, these days?
-
Cooper barn find
Straightliner59 replied to absmiami's topic in WIP: Other Racing: Road Racing, Land Speed Racers
Excellent work, Mr. Sapiro! That spring does look great!