Straightliner59
-
Posts
5,813 -
Joined
-
Last visited
Content Type
Profiles
Forums
Events
Gallery
Everything posted by Straightliner59
-
 Thank you, Bruce. Indeed, it is! Thanks for looking!
 -
Thank you, Steve! I don't think you can damage the American language any worse than we already have! ?
-
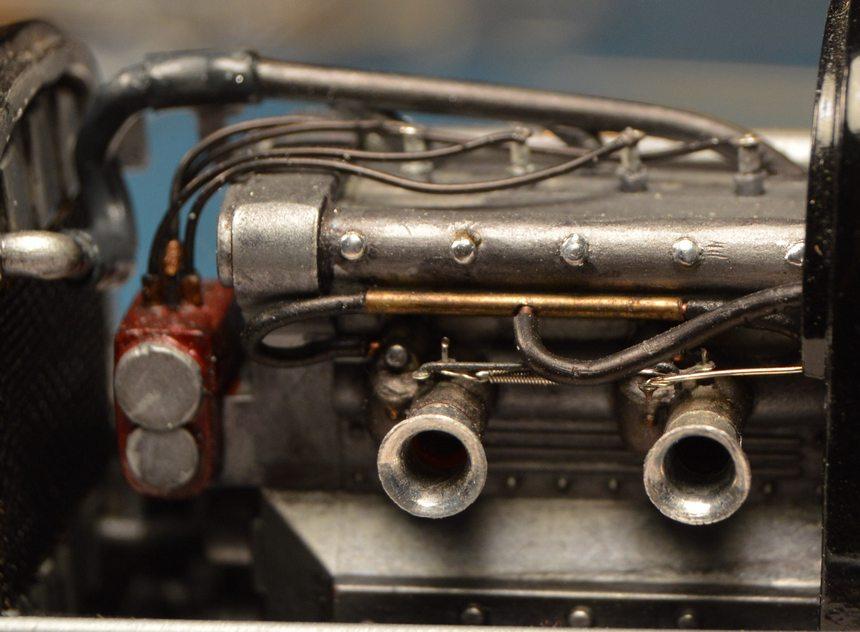
I've got a lot of work done, on this thing, but it wasn't flashy, so, I haven't updated this, in a while. I am very close to putting the wheels on it. I'm doing "punch-list" stuff, toward that. When I looked at the engine, I couldn't help but notice that it was lacking something. It dawned on me that the same method I used to make the snaps, would also help with the look of the engine. I used the inside-tapered brass tubing punch to make some small domes from aluminum duct tape to cover the nuts on the cam covers. Rather than use the tape in its natural form, I dulled its finish with a pink eraser. Once I had applied the discs, I used a short piece of aluminum tubing, again tapered on the inside, but, not sharpened, to seat the edges of the discs over the nuts I think it worked out pretty nicely! Here are before and after shots. As always, questions, critiques and comments are welcome! Thanks for looking!

-
Welcome! I grew up in Montana. First Browning, then went to high school out on the plains, in Glendive. That's where I first started building. You know, long winters, and all. ?
-
Thanks, Perry. That will keep me busy, for a minute or two!? They may have come from the place Perry mentioned, above. Thanks, Rex!
-
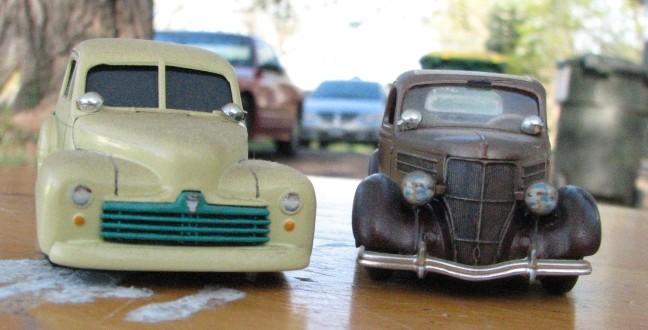
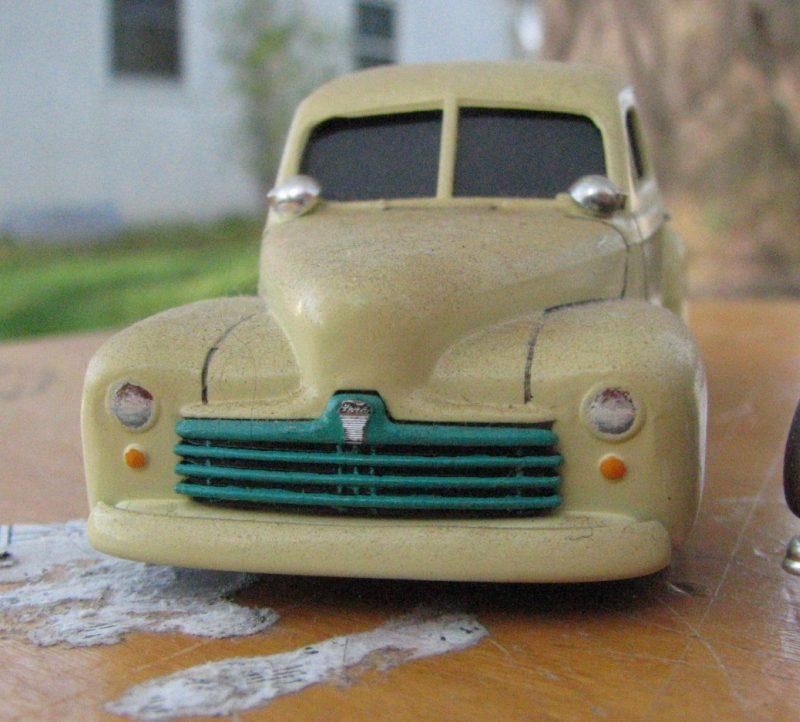
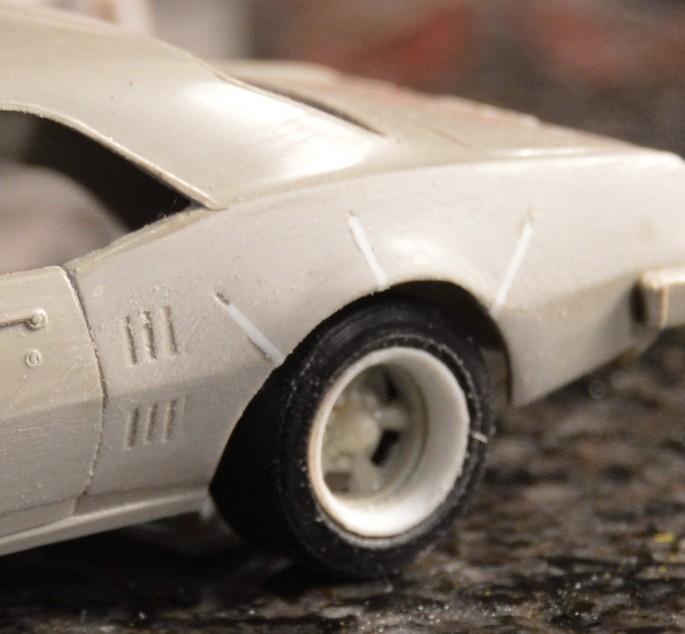
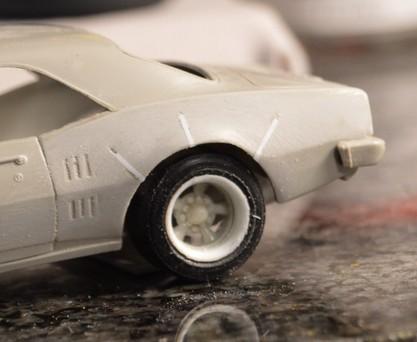
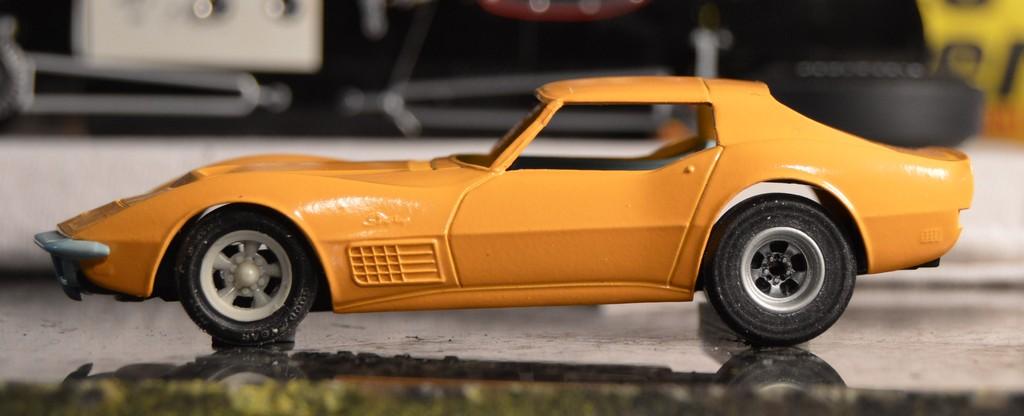
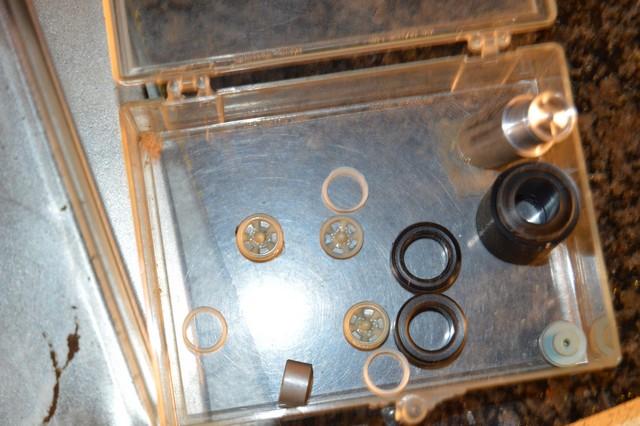
I have always enjoyed the little AMT kits. One of their shortcomings has always been a shortage of wheels. These kits are becoming more expensive to purchase, and some are not too commonly found (especially the 'Cuda, which has a very nice set of Cragar SS wheels). The American Racing wheels that I have are mostly afflicted with sinkholes, although I managed to save a couple. I realize there are aftermarket wheels available in this scale, however, they are mostly for exotic cars; Understandable, given that the market is driven mostly by those and Formula 1 stuff. I have several of them built, in the display case. They include a 'Cuda, a Torino, a '36 Ford, a '48 Ford, and a Chevelle. Ten or more years ago, I started working on one of the '68 'Vettes, to build as a Stock class NHRA racer. It was shelved, due to a lack of decent wheels and tires. One day, when I was driving for NAPA, I noticed a transmission seal that looked like it might be perfect for the slicks. I jotted down the part number, so that I could pick one up at the counter. It was perfect! It scaled out exactly to specs! Needs a bit of reshaping of the sidewalls, is all. Still, front wheels and tires were an issue. It was right about there, that my interest waned... A couple of nights ago, I was rummaging through my boxes of 1/43 scale parts, and discovered that I had two of the '67 Firebirds. Since I have been becoming more interested in vintage circle and road racers again, lately, I decided to take a razor saw and some Evergreen to the wheelwells, to flare them. Of course, that led right back to the wheels and tires issue, which leads to this post. I think I have mostly solved this dilemma! I began by chucking the American wheels in the lathe, and cutting them down , so that only the spoke cross-section of the wheel was left. I gathered a selection of the wheels I would likely use, and used them, as-is, to make molds. Castings will be less "dangerous" to work on, than original parts. Oddly, the only wheels I have that I didn't mold were about four sets of '57 Chevy wheels, which I only mention, because I don't know where I got so many '57 Chevys! The wheel's diameter is 3/8". Thus, I used a 3/8" end mill to hollow out a short length of 3/4" Delrin, on the mill. I intend to make tires as I need them for a given project, then mold and cast those, so I only need to make a master for each tire. Now, all I needed was a rim that could be easily duplicated in varying sizes--because rims don't like to be cast in open-faced molds--at least I never had much luck with them. The rim was simple. 3/8" Evergreen tubing, quickly tapered on the inside edge, and cut off, as needed, for length, to match the width of the tire. Attached are photos I have of my built 1/43 stuff, a few pics of the current projects and of my 1/43 scale tire and wheel project! The aluminum is going to become a pseudo-Centerline/Super Trick front wheel that I will mold. Interestingly, the Halibrand style wheel is from an old Aurora A/FX Grand Am funny car. It looks pretty much at home, in the Delrin tire! I will modify it some, and mold it, as well. Might make a nice set of wheels for the 'Vette! I will probably dismantle the 'Cuda, and cast its Cragars. I would like to rebuild it as an "inspired-by Blowfish" salt racer. I also want to redo the Torino as a Stock Car. I have an AMX that will probably become a road racer, as well.
-
Revell Cobra 1/24
Straightliner59 replied to Venom's topic in Other Racing: Road Racing, Salt Flat Racers
I really like this, Josh! Like Tim said--the paint looks perfect! No decals buried in high-gloss clear. I like your seat belt hardware, as well--great, innovative idea, there! Very nice work. -
Thank you, Scott. That is very helpful. If I hadn't ventured off, down another trail, tonight, I would give that a shot! I will, soon, though.
-
1961 Impala Outlaw Twin Turbo
Straightliner59 replied to streetmachine11's topic in WIP: Drag Racing Models
This whole project is fabulous! I especially dig the rack and pinion. Very nice work! -
Thank you for your comments, Scott. Much appreciated! That is an excellent idea! What did you use for the abrasive? My biggest problem is finding something to make uniformly-sized "rings". I have an X-Y table for my Dremel drill press, but haven't been able to come up something that holds its shape, over the course of the operation. Everything seems to flatten and expand, creating a finish that's not evenly-sized. Thanks for looking, sir!
-
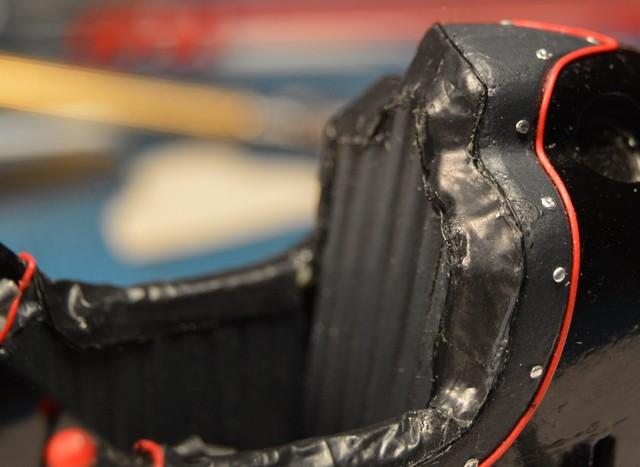
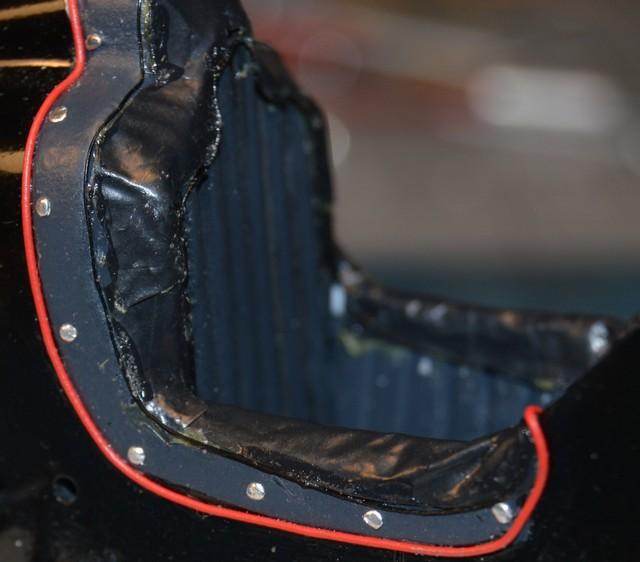
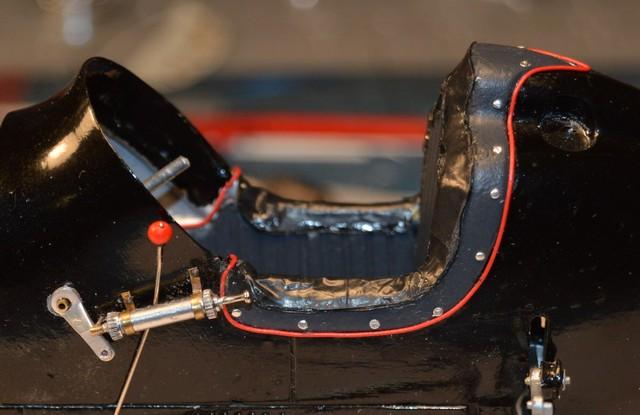
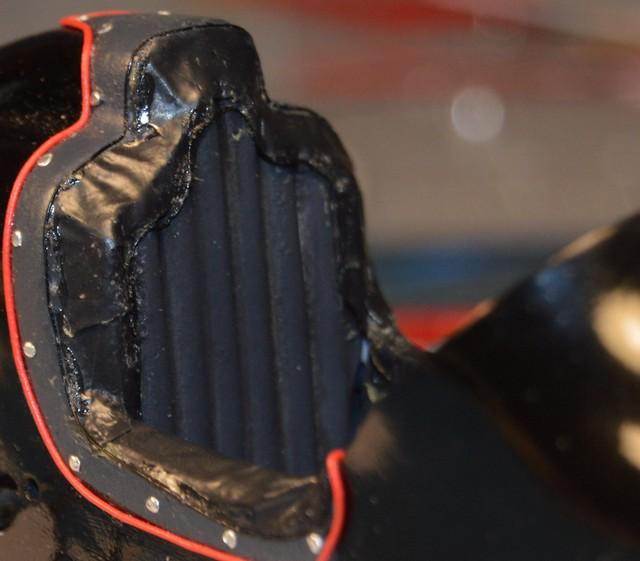
I made a leather "boot" to surround the seat from a doubled-over black plastic trash bag. I think the texture is very nice. I added black piping of Detail Master black .0075" wire. I originally intended to use their red Detail Wire for all the piping, but, I couldn't get it to stick to the body, so, I went with the too-big stuff. I need to clean/touch all of this up. That will get me very close to mounting the wheel/tire assemblies.
-
Made license plates without going to prison
Straightliner59 replied to Bills72sj's topic in WIP: Dioramas
That, too! ? -
Congratulations, Steve. Well deserved! I miss seeing some of those guys, up there.
-
Made license plates without going to prison
Straightliner59 replied to Bills72sj's topic in WIP: Dioramas
I generally just leave them on the backing paper, and finish the edge with paint, at least for models with the plates seated against the body work. I think flashing would work just fine, if it was hanging out on a bracket, and the back is visible. Once its protective coating is sanded off, it's plenty thin! The best thing about using metal, is that it can be bent. -
I would love get my hands on any of the Monogram gassers! You might try punching some discs from thin aluminum sheet. This tank lakester is sheathed in Maid-O-Metal tooling aluminum. The discs are the same material. I used a punch made from tubing, to punch these...
-
That's a very cool project. Both of them, actually! I have several 1/32 scale kits, just because I think they're cool. If it was mine, the only thing I would change, would be to find some full-wheel discs. Nice work, Steve!
-
I agree that pinning is best. Even given that, JB Weld would likely be a good choice for adhesive for metal figures.
-
Search "eye decals for figures". There are tons of them!!?
-
You may want to consider Sheperd Paine's diorama book (published years ago, by Kalmbach). Used copies are available on Ebay, for reasonable prices. Also, some of Francois Verlinden's books can be very useful. Those can also be found online, at reasonable prices (unless you want new--in that case, prepare yourself, because the prices on new copies are ridiculous!).
-
They shoot horses, don't they?
Straightliner59 replied to STYRENE-SURFER's topic in WIP: Drag Racing Models
Those look good! I have had the best luck when I've mounted them to a simple pedestal, so that, once the plastic's hot, I have plenty of room to pull it down, over the buck. -
Hi, Tom. I simply used a short length of 1/32" tubing, and tapered the inside edge with an X-Acto blade. I just chuck it in a pin-vise, to use it. The tapered inside edge causes the tape to dome, as it's cut. Makes pretty nice snaps!
-
64 Dodge D100 Pickup Pro Street
Straightliner59 replied to AmericanMuscleFan's topic in WIP: Drag Racing Models
Tim is correct about that! Superb work, Francis! -
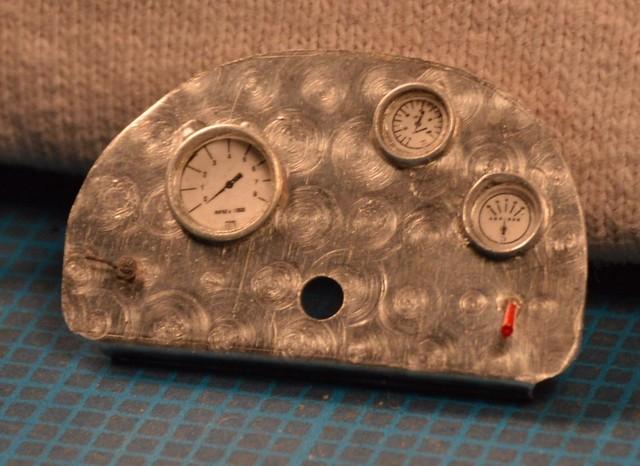
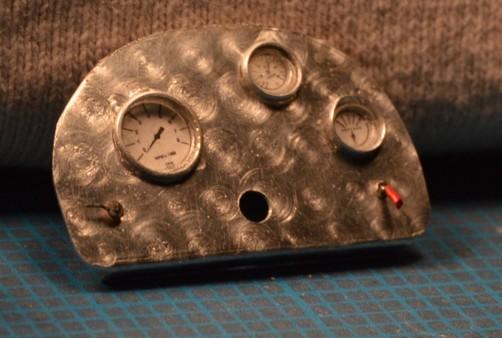
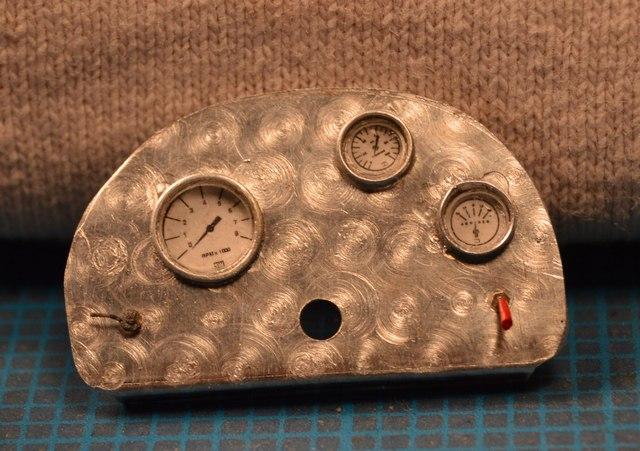
Here is the completed gauge panel. I'm not completely satisfied with the engine-turning, but, I will keep at it until I figure out a way to get a uniformly-sized pattern. I just haven't found the proper abrasive, yet.
-
Thank you, very much, Tom. There will, indeed be a windscreen!
-
Thanks, Steve! I've seen a few articles and tutorials on using it, and thought this was as good a place, as any, to try it! It worked out well!