Straightliner59
-
Posts
5,809 -
Joined
-
Last visited
Content Type
Profiles
Forums
Events
Gallery
Everything posted by Straightliner59
-

NHRA GT/AA '96 Firebird Slammer
Straightliner59 replied to Straightliner59's topic in WIP: Drag Racing Models
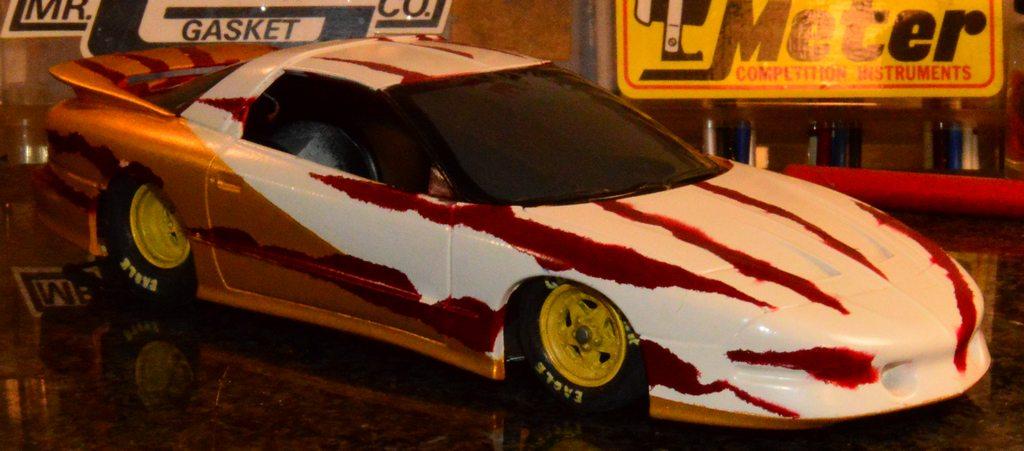
I know the windows can't be tinted, but the model's a slammer, so, I blacked out the windows. The horsepower/weight thing is standard operating procedure, thus, a heavier car with a smaller engine might be GT/B or GT/BA, if an automatic transmission, right? I'll go with GT/AA, then. Thanks for your input! It's a big help. -
"Bring Out Your Dead" Completion Build--ROUND 2 Is On!
Straightliner59 replied to Snake45's topic in WIP: Model Cars
And, that part's done! Now, it's going to need to dry/offgas for a while, before I straighten out the paint.
-
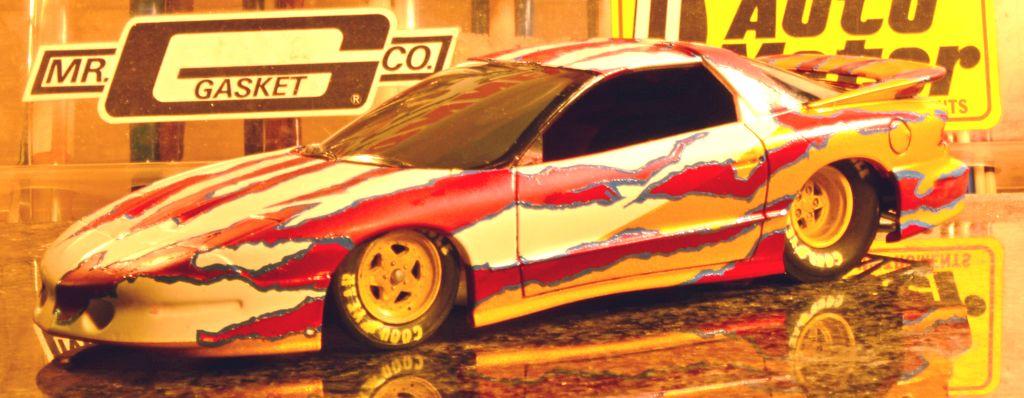
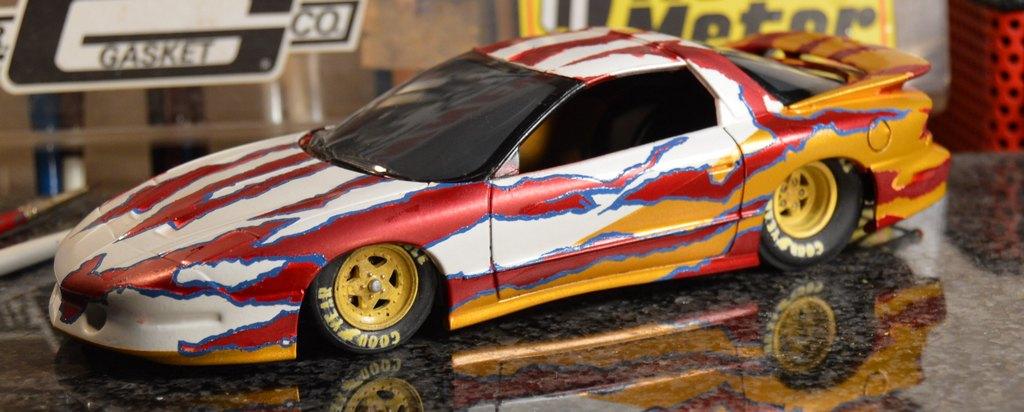
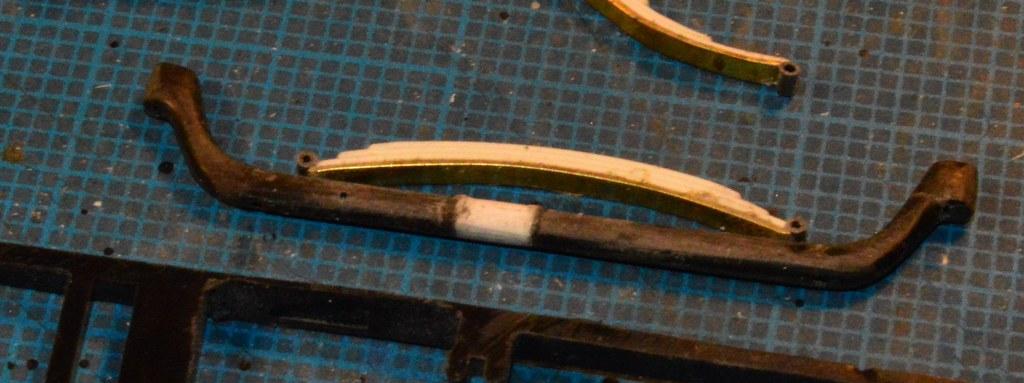
I've been posting this over in the "B.O.Y.D." thread, and thought I'd post it here, because I have a question about classifying this car. In Super Stock, there was (is?) a class for late model pony cars--I think. I also think I've seen photos of Firebirds of this era with the markings GT/AA. I say "think" because i haven't found an image in which the markings are clear enough to make out. It's a slammer, built from one of the old AMT Snap Fast kits that were essentially promos. I cut a chassis plate out of sheet stock and built some supports for the axles, on top of it. The wheelie bars are from a Monogram pro stocker kit, with the bracing built from plastic stock. I printed side window blackouts that will be white glued to the inside of the window "glass". I drew a safety net for the driver's side window. Paint was done by tearing masking tape. The outline striping is not quite half done, yet. I mixed dark blue and white One Shot enamel for the striping. Questions, critiques and comments always welcome!
-
"Bring Out Your Dead" Completion Build--ROUND 2 Is On!
Straightliner59 replied to Snake45's topic in WIP: Model Cars
As a show of good faith (?), I have already painted almost half the stripes! I mixed One Shot Dark Blue and White, to create a mid-toned blue. I am surprised how easily it's gone on. Of course, that's what it's made for. The paint's a bit rough, but, I am sure i can fix it, by the time I am done! I was kind of going for a sort of controlled chaos, to reflect the edges of the torn tape, since those can no longer be seen. It looks more finished, with the outlines, I think. Questions comments and critiques are always welcome!
-
"Bring Out Your Dead" Completion Build--ROUND 2 Is On!
Straightliner59 replied to Snake45's topic in WIP: Model Cars
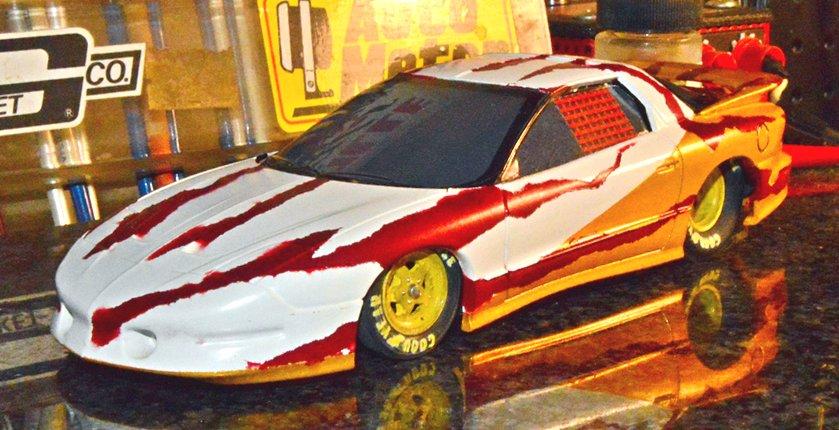
I taped the body off, last night before work, and shot more red, when I got home, this morning. The pattern is a bit more uniform, now. Next, I need to mix the blue One Shot for the stripes. I hope I can achieve the color I want, with what I have on hand. I don't really want to have to spring for a can of Process Blue, but... Once I touch the blue to the body, I am committed--then, it will have to be striped, completely. That might eat up the entire quarter!
-
"Bring Out Your Dead" Completion Build--ROUND 2 Is On!
Straightliner59 replied to Snake45's topic in WIP: Model Cars
I guess I thought I could work with it, or I wouldn't have kept spraying! When Don handed me the gold, though, I knew that was the way to go. -
Looks like you are on your way, for sure!
-
"Bring Out Your Dead" Completion Build--ROUND 2 Is On!
Straightliner59 replied to Snake45's topic in WIP: Model Cars
Thank you again, Anthony! I'm used to having a small shop space. The room it's in, now is 9'X7', part of that is taken by a 2'X4'closet that juts out. I've learned to think vertically! I could use a little more space, but, I have room for all my power stuff (lathe, mill, paint booth, sander, Dremel drill press, soldering, etc.) and it's all easily usable with a push of the desk chair! I'm very happy with it, but, a little room to spread out a little would be nice! Anyway, I digress...The gold was a can of Testor's lacquer given to me by Don Fahrni, when he saw it in the original color. He handed it to me and said, "Here. Cover that up!" ? The original color was, according to the can, a pale yellow. According to what came out of the can, it was coral, or something equally funky. I bought the red, specifically for this project. It's Duplicolor GM Dark Red, I think. I didn't have a clue as to what I wanted to do with it, but I knew that I wanted to use that color with the gold. Here's a photo of the original color. I'm not sure why I kept spraying!
-
Excited to see this one progress, Tim. I love those early Pro Stocks! If I ever get a shot at a reasonably priced Maverick kit, I'll have to jump on it!
-
What a cool idea. Well-executed. too! Nice work!
-
Good to hear from you, Bernard. You're off to a nice start! Love the fuel tank.
-
"Bring Out Your Dead" Completion Build--ROUND 2 Is On!
Straightliner59 replied to Snake45's topic in WIP: Model Cars
If you're referring to my Firebird, thank you very much, Anthony. If we venture into another round, I will be finished, by the deadline, for sure! If that's your new shop room, that will be awesome! Like an attic studio. I've always thought it would be cool, to have a place, like that. -
"Bring Out Your Dead" Completion Build--ROUND 2 Is On!
Straightliner59 replied to Snake45's topic in WIP: Model Cars
Yessir! If it's on, I am in! Now that I overcame my block, I'm a little excited, about this thing, again. -
"Bring Out Your Dead" Completion Build--ROUND 2 Is On!
Straightliner59 replied to Snake45's topic in WIP: Model Cars
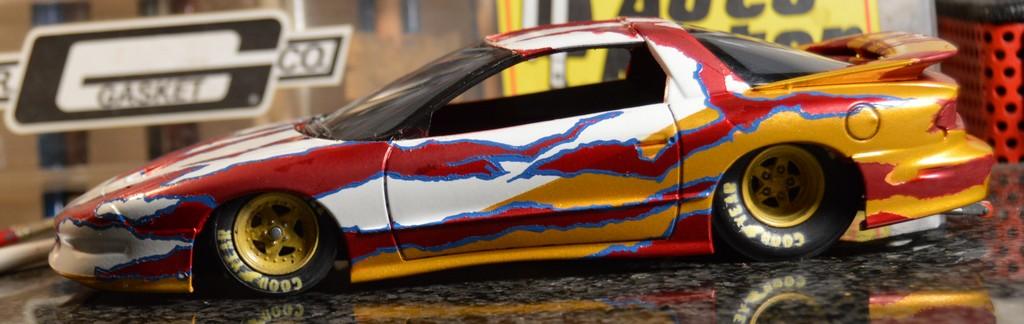
Well, I am not going to make it, this time. It took me too long to figure out what I wanted to do, and not just get to painting. Like I said in the previous post, I couldn't come up with an idea, so I just started ripping masking tape, and covering areas of the body. I like the way it looks, but, it's just too crude for me to accept it. I did, however, try the technique I mentioned for the window. I used PhotoImpact Pro to draw a black out for the windows. On the driver's side, I drew a window net. I then used white glue to stick it on the inside of a piece of clear sheet, cut to fit. It's just another way to add interest to a slammer (if it's a modern race car). I also got my decals drawn up and printed, but, I need to fix the paint, first. Sorry, Snake! If there's another round, count me in, and I will get 'er done!
-
"Bring Out Your Dead" Completion Build--ROUND 2 Is On!
Straightliner59 replied to Snake45's topic in WIP: Model Cars
After being unable to decide how to add the red to this project for a couple of years, and knowing that's what has kept me from finishing this thing when I threw in for this round, I finally decided that i would just start ripping tape, and applying it to the body. I ended up with what you see, here. I kinda' like it, but, wish I'd had a better idea of what I wanted to do, when I started. At some point, I will probably stripe, around the graphics. First, it will set them off. Second, I can use them to hide a multitude of sins! I'm thinking either One Shot Process Blue, or Black. Still some work to do to the wheels. I am going to try something new, with the side windows. Comments, questions, critiques always welcome!
-
1/25 AMT 1976 Chevy Vega Wagon Funny Car
Straightliner59 replied to Casey's topic in Car Kit News & Reviews
I built an earlier version, too. It was a flatnose Kammback. Just another, in a stellar succession of AMT funny cars! ? -
They shoot horses, don't they?
Straightliner59 replied to STYRENE-SURFER's topic in WIP: Drag Racing Models
You took the words right off my fingertips! -
50 year old magazine
Straightliner59 replied to Howard Cohen's topic in General Automotive Talk (Trucks and Cars)
What? Disco biscuits?! ? -
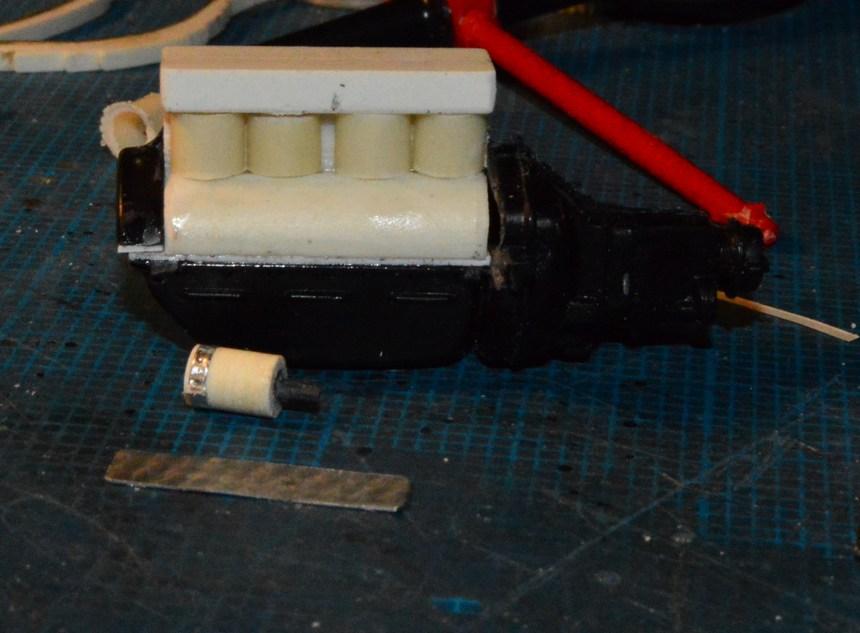
I have the cylinders cut, and have begun work on the starter. The engine-turned aluminum is the side cover, but, I may make another one that has some relief detail. It will get bolt heads, of course. I still need to make the head. I'll likely go with a Winfield. Does anybody know the best green to use on one of these early flatties? Questions, comments and critiques always welcome!
-
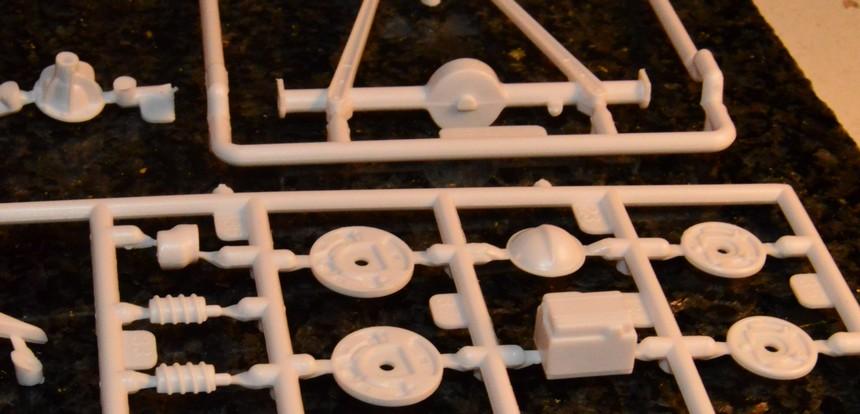
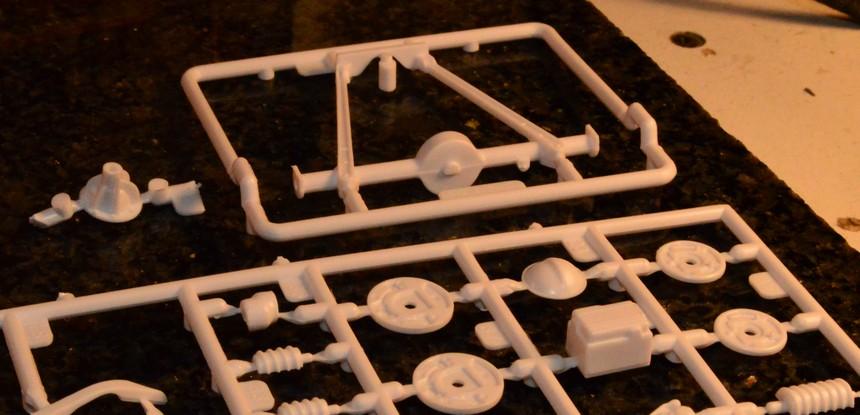
I never thought most of the deals on Ebay for parts from kits were worth their cost. However, because I needed the rear end and brakes from a '50 Olds for my Surfers dragster, and found someone selling just the chassis parts (not shown, I also received the chassis, itself, front suspension and exhaust parts), for $12.50, and free shipping, I couldn't pass it up, in order to keep a kit intact. I also got this digital angle finder, because my old, plastic medical one is getting more and more difficult to read!
-
Stuff that you can get from non modeling sources.
Straightliner59 replied to Pete J.'s topic in Tips, Tricks, and Tutorials
Some of those mylar party balloons come attached to plastic tubes. The pieces of one that I have are styrene. The tubing is roughly 3/16", in diameter. Turns out it's the perfect size for the cylinders on my four cylinder Flattie! -
A funny thing happened, on the way to a quickie build. I started thinking about the engine, and decided that I wasn't very fond of the molded on oil filler tube, starter, etc. So...now, I have this. I cut everything off the engine, above the oil pan, and began replacing it with Evergreen stock. I will also use the kit's timing cover. The plastic rod in these photos will be used to make the cylinders. I also shortened the front spring, and lengthened the axle. I wanted to use a beam axle, but, couldn't find one I liked, so, i went with this tube axle. As always, questions, chritiques and comments are welcome! thanks for lookin'.
-
Thanks, Bob! They certainly do. This one has! ?
-
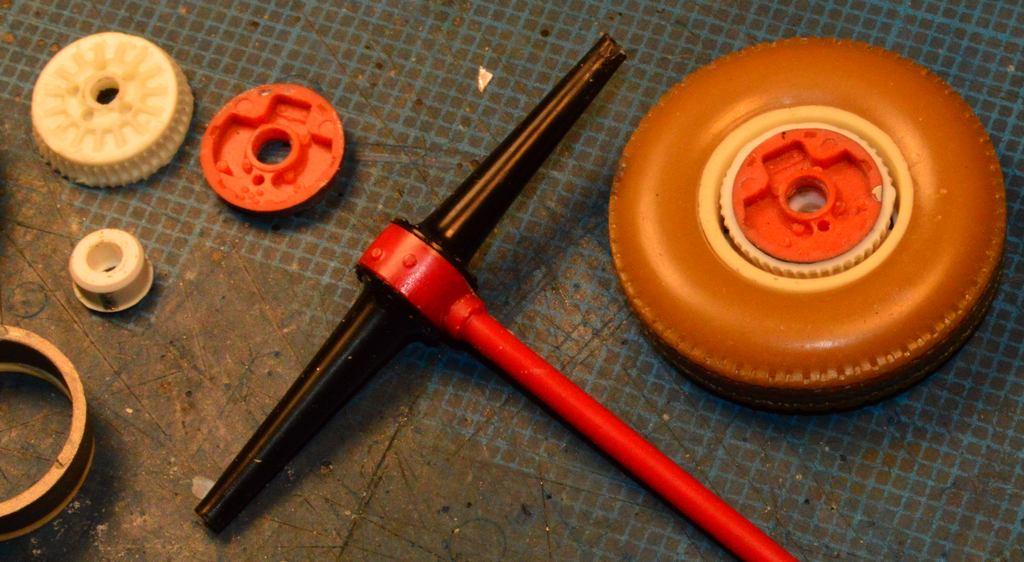
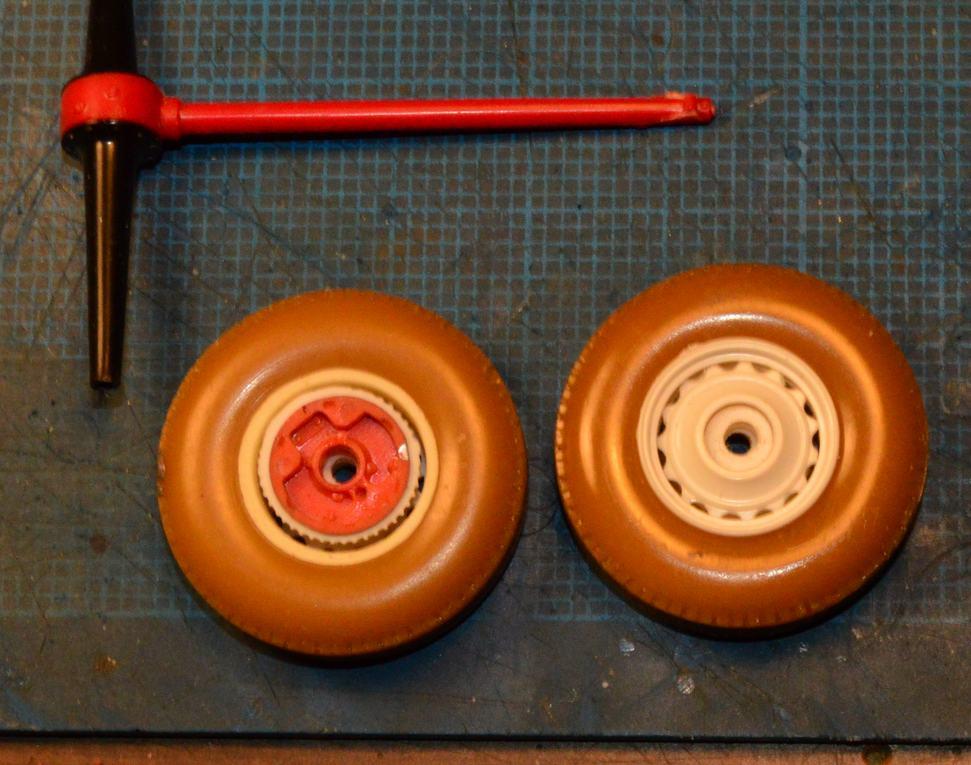
I'm getting the running gear sorta' sorted out. Here are the components that make up the rear brakes/wheel assemblies. The backing plates are, maybe from the early '80s release of Revell's T-bucket. I can't recall who cast the finned drums. They fit nicely together with the backing plates. I made the hubs from Plastruct tube. The other photo shows them stacked together. The rear axle center section is from AMT's '29 Roadster kit. I'm not sure where the axle tubes came from. They were plated, until I tossed them in the Purple lake. They are very nice. I suspect they may be Revell.
-
I would say $30 is an excellent price for the AMX!