Straightliner59
-
Posts
5,809 -
Joined
-
Last visited
Content Type
Profiles
Forums
Events
Gallery
Everything posted by Straightliner59
-
 Thanks, Roger! I just did a parts count, on these--with the straps installed, the pair is 60 pieces. I think I've "gone 'round the bend"!?
 -
’72 Dodge Demon Drag Racer 1/25 scale
Straightliner59 replied to AmericanMuscleFan's topic in WIP: Drag Racing Models
As you may be aware, I am not a prolific builder! ? I know exactly the people you're talking about! My guess is that they are pretty much everywhere, since, virtually any place I've been to a contest in multiple years, you'll see some guy with the same old models, time after time! Isn't it more fun to actually build new ones?? -
Billy the Kid Demon Pro Stock
Straightliner59 replied to dragcarz's topic in WIP: Drag Racing Models
Couldn't agree more! Well said, Bob! -
Then, there were two!

-
Thanks so kindly, Pierre. Your comments are always appreciated! Sometimes, it feels overwhelming, but, as long as I take it in "bite-sized" chunks, it usually works out. Usually!? I just try to make each sub-assembly a model unto itself, then, try to assemble all those little models into one "big" model. Plus, I really enjoy scratchbuilding and little details!
-
’72 Dodge Demon Drag Racer 1/25 scale
Straightliner59 replied to AmericanMuscleFan's topic in WIP: Drag Racing Models
Congratulations on your well-deserved success, Claude! I will enter models in multiple contests, but, never twice in the same contest, in different years. My Nostalgia Fueler may be an exception, as I entered it in one show as a WIP, and ended up winning Best In Show. I may enter it in that show again, since it will be completed, then. -
Issue 222
Straightliner59 replied to Dave Ambrose's topic in Model Cars Magazine News and Discussions
Arvada, CO, today. Just about to dig in! -
Porsche RS60
Straightliner59 replied to afx's topic in WIP: Other Racing: Road Racing, Land Speed Racers
This is a joy, to watch, JC. Your work is always so clean, and right! -
That place was incredible! There used to be a lot of excellent hobby shops, here in the Denver area, but, Colpar is really the only good one left. I miss Scale Model Supplies, in St. Paul. It's my favorite shop, ever! I mean, it's still there, I'm just not!
-
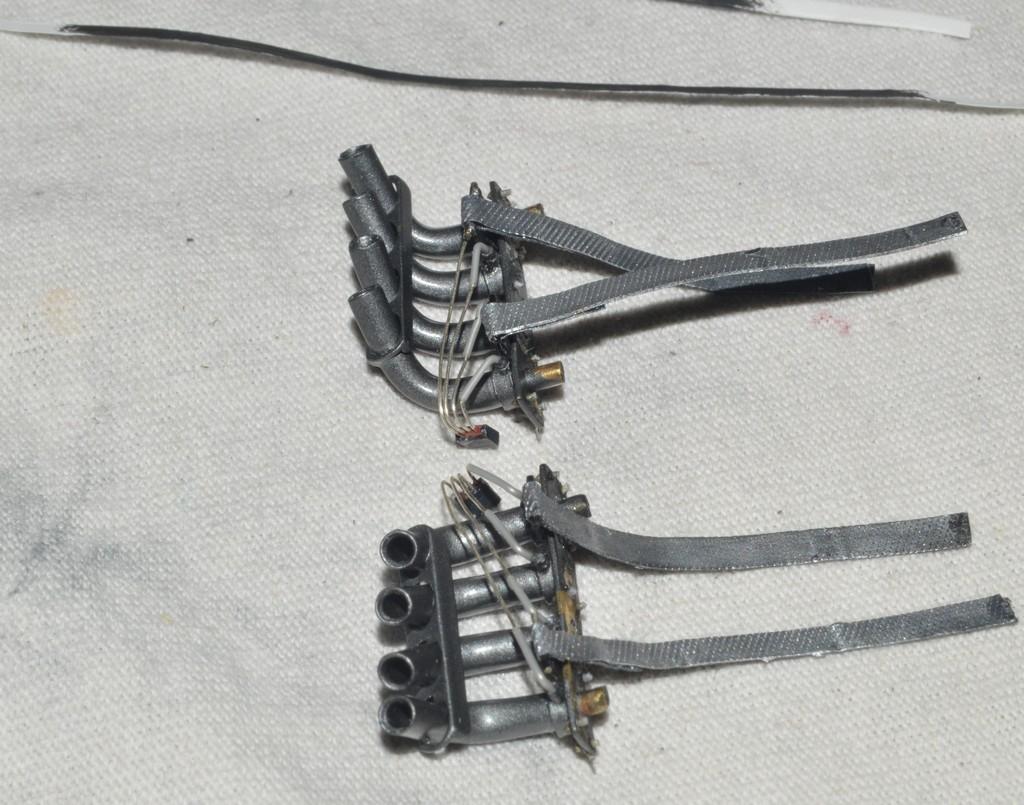
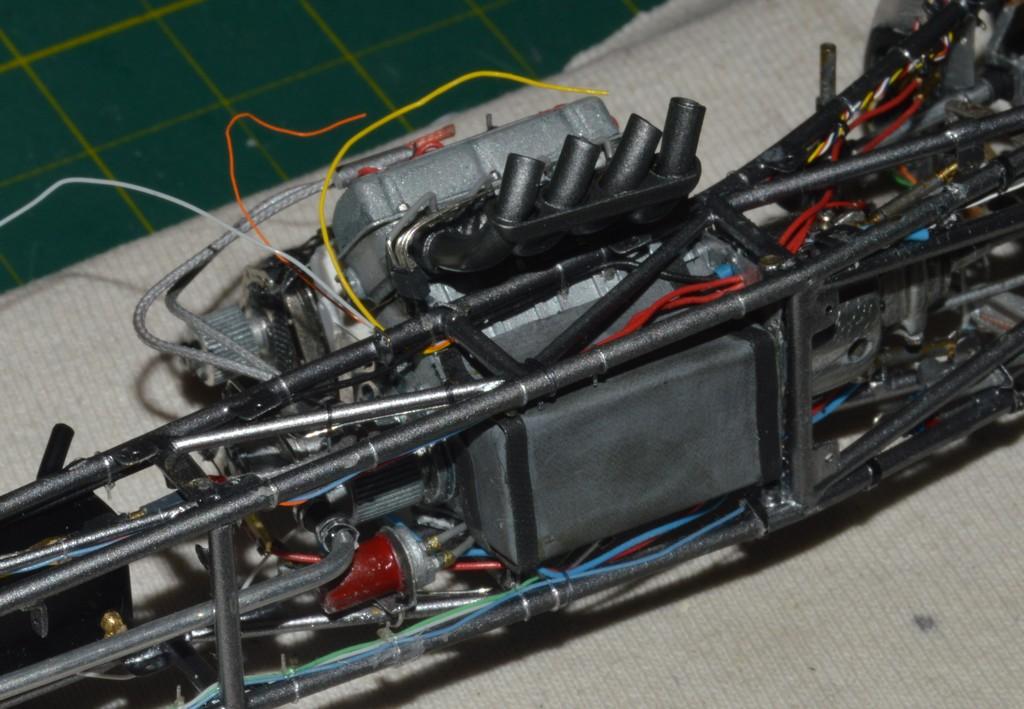
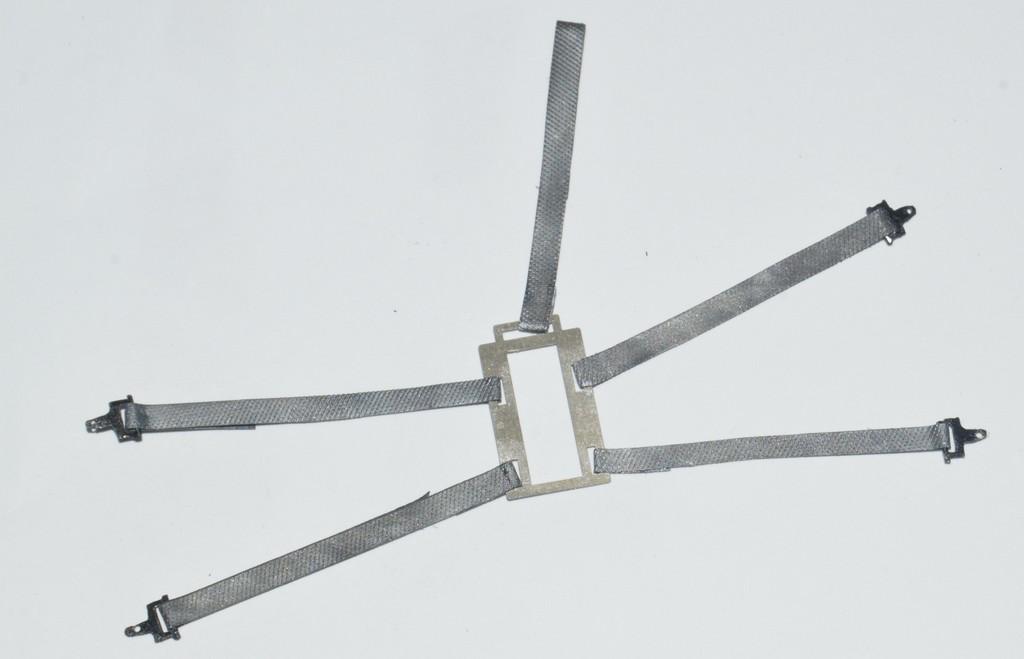
I think I have one header completed, except for the straps for the diaper. Those are painted; I just need to install them. I would have them both done, but I heard the dreaded "tick" sound, and one of the blower restraint strap brackets disappeared from the tweezers into whatever void it is that parts disappear into. Therefore, next item on the agenda is to make a new one! I added some silver Rub-n-Buff to the restraint straps, as they were a tad too close to a steel color. Comments of any sort are always welcomed. Thanks for looking!
-
Billy the Kid Demon Pro Stock
Straightliner59 replied to dragcarz's topic in WIP: Drag Racing Models
Nice work with the rear wheel openings. That method works great for altering wheelbases, too. I grafted the ones from the Old Pro Nova, into a stock Vega body, to fit slicks under it. I learned that from a Hank Borger article, almost 50 years ago! Love these early Pro Stocks! -
Very cool piece, Walt!
-
AMT "Miller" GMC Astro 95
Straightliner59 replied to Goodwrench3's topic in WIP: Model Trucks: Big Rigs and Heavy Equipment
Sound advice for over 50 years!? -
Brilliant!?
-
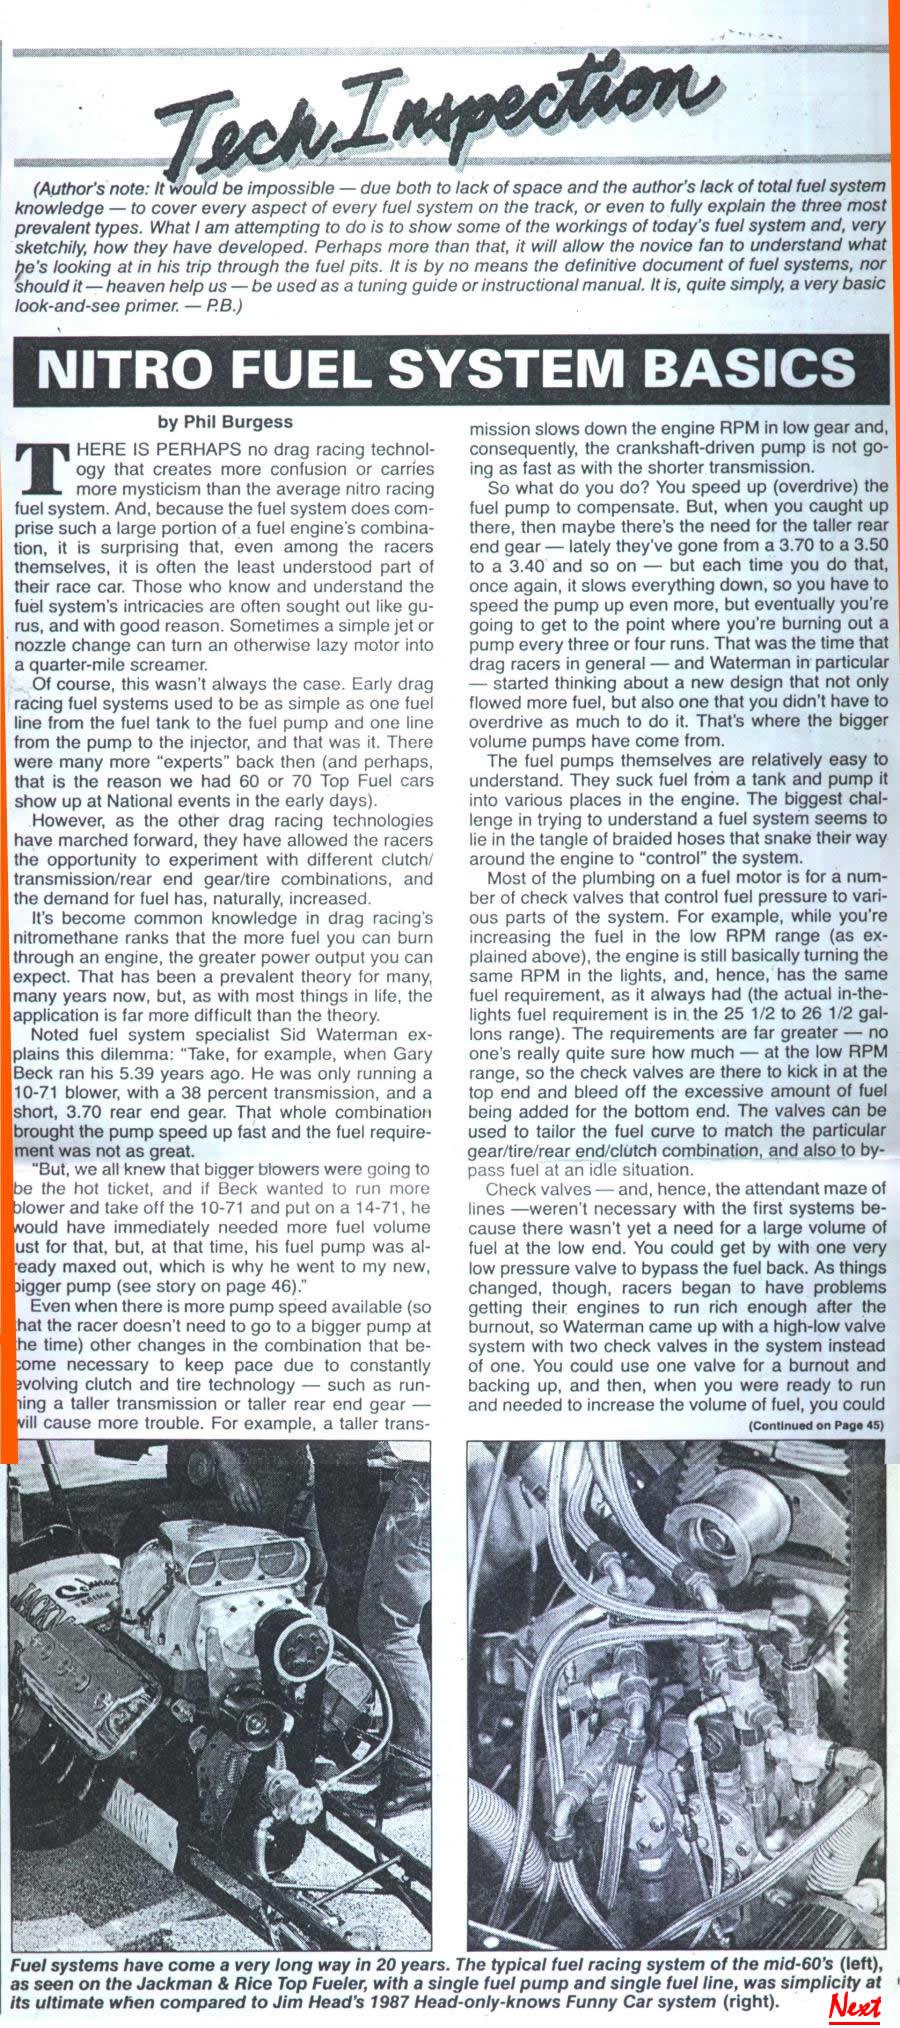
This should help. It's the most comprehensive explanation of nitro fuel systems I've ever seen. You'll want the single pump setup.
-
Thank you, my friend! The only goal I ever have is to make each better than the last, in some way, or to try something new. I am confident that you are correct! I am very happy with this project!
-
’72 Dodge Demon Drag Racer 1/25 scale
Straightliner59 replied to AmericanMuscleFan's topic in WIP: Drag Racing Models
I am about to employ it, when I re-solder the tab for the tie rod. I pulled one of them off, when I was shortening the tie-rod. I'll use aluminum tubing, since the solder won't stick to it! I'll have to touchup the paint, as well. C'est la vie! -
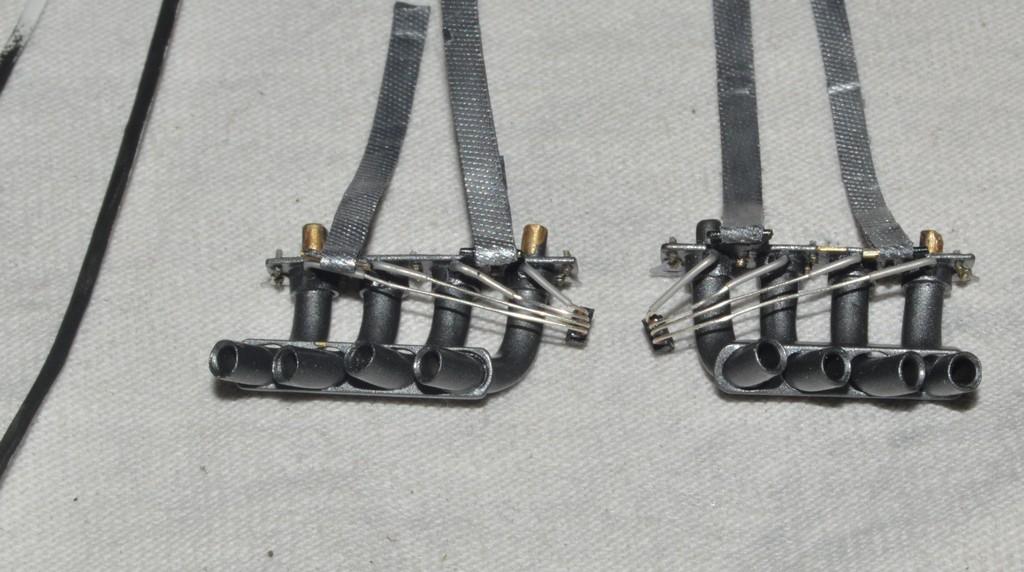
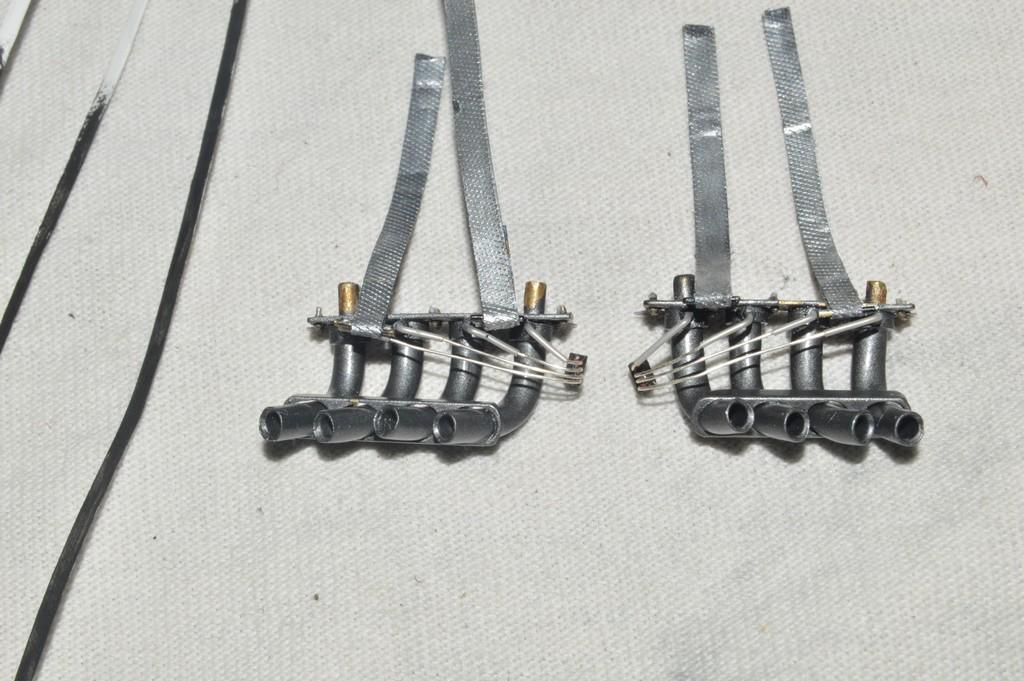
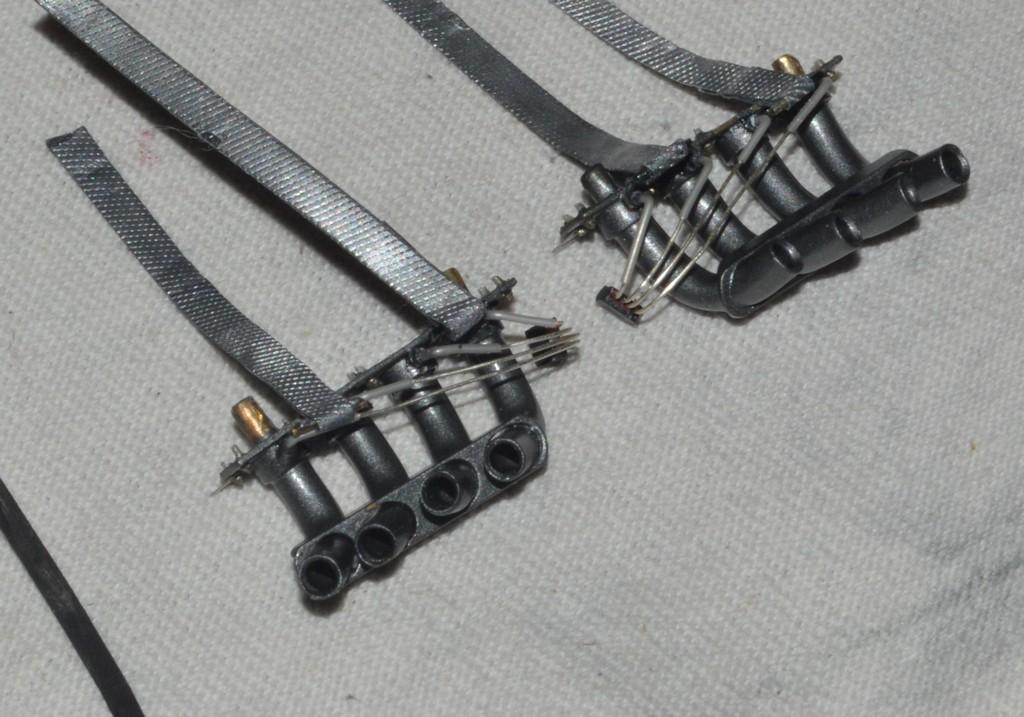
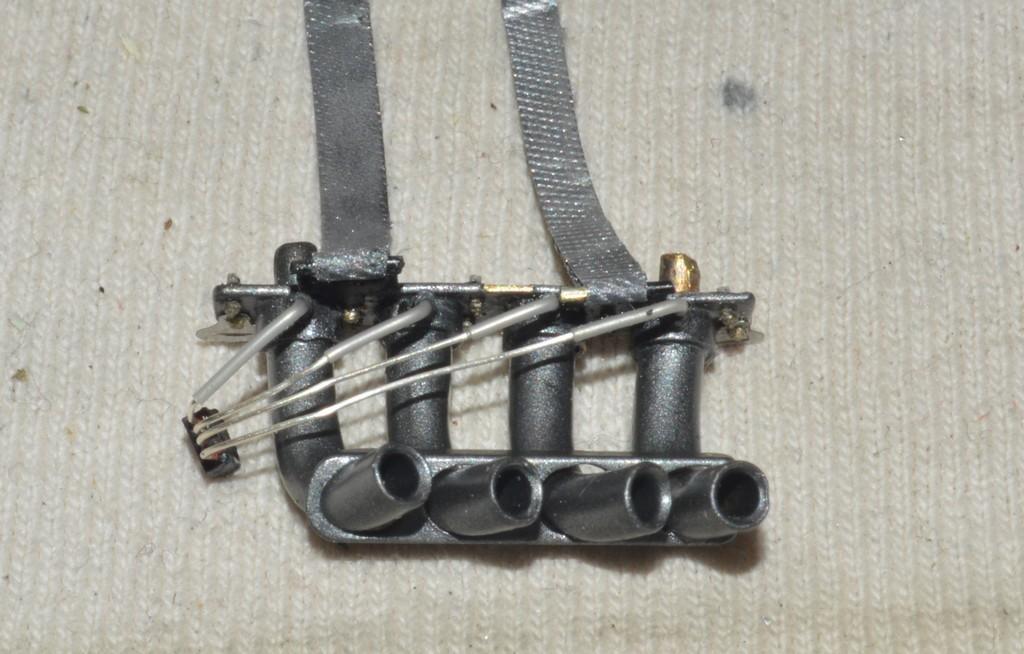
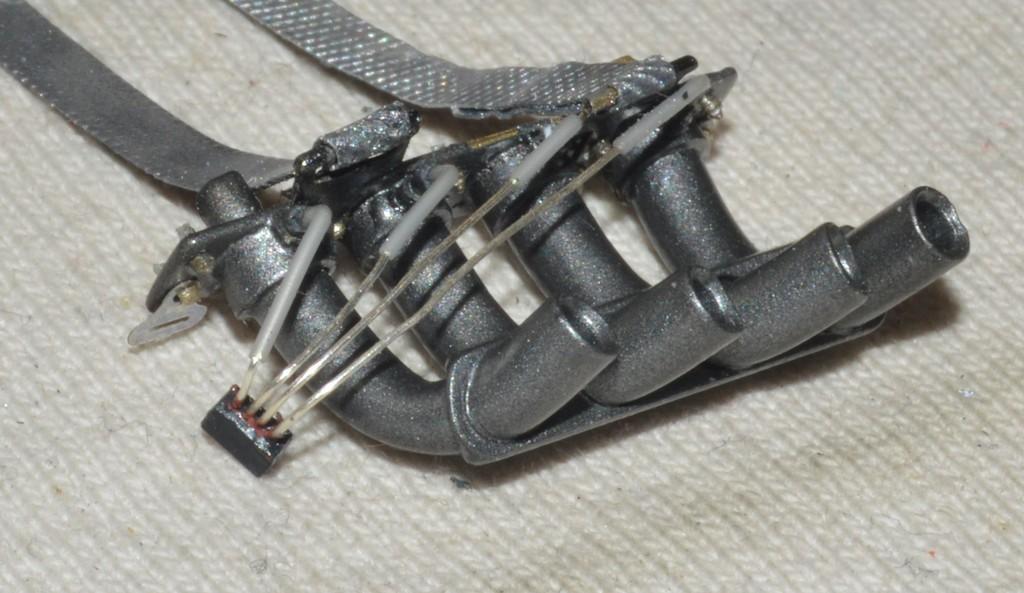
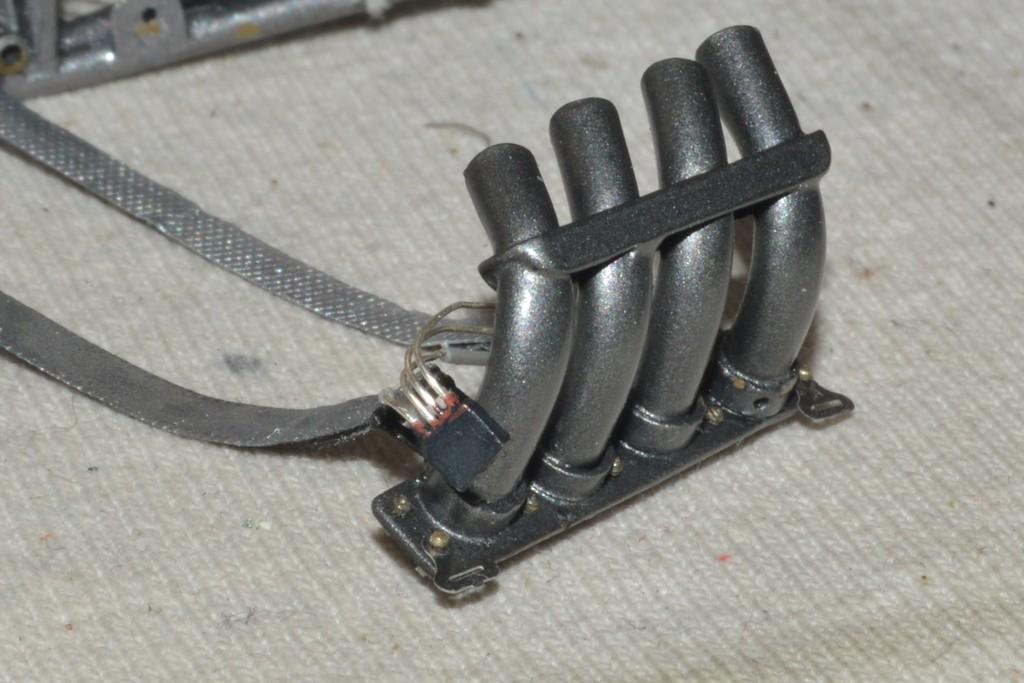
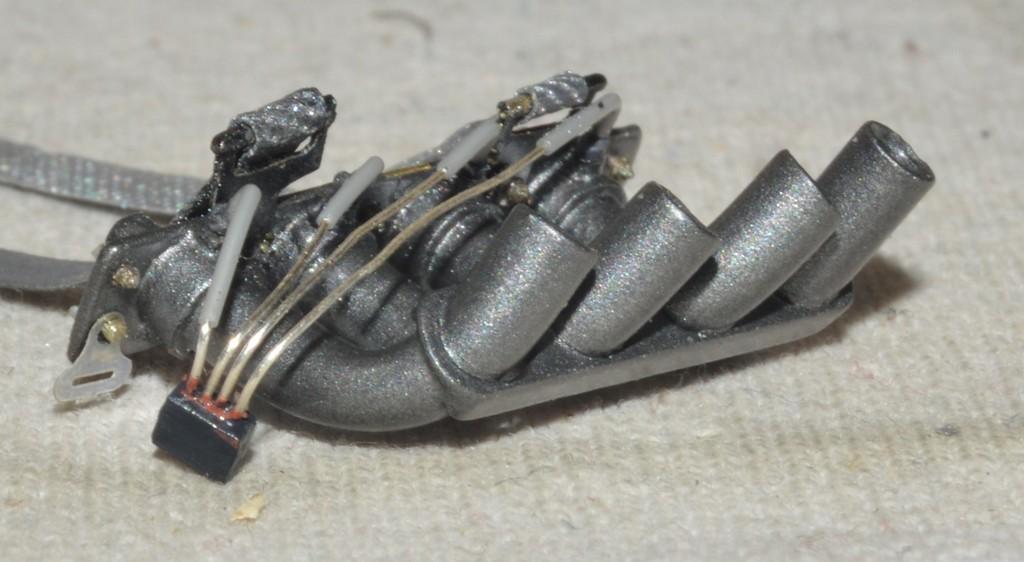
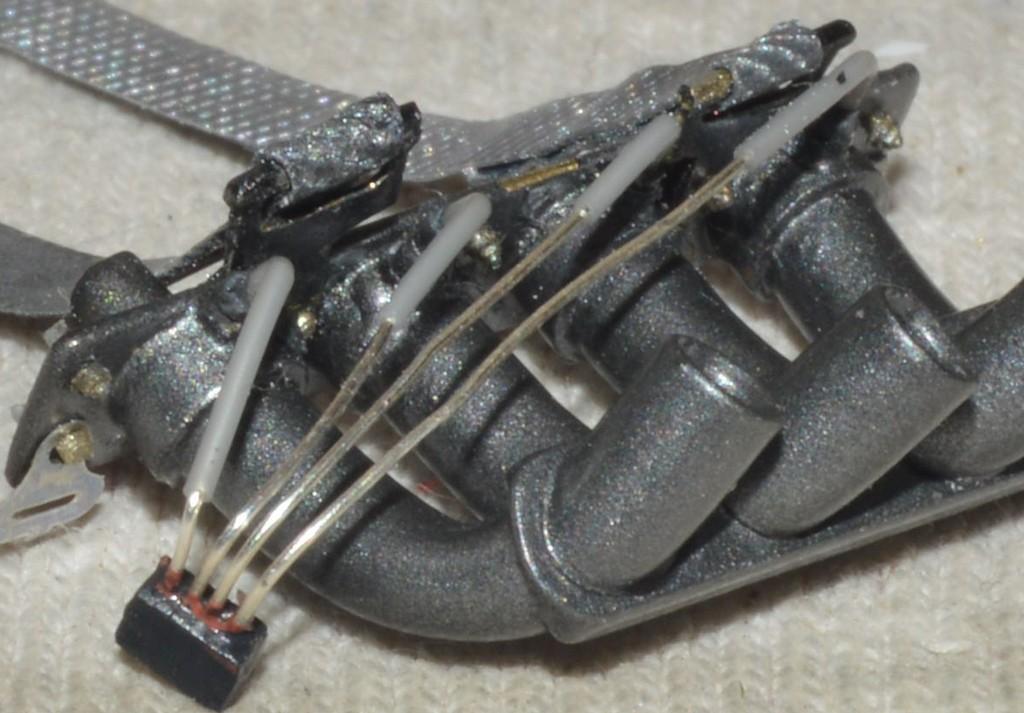
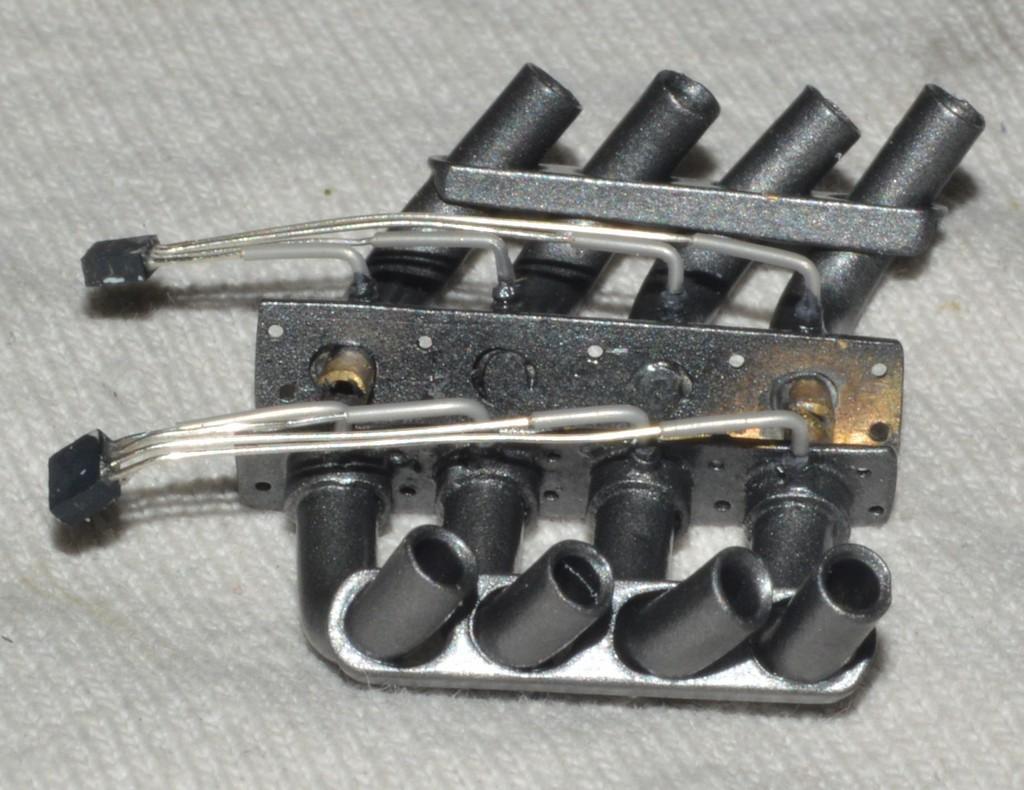
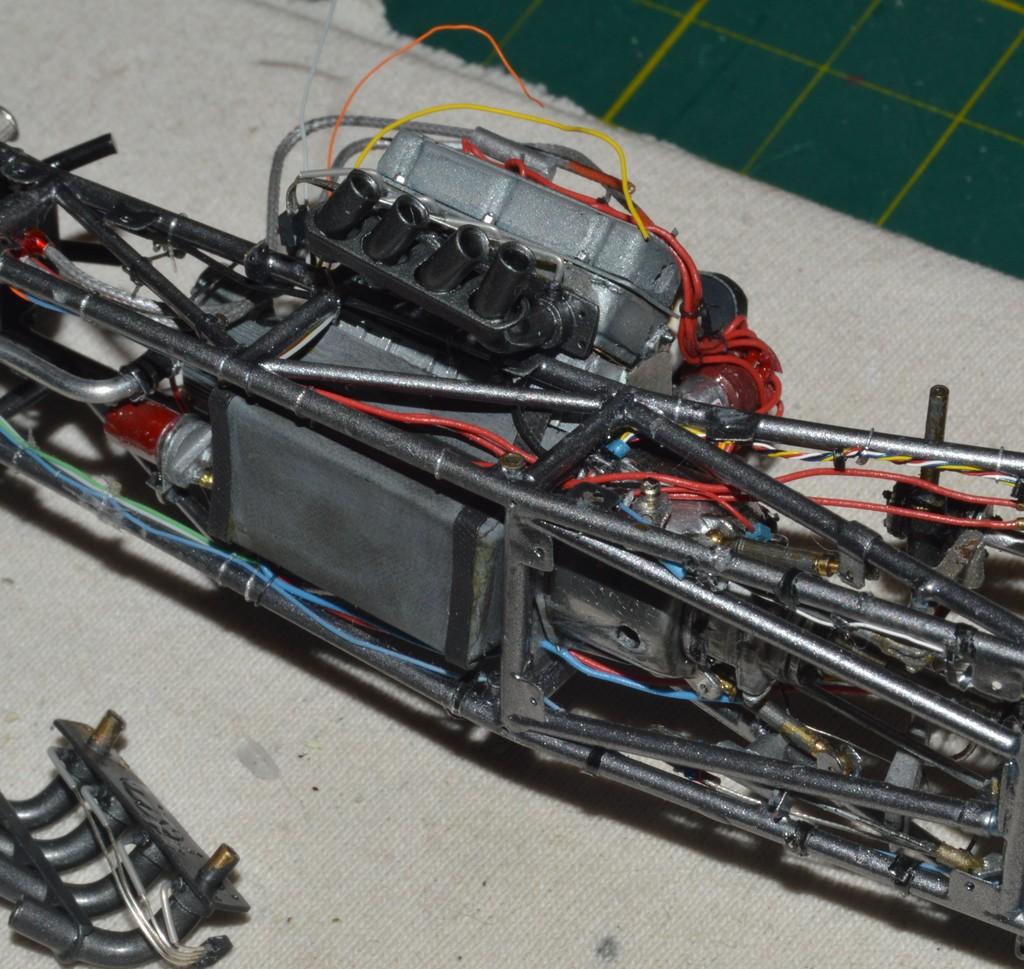
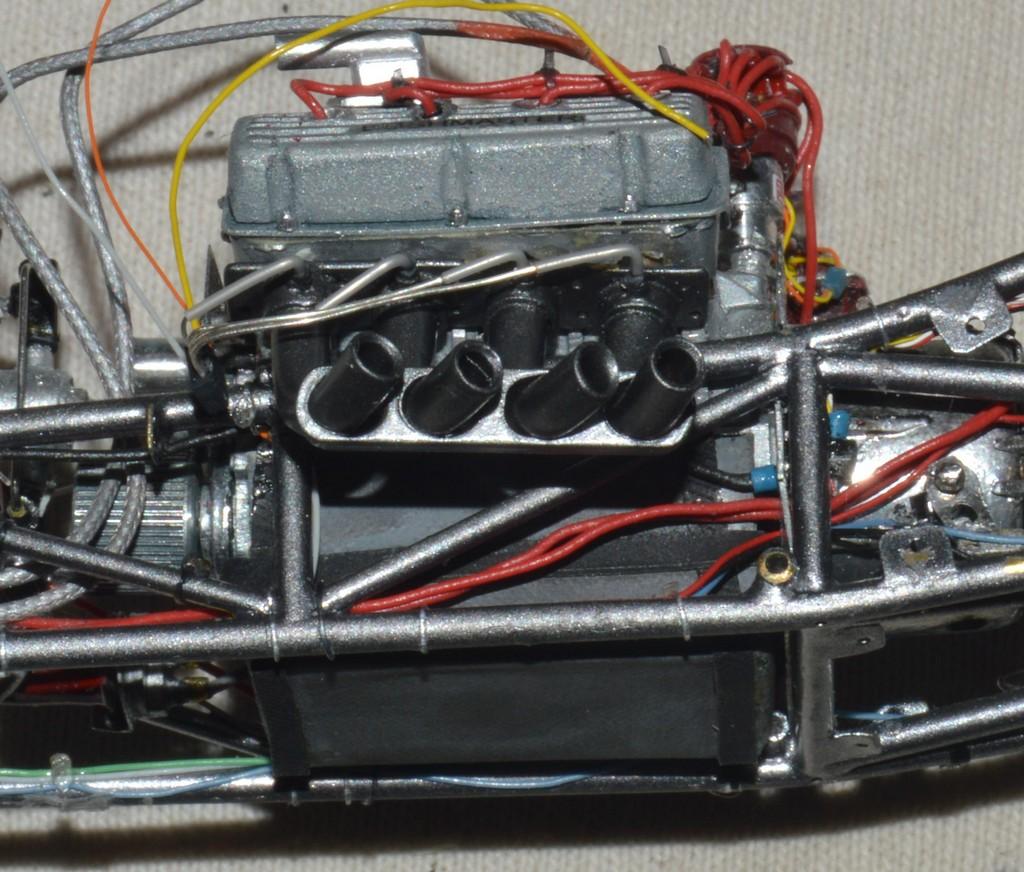
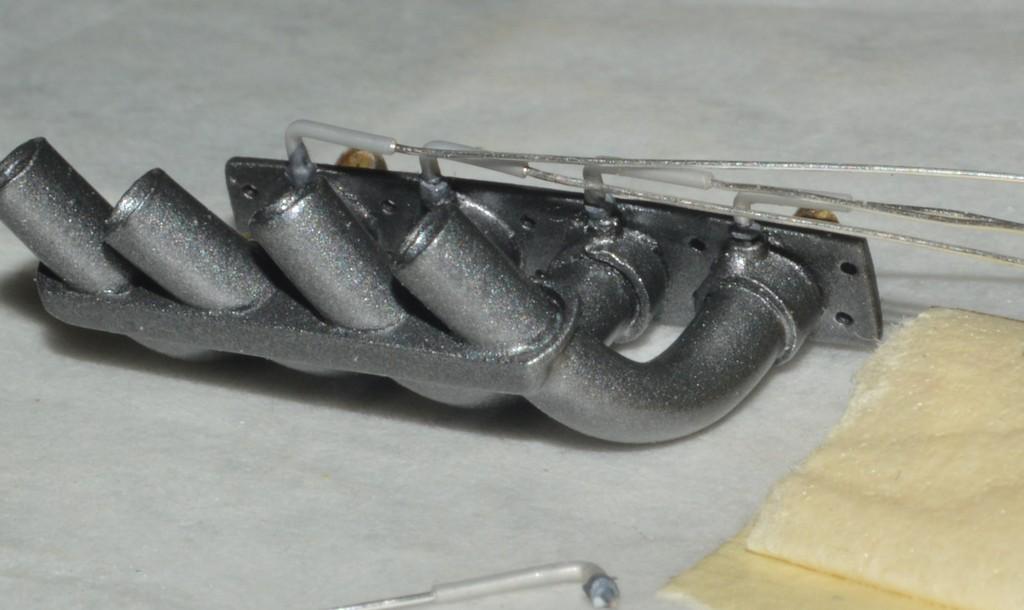
I got the thermocouples mostly done, sans a bit of detail paint. I also got the diaper installed, and figured out how to make all the hardware play nicely with the strap material...I think!? Next, I'll install the aforementioned strap hardware to the header flanges, and add the bolt heads, before fine-tuning the mounting of the headers, and installing them. I still need to fix the tie rod bracket, and shorten the tie rod. I think it's getting closer! Your comments are always welcomed. Thanks for looking!
-
Fittings At Hobby Lobby
Straightliner59 replied to Zippi's topic in Model Building Questions and Answers
That's how I make all of my fittings. I'm not sure I'd want to do it without a lathe, though. Not saying it can't be done, without, just that it makes it a ton easier! -
’72 Dodge Demon Drag Racer 1/25 scale
Straightliner59 replied to AmericanMuscleFan's topic in WIP: Drag Racing Models
That looks great, Francis! That's exactly how I like to align components, as well. Excellent work, my friend. -
Replacement for Model Master Metalizer
Straightliner59 replied to Straightliner59's topic in Tips, Tricks, and Tutorials
I didn't realize that. I just did a quick search and found quite a few available for sale. They're still cheaper than Testors. Get 'em while you can!? -
Replacement for Model Master Metalizer
Straightliner59 replied to Straightliner59's topic in Tips, Tricks, and Tutorials
I like the Mr. Metal Color, too, but, this stuff "feels" the same as the old MM stuff! -
Replacement for Model Master Metalizer
Straightliner59 posted a topic in Tips, Tricks, and Tutorials
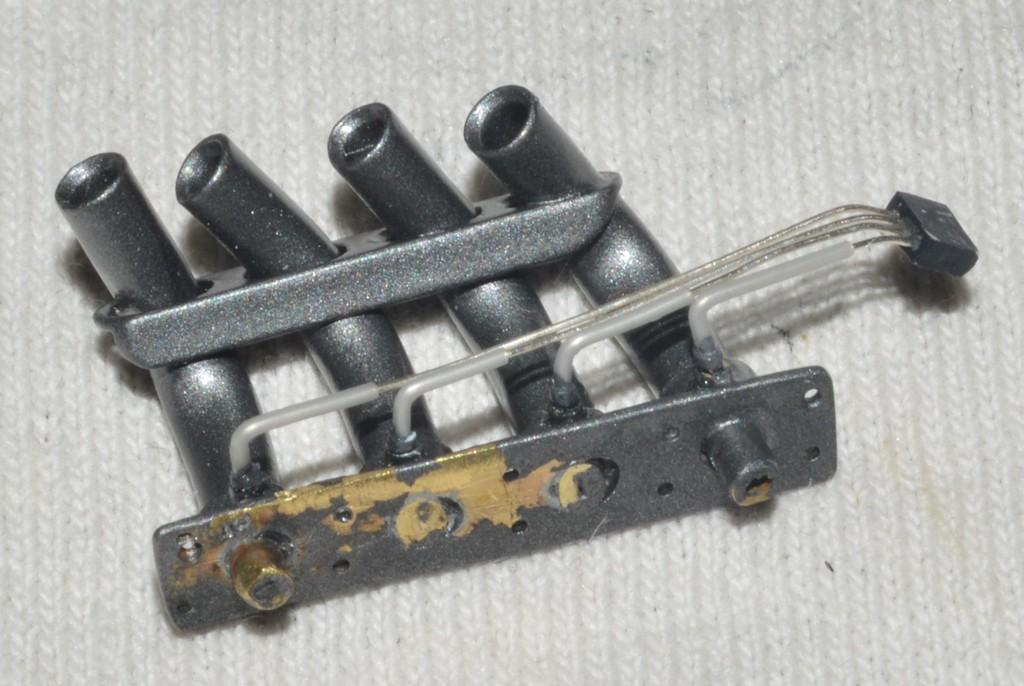
I discovered a tin of Humbrol Metal Cote Polished Steel, in my paint drawer. It's the closest thing, performance-wise, I have found to Testors discontinued product. It brushed on, very nicely and dried quickly. In researching the line, I found that they also have it in aerosols. The only thing I used it on was the tiny hex nuts on these thermocouples. I'll be buying more, for sure. If I can get it, locally, I'll try out the spray, too...
-
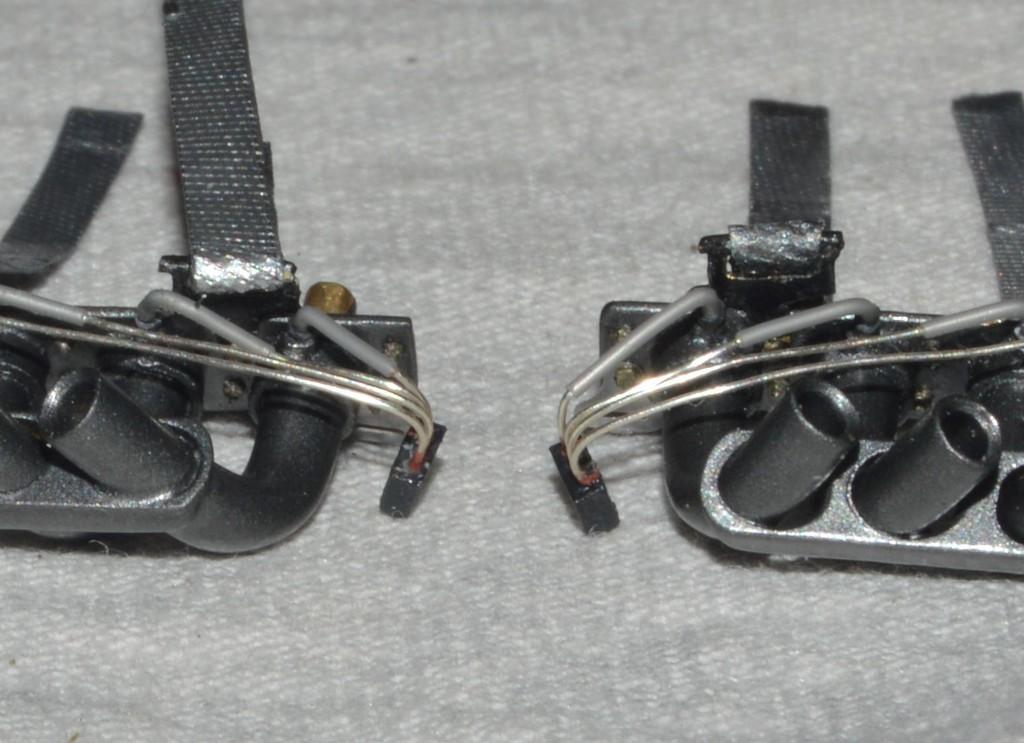
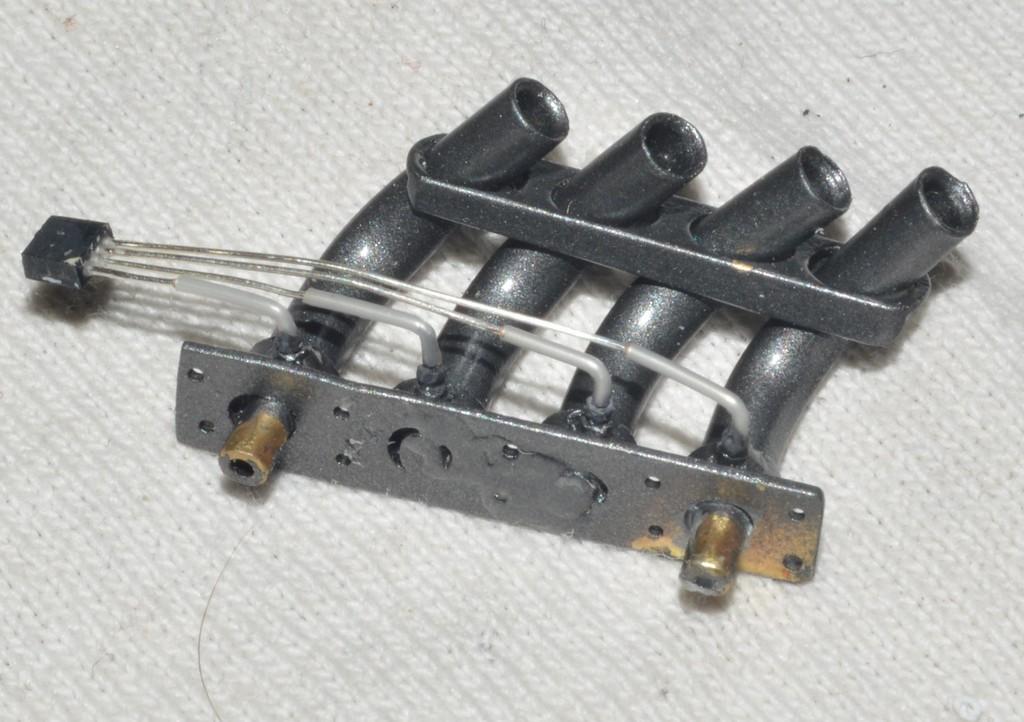
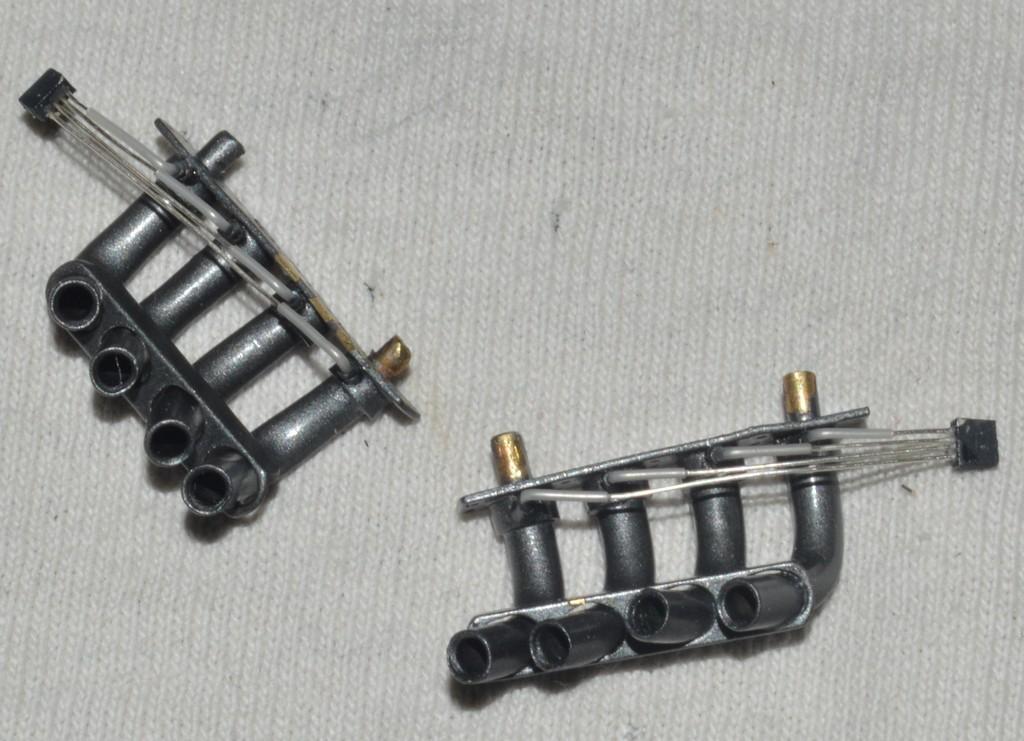
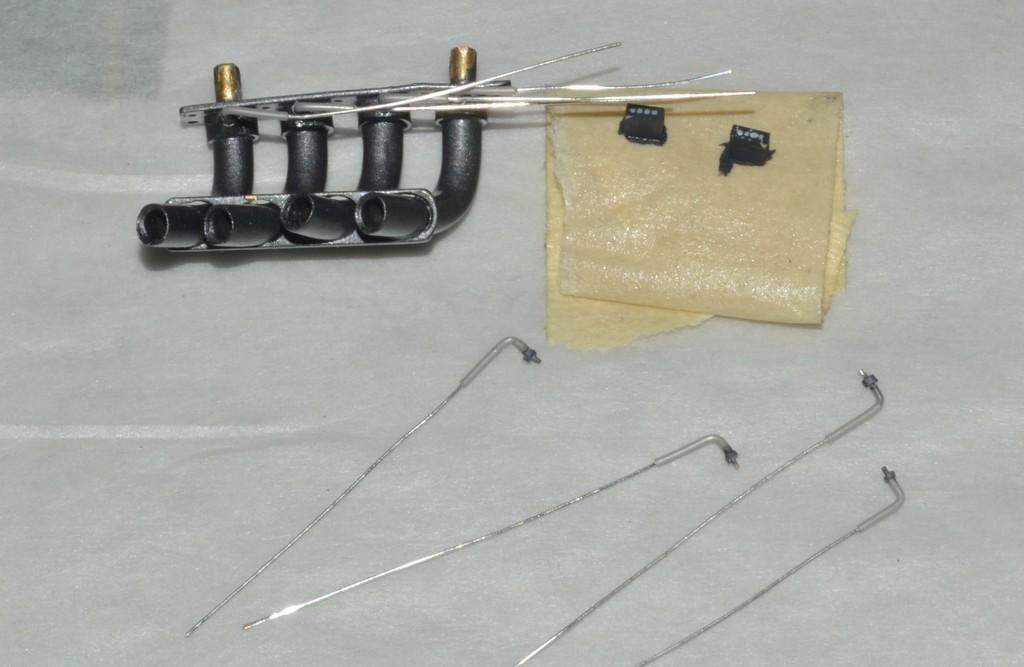
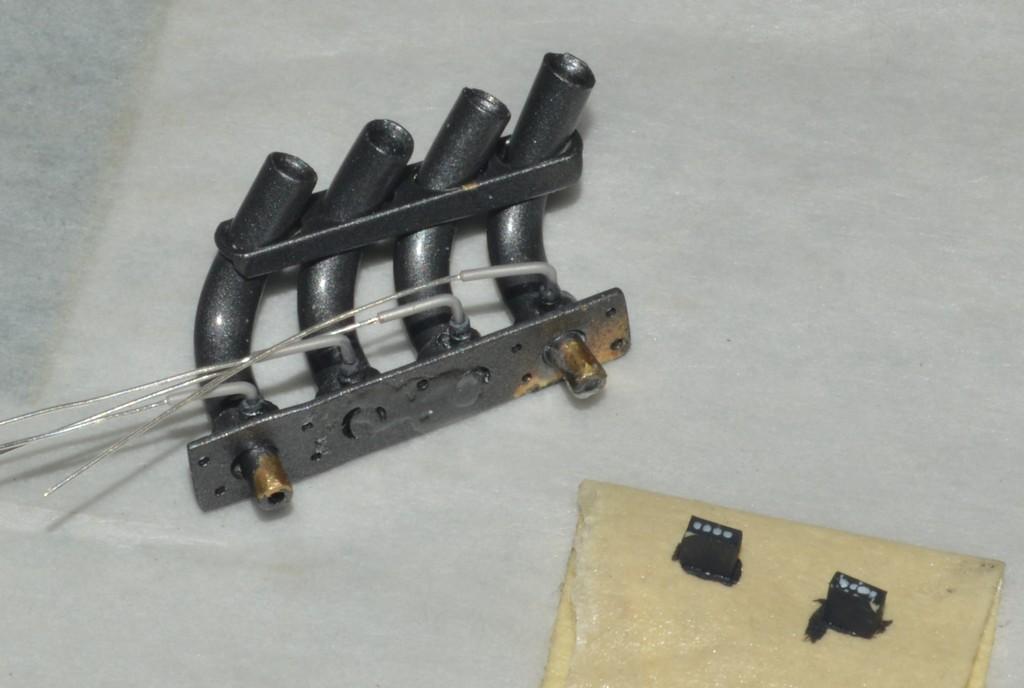
I have been working on the temp sensors for the headers. It took a few days to decide exactly what I was going to use to make them. i ended up using some old MSC silver/grey plug wire. I stripped off most of the insulation, and left 1/32" bare on one end, then super glued the remaining insulation in place. I drilled a hole in a piece of .080" Evergreen strip, to use as a bending jig. Once I had the pieces bent, I added a small nut, made from Plastruct .030" hex, bored on the lathe. I painted the nuts with Humbrol Polished Steel Metal Cote. I am going to purchase more of their colors, from this line, as they behave almost exactly as Model Master metalizers do/did. I got the thermocouples mounted on one header, and I am very happy with their appearance! I made the "collector" boxes from .040"X.080" Evergreen strip. I used the mill, to properly space the holes. I'll pull the other header from the engine, so I can install the hardware (also includes the brackets for the blower restraint, and the diaper straps) to both flanges, as well. Once the other header is free, I can work the diaper into place, and feed the straps up over the top tubes of the frame. Speaking of the frame--I have to make a small solder repair. The tab that holds the tie rod in alignment, on the left side of the chassis came loose, while I was shortening the tie rod. I think I can safely repair it, with minimal damage/cleanup. As always, your questions, critiques and comments are welcomed. Thanks for looking!
-
Satin? Black Finish
Straightliner59 replied to NOBLNG's topic in Model Building Questions and Answers
I did these blower restraints with SNJ aluminum powder rubbed into flat black. I have a couple of brass and bronze metal powders, but, I want to experiment with more of them. there's quite a variety, on Ebay.