Straightliner59
-
Posts
5,809 -
Joined
-
Last visited
Content Type
Profiles
Forums
Events
Gallery
Everything posted by Straightliner59
-
 I think Testors was involved with it. I was working in a hobby distributorship, when it was on. I seem to remember seeing Testors correspondence touting it.
 -
Wow! This is really moving along, Marcos. Good job, man!
-
I ran all the plug wires, then decided that I didn't like the boots. I made a new set. I didn't get a chance to install them, yet. They look much better. It was a case of "make them as small as you can, then toss them, and make a new set, even smaller!" I'll get this wired in the next couple of days, with any luck. Thanks for lookin'!

-
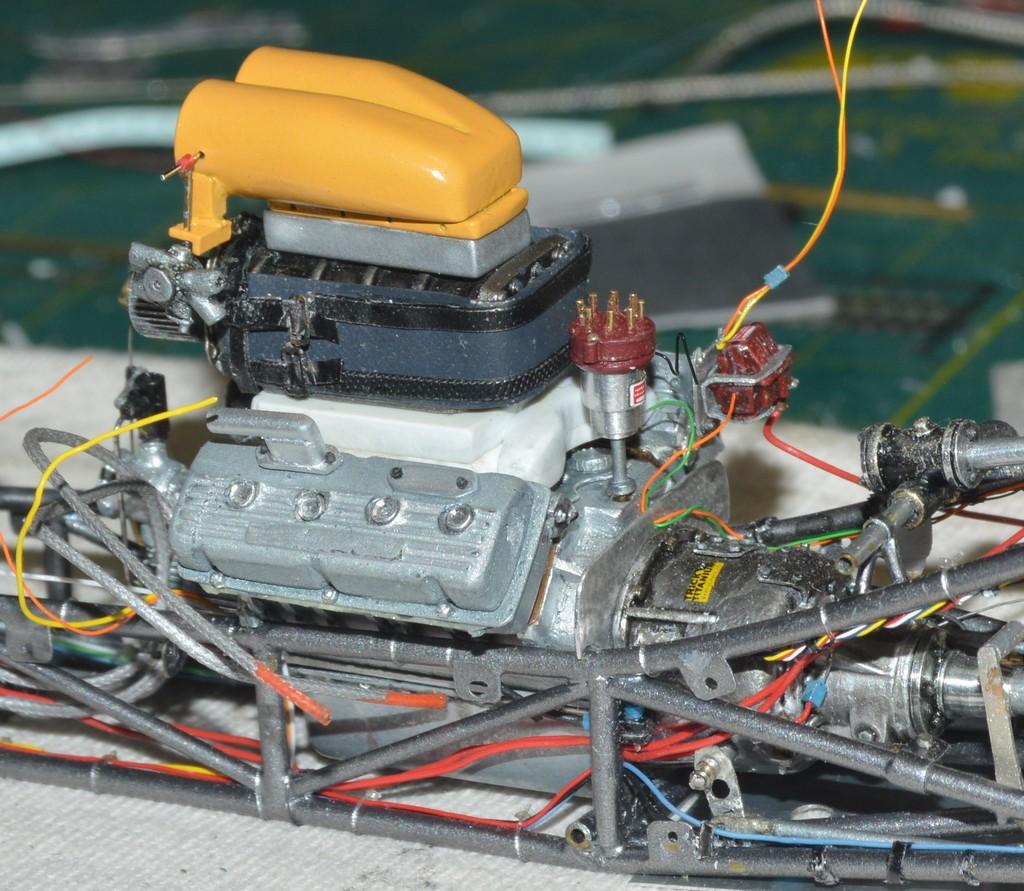
I got those secondary wires hooked up and the plug wire mag boots made and painted. Those will be next...
-
Looks superb!
-
I sincerely appreciate your kind words, Pierre. I thoroughly enjoy the things you do with your models. Does it help you to feel better knowing that I first worked on this in 1997?? I probably worked on it pretty steadily for seen or eight months, then. At that point, I decided that my skills weren't where they needed to be to complete it, so I put it aside, until last November. By then, I felt I'd developed the tools I'd need to see it through. I hope to have it done by year's end. I'll be wiring the mag/plugs, today. That will be a pretty big step! It feels like the "to-do" list is getting significantly shorter! I'm really struggling with my design for the paint. I have the colors and the technique figured, just not the layout. I did this drawing, so that I can experiment with my graphics program. Thanks for checking in! Thanks, Andy! Nice work on the 166 grille, by the way.
-
What is this?
Straightliner59 replied to Brudda's topic in General Automotive Talk (Trucks and Cars)
Whether or not it's actually steam-powered, it's definitely Steampunk! I'm not really into art cars, but, small(er) touches of Steampunk could be kind of neat, on the right project. -
Thanks, kindly, Ian! I got it installed. Now to hook it all up...
-
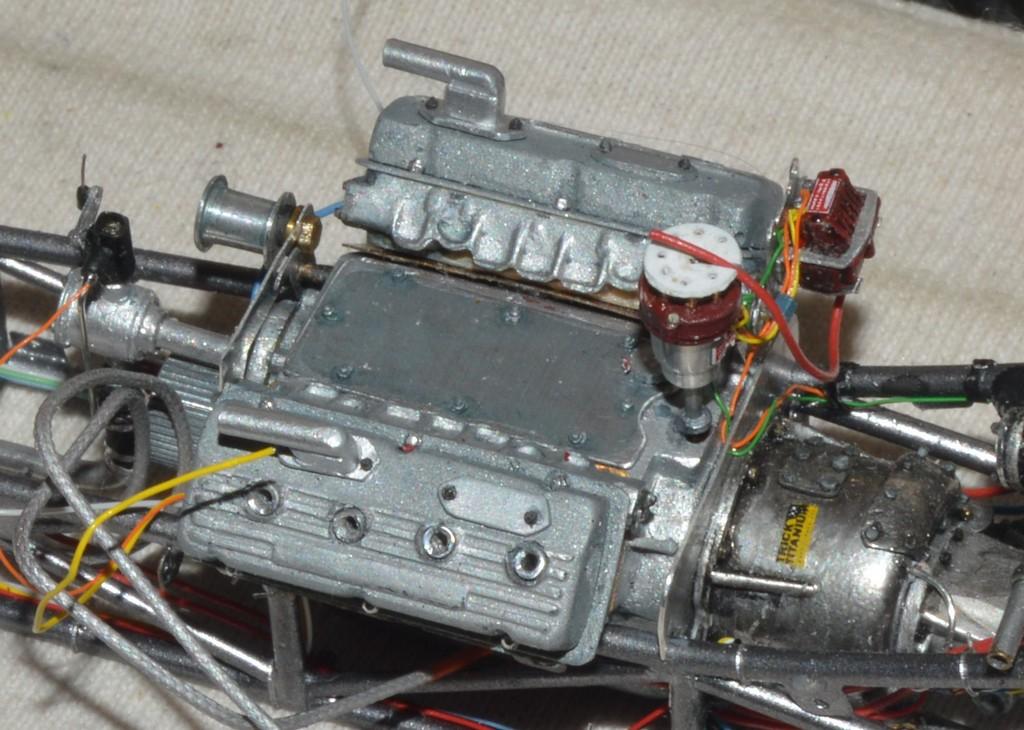
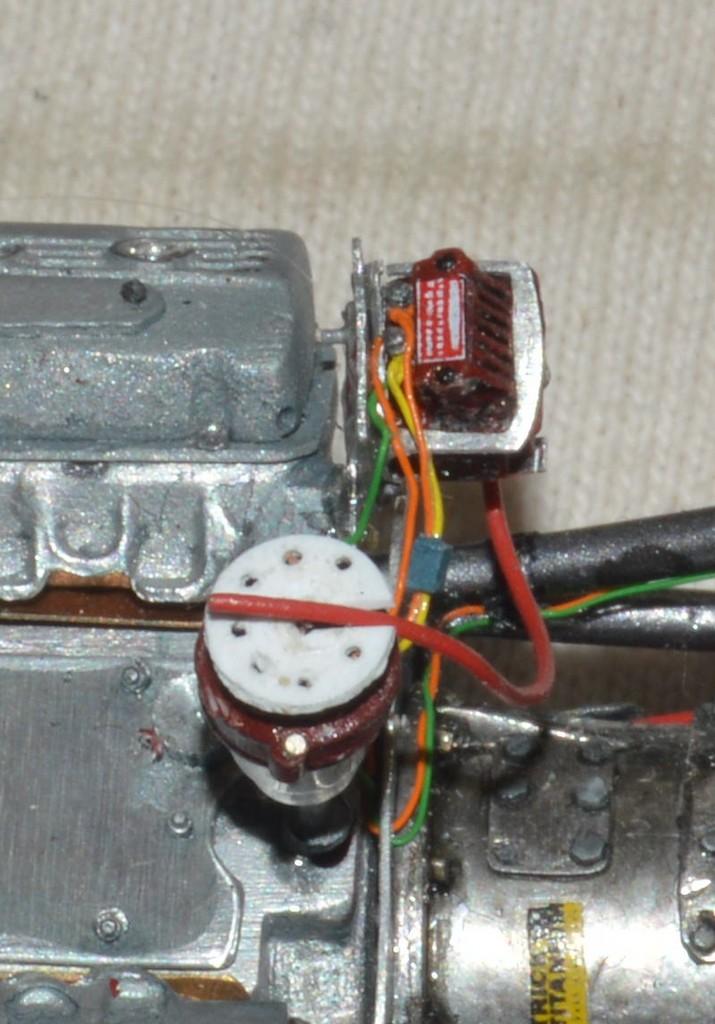
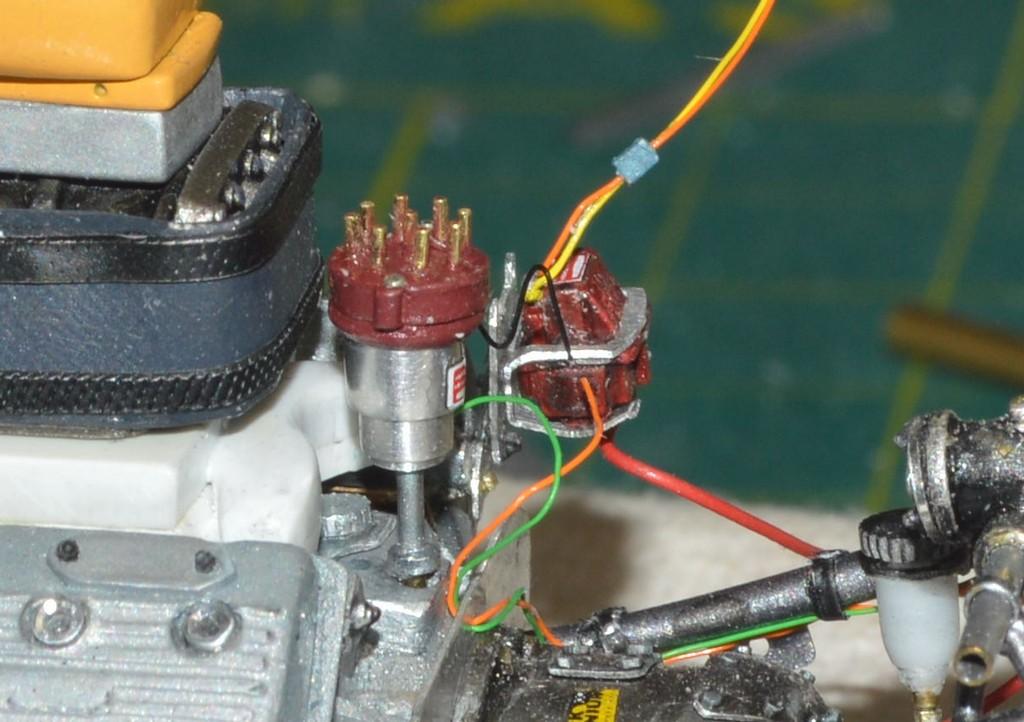
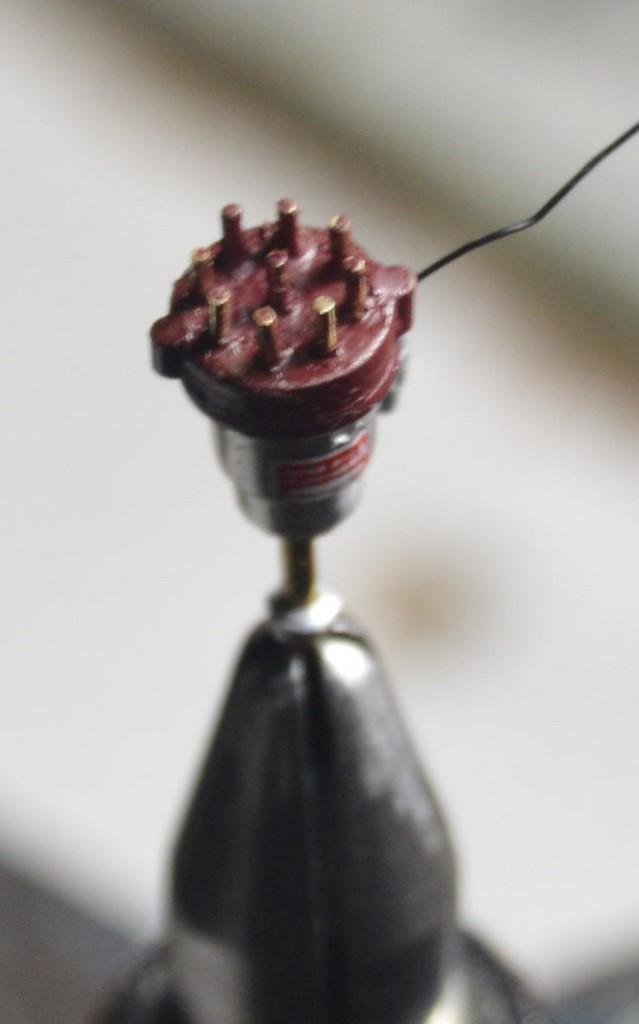
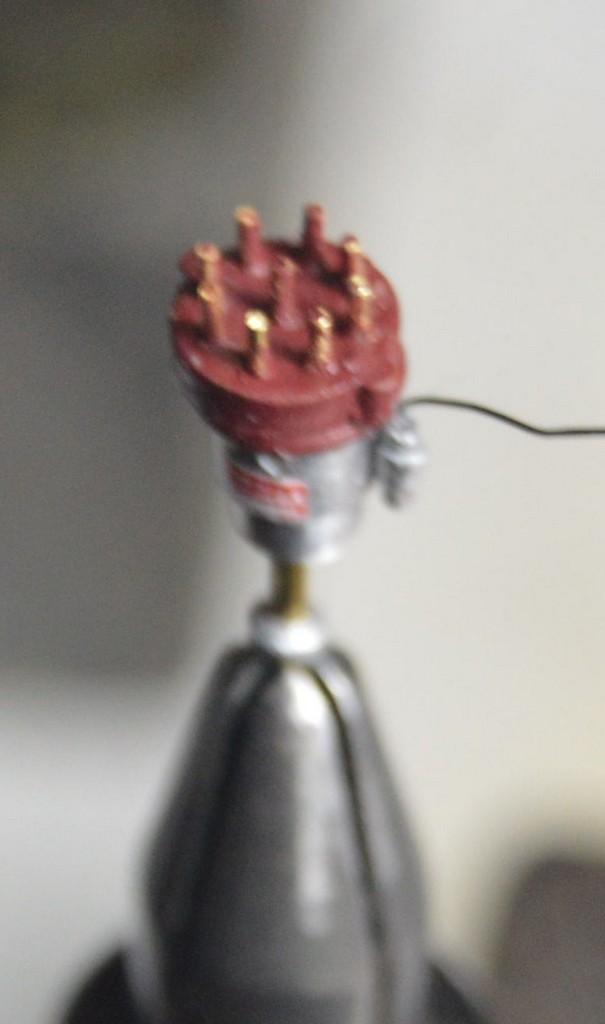
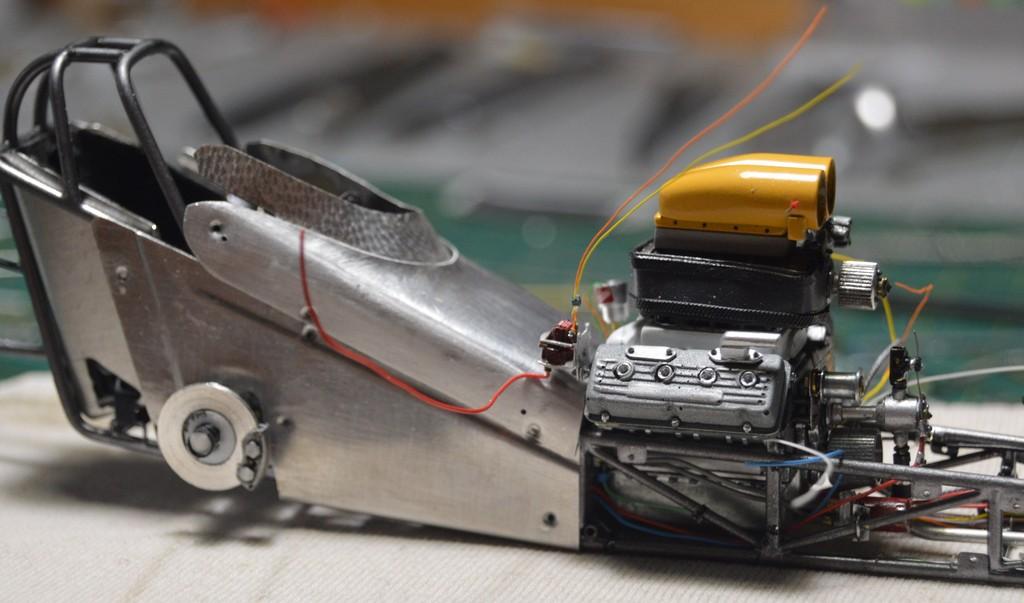
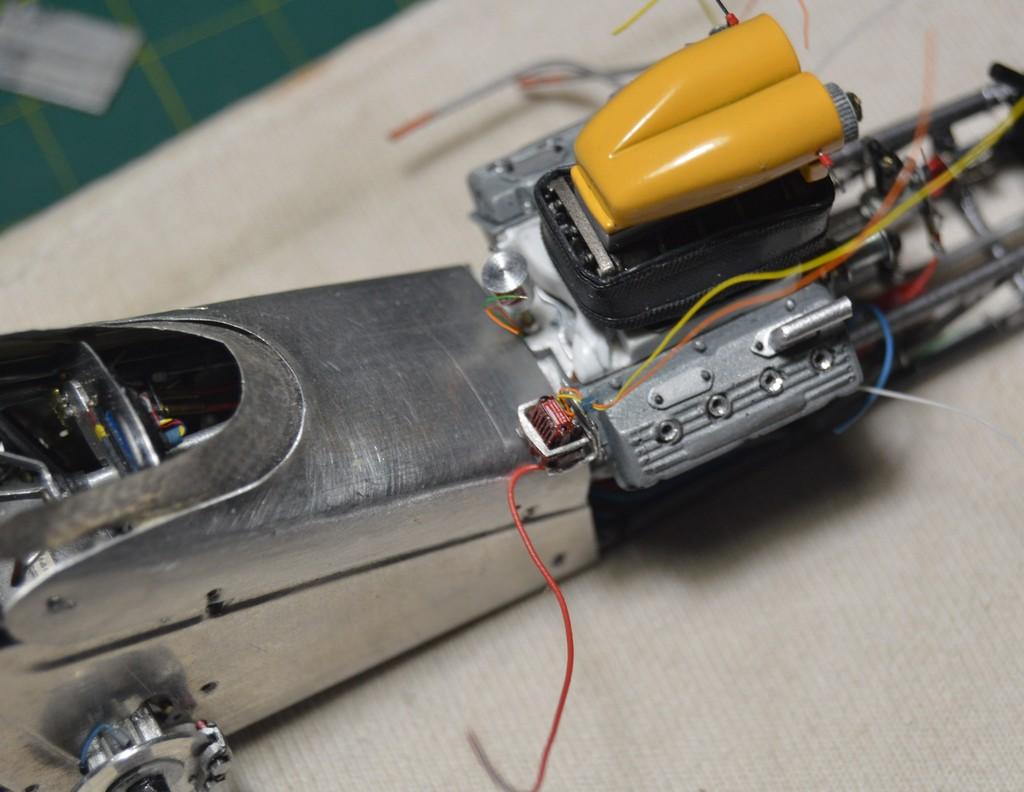
The mag is about ready to install. The mag cap is Humbrol German Purple. Since I took these, I painstakingly removed the paint from all the terminals, using a Squadron panel line scriber. This will make it easier to slip the boots onto them. The mag will have to be installed, first, so I can hook up the secondary wiring from the mag to the transformer and the kill switch. I made the condenser by turning a length of aluminum knitting needle (Dollar Tree--good material, cheap!), then drilling it to accept the Detail Master .0075" detailing wire. The wire is too big, but, it'll be obscured by the fact that it's black, and will enter the mag at the same place the other two wires do, so it shouldn't be too obtrusive. Your comments are always welcomed. Thanks for looking!
-
Very nicely done! That's just what a gasser should look like!
-
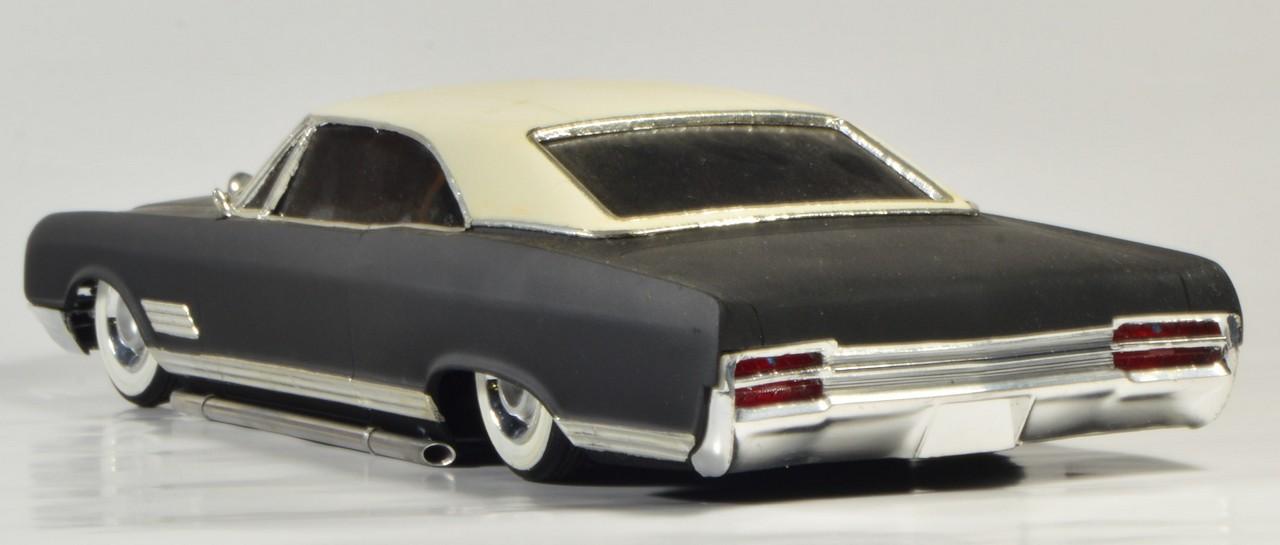
I found an okay photo of a pair of the gem-cut blue glass in a Hasegawa Buick I slammed...
-
I have some small, blue MV lenses, and some that are gem-cut. I got them years ago, at a model RR shop, just for this purpose. I can't recall who made the gem-cut ones. Maybe Grandt Line or Detail Associates. Maybe neither!?
-
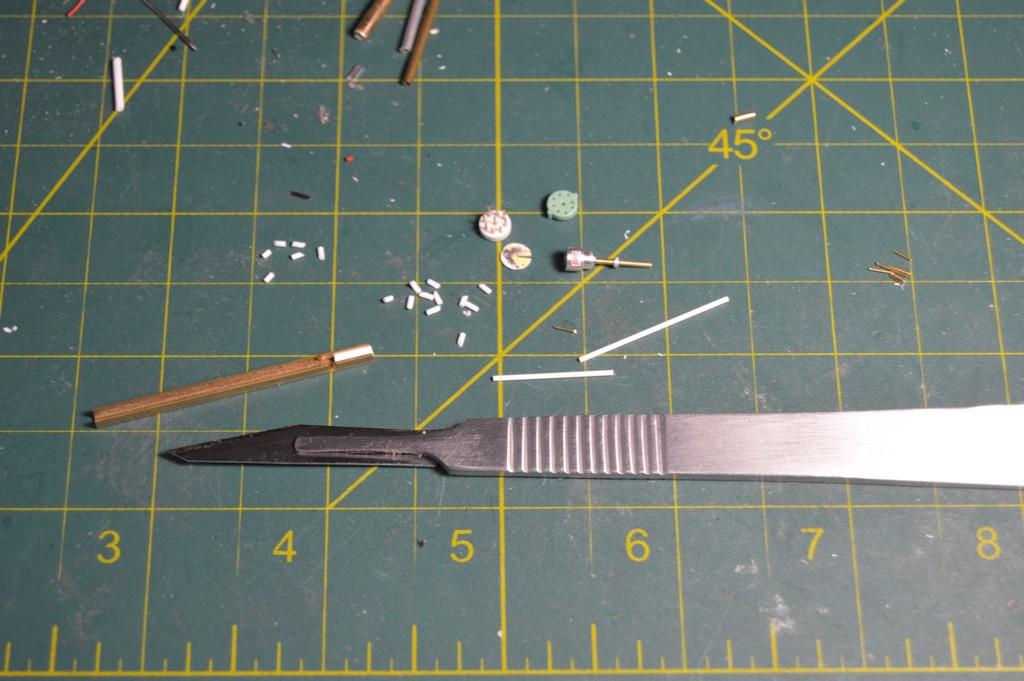
I used the mill to drill the body of the mag. I cut short lengths of .016" brass rod to make the posts. I still need to add the "ears" to the side of the cap/body. Also shown are the tiny miter box I use to cut the 45-degree angles for the 90-degree boots (3/32" K&S brass channel) and the scalpel I use to cut them. I use the scalpel because its blades are sharper, and hold their edge longer than #11 X-Acto blades. That sharpness is necessary, because the boots are .030" (yes, a tad big) Evergreen rod bored .016" to accept the terminal posts and the plug wires. More, when it's done! Thanks for looking!
-
Thank you, John. I appreciate that! Thanks, Steve. Once I get the ignition completed, I'll get to work on the upper part of the fuel system, and the injector. I hope it's all in scale! A lot of it is just trying to make stuff as small as I can!?
-
This looks so great, Ian. The front tires look exceptionally realistic. The plumbing and wiring--it's all spot-on! Nice work, my friend!
-
Strange Result Stripping Chrome
Straightliner59 replied to Olderisbetter's topic in Model Building Questions and Answers
That's been my experience, as well. -
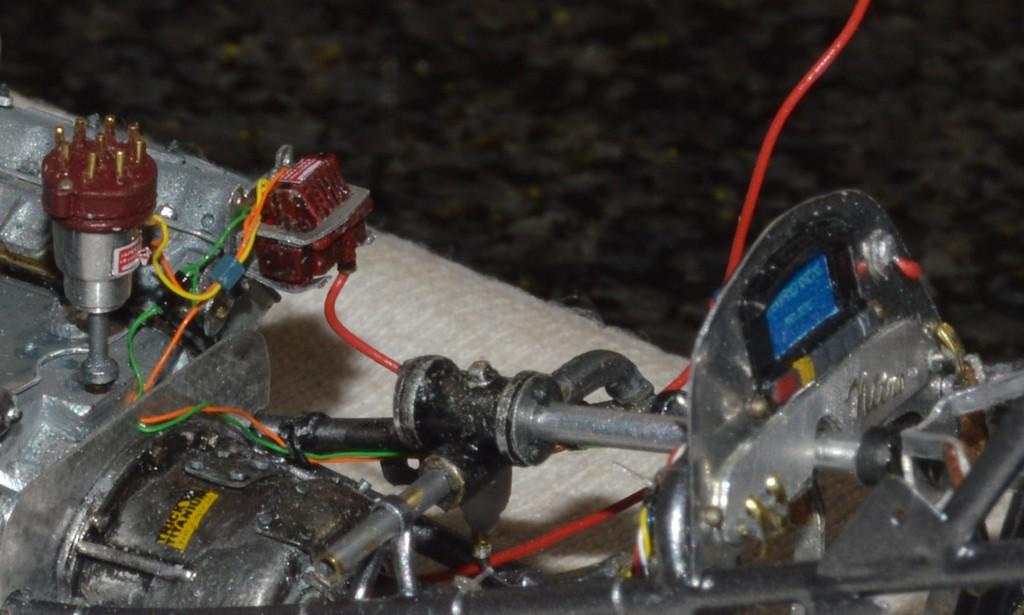
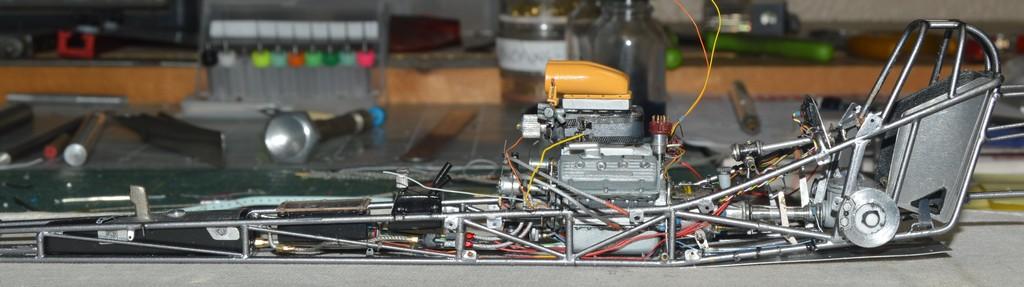
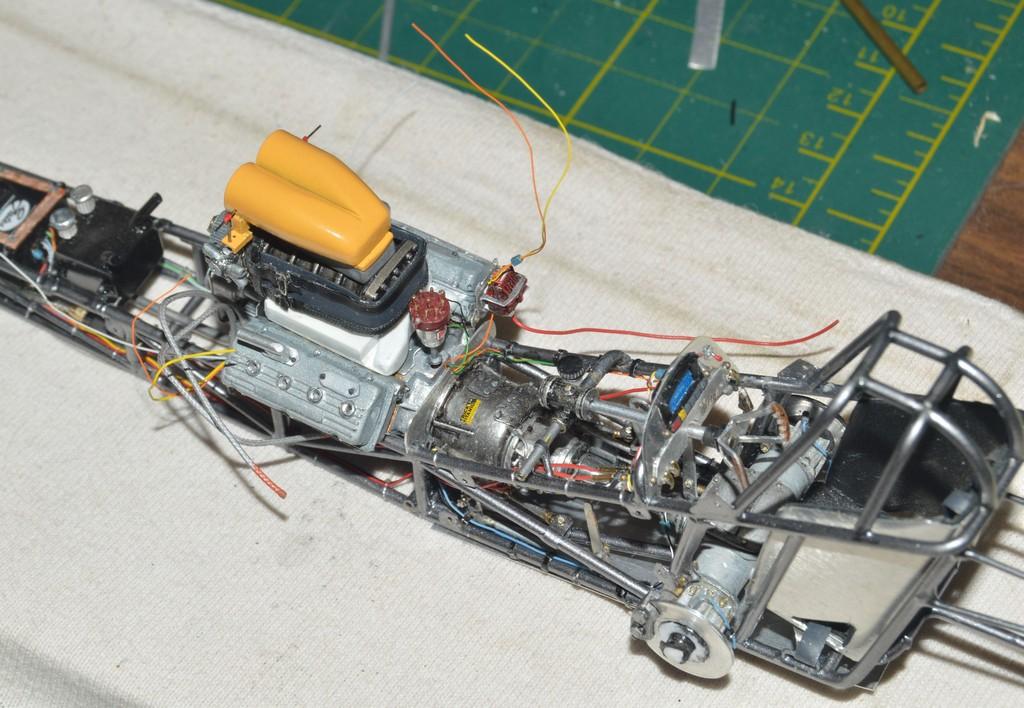
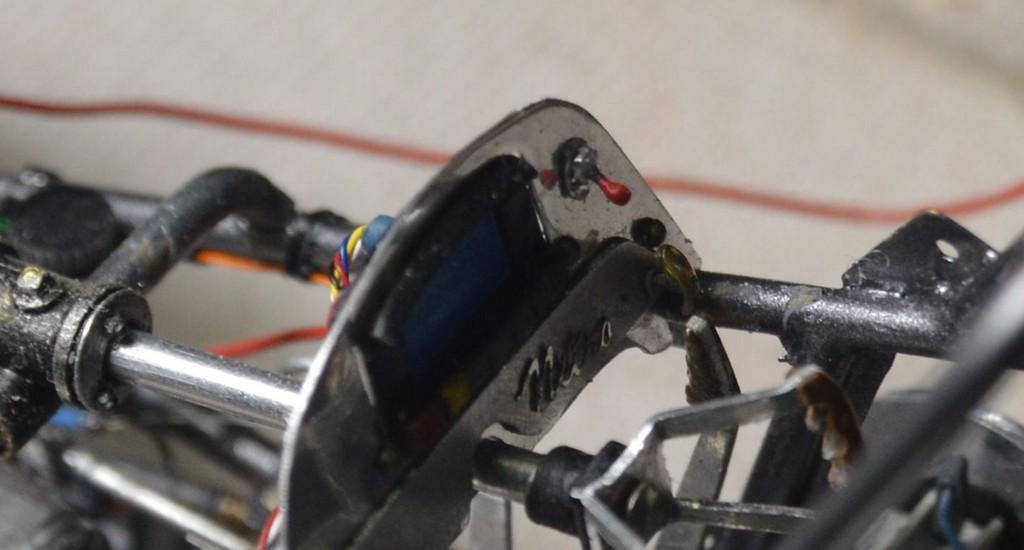
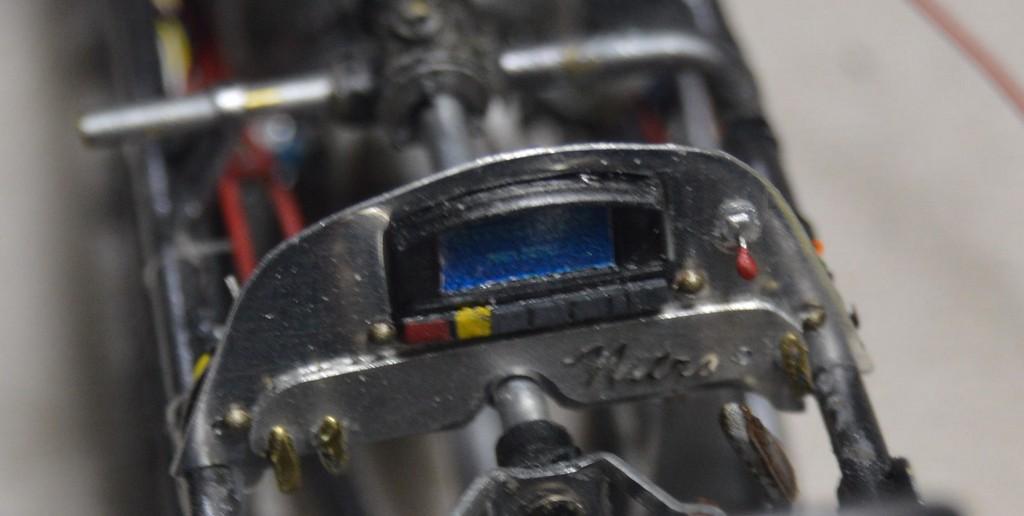
I was concerned about the mounting of the transformer for the mag. As it turned out, my original mount was too low to clear the cowl. I simplified the shape of the mounting bracket, and reversed it. That got all the clearance I needed. I made some faux tabs for the fuel tank, to replace the ones I removed in an "I don't need that, anymore!" frenzy. Turns out I did need those! I added some Detail Master (DM) photoetched Dzus fasteners to the tabs. I also added a DM "Nitro" script to the dash panel. Magneto and ignition wiring, up next. It's gonna' be a blast, making all those 90 degree boots for the plug wires on the mag. I'm trying to figure out if this thing is closer to paint and final assembly than I think, or farther away! Thanks for looking!
-
Love that tank.
-
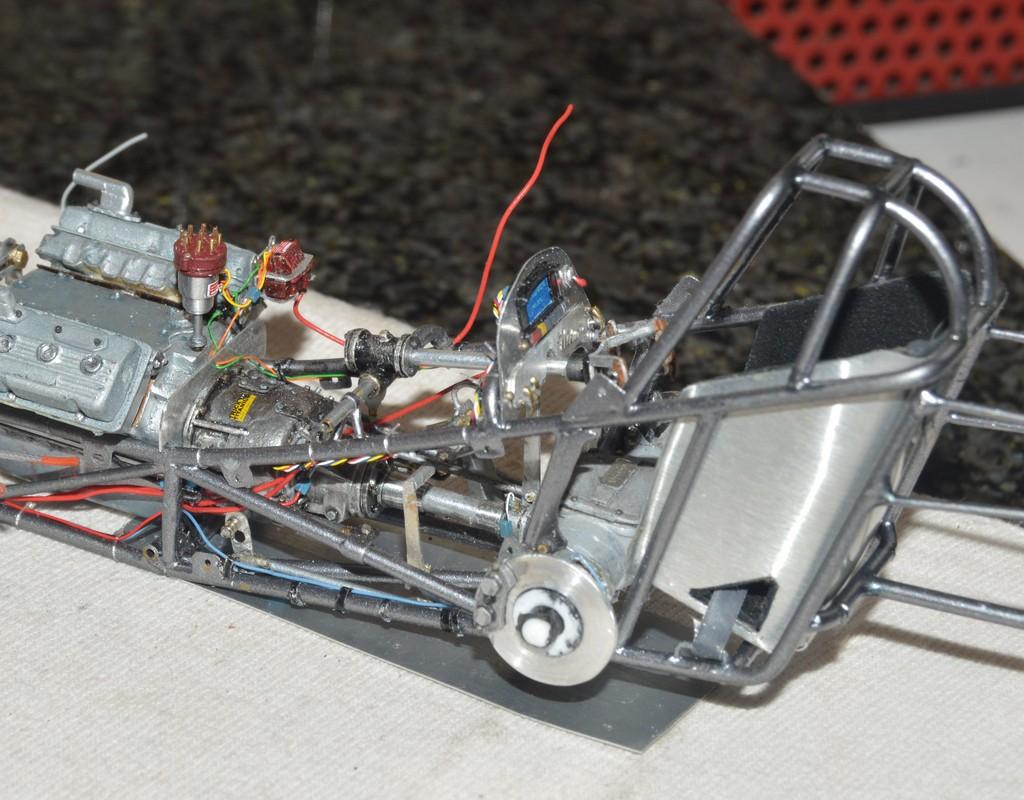
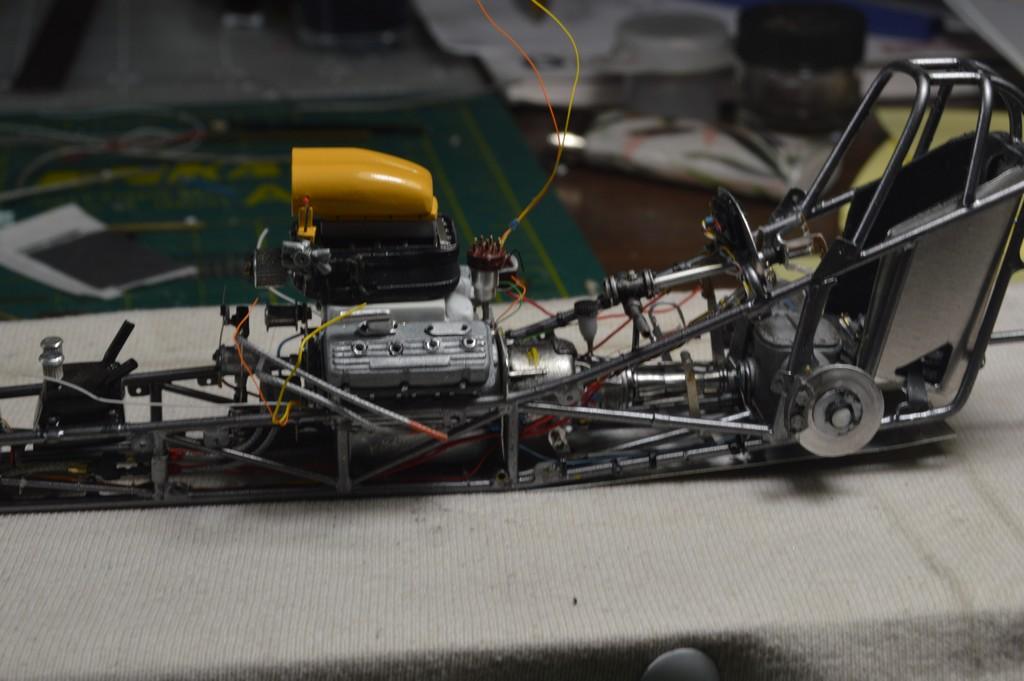
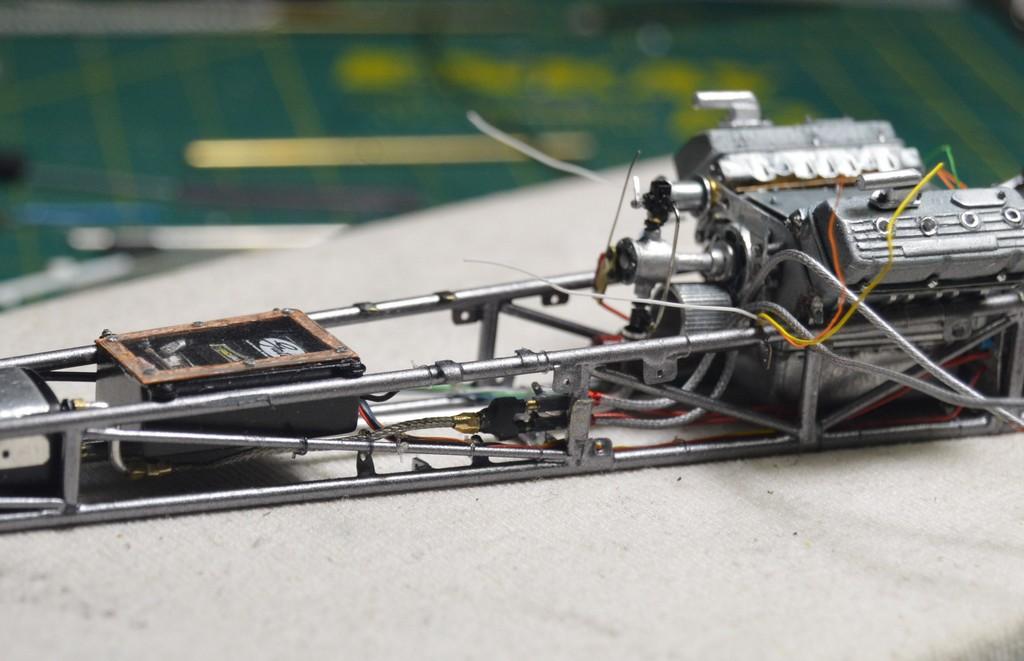
To close out July, I thought I would reunite the chassis with the wheels. I finished the shutoff cable/bracket assembly. I also added the two clamps for the line side of the pump connection. I think the next project will be the ignition system, beginning with the transformer mounting. I like it! Seeing it on the wheels, every once in a while adds a little bit of extra incentive and inspiration. Comments, questions and critiques are always welcomed. Thanks for looking!
-
My take on the most famous ‘55 gasser street machine’…
Straightliner59 replied to OldNYJim's topic in WIP: Model Cars
One of my favorite kits. You're off to a great start, Jim! I'm really looking forward to watching you build this'n. -
Thank you, Edgar! I appreciate it. I have so much more fun when I am fabricating stuff! I've been fortunate, over the years to be friends with, or have contact with many people associated with drag racing. It's been a great benefit. As always, Francis, thank you for your kind words and your encouragement!
-
’72 Dodge Demon Drag Racer 1/25 scale
Straightliner59 replied to AmericanMuscleFan's topic in WIP: Drag Racing Models
Sometimes, that's the way it has to be! -
Love that! Aluminum is the best thing to use, to represent aluminum!?
-
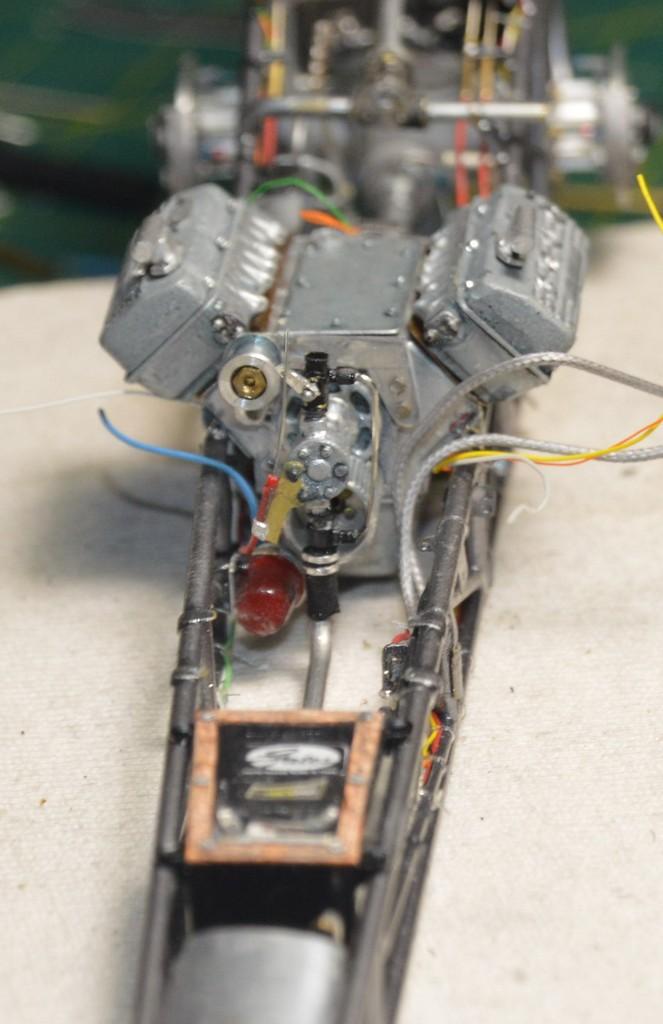
I think I got a lot done, over the last 26 hours, or so! I built the main fuel line and machined a fitting for the tank. I installed two hose clamps on the pump side of the flexible connection, and haven't installed the two on the tube side. In test fitting the pump and main line, once they were in place, I decided to just cement them in place. That part of the fuel system is virtually done, sans those two clamps. I then milled the heads of four .023"X1/4" nails to hexes, for mounting the idler pulley bracket. I milled the head of a 00-90 hex bolt thinner to mount the idler. I was looking to see what I thought of a matching nut I had thinned, and I couldn't get it out. I guess it's going to live there. I think I can camouflage it with a wash, or two. It looks as though the pulleys will align, so, that's all good! I have another bracket/tab to add to the shutoff cable. In addition to that, I rearranged a bunch of stuff for my machines, and I like it a lot better! As always, questions, comments and critiques are welcomed. Thanks for looking!
-
Thank you very much, Ian. My late friend, Mark Brown extolled the virtues of braided fishing line. I would really like to find some other sizes. I am very impressed with the way this looks--and behaves.