Straightliner59
-
Posts
5,814 -
Joined
-
Last visited
Content Type
Profiles
Forums
Events
Gallery
Everything posted by Straightliner59
-

1964 Pontiac Bonneville Convertible.
Straightliner59 replied to StevenGuthmiller's topic in WIP: Model Cars
It certainly did! Looks great! -
I have a couple of the later issues of that Mongoose dragster. I had the Snake one, at one time, but sold it with a collection. I want to build one of the 'Goose cars OOB, and see if I can make the vinyl parts look reasonably acceptable. Nice haul!
- 39,074 replies
-
- 1
-

-
- johan
- glue bombs
- (and 1 more)
-
That's really cool!
-
Making a Pre-Wired Distributor
Straightliner59 replied to bobss396's topic in Tips, Tricks, and Tutorials
Here's how I make mine:
-
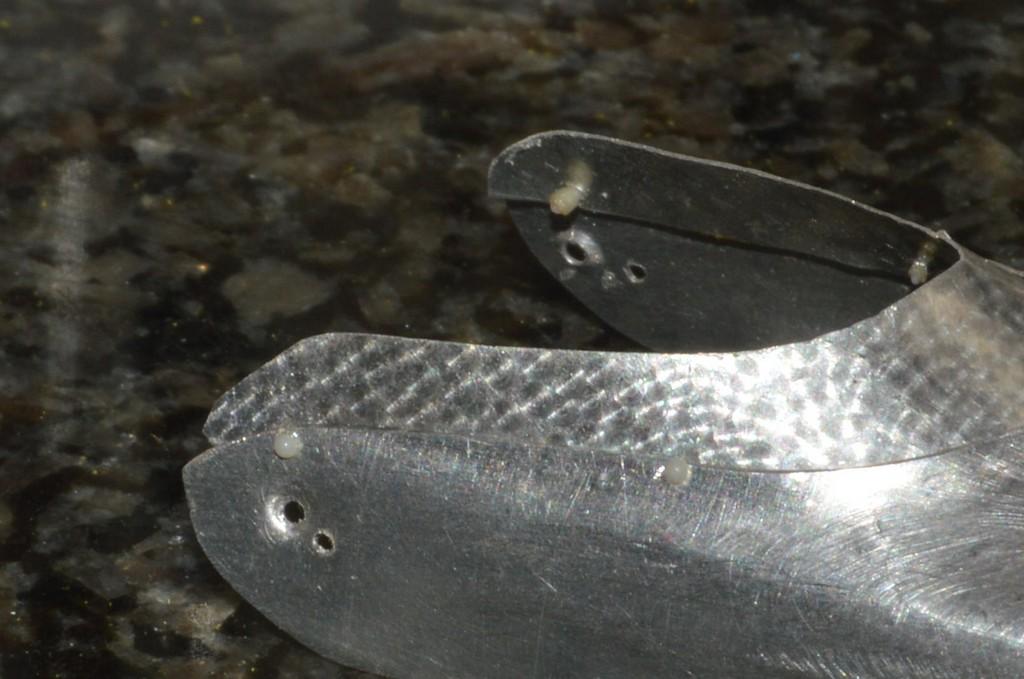
Electrical shrink tubbing as header collectors.
Straightliner59 replied to GLMFAA1's topic in Tips, Tricks, and Tutorials
I used it, for these. The headers are solder and the tailpipe is aluminum tubing. I used my thumbnail to press the still warm tubing around the headers tubes. I'm happy with them!
-
1964 Pontiac Bonneville Convertible.
Straightliner59 replied to StevenGuthmiller's topic in WIP: Model Cars
Steve, what did you use to make the hose clamps? They look fantastic. So does the rest of the car, but, I am curious about those. -
Picked these up at a local store, Wednesday. I had never seen the K&S square aluminum tube, before. I'll use the 3/8" rod for lathe stock, and the 1/64"x1/32" brass strip--well, just because! I went for 1/64"x1/8" brass strip, but, they were out of stock. I picked up the Tamiya Clear Orange lacquer, to be sure I wouldn't run out, doing the dragster.
-
I absolutely get that. I was nervous enough shooting the orange on the small areas of the dragster. I'm a big fan of orange race cars, but this silver looks right!
-
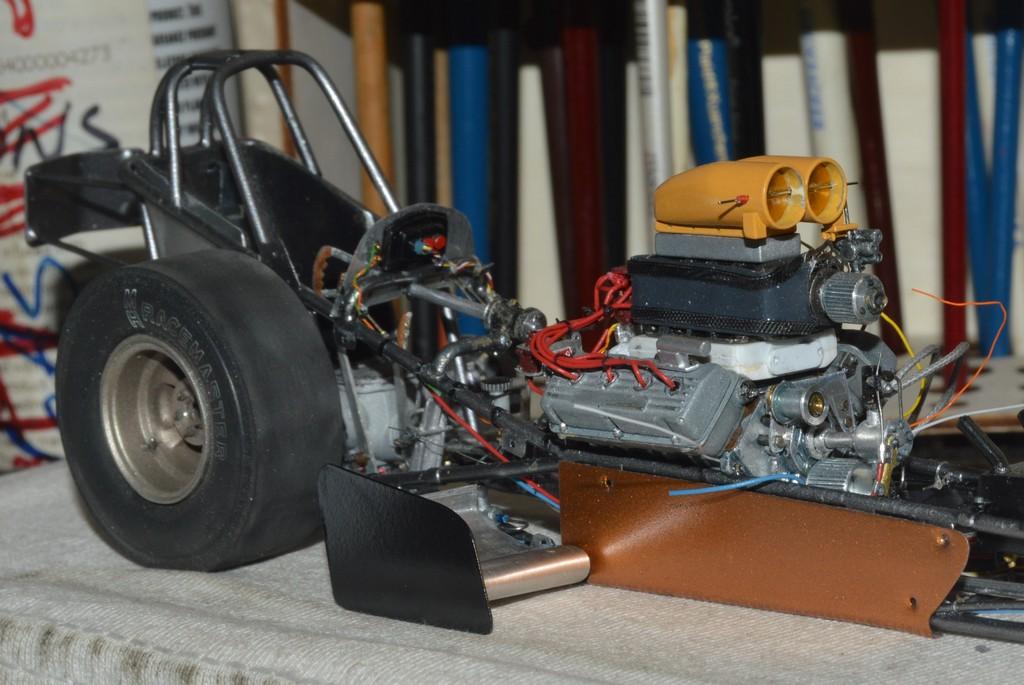
So...I finally figured out that it would be simpler to put on the orange clear, before taping off, for the black! What a moron!? As you will see in these photos, I am currently waiting for the black to dry a day or two, before I tape it off to apply the orange clear coat. Even having painted the orange clear coat on the cowl and tail, tonight, using the Parafilm, I could do the black, now, if I choose to. I'm still figuring out exactly what I want to do with the cowl panel. I'm considering something shaped, to incorporate a name badge cowl art. I have a couple of ideas. It's coming along! Comments are always welcomed. Thanks for looking!
-
But they're not too heavy for something like this...?
-
Thank you, Jim! I am always happy when someone finds something useful in one of my posts! Thanks for saying so. It's probably my most involved paint. job, so, I'm hoping I can pull it off. So far, so good.?
-
That silver laid down nicely. It's beautiful, too!
-
The paint is on the engine panels. You can see the difference in the gold, after the orange clear coat is applied. The dappling with the natural sponge looks as I'd hoped. I "taped" the panels off with Parafilm M. Andy Sapiro uses it for other things, but, it reminded me of an article I'd once read, regarding it being used as a masking medium. I like the way it's performed, so far. It creates a tight seal, with no lifting of paint. Cockpit side panels will be next...
-
1969 Nova F/SA NHRA Stock Eliminator
Straightliner59 replied to R. Thorne's topic in WIP: Drag Racing Models
That looks like a good idea. -
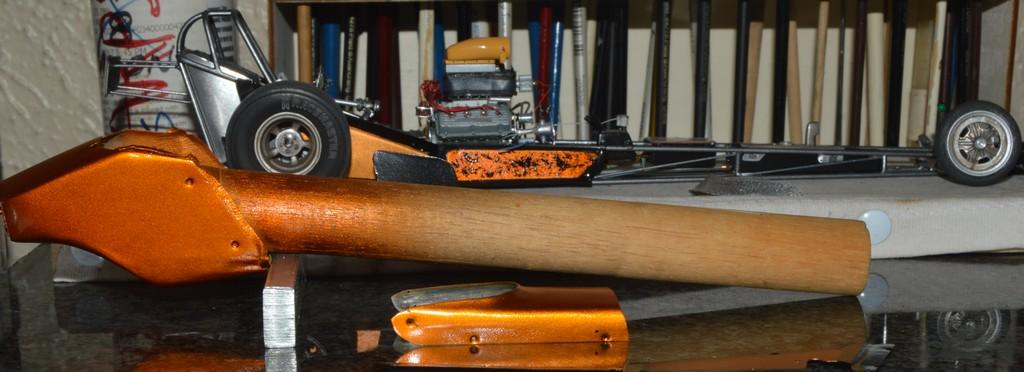
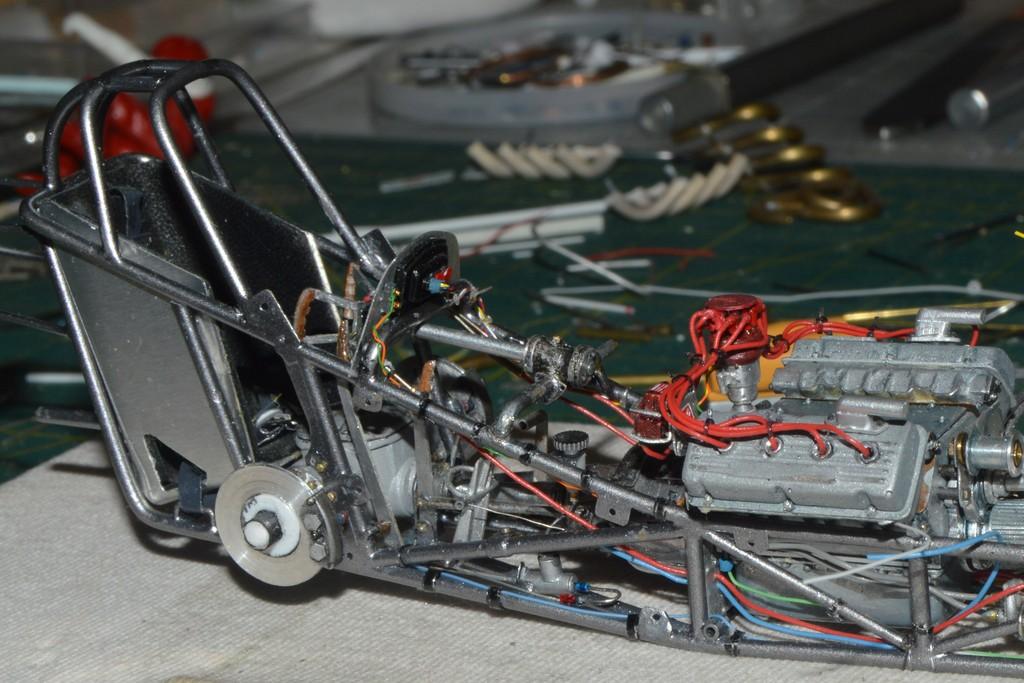
Before the cowl can be painted, the windscreen needed to be riveted to the cowl. I marked the center hole, first, and drilled it. I then marked the windscreen, in the corresponding location, and drilled it. Next, I inserted a plastic model railroad rivet through the holes, and melted the inside end with a lick of flame from a lighter. I then did the holes on each end in the same manner, and riveted them. Now, the windscreen was secure, and the two "midway" rivets were easily done. These five "live" rivets will mount the screen. Any others will be just heads, attached to the body. Now that this is complete, I can cut the installed rivets, and remove the windscreen to prep and paint the cowl. The black area of the windscreen will be trimmed away. Questions, comments and critiques are always welcomed. Thanks for looking!
-
Thank you, kindly! A plaque or two wouldn't disappoint me, to be sure. The important thing, for me, is seeing it in my display case. I am really looking forward, to that!
-
You whipped that body right into shape! Excellent! I grew up about as close to Calgary as you can get, and still be in the U.S. There's some stunningly gorgeous country, up that way. Jasper, Banff, Waterton-Glacier...
-
1969 Nova F/SA NHRA Stock Eliminator
Straightliner59 replied to R. Thorne's topic in WIP: Drag Racing Models
Nice job, especially given it's your first! Keep it up, Ron! -
Last couple, as it's getting close to bedtime. I had no plans for painting, yet, here we are!
-
Got these in the mail, today from Model Car Garage. I need the linkages for my dragster. They're very finely-etched. Beautiful pieces. The harness hardware is just so I have it on hand.
- 39,074 replies
-
- 3
-
-
- johan
- glue bombs
- (and 1 more)
-
Well, that escalated, quickly! ?
-
I couldn't resist. It's almost identical, to my eye, in the light of the workbench, to the color on the Magicar. These photos are a little deeper in color than it looks, in actuality.
-
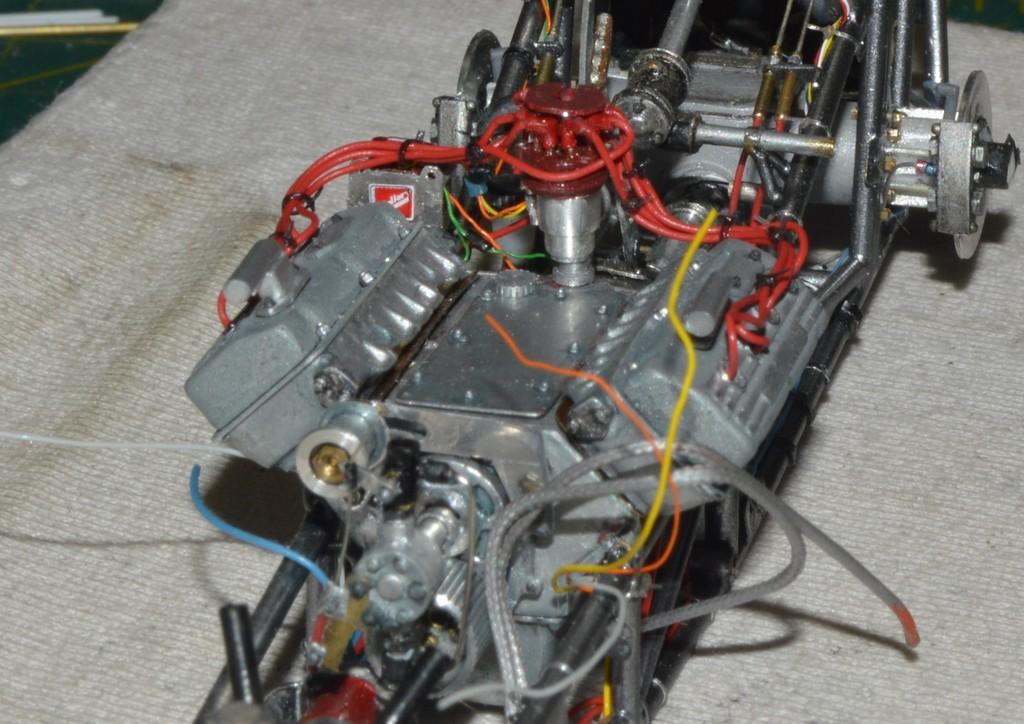
These are .018". They're MSC's old plug wire material. I suspect it's a 30 ga. wrapping wire. It's big, but these fuel motors run fat cables, with that 44 amp magneto! Thanks, Andy.
-
My take on the most famous ‘55 gasser street machine’…
Straightliner59 replied to OldNYJim's topic in WIP: Model Cars
Awesome, Jim! It's not often that I see someone else performing work on one of these old Monogram kits that has their friends and family wondering about their sanity. ? I mean that, only in the best possible way! Excellent work, sir. -
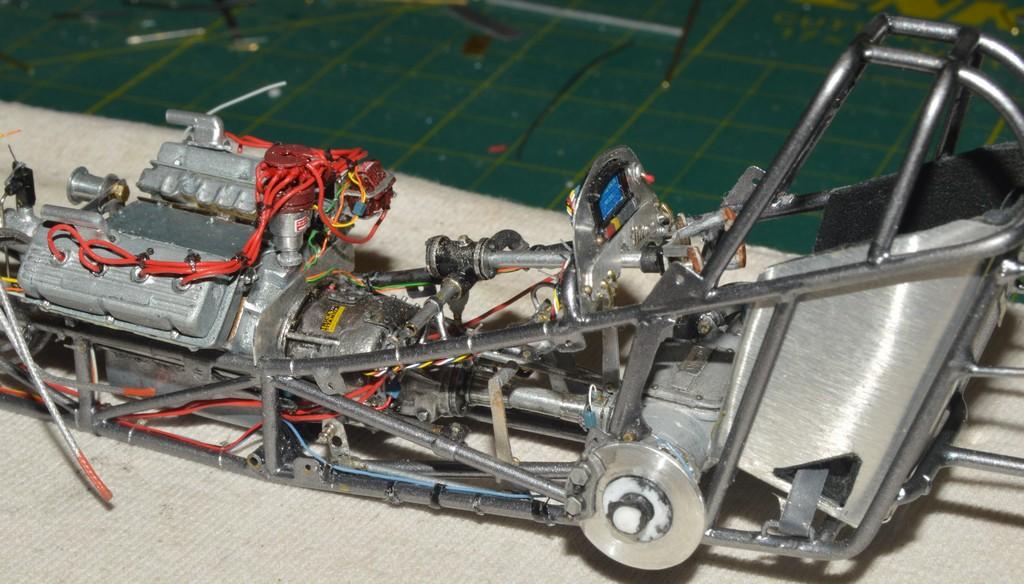
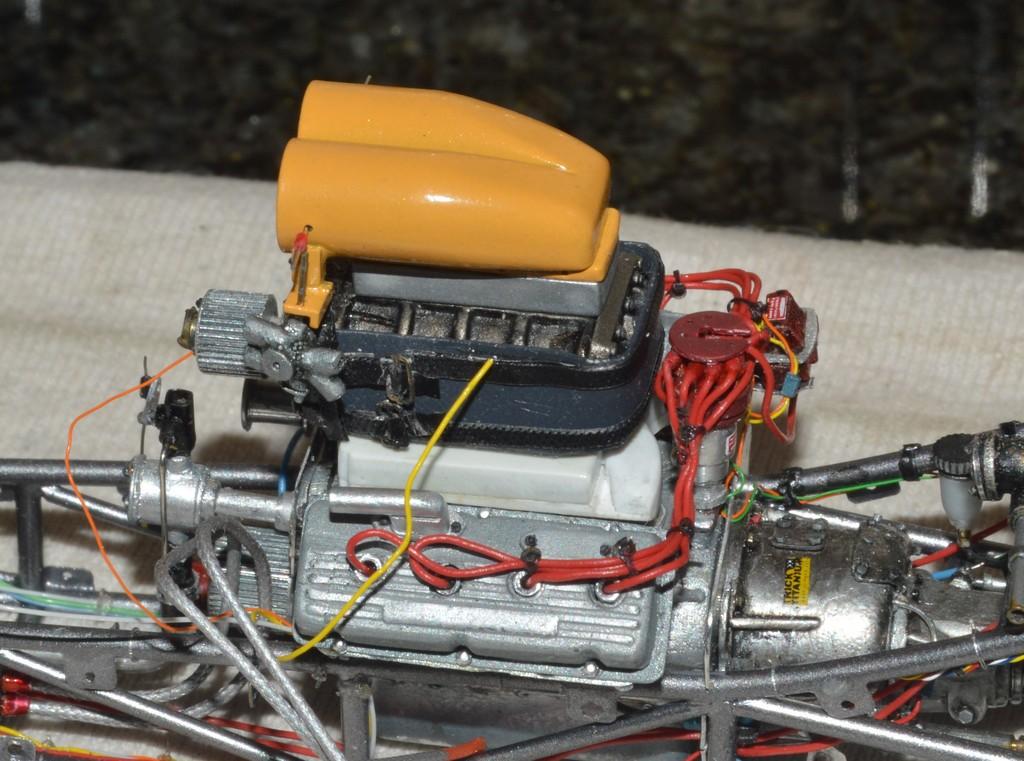
After several missteps and repairs, I think the ignition system is finally done. It was brought to my attention that the mag drive shaft was likely too long, so, I fixed that. I the process of the final installation of the plug wires, the mag came loose from the engine. No biggie, I'll finish the plug wires, and use them to help hold the mag in place, while the glue sets. The best laid plans...The mag cap then came loose from the body. Since it was completely free, I pulled the mag body/drive assembly, and cleaned it all up, and replaced the damaged decal. When I put it back in, it levelled more easily. I was then able to replace the cap/wires. It was a fair amount of work, and sometimes nerve-wracking, but I think it looks better. I also think I have my paint scheme figured out. Finally. It should look pretty nice! I like the balance of color, between the orange and black. It should look even better with the black "stippling". I'll do the top of the tail section, as well, to mimic/compliment the cowl. I think I'll add paint to the mixture I made from two Humbrol metallics--copper and brass, and shoot the gold/orange on the tail section. The gold mixture gets overcoated with Tamiya clear orange lacquer. Once that's ready, I can tape off the panels and shoot the black. Finally, the gold panels will be dabbed with One-Shot enamel, applied with a small piece of natural sponge. I've started working on the Cragar blower manifold, and thinking about the headers. Comments, questions and critiques are always welcomed. Thanks for looking!