Straightliner59
-
Posts
5,814 -
Joined
-
Last visited
Content Type
Profiles
Forums
Events
Gallery
Everything posted by Straightliner59
-
 That's hilarious! I never even noticed that, before!
 -
AWB Fun with Seaton's Shaker
Straightliner59 replied to papajohn97's topic in WIP: Drag Racing Models
Very nicely done! There's not a better way to do that, that I'm aware of, and it's pretty easy. Especially the part where you don't have to re-create a body line!? -
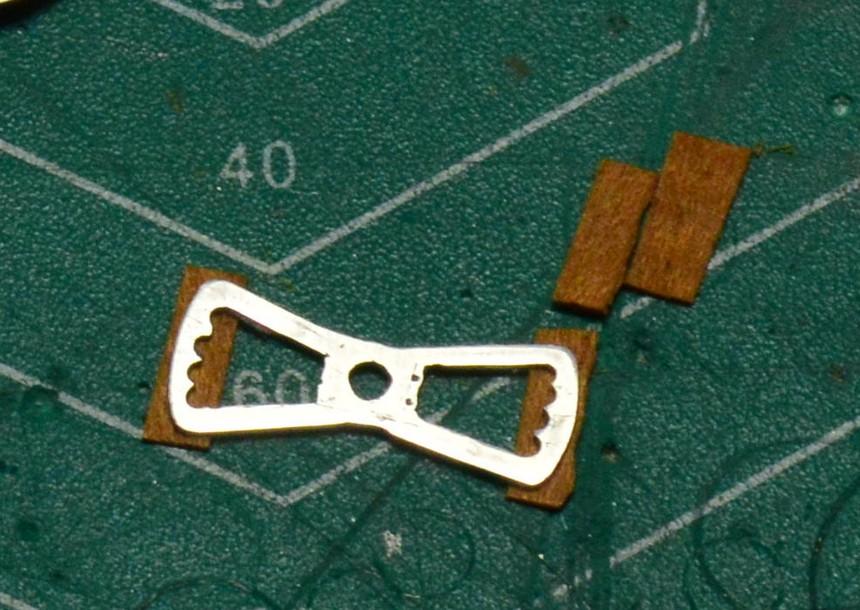
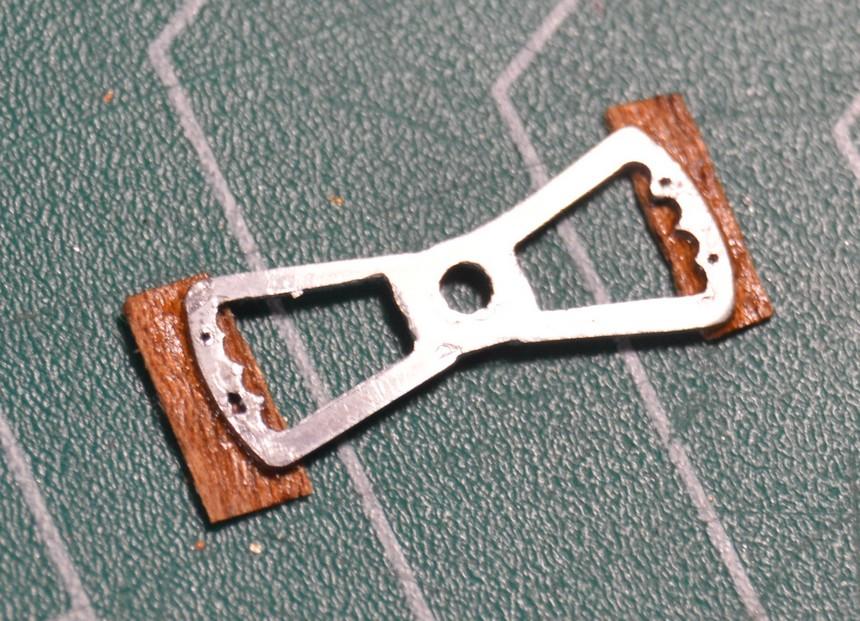
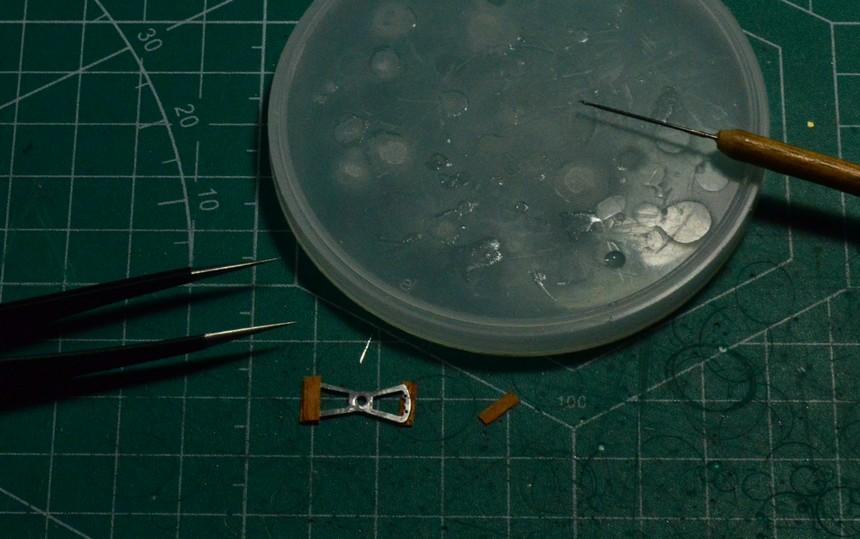
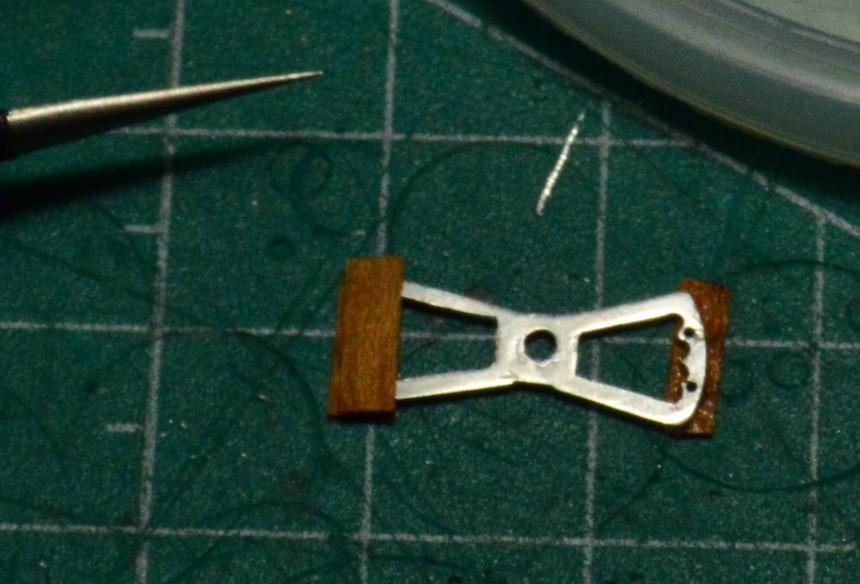
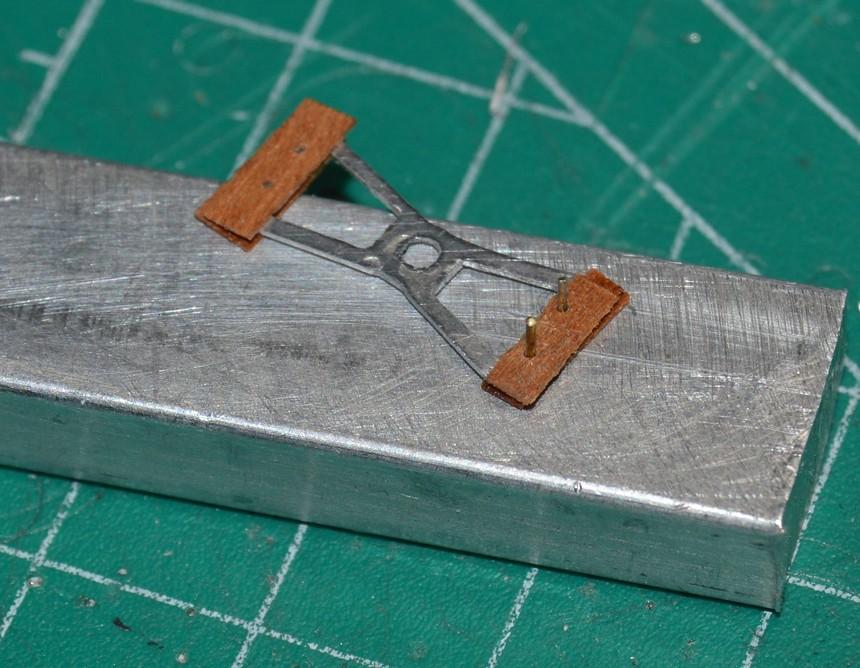
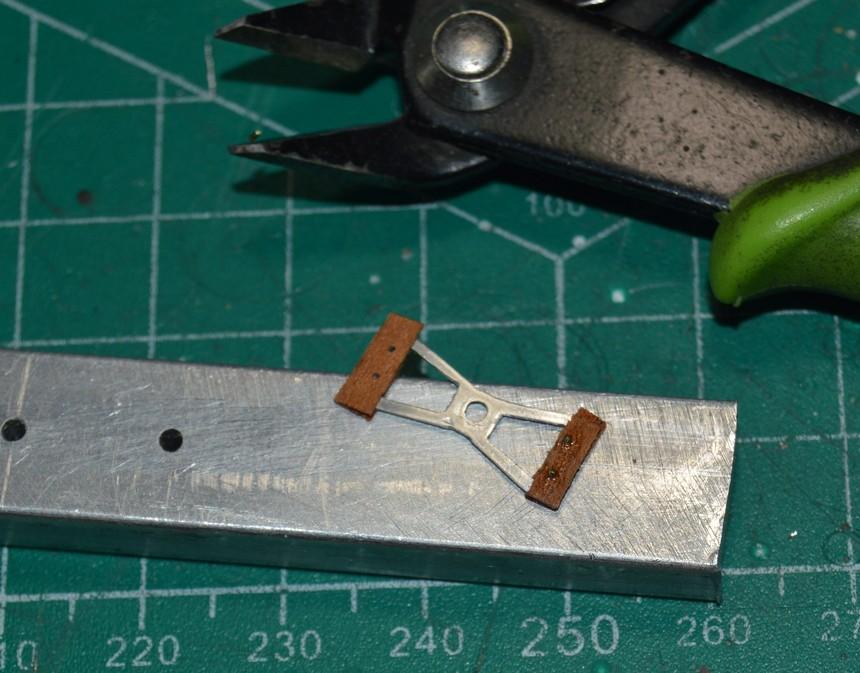
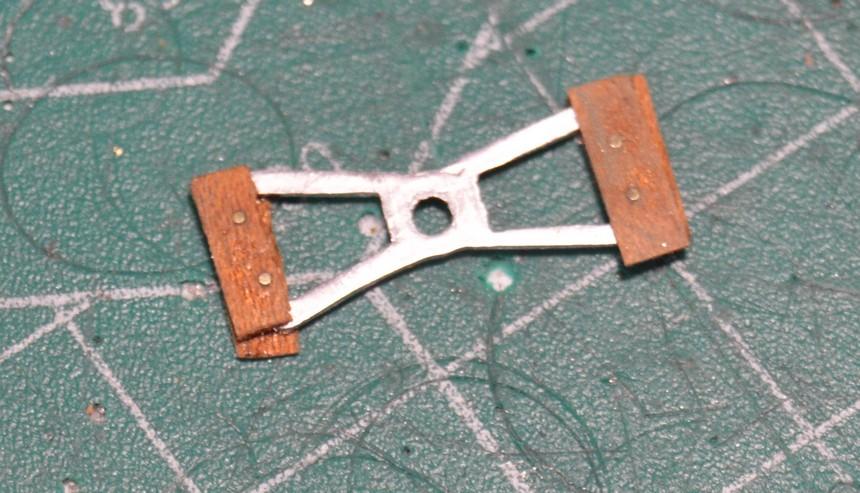
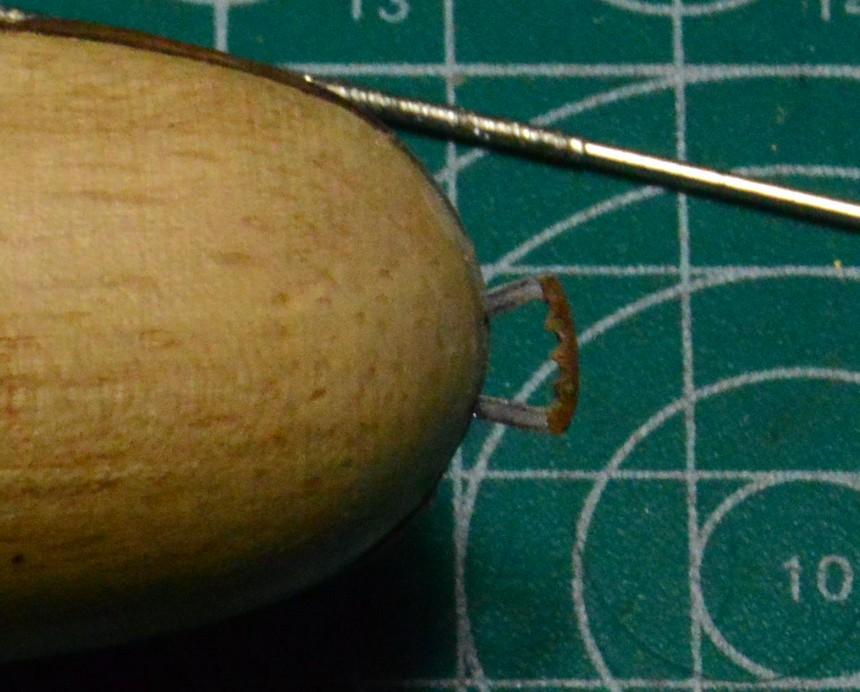
Once the butterfly was cut out, and filed and sanded to shape, I drilled two holes in each of the grip areas. These were used to accommodate brass pins that will hold the wooden grips on the wheel. They'll look cool, too! I cut four small rectangles of cigar wrapper veneer to make the grips. Using superglue gel, I glued a rectangle to each end of one side of the wheel. I pressed the grips firmly to the butterfly, and let the glue set for a few minutes. I then flipped the assembly over, and, using the holes in the butterfly as a guide, drilled through the newly-installed grips. I repeated the process on the other side. Next, the brass pins were installed, again using superglue gel, then further cementing them with a more viscous superglue. The brass pins were nipped closely against the wood, and were then sanded smooth, and level with the wood using nail boards. The assembly was then place in the ring clamp, and using sanding boards again, the outer sides of the grips were shaped to match the wheel. The inner sides were shaped using the same round, straight diamond files I used to shape the metal "frame". Now, the grips will be finish-trimmed and polished, using a four-way polishing board. Lastly, it will be bent to shape. I think this is my fourth wheel built using this technique, which is essentially a duplication of the 1:1 process. Two were round wheels with Delrin grips and nichrome pins. I hope someone finds this to be of use. Questions, comments and critiques are always welcomed. Thanks for looking!

-
Excellent work, Andy! This is a real beauty, sir!
-
The thought that I might set it aside, again, lasted about as long as it took me to reach for the first tool, to begin repairing it! Perhaps I am maturing as a modeler!? I still have a way to go, but, I'm surely in to see it through. One of the things I'd hoped to achieve with this car is a modern N/TF car with a nod to its roots. I think the paint helps to convey that. I just need to figure out how I'm going to lay it out on the car. I would recommend the ring clamp! They're inexpensive, non-marring, and they hold certain things like nothing else can, and leave it easily workable. It's one of those tools that looked like it might come in handy, that I use pretty frequently. I think you'll like it! Thanks, as always, for your comments, my friend. They are very much appreciated.
-
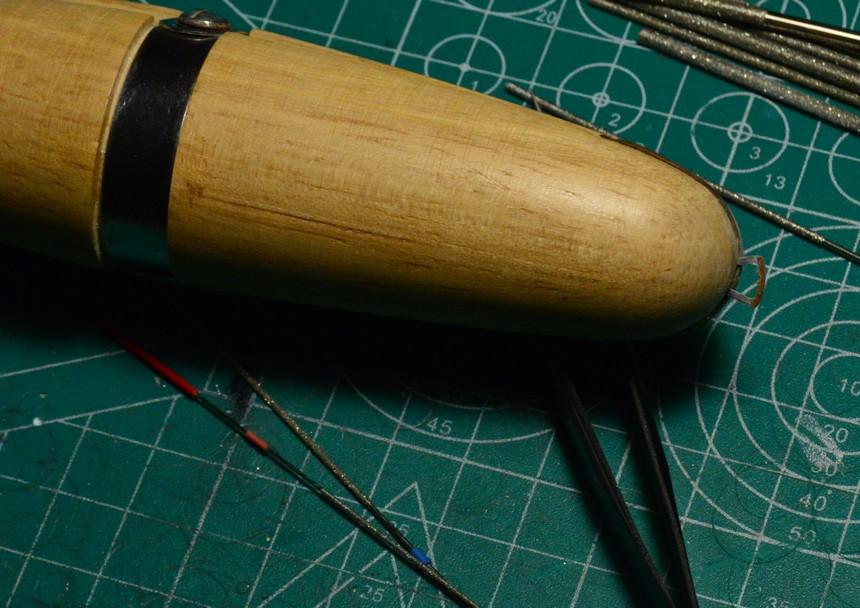
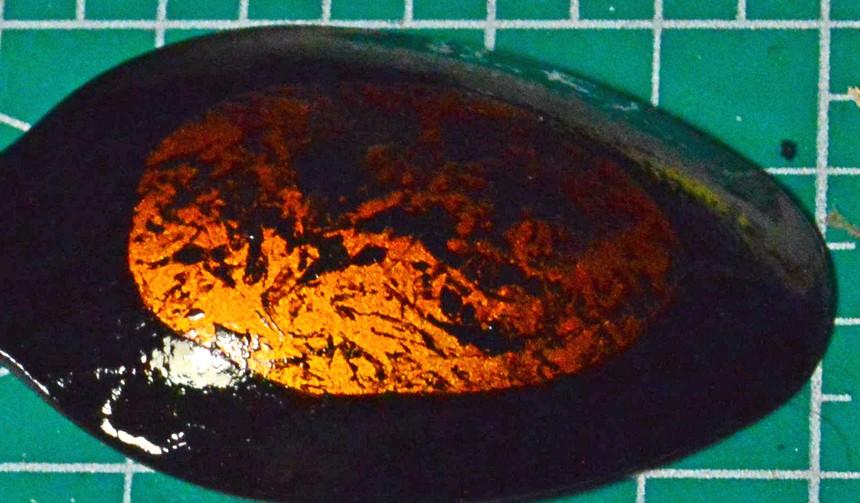
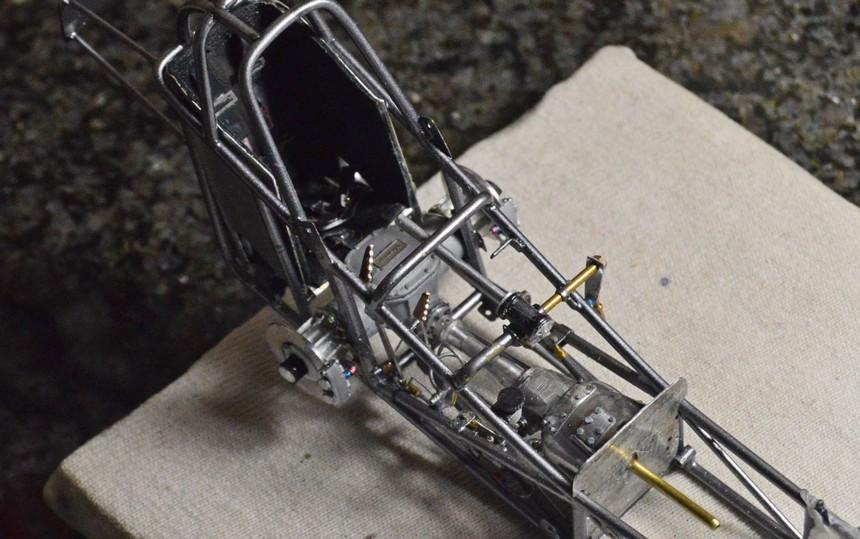
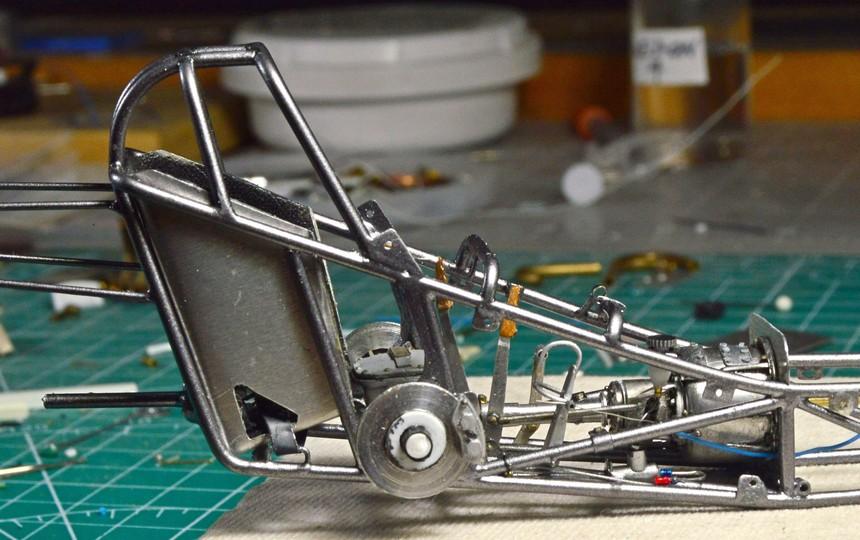
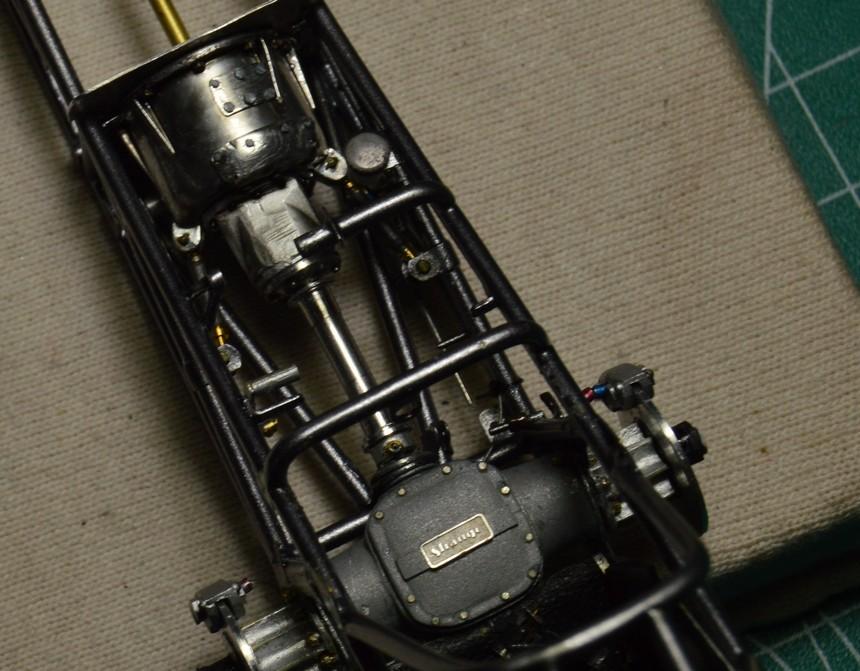
I installed the steering box, and have begun working on the butterfly. I plan to "rivet" wooden grips to the aluminum frame. I feel like I'm back on track (no pun intended), again. I used the mill to open the butterfly, then used a file to finish the inside areas. The ring clamp is very handy, for this type of work. I'll get some of the outside shaped, before bed. I added bolts to the steering box ends, as well as a filler cap. The bolts are model railroad Hex nut/bolt/washer castings. The cap is a larger scale (O) square n/b/w casting. The spoon is the paint test using the actual paints I'll use in the same order. The orange is Tamiya clear orange lacquer. I'm now in the process of figuring out how I want to lay it out. It should be pretty striking. Comments, critiques and questions are always welcomed. Thanks for looking!
-
-
’72 Dodge Demon Drag Racer 1/25 scale
Straightliner59 replied to AmericanMuscleFan's topic in WIP: Drag Racing Models
Those will look fabulous with aluminum skins! Great work, my friend. -
Tom Hanna inspired front engine AA/FD build
Straightliner59 replied to GlueSniffer's topic in WIP: Drag Racing Models
Man, that engine is beautiful. -
Need paint help, please.....
Straightliner59 replied to TECHMAN's topic in Model Building Questions and Answers
I agree with Jeremy. I'm a Krylon guy, through and through. They have semi-gloss, semi-flat and satin. They're all a little different, too. -
Their website looks normal. https://alclad2.com/
-
Thank you so kindly, Pierre! Indeed, the risks are greater with that big, ol' grenade in front of your face! This one will have a bag and straps for the blower, being a more modern Nostalgia Top Fuel car, but fire is still a concern. There was a point, yesterday that it looked like the driveline had exploded. I'm glad I got it back together without feeling like it isn't as decent as before!
-
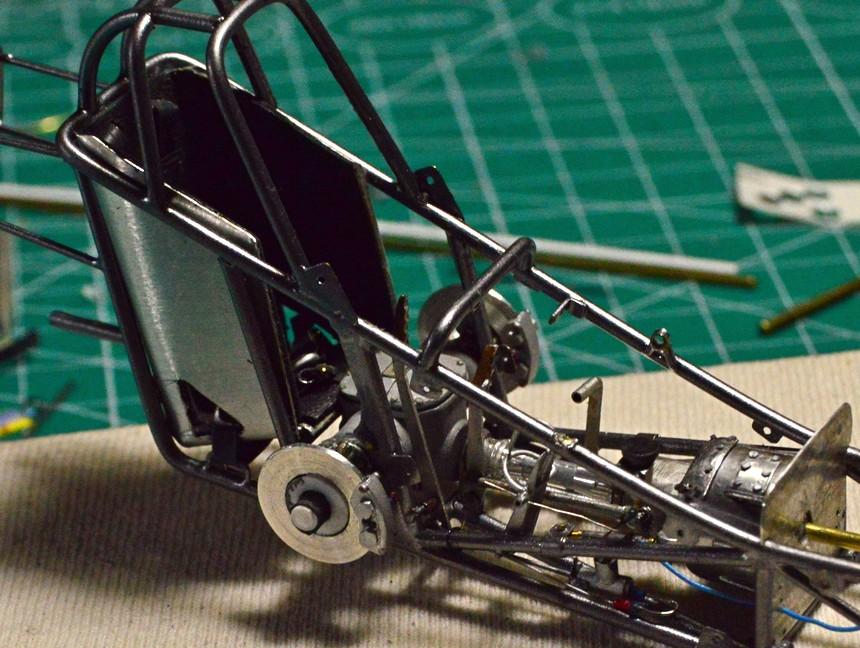
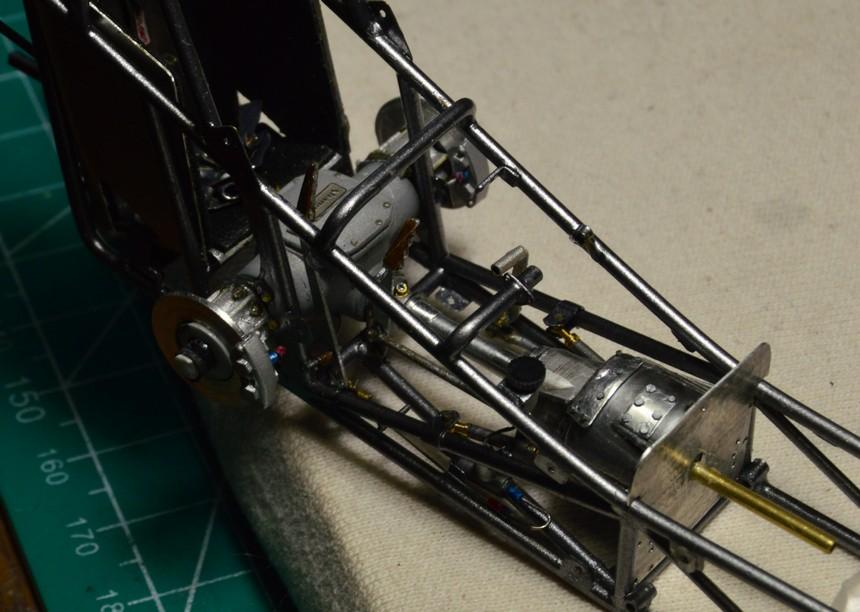
Well, it was a long, intense day, without a lot of sleep. Mission accomplished. I'm basically back to where I started, with a couple of improvements. I will need to clean up and touch up the joint where the steering support meets the chassis. Anyway...I am tired, and need to get some sleep. Thanks for looking!
-
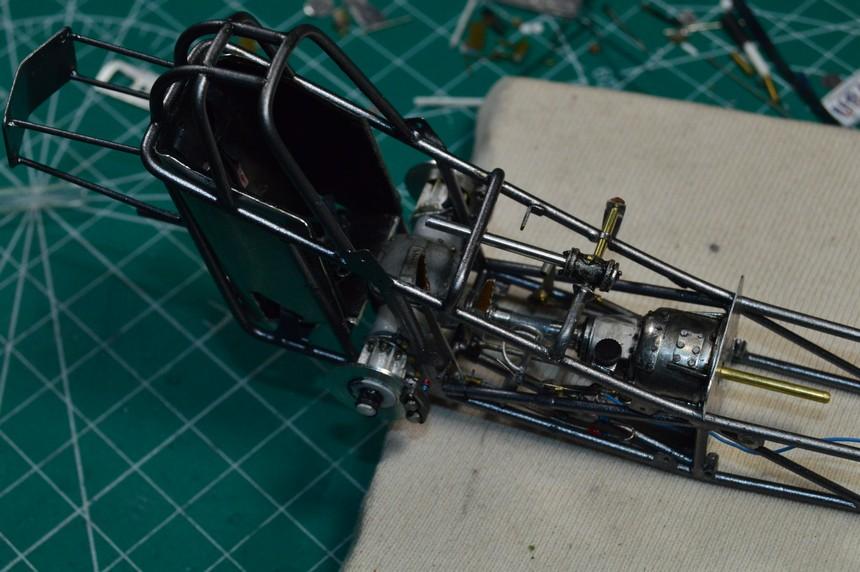
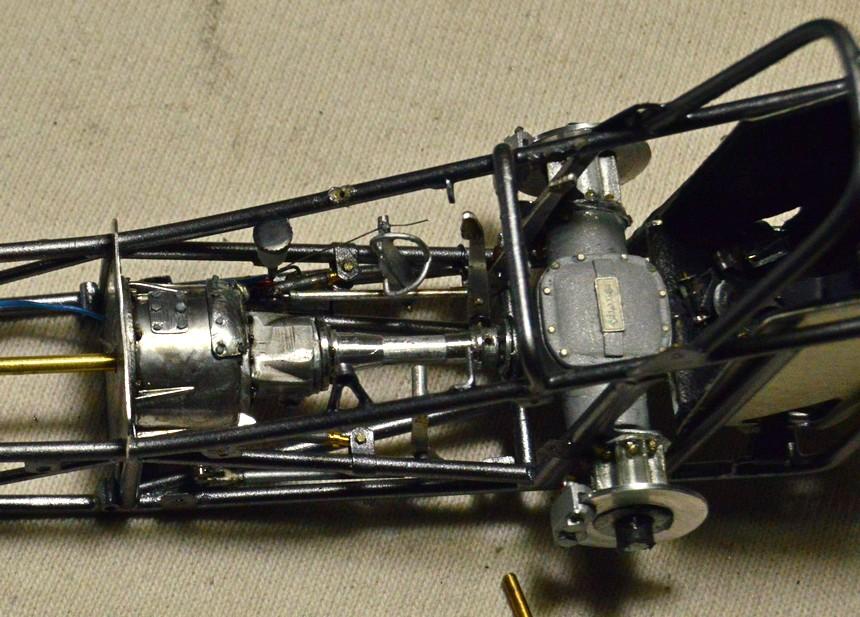
True, enough. Unfortunately, it didn't help, today. I've had a series of mishaps that have all been disheartening. While installing the steering box, I broke off the steering support (again!). At this point, solder is not an option. I drilled the support, and drilled the chassis .020", and installed a small piece of wire to anchor it with superglue. It will be plenty strong, once the rest of the steering is in place to add support. I proceeded to install them, temporarily, because they fit well, and snugly. Problem solved! Except that, when I began to glue the data wiring for the shaft speed, I discovered that the driveline tube was loose, just spinning around the center shaft. While attempting to cement it in place, I realized that I'd accidentally glued the front "collar" too far back on the drive tube. While attempting to slide it forward, the tube and front collar crushed. That caused the reverser to come loose from the bellhousing. When that happened, the reverser rotated from side-to-side, pushing the bellhousing forward and bending the motor plate. It also disconnected the blow back rod, on one side. Again, I refrained from shelving the project. I have straightened the motor plate. I now need to cut a new drive tube and make a new front collar for it. The bellhousing will need to be reattached to the plate. The reverser must be re-mounted to the bellhousing and its linkage reattached, and the driveline reassembled. I hope that's everything. The idea behind all my planning was to work myself up and out of the cockpit, and avoid having to work beneath the steering. Fortunately, the bottom of the chassis is open, so that helps, some. I hope that I can have it all back together by bedtime, in the morning. Just one of those days!
-
Got a small shipment from the fine folks at Burbank's. I haven't tried any of Vallejo's stuff, yet, but, I have been trying different things for washes. I've heard good things, so I decided to try these. The brown looks similar to raw umber oils, which I like, but, thinner doesn't always play well with all the different finishes I like to use, so I wanted to give something water-based a shot. The clear orange Tamiya lacquer will go over the gold I mixed for the Nostalgia Fueler. I love the way Tamiya's clear orange acrylic looks over the gold, but I don't trust their clears, over larger areas. I had one, and have seen/heard of too many bad experiences with them. 3/32" aluminum is just so I have it on hand--you can never have too many scratchbuilding supplies. Or tools--you can never have too many of those, either.?
-
That is very cool! I really would like to find the 'Cuda from this series. I built a Modified Production racer from that kit. It was one of the first models I built that I did major modifications to--I cut out the molded-in rear axle, and replaced it with something from another kit, and scratchbuilt shackles. I even used the 1975 NHRA rule book. I only have these tow photos of that car.
- 39,074 replies
-
- 1
-

-
- johan
- glue bombs
- (and 1 more)
-
What is your oldest unfinished W.I.P
Straightliner59 replied to Sam I Am's topic in General Automotive Talk (Trucks and Cars)
Snake started a "Bring Out Your Dead" thread, a few years ago. I think I finished three or four old projects, because of that thread! -
I love the old school Morosos! Starter is excellent, too, Ian. This thing is going to be killer!
-
The steering rod and pittman arm are fantastic! Well, really, the whole thing is, but...
-
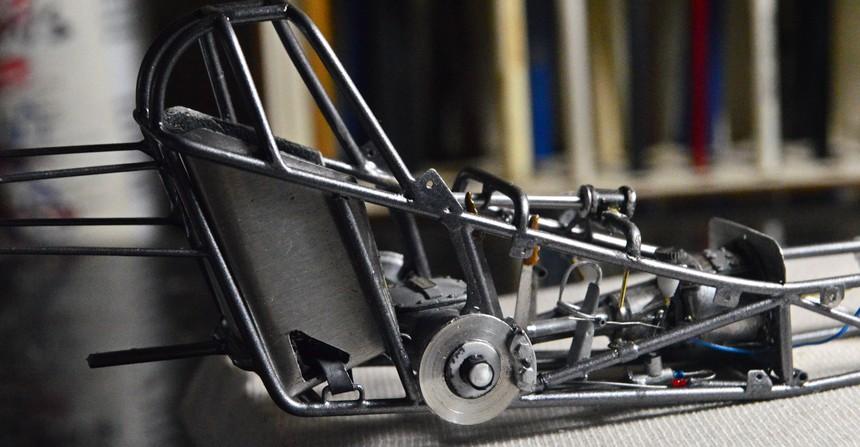
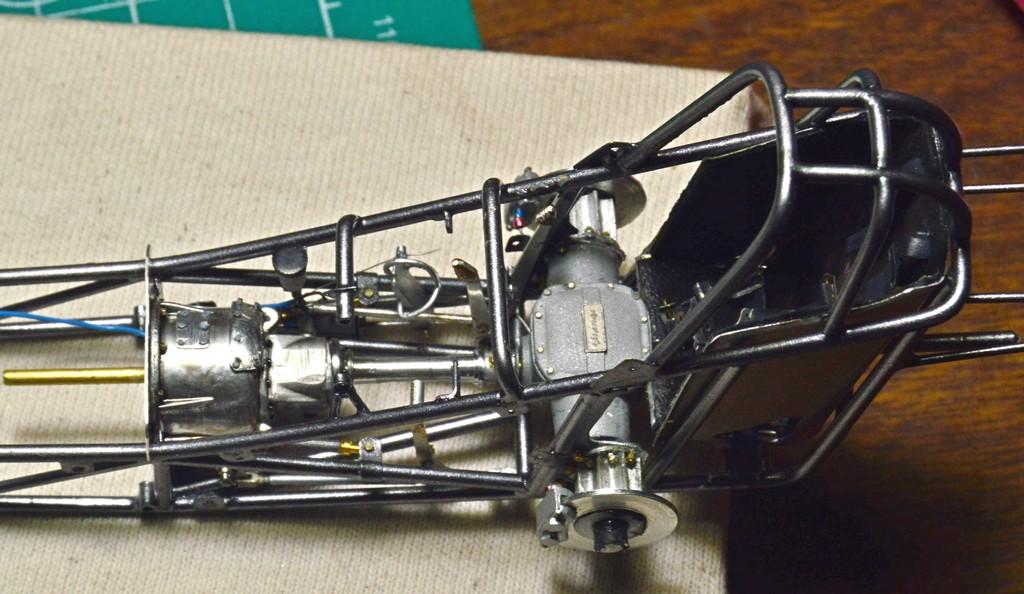
The throttle pedal and (the first!) cable are installed. I feel like I am making steady progress. I shot some semi-gloss black on the steering box. I think that will be the next installation. That, and construction of the butterfly. Comments, critiques and questions are welcomed. Thanks for looking!
-
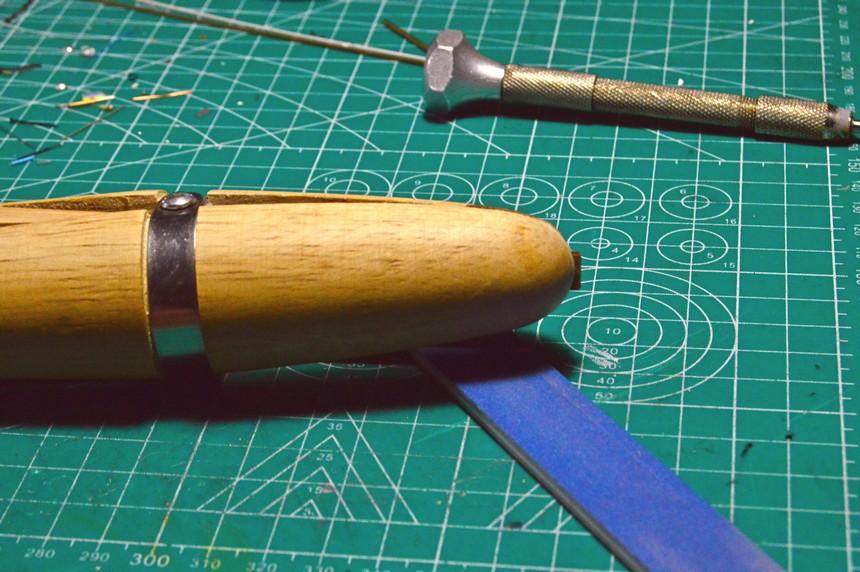
The reverser and brake handle are installed. I brushed some Floquil Crystal Coat on the wooden grips. I always liked that as a clear coat--the bottle I have is 40 years old, and it hasn't yellowed, at all. I miss that brand. I shot some paint on the throttle pedal, so it can dry while I attempt to thread the cable through the "stop" tab, soldered to the inside of the chassis. It's proving to be tricky! As always, comments, questions and critiques are welcomed. Thanks for looking!
-
’72 Dodge Demon Drag Racer 1/25 scale
Straightliner59 replied to AmericanMuscleFan's topic in WIP: Drag Racing Models
Excellent work, Francis! Those doors tuck in, nicely. -
Parts falling off is a bugger. This thing is looking gorgeous, Andy. It's a thoroughly enjoyable "watch".
-
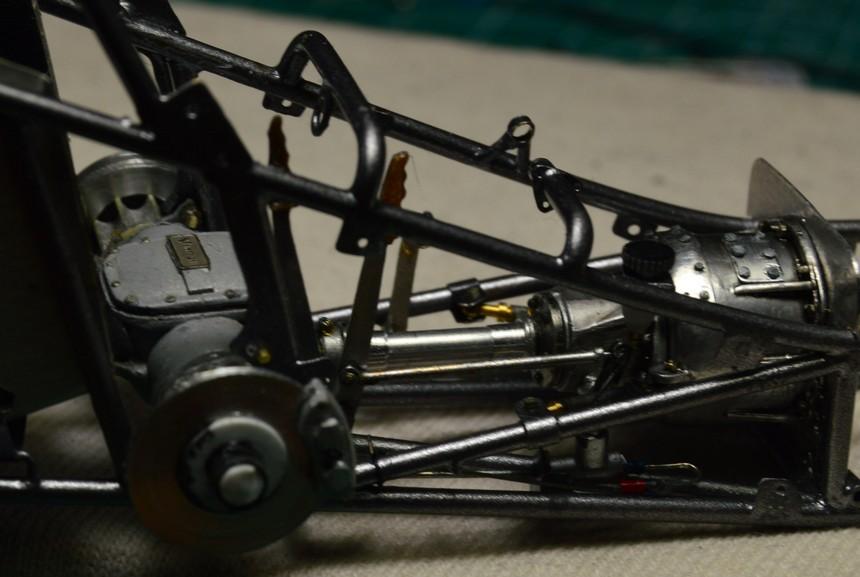
The clutch assembly is complete! The pedal and linkage and the adjustment cover have been installed. Next up will be the reverser, and some bolts on the motor plate.
-
AMT Ertl's plastic, during that period was horrible! I was working in the wholesale segment of the industry, then. Defective kits were plentiful (which was great, if the kits had other decent parts, because I could purchase defects for .$20 on the dollar!) with warped bodies, especially. Lots of short-shots, too. Production-wise, it was not a good time, for them.