Straightliner59
-
Posts
5,809 -
Joined
-
Last visited
Content Type
Profiles
Forums
Events
Gallery
Everything posted by Straightliner59
-
That's very cool!
-
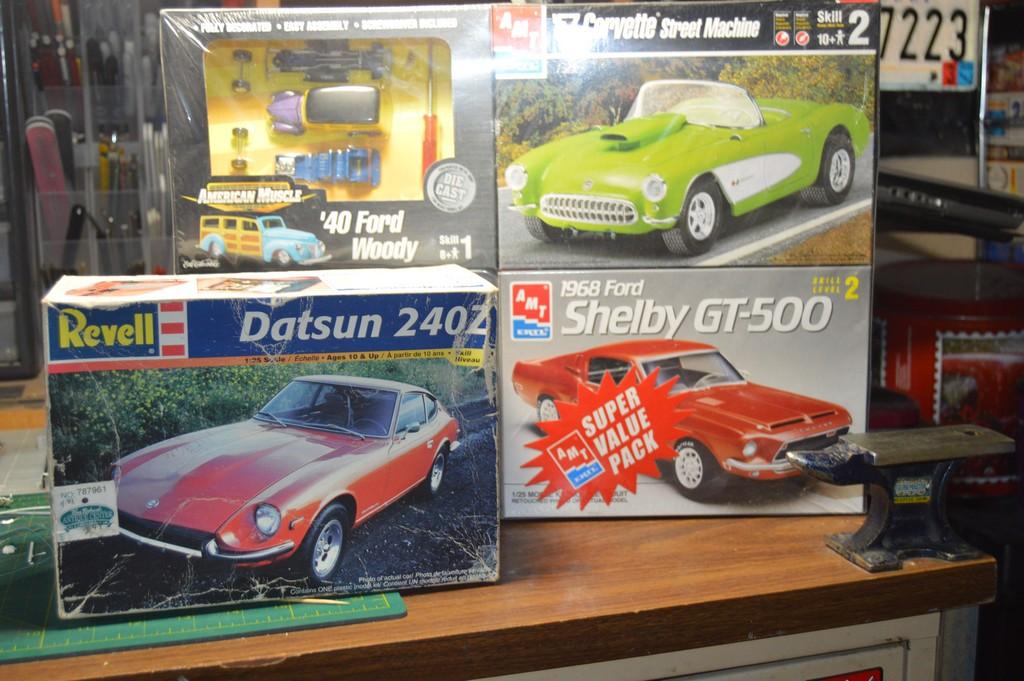
 Got these for under $80, shipped. I hadn't seen this issue of the 240Z that I ever recall. The GT 500 is just sentimental--I built one, back in my early modeling days--it was a big deal, to me, because I ordered it from Auto World! It might have been the Modern Classics(?) version. The shipping on both items was more than the kits! No combining that, as it was two different sellers. Anyway, not sure what I'll do with the Woody. I already tossed the glue, paint and brush.
- 39,074 replies
-
- 2
-

-
- johan
- glue bombs
- (and 1 more)
-
That transmission is looking great! I love doing that kind of stuff!
-
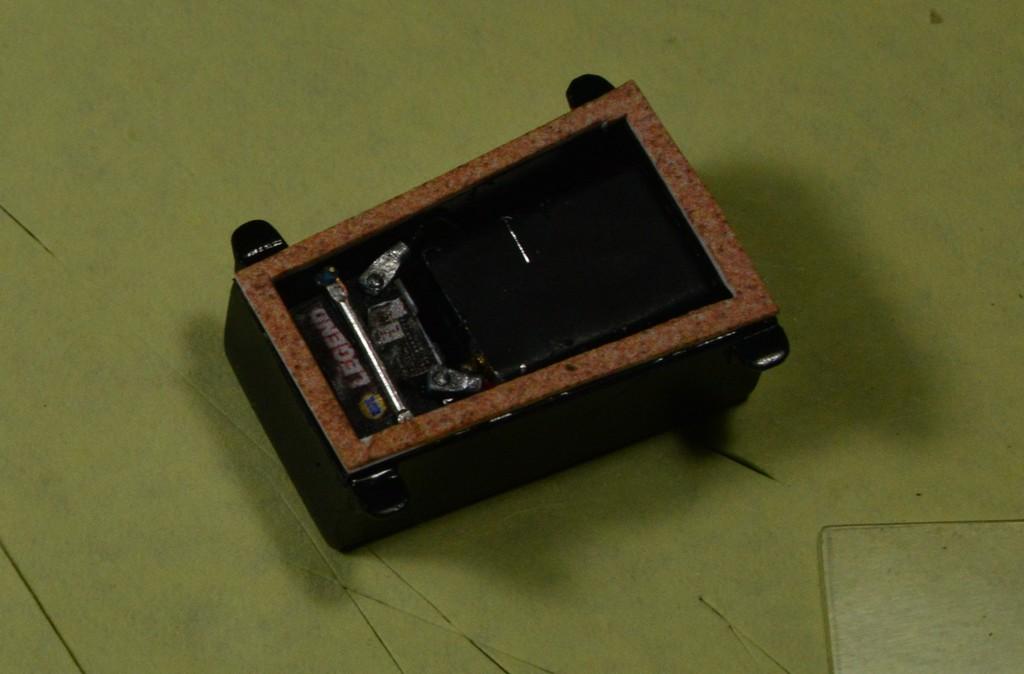
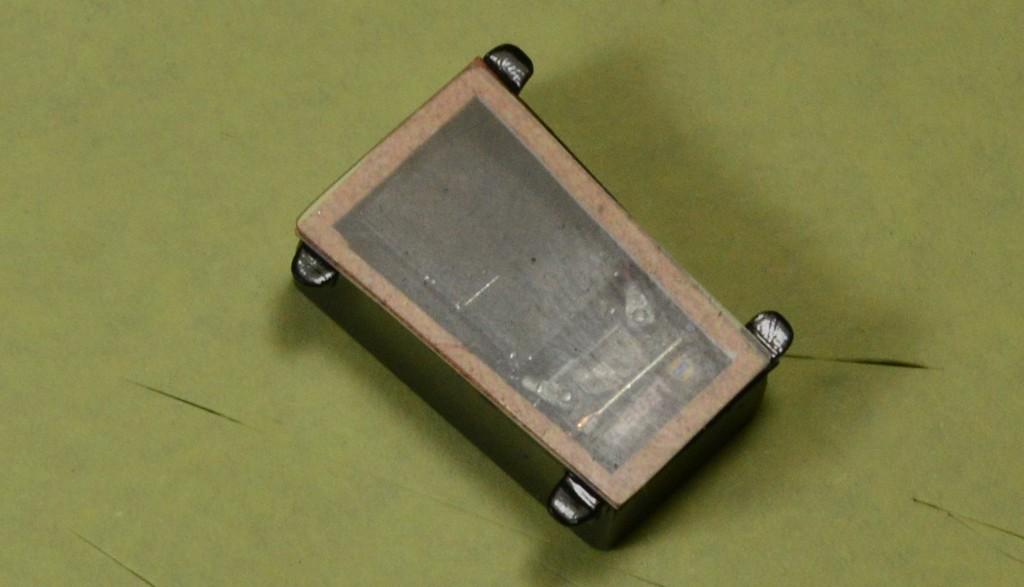
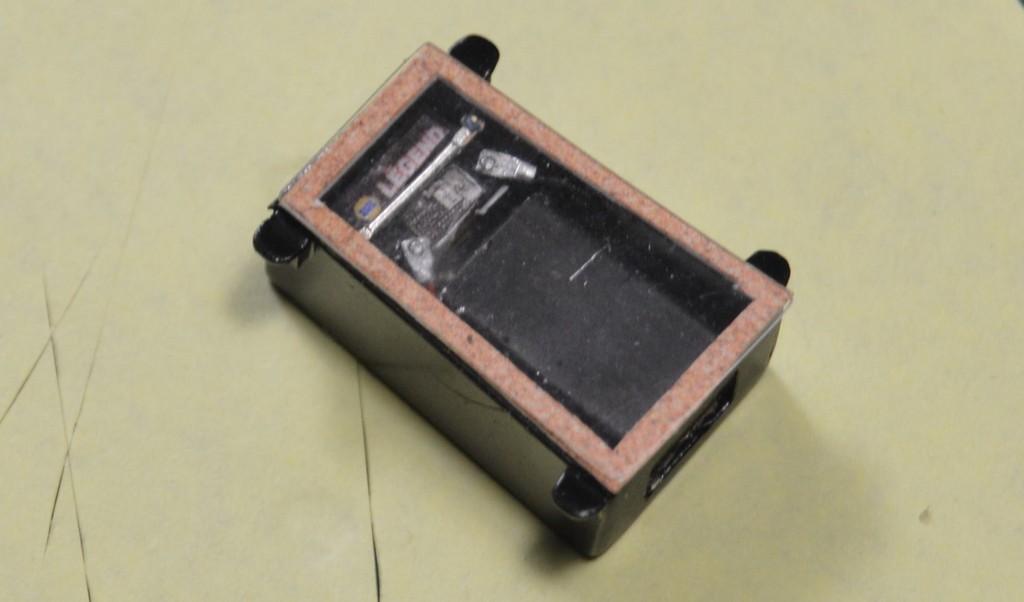
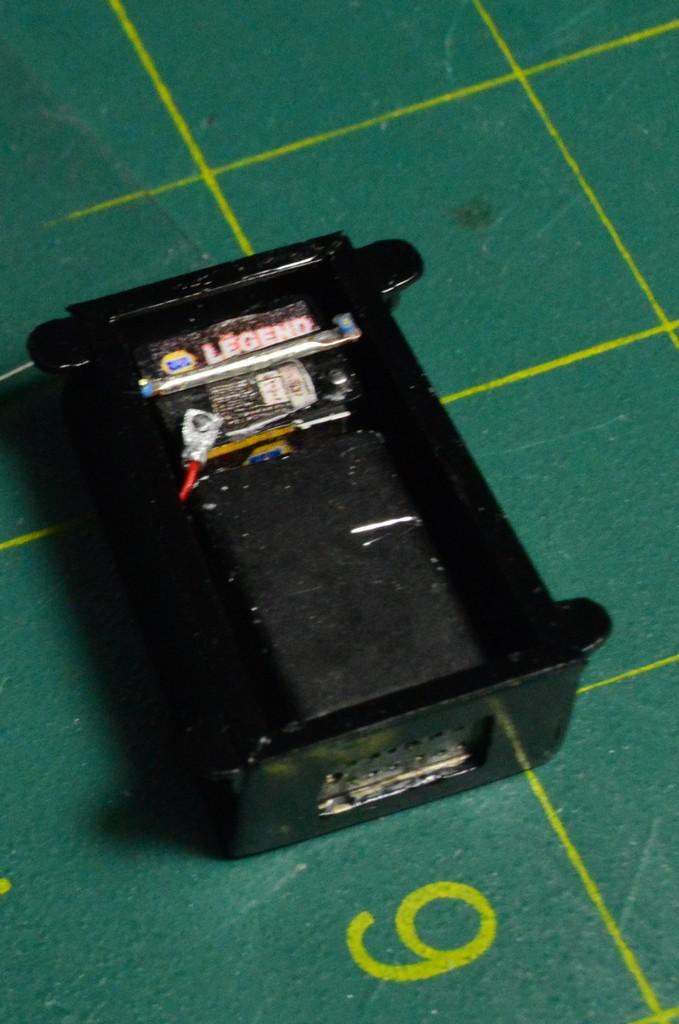
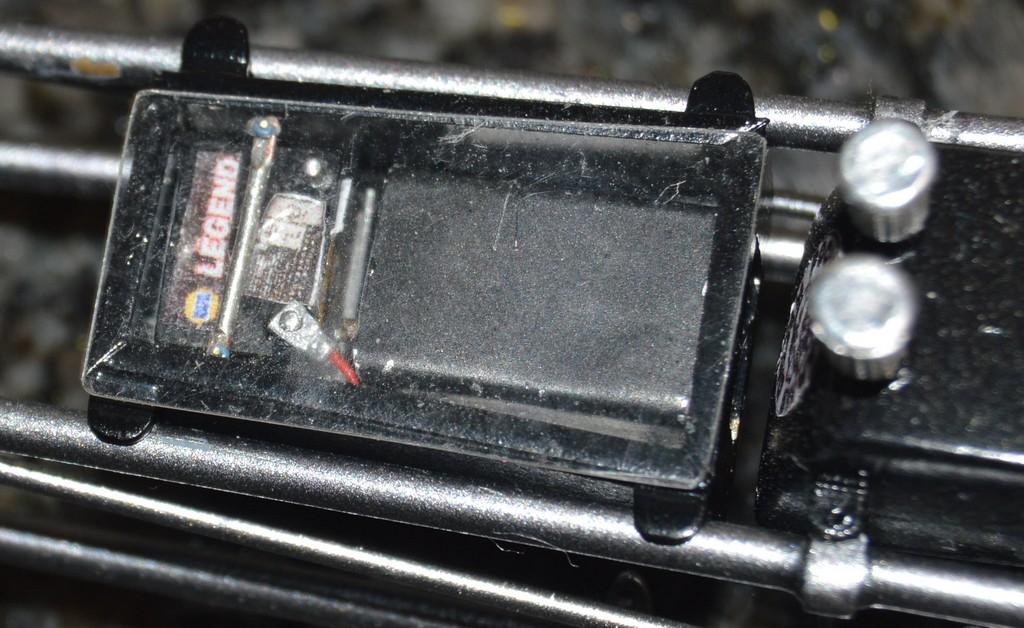
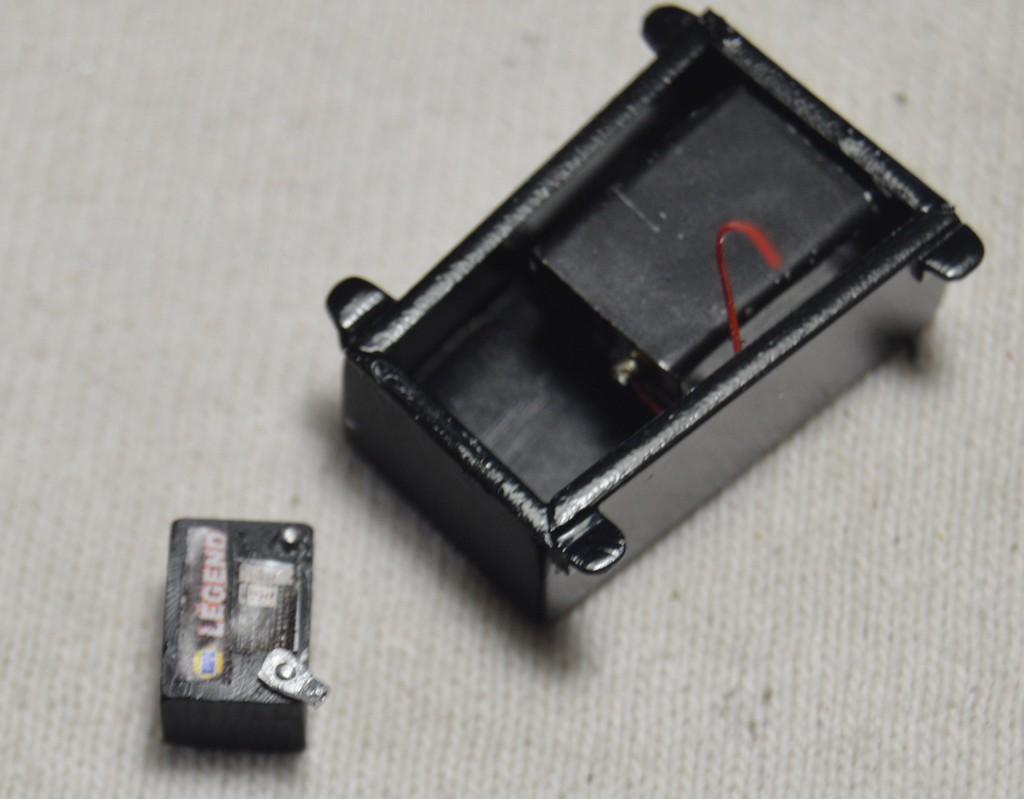
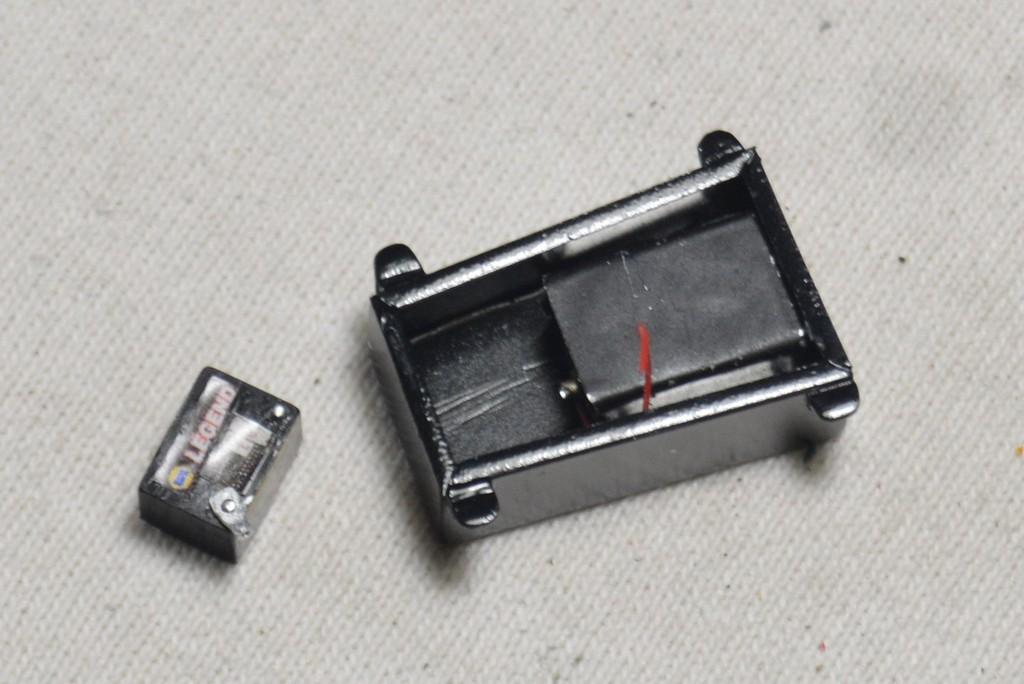
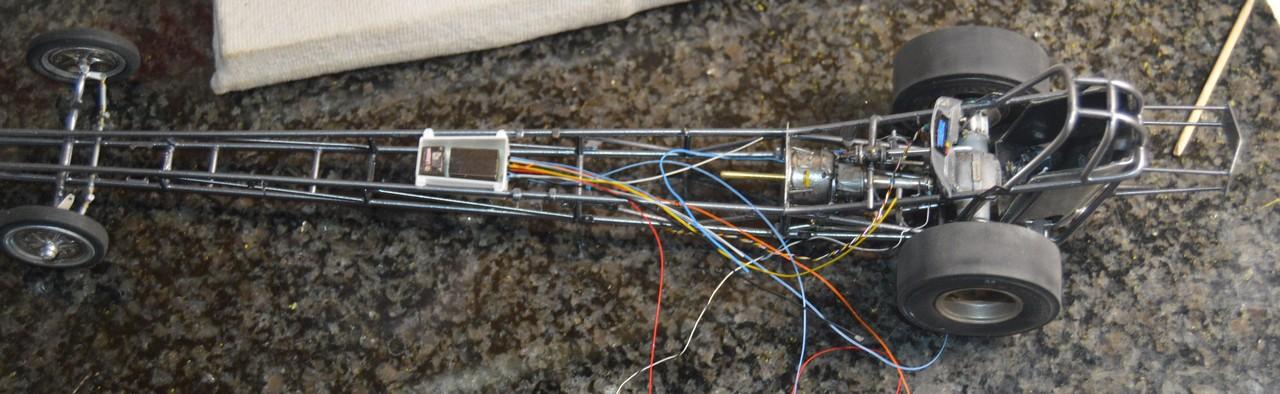
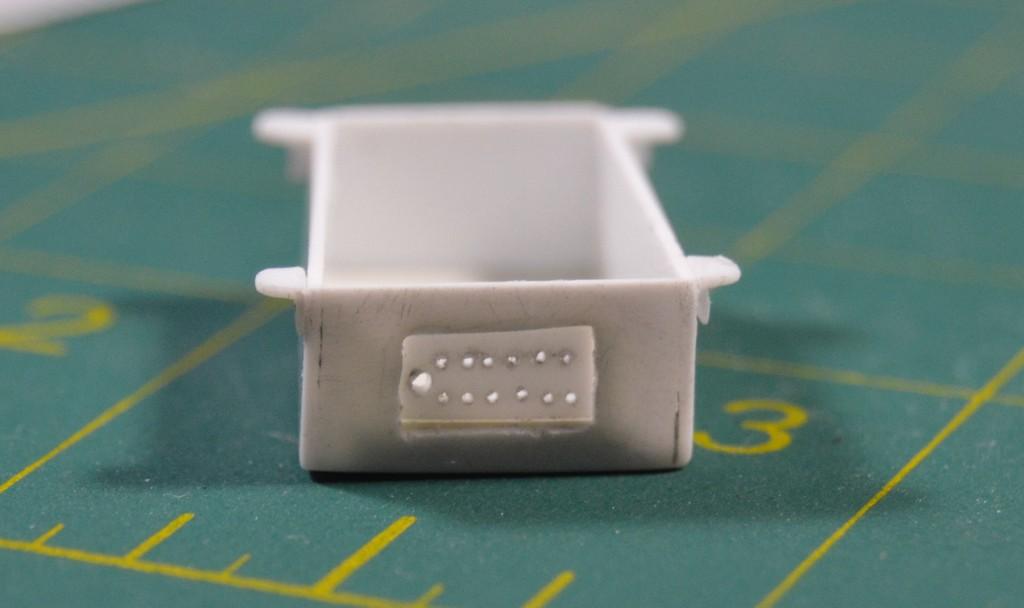
Just a few more details, and a bit of paint left to do. I got the other battery clamp made and installed. I printed a "tile" of corkboard on plain paper, shot it with Krylon Matte Clear, glued two pieces of it back-to-back with diluted white glue (Alene's Tacky Glue), and carefully cut it out, to make a gasket for the top of the box. I'm really happy with this assembly! Next, I will be working on the "fasteners" for the plexiglas top. Then, I can plug in some wires, and see if the stereo works!? The last two photos, here are with the cover on. Thanks for looking!
-
Well, thank you, kindly. Nice interpretation! I like the bare-metal nose, a ton! The body just screams to have the engine up front, with a scoop poking out of the hood. Great work! It would also make a great-looking salt flats racer. Hmmm...I might have to find me another one!
-
But, I like it, that way!? No doubt it's going to be killer!
-
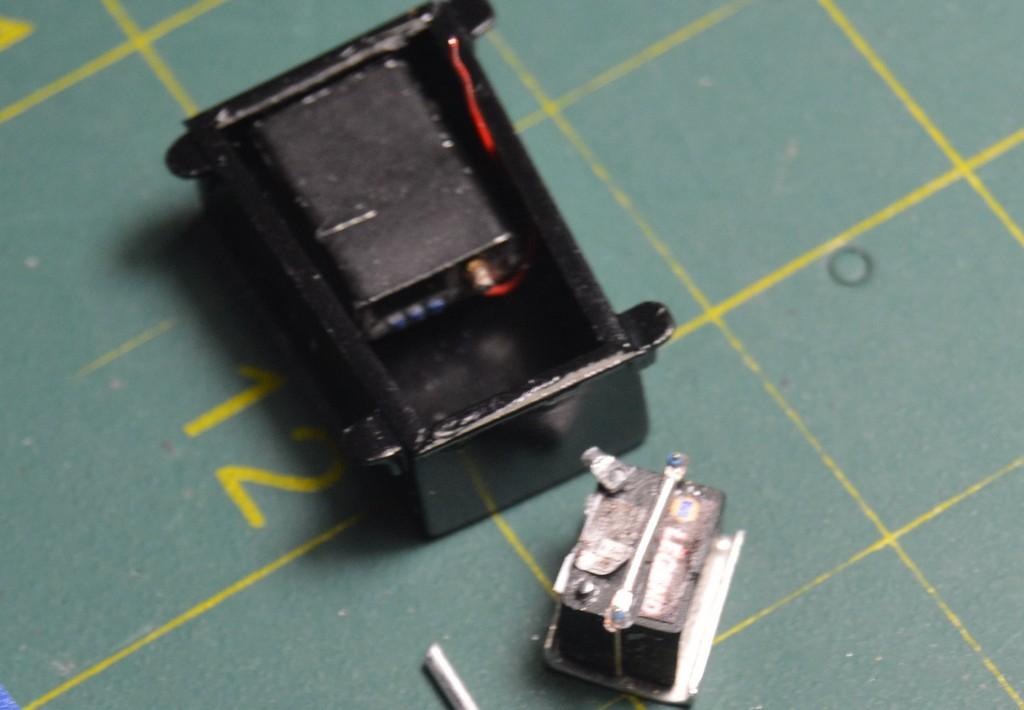
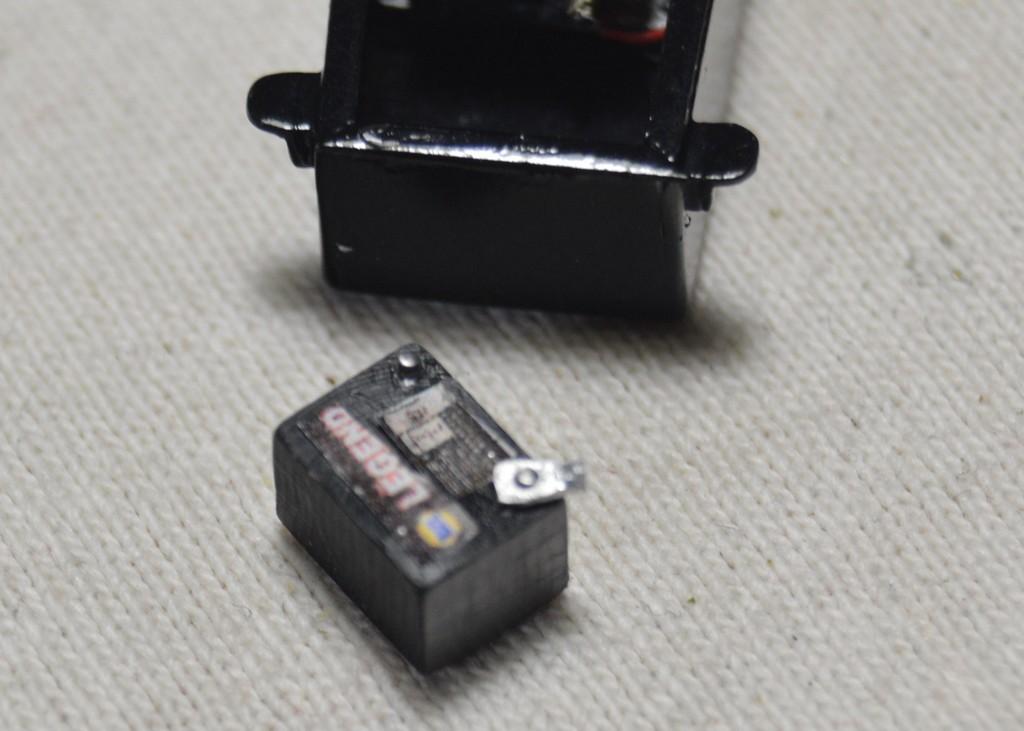
The battery's installed. I still need to make another terminal clamp, and install a ground wire. Decals don't like Delrin! I also need to paint the nuts on the hold-down bar. The tabs on the box will get filed, some, so that the box can more freely move forward between the rails. I'd like it to be about another .250" ahead of where it is, now. I plan to add a gasket, under the Plexiglas lid, and, of course, fasteners. Comments are always welcomed. Thanks for looking!
-
You should! Your work is always a joy to see!
-
Still plugging away at the data collection system. The new box is painted. The computer is installed, and the power cable attached. I made a battery terminal clamp from aluminum wire. It still needs a little shaping; then it needs a twin. Once I've made a battery hold down, and the battery's installed, I can finish wiring the box. It looks like I'll be making a whole bunch of zip-ties! ? More as work progresses. Questions and comments are always appreciated. Thanks for looking!
-
Shirley Shahan’s Hornet Pro Stock
Straightliner59 replied to dragcarz's topic in WIP: Drag Racing Models
Those setbacks can be energy-sapping, for sure. I've had a couple of them in the past few months. You're definitely on the way back, with this! -
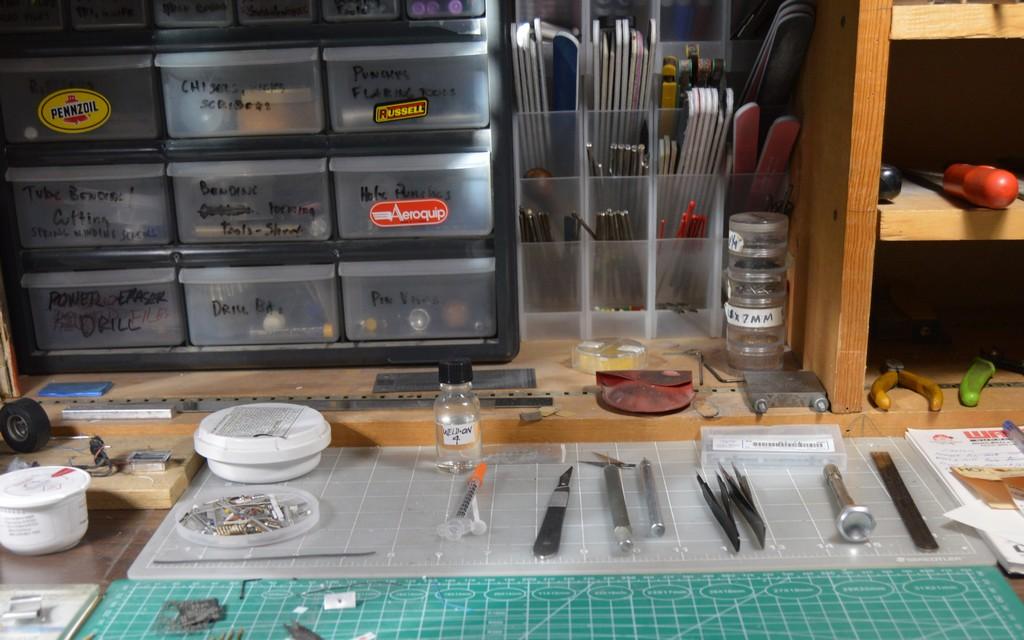
This is kind of where I've arrived. The line of tools on the rear cutting mat just stay there. I use them almost constantly, so it doesn't seem to make a lot of sense to put them away. The pile of stuff in front of those are bits of scratchbuilding materials, and the assemblies in progress, that I am using them on. To the left of those are more complete, and some finished assemblies. Directly to the left of the chair (this POV) is a 1" thick slab of granite that I keep the main part of a project on, and do final assembly on. Other tools that I use frequently, but not constantly are open, on shelves, or in the bins or drawers, at the back of the bench. I only recently began keeping that line of tools out on the bench. I've discovered that I like it this way! Every two weeks to a month, I sort the main pile back into its various storage, and start that process over again.
-
If somebody wanted to build a nicer Pinto FC, the Johan kits can still be found at fairly reasonable prices, if one is patient.
-
Shirley Shahan’s Hornet Pro Stock
Straightliner59 replied to dragcarz's topic in WIP: Drag Racing Models
Yeah. That's better! -
Thank you, Ian. No kidding--there used to be virtually no wiring on these things, besides the mag. I have since shot some black on the box. I also added a flange around the top, for the plastic cover. I'll have some photos in a couple of days. The Camaro is looking great!
-
1932 ford saltlake car
Straightliner59 replied to charlie libby's topic in WIP: Other Racing: Road Racing, Land Speed Racers
Love the tonneau! Nice work! -
Looking great, Ian. Coming along very nicely!
-
Thanks, kindly, sir!
-
I appreciate your kind words. You do marvelous work with styrene! I always enjoy what you're working on.
-
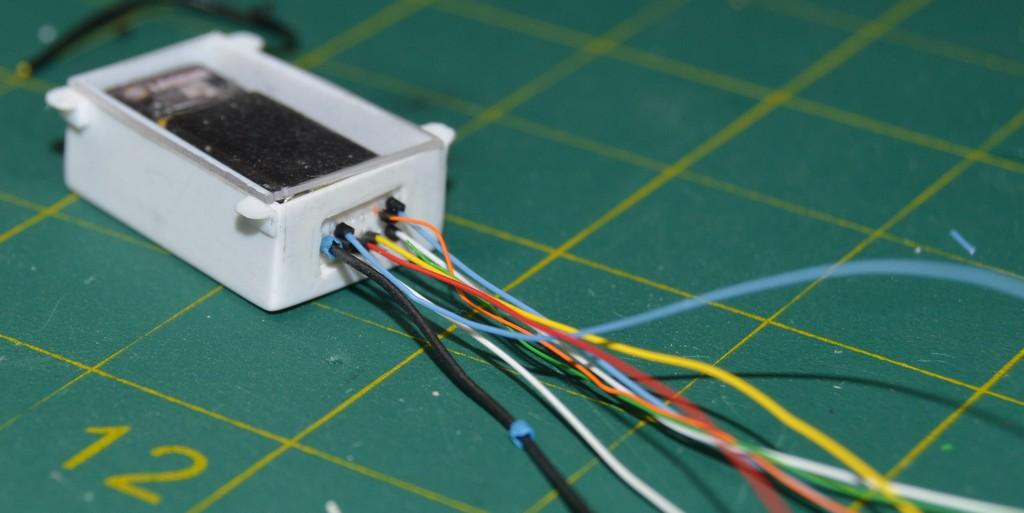
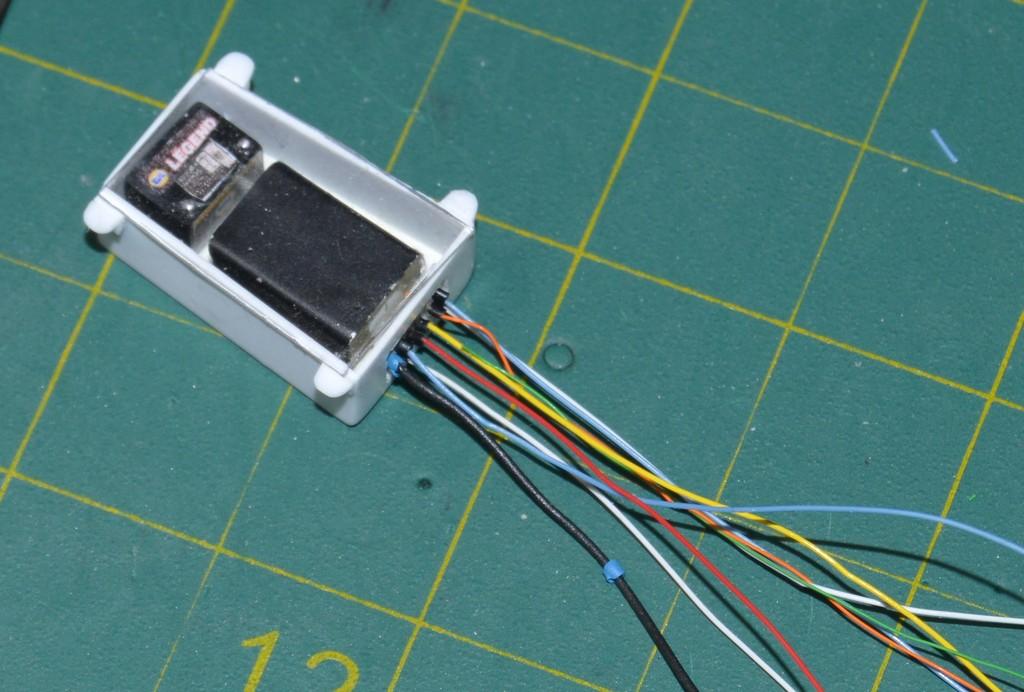
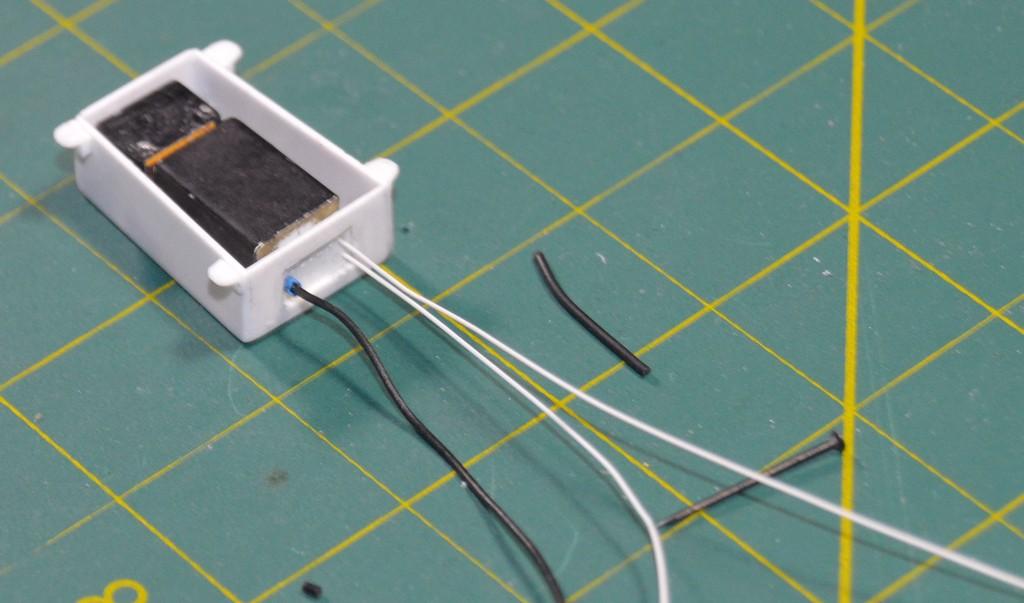
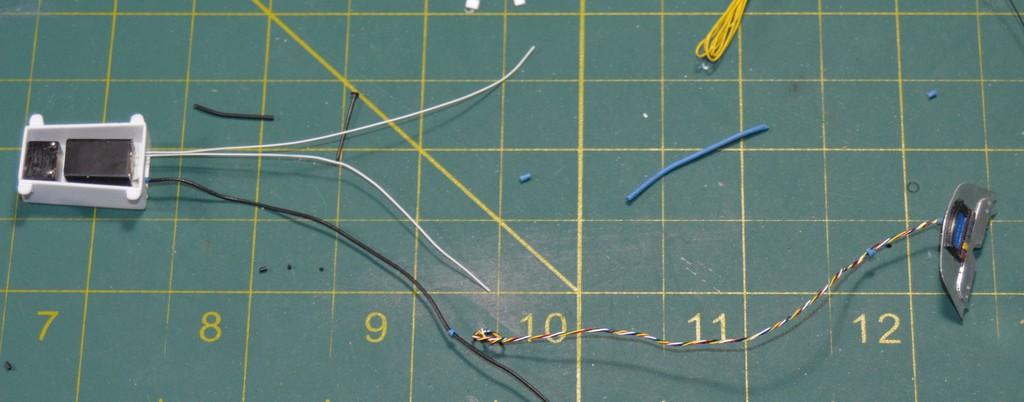
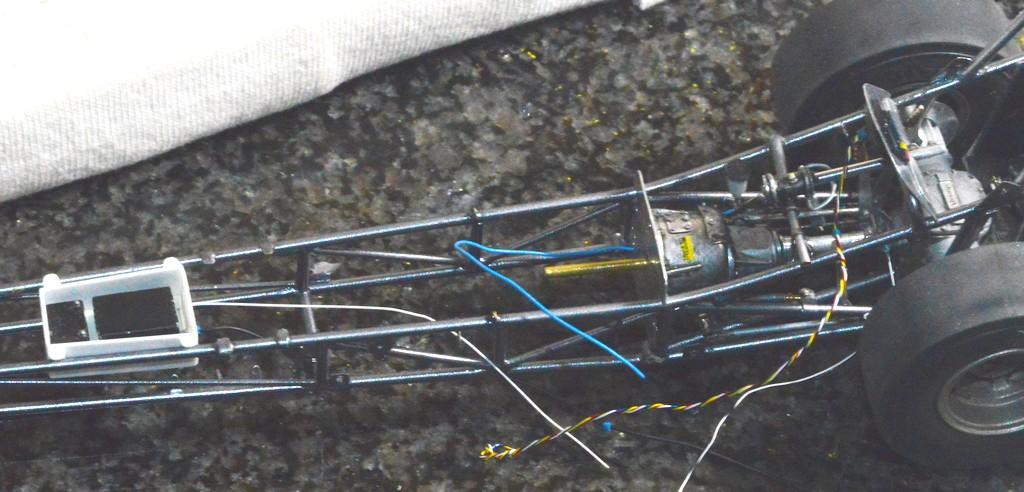
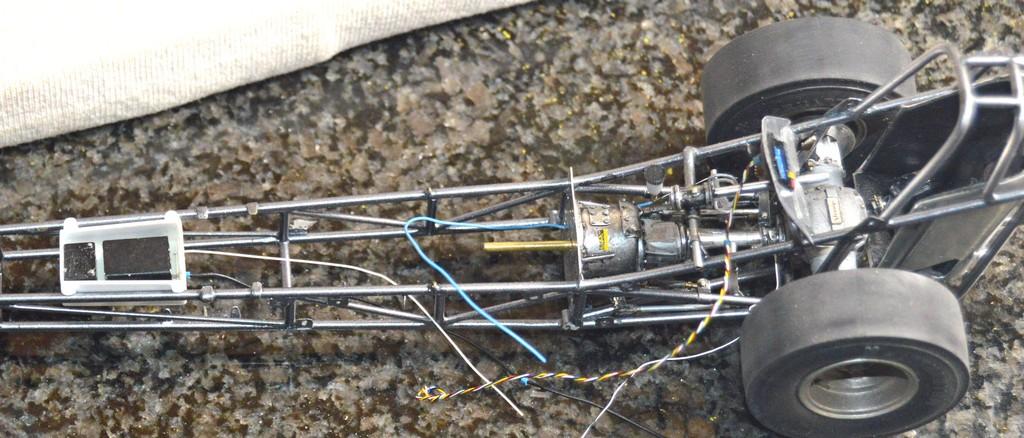
I wanted to get an idea of what this will look like, so I cut some wire, and stuck it in some holes.? I kinda like the way it looks. It should look even better, once the box is painted. I have more colors of the .011" on the way, so I can replace the green and orange leads. The white leads will be for EGT, blue for axle speed. Green will handle oil pressure, yellow RPM and orange fuel pressure. Finally, red will tuck into the bellhousing for clutch RPM. I still need to make and wire the kill switch. Thanks for looking!
-
Excellent, beautiful work, Pierre! I always enjoy what you do with these old kits!
-
This is looking great! Nice work!
-
This started out as that!
-
I finally decided I have enough information to get started. Technically, the twisted bundle from the dash panel would just be a continuation of the same conduit as the black wire, from the computer box. I used twisted DM Detailing Wire because I think it's more interesting. The white wires will connect to the exhaust gas temp modules (one left, one right). I also will install "probes" for axle speed, clutch speed, output shaft speed, fuel pressure, oil pressure and RPM. I'll use some short bits of plug wire insulation for plug ends at the box. Probe ends will be set up, accordingly. I need to re-apply the decals to the top of the battery, as I decided I wasn't happy with them. As always, questions, comments and critiques are welcomed. Thanks for looking!
-
Paint on decals question
Straightliner59 replied to iBorg's topic in Model Building Questions and Answers
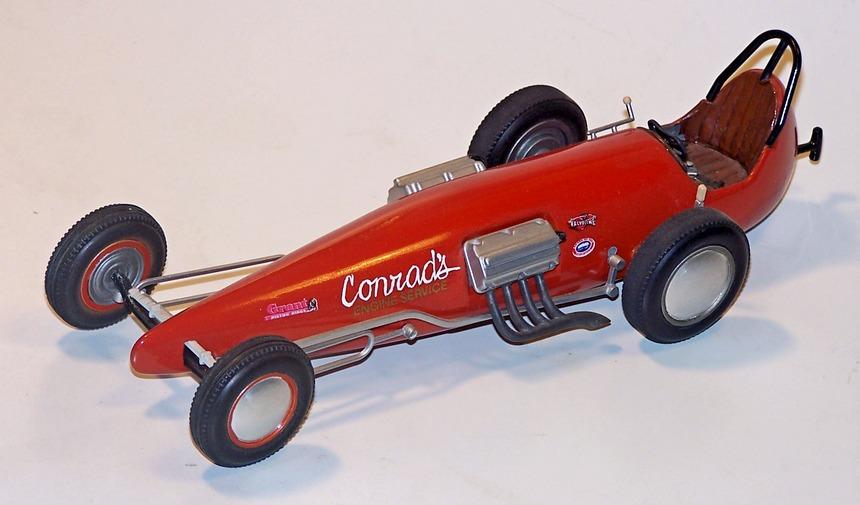
I've done it. I use Sign Painter's One-Shot enamel. That's how I did the "Conrad's" on this dragster...
-
Those iridescent numbers are SO '70s! Perfect!