Straightliner59
-
Posts
5,814 -
Joined
-
Last visited
Content Type
Profiles
Forums
Events
Gallery
Everything posted by Straightliner59
-

Raw Fiberglass Color
Straightliner59 replied to Jim B's topic in Model Building Questions and Answers
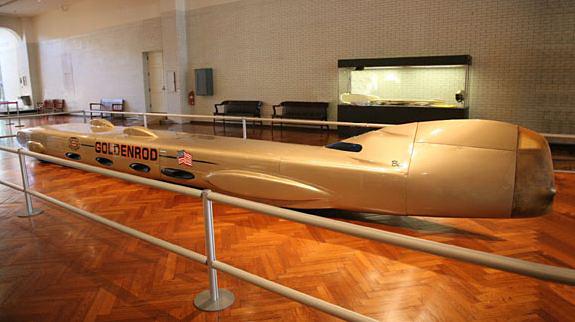
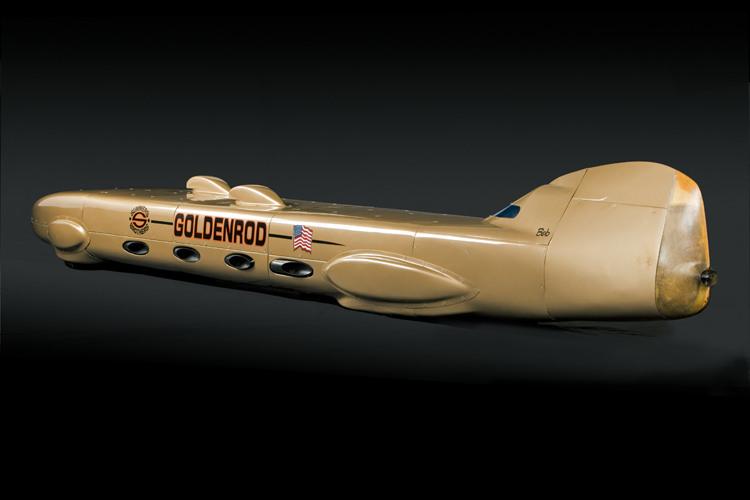
In photos of the Summers Bros. Goldenrod, it's apparent that the section of the tail that housed the 'chute tubes was thin fiberglass, somewhat resembling that of corrugated panels. It appears somewhat translucent, as well. I don't recall the colors I used (one was likely Humbrol Unbleached Linen), but the stuff applied over the base was more or less dabbed on, with a brush, to create a mottled look. It's not perfect, but it's at least an attempt!?
-
Poorly-done figures can ruin an otherwise fine diorama. Yours are always fantastic! I love your work!
-
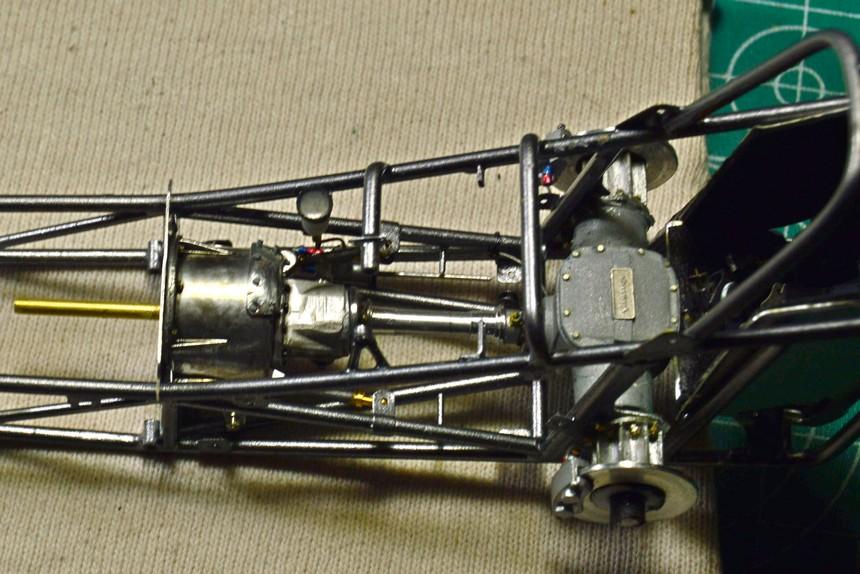
Thank you, Ian! Yes, I'll definitely be going with the orange overcoat. It just kind of makes it pop. Before I went to bed Sunday morning, I got the motor plate and driveline installed. The last thing I did was to paint the tubes for the blowback devices. The brass rod is tacky-glued at the motor plate, so that it doesn't slip out, during construction. When it's time to install the engine, I will pull it out, and replace it with the one that's permanently attached through the engine. Easy as pie! I need to add bolts to the rear of the blowback tubes, and to the motor plate. Then, I can add the pedals, handles and cables, before moving on to the steering box, and the dash. Maybe in a couple of months, I can have it in the display case!
-
I love this old Mack kit! I recently (within the last three years, or so) used a stake truck variant to build a lumber truck. I scratched a new bed, for it, so, yes, you can fit a Beer Wagon on it!? You'll enjoy building it, Jim!
- 39,074 replies
-
- 1
-

-
- johan
- glue bombs
- (and 1 more)
-
It's a nice, dark grey, not quite completely flat. It really reminds me of Hot Rod Primer--and I still have a viable bottle of that! The Color Place paint is very nice! I've been using the Gloss Black to undercoat chrome spray, and, I intend to use it on my dragster. It's great paint!
-
I got these off of Ebay. They're refurbished, used tools. I often buy tools, that way, because they're less expensive. Often, like these, they are ground to non-"stock" specs. I find this bunch extra interesting, because it's clear that the person who owned them before was a craftsman. First off, most of them were custom ground--beautifully. They're also engraved as to each one's purpose. There are remnants of Dykem on a couple of them, from marking for angled tools. Honestly, I felt a tad sentimental, when I was holding, and looking at them, the first time, understanding that they really meant something to their previous owner. One of them is engraved "Mauser Buttress" which would lead me to believe that some gunsmithing must have been involved in his work. Anyway--I shall continue to use them, as intended, and to the best of my abilities, which, I am sure, are not even close to his!? The different lighting in the images makes all the engraving more legible.
- 39,074 replies
-
- 1
-
-
- johan
- glue bombs
- (and 1 more)
-
@Snake45If you can find yourself a can of Krylon Chalky Finish Anvil Grey spray, I think you'll find it pleasingly similar to Pactra's Hot Rod Primer.
-
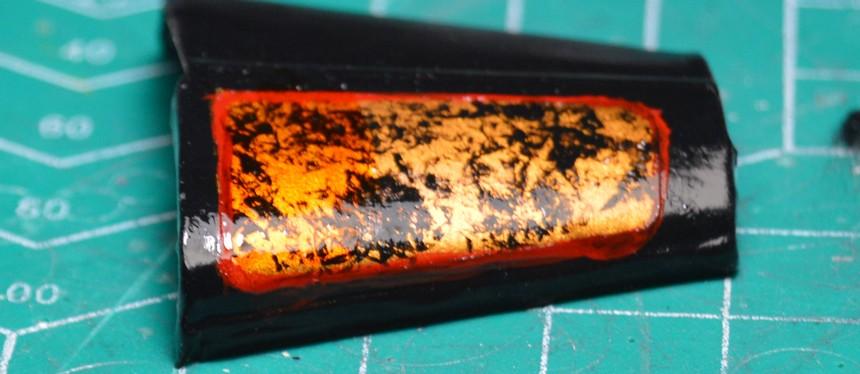
I used an old burnishing of a '32 Ford hood in tooling aluminum to test my paint scheme/idea for the Nostalgia Fueler. It's plain old Krylon gray primer, shot over with a mixture of a couple of Humbrol gold colors, cut with lacquer thinner. I taped off the panel, and shot Walmart Color Place gloss black over that. Once the tape was removed, I brushed some black Sign Painter's One Shot enamel onto a paper plate, and dabbed wrinkled plastic kitchen wrap into the paint, then onto the gold panel. I like it, a lot! Here, the left end of the panel was overcoated with Tamiya clear orange. I like that, even more! Disregard the red border. I don't care for that.?
-
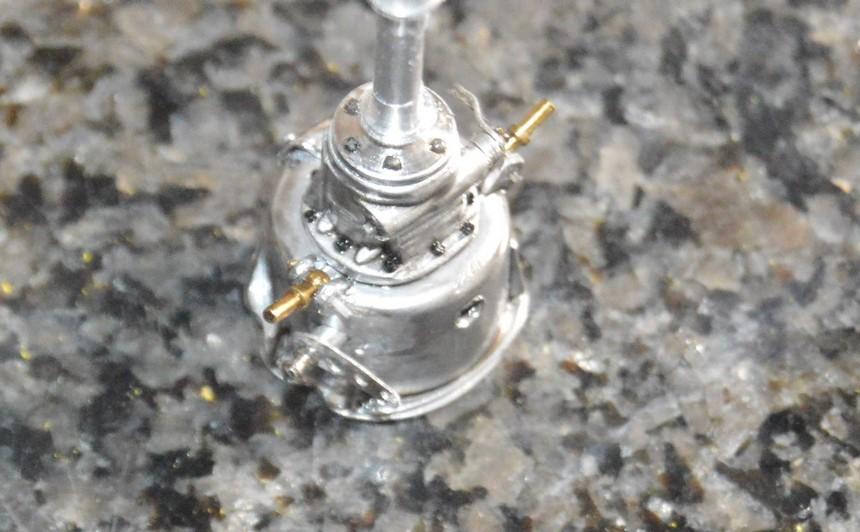
I think I like this: On the left end of the panel, just to check for effect, I brushed some Tamiya Clear Orange over the paint. I like the warmth it gives the gold. I brushed some Tamiya Smoke over the bellhousing and reverser. I think it gives the bellhousing a look more similar to the titanium prototype. I won't be doing the border. I had to see, though.
-
I remember a time in the later '80s when their plastic was rather "rubbery". It was prone to ghosting, crazing, warping, and just generally being garbage. But that was also about the time they released the '66 Nova, the '34 Ford Sedan(?) and the Cameo pickup. So, it was a mixed bag!
-
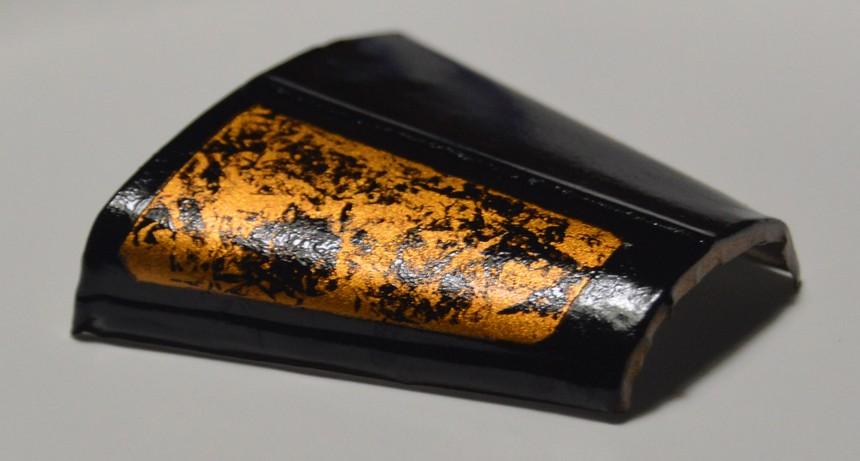
I just spent the last three hours or so, testing my idea for the paint. This is tooling aluminum, burnished over an AMT '32 Ford hood. It's been sitting around here, for years. I used it, because it's aluminum, and because it has a distinct area for a panel. Krylon gray primer, my Humbrol metallics mixture (cut with lacquer thinner), Walmart Color Place gloss black spray and Sign Painter's One Shot black for the effect in the panel. I think we have a chicken dinner! Imagine when I take my time! What do you all think? Thanks for looking!
-
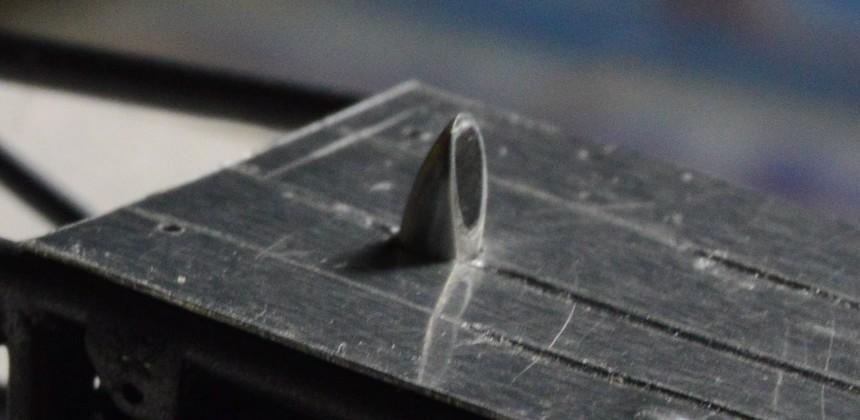
I finished fitting the floorboard. I drilled for the clutch exhaust, and hammered a couple of divots: One for the brake cylinder flange, and one for the brake 't'-fitting, on the third member. I like the way the pipe sticks through! I'm going to thin the wall some, yet, too. I'll lightly airbrush a trail of clutch dust, behind it.
-
I believe the proprietor retired. It's too bad, for us.
-
Thank you, Francis. I had to shorten the drive tube a little, to get it to fit, but, I knew I was very close, due to assembling, disassembling then reassembling several times before anything ever got paint. You know how that is!
-
That seems to be the consensus (myself included)! Thank you, sir!
-
I'd forgotten about those panels! I'll fiddle around with this, and see what I come up with. It is a neat-looking effect.
-
I stopped at a local shop today and picked up a bottle of Testors liquid cement, three bottles of paint and some 1/16" aluminum tubing (If I have any, I couldn't find it) and some K&S Special Shapes 3/64" brass tube. I buy the 3/64" and 1/32" tube, whenever I see it. In the mail I got 5) .065"/1.65 mm carbide bits. I like them for making holes for 1/16" rod or tube, because it's loose enough to fit, easily but, not so loose as to create a visible gap.
- 39,074 replies
-
- 1
-
-
- johan
- glue bombs
- (and 1 more)
-
’72 Dodge Demon Drag Racer 1/25 scale
Straightliner59 replied to AmericanMuscleFan's topic in WIP: Drag Racing Models
Stop it! You are not--because I'm not!? -
’72 Dodge Demon Drag Racer 1/25 scale
Straightliner59 replied to AmericanMuscleFan's topic in WIP: Drag Racing Models
It feels very rigid, to me. When I angle it, as soon as I am finished, I just return it to vertical. I have the tilting table, as well. Your work is very impressive! I'm a neophyte, when it comes to machine work, but I'm spending more time with it, lately. I have a lot of toys for my equipment, too. I've been acquiring it over the last twenty years, or so. I bought the mill and lathe package that was just above the most basic one. Still, I have probably spent another couple of thousand dollars, over the years purchasing accessories that are almost necessities: rotating mill vise, tilting angle plate, rotary table (I think it's most useful), vertical fixture for the rotary table, the taper cutting attachment for the lathe, various lathe bits, drill bits and end mills...Sometimes, I'm almost embarrassed to have all that stuff, because I have put it to so little use. Thankfully, with inspiration from yourself, and Tim and Charlie, I've been pursuing it, a bit more, and I've been pleasantly surprised at some of the things I've accomplished, no matter their simplicity! You're right, too, it's always interesting to see the different approaches we take, to reach our end result. -
’72 Dodge Demon Drag Racer 1/25 scale
Straightliner59 replied to AmericanMuscleFan's topic in WIP: Drag Racing Models
The good ol' scanner! This just made me think of trying to do research, in pre-internet days. Now, I wonder, "How the devil did we build anything?!"? -
Very nice! That looks much better! It's a joy, watching this come together. Great work, Bob.
-
As Harry Carey used to say, "I'm a Cub fan, and a Bud man."
-
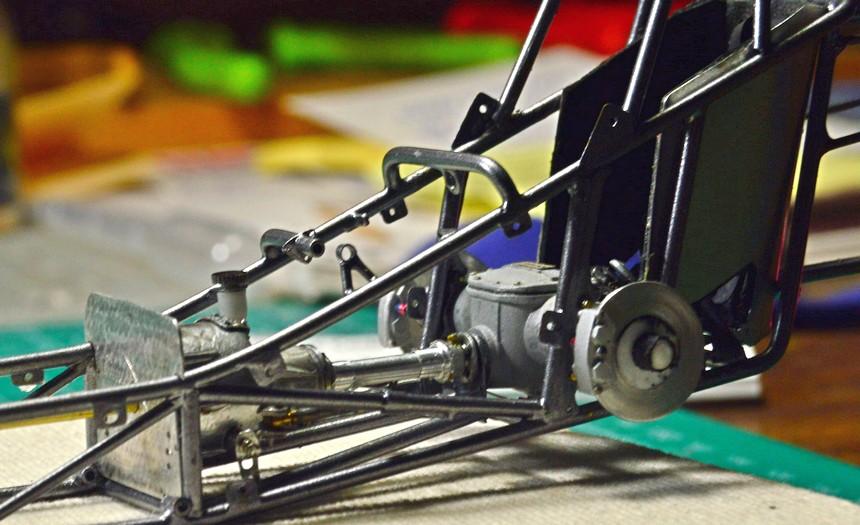
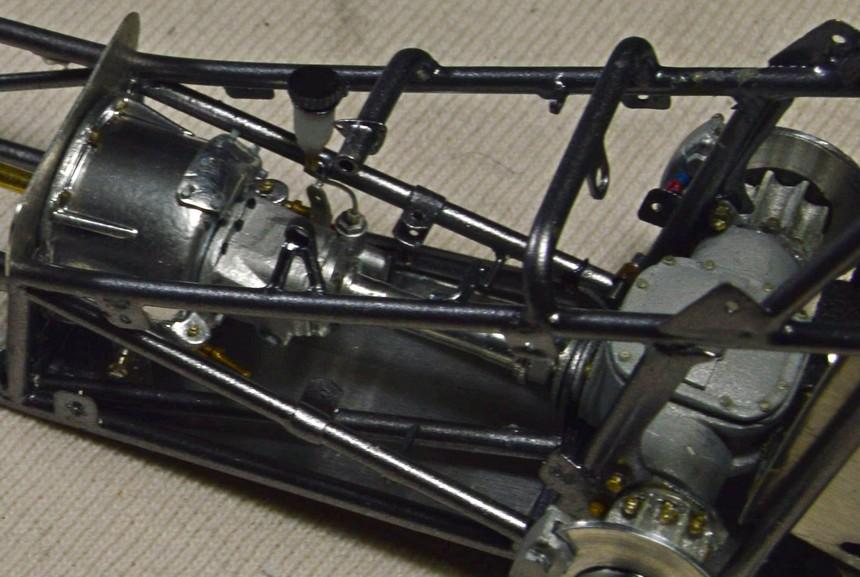
Well, it fits! It's not glued/pinned in, yet. I still need to fit the clutch blowback bars, and do some work to the motor plate (I can also see it's a little twisted, here--that'll need to be straightened). Eventually, I should be able to install the plate, and driveline, leaving the brass rod in place. Once the engine's built and ready to install, I can pull the loose rod, and run the original one, still in the engine, through the driveline. It should work well! I plan to do some test shots with paint, this weekend, so I can find out if my idea will be as I hope. Questions comments and critiques are always welcomed. Thanks for looking!
-
I do, too. It's much easier to cover a like color than not.
-
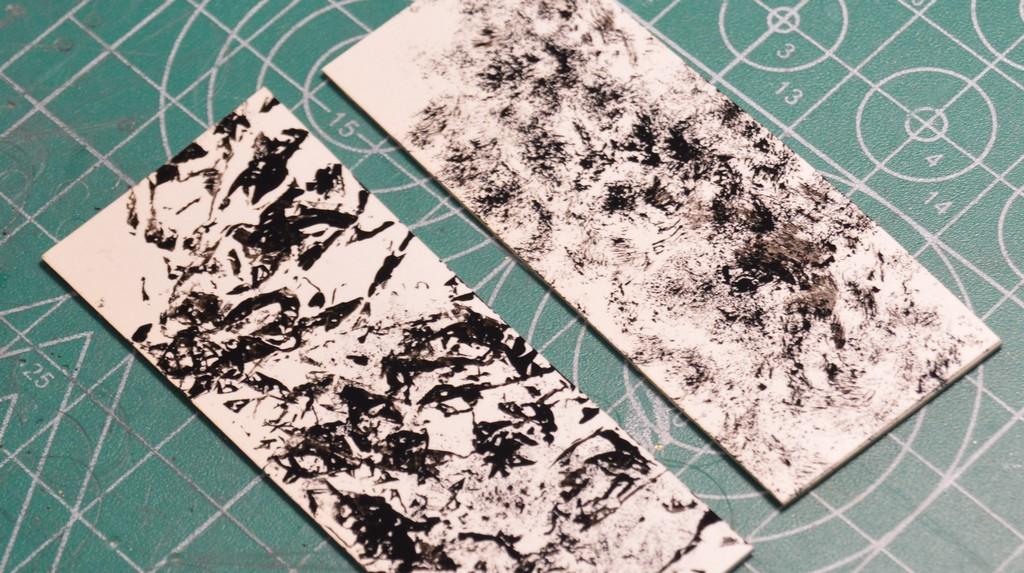
Thank you, sir! Thank you kindly, EMRE. I already have a dragster in unpainted metal!? I understand what you're saying, though. It should look good. I'm leaning toward black with the gold "panels" and one of these two effects, in black (Sign Painter's One Shot), over the gold. The one on the left is done using kitchen plastic wrap. The right is with natural sponge. What do you think? Thank you, Marcos! It's coming along!