StevenGuthmiller
-
Posts
15,071 -
Joined
-
Last visited
Content Type
Profiles
Forums
Events
Gallery
Everything posted by StevenGuthmiller
-
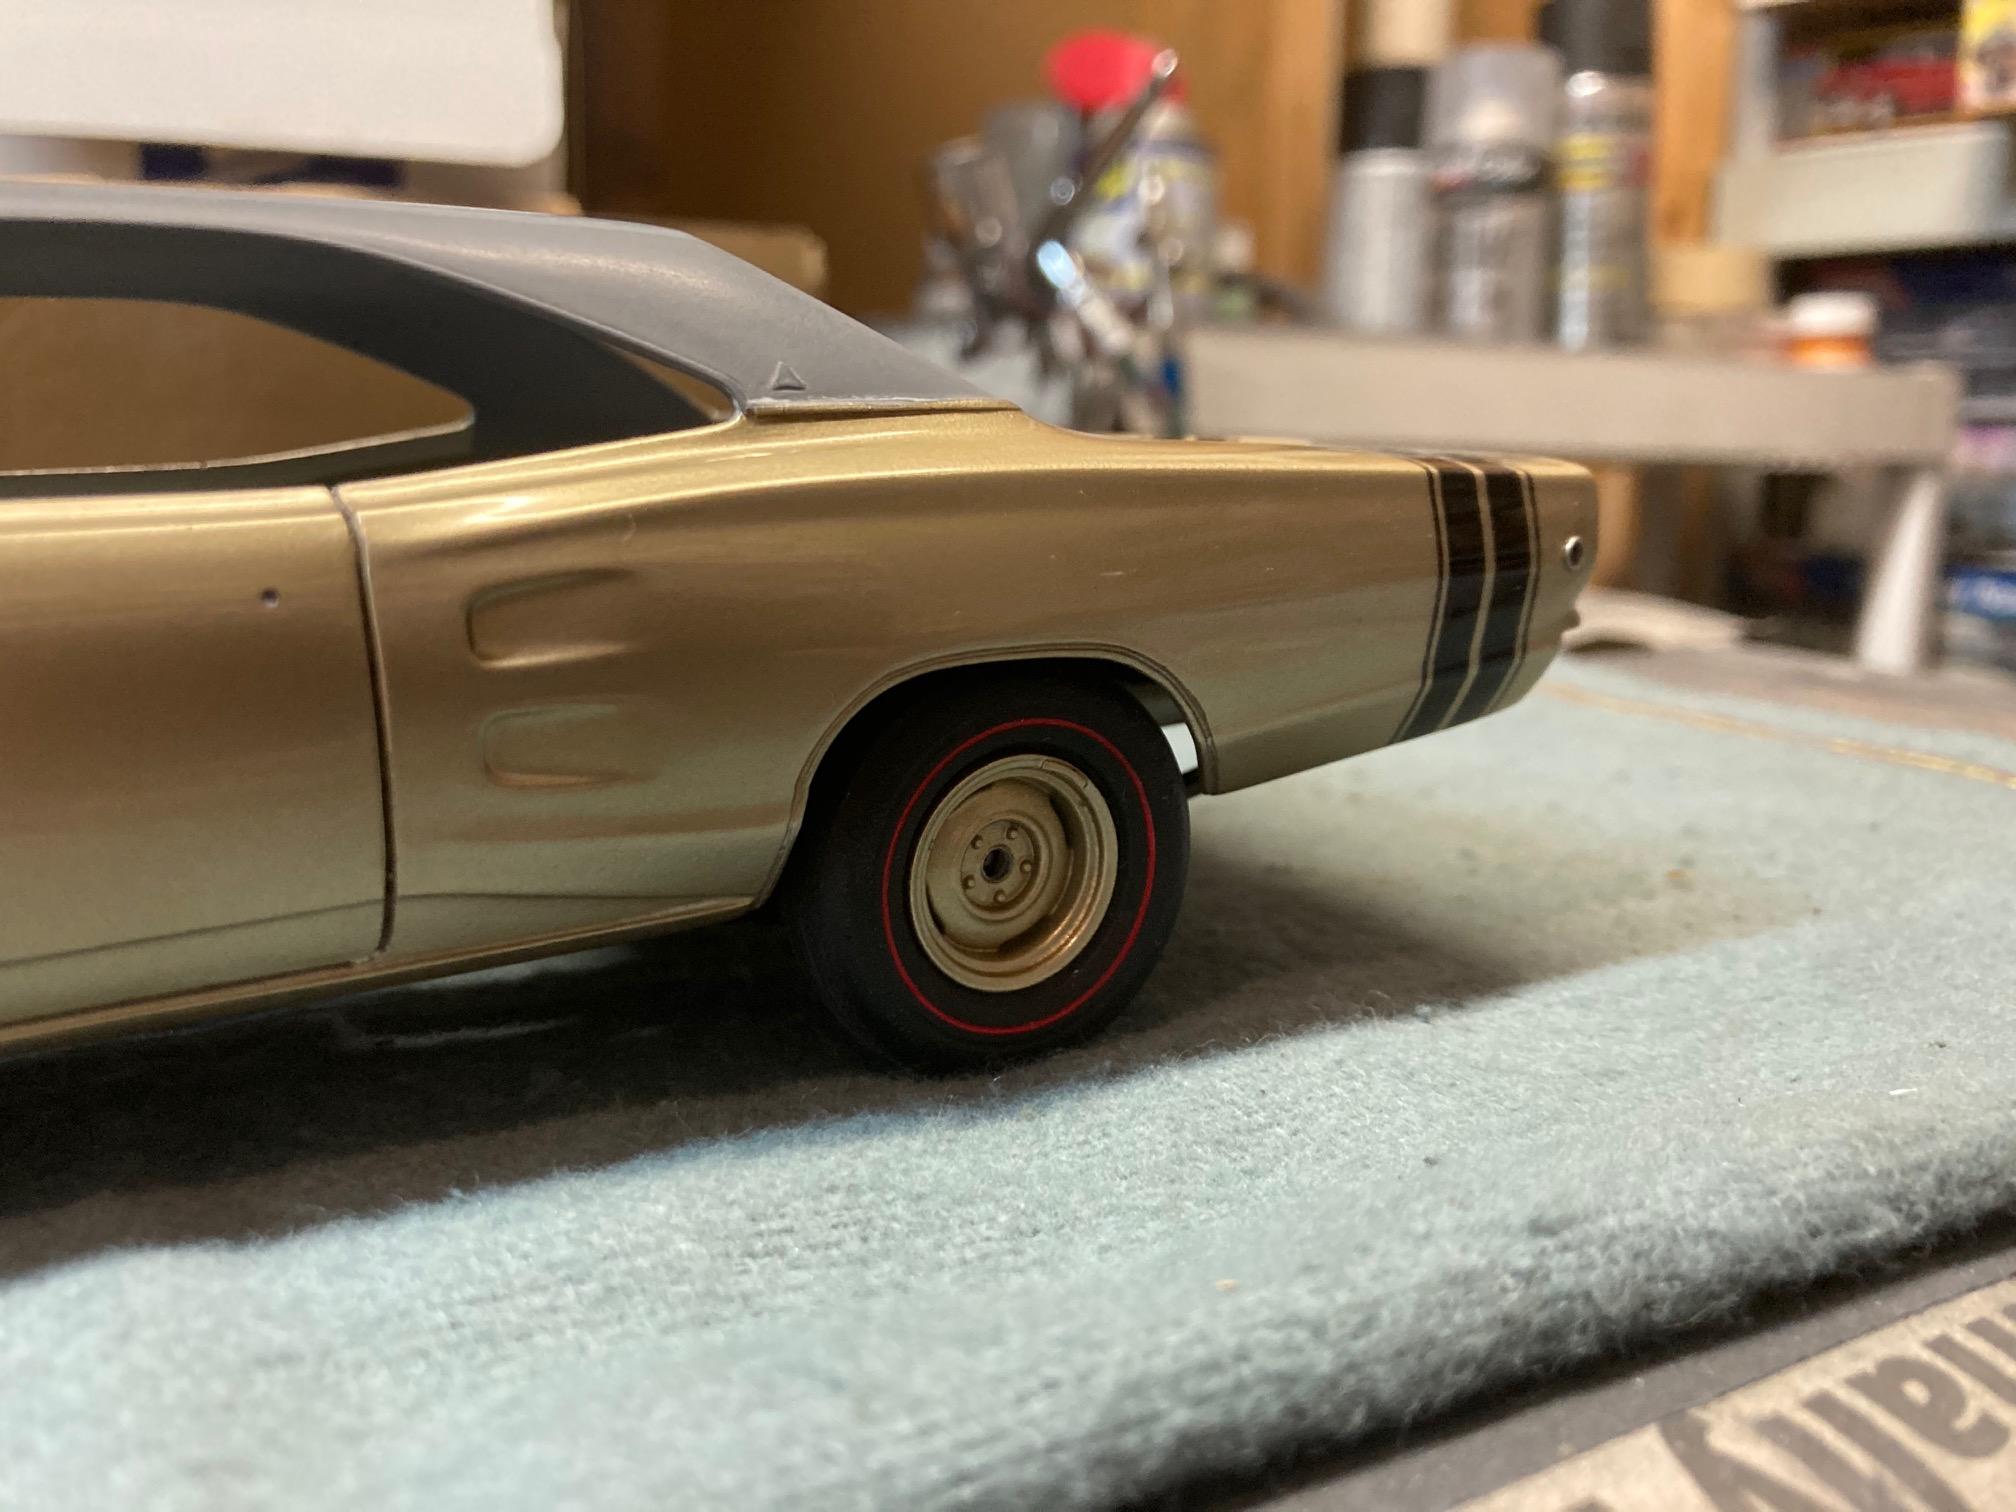
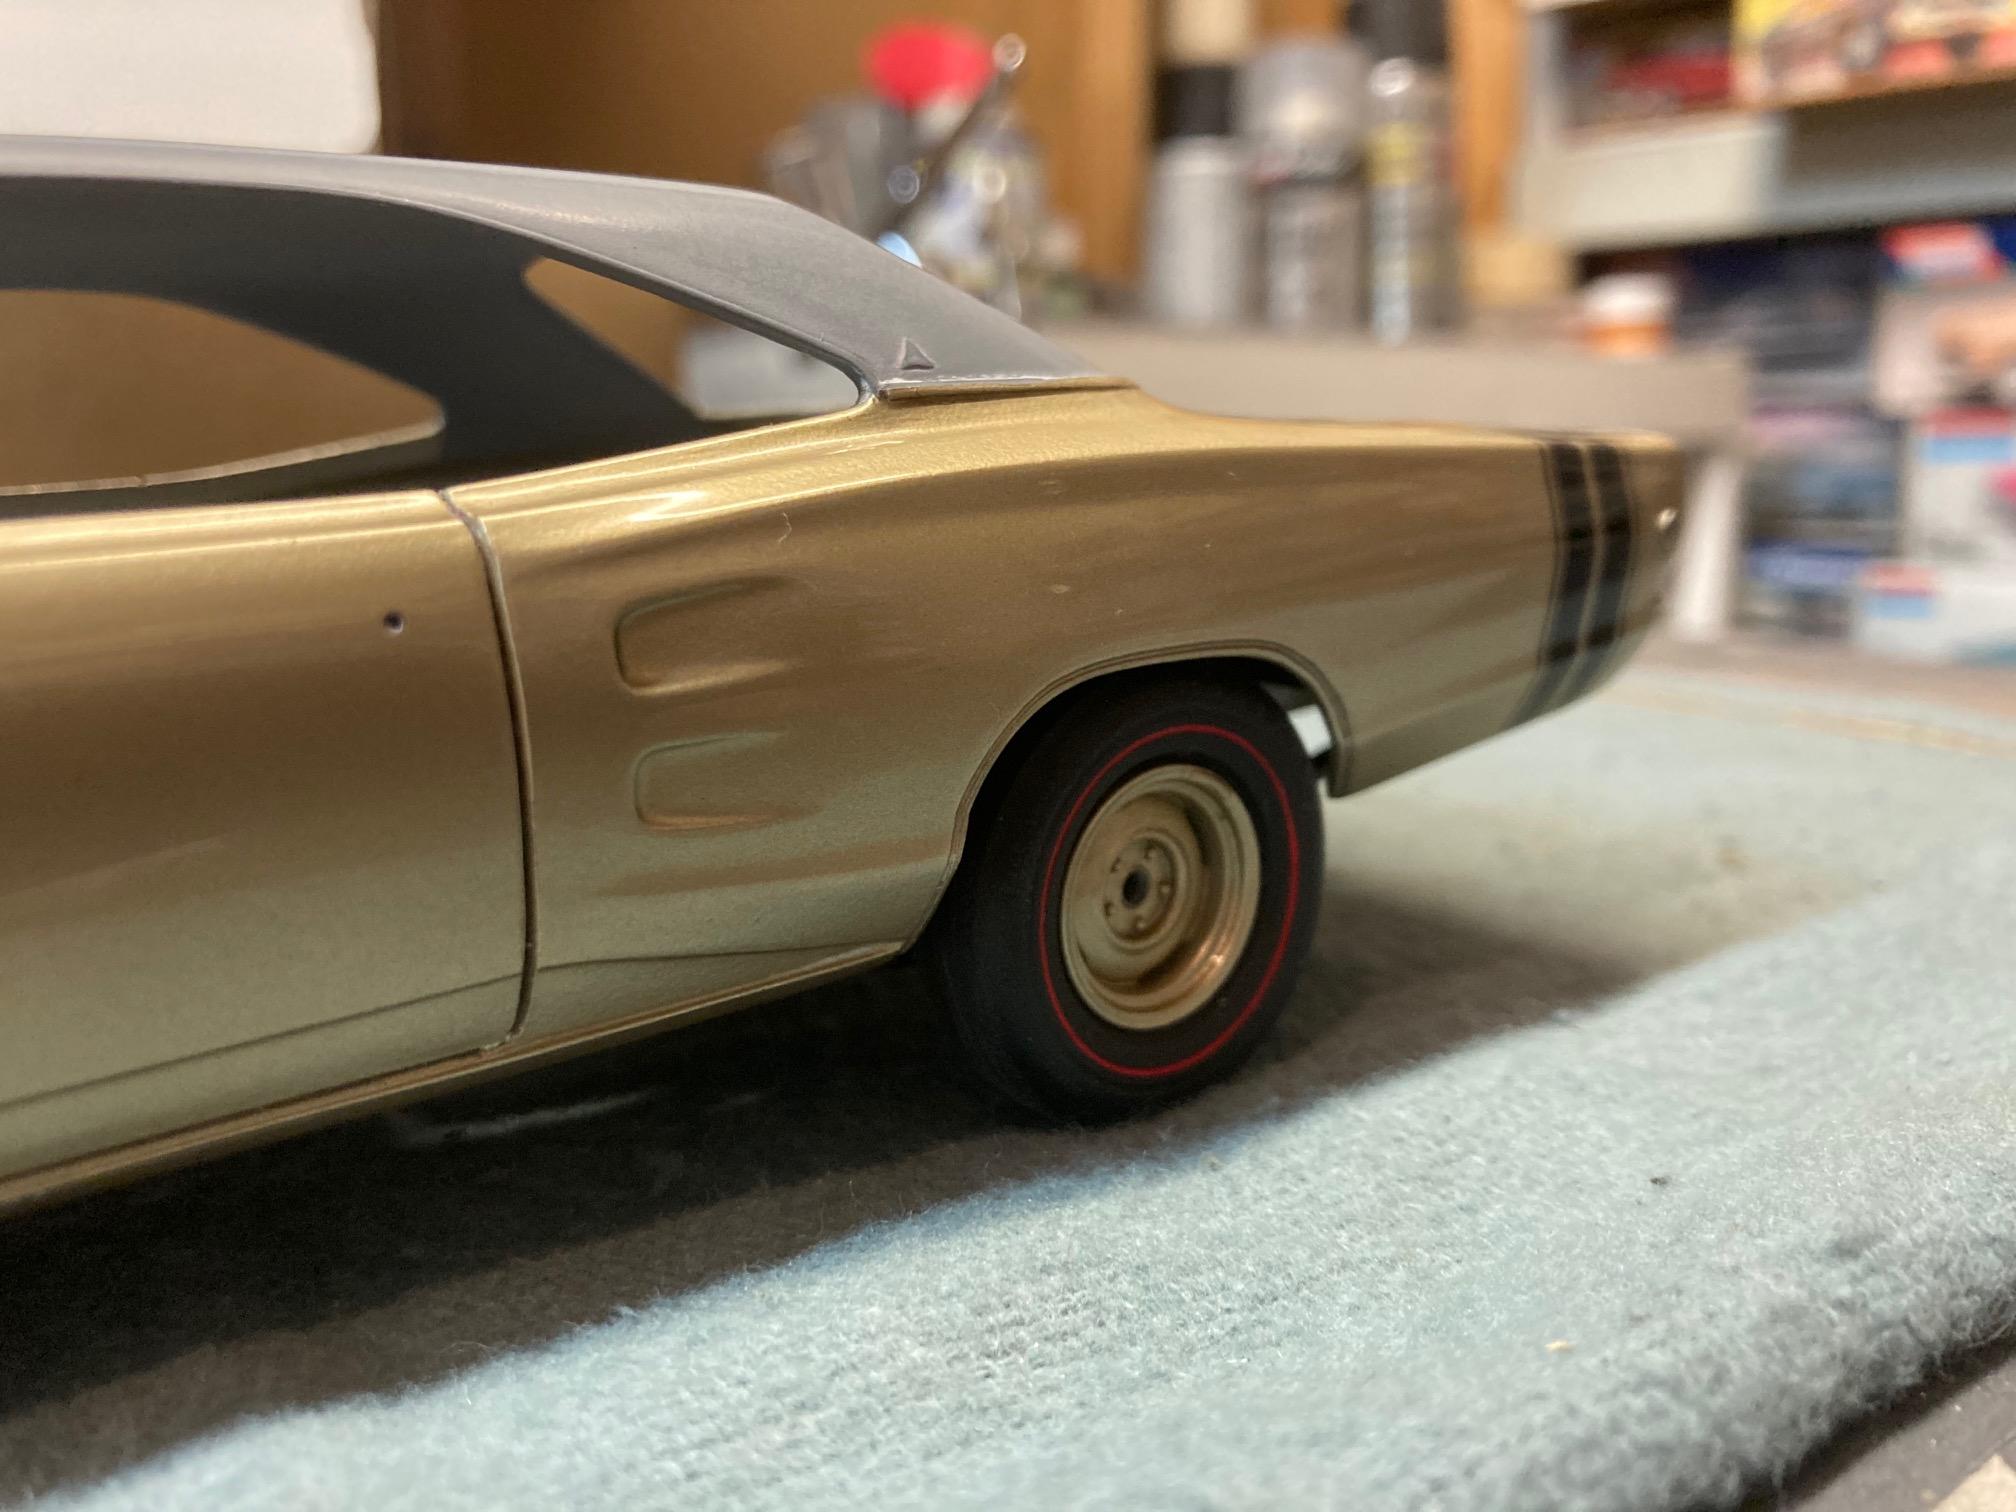
I'm using a set of resin tires from Fireball Modelworks on this build, so the red lines need to be painted. I picked up some white and some red acrylic at the hobby shop today and was anxious to see how it would go. I was very happy. The tires are molded with a recess for the red lines/white walls so painting was quite easy. Started with a little Mr. Hobby white, followed by a coat of red, and then cleaned off anything outside of the recess with a little bit of mineral spirits on a conical swab. A pretty easy operation, and the results are nice. Oh, I also "flat spotted" the tire by shaving and sanding a little off of the bottom, though it's really not evident in these photos. The resin in these tires is quite difficult to cut in comparison to a regular vinyl kit tire. Steve

-
Good question! I guess that I just take things very slowly, and maintain a picture in my head of what I need to do. As has been mentioned before, I try to treat every aspect of a model as a separate model in itself, so when I begin working on a particular part, I try to concentrate just on that part until the end. That's not always possible, but that's what I try to do. That said, in the end, when all of those "separate models" begin to come together in the final assembly phase, I do begin to keep a list of things that need to be done, and in what order. Steve
-

Good news for a change...
StevenGuthmiller replied to tim boyd's topic in General Automotive Talk (Trucks and Cars)
Yes. The Hobby Hut on 17th Ave, right off of 45th street. Steve -
Good news for a change...
StevenGuthmiller replied to tim boyd's topic in General Automotive Talk (Trucks and Cars)
I just returned from my only small local hobby shop this afternoon after not being in for some time, and it appears that they must be doing well. Fully stocked with all kinds of models, and I was quite surprised to see that their paint section had gone through a complete and total transformation! Gone were all of the old Testors paints......and I mean ALL OF THEM! Not a single bottle of Testors enamel to be found! I have to say that I might miss the Testors enamel jars, more for the familiarity than anything else, but chances are good that I'll get over it really quick. Now my shop has 5 full racks of Tamiya spray paints, and Mr. Hobby and MCW acrylics and enamels, as well as all of the corresponding primers, thinners, etc, etc, etc! My eyes began to glaze over after a few minutes and I had to engage with the owner to help me figure out this giant array of paint in front of me! I guess I've got some research and learning to do to figure all of this stuff out now that Testors has bit the dust! Goodbye Testors! I really can't say that I'll miss you very much! Steve -
Molotow Liquid Chrome pens
StevenGuthmiller replied to Hi-Po's topic in Model Building Questions and Answers
Apparently some people were confused by my comments above, but the issues with Molotow chrome expressed by this thread are just one of the problems with this product. I've had the same problem with the ink in my 2 pens turning to garbage with them both being still more than half full, and with the cost of this stuff being what it is, I'm not pleased with it. Not sure why that would be confusing. And no, it has nothing to do with the tips. I never used the tips anyway. I either took the ink from the tip with a brush and applied it that way, or cracked open the pen and used a brush. Now I have two pens, two thirds of the way full with trashy, non-durable silver paint. What is it exactly that should make any of us think that this stuff will act any differently after it's applied to the model and it's a few years down the road. That's the problem that I have with this product. It was never designed for this hobby and it's properties of longevity are completely unknown, not to mention the fact that you can't touch the stuff after it's applied. I'm out! The rest of you are more than welcome to my share. Steve -
Steve
-
Masking Tape Leaking -2 tone Paint Job
StevenGuthmiller replied to 69NovaYenko's topic in Tips, Tricks, and Tutorials
That’s totally uncharacteristic. I’ve used dozens of rolls of Tamiya tape and have never had adhesion issues. I’d be interested to know the particulars of the paint that it wouldn’t stick to. Otherwise, you were unlucky enough to receive the only roll of bad Tamiya tape on the planet! ? Steve -
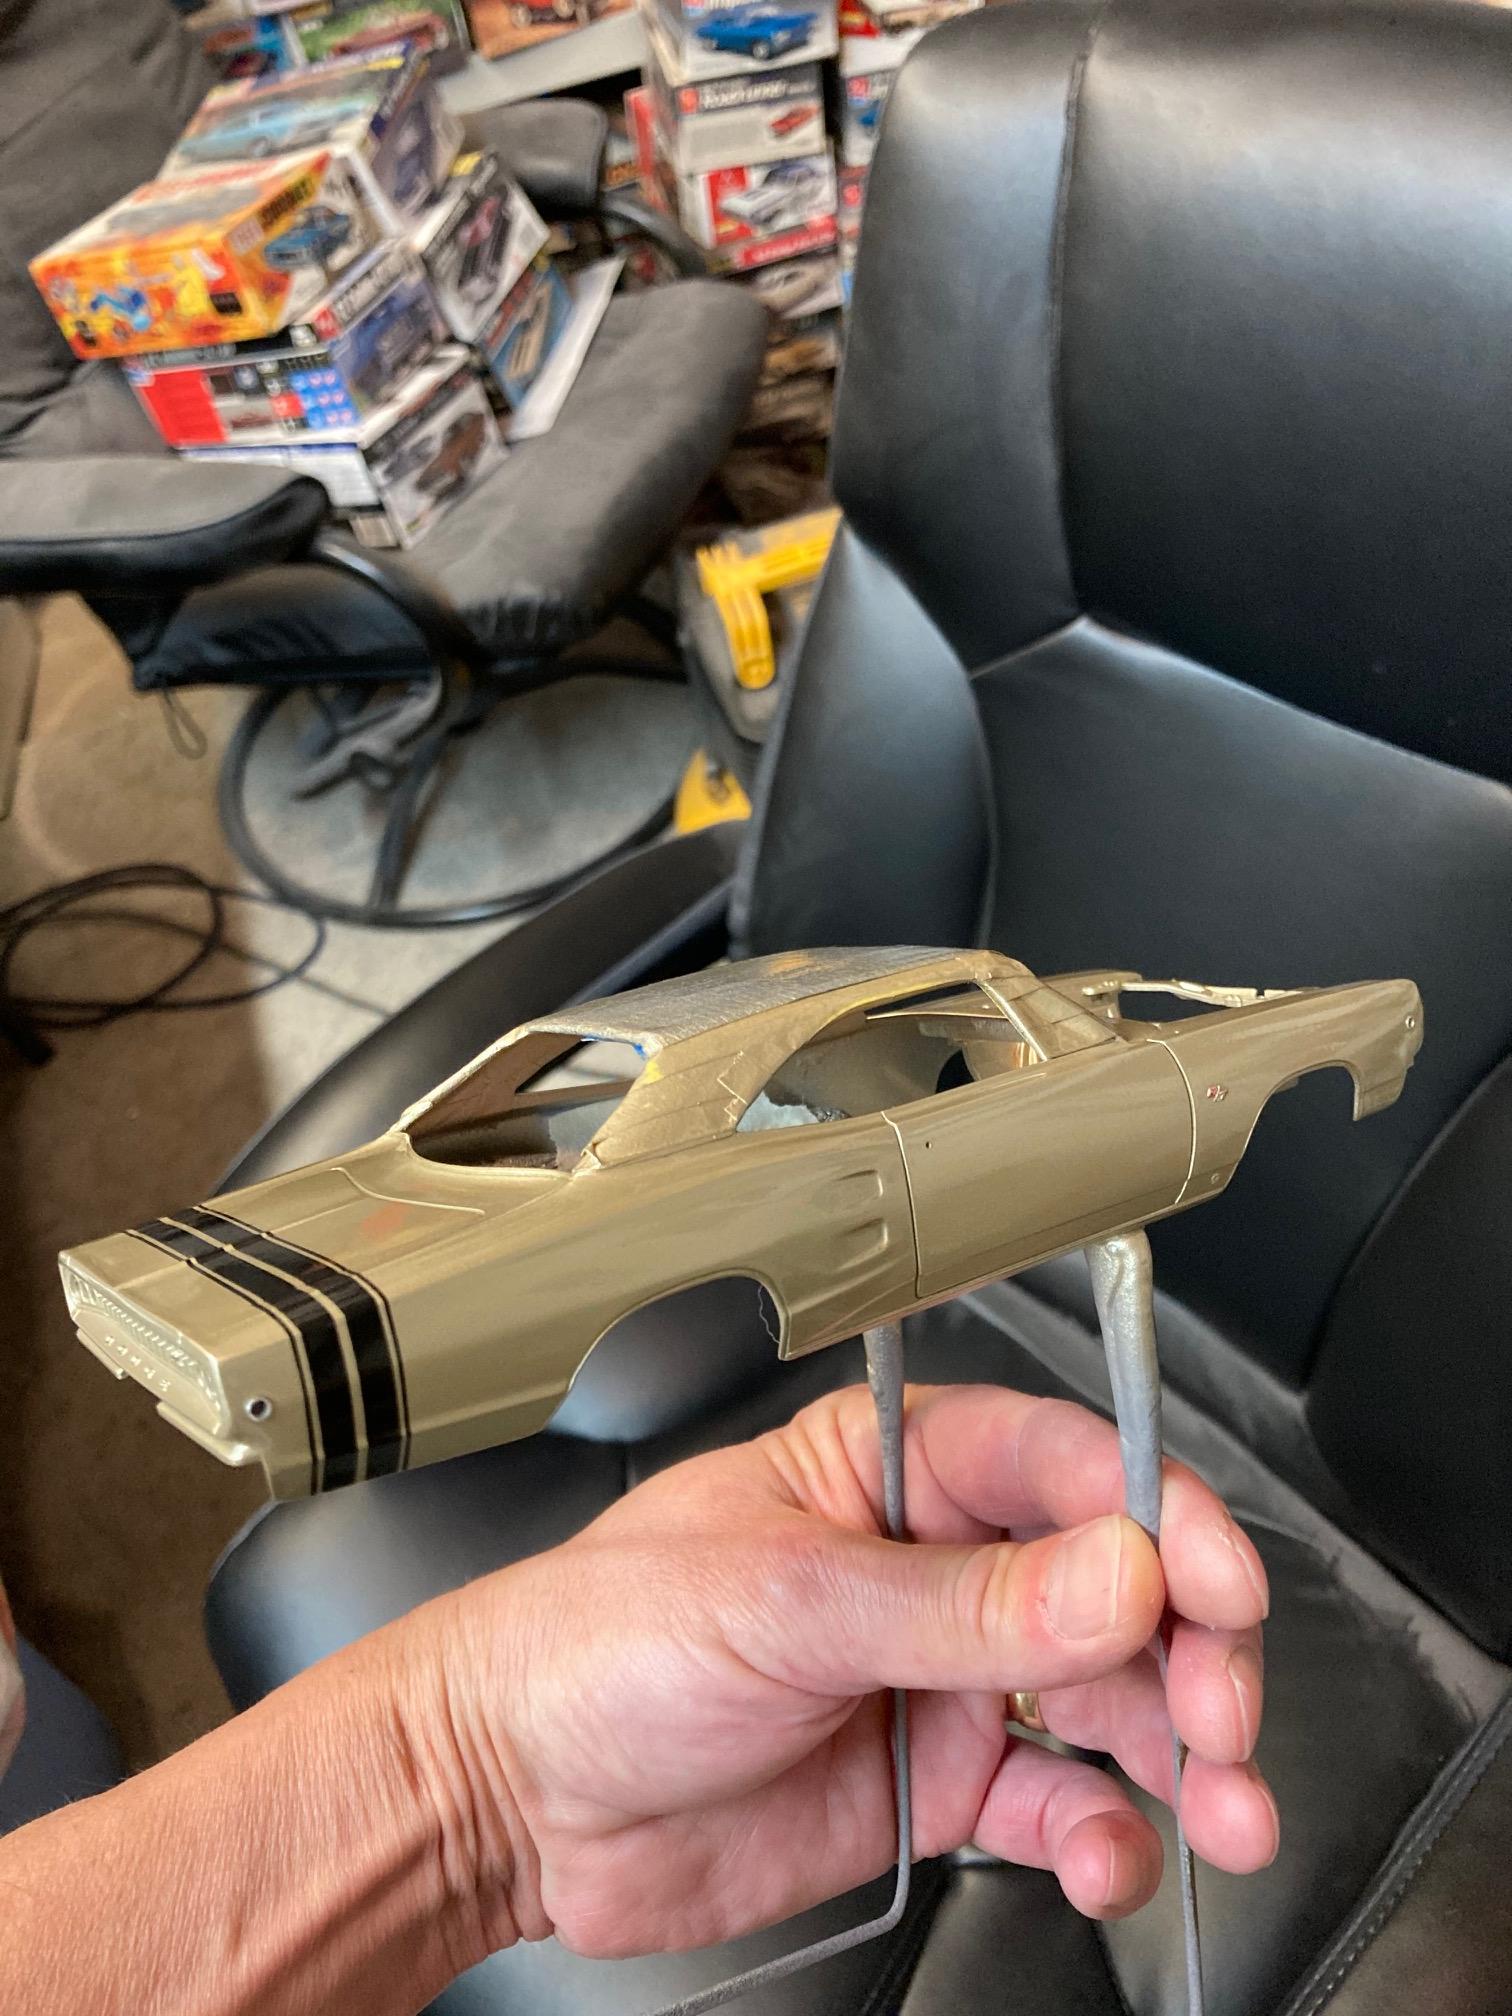
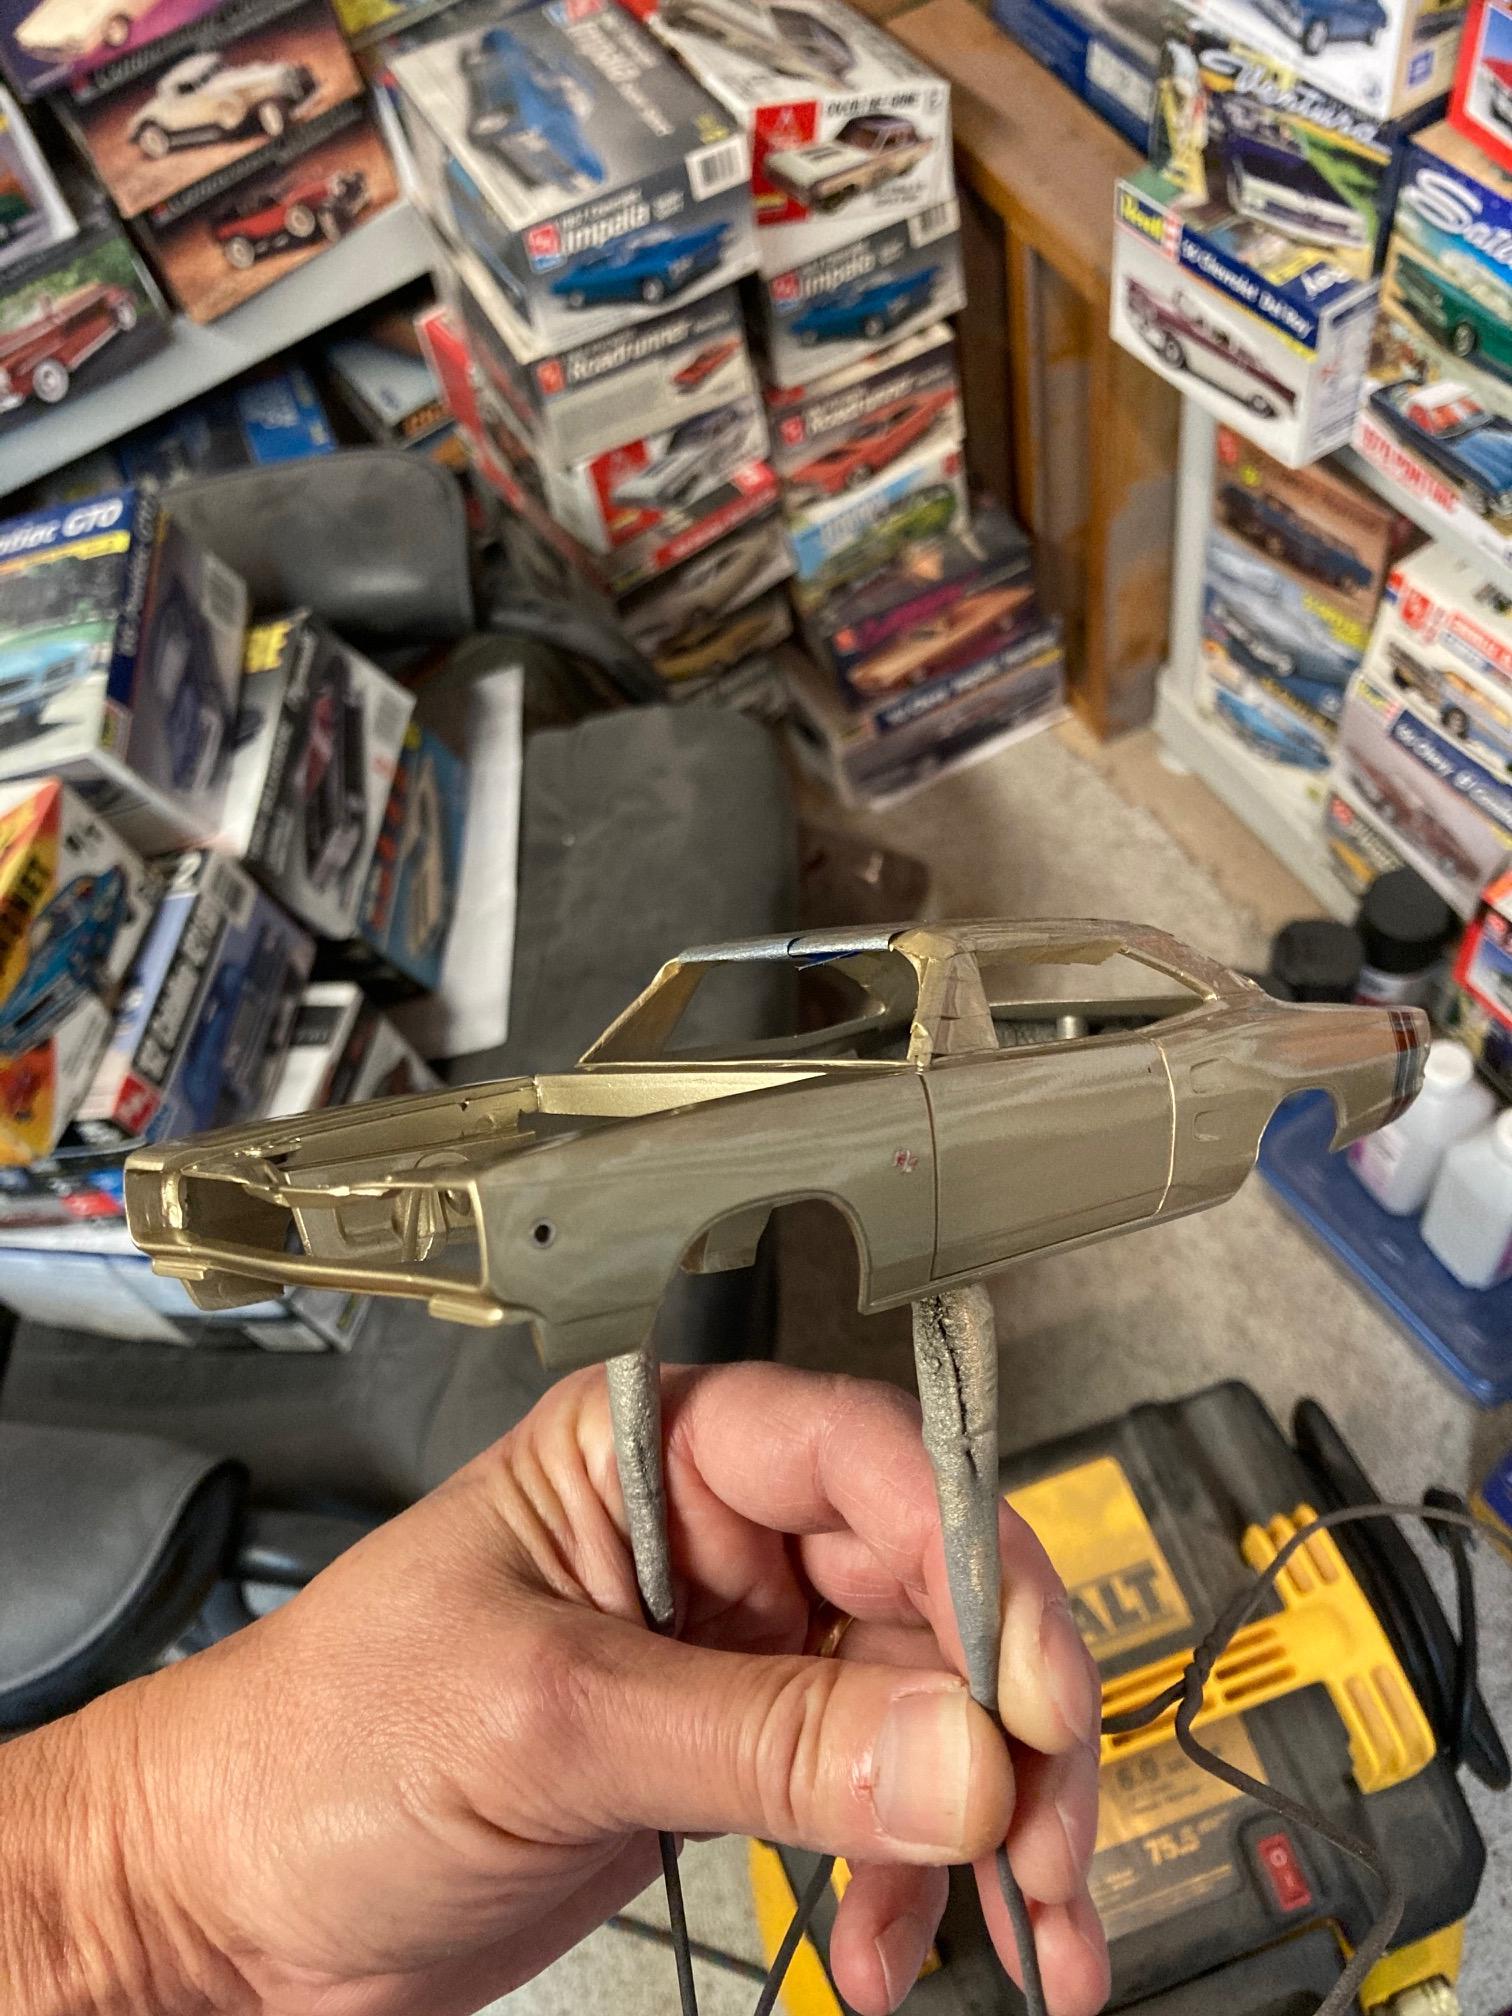
Commencing with one of my least favorite operations.......polishing. But I feel that it's so worth it! Steve
-
Thanks John. If nothing else, the photos in the link are interesting as it looks as if I got the right color! Steve
-
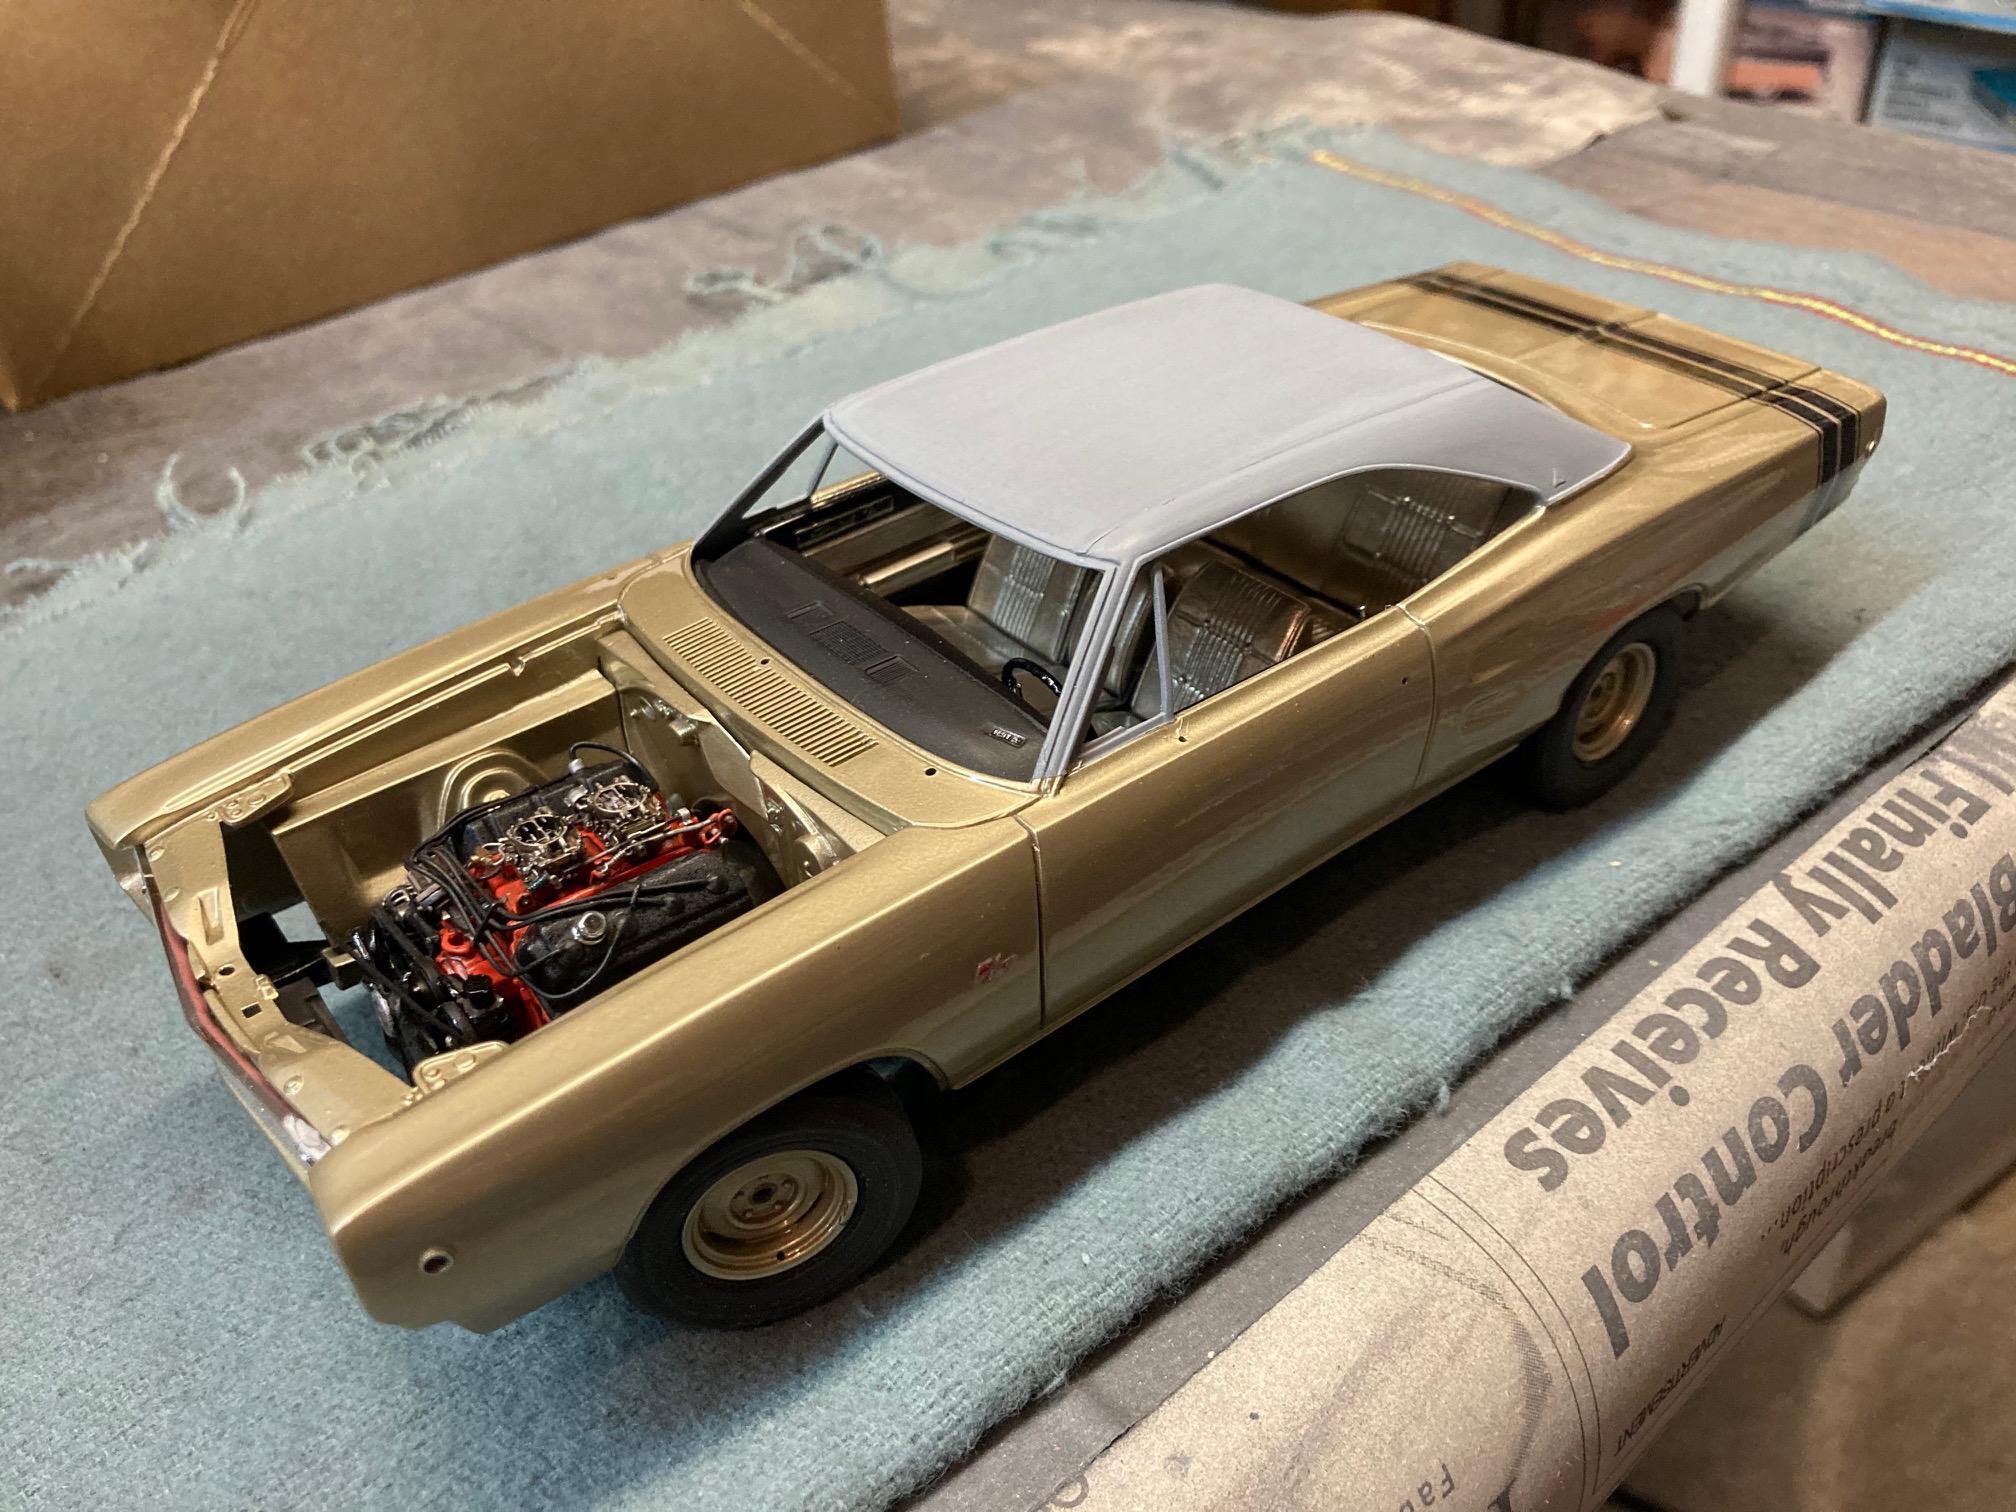
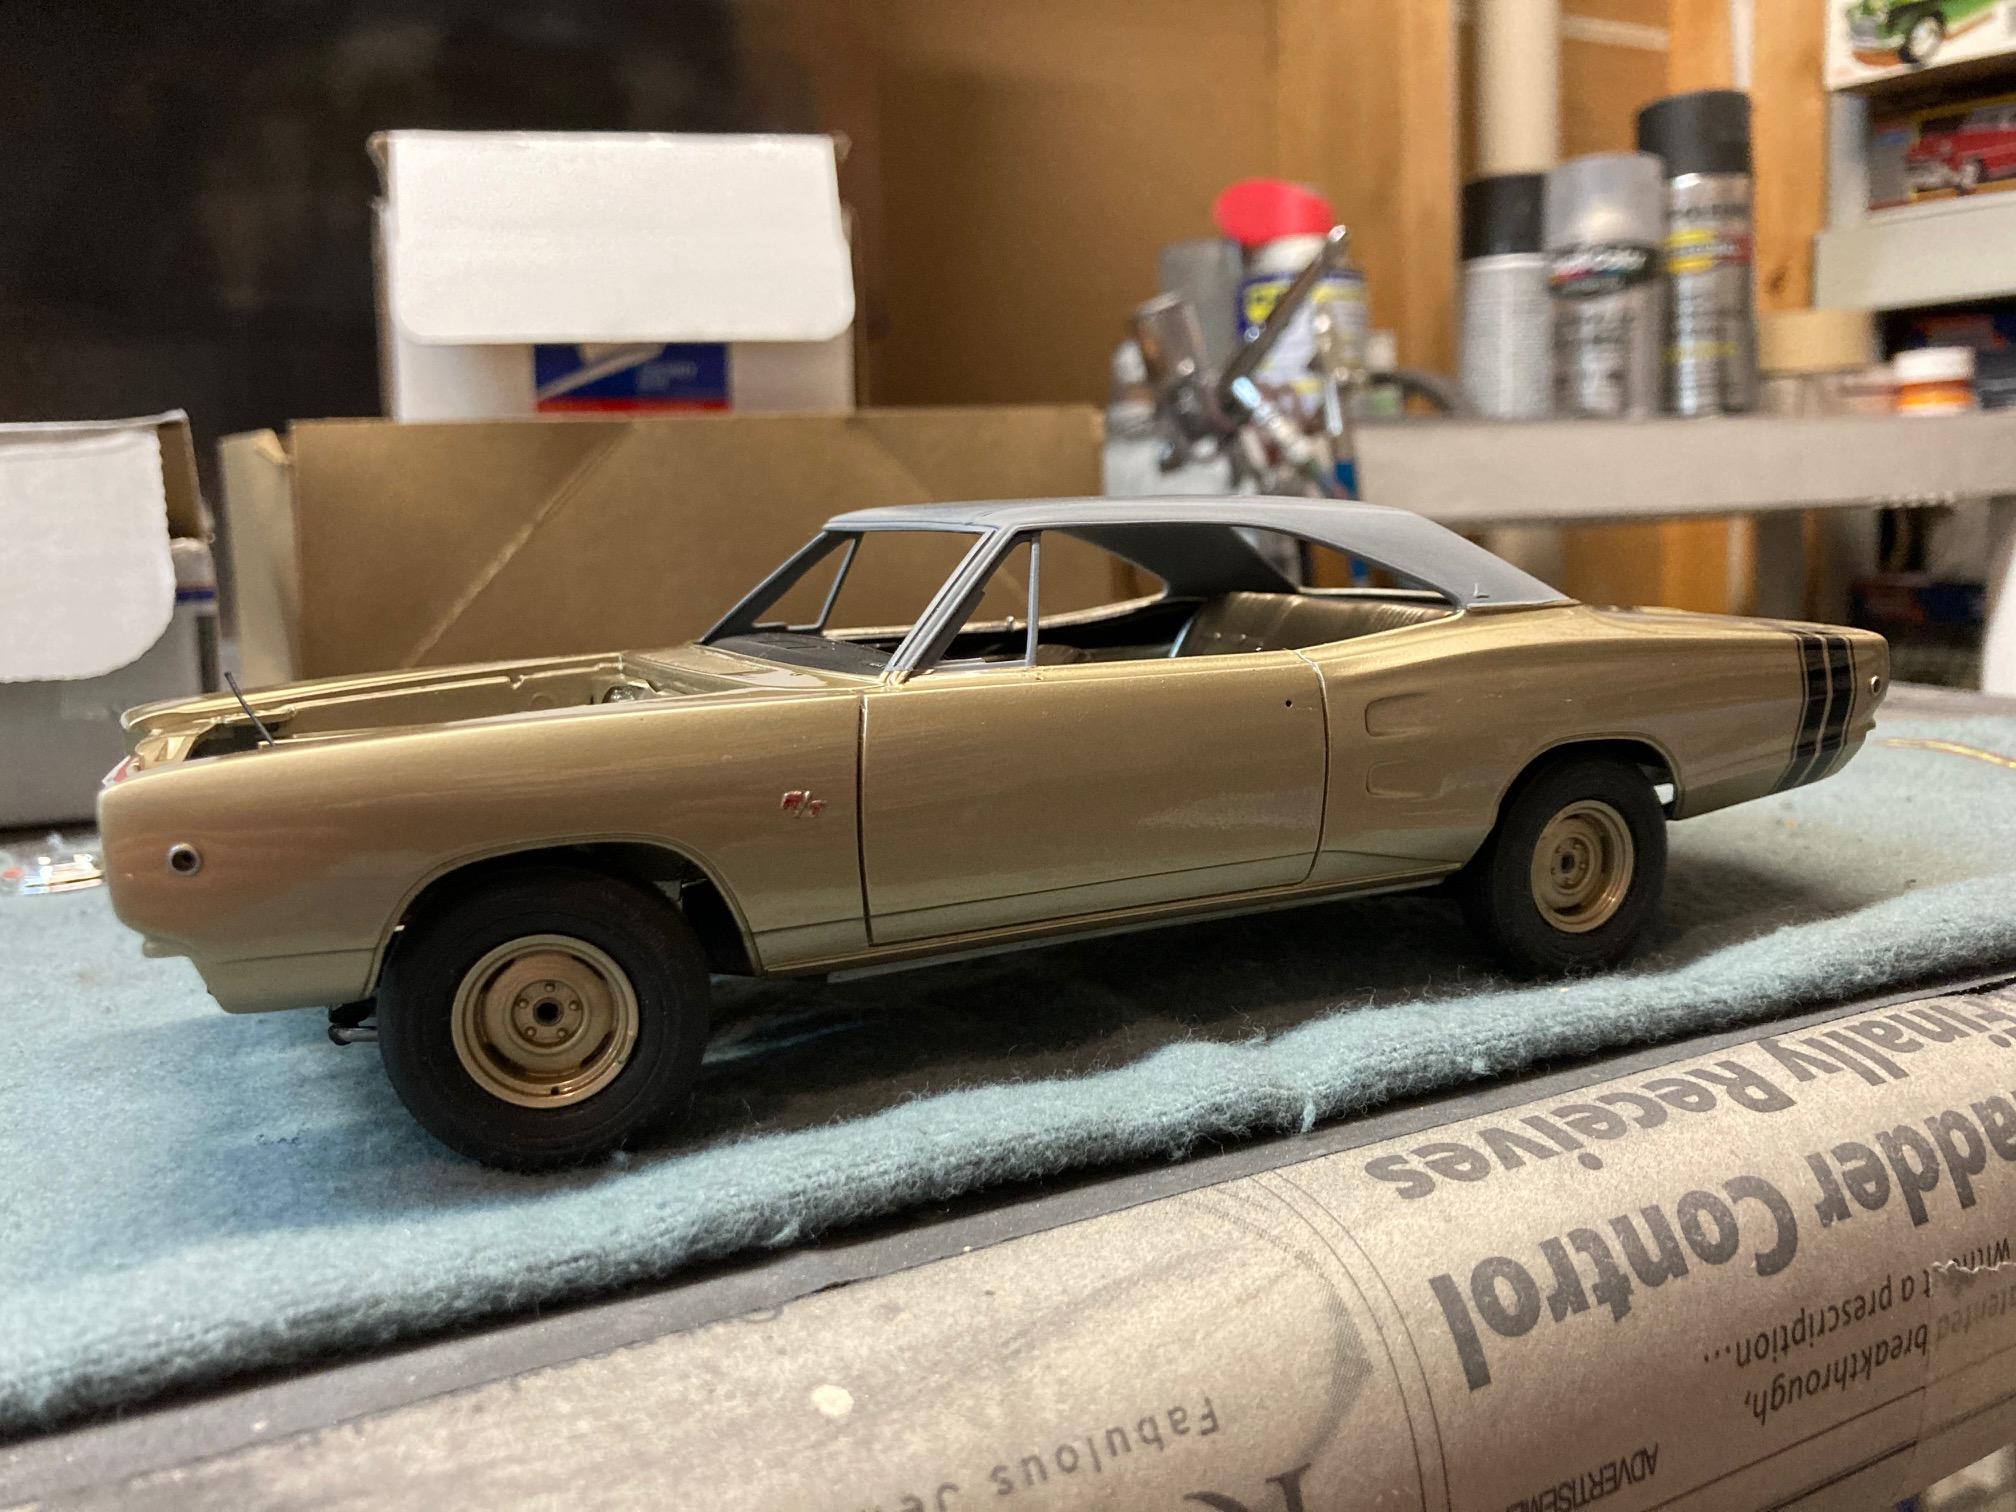
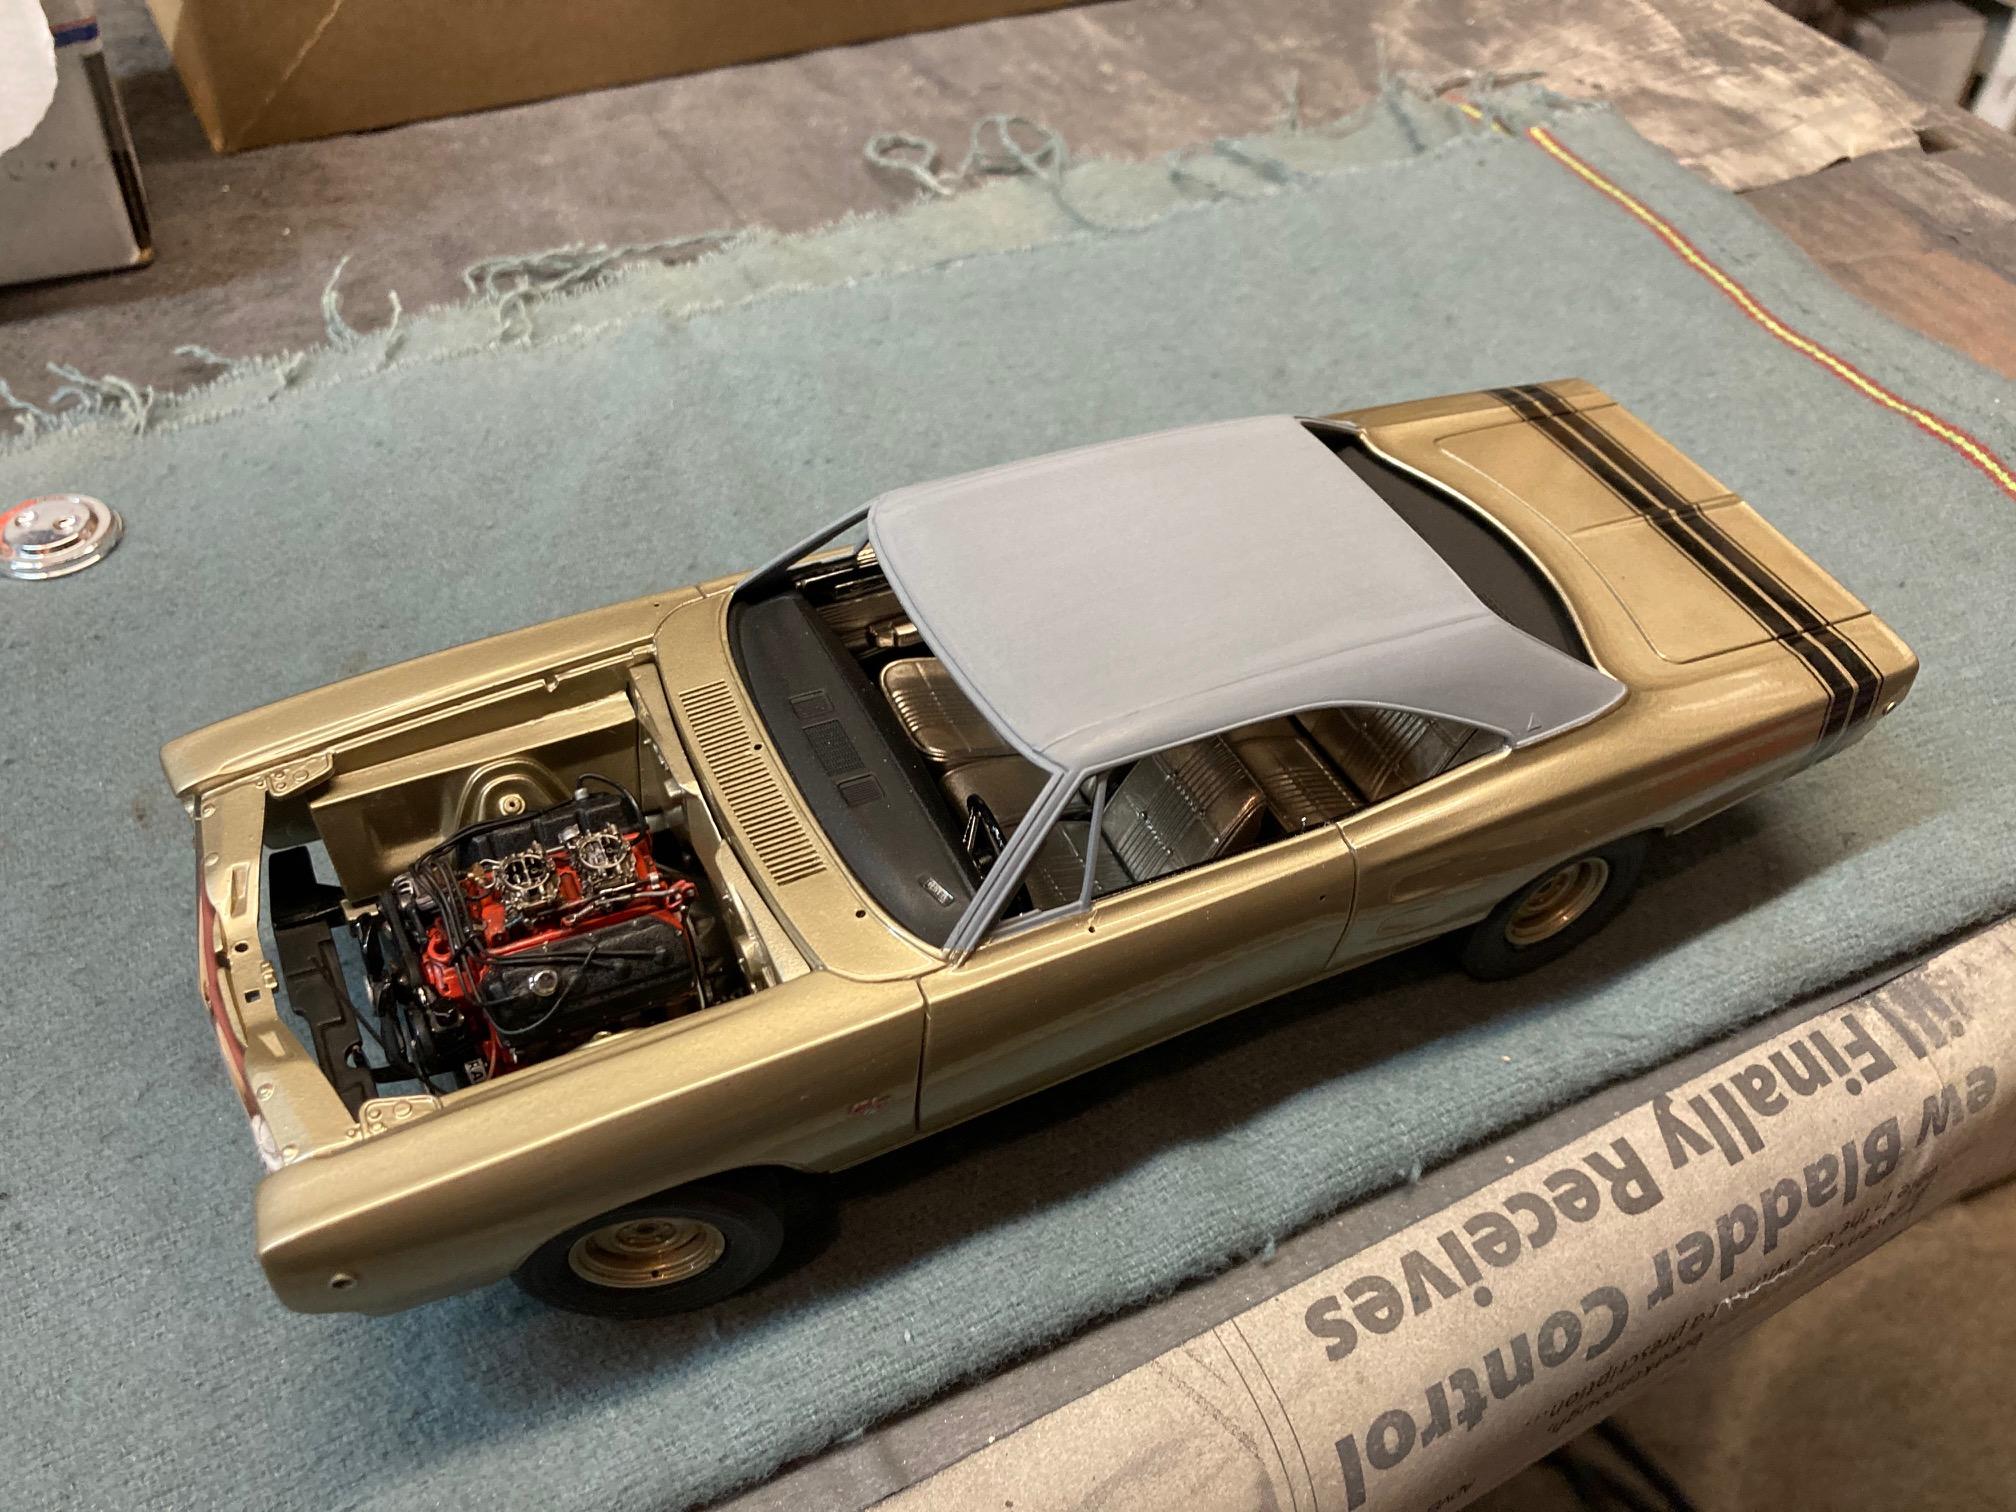
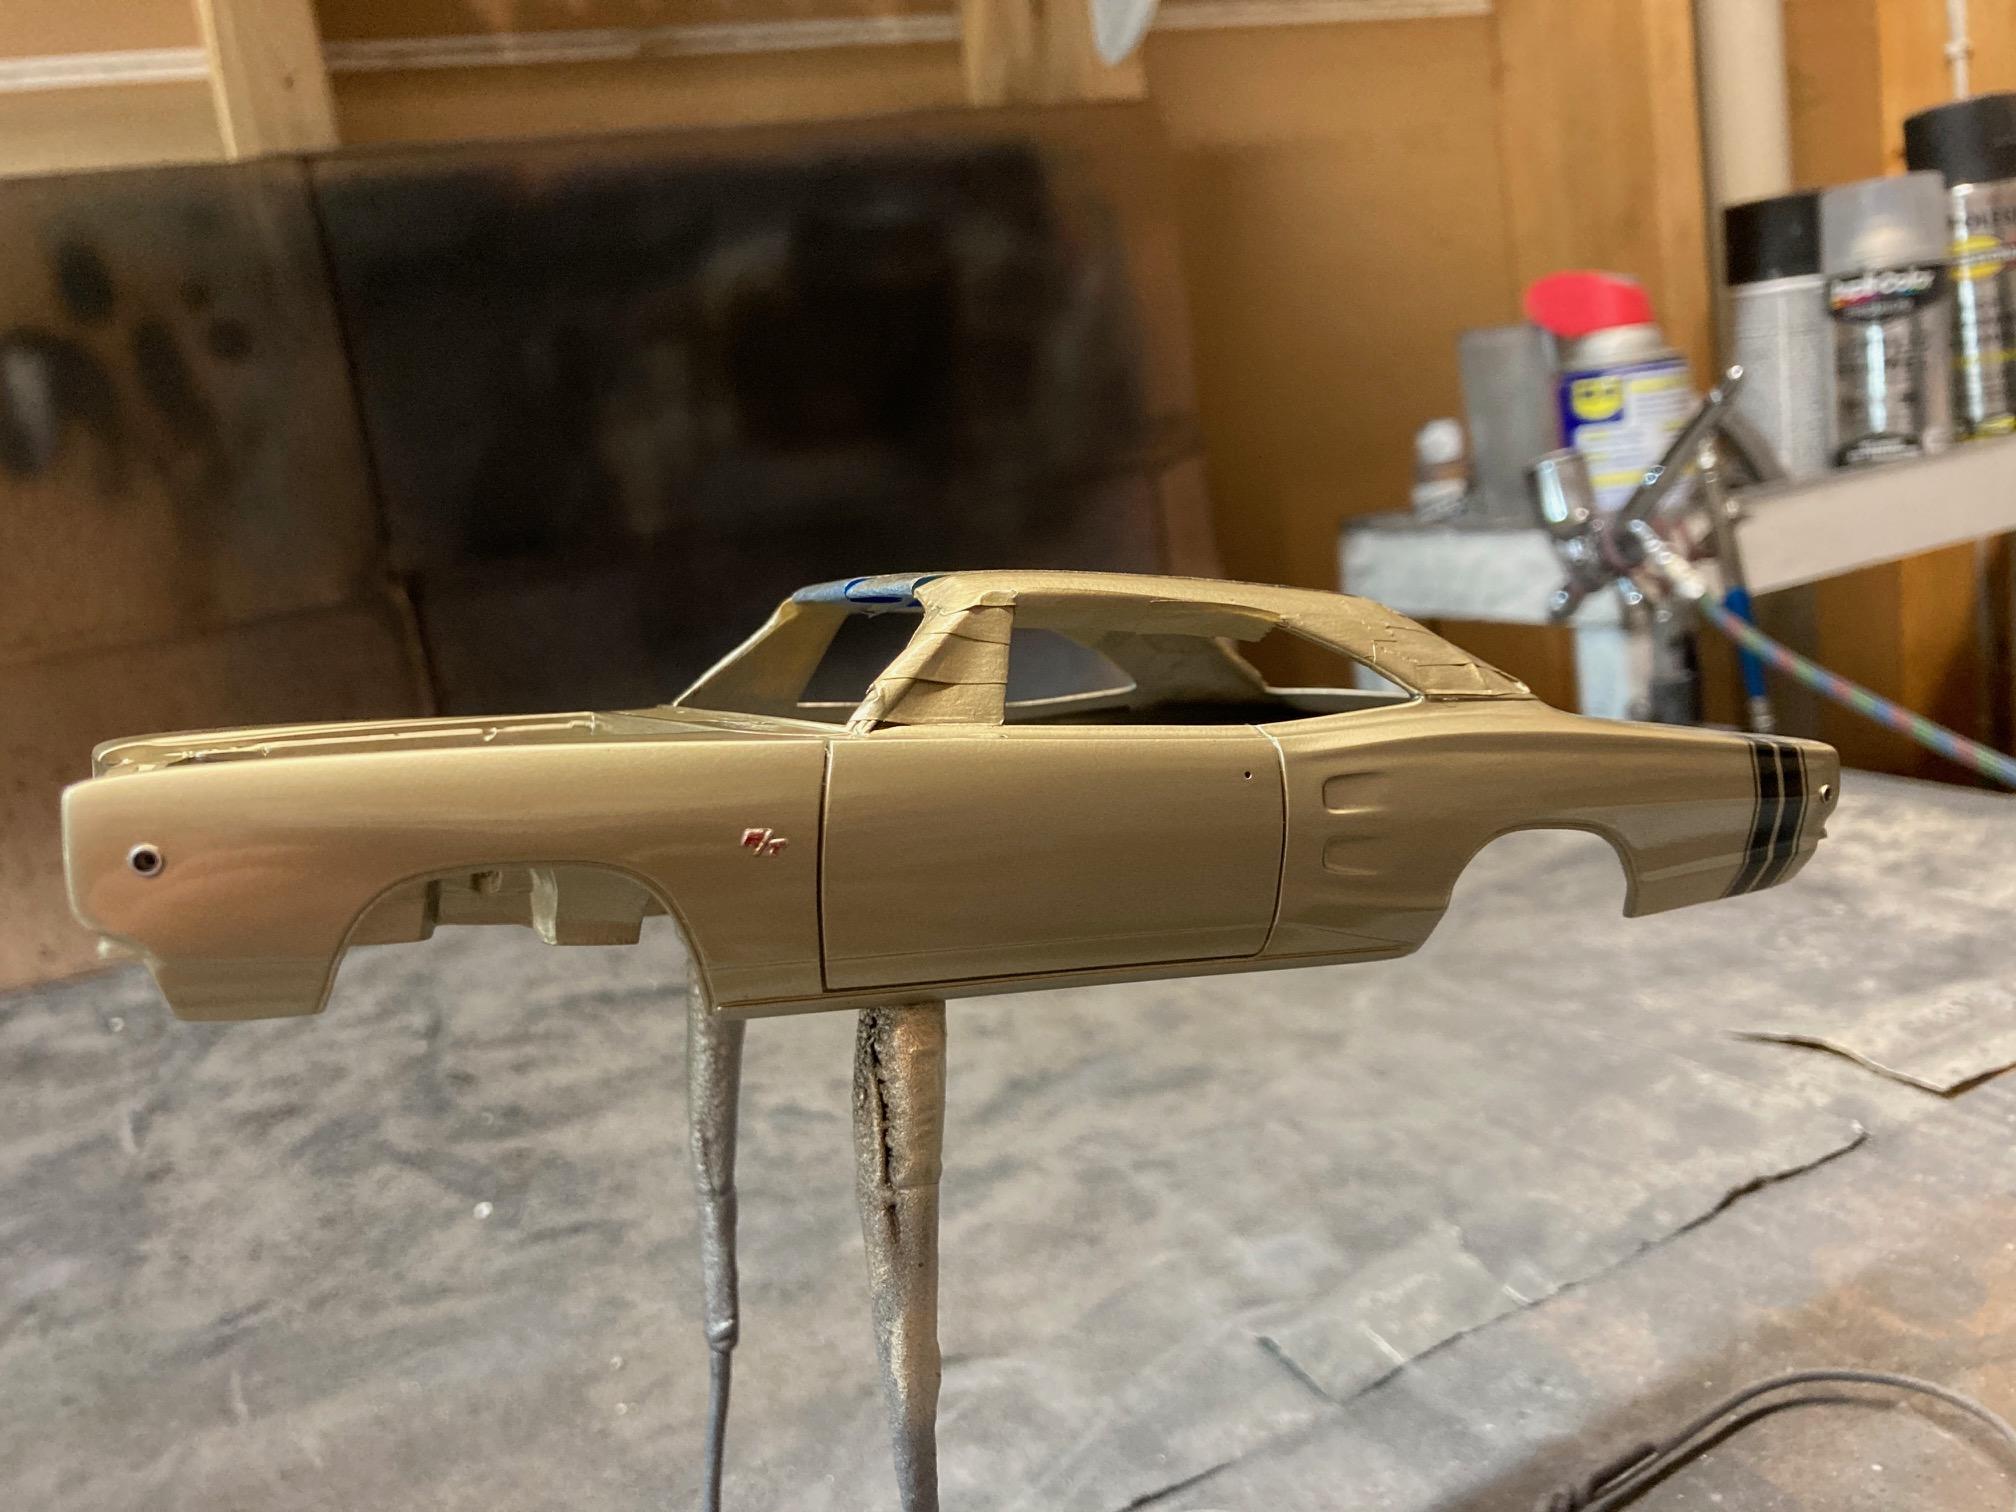
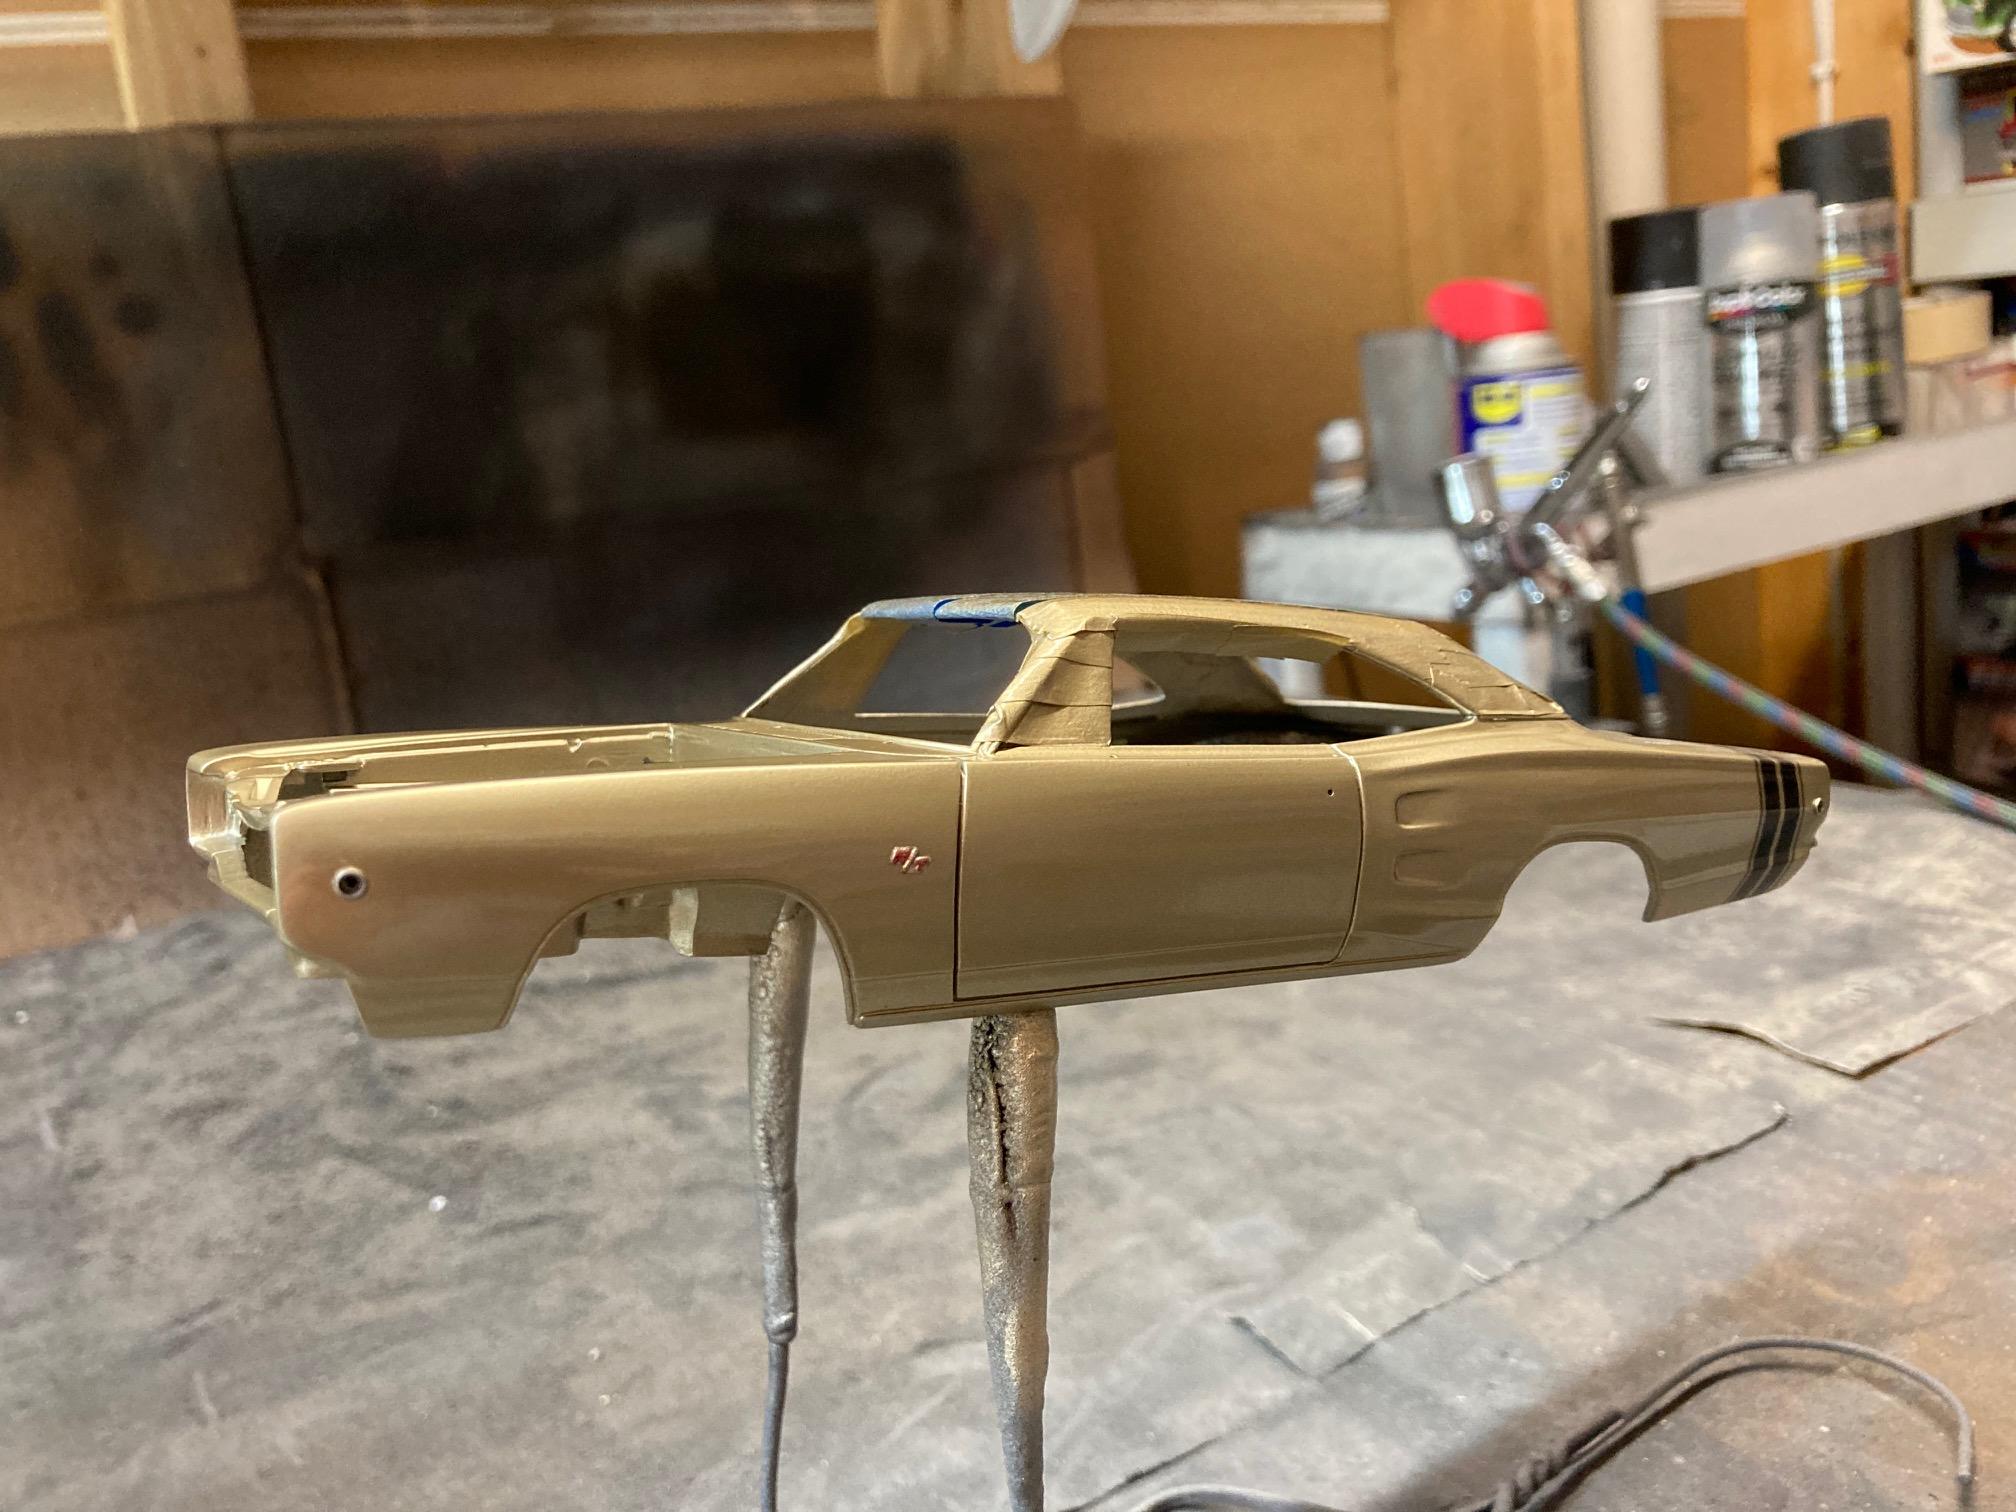
Thanks Bob. Hopefully the addition of the rest of the engine bay detail won't ruin the affect. Thanks David. I was going for that slightly high ride height. I think it gives a lot of cars a more "muscular" look. Makes them look like they mean business. Thanks John. I'm not too worried about the underhood decals. I've got quite a few different sheets of Mopar decals laying around, plus I still have a lot of generic underhood decals left from a couple of "mini sheets" that I got from Speedway Decals a long time ago. Anybody have any knowledge of what kinds of "chalk/inspection markings" you would have seen on a car like this? I did some of that on my last 2 GM cars and kind of liked the affect, but I'm not sure yet on this one. Steve
-
Masking Tape Leaking -2 tone Paint Job
StevenGuthmiller replied to 69NovaYenko's topic in Tips, Tricks, and Tutorials
That's probably one of the worst tapes to use for masking edges. It's literally designed not to stick very well. Second worst tape to use is regular masking tape. It sticks too well, but still does not seal well enough on the edges, plus it has the tendency to leave residue behind and can even tear off the underlying paint. Tamiya tape is your answer. I recently did these stripes with Tamiya tape and all that I did was cut a clean edge, apply it, burnishing well on the edges and then apply light coats of paint. It will give you perfect lines if you do it right. Steve
-
Molotow Liquid Chrome pens
StevenGuthmiller replied to Hi-Po's topic in Model Building Questions and Answers
Personally, I don’t think this stuff was ever going to live up to the hype that it was given. I was never convinced that it was that great in the first place. Looks nice to start with, but the durability is for cr*p and now it’s starting to become evident that you’re probably going to have to throw half of it in the garbage before you can use it up. If you ask me, it’s beginning to look like the chickens coming home to roost. Steve -
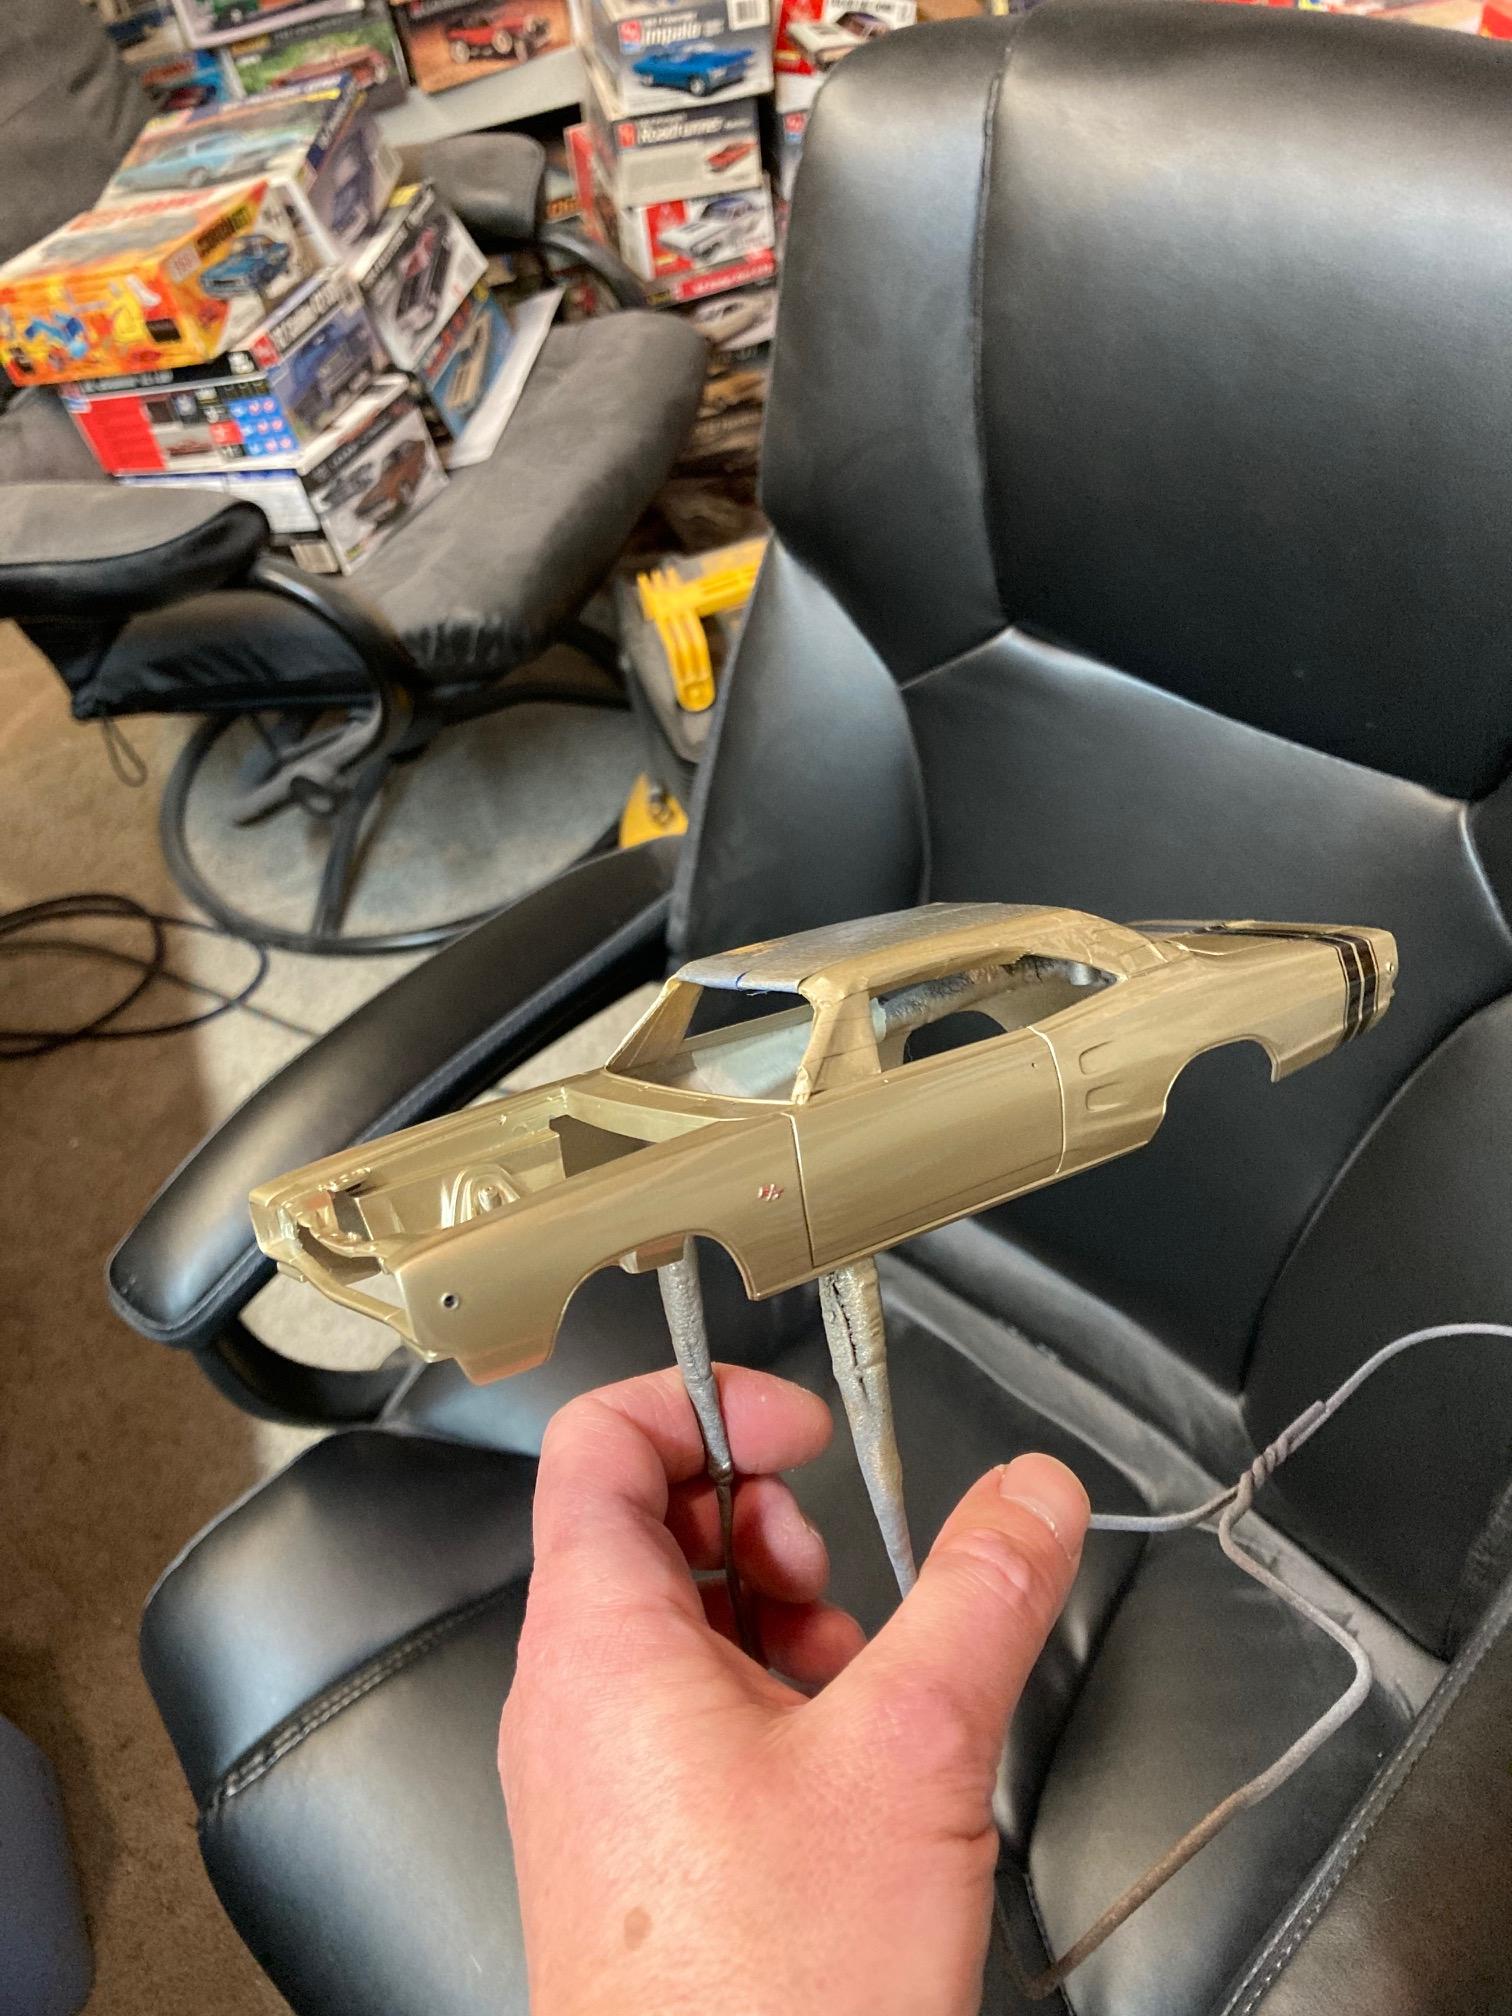
Haven’t given much thought to the engine bay stickers yet. I’ll consider that at a later time. The top isn’t white, it’s just primer for the time being. I’ll polish the body first and then do a black vinyl top. Steve
-
Thanks guys! I wasn't sure originally, but now I feel like I made the right decision. I really like it too. Steve
-
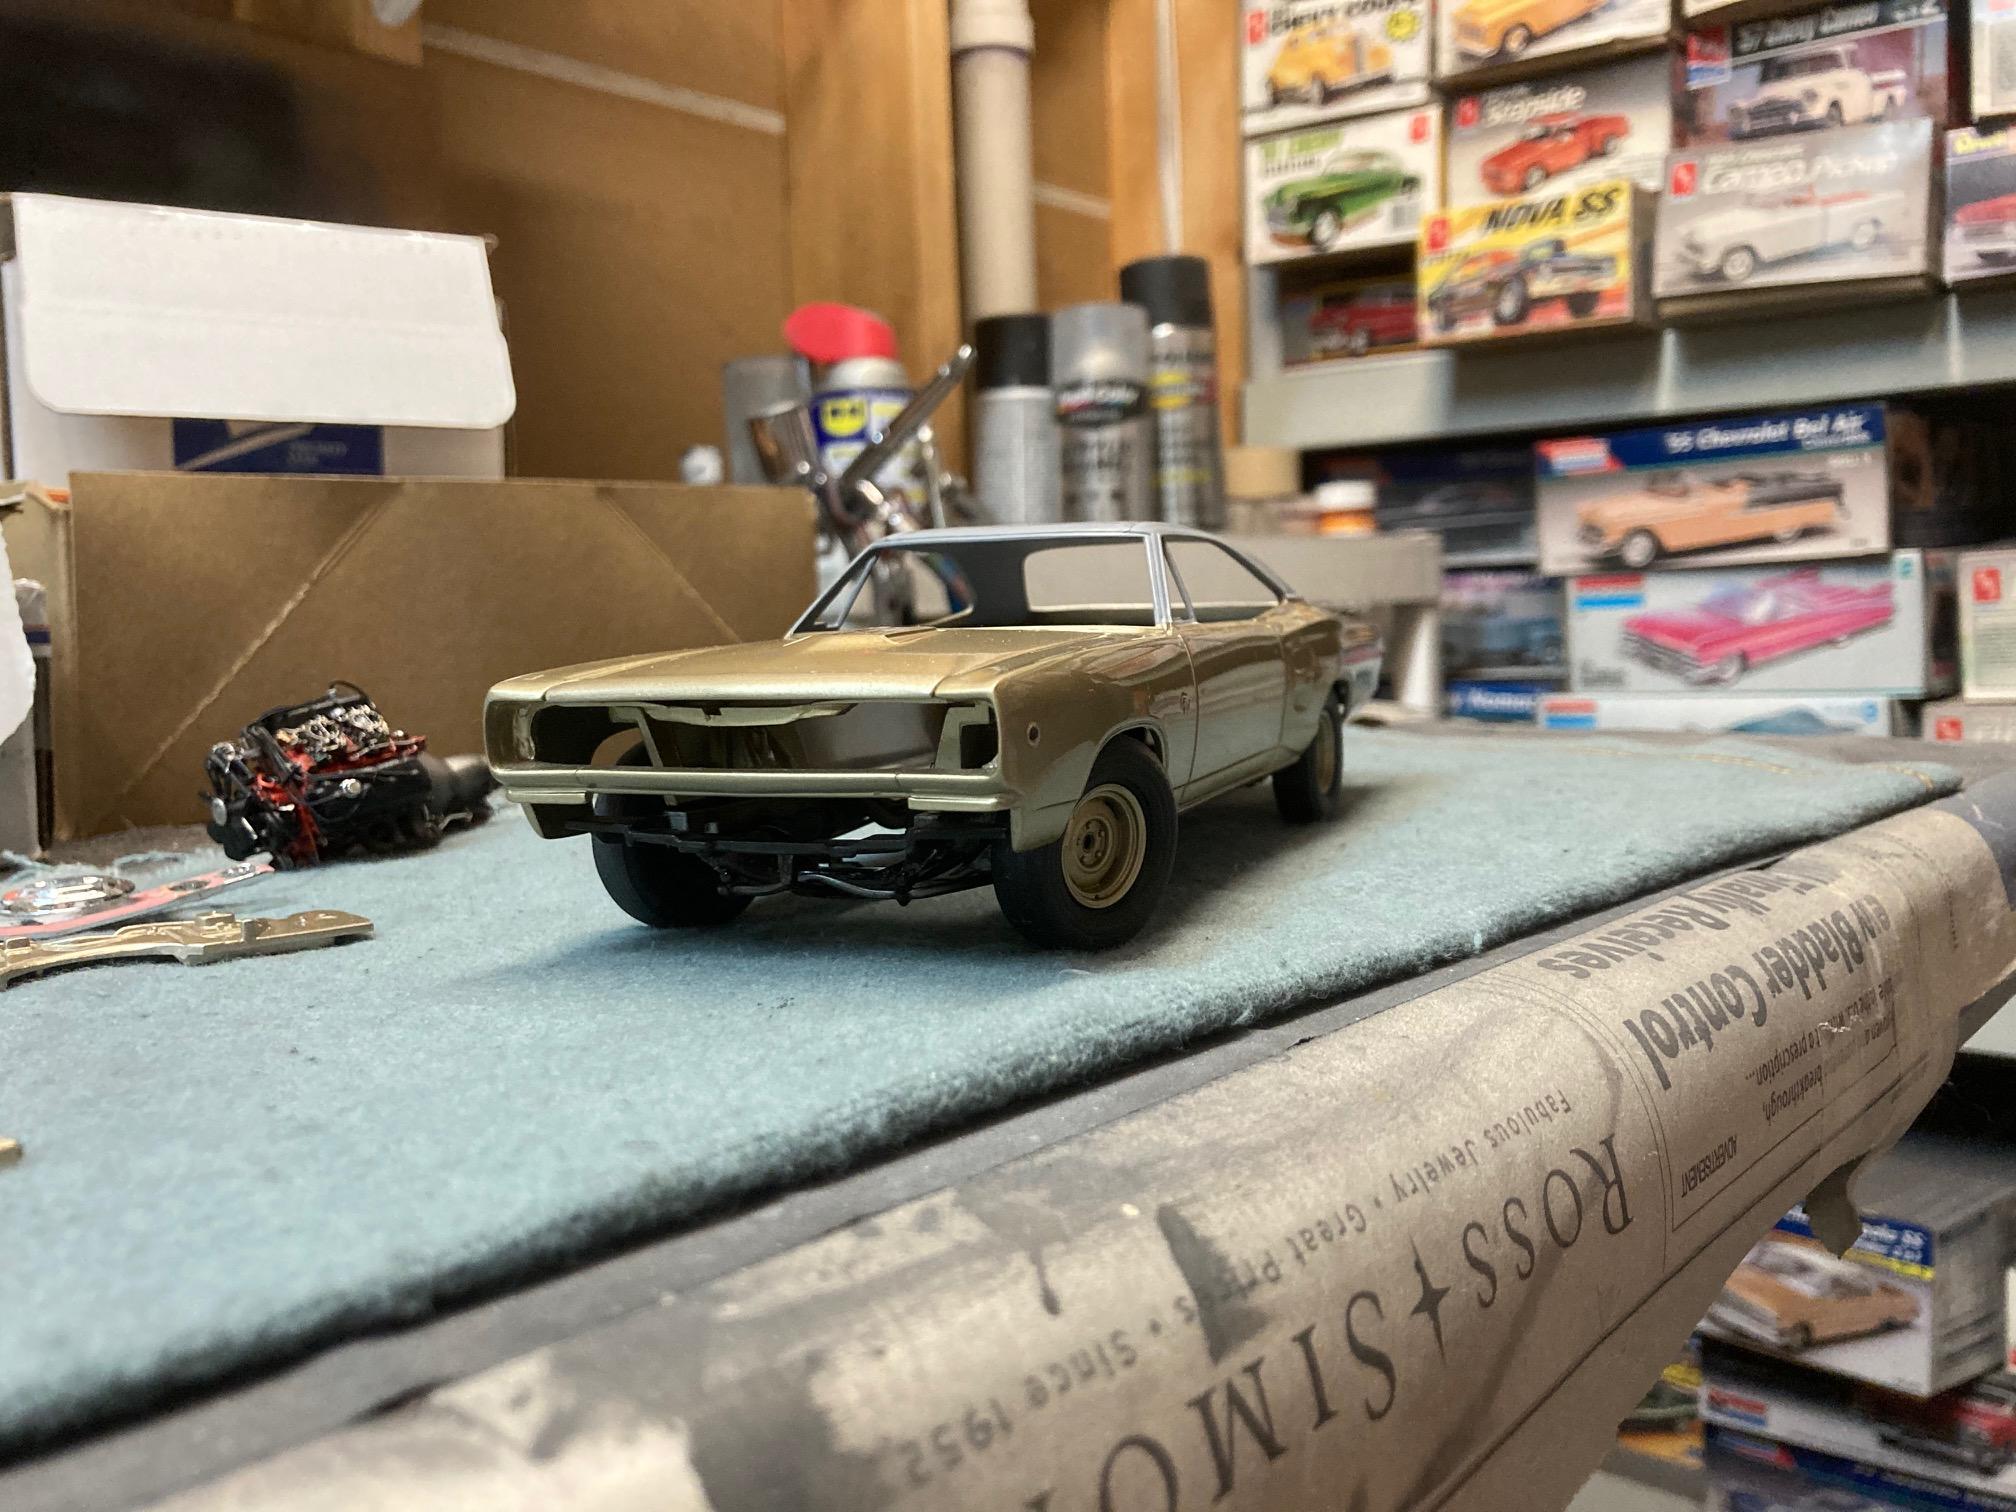
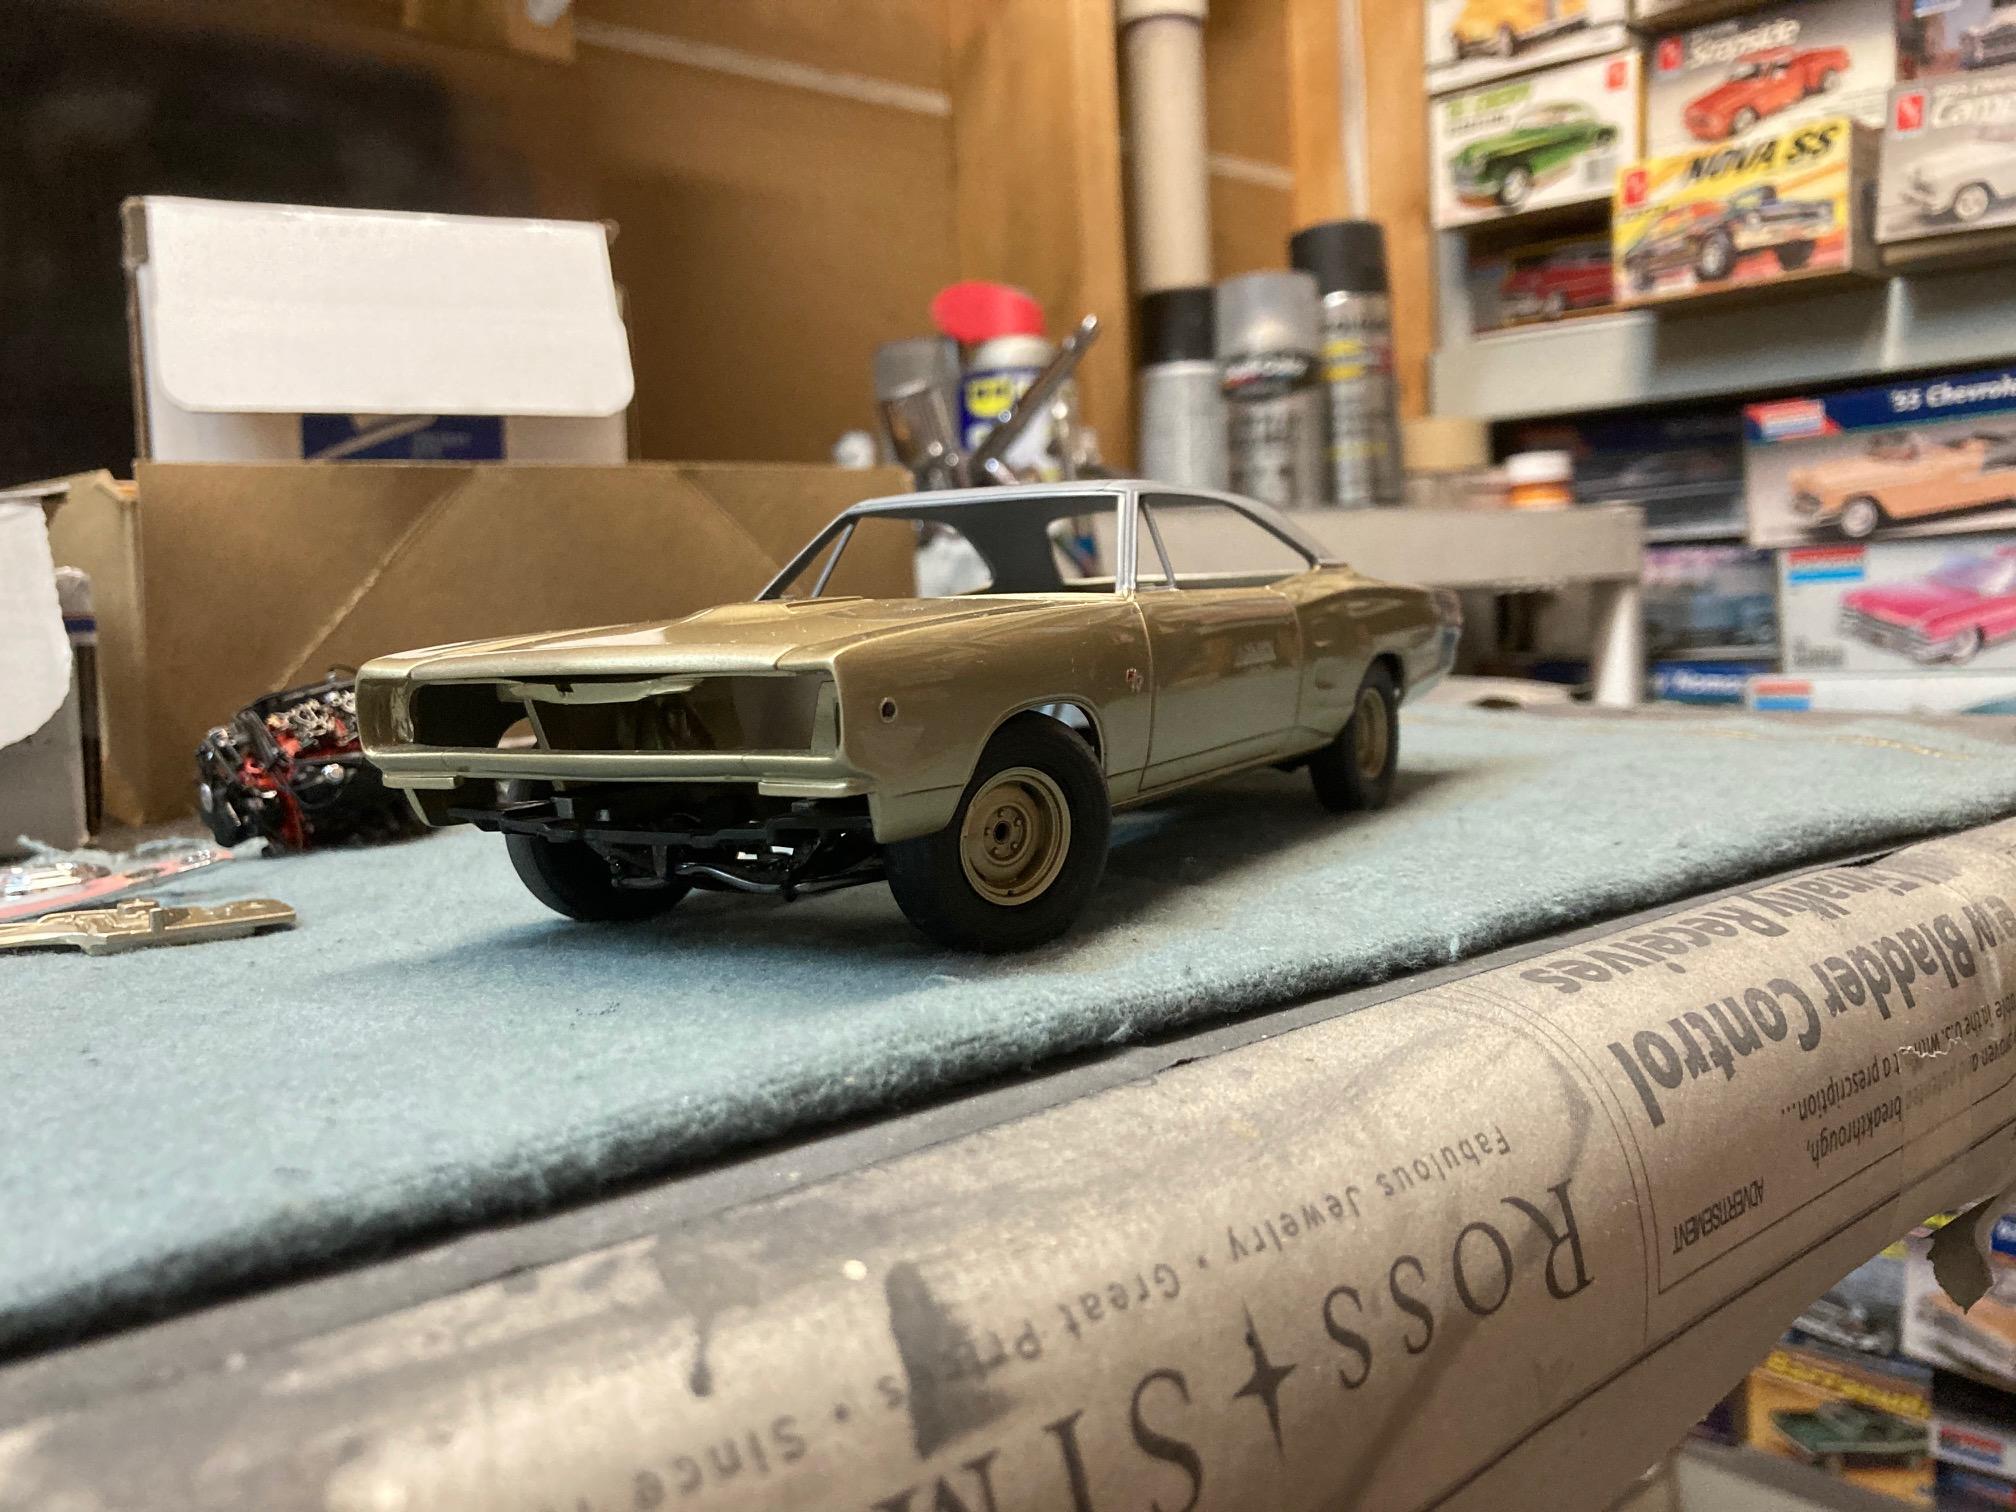
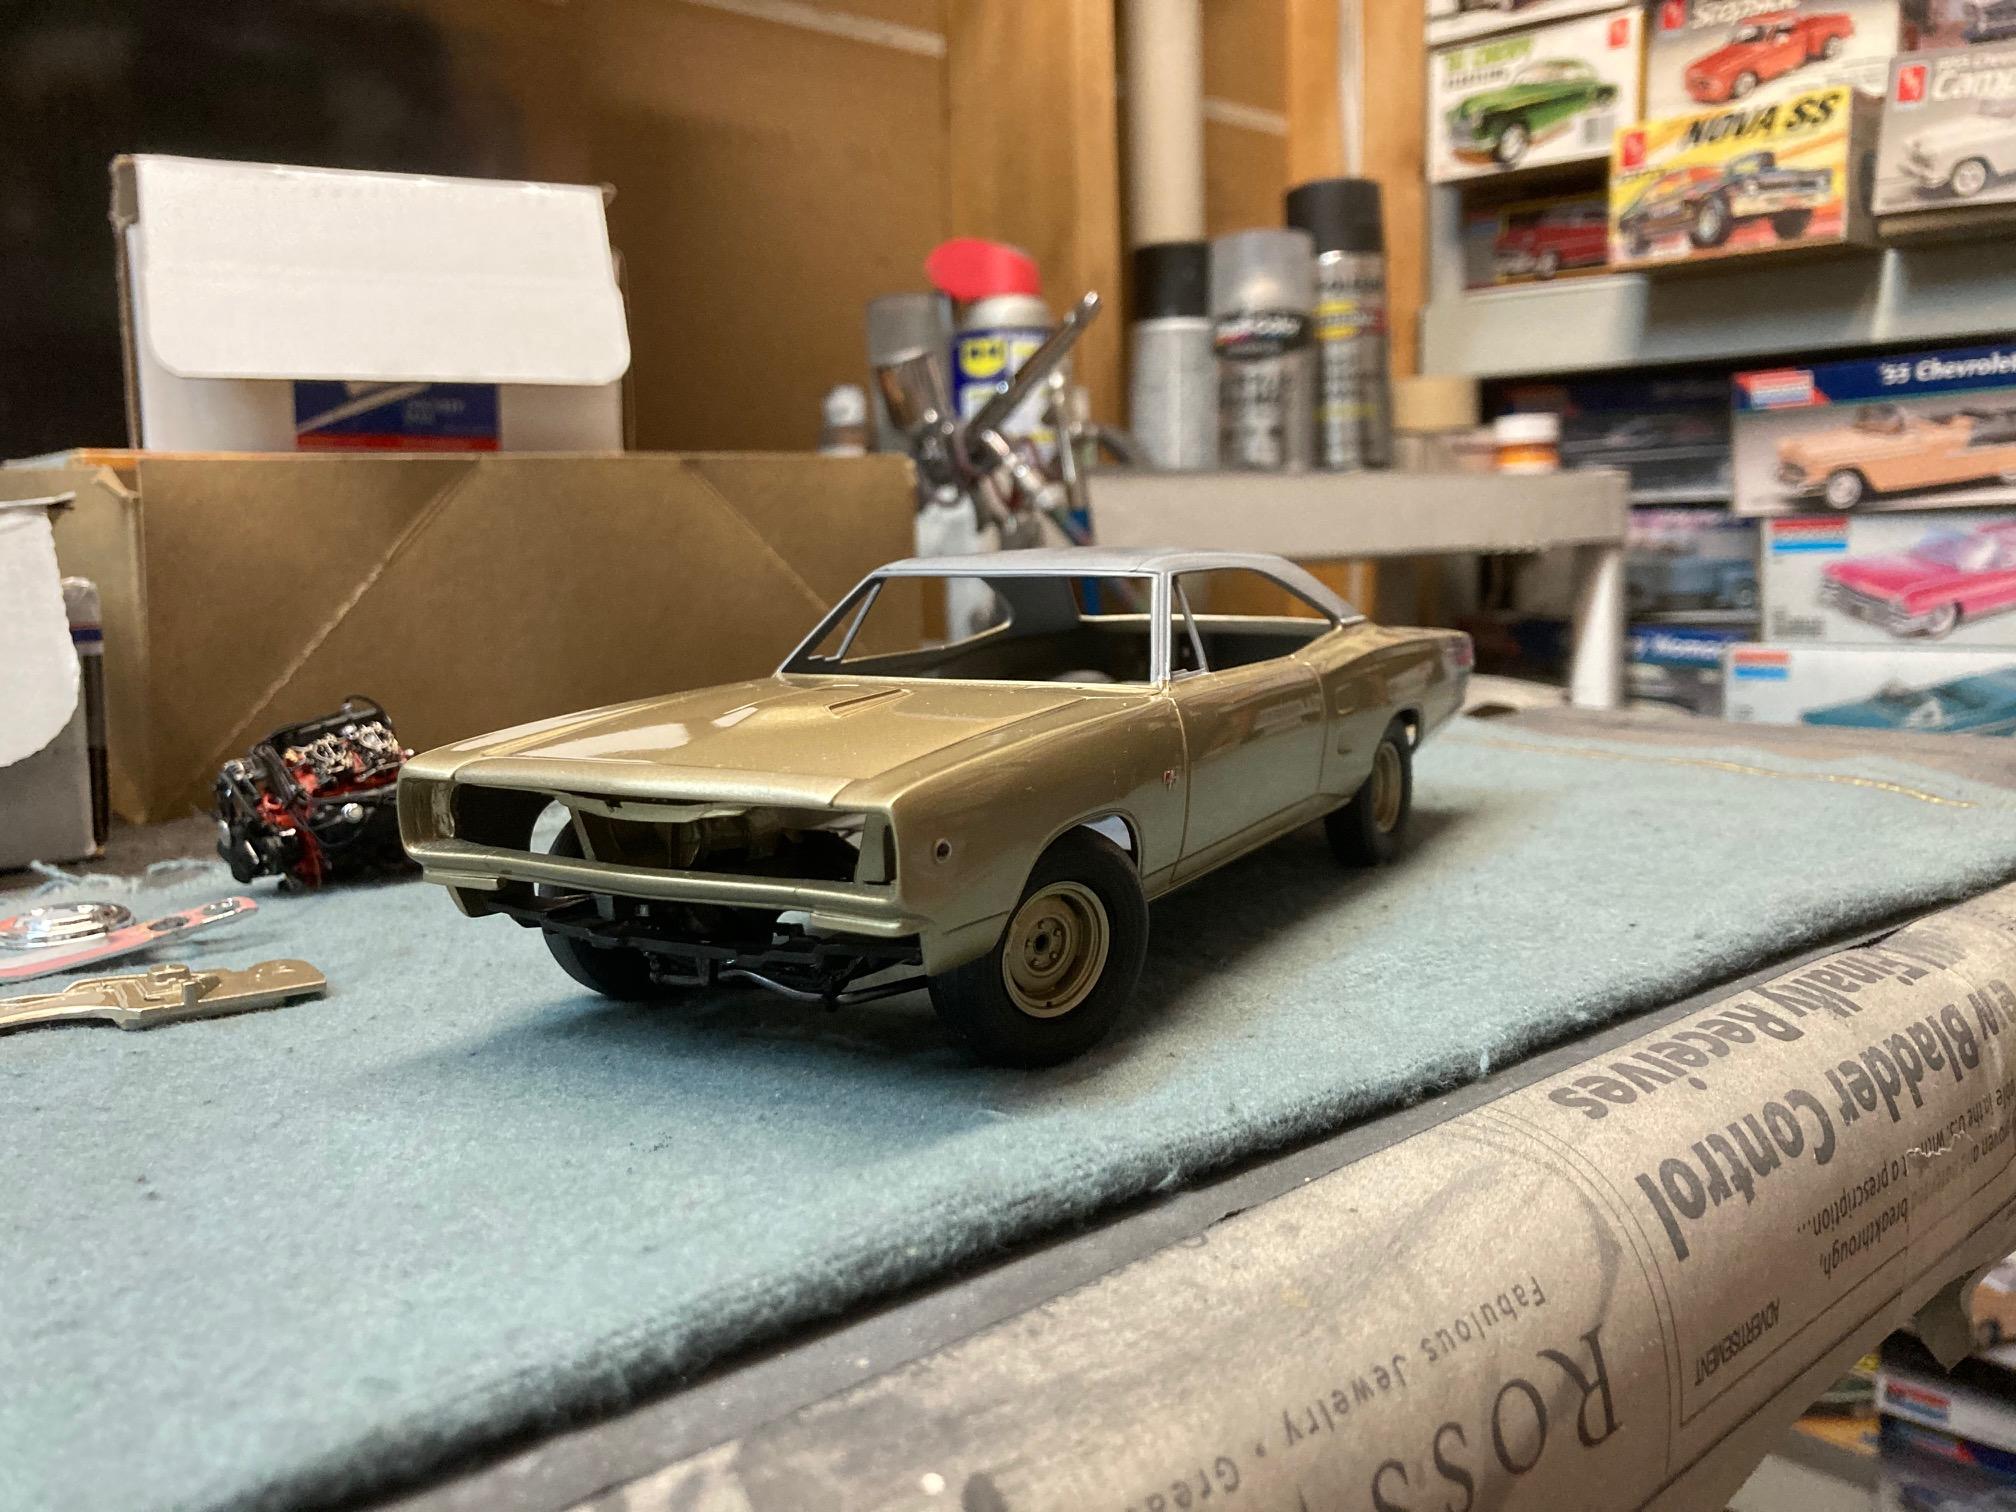
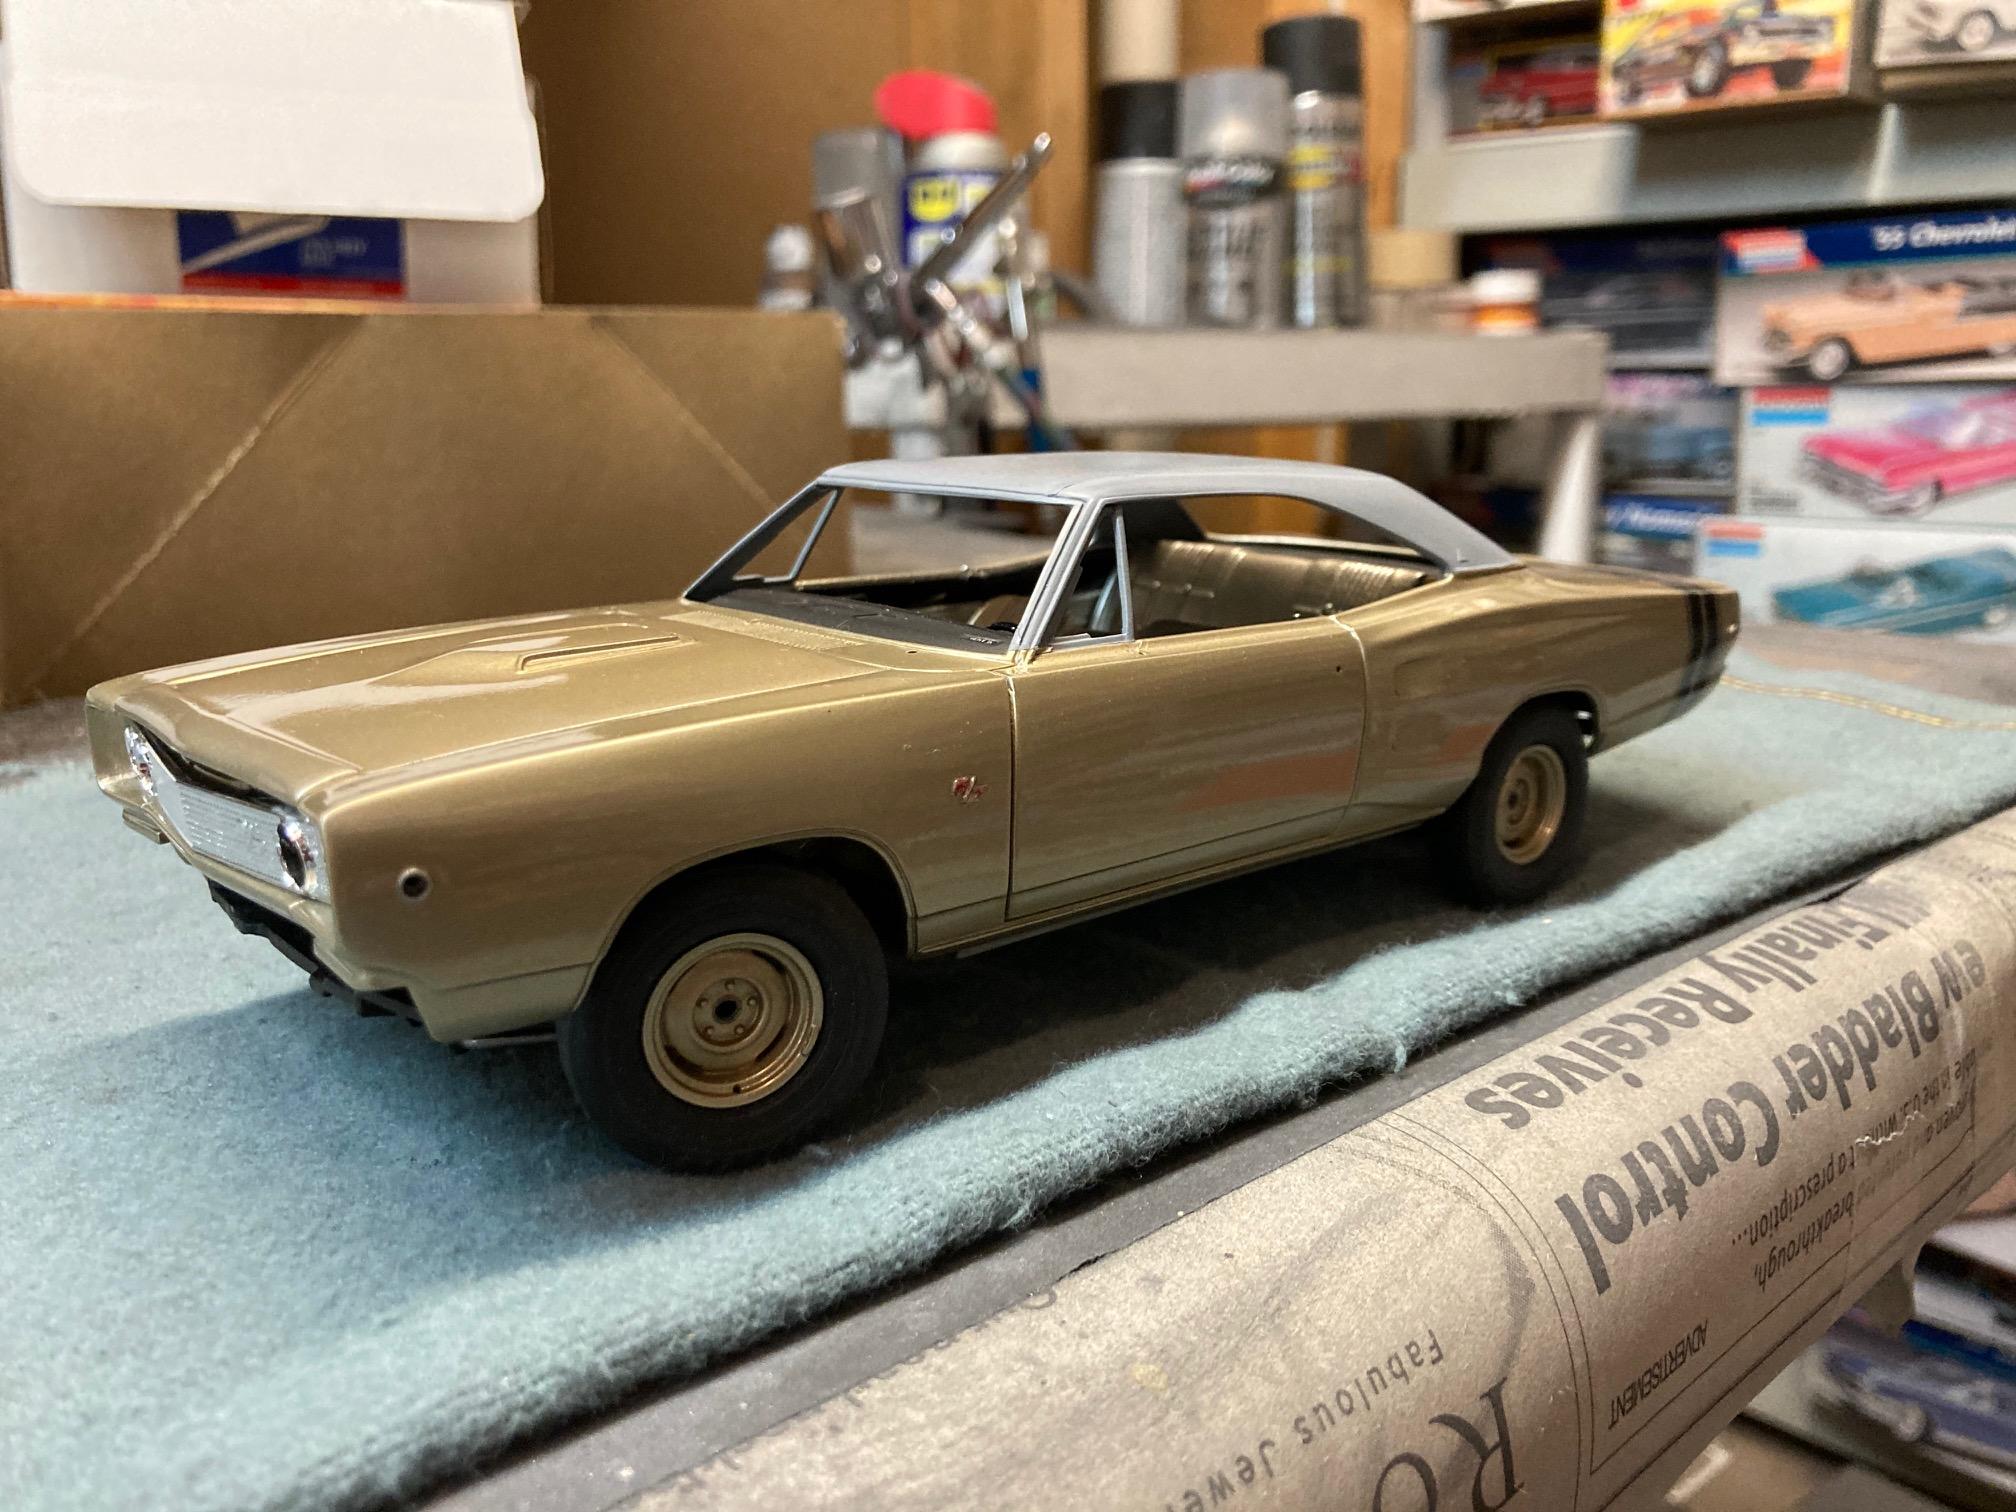
A quick mock up to be sure that everything is fitting as it should. So far it's looking good. Steve
-
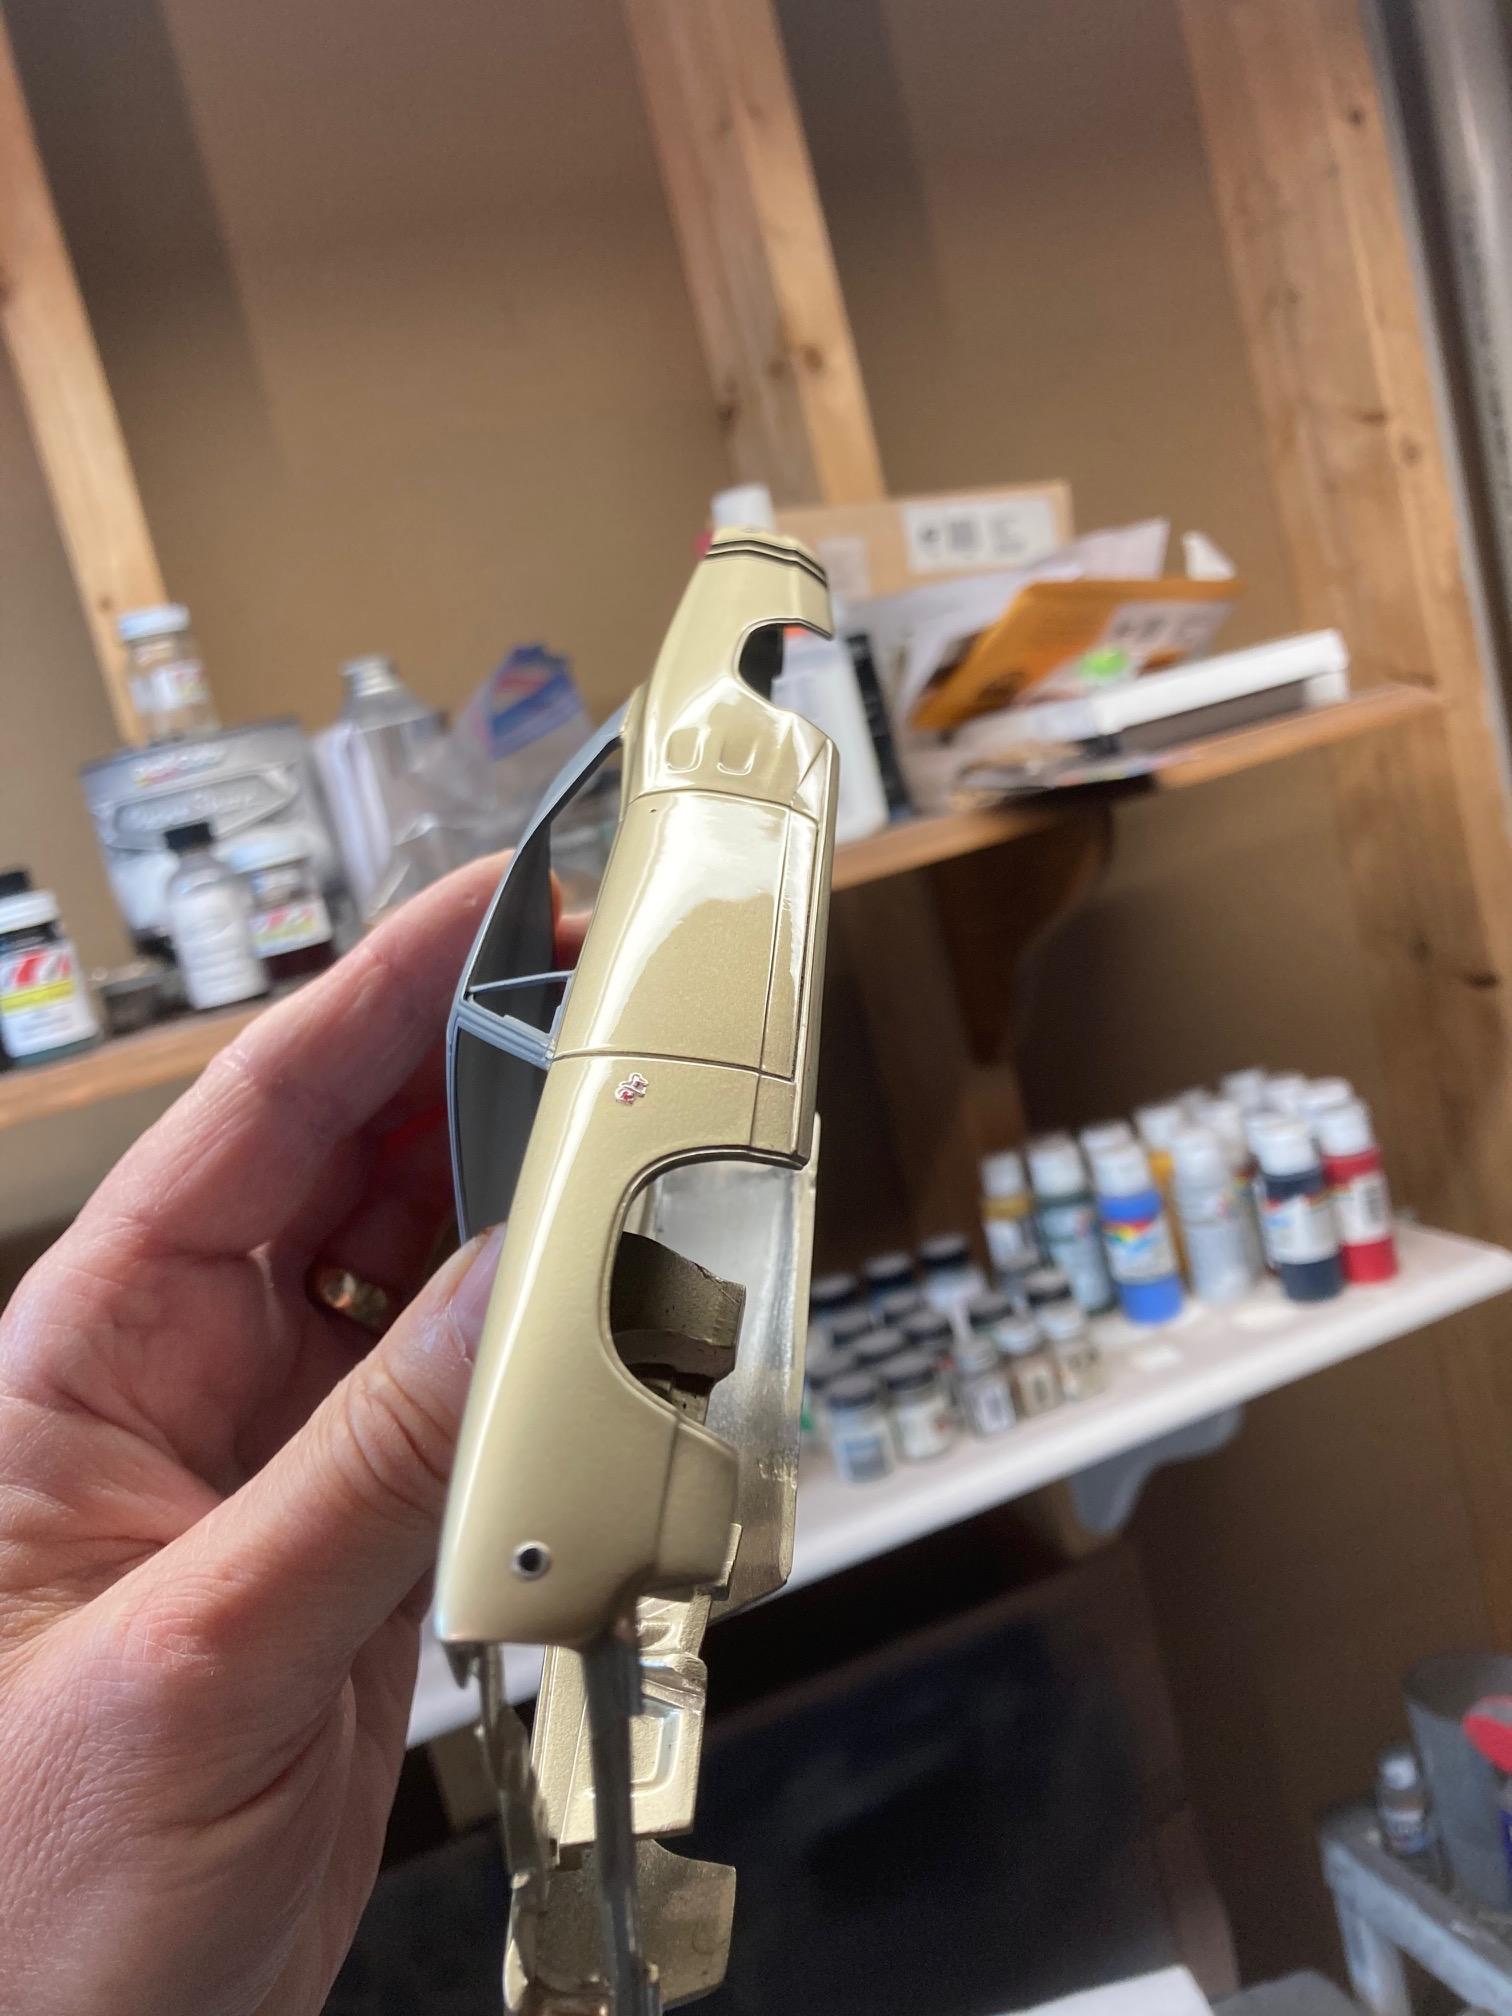
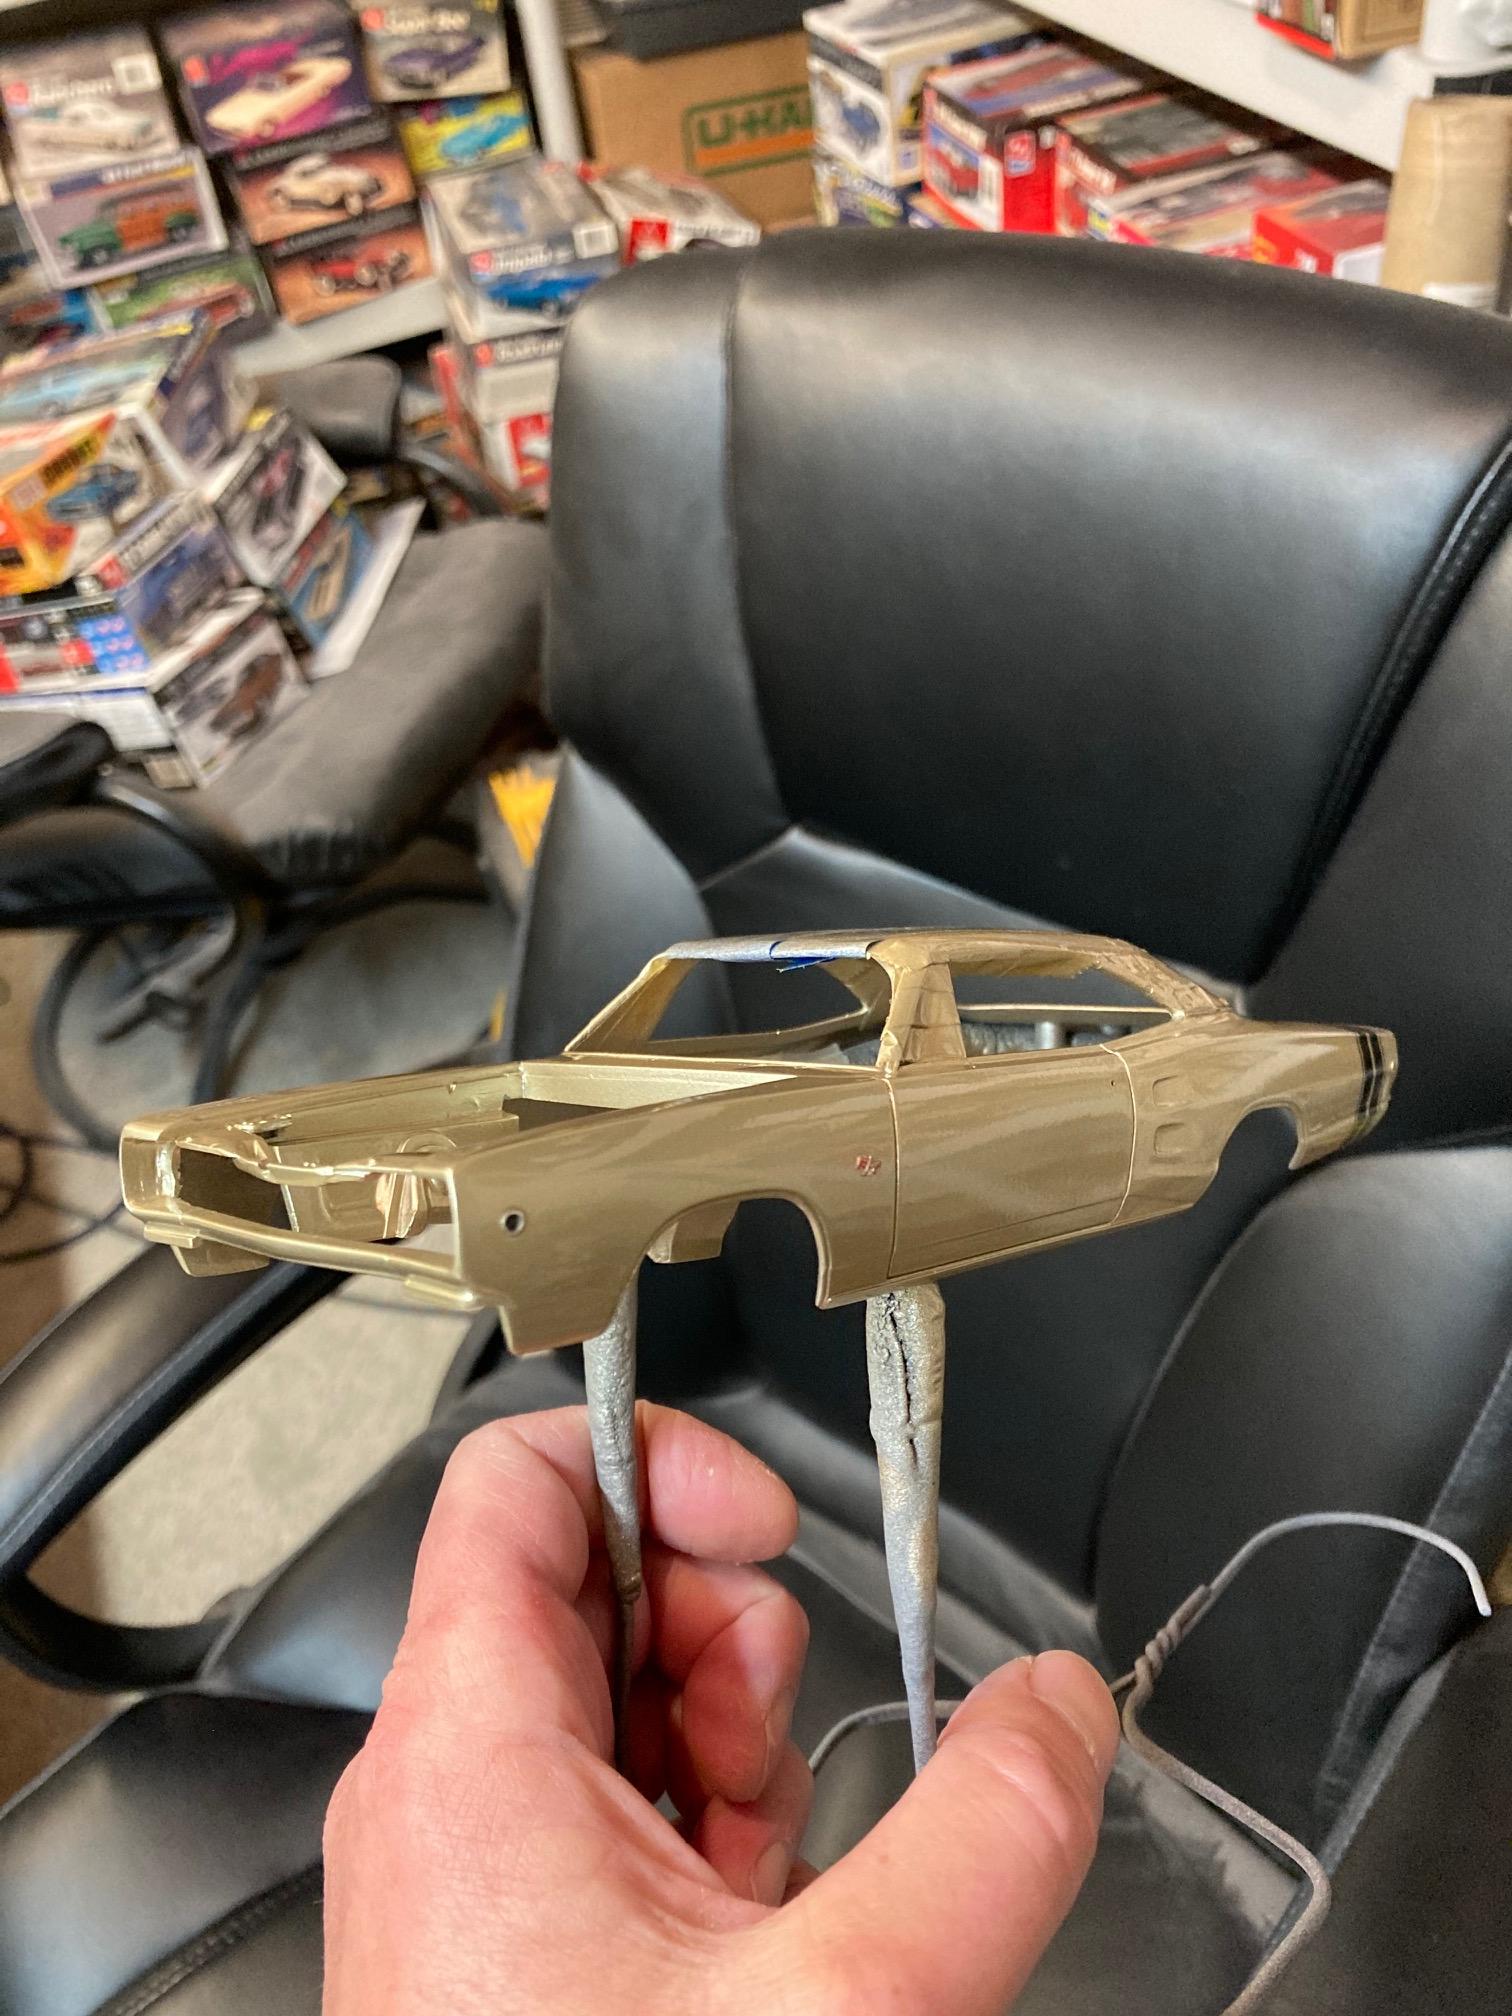
Clear coats are finished. I added an extra one this time, which makes it 6 coats. I'll give it a few days to cure completely, and then I can begin polishing. Steve
-
I think I'll shoot one more coat of clear, and then I'll be ready to polish before tackling the vinyl top, rear panel, etc. Steve
-
He does send them out to a plater that I believe is located in Wisconsin or Michigan. Apparently, the same plater that used to do all of the chrome trees for many of the kit manufacturers years ago. (AMT, MPC?) The individual that took over for him when he got out sent them to the same place, so I'm sure that the chrome would have been of the same quality........if you could have relied on his service! I heard a story some time back about an individual who sent his parts out to be re-chromed with the "new" guy, and after a few months, when his parts hadn't returned and he was getting no responses to his inquiries, he finally received a package in the mail. When he inspected the parts, he found that his originals had been replaced with plated resin copies! Apparently the guy told him that if he was in "such a hurry", he figured that it would be okay to replace his originals with resin copies that I guess he had on hand? Originals, resin copies......same thing, right? Steve
-
Maybe I need to bug him again. He stopped doing chrome several years ago in favor of his "Bob's Paint" business, and the chroming operation was passed along to another individual, whom I won't name, who turned out to be pretty much completely unreliable. At least I had heard enough bad stories to keep me from sending him any of my treasured parts. When Bob ran the operation, everything was done with the utmost integrity. I really wish he would start taking parts on a larger scale again. The hobby needs people like him to run services such as this, and lord knows, there is a market for some good rechroming operations. I could easily throw together about 20 kits worth of parts in pretty short order that he could plate for me! Bob's a great guy! I've met him in person a couple of times at an NNL show, and when he was running the plating operation, he wouldn't hesitate to contact you if there were any issues. More of his kind of service please!! Steve
-
Tamiya tape is naturally lower tack than something like regular masking tape, but it's much more flexible and does a much better job than masking tape at leaving a super clean edge. Just make sure to burnish down the edges pretty well, and shoot the first couple of coats of paint lightly and you should be very happy. Remember, I used Tamiya tape on this little gem. Steve
-
How long ago did you have the chrome redone? As far as I know, Bob's been out of the re-chroming business for several years. I wish he wasn't! There are very limited options today, and Bob's service and product was absolutely top notch!! Steve
-
Part of the reason that I like Super Clean is that you don't have to think about it at all. It works better than most of it's competitors, (Purple Power, Simple Green, etc.) Oven cleaner is messy, the odor is horrible, and it's not reusable. I've never had very good results with brake fluid or alcohol for most applications, (just my personal experience) plus brake fluid is a pain to get rid of when the time comes. I've not used ELO, but if it will reduce your model to to a blob of jelly in some circumstances, I'm a little reluctant. With Super Clean, I'm assured that it will work every time, (at least it does for me) and I never have to worry at all about ruining a body. I just drop it in the tank and walk away. If I forget about the parts soaking in it for a month, it's no big deal. I've had parts soaking in it that were forgotten for a couple of months, with zero damage at all. Steve
-
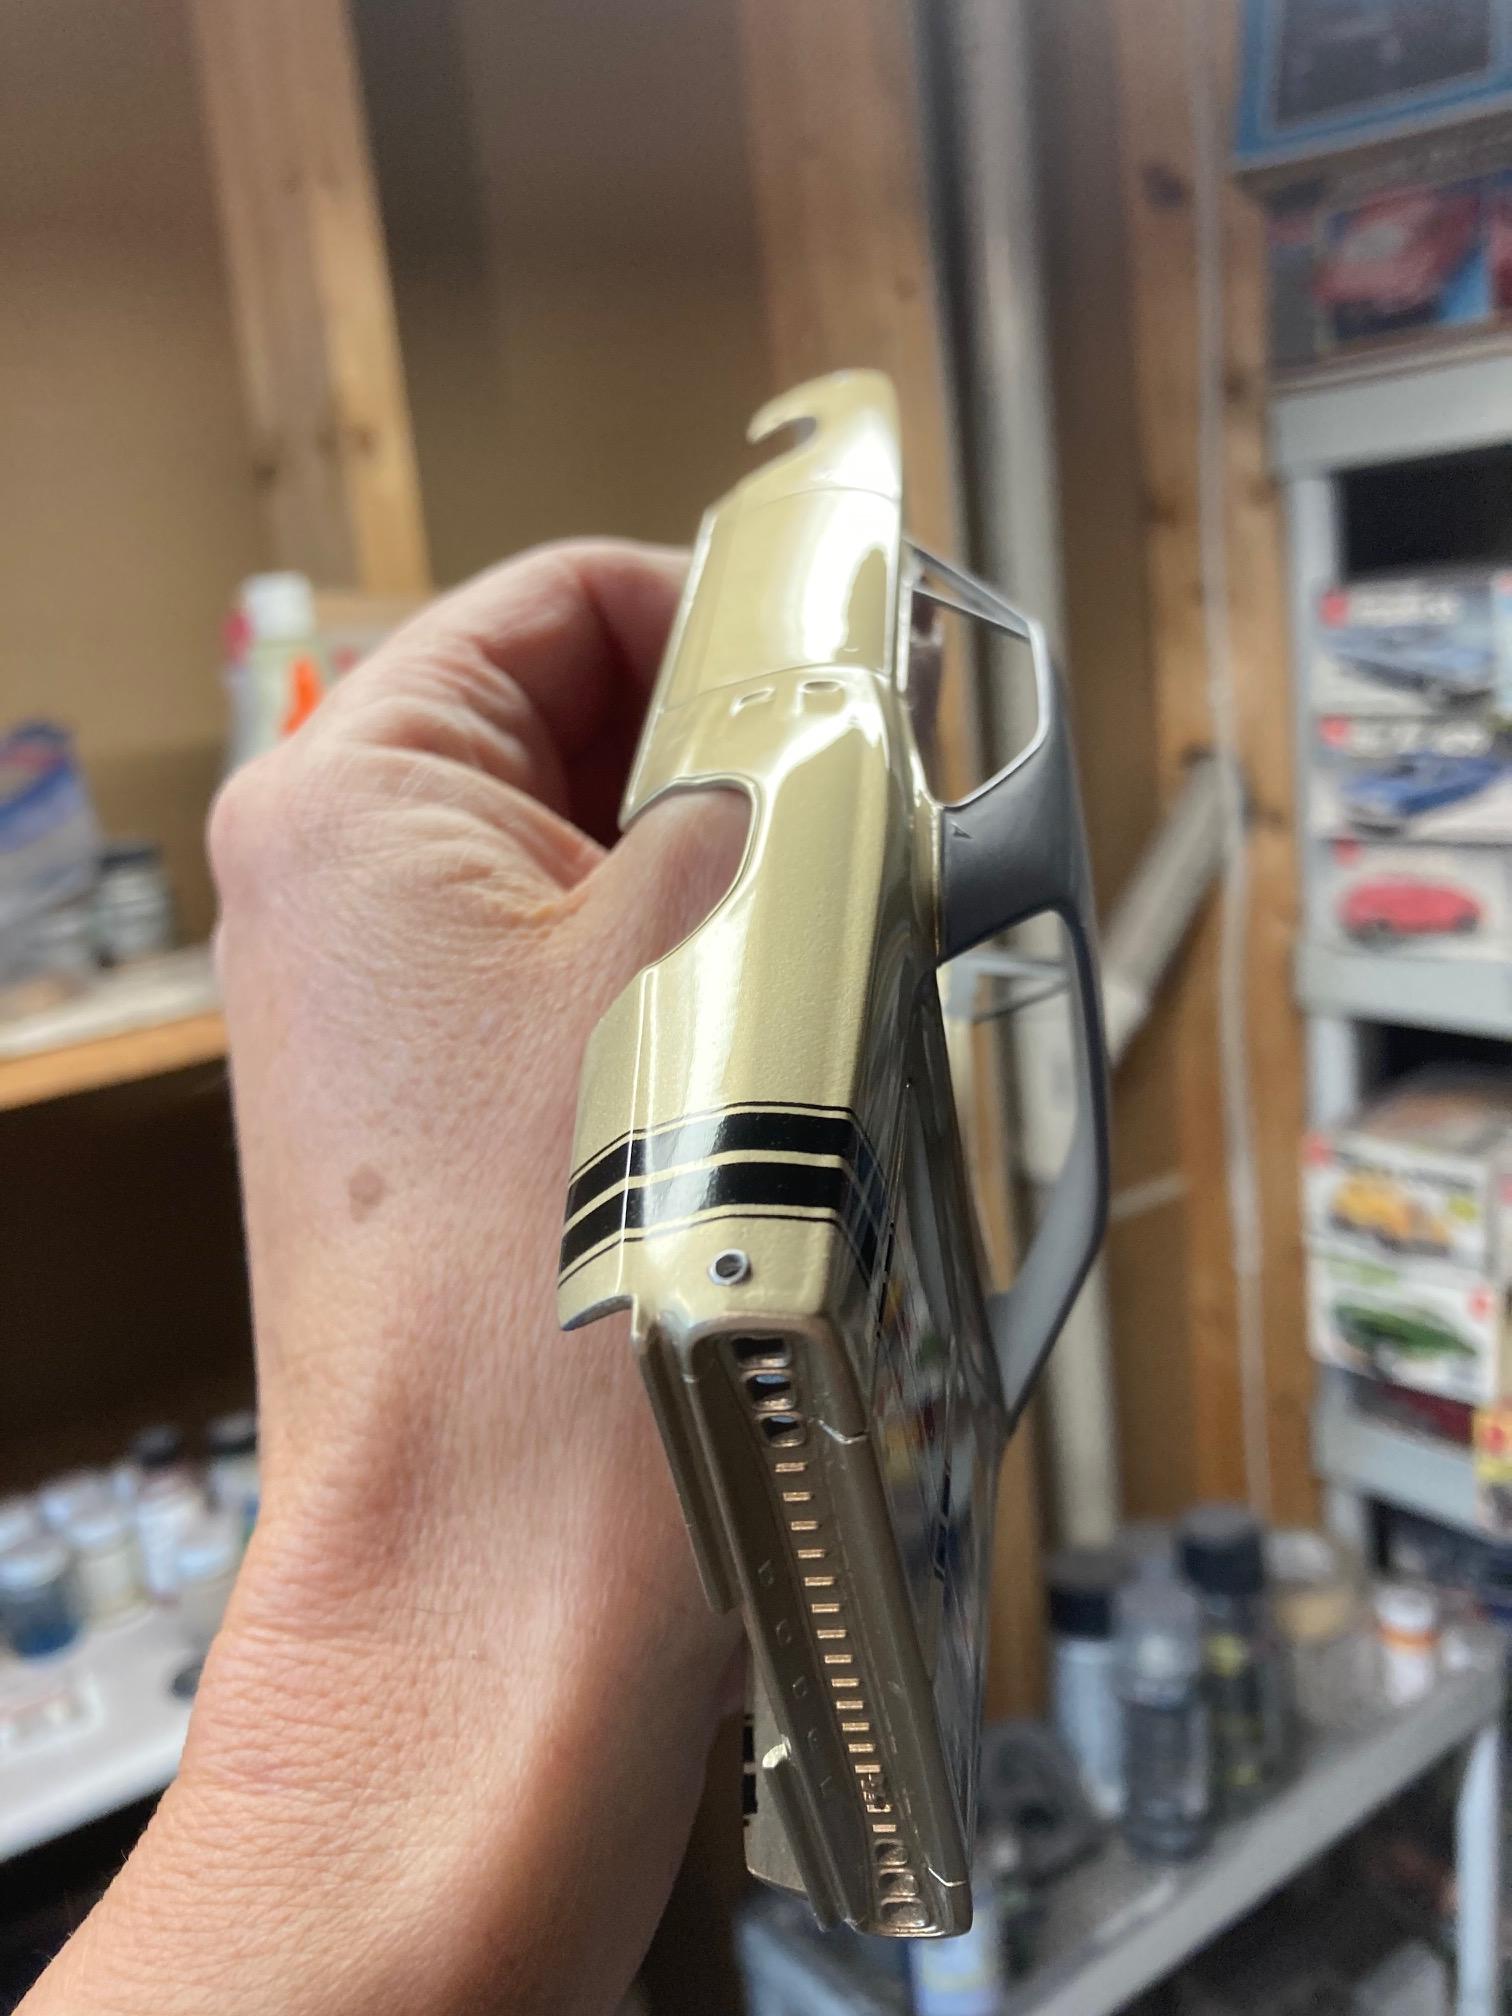
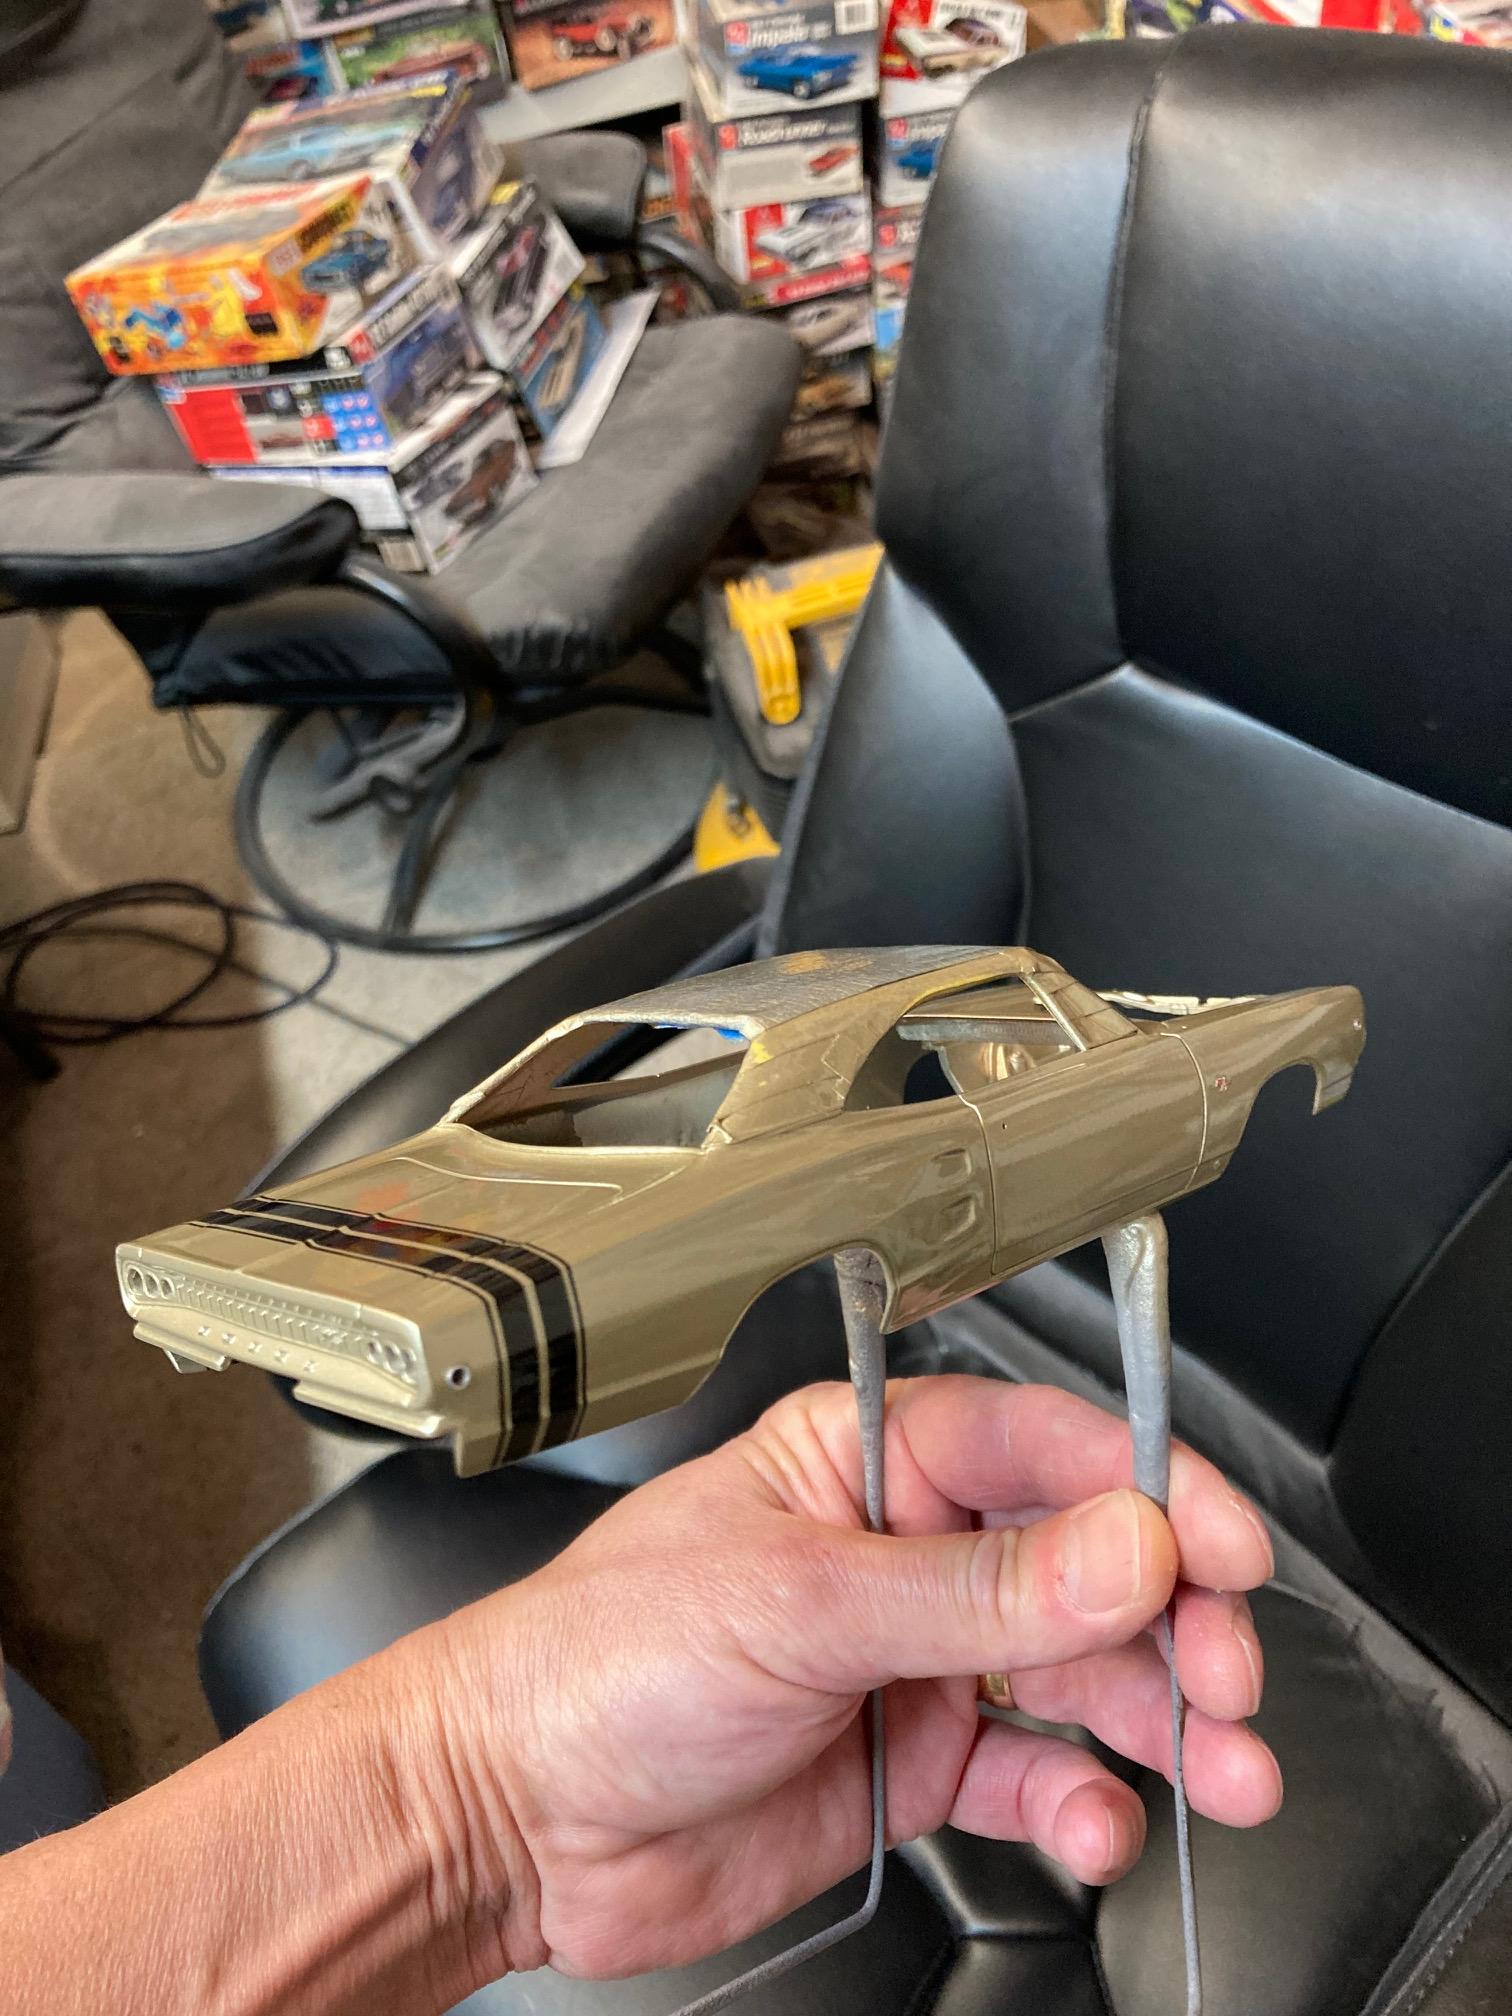
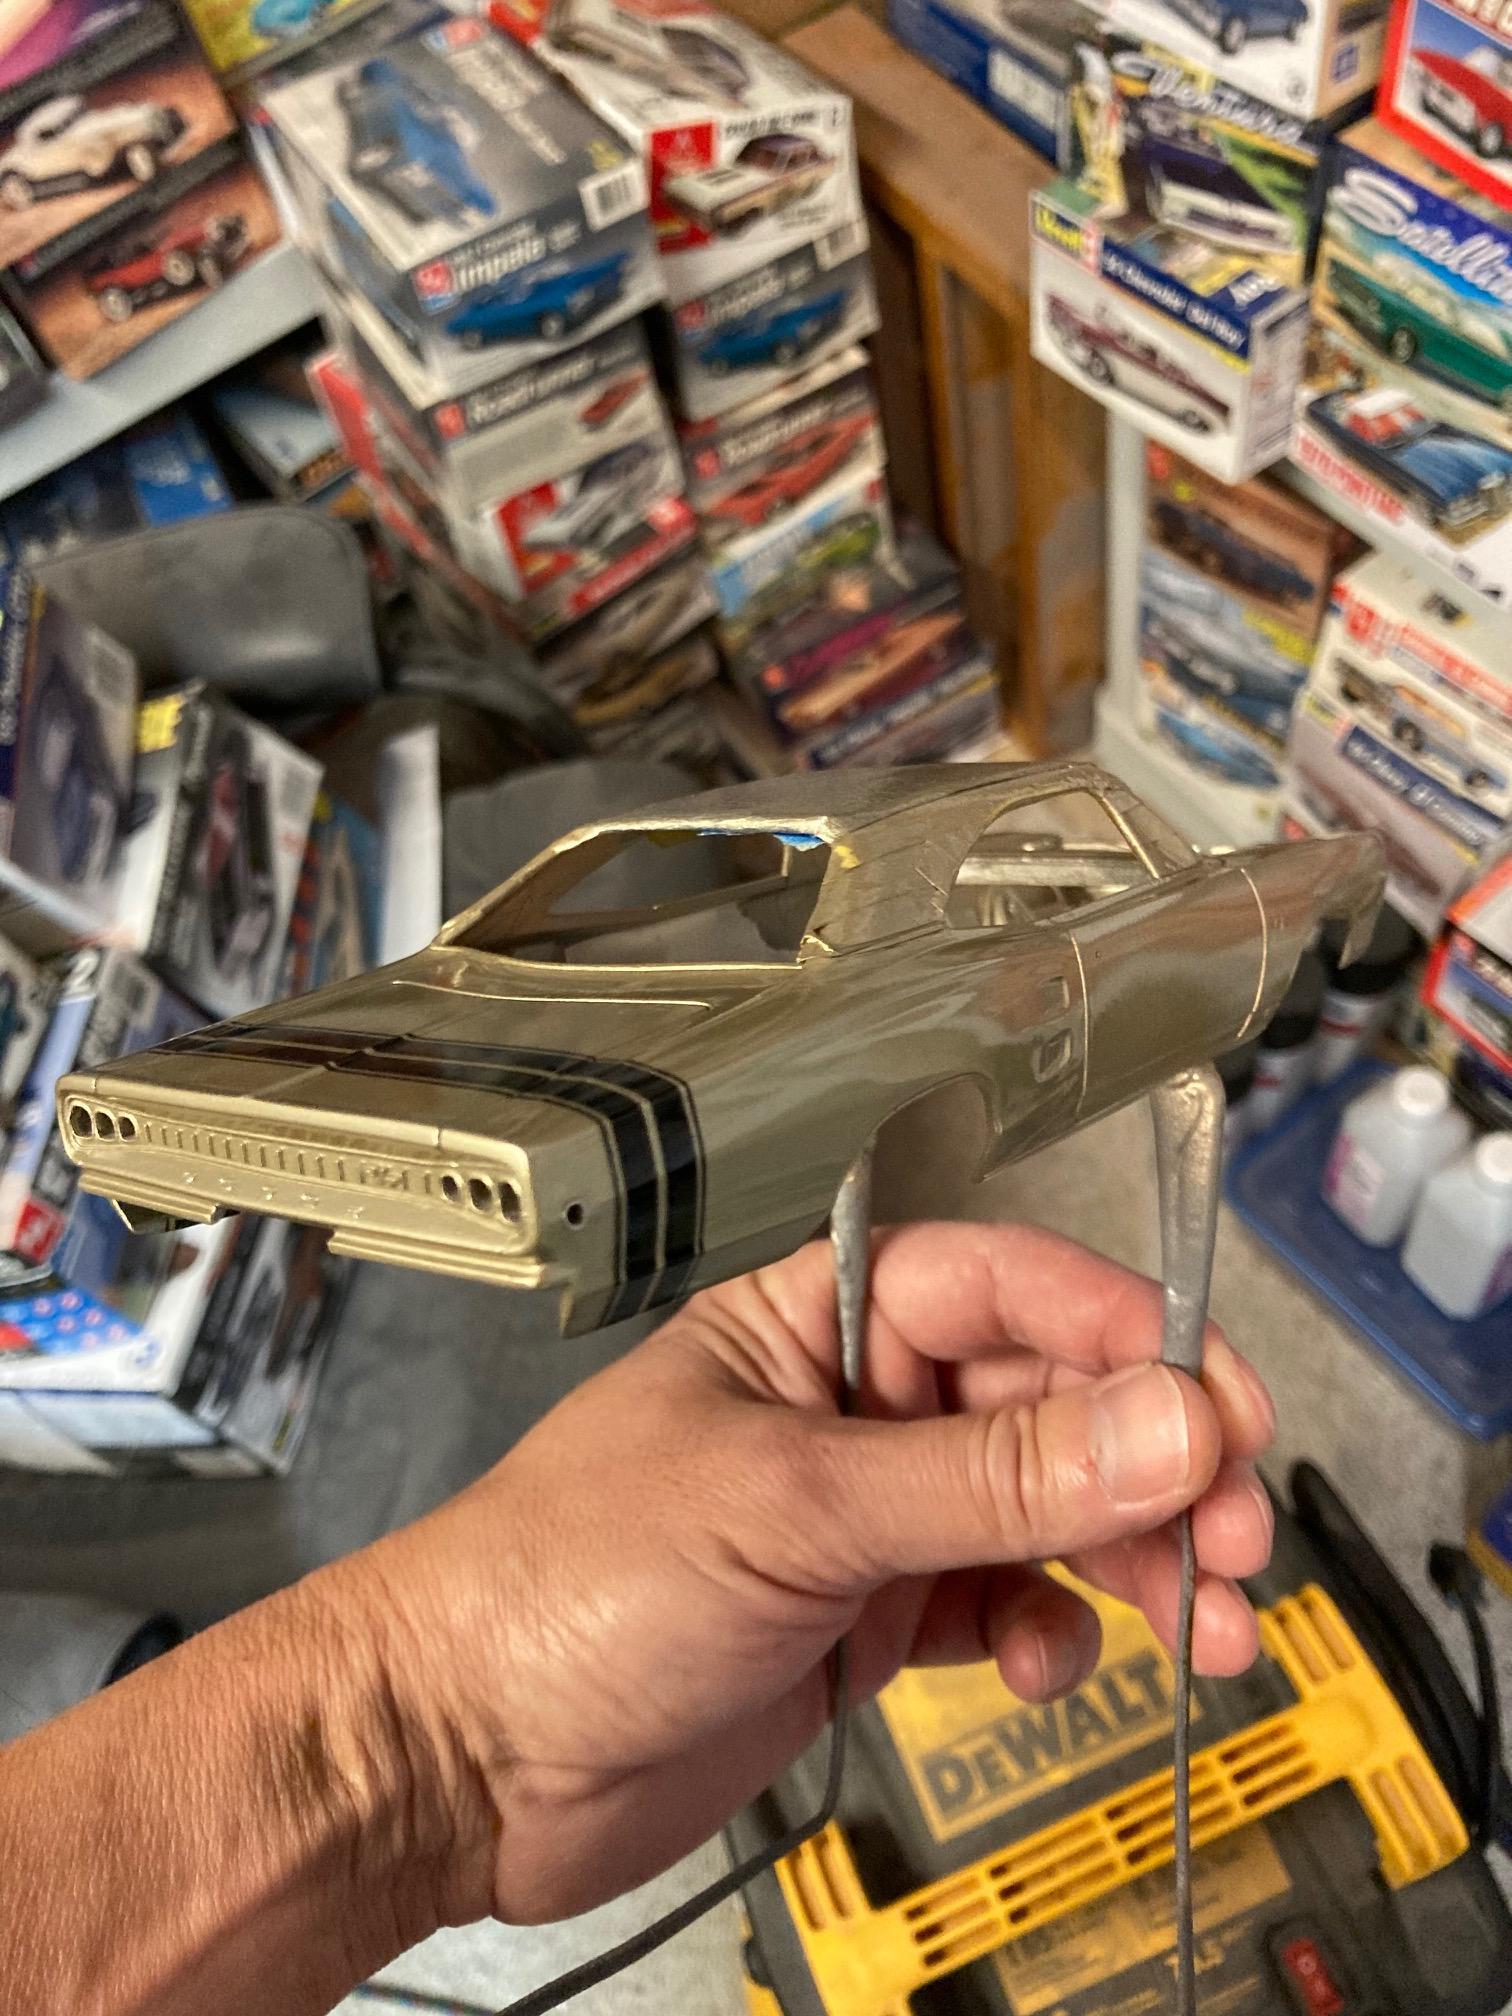
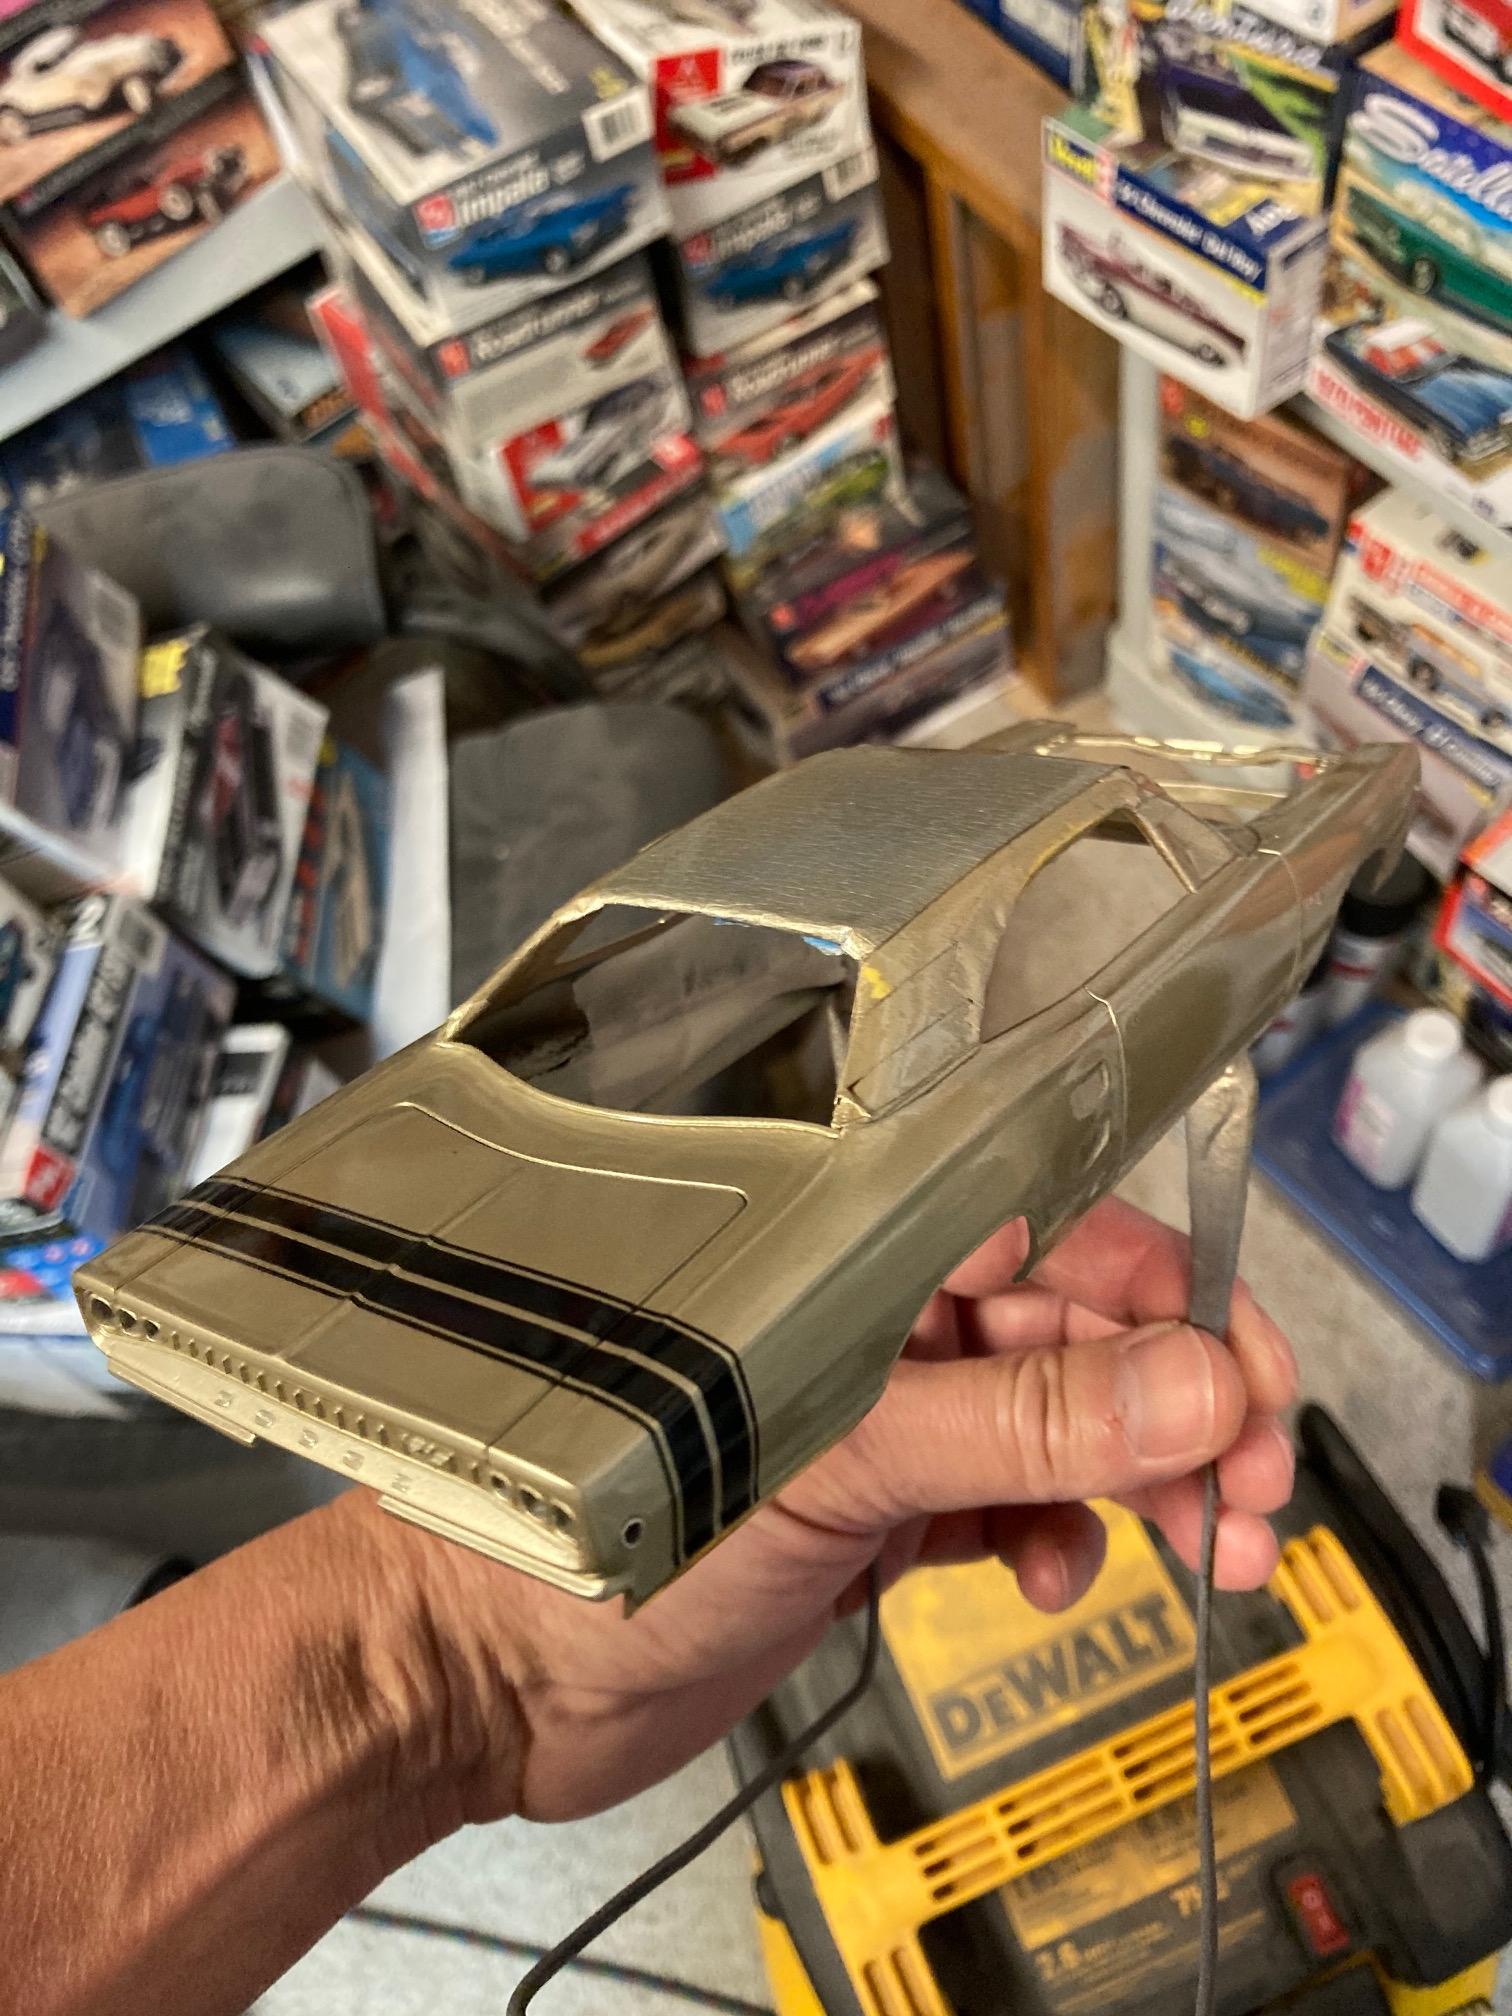
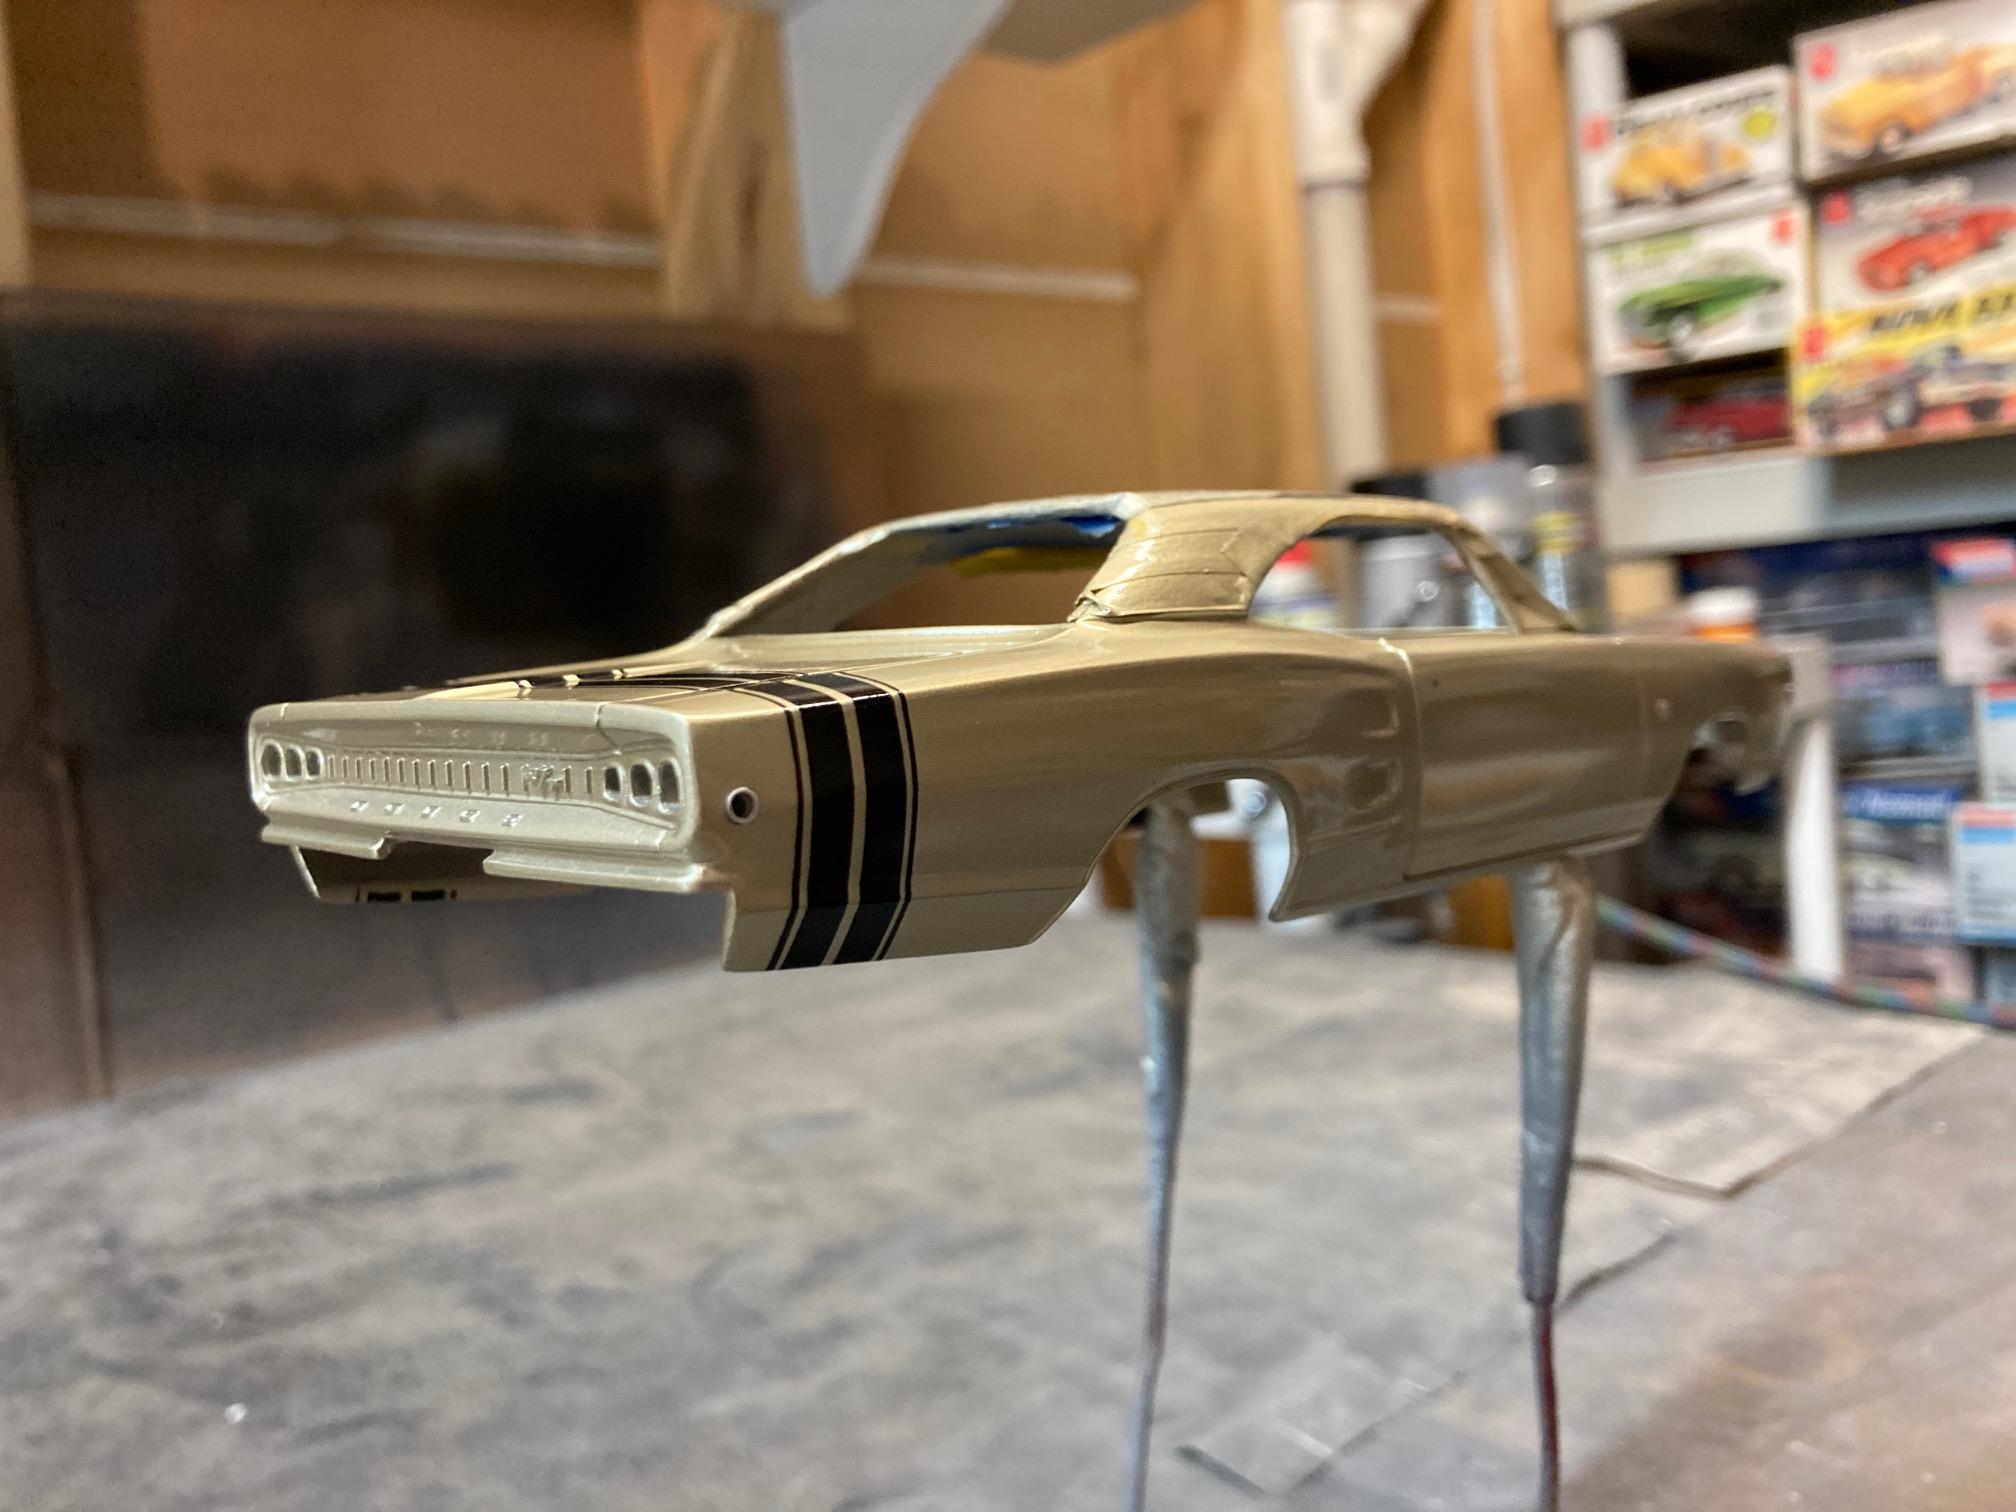
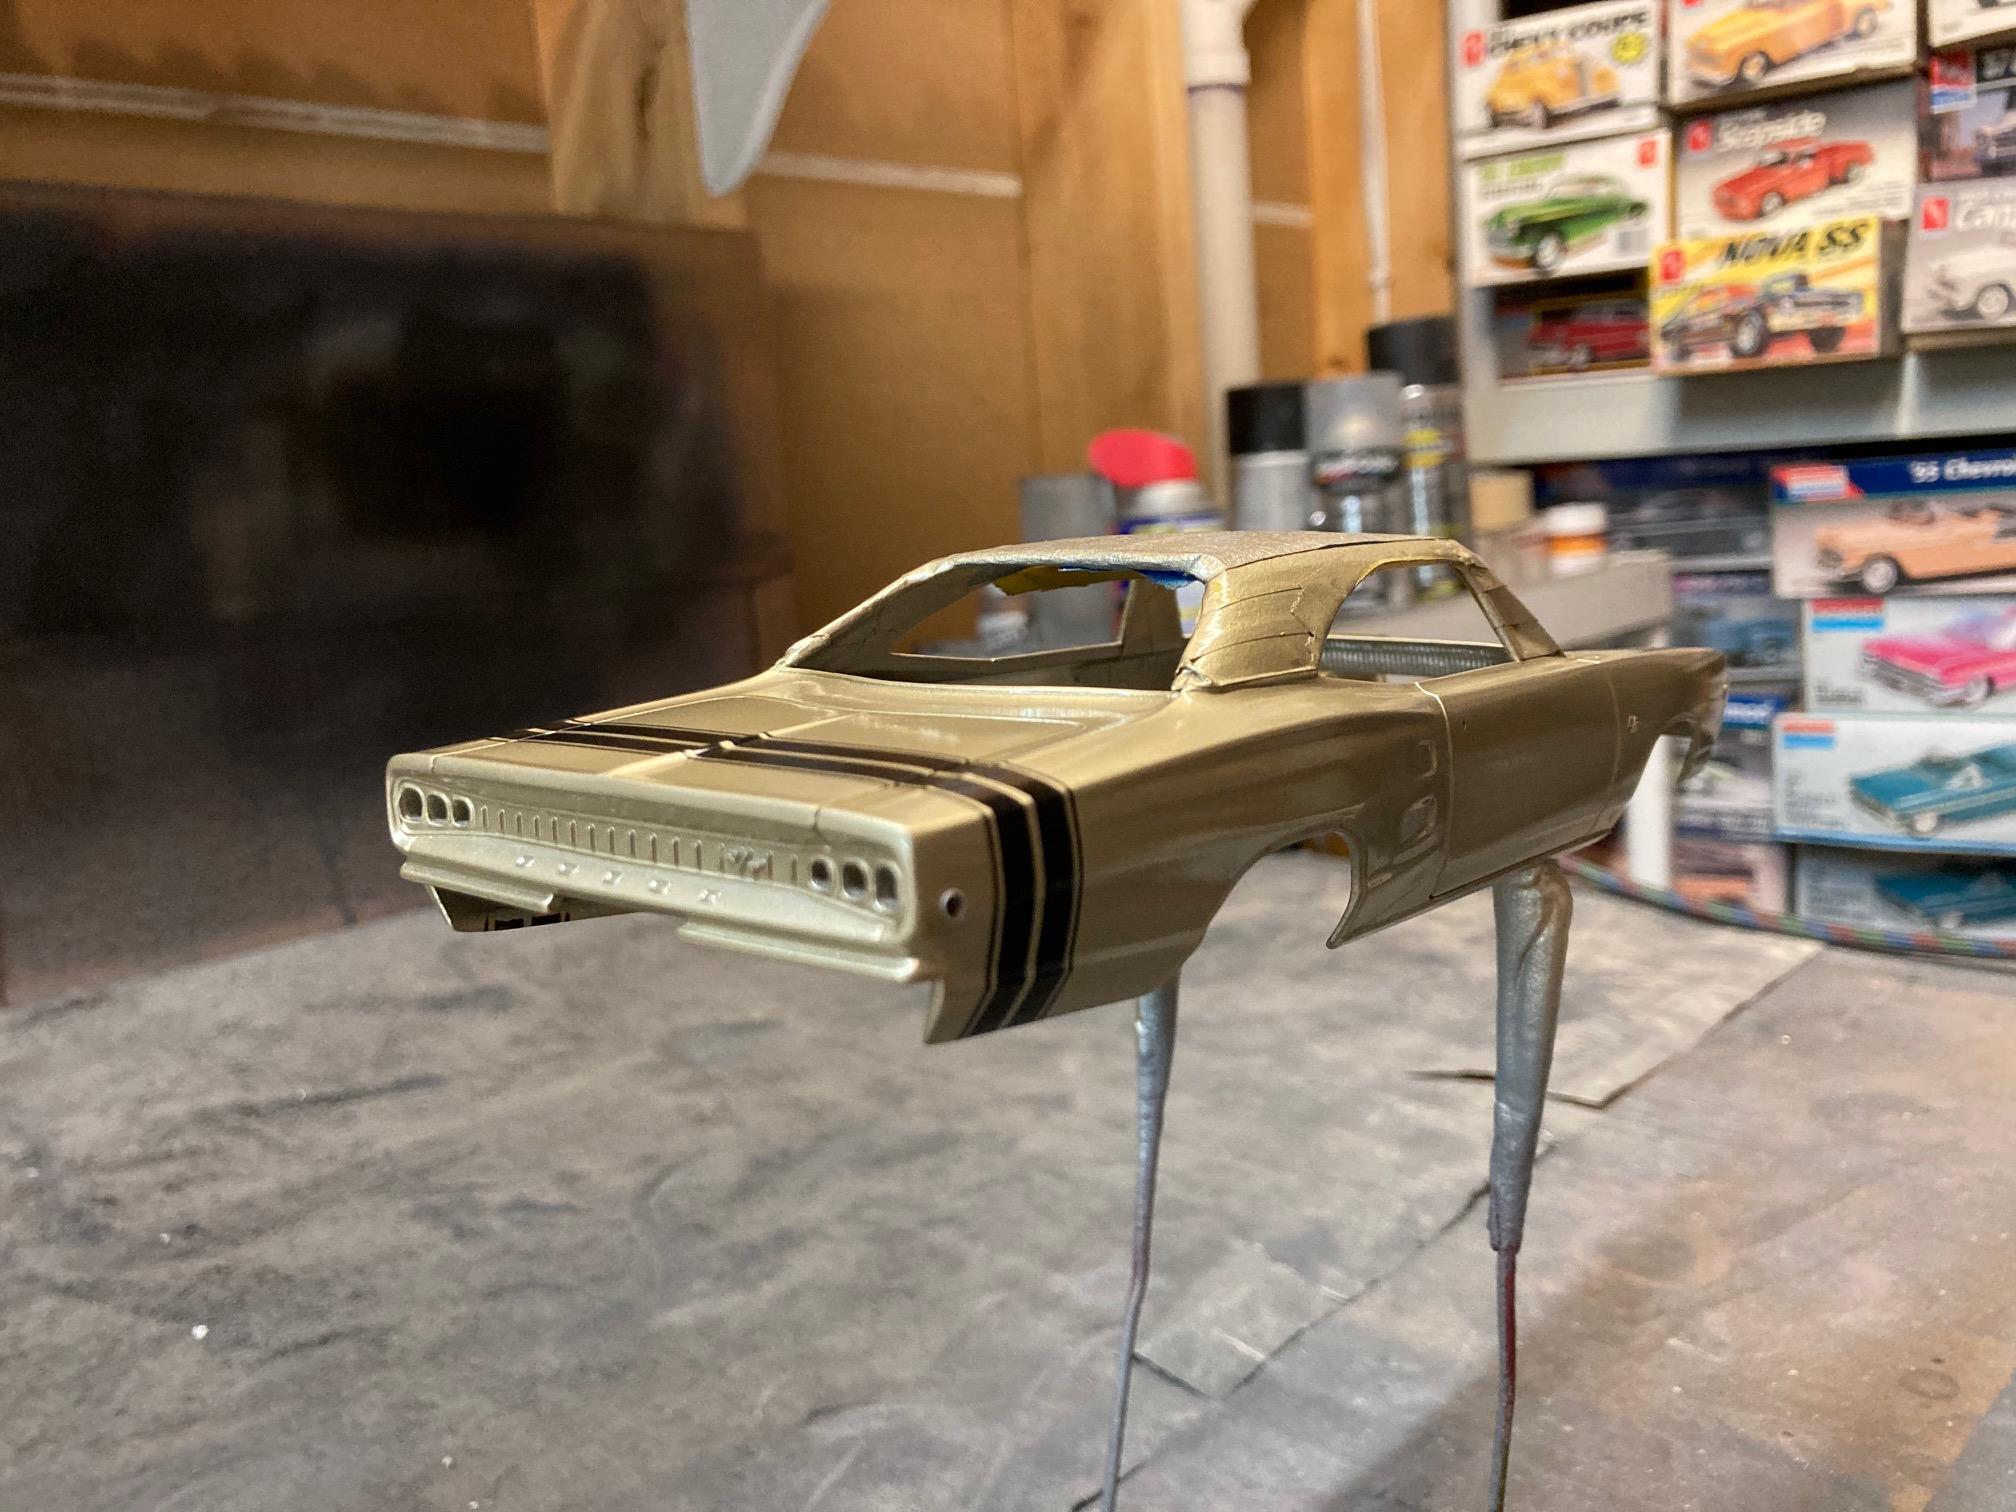
The more that I look at these stripes in a "normal" 3/4 type view, rather than dead on, the more that I feel like I'm okay with them. I think they're good enough. I'm going to suck it up, add a couple more clear coats, and move on to the polishing stage. I am also happy with the affect that scribing the door and trunk lid lines more deeply has had on darkening the panel lines. From now on, I'm going to rely on this method rather than using paint to darken them. I think it looks more realistic. Steve
-
Very simply, with a steel ruler and a sharp #11 Exacto blade. If you read the above post, you'll see that I didn't have to cut much for extremely thin pieces. I worked it so that most of the tape cutting was just to clean up the edges. Only the piece that separated the wide stripes had to be measured and cut precisely. Steve
-
Well, it might not be easy to explain, but I'll try. I started by laying a piece of tape all the way across for what would be the farthest side of the pin stripe. I could have measured this, but it was close enough to the wide stripe to eye ball it. Then I laid the next piece of tape along what would be the inside edge of the pin stripe, using the other piece of tape, and the edge of the wide stripe, (which was visible through the tape) as a guide to get it as straight as I could. I'm sure that some might think that I went about these stripes strangely, and I guess the way that I did it might have contributed to it not coming out exactly as I would have wanted, but there was a method to my madness. Because of the way that I approached them, I didn't have to cut and try to handle and keep straight long and extremely thin pieces of tape. Only the piece of tape used between the two wide stripes needed to be cut thin, (in retrospect, it could have been a little thinner) and even that piece was difficult to wrangle and keep straight. I hate to think of trying to cut and lay out pieces of tape thin enough to separate the wide and thin stripes. This way, the rest of the pieces of tape were 6mm Tamiya tape that I just had to cut a clean edge on. Steve