
RancheroSteve
-
Posts
1,711 -
Joined
-
Last visited
Content Type
Profiles
Forums
Events
Gallery
Everything posted by RancheroSteve
-
Kurtis Offy Midget #1
RancheroSteve replied to RancheroSteve's topic in WIP: Other Racing: Road Racing, Land Speed Racers
Getting the bodywork and a few other bits on. -
1964-66 Shelby Daytona Coupe
RancheroSteve replied to Venom's topic in Model Building Questions and Answers
Very nice work on all of those, Gary! -
1964-66 Shelby Daytona Coupe
RancheroSteve replied to Venom's topic in Model Building Questions and Answers
Thanks again, Josh. It is Viking Metallic Blue (from MCW Finishes) - the correct color for the early Cobras and Cobra Daytonas before they changed to the darker Guardsman Blue - and incidentally the color my Ranchero was painted when it came from the factory. -
1964-66 Shelby Daytona Coupe
RancheroSteve replied to Venom's topic in Model Building Questions and Answers
Or go here for a bunch of views: https://public.fotki.com/Roullier/model_cars-1/shelbys_cars/ -
1964-66 Shelby Daytona Coupe
RancheroSteve replied to Venom's topic in Model Building Questions and Answers
Thanks Josh. Yes, that's mine. There are a few other pictures of it on the various Cobra Daytona threads here. -
1964-66 Shelby Daytona Coupe
RancheroSteve replied to Venom's topic in Model Building Questions and Answers
I totally agree with you about the two pic listing. I bought one off eBay some years ago and got a good deal (under $100) because it had been barely started, but I could see what I was getting, so no surprises. For what it's worth, I cut the hood away when I built mine, even though I built it basically box stock/curbside. It's been a while, but I remember thinking that it made getting the body on the chassis much easier. If it's done cleanly it shouldn't be a problem. -
Kurtis Offy Midget #1
RancheroSteve replied to RancheroSteve's topic in WIP: Other Racing: Road Racing, Land Speed Racers
Thanks for the interest, everyone. I absolutely agree with Justin - this kit is right up there! This is indeed a fine little (and I do mean little) kit; really fun to build, goes together without any drama. Delicate for sure, but very much in scale, with nice opportunities to add a few details here and there. Metallic finishes are a combination of things: Testors Metallizer (airbrushed), Molotow (airbrushed), Tamiya TS-30 (out of the can), some Model Master and Testors bottle paints (brushed on), plus a wash here and there with Tamiya Panel Line Accent Black. I'm also experimenting with a new lighting set-up for photos - I recently bought a couple of rechargeable LED worklights, and the combination of those lights and old-fashioned incandescent bulbs makes for some interesting reflections and color casts, but also illuminates well overall. -
I waited until I was a little ways along to start a thread on this one. The Revell Kurtis Offenhauser Midget, with a few modifications. I added a crossmember under the transmission (per Tim Boyd's suggestion), nerf bars to the rear radius rods, and modified the front nerf bar. I'm building a specific car (more about that later), so I've made some other body modifications, as well as custom decals. More soon.
-
Deora Meets 911
RancheroSteve replied to SSNJim's topic in General Automotive Talk (Trucks and Cars)
You were the guy I was thinking of, Russell! -
Deora Meets 911
RancheroSteve replied to SSNJim's topic in General Automotive Talk (Trucks and Cars)
Ha, great - as a Deora fan I love it! What builder is gonna take this on? -
I've probably got about a half dozen of those and have built a couple. Very nice curbside kits. Let me know if you need any info on them.
-
1970 Chaparral Camaro Trans-Am
RancheroSteve replied to Phildaupho's topic in Other Racing: Road Racing, Salt Flat Racers
That came out great, Phil! -
Revell 1940 Ford kits
RancheroSteve replied to junkyardjeff's topic in General Automotive Talk (Trucks and Cars)
Revell/Monogram: -
Revell 1940 Ford kits
RancheroSteve replied to junkyardjeff's topic in General Automotive Talk (Trucks and Cars)
These are really nice kits - well-engineered and detailed. I'm using the chassis and running gear for the '36 Ford that I'm building. -
NASCAR kit question
RancheroSteve replied to Oldmopars's topic in WIP: Stock Cars (NASCAR, Super Stock, Late Model, etc.)
Same here. I remember watching some of those races when guys were breaking axles left and right, and the announcers had no clue as to why. Of course later it became clear. -
Yes, I have that issue - great reference for building the model. I found a lot of photos online, including some stuff from the shop that restored it, but there are some details in that RJ article that don't show up anywhere else.
-
Some more progress. I've spent a lot of time trying to get a passable rendition of the louvered hood and hood sides. I won't go into the details, but the hood top took three tries; not perfect, but it will have to do. Louvers are from the Revell '49 Mercury custom hood. Hood side louvers cam from the Revell '32 Roadster. The fit is actually better than it looks in these photos, since everything is just help in place with tape. I also made some structure for the underside of the trunk lid. On to the chassis and mechanical stuff next. Thanks for looking.
-
Gunze Sanyo Cobra Daytona Question
RancheroSteve replied to Ralph Henderson's topic in Model Building Questions and Answers
Thanks - decals are from the excellent VRM sheet. -
Gunze Sanyo Cobra Daytona Question
RancheroSteve replied to Ralph Henderson's topic in Model Building Questions and Answers
In answer to the original question, yes: -
NASCAR kit question
RancheroSteve replied to Oldmopars's topic in WIP: Stock Cars (NASCAR, Super Stock, Late Model, etc.)
Also keep in mind thy are running full floating hubs, which gives you more leeway with camber. I found this: "A year ago [2012] the four cars at Hendrick Motorsports had a significant advantage at midseason by creating a way to manipulate the rear axle housing. One side of the axle was able move forward and backward. That allowed the rear tires to work outside the track of the front tires to give the car more traction in the turns.The evolution of that change took months and hundreds of thousands of dollars to create. It cost the rest of the garage area millions to catch up. Now that all that work and money has been invested, NASCAR said rear housings must be locked in one position. Harry Gant won four consecutive races in 1991 when his team created a way to have the bottom of the right side tires stick out more than the top of the tires. By creating negative camber, the tires gained grip in the corners. Other teams eventually figured it out and did the same thing until they took it too far. NASCAR eventually mandated the amount of camber after several teams broke axles." None of this makes much difference in scale I suppose, but interesting if you care about the technical stuff. -
NASCAR kit question
RancheroSteve replied to Oldmopars's topic in WIP: Stock Cars (NASCAR, Super Stock, Late Model, etc.)
A quick Google search turned up this: "Front and rear steer is where the steering box is located on the frame. Up until the early to mid 80s all Cup cars were rear steer meaning the box was located on the frame behind the front tires. That style was known as Ford steering, Holman Moody and Banjo Matthews dominated the market of building rear steer Cup chassis for Cup. Then came Bobby Allison and Mike Laughlin with the Chevy style box in front of the tires, being the geometry was much easier to work out and the drivers preferring the feel of that style of steering it is now dominate." -
Revell Cobra 1/24
RancheroSteve replied to Venom's topic in Other Racing: Road Racing, Salt Flat Racers
Wow, excellent! Details and textures are very realistic. Nice photography, too. -
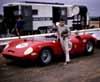
I believe those ports are for the air jacks - the Grand Sport was at least one of the first cars to use them in competition, but not all cars used them at all races. Article here about the restored #005 with some good reference shots: http://www.superchevy.com/features/1811-penske-hall-1963-grand-sport-corvette-005
-
1960 Ford Ranchero
RancheroSteve replied to Brizio's topic in WIP: Model Trucks: Pickups, Vans, SUVs, Light Commercial
If you want to build an accurate stock version, you have some work ahead of you, but whatever you do with it, I'm sure it will be good. I'll be watching! There's a long thread on the kit here: -
1989 Ford IMSA Mustang
RancheroSteve replied to Reeves Racing's topic in Other Racing: Road Racing, Salt Flat Racers
I'd like to hear that story, Dave. Just to be clear, Mitch - I really dig your build! I've got a real soft spot for this kit - the Motorcraft version was the first kit I built when I got back into model building in the late 80s, inspired by a trip to the IMSA race at Del Mar. Sitting here at my bench, I can see three Mustang and two Camaro versions new in the boxes on the shelf; one of them has a resin body and decals to build a mid-90s Valvoline Trans Am Mustang. One day, maybe!
