peteski
-
Posts
9,226 -
Joined
-
Last visited
Content Type
Profiles
Forums
Events
Gallery
Everything posted by peteski
-

Best built-right-from-the-box kits?
peteski replied to Jantrix's topic in Model Building Questions and Answers
Yes, I would say any Tamiya kit (many do have full engine detail). And as Michael stated, other Japanse manufacturers (Aoshima, Fujimi, . . .) are close behind. -
I'm not a truck guy. I saw this picture in another thread here, so I borrowed it. Ever since I've seen a truck like that I've always been curious: What are these trucks, what's inside them, and why all the antennas and other doo-dads on the middle compartment? Is it a sleeper? An office on wheels? What sort of cargo do they carry? I have also seen similar trucks with blue FedEx logos (although it's been a while since last I've seen one of those).
-
Maybe this is a double plank on frame kit? I really don't know much about wooden ship kits, but I have heard that term so I figured I would just throw it in here.
-
Kit Manufacturers Quality Control Or Lack Of It
peteski replied to VW93's topic in General Automotive Talk (Trucks and Cars)
Ah, sort of like those automotive 3-in-1 kits. Just sell one kit of the tank, and include all the parts in it to model the variations. -
Sharpie works very poorly as etch-resist pen. I've tried it. Your idea has merit, if the adhesive will stick well enough to the metal to prevent any of the liquid etchant from getting in between the adhesive and metal. I would compare it to masking and airbrushing multiple colors on a model car body. If the masking tape edge is not burnished perfectly, the paint will bleed under it. Other than that, it should work. The vinyl and pressure sensitive adhesive on it should easily withstand contact with the etchant. Make sure the metal surface is smooth, clean, and grease free. I clean the copper and brass I etch using household copper cleaner. It cleans using both, gentle abrasive, and chemical action.
-
What you are describing already exists: it is called a taxi, uber, lyft, etc. Self-driving part is done not by a computer but by a human brain. Yes, that is a good idea for when you are not up for driving (had a fun night on the town, or something similar). Then you have your "toy" car you enjoy driving. But what about your mundane type of driving (like going to work, shopping or visiting the in-laws)? Would you like to use a self-driving vehicle, or your "fun toy" manually-driven car?
-
Dave, A quick search of the forum would reveal that we discussed this subject less than a week ago (here). And some info from last year.
-
Kit Manufacturers Quality Control Or Lack Of It
peteski replied to VW93's topic in General Automotive Talk (Trucks and Cars)
Can't compare plastic model kits with Legos. The only thing they have in common is that they are both injection modled plastic. Lego's target audience is totally different than model kits. Lego models are not about accuracy or fidelity - it is about creating objects that look somewhat like the modeled subjects, but made from plastic blocks. And Lego aficionados have deep pockets. -
If the WWW crashes, we will have much bigger problems to worry about than cars. Today's world is way too dependent on the network connectivity to function properly, or even stumble along without it. Unfortunately.
-
Not only that, but not all hackers are after stealing personal info from large companies. There are plenty of hackers out there (especially lone-wolf young ones) who do it for the thrill of it, or just to cause mayhem. I'm sure those individuals will try (and likely succeed) hacking the self driving vehicles, causing all sorts of mayhem and destruction. Heck, even now, there are Internet-connected non-self-driving cars that can get hacked.
-
ultra sonic cutter article
peteski replied to Greg Wann's topic in General Automotive Talk (Trucks and Cars)
Micro Mark sells an ultrasonic cutter, but it is very expensive (like everything Micro Mark sells). I've seen one just like Micro Mark's,, sold directly from China, but it wasn't much cheaper than Micro Mark's. -
'Mad Mike' Hughes killed in homemade rocket crash
peteski replied to Mike C's topic in The Off-Topic Lounge
Unfortunately there are lots of "those" people in this world, and from what I am seeing around me, their number is increasing Again, unfortunately true. -
I have never tried that, but I suspect that it will be ok (not run). But I recommend testing this combination on a piece of plastic (sheet styrene, or maybe a plastic spoon), to be sure.
-
'Mad Mike' Hughes killed in homemade rocket crash
peteski replied to Mike C's topic in The Off-Topic Lounge
Cute, but the impenetrable ice wall at the edge prevents that. Plus cats do not like cold. Then, if the Earth was actually spherical, wouldn't cats try to roll it and unwind its yarn? Silly theories! Doesn't everybody know by now that the Earth is a donut-shaped? -
'Mad Mike' Hughes killed in homemade rocket crash
peteski replied to Mike C's topic in The Off-Topic Lounge
Um, you are talking about someone who was convinced that the earth was flat disk with impenetrable ice wall on the edge, and that the moon was a projection. WHo knows what was going on in his brain. -
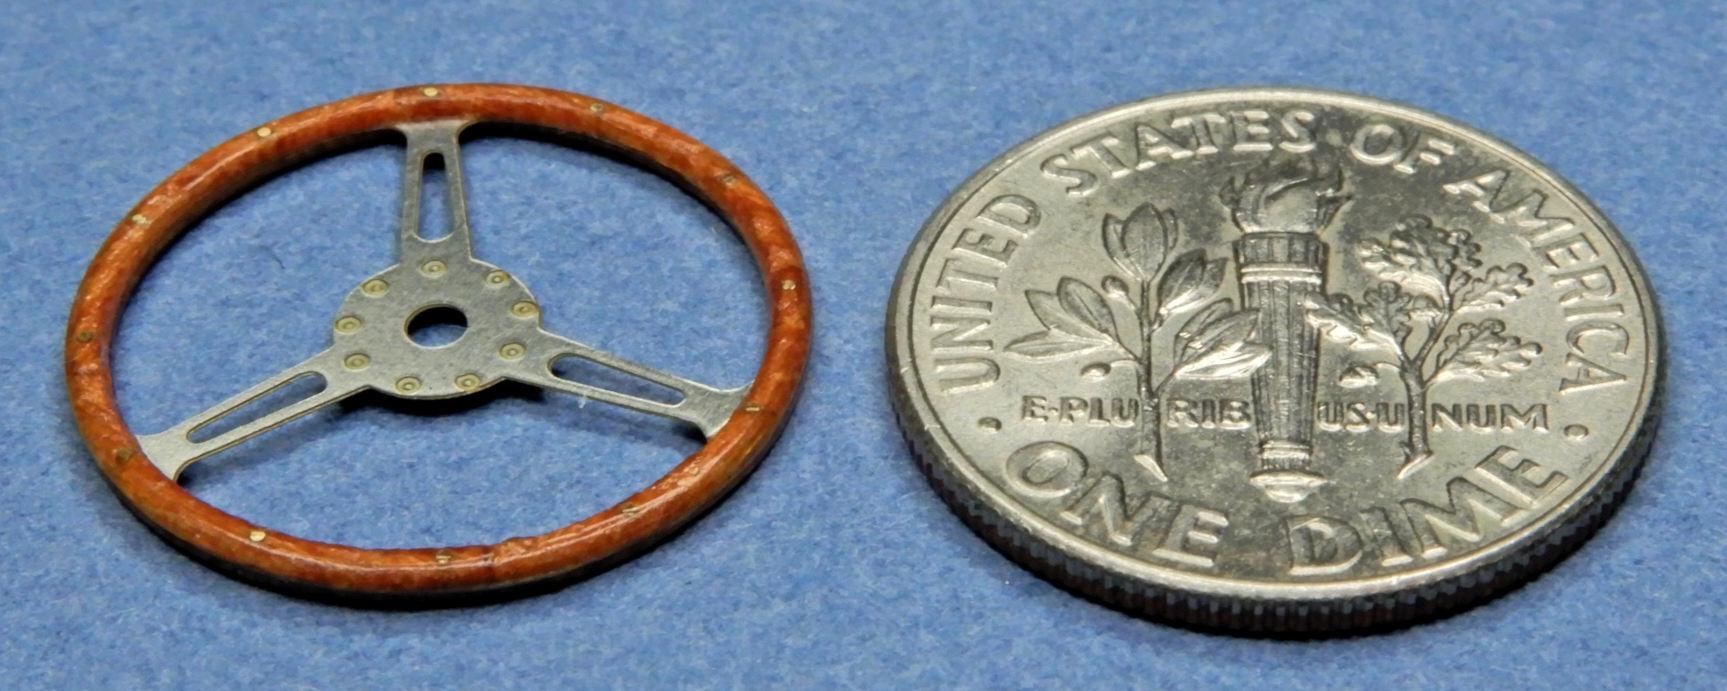
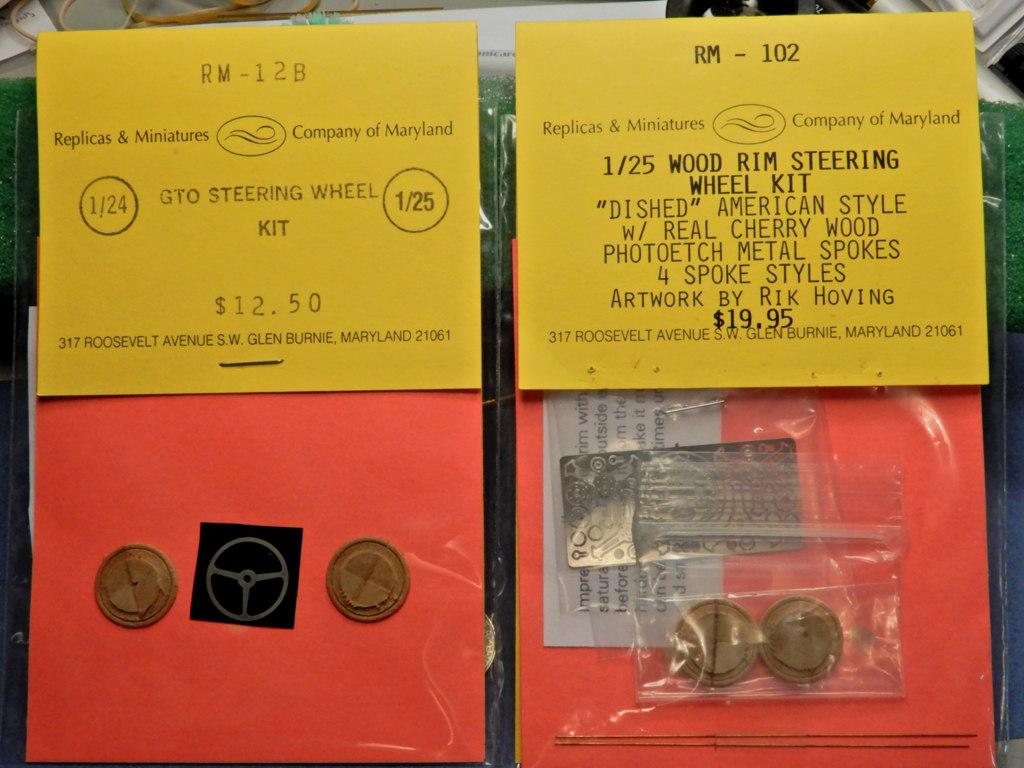
A fellow modeler was looking for some wooden rim steering wheels, so I am posting some photos of a completed wheel (RMCOM RM-13B Derrington style), and couple of other types. These wheels are gorgeous, and even include the "rivets" around the rim. Unfortunately I was informed that the latest RMCOM catalog does not show these as being made.

-
In my experience gel-type pens do not dry on plastic or painted surfaces (so touching the ink will smudge it. They are meant for paper (thus the "will not bleed" statement). It is Sharpie permanent markers (which do dry on smooth surfaces) that will run when clear lacquer.
-
In today's crazy world, other forums or groups I belong to moderate new members for few posts. Unfortunately it is the sign of times. Necessary evil. Hopefully Guy's moderation will end soon.
-
Wheel Arch Molding Foiling Tutorial
peteski replied to StevenGuthmiller's topic in Tips, Tricks, and Tutorials
Actually on the 1:1 cars those thin metal moldings are usually either polished aluminum, stainless steel, or a sandwich of both metals. But still, like you mentioned, BMF provides the "right look" that no silver paint can match. -
I would never think of using glossy black paint. Gloss (like a mirror) reflect light. Flat black is what I use to simulate grille openings. Flat black absorbs (not reflects) light, so the black area looks liek a hole. Flat Black Hole!
-
'Mad Mike' Hughes killed in homemade rocket crash
peteski replied to Mike C's topic in The Off-Topic Lounge
While this is an excellent contender, we are only 2 months into 2020 - there might be someone even crazier getting ready to compete for the award. But I do have to admit that Mad Mike will be hard to beat. -
I see it now. Yes, Alps MD printer is a wonderful hobby tool. It has its limitations, but there are workarounds for most of those.
-
I believe it is the ease of creating the mold. Depending on how the wheel is designed, instead of a simple 2-piece mold used to mold each wheel half, 1-piece wheel might require a more complex slide mold. Unless the 1-piece wheel design is greatly simplified. What also might come into play is the depth of the mold. It might be more difficult to completely inject a deep 1-piece mold with plastic.
-
Wheel Arch Molding Foiling Tutorial
peteski replied to StevenGuthmiller's topic in Tips, Tricks, and Tutorials
Excellent! I use similar technique, but I put the masking tape "guide" on before the foil. But ether way, the result will be good. -
Judging by the gold ink, he is likely using Alps MD printer - excellent way to make waterslide decals.