atomicholiday
-
Posts
2,281 -
Joined
-
Last visited
Content Type
Profiles
Forums
Events
Gallery
Everything posted by atomicholiday
-
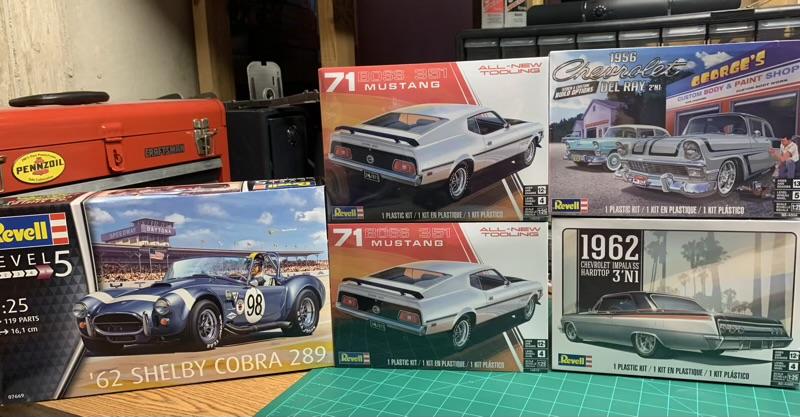
Me too, but the Revell site had them listed on sale for July 4th.?
-
Revell 1971 Boss 351 Mustang
atomicholiday replied to Justin Porter's topic in Car Kit News & Reviews
Yes they will! Just got them today.?
-
That looks terrific! Too bed the paint gave you so much trouble, but it looks great.
-
Thanks Carl. This thing has been a bit of a beast so far. But I'm hopeful that it comes out nice in the end. It's just such a cool car!
-
Ollie's strike again
atomicholiday replied to GLMFAA1's topic in General Automotive Talk (Trucks and Cars)
I almost stopped in last week. Now I know I need to make a run. If nothing else, I'd like to pick up one of the '57 Chevy kits. That van kit looks pretty cool too. -
It's possibility out of position a little. Test fitting was pretty difficult. I'll be watching that very carefully during final assembly. Thanks for the suggestion.
-
That looks spectacular. Excellent build quality, and I really like your photography too.
-
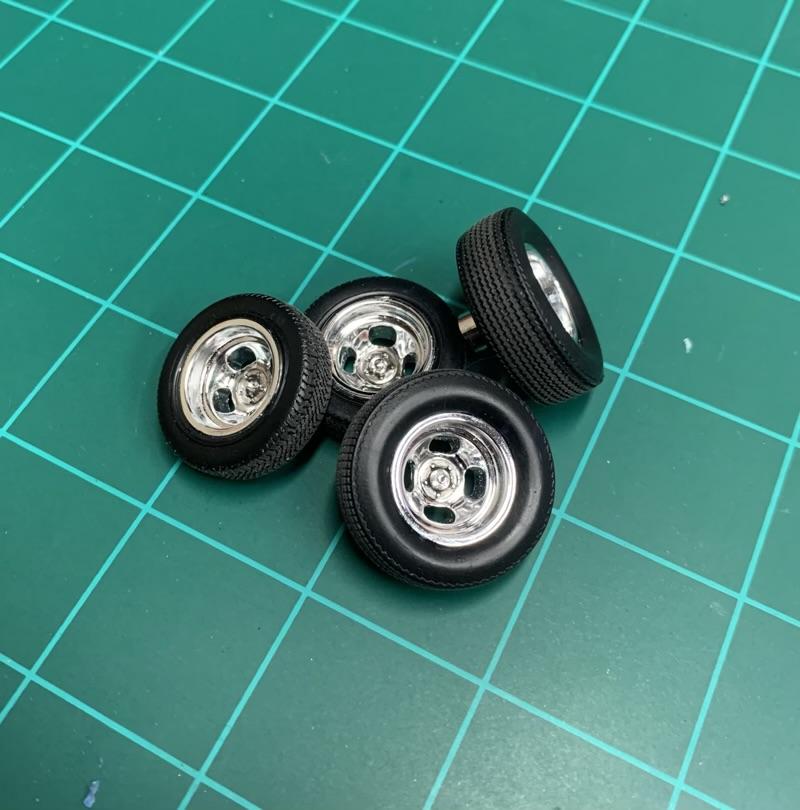
Very minor update. I put together the rims and tires yesterday. Sanded the treads and put a little black wash around the lug nuts. I was never big on the four hole slots but I think they’ll look good on this project. There’s been a little other progress too, but nothing major. Chassis is basically together, not that there is much to begin with. I’m debating doing some very light weathering. The main hold up for completion now is that I’m waiting for some new scalpel blades to try out on the bmf.
-
Amazon Kit Deals
atomicholiday replied to OldNYJim's topic in General Automotive Talk (Trucks and Cars)
I’ve been getting the same treatment from eBay sellers. It’s happened a couple of times, the most recent being just last week. -
Stunning! I love that color!?
-
That looks great! Wow, that was a fast build! I just picked this one up recently too.
-
That looks great. Love the livery!
-
Amazon Kit Deals
atomicholiday replied to OldNYJim's topic in General Automotive Talk (Trucks and Cars)
That seller is overstock hobbies. Same one I picked up the Revell ‘71 GTX from. They seem to have pretty good deals from time to time. -
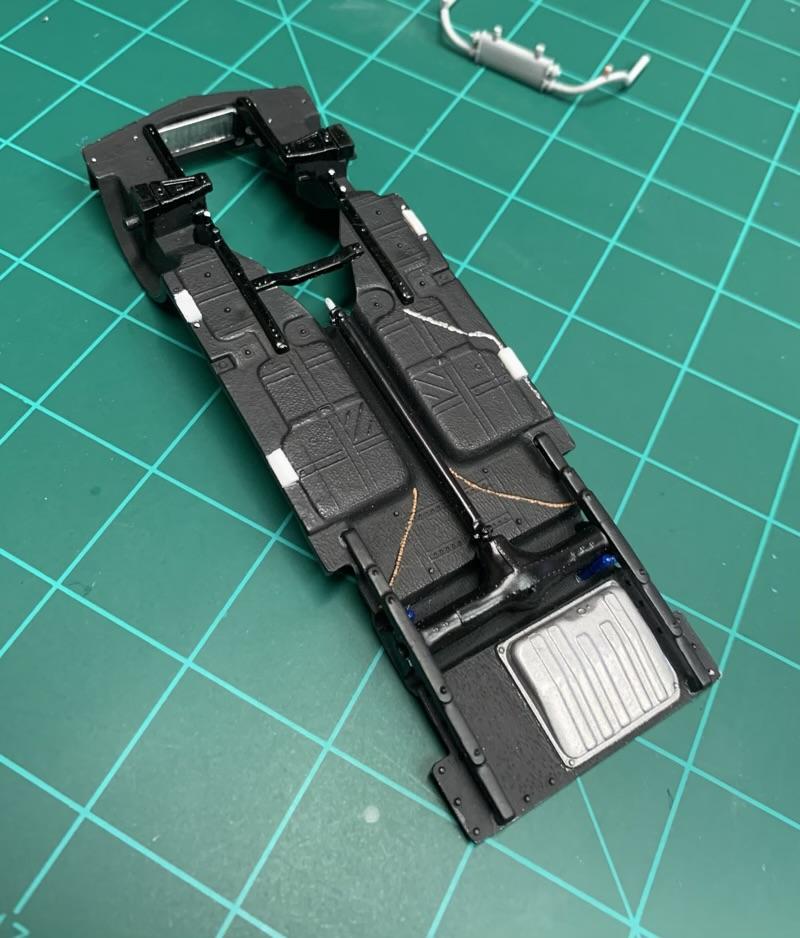
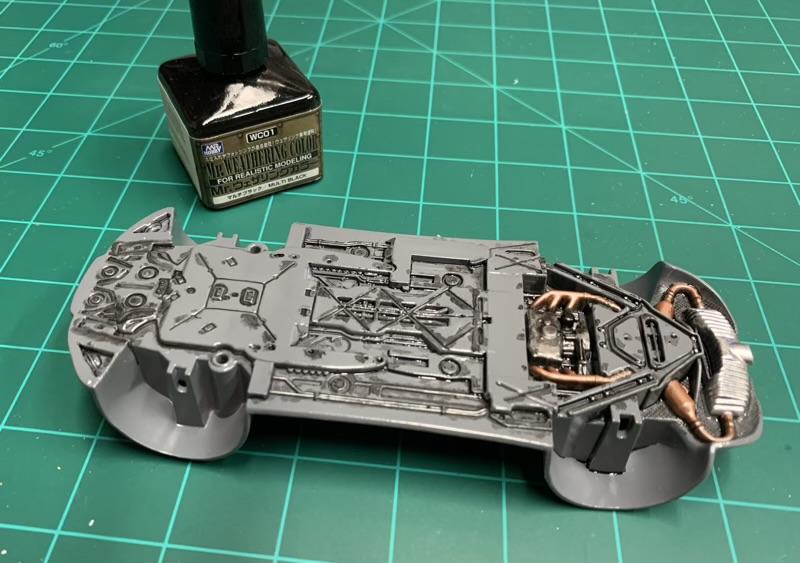
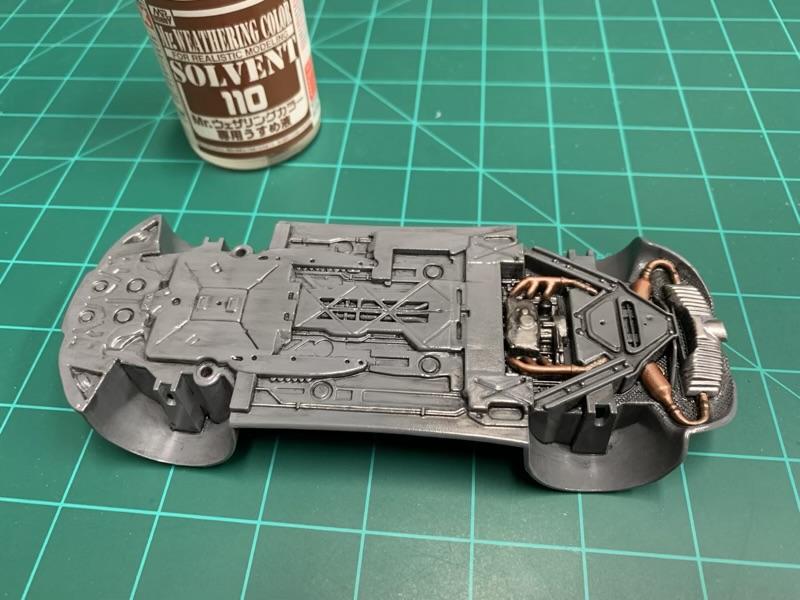
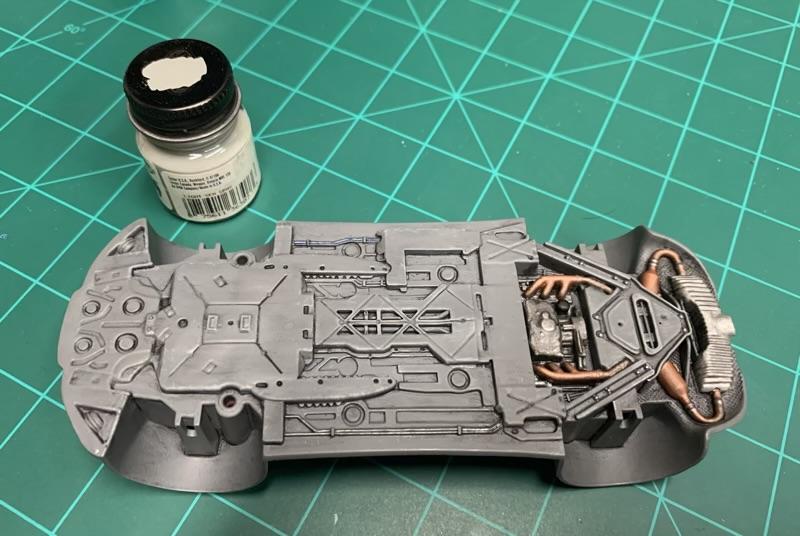
I think I’m calling this floor pan done. This is my first attempt at weathering the undercarriage of a car model. It’s not perfect but I can live with it. Tried dry brushing today for the first time. I think I got a little heavy-handed in some areas and a bit light in others. But I think I’m figuring it out. Disclaimer- I’m winging a lot of this and am by no means an expert. As such, this isn’t meant to be a tutorial. Just showing you how I did it, right way or wrong. Follow along at your own risk!? Here’s a recap of what I did. 1. Floor pan was shot in grey primer, detail painted, and then shot with gloss clear. I picked this tip up from the military guys. The purpose of the gloss clear is to let the wash (next step) flow better and follow the contours. 2. Next I slathered on Mr Weathering multi black. I wasn’t worried about being neat at this stage. It will get cleaned up on the next step. 3. Now it was time for clean up. Mr weathering color solvent was used to remove the excess wash. 4. The wash I used is oil based, so I let everything cure for a couple of weeks. Then I shot the whole thing with flat clear. 5. Today was all about dry brushing. Another tip I learned from the armor guys is that dry brushing works best over a flat finish. It gives the paint something to grab onto. For this last step, I used MM light sea grey. It’s a touch lighter than the base color. To my eyes it’s almost too subtle, but I’d rather quit while I’m ahead than go too far and have to start over. That’s it! Questions, comments, and criticisms are welcome.?
-
Nice work. I like the in-flight pictures too.?
-
Great looking truck.?
-
Aoshima Subaru Sti
atomicholiday replied to PatW's topic in Other Racing: Road Racing, Salt Flat Racers
Great looking Subaru! This makes me really want a wrx.? -
Looks just like the real thing. This is model building at its finest.?
-
Amazing work. That’s gorgeous. Looks tastefully done.
-
That looks great! Good choice for the colors.
-
So cool. Love those old funny cars. Excellent job!?
-
Looks great! I’ve been kicking around the idea of building one. I’d like to build it like the one James May drove in one of the Grand Tour specials.
-
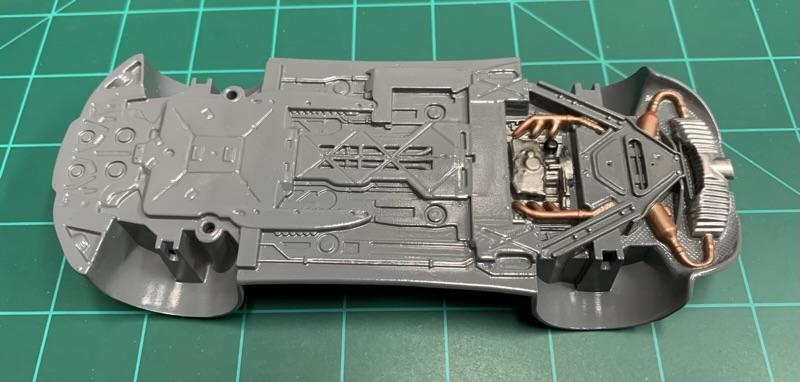
My wife is working today, so I get to spend some time at the bench today. Just a minor update on this one. Got the first couple of primer coats shot. Looks like I have about two or three small areas that need a little sanding, but nothing major.
-
Revell 1971 Boss 351 Mustang
atomicholiday replied to Justin Porter's topic in Car Kit News & Reviews
Revell site says they’re available now. I just placed an order.