atomicholiday
-
Posts
2,281 -
Joined
-
Last visited
Content Type
Profiles
Forums
Events
Gallery
Everything posted by atomicholiday
-
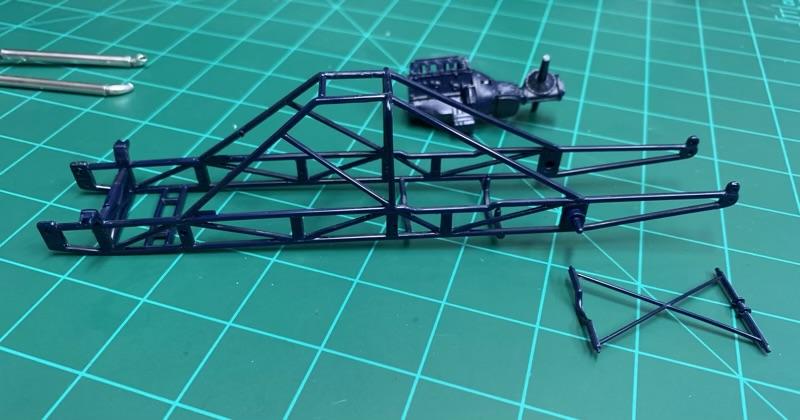
Been thinking about the way the instructions say to build the frame for this. They say to build up the front half of the frame around the seat in step 2, and the back half around the engine in step 3. Not excited about that because it would make painting more difficult if you want to paint the seat and engine different colors than the frame. I did a bit of test fitting, and it looks like you can assemble everything on the frame except for the rear cross beam section. Getting the seat into position will require a bit of finagling, but I think it will go in okay. But there’s no way to get the engine in with the rear cross brace glued in place. Still, this is a better solution I think. At least now I can paint things any color I want. Got things glued up to this point. That’s as far as I plan to go with the frame until I decide on a color for the body. Then I’ll paint the frame to complement.

- 16 replies
-
- 1
-

-
- atlantis
- troublemaker
- (and 1 more)
-
Revell 1971 Boss 351 Mustang
atomicholiday replied to Justin Porter's topic in Car Kit News & Reviews
I think HPI guy references this same feature in his YouTube build of the kit. And had the same conclusion as you Tim. Good info to have. Thanks.? -
That’s a really clean build. Great colors too. Nice work!?
-
What was your first model car?
atomicholiday replied to Kit Karson's topic in General Automotive Talk (Trucks and Cars)
Wow! What a fantastic experience that must have been! Great story. Thanks for sharing!? -
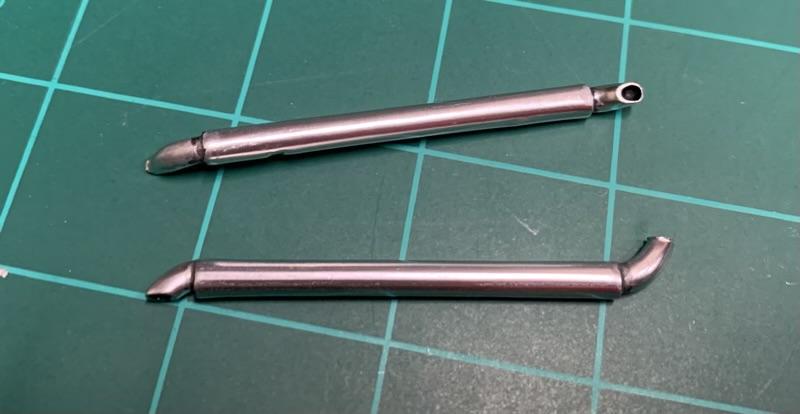
The Pintera has been stalled for about a month now while I was waiting for new scalpel blades to use on the window trim. I got them a week ago and I’ve been working up the nerve to take a sharp object near my paint job.?. Hoping to tackle that this weekend. In the meantime, I worked on the side exhaust pipes. Not super happy with the results so far. I’m thinking of stripping them and trying out some finger nail chrome powder. I’ve been wanting to check that stuff out for a while now anyway. If I don’t get the results I want with that, I’m considering getting some 3/16 aluminum tubing, making new pipes, and polishing them. One step at a time though. Here’s what state they’re in currently.
-
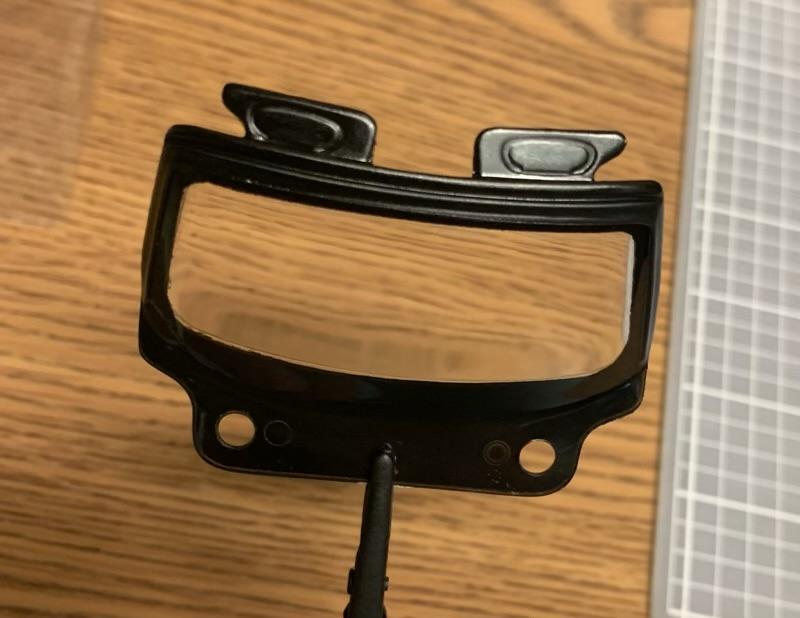
Tried another new technique tonight. Window masking this time. Seems like lately every time I’m at the bench it becomes a new experiment. Again not perfect, but not bad for a first attempt.
-
Twisted frame aside, that is one gorgeous build. Excellent job!?
-
That brings back the memories! Looks terrific!
-
That’s gonna be a sweet ride. Nice stance.?
-
Cool project. You can never go wrong with torque thrust wheels.?
-
Cutting Styrene Round
atomicholiday replied to Horrorshow's topic in Model Building Questions and Answers
I’ve been wondering about this topic too. Would something like this punch & die set work? I’ve used them in the past with sheet metal, but never plastic. Also wondering if the same thing would work for round decals? Or would they paper just tear?
-
That’s a good deal for the turbo prop kit. Supposed to be pretty nice. I picked one up at 40% off a while back but haven’t opened it yet.
-
Really clean build. That's gorgeous.
-
Monogram 55 Chevy Street Machine 2n1
atomicholiday replied to bluestringer's topic in WIP: Model Cars
Oh that’s sweet looking! What paint did you use? -
Dupli Color and blushing
atomicholiday replied to atomicholiday's topic in Model Building Questions and Answers
I’ve shot Dupli Color three times before but this is the first time I’ve seen blushing. Finally a paint problem I can ignore!? -
Dupli Color and blushing
atomicholiday replied to atomicholiday's topic in Model Building Questions and Answers
Awesome. That's what I was really hoping to hear. You may be right. I used low heat, but it still warmer air than outside atmosphere. It would have had about 10-15 minutes to cool while the paint was warming up, but who knows. Thanks all for your quick replies. -
Great paint work. I really like your color choices. What you're doing with the exhaust is impressive. I'm inspired to give that a try sometime soon.
-
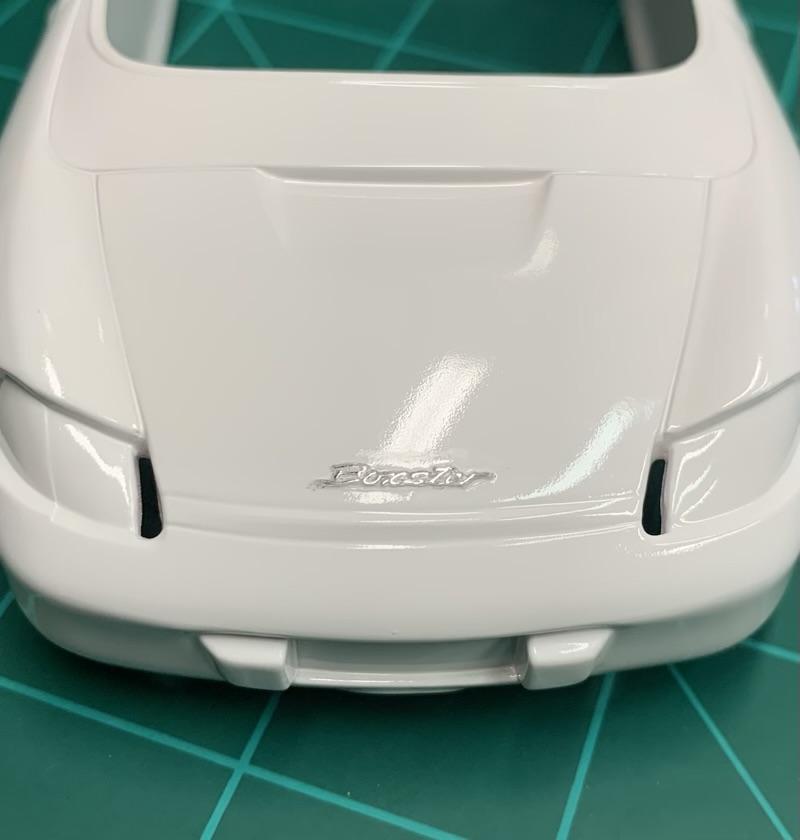
Tried doing a script by foiling under the paint and using a toothpick soaked in lacquer thinner. My first attempt. Not perfect but I can live with it. I’ll keep working at it on the next few projects. I can see how this would be the way to go if you can keep the paint layers thin enough.
-
Quick question about Dupli Color perfect match. I just reshot my 70 1/2 Camaro and the finish came out smooth but blushed pretty badly. I’ve done some research here and elsewhere online, and know that humidity is the issue. In this particular case I don’t think it’s the outside atmosphere but a different cause I’ll explain in a minute. My question is, can I continue adding coats as usual, or do I have to sand or strip the paint? It’s smooth, without excessive orange peel. Just looks milky. What are my next steps? So here’s the root cause (and I won’t do this again). I’ve sprayed this exact color before without issue, but this is a brand new can. Don’t think that’s the problem. Outside it’s sunny, 85 degrees, and humidity is only 48 percent. I’ve sprayed this stuff in higher humidity without issue. Here’s where I believe it all went wrong. Watching a video from a well respected model builder, he recommended washing your model, and then drying it with a hairdryer (low heat) and painting immediately, to avoid dust collecting on it. I don’t believe his advice is wrong. He’s won many awards. But I do wonder if there might not be more to it. I followed this advice, drying the model until no visible moisture could be seen anywhere. My theory is that there must have still been some moisture (microscopic particles) on the surface.
-
You free handed that? Wow! Looks great! Nice build!
-
Really nice build.?
-
Some things that hurt a hobby
atomicholiday replied to Plasticated Guy's topic in The Off-Topic Lounge
Love those old red lines!? -
Ollie's strike again
atomicholiday replied to GLMFAA1's topic in General Automotive Talk (Trucks and Cars)
My thoughts exactly. One of the local Wal Marts had about half of the kits I've seen shown on this thread. I keep expecting to see the 70 1/2 Camaro or Grumpy Vega show up. -
Monogram 55 Chevy Street Machine 2n1
atomicholiday replied to bluestringer's topic in WIP: Model Cars
I picked this one up recently too. I’m interested to see how it goes for you. Built the bad man as a kid but I don’t have any memory of how it went. I’m along for the ride.? -
Interesting. I'll have to give it a shot sometime. That engine looks terrific. Great work!