BigTallDad
-
Posts
1,526 -
Joined
-
Last visited
Content Type
Profiles
Forums
Events
Gallery
Everything posted by BigTallDad
-

CA glue/Zap A Gap alternate containers
BigTallDad replied to aurfalien's topic in Model Building Questions and Answers
GMTA -
CA glue/Zap A Gap alternate containers
BigTallDad replied to aurfalien's topic in Model Building Questions and Answers
I think you'll like it. In a similar fashion, I keep a small jar that contains lacquer thinner. It's great for cleaning paint brushes, and I also have several spray heads from rattle cans in there...a couple of Tamiya, Testors, Krylon, etc. Just before spraying, I'll put a fresh head on the can to ensure a nice clean spray pattern. -
I had an edge....a member of my modeling club was a well-known eye surgeon. He got me into an FDA program that provided top-of-the-line lenses, as well as medications, for free.
-
No, but cataract surgery might help. I had that done when I was 74 (a year ago, both eyes) and I no longer have the "Prescription Lenses Required" constraint on my Driver's License.
-
Very nicely done! All aspects (engine, paint, interior, etc.) are precise and lifelike. It's refreshing to see an SS with a 327...most had the 396. It is a common misunderstanding that the SS package was a performance package, which is not correct. The SS package was a trim package, meaning you could have an SS Camaro with a 6-holer.
-
Spinner knock offs
BigTallDad replied to hedotwo's topic in General Automotive Talk (Trucks and Cars)
The AMT 57 Chevy Pro Shop kit (with yellow box art) has those exact wheel covers -
CA glue/Zap A Gap alternate containers
BigTallDad replied to aurfalien's topic in Model Building Questions and Answers
I keep a glass olive jar (it's short and wide) on my workbench...about half-full of acetone. If a CA tip gets clogged, won't seal properly, etc. I toss it in the jar, replacing it with a tip from a used-up bottle (I'm a pack rat) that has been sitting in the sealed jar. The jar also contains those cute little extensions that clog up quickly, so I don't have to keep buying them. -
Nice work; it brings back memories. Any engine pics?
-
I graduated high school in '61, so I'm familiar with the era. What I'm confused about is the duality (side and rear pipes); would both pipes on each side be functional, making for four outlets?
-
Absolutely dazzling! I think I'm a bit confused by the exhaust system(s)...the side pipes and the rear "bumper" treatment seem unusual to me.
-
Auto Art. What's in your yard ?
BigTallDad replied to Greg Myers's topic in General Automotive Talk (Trucks and Cars)
Are you talking about the calendar or the grille? -
making headlight lenses
BigTallDad replied to foxbat426's topic in Model Building Questions and Answers
Elmer's white glue dries clear. I've seen lots of dashboards where it was used to create clear lenses for gauges. -
Just a suggestion...the detailing is free, as opposed to buying PE
-
Monogram 66 Malibu Street Rat
BigTallDad replied to Jantrix's topic in Model Building Questions and Answers
Just looking at the box art (comparing the two) the flared out rear tires on the Street Rat version are too flared-out for my taste. Reminds me of some of the pancaked wheeled rice-burners I'm seeing now. -
Here's a bit of detailing you can do on the wiper blades....

-
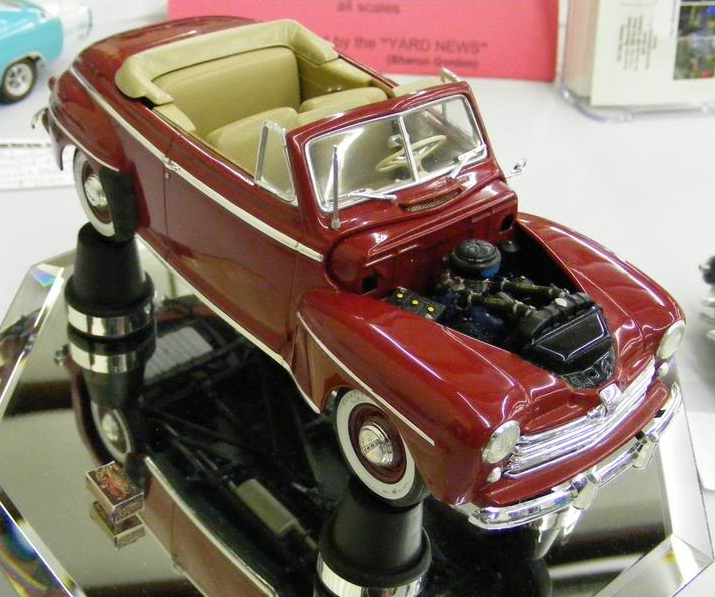
I've used a dehydrator to re-shape parts. Construct a wooden form, insert it into the opening, and place the kit in the dehydrator. You might need to do this in stages, using smaller forms and graduating to the final size. This is a '48 Ford I recovered using the dehydrator. When I put the color coat on, I left the body on a Tamiya paint rack, then placed the whole thing in a dehydrator. The spring tension on the paint rack widened the body...so I added a couple of cleats to some scrap plywood, wedged the body in there, and put it back in the dehydrator. The body came out the correct width, although I had to tweak the front pan which had curled upwards while the body was being "narrowed".
-
painting wood paneling on a station wagon
BigTallDad replied to davysmodels's topic in Tips, Tricks, and Tutorials
You could also print your own decals. There are a couple images (dark/light wood) in this tutorial http://www.modelcarsmag.com/forums/topic/101995-woodification-making-it-a-woodie/ -
I guess I missed the irony.
-
Sorry, but for somebody asking for custom decals yet has the "3rd Party has been temporarily disabled" in their photos...nevermind
-
Can you post pictures of one of your models that you think is too glossy?
-
Glad I could help
-
A Google search yielded this http://www.scalefinishes.com/Apply.html
-
Same here
-
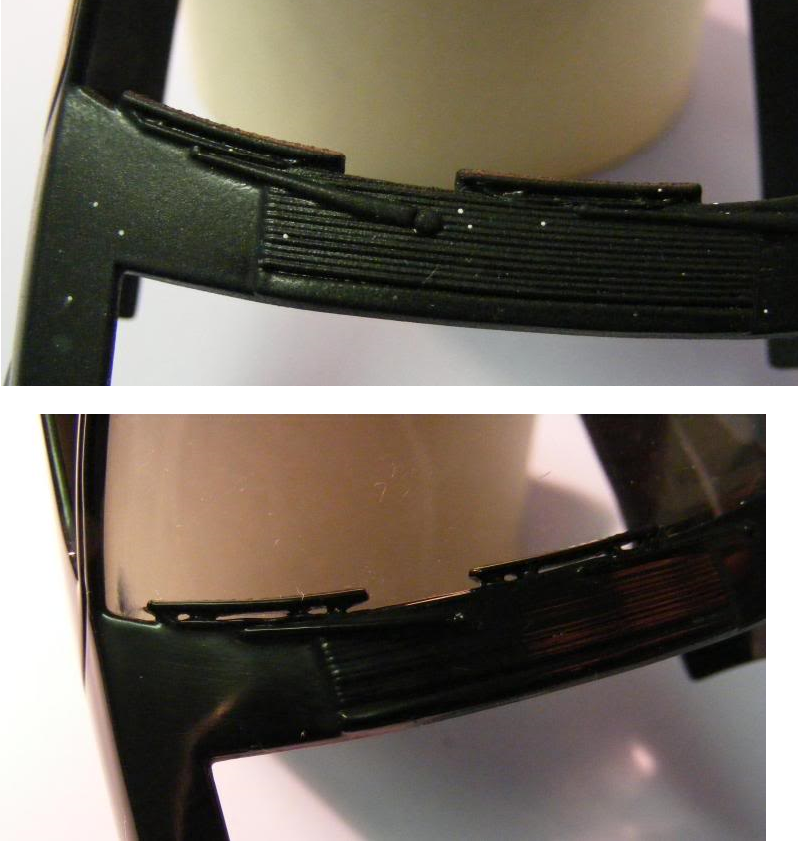
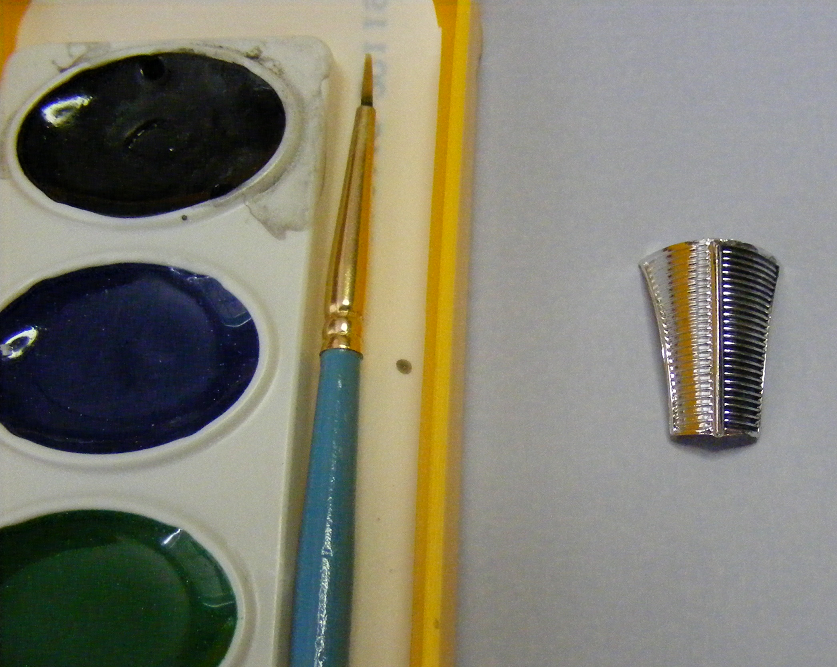
Excellent job!!! At 75 years of age, I remember those cars well. I have that same color (in a rattle can) from a 1:1 restoration site; I had planned on doing that kit '57 in one color, not two tone, but ran into other difficulties. A couple of observations, and these are in no way criticism of your fine workmanship: 1. The mesh around the headlights has a black background. You can still recover this by using children's water paints, which pose virtually no risk. Paint the mesh, let dry, wipe off with a damp business card. If you don't like it, use a clean paintbrush and water to remove it. Here's a '40 Ford grille done using that approach 2. There is an obscure kit error. The spare tire in the trunk is shown with lug nuts, instead of mounting holes. I suspect AMT just grabbed a mounted wheel from some other kit. If you're building an entry for Out-of-the-Box, you're golden. Personally, I don't know if I'd remove the tire just to drill the holes (which might entail repainting). Again, my comments are not intended to be negative, just (hopefully) constructive, and I hope you take them in the way they were intended.
-
I'd be inclined to agree with you; I don't think it's the oil filter.