Dann Tier
-
Posts
8,151 -
Joined
-
Last visited
Content Type
Profiles
Forums
Events
Gallery
Everything posted by Dann Tier
-

Otaki 1/12 Lamborghini Countach Twin Turbo...Mission Statement
Dann Tier replied to Dann Tier's topic in WIP: Model Cars
Thanks, Bruce!!….glad you are!! -
I agree 100%!!....excellent Build!!!
-
Otaki 1/12 Lamborghini Countach Twin Turbo...Mission Statement
Dann Tier replied to Dann Tier's topic in WIP: Model Cars
Thanks, bud!! -
Otaki 1/12 Lamborghini Countach Twin Turbo...Mission Statement
Dann Tier replied to Dann Tier's topic in WIP: Model Cars
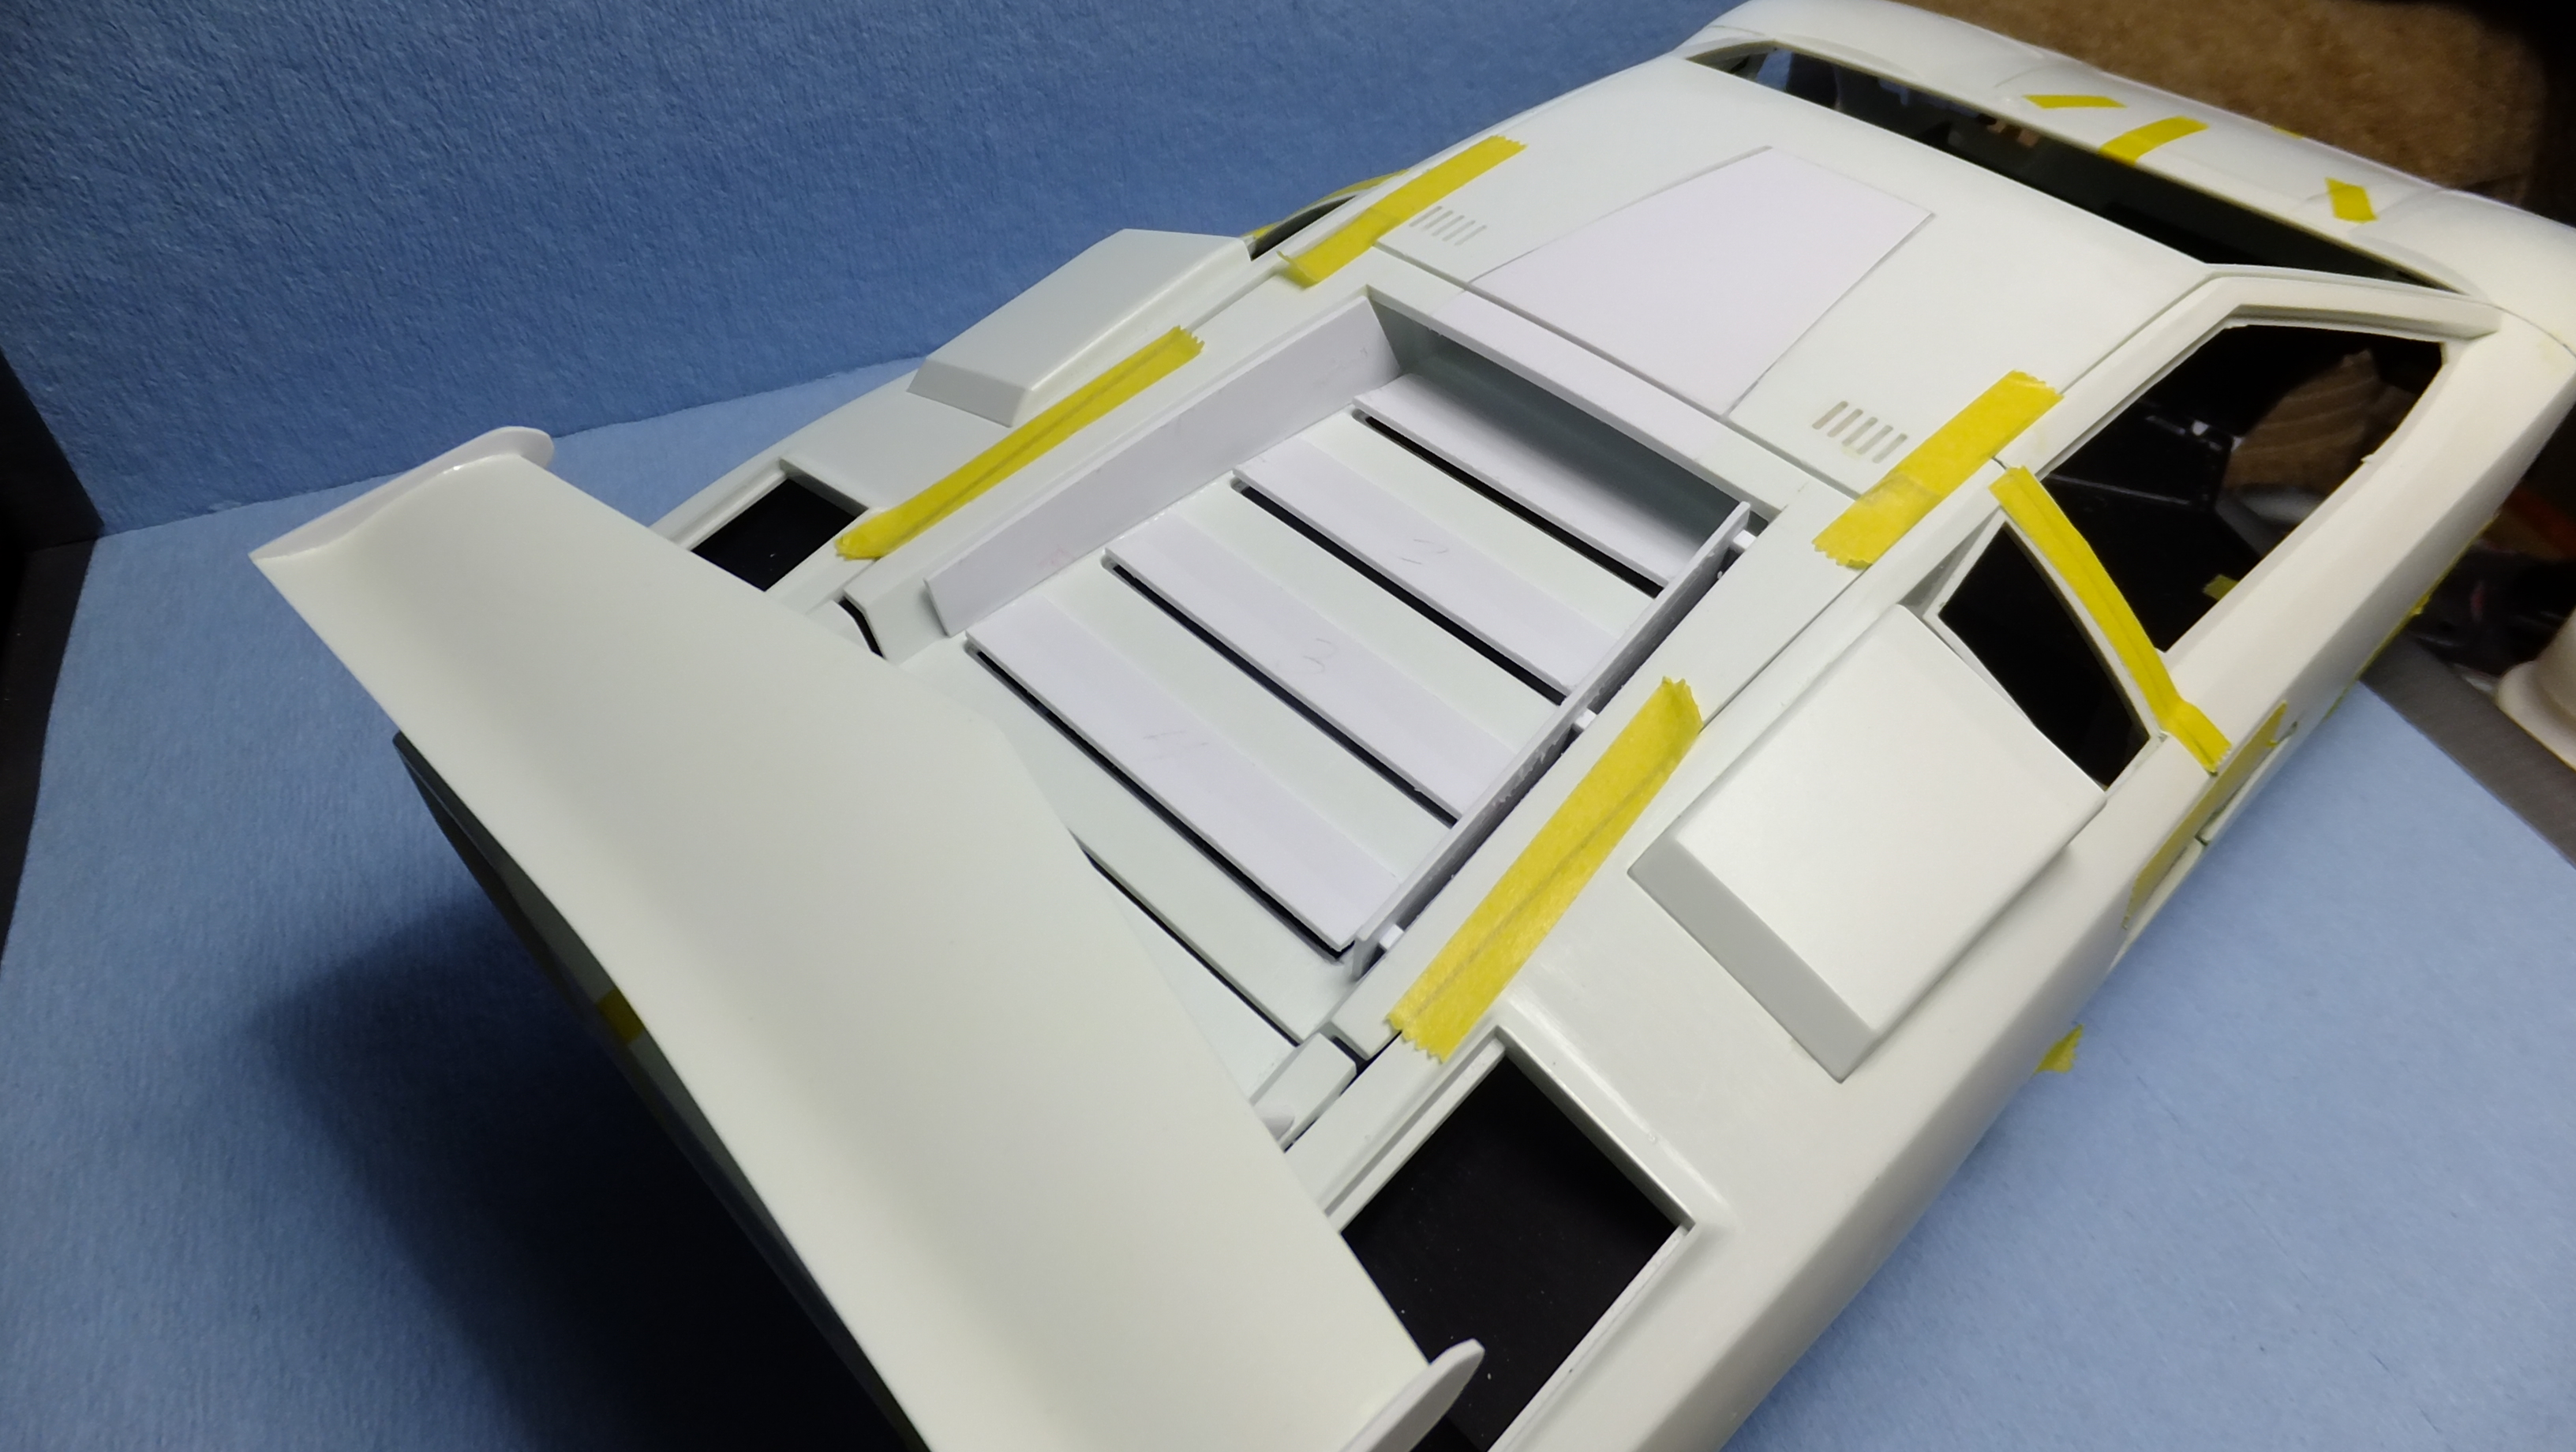
Heres a loose test fitting of all the bits....i'm pretty stoked.
-
Otaki 1/12 Lamborghini Countach Twin Turbo...Mission Statement
Dann Tier replied to Dann Tier's topic in WIP: Model Cars
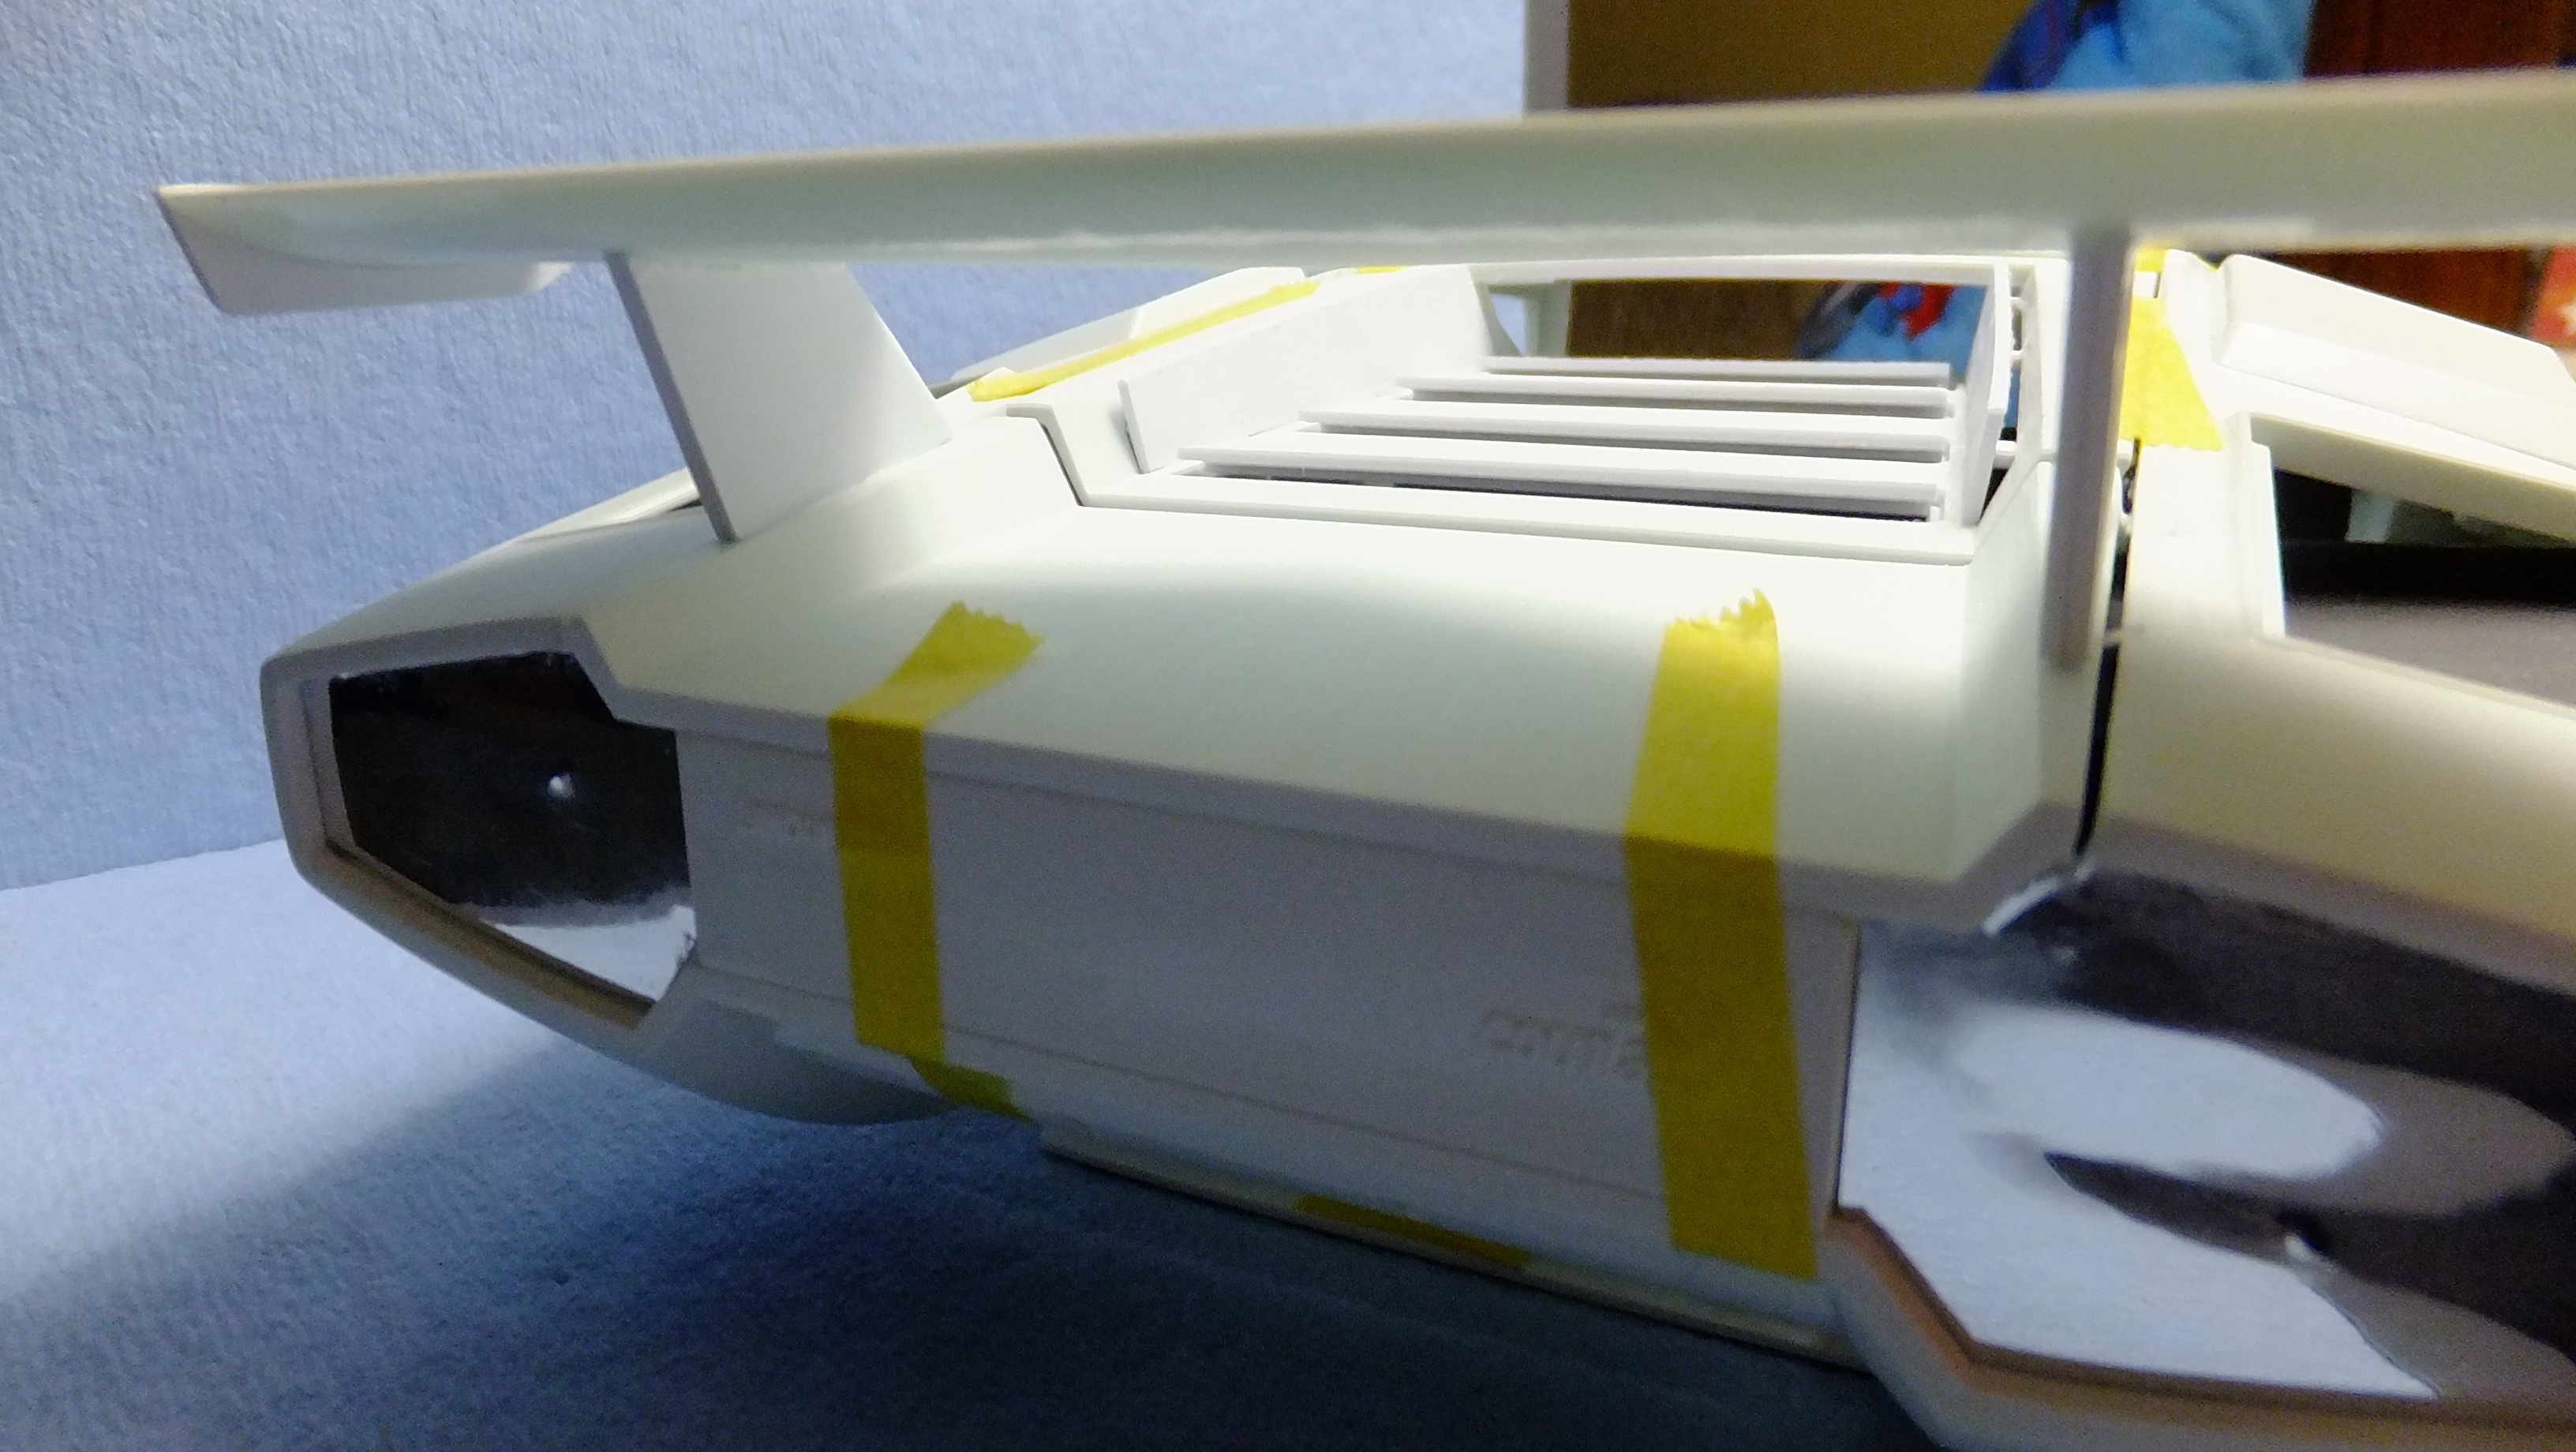
Time to finish off these side vents...First, I carefully used my Olfa blade to separate the top contacts, then removed the canopy glue residue. I then used rectangular styrene stock as the 6 spacers...only gluing them to the hood itself, NOT the sides of the vents. They will need to be removed, cleaned from all the canopy glue, and then glued in place. The side vents need to be blended in where they contact the hood. I will be sniping-off the excess on the spacers, when its all done.
-
Otaki 1/12 Lamborghini Countach Twin Turbo...Mission Statement
Dann Tier replied to Dann Tier's topic in WIP: Model Cars
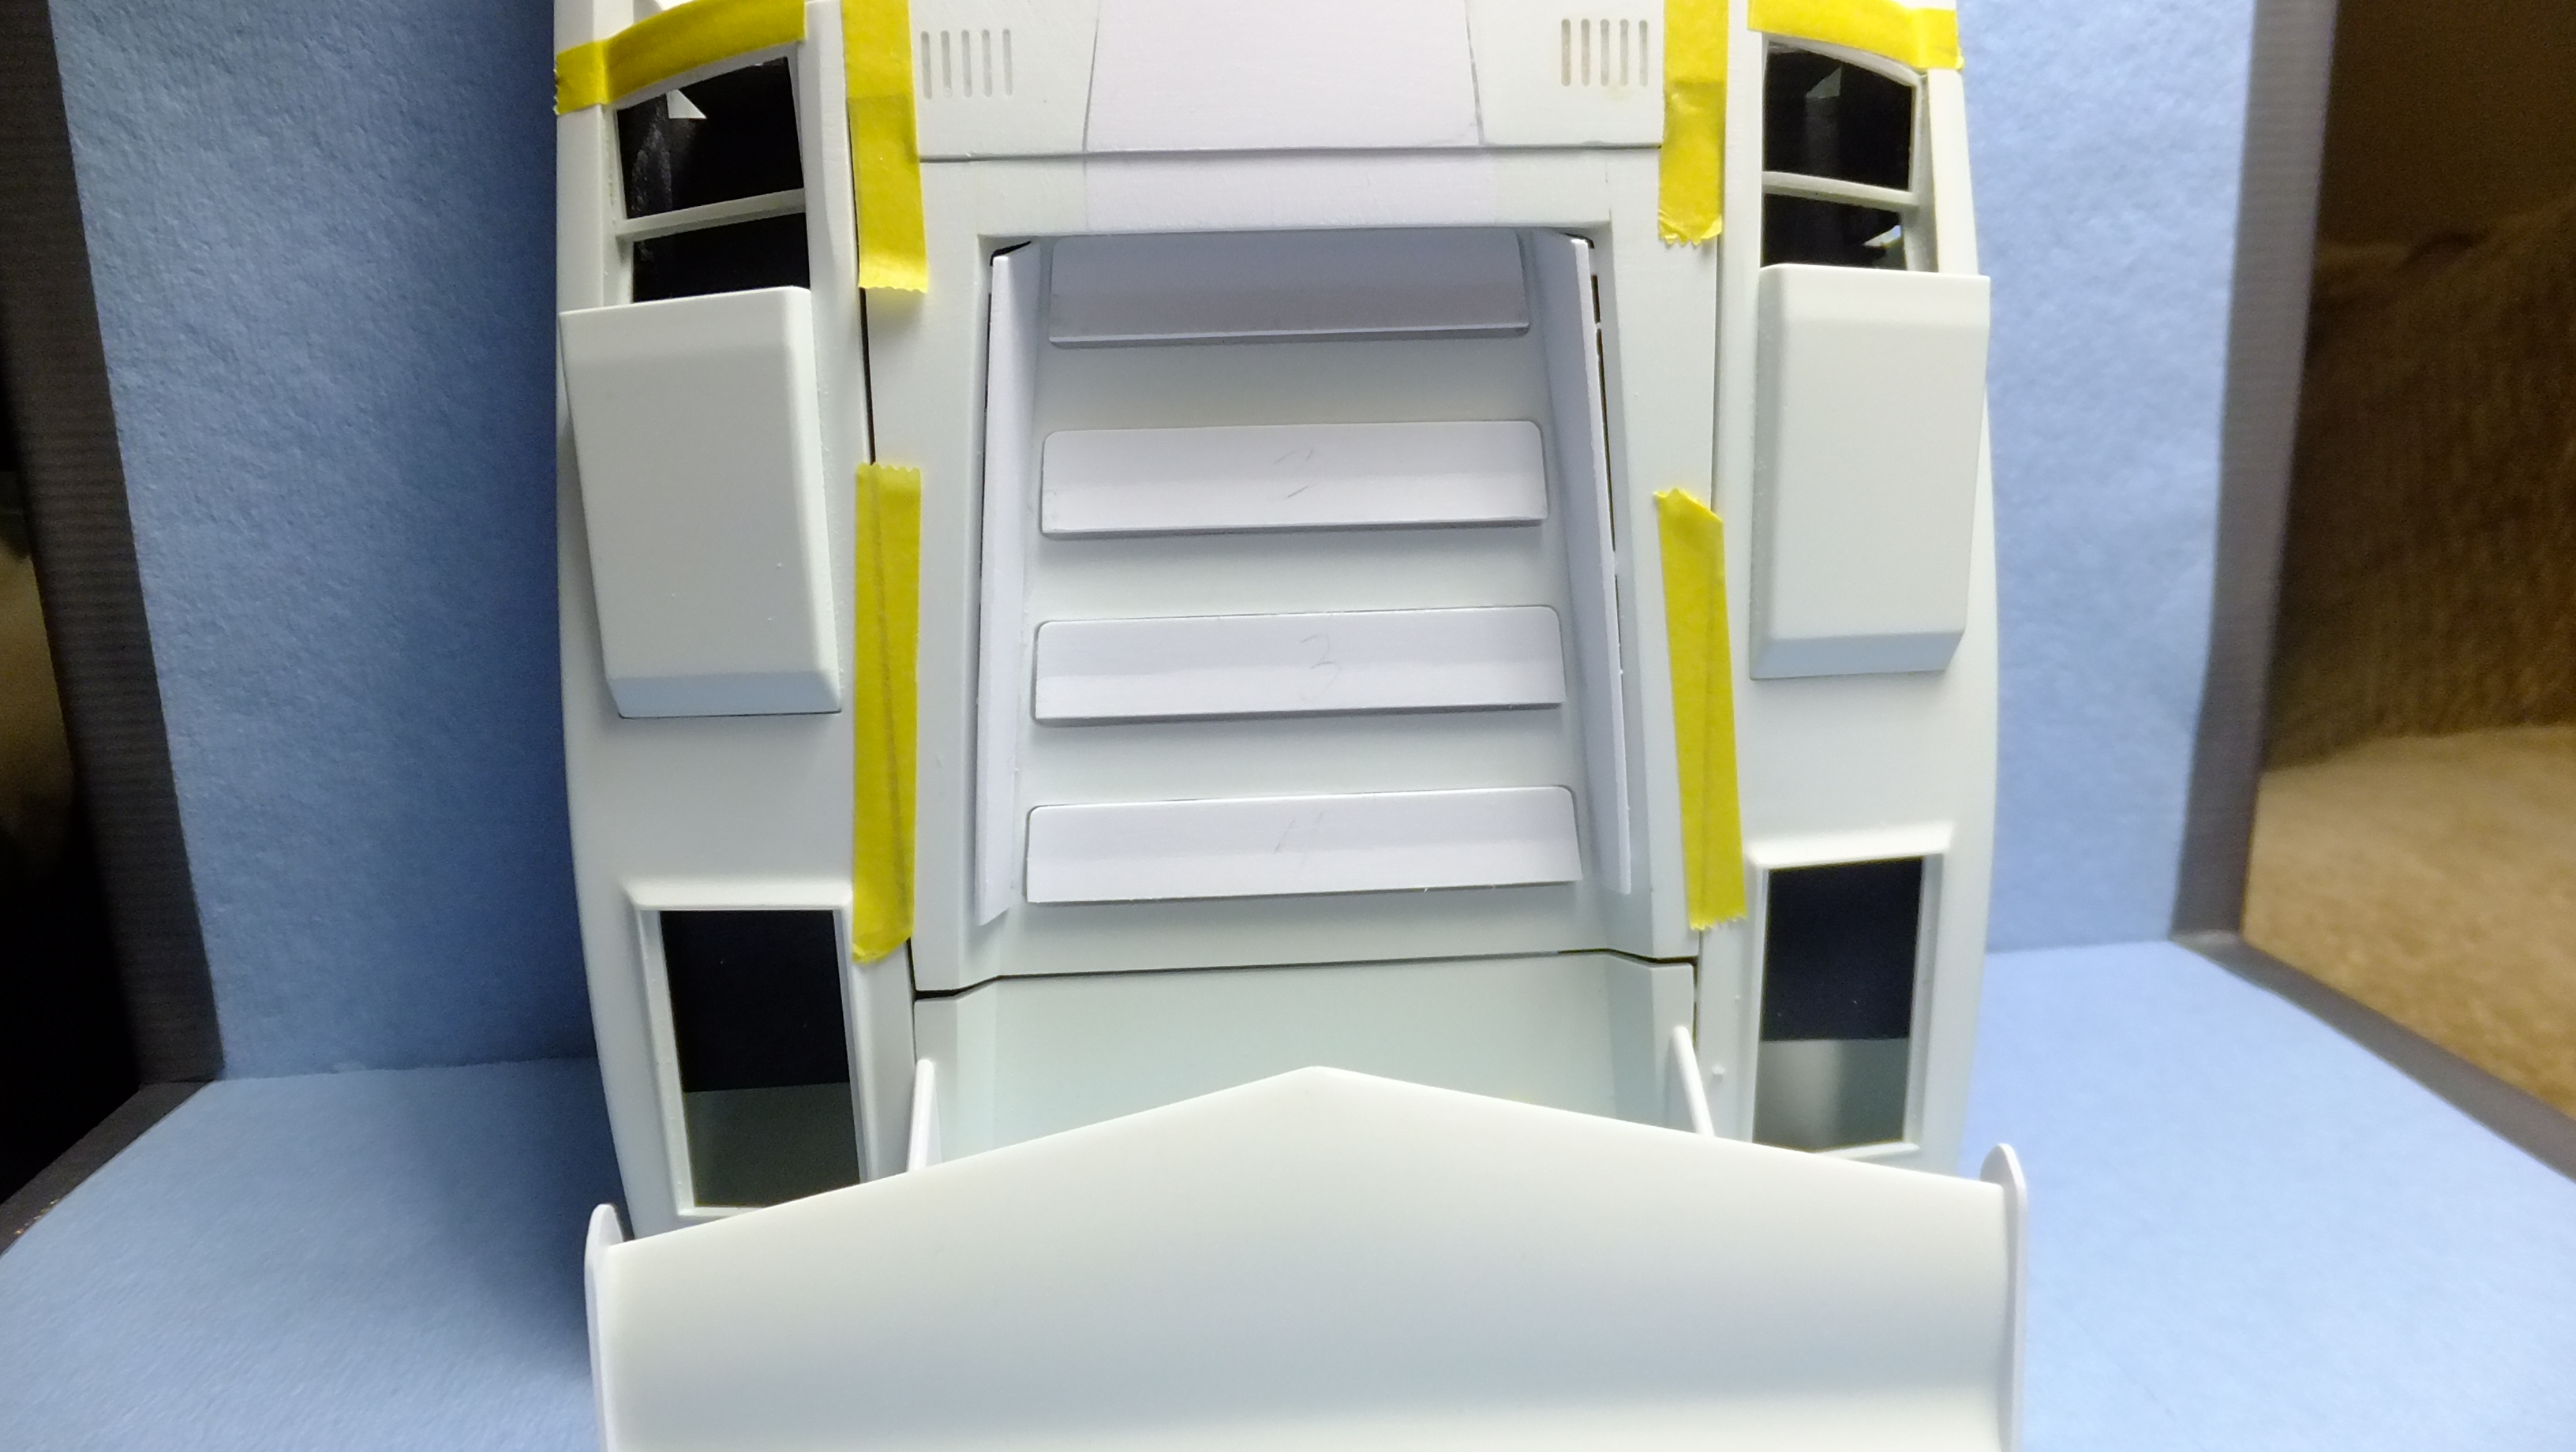
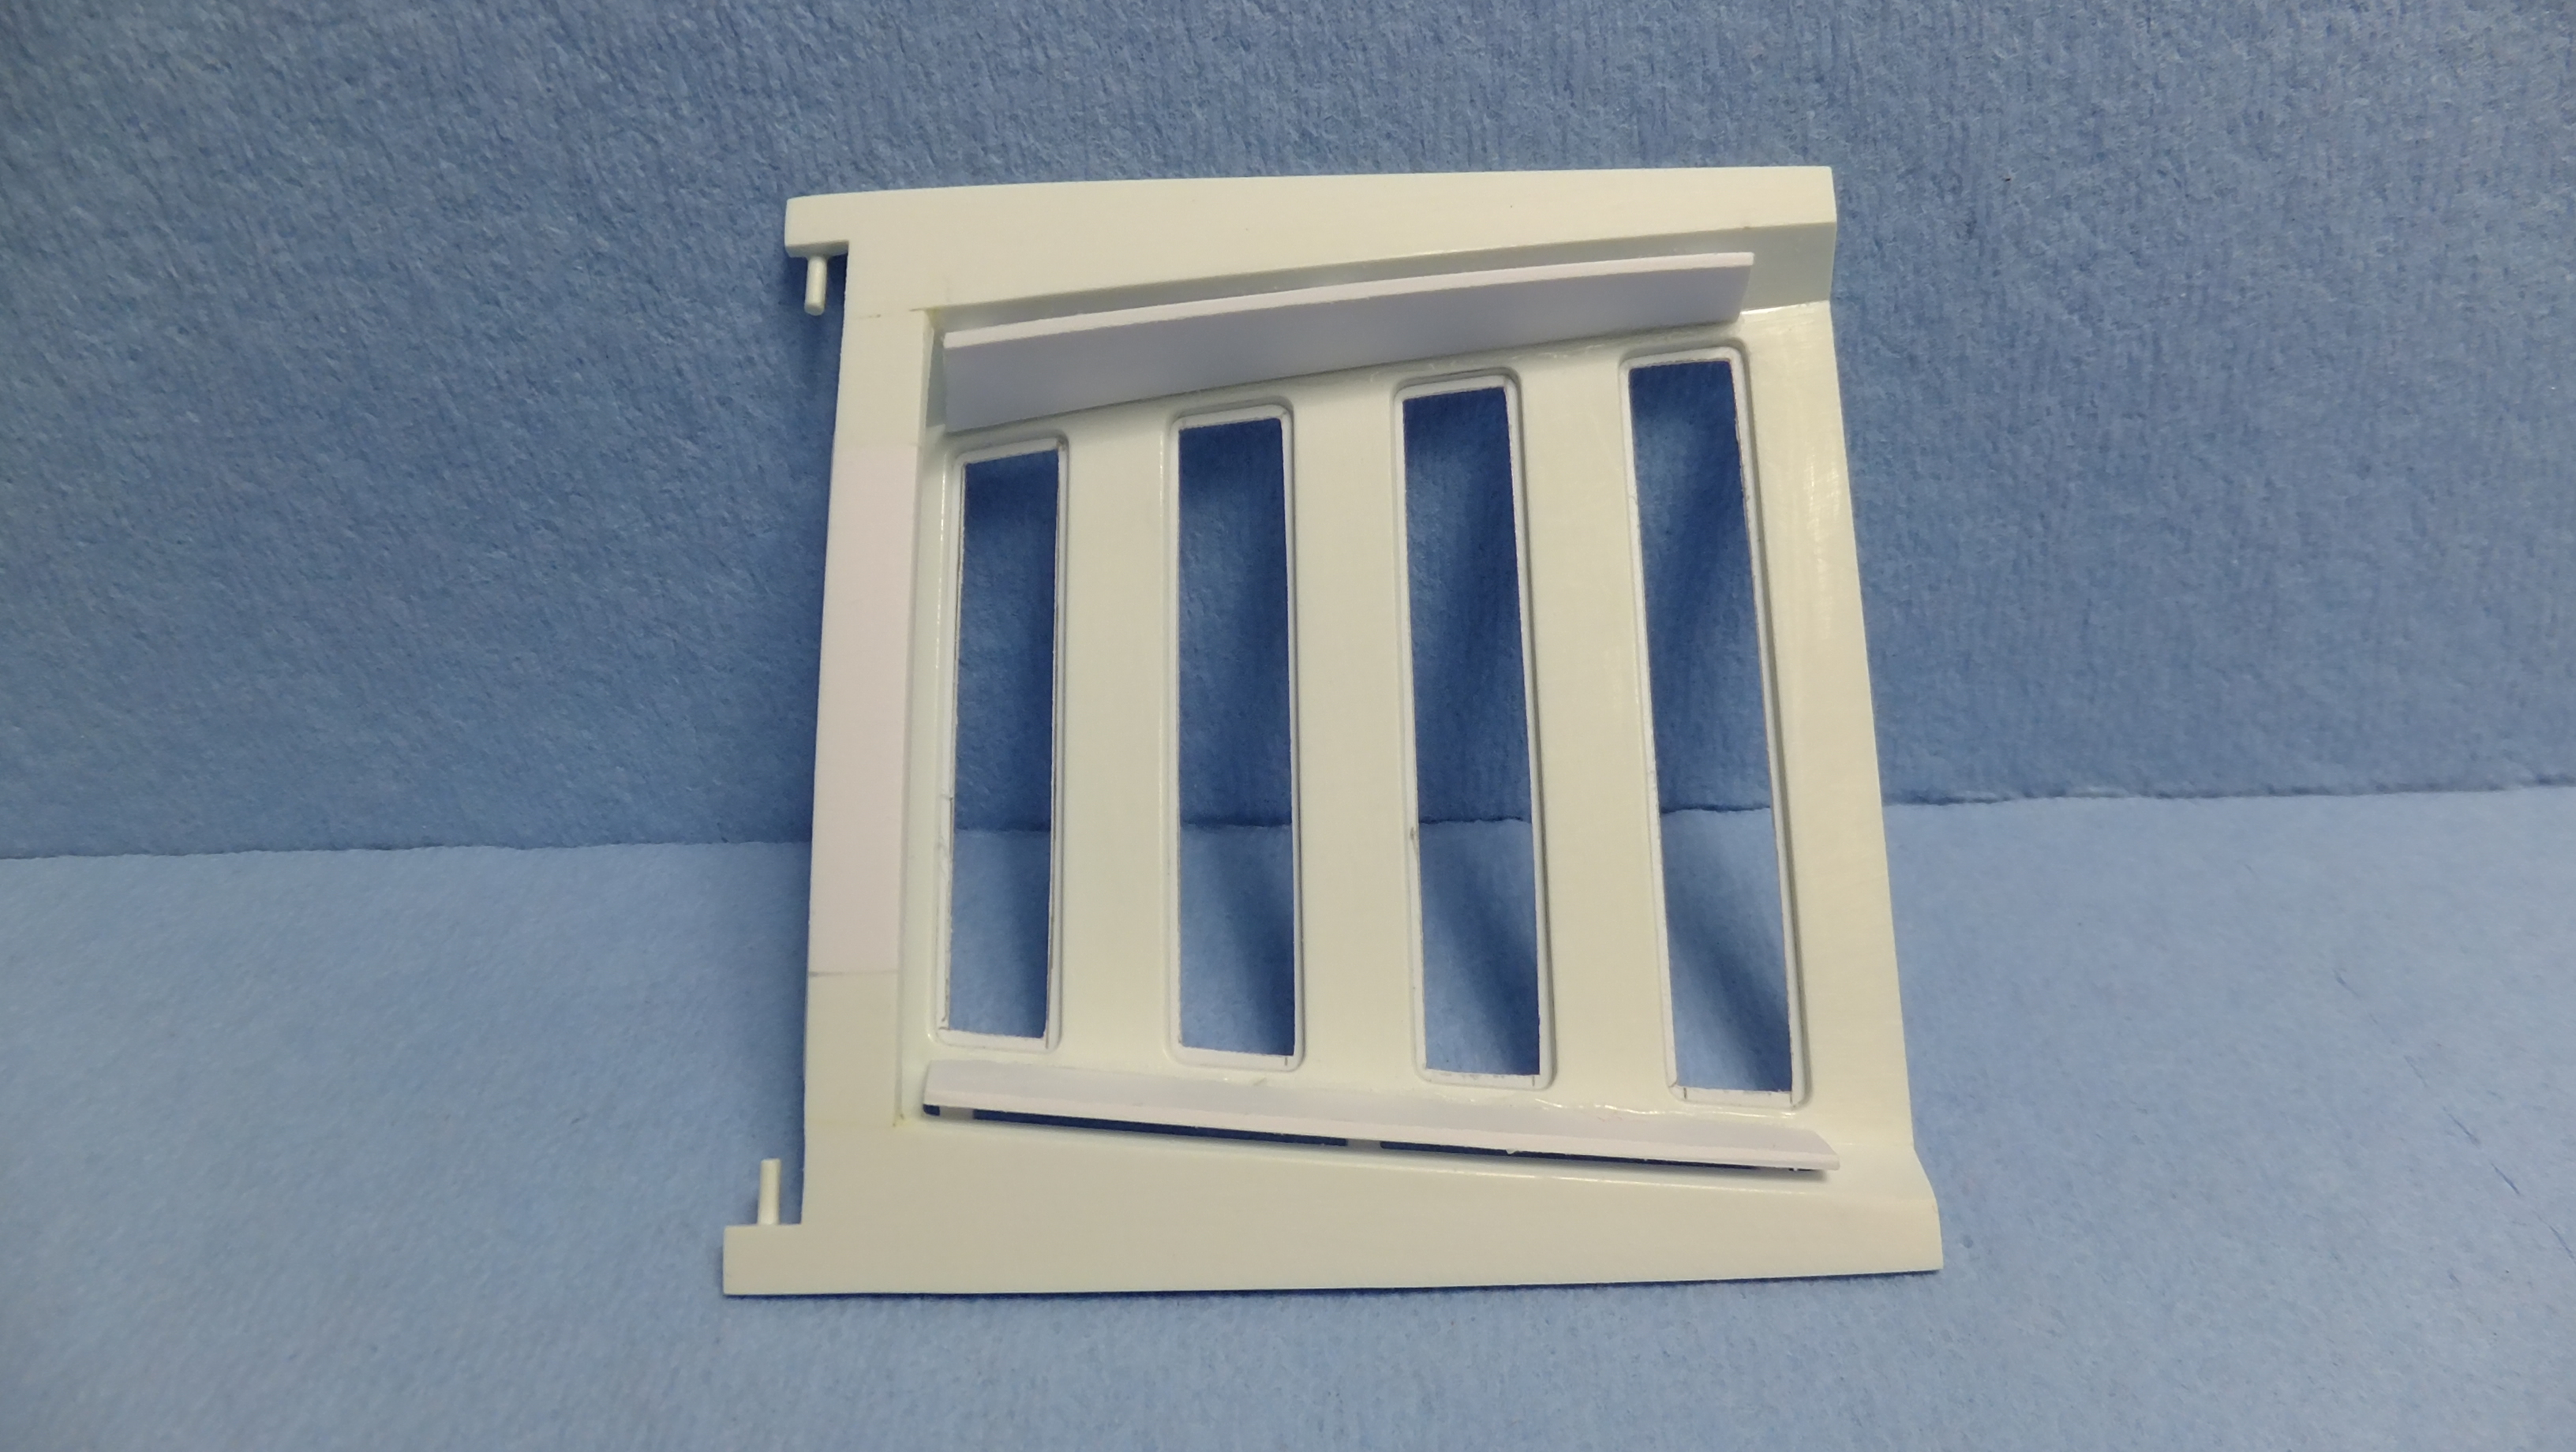
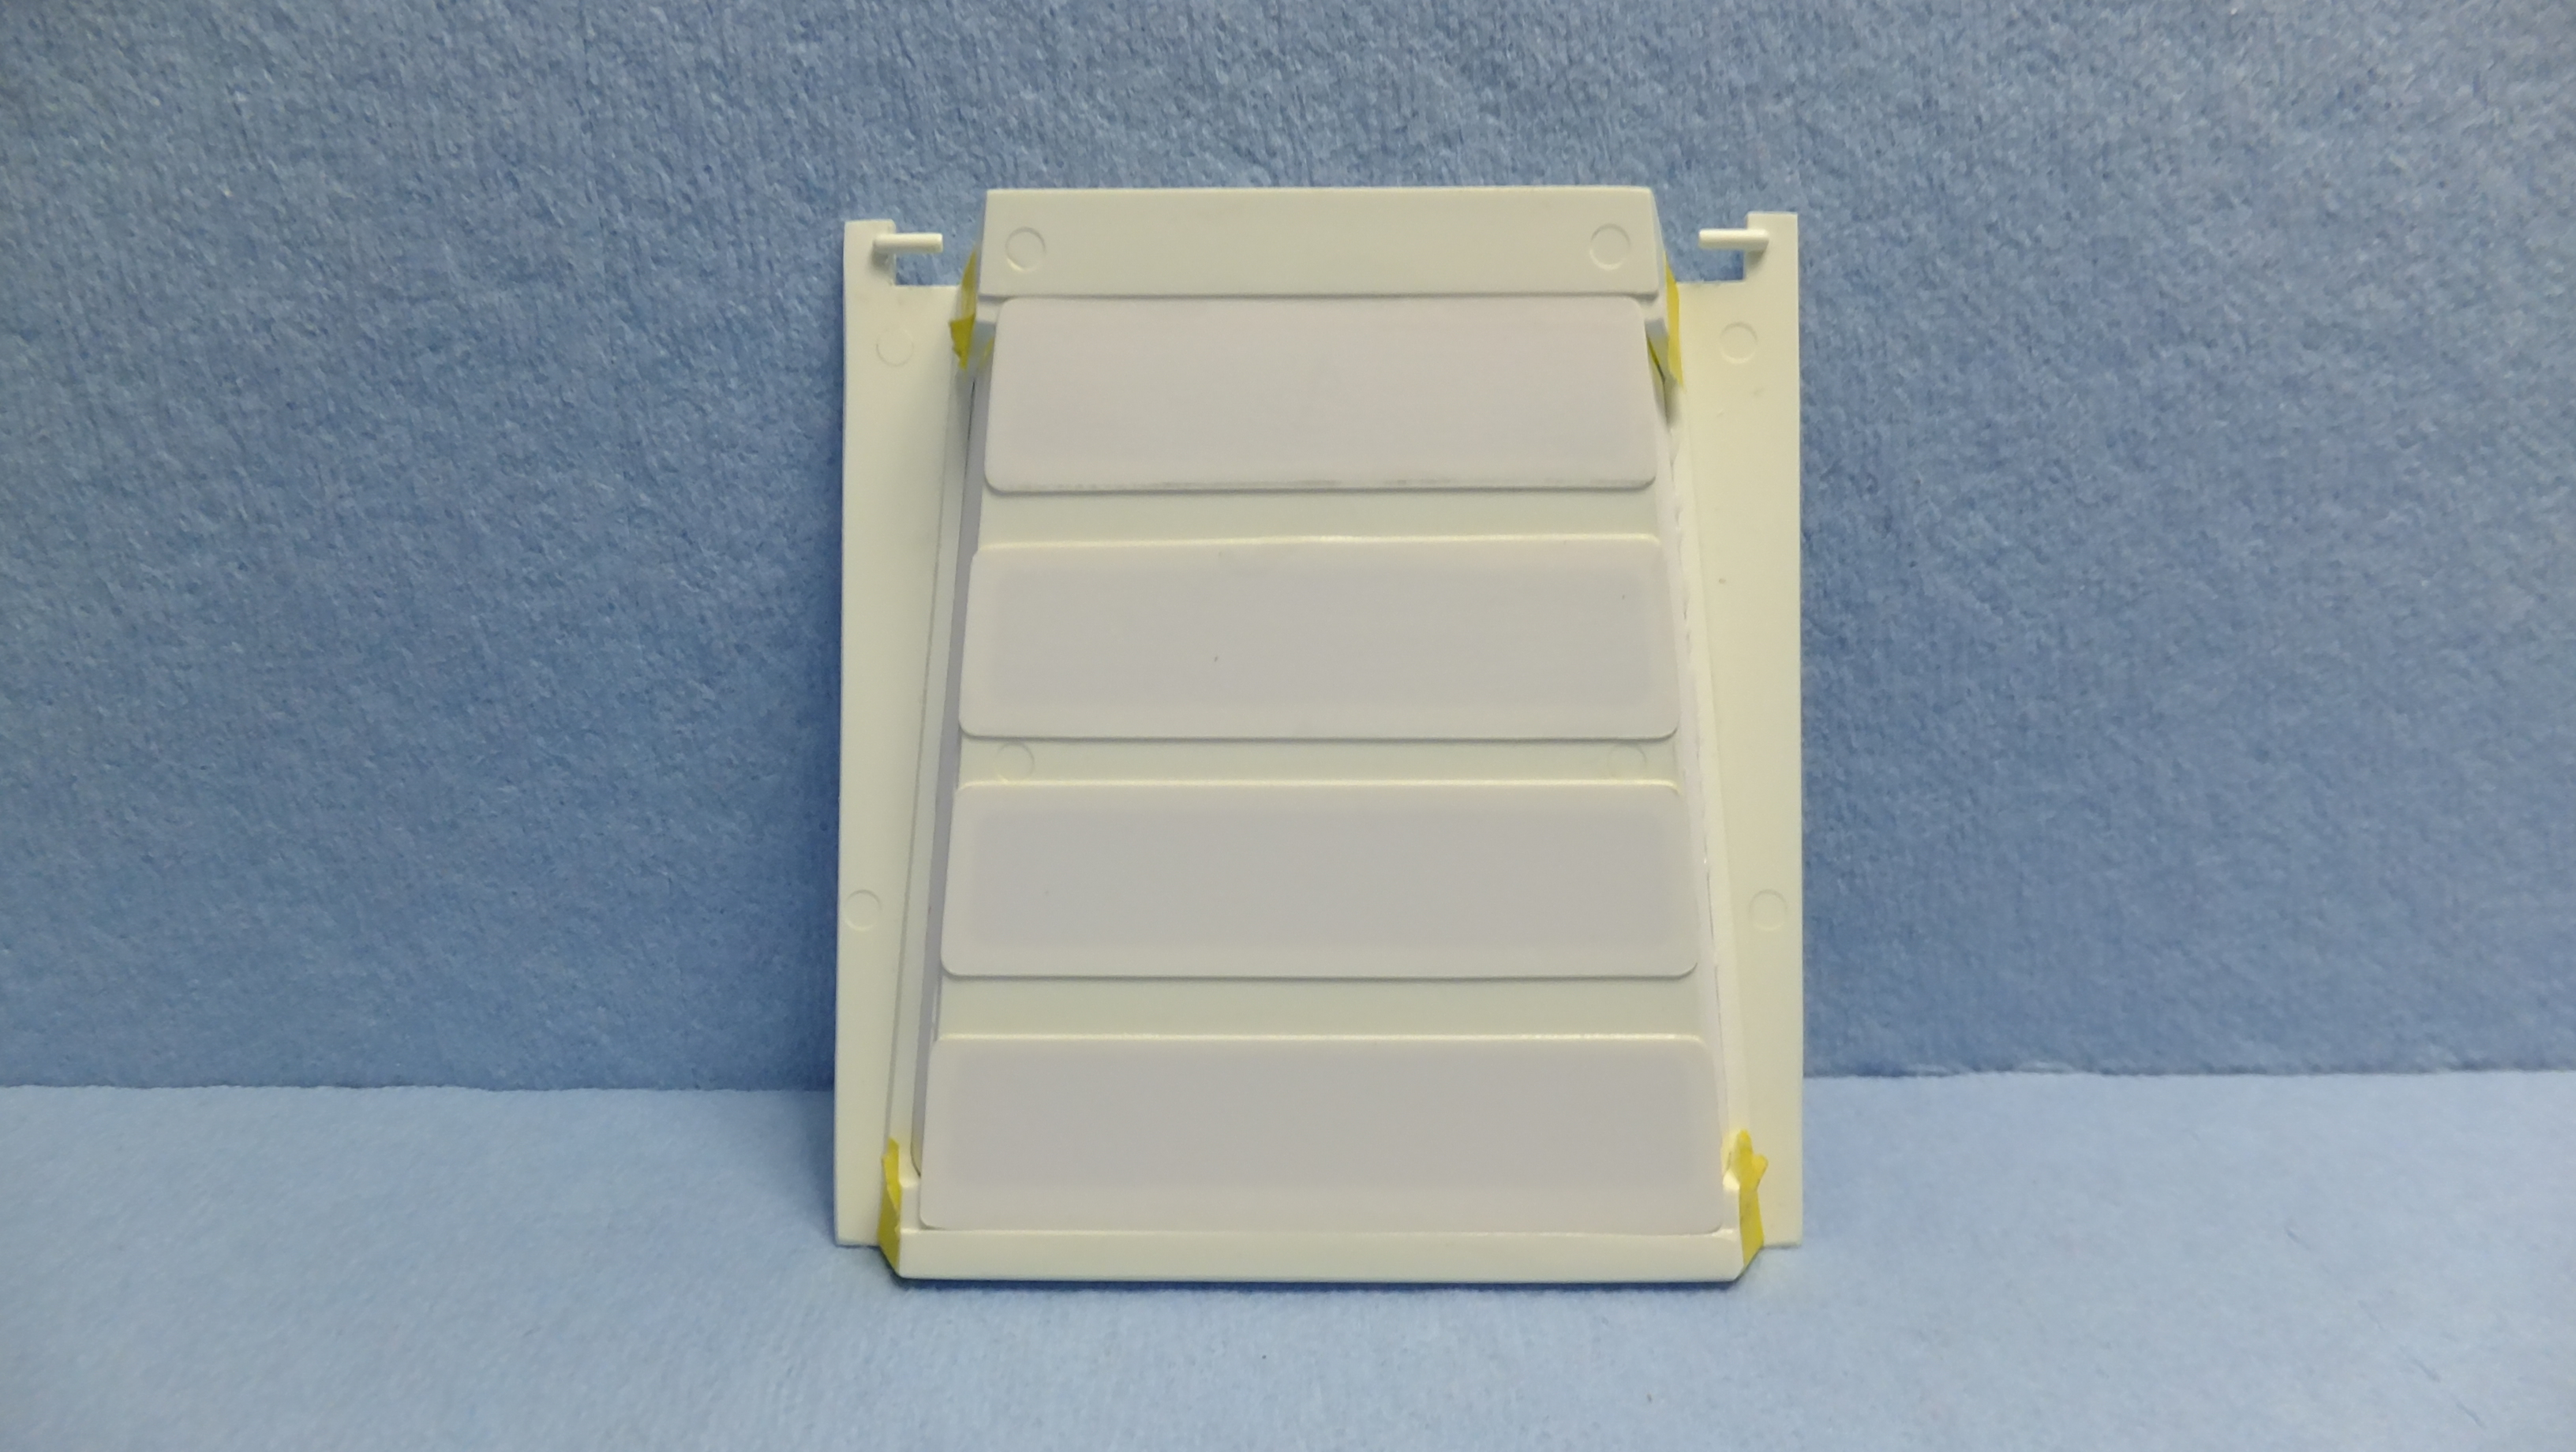
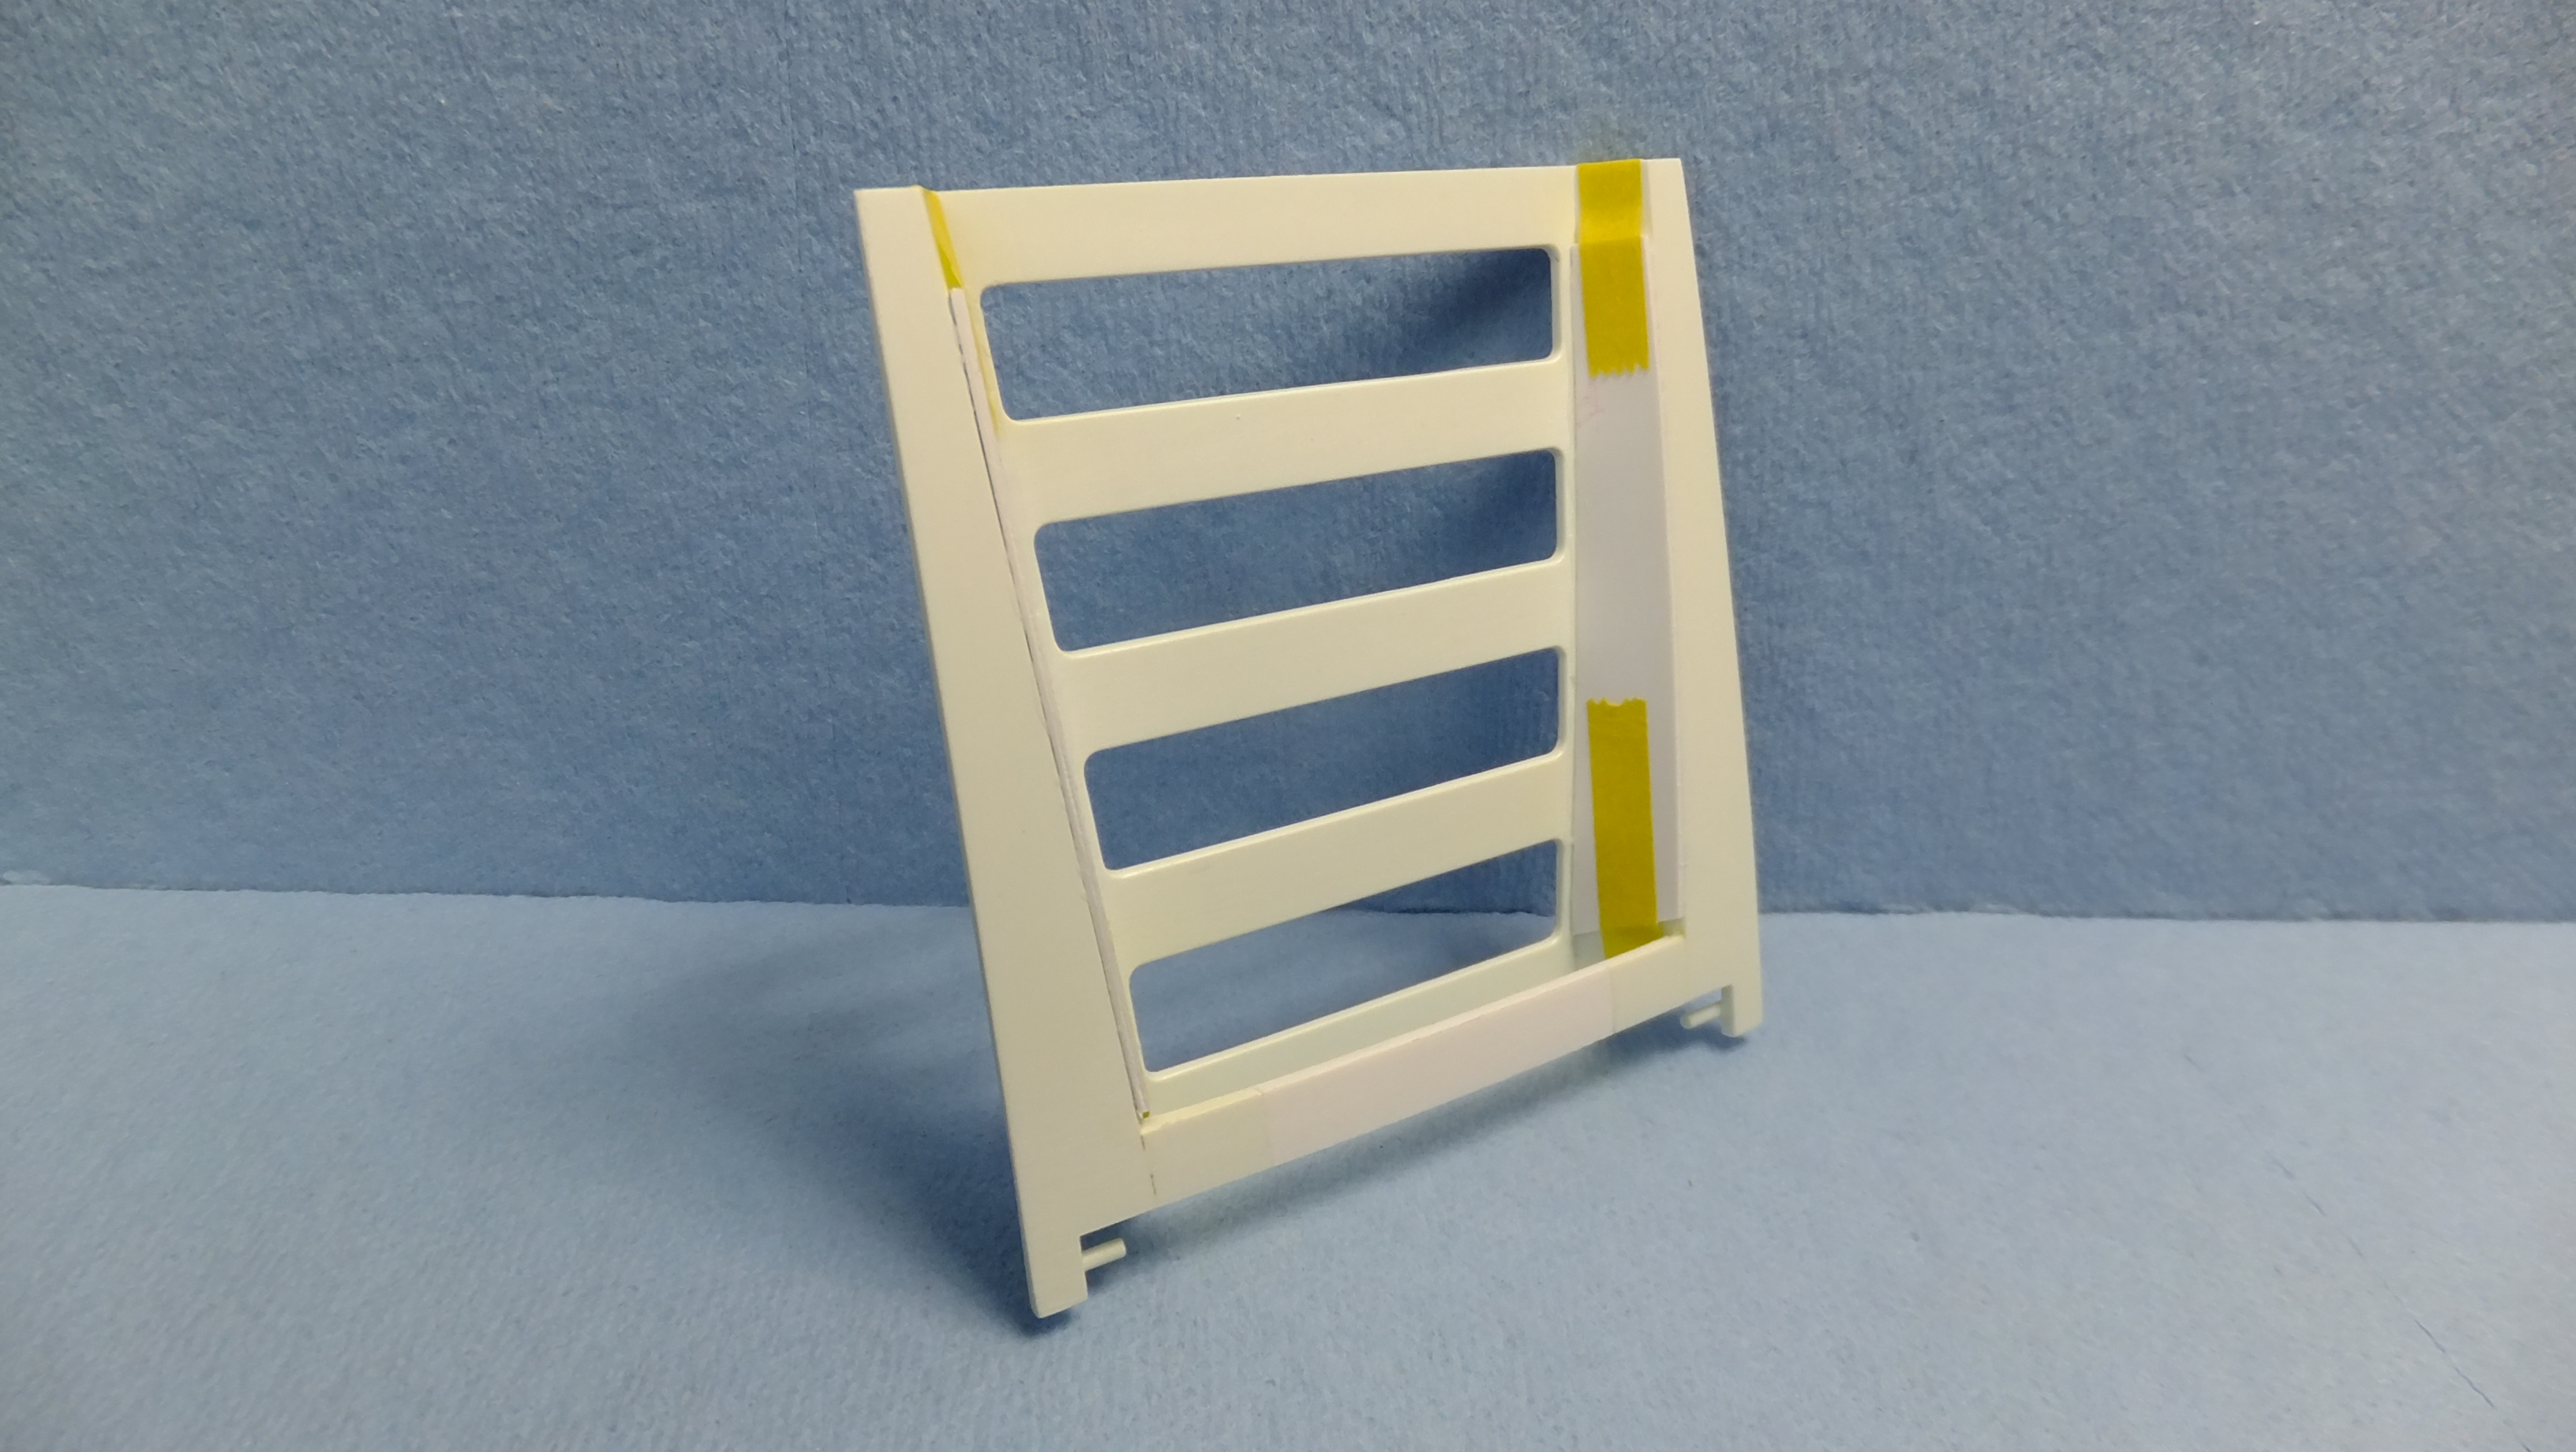
Heres the final test fitting, they will be glued down after the painting process, since the mesh needs to go down first.
-
Otaki 1/12 Lamborghini Countach Twin Turbo...Mission Statement
Dann Tier replied to Dann Tier's topic in WIP: Model Cars
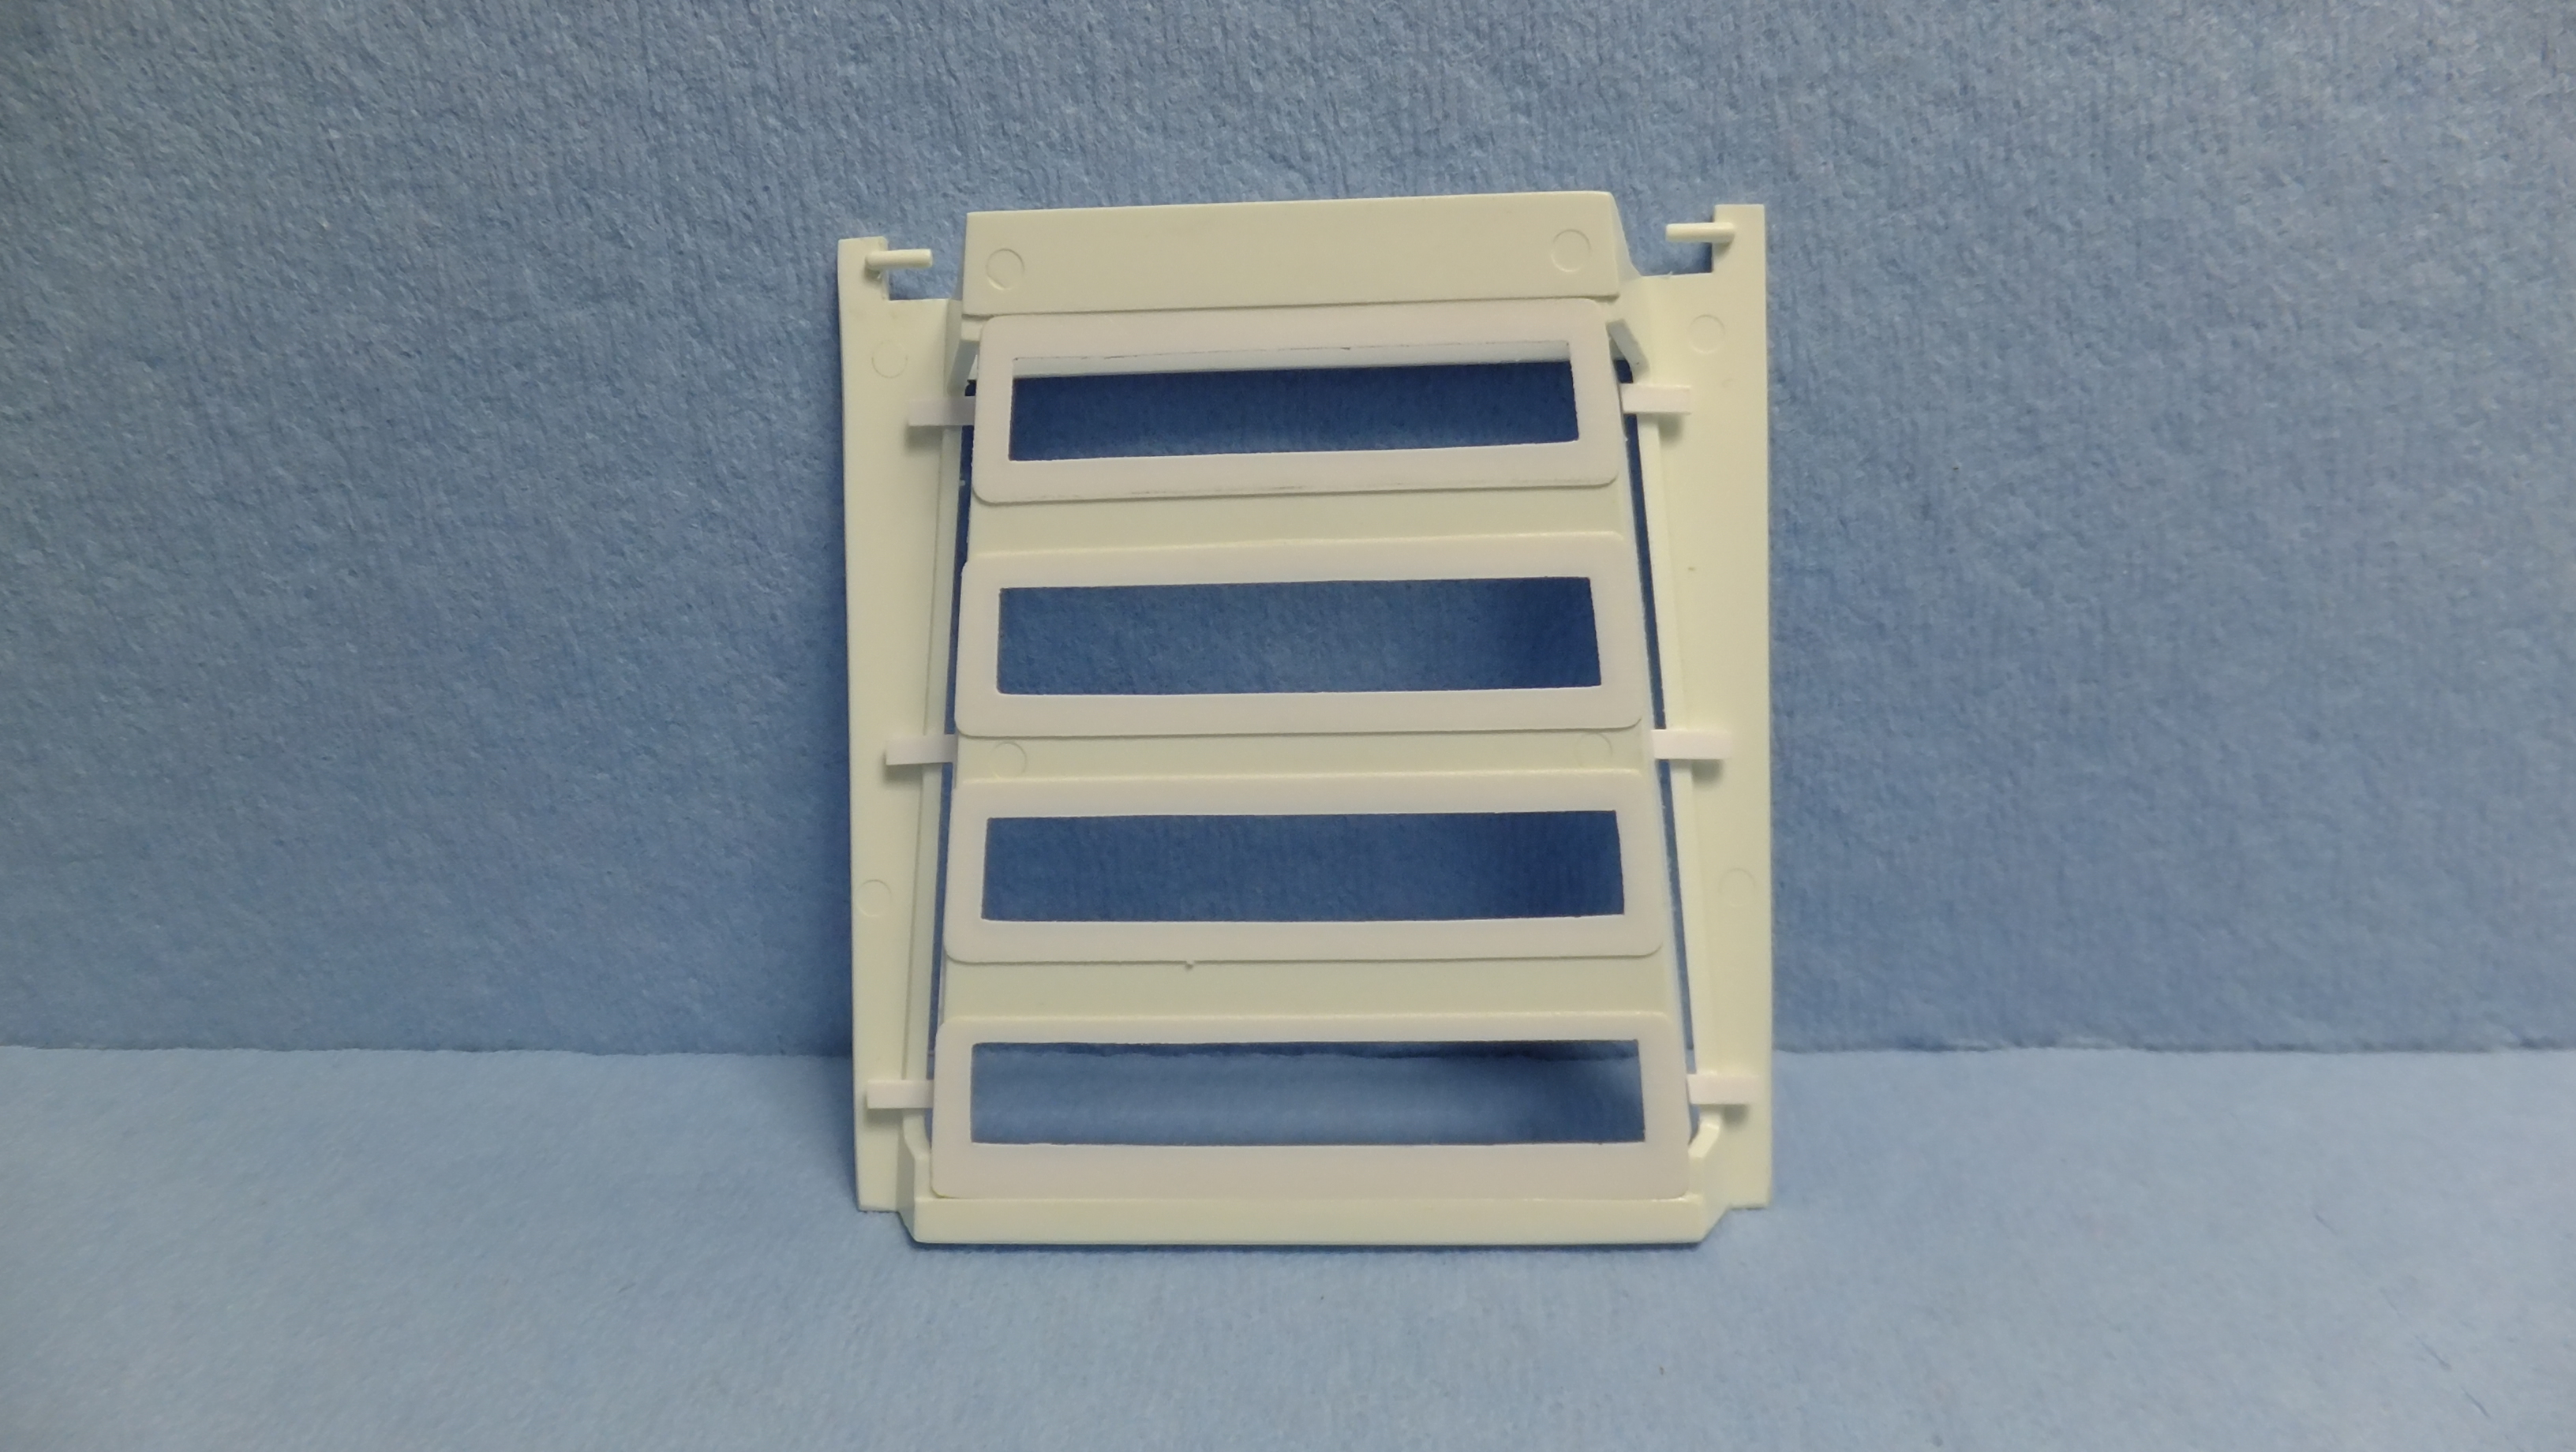
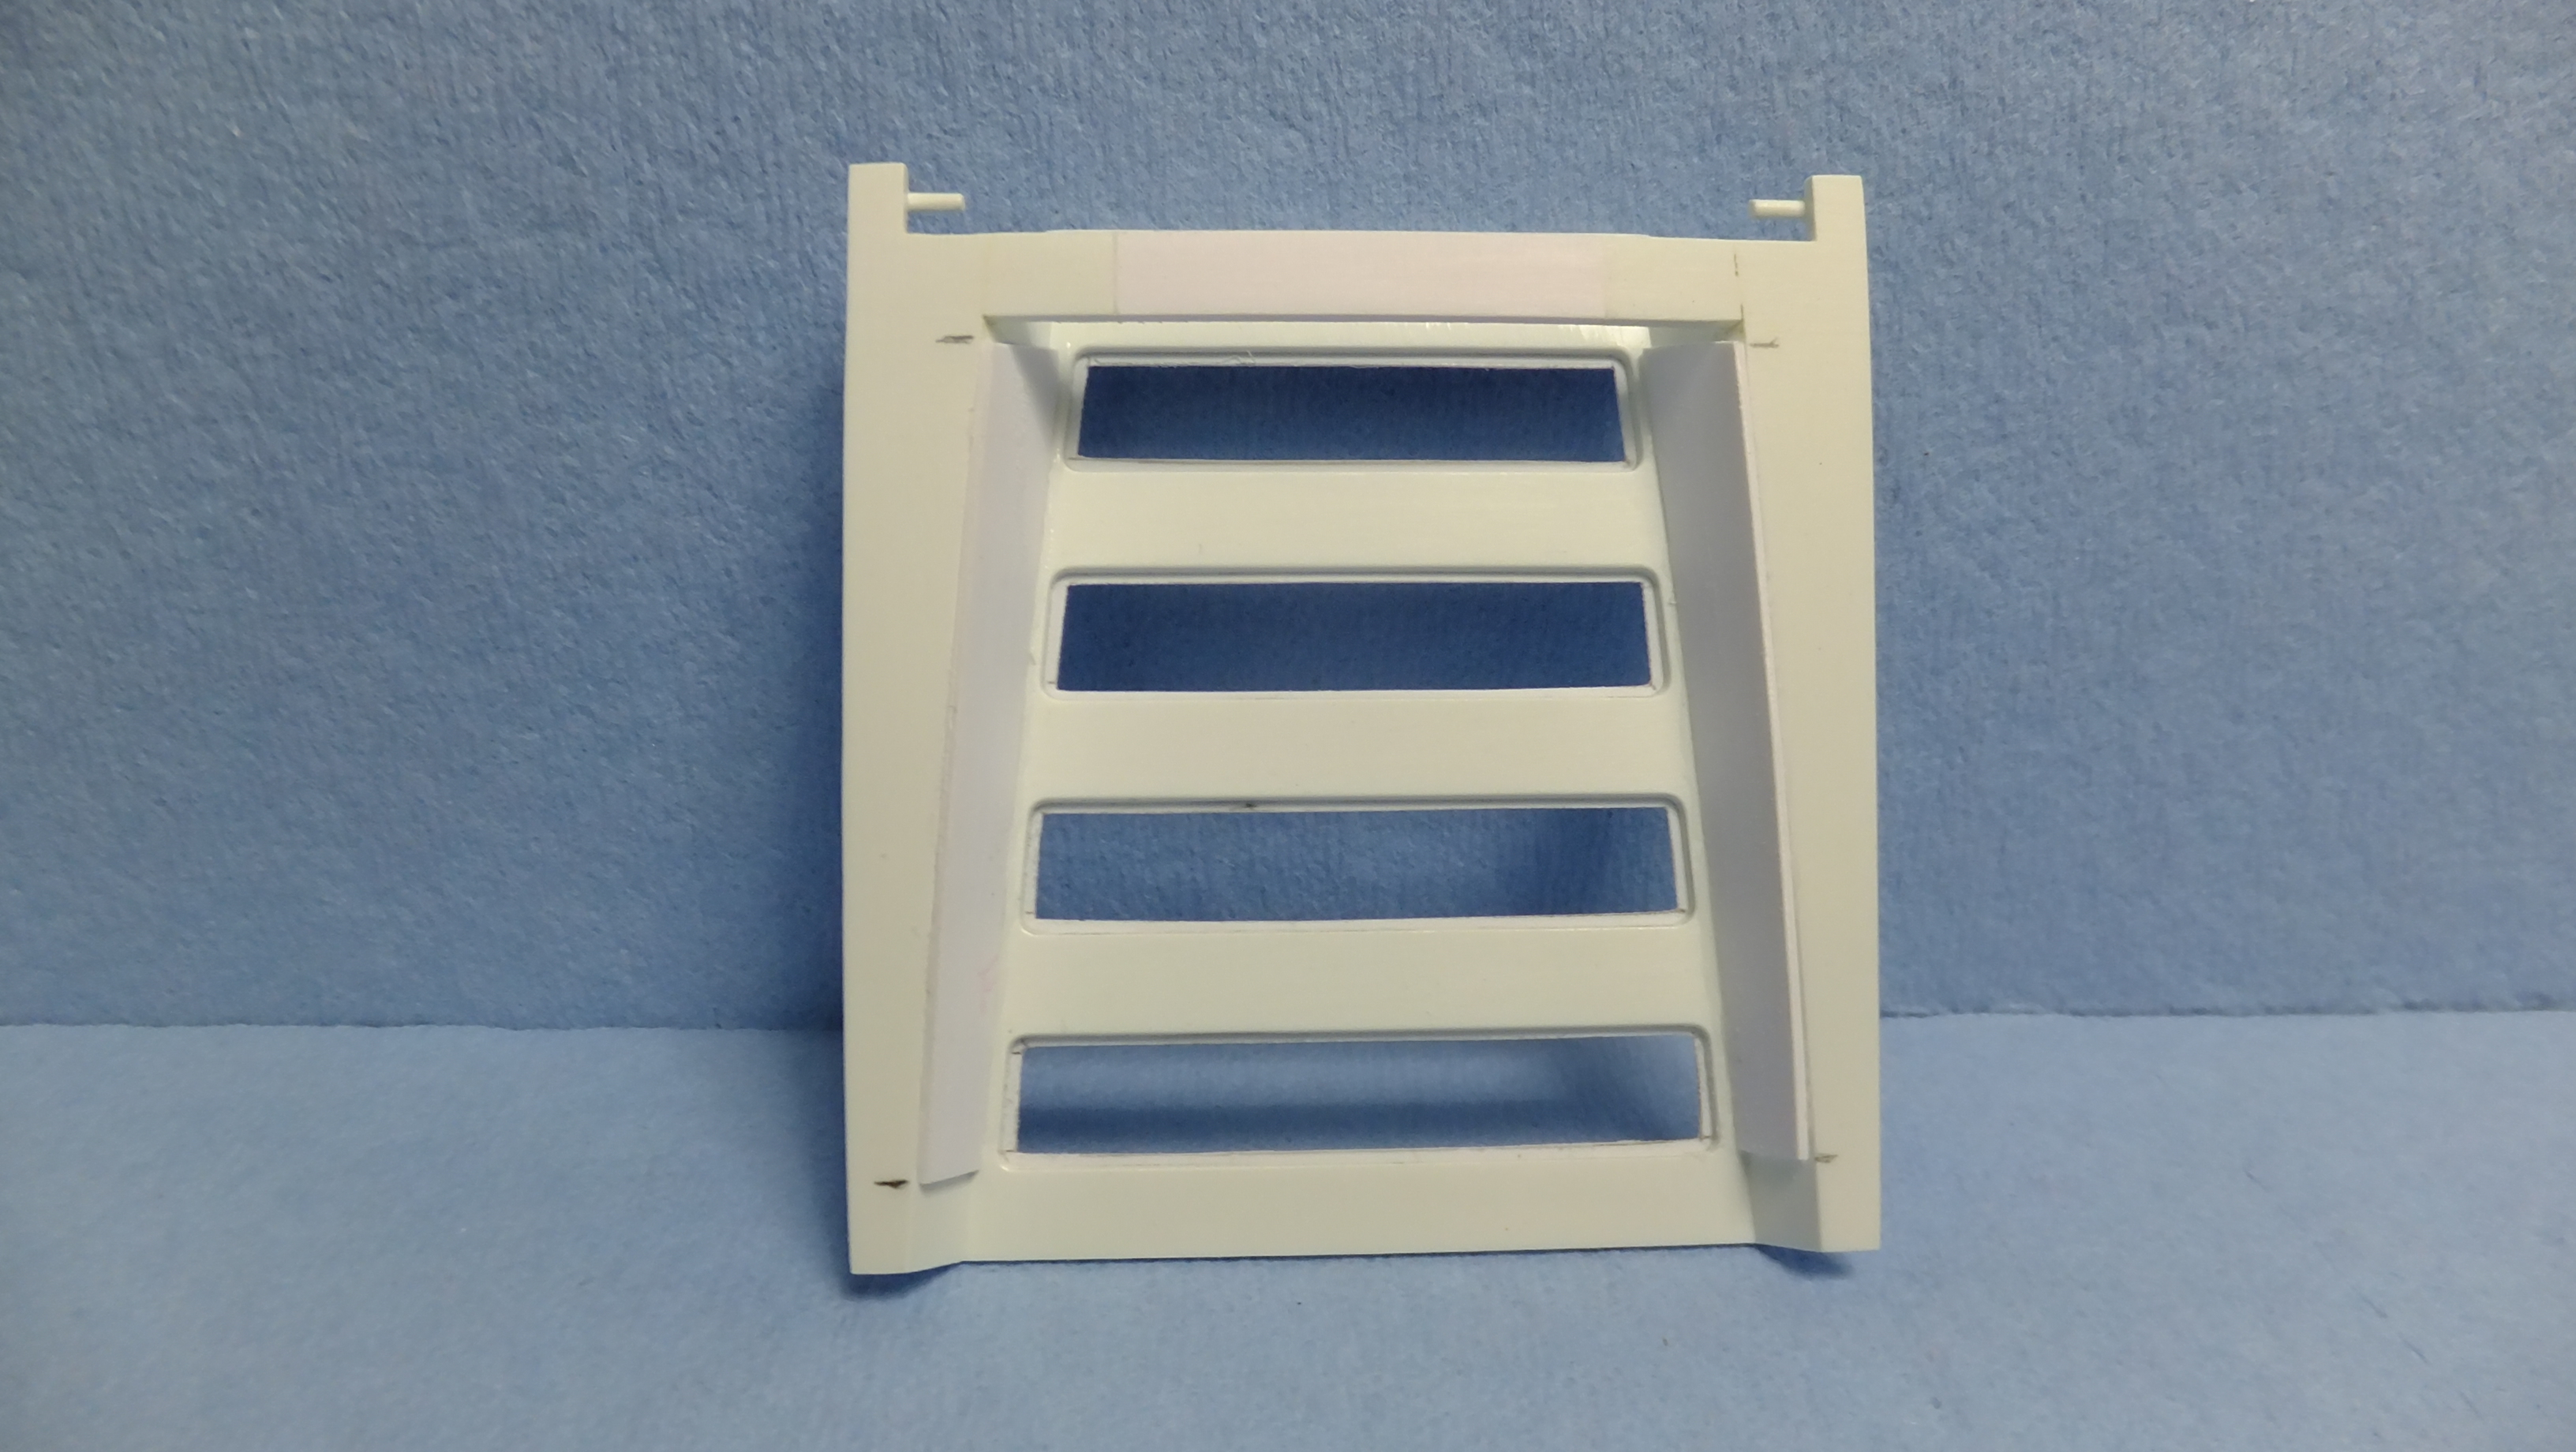
Before I made the ridges, I made a template of the openings to help me make these vent covers. First was to make strips that go half way across the openings, then make a full piece, and glue them together. With the top side facing down, I I scored the plastic twice, going half way through, using the half piece as a built-in straight edge. It was now time to carefully bend them up at a slight angle...about the thickness of the styrene. To keep it from breaking, or flattening out again, I used super glue to fill the cut -two applications.
-
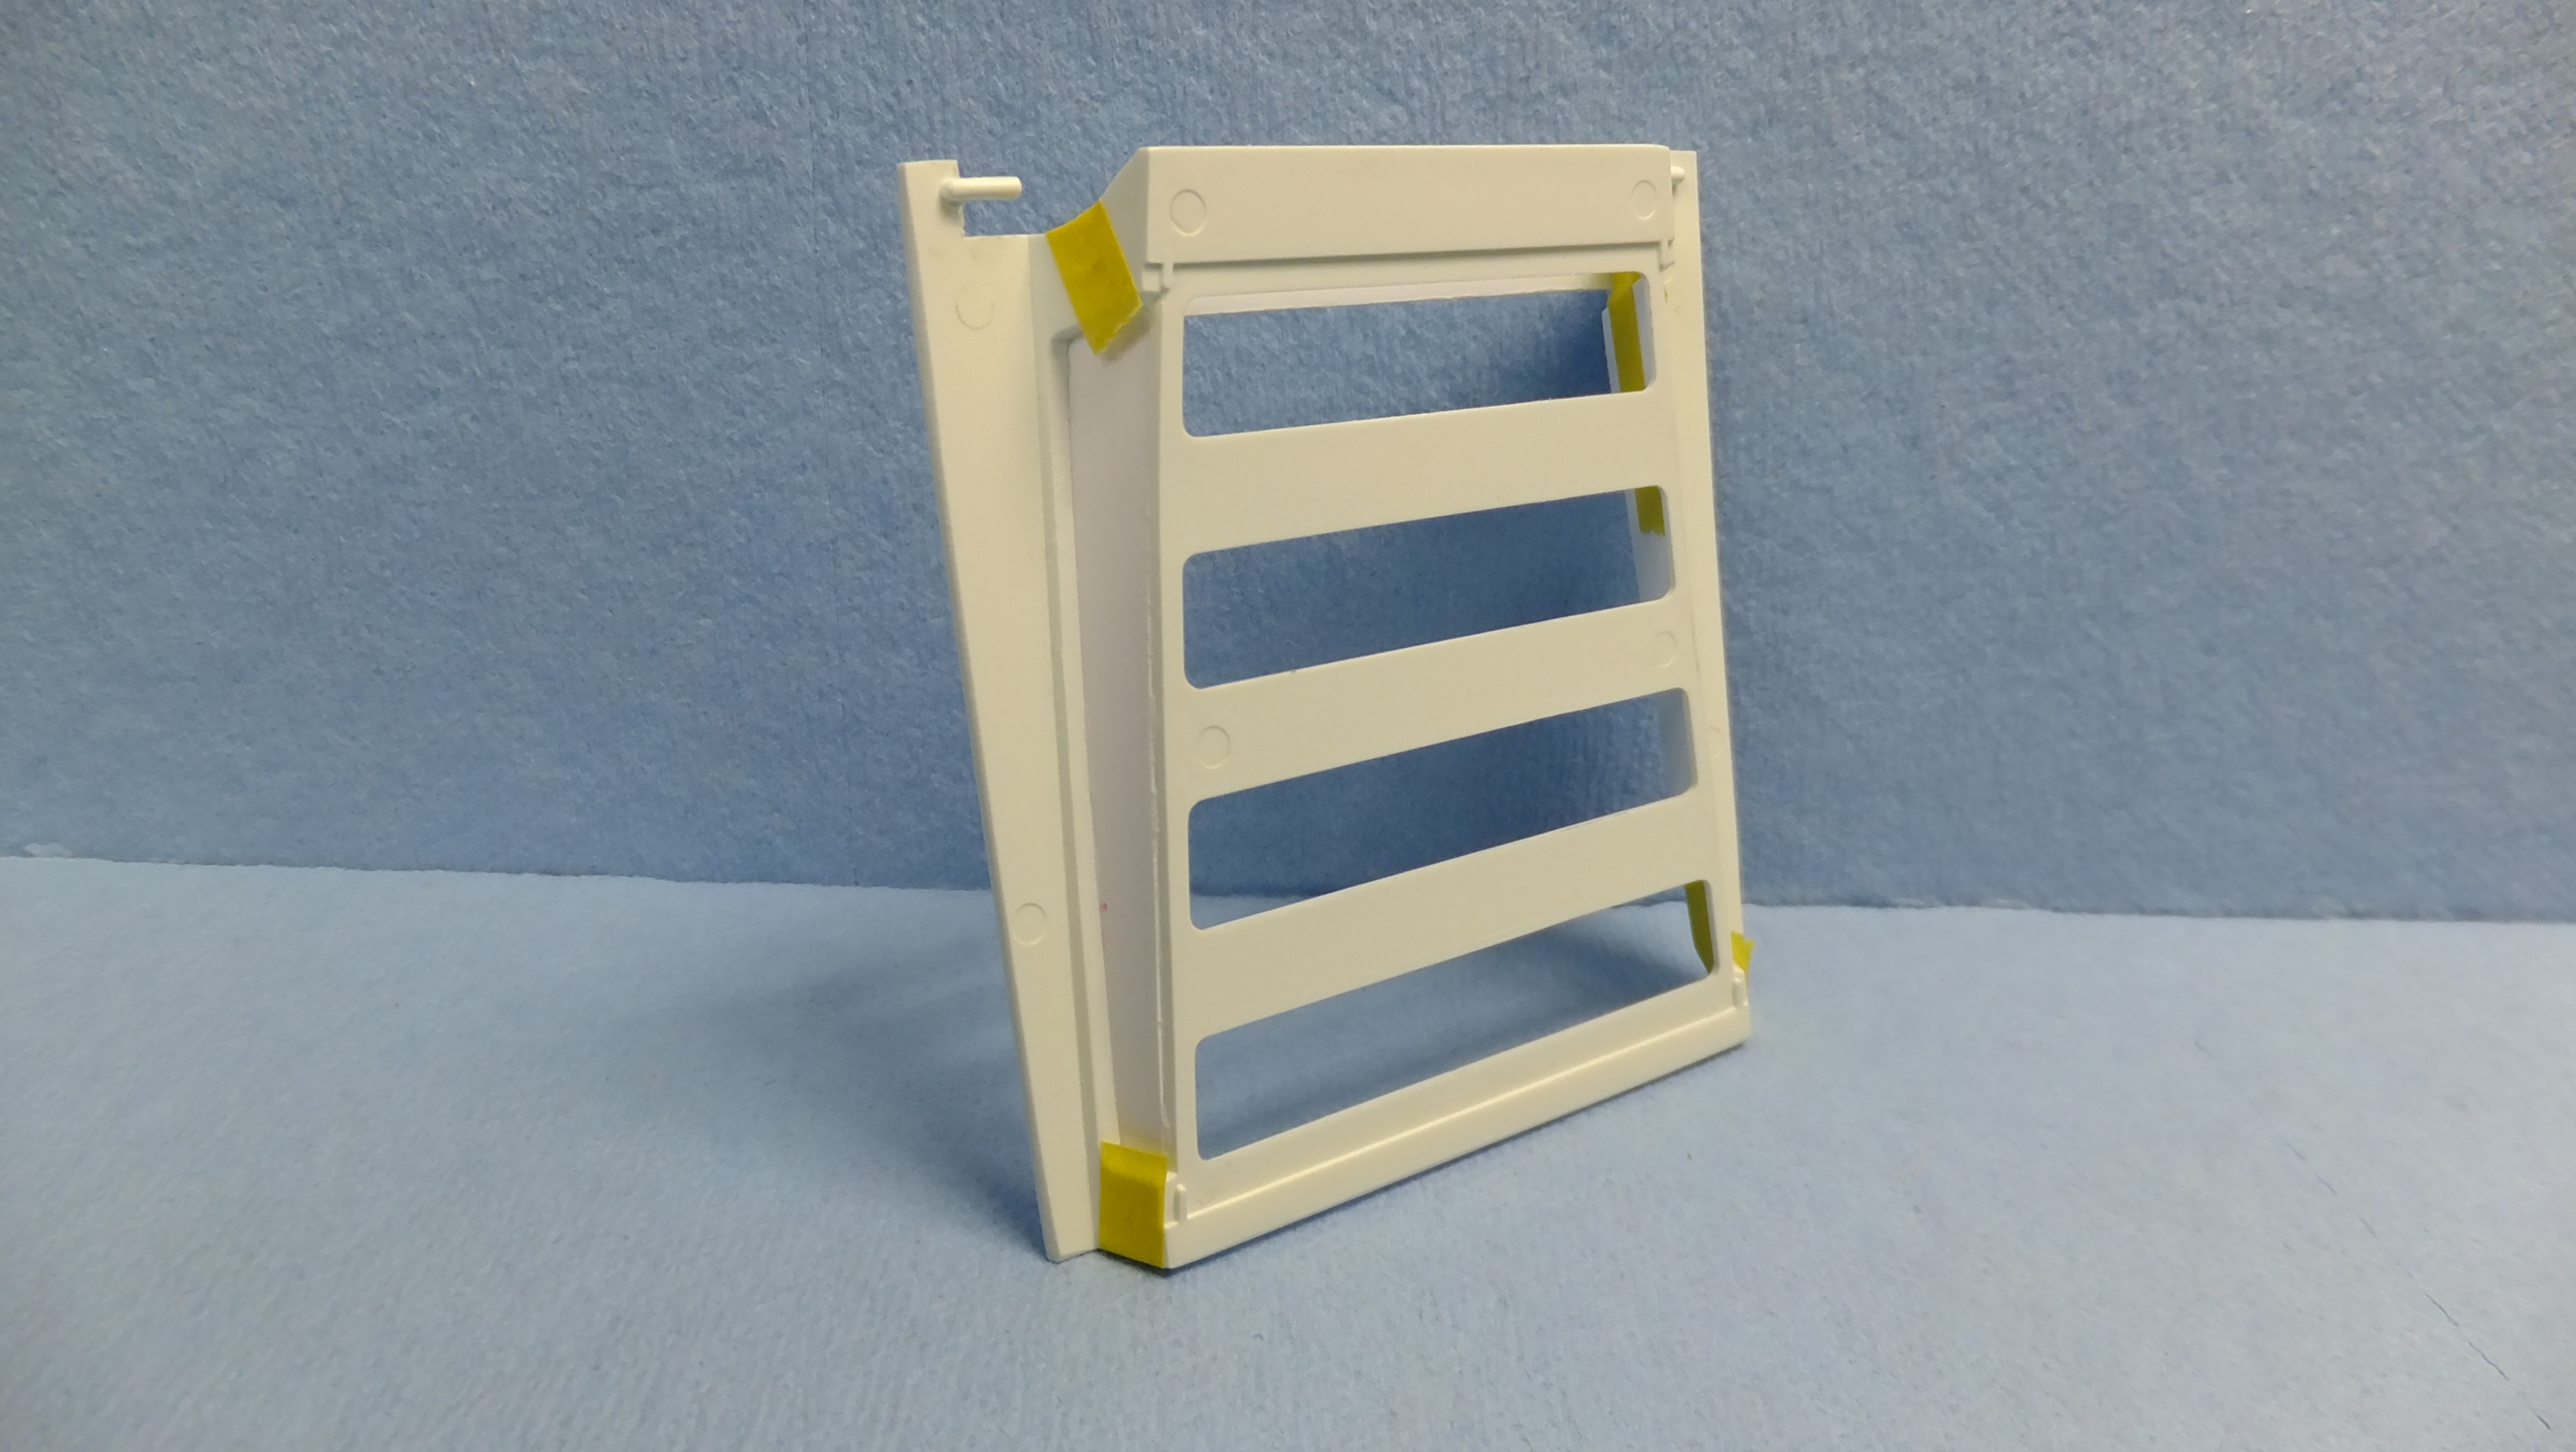
Otaki 1/12 Lamborghini Countach Twin Turbo...Mission Statement
Dann Tier replied to Dann Tier's topic in WIP: Model Cars
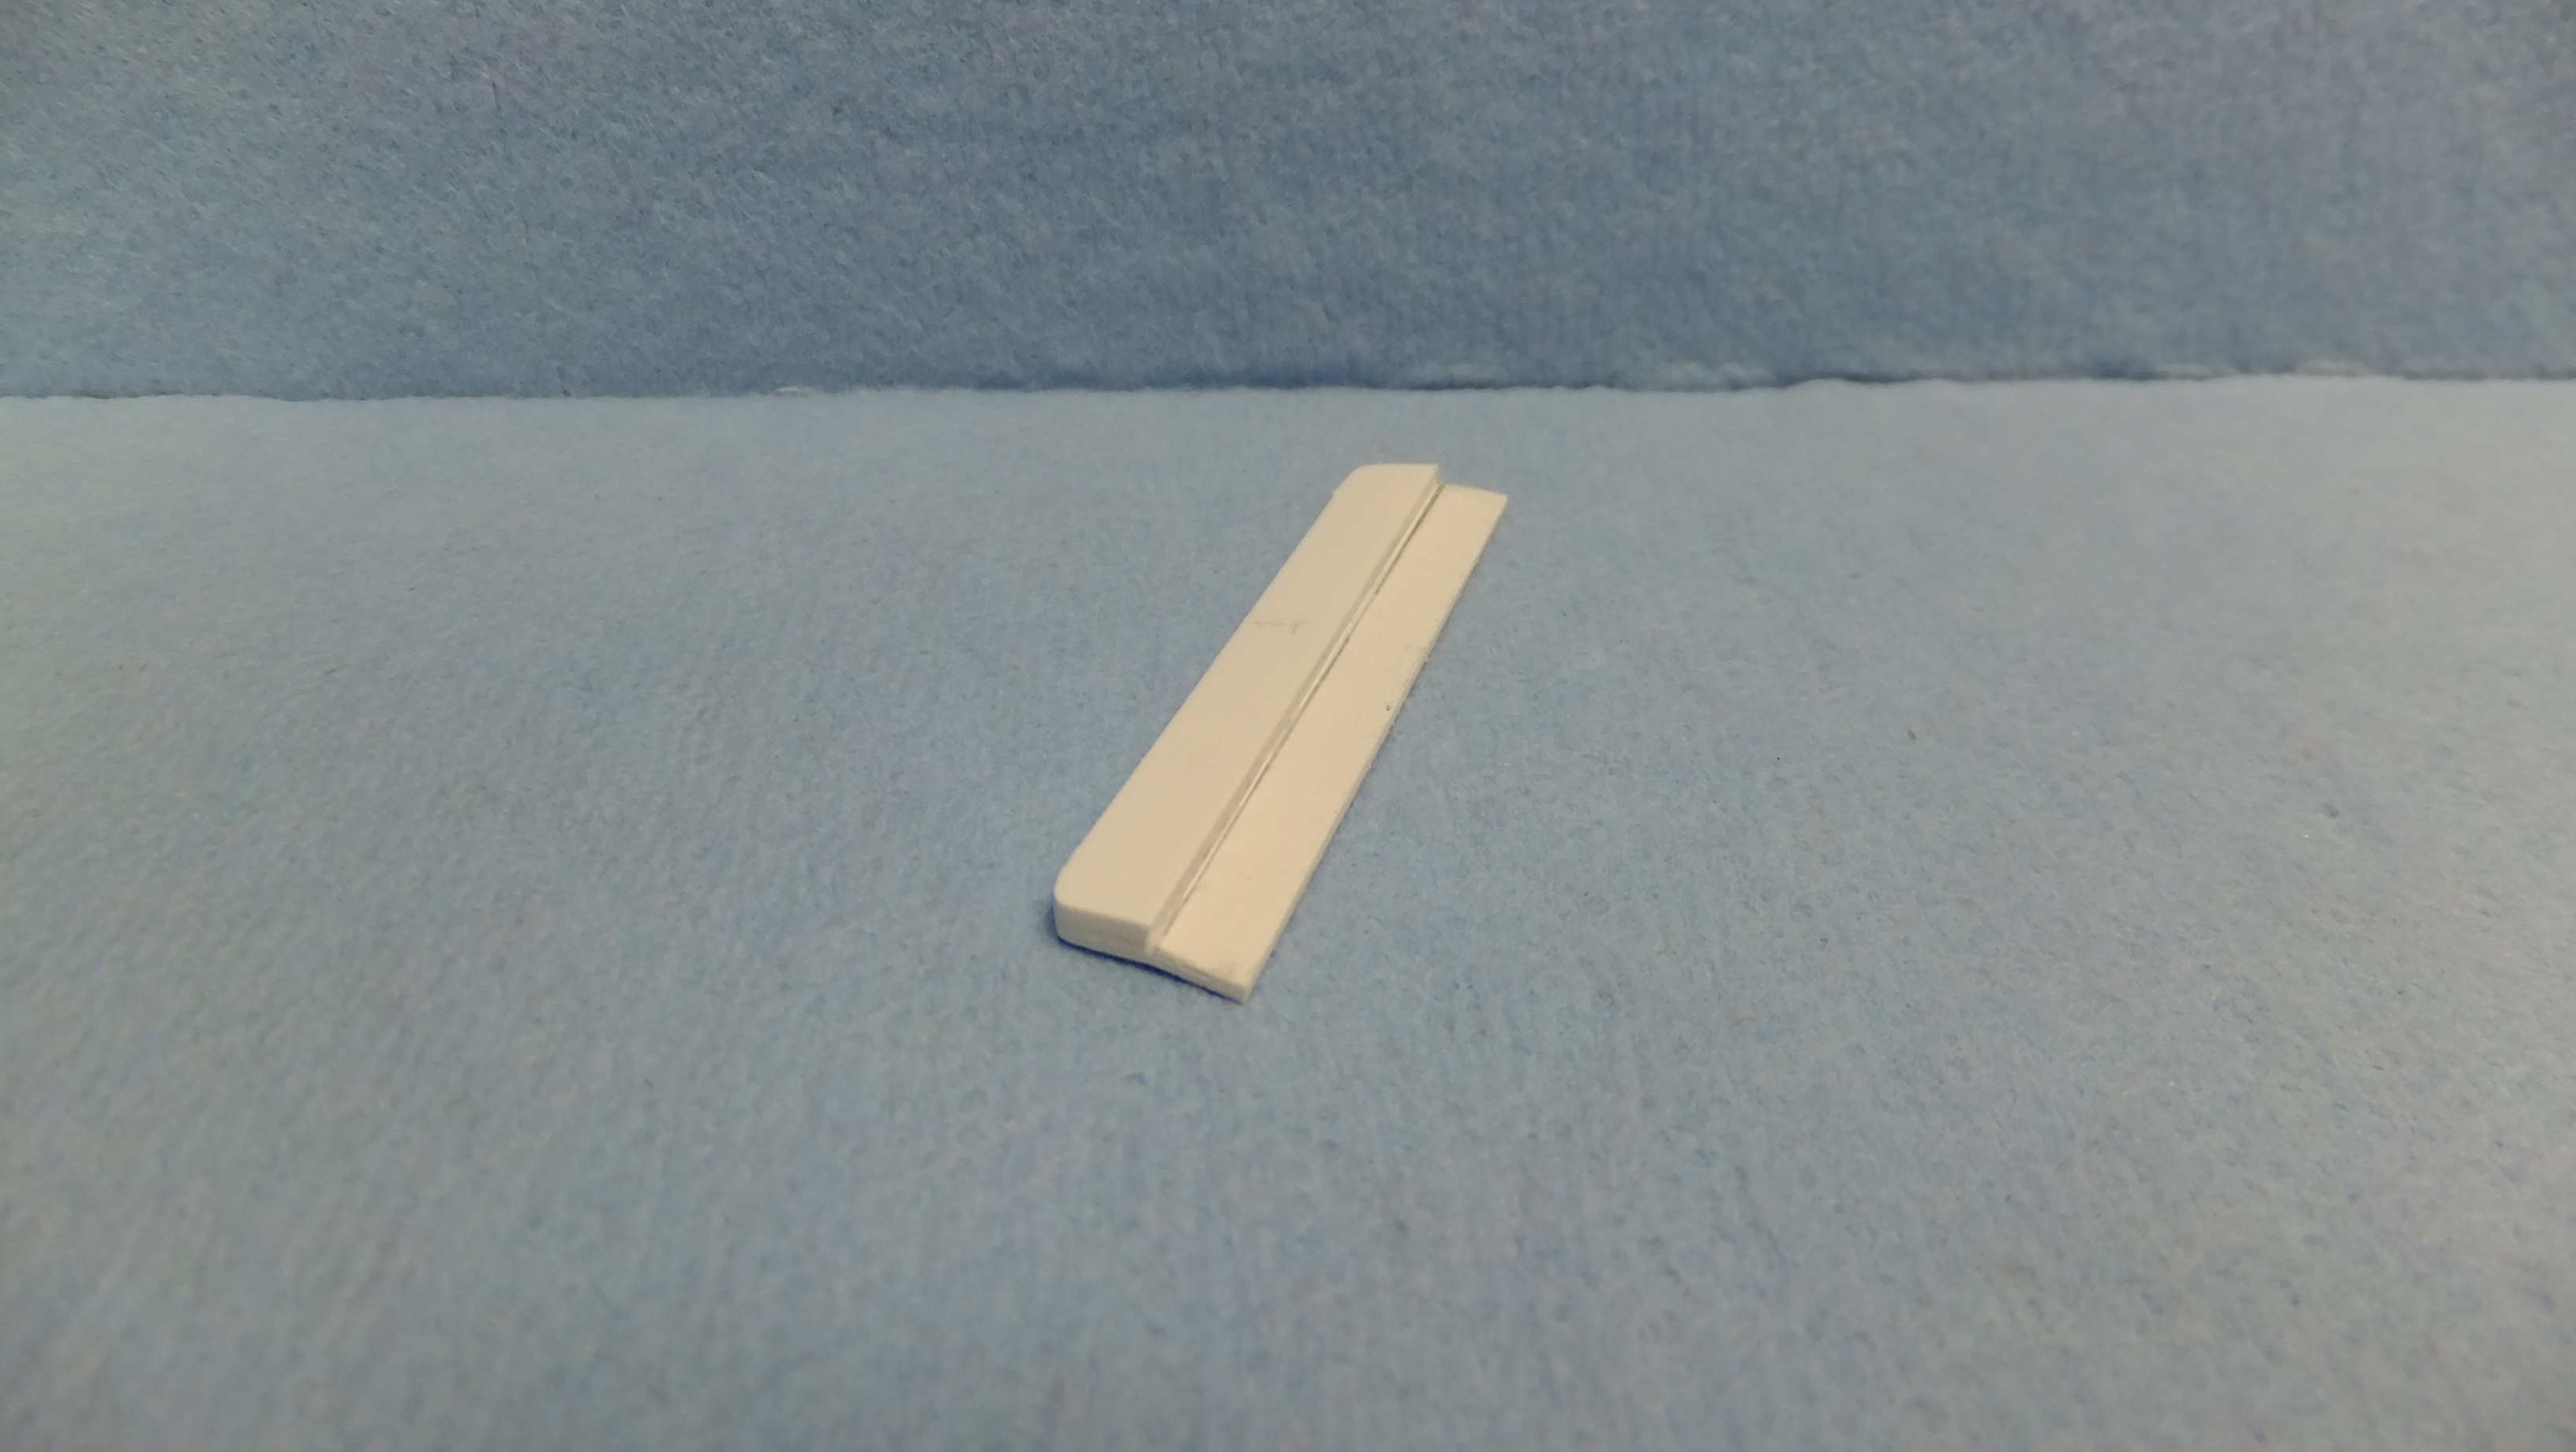
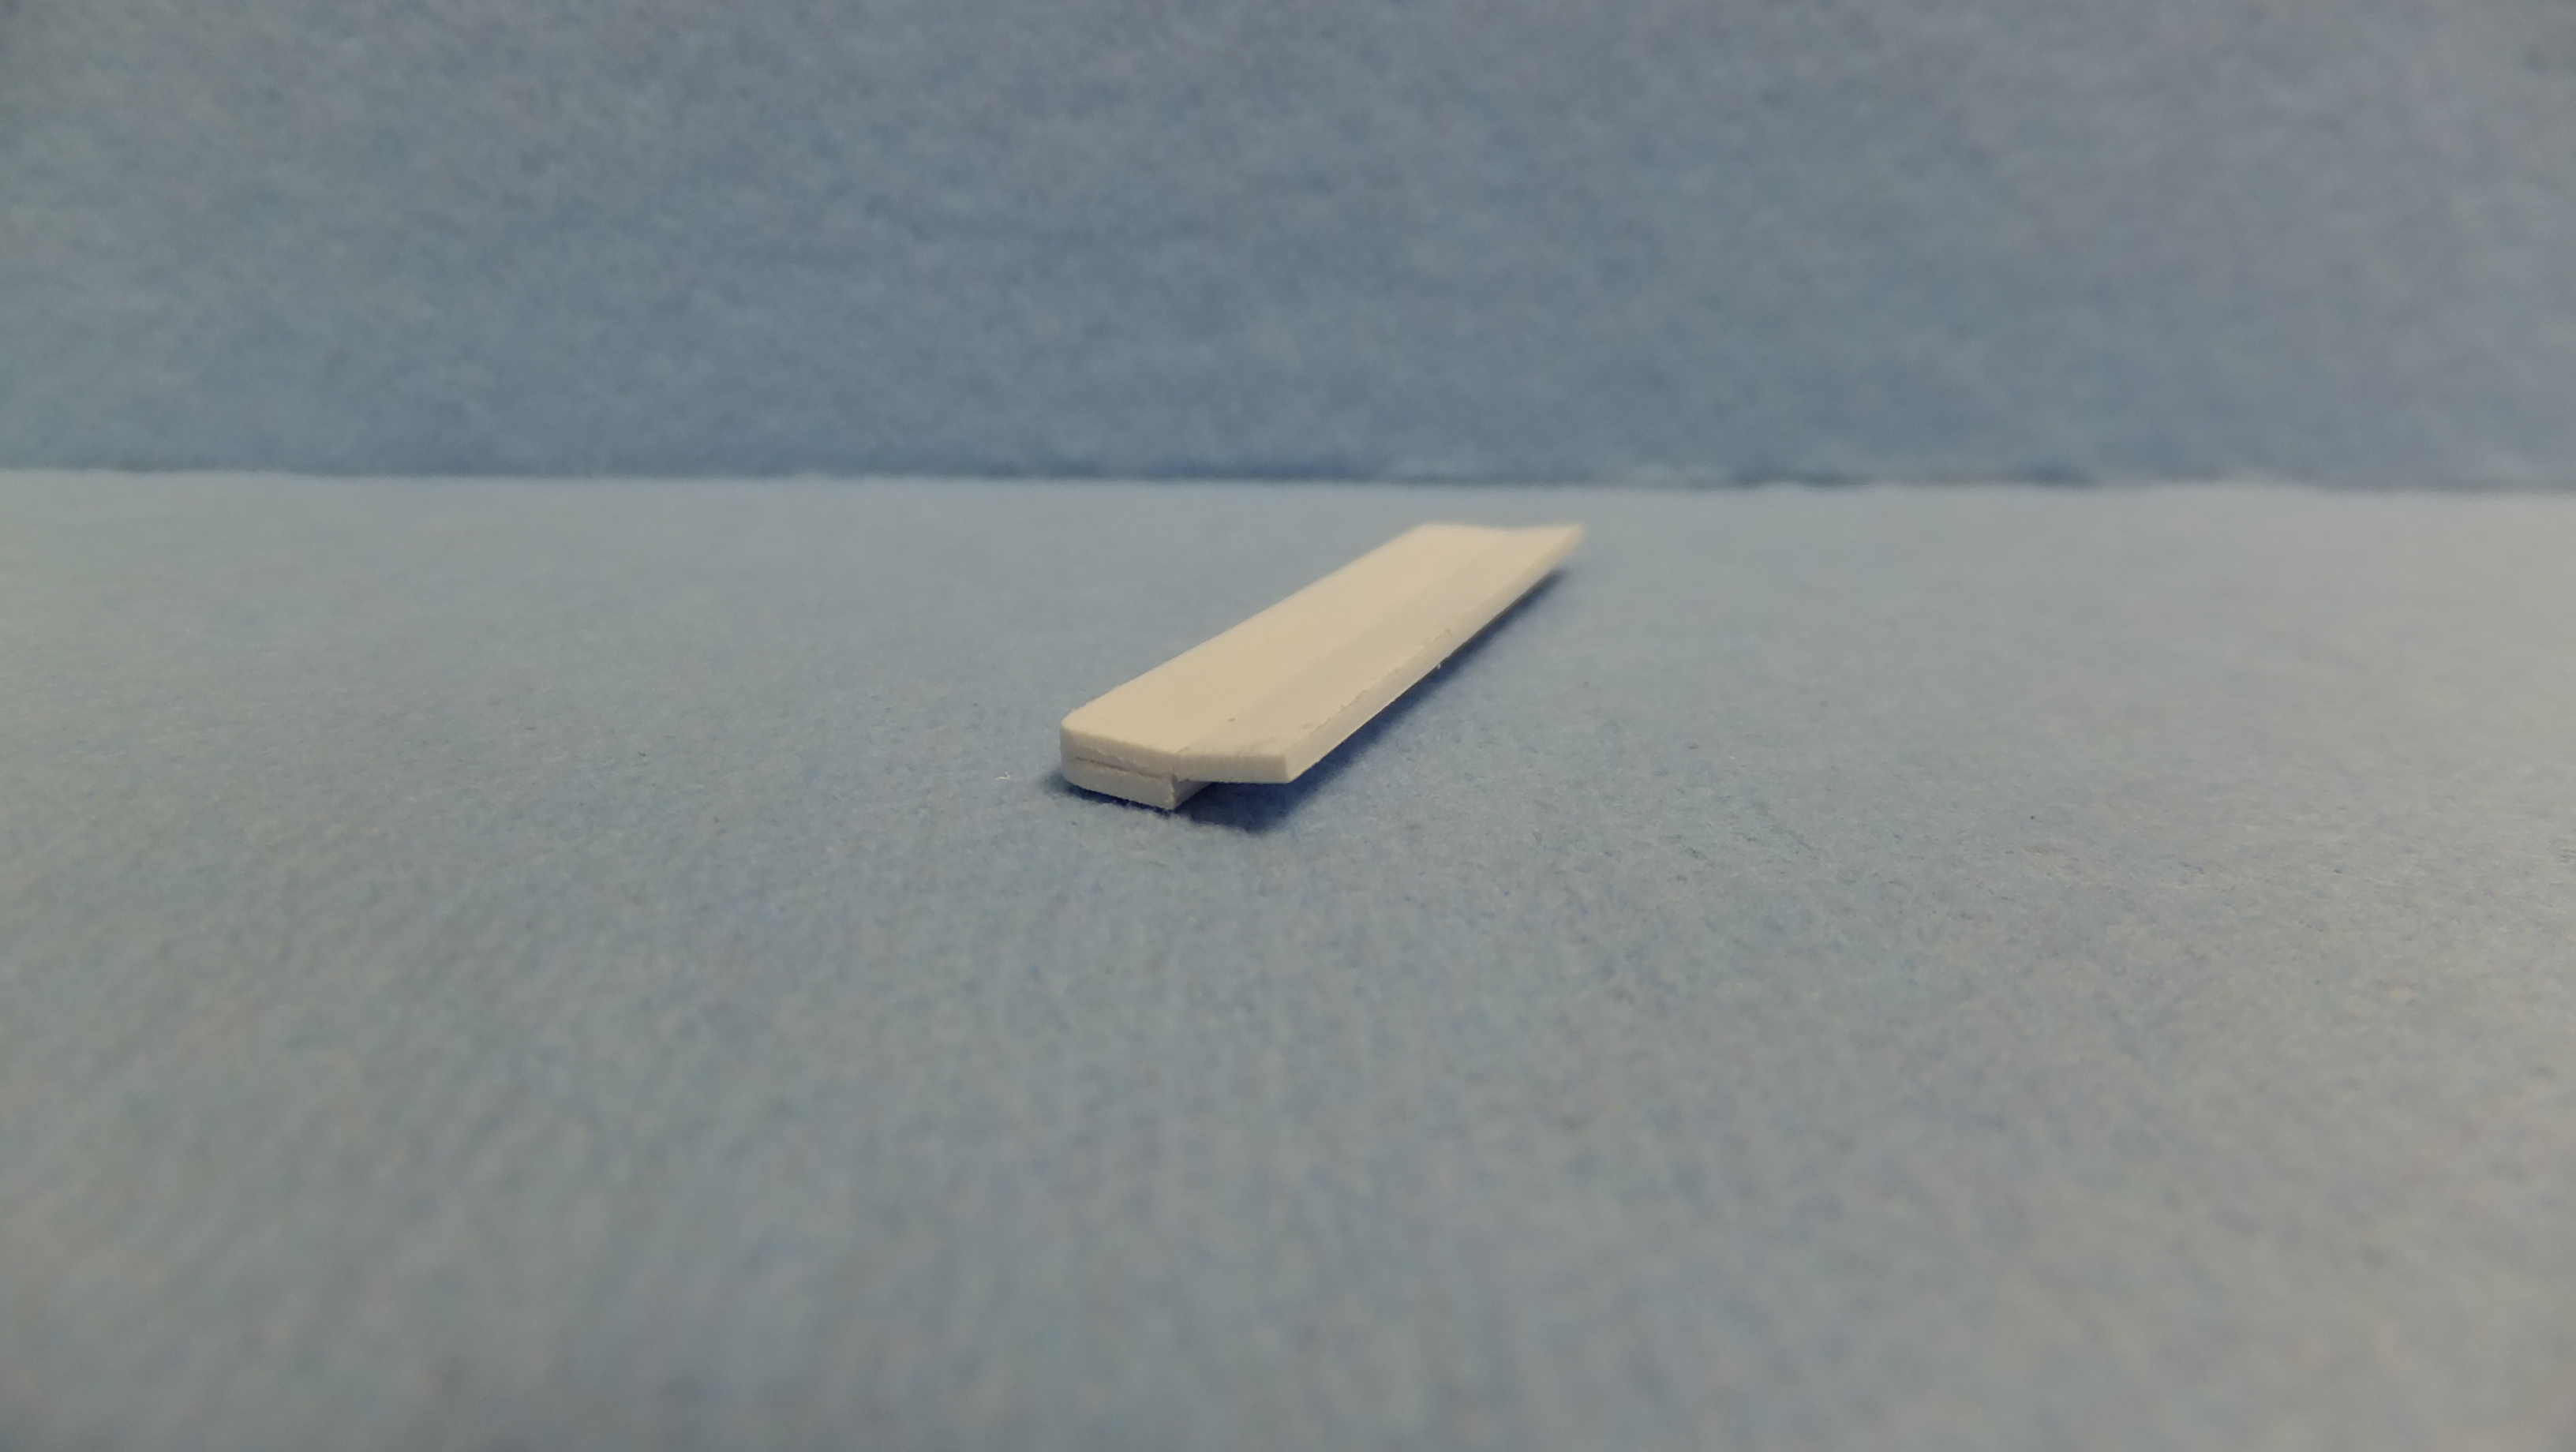
I was able to make a uniformed ridge, by using a piece of square styrene rod.....I just opened them with my Olfa blade.
-
Otaki 1/12 Lamborghini Countach Twin Turbo...Mission Statement
Dann Tier replied to Dann Tier's topic in WIP: Model Cars
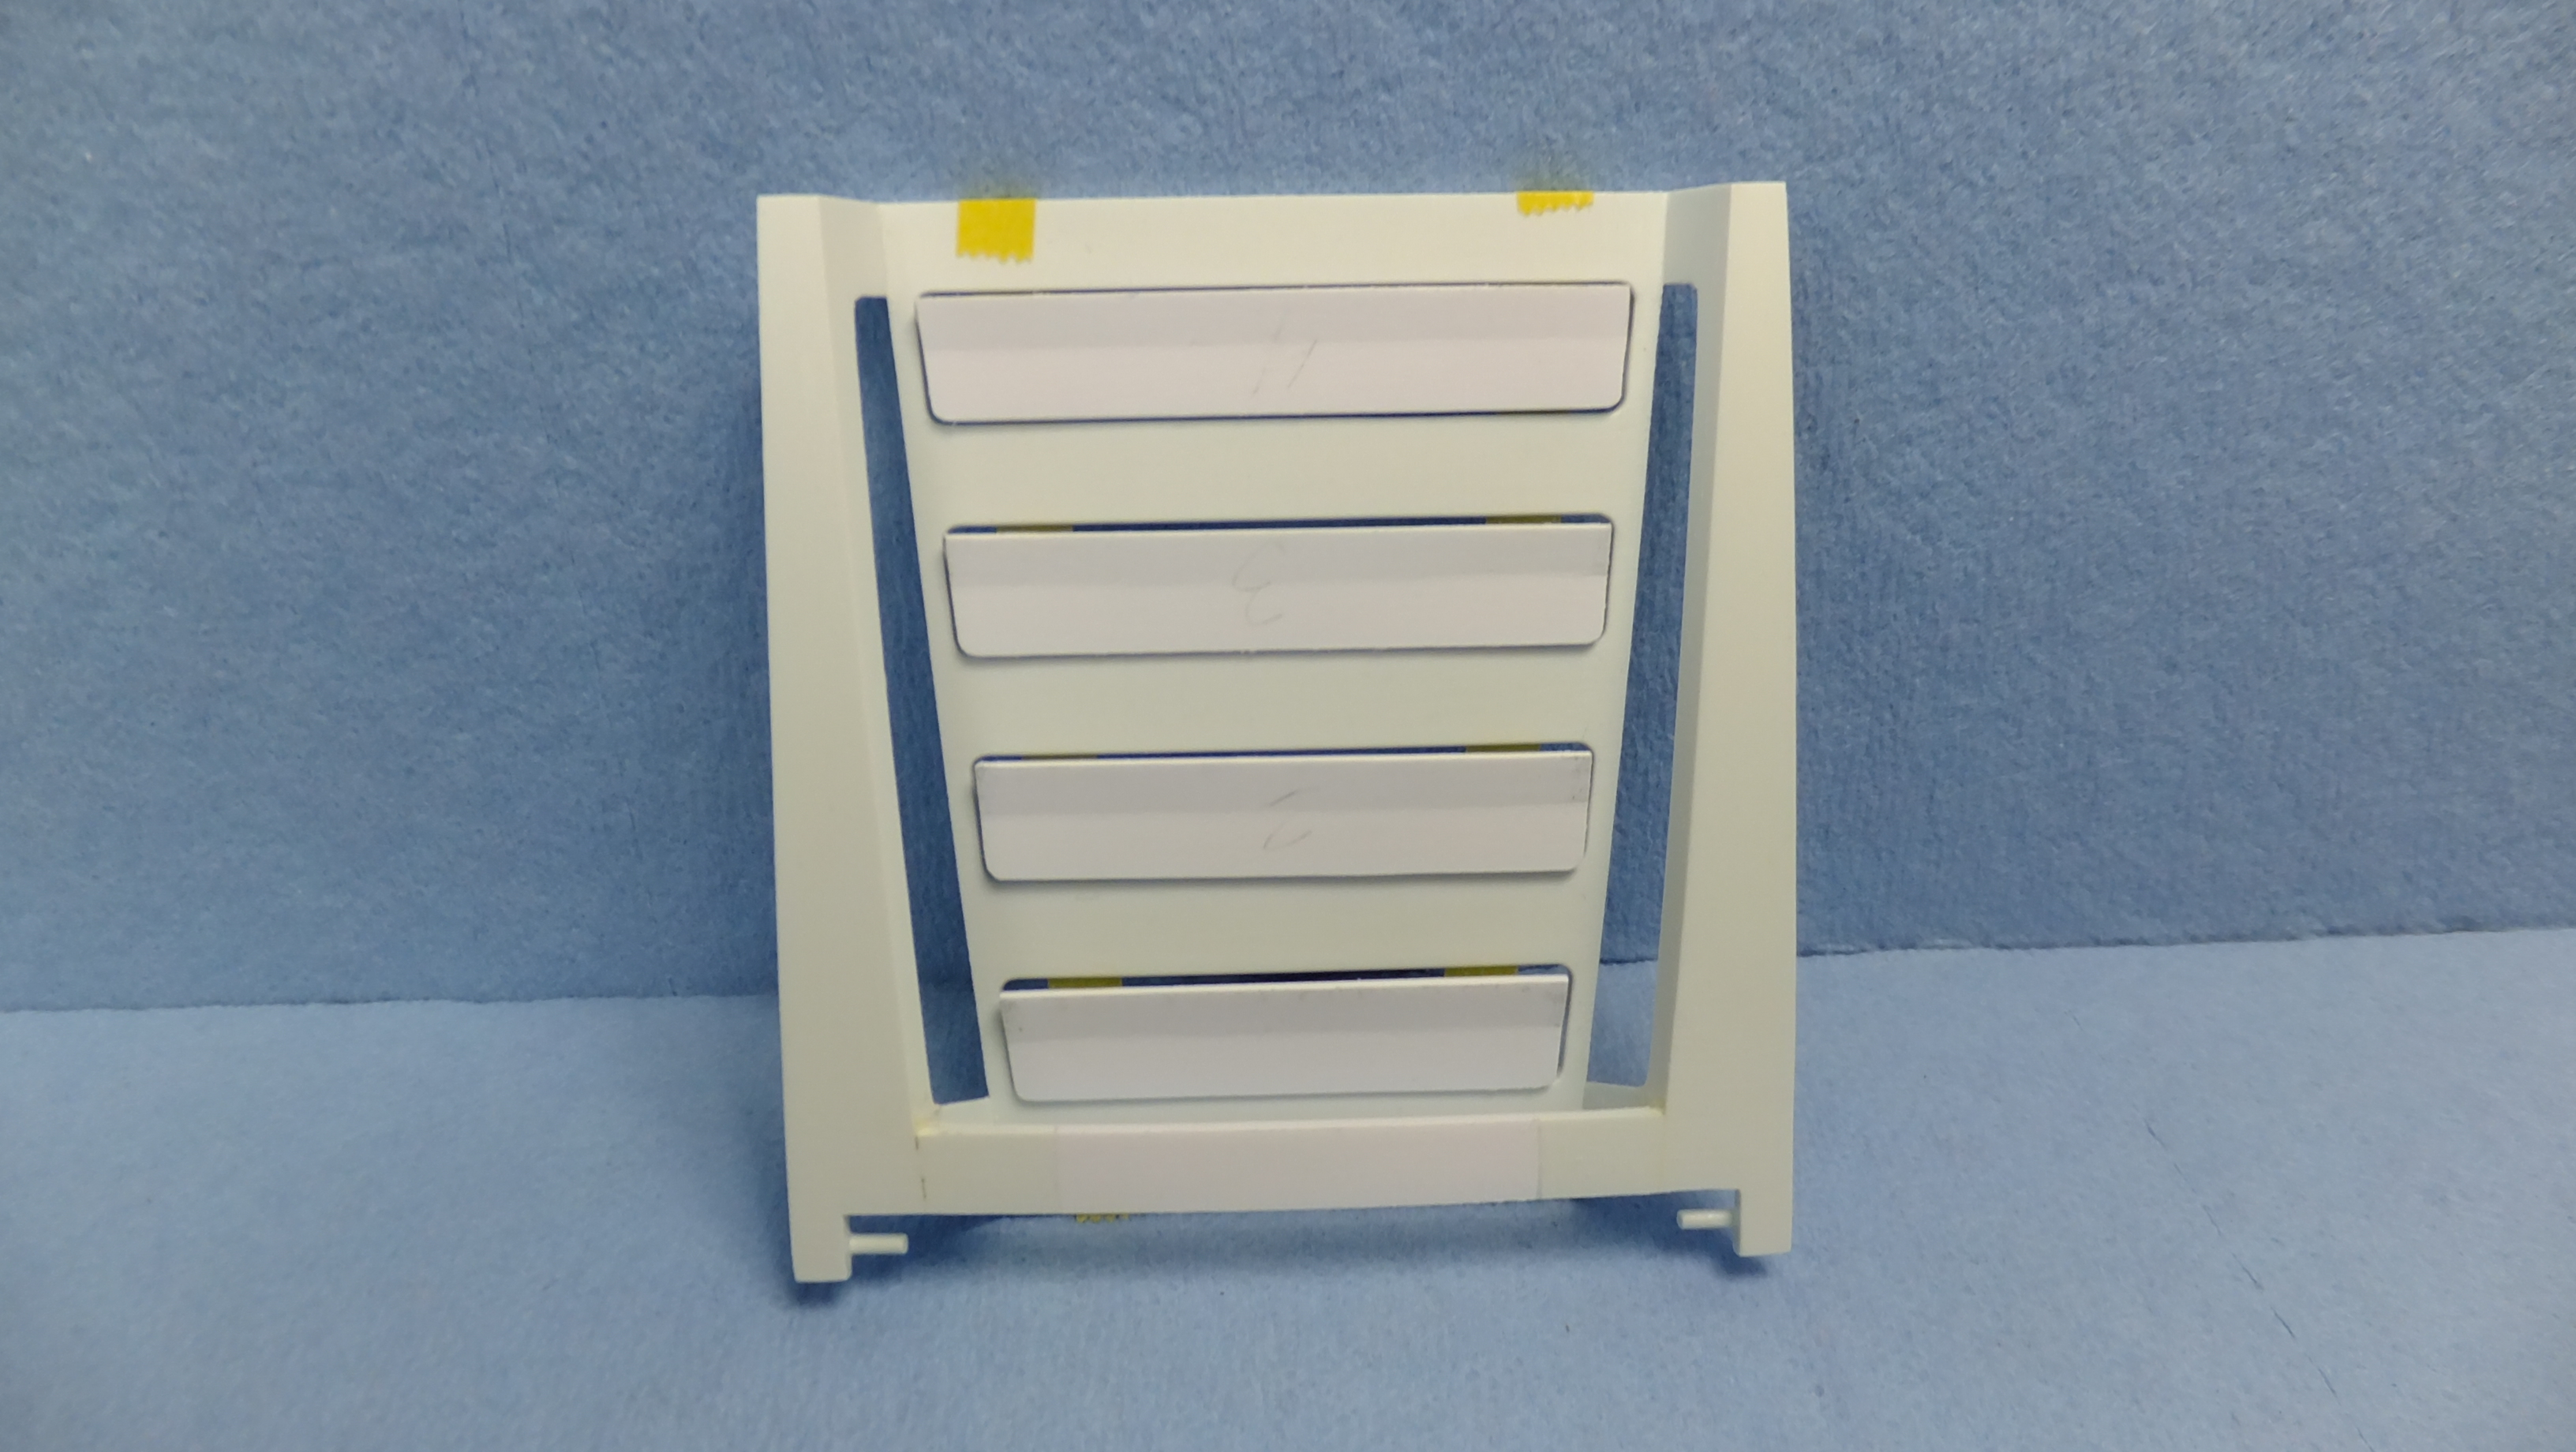
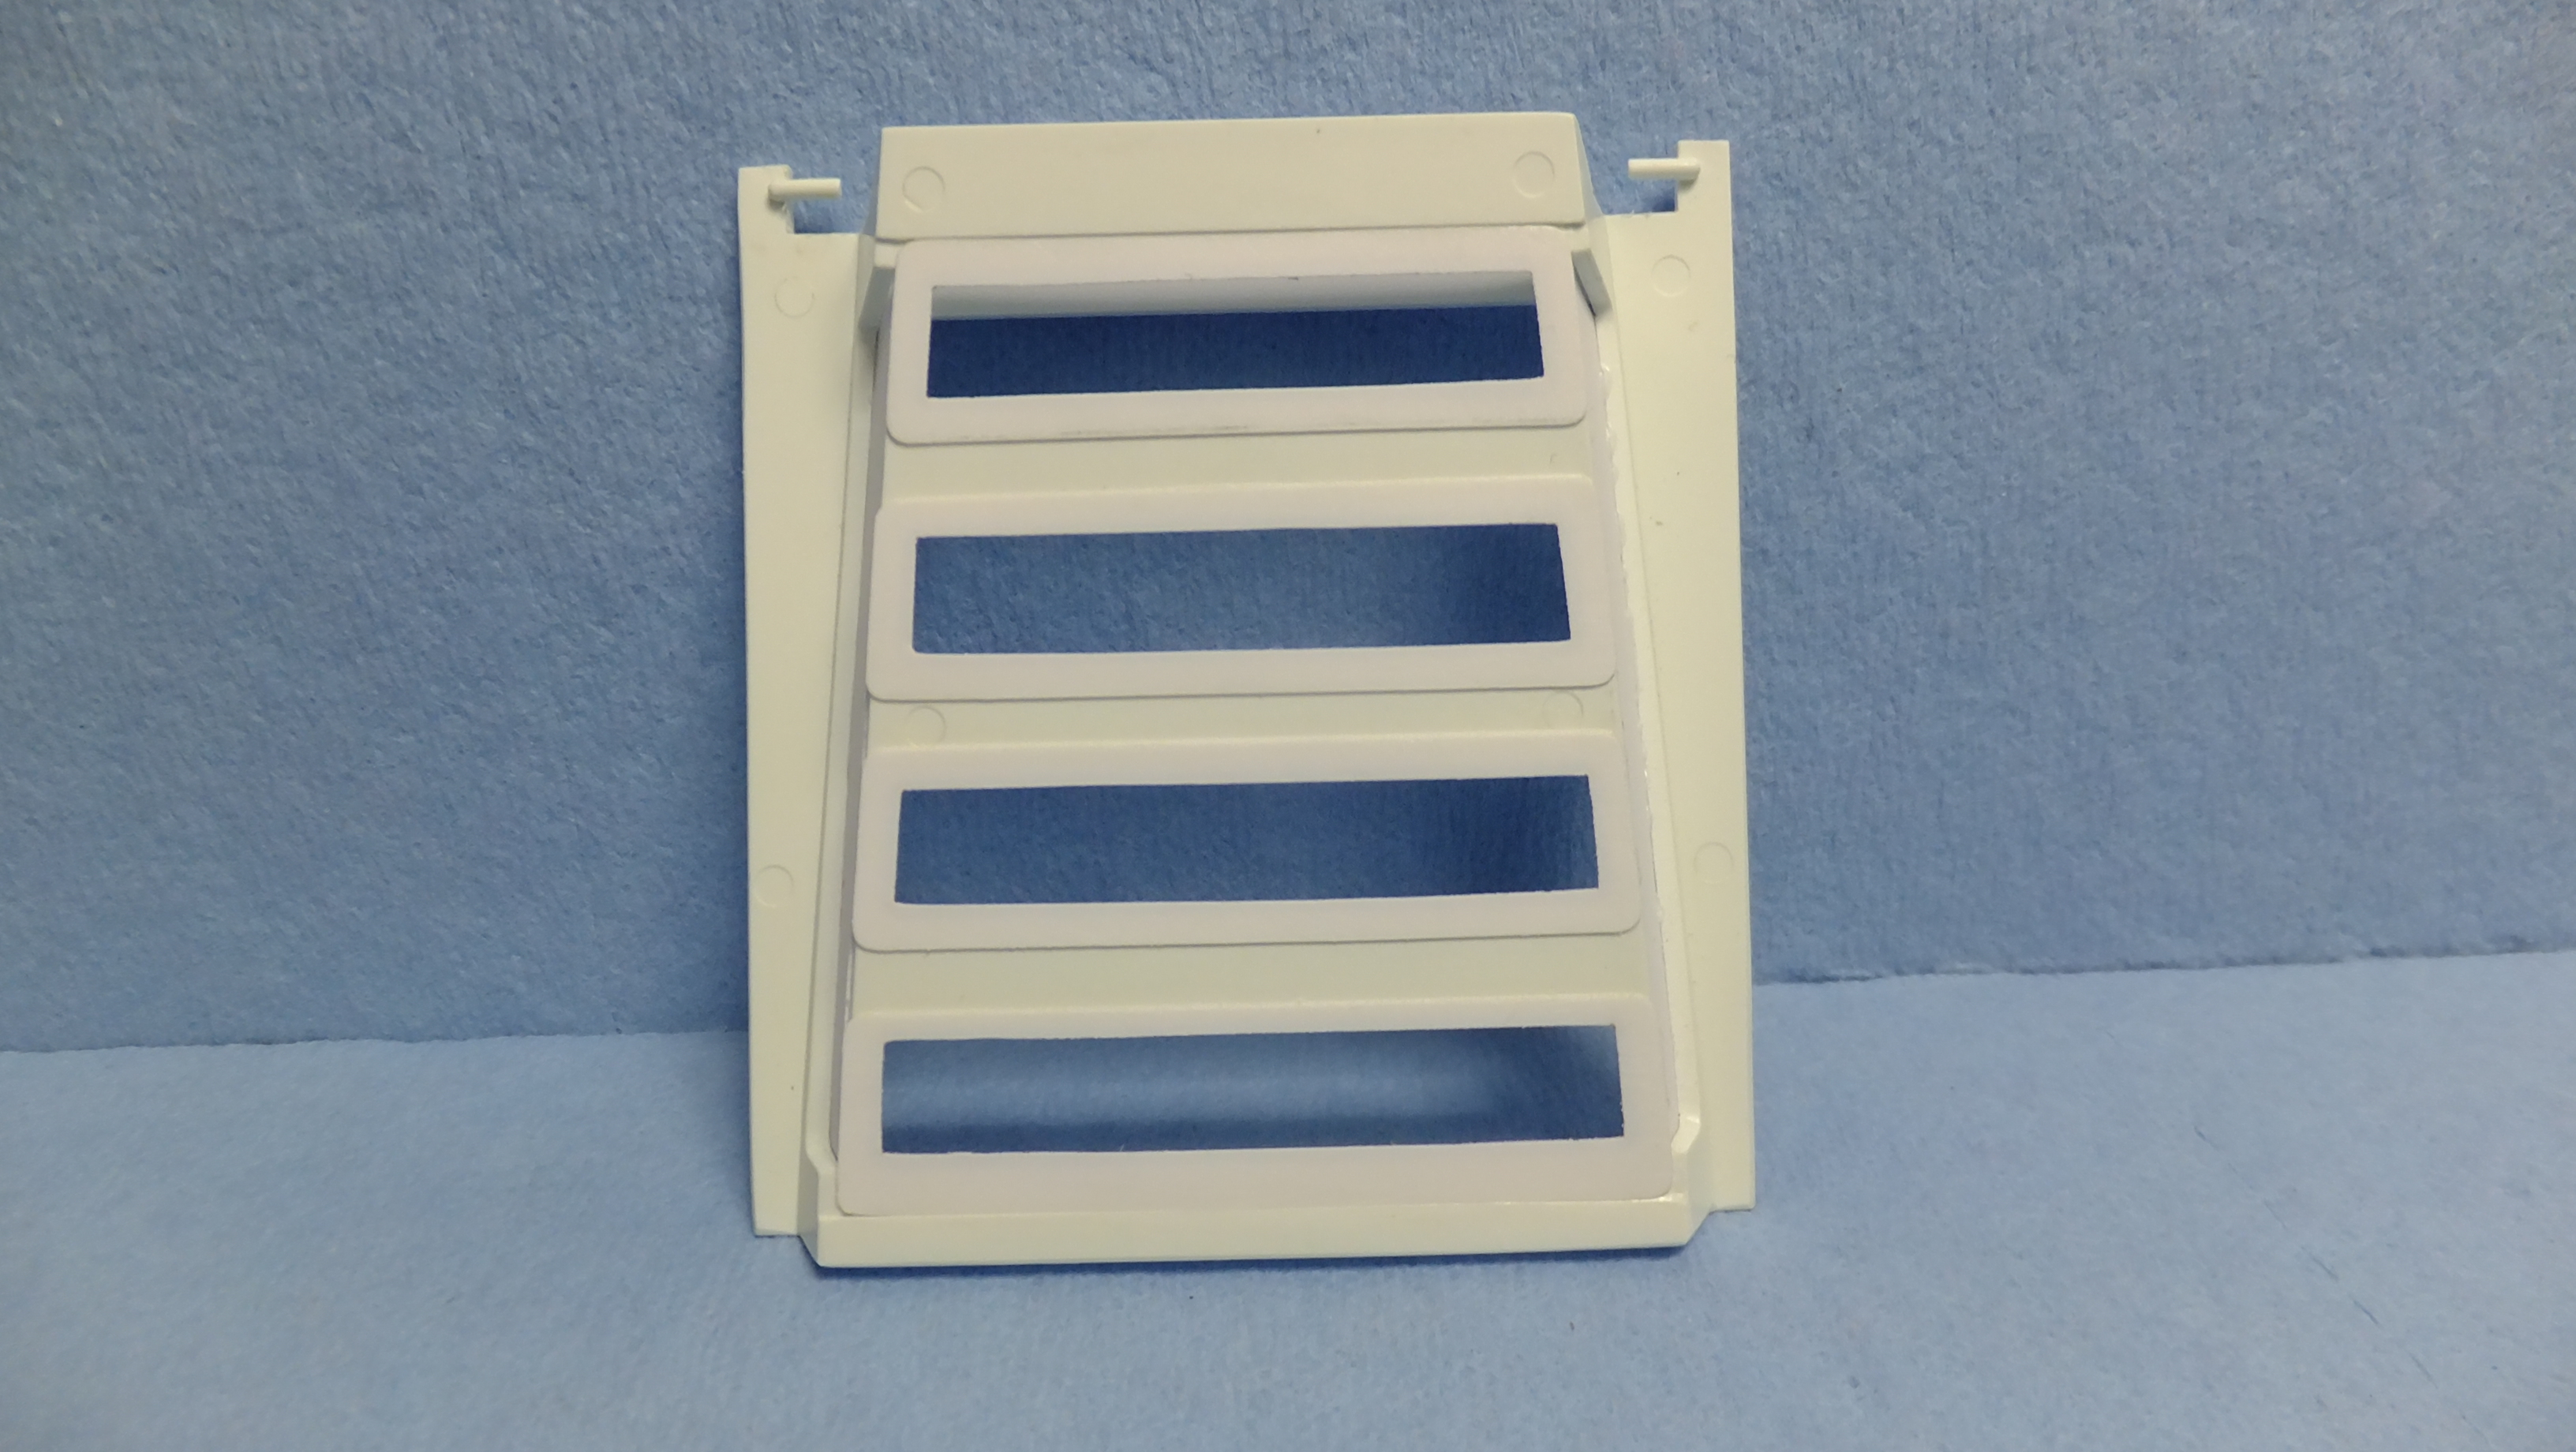
Using my thinnest styrene, I covered the openings with the proper overlap...
-
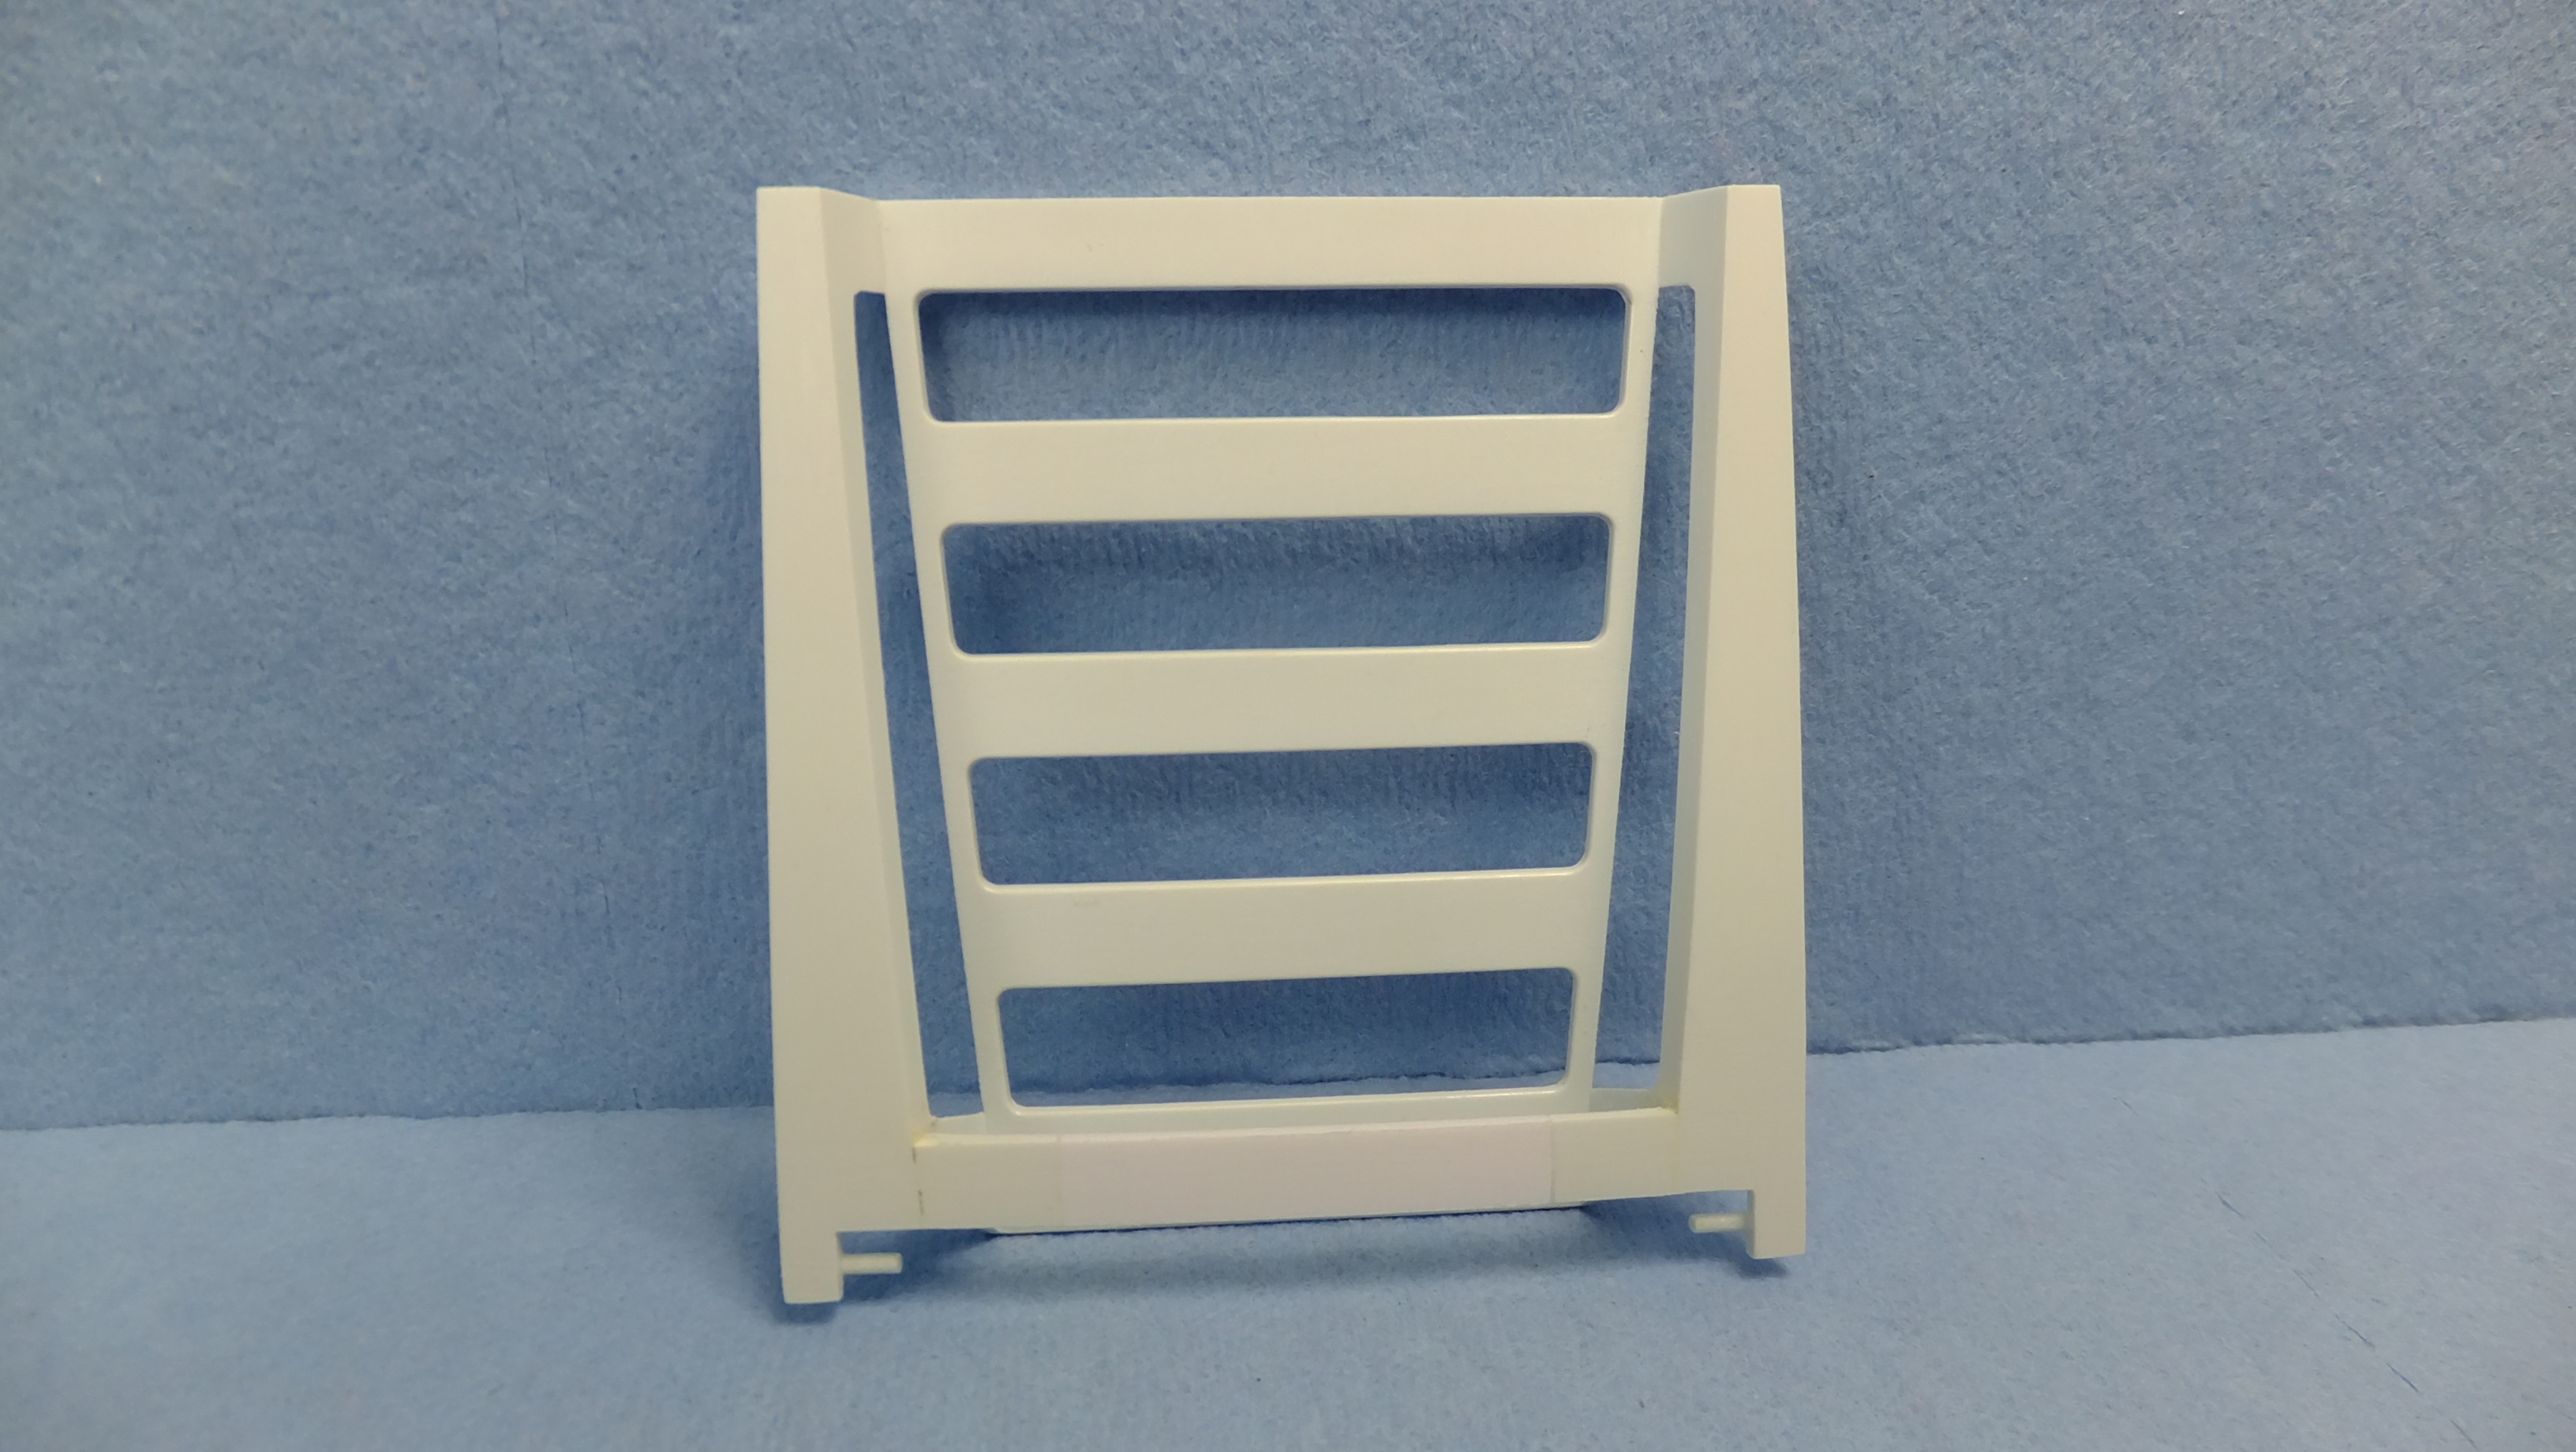
Otaki 1/12 Lamborghini Countach Twin Turbo...Mission Statement
Dann Tier replied to Dann Tier's topic in WIP: Model Cars
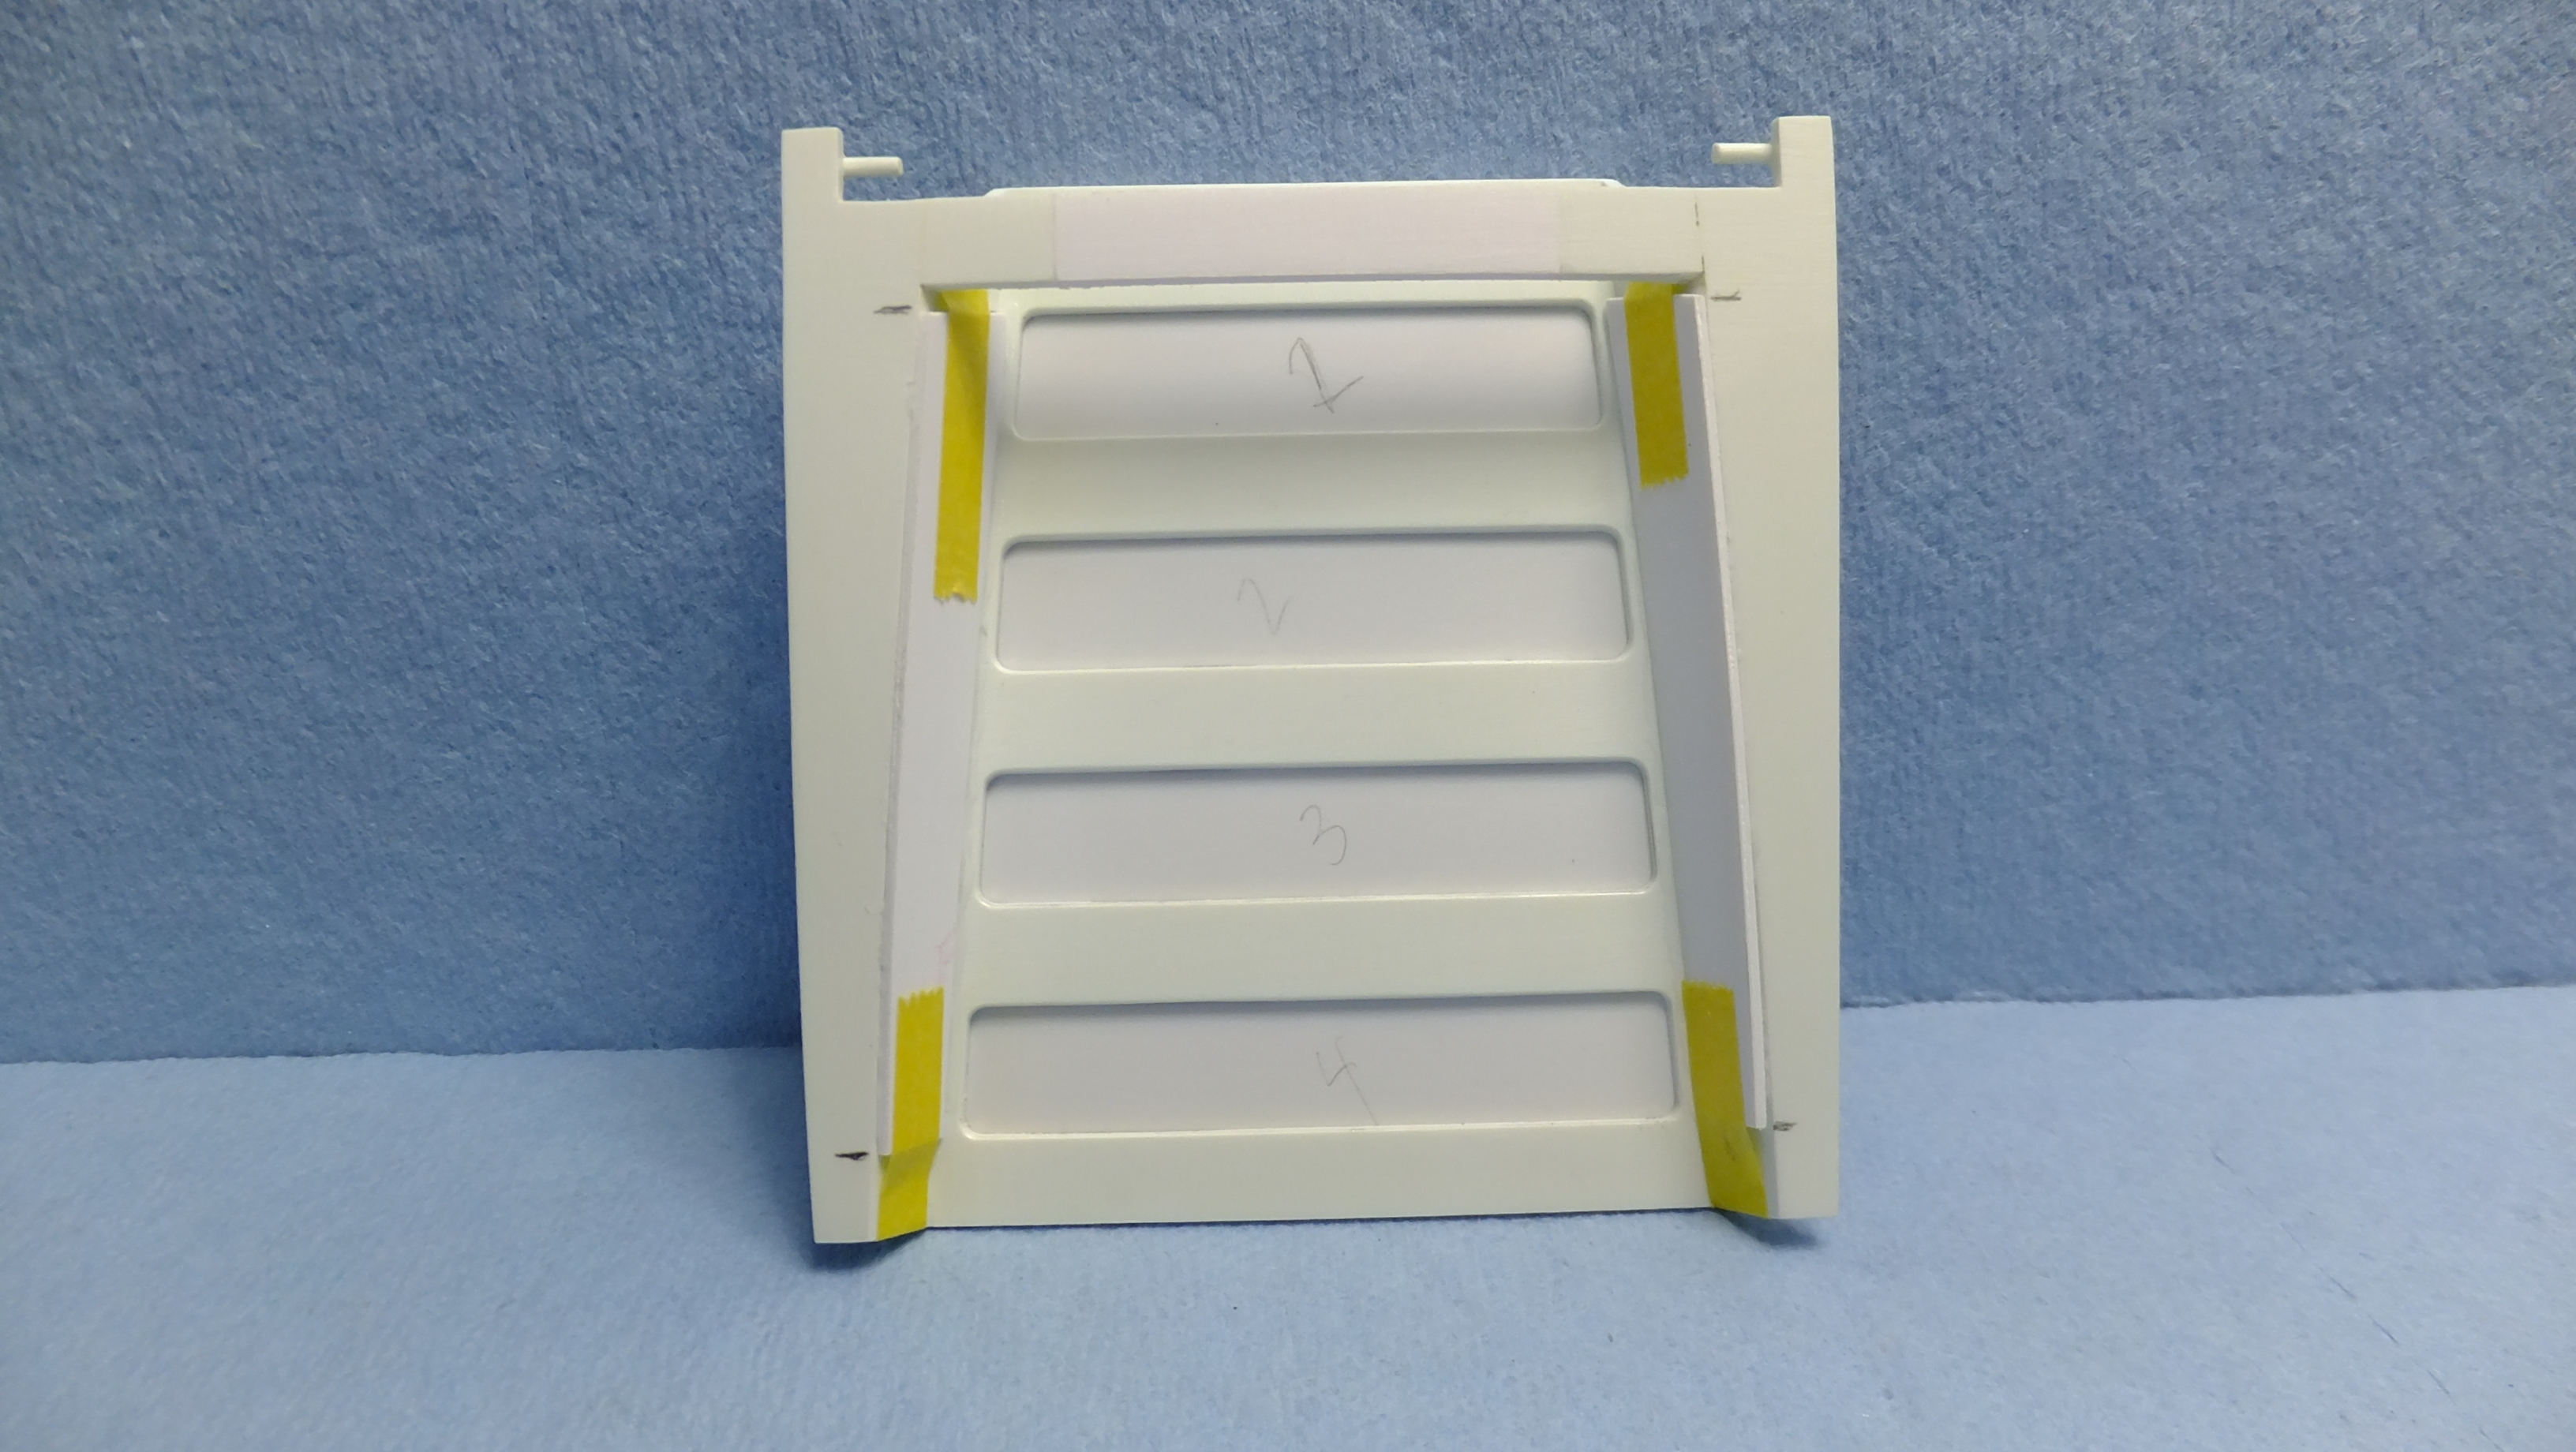
First, I needed to SB the side vents, so using the opening to make a template, I made the two parts, and glued theme in place with canopy glue. This served two purposes; 1) it made it easier to sand the top edges to match the top of the hood, and 2) it will help act as a hinge in a later step.
-
Otaki 1/12 Lamborghini Countach Twin Turbo...Mission Statement
Dann Tier replied to Dann Tier's topic in WIP: Model Cars
Hey, everyone!, I have started the hood change process...Here is the kit hood with only my crossmember change. the vents are black plastic parts...tossed a long time ago. I wanted to have the 1977+ hood, so the fun begins!
-
Just like I thought.....a freaking BEAST!!!.....VERY well done, bud!!!
-
Windows is ALWAYS nerve wrecking. Even if you weren't weathering the car, I think that fine scratches can actually add realism. Anybody who knows cars, knows how impossible it is to keep them klean, and perfect....only way is if you literally NEVER drive the car. I still think this is looking INCREDIBLE, bud!!! Clever idea with those metal retainers too!!
-
WOW, bud!!!!!, you have been busy!!…..OUT-FREAKING-STANDING!!!!
-
I knew it would turn out looking FANTASTIC, Ray!!!!
-
Welcome back!!, it looks BRILLIANT!!!
-
Cant wait to see one of these built!!!
-
I'm gonna enjoy this!!!.....great choice, Ray!!
-
Looking FANTASTIC!!!.....can I ask where you got those rear tyres?.....Fireball??
-
WOW!!!...…….just WOW!!!!
-
CONGRATS, RAY!!!
-
Thought I commented on this one already...…...this is one hell of a beautiful build going on, bud!!!
-
Nice adjustments!!
-
Fantastically BRILLIANT!!!
-
Otaki 1/12 Lamborghini Countach Twin Turbo...Mission Statement
Dann Tier replied to Dann Tier's topic in WIP: Model Cars
Thanks, bud!!…..next, I have to sand off that texture on the surrounds.