Dann Tier
-
Posts
8,151 -
Joined
-
Last visited
Content Type
Profiles
Forums
Events
Gallery
Everything posted by Dann Tier
-
I probably will too!!
-
 Its a toss-up between these three; My original Airfix JB DB-5, which I just started yesterday, my Chitty Chitty Bang Bang....original, was still sealed, but I opened it since i'm going to build it too, and my Fujimi Ferrari 288 GTO kit No.9......VERY hard to find!!! -I don't care how rare, I build them all!!
-
great job!!, love this kit!
-
YES!!…...ANOTHER Cobra!!
-
This sure is looking beautifully realistic!!!!, hope you get back into it!!
-
Otaki 1/12 Lamborghini Countach Twin Turbo...Mission Statement
Dann Tier replied to Dann Tier's topic in WIP: Model Cars
A little update here; changing the wheels....
-
Thanks, Dan!
-
Thanks, Patrick!, those aren't decals, I hand painted everything.....basically three times, since I did three THIN coats of each kolor. The DB-5 is the Doyusha "Goldfinger" kit.
-
Otaki 1/12 Lamborghini Countach Twin Turbo...Mission Statement
Dann Tier replied to Dann Tier's topic in WIP: Model Cars
Thanks, Dennis!, Nice scratchbuilding!!, I don't mind you sharing here, I hope you start building yours again, and posting it here...….we can compare notes...lol -
Fully detailed Airfix James Bond Aston Martin DB-5
Dann Tier replied to Dann Tier's topic in WIP: Model Cars
Thanks, Matt!, and I keep thinking that my $250 was a great deal...You'd be mental NOT getting it!!! -
Thanks, Dennis!, so do I!!
-
Thanks, JC!, its one of my favorite Lamborghinis.
-
Here is the new firewall padding, i'm VERY happy with this one!
-
Fully detailed Airfix James Bond Aston Martin DB-5
Dann Tier replied to Dann Tier's topic in WIP: Model Cars
I will check it out, thanks! -
Fully detailed Airfix James Bond Aston Martin DB-5
Dann Tier replied to Dann Tier's topic in WIP: Model Cars
I sure did!!….all of your builds -
Thanks, Ashley!, I've got some neat techniques for this one!
-
Thanks, Chris!
-
Thank you!!
-
Thanks, Jason!!, I cant really remember...lol, I will get back to you on that.
-
Fully detailed Airfix James Bond Aston Martin DB-5
Dann Tier replied to Dann Tier's topic in WIP: Model Cars
They look VERY awesome!!!!…..nice job!!! -
Otaki 1/12 Lamborghini Countach Twin Turbo...Mission Statement
Dann Tier replied to Dann Tier's topic in WIP: Model Cars
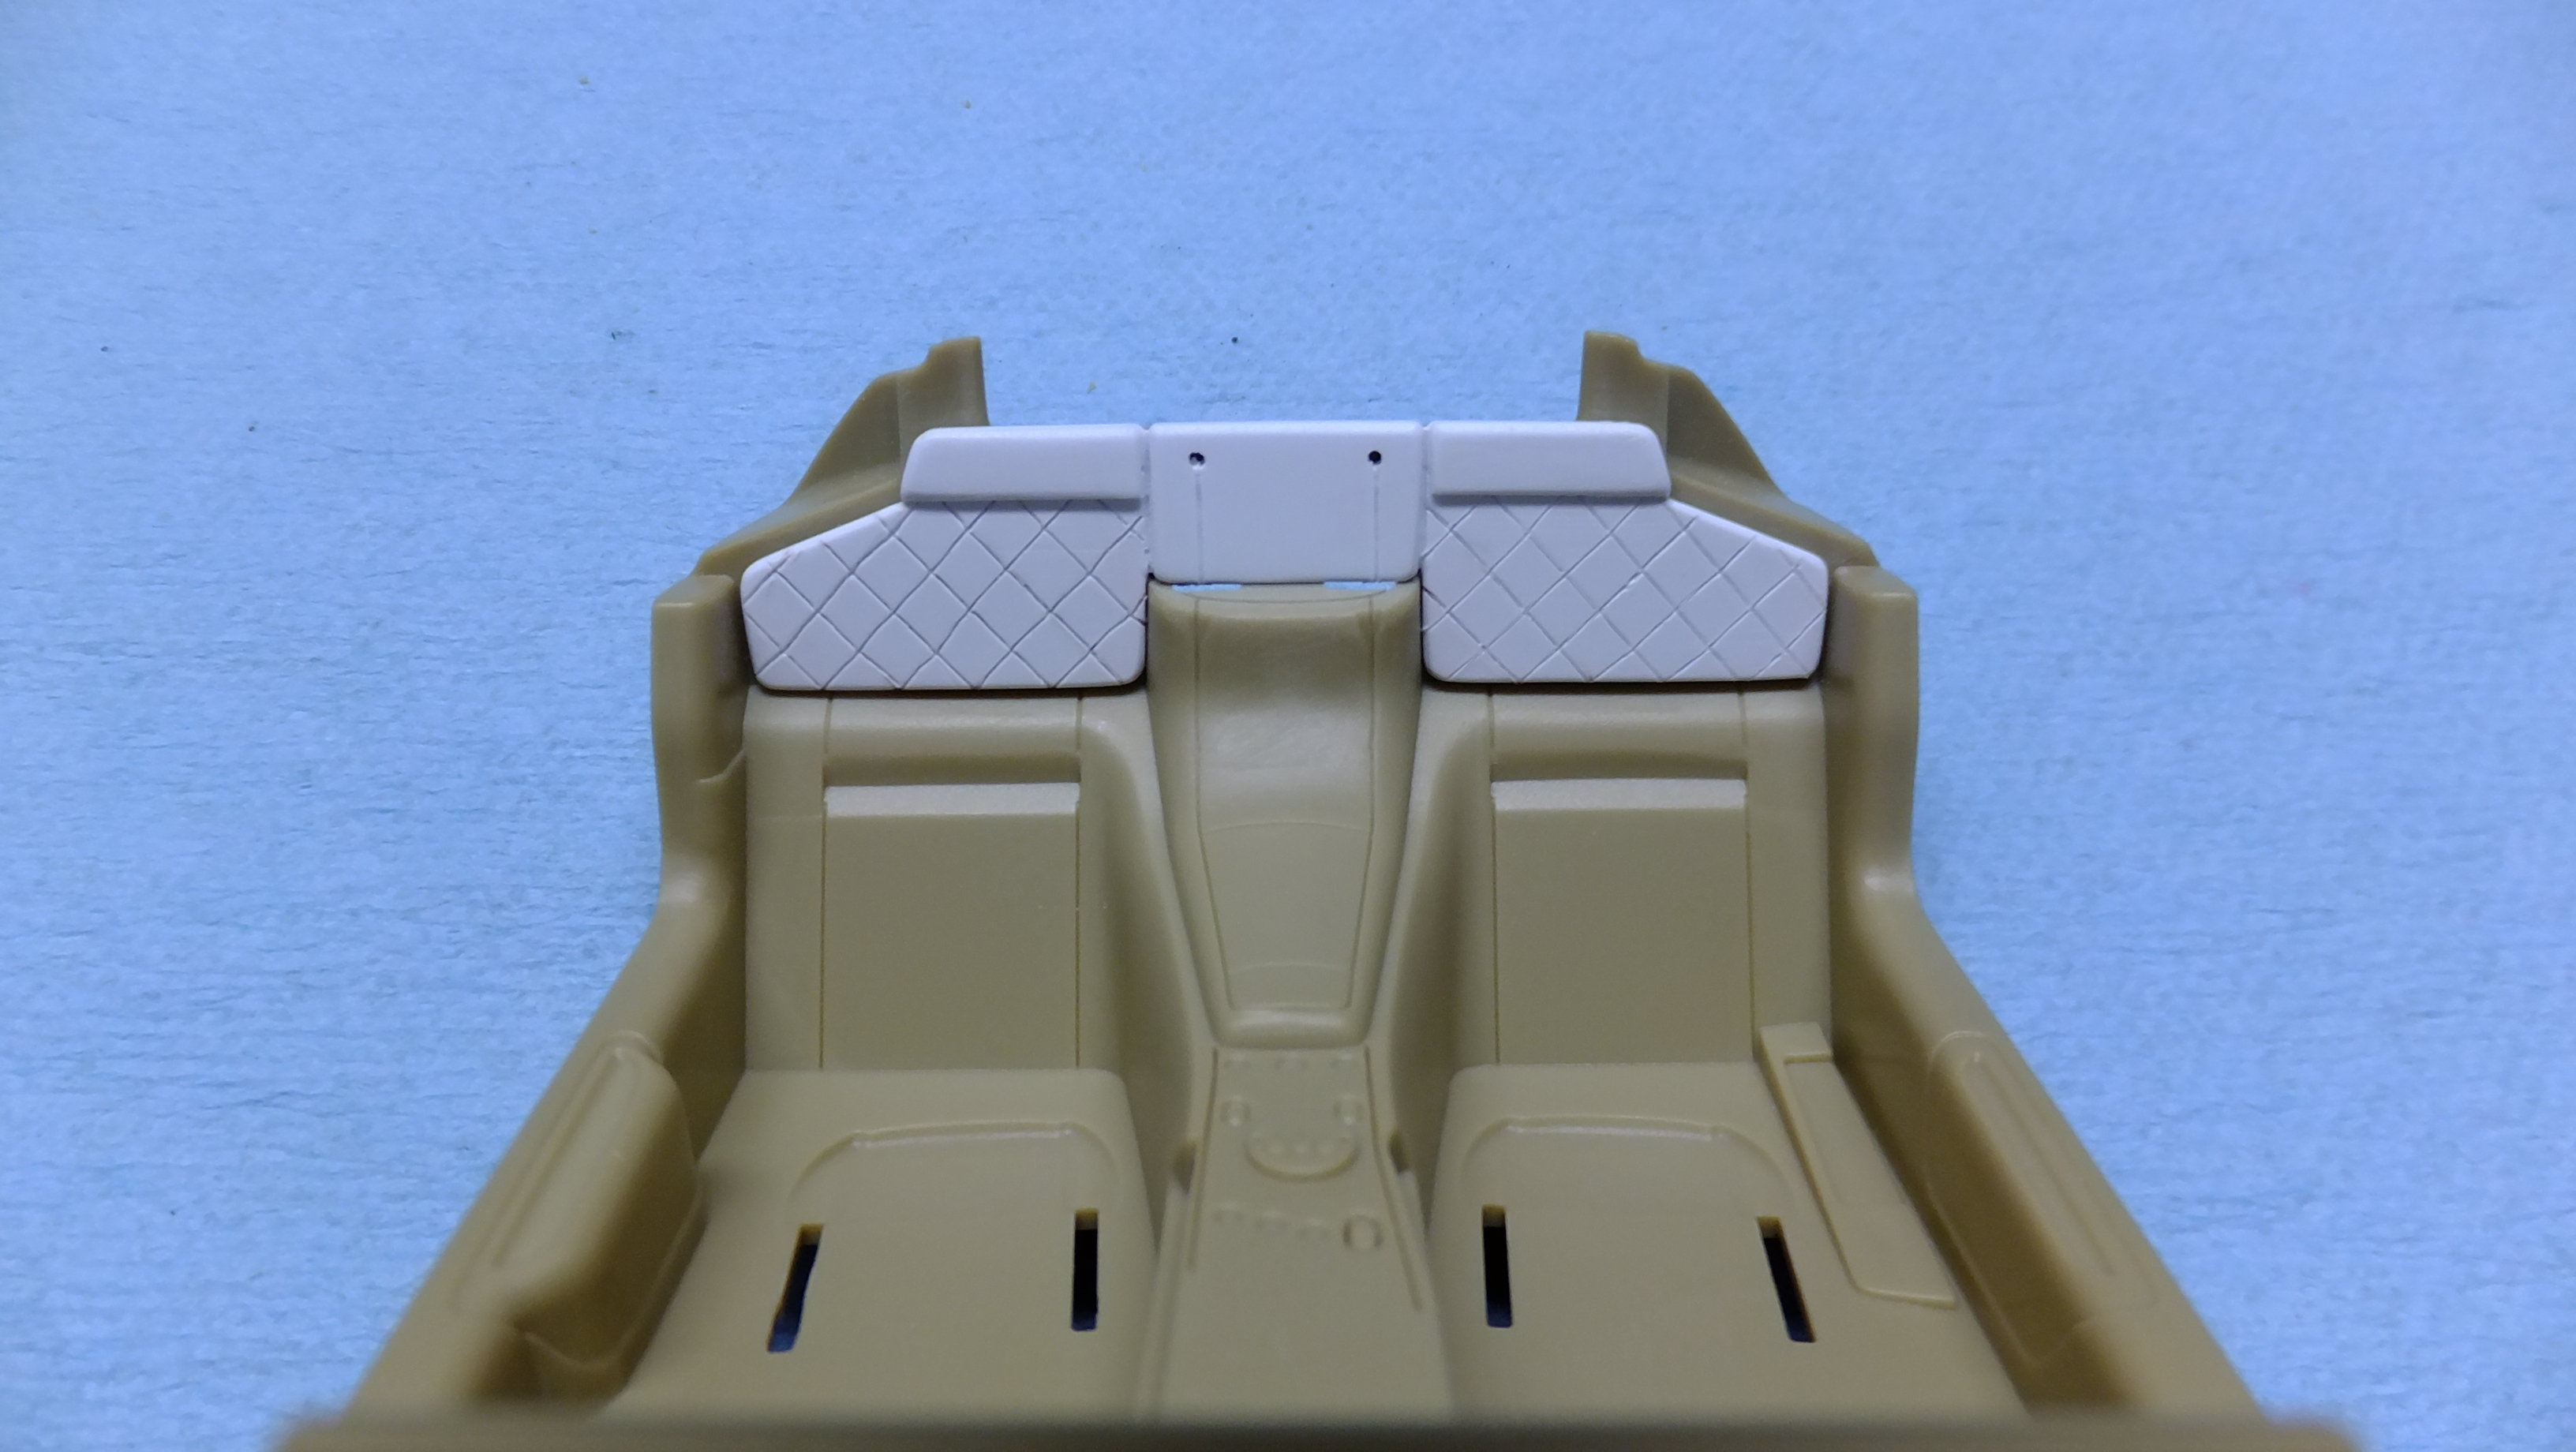
Anybody who knows me, knows that I rarely follow the instructions, so I've decided to start with the interior. After rounding-off all the edges that were too sharp, I used a white colored pencil to mark where I needed to scribe the stitching seam-lines. Lamborghinis back then were hand made, so I didn't scribe perfectly straight lines, and some plastic "sagging" was left to help create realism. I opened up the shifter hole, so that it could move through the gate better. I will be scratchbuilding new seatbelt tie-downs, interior light, newer e-brake, better center counsel knobs, firewall trim that goes behind the headrests, and whatever else pops into my head as I go along. After painting over the speaker grilles with flat white, I drilled-out the holes. There were too many holes compared to my reference photo, so I drilled-out every other hole, and it looks great! To make it easier to fill, and sand the joint-seam on both sides of the guage enclosure, I first cut out the gauges, then glued, and sanded the two dash halves. I sanded off the stereo since i'm going to scratchbuild a newer one, and I cut the seatbelt slots where they retract to. Lastly, I stripped ALL the chrome parts.....especially that CRAPPY gold stuff!!!
-
Hey everyone!, this is gonna be my first ever large scale build......and my last. A friend of mine gave me this kit, and I said that I don't normally do large scale, but if I did, it would be a Countach, so here I am! I say "upgrade", because EVERYBODY builds this kit as the kit specifies...….NOT me, I will be turning it into a later model 500s, while getting inspiration from the lesser-known Twin Turbo prototype, so there will be a TON of scratchbuilding involved! -thanks for checking it out!
-
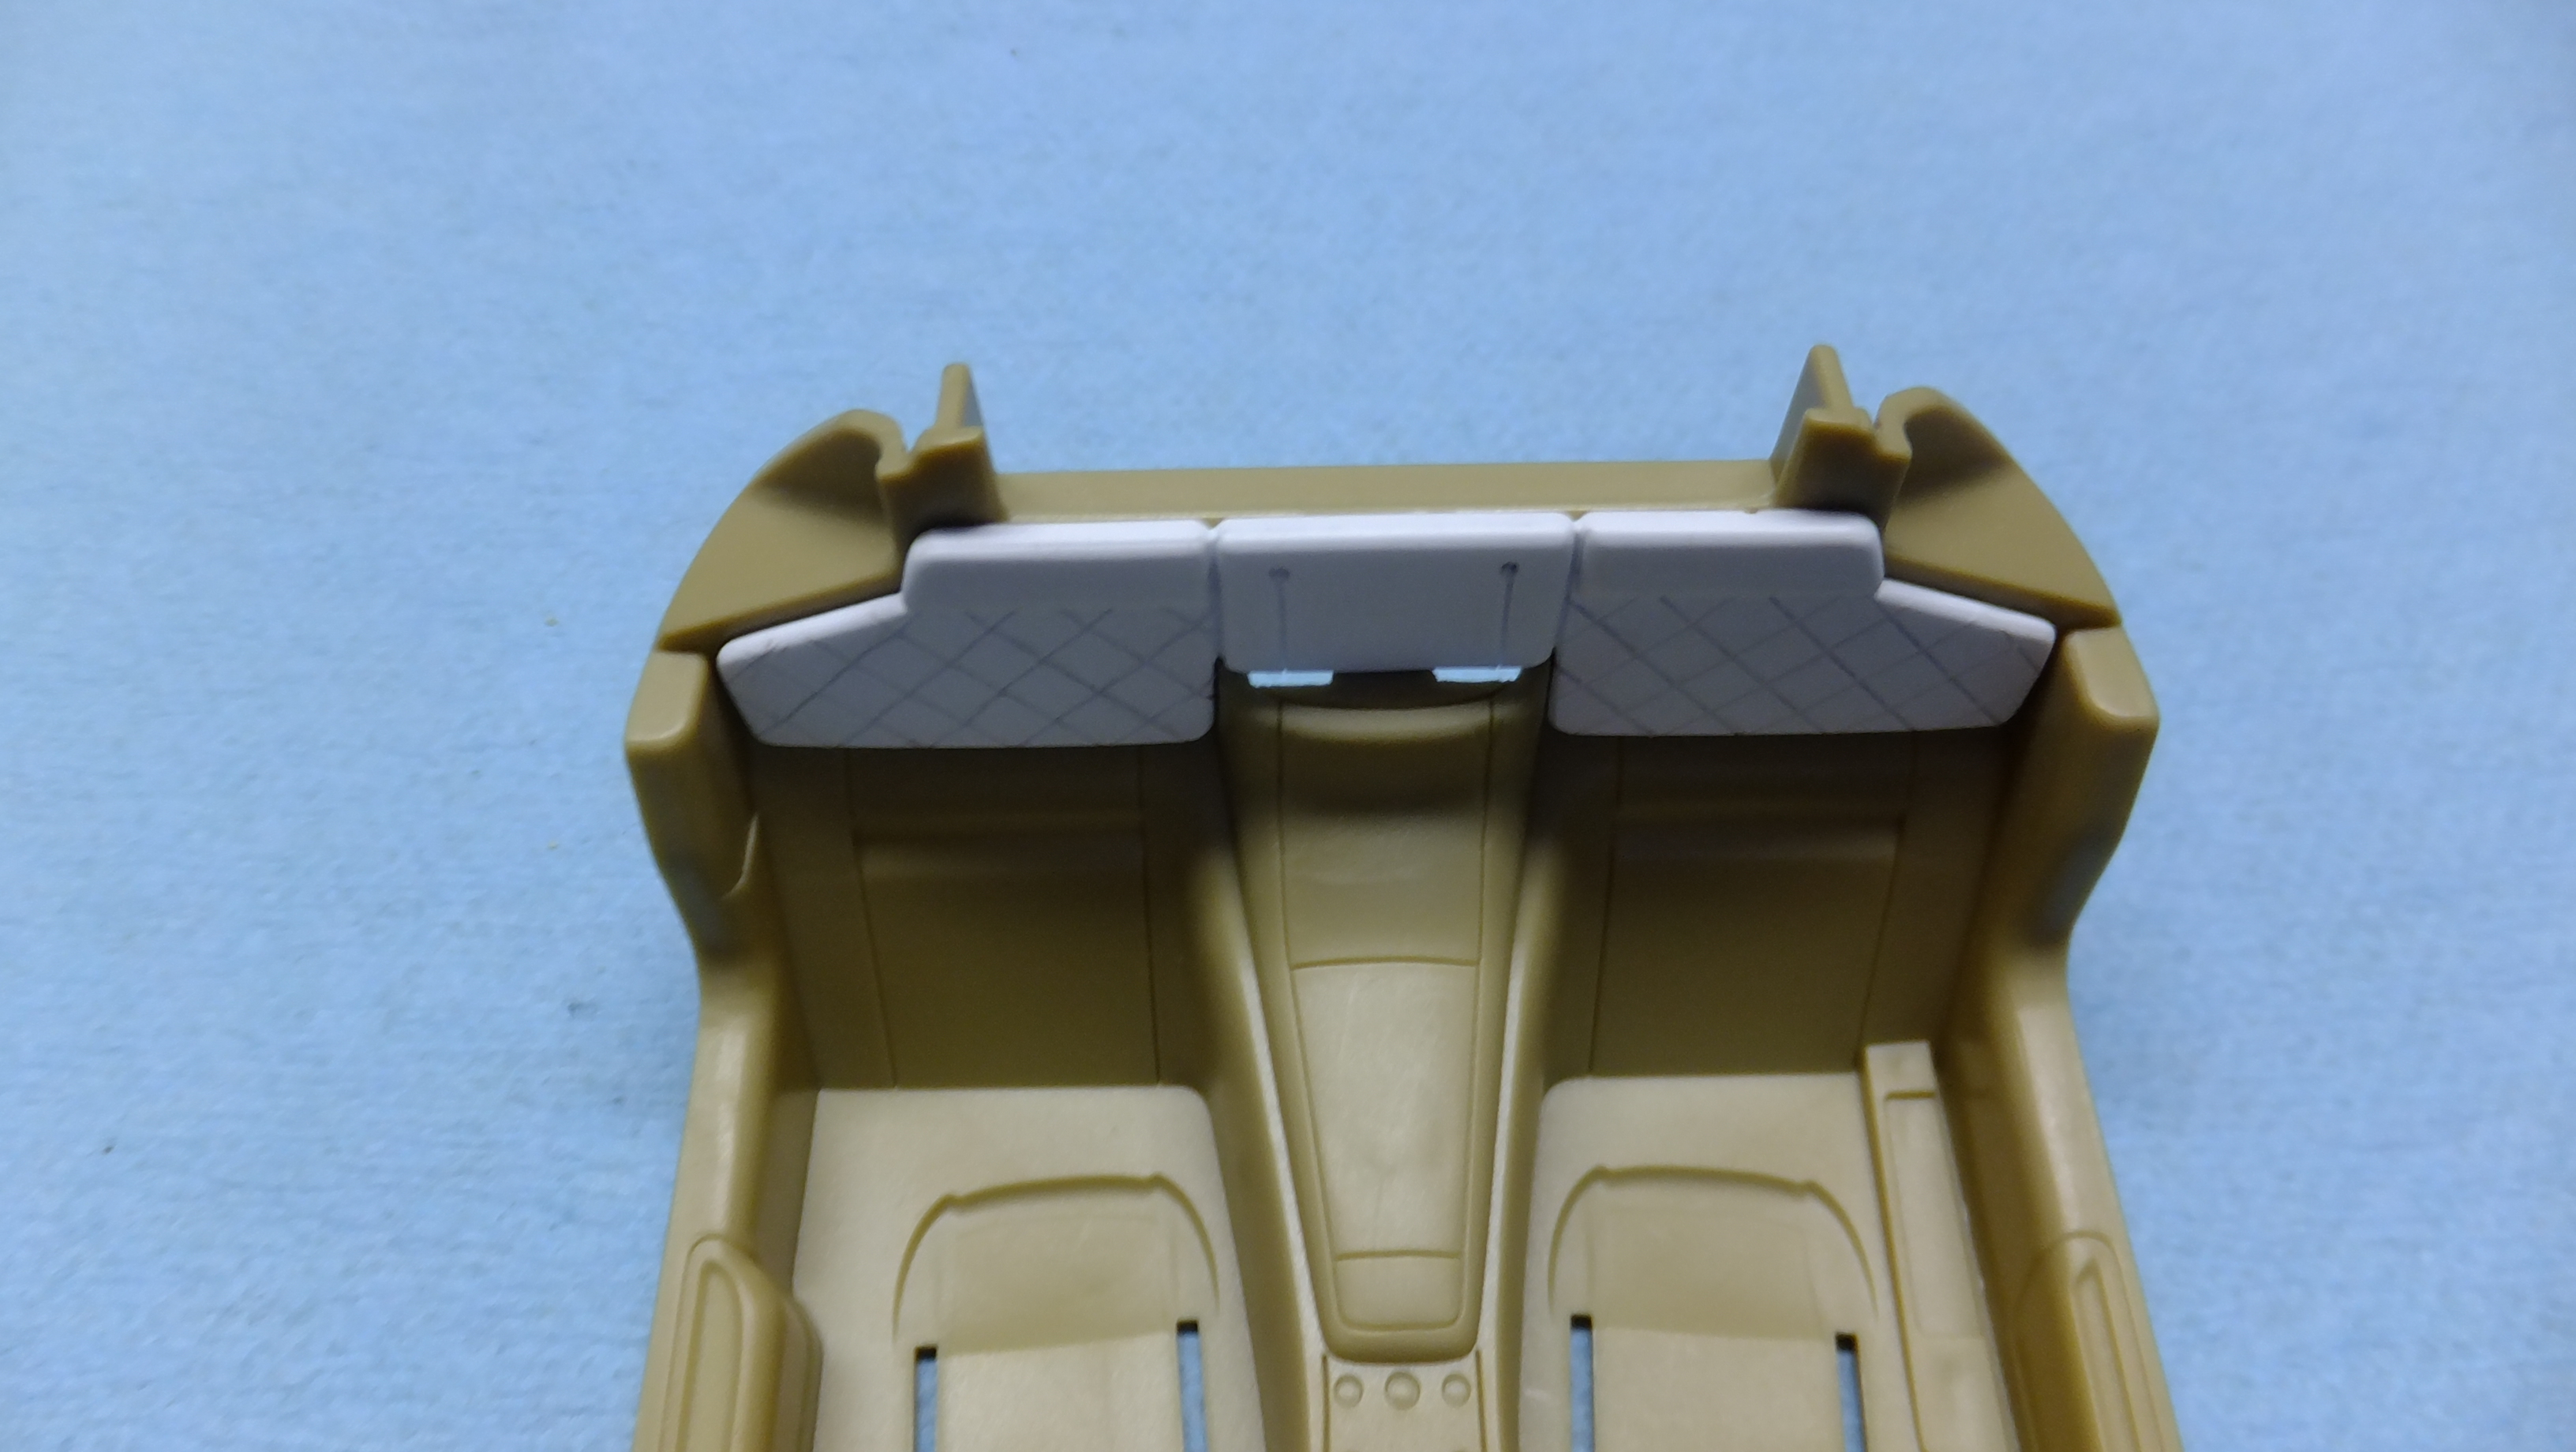
I've decided that i'm not totally happy with my firewall padding, so I am going to redo it with a bit thicker piece of sheet styrene.....same technique though.
-
Thanks, Ray!!
-
Thanks, Trevor!!