Dann Tier
-
Posts
8,151 -
Joined
-
Last visited
Content Type
Profiles
Forums
Events
Gallery
Everything posted by Dann Tier
-
...By the way, its gonna be great following this!!!......whats the bits like to that Fujimi cartoon kit??
-
Hey, Bud, you may wanna put some punctuation after your "Hey"......it reads like you're chatting him up, lol
-
I hate making roll cages, lol.....yours is looking Great, Bud!!!
-
Thats a really good idea too!!...it is a mildly updated look i'm going for....Danke!!
-
LOL....With all the tiny, workable stuff you make, drilling those holes will be a dottle!!!
-
Thanks, Bud!!, Your Ferrari looks Perf!!, I havent quite decided if i will shave them off, and SB my own, snip them off...modify them, and put them back on, OR do that slick little trick you came up with using the PE saw...
-
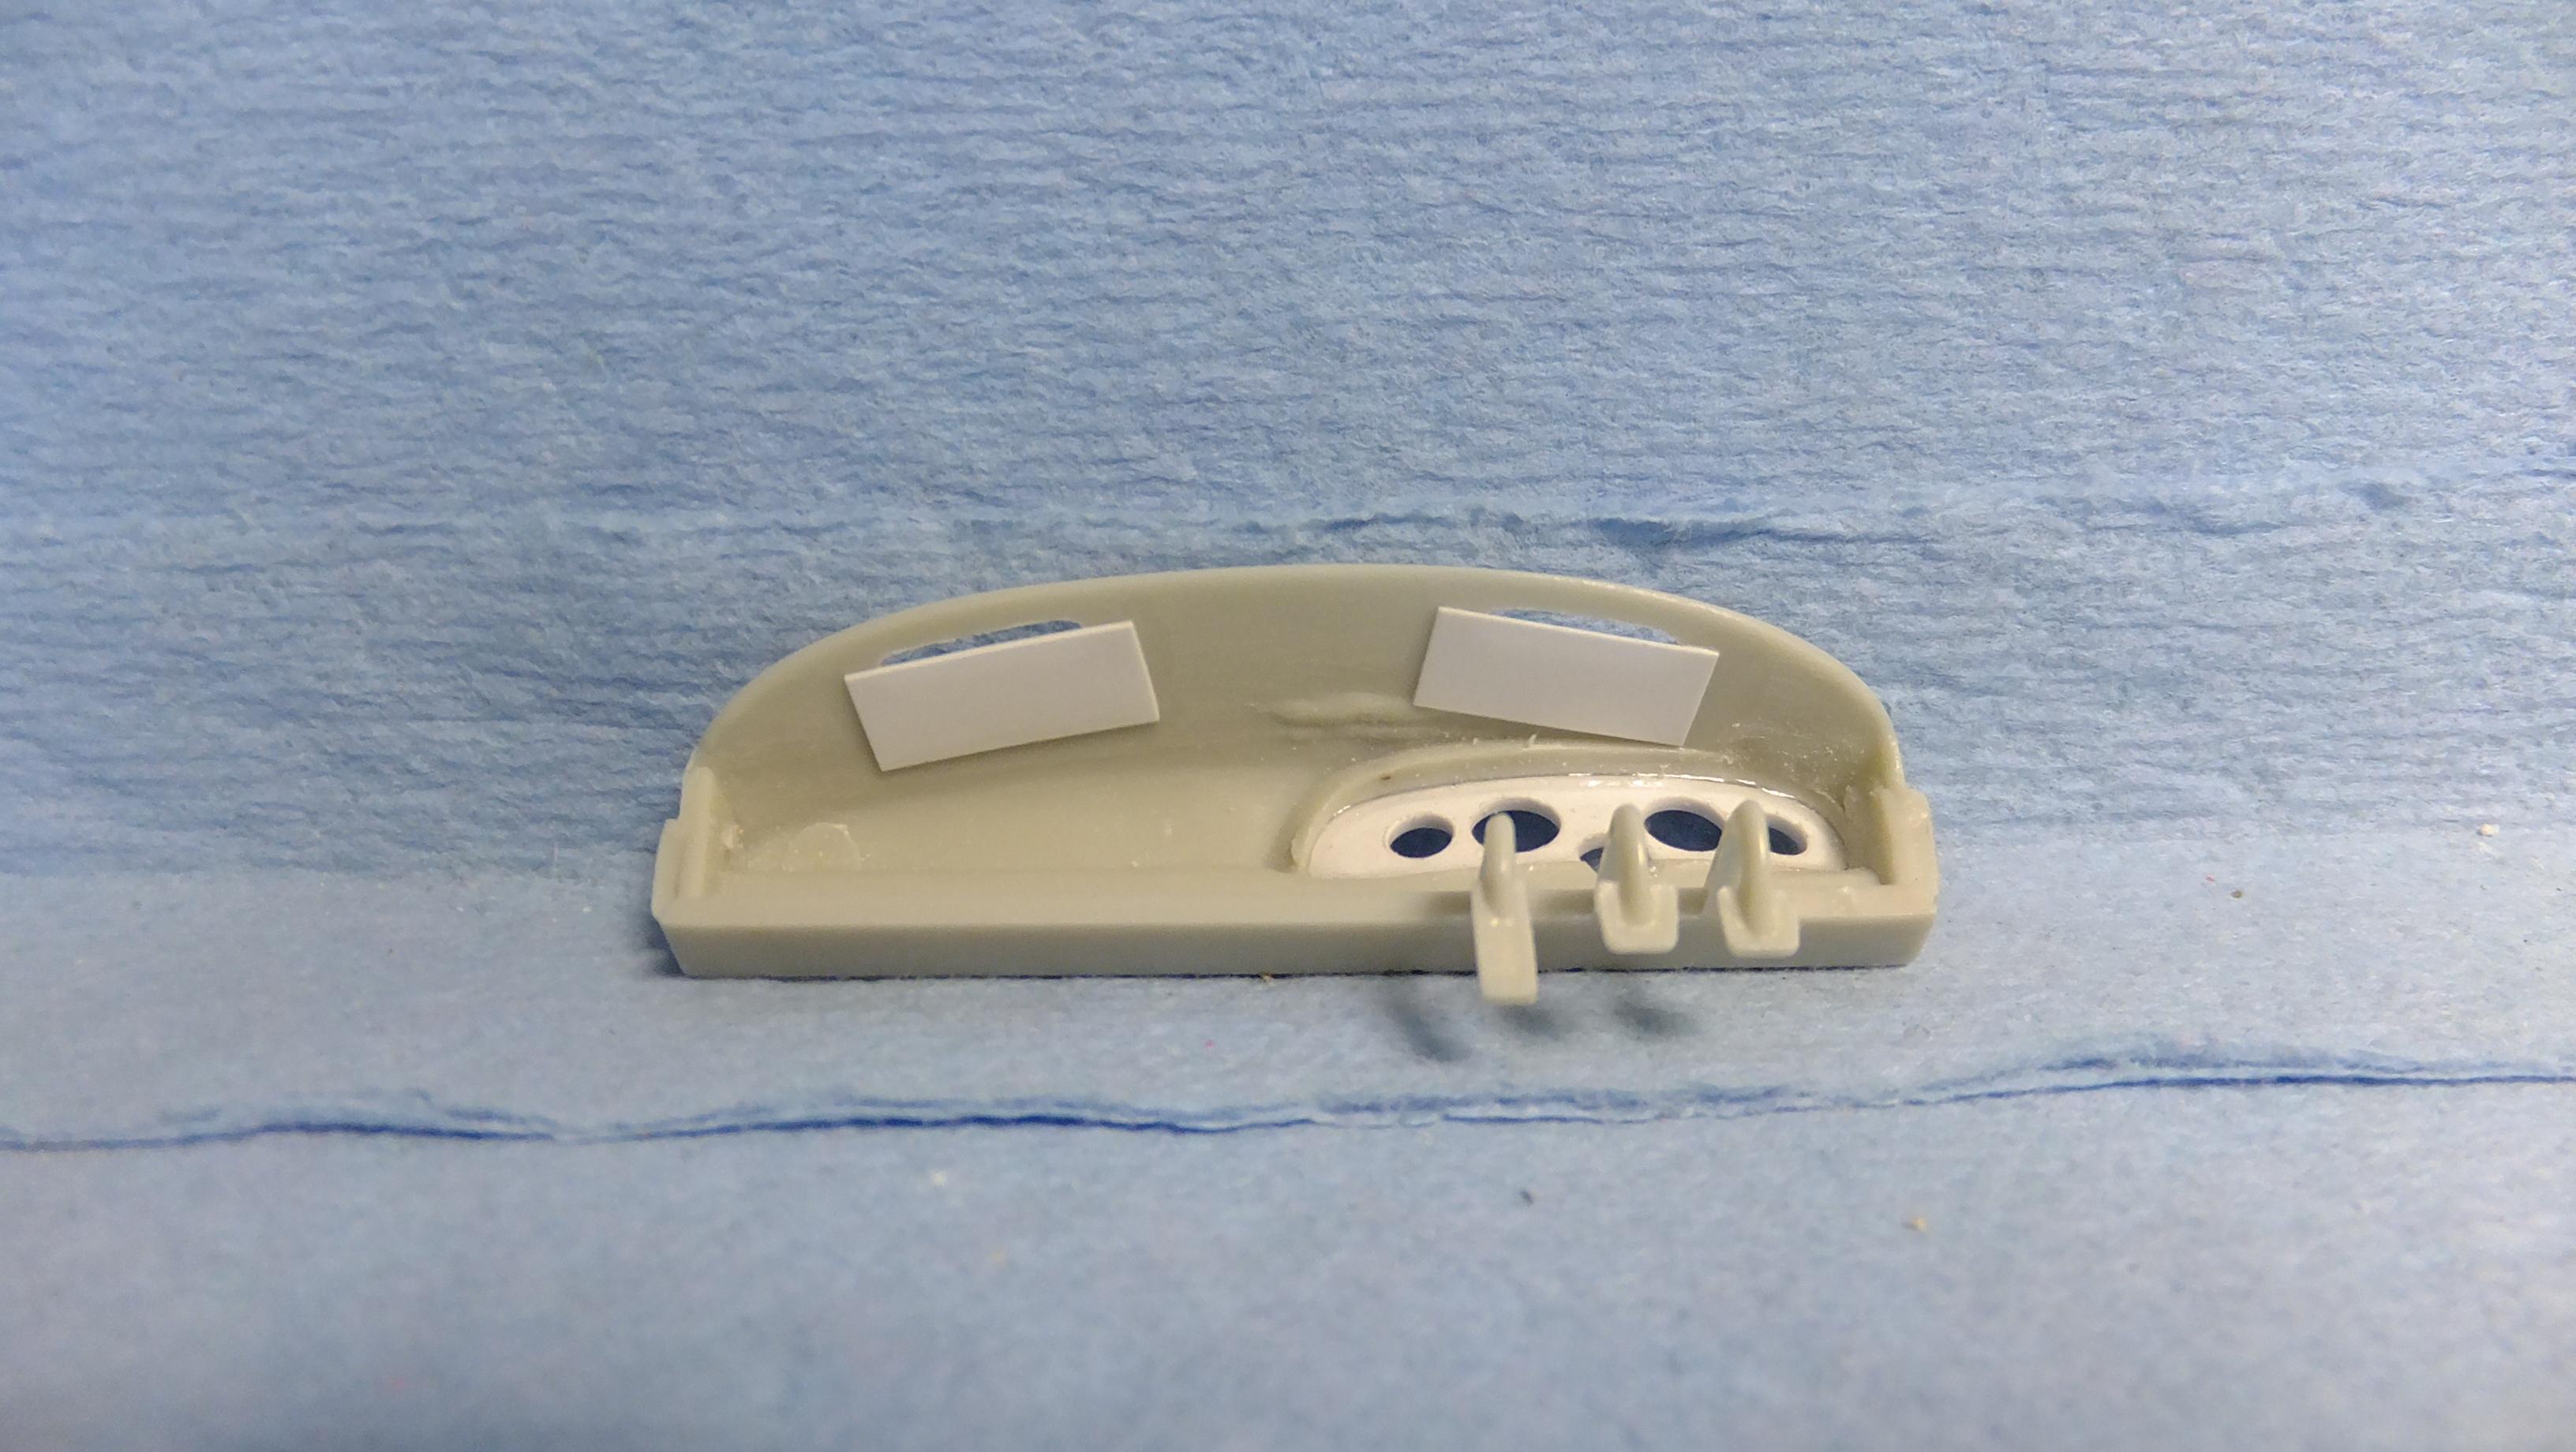
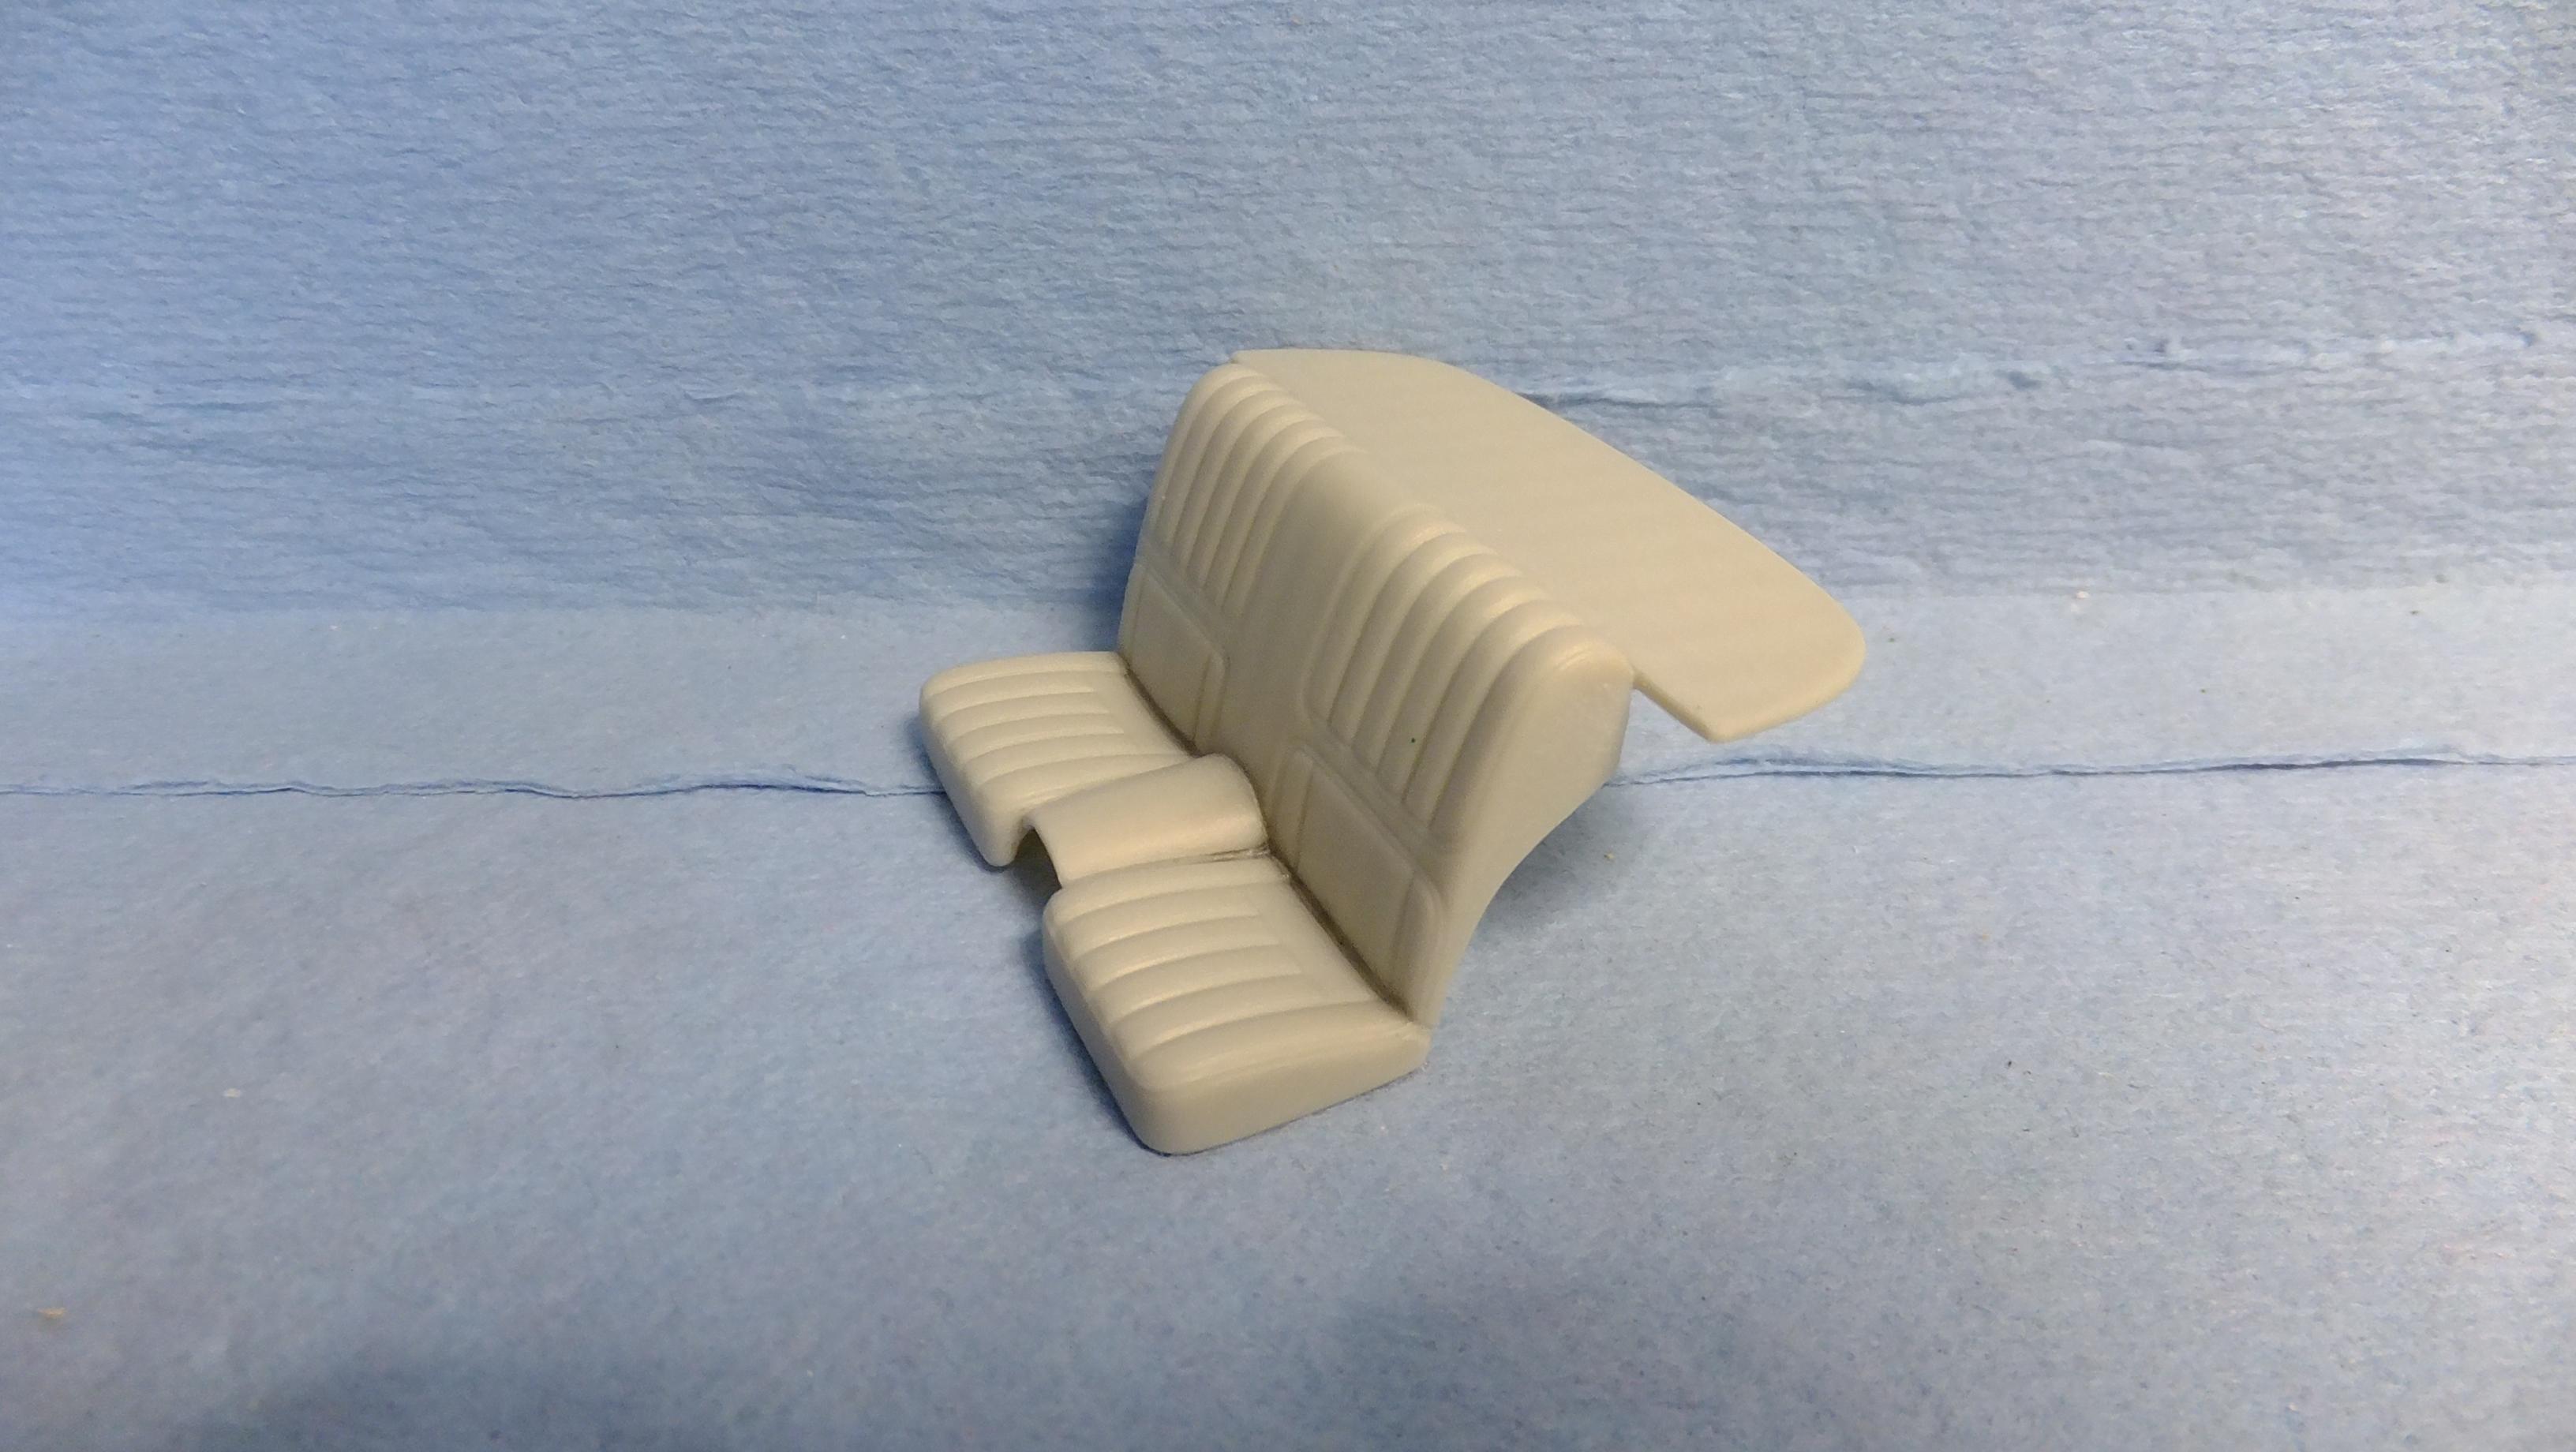
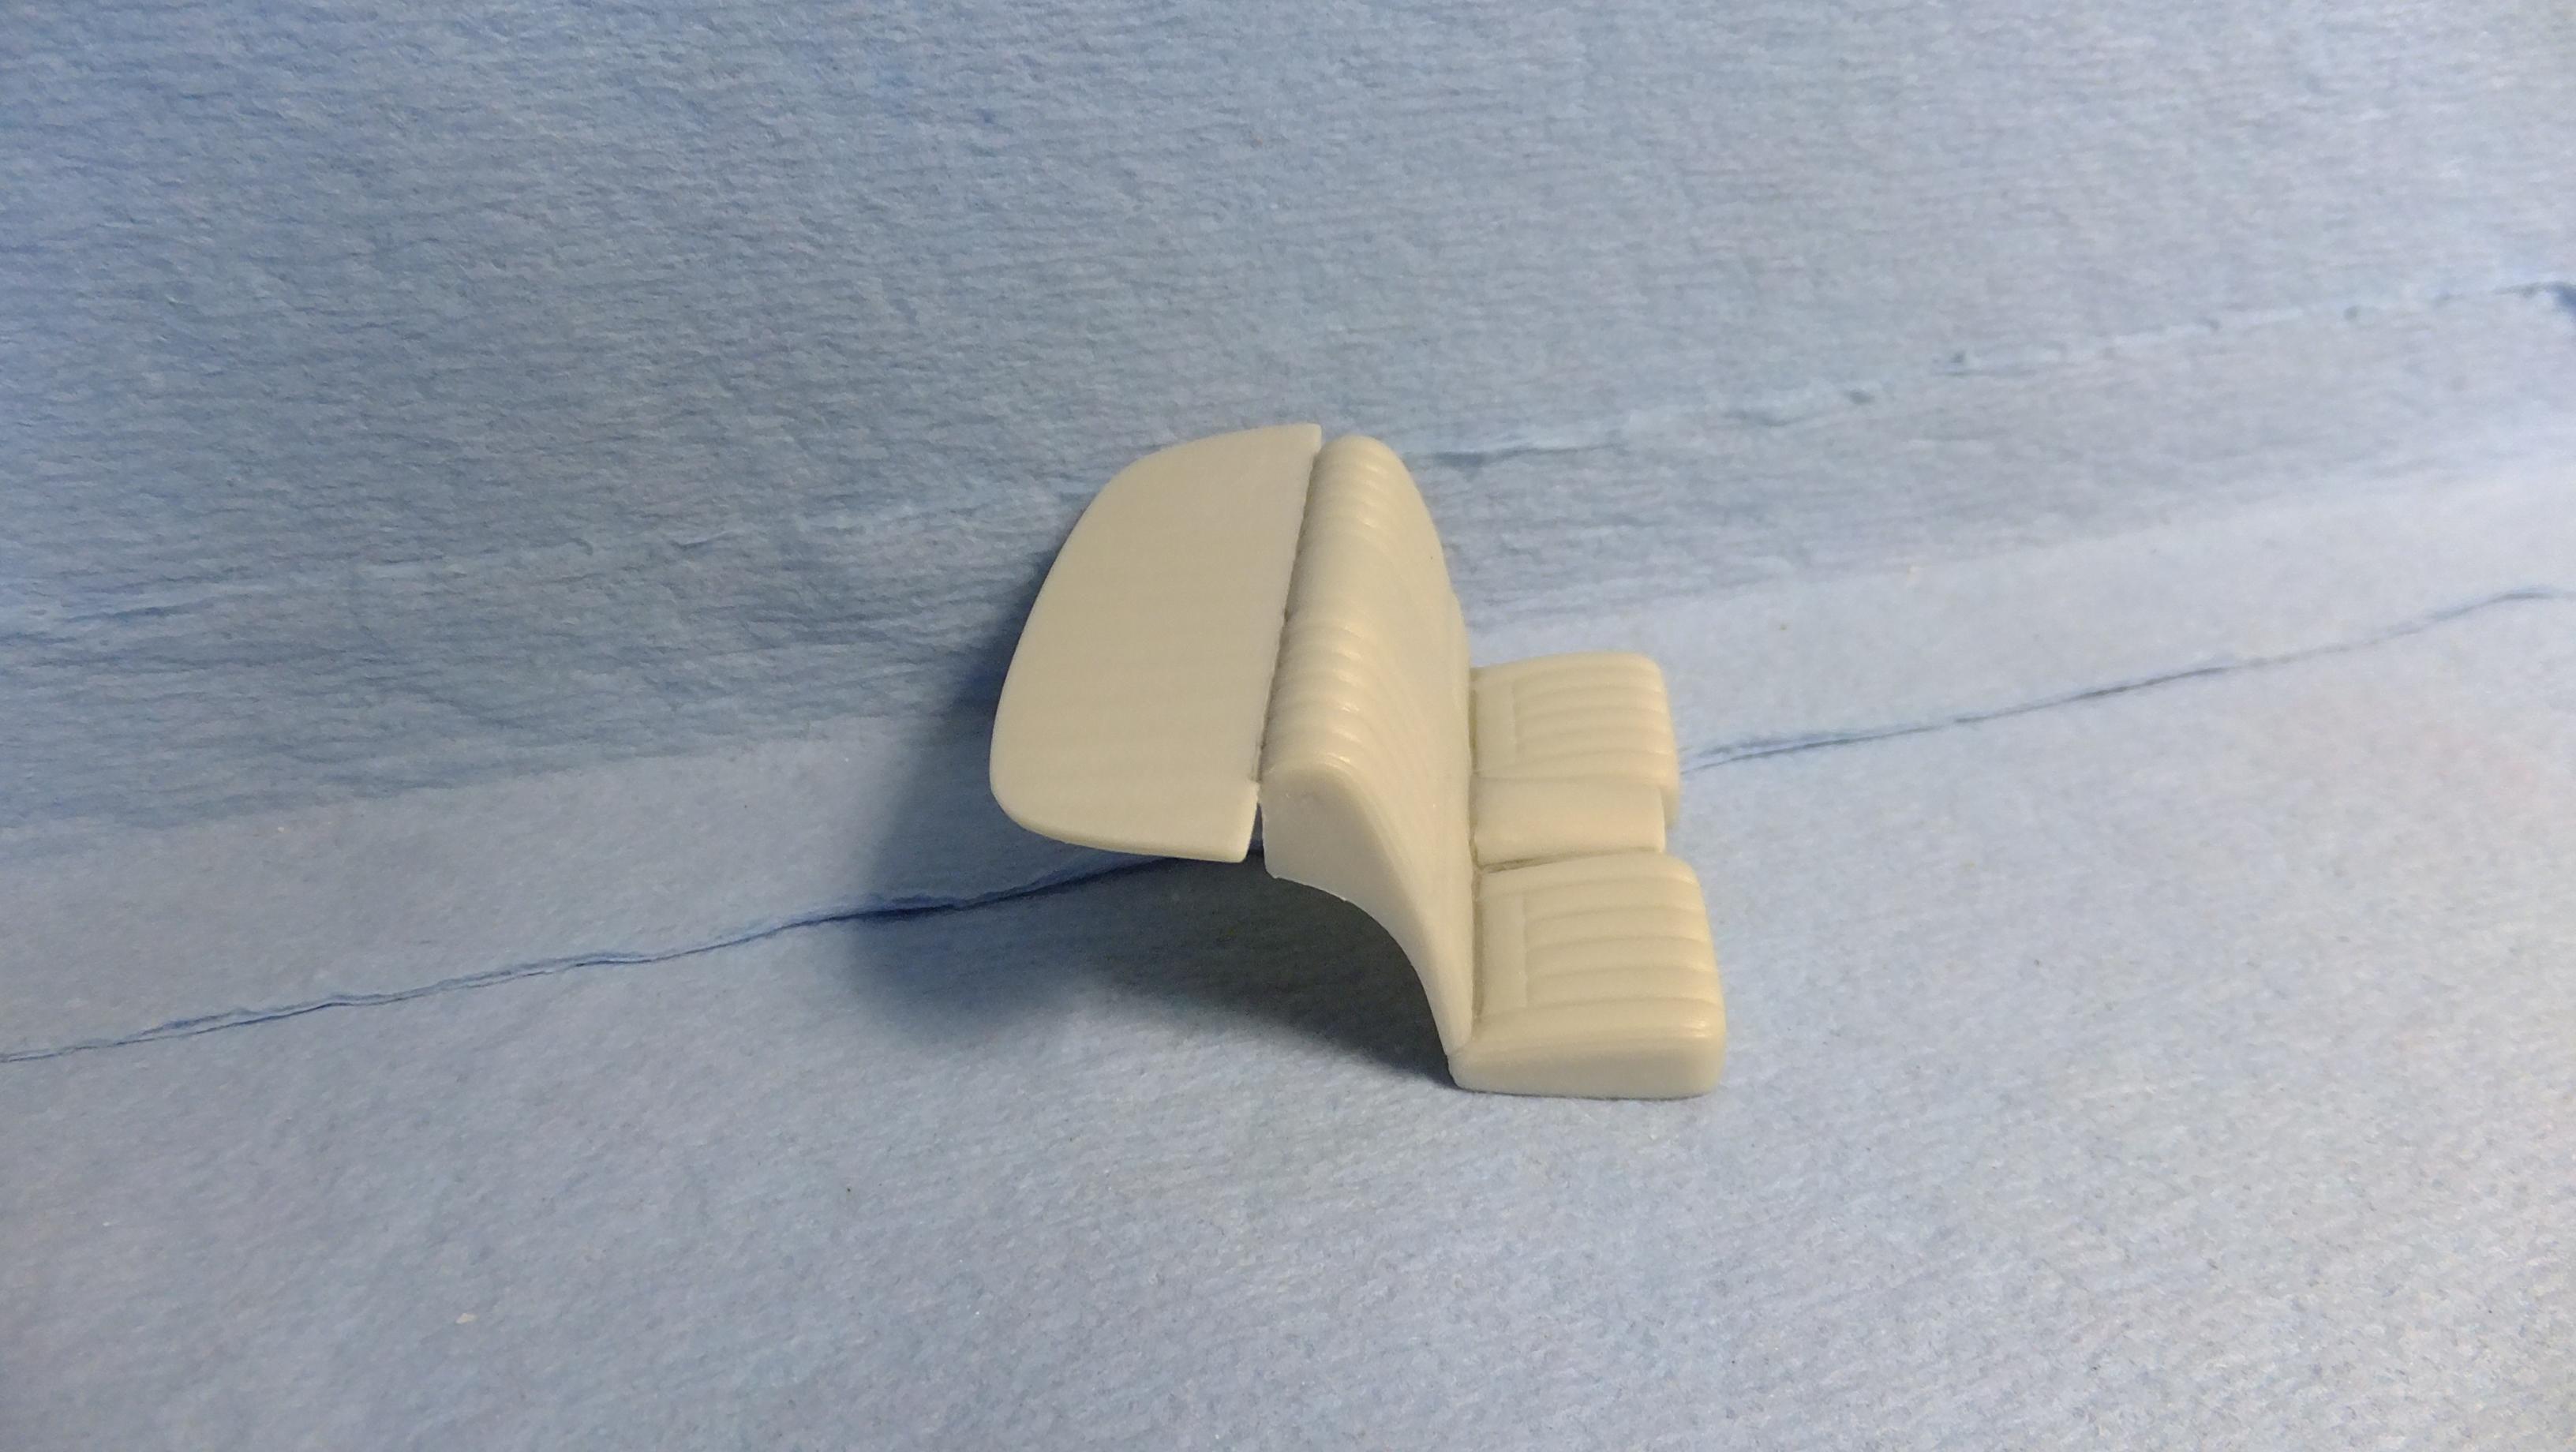
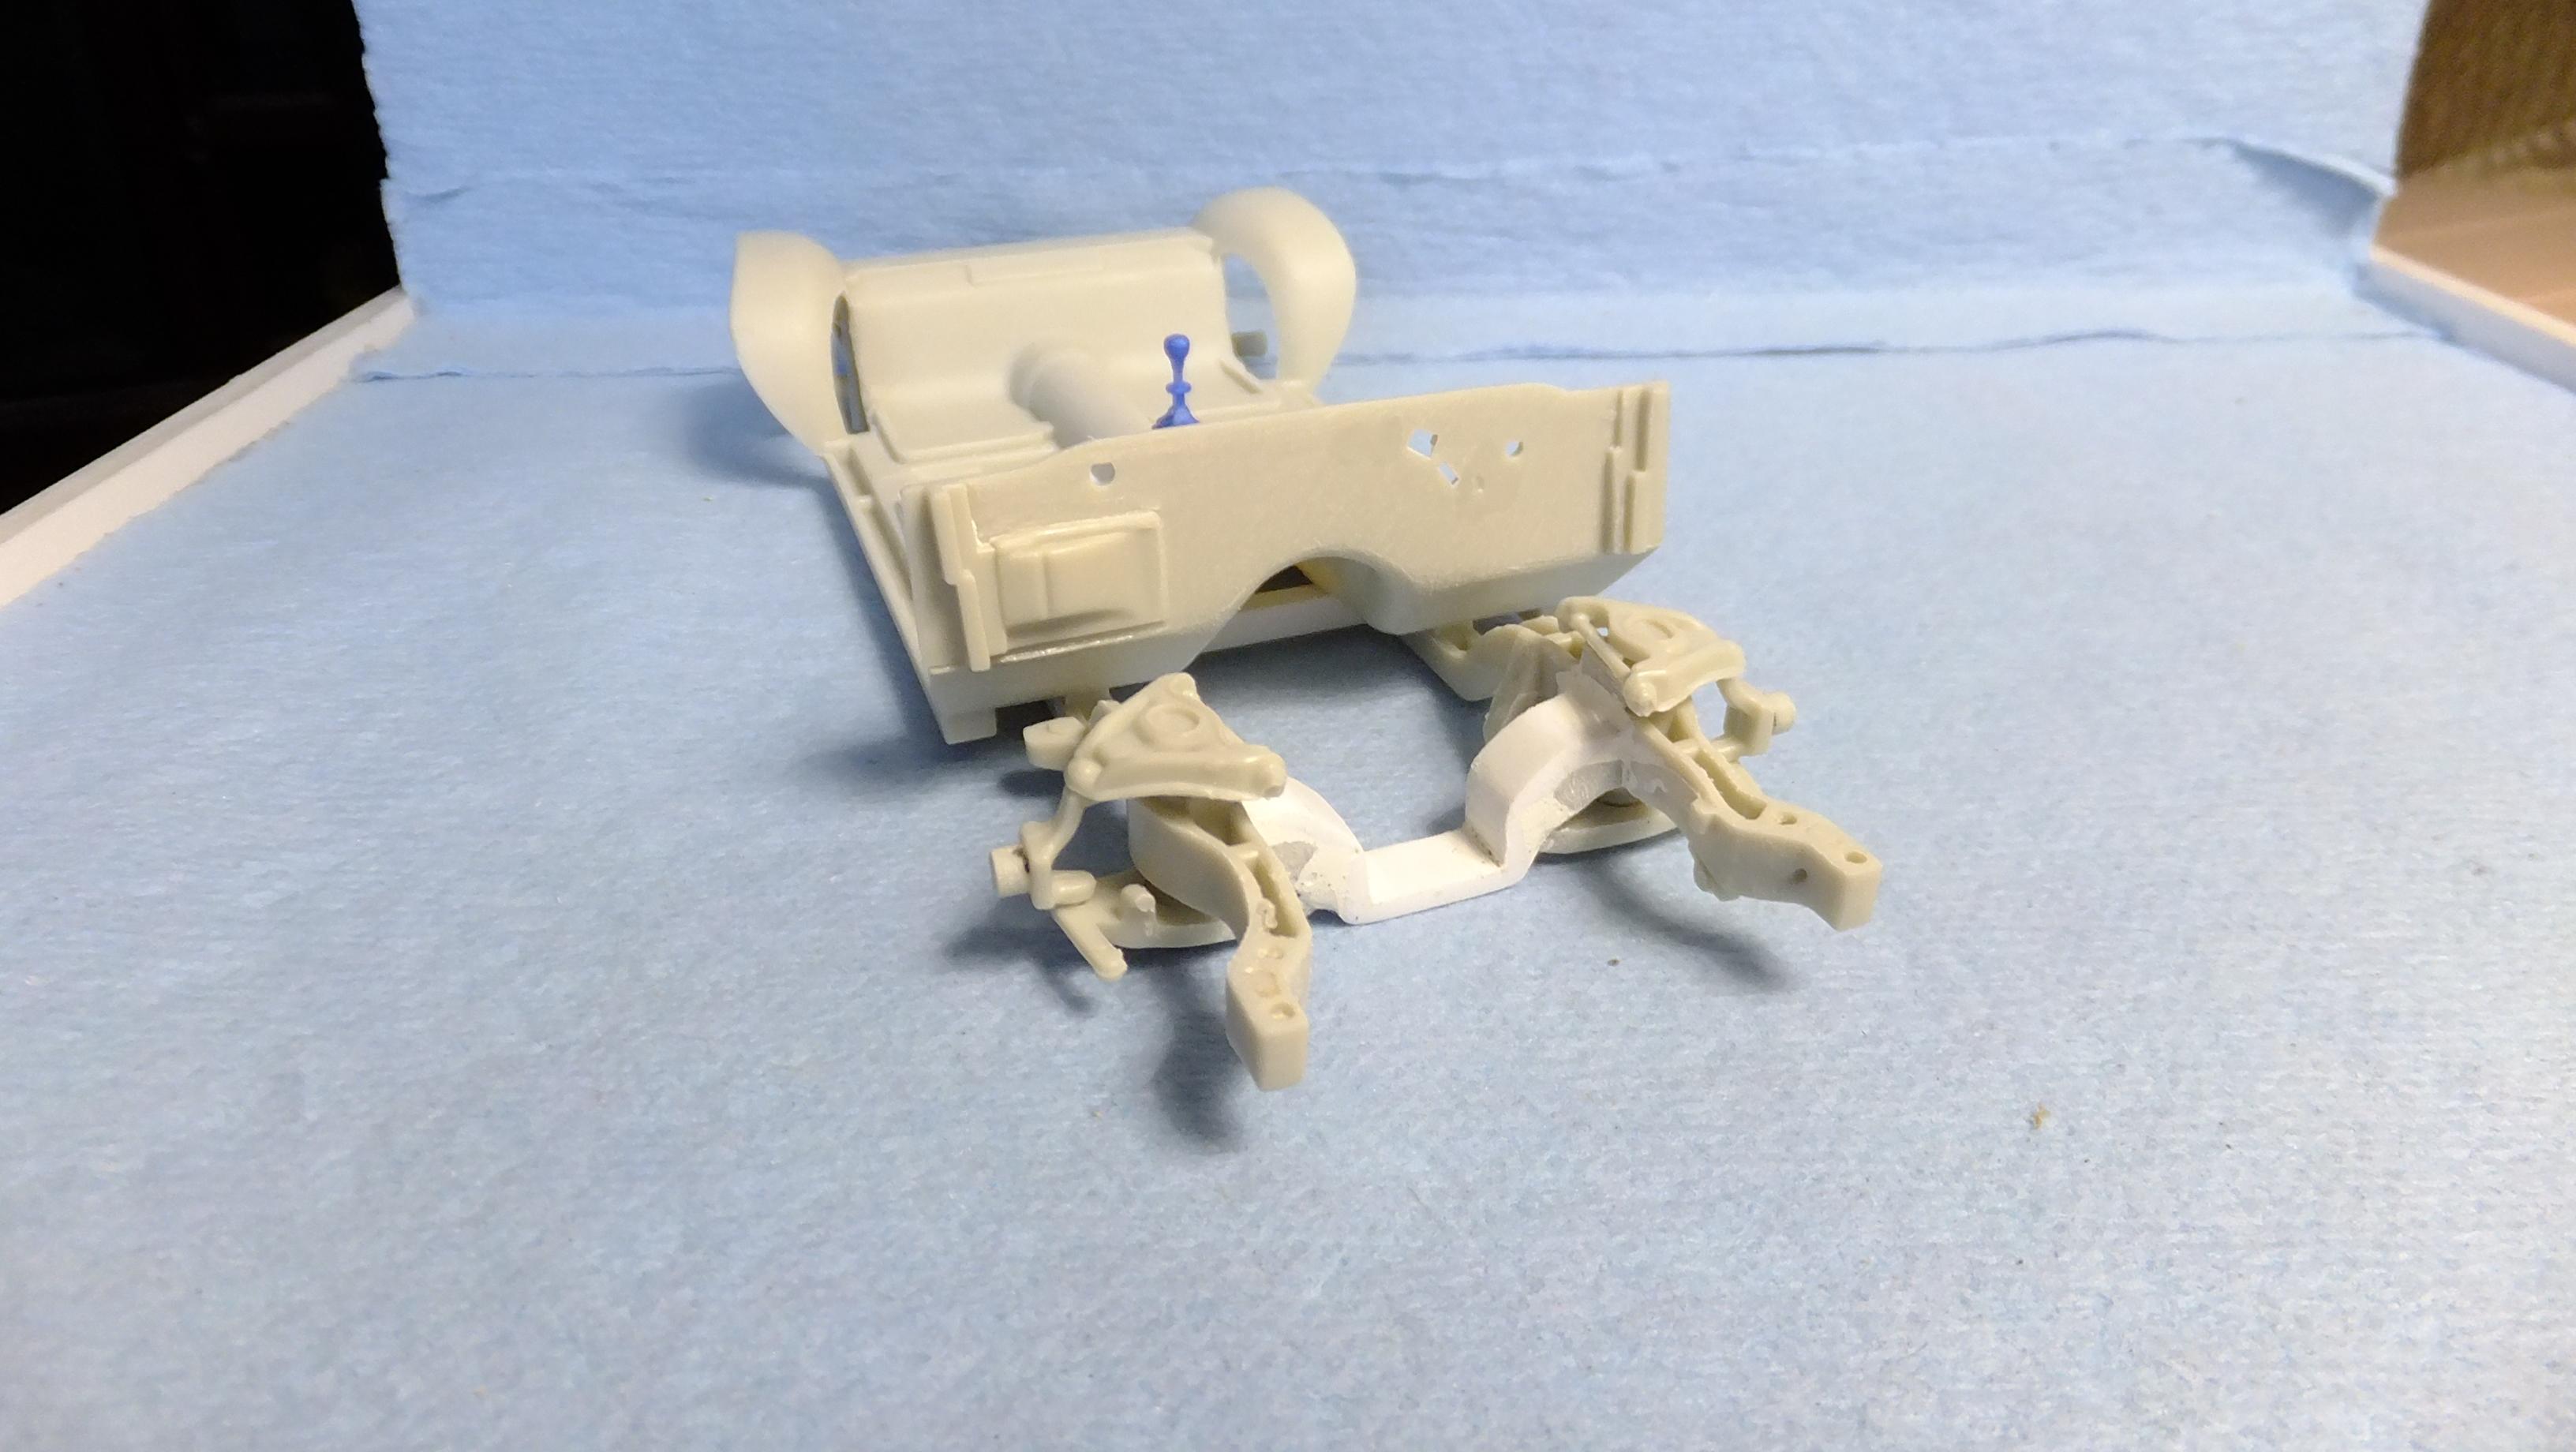
Heres another interior update...its moving right along now! -Photo 1&2; Not sure why the speaker, and vents werent on the dash top, but they needed them...here are the vents...the speaker is on its way. -Photo 3; Styrene rod column...Fujimi Ferrari 288 GTO steering wheel, and a turn signal stalk that i had laying around. -Photo 4; Its gonna do the job... -Photo 5; Its hard to tell i guess, but i scribed the door seams deeper. -Photo 6-10; Scribing the seats to help convey separate cushions, and to give a more realistic look, really does work well! -Photo 11; The putty for the shifter base was all cured, so i glued down the shifter that i sourced from a Tamiya Subaru rally car. The whole interior is gonna be black anyway, and as much pre-assembly i can do, will make for fewer bits, and easier painting. -Photo 12; The engine cradle is all sanded, and ready to go...

-
Thanks, Mattias!!, it does make a noticeable difference...
-
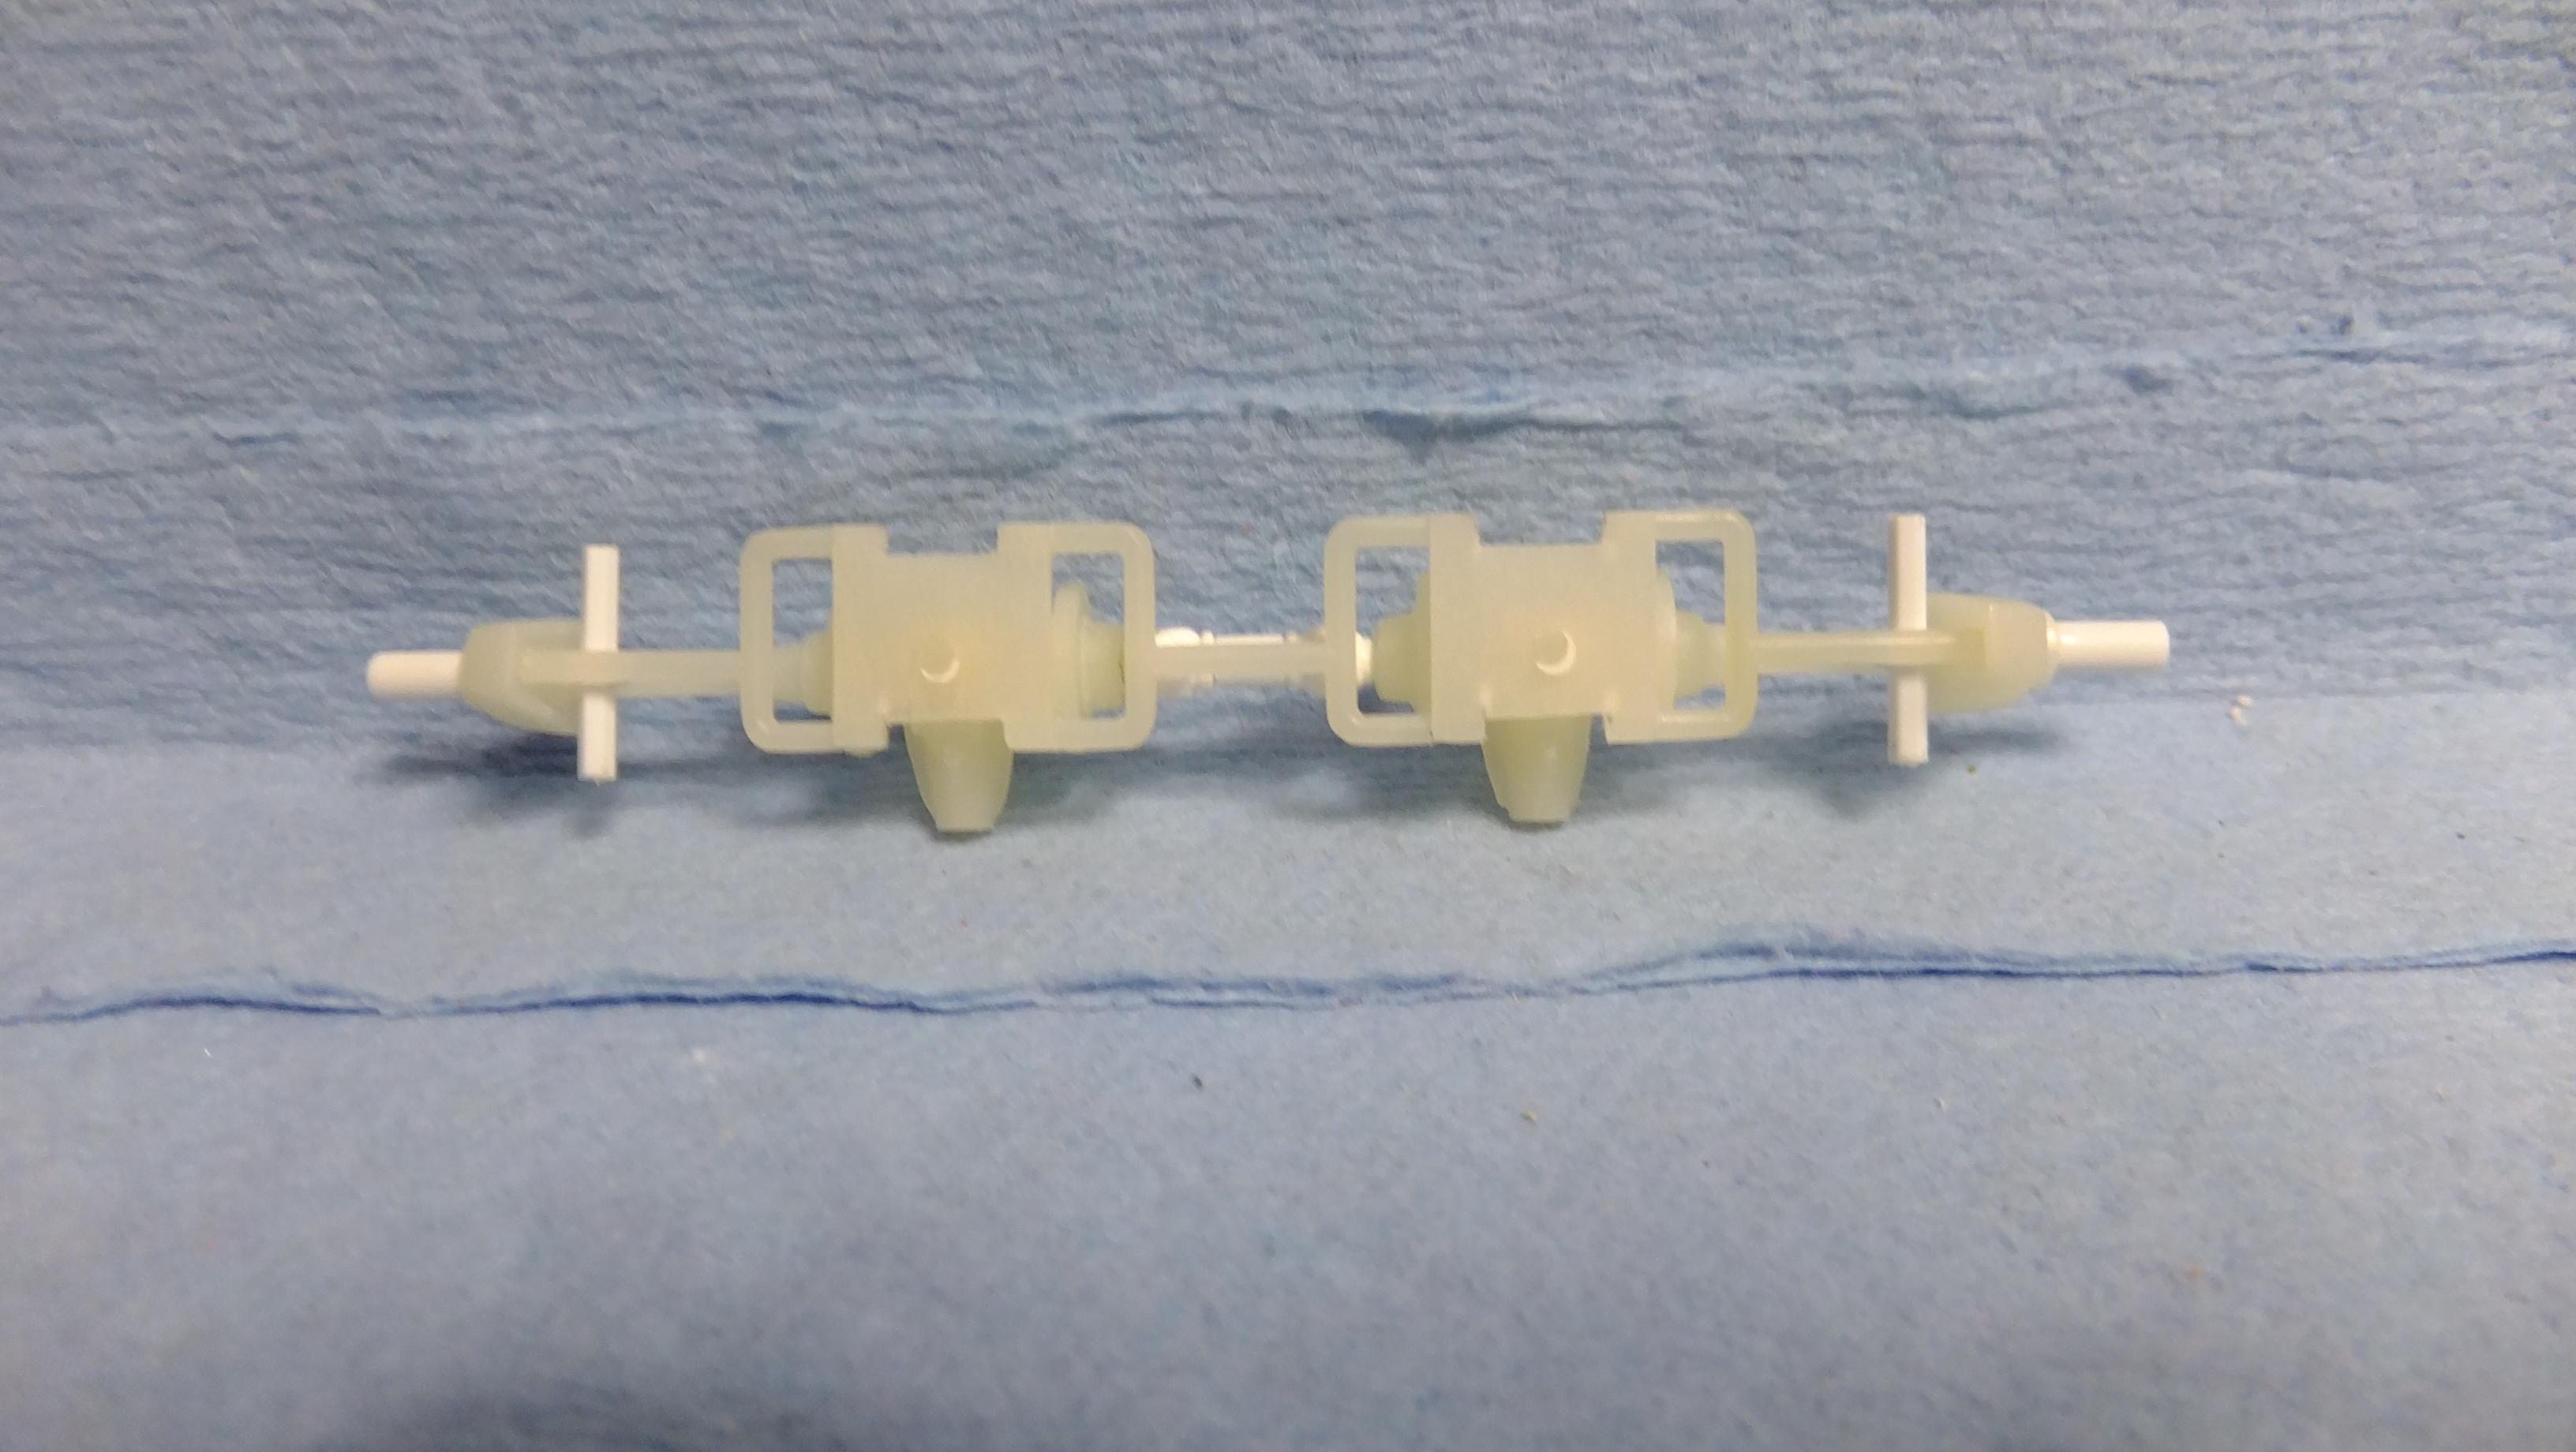
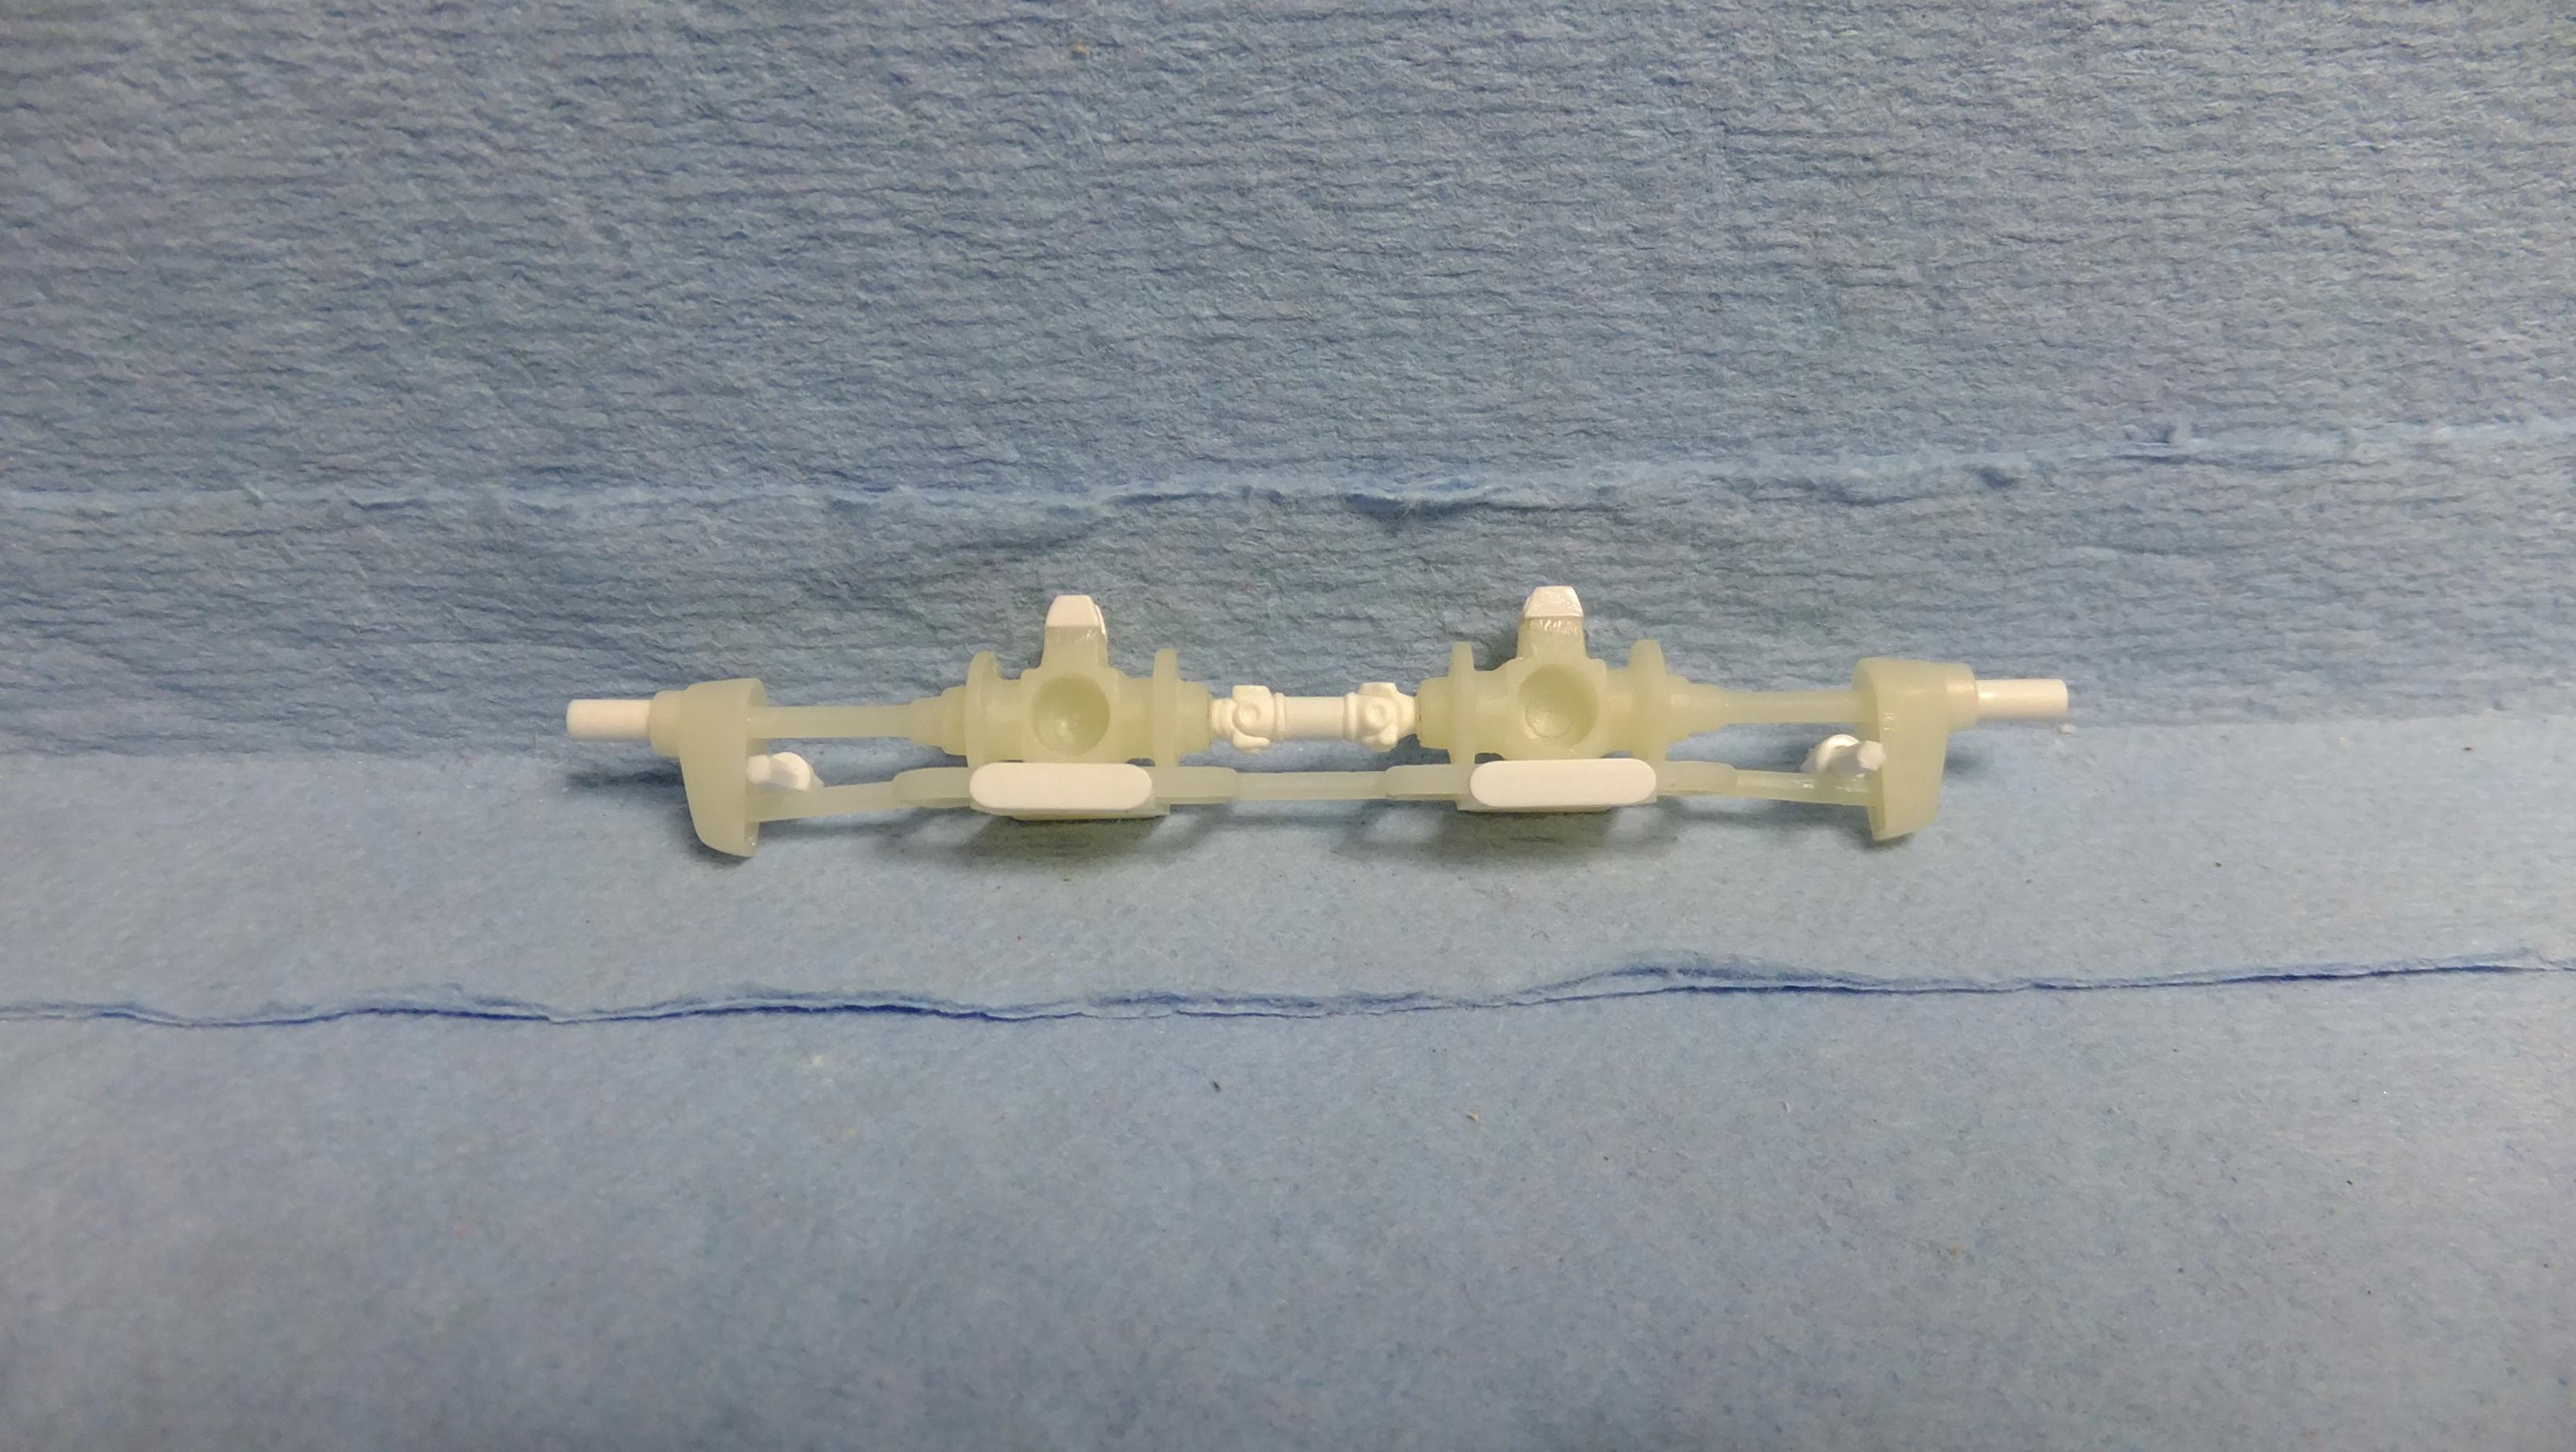
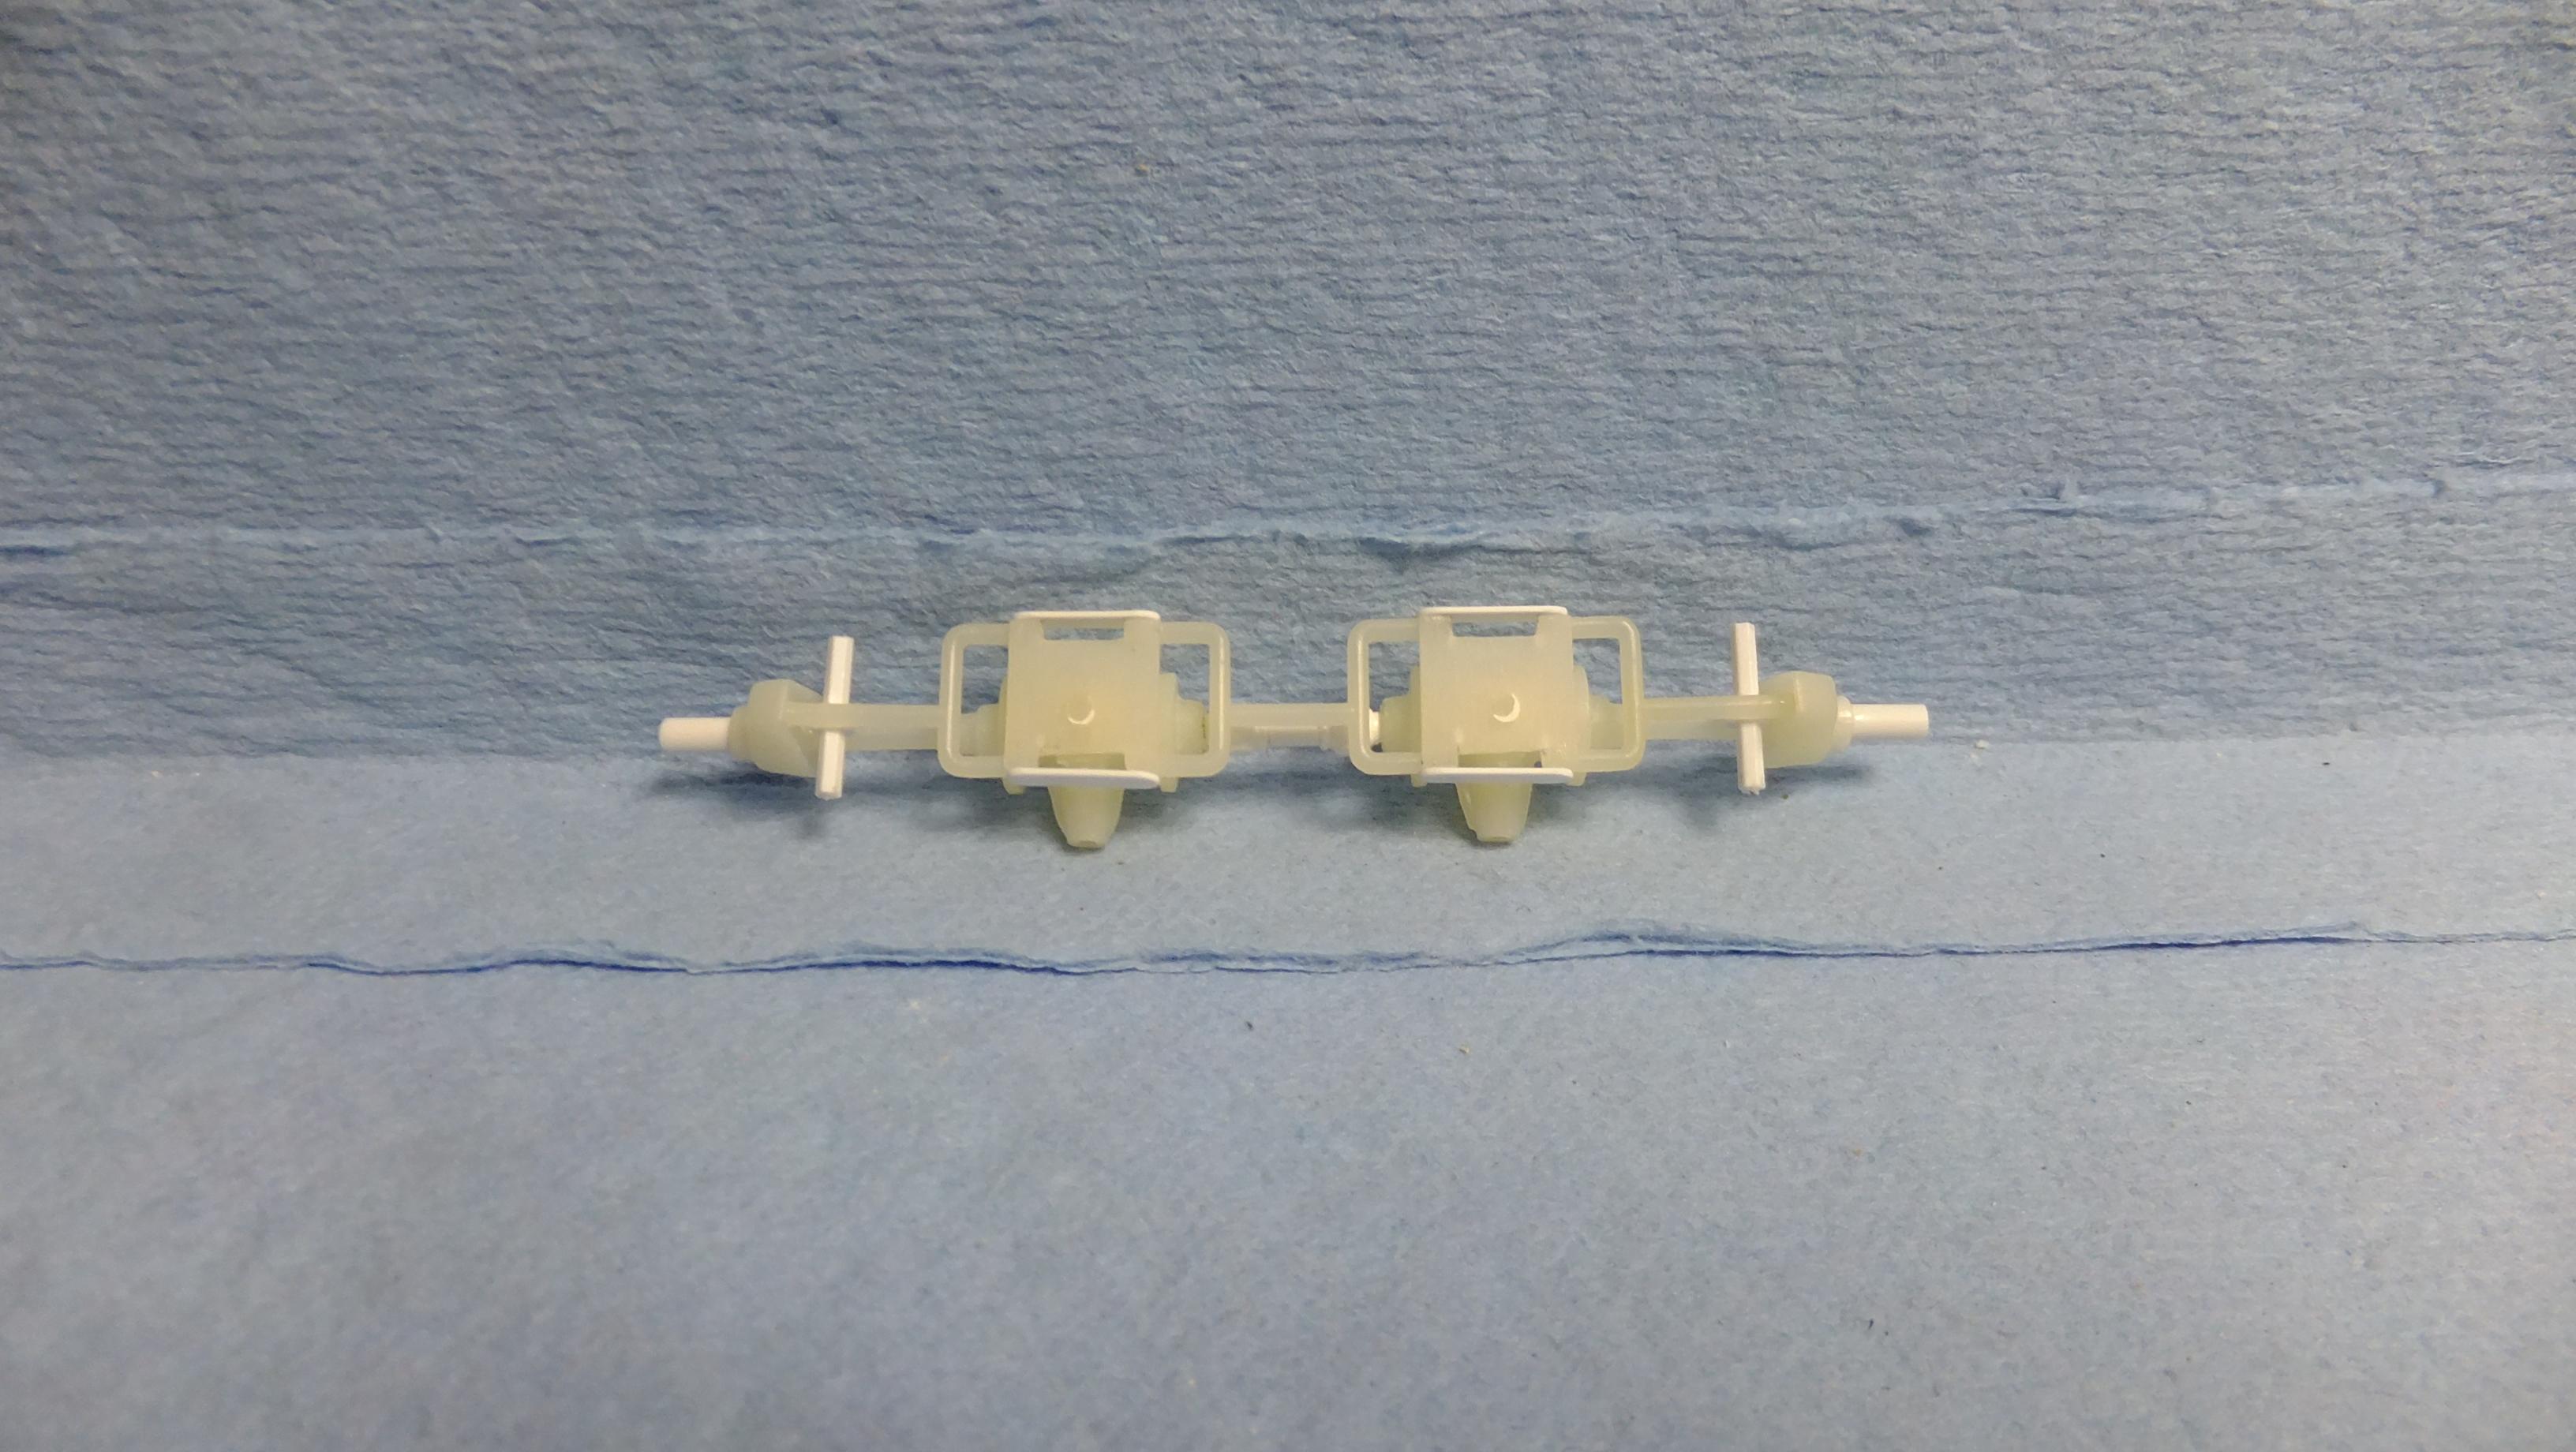
Hey, everyone!, heres a bit more i got done yesterday; -Photo 1; The rear half of the framework still didnt look right to me, so i decided it needed more structural strength, so i added these two side supports...now i'm happy. -Photo 2; ...speaking of "lacking", the interior still was as well, so i added piping to the tops of the door cards, as well as behind the headrests. You can also see one of my modified driveshafts, which i cut one of the pins off in order to make instillation easier. You can also see one of the front spindle assemblies, with vented disc breaks. You may have noticed that the other one is glued on , but why not this one?, i already found the ride height i wanted, so to make things easier, i glued one down. I left the other one adjustable so that i can make sure all four tyres touch when finished....its the beauty of my Sliding Spindle -Waaaay easier to get the perfect ride height, and/or eliminate wonky tyre contact. -Photo 3; I didnt like the spinners that came with these wheels in the Accurate Miniatures kit, so i decided to make my own knock-off nuts from super thin sheet styrene, and drilled out hex rod stock. -Photo 4; This is the look i was going for....next stop; the paint booth!
-
Much appreciated, Jim!!....should have a decent update later today!
-
Thanks, Bud!!...glad you're liking them!!!
-
Thanks, Ray!!!!, its a fun build!
-
Nice klean building!!!, and i really like the slight weathering on the carbs!!!
-
These are neat cars, and you are doing them justice!!.....GREAT start!!!
-
Looking GOOD!!!...love the interior kolors you chose, and making those straps was a great idea that adds extra visual interest....Well done!!!
-

1968 RKE/JRT SCCA Trans Am Javelin
Dann Tier replied to swede70's topic in WIP: Other Racing: Road Racing, Land Speed Racers
Loving it!!....keep up the great work!!! -
Advans have been done so many times, i personally think the Work Genosis wheels look way more visually interesting, and COOL!!!!
-
What a magic show, Bud!!!.....its so much fun watching your ideas come to life!!!
-
You are getting there, Bud!!!!....primer looks great!....your up-coming SB projects look fun!, and i too take quite a bit of liberty doing my own thing, lol
-
Thanks, Scott!!
-
....every time i think i'm ready to paint, i find something else to add to this bugger, lol......it IS ready now though!!...dont know why, but the photos got all mixed up, but you can still see how i modified it.
-
Heres another bit of update... -Photo 1; Since i had to remove the middle of the firewall to make room for the V12 tranny, there was no longer a definite contact location for the center column/tranny tunnel. There is a VERY faint raised area that shows where it should go, but after painting, it would be subject to glue smears, and off-placement....NOT willing to risk that, so i added styrene stock for the perfect job. -Photo 2; Everything is fitting great!...now its time to repair that hole!!
-
Thanks, Anton!!....thanks for the photo!.....Hemi's are the BEST!!!!
-
Thanks, Bud!!, i will give it my best shot, lol
-
Thanks, Bud!!...tyres are from an AMT Viper, and the wheels are from an AMT 57? Corvette Gasser kit.