adamelvis
-
Posts
556 -
Joined
-
Last visited
Content Type
Profiles
Forums
Events
Gallery
Everything posted by adamelvis
-
This is a Nice, Sharp lookin' Deuce !! TCB, Adam
-
I built this kit. It went together nicely, except for the front & rear valance. I even corrected the notorious headlight gap in the front grille. It has a nice engine that is great for detailing ! Have Fun !
-

2020 Shelby GT500 TK--Coming Soon !!!
adamelvis replied to Jhedir6's topic in Car Aftermarket / Resin / 3D Printed
JUST PRE-ORDERED 2 KITS !! This is gonna be one of my dream builds, right up there with the Eleanor Mustang !! TCB, Adam -
Love IT !! TCB, ADam
-
WOW ! Fantastic weathering !! TCB, Adam
-
Thanks Anton. Working on the trunk hinges now.
- 196 replies
-
- 1
-

-
- eleanor
- shelby gt500
- (and 2 more)
-
1/25 Revell 1990 Ford Thunderbird Super Coupe
adamelvis replied to Cuba_13's topic in WIP: Model Cars
Great work so far on this build ! Adam -
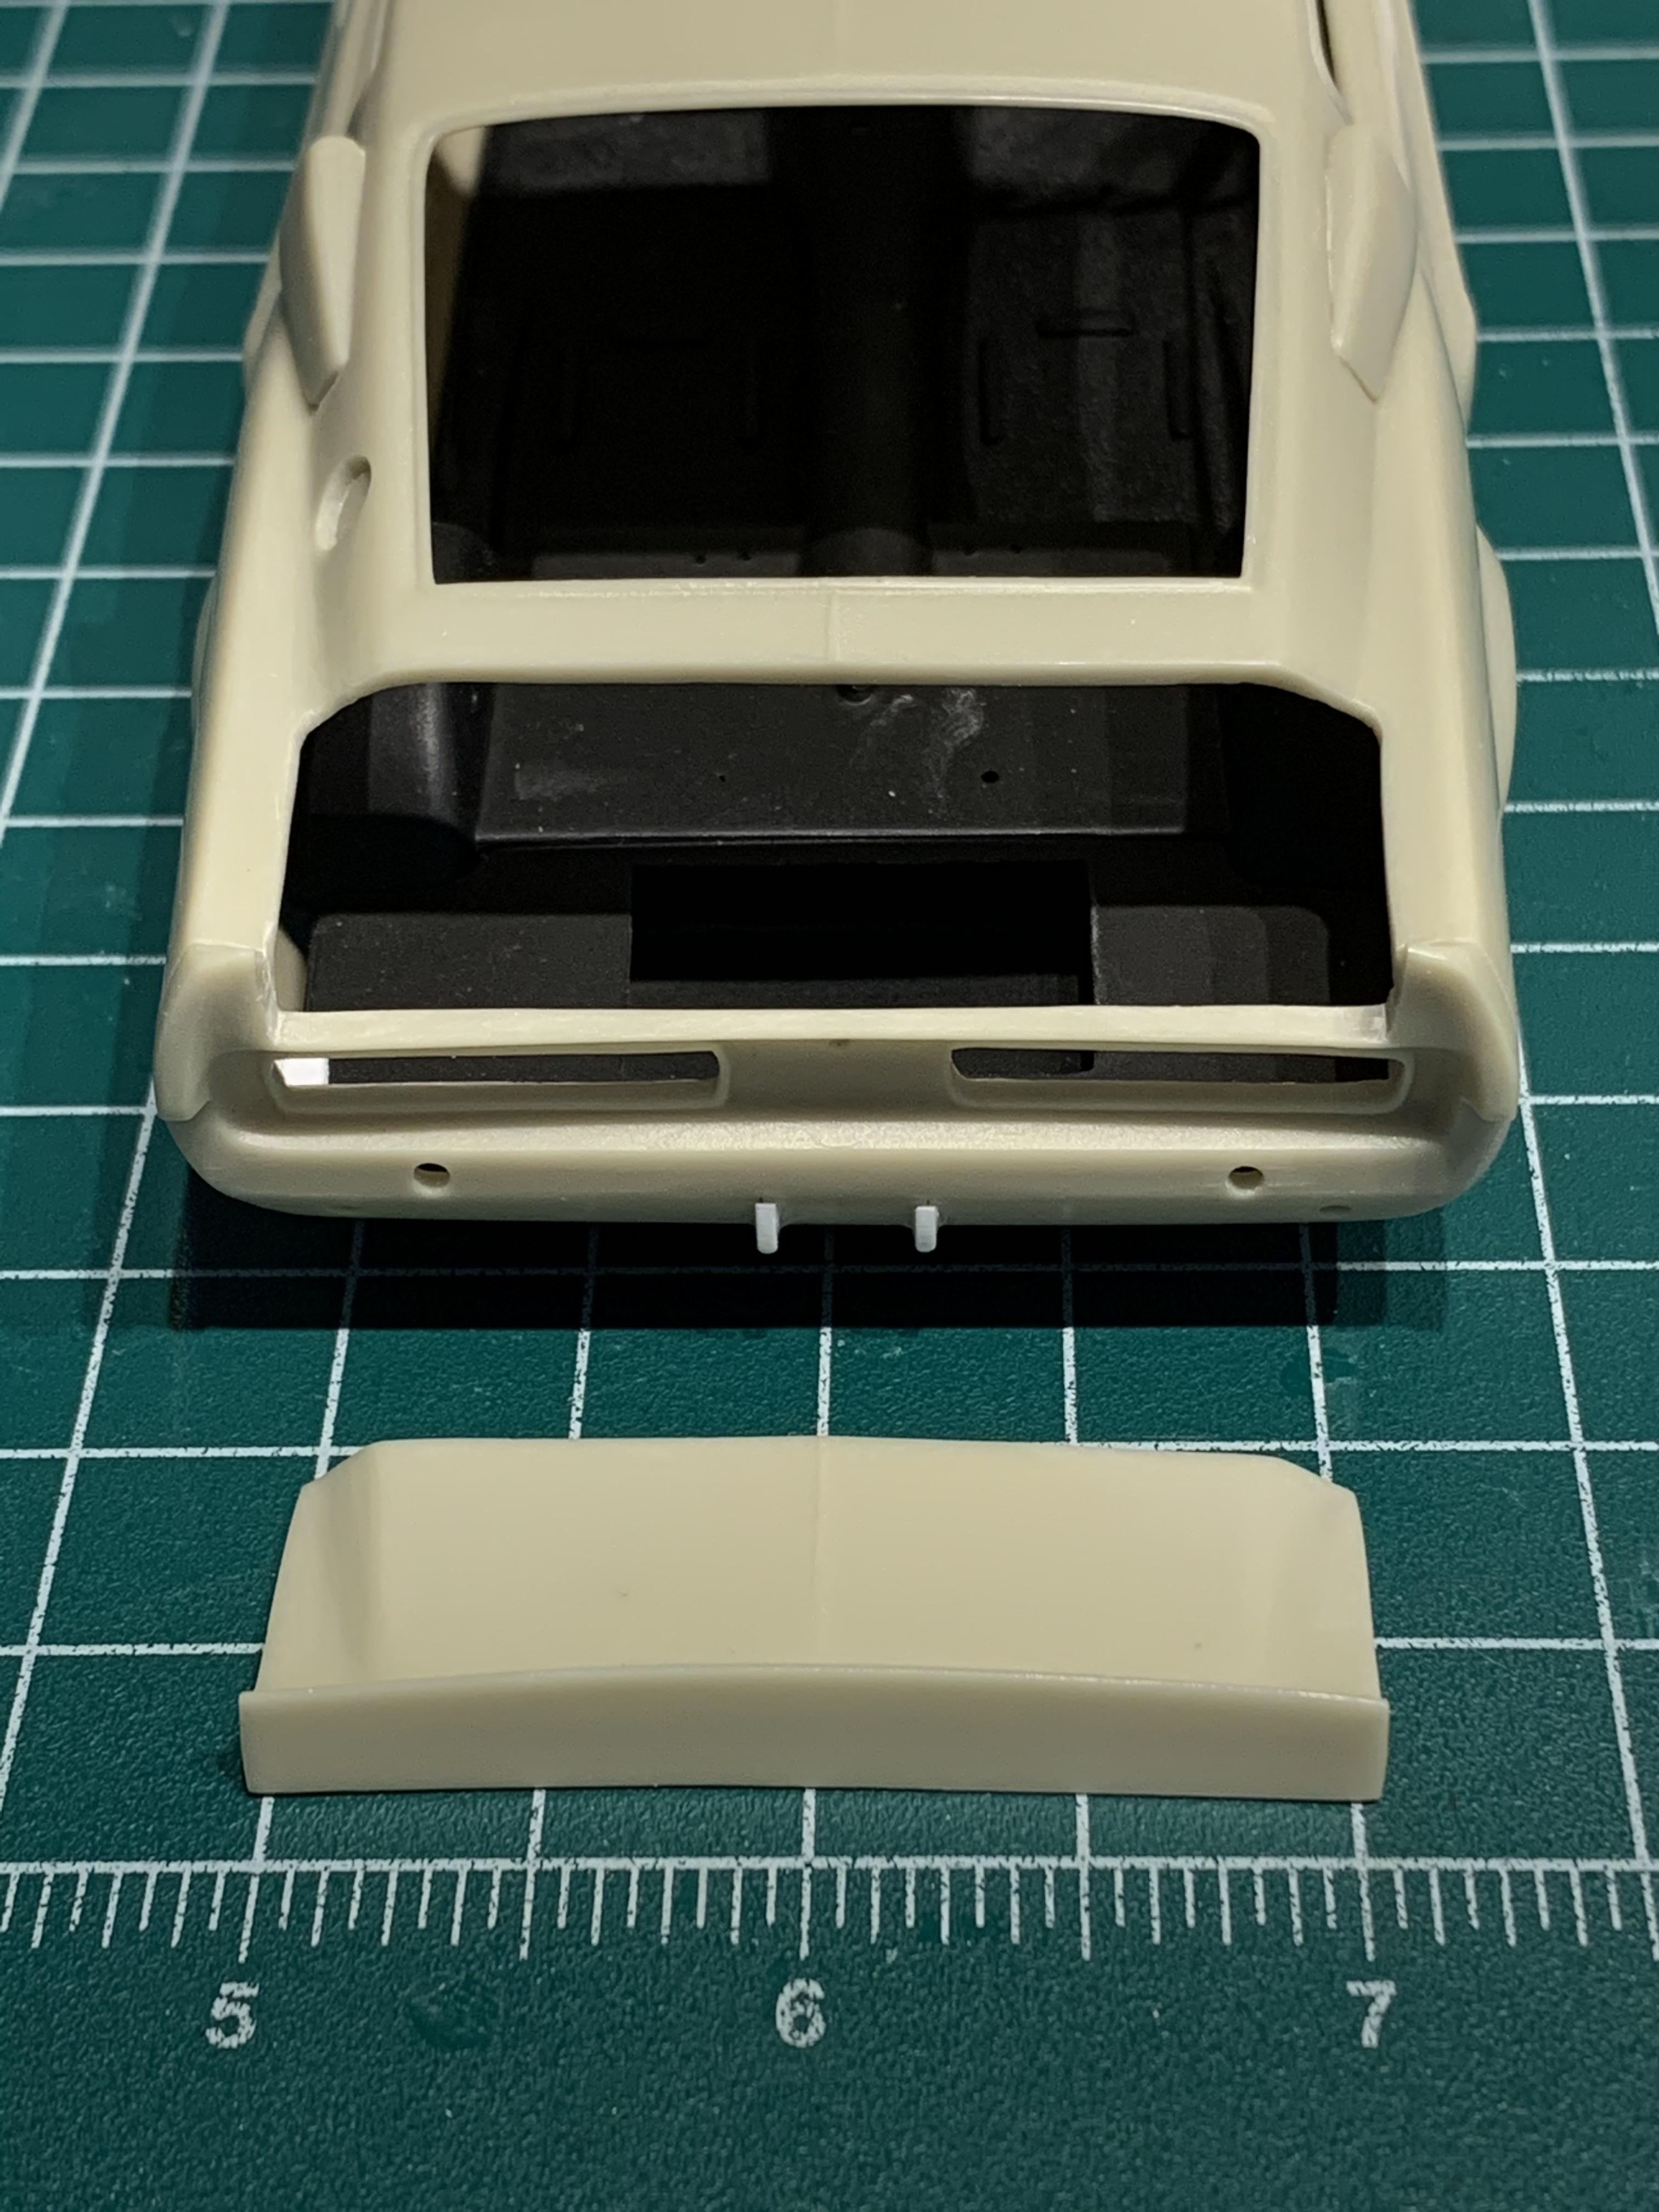
Adding some detail under the trunk lid.

- 196 replies
-
- 1
-
-
- eleanor
- shelby gt500
- (and 2 more)
-
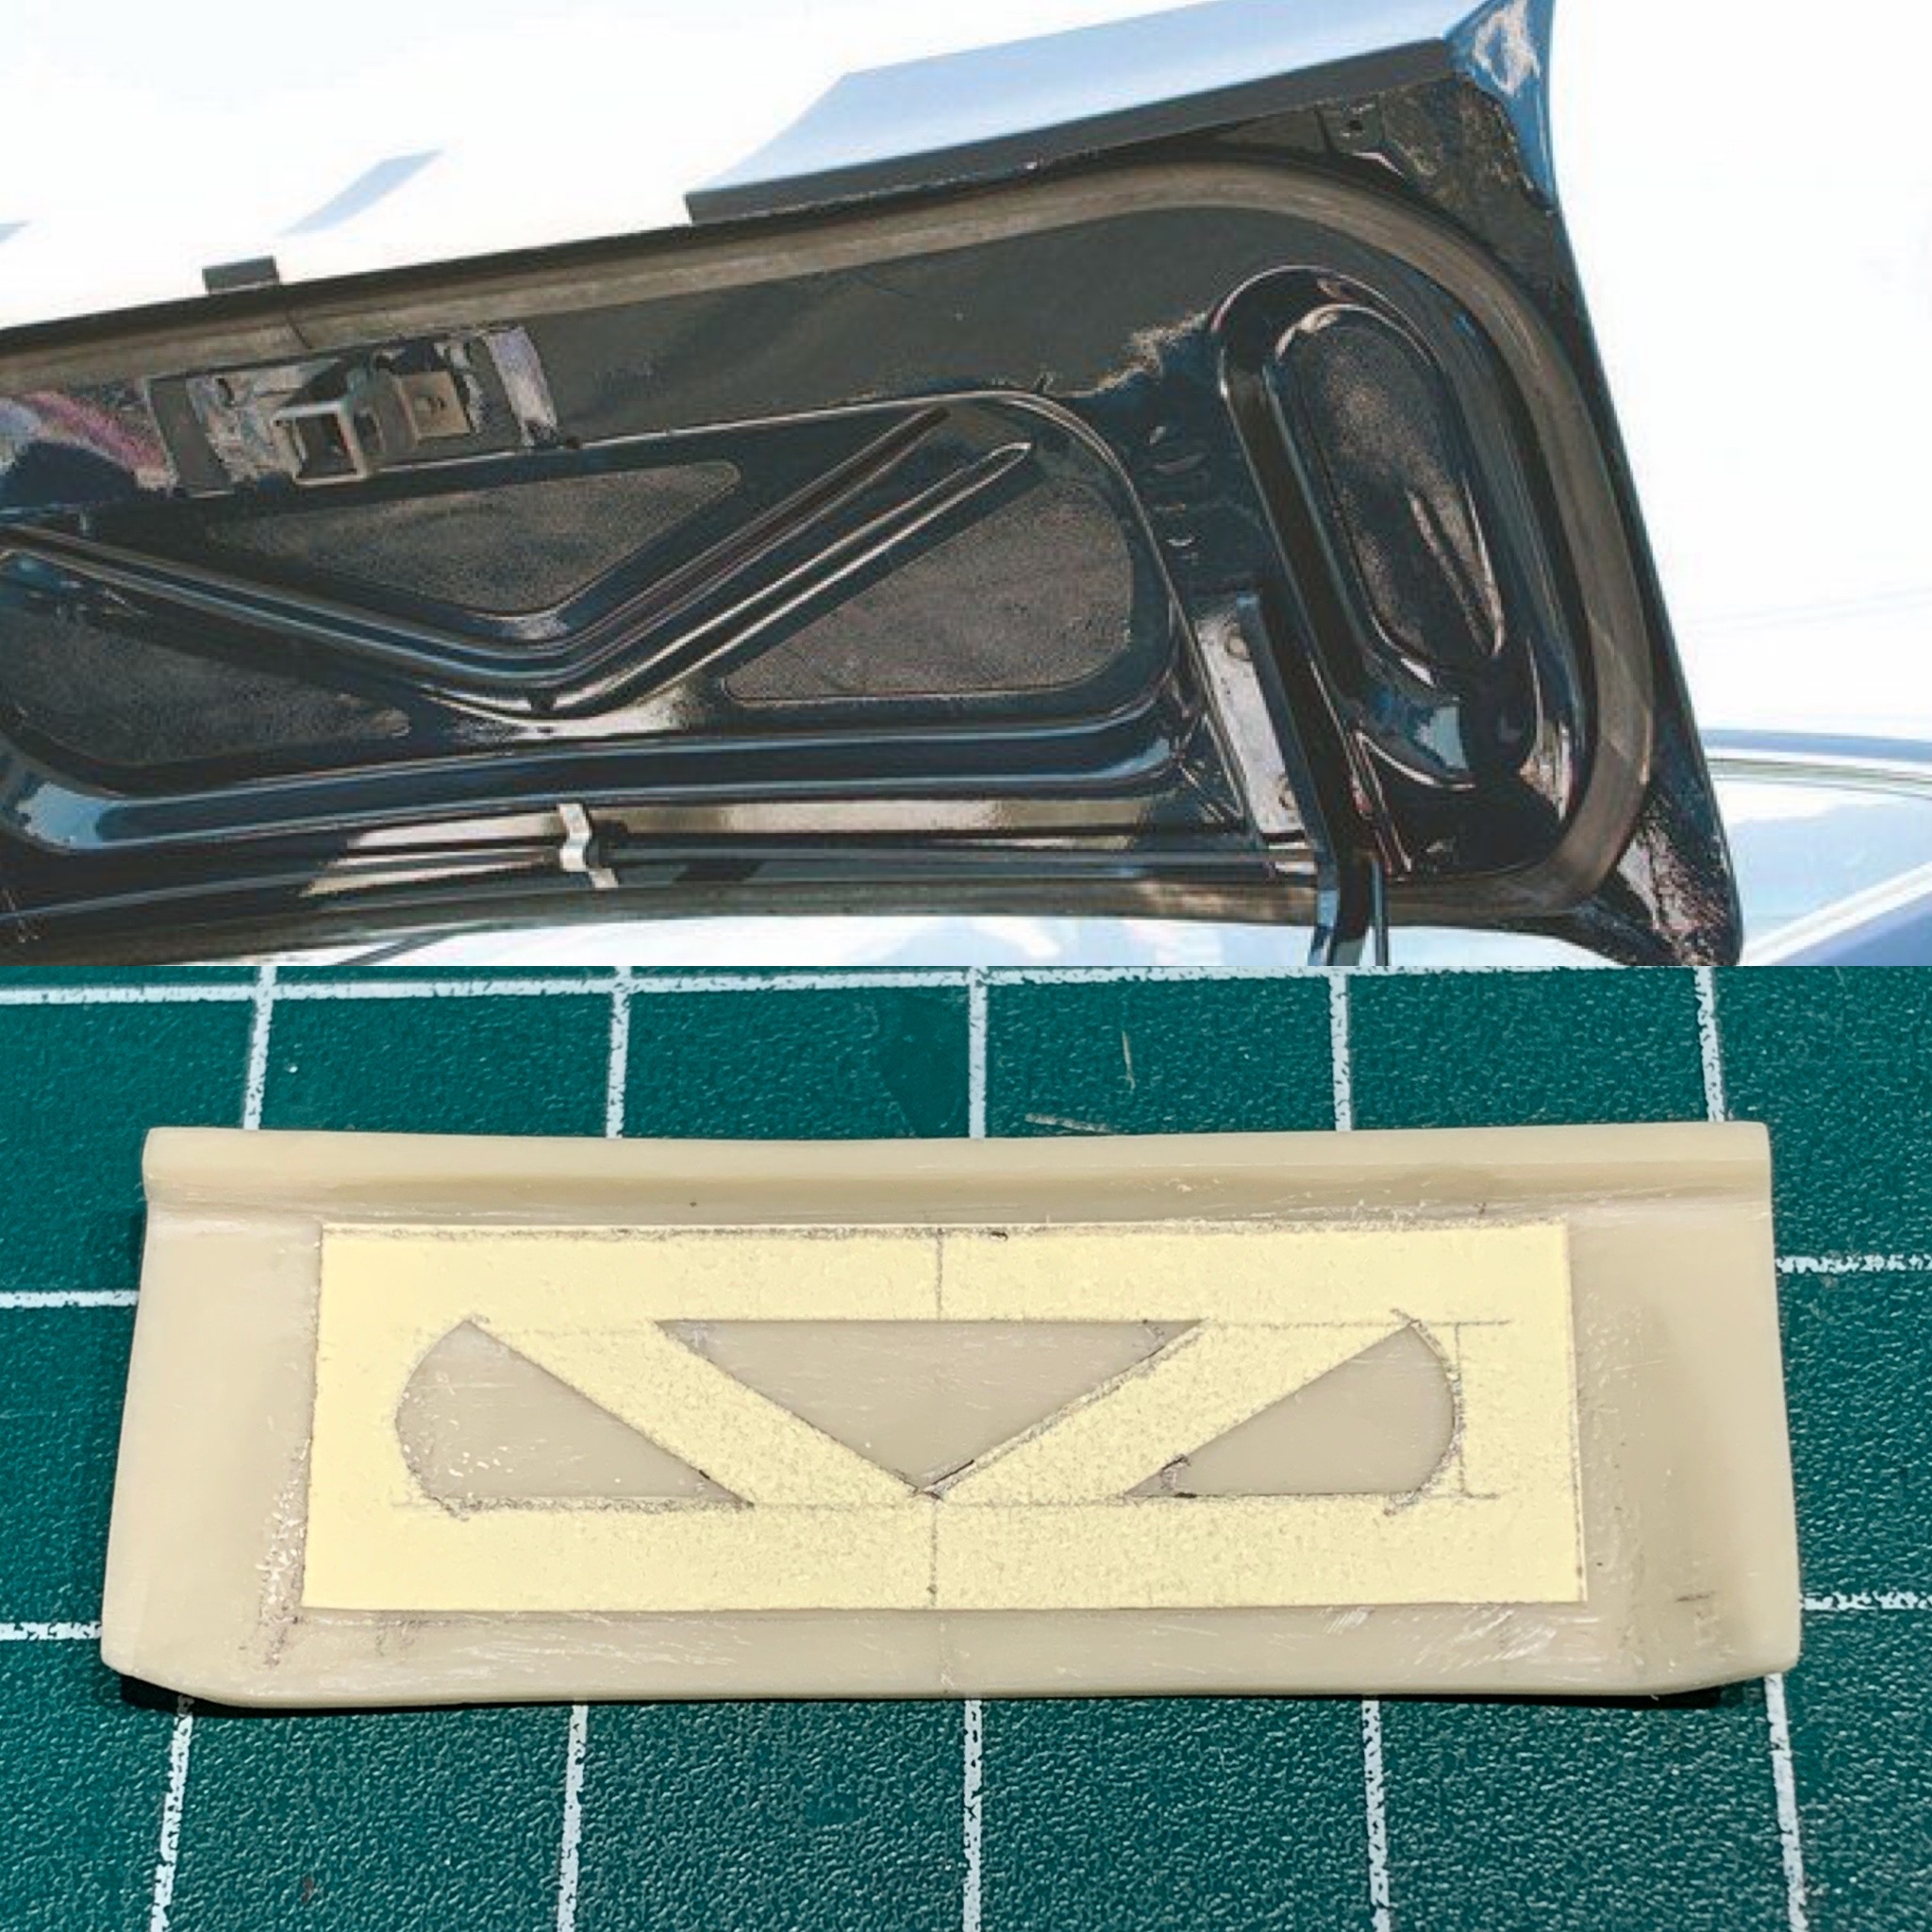
Cut open the trunk. Now to work on filling in some of that gap and make a nice set of hinges. There is going to be a lot of goodies and detail inside !!
- 196 replies
-
- 1
-
-
- eleanor
- shelby gt500
- (and 2 more)
-
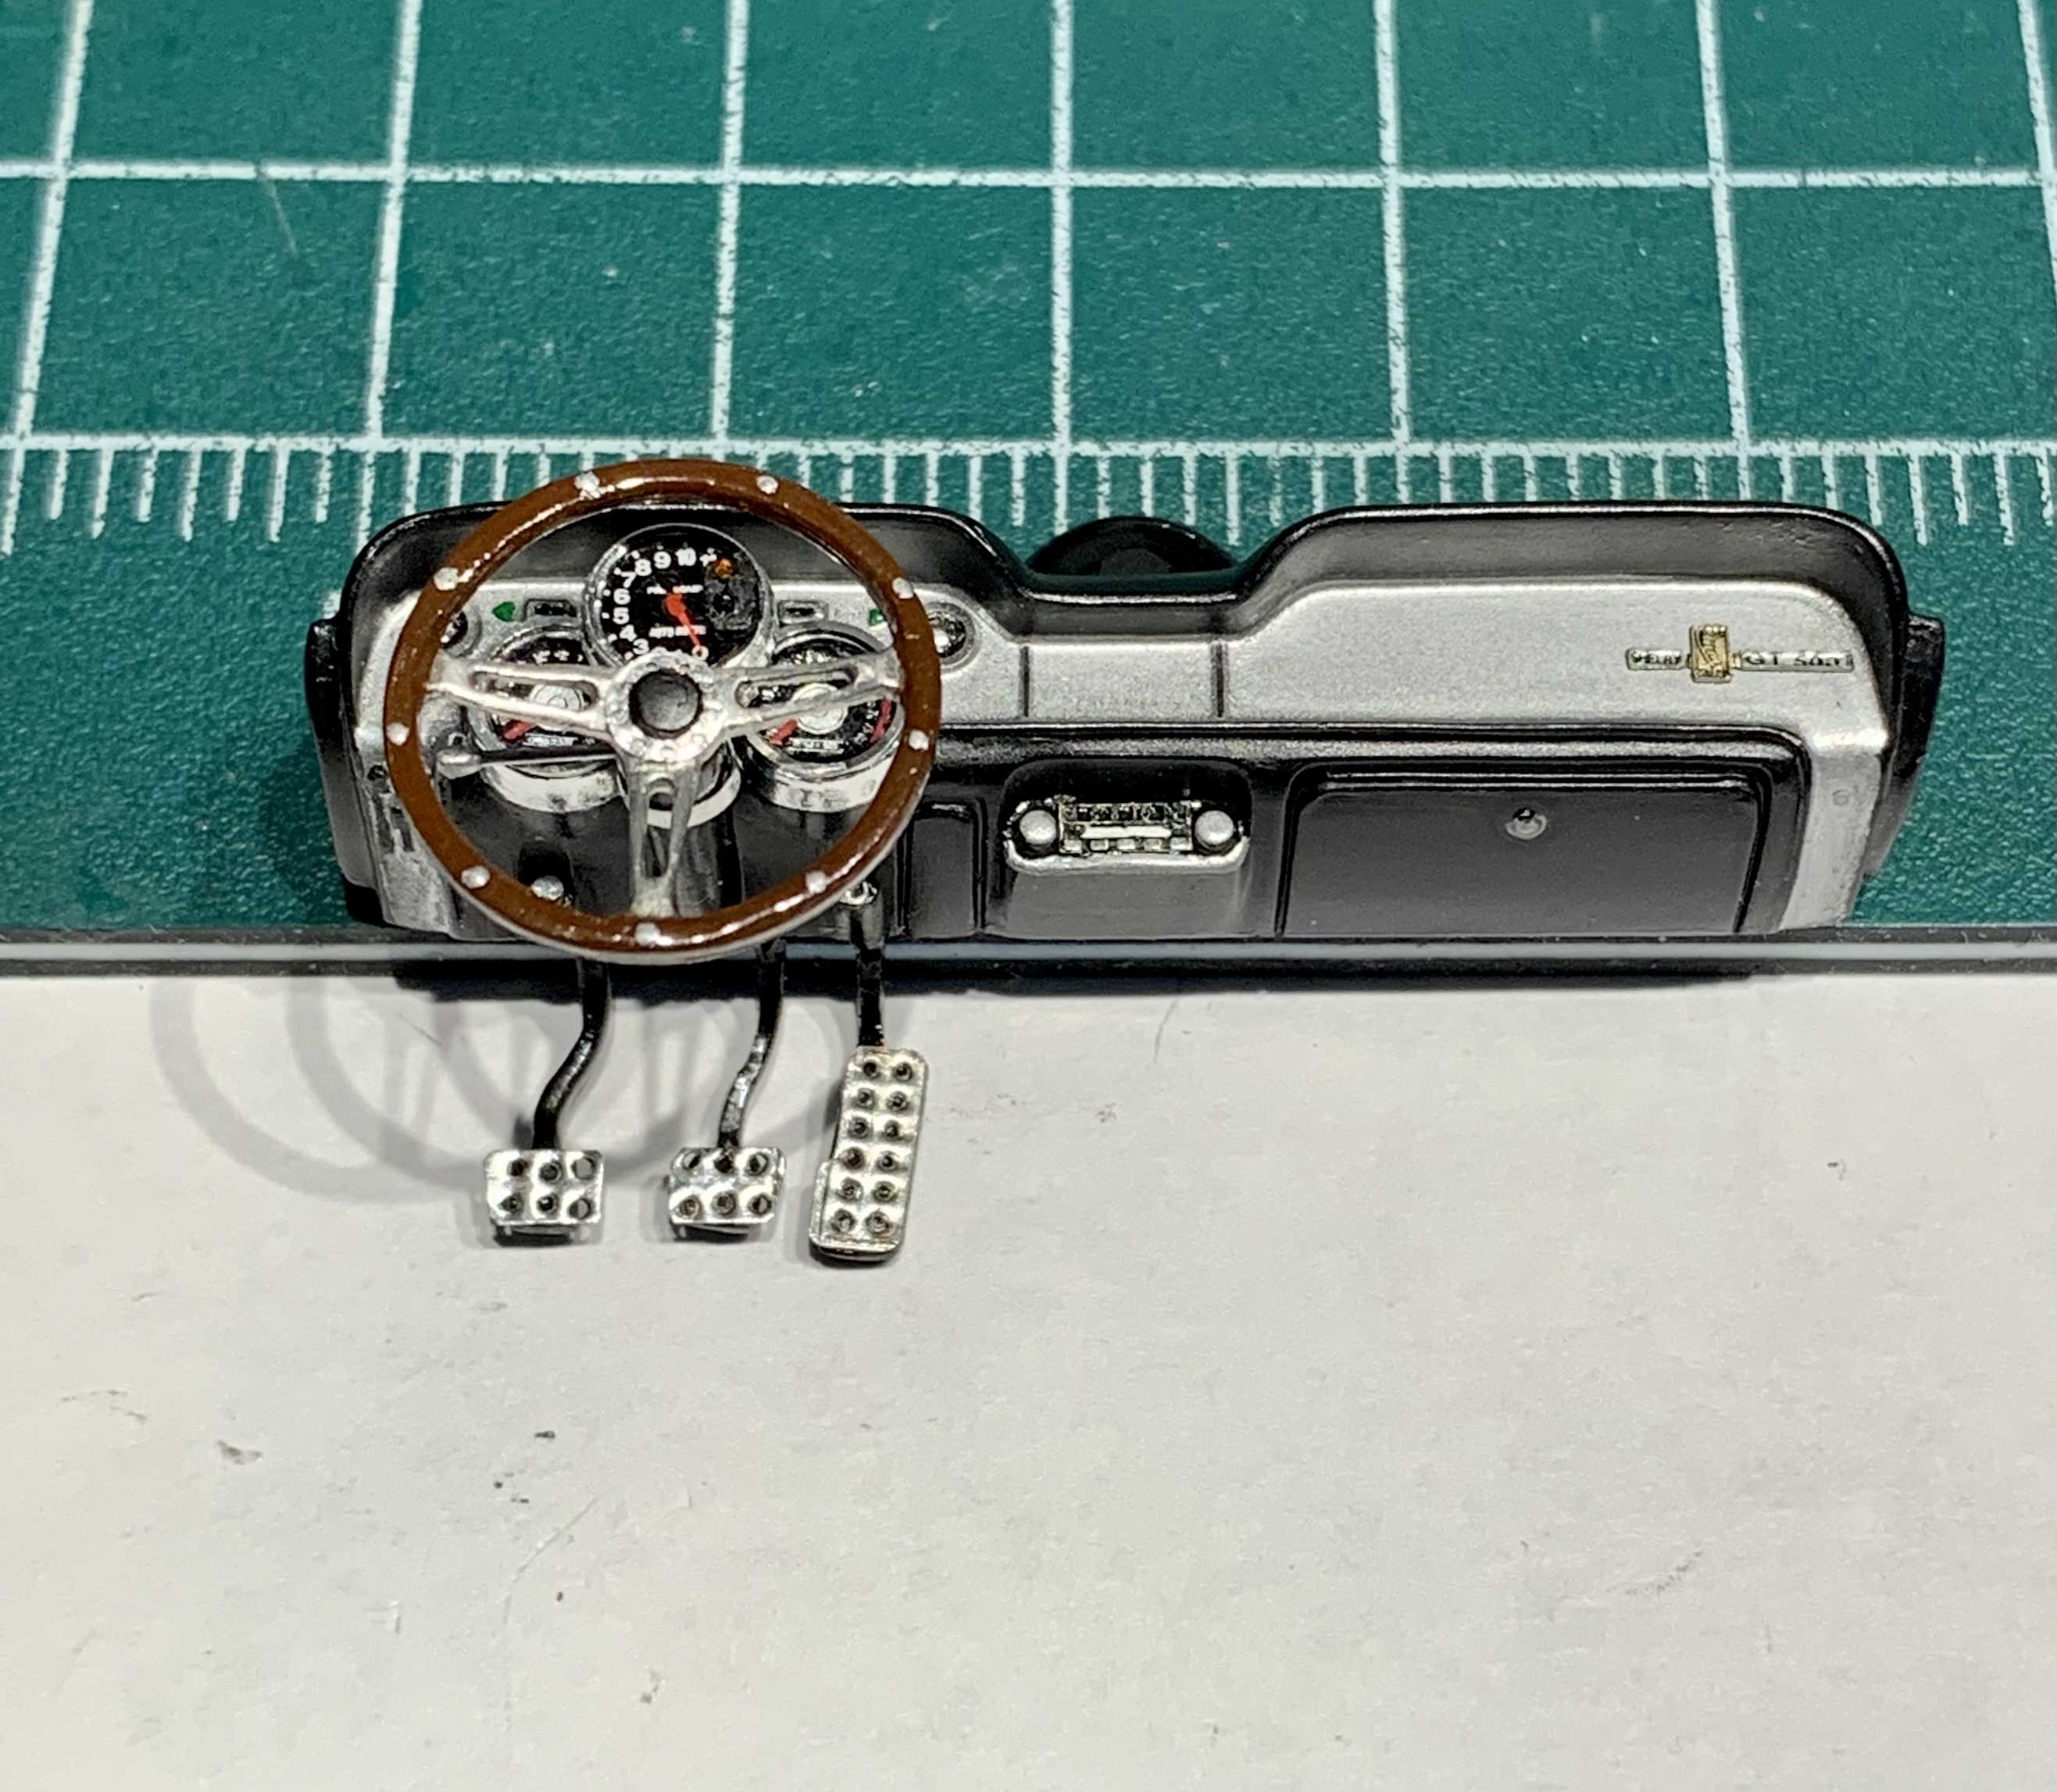
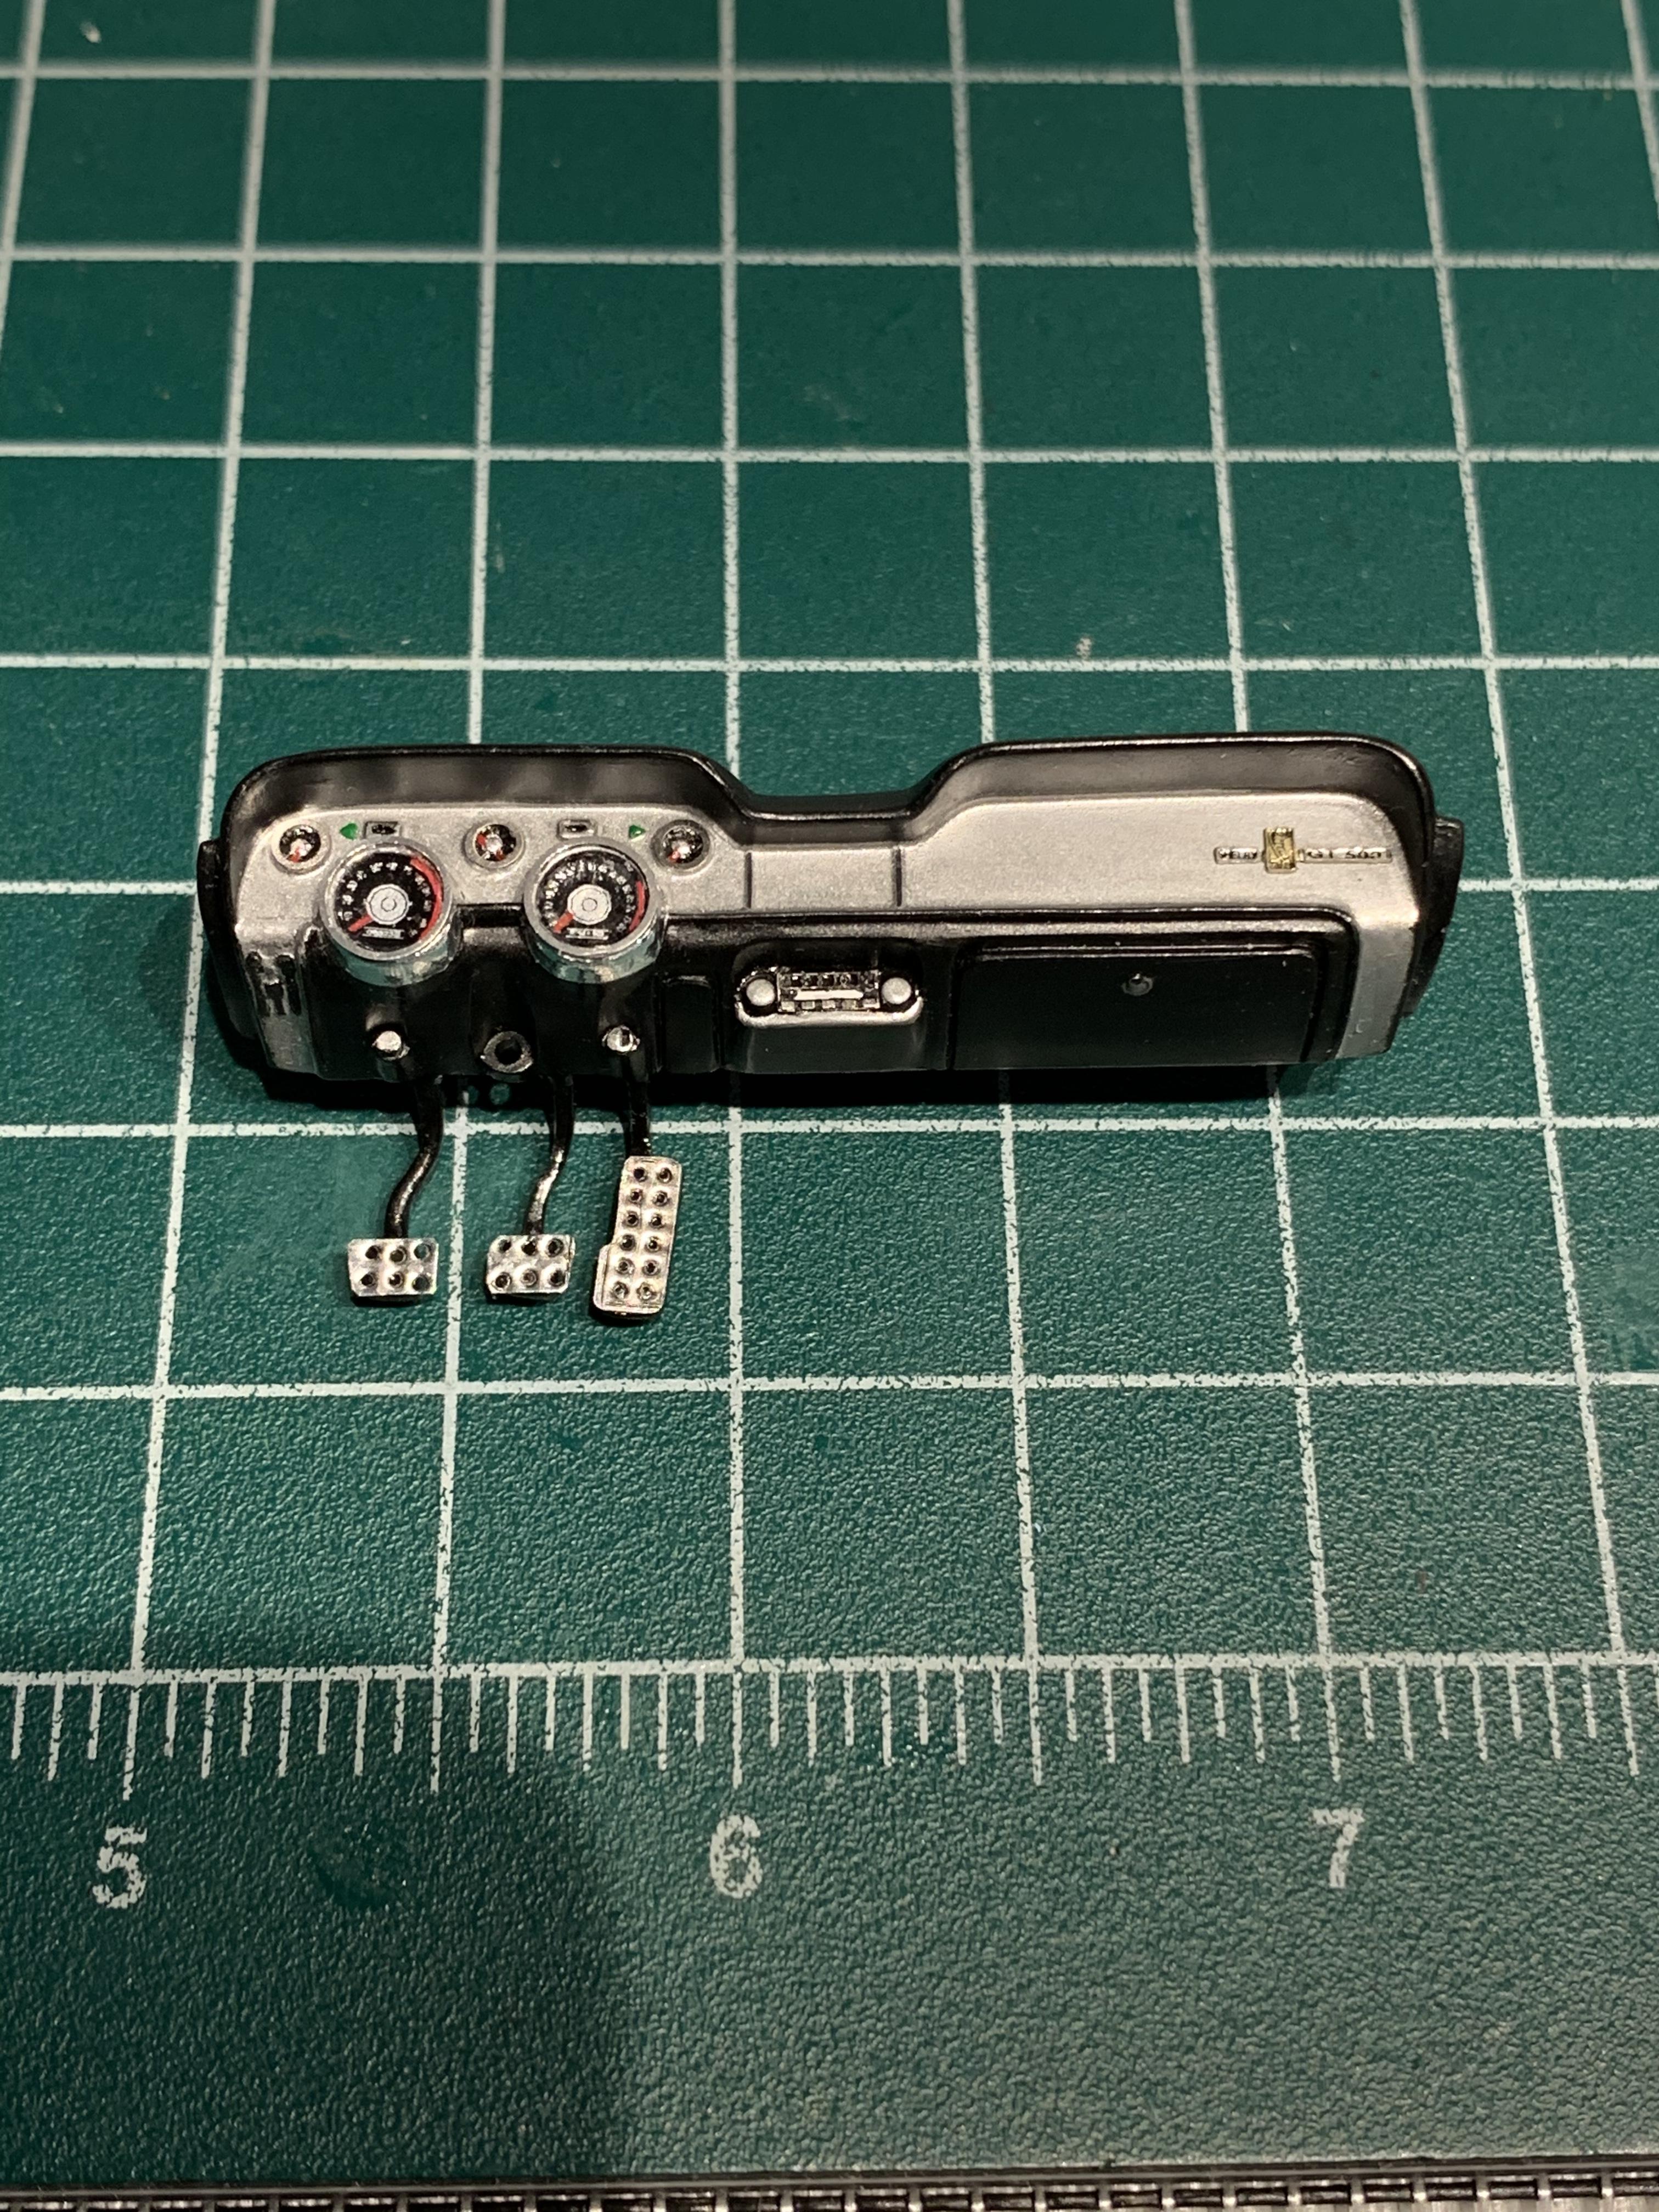
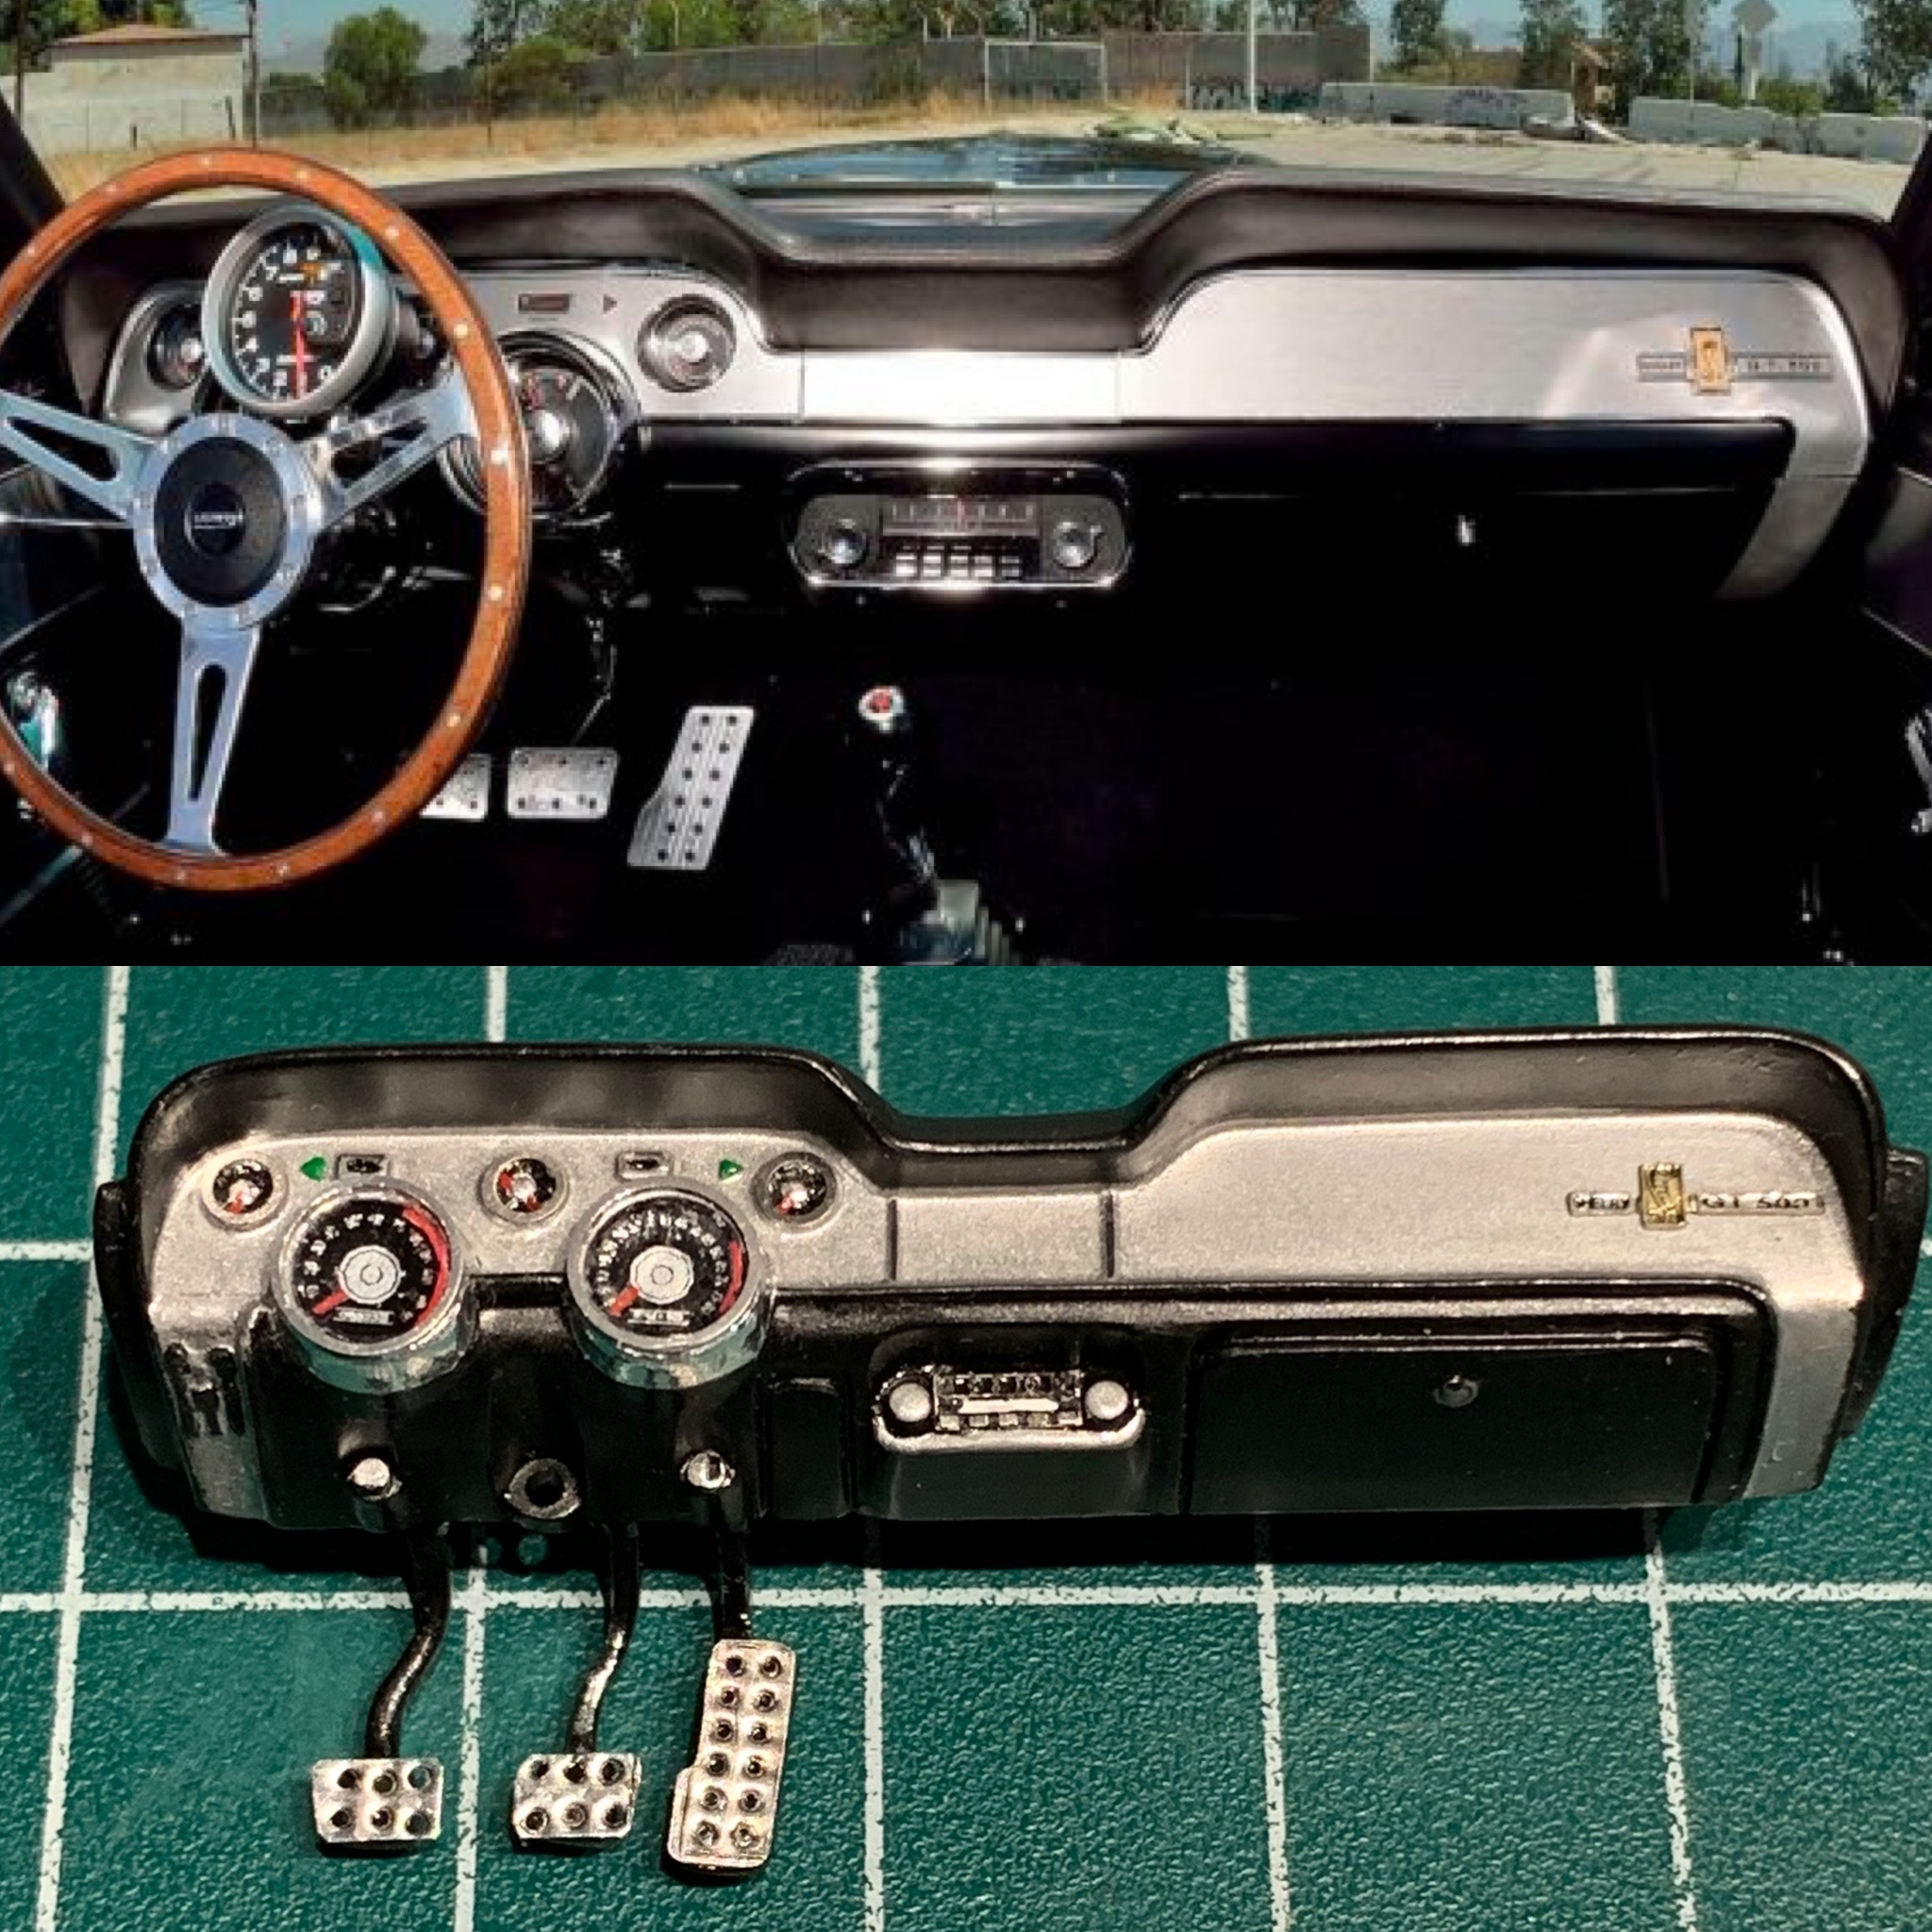
I had scratch built the shift-lite and reset button from a small piece of styrene. Drilled two small holes and glued in a small piece of metal rod, painted black and the other I used transparent yellow for the light. Below is the final result and the completed dashboard.
- 196 replies
-
- 2
-
-
- eleanor
- shelby gt500
- (and 2 more)
-
Thank you. Adam
-
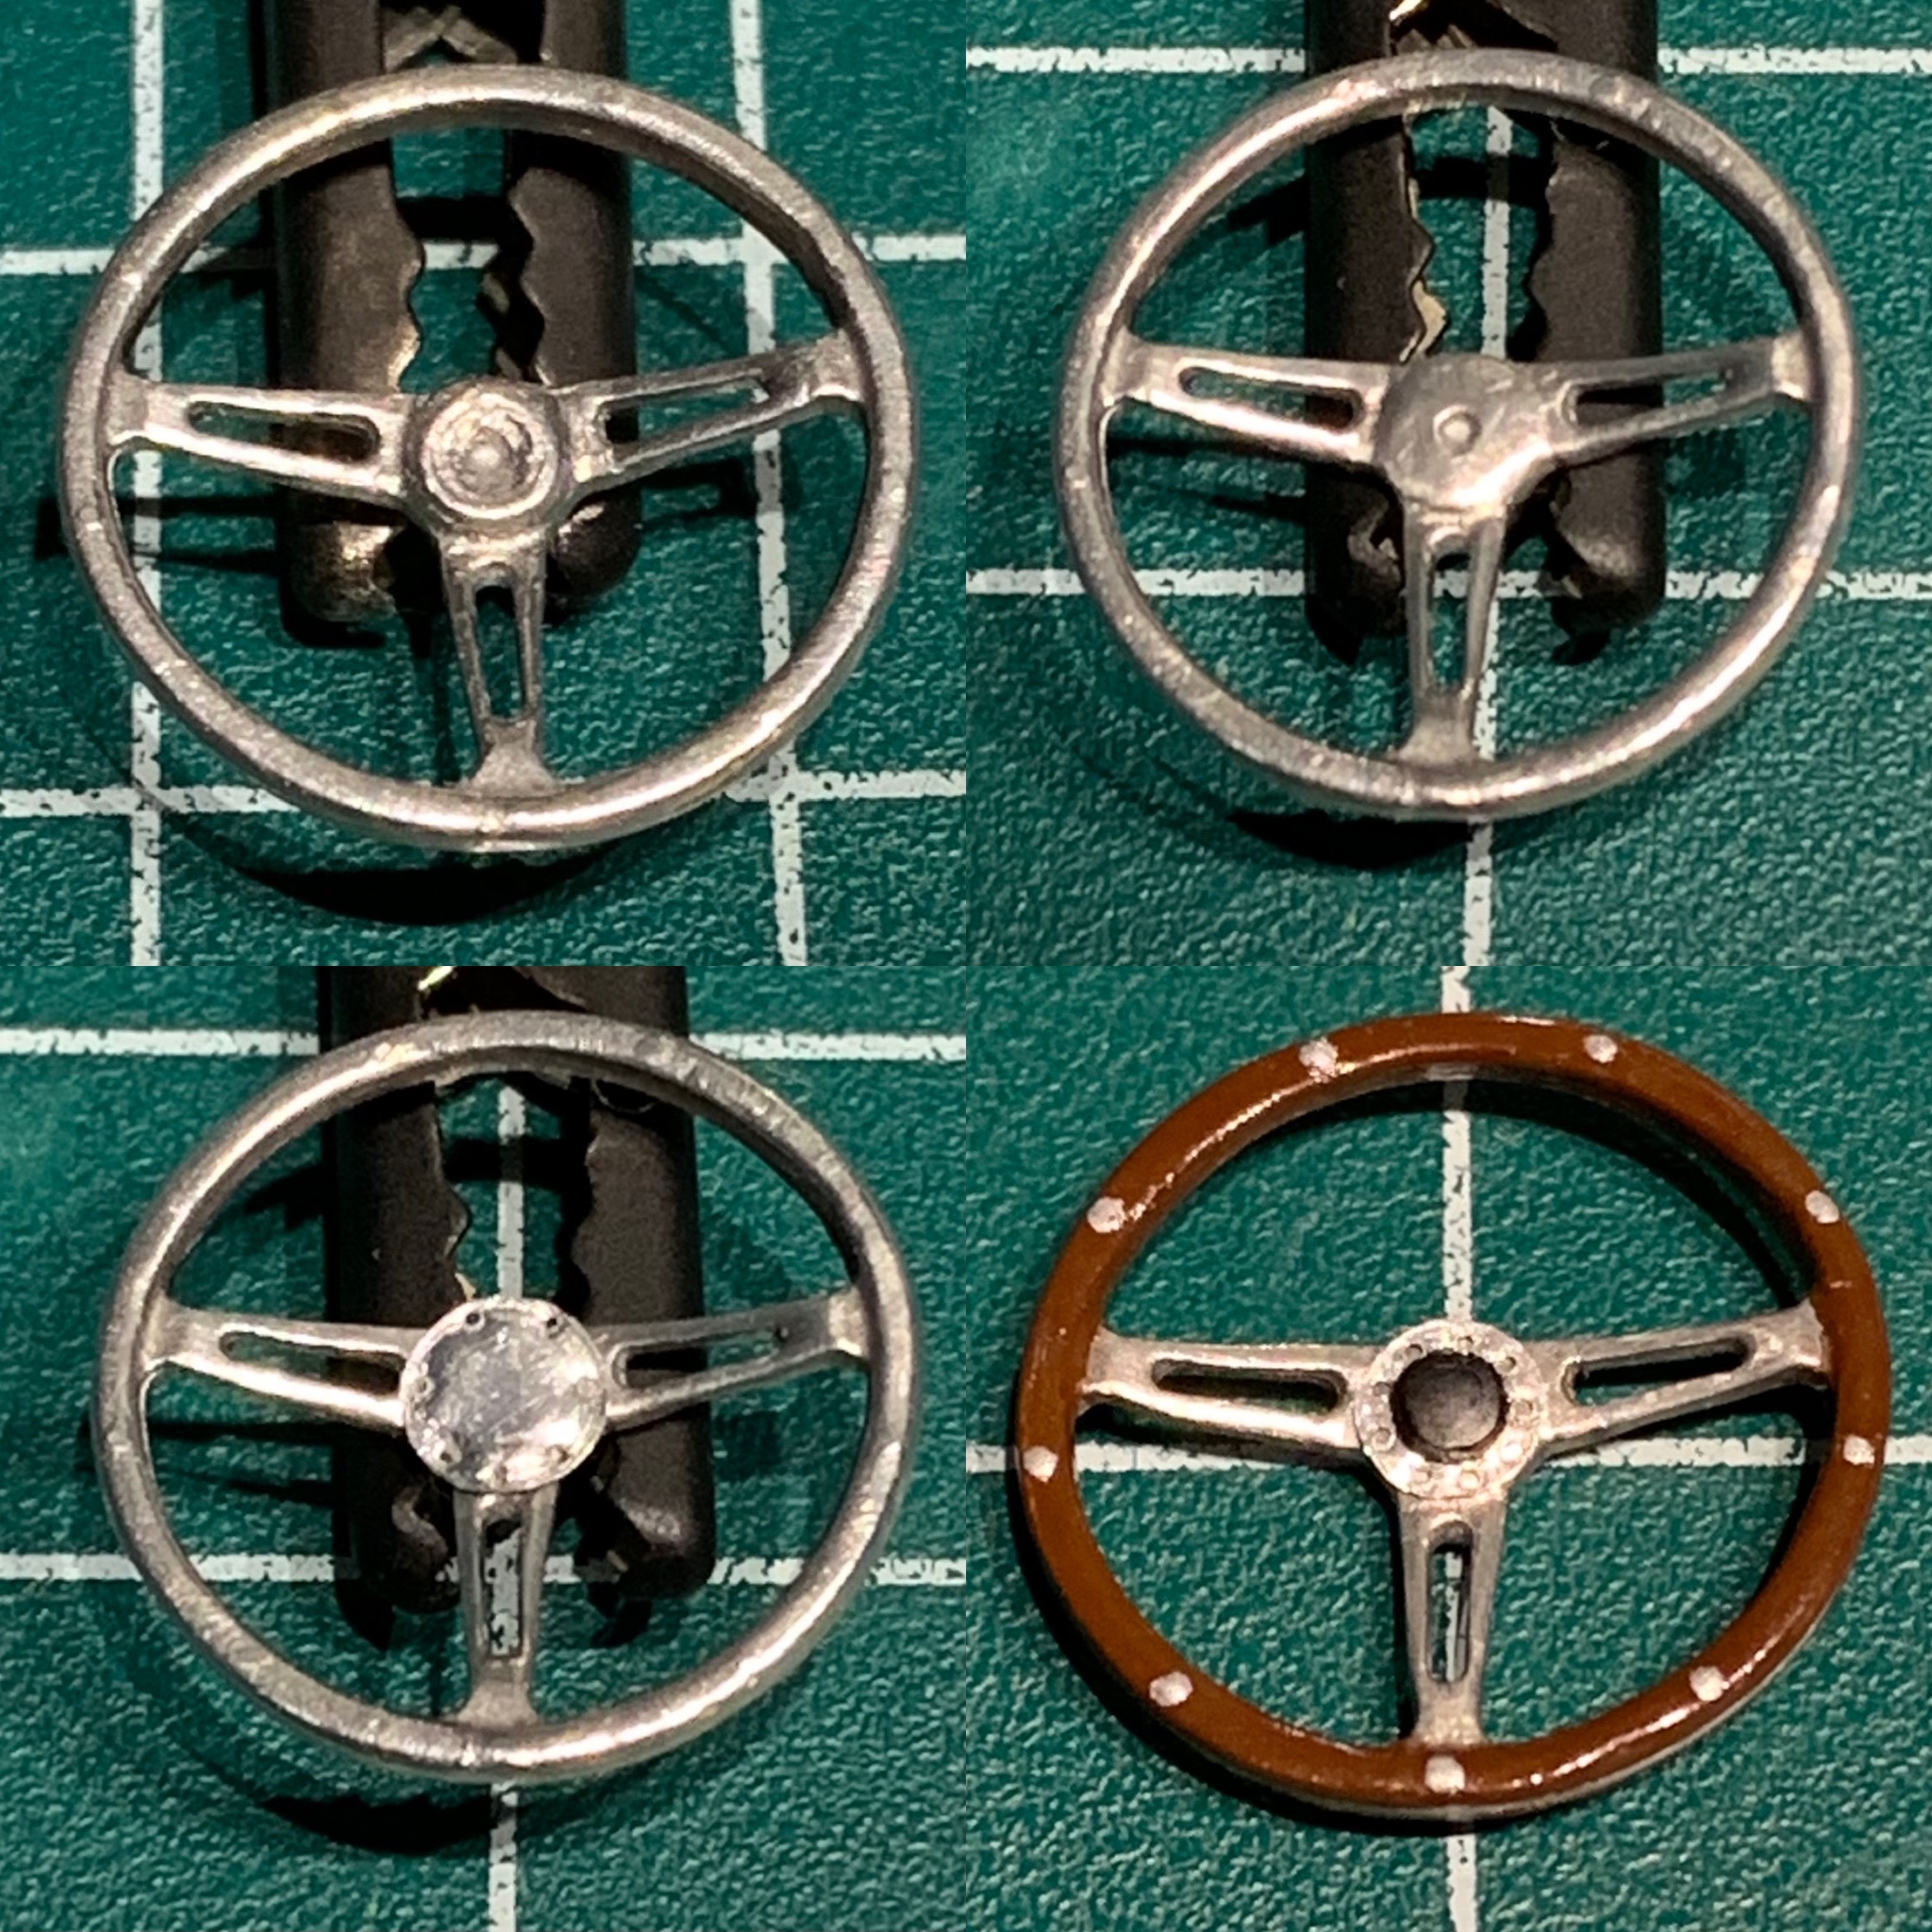
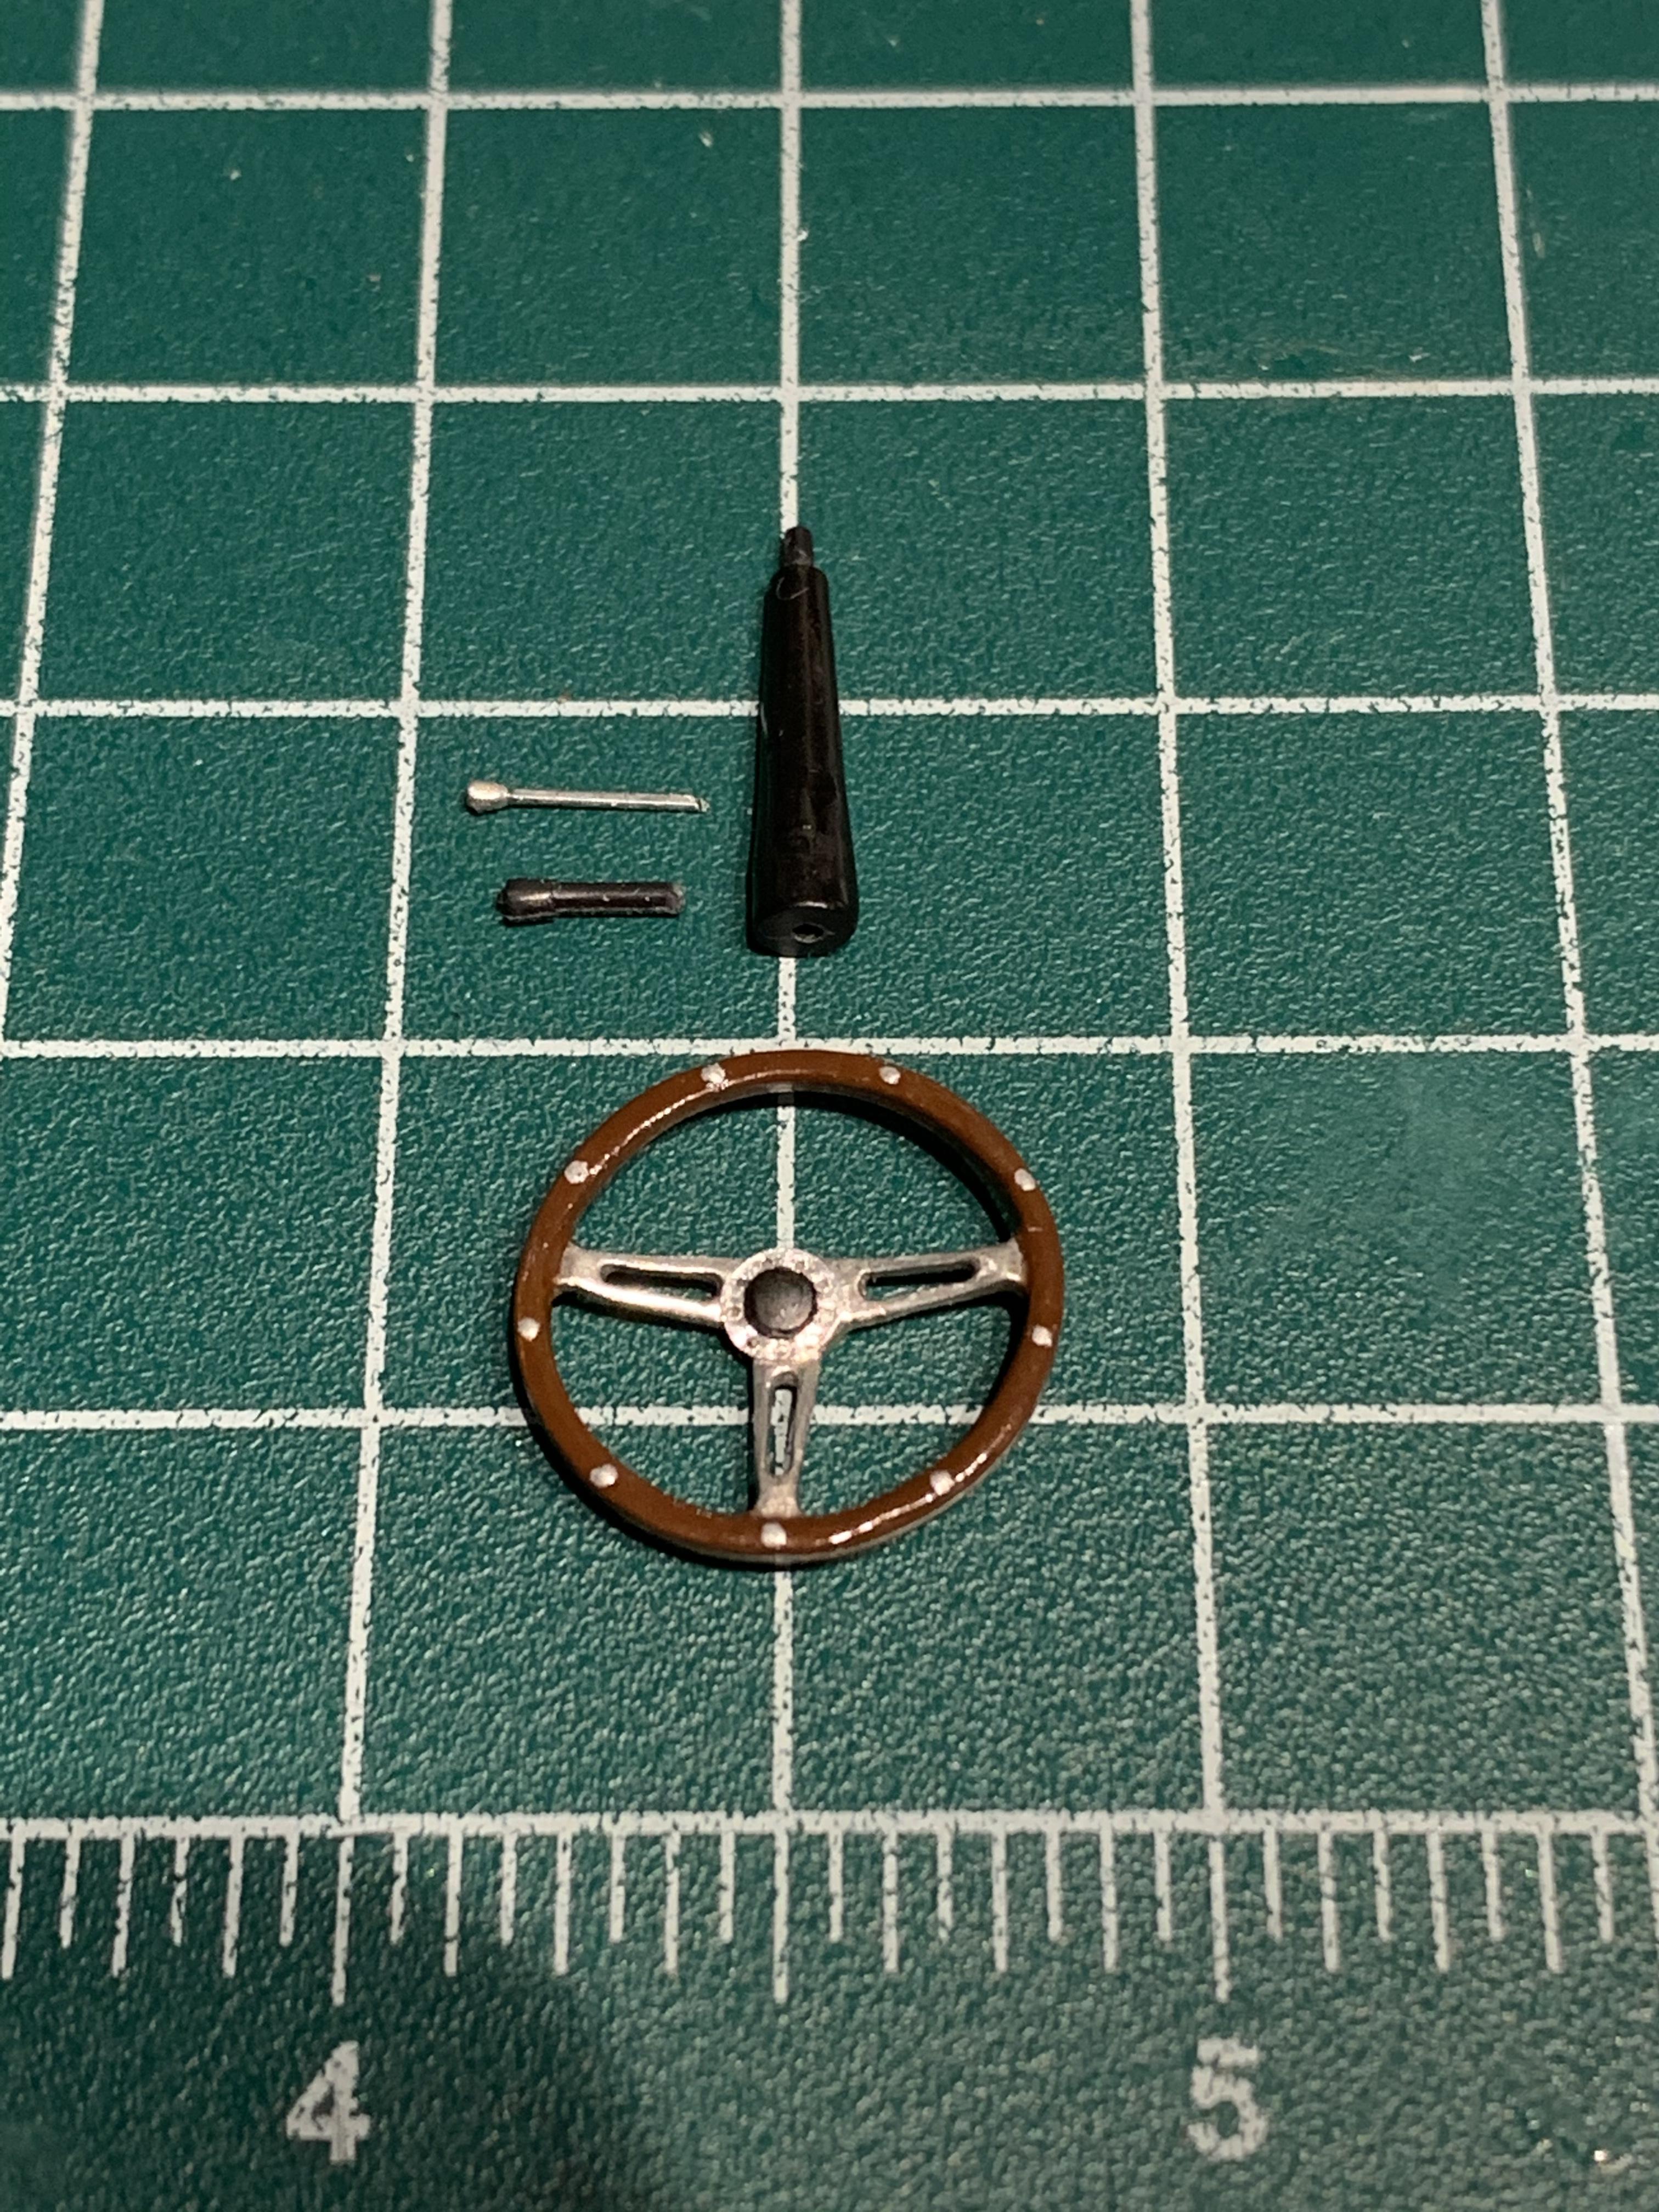
EVOLUTION OF THE WHEEL .. ! This Scale Productions transkit had a aluminum steering wheel, which I believed was cast from an earlier Revell AC Cobra kit. It was a nice upgrade, however, the one used for the Eleanor car was similar to the Shelby Cobra steering wheel, but was manufactured by the aftermarket company Lecarra. This was a 15” diameter 2-piece wooden steering wheel and it had a 9 bolt pattern around the center cap. I tried to modify the steering wheel and the finished result has a scratch built center cap from aluminum sheet and the painted wood grain is separated in the middle to expose the metal. The turning signal lever was upgraded and replaced with a thin rod. I had dabbed a little glue on the end and let it harden. Repeated 3x and then painted over with silver. These little small things are the easiest to do and they bring more realism to your builds. TCB, Adam
- 196 replies
-
- 1
-
-
- eleanor
- shelby gt500
- (and 2 more)
-
That's a lot of work ! Good Job.
-
2020 Shelby GT500 TK--Coming Soon !!!
adamelvis replied to Jhedir6's topic in Car Aftermarket / Resin / 3D Printed
Love the GT500 !! -
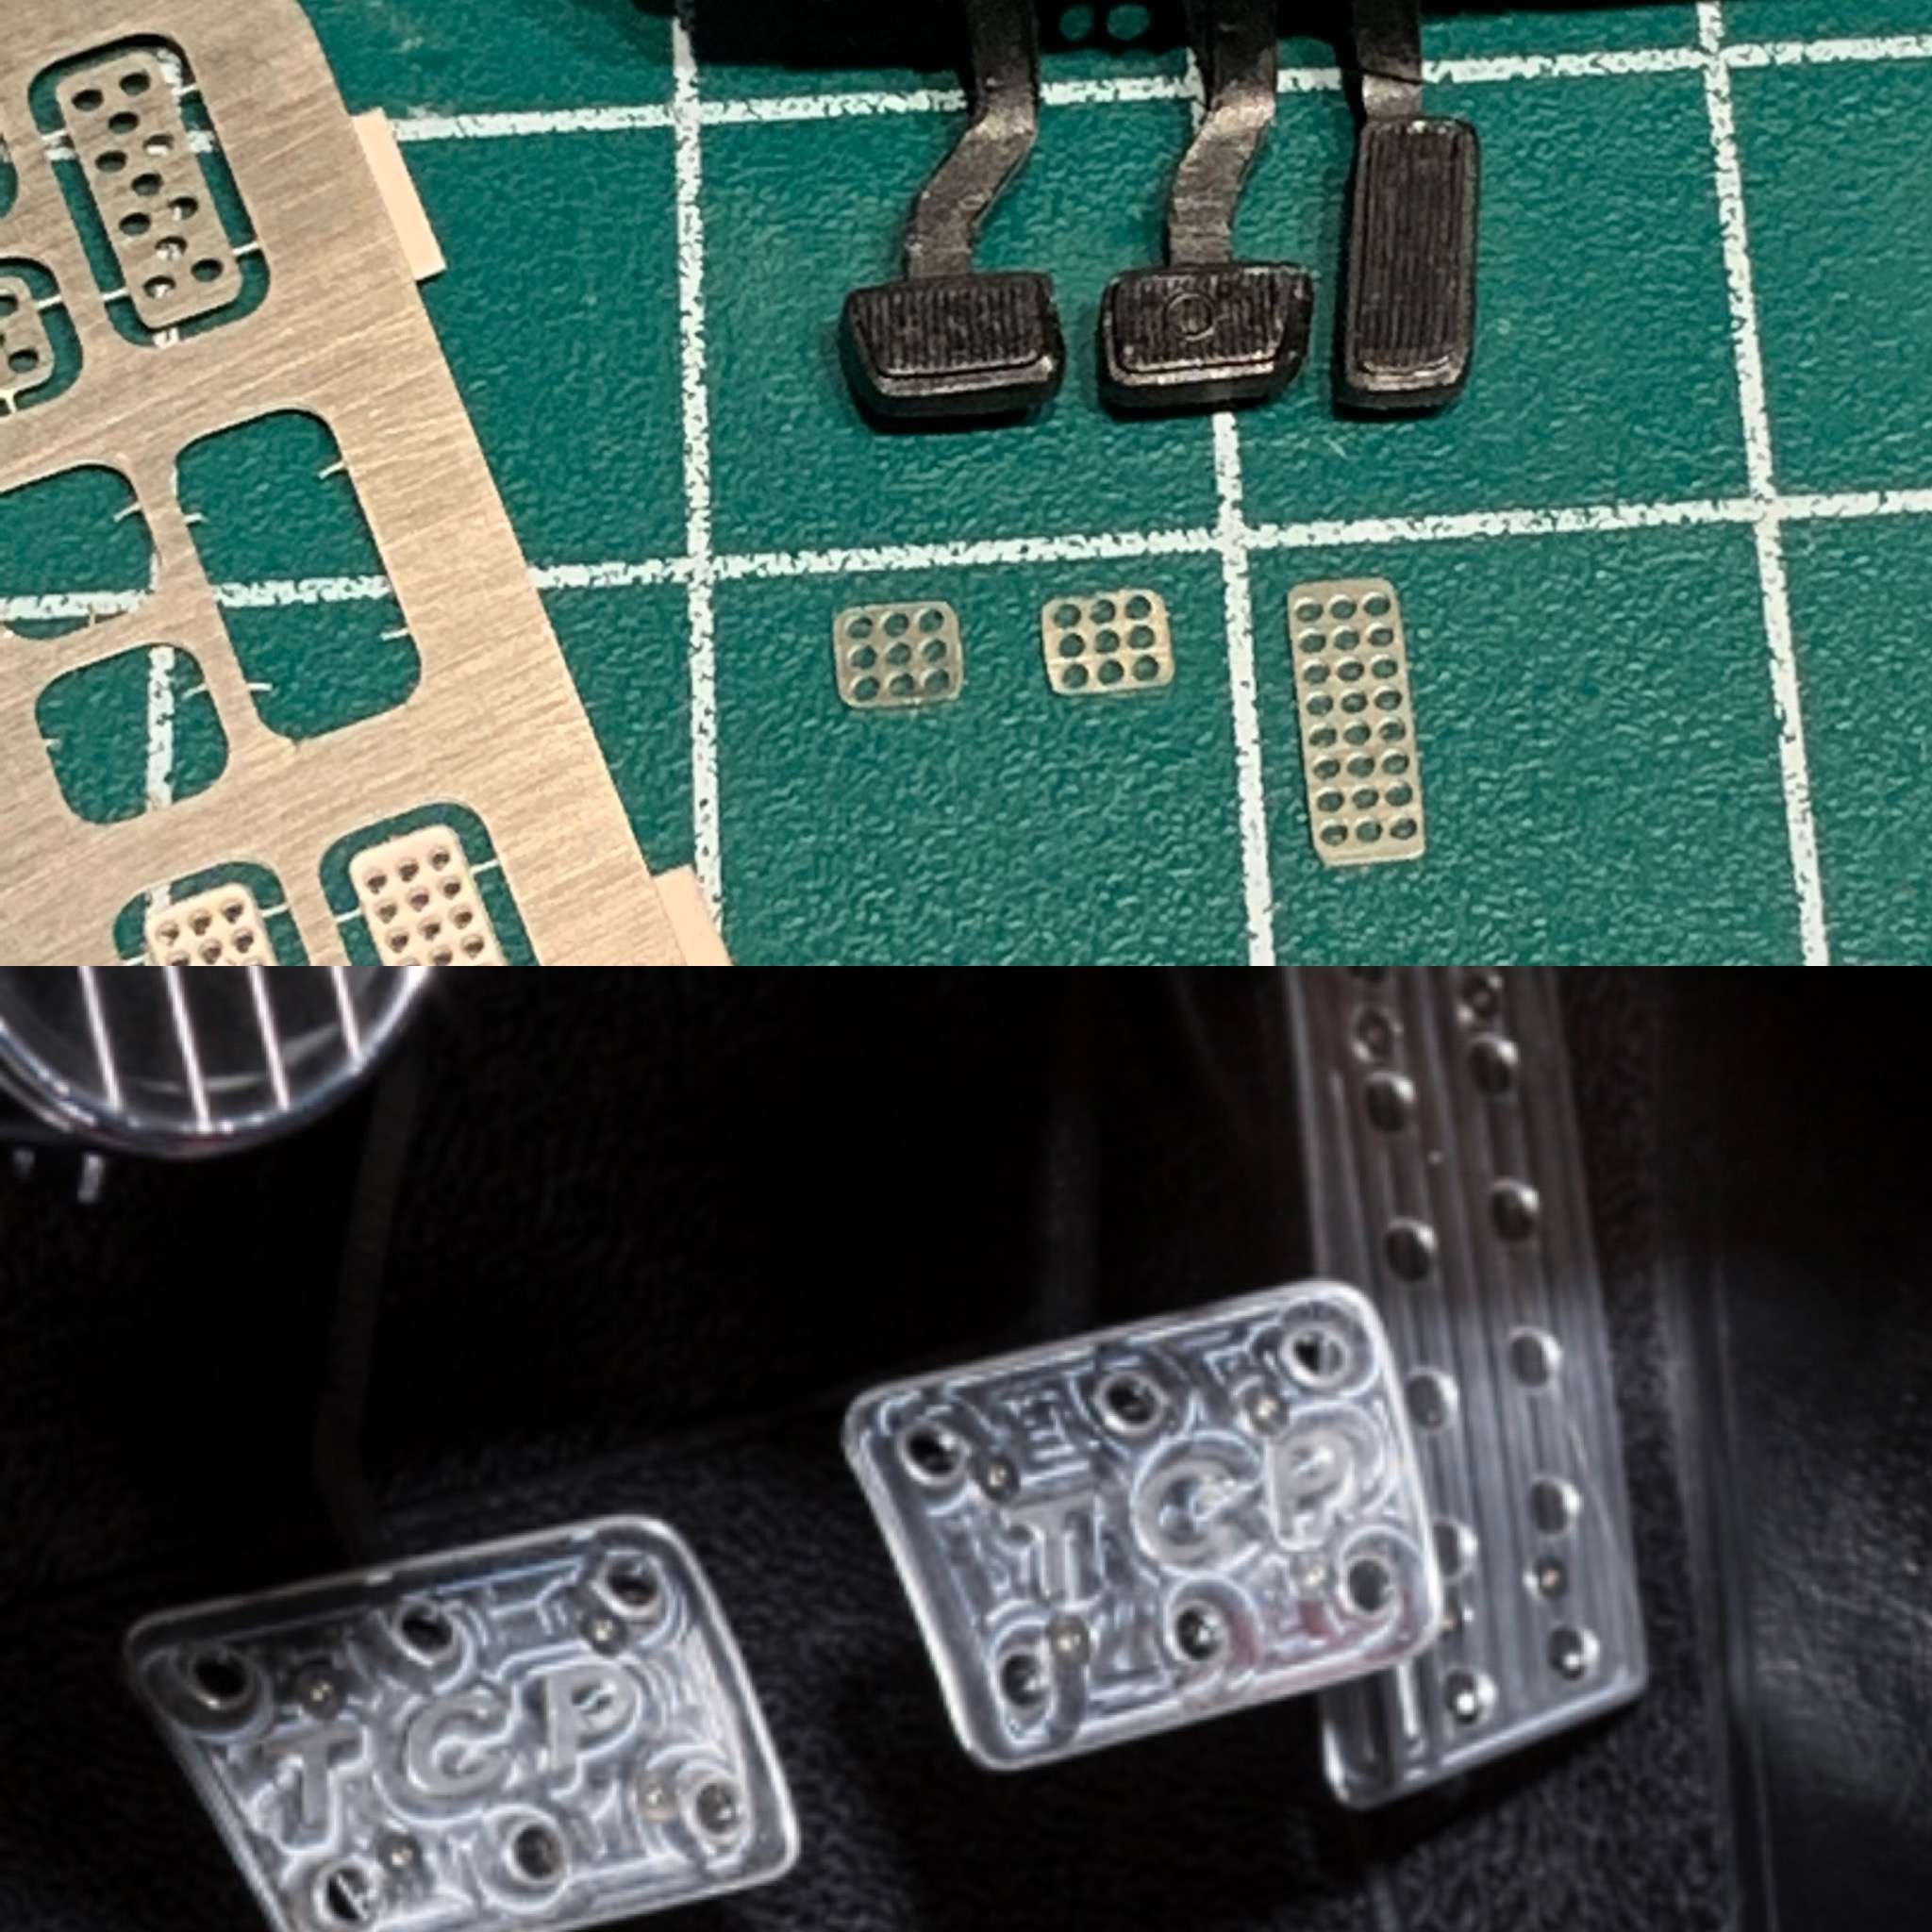
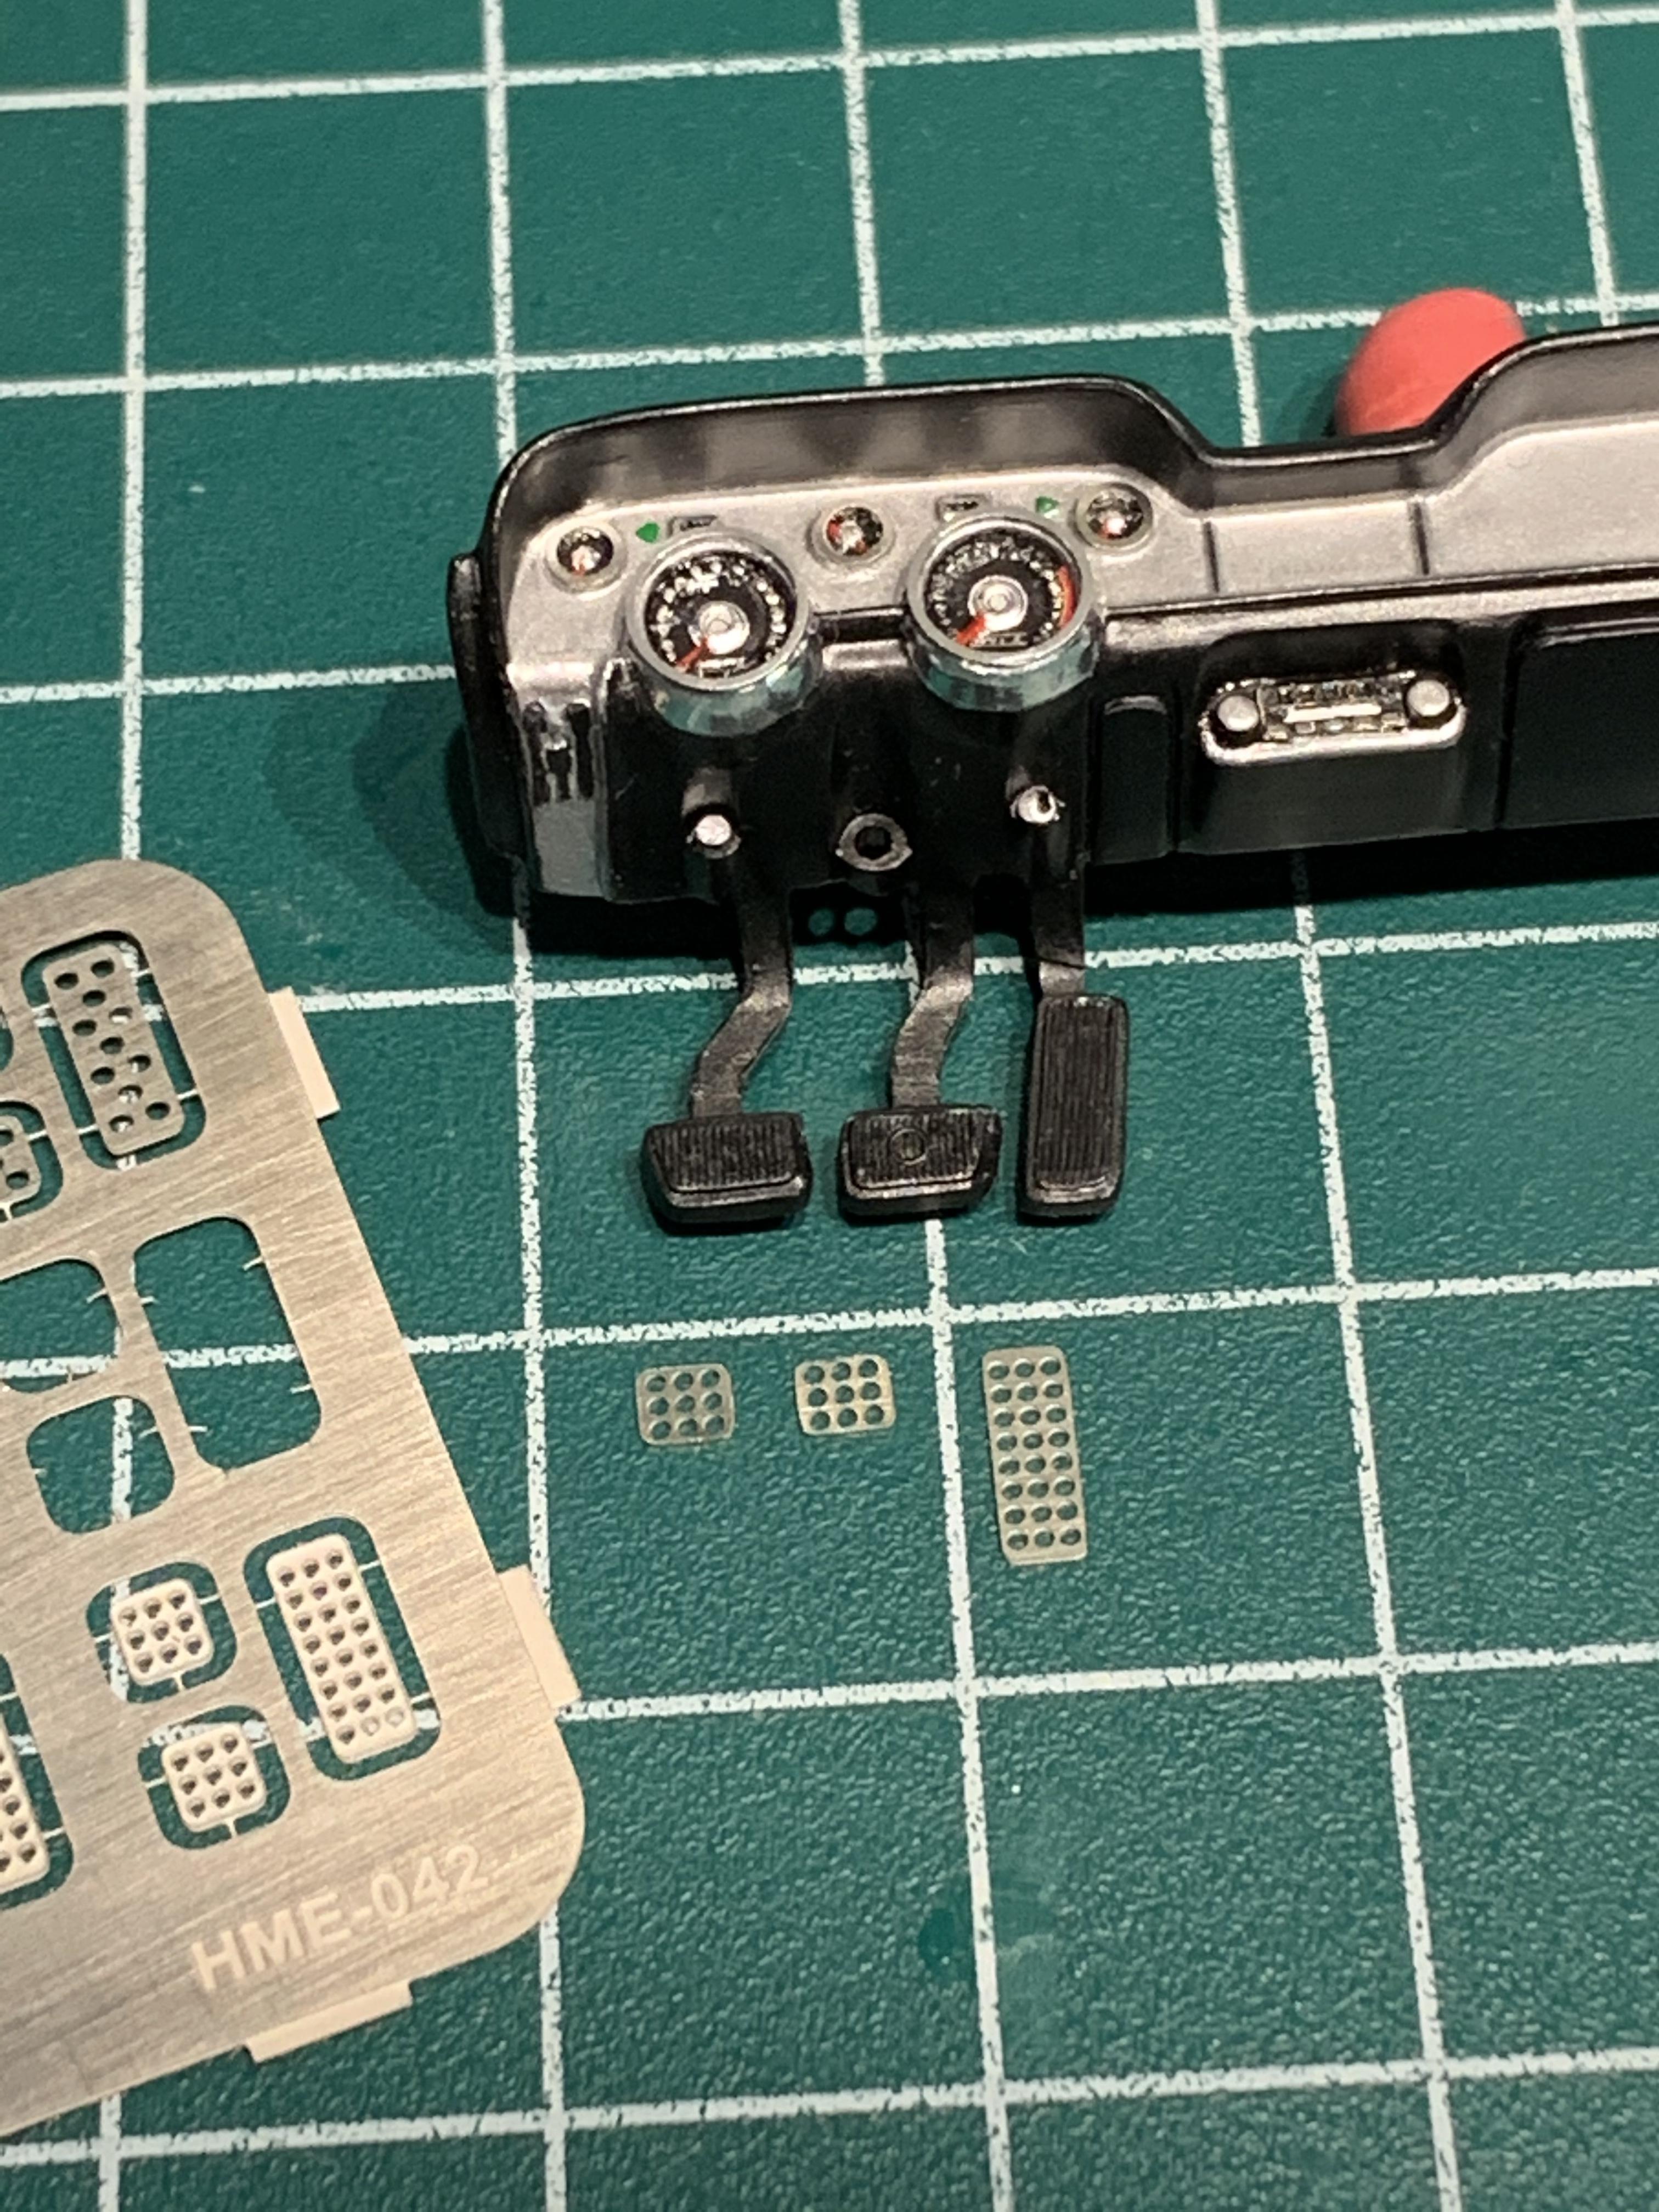
The aftermarket pedals I was going to use did not have the same hole pattern as the one on the Eleanor Mustang that I was using as reference. So, I made my own from some embossing foil and drilled out the correct hole pattern. I also trimmed down the foot pedal bars to almost half the thickness. The pic below shows the comparison.
-
Aftermarket pedals
-
Nice Work !
-
This build is wicked Awesome ! TCB, ADam
-
Cool ! Nice work so far.!!
-
Stunning work. TCB, Adam
-
another '32 sedan -update 4/26/21
adamelvis replied to Rocking Rodney Rat's topic in WIP: Model Cars
Hey, roof chop looks fine .. ! Great work. TCB, Adam -
Nice color and engine detail !
-
I had a Senna parked out front of our building last summer. My son and I went down and took some pics & videos. This will be a nice build ! TCB, Adam
-
This is a nice kit. Good job !
-
Nice color combo and the wheels are perfect for this era ! TCB, Adam