-
Posts
2,781 -
Joined
-
Last visited
Content Type
Profiles
Forums
Events
Gallery
Everything posted by Chariots of Fire
-

1954 Maxim 750 Pumper
Chariots of Fire replied to Chariots of Fire's topic in WIP: Model Trucks: Big Rigs and Heavy Equipment
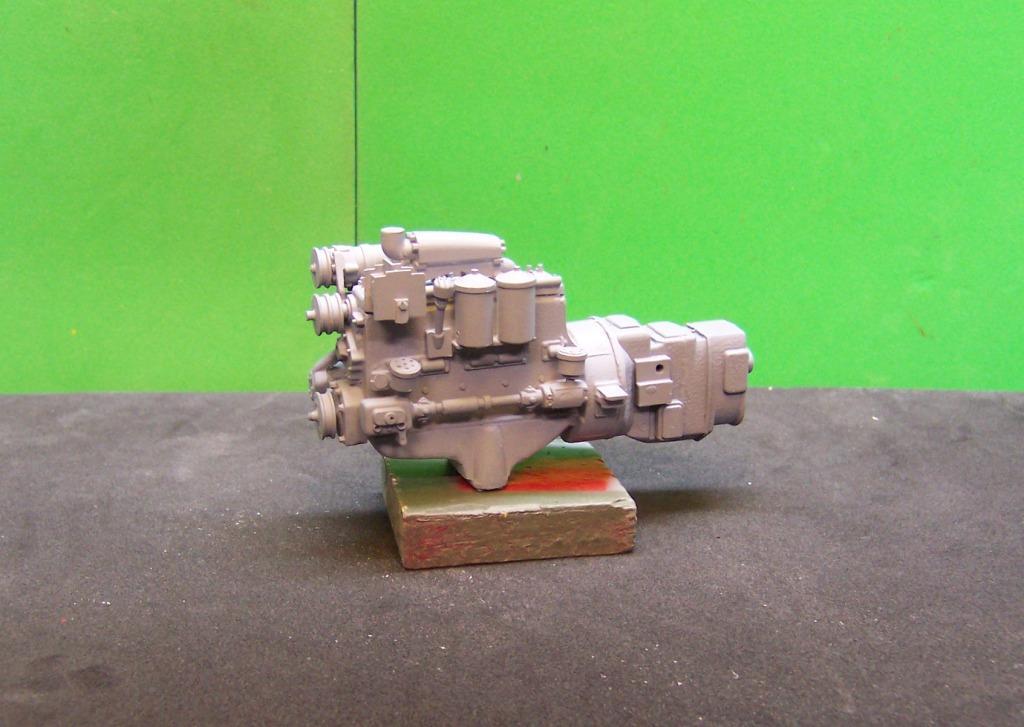
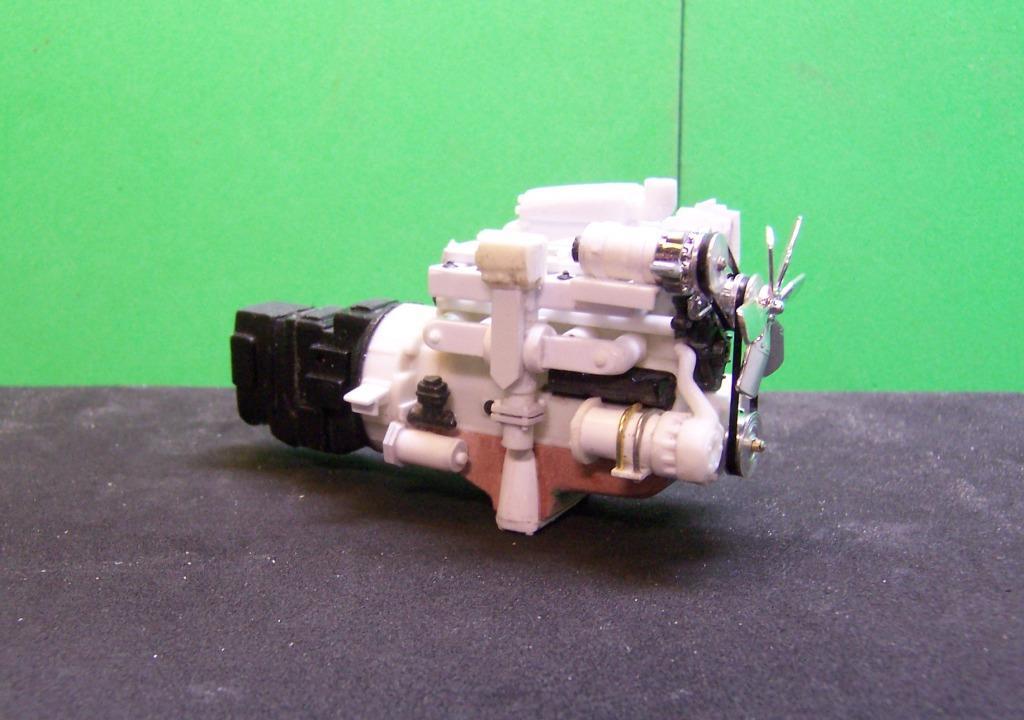
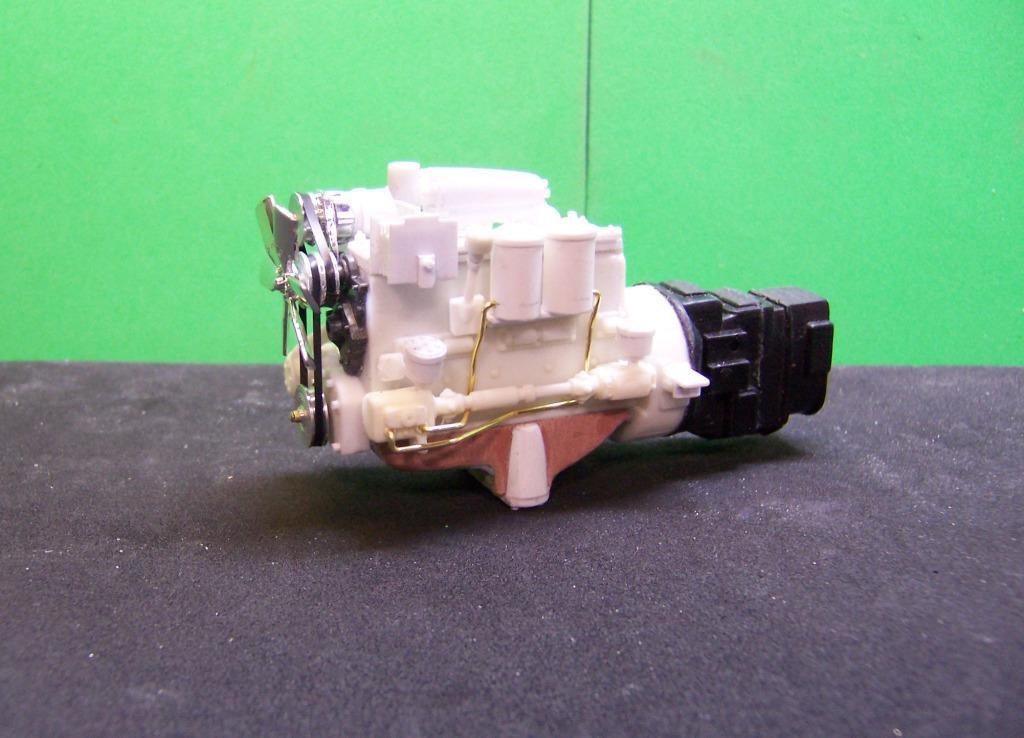
Here's a look at the finished engine. Color is Krylon satin black. The heat exchanger and transformer are medium blue. Distributor caps are rust red. Wiring is from Michaels craft store. For some reason there are limits on posting my photos so I will have to do them in individual postings. They have been reduced for posting and are no different than before but with the new limits they are too big. -

Autocar DC9964?
Chariots of Fire replied to guitarsam326's topic in WIP: Model Trucks: Big Rigs and Heavy Equipment
I like the old stuff! They look like trucks that have power and can go anywhere! Will be watching this one! -

1954 Maxim 750 Pumper
Chariots of Fire replied to Chariots of Fire's topic in WIP: Model Trucks: Big Rigs and Heavy Equipment
Put on some primer to check out spots that might need some cleanup. Makes it a lot easier to see the details. -

1954 Maxim 750 Pumper
Chariots of Fire replied to Chariots of Fire's topic in WIP: Model Trucks: Big Rigs and Heavy Equipment
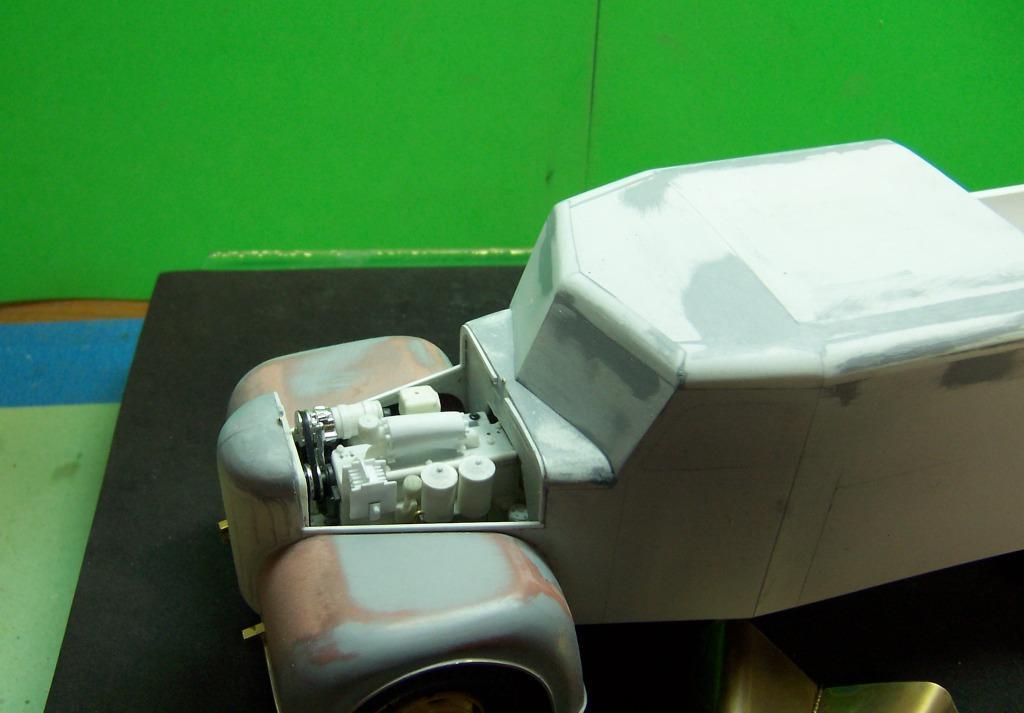
An update on progress for the Maxim. Scratch building a Hercules RXLDH 6 cylinder engine was a challenge but a fun project nevertheless. Lots of plastic stock, a bit of Renshape, hex rod for nuts and bolts and a few pieces from the parts box as well as aluminum turnings for the fan belt pulleys. Still to go are the plugs (2per cylinder) and the wiring from the dual distributors. Then there is a ton of tubing and wiring to complete it. It took some tweaking here and there to get it into the engine compartment but it is there and I can still close the hood! -
Anybody else having trouble loading photos? For the last two times the photos are not accepted even though they are all below 420 kb in size. I keep getting a notice of the maximum size. Did something change? I'm loading photos by choosing them as noted below.
-

1954 Maxim 750 Pumper
Chariots of Fire replied to Chariots of Fire's topic in WIP: Model Trucks: Big Rigs and Heavy Equipment
Thanks for the heads up! I'll check them out and see if they are adaptable. -

1954 Maxim 750 Pumper
Chariots of Fire replied to Chariots of Fire's topic in WIP: Model Trucks: Big Rigs and Heavy Equipment
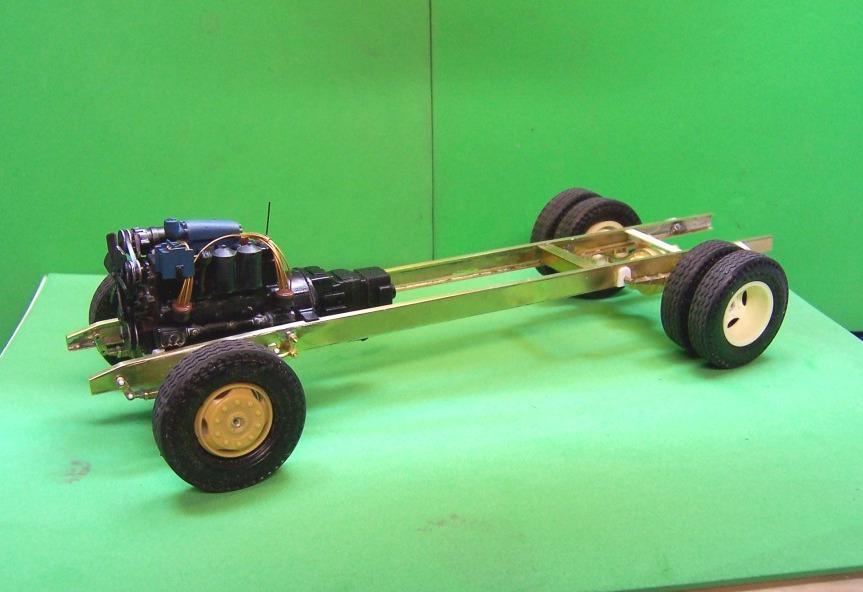
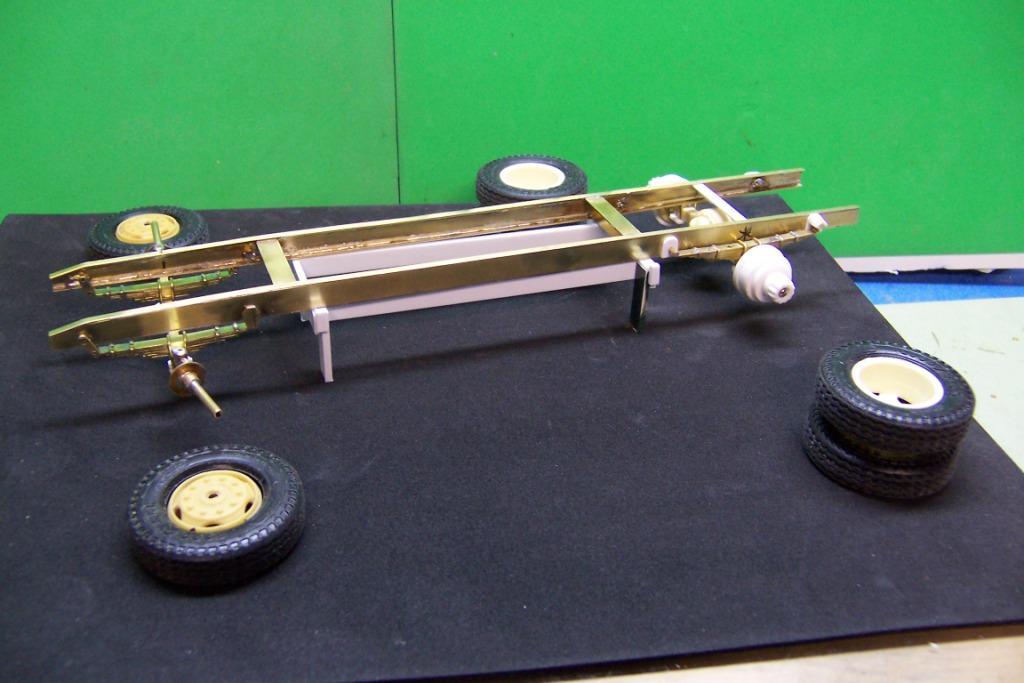
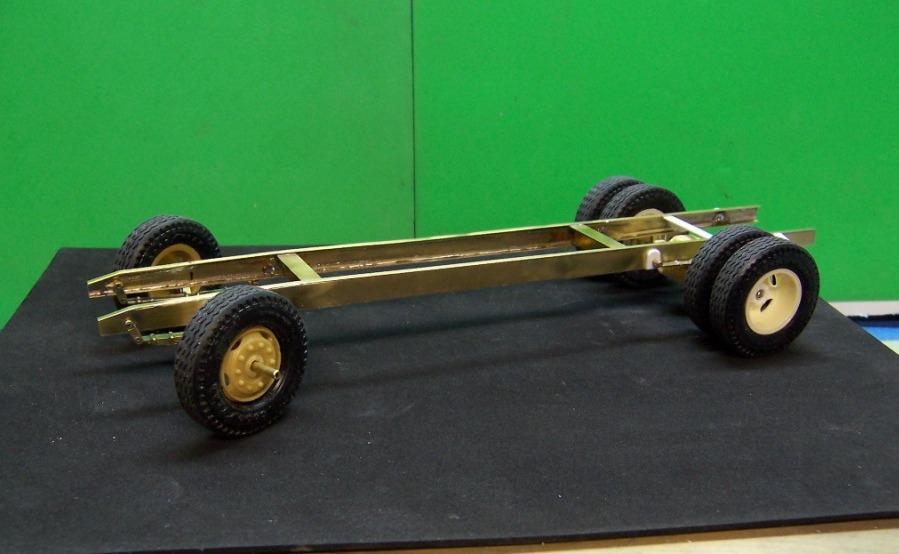
The frame is now basically complete with springs and axles attached. There will be more detailing as we go along but with that work out of the way I could concentrate on setting the body at the right height. Along the way it was necessary to do some checking of the wheel base and mark the frame accordingly for the axle locations. Mating them up to the wheel well openings take a bit of tweaking. There is nothing worse than having the tires look like they don't belong where they are. In the photo above I have attached the rear hubs with small screws. A piece of plastic rod was superglued inside the brass tubing and then drilled out for the screw. The screw head is just large enough to keep the hub from slipping off. When all is done the screw will be covered with the hub end. The same will be done for the front wheels. The brass axles will be cut off, the plastic rod inserted and drilled for screws. The fit is smooth with no wobbles and the tires and wheels are vertical. The rig is now up on all fours (or sixes if you prefer) and is at the correct height. Measurements were taken of the height of the frame and height of the top of the running boards relative to ground level so that each will be sitting properly. If the front wheels look a bit off it is because they are pivoted on the axle hubs. -

1954 Maxim 750 Pumper
Chariots of Fire replied to Chariots of Fire's topic in WIP: Model Trucks: Big Rigs and Heavy Equipment
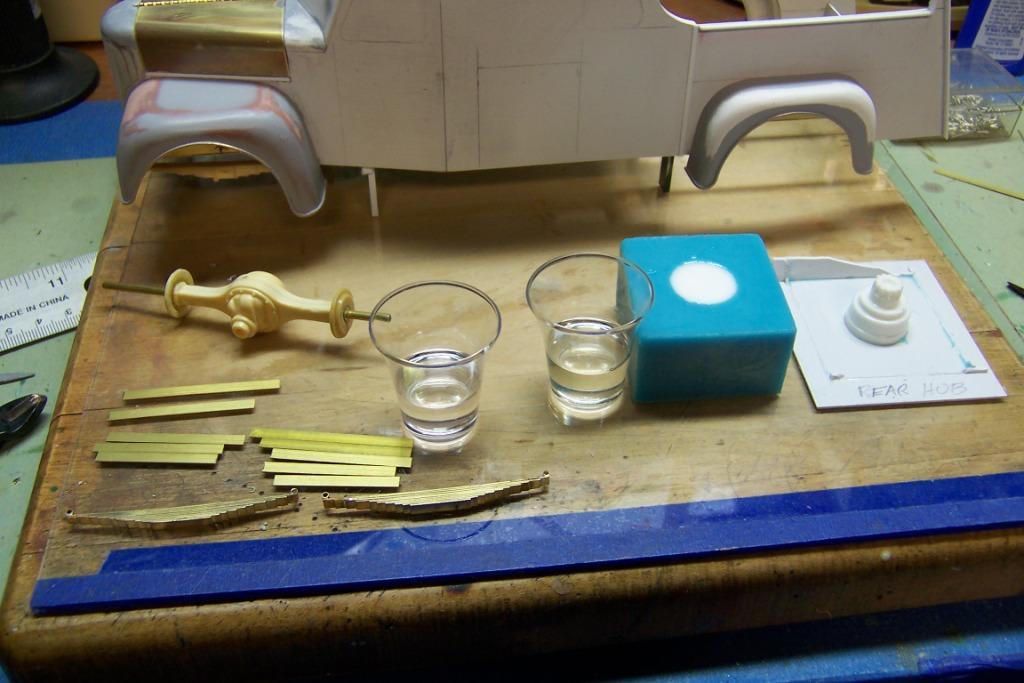
Went to the stash to see about the wheel hubs for the rear axle and found none! Had to open a sealed ALF kit to get one but after making a mold and casting some I can put the original back in the kit box. In the photo are the small cups of casting resin, the completed mold with cured resin and the master to the right. Also in the photo are the completed rear springs and the individual pieces of brass strips that will make up the front springs. Rear axle is done with a brass insert for stiffness and smooth turning of the rear wheels and the tube that will be inserted into the hubs once they are fully cured and drilled out. -

1954 Maxim 750 Pumper
Chariots of Fire replied to Chariots of Fire's topic in WIP: Model Trucks: Big Rigs and Heavy Equipment
From the research I found that there are a lot of variations in the grade of Renshape. I'm using Renshape 440, one of the lower grades of material but I really have found it to be excellent to work with. For scratch building it is almost indispensable. -

1954 Maxim 750 Pumper
Chariots of Fire replied to Chariots of Fire's topic in WIP: Model Trucks: Big Rigs and Heavy Equipment
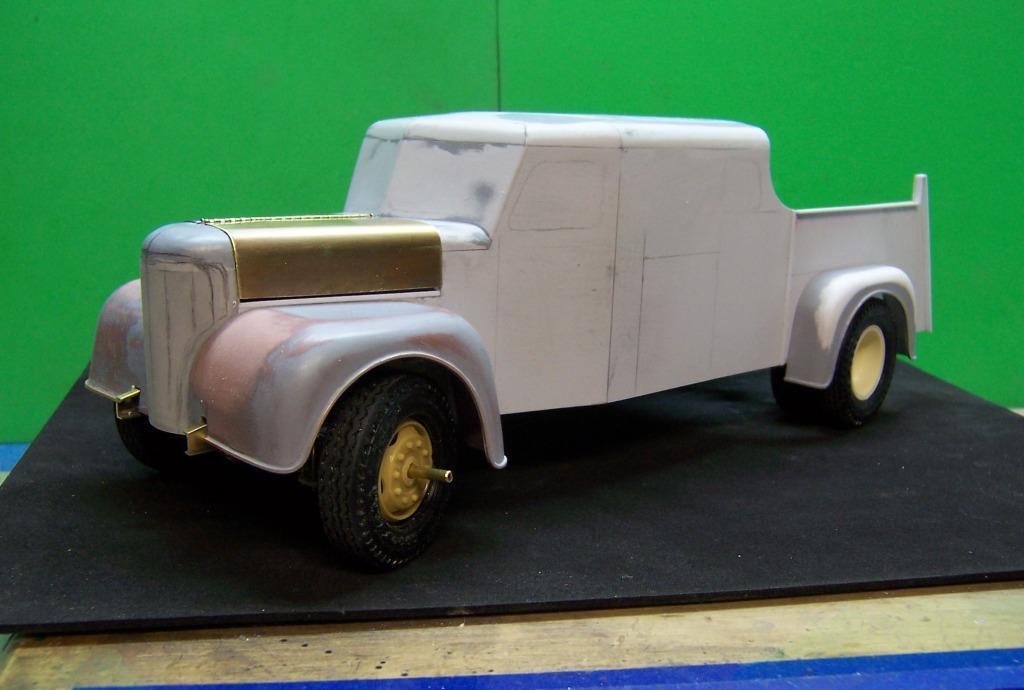
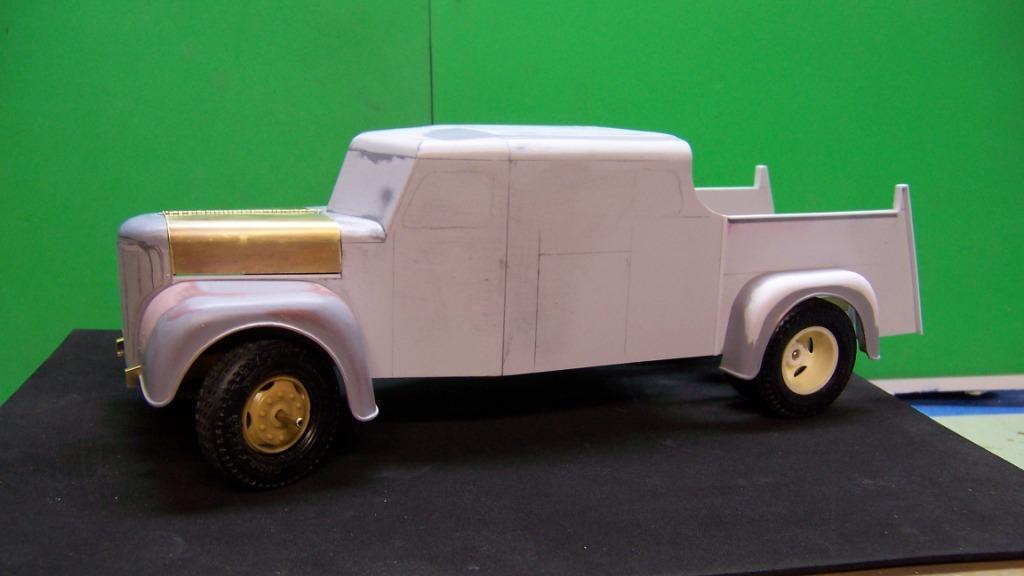
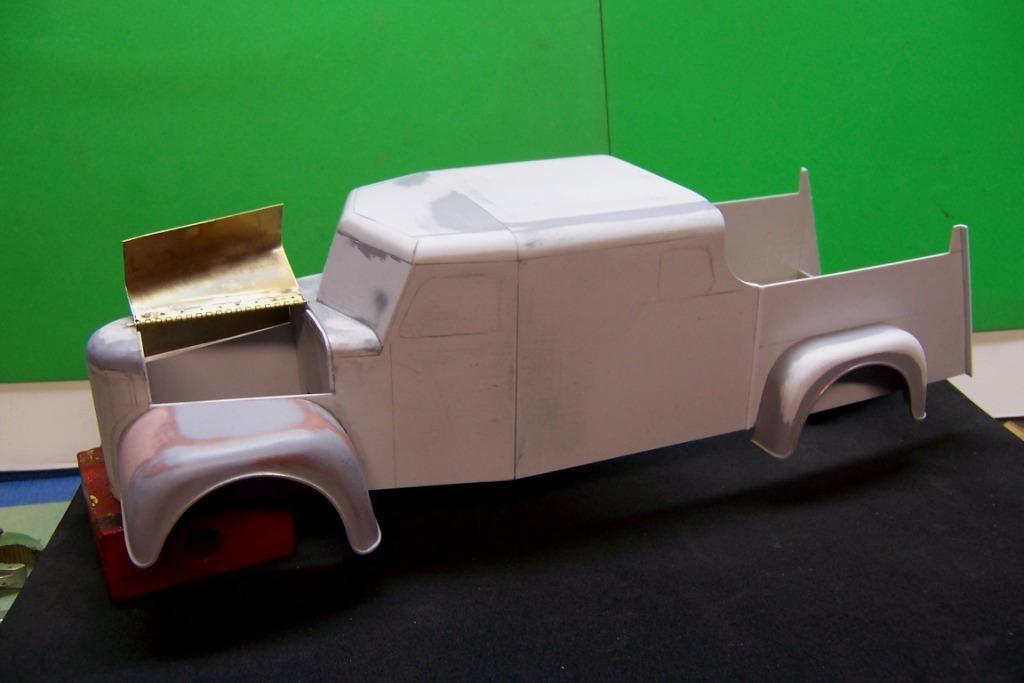
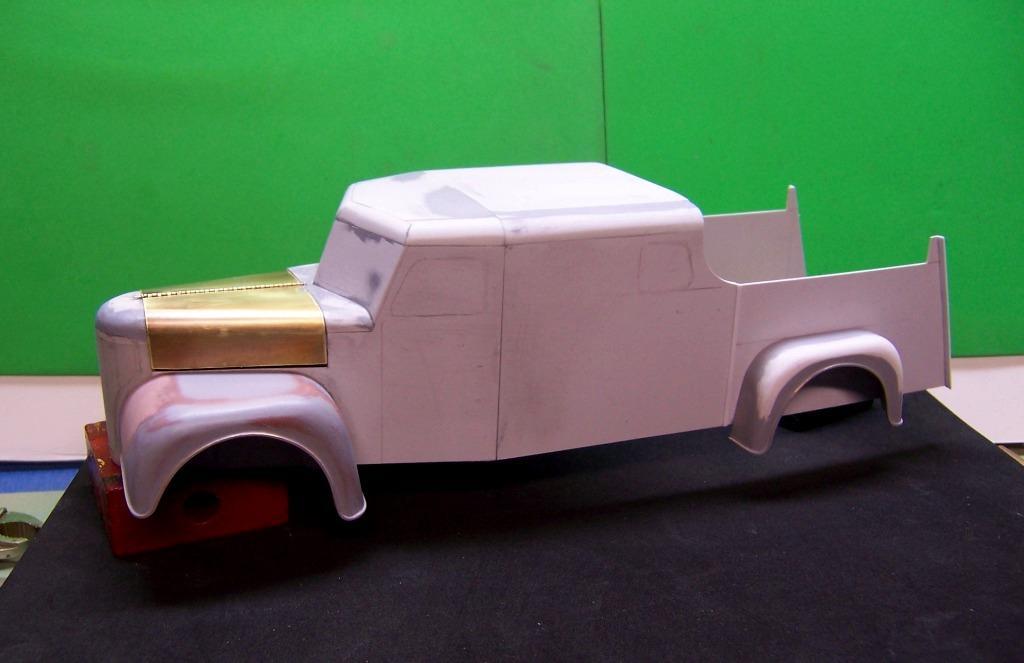
Got a bit more done today by cutting out some brass sheet stock for the hood. The pieces were annealed to make it easier to bend. After the bend was made the rough outline of the opening was transferred to the brass. Excess material was cut away with a dremel and cutting wheel. The hood is hinged with a small brass hinge and held together with a stainless steel wire. Still a bit of tweaking to get done and some shimming to do on the right side to keep the hood from dropping below the cowl line. Bending and fitting the brass takes some time and many test fits. Unlike plastic stock you can't sand it away. The gap below the hood will have a piece of plastic stock filler to close it up. The hood on the actual truck doesn't drop to the top of the fender. Latches will hopefully keep it in position once all of the fitting is complete. -

1954 Maxim 750 Pumper
Chariots of Fire replied to Chariots of Fire's topic in WIP: Model Trucks: Big Rigs and Heavy Equipment
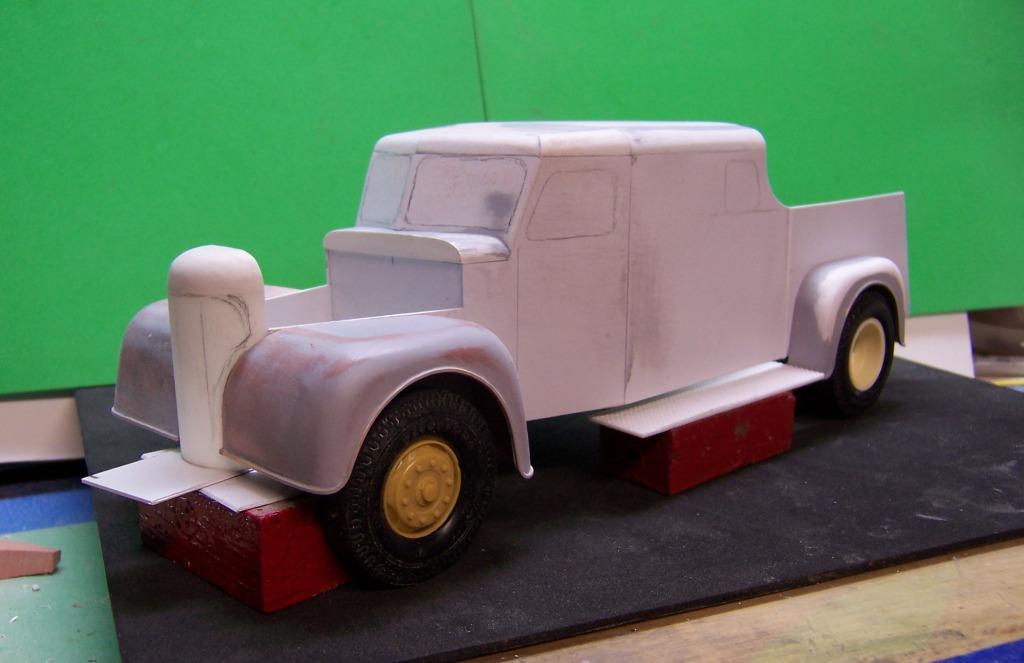
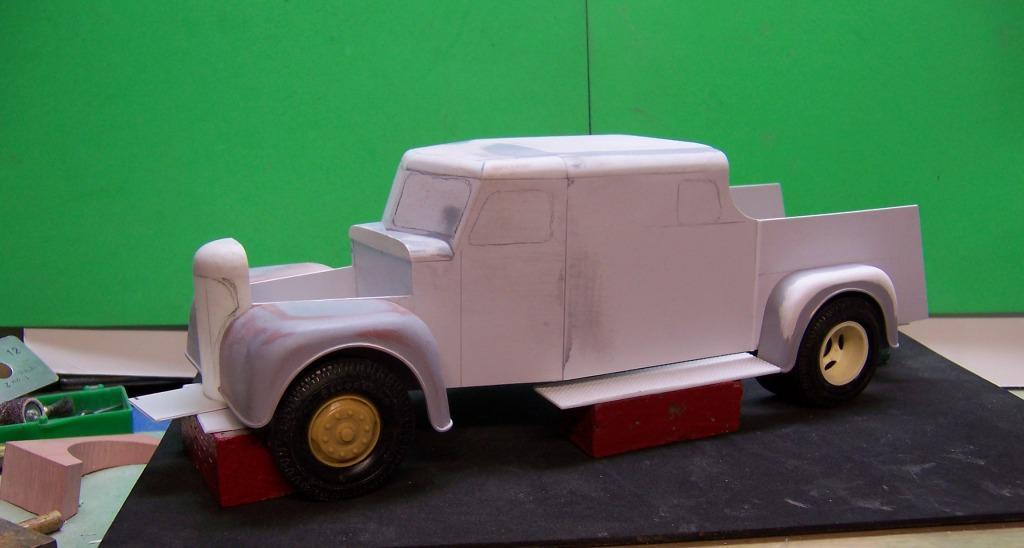
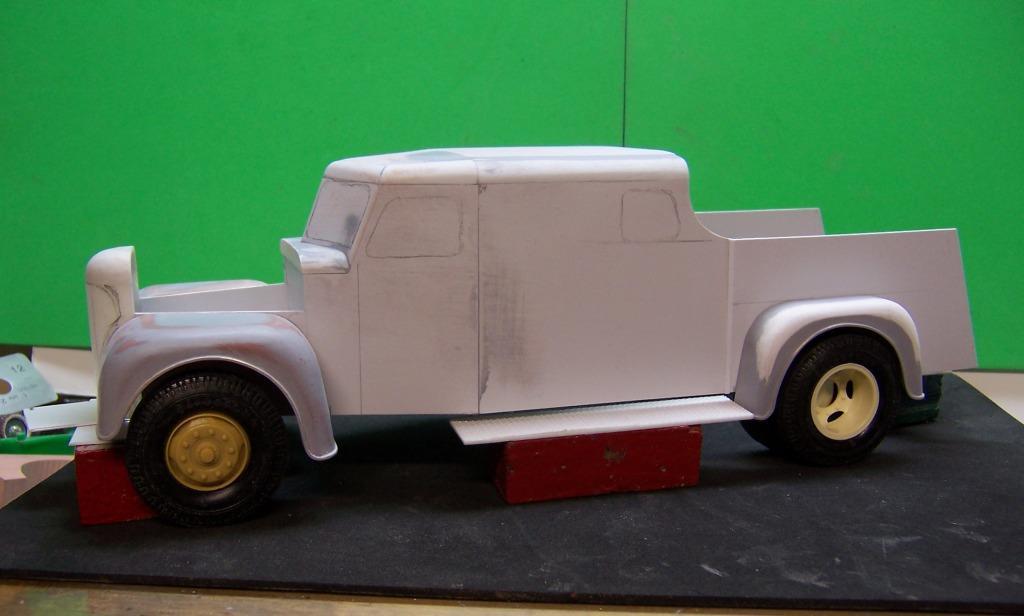
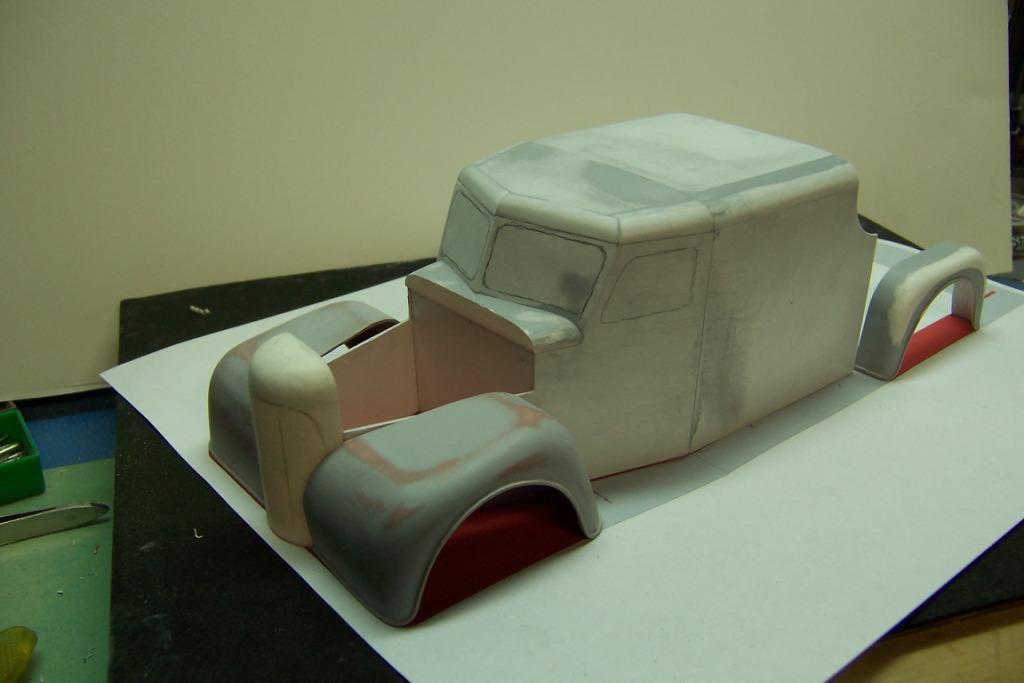
With a bit more done on the body sides the fenders were glued in place. The front fenders will need a bit of tweaking along the bottom edges to even them up but otherwise than that the fit is pretty good. Next will be to build up the inside of the hose body. That will add considerable strength and stiffness to the back as right now it is a bit wobbly. The running board will extend to the front fender and will taper in at the same point as where the cab tapers toward the grill. The bottom of each fender actually extends below the running board. The body sides and behind the front fenders will have to be cut out now that the fenders are in place so that the springs and axles can be set. The hood will be made of brass and hinged in the middle. The interior of the grill will also be cut out. In the stash is some nice photoetch mesh that will be curved to shape and fitted into place. The hard part will be the headlight bezels. Unlike other light bezels these are teardrop shape so I haven't figured out quite yet how they will be made. The part that fits the fender is easy enough but the chromed part where the headlight and parking light go is the teaser. -

1954 Maxim 750 Pumper
Chariots of Fire replied to Chariots of Fire's topic in WIP: Model Trucks: Big Rigs and Heavy Equipment
Measurements and photos translated into line drawings Dave. The relative dimensions of various parts are critical and basic. Once you have those you can use the drawings for the details. I also have a little trick when using photos. For example if I want to reproduce the fenders of this truck it would take a ton of measurements to get the curves right. But by getting the overall width in front and back, and the overall length I can do the rest with photos. So if I take a good straight shot of the front fender looking dead at it I can put the photo into my graphics program. Now the only thing left is size. If the overall fender length is say 50", I make a line 50mm long and put it over the photo. Then the photo can be scaled either up or down to where the overall length in the photo is exactly the same length as the line. Having that I print it out to scale and then cut the fender profile out to make a paper template, stick it to the medium the fender will be made of and start cutting. With the basic shape accurate the edges can be sanded and ground to round them off. that is essentially what I did in the first couple of photos of these posts. -

1954 Maxim 750 Pumper
Chariots of Fire replied to Chariots of Fire's topic in WIP: Model Trucks: Big Rigs and Heavy Equipment
-

1954 Maxim 750 Pumper
Chariots of Fire replied to Chariots of Fire's topic in WIP: Model Trucks: Big Rigs and Heavy Equipment
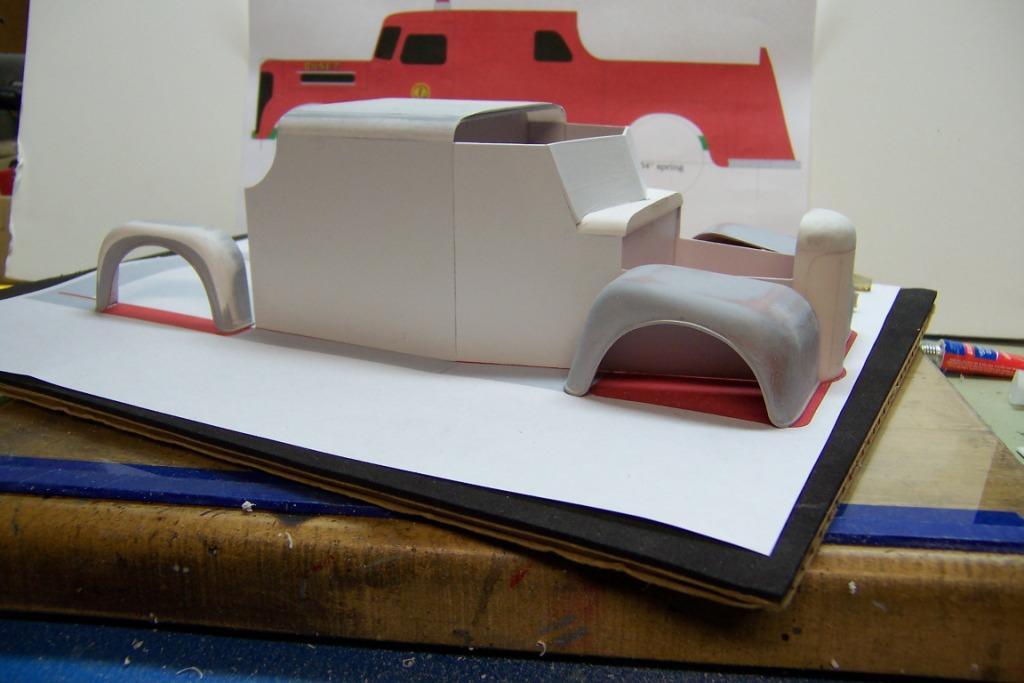
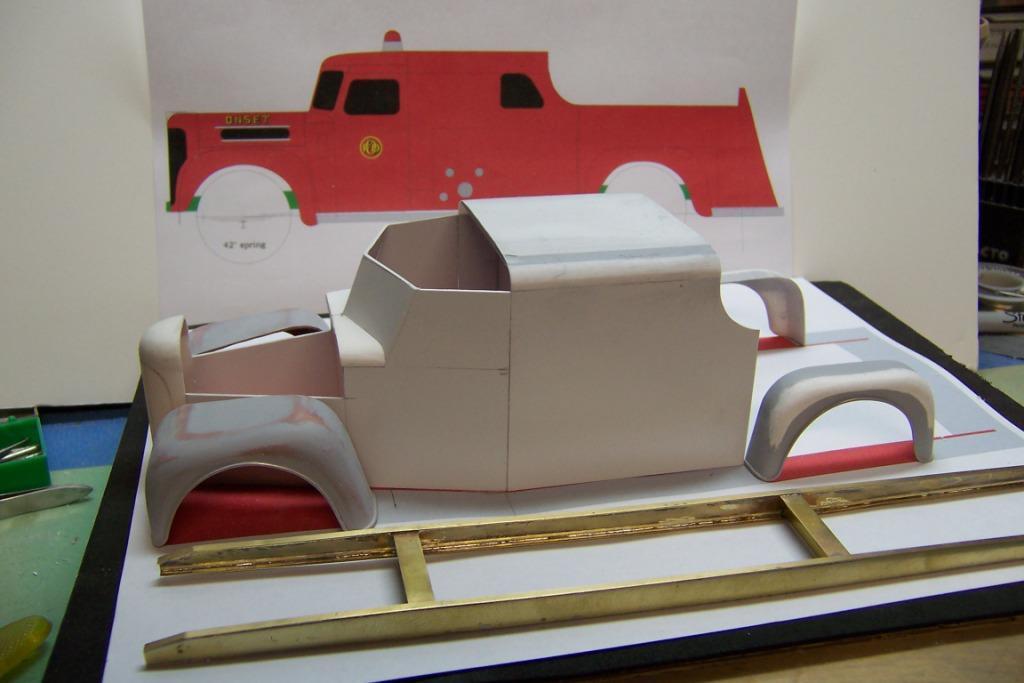
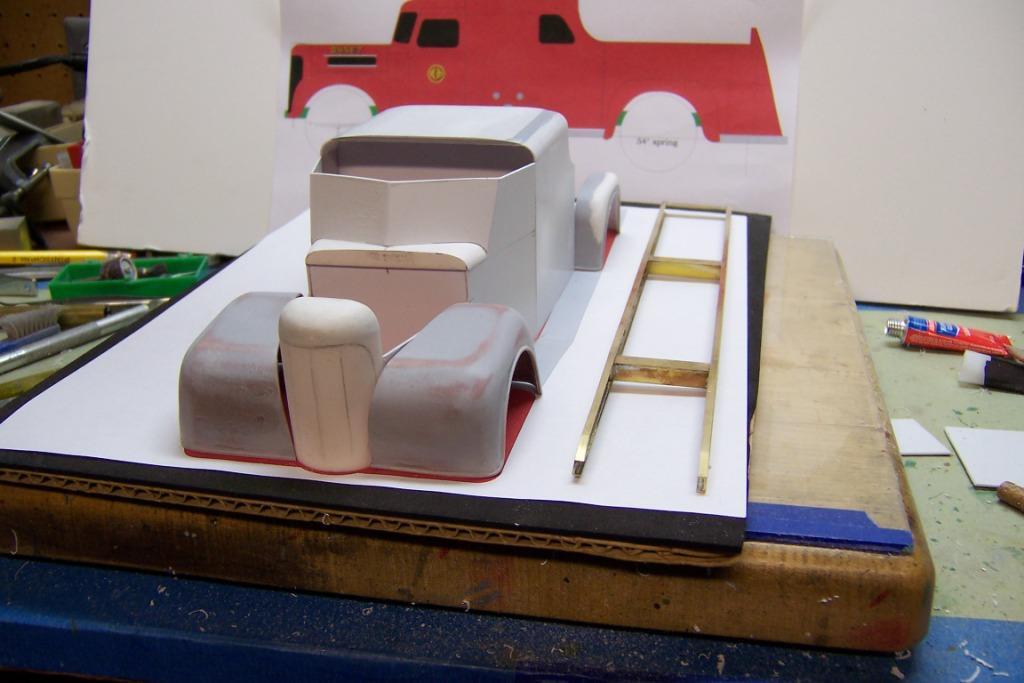
Work on the Maxim is continuing with some progress made on the body and cab. Having the dimensions of the truck helps immensely to make up side and top view drawings. Measurements of the stock to be used can be taken directly from the linework and it insures that the construction will be square. I started with the rear top and then added the sides. Since the cab angles in at the back of the cab doors to the front grill those pieces were cut out of sheet stock and glued in position. Then the cowl was shaped out of some porch railing stock. Adding the firewall stiffened things up some but it will become much better once the rest of the top is in place and the cab interior is made thicker with stiffeners. The hood and doors will be made of brass sheet stock. The front fenders need to be worked on a bit before they can be glued into position. In the line drawing behind the model you can see that the rear of the fender drops below the running board in order to be parallel with the hood line. After the body and front portion are made more rigid the fenders can be glued up. -

1954 Maxim 750 Pumper
Chariots of Fire replied to Chariots of Fire's topic in WIP: Model Trucks: Big Rigs and Heavy Equipment
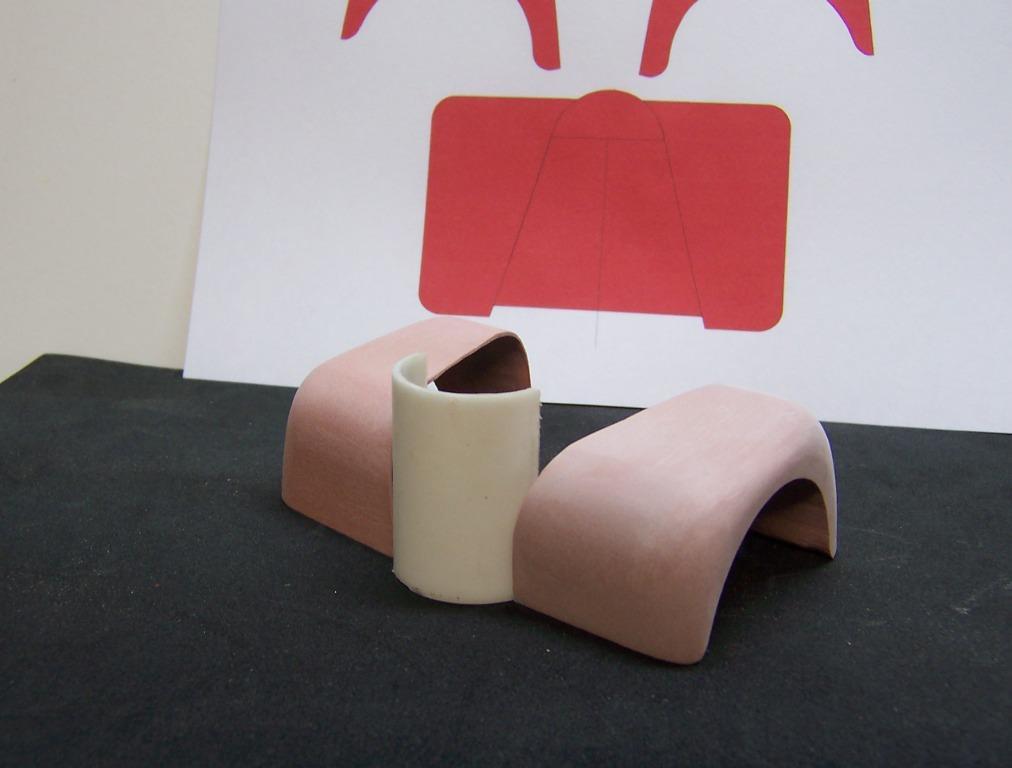
I went back to see if my piece of left over Renshape was enough for the rear fenders and found it was nowhere near enough. What to do? I searched and finally found a source for a good size piece for short money so I've ordered it. In the meantime I have this old stash of porch railing plastic material that I was given a long time ago. I actually used it to make the fenders for my '37 Seagrave ladder truck. So I got out a piece, traced the fender oulines as before and cut them out on the band saw. A little final profile shaping and grinding and I had the fenders. The photo below shows the rear fenders and a piece of the railing stock in the back. It is a bit harder to sand than the Renshape and is a bit more porous. But that can be taken care of with some filler like clear Testors lacquer. I'll slosh around some two part resin on the underside just to smooth it out and give it a bit more strength. But it is still amazing how much overall strength it has even when it is thinned out like what you see. Like the front fender beside them I'll take some brass wire and wrap it around the edges to make it more rigid and more like the real thing. The wire is filed flat after being super glued on. The primer and finish paint will act as a filler to make it look more like part of the fender itself. -

1954 Maxim 750 Pumper
Chariots of Fire replied to Chariots of Fire's topic in WIP: Model Trucks: Big Rigs and Heavy Equipment
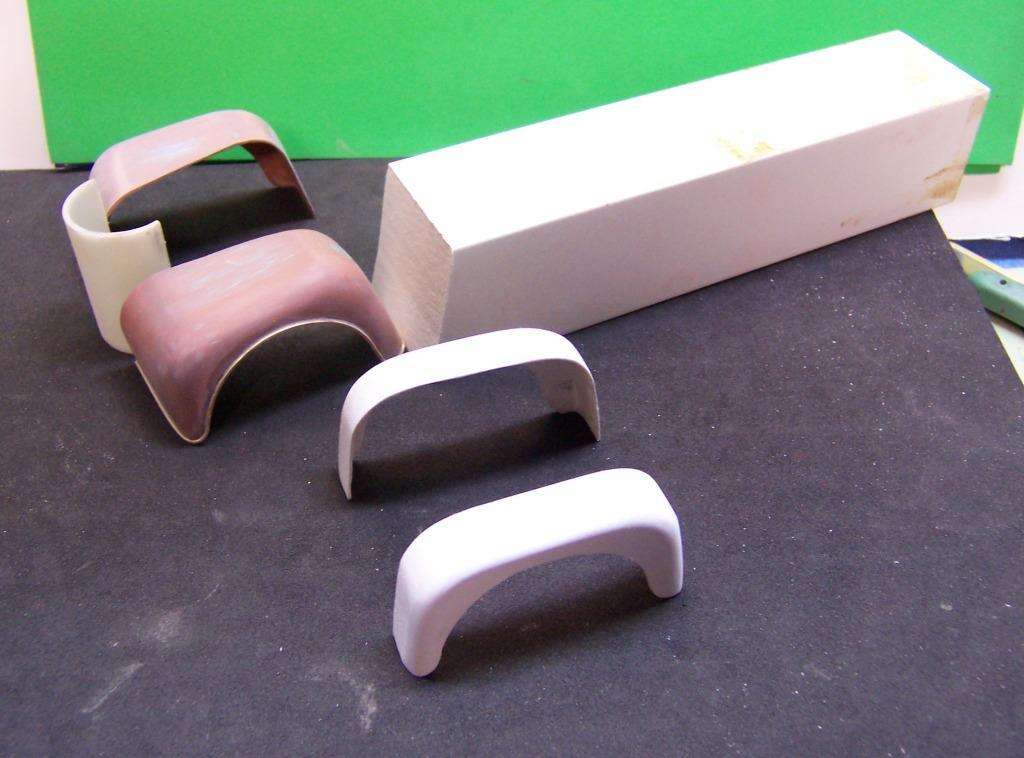
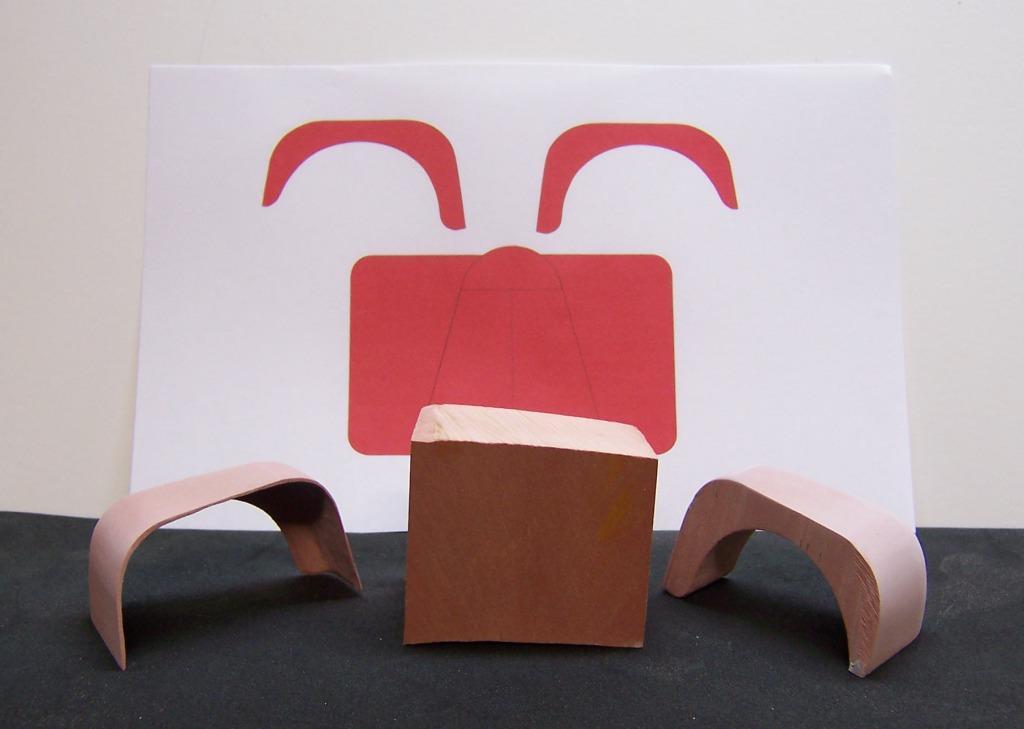
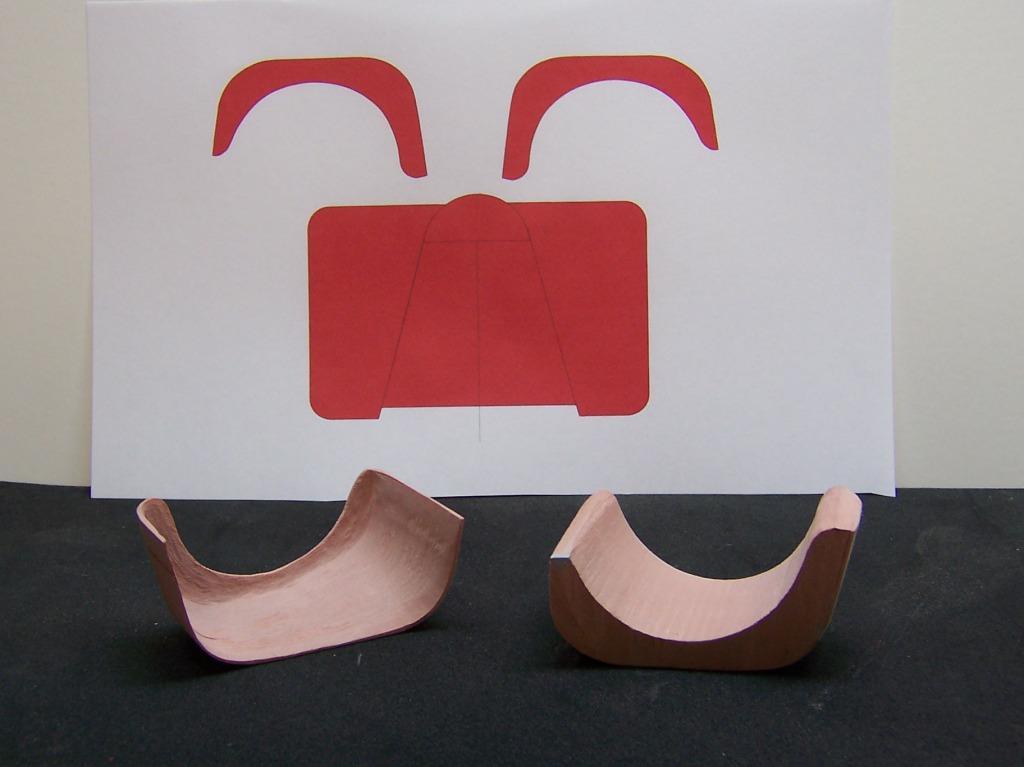
Having finished up the basics of the front axle I decided to get on with making up the front fenders. At first I tried soldering some copper sheet over a wood buck the the results were less than perfect so it was on to Plan B. I have a block of Renshape which is an extruded plastic material that has the look of wood. But unlike wood it has no grain and carves beautifully. So I cut out the fender patterns in the profile and top views and taped them to a piece of Renshape block. The I cut the profile out on a bandsaw. Using a dremel with a drum sander it was easy to round off the corners of the fenders and then sand them down smooth. After the outside shaping was done I used the drum sander to carve away the underside. In the first photo you can see the completed fender on the left, a Renshape block remnant in the middle and the other fender that still needs to be hollowed out. In the second photo it's apparent how much material has to be removed. And in the last photo is the piece of round plastic that will form the grill. I used the other half of this plastic on the 1955 Maxim Aerial that I built more than 25 years ago. I purposely kept this piece in the stash with the idea it would come in handy for a future project. Lesson? NEVER throw extra pieces away! -

Down Range Productions (Matt Leese)
Chariots of Fire replied to Tesla's topic in Truck Aftermarket / Resin / 3D Printed
Me too! He recently did an IH Workstar grill for me in 1/25 scale. It is awesome! -

White 3000 single axle tractor
Chariots of Fire replied to Pete68's topic in WIP: Model Trucks: Big Rigs and Heavy Equipment
That will be a nice piece. Will you be dropping the cab down any on the frame? -

1954 Maxim 750 Pumper
Chariots of Fire replied to Chariots of Fire's topic in WIP: Model Trucks: Big Rigs and Heavy Equipment
You got it, Casey. I made a paper template, taped it to the piece of flat stock, cut and shaped it. Then top and bottom were soldered in place. -

1954 Maxim 750 Pumper
Chariots of Fire replied to Chariots of Fire's topic in WIP: Model Trucks: Big Rigs and Heavy Equipment
That machine is a secret, Tom! Only the trolls know how it works and they know to keep mum about it! I'll be sure to keep the build coming. Next is to get some strip stock to begin making up the springs. -

1954 Maxim 750 Pumper
Chariots of Fire replied to Chariots of Fire's topic in WIP: Model Trucks: Big Rigs and Heavy Equipment
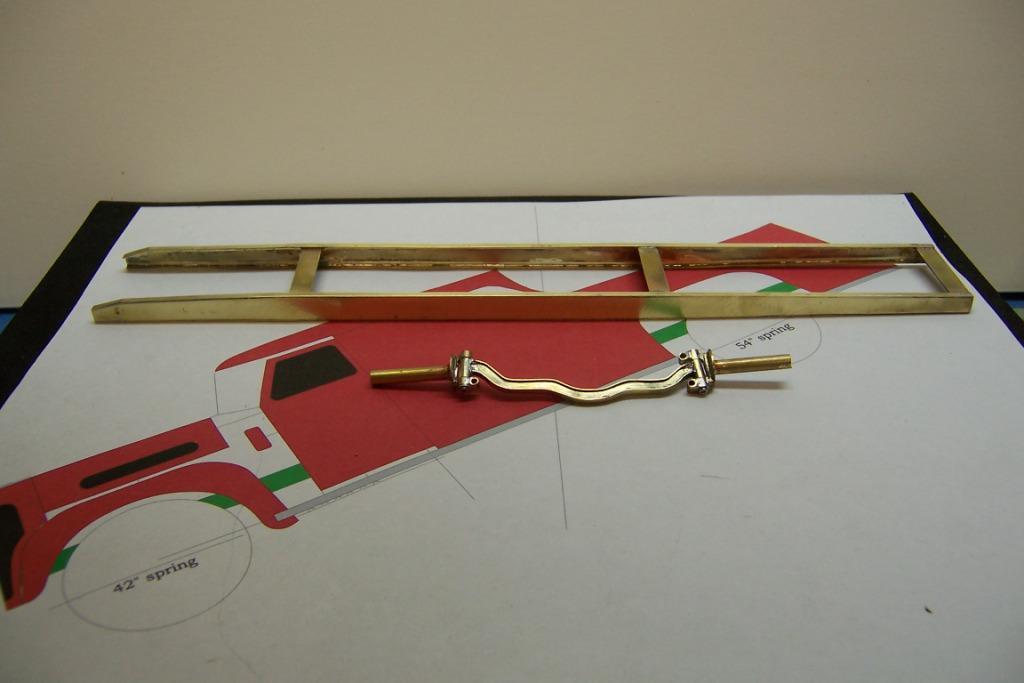
As promised here is a photo of the start of the Maxim. The frame is made of brass strip stock with the top and bottom flanges of the frame rails soldered to the web. Temporary spacers of strip stock hold the rails in alignment until I see where other components will be located. The front axle is made of several pieces of brass strip stock and tubing. The hubs will be cut down once it is known how the wheels will be located. It will be important to make sure that the tires and wheels are inside the fender openings but not far that they look too small. The brass work is sitting on a cad drawing of the truck profile done at 1/25 scale. -

1954 Maxim 750 Pumper
Chariots of Fire replied to Chariots of Fire's topic in WIP: Model Trucks: Big Rigs and Heavy Equipment
Aaron: Here's a tip for you. I'm doing up the front axle and it has a lot of small pieces as you will see when I get the photos posted. Using two different temperature solders has solved the problem of small parts coming off because the solder melts. I've used the higher temp. solder for the smaller initial pieces and the lower temp solder for the last ones reducing the chance that things will all fall apart. I don't have a resistance soldering tool for this but it would come in handy! Maybe Santa Claus has one in his sack he could crop off! -

1954 Maxim 750 Pumper
Chariots of Fire replied to Chariots of Fire's topic in WIP: Model Trucks: Big Rigs and Heavy Equipment
Got started the other day on the frame for the truck. The front axle is a bit different in that the center of it is dropped down to clear the bottom of the engine. As soon as I finish it up I'll post some photos. -
Hey Towman.. I built that a few years ago. A tip about the cab: Plan on putting some crossways stiffeners inside the top to keep the top from sagging. The real rig would have had them anyway. I also found the resin bumper to be very soft. If I accidentally placed it on an uneven surface it took the shape of that surface. So I made a new one from brass strip stock. Plastic strip stock would work also. I also have some Ward LaFrance drawings of the body. And there is a walk around video of E-51 that shows you what it looks like as well. I think if you just type in "Engine 51" it will pop up on U tube. Let me know if you run into any problems. I'd be glad to help.

