Warren D
-
Posts
1,839 -
Joined
-
Last visited
Content Type
Profiles
Forums
Events
Gallery
Everything posted by Warren D
-
Cat D8H Dozer
Warren D replied to Warren D's topic in WIP: Model Trucks: Big Rigs and Heavy Equipment
My PE sets are all CTM, Czech Truck Models. You could probably order right from their website if you can't find them in-country. -
Cat D8H Dozer
Warren D replied to Warren D's topic in WIP: Model Trucks: Big Rigs and Heavy Equipment
I'm using my own blend of Pollyscale yellows. Looks like the older Cats I saw when growing up. Pics have a little green tint that isn't there. -
Cat D8H Dozer
Warren D replied to Warren D's topic in WIP: Model Trucks: Big Rigs and Heavy Equipment
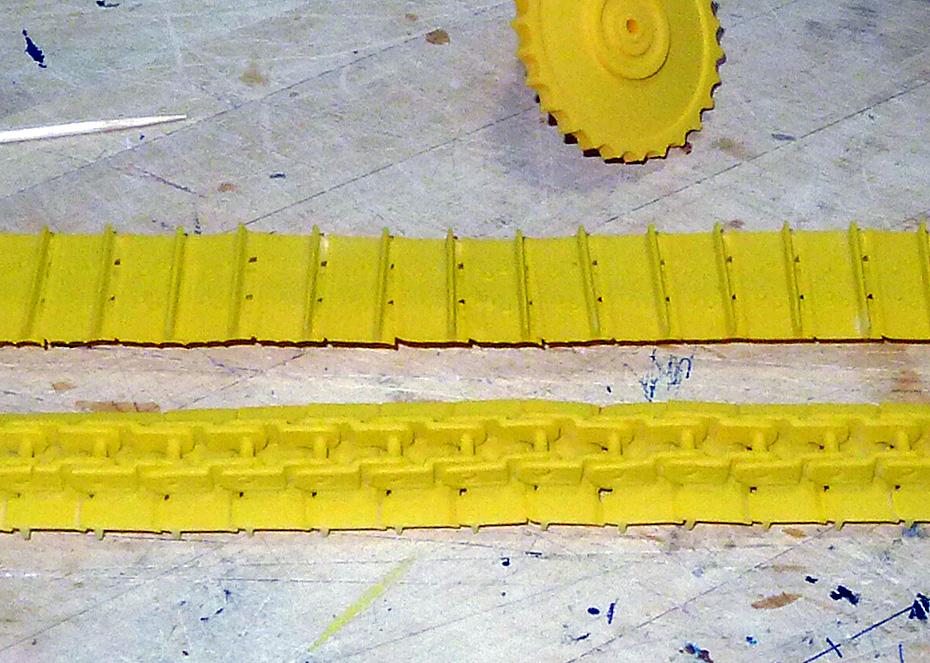
Started working on the tracks, these are aftermarket. I started by painting them yellow, holding an arc as if they were going around the sprocket. I did this to get paint into the joints. I use Polyscale, the tracks are 3D printed and don't need primer as the Pollyscale sticks to 3D prints and resin as good as any primer I've used. Next, I laid the tracks face up and flat and sprayed them with Testors chrome in a rattle can. A quick touch up on the backs with more yellow and I ran some steel wool over the chrome to "scratch it up". When the tracks are on the sprocket, you'll see the yellow paint between the grousers. The look I'm going for is a newer (or newly repainted) unit with some light use.
-
D8H Caterpillar dozer
Warren D replied to Mopar - D's topic in Model Trucks: Big Rigs and Heavy Equipment
Came out great! Thanks for blazing that trail! LOL! -
Looks good, well done.
-
Cat D8H Dozer
Warren D replied to Warren D's topic in WIP: Model Trucks: Big Rigs and Heavy Equipment
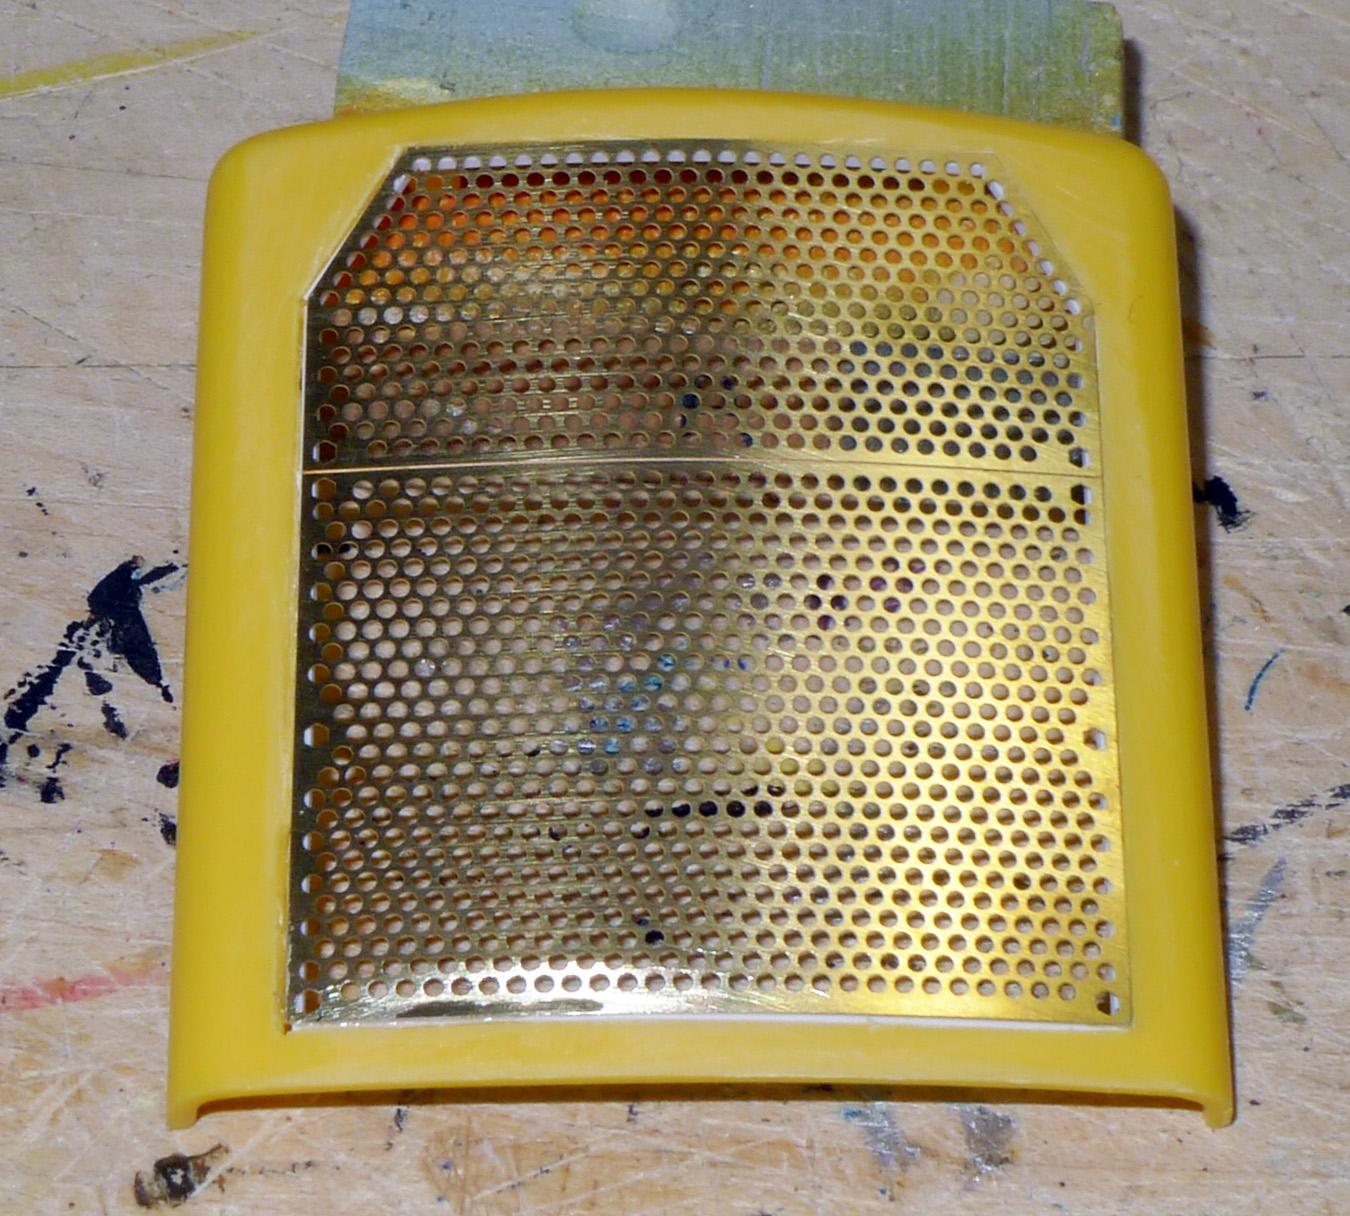
The tractor body is coming along, got the floor and fuel/hydro tanks installed. At some point very soon, I'll need to start painting. As for the grill, I decided I wanted the PE grill to sit flush with the surroundings as I've seen in photos of the real thing. That meant precision removal of the center section. I taped the PE grill over the nose and scored around the perimeter with a new #11 blade. I removed the PE and used very fine toothed saws to remove the inner section. I then used 0.30 square stock as a backer. I'm generally pleased with the result, I have to add the bolt head detail. It isn't quite perfect, but I'm satisfied.
-
Great idea for the tanks ends! I can see using different cans with different curves for an almost endless variety of looks.
-
Nice build, like that color!
-
Cat D8H Dozer
Warren D replied to Warren D's topic in WIP: Model Trucks: Big Rigs and Heavy Equipment
Another lesson learned the hard way. I got the frame together and the radiator in. I then checked the fit of the nose (with the grill) and found out the frame is 1/16" wider. I want the nose to fit flush with the sides so carefully removed the radiator, shaved it down and re-installed. The nose now will sit flush with the sides. If I build another one, I'll check the fit first! (If I remember. It's been about 40 years since the first one so not likely I'll be around in another 40!)
-
Cat D8H Dozer
Warren D replied to Warren D's topic in WIP: Model Trucks: Big Rigs and Heavy Equipment
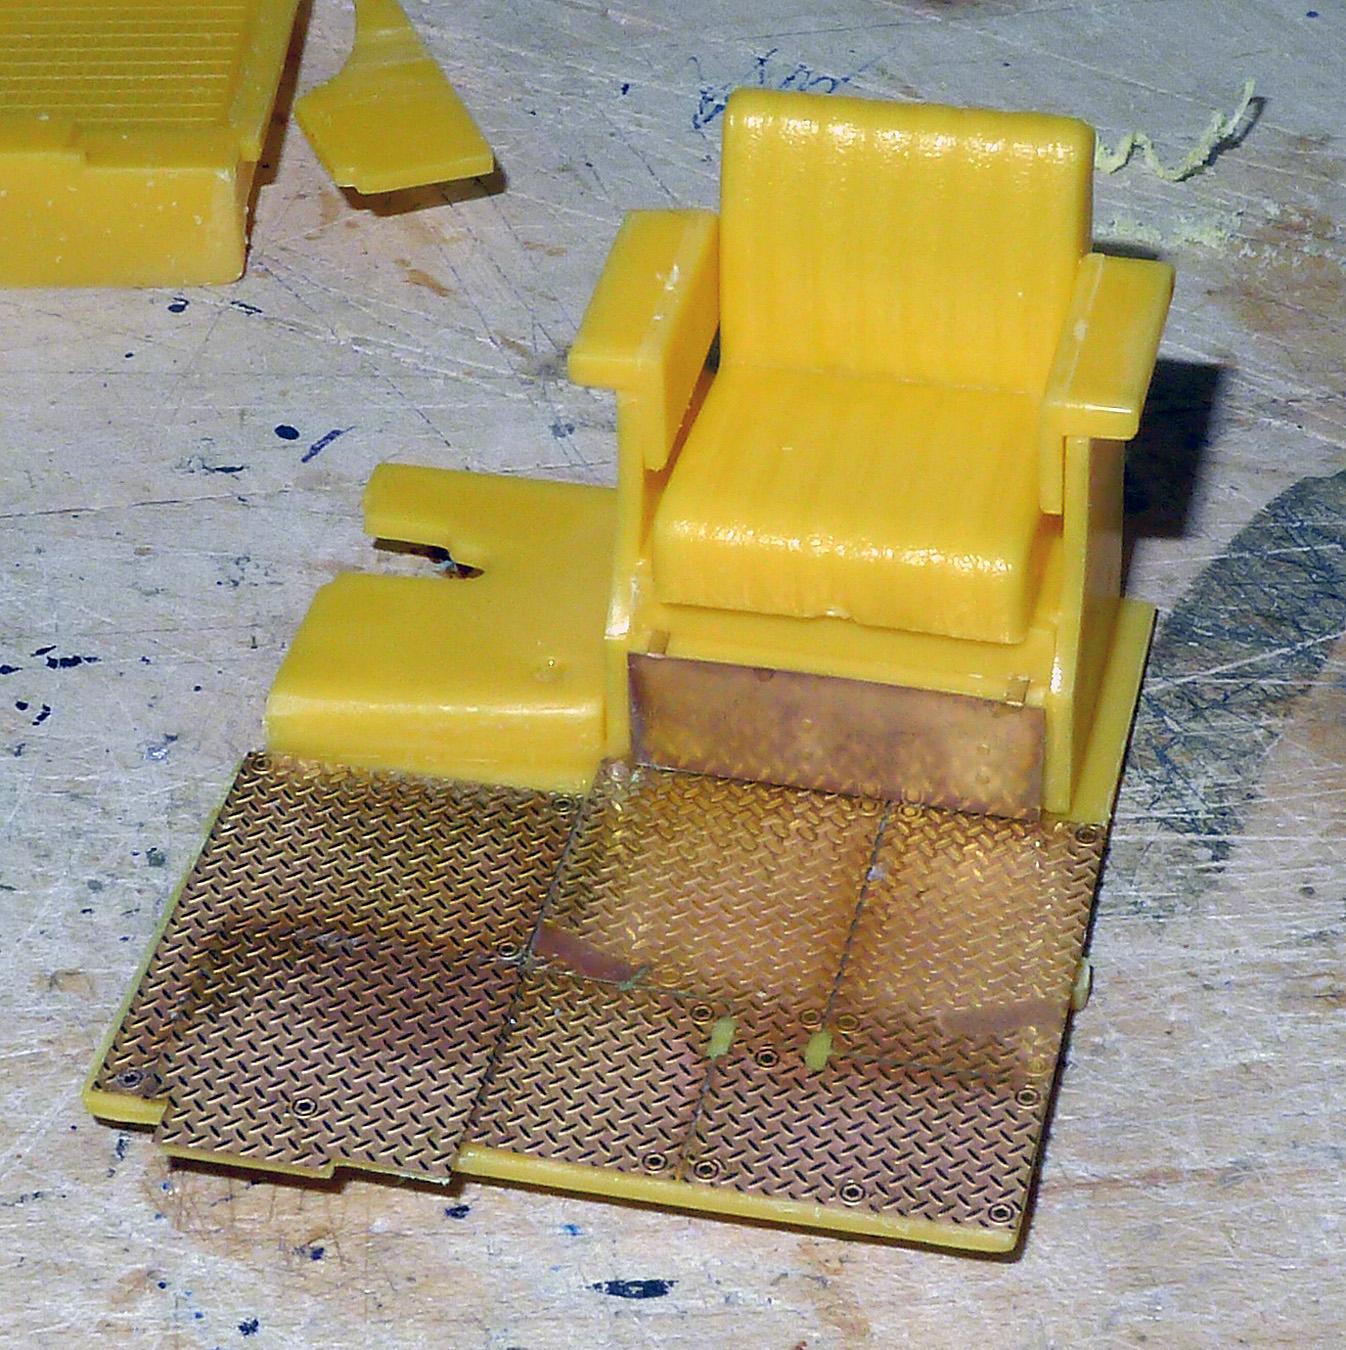
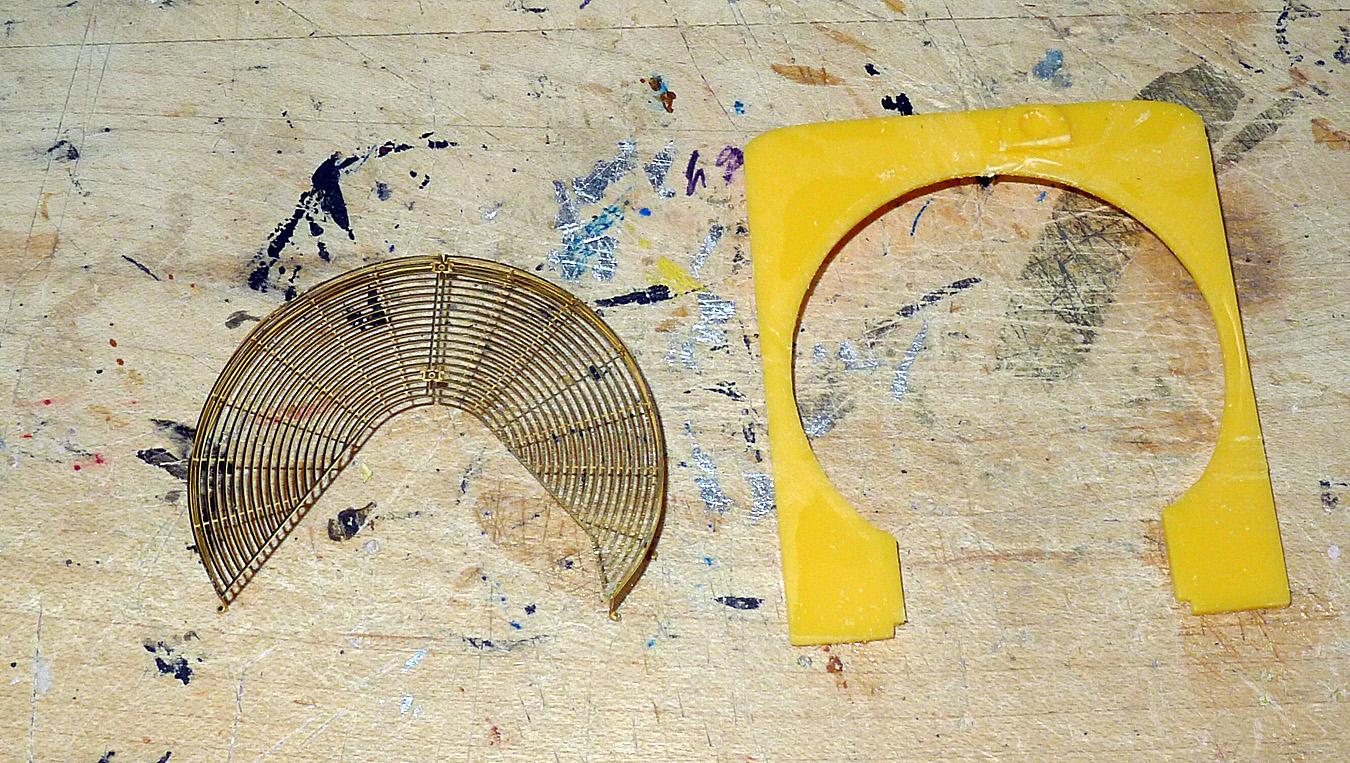
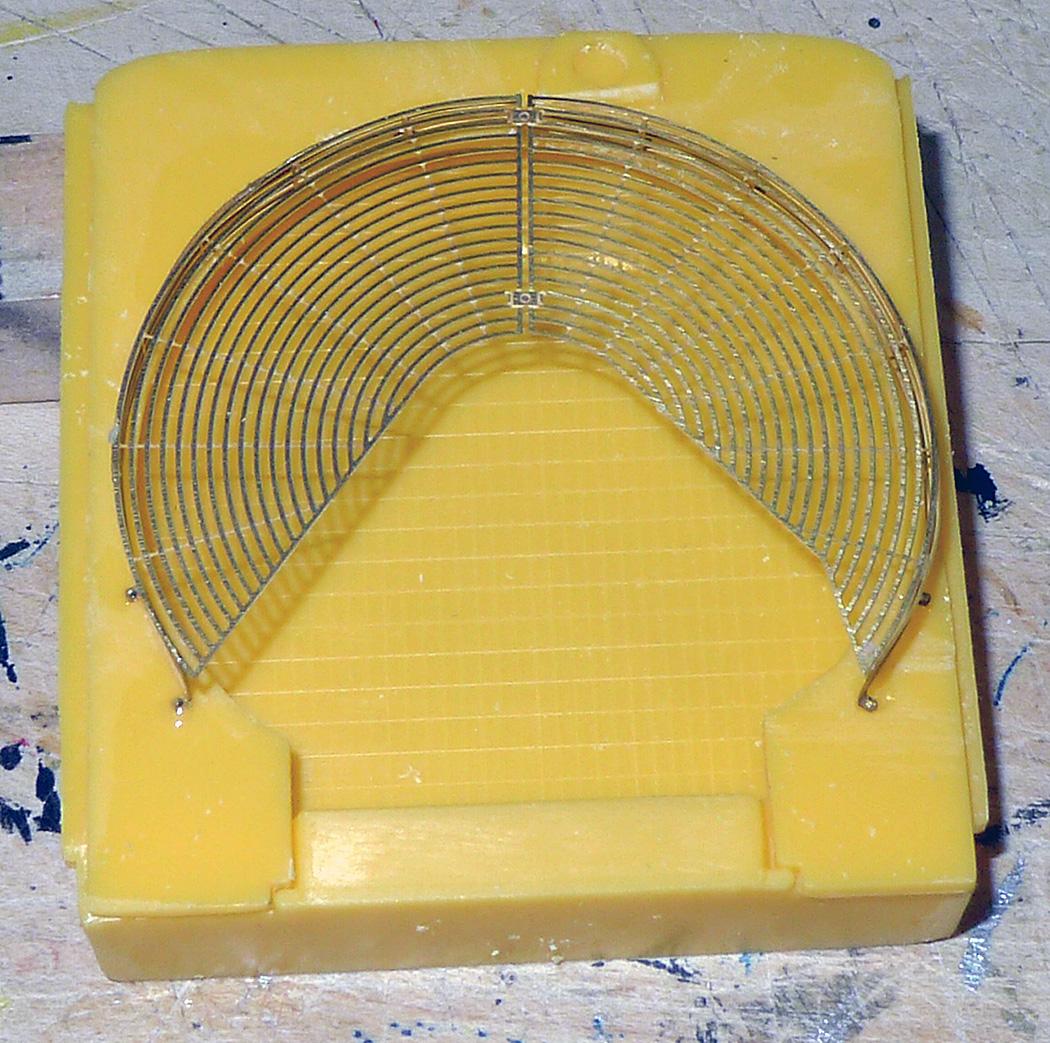
Other PE work, the floor of the cab. I ground off the molded on diamond plate prior to mounting the PE. I also got the battery box done. The CTM instructions seem to indicate that the radiator screen should go on the inside but I put it on the outside as it will probably be seen thru the grill.
-
Cat D8H Dozer
Warren D replied to Warren D's topic in WIP: Model Trucks: Big Rigs and Heavy Equipment
Some progress with the PE. I removed the molded on fan shroud before mounting the PE one
-
Cat D8H Dozer
Warren D replied to Warren D's topic in WIP: Model Trucks: Big Rigs and Heavy Equipment
You can get the original decals from Jerry @ Modeltruckin'. I think I have a couple sets I bought a couple of years ago, I should probably hunt them down sooner than later! -
Cat D8H Dozer
Warren D replied to Warren D's topic in WIP: Model Trucks: Big Rigs and Heavy Equipment
Thanks, I've been working various parts this afternoon, CTM instructions are a little shaky......some of these PE parts are SMALL!!!!! -
Cat D8H Dozer
Warren D replied to Warren D's topic in WIP: Model Trucks: Big Rigs and Heavy Equipment
The aftermarket tracks seem pretty good, 3D printed and they look much better than those in the kit. I'm sure once you get going you'll do your normal excellent work. -
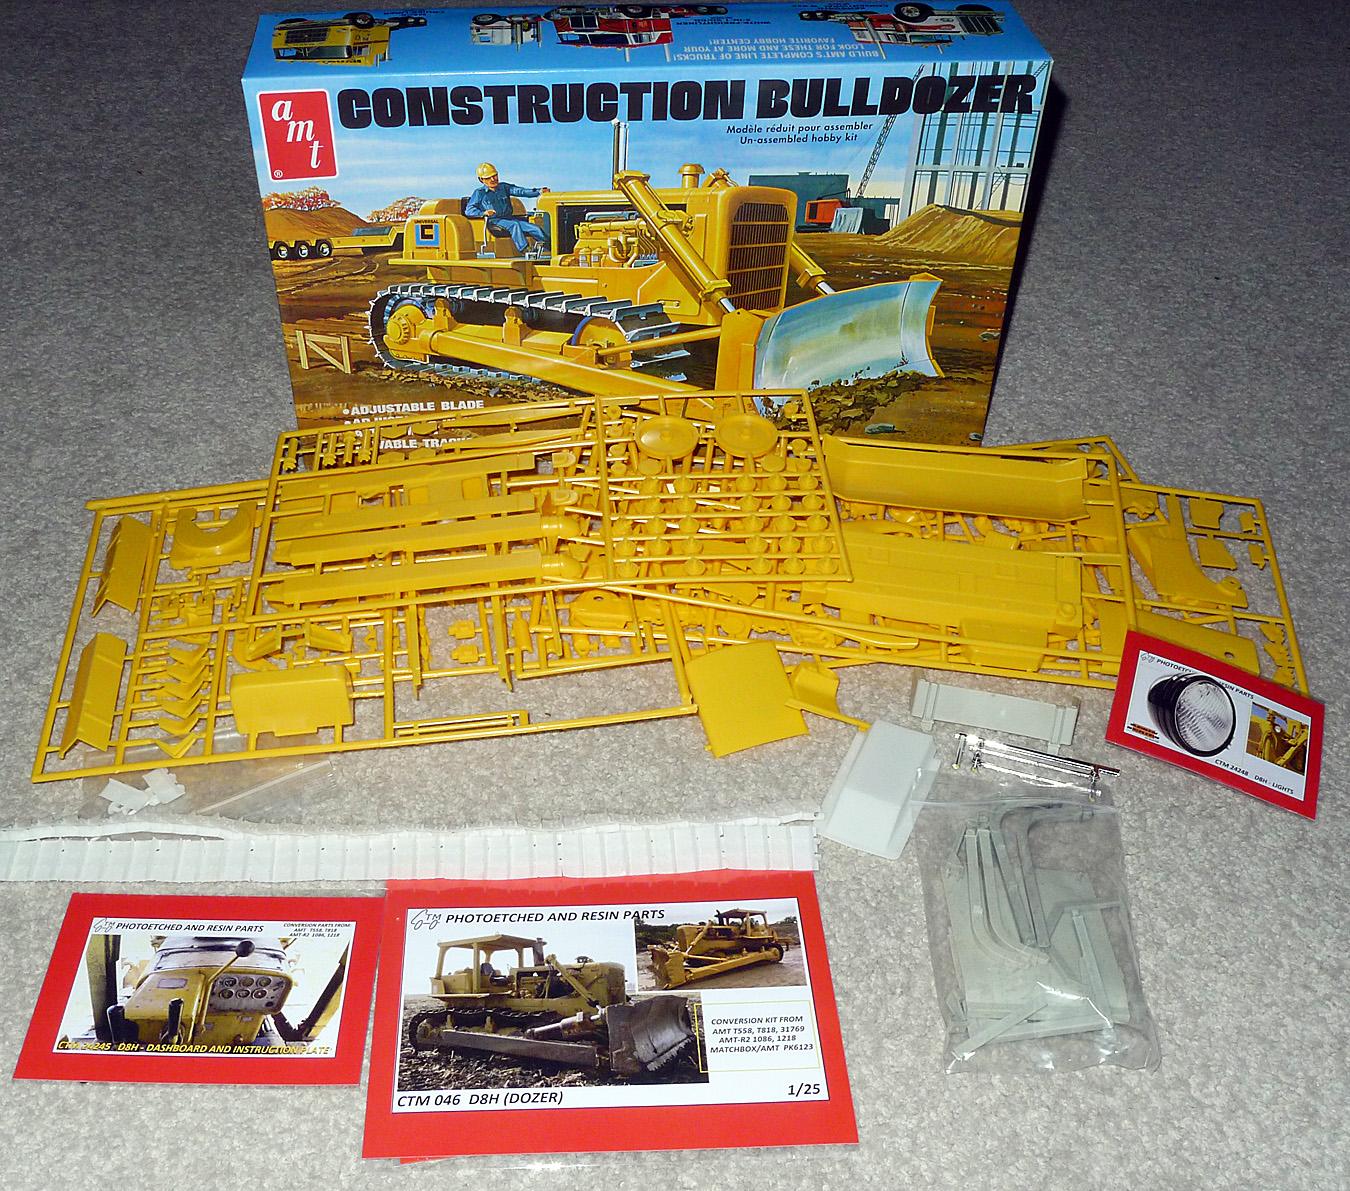
Starting a new build while waiting on parts for the Brock 360. I built the original about 40 years ago and still have it (minus the exhaust stack). I need a break from trucks so this should scratch that itch. I got the new kit and decided to add some PE so I got the CTM details. I'm using replacement tracks and will add a ROPS from Jamie. My biggest concern is the grill, guess I need to take my time and keep my fingers crossed.
-
CF White-Freightliner SD with doubles
Warren D replied to 1959scudetto's topic in Model Trucks: Big Rigs and Heavy Equipment
Still looks good to me. -
Rough Terrain Freightliner
Warren D replied to BIGTRUCK's topic in Model Trucks: Big Rigs and Heavy Equipment
Very good execution of a unique subject! -
You did a great job on this.
-
KW flat top kustom
Warren D replied to DrKerry's topic in Model Trucks: Big Rigs and Heavy Equipment
Looks good! -
Link-Belt HC-218 Truck Crane
Warren D replied to redneckrigger's topic in WIP: Model Trucks: Big Rigs and Heavy Equipment
Times 2!!!! -
Bottom Dump trailer
Warren D replied to Mopar - D's topic in WIP: Model Trucks: Big Rigs and Heavy Equipment
Impressive work, it's looking great! -
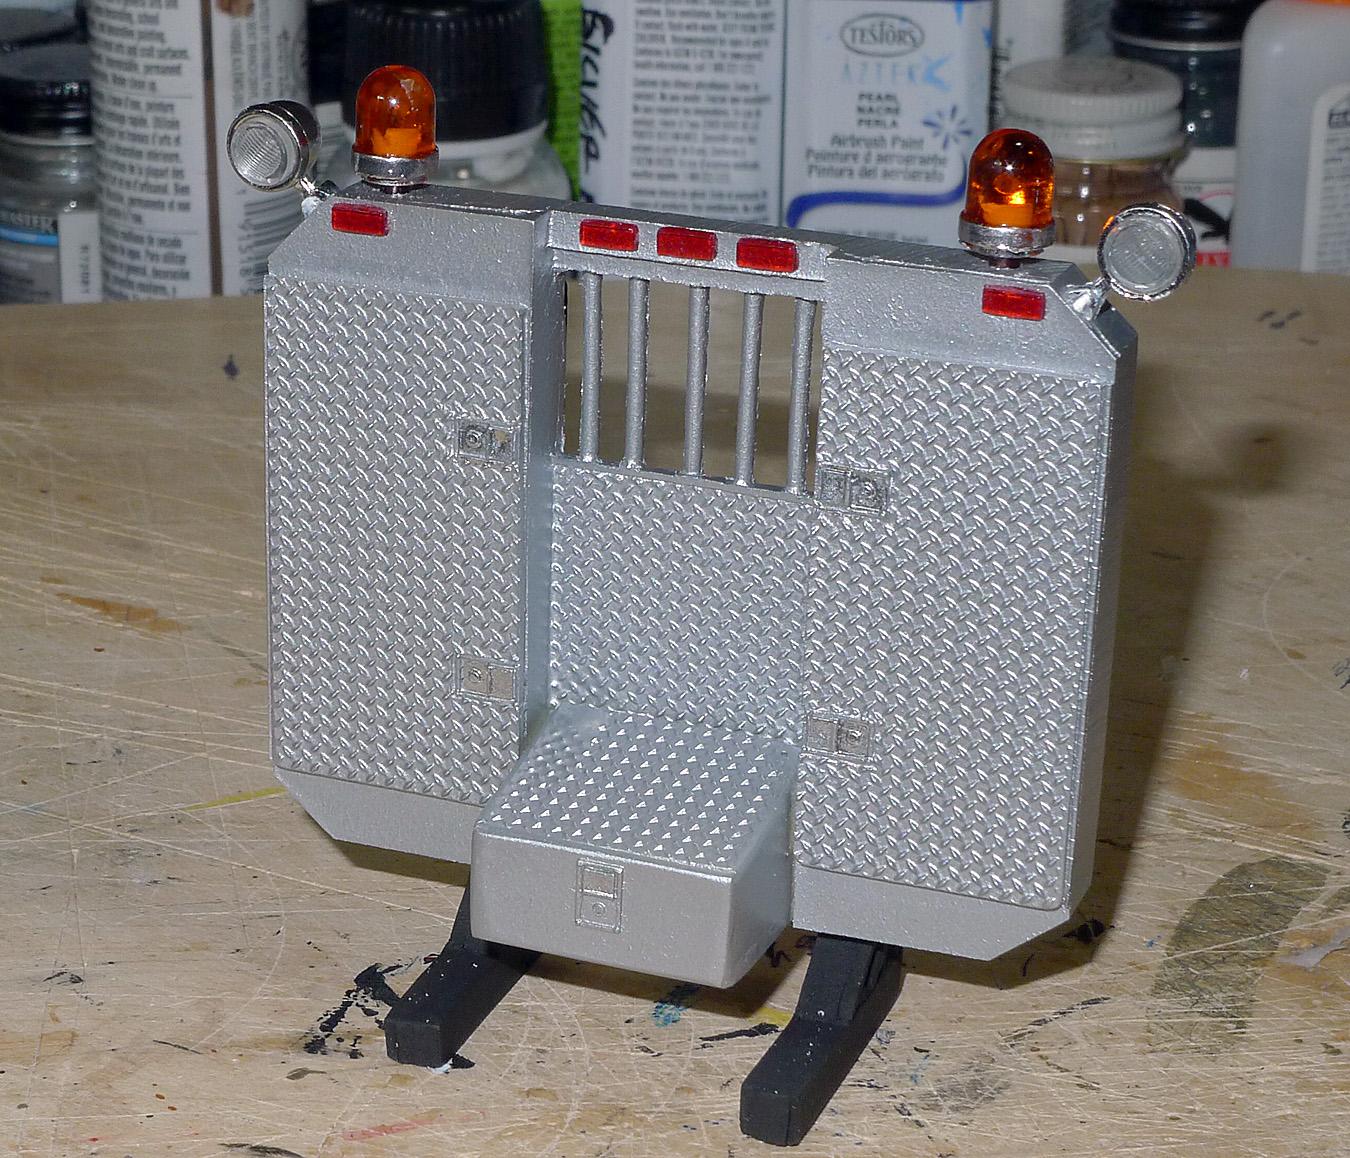
Brockway 360 Heavy Haul Tractor
Warren D replied to Warren D's topic in WIP: Model Trucks: Big Rigs and Heavy Equipment
I think I'm finished with the headache rack, at least until those darn squirrels start up again......
-
Question on 2 hole Bud wheels
Warren D replied to DrKerry's topic in Truck Aftermarket / Resin / 3D Printed
Great, just found out, order placed! -
Bottom Dump trailer
Warren D replied to Mopar - D's topic in WIP: Model Trucks: Big Rigs and Heavy Equipment
I hear you on that! I have yet to find a way to get the nooks and crannies smooth. It seems to require filler primer and lots of sanding. While I often curse resin, it's actually easier to work with. -
Bottom Dump trailer
Warren D replied to Mopar - D's topic in WIP: Model Trucks: Big Rigs and Heavy Equipment
Interesting build. Not sure but I think Doug Wagner at Keystone/AITM makes one but maybe not this same manufacturer.