Warren D
-
Posts
1,839 -
Joined
-
Last visited
Content Type
Profiles
Forums
Events
Gallery
Everything posted by Warren D
-
Came out great, well done!
-
I'm getting used to narrowing front track as I'm using larger wheels more often than not. Takes a bit of thinking but you should be able to pull the wheels in. Great job on the box!
-
It appears that Dave (formerly AITM) has passed. Not much available at this time, just a few references on FB.
-
New Garbage Body Coming
Warren D replied to Warren D's topic in Truck Aftermarket / Resin / 3D Printed
My thoughts as well, I don't care for the look of the Garwood and I'd only use the body anyway as I don't care for the Ford cab. I've thought about a Mack COE for a more current look but thinking I'll probably go with a Brockway 360 for a more retro look. I've always like the Leach bodies.... -
New Garbage Body Coming
Warren D replied to Warren D's topic in Truck Aftermarket / Resin / 3D Printed
He also has announced a front loader (also a Leach) coming next month. -
New Garbage Body Coming
Warren D replied to Warren D's topic in Truck Aftermarket / Resin / 3D Printed
Now available for order, it is a Leach, 25 yard rear packer: https://www.kamodelminis.com/product-page/rear-loading-trash-truck-body -
AMT 1/25 Caterpillar D8H
Warren D replied to KevinCarroll's topic in Model Trucks: Big Rigs and Heavy Equipment
Thanks, I have the same PE stuff and as you know, there are no instructions/suggestions. The first D8 I made many years ago I applied the stick-on decal and then drilled out every hole with a small bit in a pin vise...all by hand! This seems easier..... FWIW, I have Cat decals, I recall I got them from Jerry at Model Truckin' -
Doug Wagner pre-announced a new 3D printed garbage body on his FB page. Suppoosed to be announced this weekend. Looks good to me, might be a Leach. https://scontent-lga3-1.xx.fbcdn.net/v/t39.30808-6/275497723_5346383965395264_1866706307899158037_n.jpg?_nc_cat=111&ccb=1-5&_nc_sid=8bfeb9&_nc_ohc=oMFy8Rt6J2IAX9ehnK_&tn=ggypfqa6lkvzWT9y&_nc_ht=scontent-lga3-1.xx&oh=00_AT9DK-dFBjOs2A6QS0fPxcIQ6qzVI0Mn5yB5YaHH-gQgpA&oe=6230C2C6
-
AMT 1/25 Caterpillar D8H
Warren D replied to KevinCarroll's topic in Model Trucks: Big Rigs and Heavy Equipment
Curious what you used for the grill, the originals came with stick on "decals". I have a new kit and the photoetched grill, just trying to figure out how to do it. -
Original AMT 'Pete"
Warren D replied to GLMFAA1's topic in Model Trucks: Big Rigs and Heavy Equipment
I have one of the originals, my first big truck build. I've thought of doing a rebuild like you did but something in me says to keep it the way it is, warts and all. Seeing your re-build makes me think I may have a go at mine. Well done! -
1941 Chevrolet tanker
Warren D replied to landman's topic in WIP: Model Trucks: Big Rigs and Heavy Equipment
Good idea, I have the same tank body, plan on putting mine on a Chevy COE (I think it's a 50 or 51) also Jimmy Flintstone. Interested in seeing what you do for a frame. -
Awesome job! Love all the little details.
-
White Freightliner SD
Warren D replied to raisin27's topic in Model Trucks: Big Rigs and Heavy Equipment
Very well done, good to know it was easier than you thought. -
GMC General Container Roll-Off
Warren D replied to Warren D's topic in WIP: Model Trucks: Big Rigs and Heavy Equipment
Don't need to do anything, just a window in the back of the cab. -
While working on the GMC wrecker build, I picked up a roll-off container off of ebay. It was 3D printed and came with the tilt rack. I got to thinking the GMC chassis was just about the right size, so I picked up another GMC kit. The plan is a trash bin roll-off from the 70's, no sleeper. I'm using the wheels/tires from the Autocar Dump kit, I like the 11x22's better than the 10x20's in the GMC kit. I also like the spoked wheels, I think they are more in line with the theme than ten hole's. I'm also going to use this build to answer a few questions I have about the parts fit for the wrecker build. This one is basically box stock, no sleeper and 11x22's.

-
AMT 1/25 Caterpillar D8H
Warren D replied to KevinCarroll's topic in Model Trucks: Big Rigs and Heavy Equipment
Very well done! -
Mack B61 Dump
Warren D replied to Warren D's topic in WIP: Model Trucks: Big Rigs and Heavy Equipment
Done, AITM had the front bumper: -
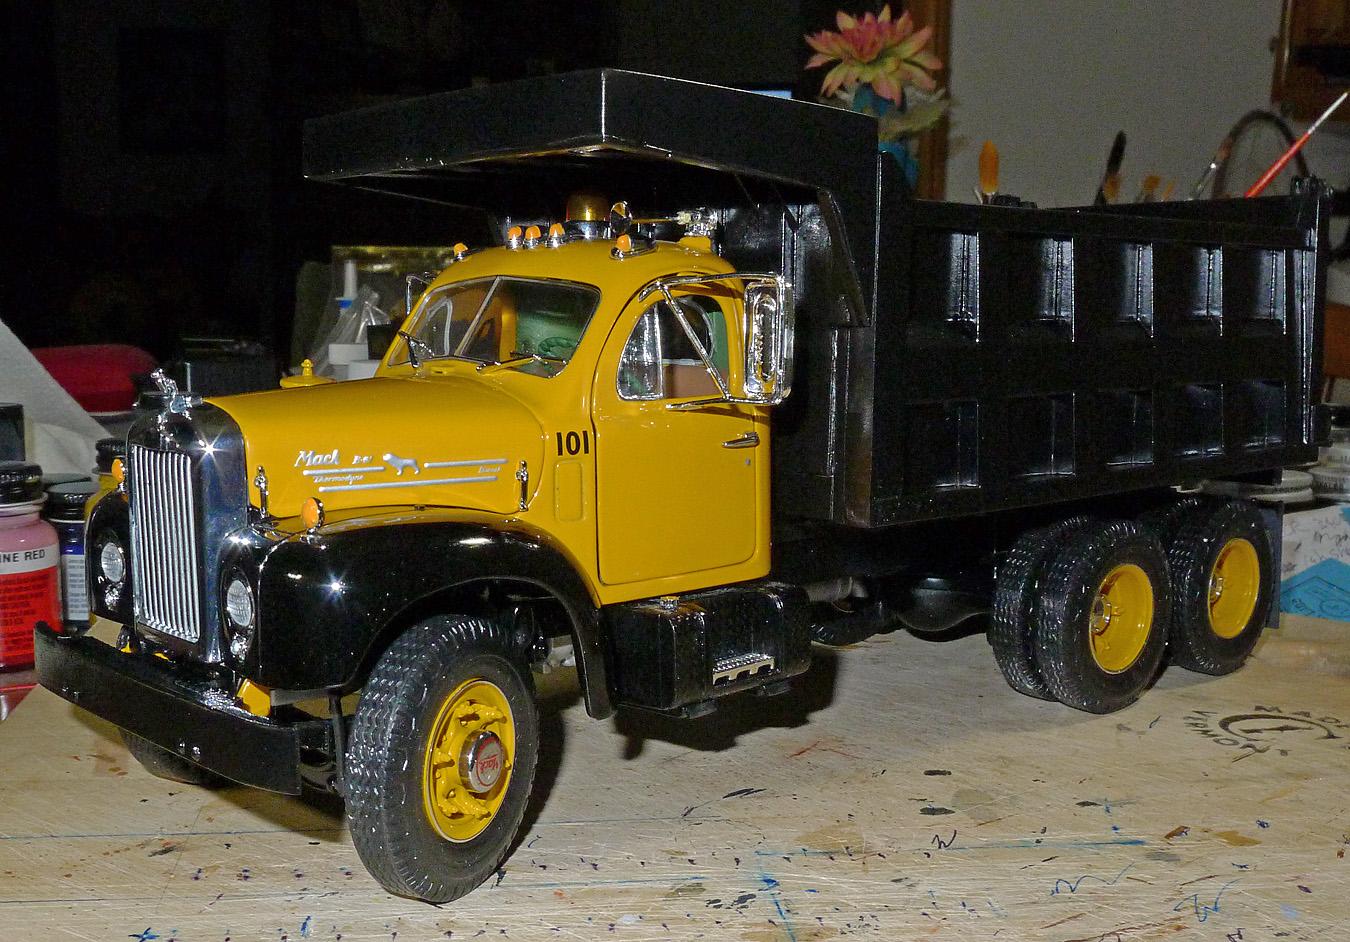
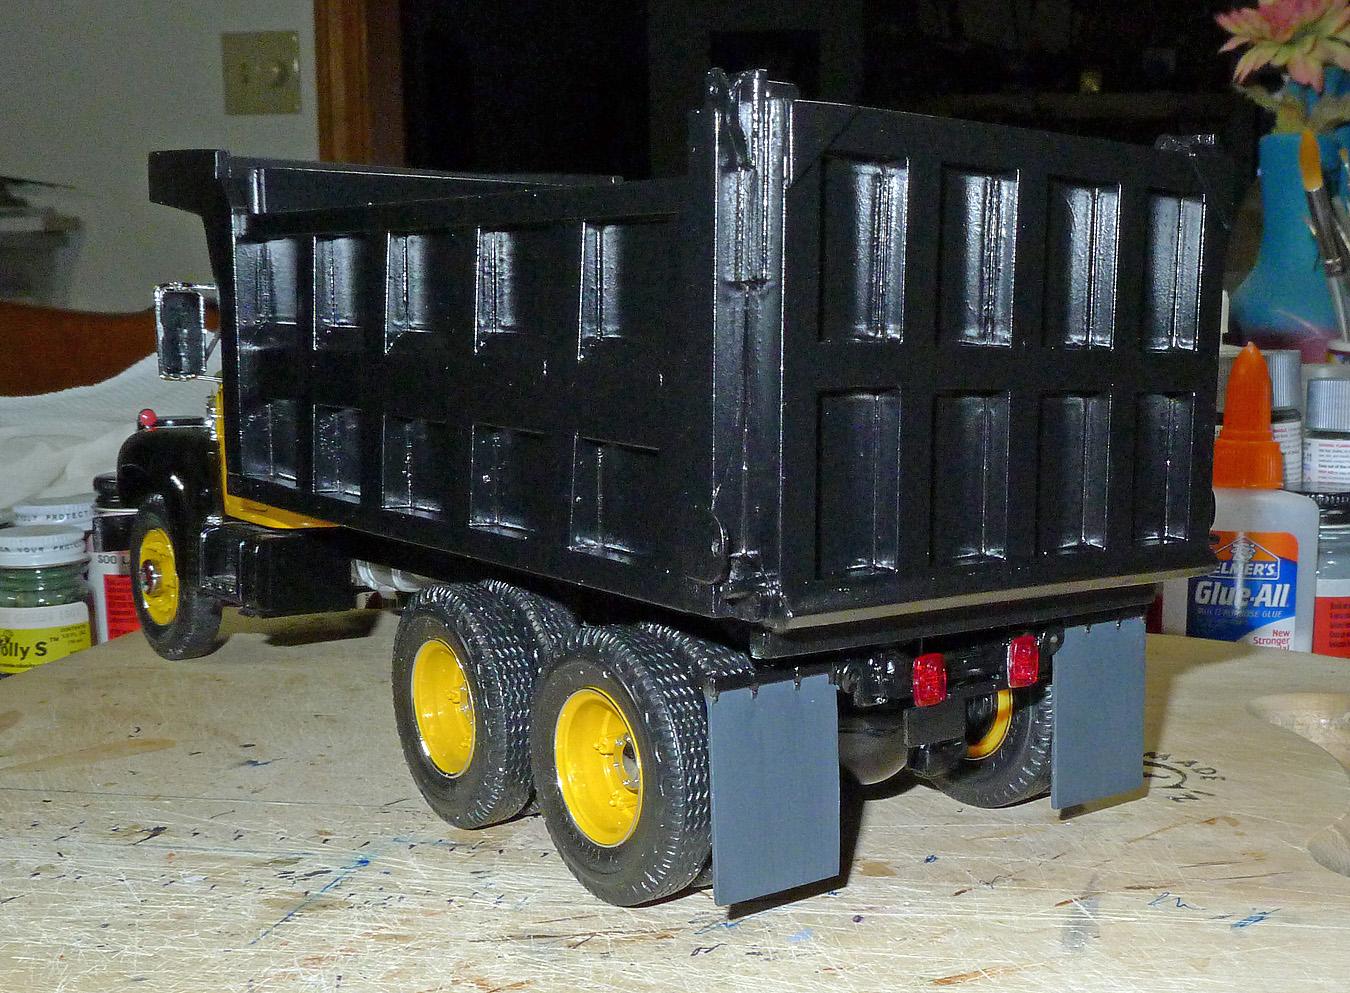
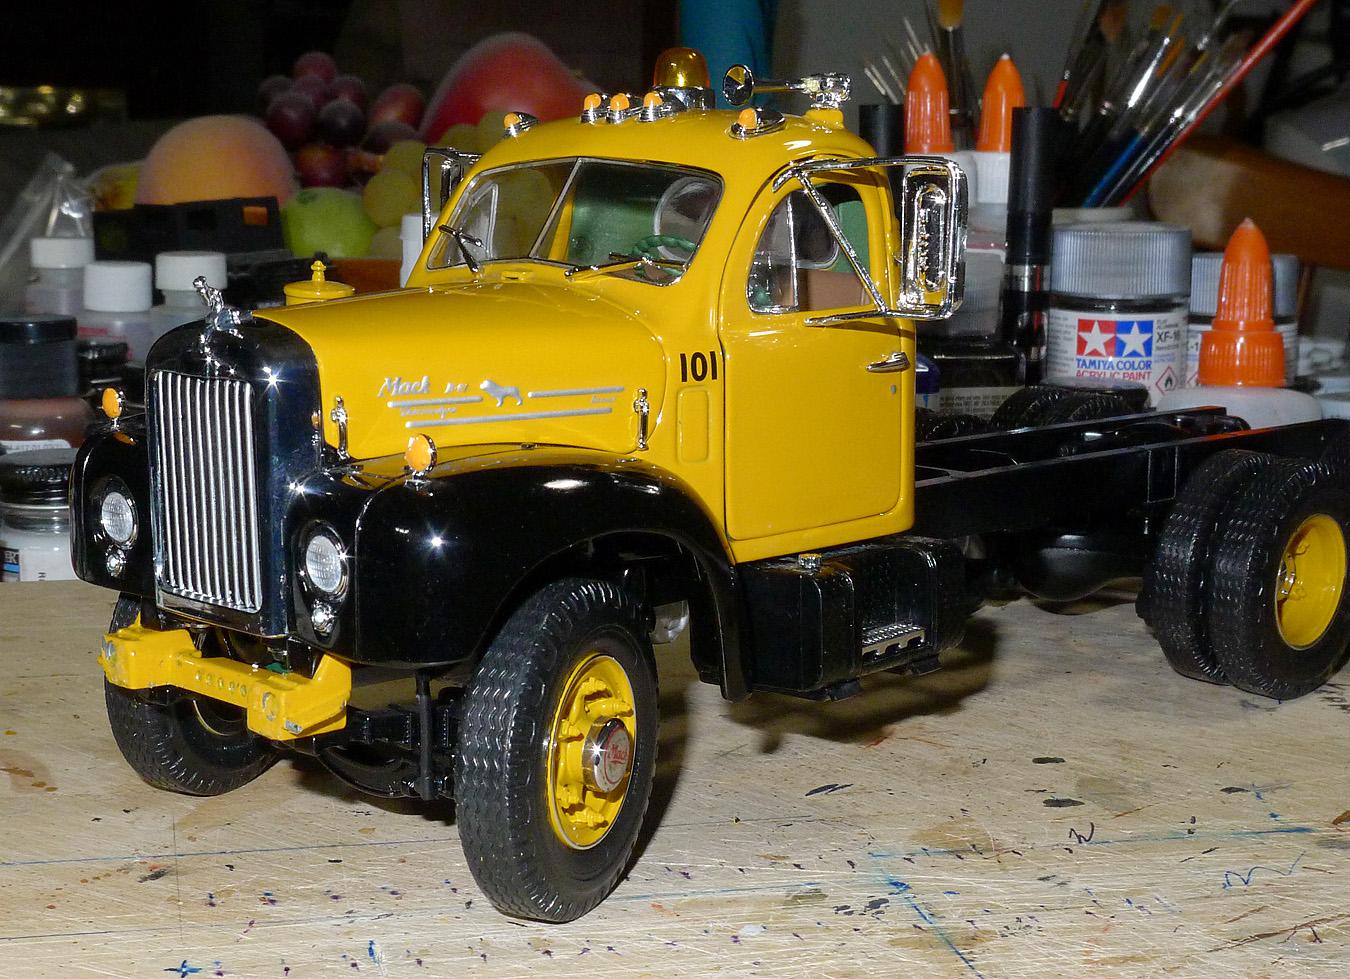
Calling this one done, the cab and chassis were left after I stole the wrecker body for the General build. I had an AITM dump body in stock and decided to use it to complete the cab/chassis. I removed the push bumper (harder to do than I thought as it was both pressed and glued!) and put on a bumper from AITM. The mudflaps and tail lights came from the General kit as they won't be used for the wrecker.
-
Mack B61 Dump
Warren D replied to Warren D's topic in WIP: Model Trucks: Big Rigs and Heavy Equipment
Already have. Dave would sell just the bumper.....hopefully the new owners will as well. -
Mack B61 Dump
Warren D replied to Warren D's topic in WIP: Model Trucks: Big Rigs and Heavy Equipment
Well, that wasn't as much fun as I thought. Looked like it was only 2 screws but once I got it off, it was a tussle to get the mounting block seperated from the bumper. Now to find a B61 bumper....
-
1962 GMC B 6500 with flatbed trailer
Warren D replied to leafsprings's topic in Model Trucks: Big Rigs and Heavy Equipment
X3! -
Nice clean build!
-
Mack B61 Dump
Warren D replied to Warren D's topic in WIP: Model Trucks: Big Rigs and Heavy Equipment
Looks like I can remove the push bumper without too much drama, so I'm headed off in that direction. -
Mack B61 Dump
Warren D replied to Warren D's topic in WIP: Model Trucks: Big Rigs and Heavy Equipment
I'm looking at it. I'd like to, just not sure if it is practical. I'd need a proper Mack bumper, I'll have to see if AITM makes one. -
After relocating the wrecker body to the GMC General build, I had a perfectly good First Gear Mack cab and chassis. It seemed a shame to let it sit so I decided to use a dump body I got from AITM a while back and make a dump truck out of it. Primer and paint are next, then I'll fix up the rear of the chassis with brake lights and mud flaps. The factory painted door logos came off with some old Pollyscale decal lifter/remover. Not sure what's in the stuff but it took off the logos without touching the base paint.