Hoffman
-
Posts
422 -
Joined
-
Last visited
Content Type
Profiles
Forums
Events
Gallery
Everything posted by Hoffman
-
David, you are SO right. I did a few diecast makeovers just for fun, finally got past the mental block with this project, and ready to dive back in. Sometimes there's an initial rush from realizing something is possible, that with the right combination of pieces and scratch building you can actually pull it off. So you jump in with both feet, there's a flurry of activity, but yes, you can get burned out and need a break. By the way, I've noticed you're quite a prolific builder. I'm impressed by how you seem to be cranking out one fantastic build after the next, very high quality too. Awesome work! Last thing, your scripture quote is GREAT! and I just happened be reading those same passages a few days ago. ☺️ Thanks!
-
Bob, thank you very much! You've been really active lately, posting lot's of Cool stuff. Great work you're doing. Keep it up!
-
David, thank you, kind Sir!
-
Trevor, thank you so much! This thing has been a head scratcher at times, trying to figure out how to piece together something that will resemble the full size article. That's what we do though, right? ? I've enjoyed your work posted here as well. Thank you again!
-
Beautiful, Helmut. Thanks for sharing!
-
It's coming along. Hope you enjoy. ?

-
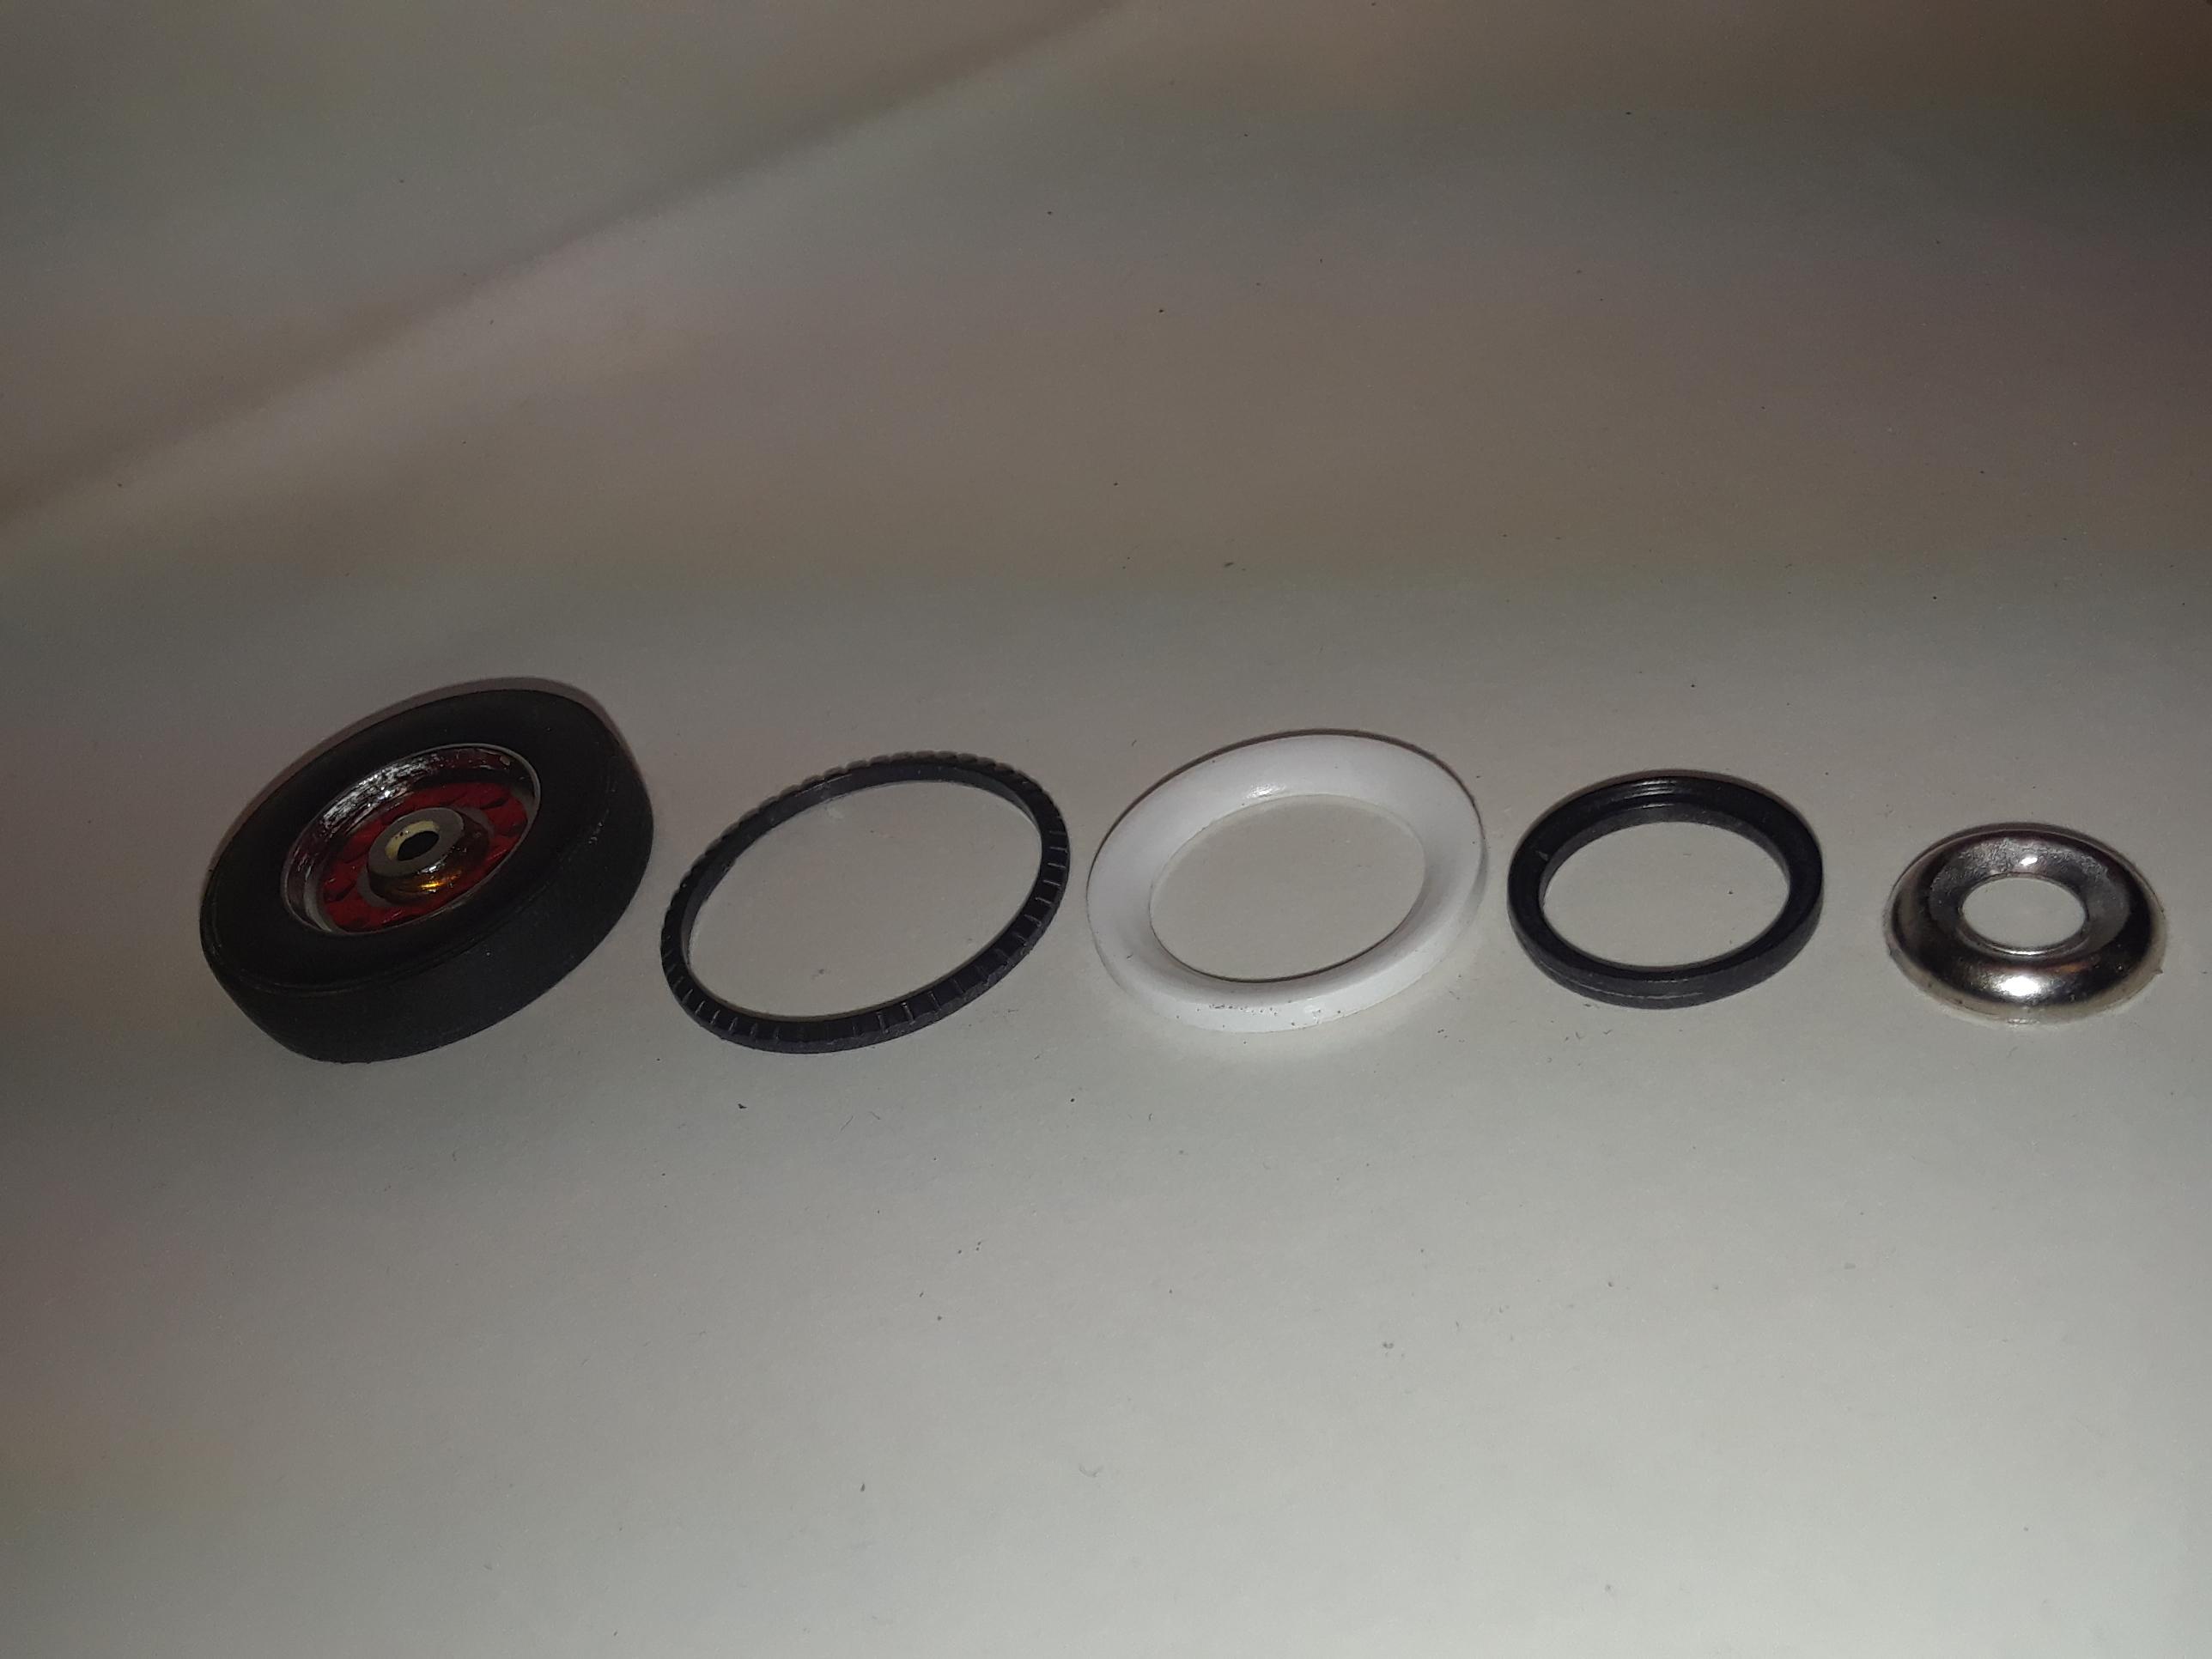
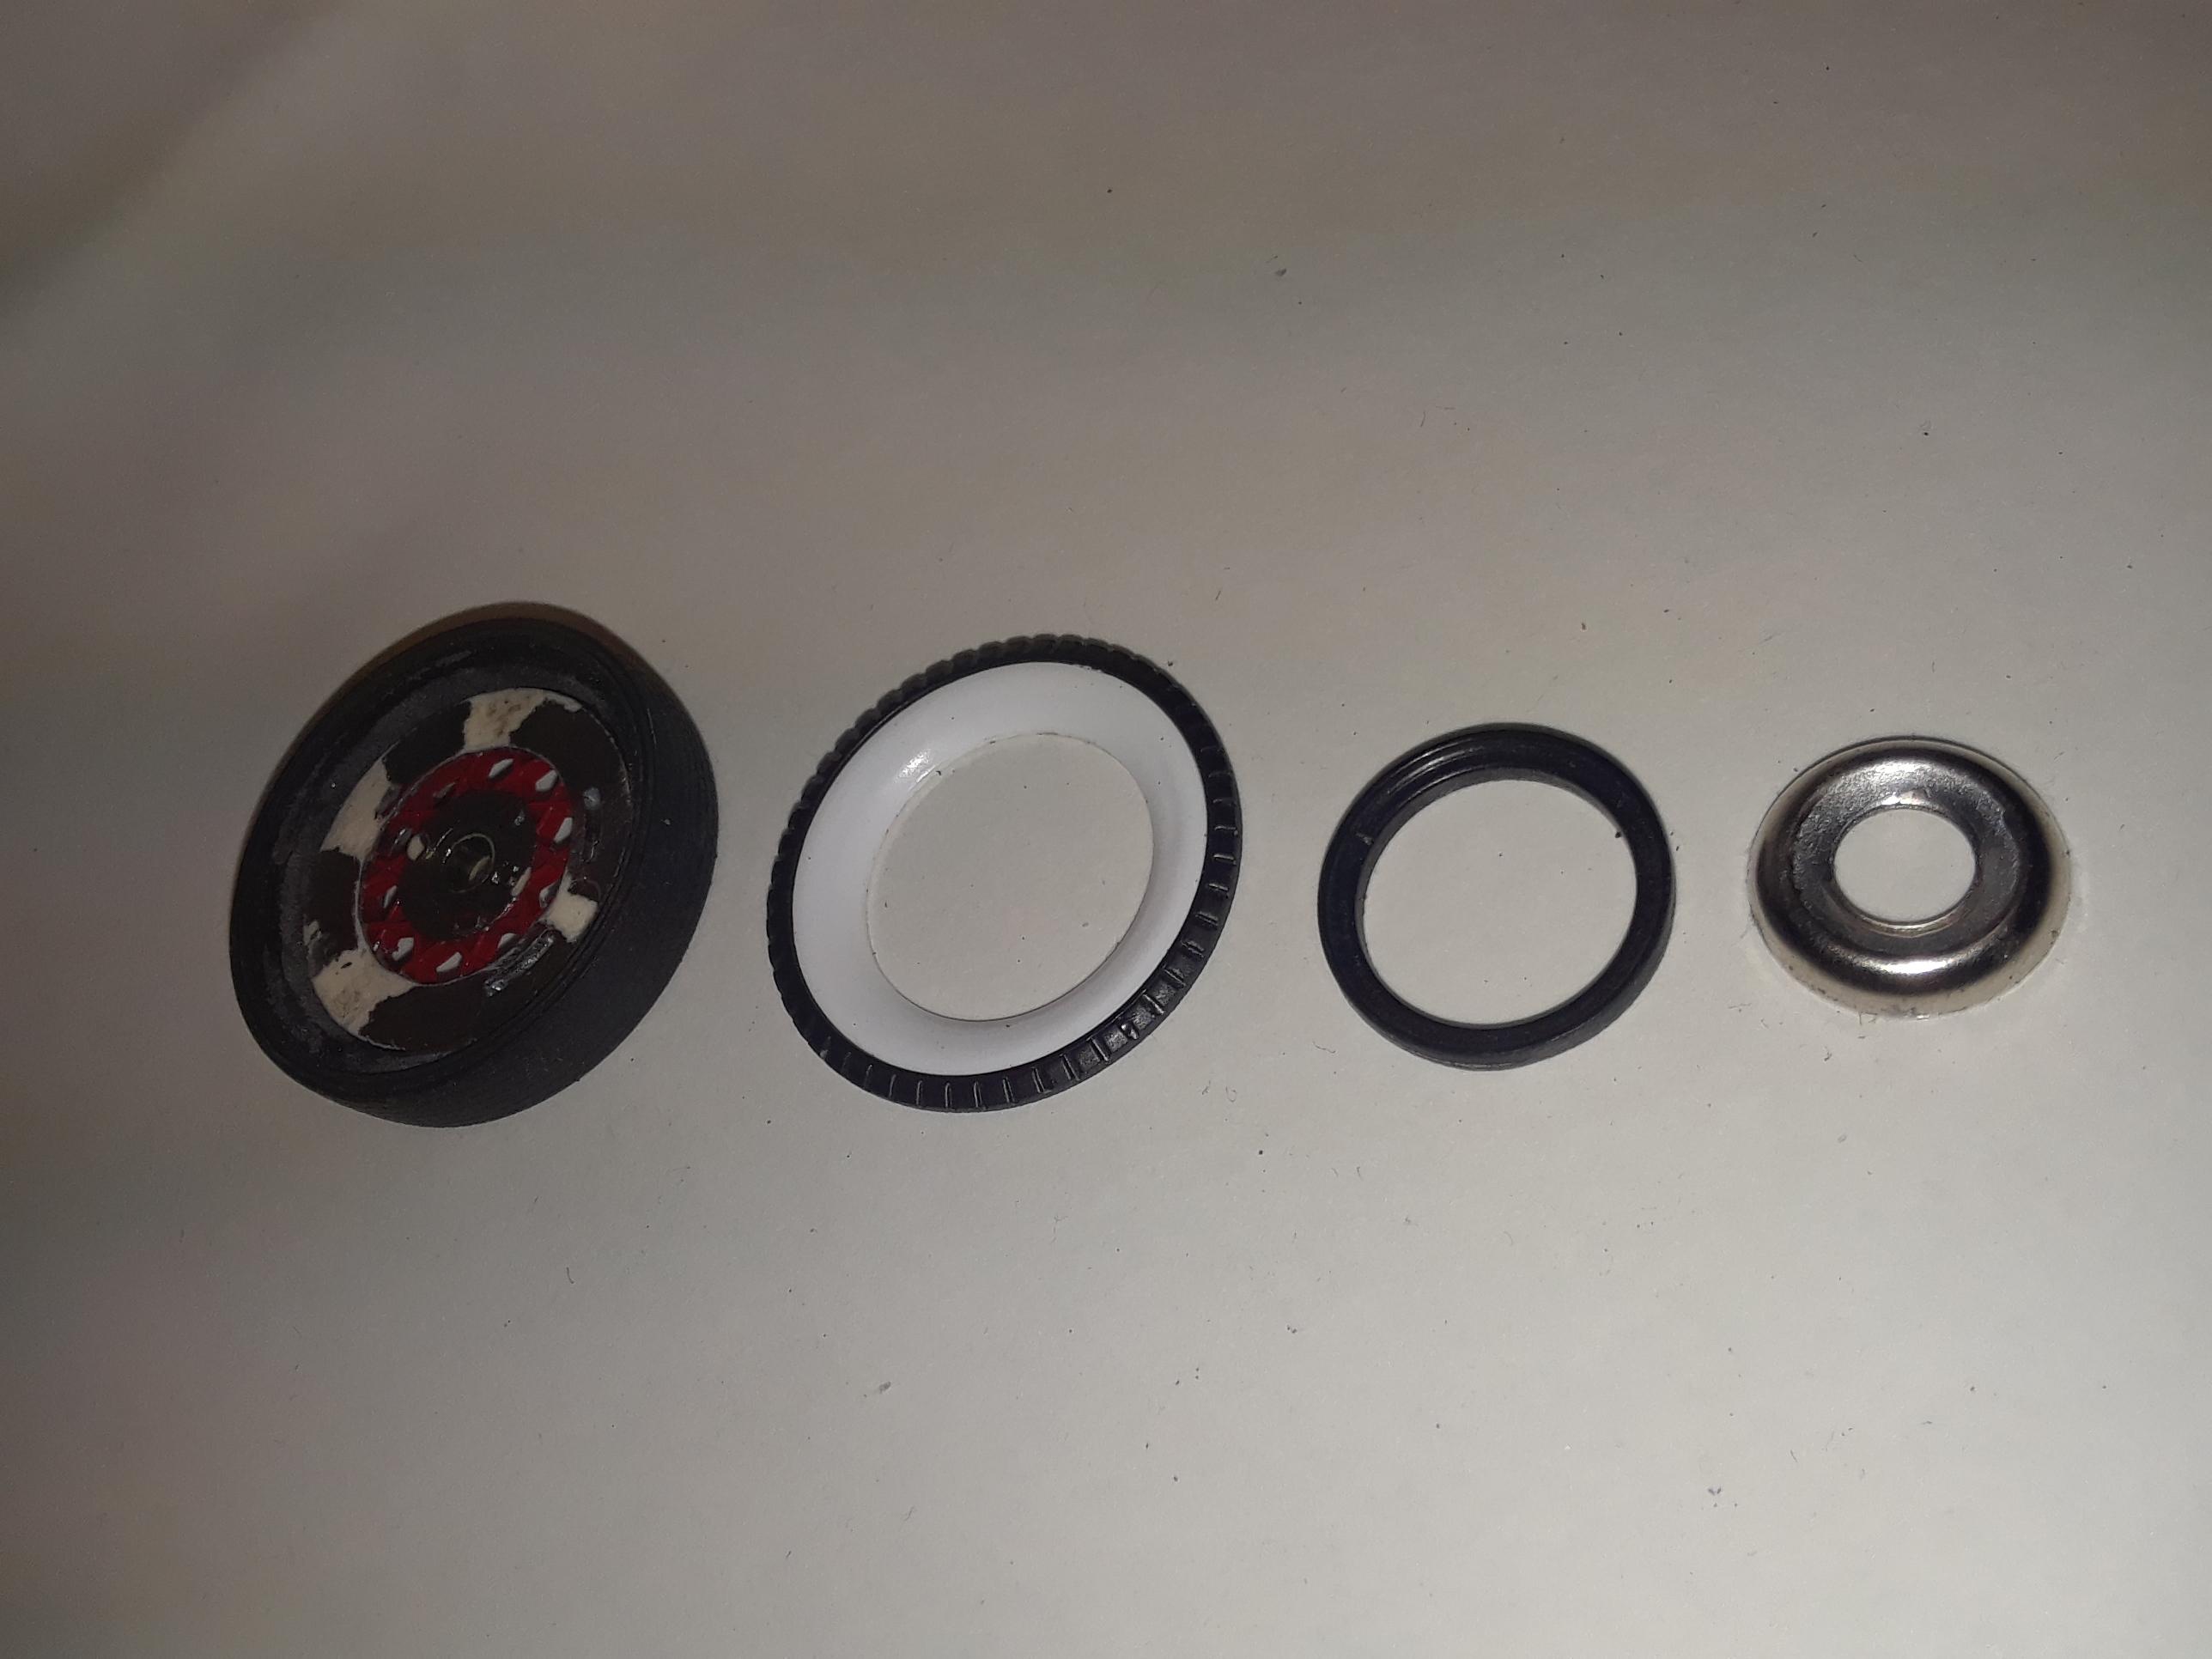
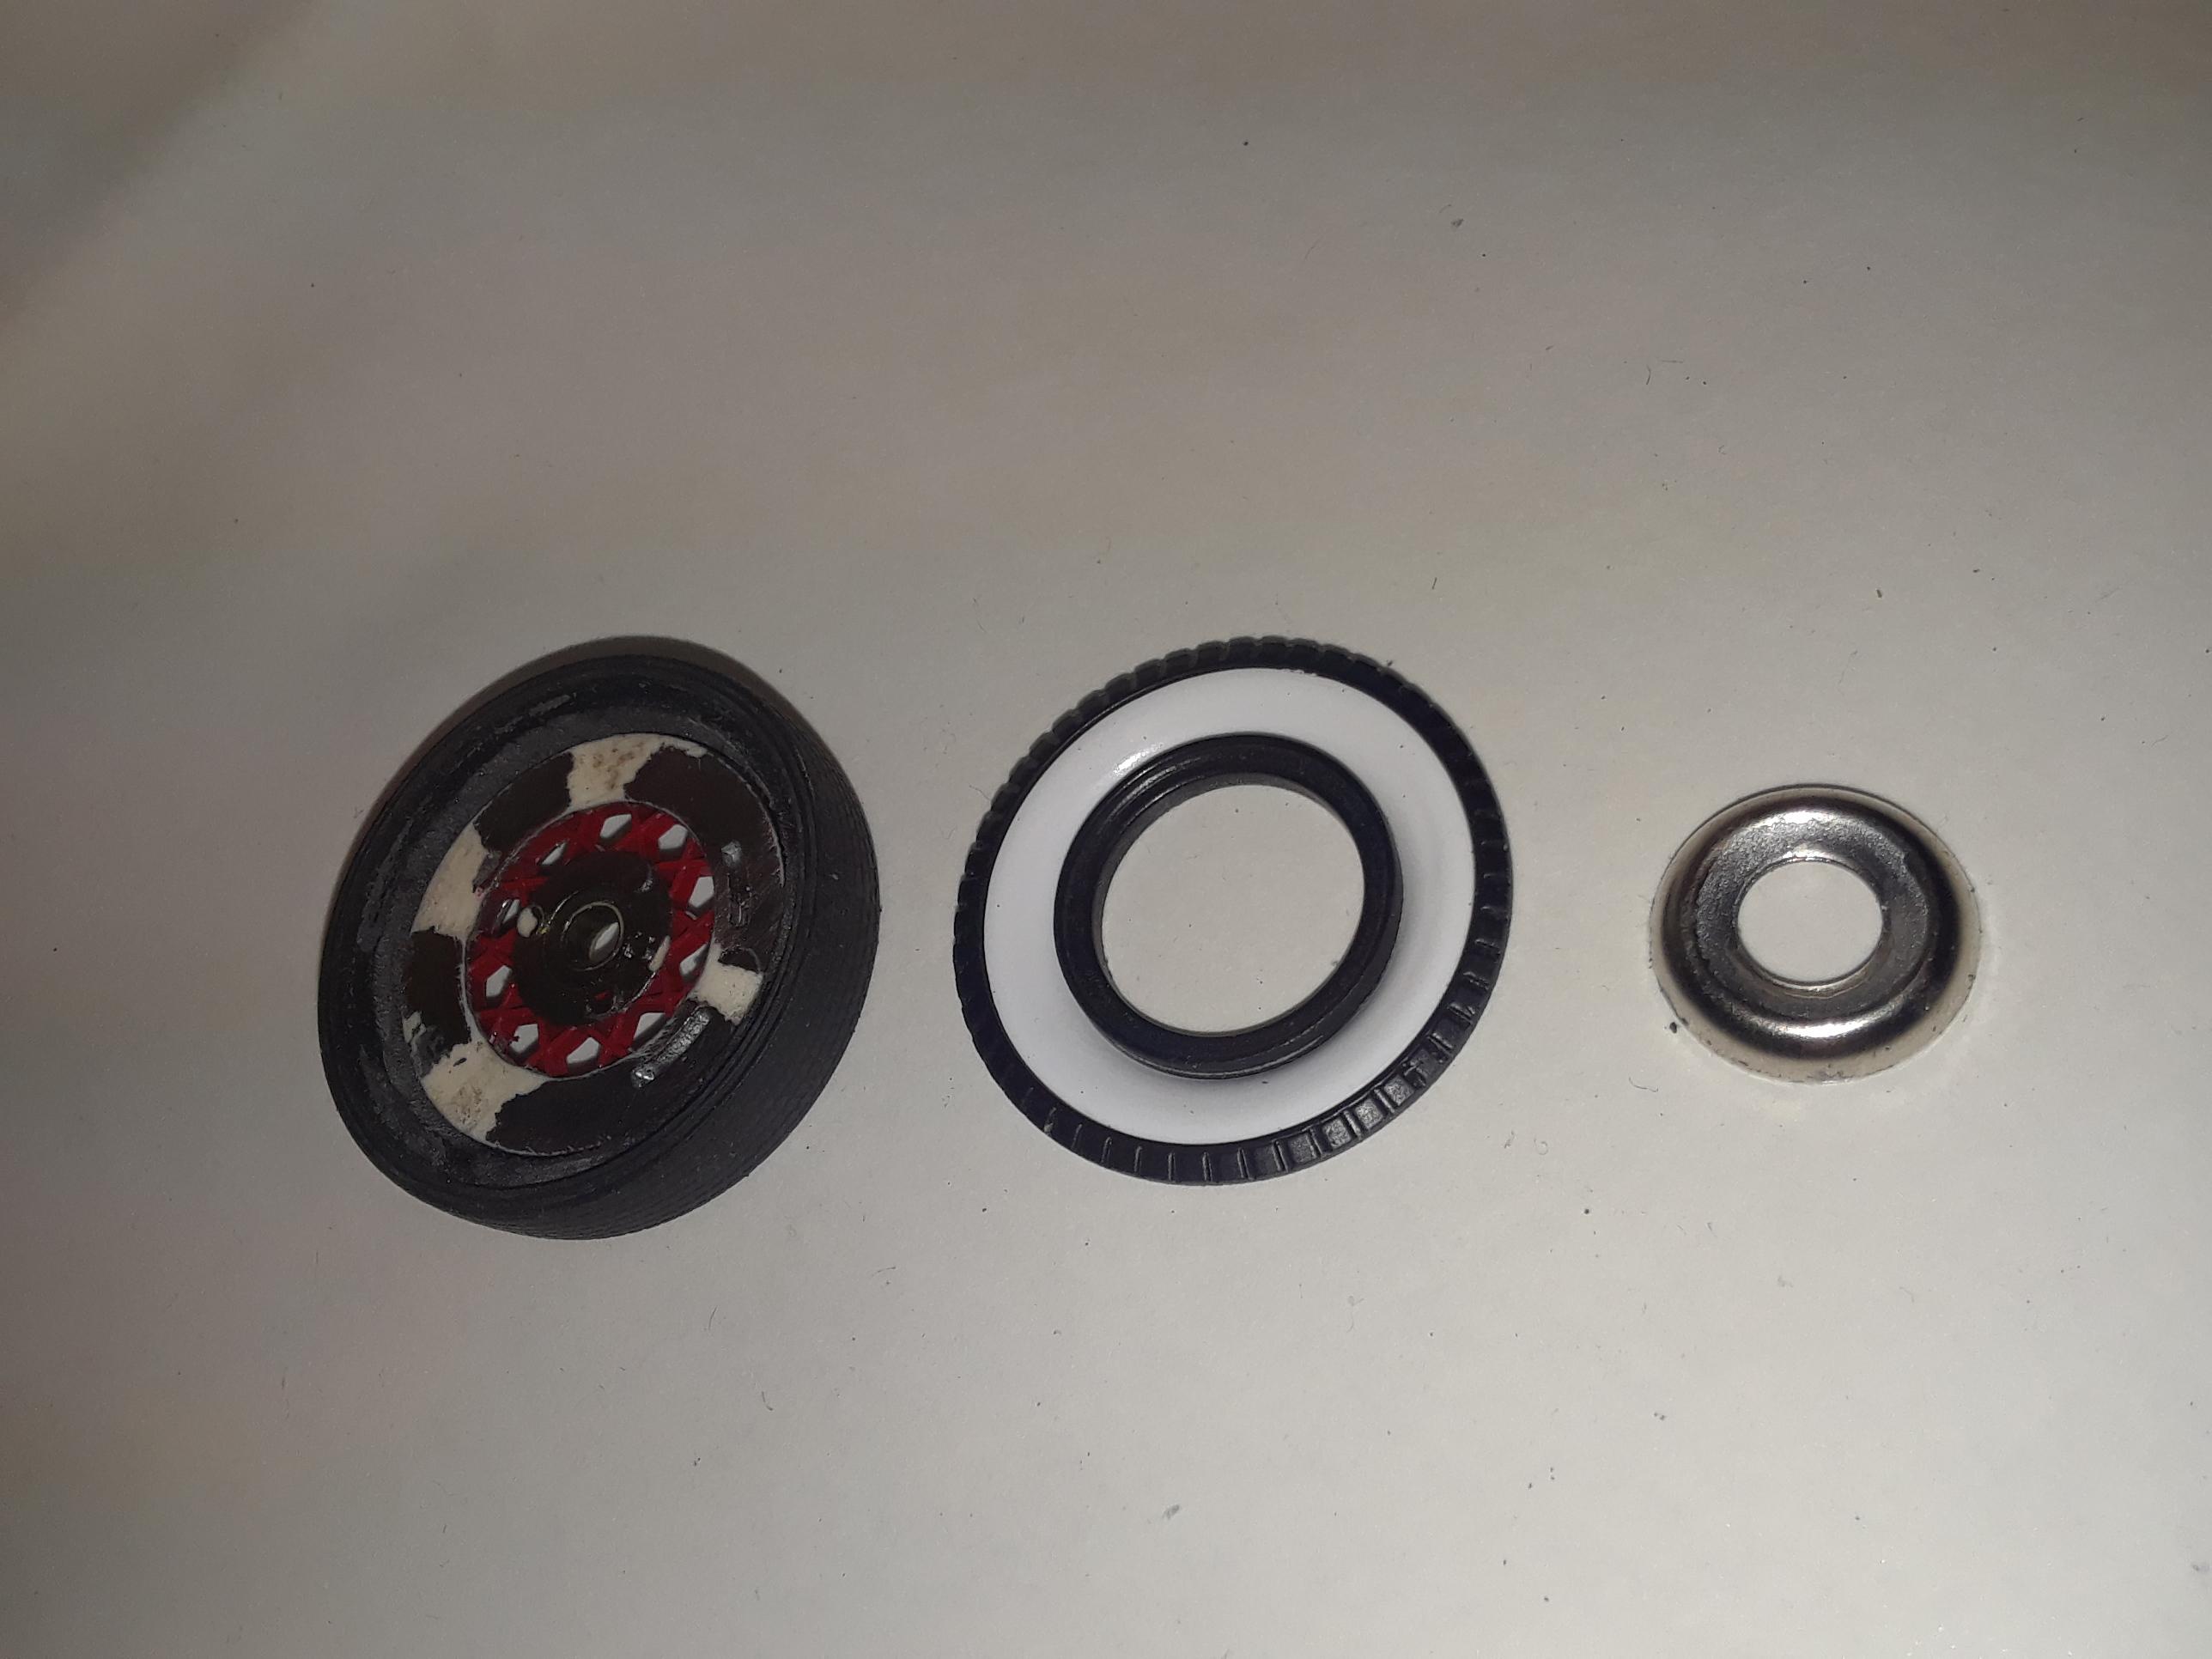
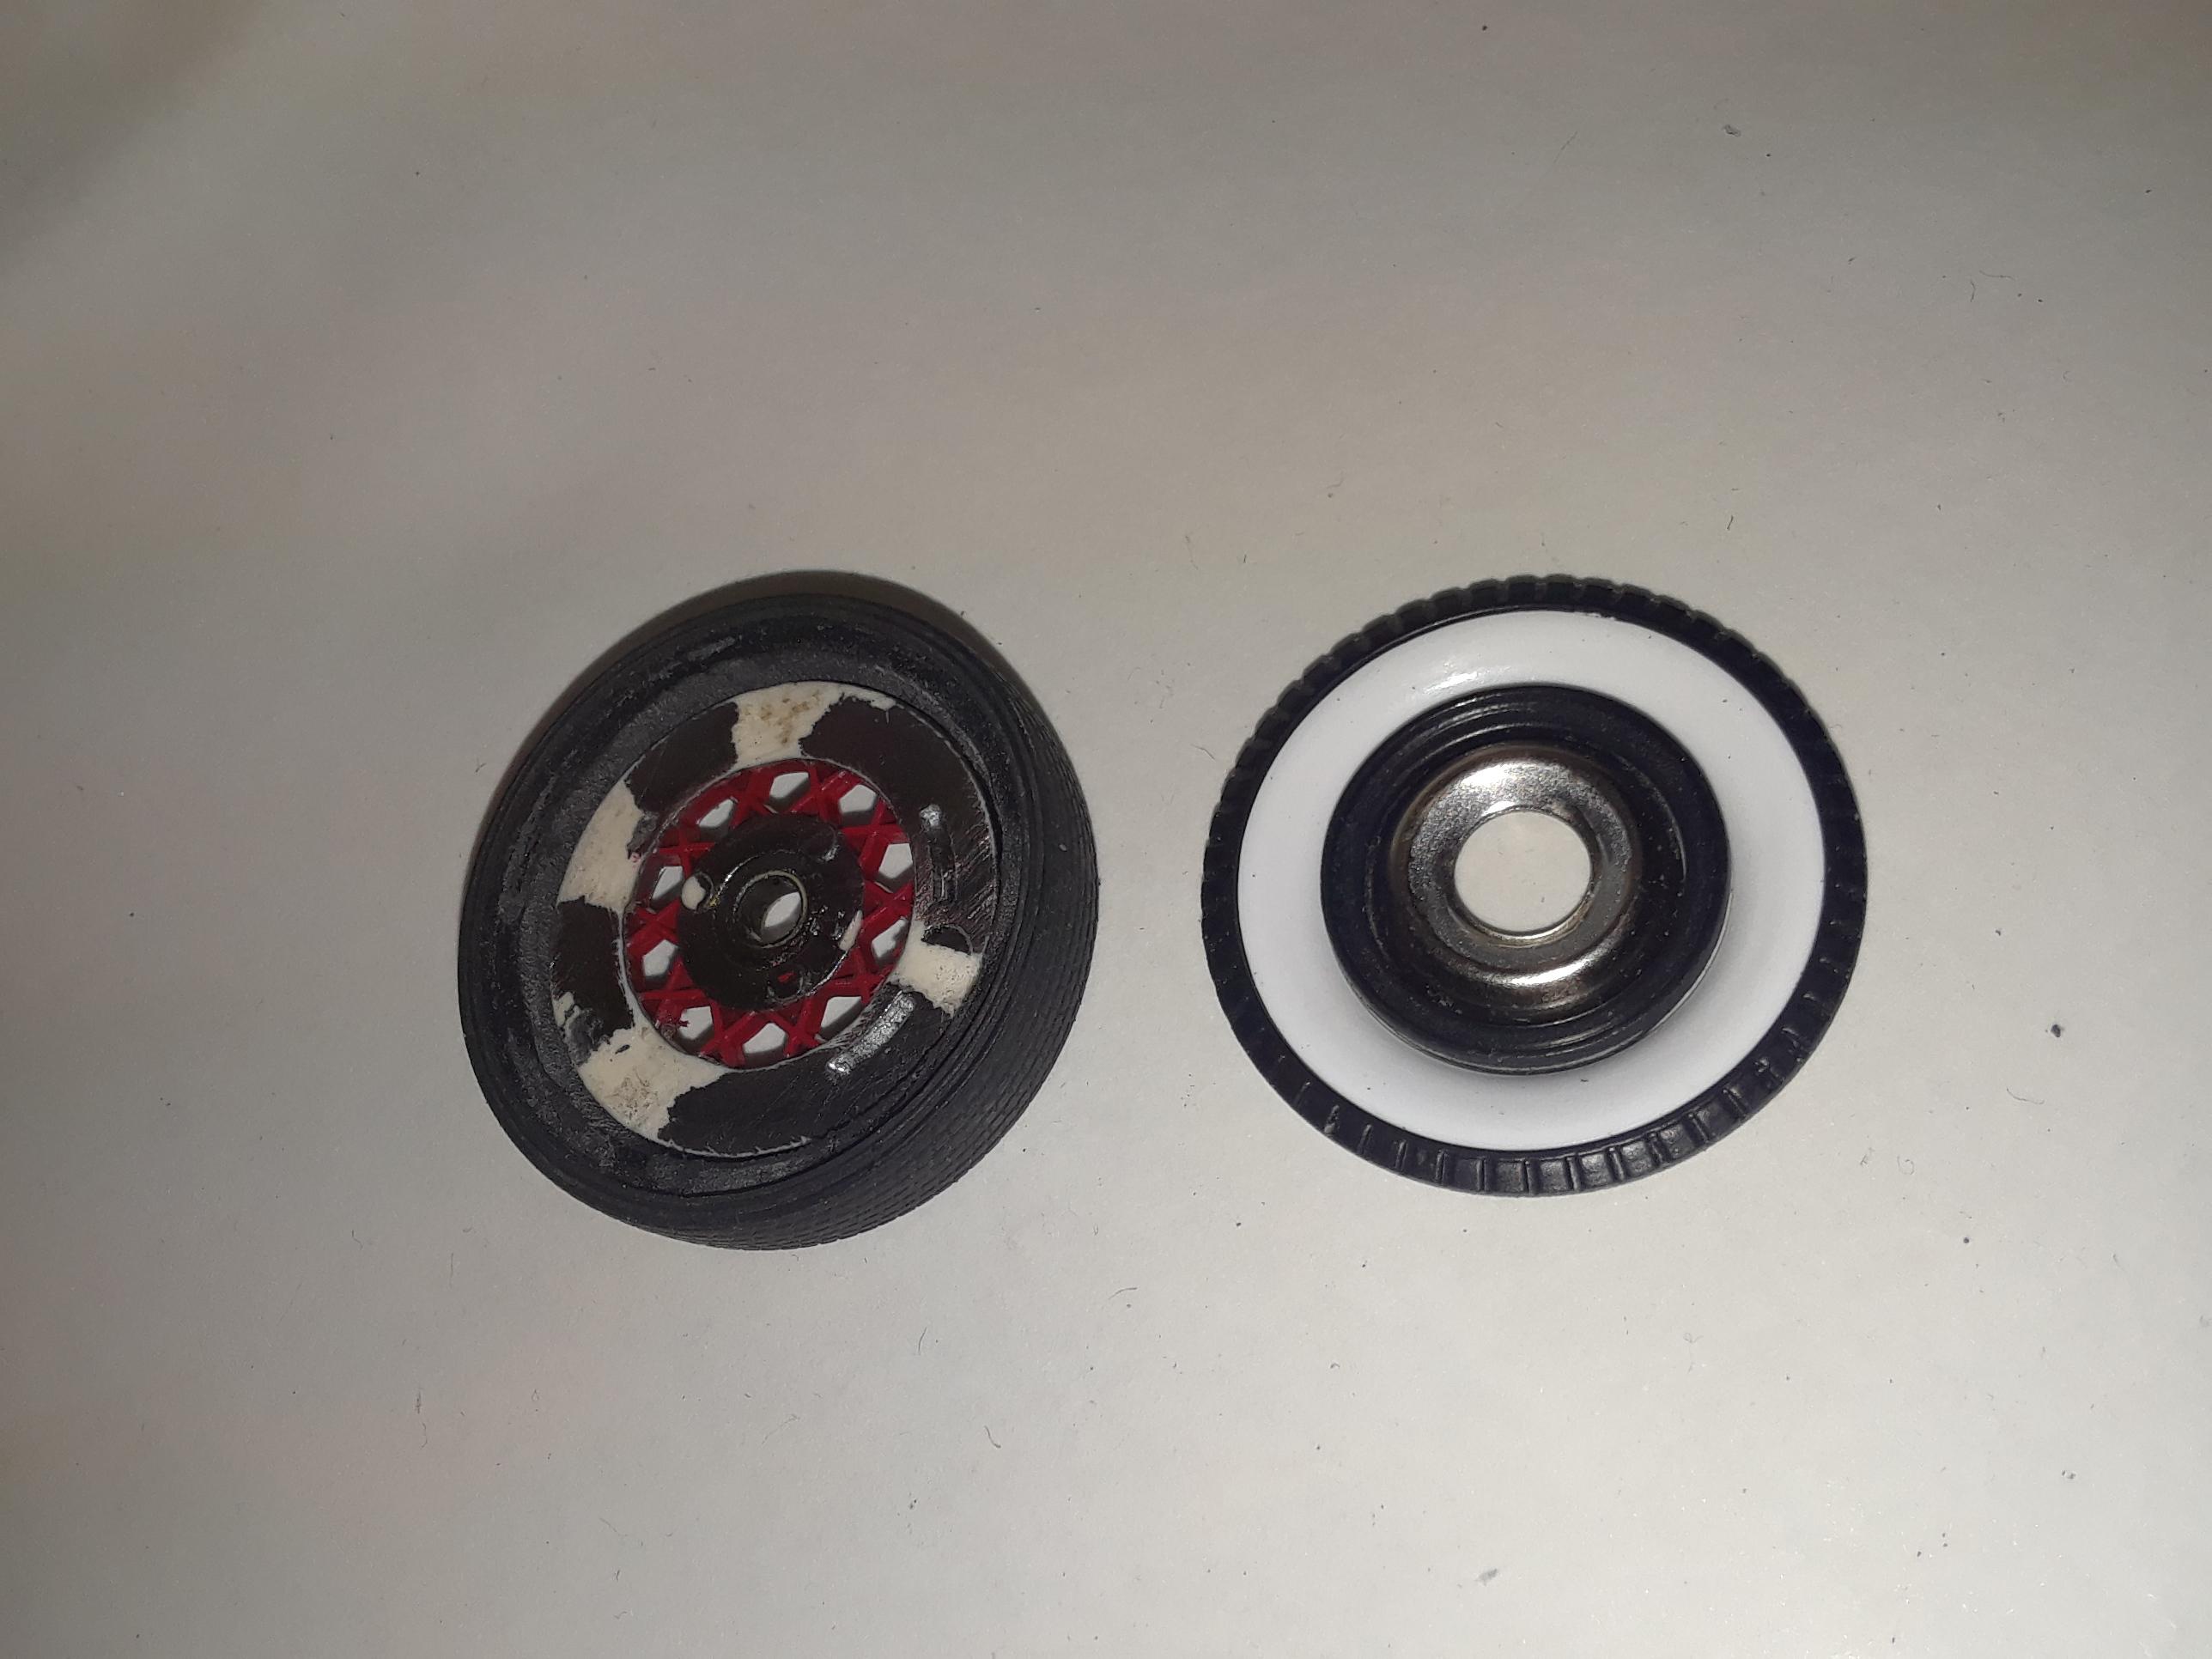
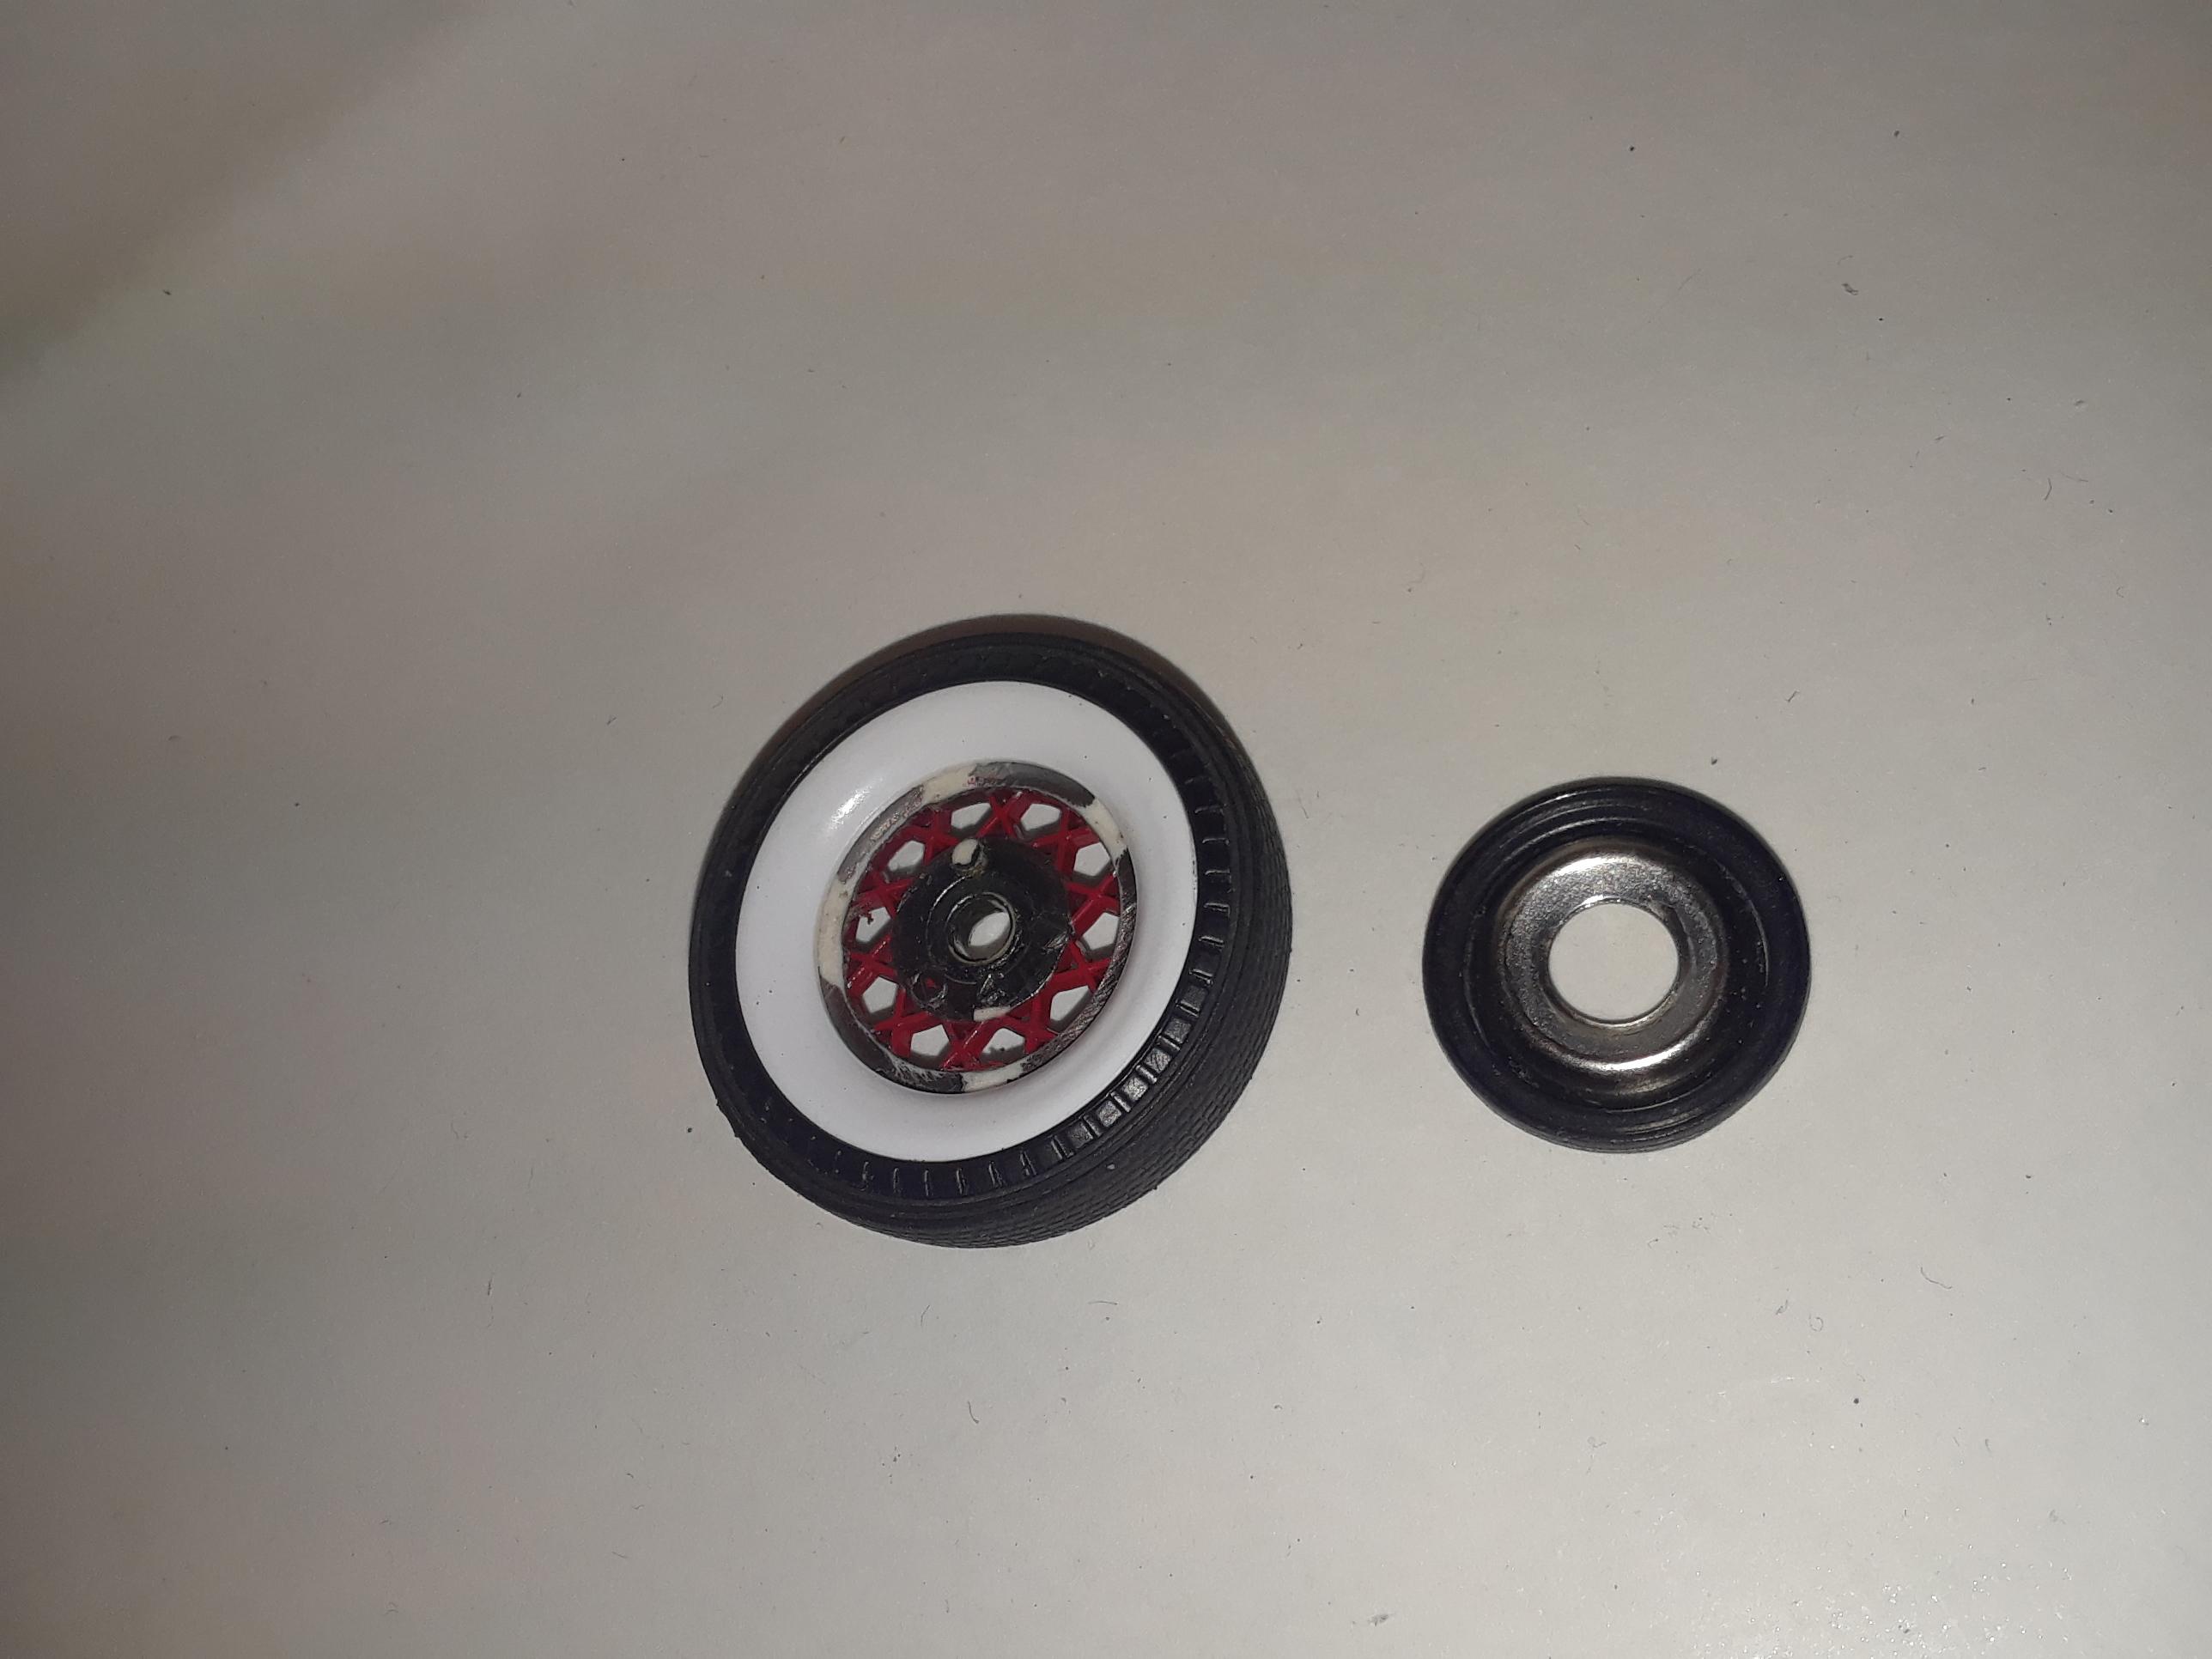
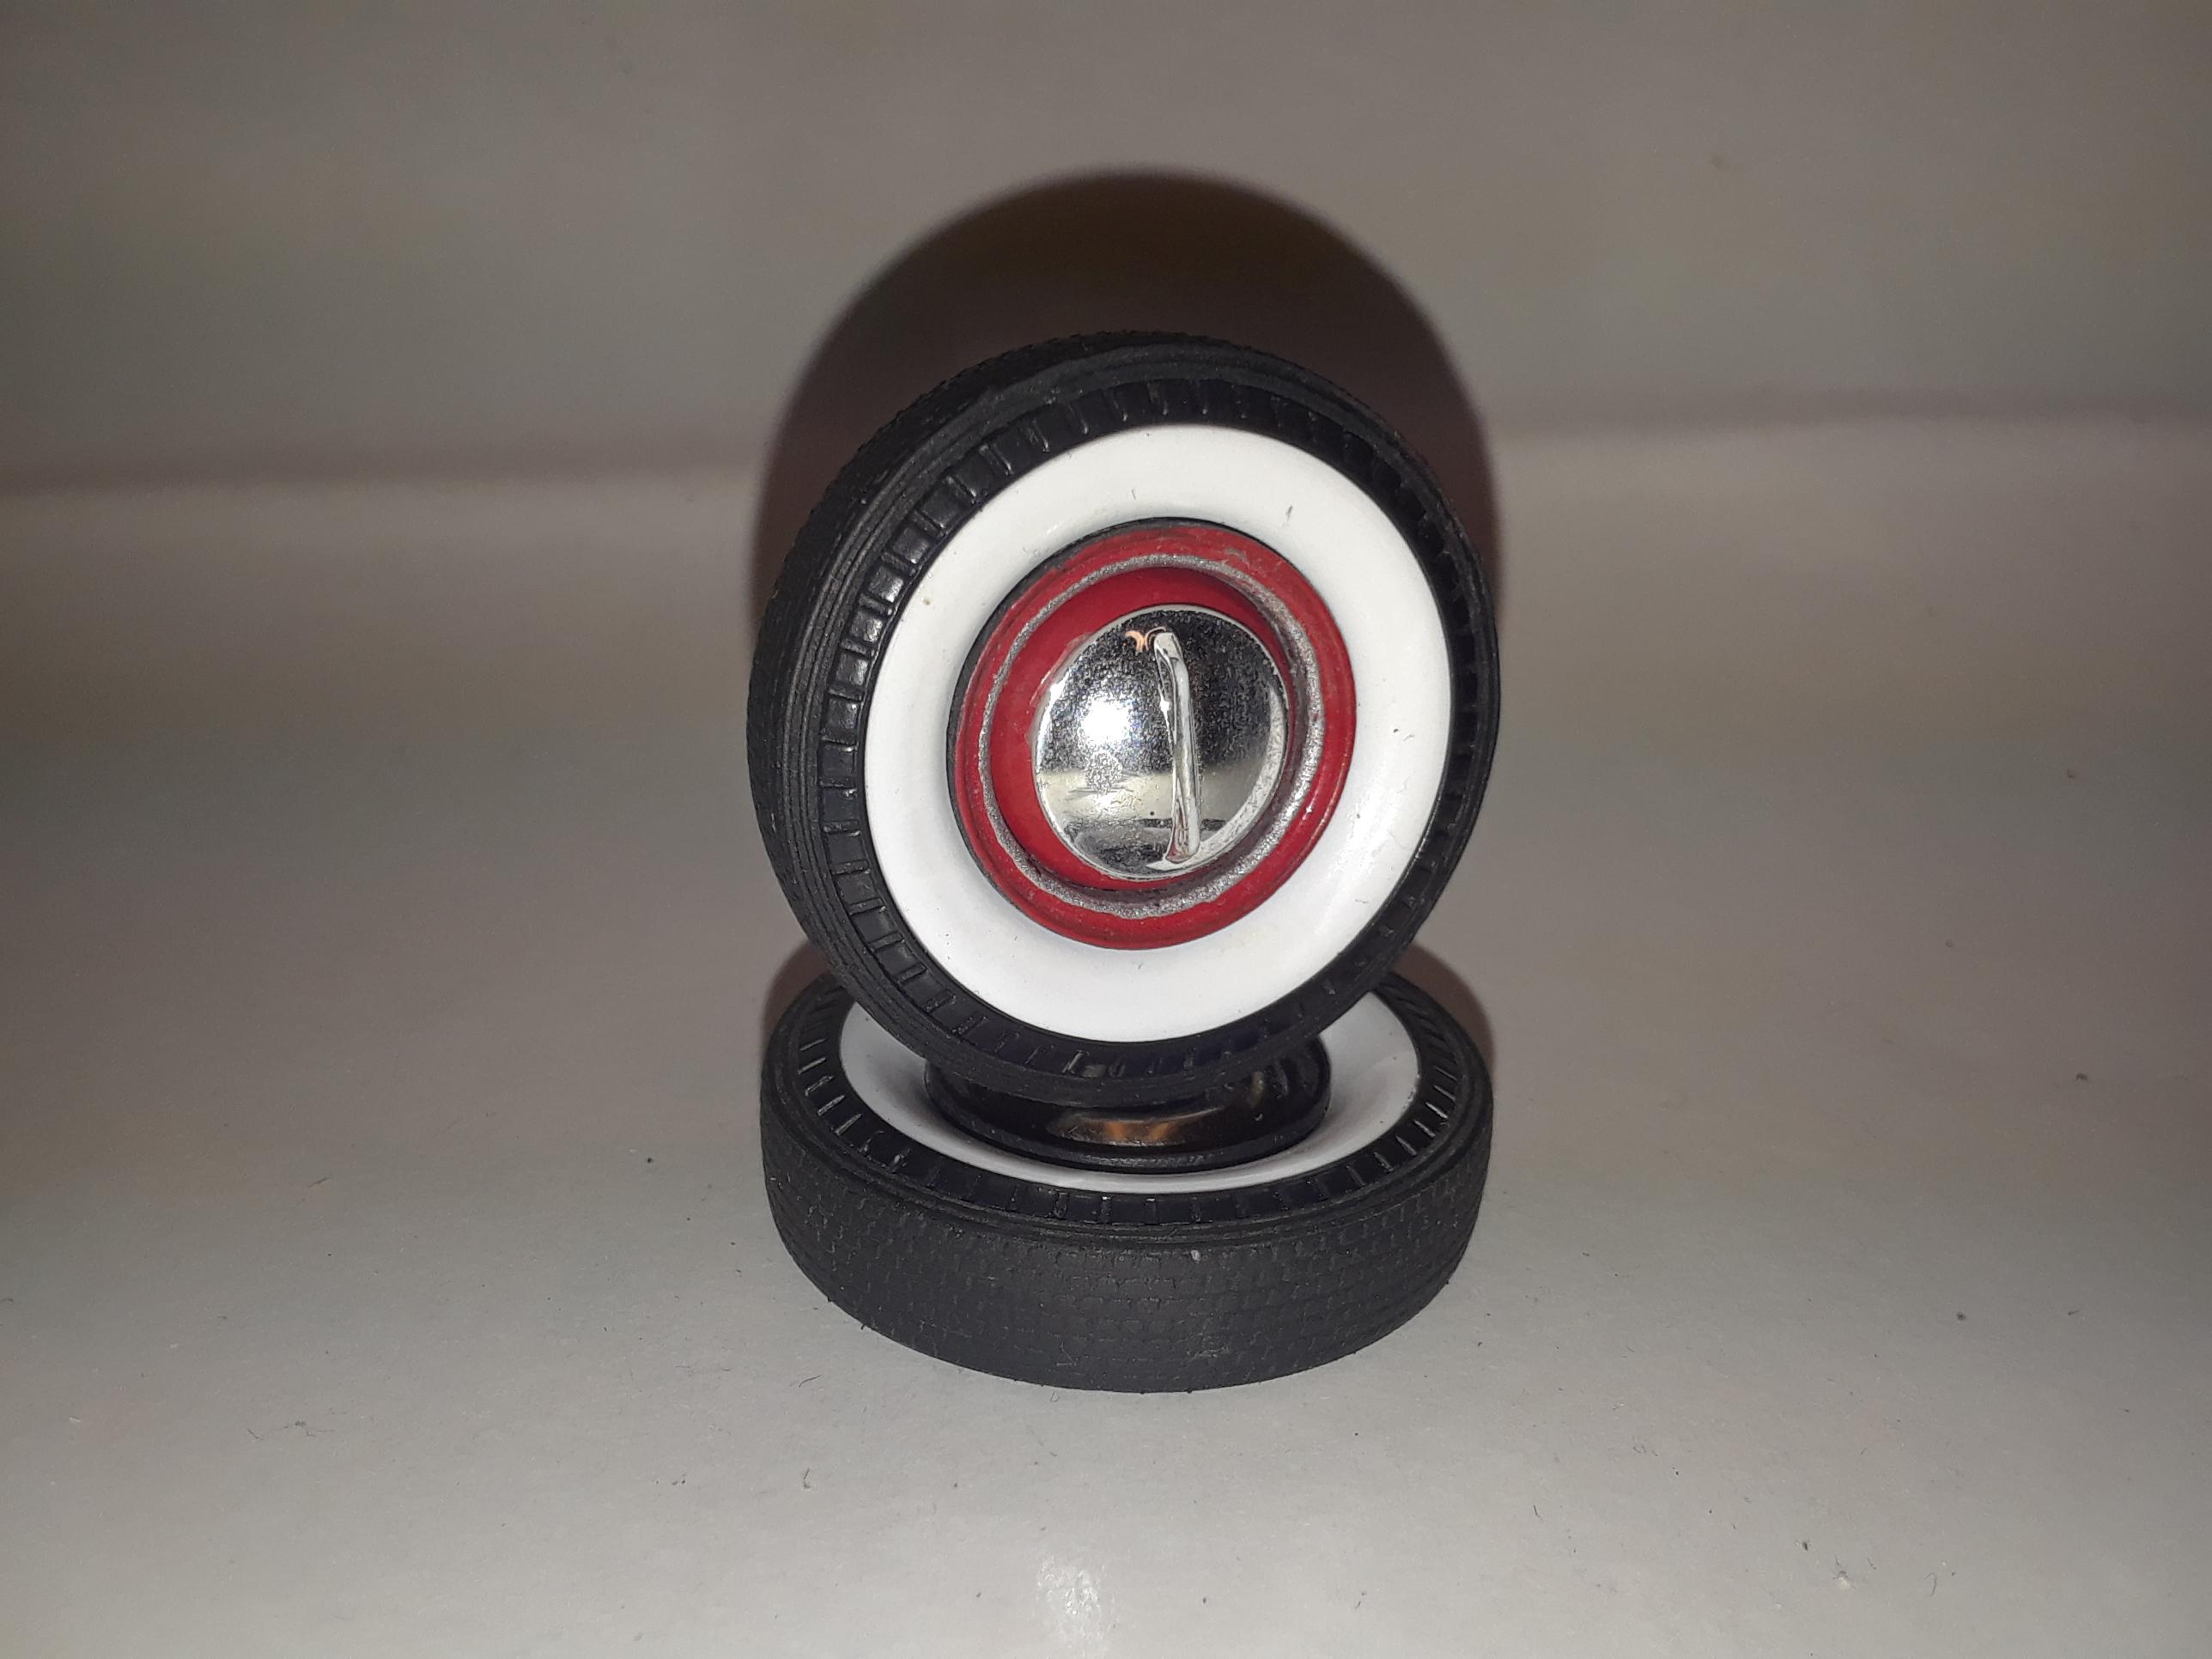
The wheels and tires have taken some effort as well. The Italeri tires are slightly too small in diameter, in my opinion. The hubcaps are entirely wrong. I found the Franklin Mint '32 Cadillac tires were slightly larger in diameter and looked pretty good. However, the wheels are too big in diameter, and the WIDE whitewalls don't look right on a '33. The 33's are closer to a medium white wall. the solution I came up with was to remove just the outer ring of the Italeri plastic tires, shrink down their thickness and outer diameter slightly, until they were the right size to pop into the Franklin Mint tires. I used the Italeri white walls. I cut out the wheel rim from the front half of the Italeri wheel/tire assemblies. For hub caps, I'm using Everbilt #10 nickel plated finishing washers available at Home Depot in the hardware department. That's the first part. On top of that, I'm using Monogram flipper hub caps from their '48 Ford kits, reduced slightly in diameter. The photos depict the component parts I'm describing, along one wheel mocked up with some red paint and Molotow trim ring to see how they'll look on the finished car. Now, a very good match for the full size '33 Cadillac wheel and tire. The last photo shows what the Italeri pieces look like out of the box.
-
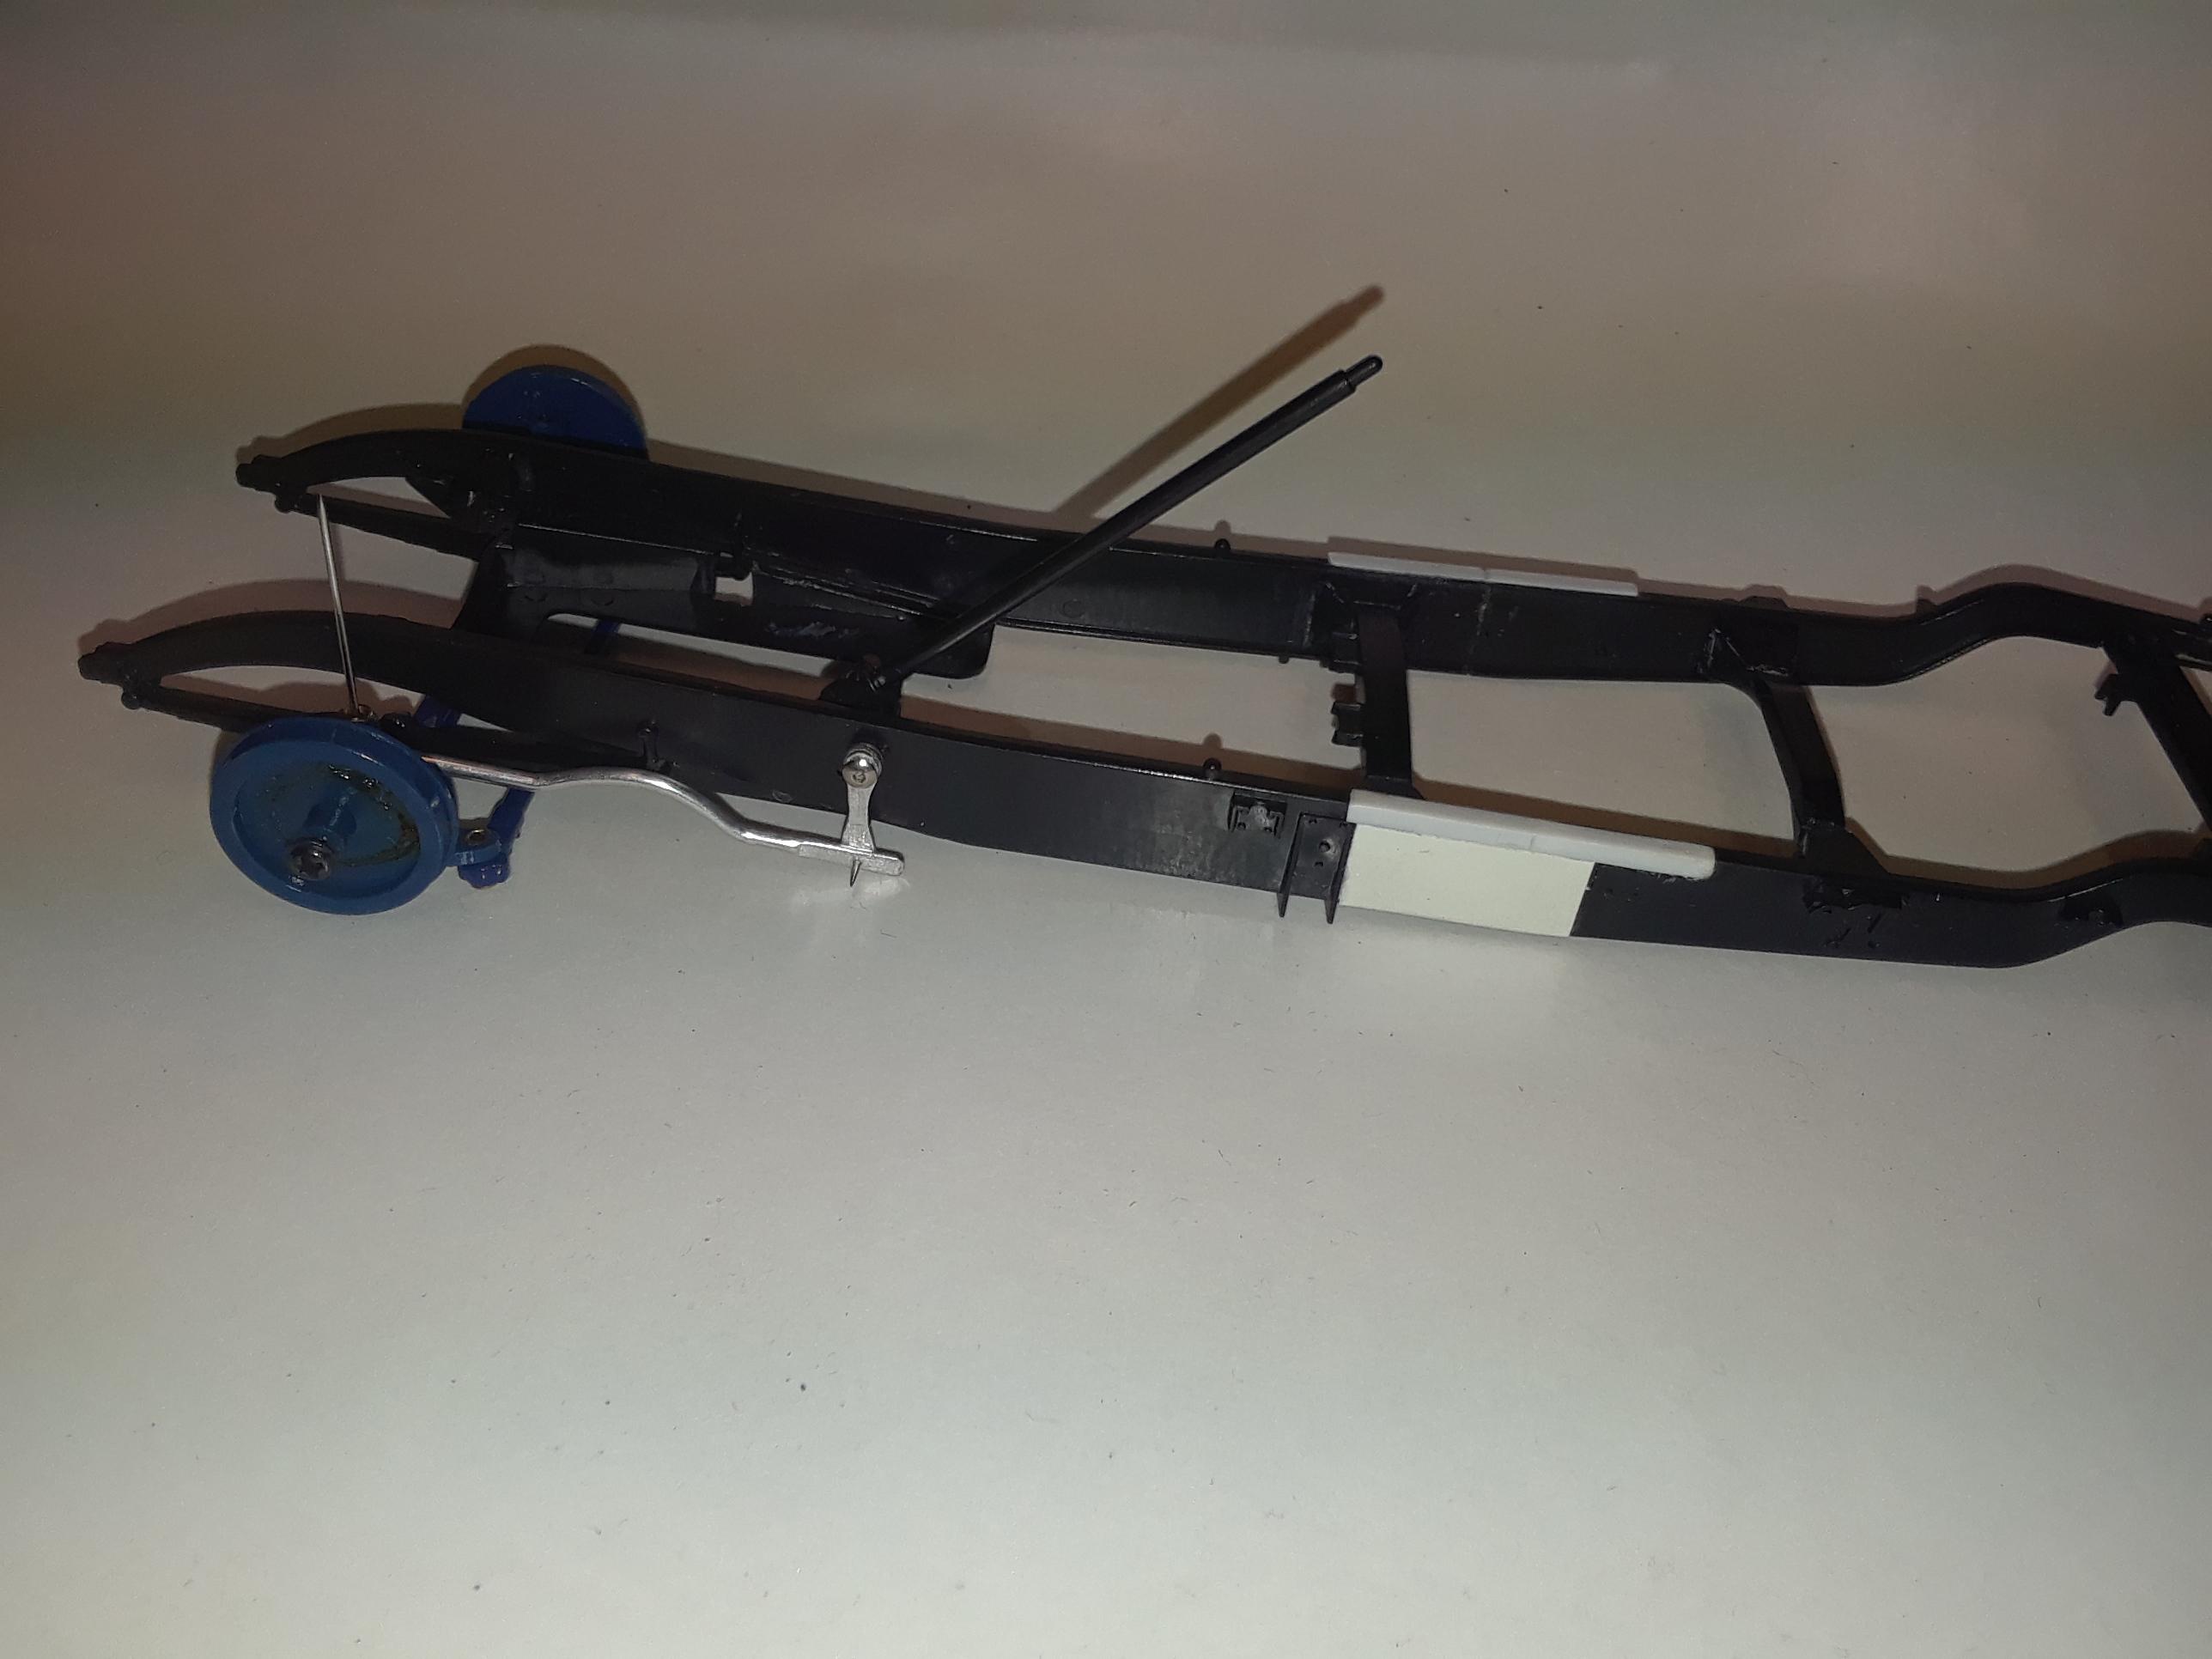
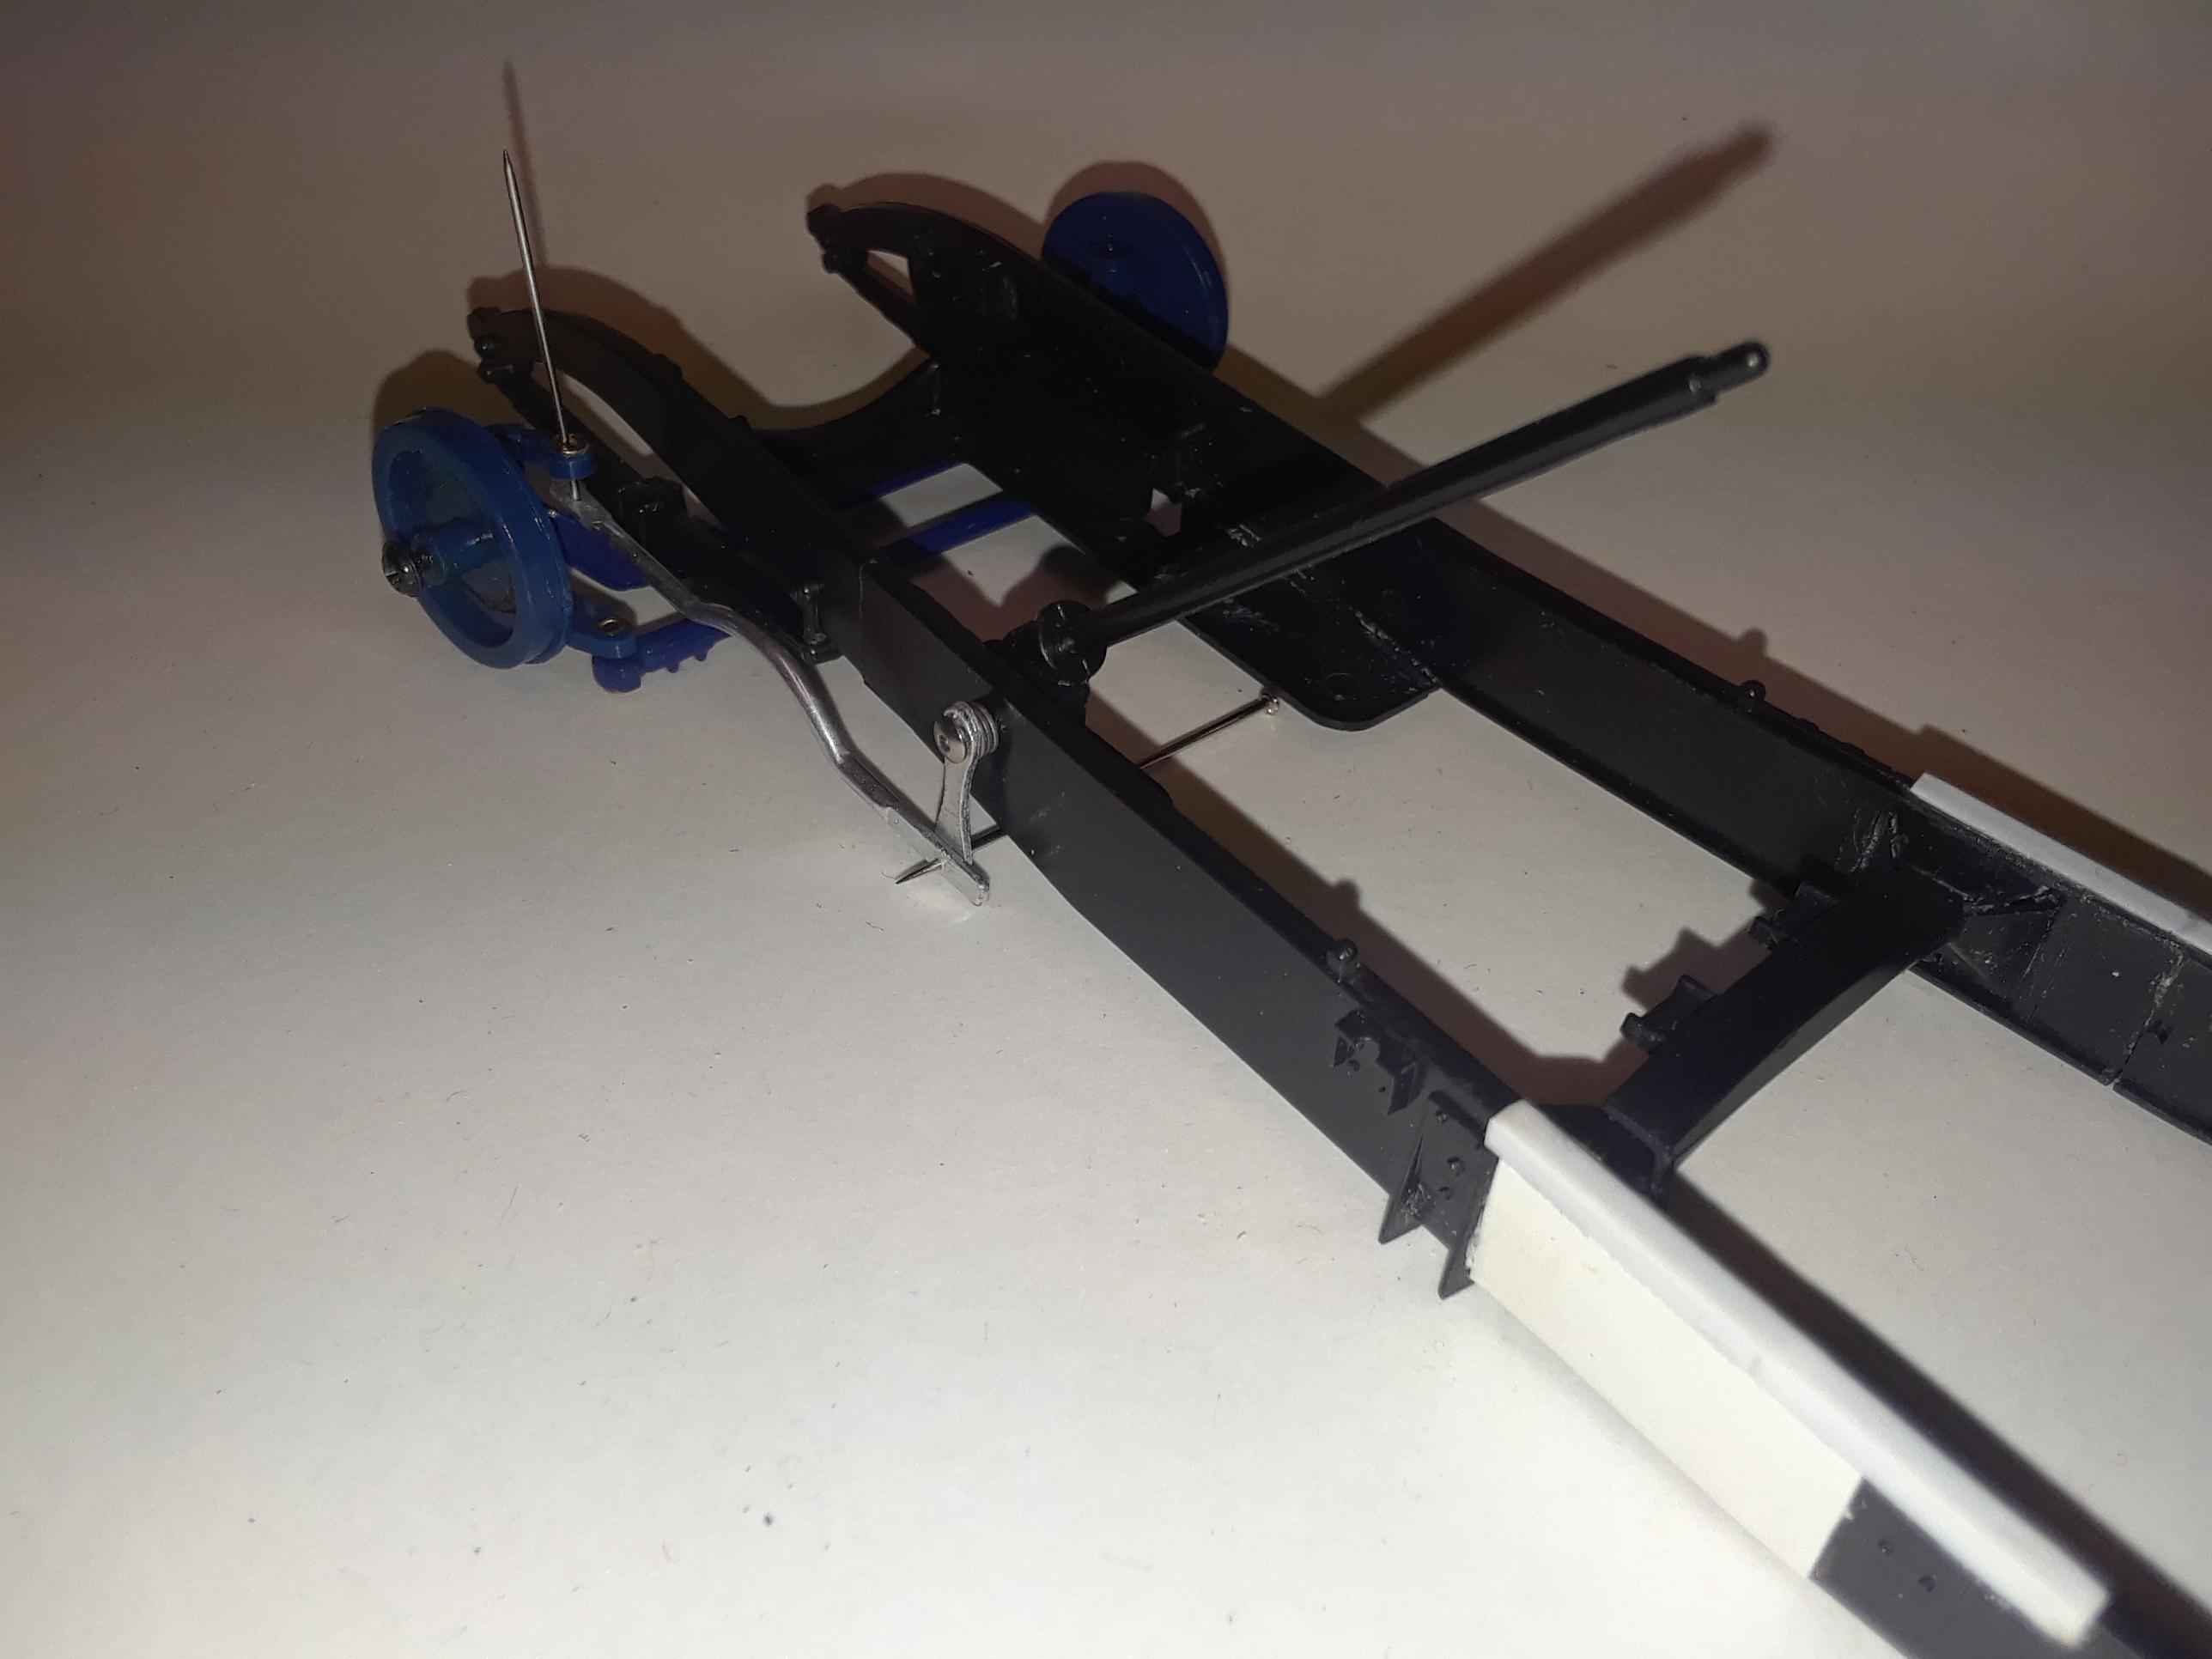
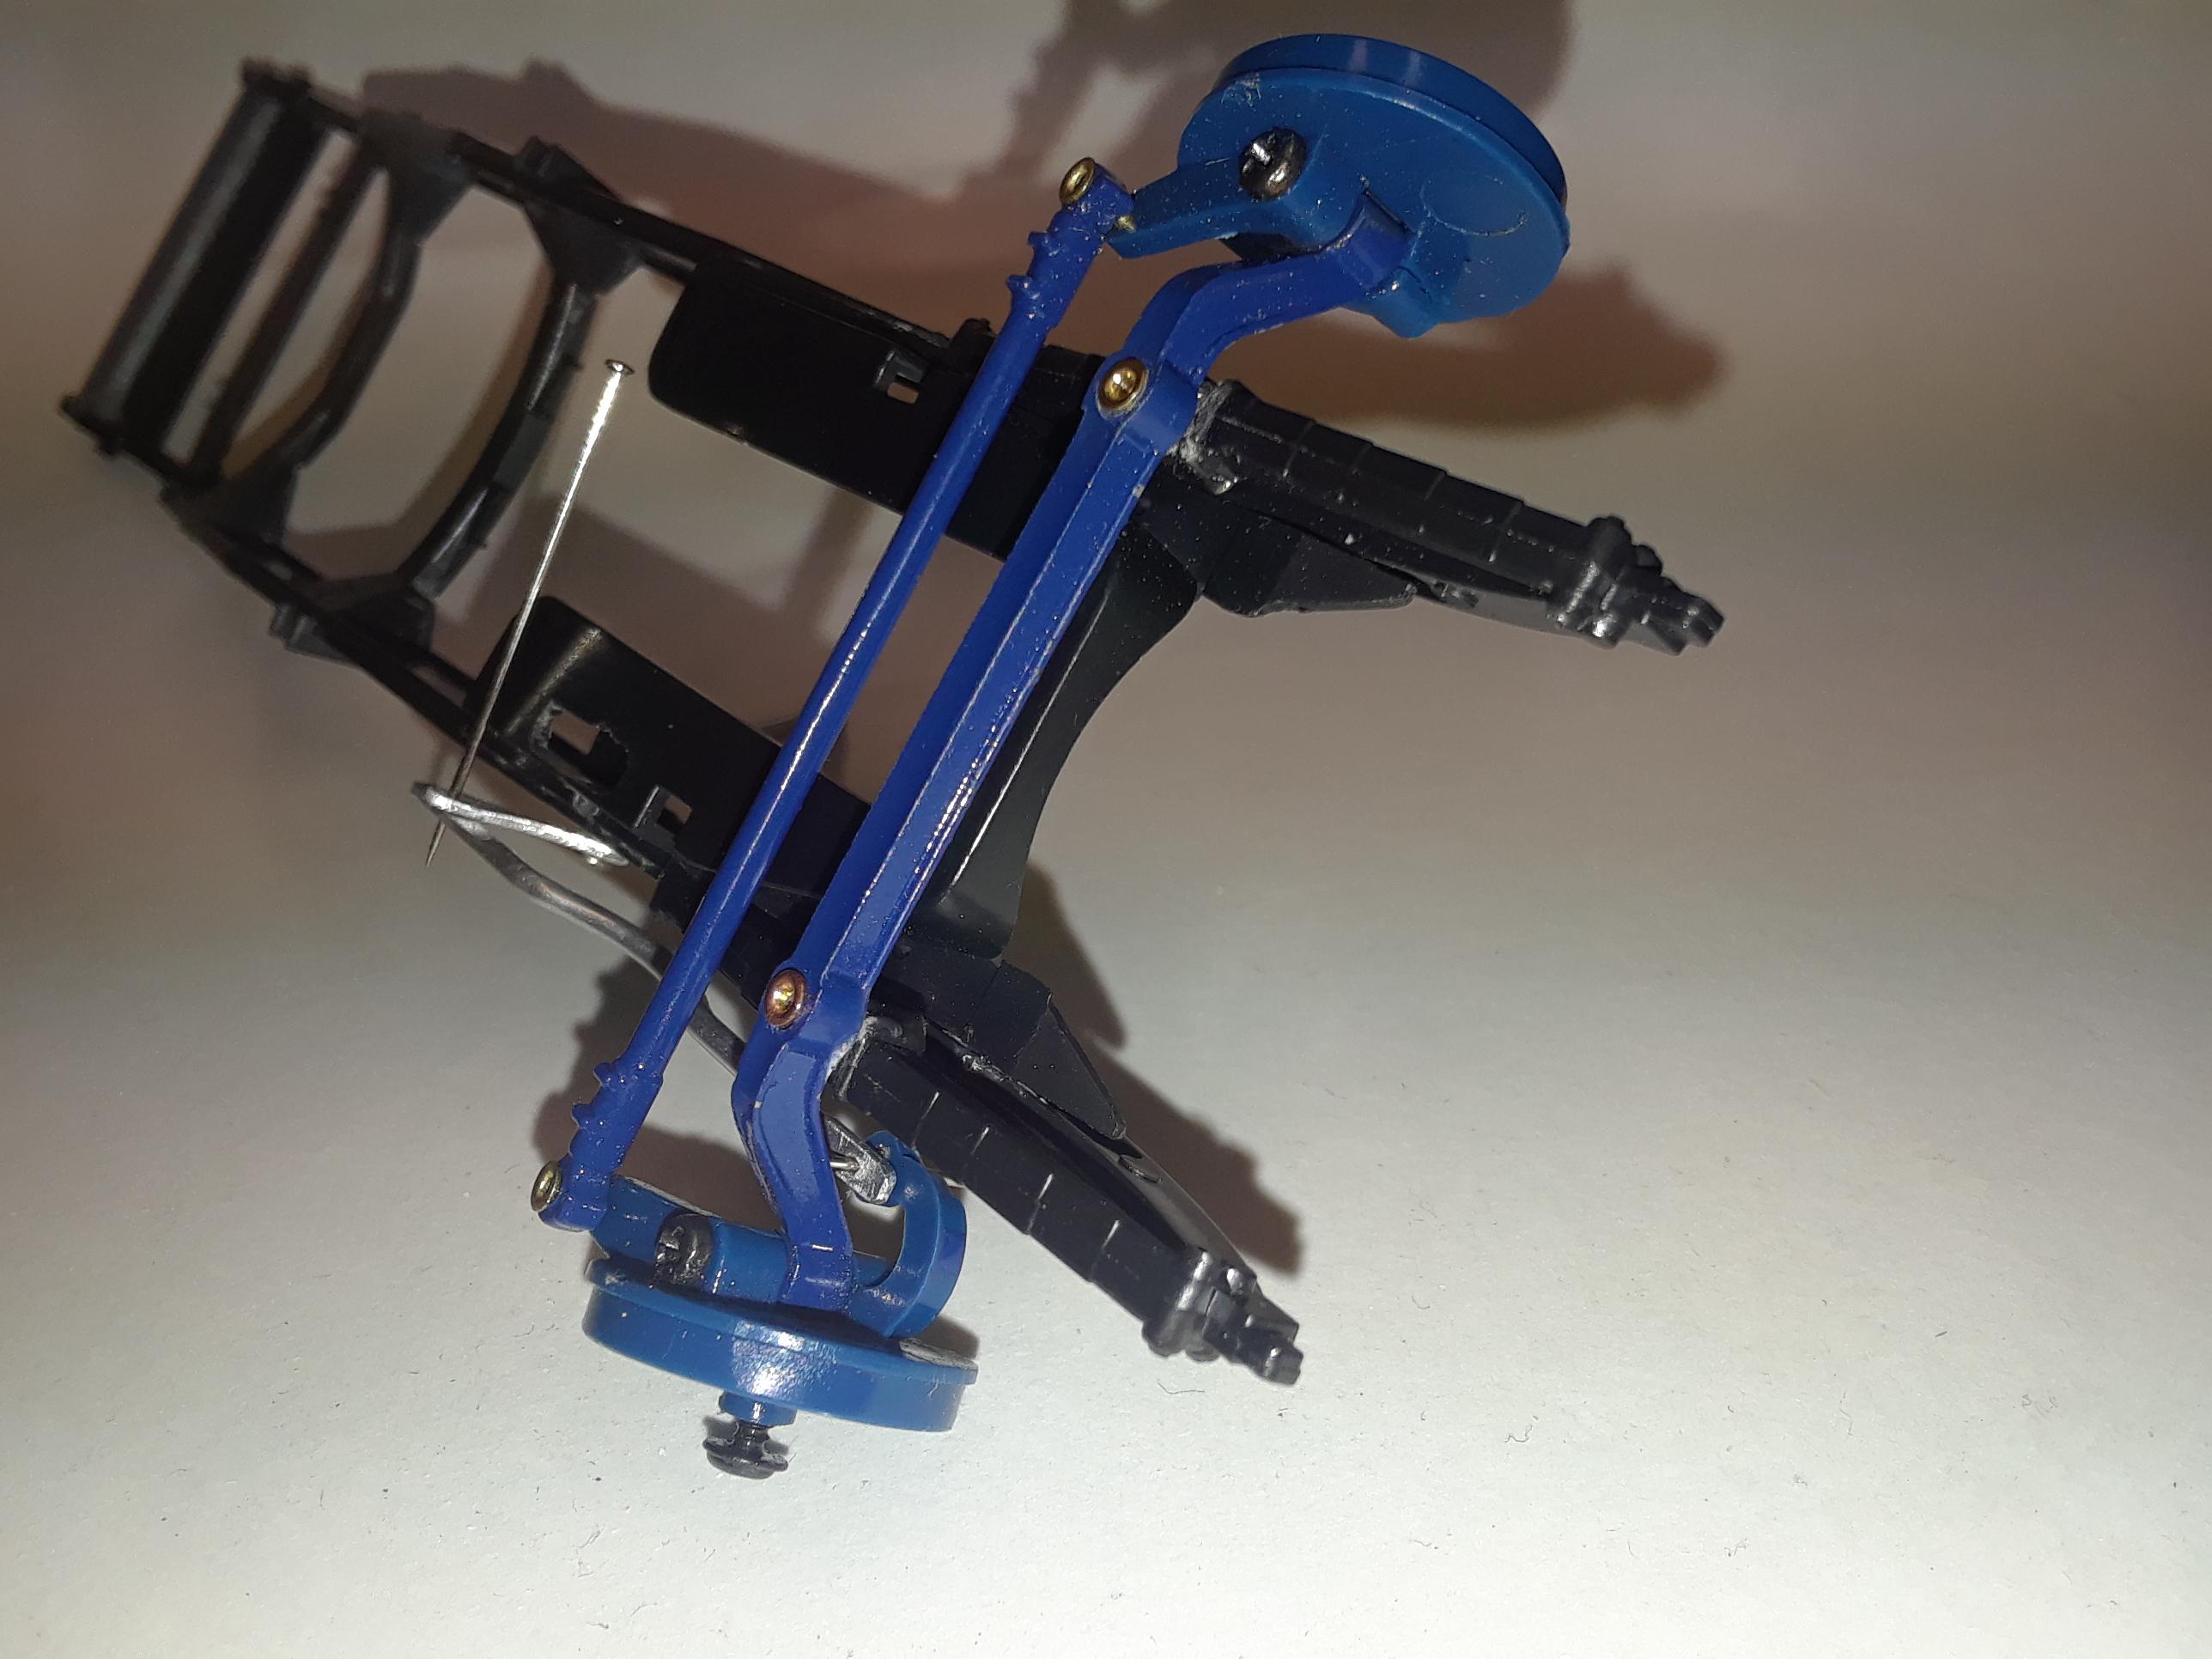
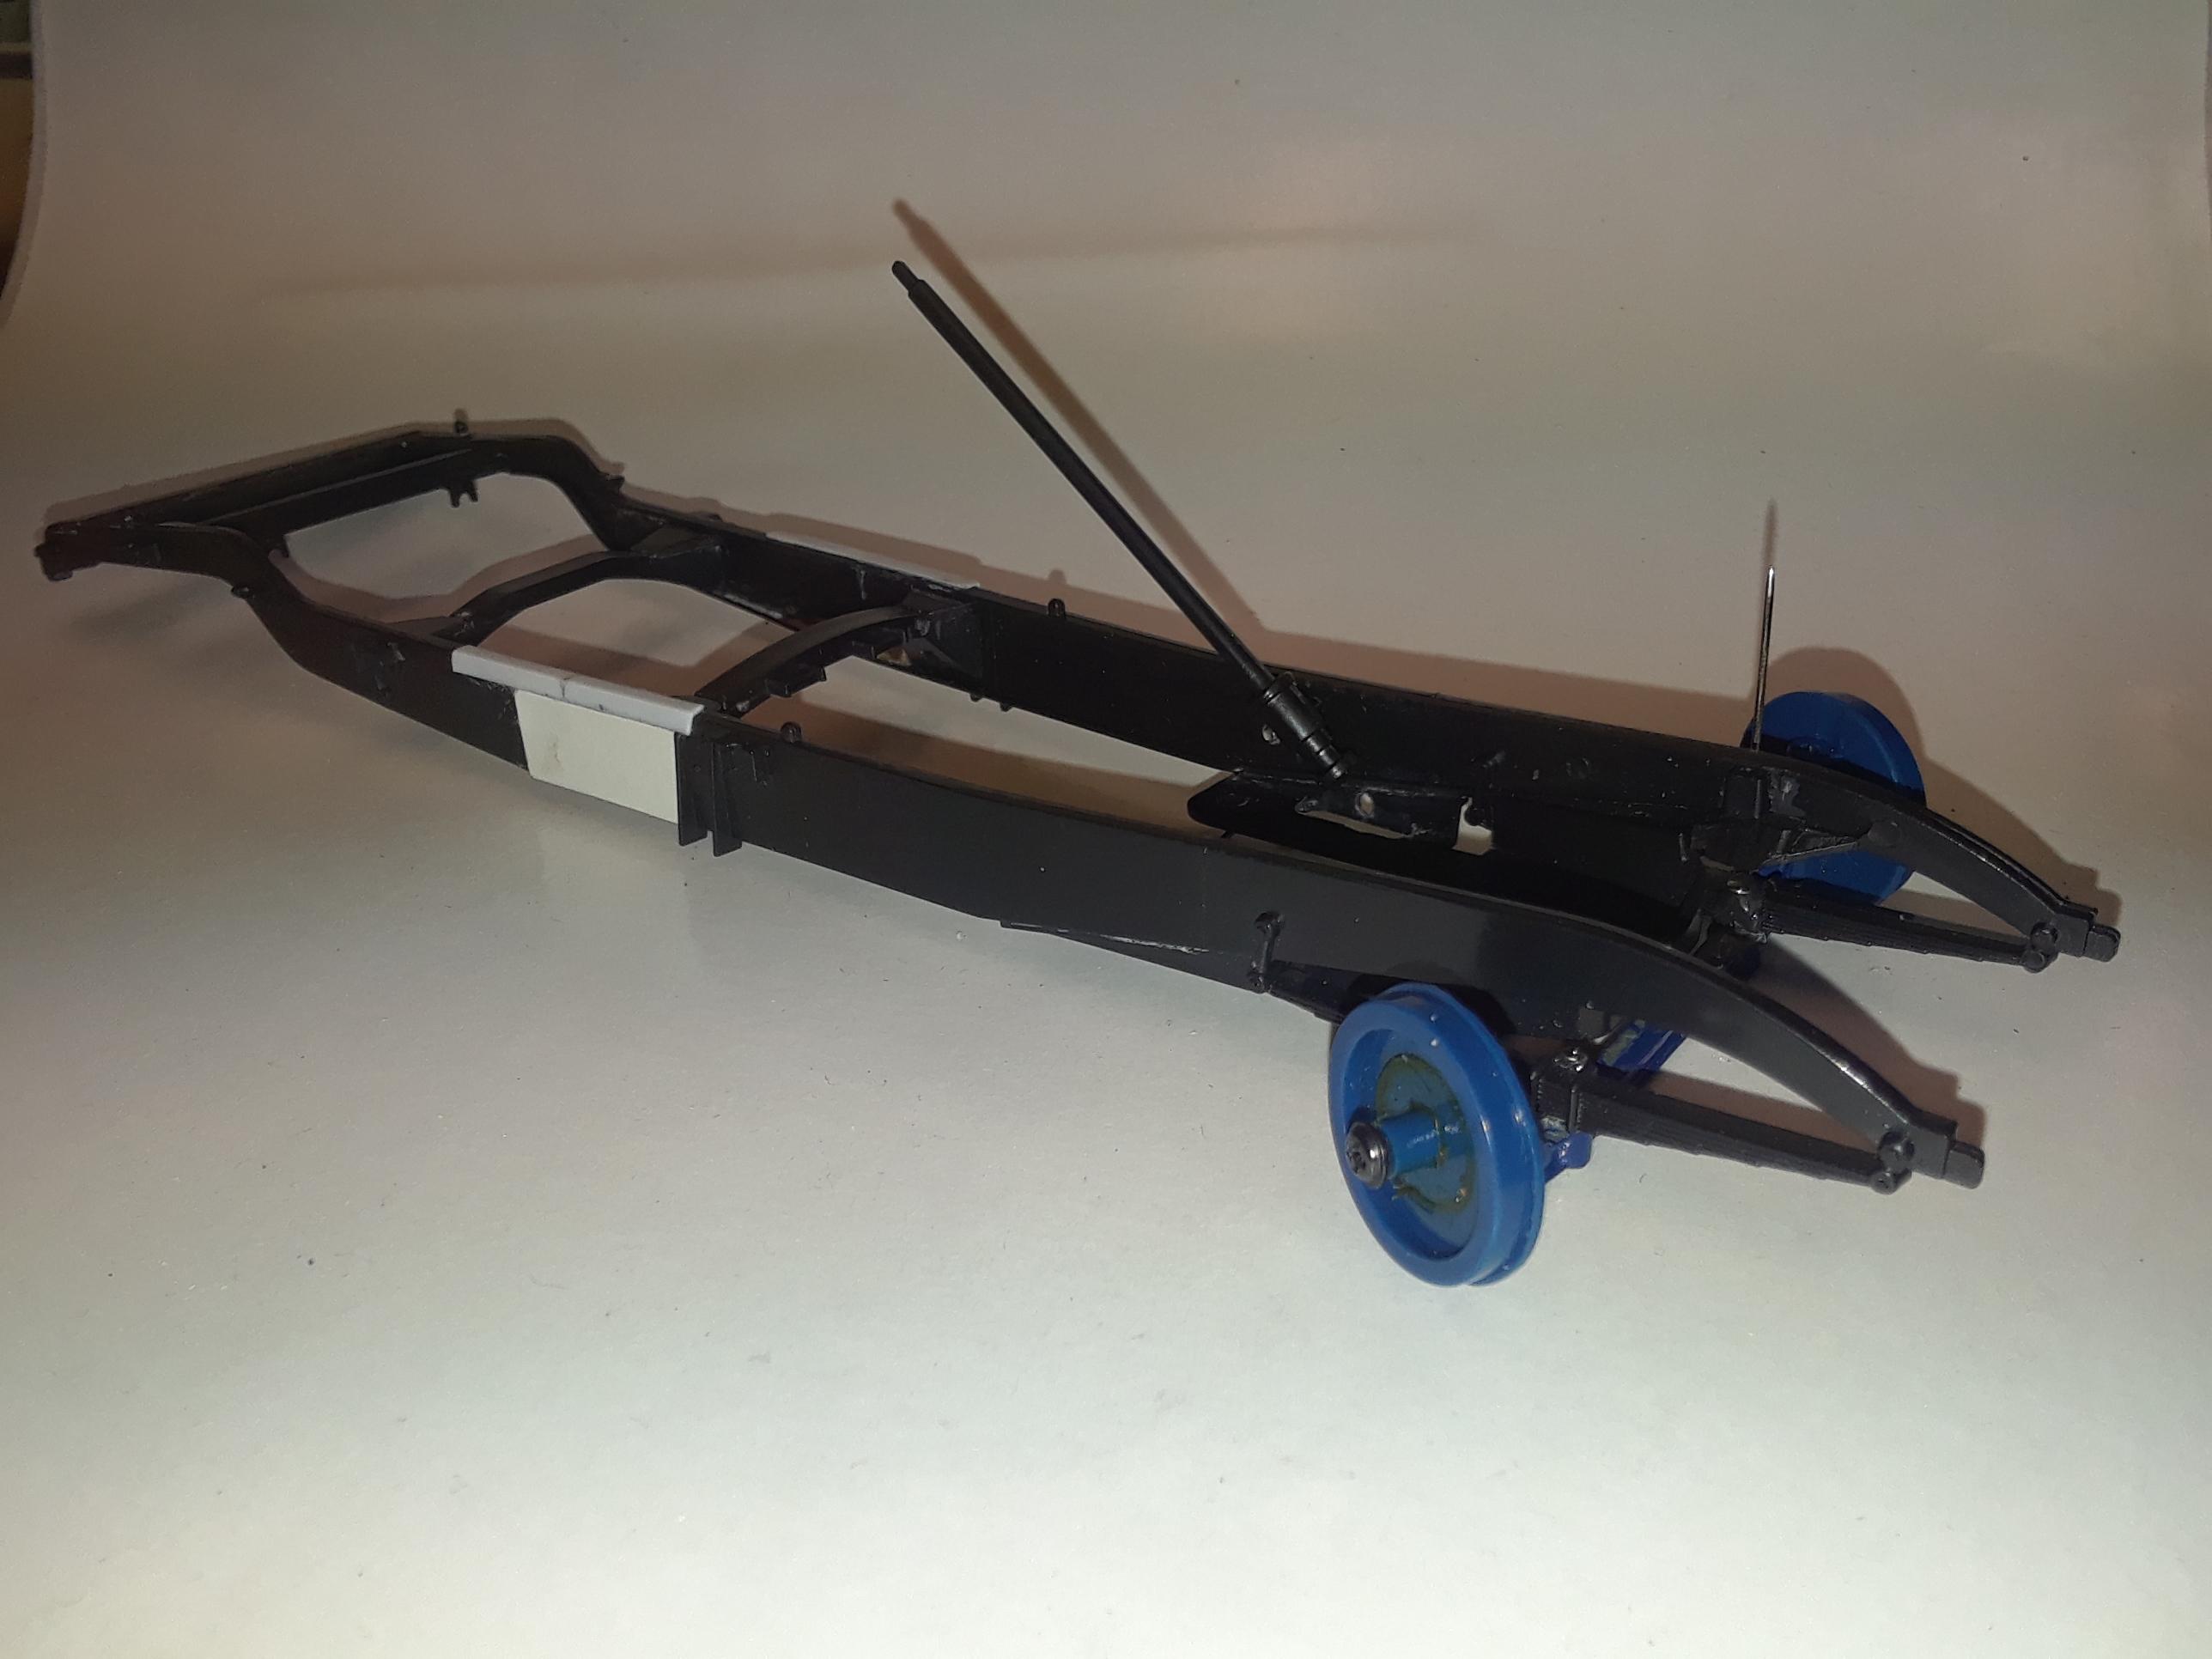
I've been working on the chassis as well. I've got a Franklin Mint '32 Cadillac all-wheather-phaeton I'm using as a parts car for various projects. For this '33 Cadillac, I'm using the wheels and tires, and the pose-able front axle. Originally I was going to try to use the steering box too, which enables working steering, but the plastic chassis seems a little too light weight to hold everything intact to function properly. Getting all the moving parts positioned in exactly the right locations and angles was giving me some trouble too. So as a compromise, I decided to just make it pose-able. I fabricated a drag link from aluminum tubing and a pitman arm. I drilled and tapped the chassis and plastic kit steering box so I could run an 0-80 button head bolt in. This fastens the steering box to the chassis much better and functions as the fulcrum point for the pitman arm as well. I glued pin heads to the springs as locating pins for the front axle. I glued brass eyelets into the axle to reduce the diameter of the screw holes that were used to attach it to the diecast model. Now it pops into place on the Italeri plastic springs in the correct position. In these photos you can see currently just pinned together. The white plastic on the sides of the frame rails are where I shortened it to the 143" wheelbase this car has.
-
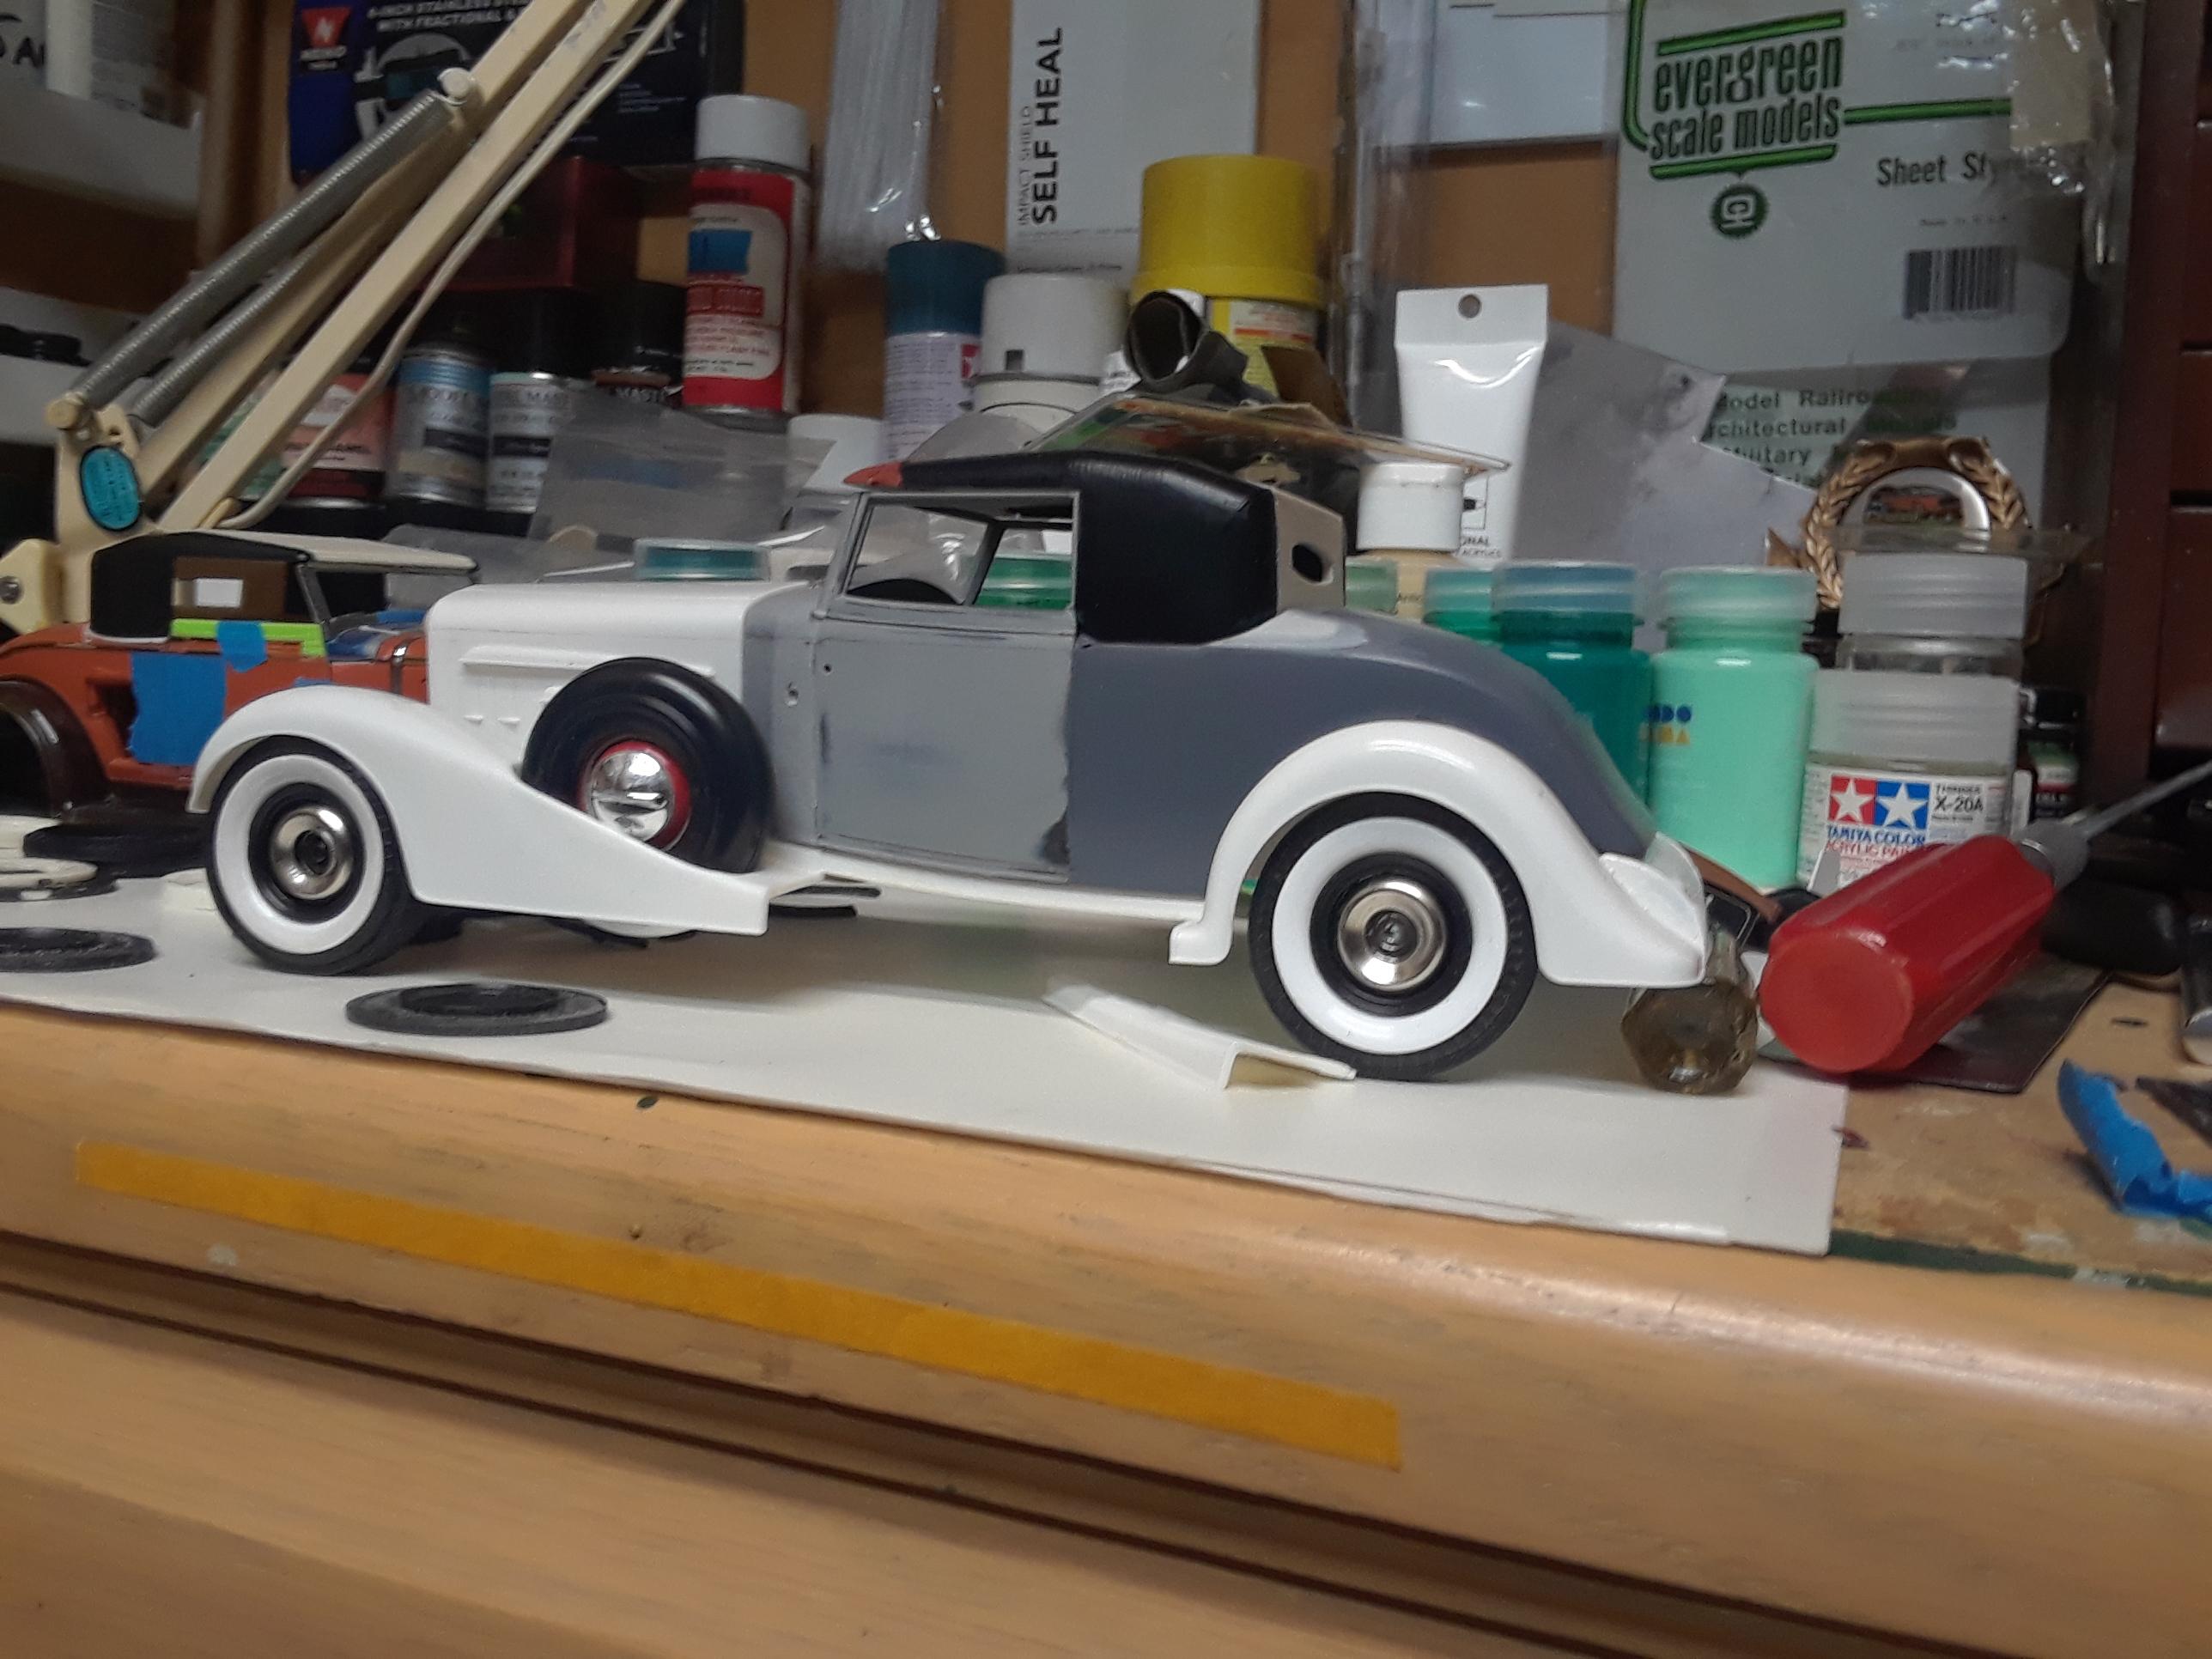
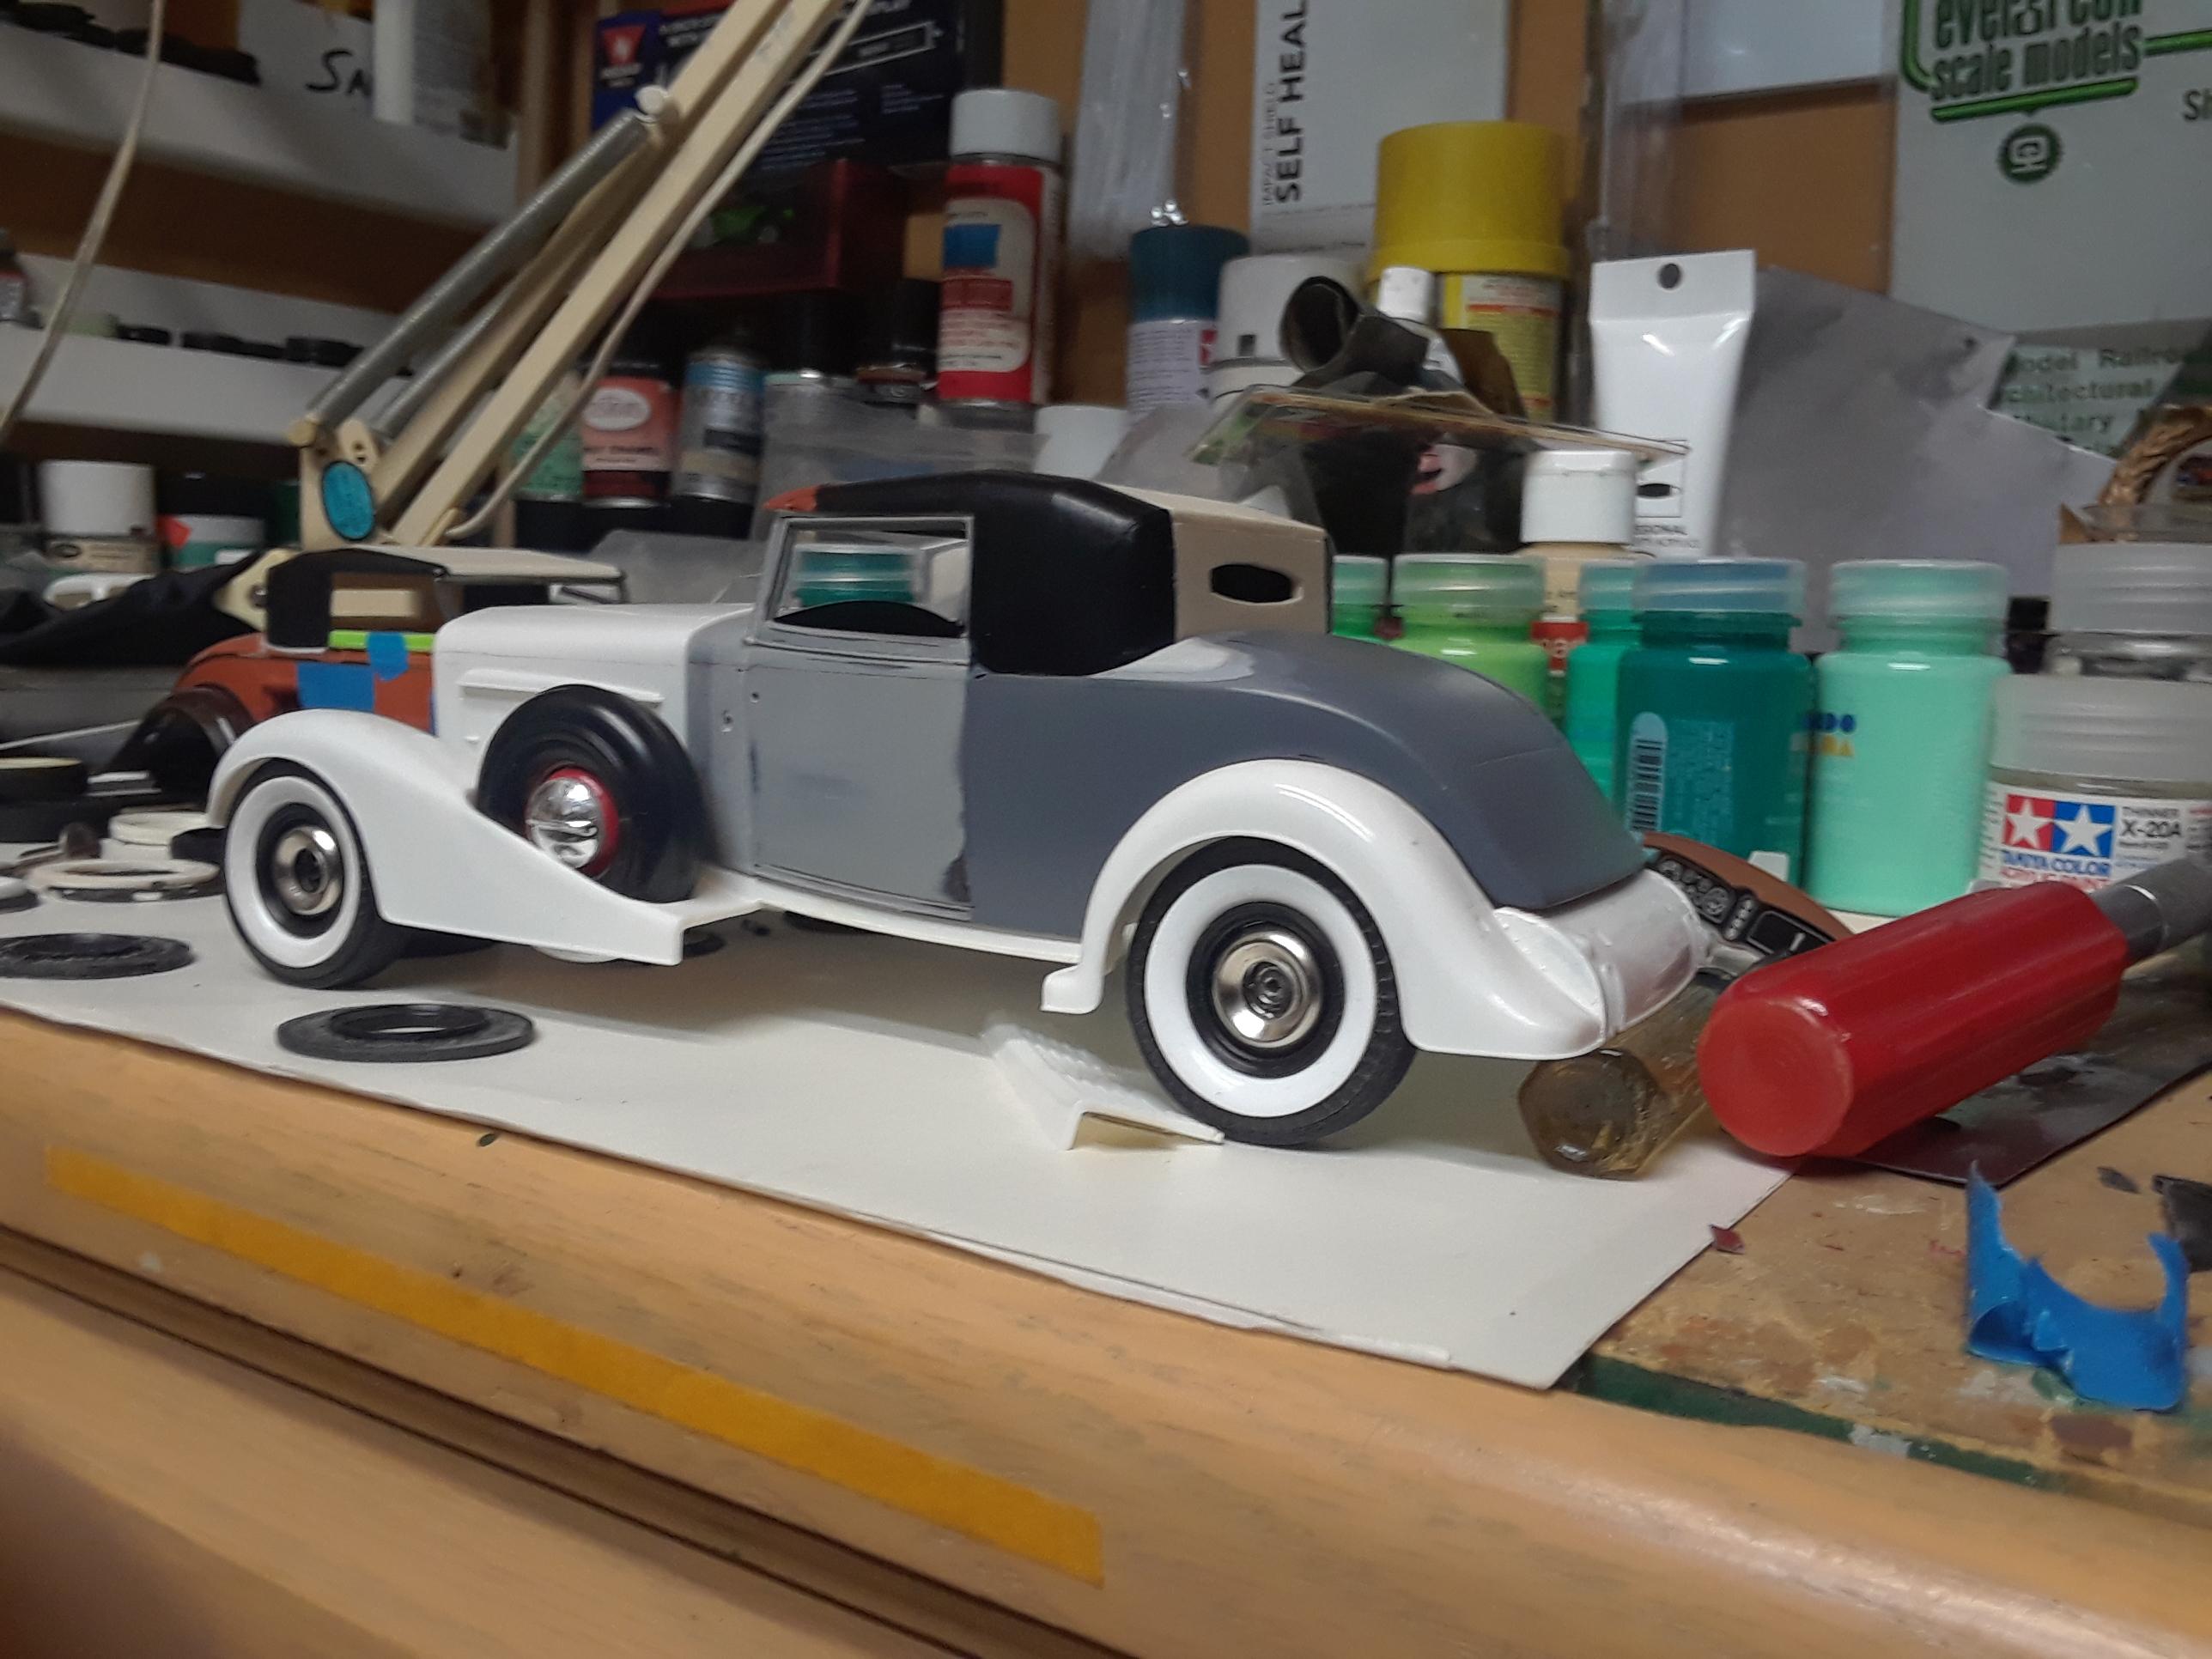
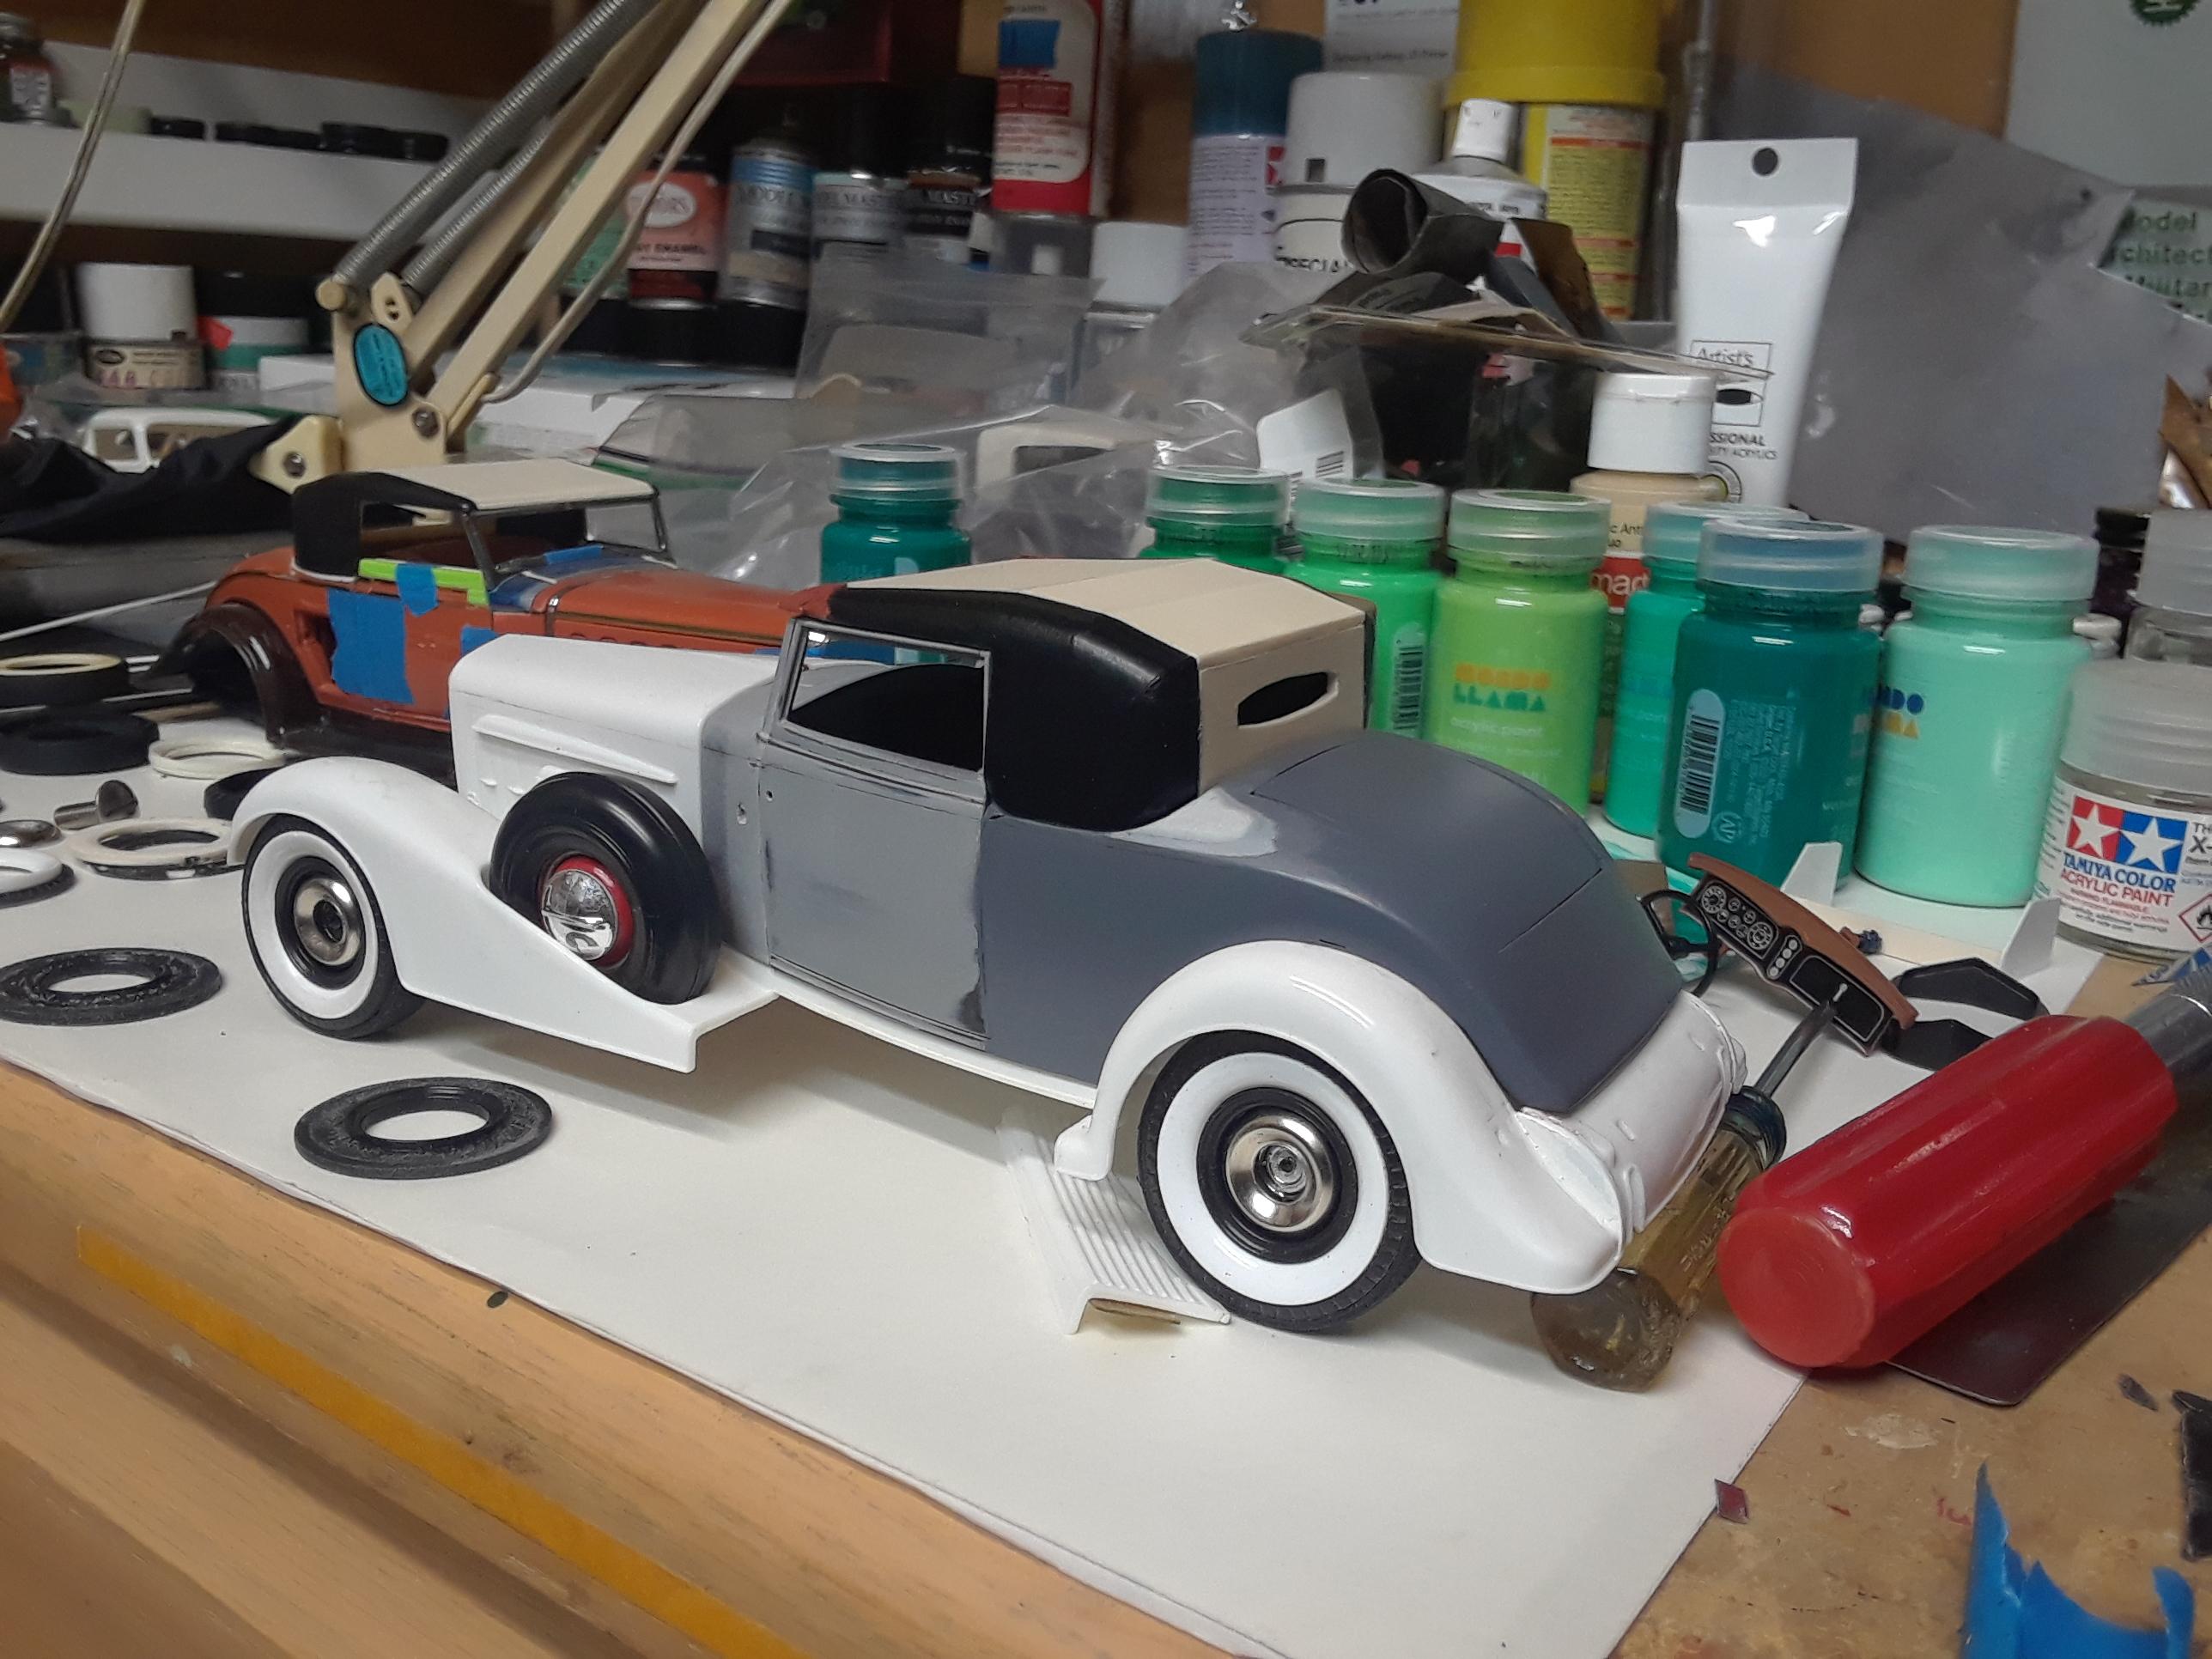
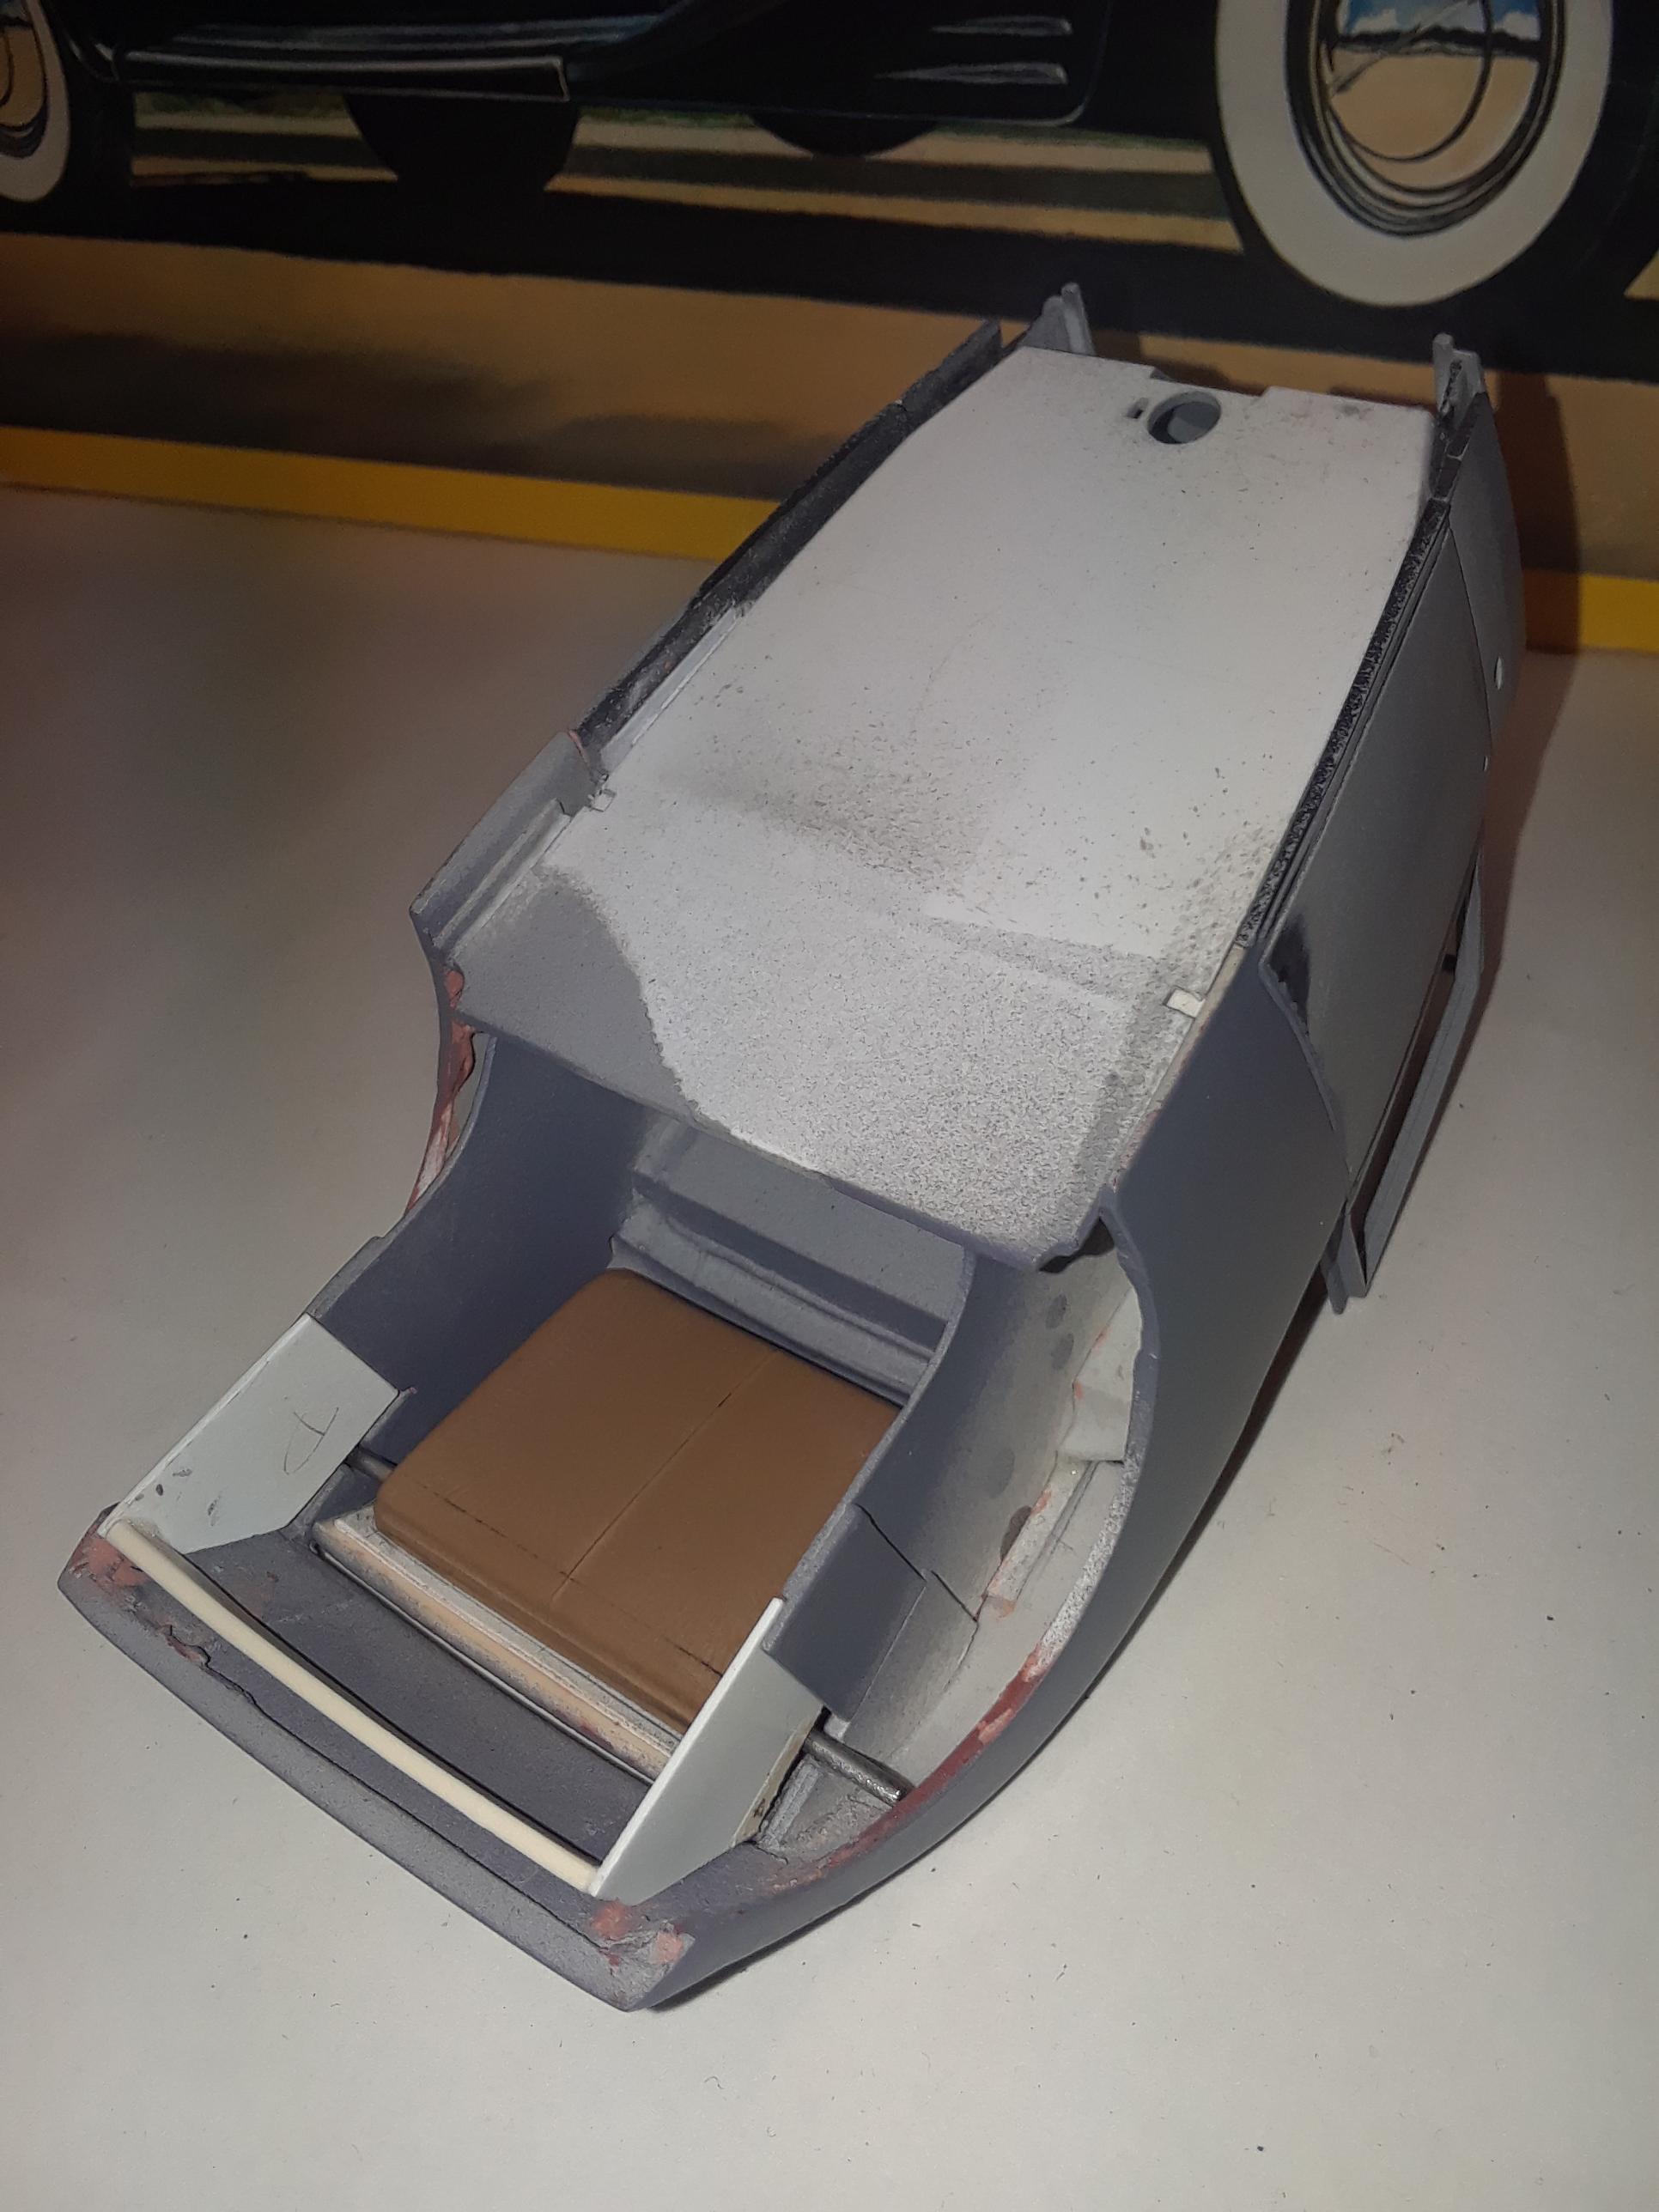
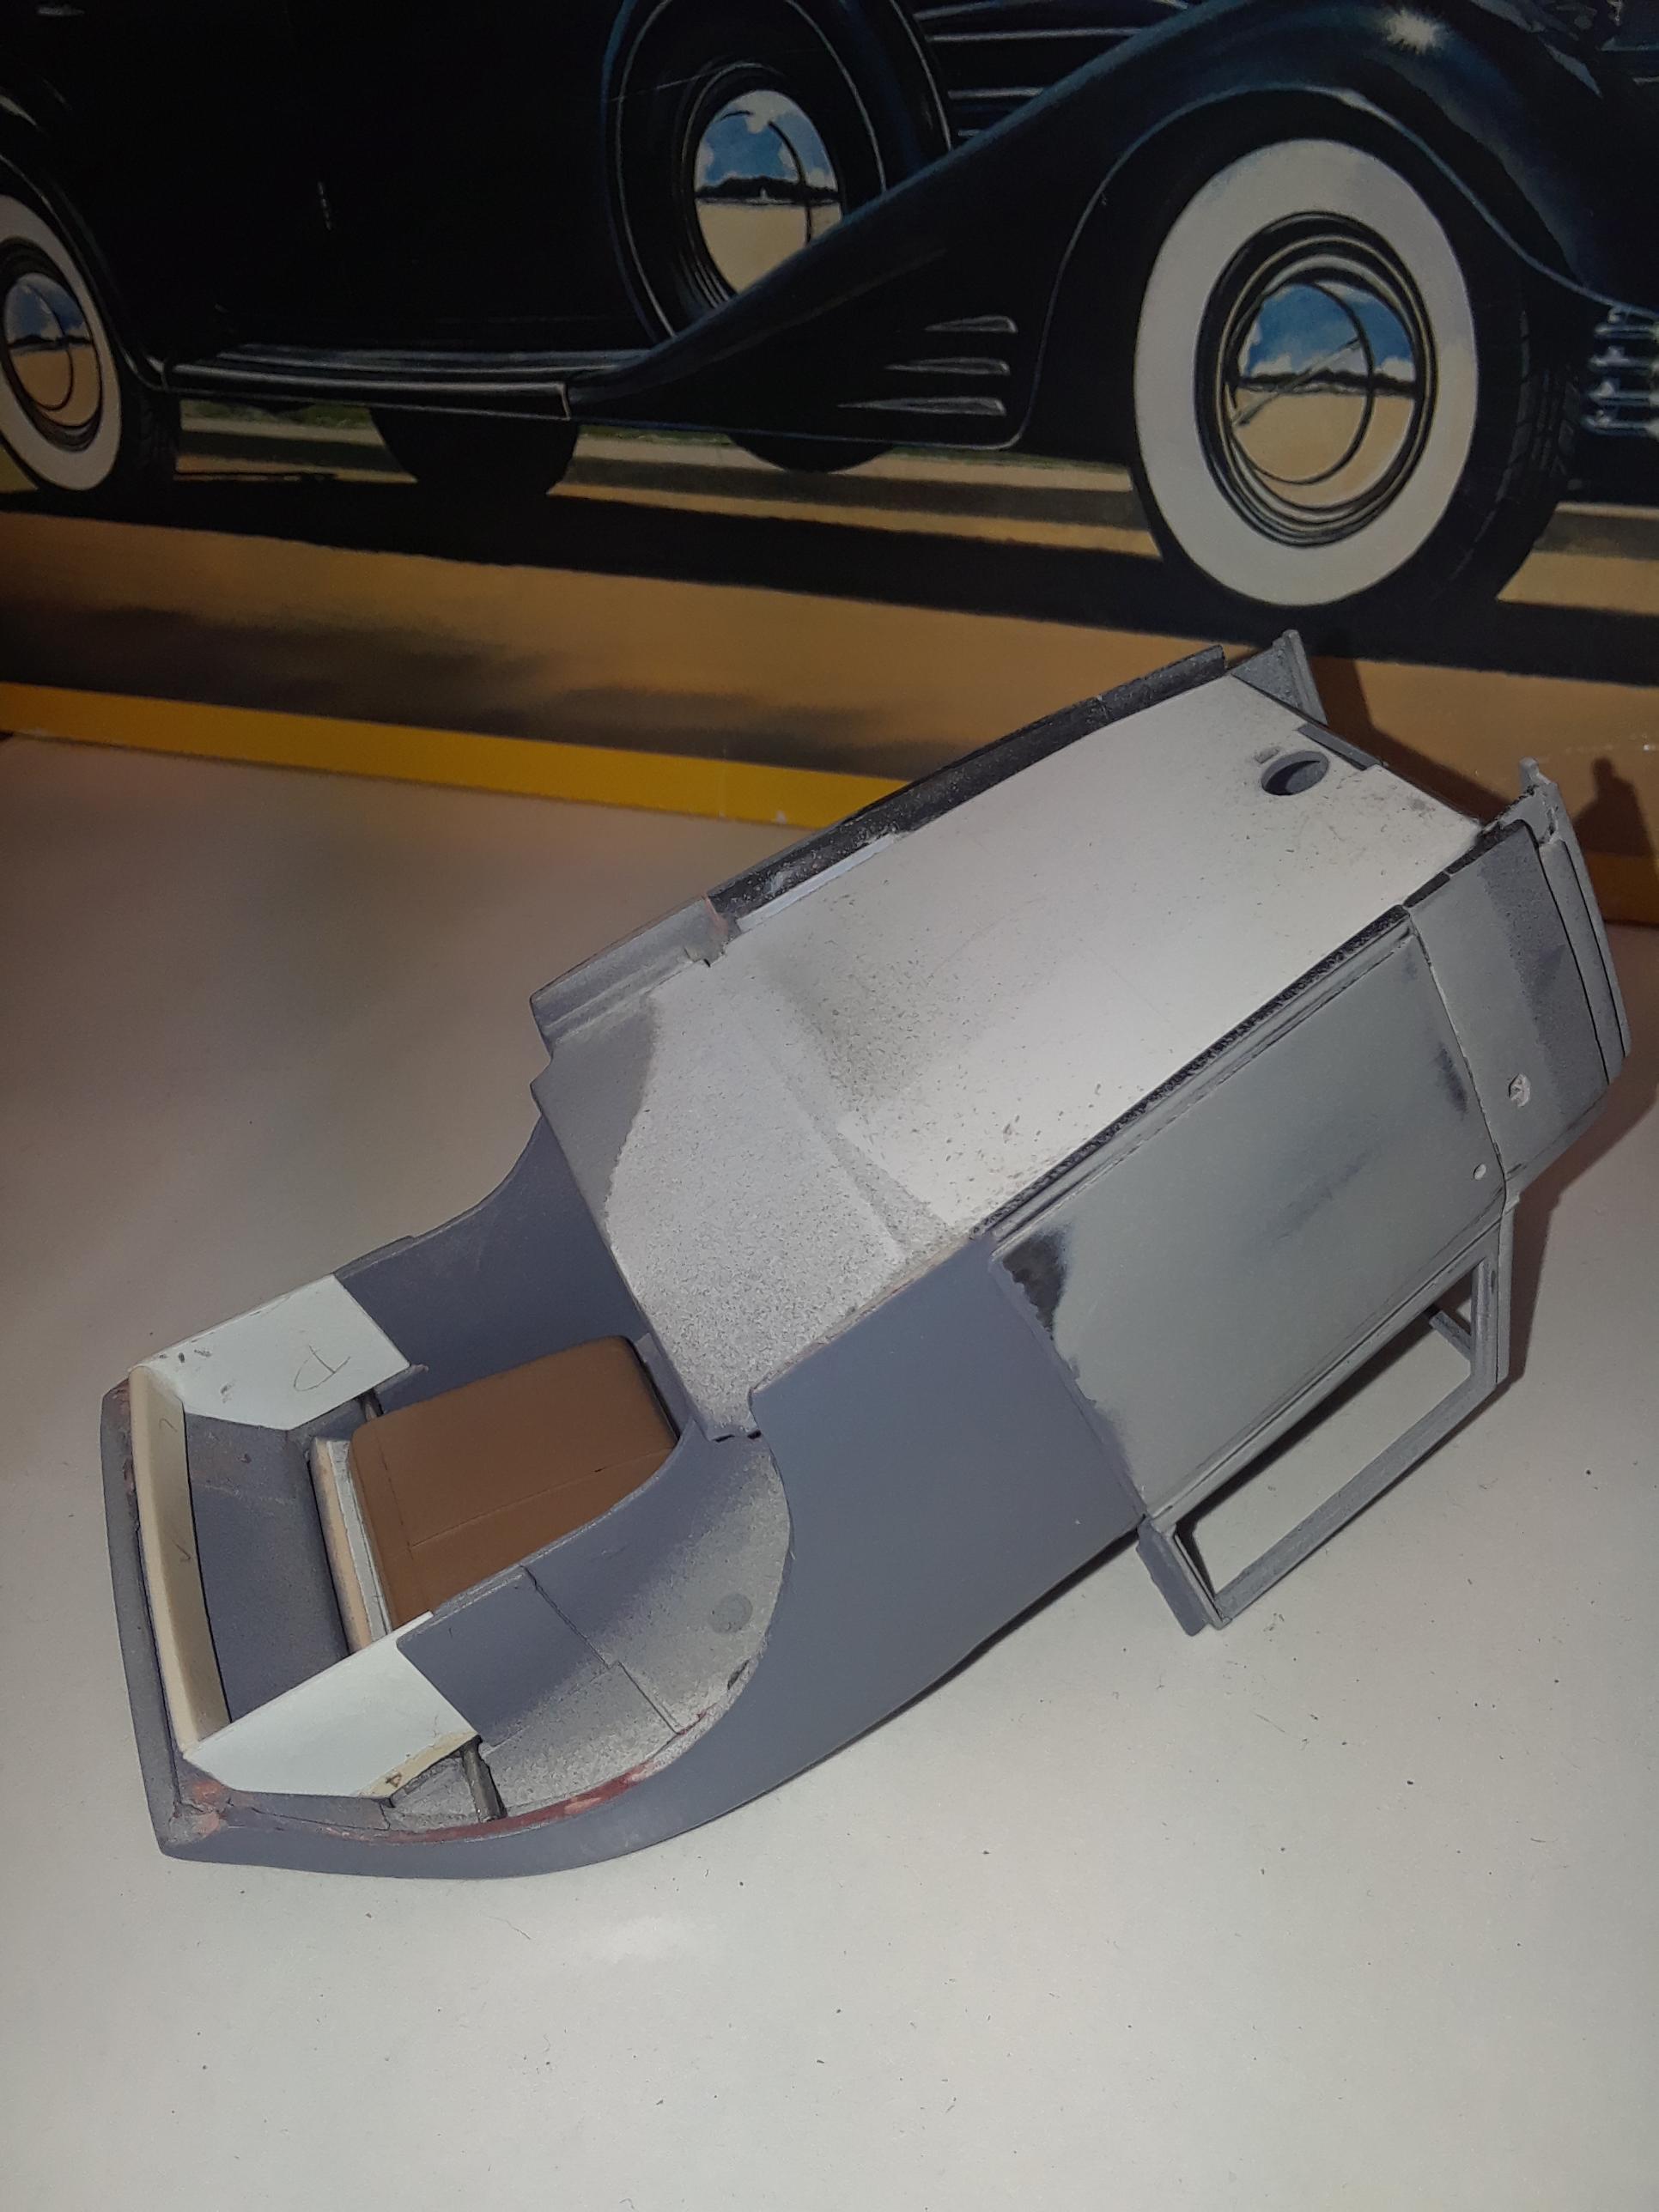
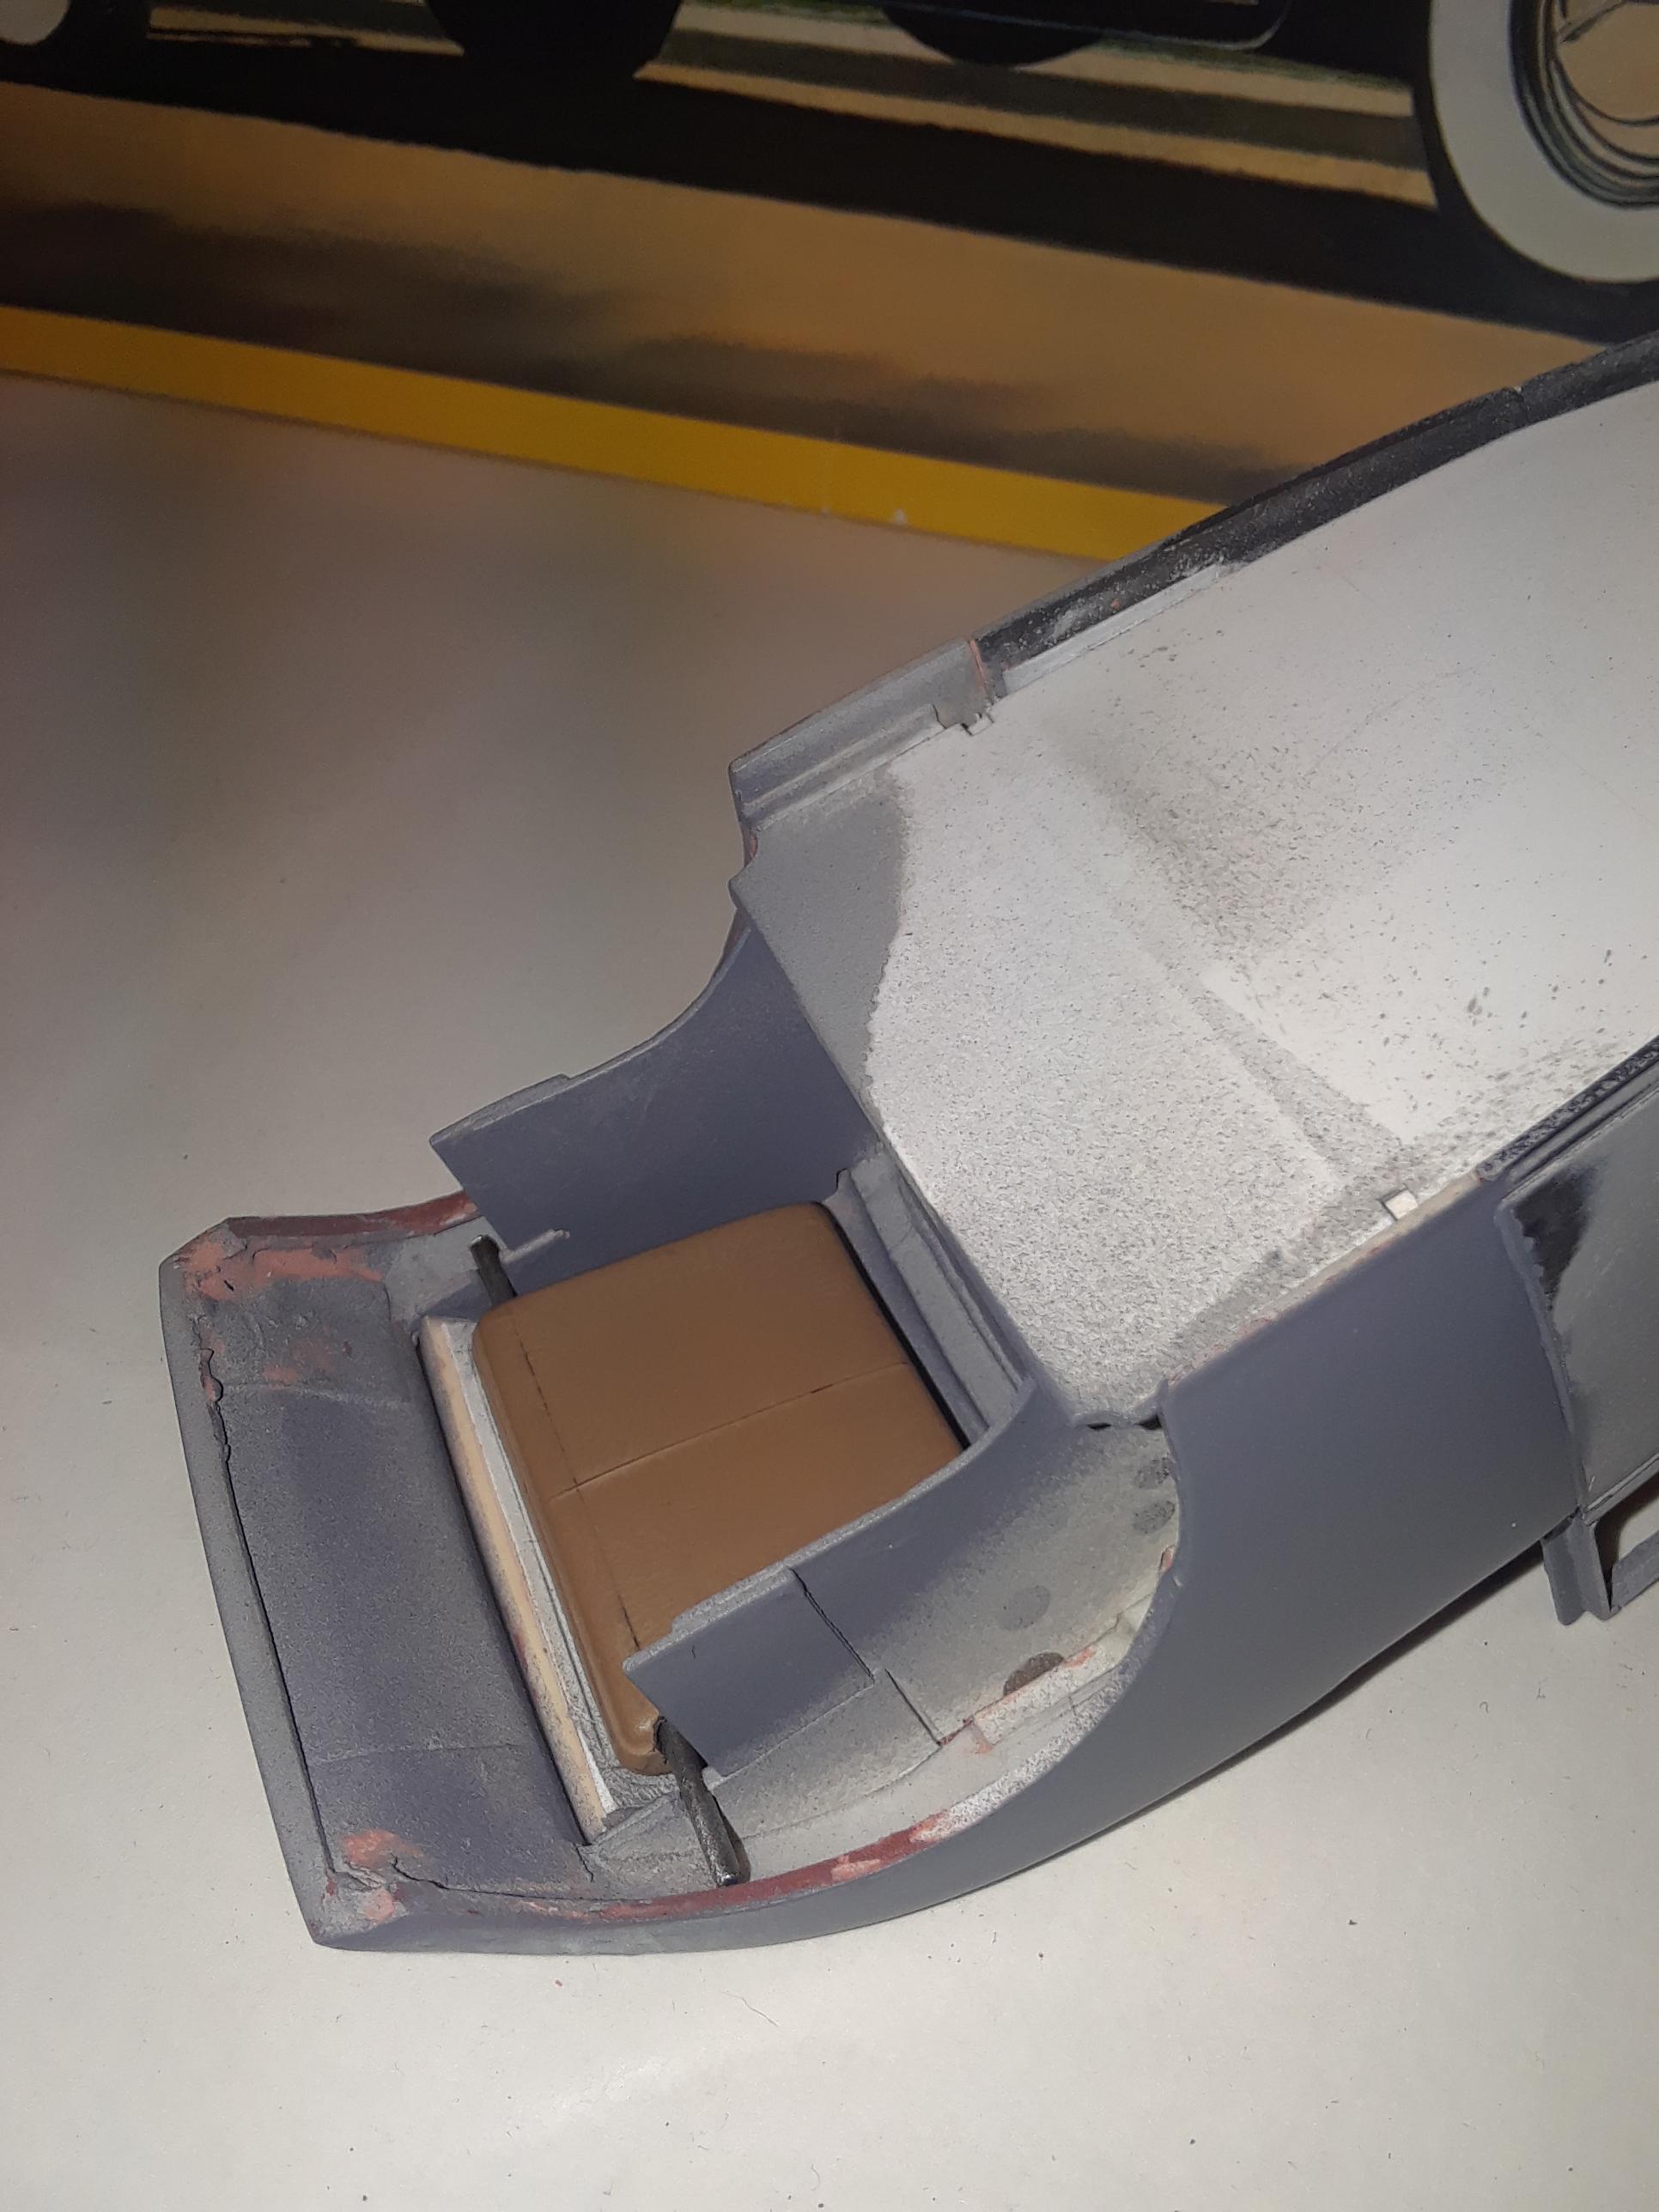
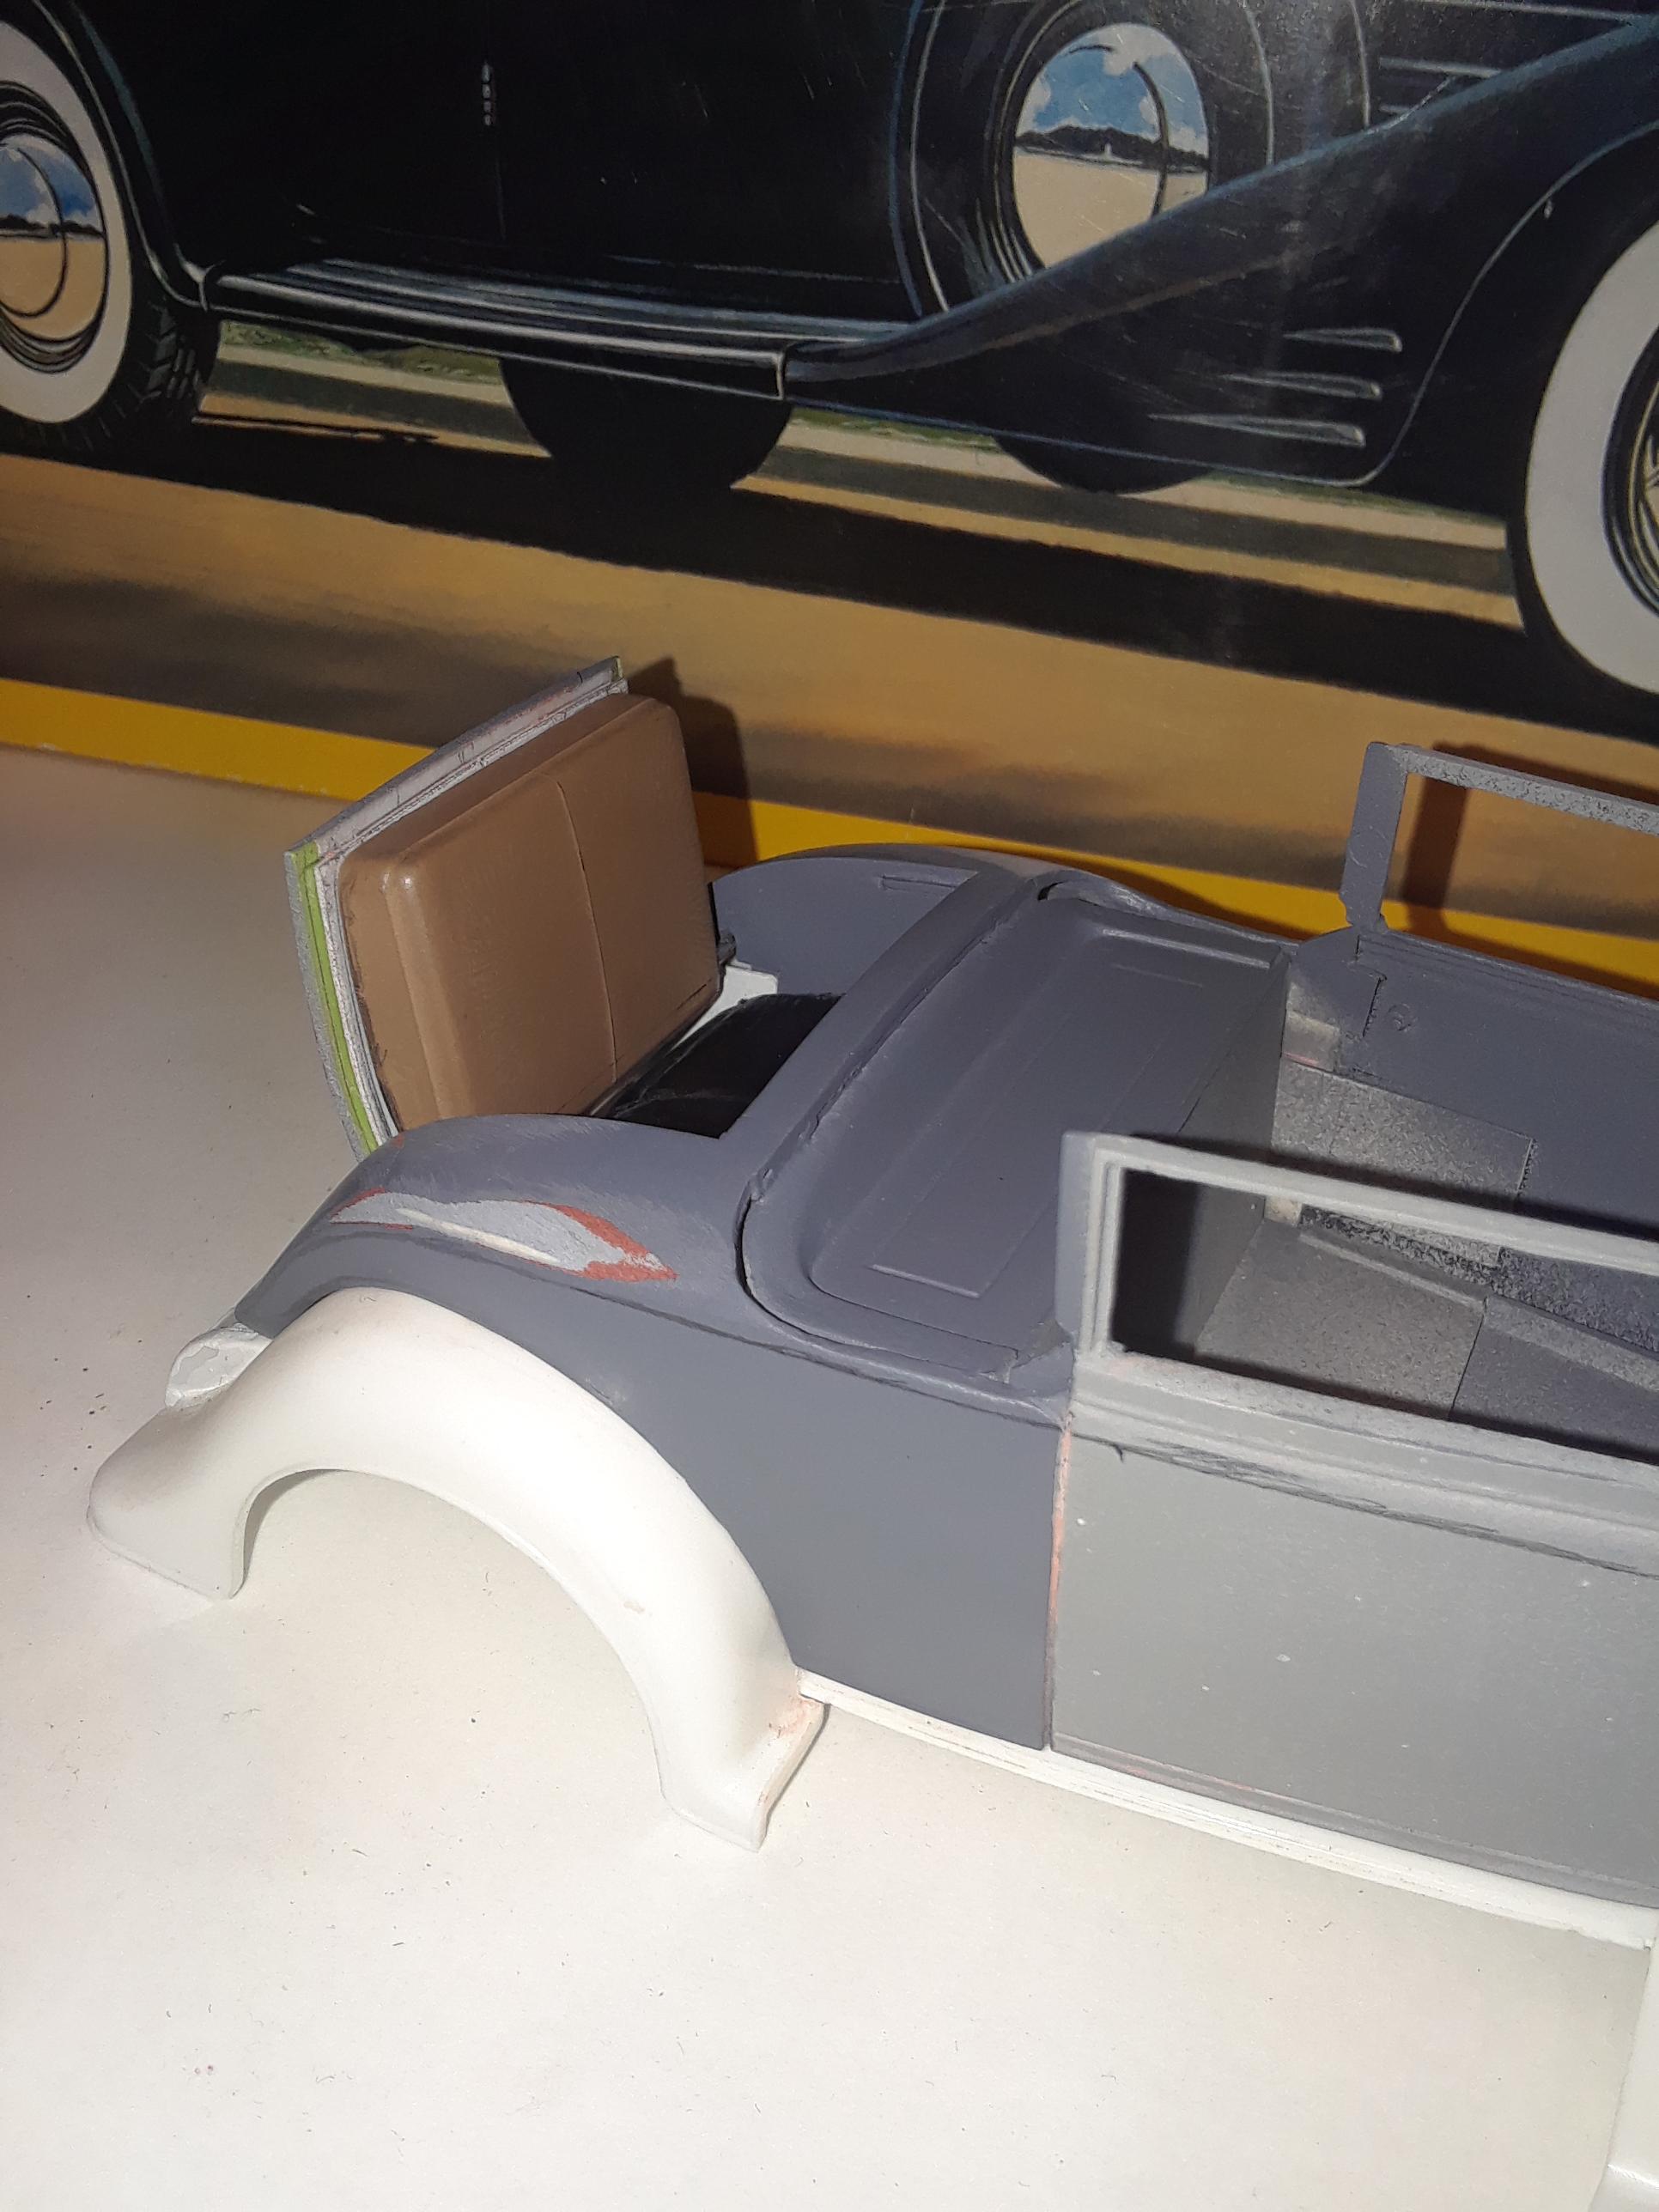
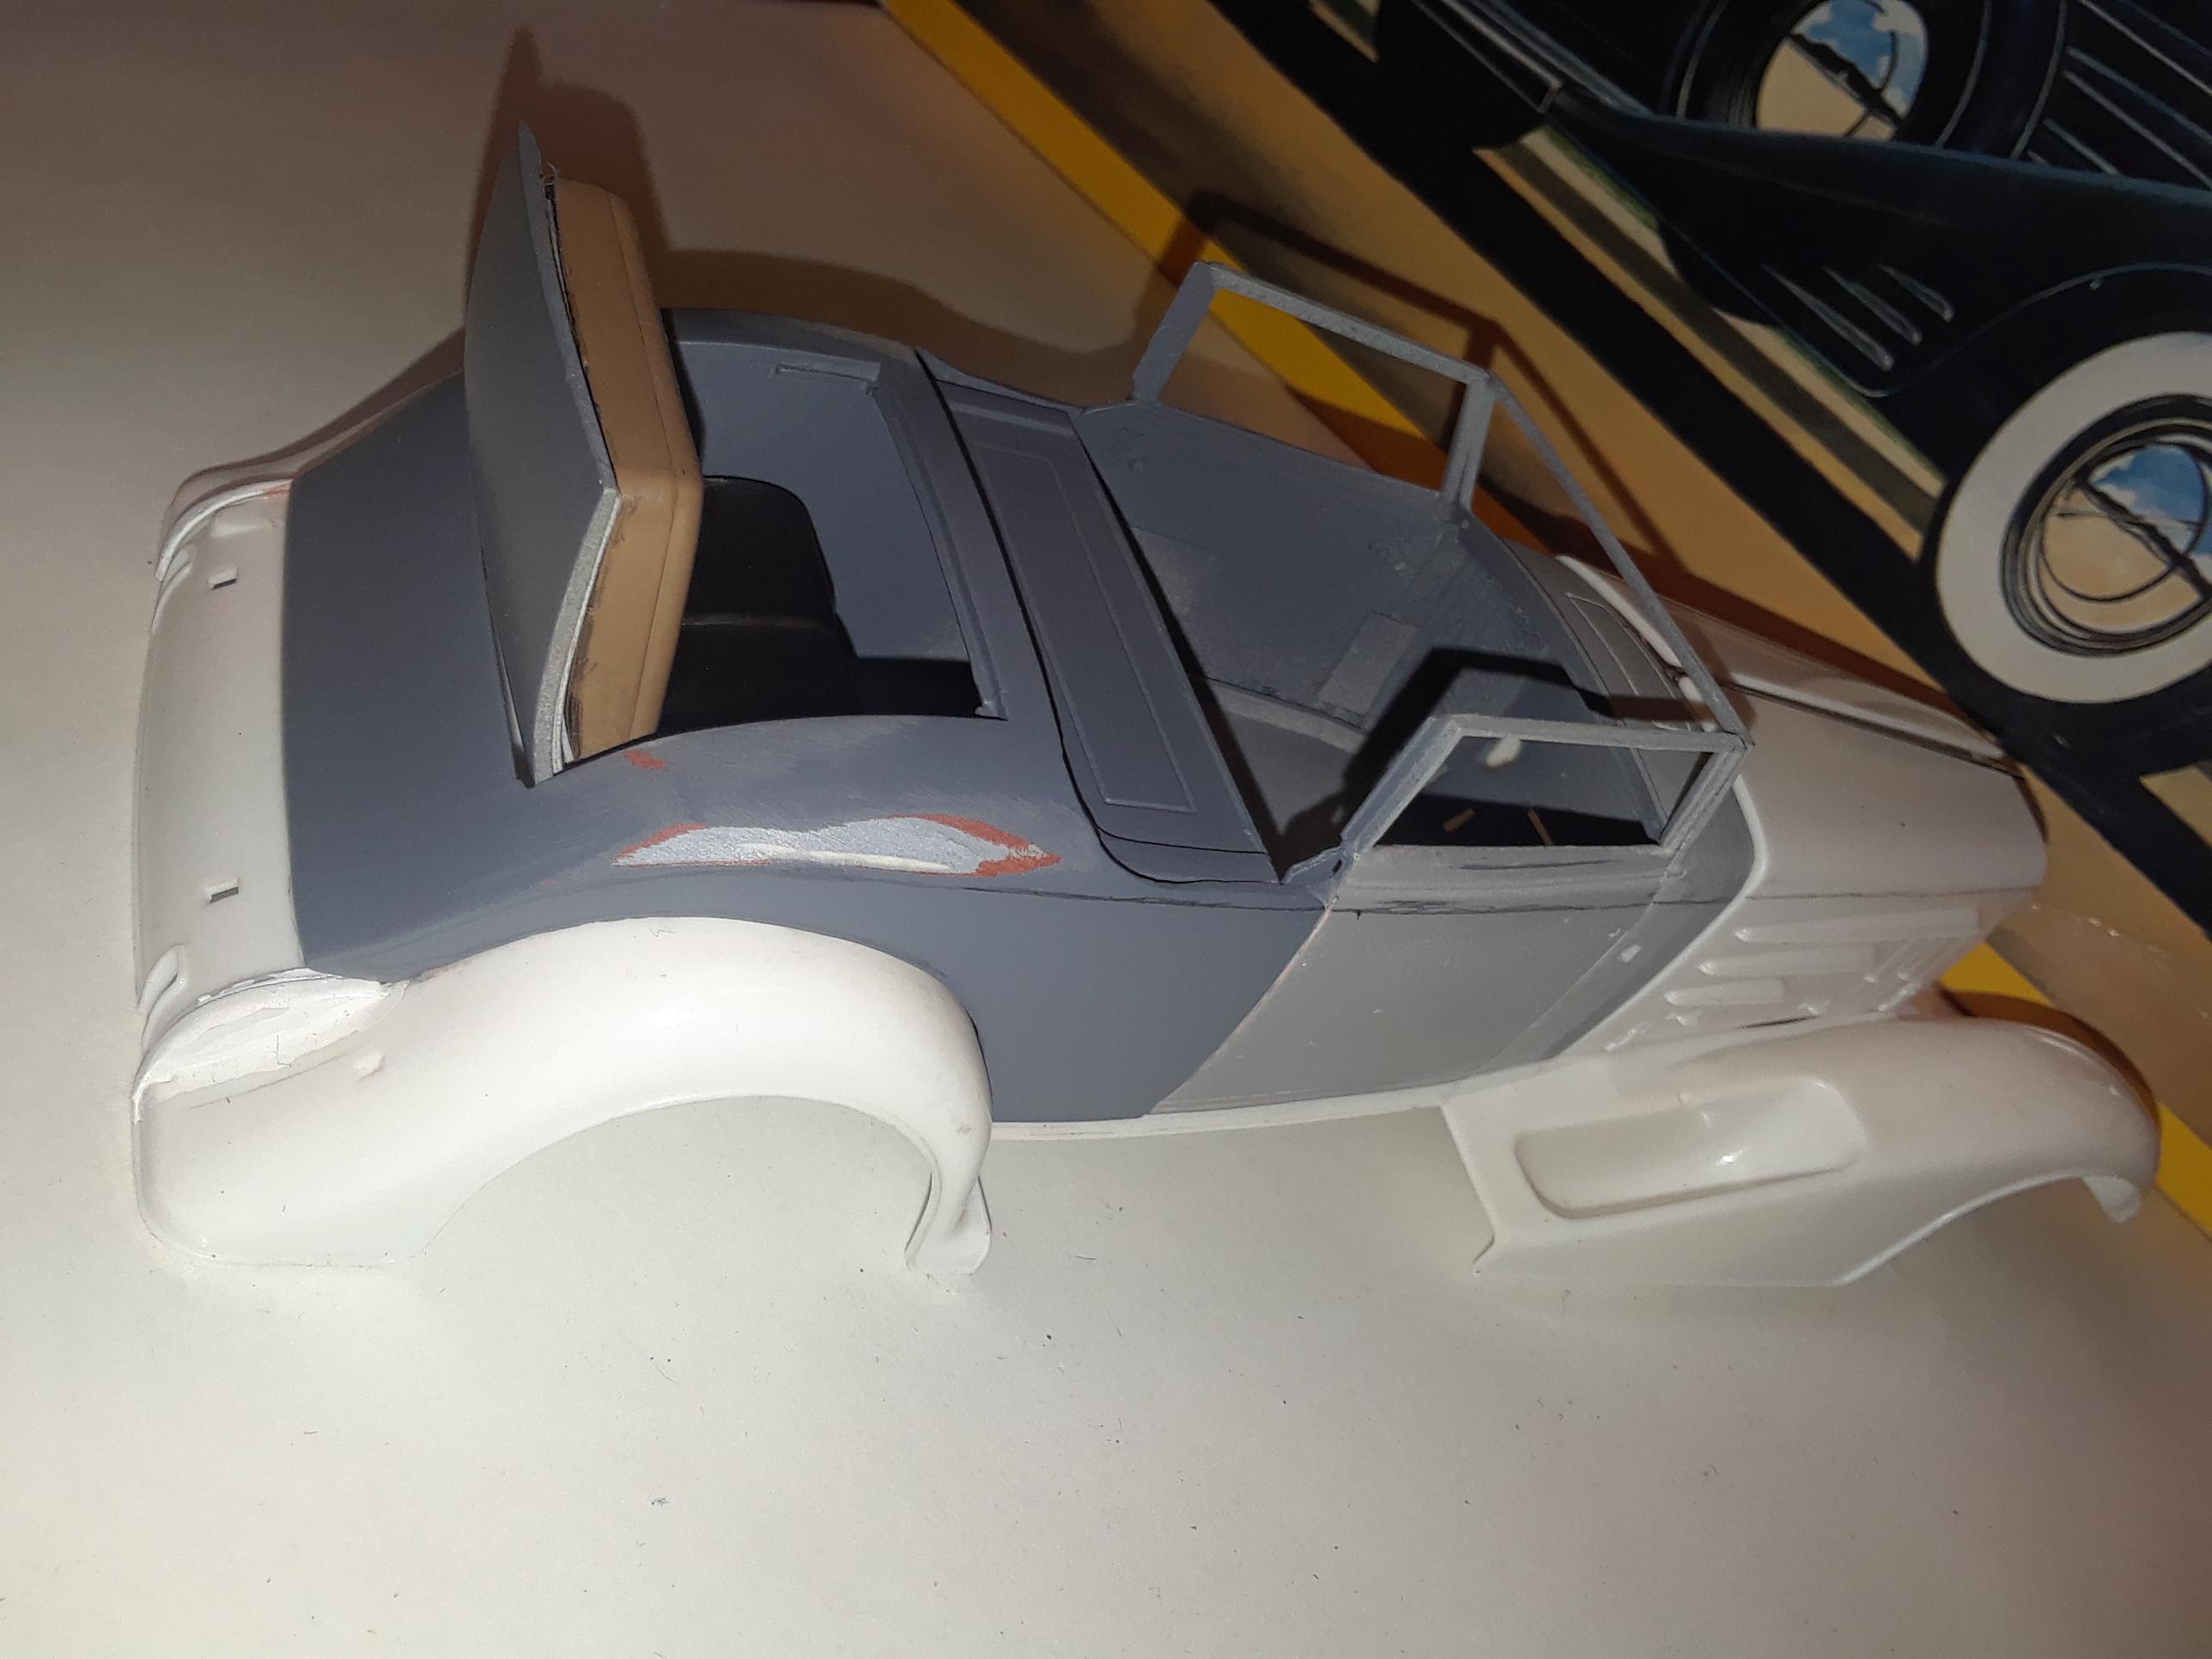
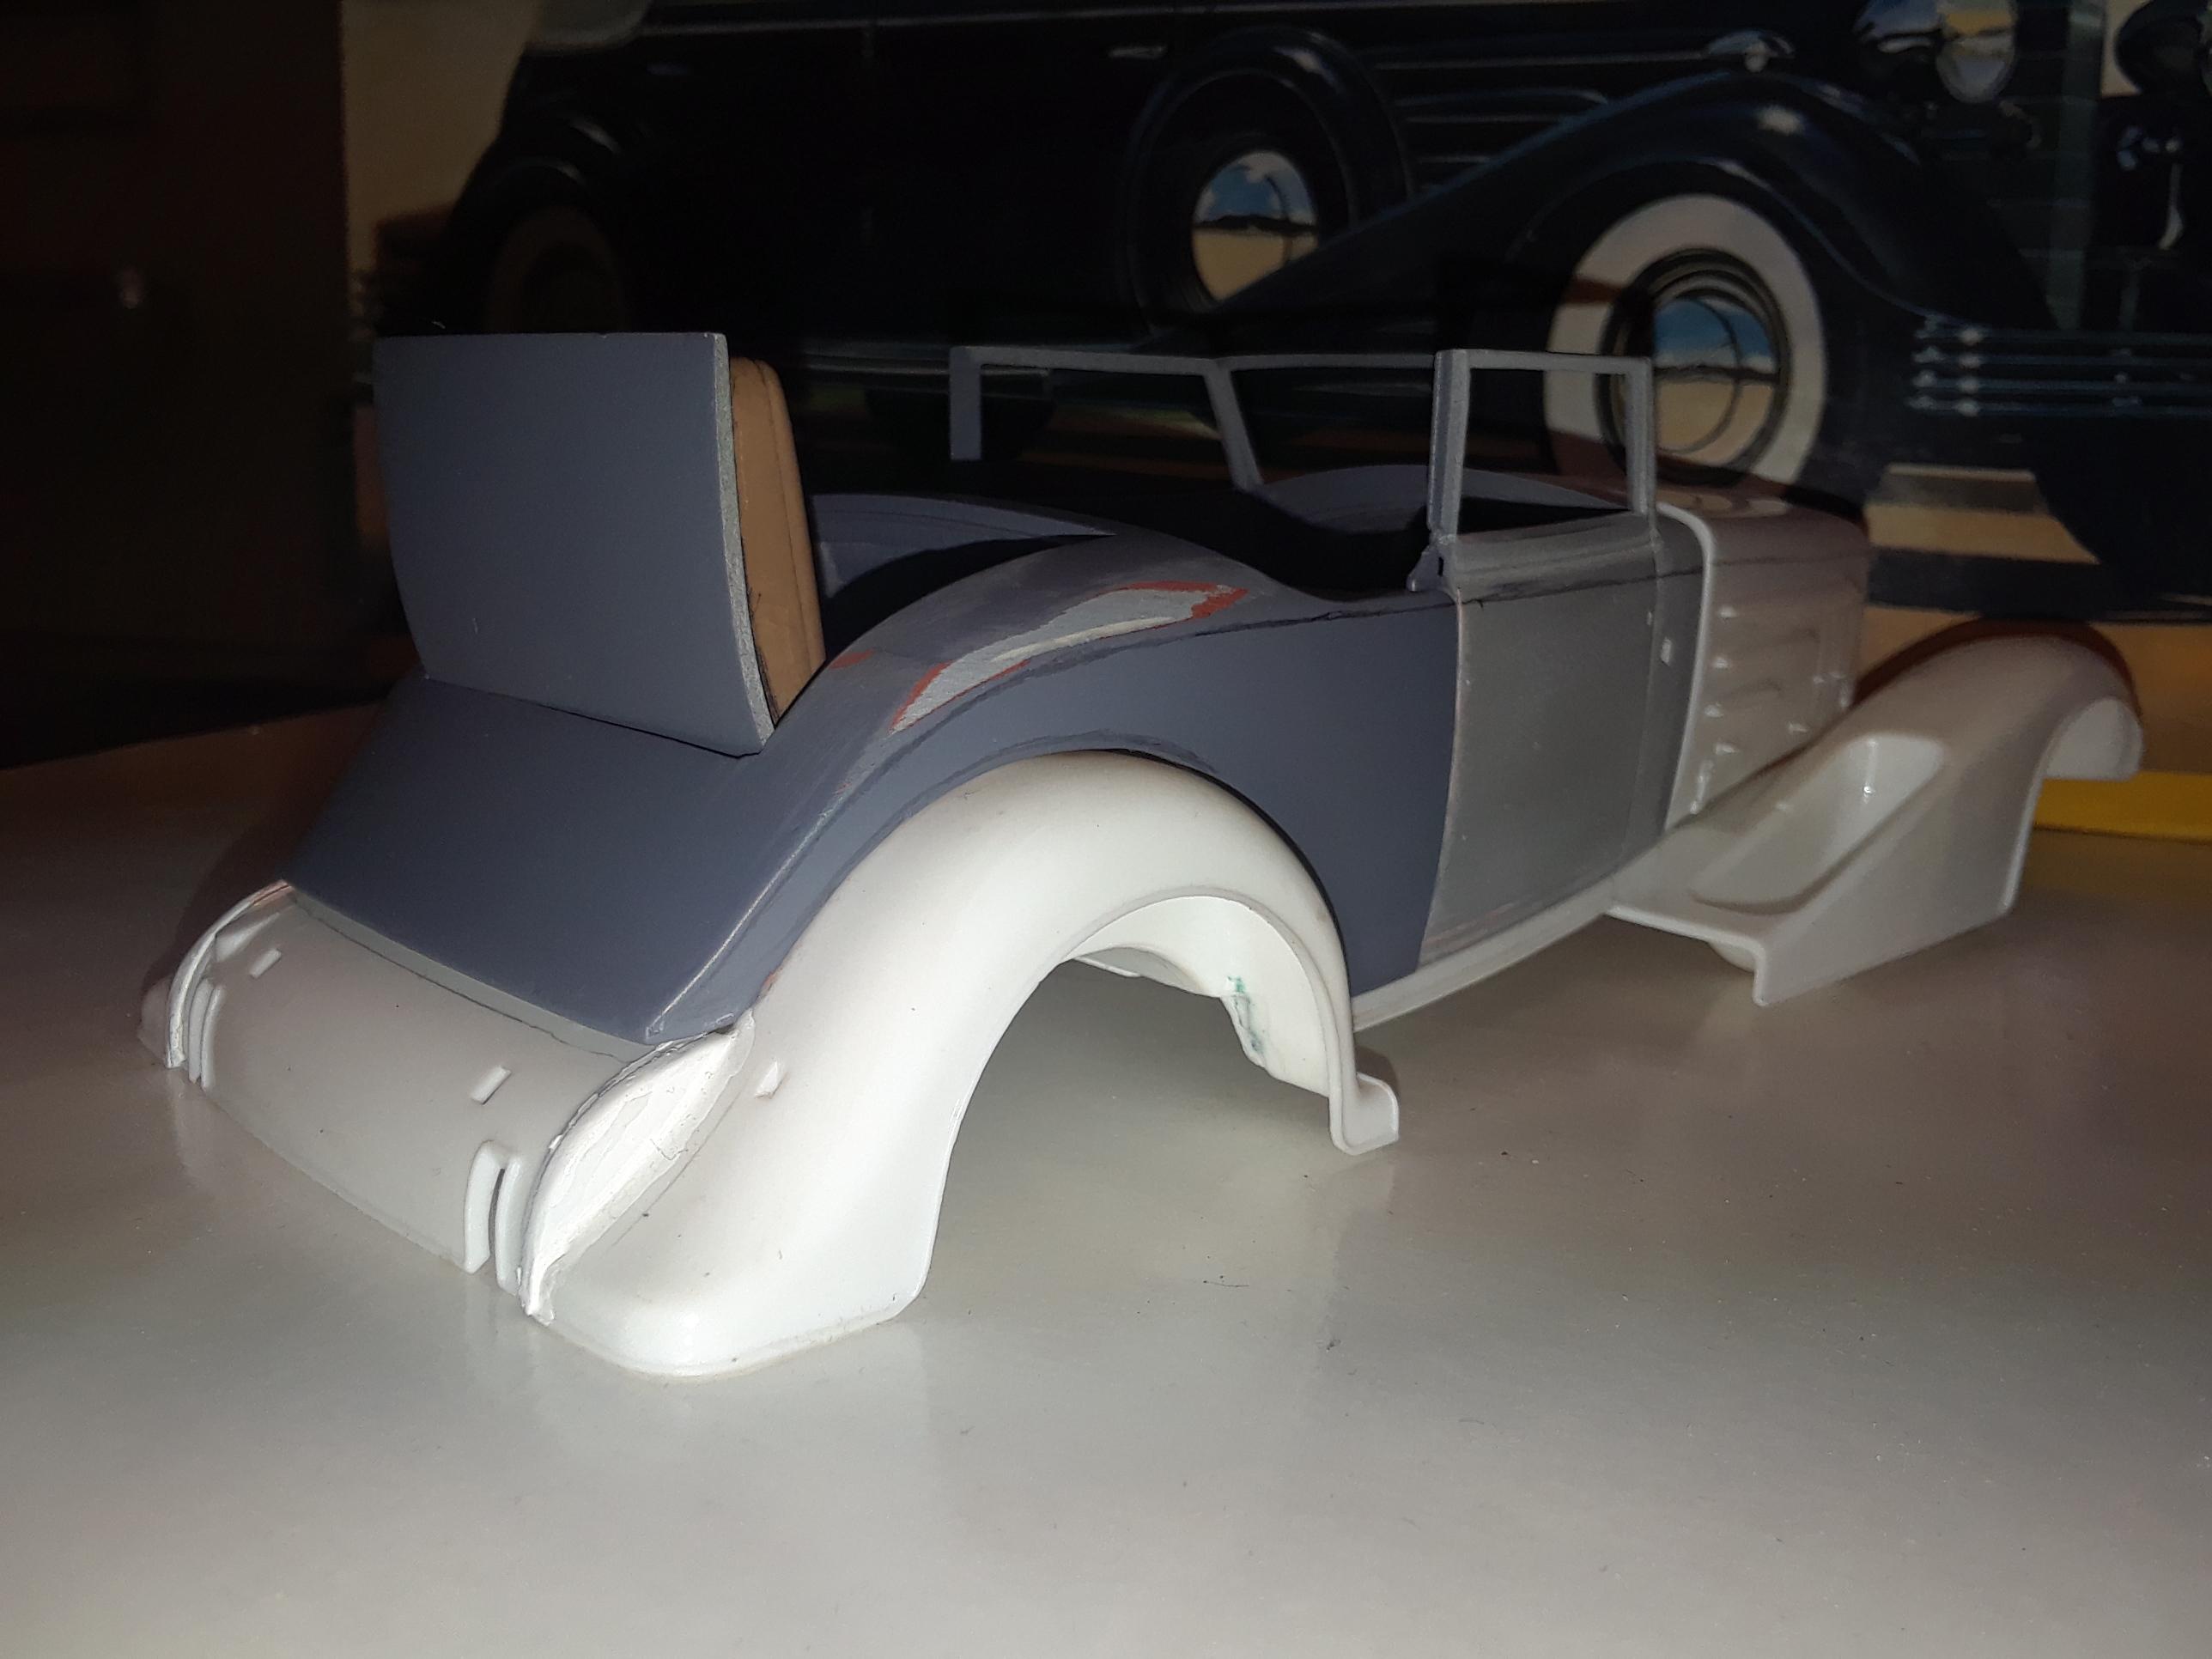
Finally getting back to this project, after about a year off, working on other things, and well, way too much working! Lot's of overtime. Anyway, glad to get back to it, and determined to finish it. So, the body work is coming along. I'm almost ready to tackle the belt line moldings. I've worked out the rumble seat. The trunk lid is mostly Johan '31 Cadillac, but lengthened and widened. The top cushion on the trunk lid is modified Monogram Duesenberg, with an AMT metal axle for a hinge pin. The bottom cushion is modified Johan '31 Cadillac again, this time narrowed and shortened to fit.
-
Fantastic, Mario! I appreciate the detailed response. I'll be on the lookout for your Duel truck. That was such a great movie. It's one of those you have to watch again every so often and it never gets old. ? Thanks!!
-
Terry, I've always enjoyed your work over the years. Great job! By the way, there's a feature on the Bangshift web page right now you should check out. It's Gene Winfield's recent party at his shop in Mojave. Several of the movie cars are in the article. https://bangshift.com/bangshift-galleries/gene-winfield-car-show-photos-the-2021-winfield-watson-custom-car-and-hot-rod-gathering-did-not-disappoint/
-
Mario, your model is great, and I love the photos! This might sound silly, but I'd love to see what your base looks like; the platform you placed the model on for the shot. The depth of field is really good. The background and foreground are not wildly out of focus or obviously distinct, one from the other. The way the model is positioned in front of the background, it looks in scale, blends right in and is very convincing. I've just been doing sort of 'in studio' photos up to now but would like to try outdoors. It looks like you know how to do this really well.
-
Very nice! What are the colors, exactly; the red and the blue, please?
-
Grant, that's radical! Very imaginative and excellent execution. Go Tillers!
-
 Dave and Max, the truck looks GREAT! ?
 -
1959 Ford Galaxie Skyliner Rectractable Hardtop
Hoffman replied to 1959scudetto's topic in Model Cars
Helmut, well done! The colors are very close to factory offering cumberland green and colonial white. Looks great! -
Bruce, you did an exceptional job on this Rolls Royce. Beautiful!
-
I Like it! ?
-
Gentlemen, thank you for all the nice compliments! ? Glad you like it. Jim B, this is 1/24 scale.
-
Pico, it looks great now! And I agree, the Kellner Coupe is arguably the best looking Royale of the bunch. I got to see it in person when it was still owned by Briggs Cunningham and on display in his museum in Costa Mesa. I was 18 at the time and just completely blown away by the car. So huge, yet so perfectly proportioned, elegant, stately, just amazing. This is on my list to scratch build. Getting back to my Italeri '33 Cadillac convertible coupe project now. Just finished reworking a Danbury Mint Hispano Suiza for fun, now it's back to body work. If I grab another die cast before finishing that Cadillac, Eric Macleod will punch me. ?
-
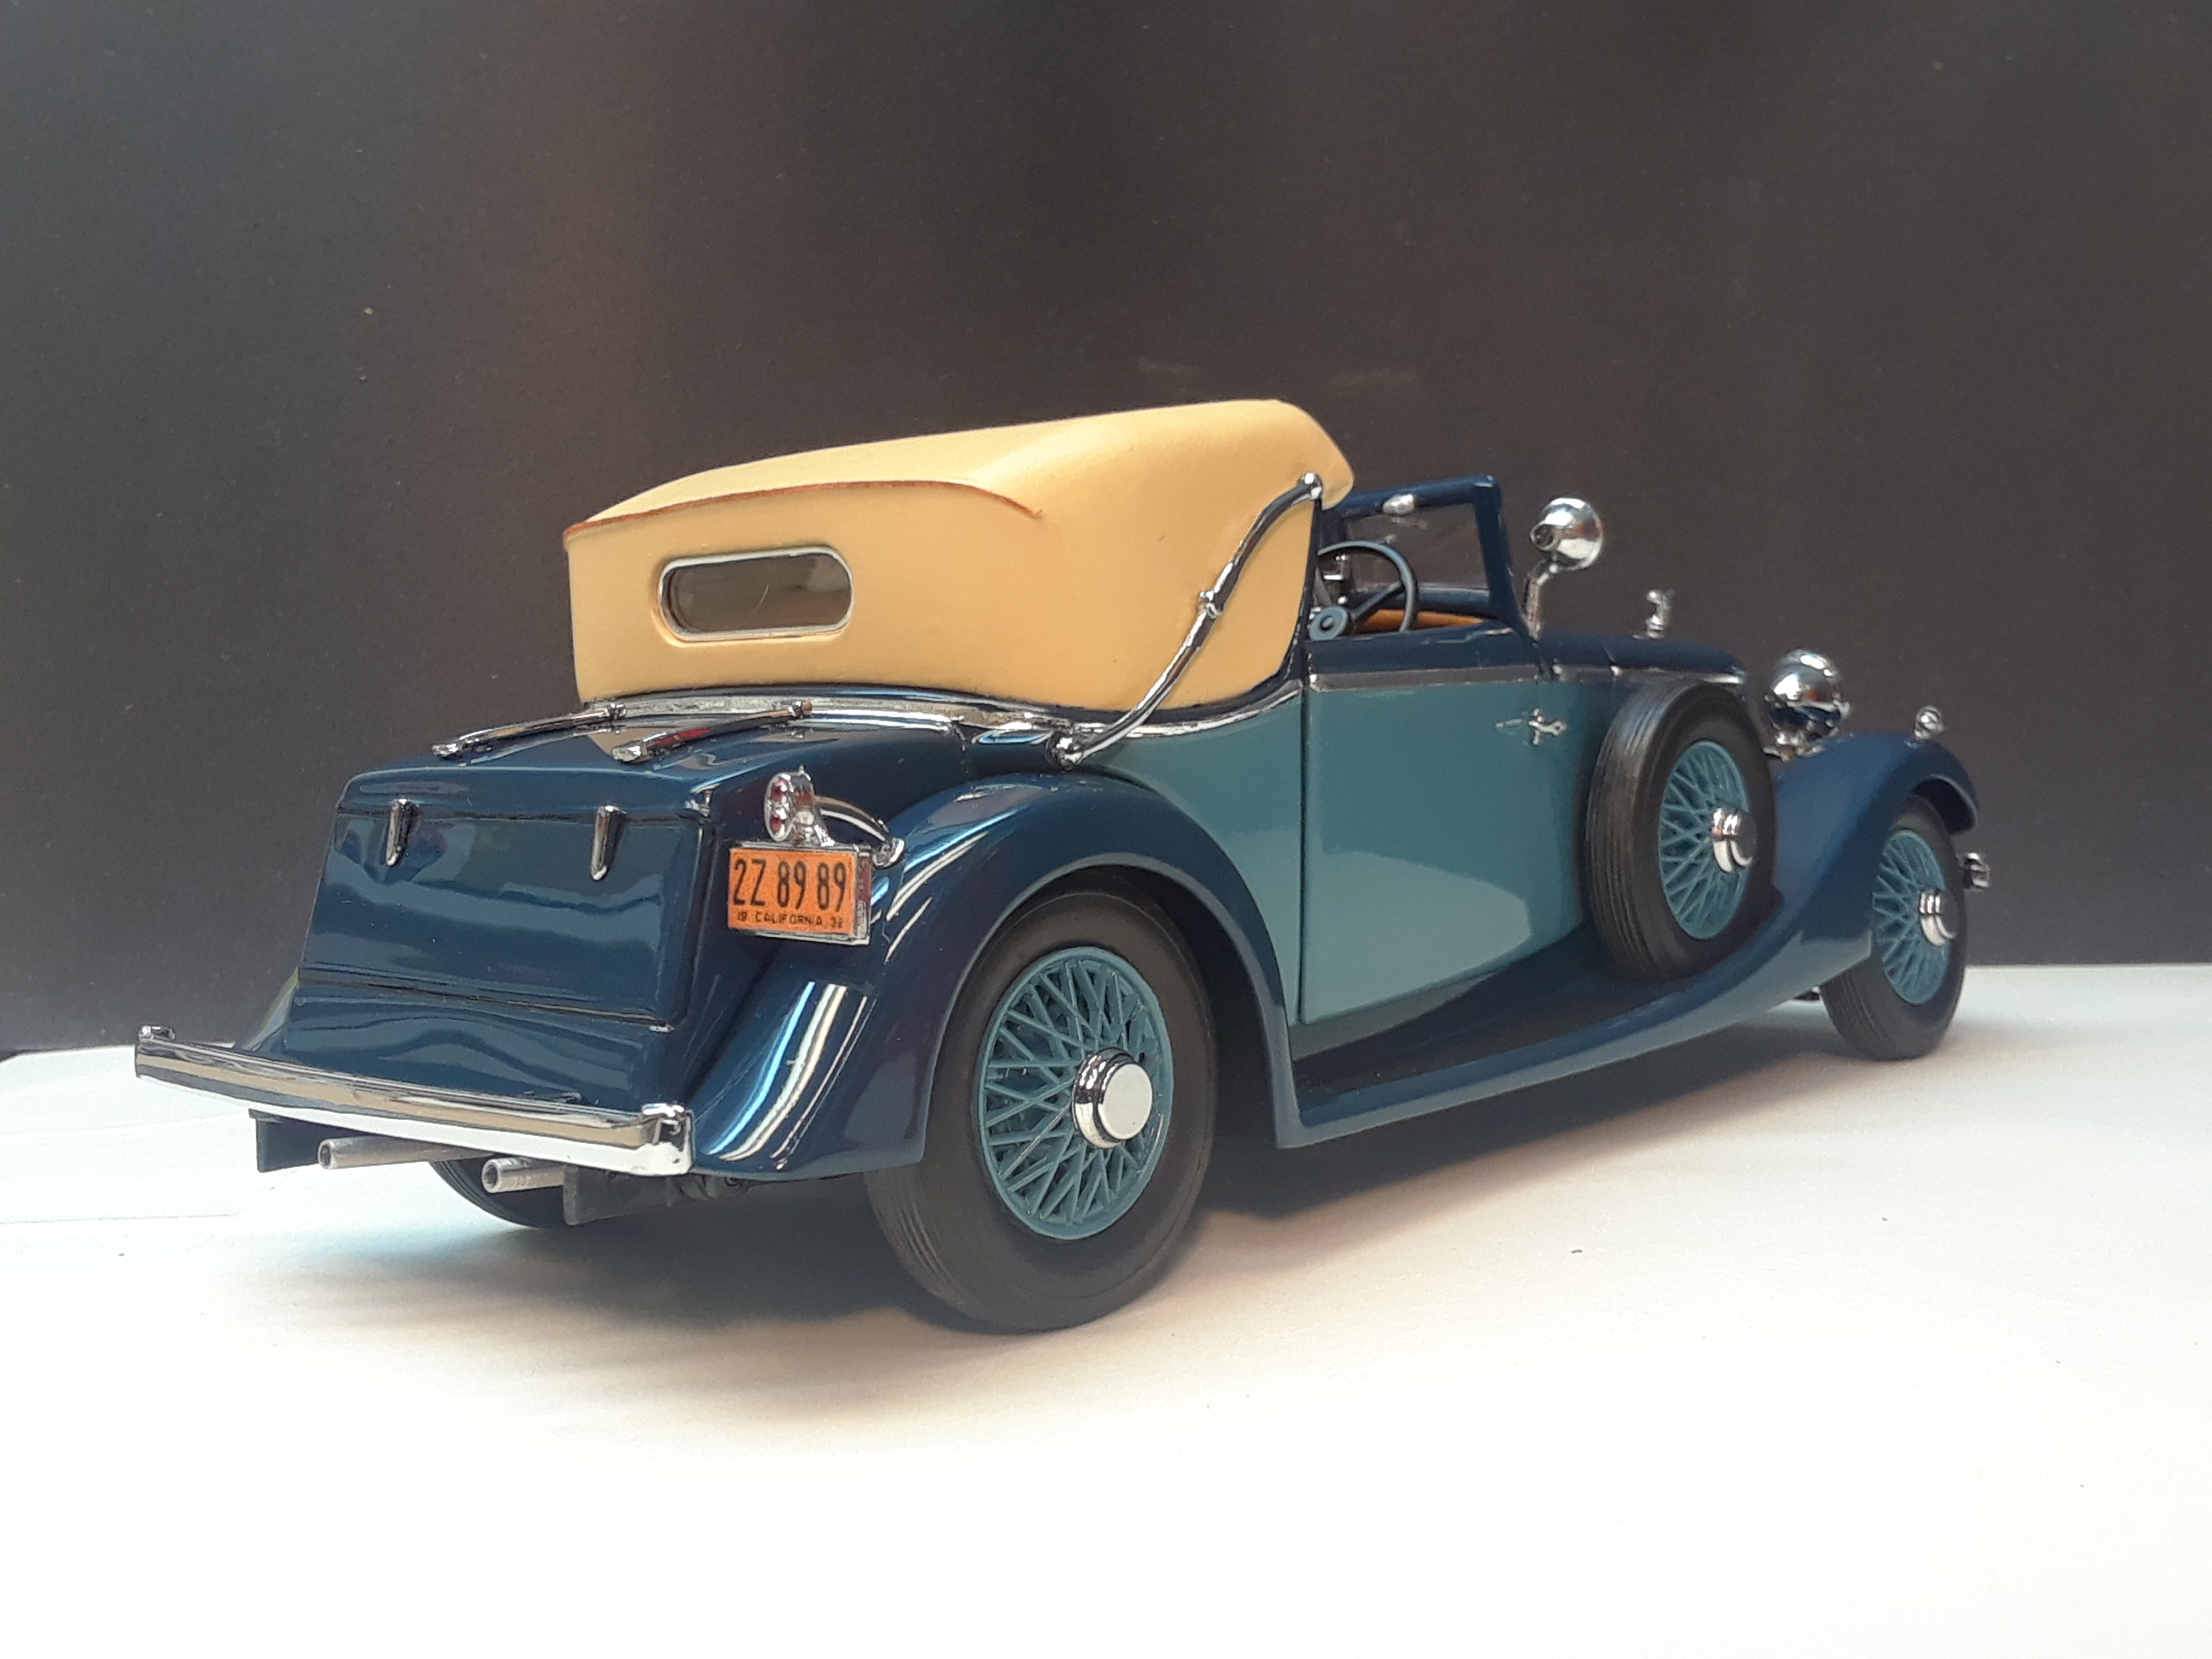
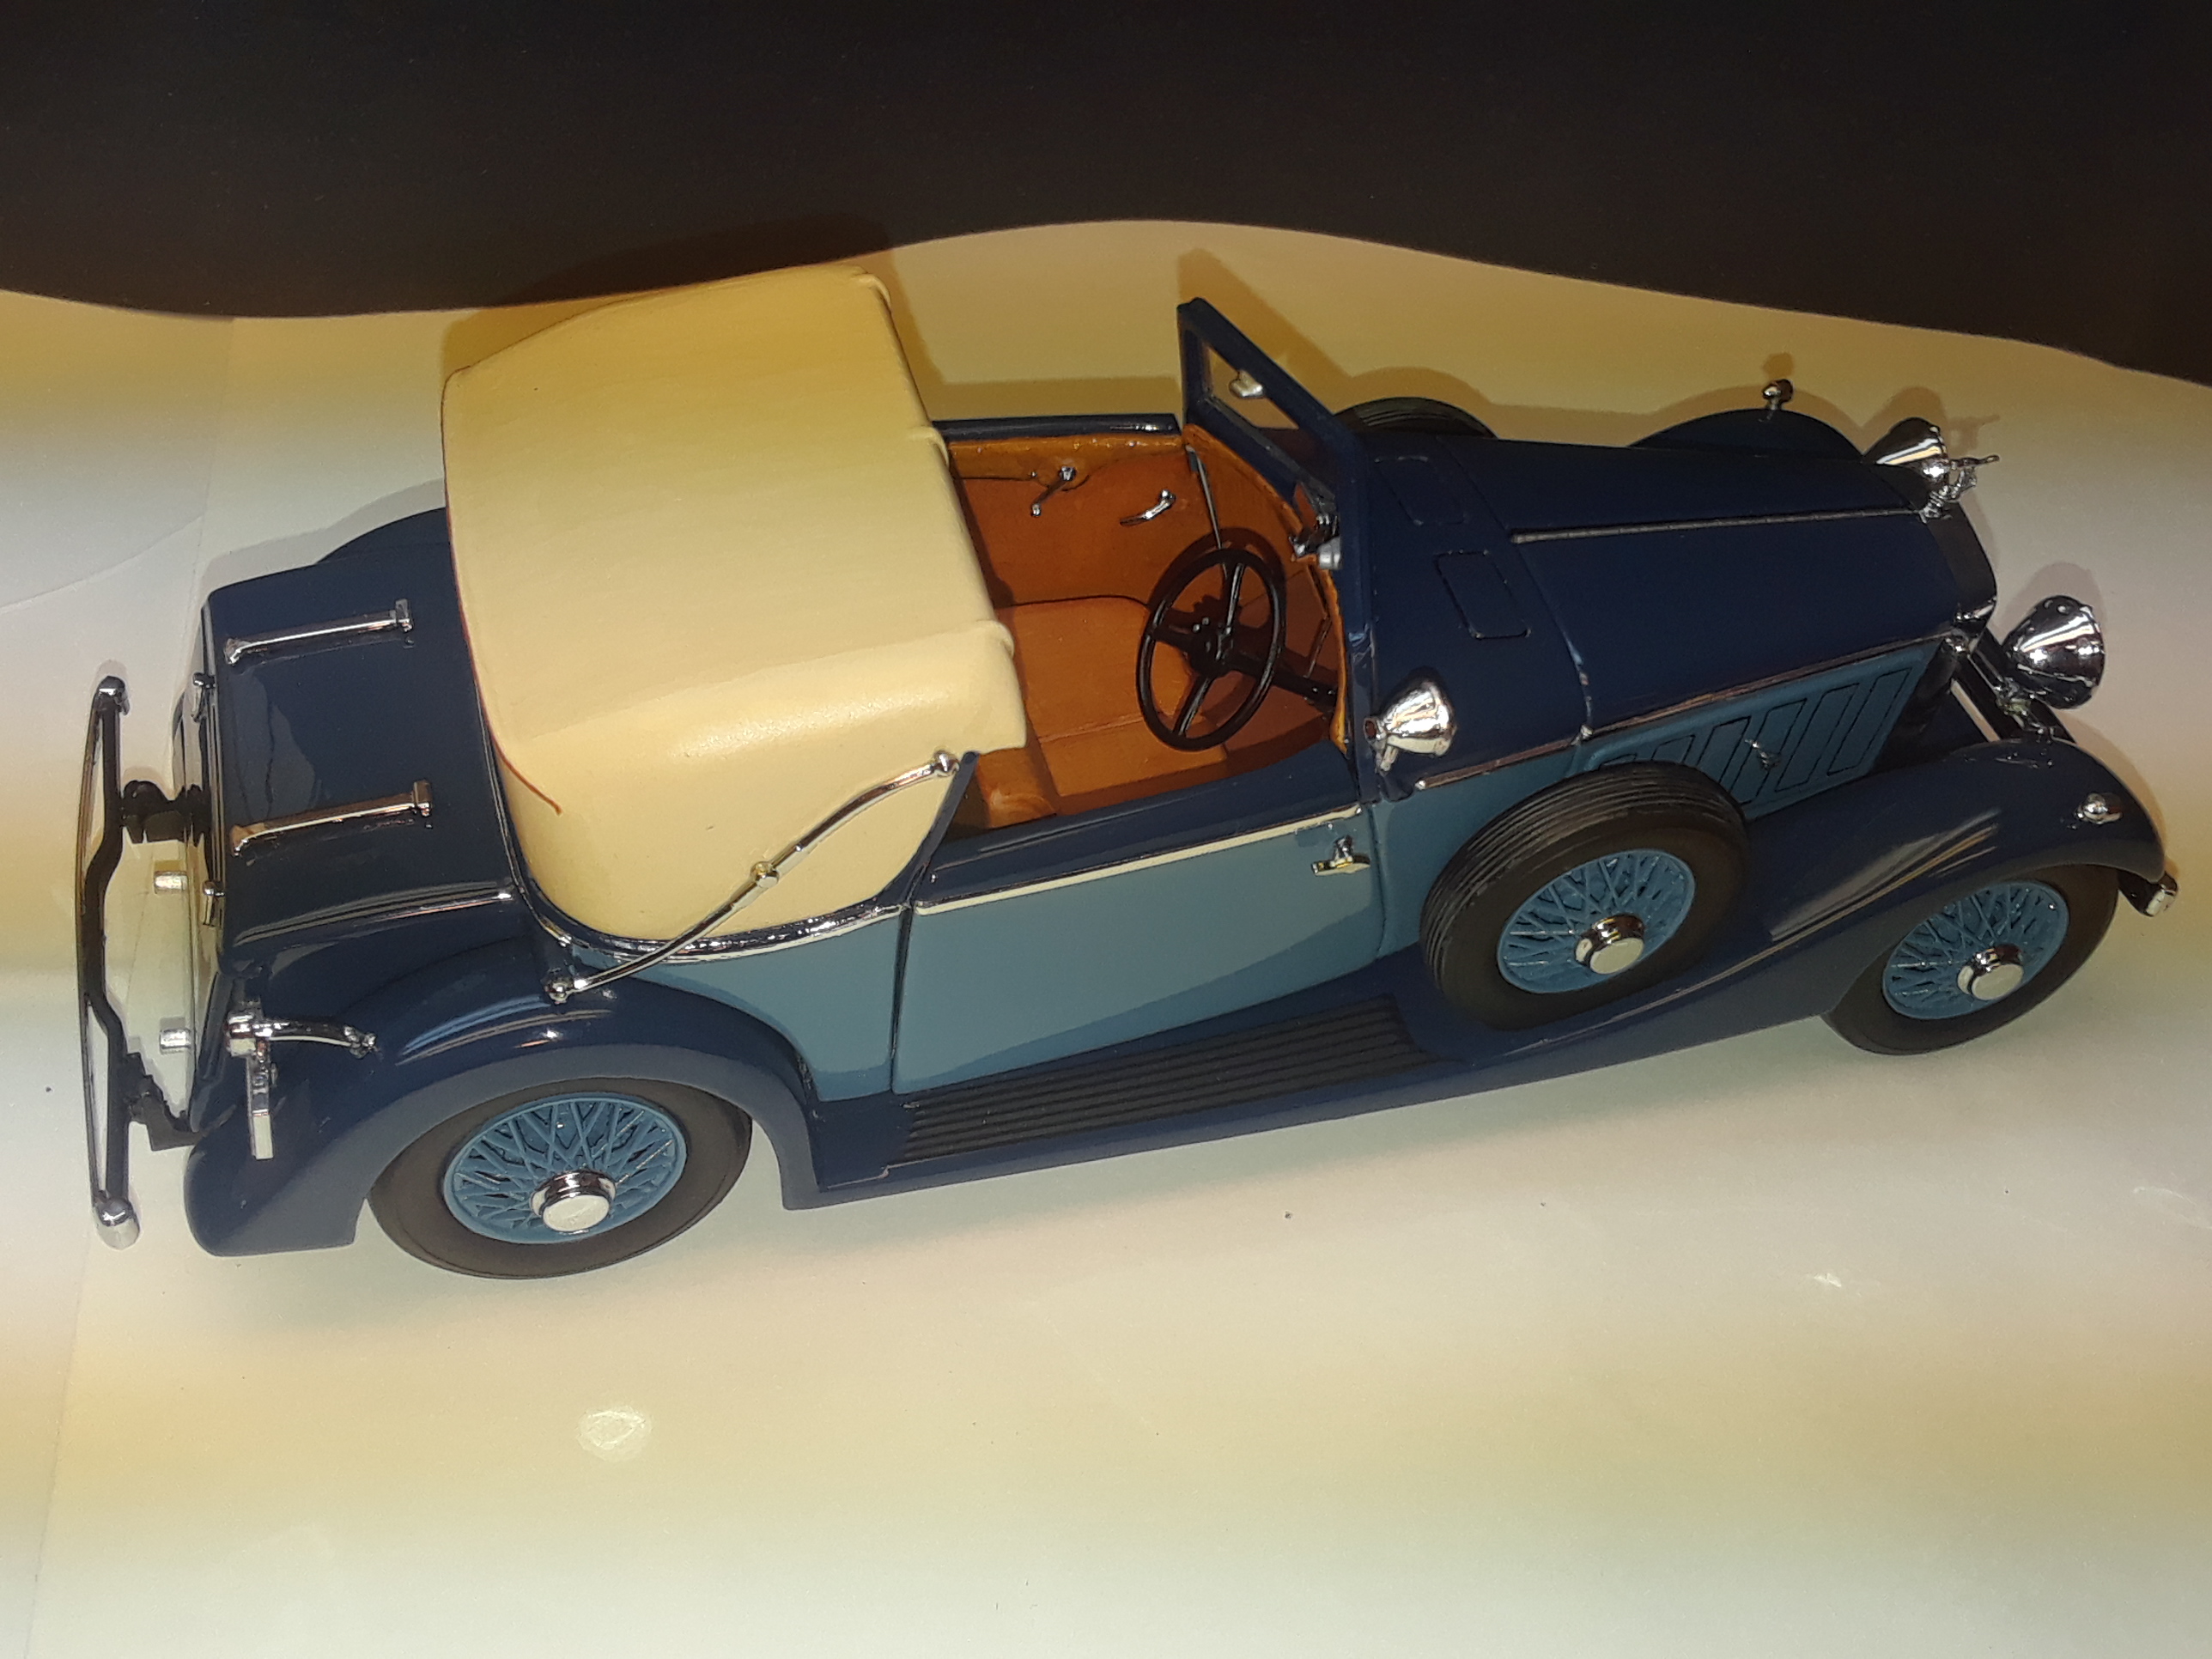
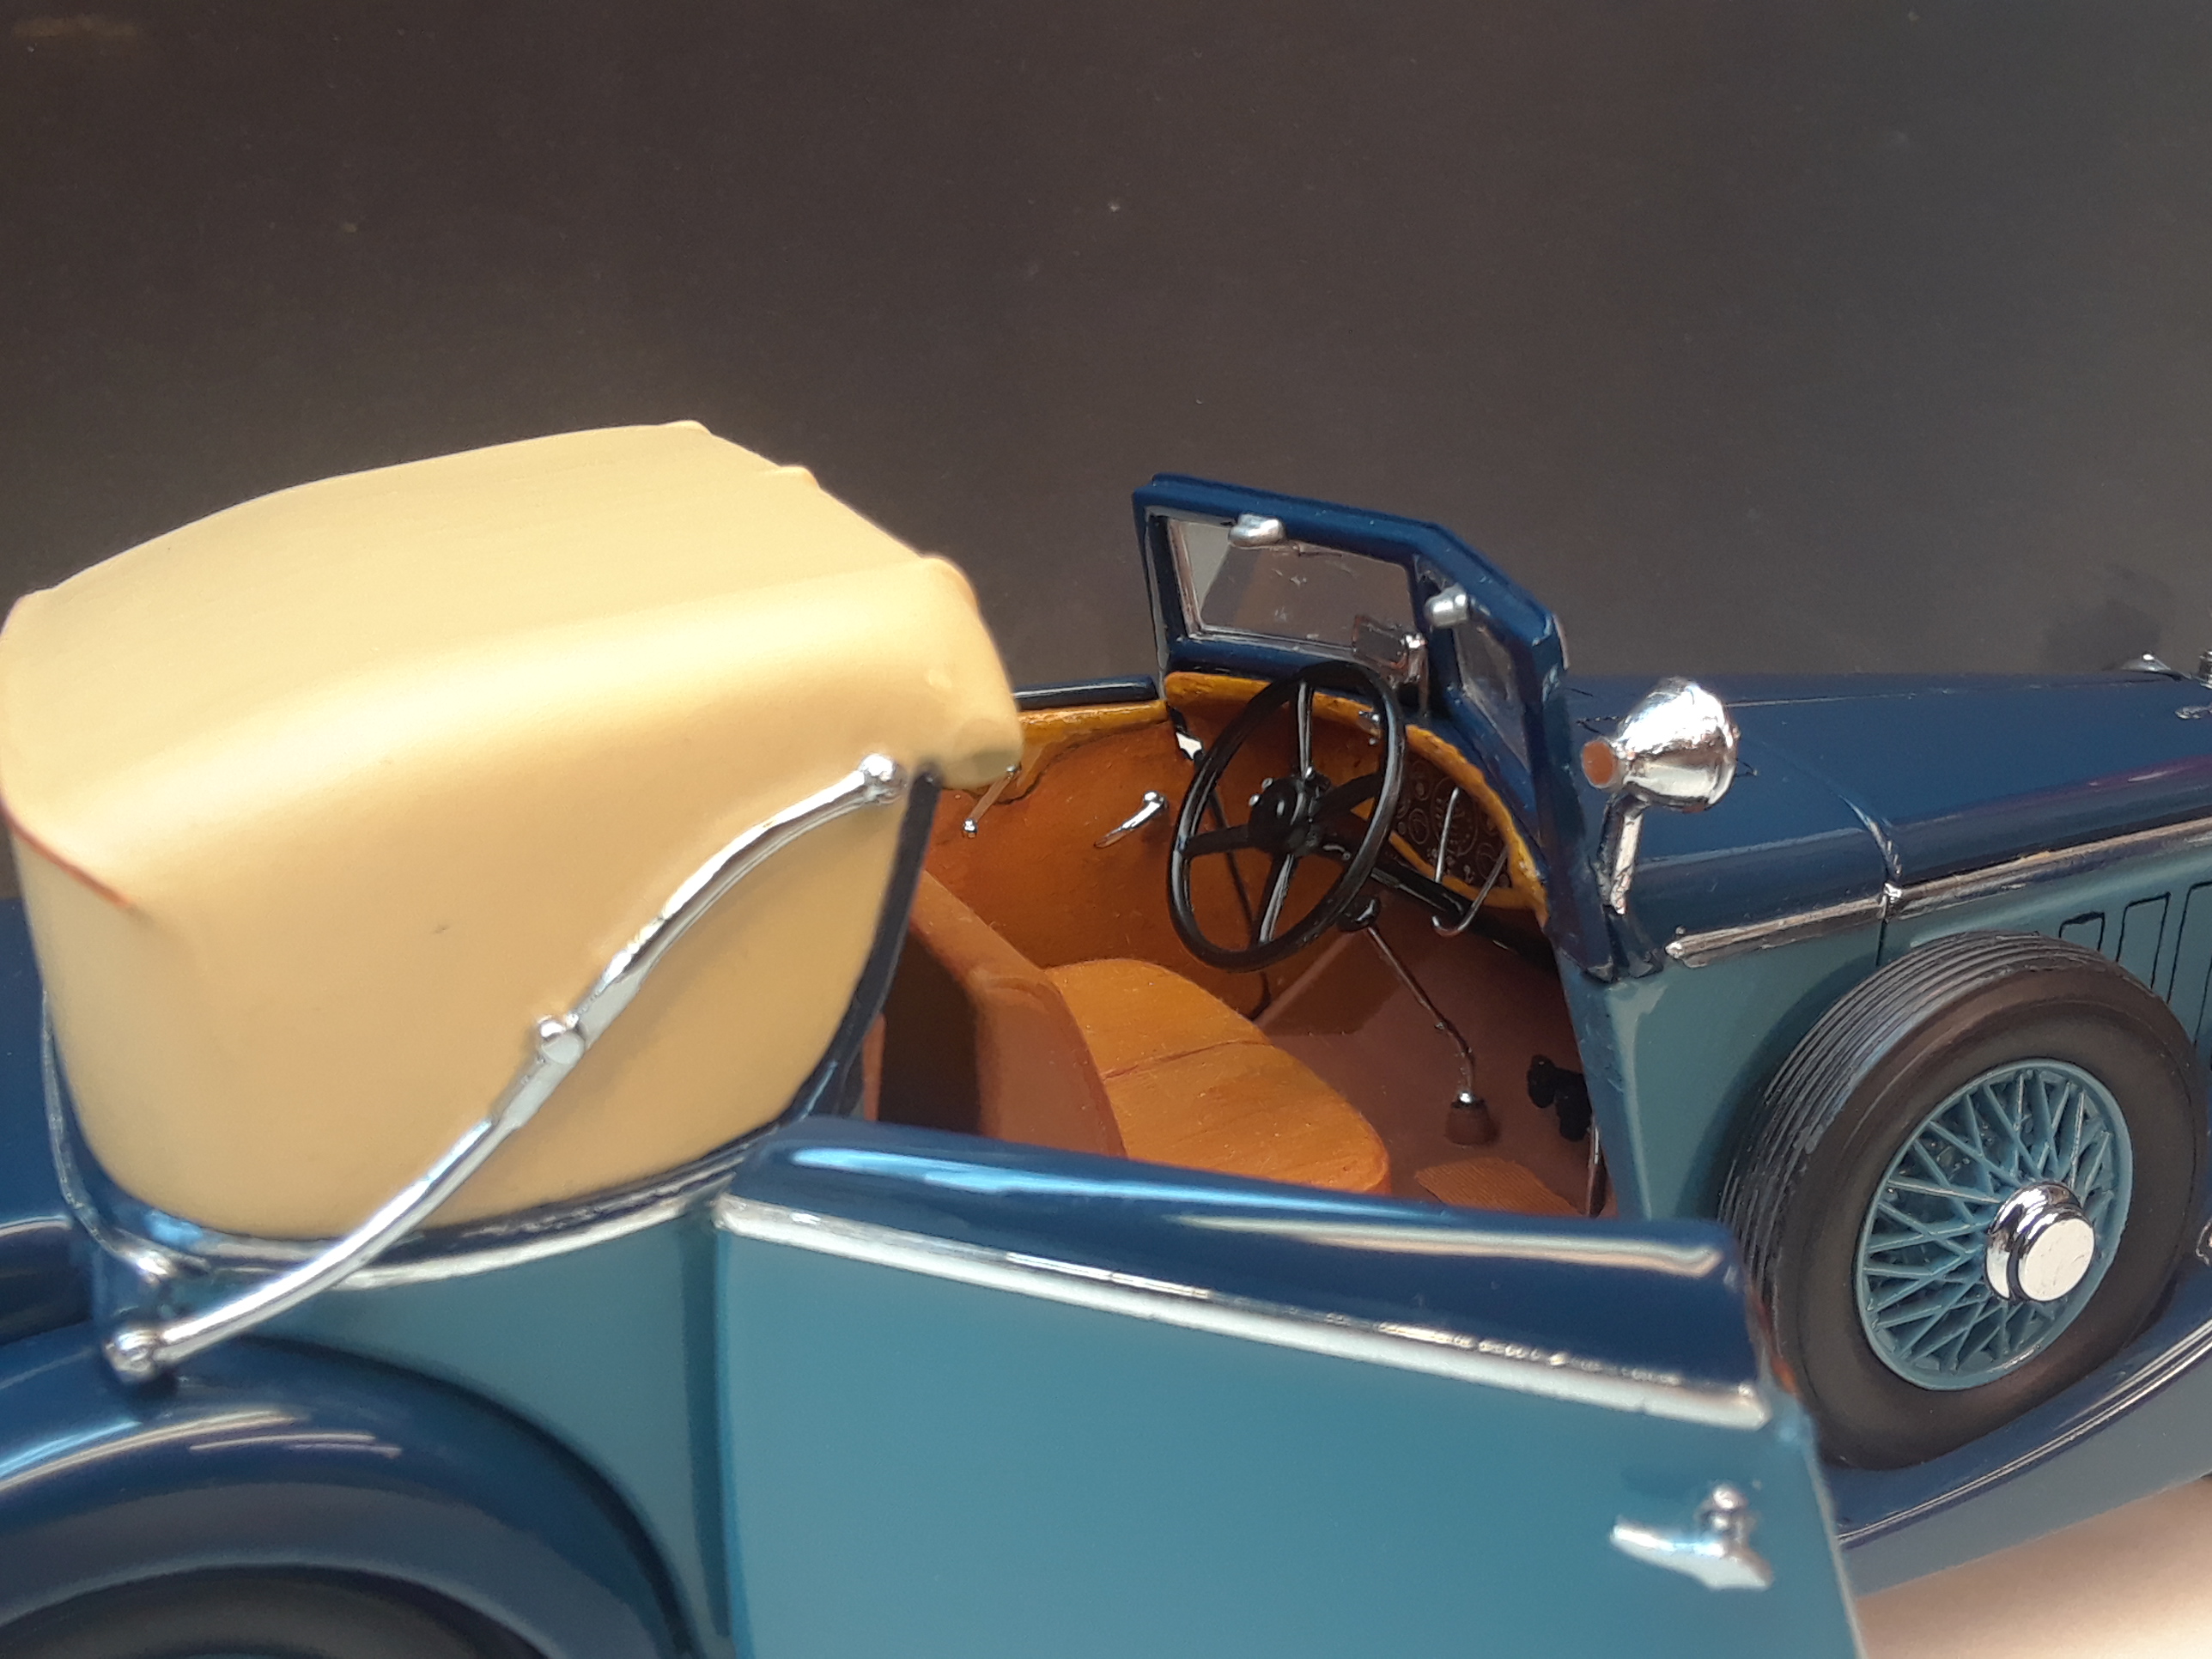
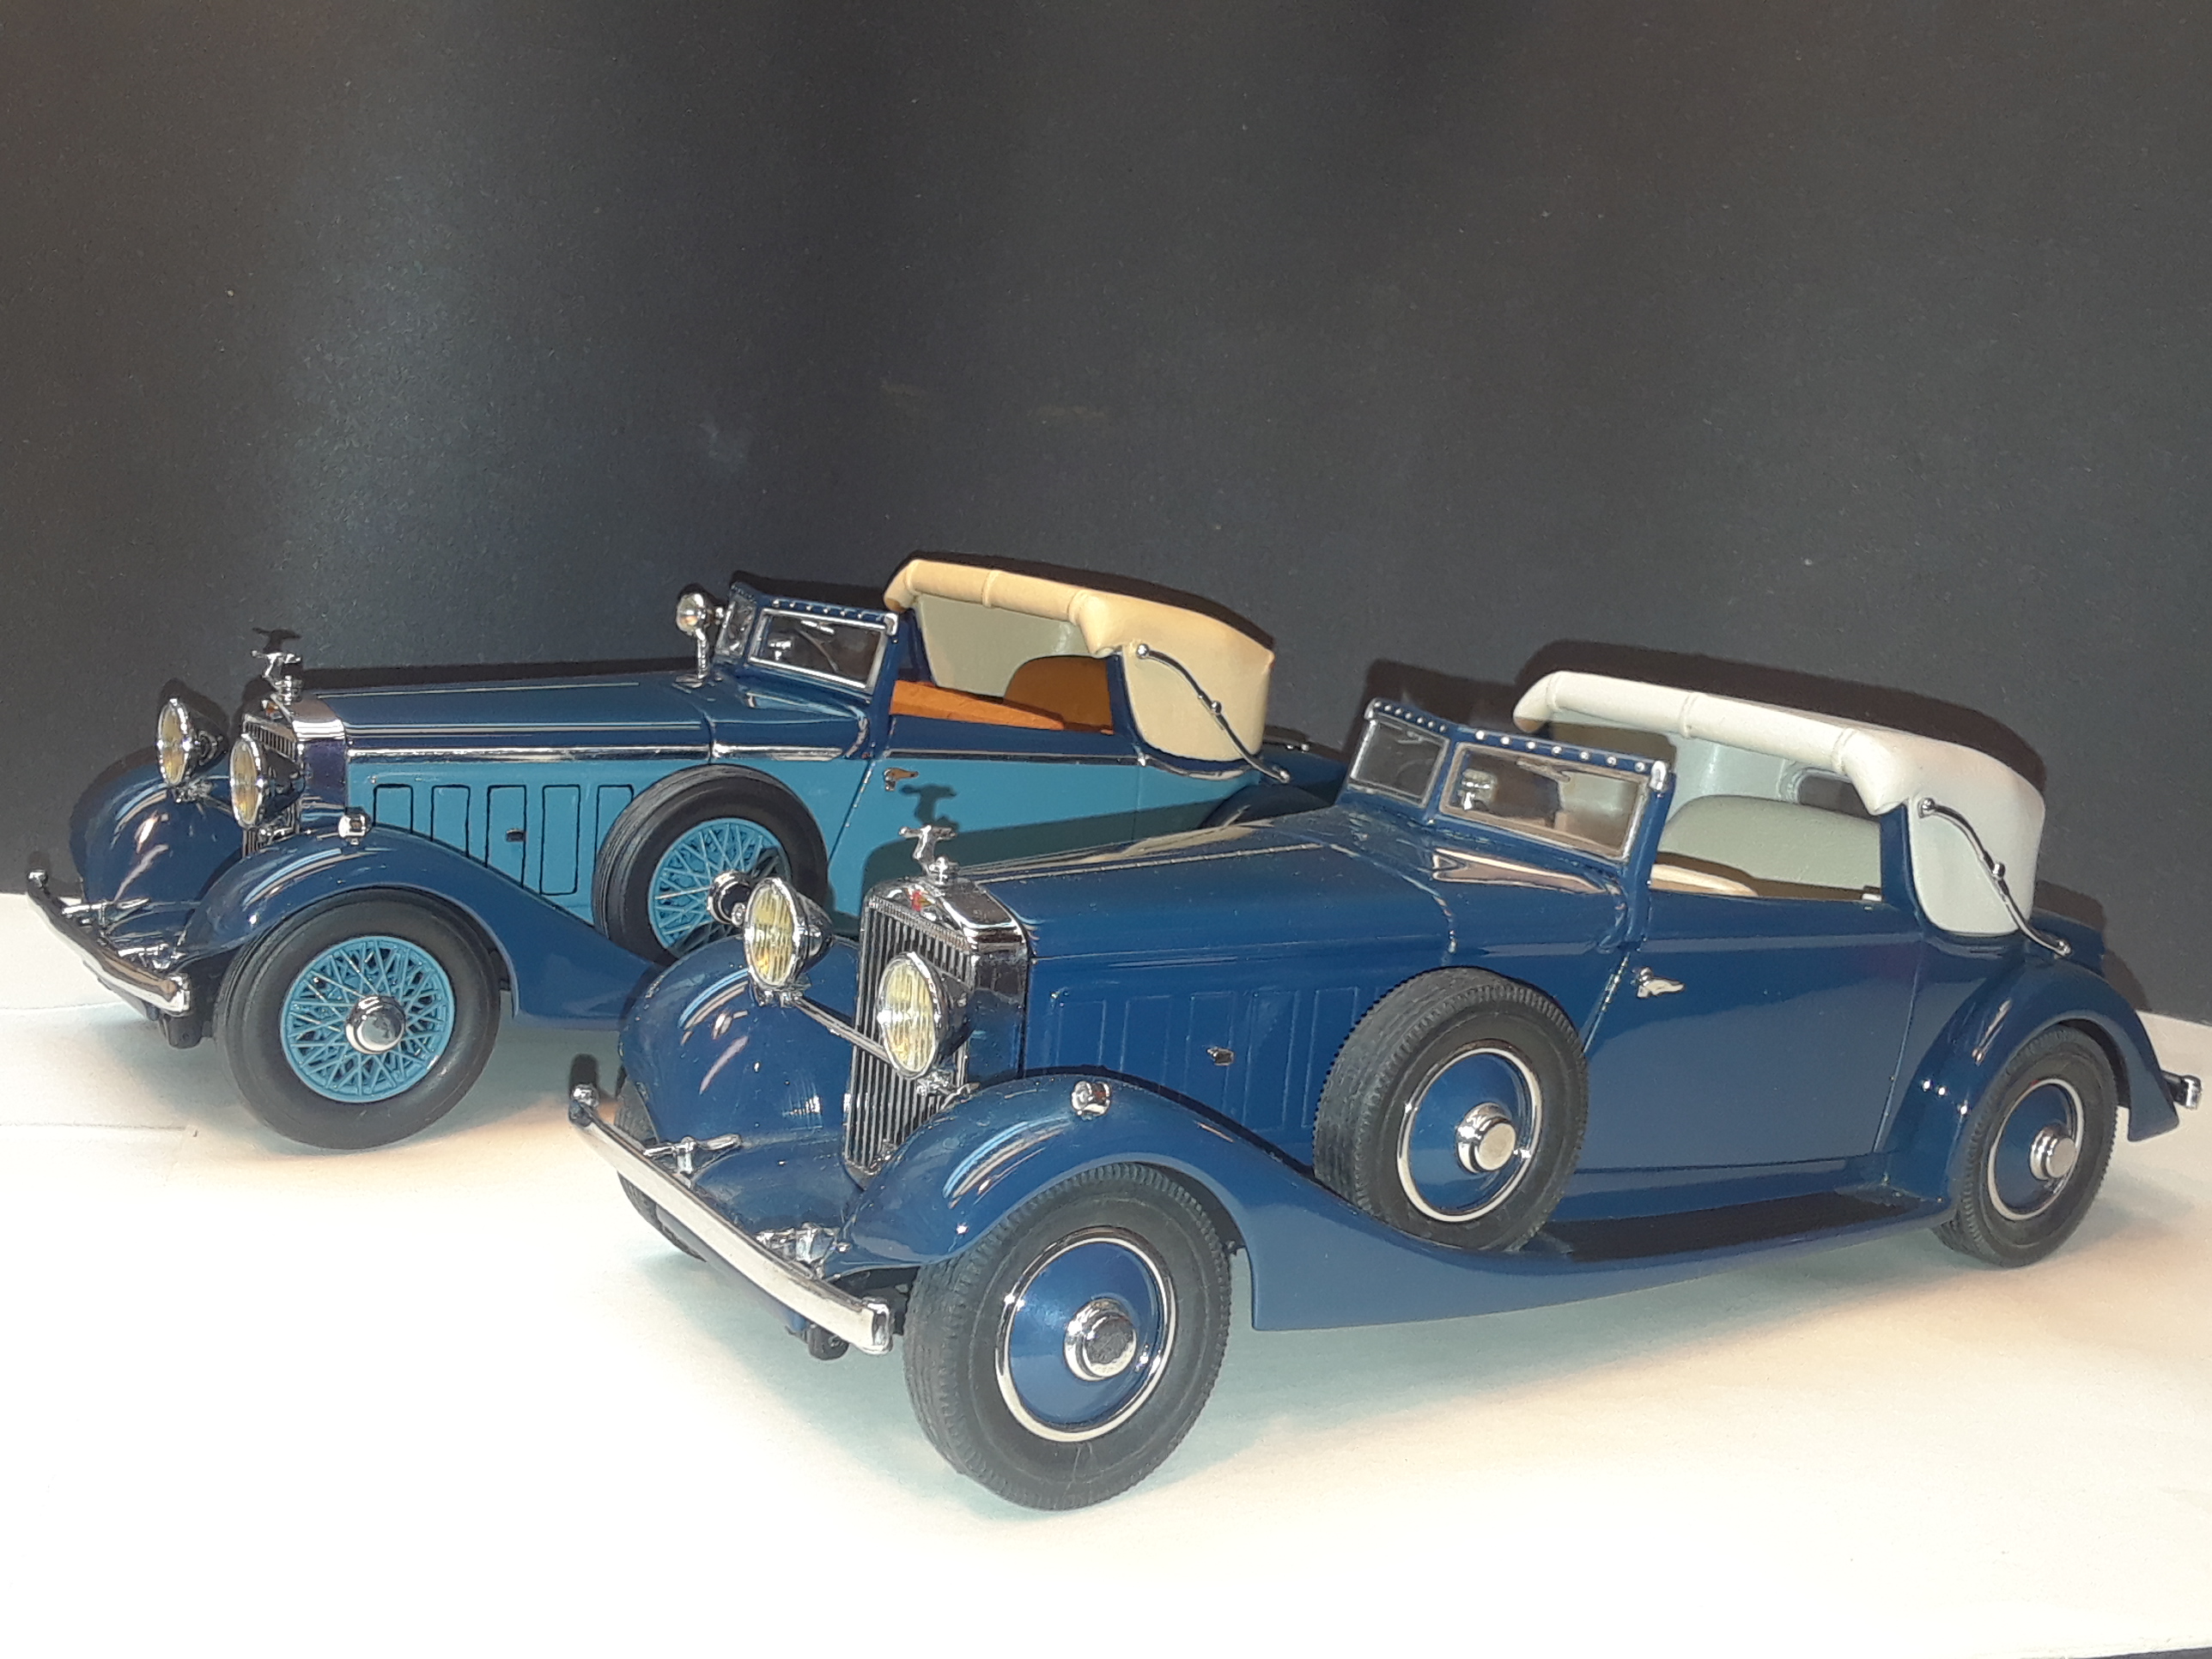
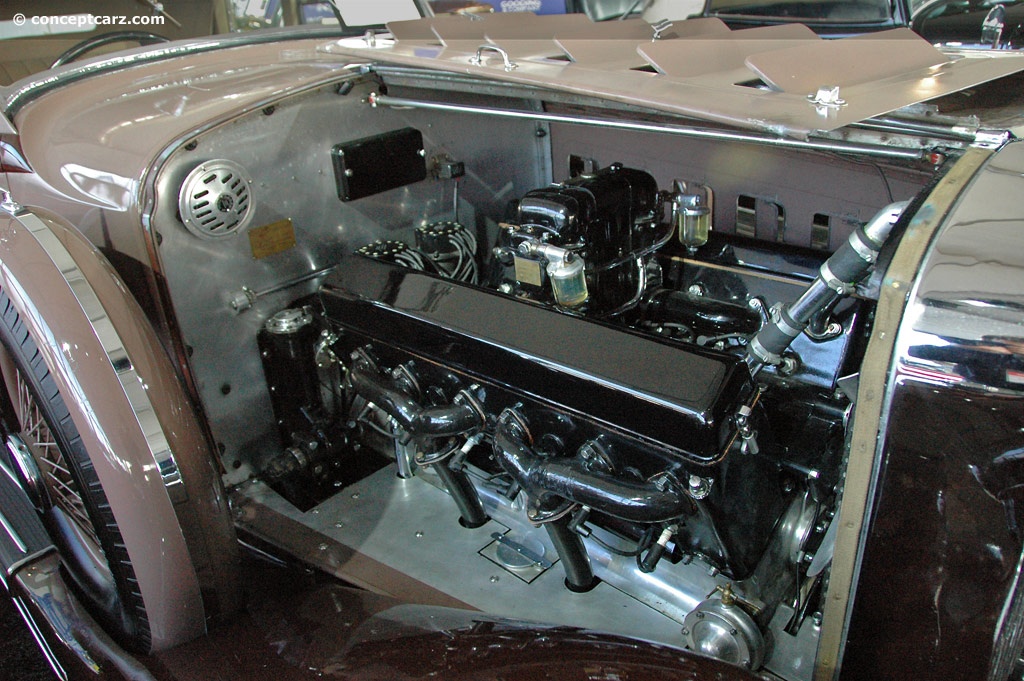
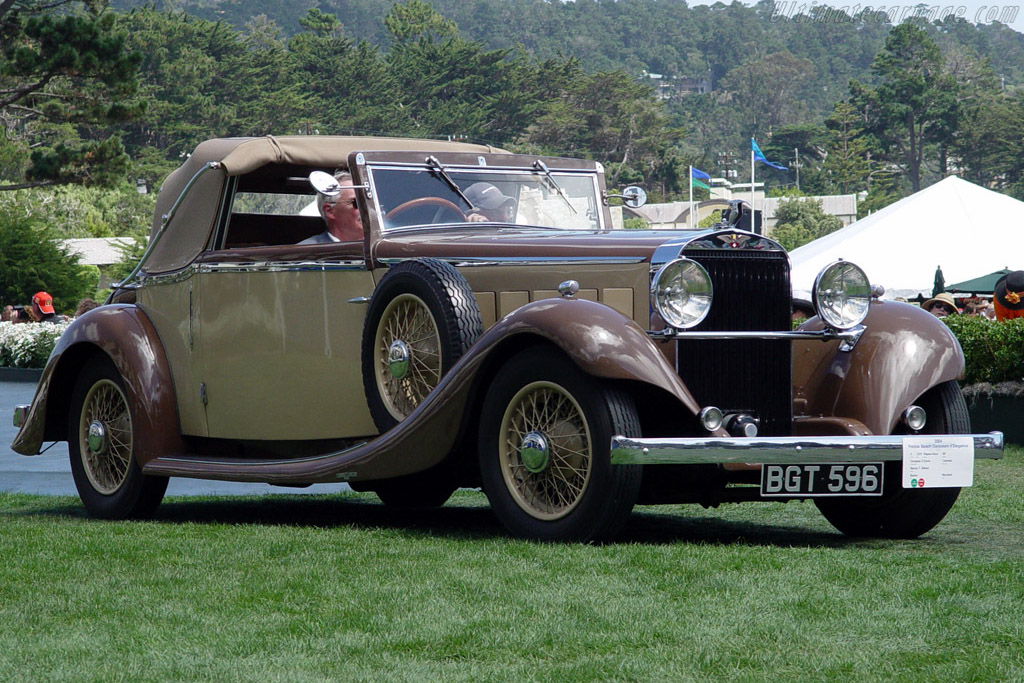
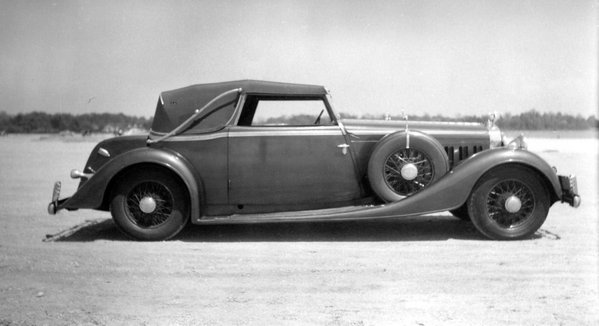
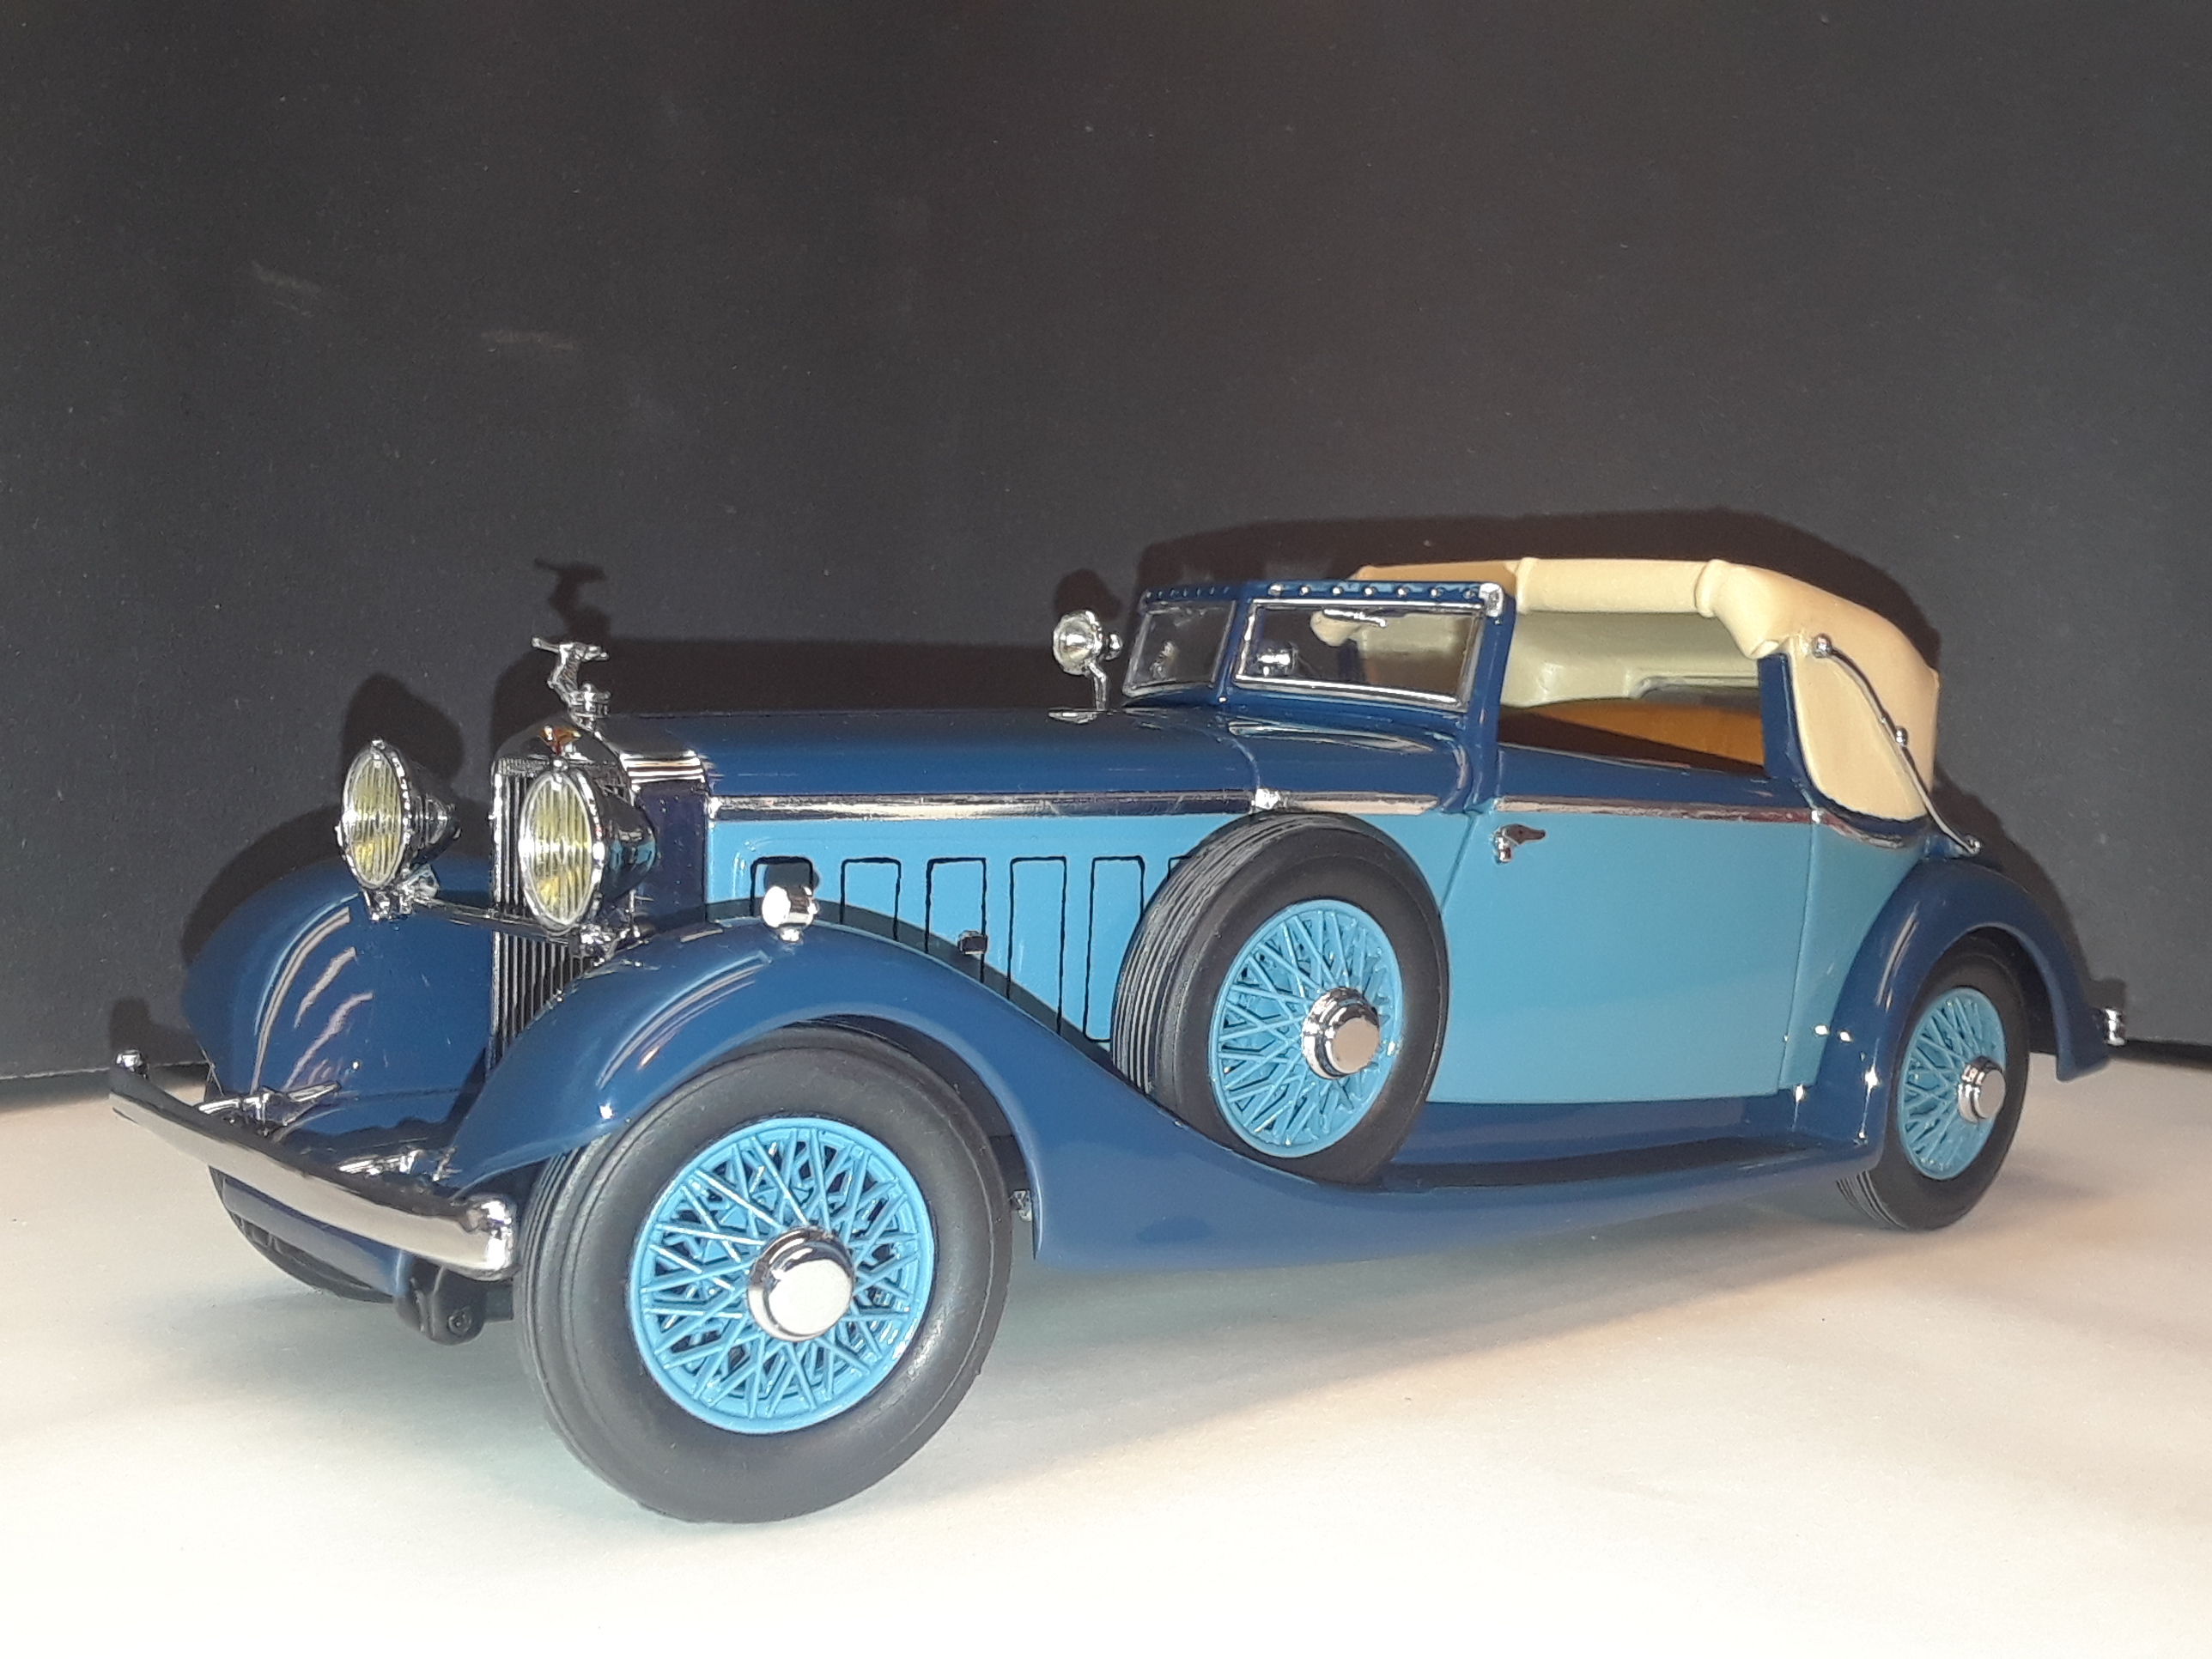
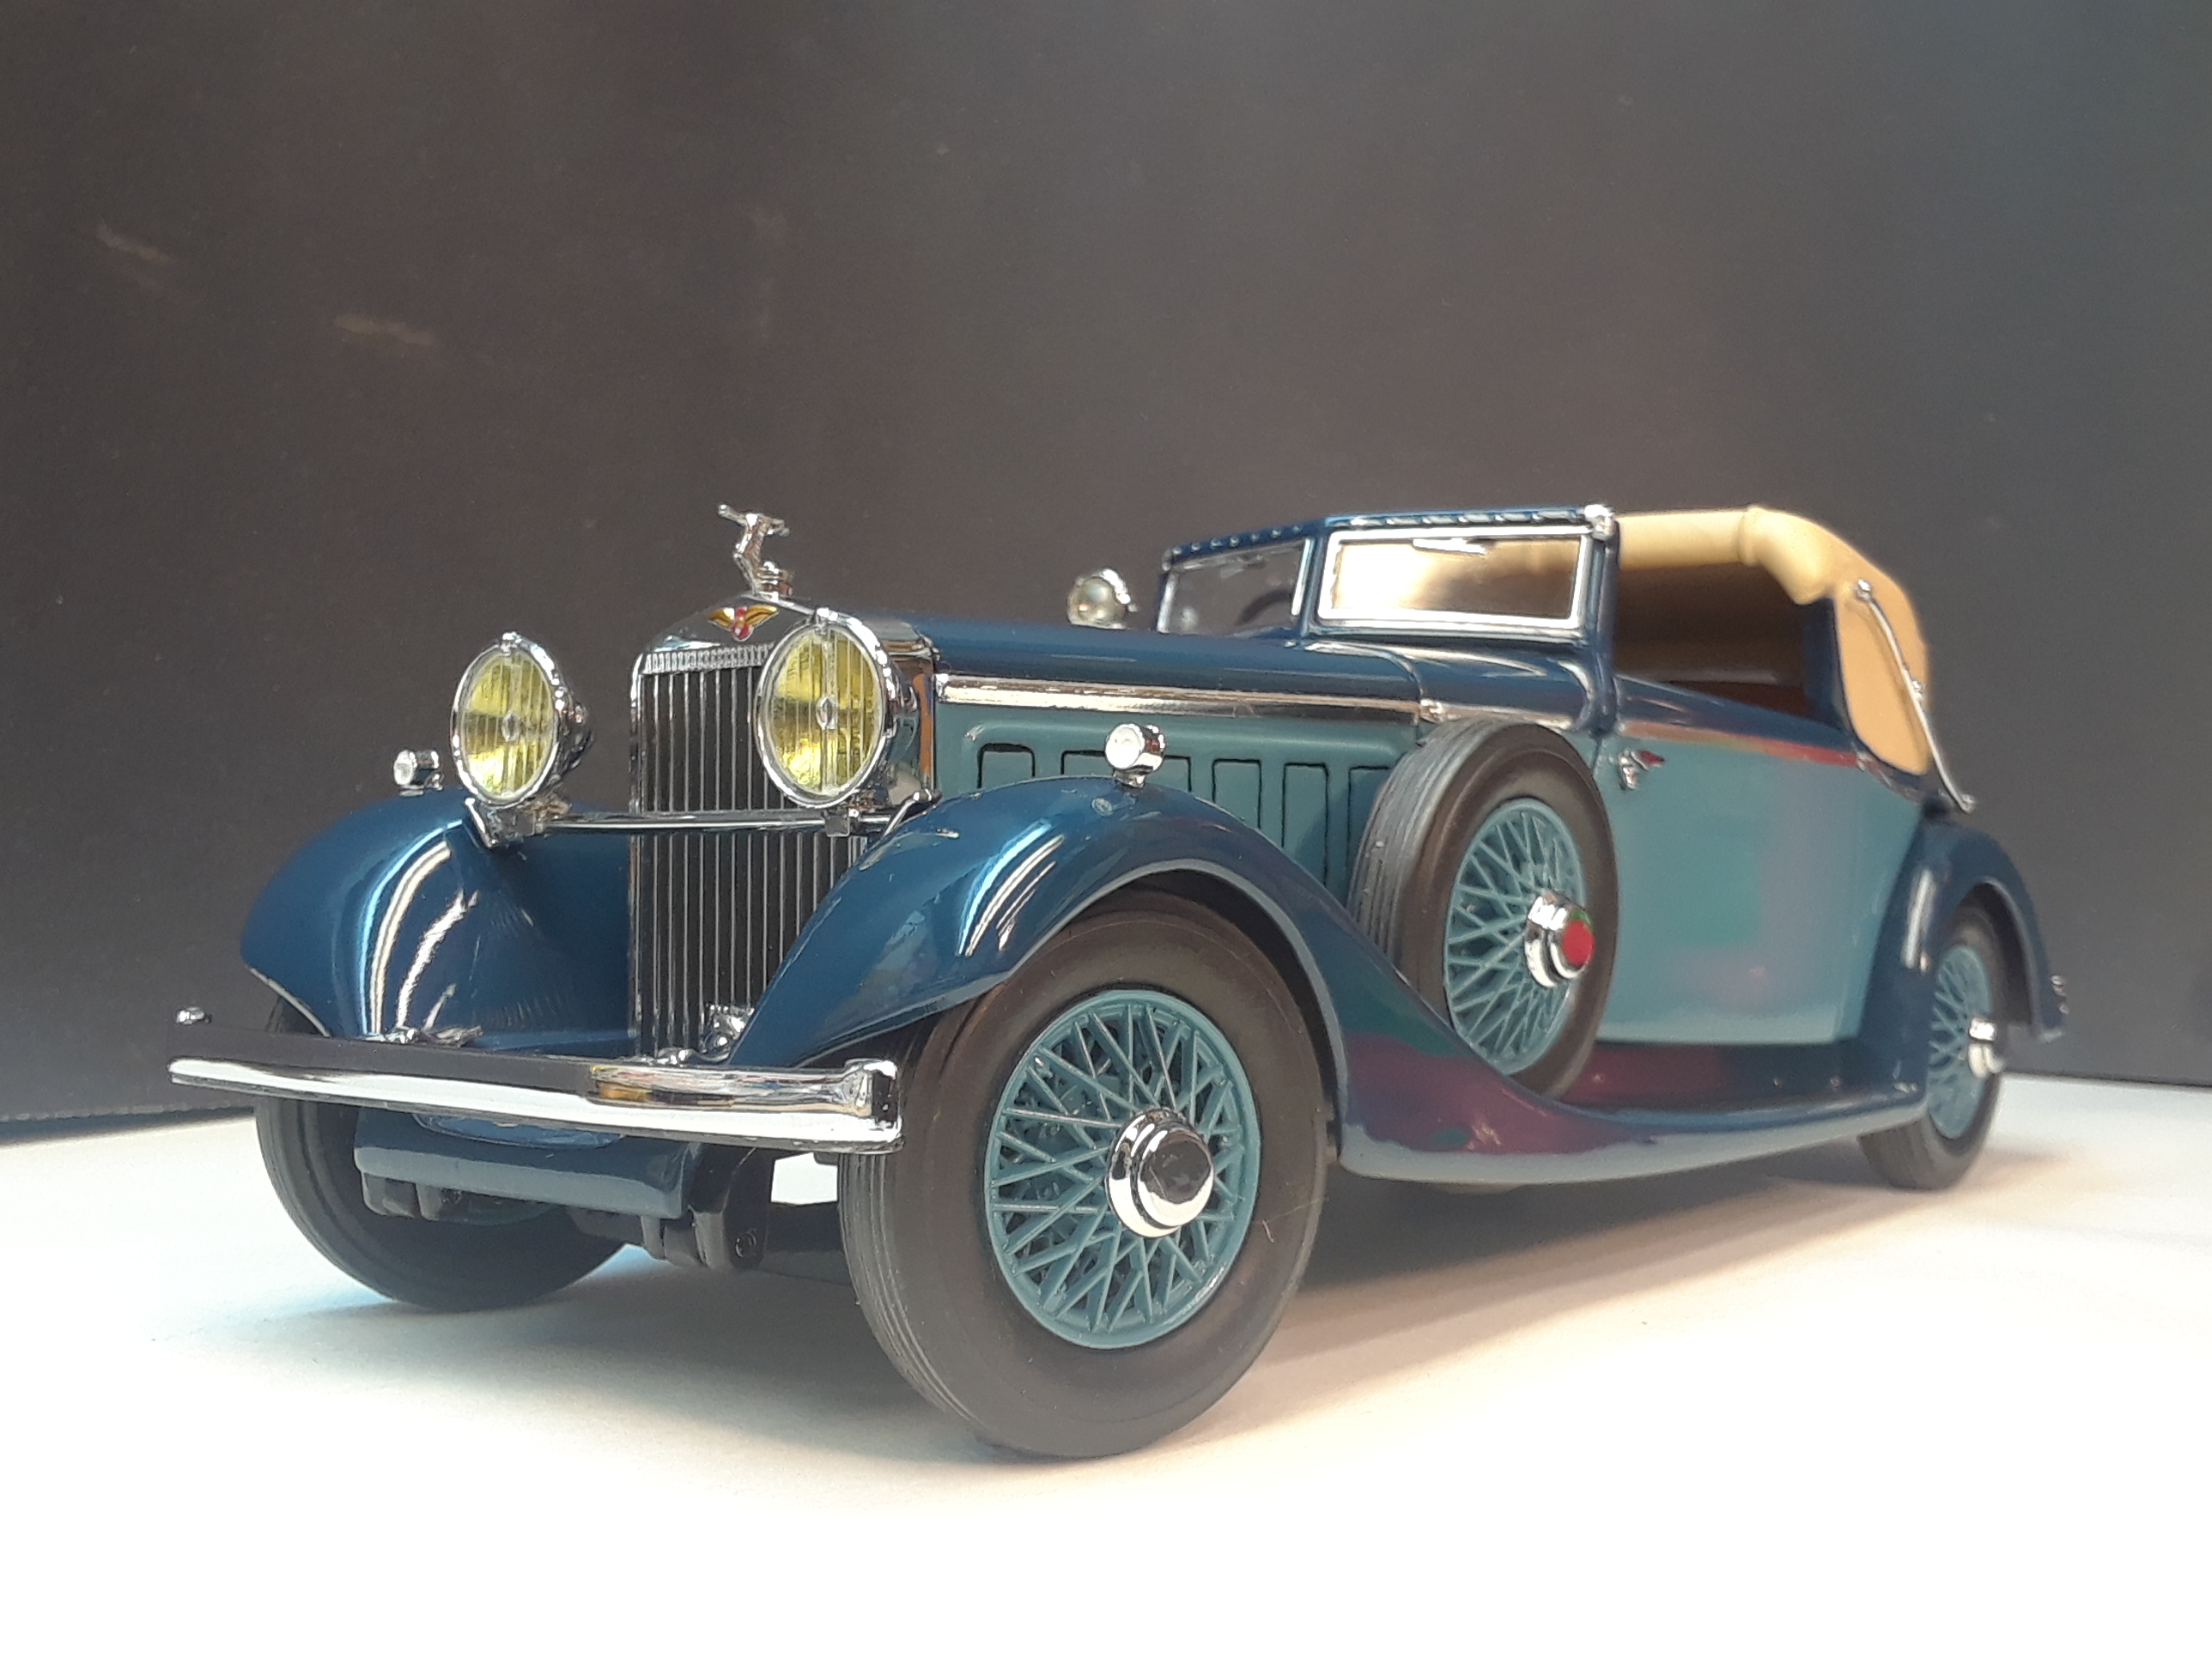
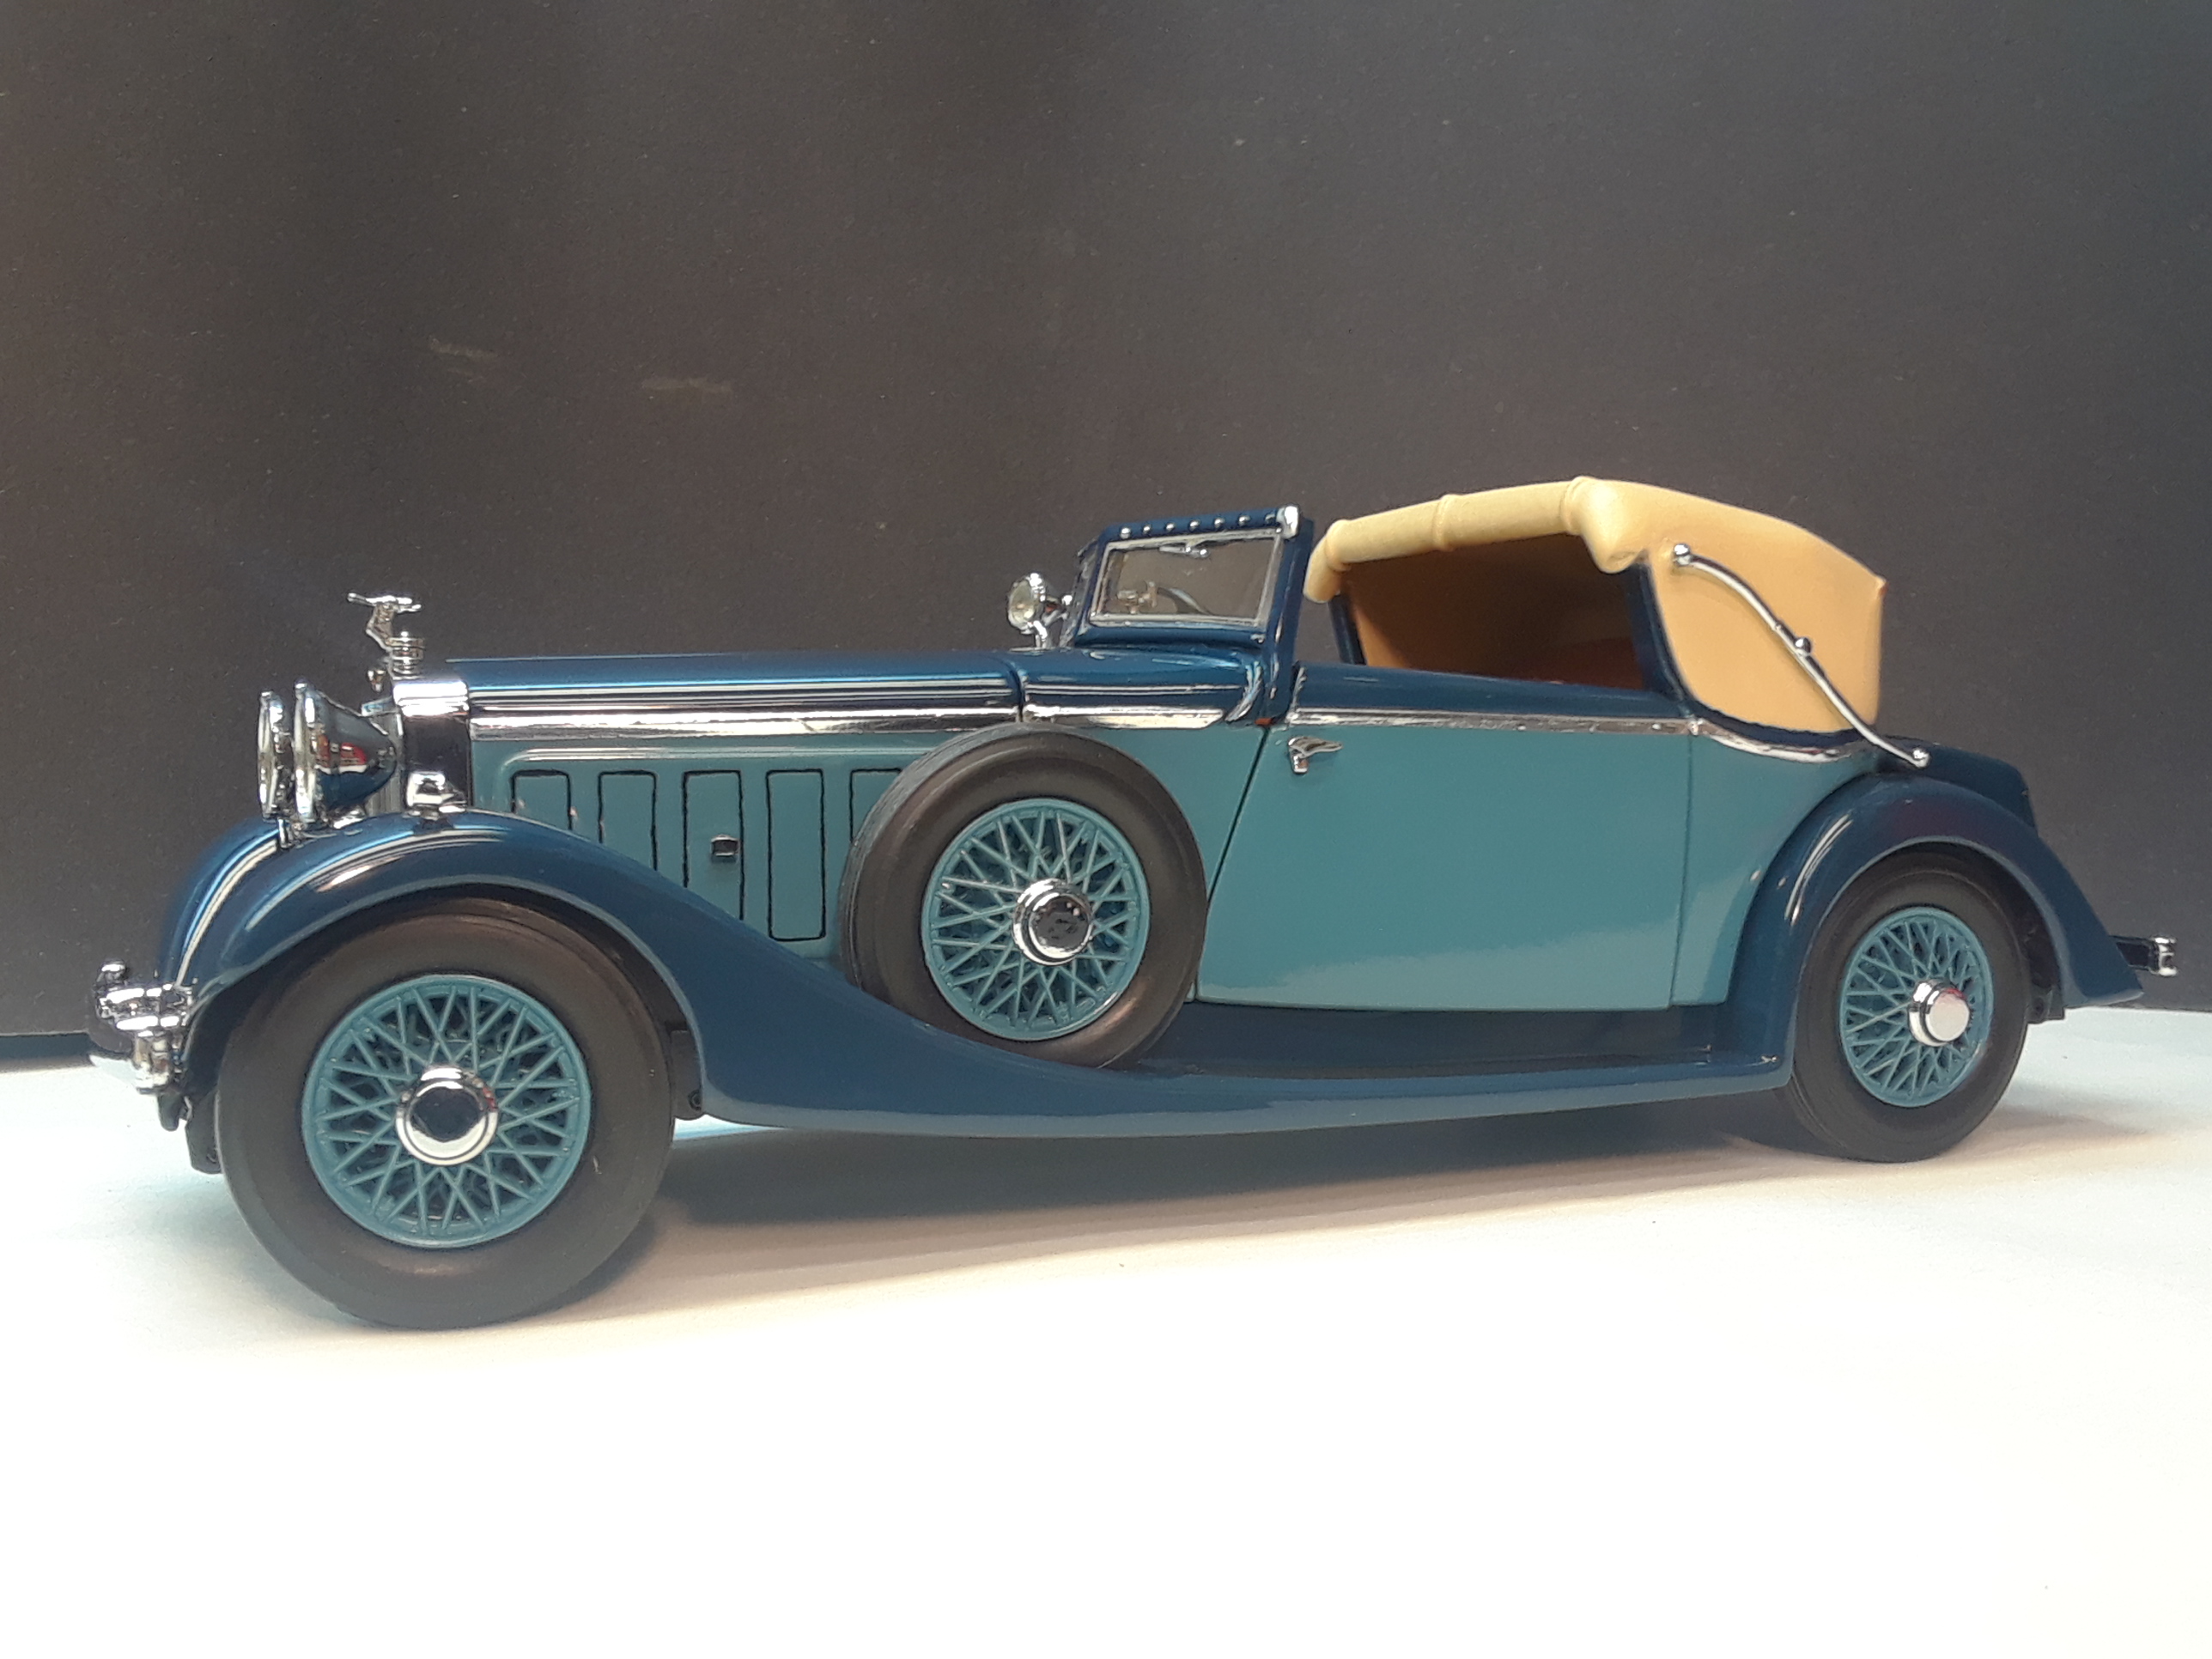
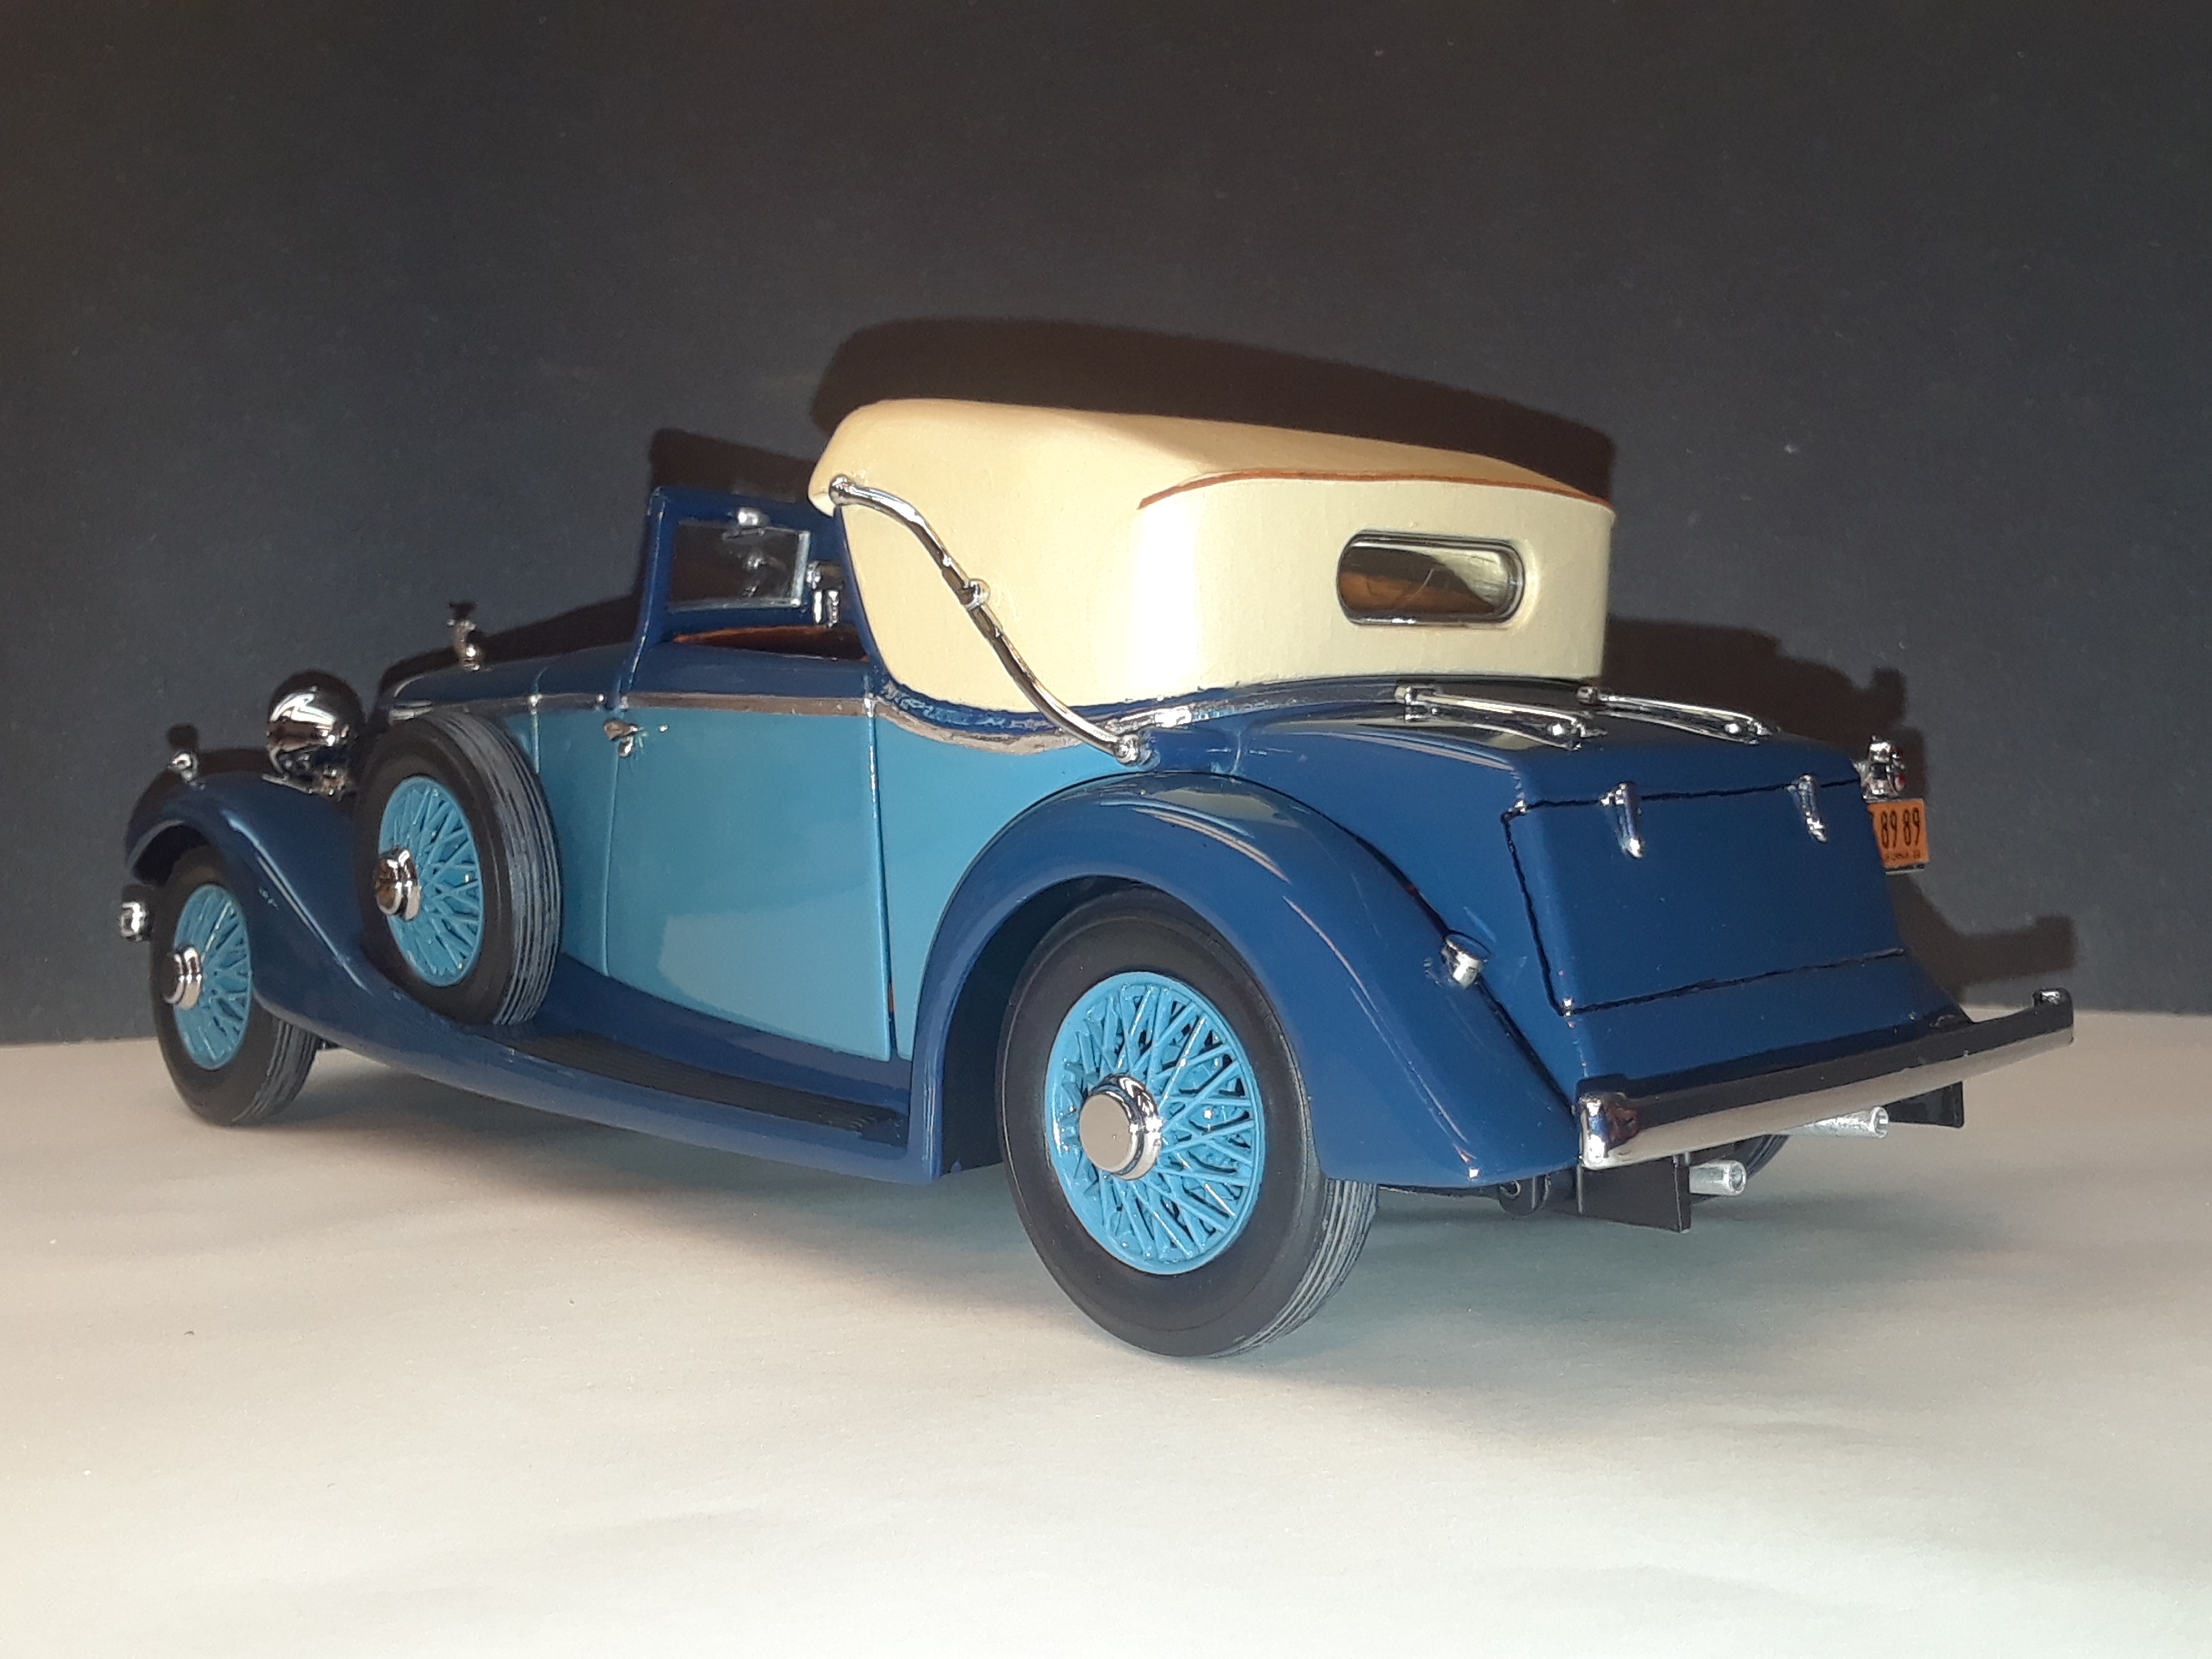
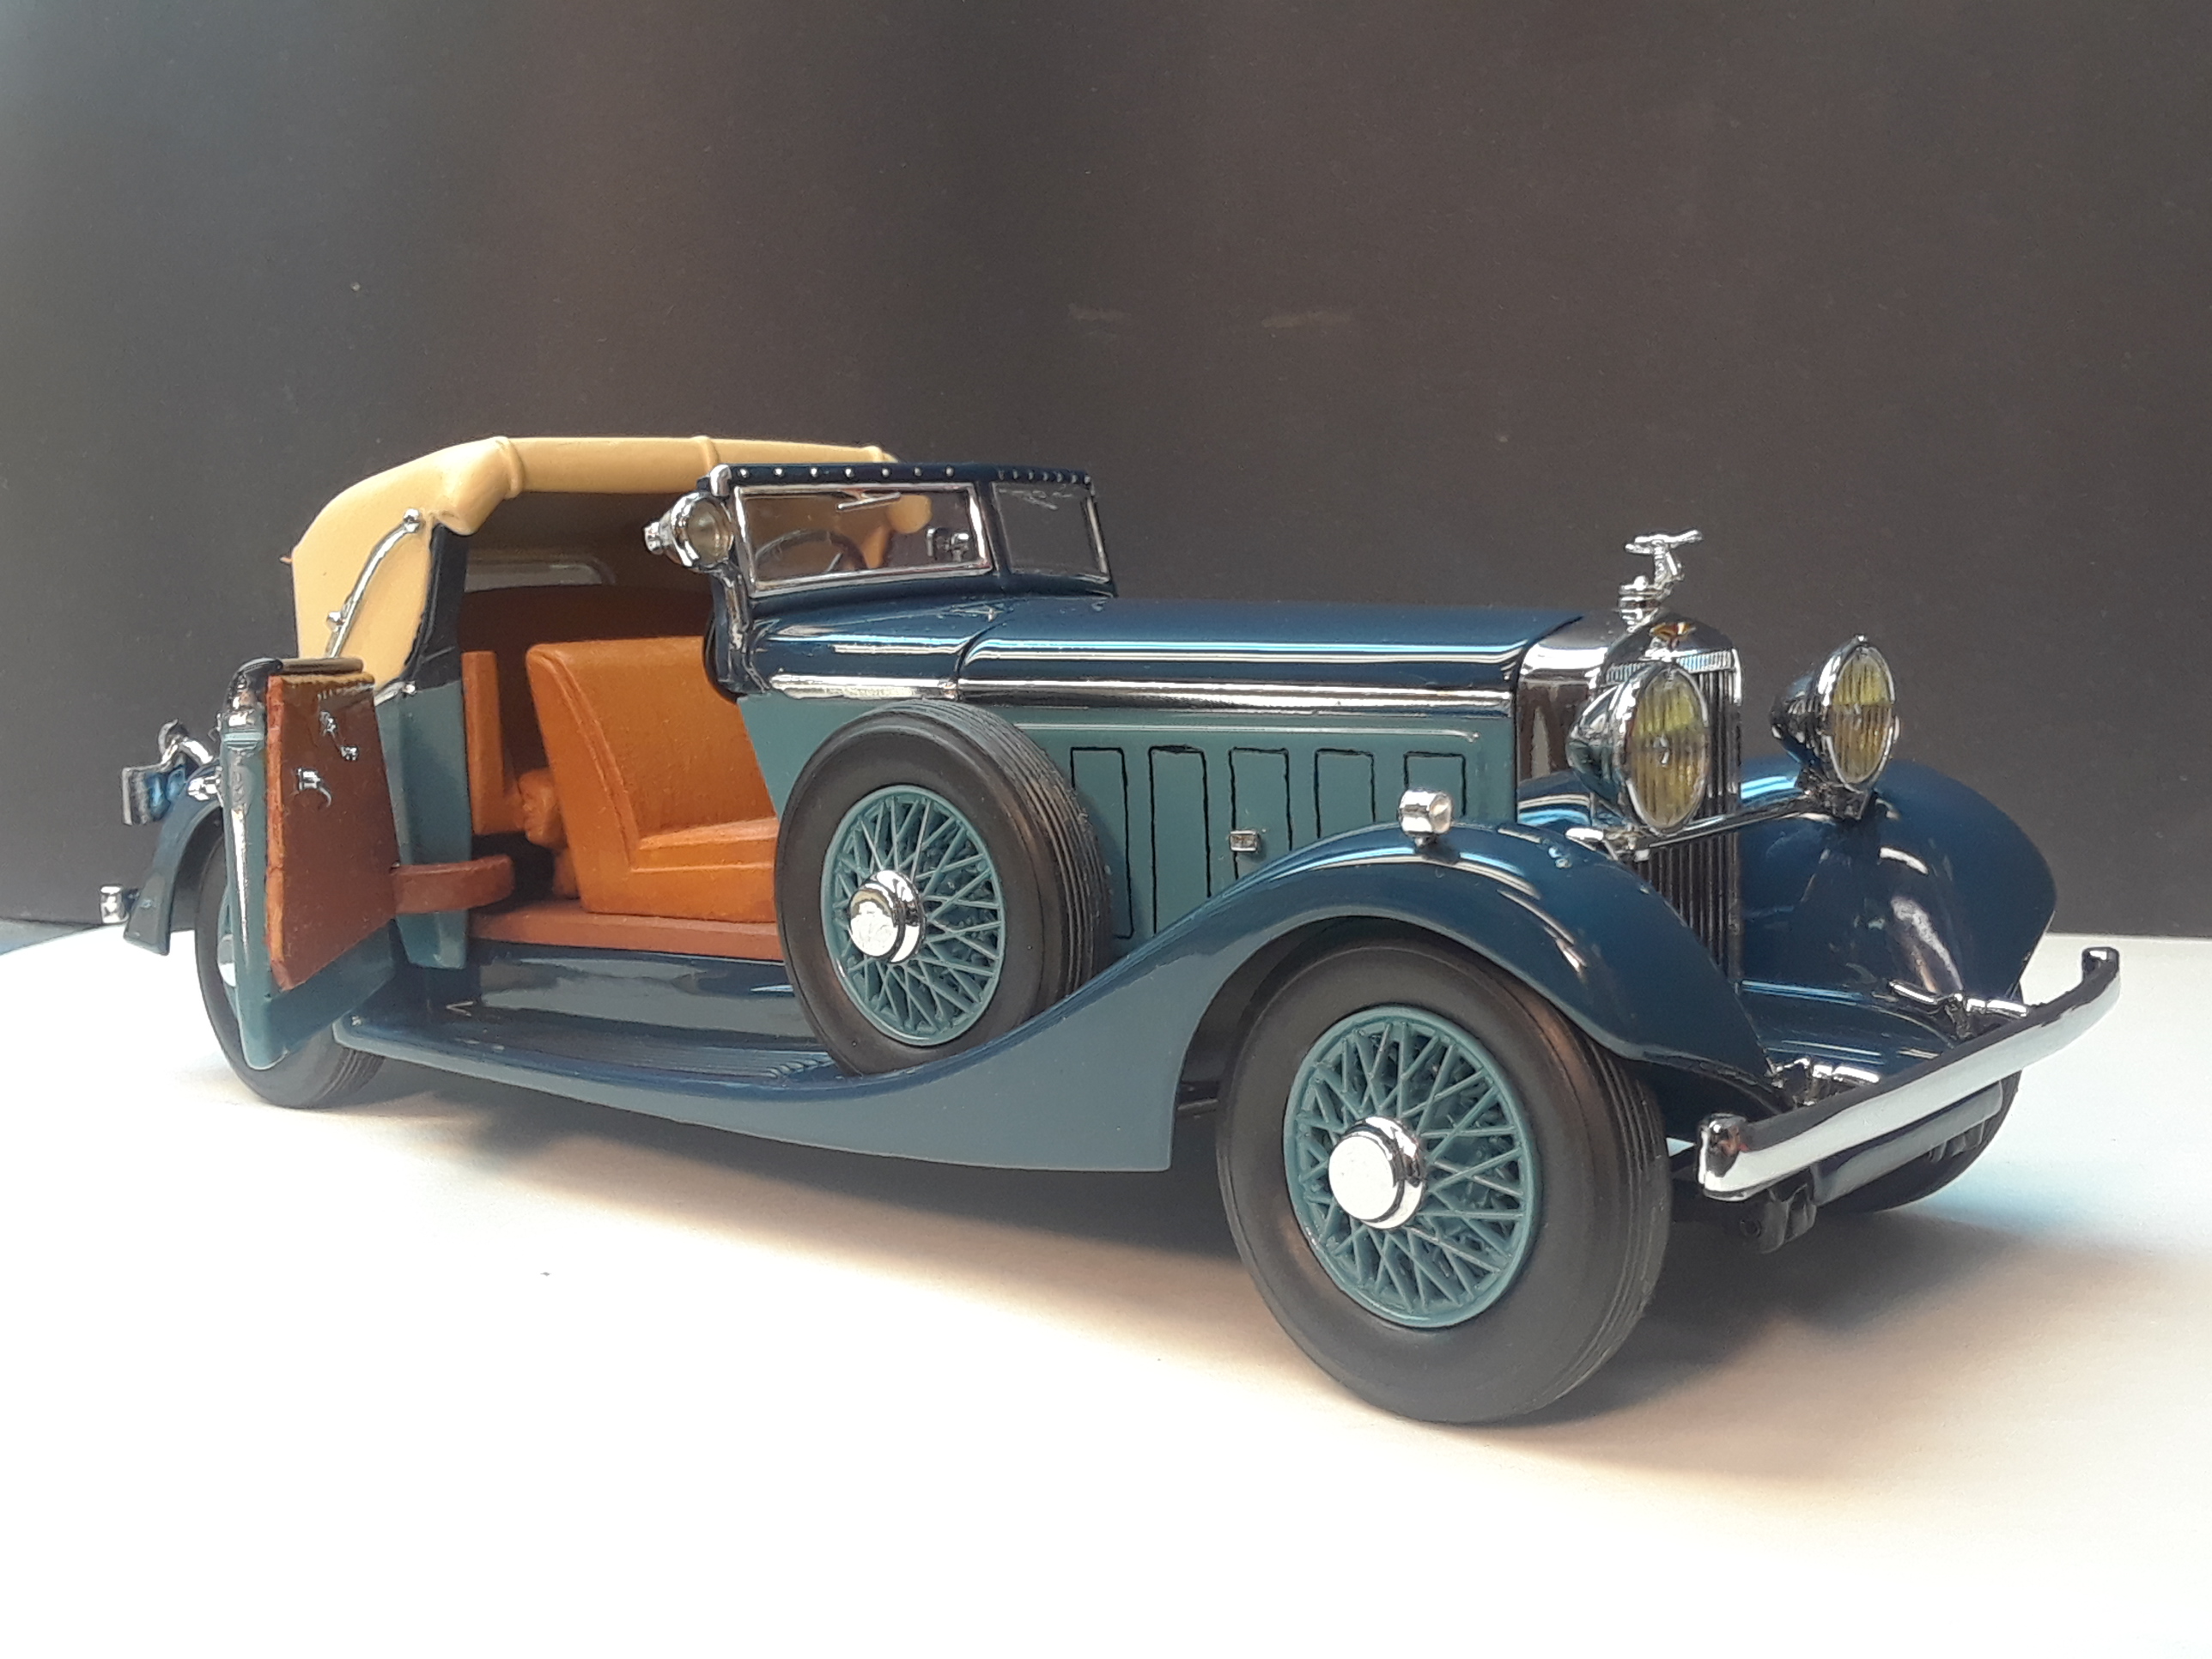
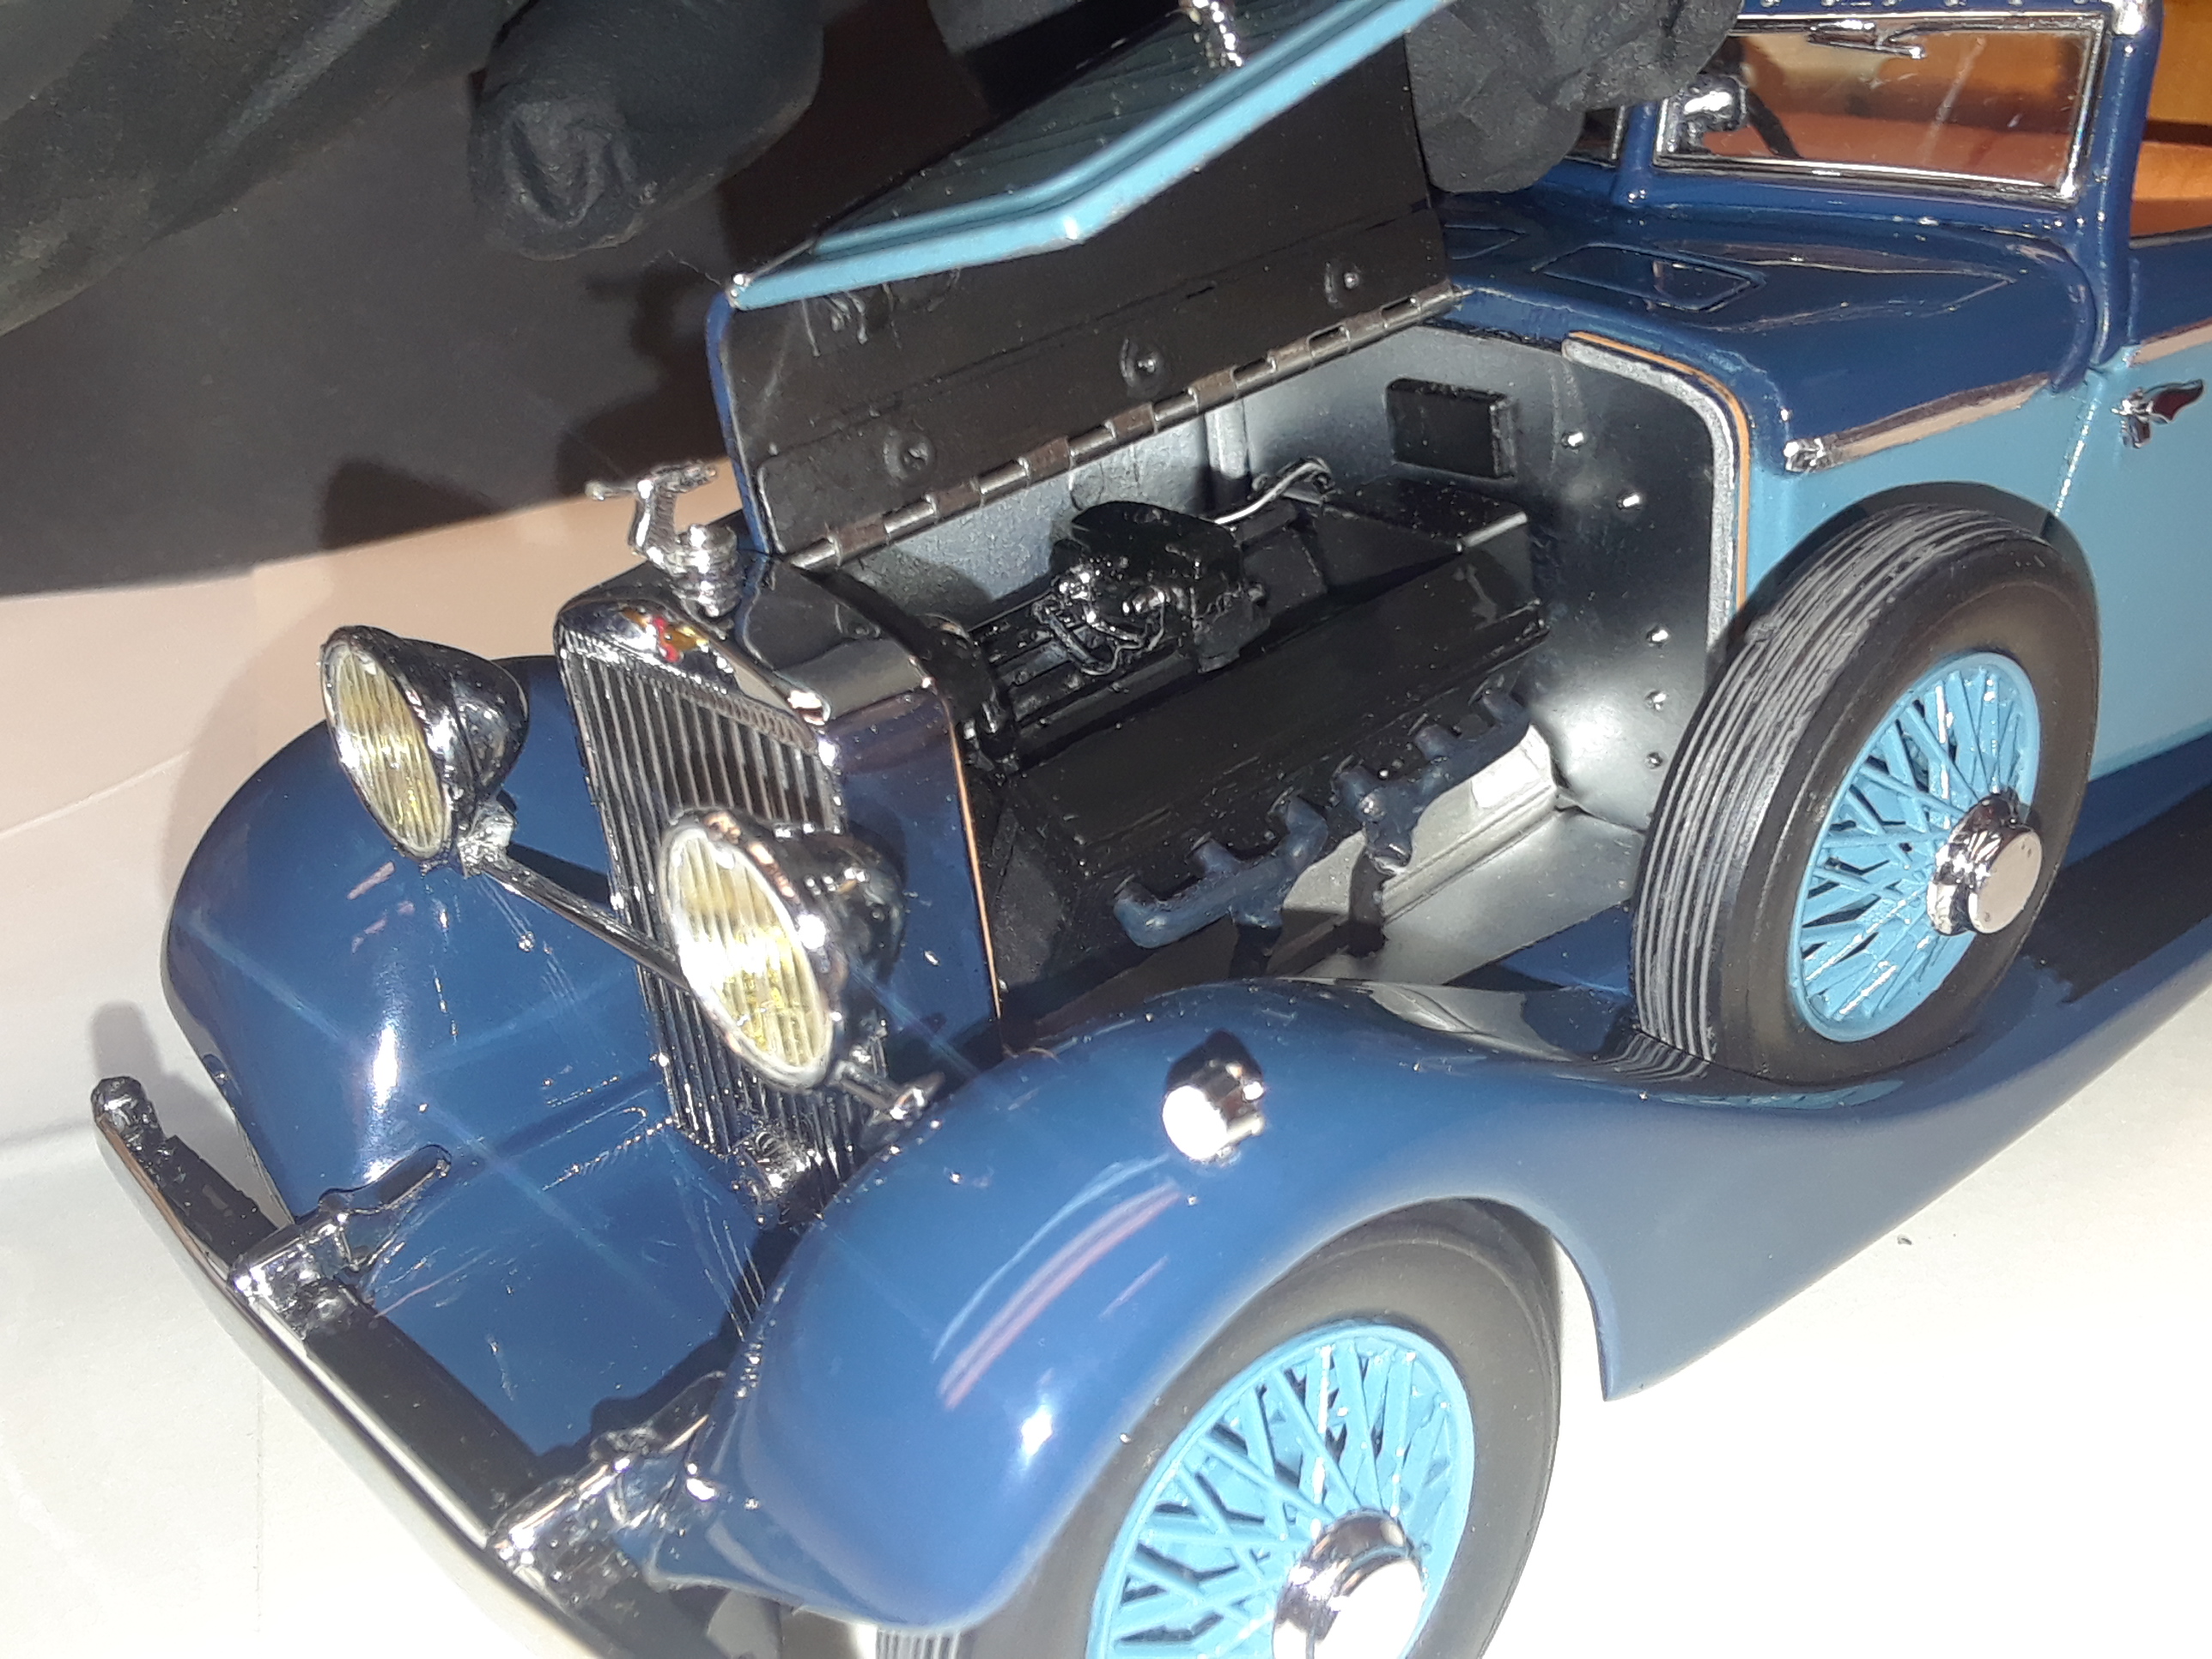
The idea with this project was to disassemble the model and repaint everything to better match some of the few full size examples still in the world. The Fernandez & Darrin cabriolet body appeared both on the J12 cars and K6 as well. Hope you enjoy the photos of the updated model and some prototypical Hispano Suiza's I looked at for inspiration. Exterior- Dark blue shade is original Danbury Mint color. Light blue is Tamiya Color for Aircraft, #AS19 Intermediate Blue, followed by Testors #1834 Wet Look Clear lacquer. Panel lines on the trunk and vent doors on the hood were done with Indian ink in a Koh-I-Noor pen. Chrome trim added to the beltline is a combination of Bare Metal Foil and Molotow chrome pen. The Sedanca style canvas top was brush painted a custom mixed tan color in water based acrylics, then sprayed over that with Krylon chalk clear coat. Added a combination spot light and rear view mirror from a Mercedes 500K, which is a match for what I’d seen on one of the full size Hispano Suizas. The license plate is a photo reduced copy of an actual vintage California plate. Wheels and Tires- Monogram classic series tires (Duesenberg, Packard, etc). Wheel back halves are modified Monogram Packard, front halves are modified Monogram Rolls Royce. Hubcaps are cut down Hispano Suiza caps from Danbury Mint. Tire walls painted with Liquitex water-based black acrylic. Treads are a mixture of gray/brown Liquitex. Interior- Monogram Rolls Royce Henley Roadster bench seat in place of stock buckets. Floor and door panels painted with water based acrylics first, then door panels painted with artist oils over that to give them the look of leather. Oils used to wood-grain the door tops and dashboard, then clear enamel for gloss over that. Engine Compartment- Model originally had a shiny chrome plated firewall. Experimented with Krylon clear Chalk over that chrome to make it look more like the aluminum firewall on full size HS J12's. Also, the model originally had large, square gaps in the engine compartment flooring around the exhaust pipes. Not correct. Added material to complete the flooring like a full size HS J12, covered that in chrome mylar tape, again over sprayed with chalk clear to make it look like aluminum. Detail painted the valve covers gloss black, mixed up a blue/gray/black color for the exhaust manifolds, painted the engine block a warm kind of cast aluminum color, painted the hood sides, added the fabric weather strips common on 1930's cars around the edge of the firewall and radiator.
-
- 1
-

-
The idea with this project was to disassemble the model and repaint everything to better match some of the few full size examples still in the world. It helps sometimes to dig up older photos. There's a tendency with modern restorations to put chrome wire wheels and white walls on everything, even if that isn't very accurate for the subject in period. Painted wires don't look quite as nice sometimes, which is a matter of taste, but frequently that's what these cars had to begin with. Hope you enjoy the photos of the updated model and some prototypical Hispano Suiza's I looked at for inspiration. The Fernandez & Darrin cabriolet body appeared both on the J12 cars and K6 as well. Wheels and Tires- Monogram classic series tires (Duesenberg, Packard, etc). Wheel back halves are modified Monogram Packard, front halves are modified Monogram Rolls Royce. Hubcaps are cut down Hispano Suiza caps from Danbury Mint. Tire walls painted with Liquitex water-based black acrylic. Treads are a mixture of gray/brown Liquitex. Interior- Monogram Rolls Royce Henley Roadster bench seat in place of stock buckets. Floor and door panels painted with Liquitex acrylics first, then door panels painted with artist oils over that to give them the look of leather. Oils used to wood-grain the door tops and dashboard, then clear enamel for gloss over that. Sedanca style canvas top repainted a custom mixed warmer tan color in water based acrylics, then sprayed over that with Krylon chalk clear coat. Exterior- Dark blue shade is original Danbury Mint color. Light blue is Tamiya Color for Aircraft, #AS19 Intermediate Blue, followed by Testors #1834 Wet Look Clear lacquer. Engine Compartment- Model originally had a shiny chrome plated firewall. Experimented with Krylon clear Chalk over that chrome to make it look more like the aluminum firewall on full size HS J12's. Also, the model originally had large, square gaps in the engine compartment flooring around the exhaust pipes. Not correct. Added material to complete the flooring like a full size HS J12, covered that in chrome mylar tape, again over sprayed with chalk clear to make it look like aluminum. Detail painted the valve covers gloss black, mixed up a blue/gray/black color for the exhaust manifolds, painted the engine block a warm kind of cast aluminum color, painted the hood sides, added the fabric weather strips common on 1930's cars around the edge of the firewall and radiator.
-
Very Nice, Dave! Love it. ?
-
Those are cool!
-
Outstanding!! With the right background, you could easily convince people it was a full size vehicle. Well done, Muldoon! ?