89AKurt
-
Posts
8,426 -
Joined
-
Last visited
Content Type
Profiles
Forums
Events
Gallery
Everything posted by 89AKurt
-
whatever's on sale
-
I know someone in the AZ Ferrari club, was invited along with Ford club, and the press. He said it's over 2 hours but not boring at all, well done.
-
Don't tell me
-
Have to ask, who would block this ?ad? ?

-
can be spun
-

Two of the best drag cars I’ve ever seen
89AKurt replied to NYLIBUD's topic in WIP: Drag Racing Models
Amazing work. I like the GoPro detail, might steal that idea. -
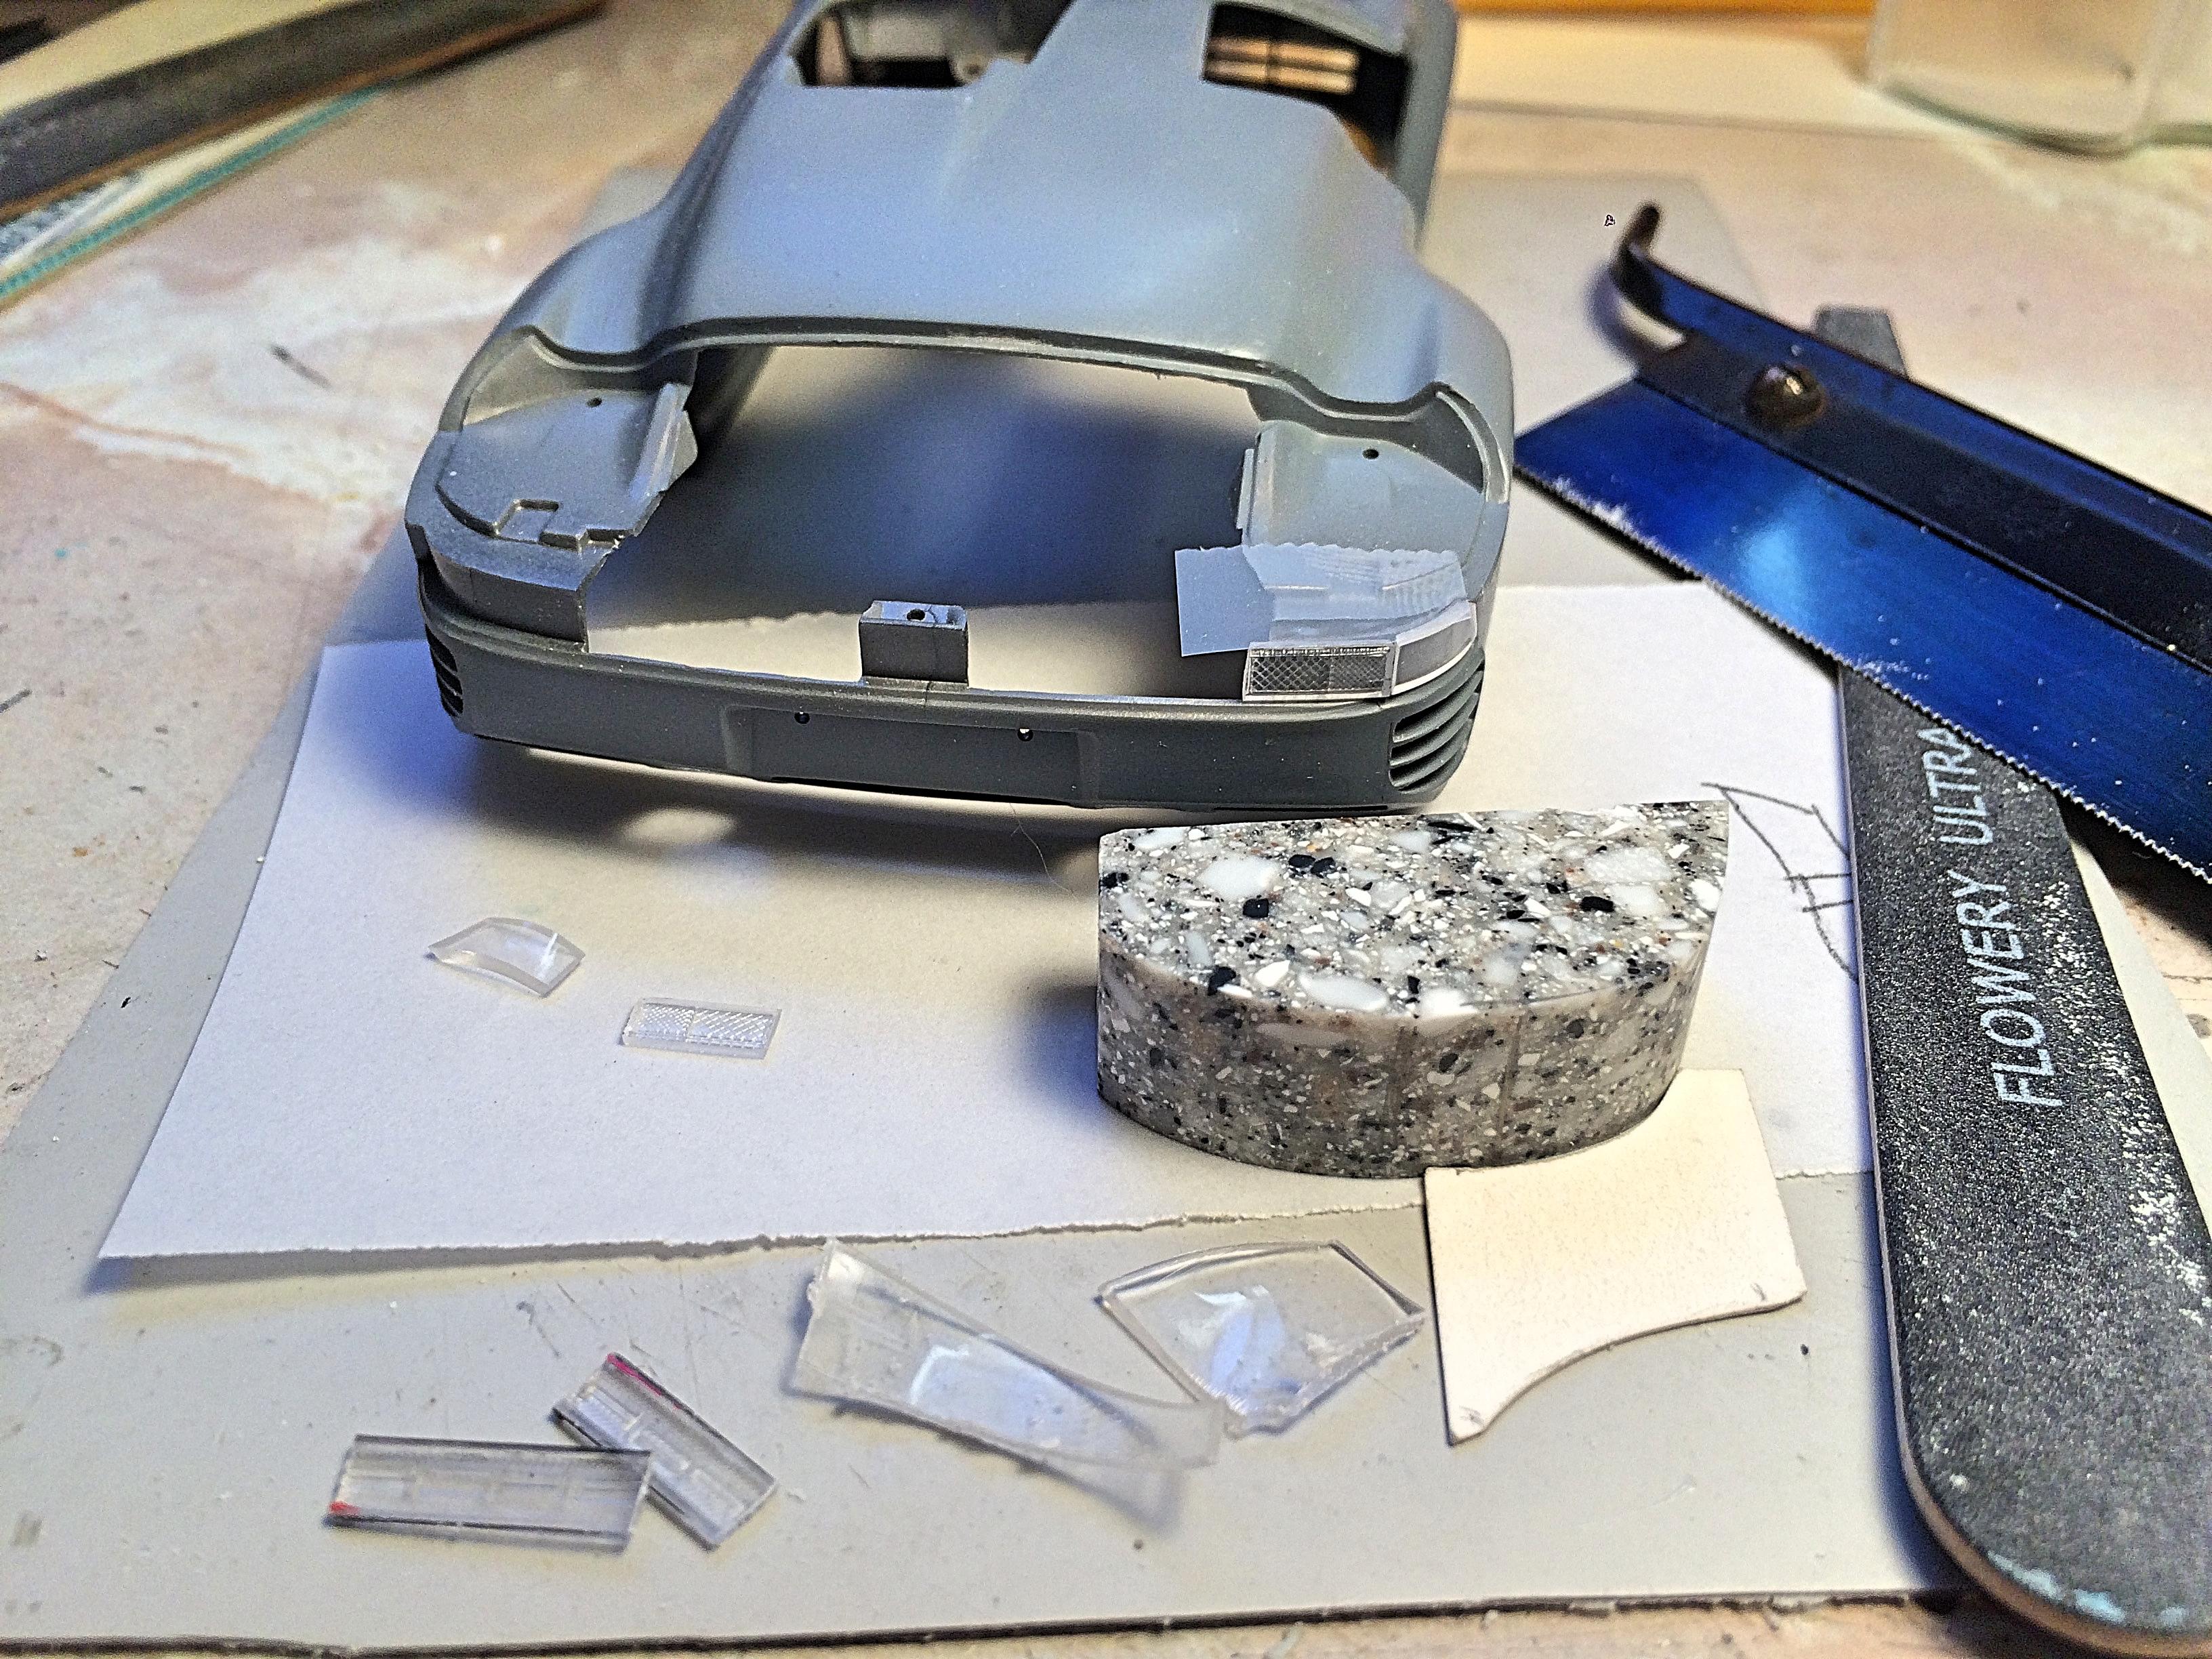
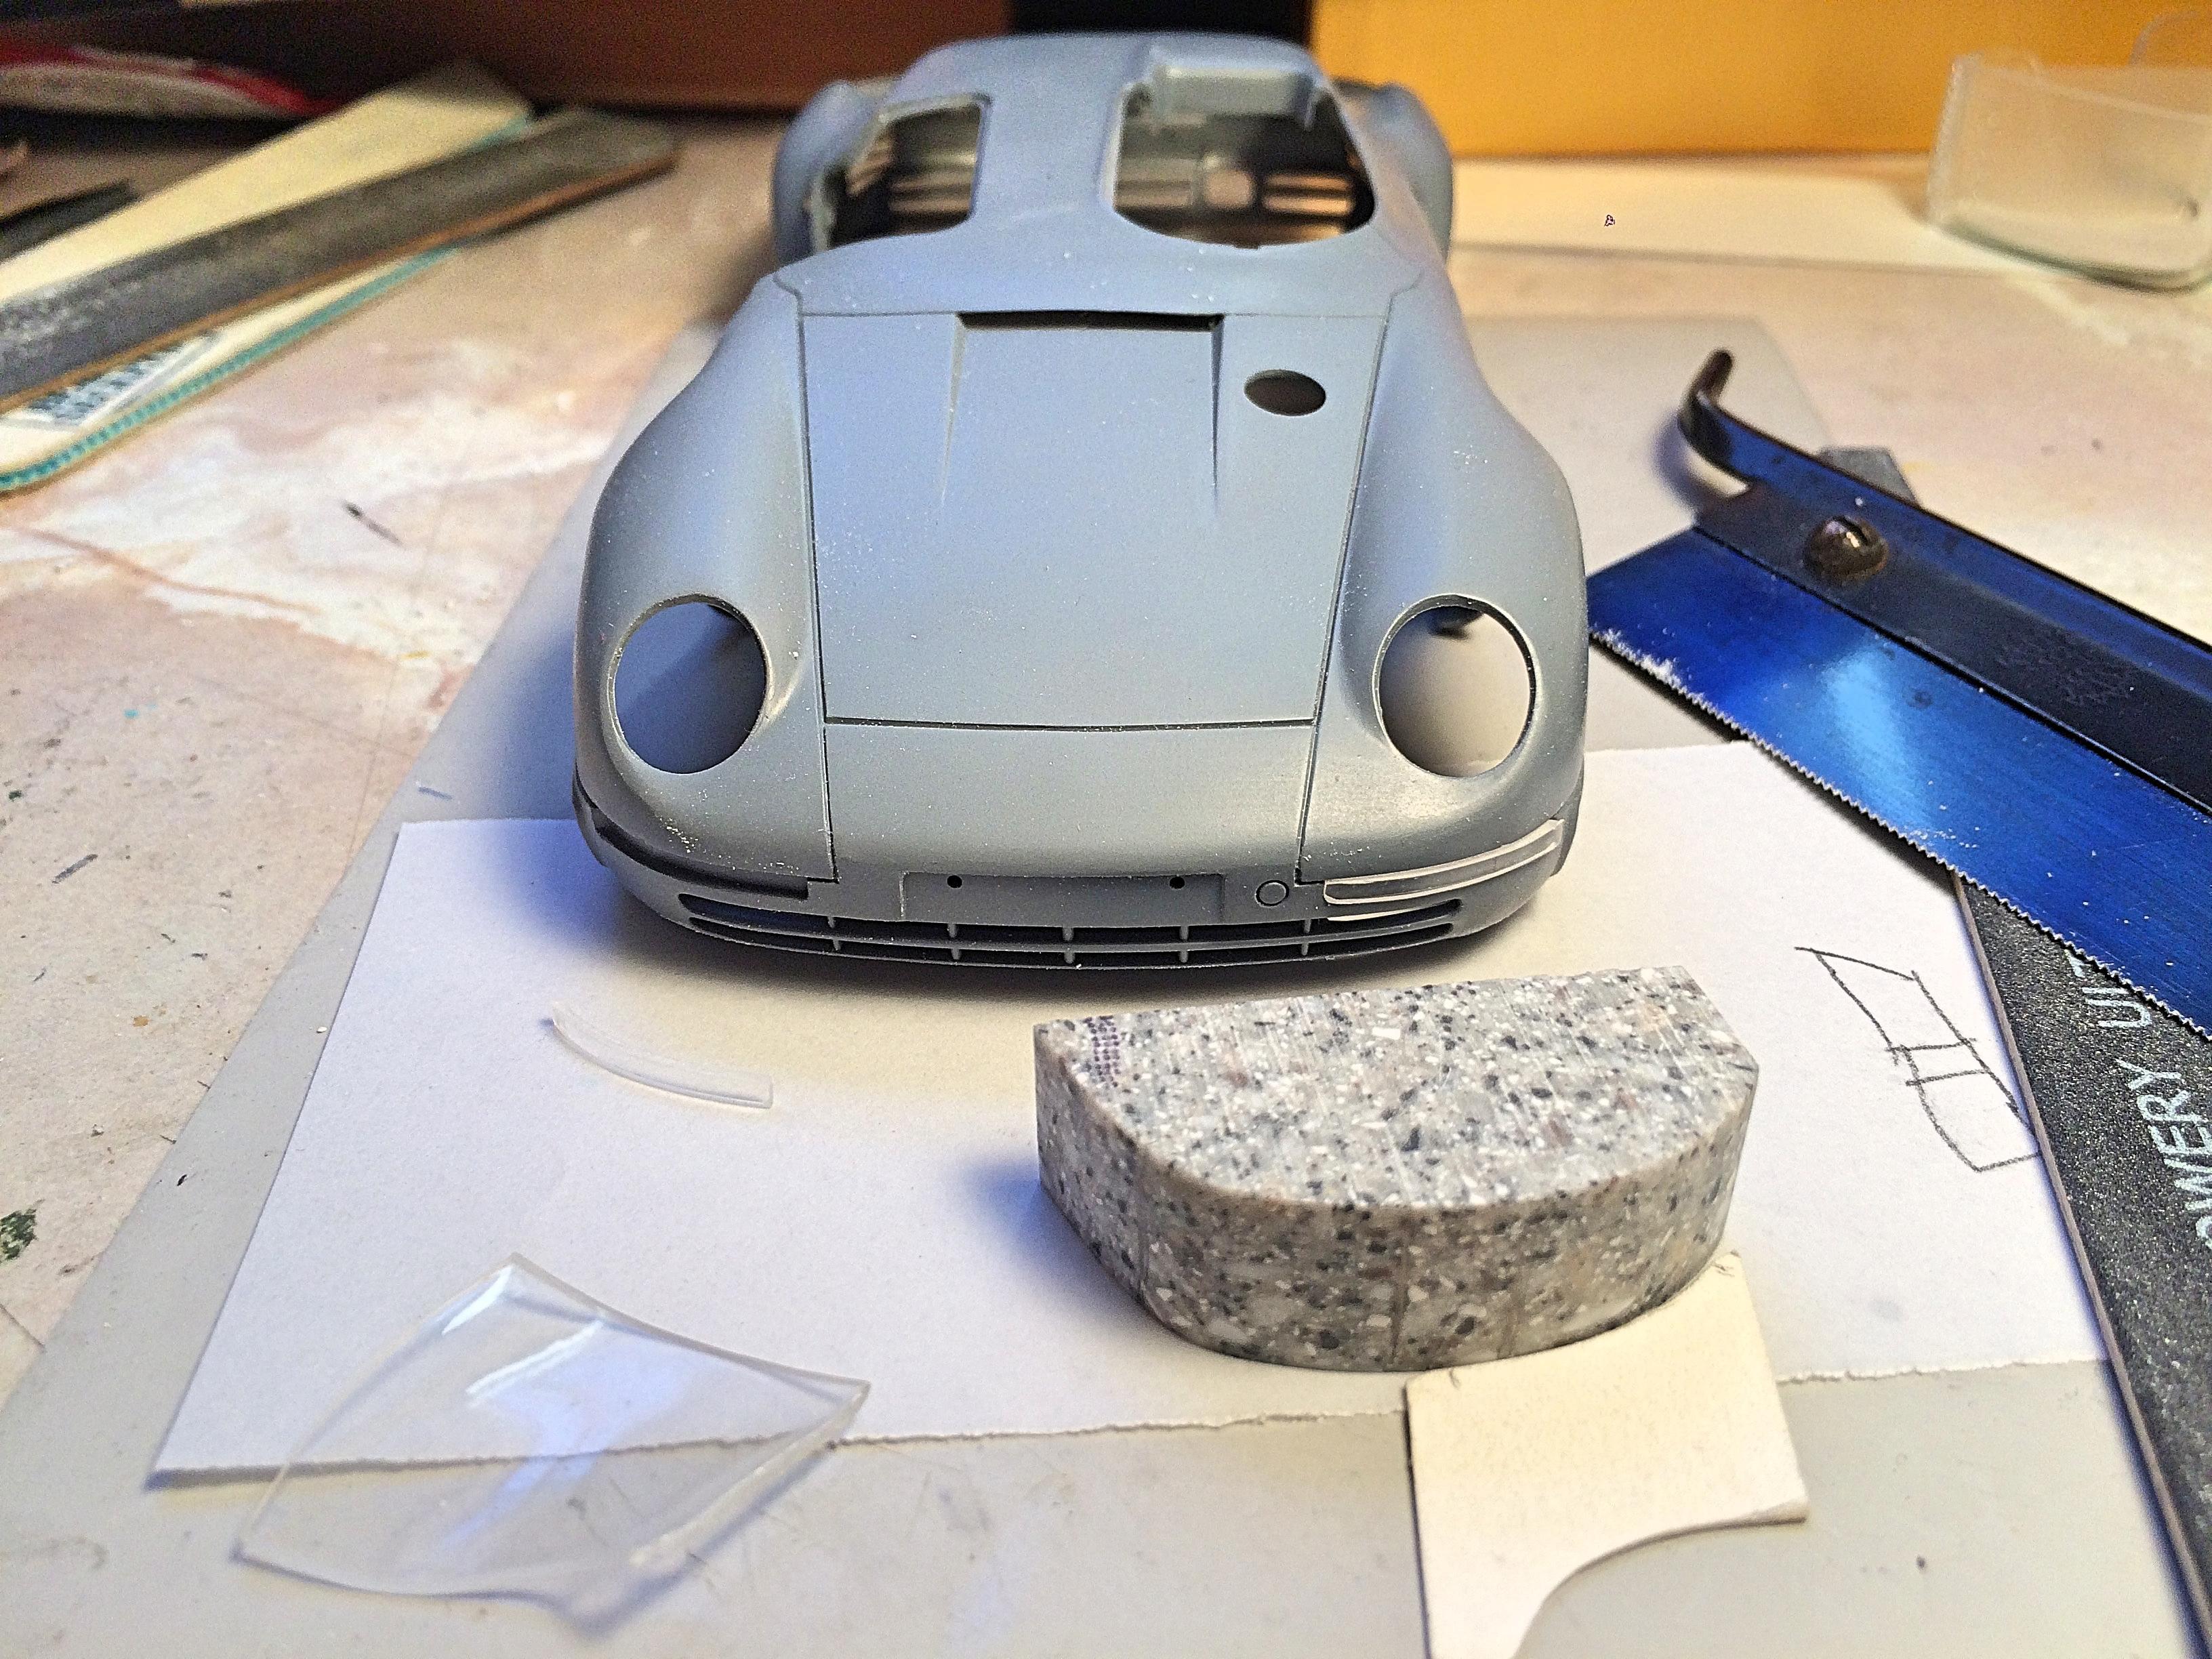
Here is the hard way.... Make a pattern, I used Corian because it shapes easy and is resistant to heat (can bend metal sheet, say a soup can for example). Profile should be the back, my mistake was outside profile. Use a parts box windshield, heat over your range to get it soft (hold with pliers), then slap on the form. The piece should be much larger, then pick the best section, saw cut (don't use a knife), sand edges to final shape. You could do aftermarket "Alteza" style lights too, they are clear lens with round red lights. If you aren't a sadomasochist, then ignore this. ?
-
Anything that is low production and involved for manufacturing is going to cost. Over the years have acquired Herb Deeks set, which is cast metal rims which I don't like, but nice tires; Hobby Design and KA Models have turned aluminum rims which are superior. I have this kit! Pulling up a seat to watch your build. It's too bad there is no engine.
-
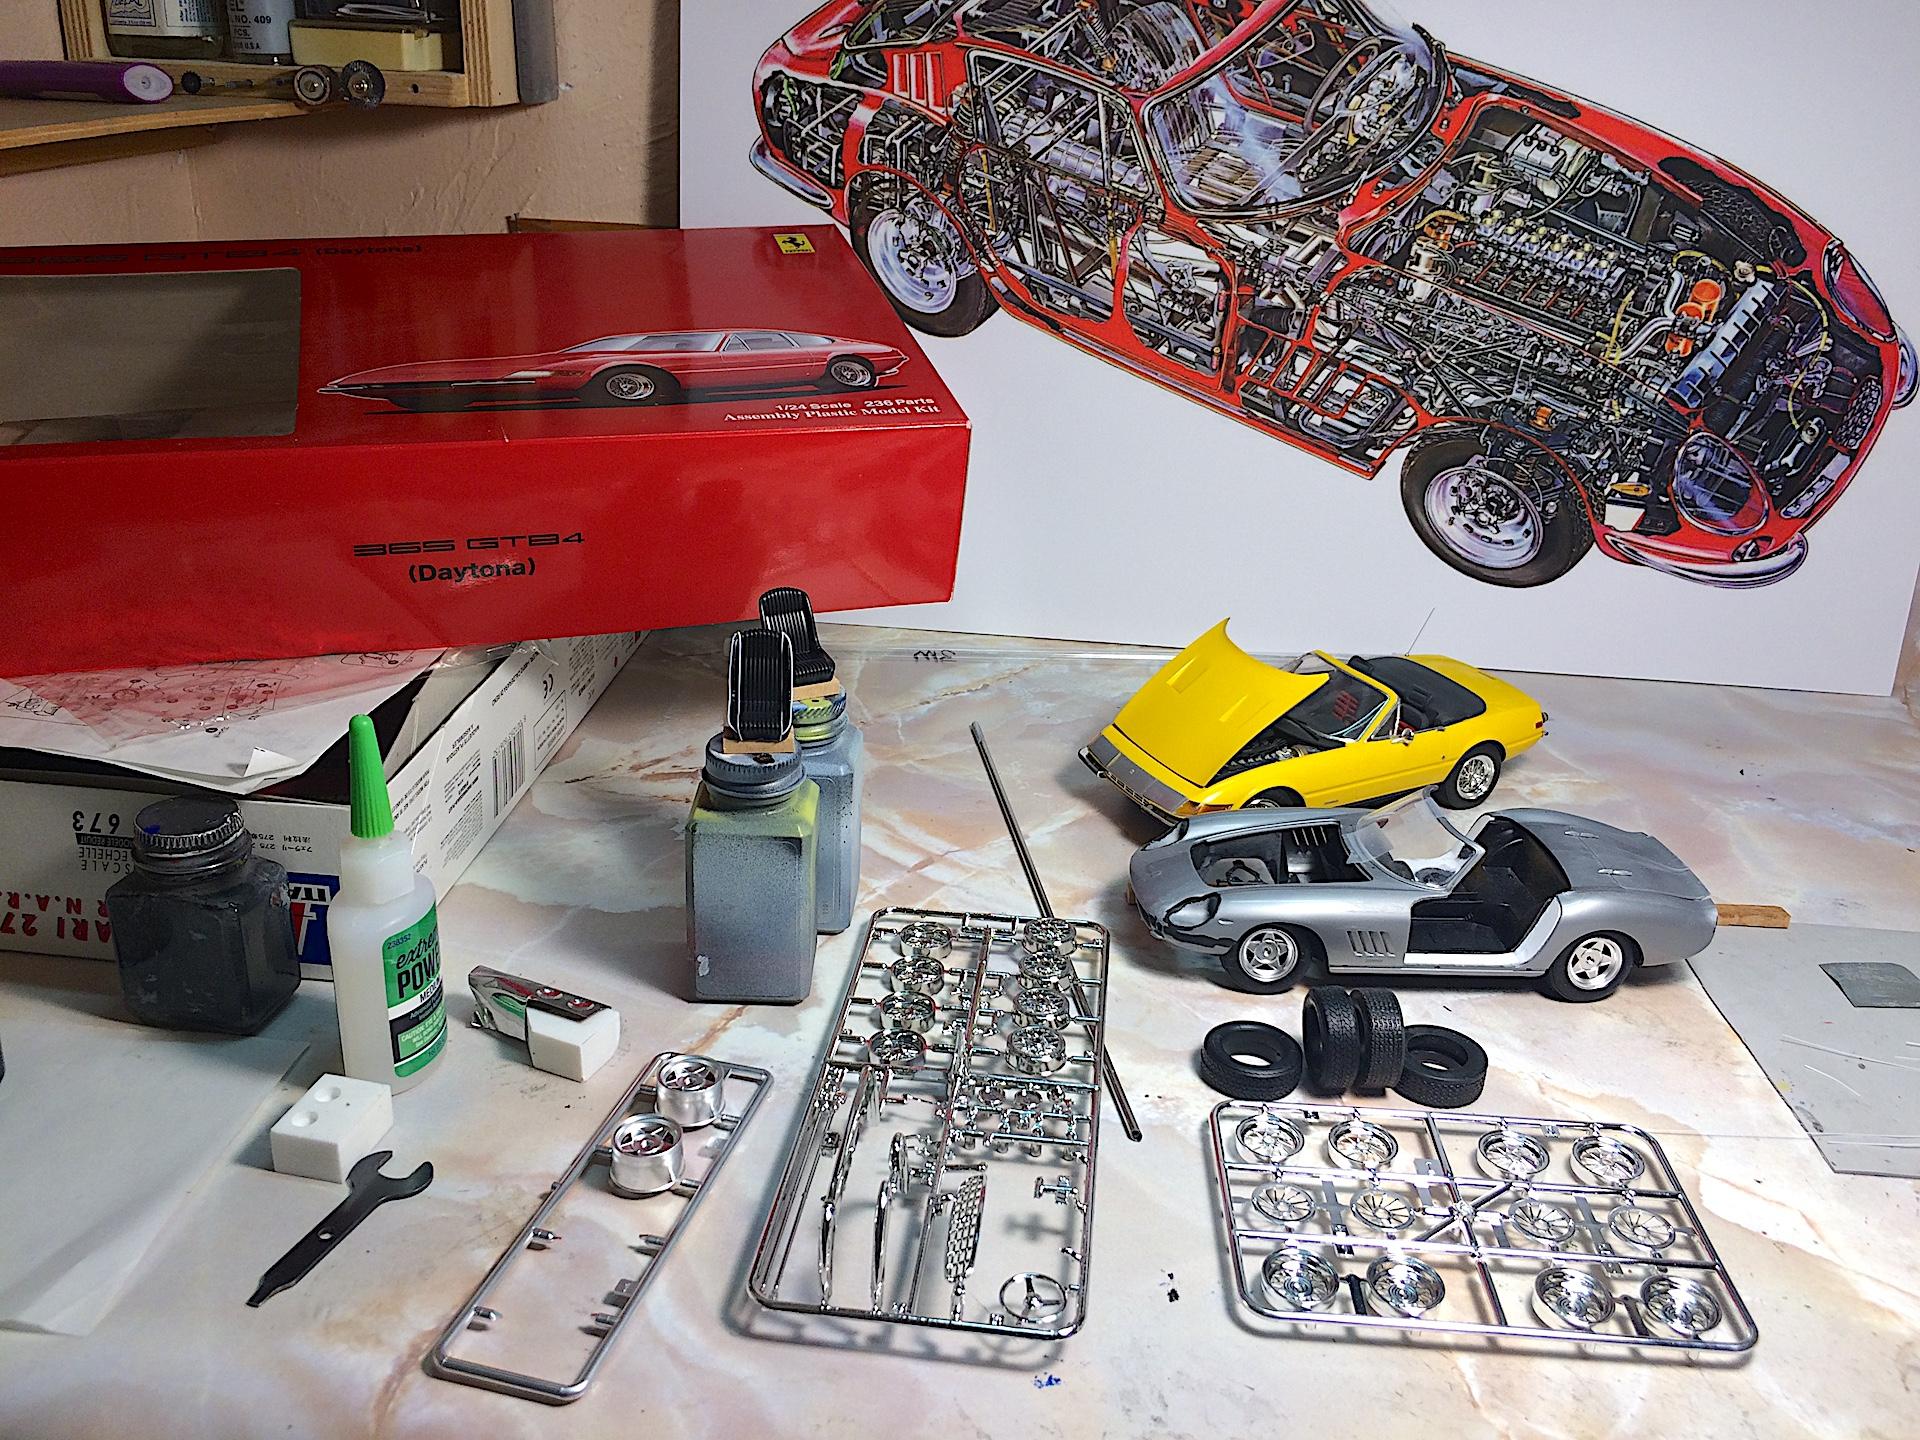
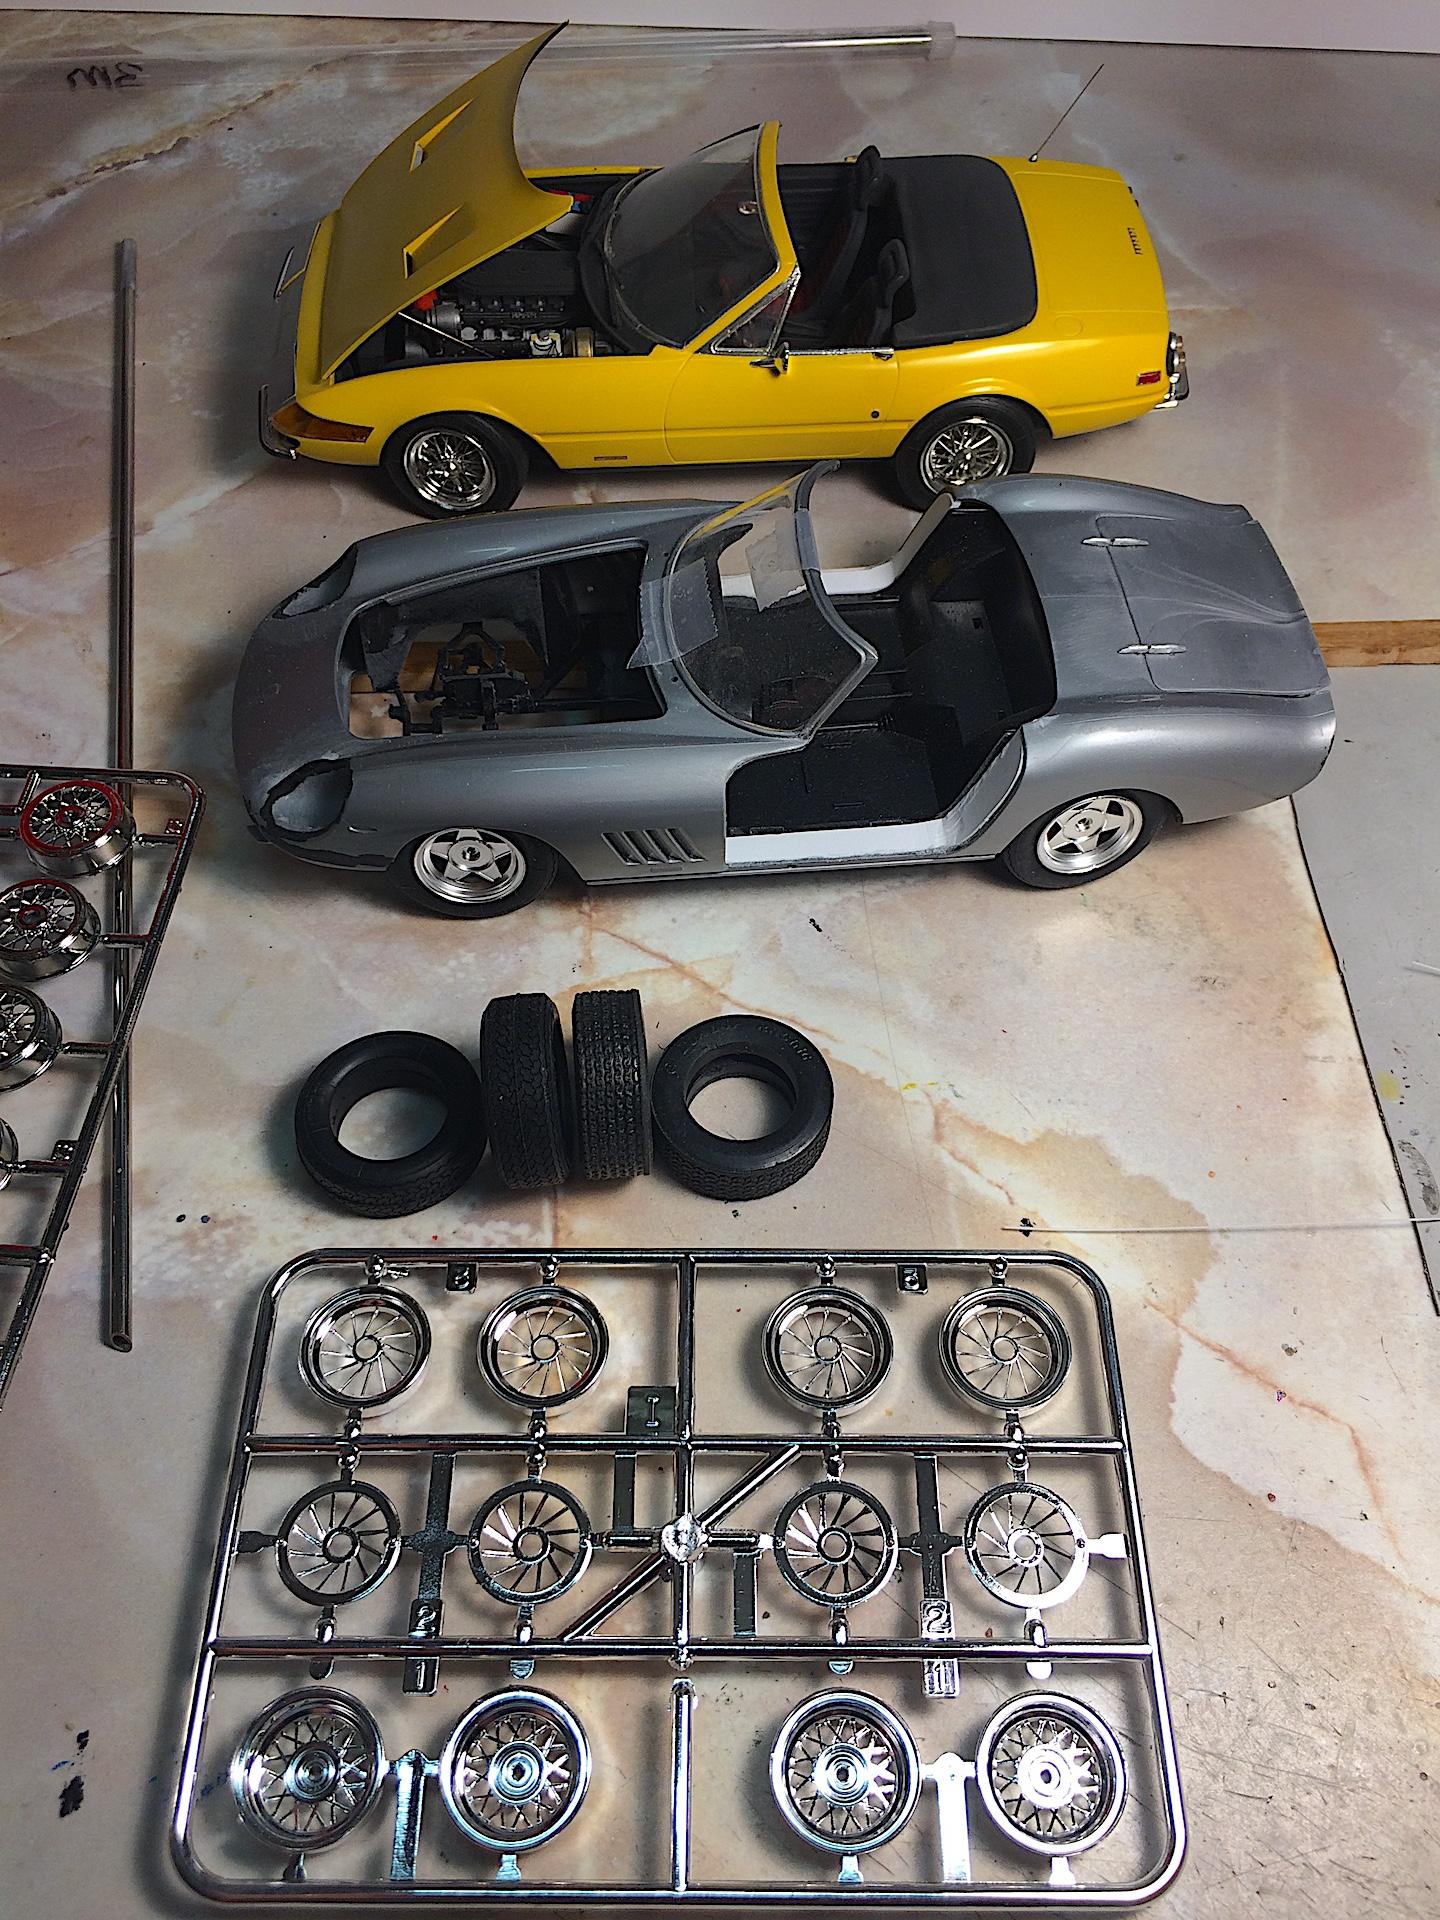
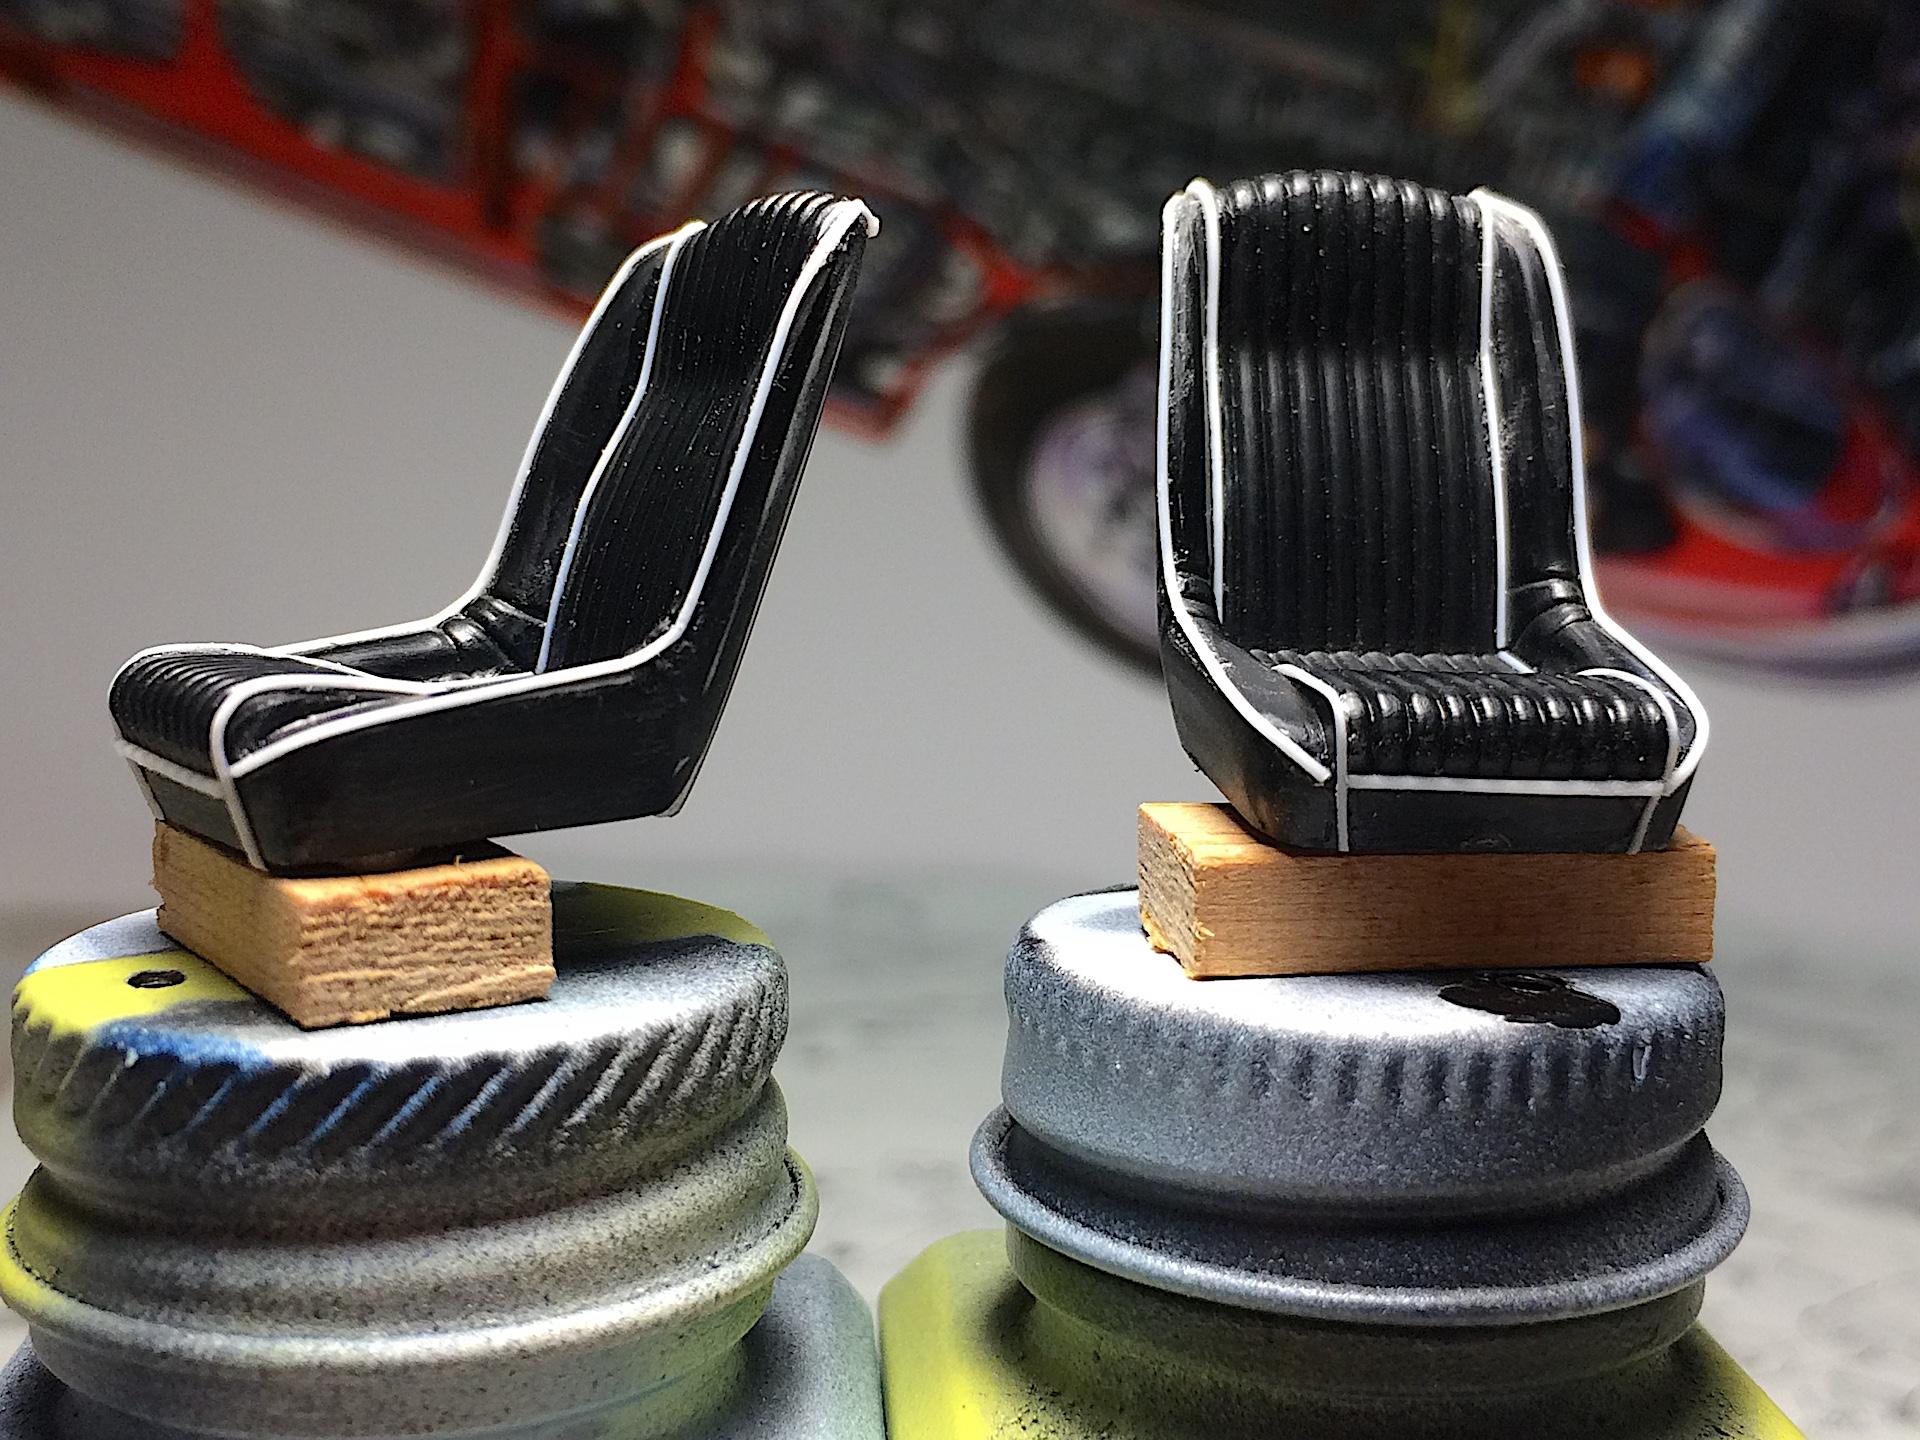
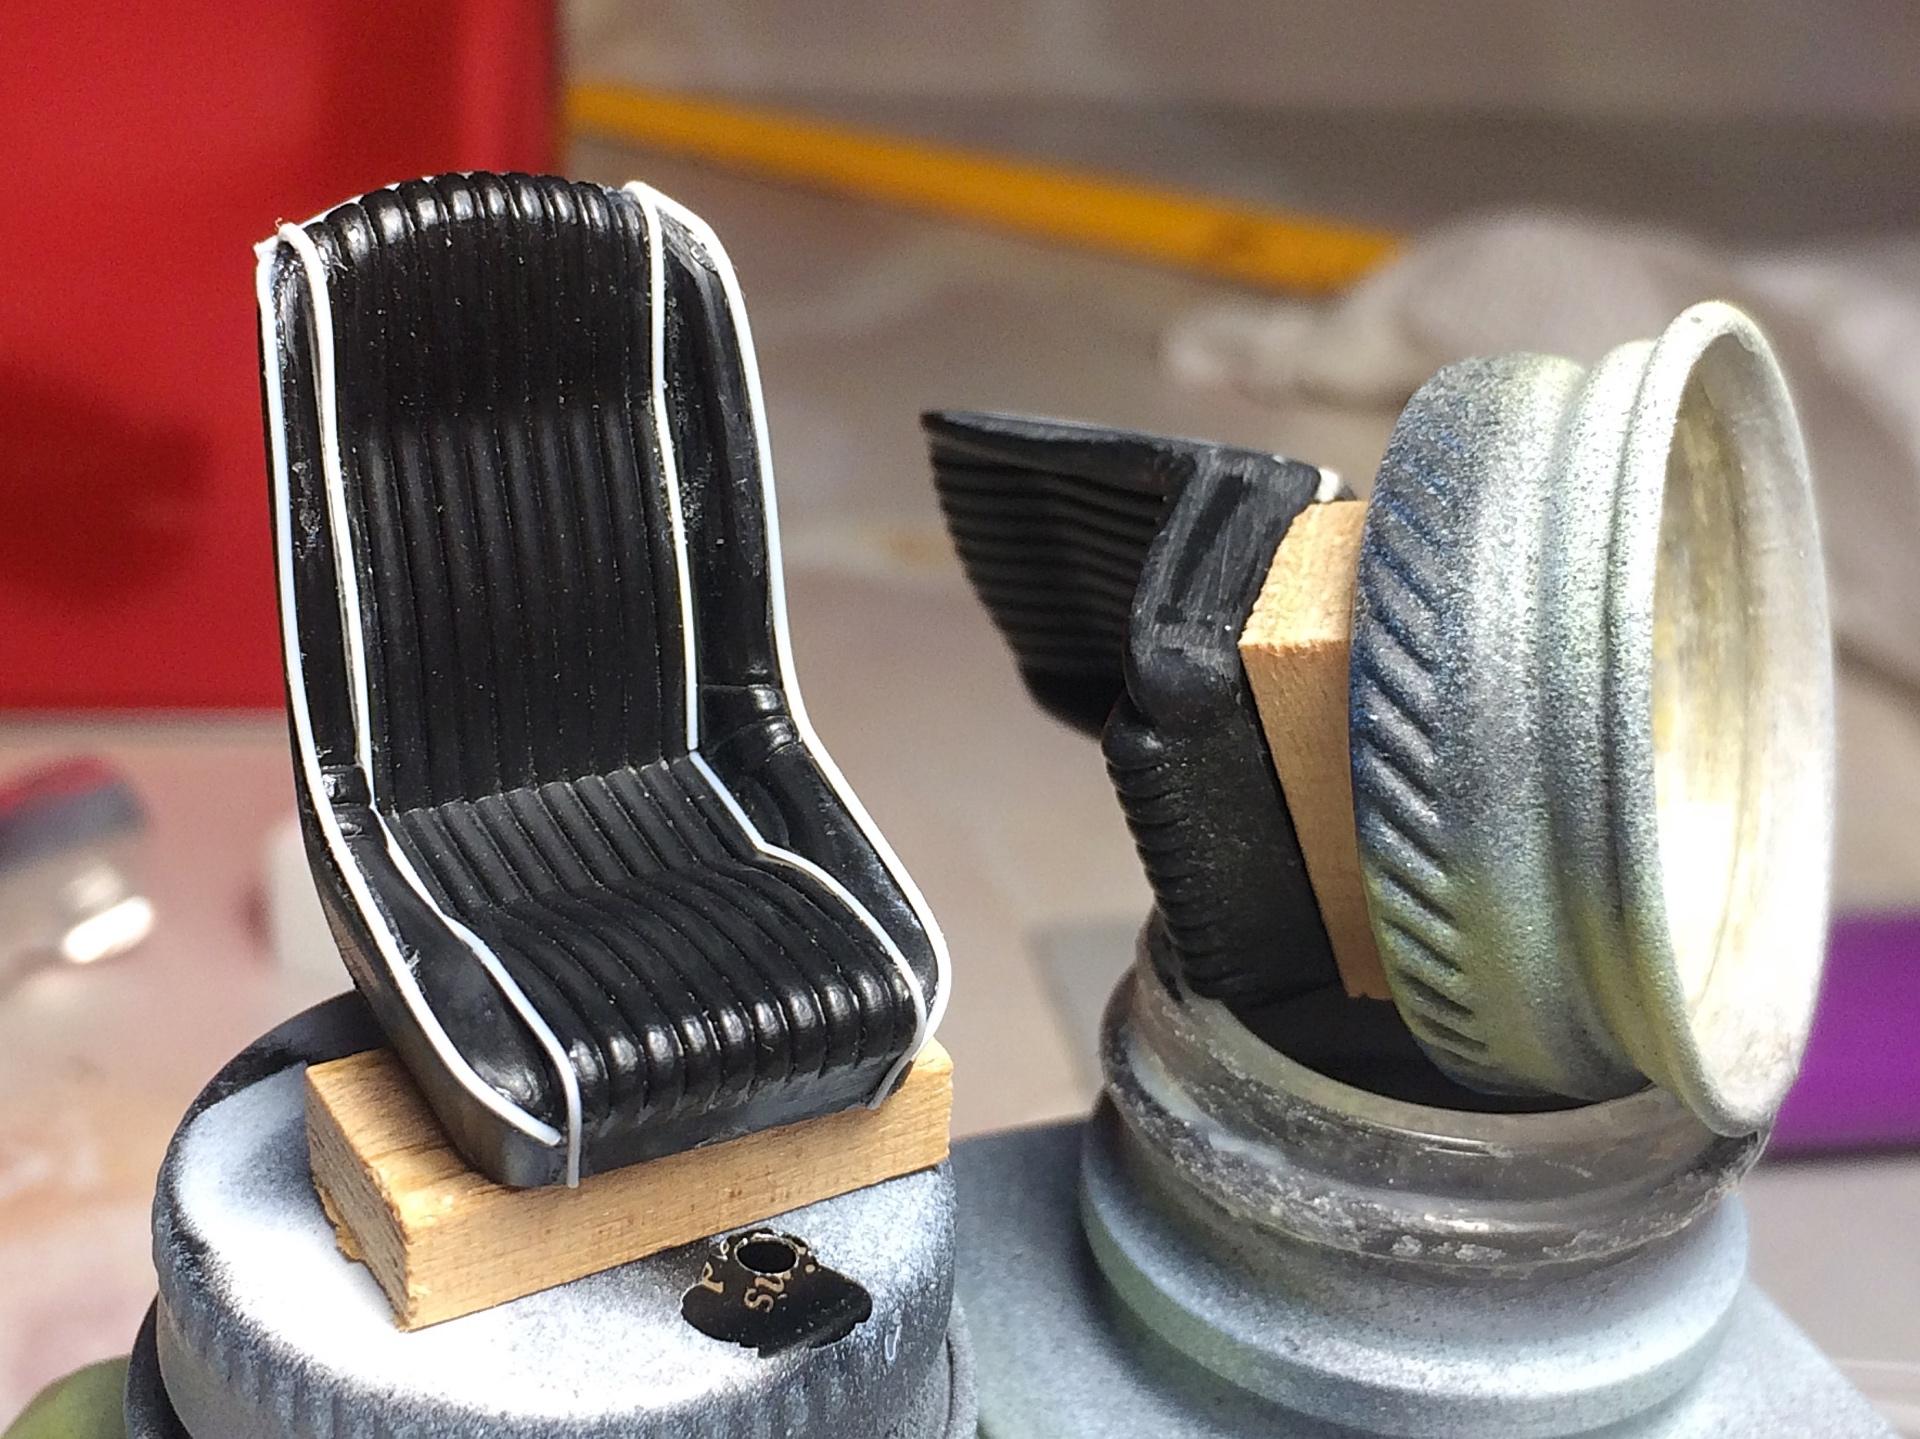
No worries, you bumped up my topic so I wouldn't have to dig down so far. ? Looks good, but I worry about tape adhesive going bad after awhile, but you said sealing helps. Could use wire too, especially with keeping a different color; my seats will be all tan. I know this is crazy, but I went on eBay and found a Fujimi Daytona being auctioned, waited to the last minute and put in the winning bid, so with Canadian exchange rate favoring the dollar it cost less with shipping, than getting one from Japan without shipping added. Will need to use the wire wheels too, which are nice units. I built the Daytona convertible last century. I'm also going to use steel tube for the exhaust tips. But I don't like the thick wall, found another source so will order and see what it looks like. Anyone want the Dunlop truck tires? I was playing with the alloy wheels..... Got the other seat done.
-
I'm still running around in shorts and sandals. ?
-
when news reporters
-
? I'm sure you have a similar wall. Yea, sometimes my back hurt, know slouching isn't good, or you talking about the minimal cushion? I'm crazy, not sure if I can make those open, but going to try. Later! Humidity ? and can't pack my shop. Took only one weekend, after thinking about it for about 20 years. I've been trying different lightbulbs, so many are dim, not the same as incandescent! Had a halogen that had coke glass, heavy and the lamp would keep falling down. When I'm done, that print will hang with 3 others (F40, 959, Countach). Always keep your eyes open, and don't be afraid to try new techniques!
-
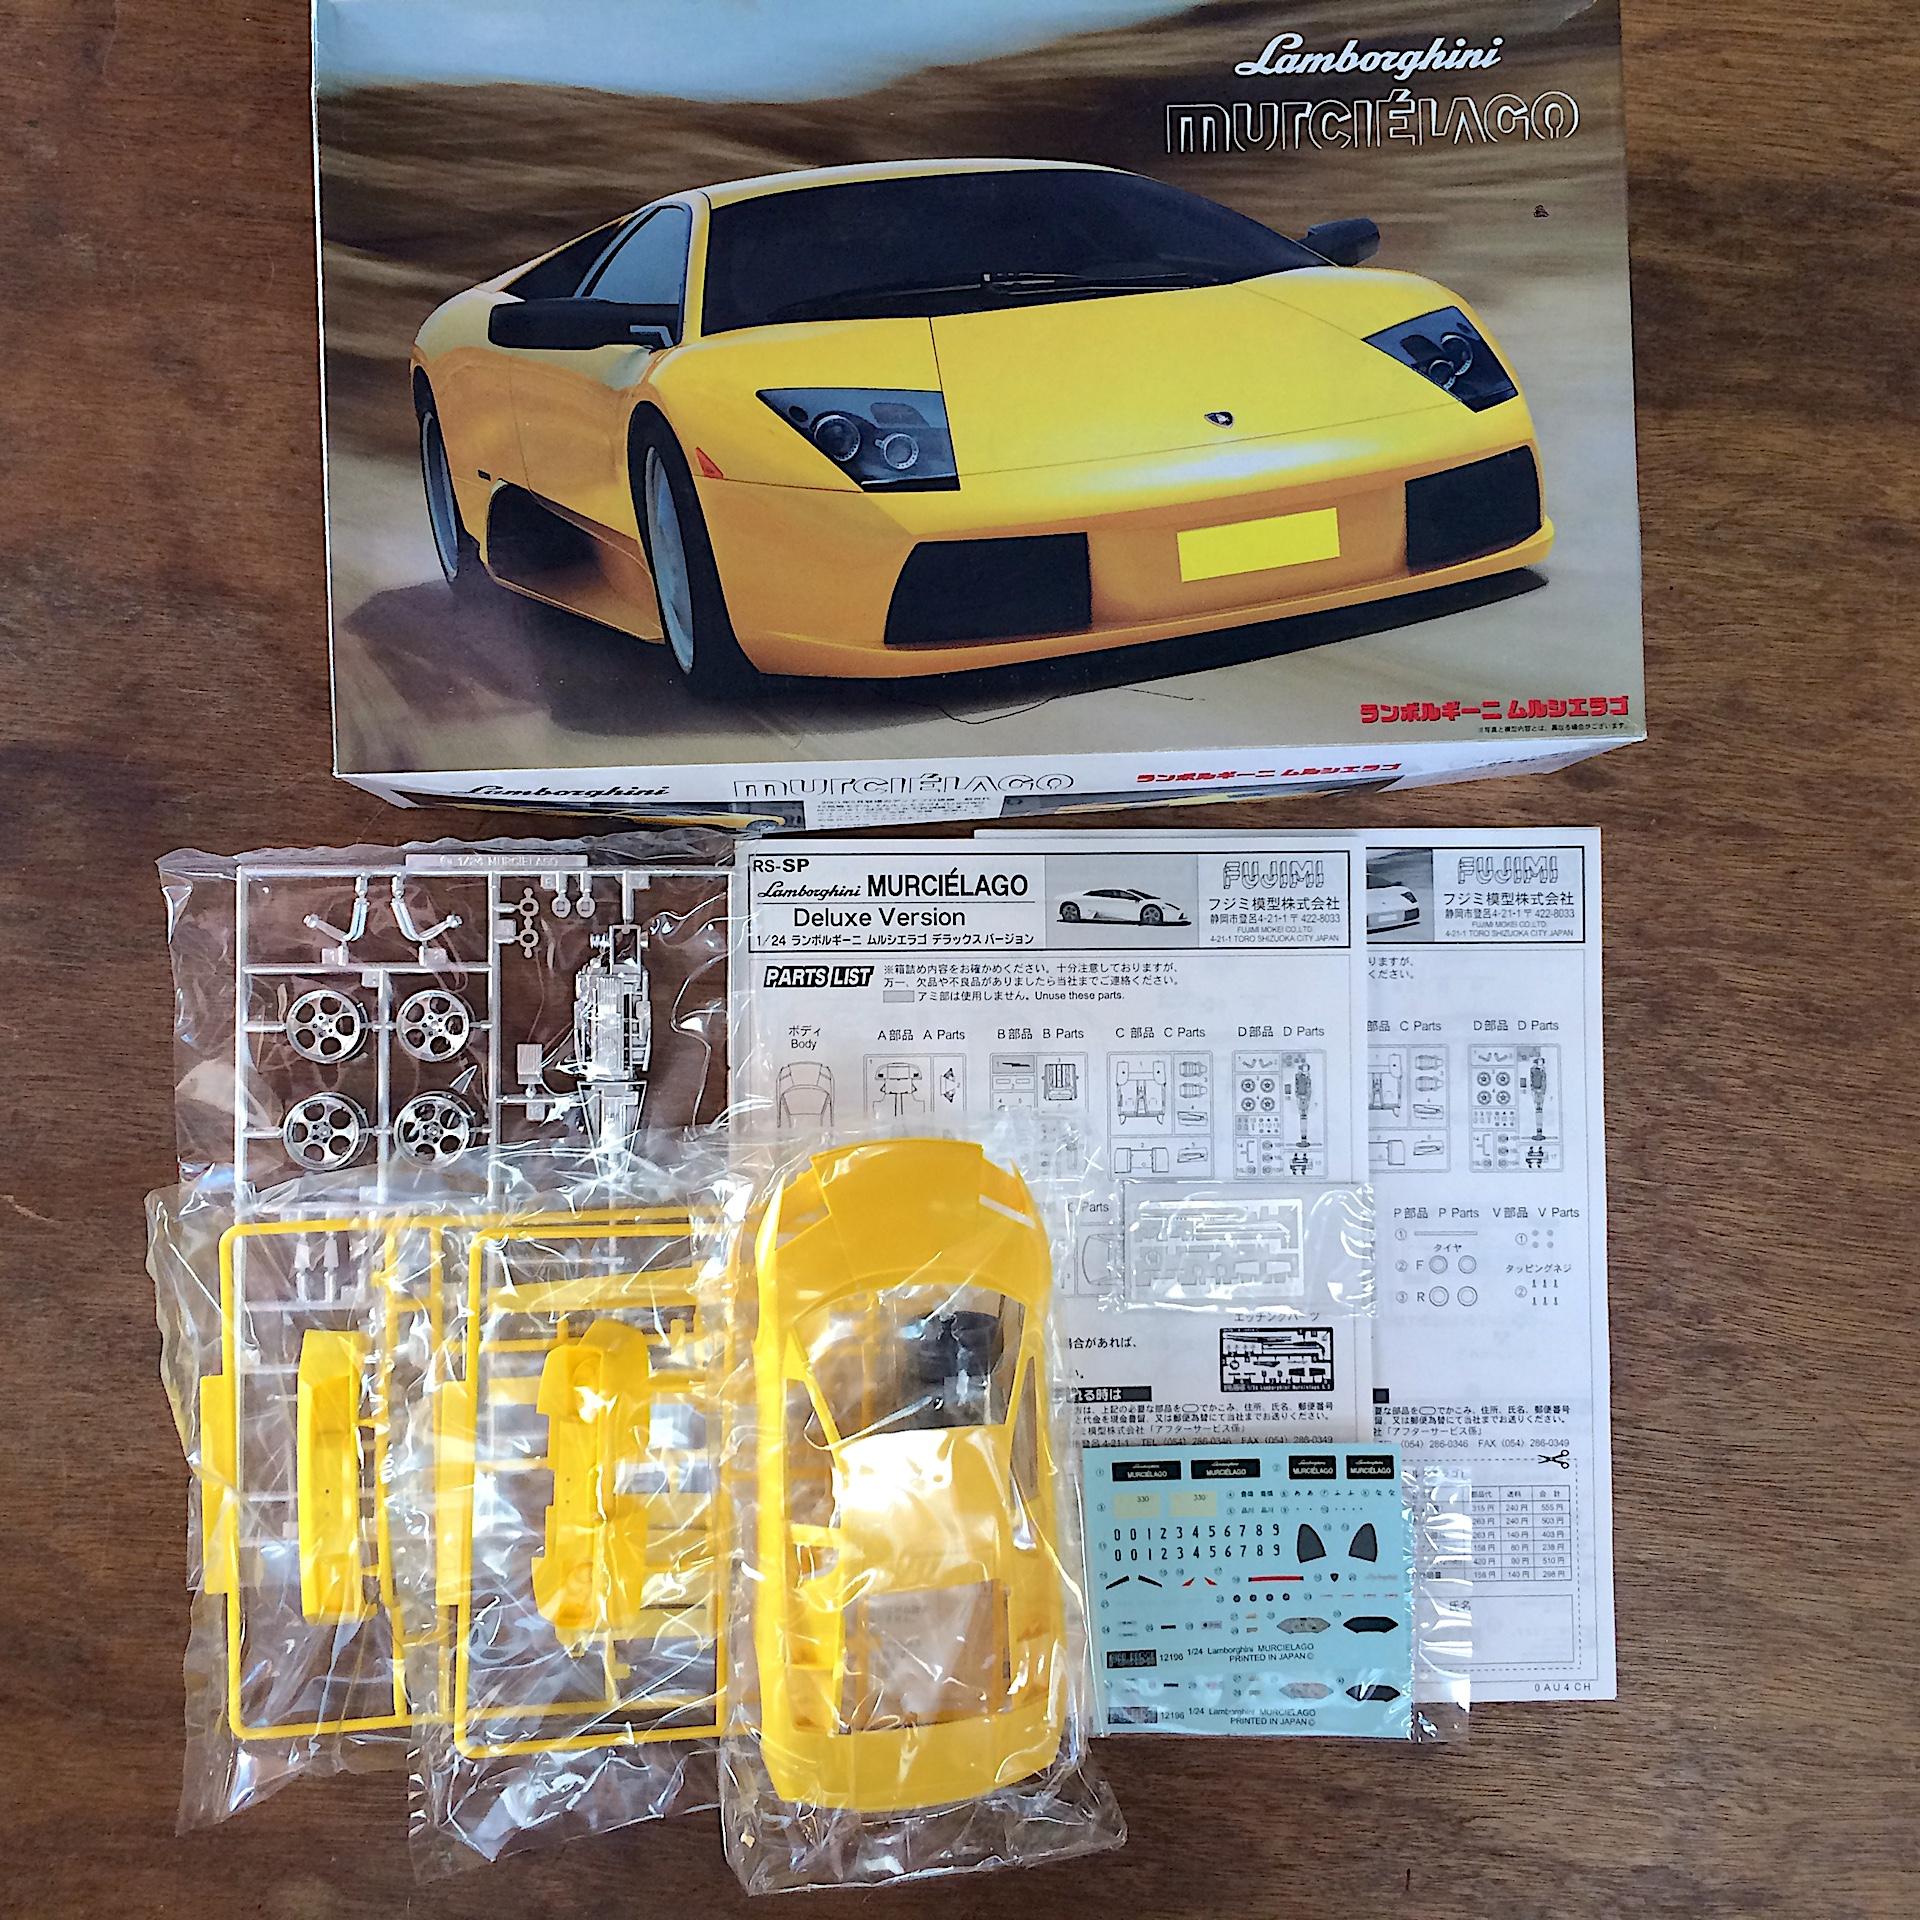
Friend picked up a collection from a builder who couldn't build anymore, if there is a way to show what's available on this forum, let me know. For myself, got this Lamborghini, appears he had two, includes the photo-etch.
-
to play games
-
Yea, cameras have trouble with such colors, but I get the idea, nice to see something different. Are exhaust tips turned aluminum?
-
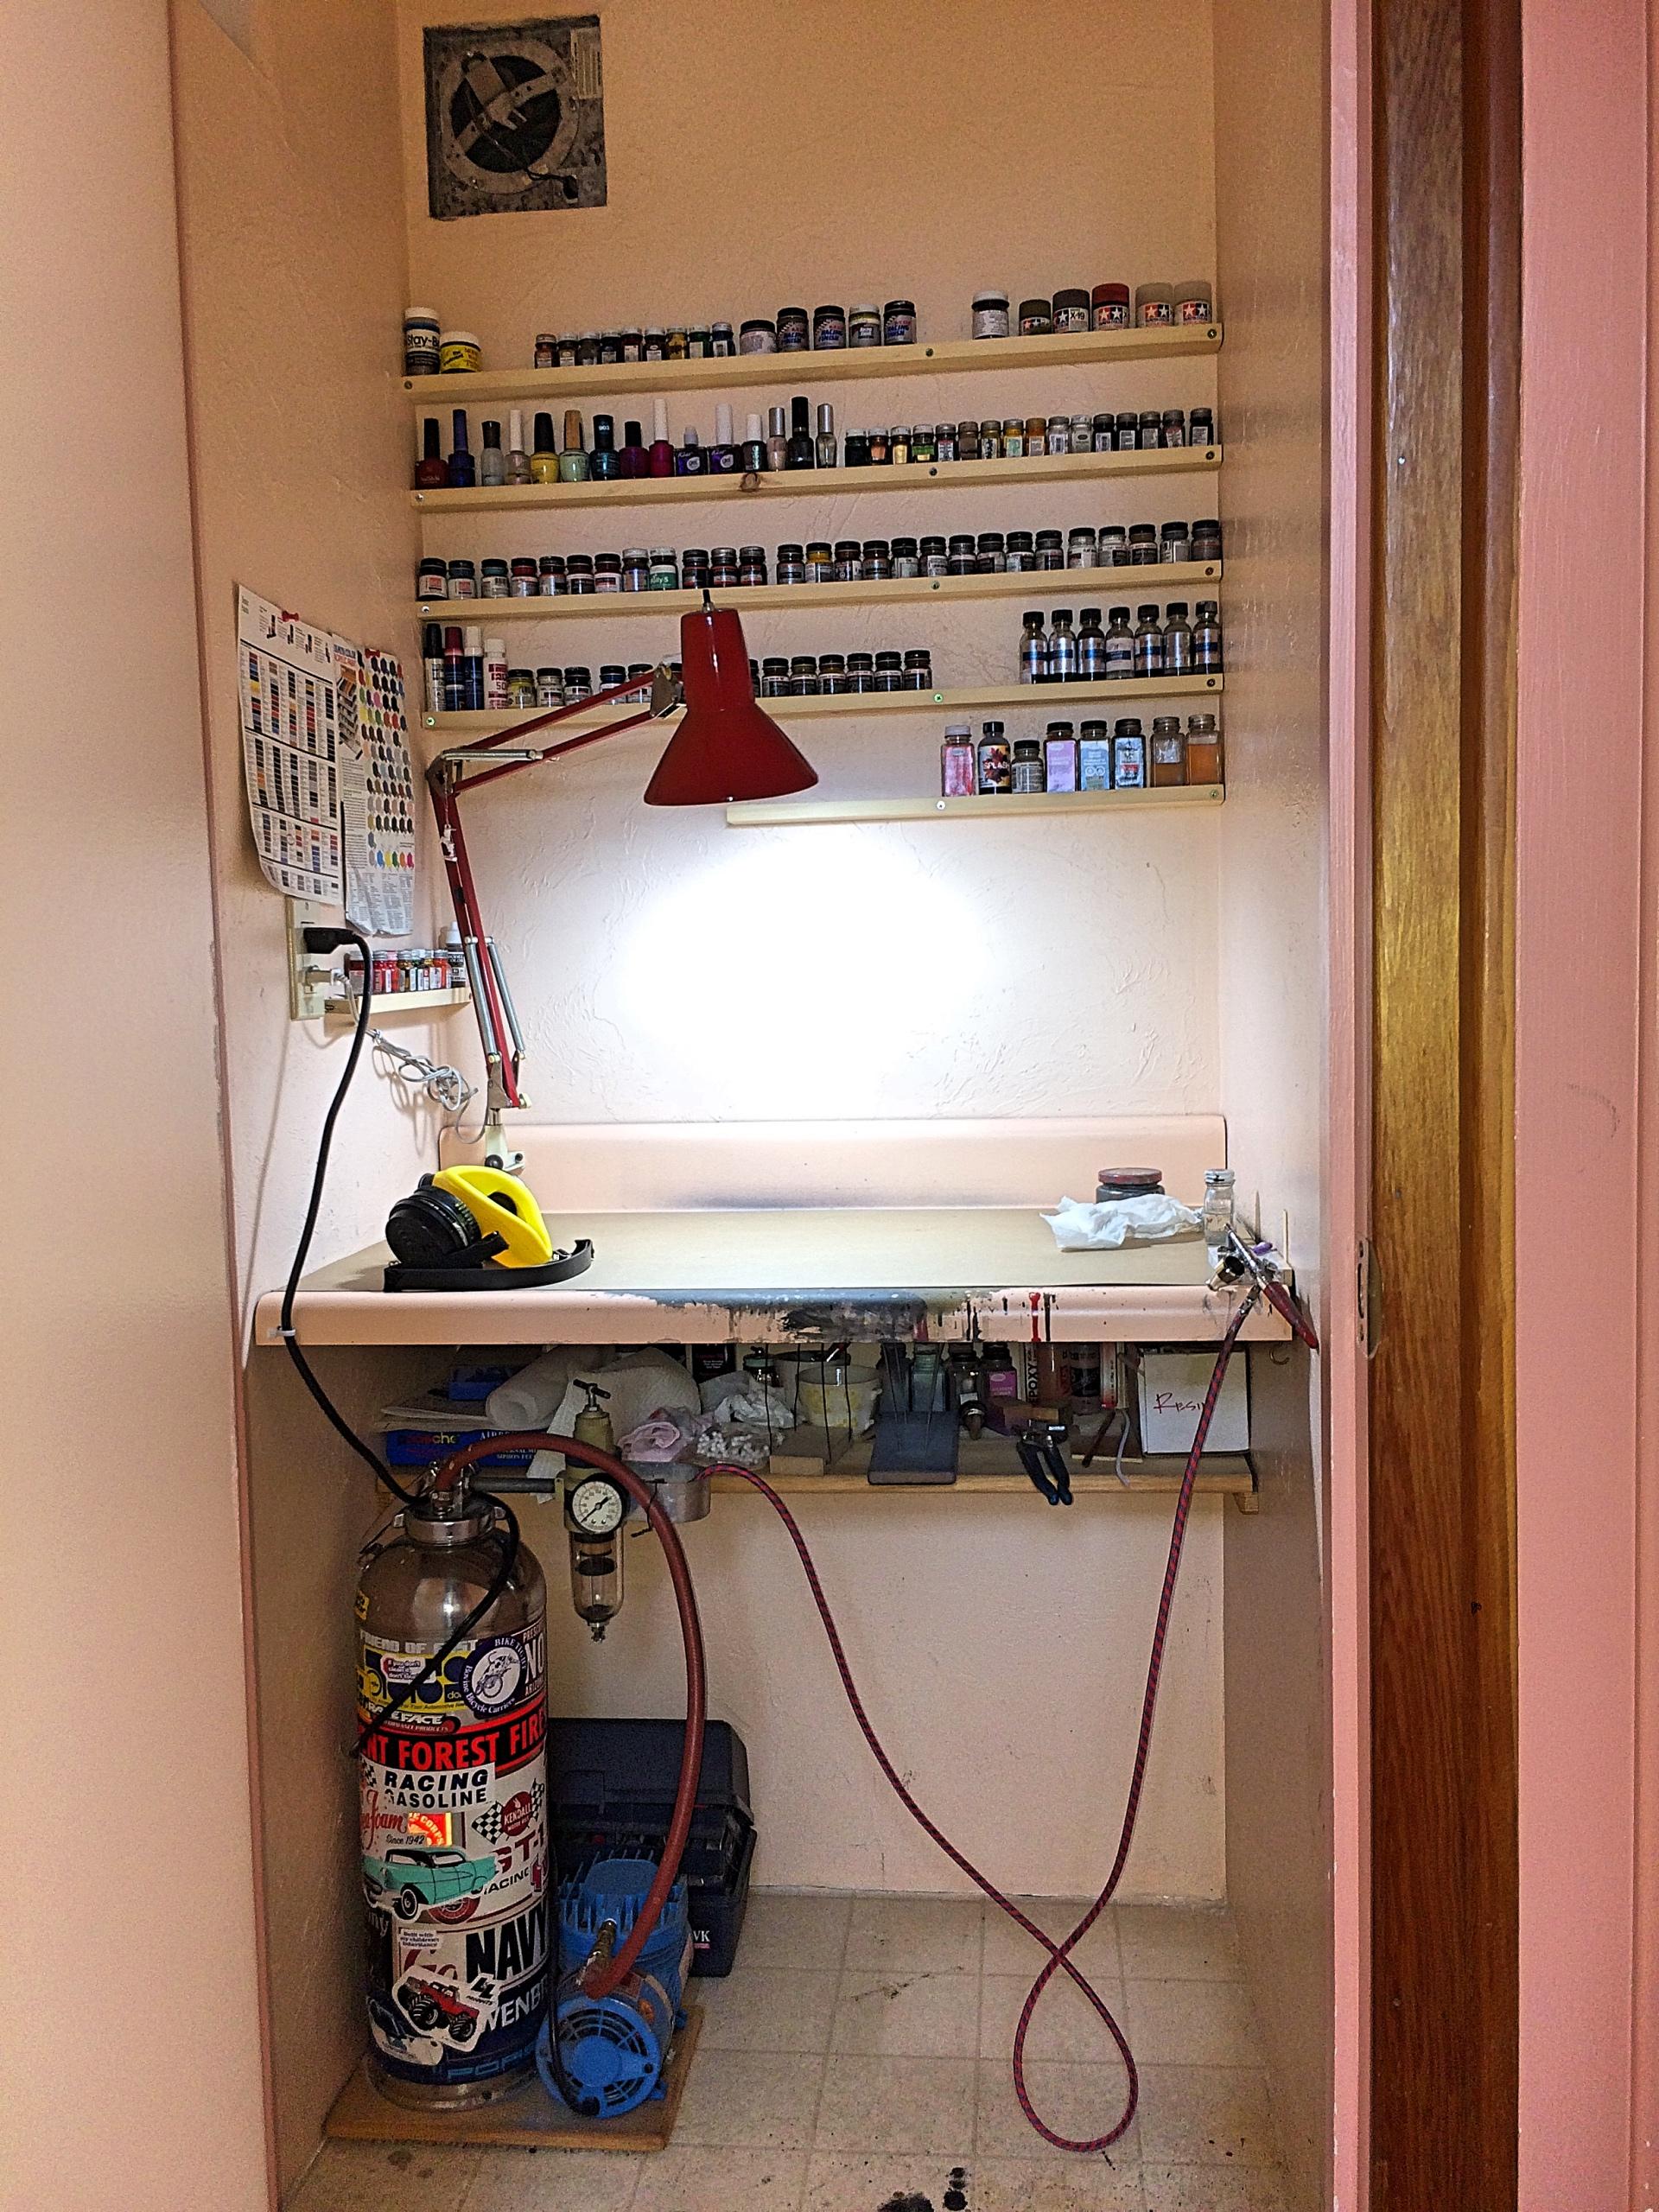
Back onto this project, after doing a major cleanup de-clutter of my hobby room! I used stretched sprue to add piping to a seat. I glued fat sprue with a hole drilled under the seats, drilled holes in the lids of these paint bottles. I like using these bottles, good weight, don't tip over, usually tape parts to paint.
-
by militant vegans
-
How do I get anything done???
89AKurt replied to tbill's topic in General Automotive Talk (Trucks and Cars)
I know right? First thing will be to dump the tools on the bench. ? I finished today, so last pictures, I promise. Bookcase is arranged, and actually useful. Paintbooth is decluttered. I made some wider shelves, and used up the left over on the side. Covered the whole bench with cardboard, there was about 1/16" of paint on the old one! Little used toolbox is there now. Added another shelf to the right, for boxes of scrap for scratch-building, it was always hogging bench space too. So glad to have done this!!!!!! ? Ok, back to the regularly scheduled program.
-
Anyone Getting Ready For Winter?
89AKurt replied to OldTrucker's topic in General Automotive Talk (Trucks and Cars)
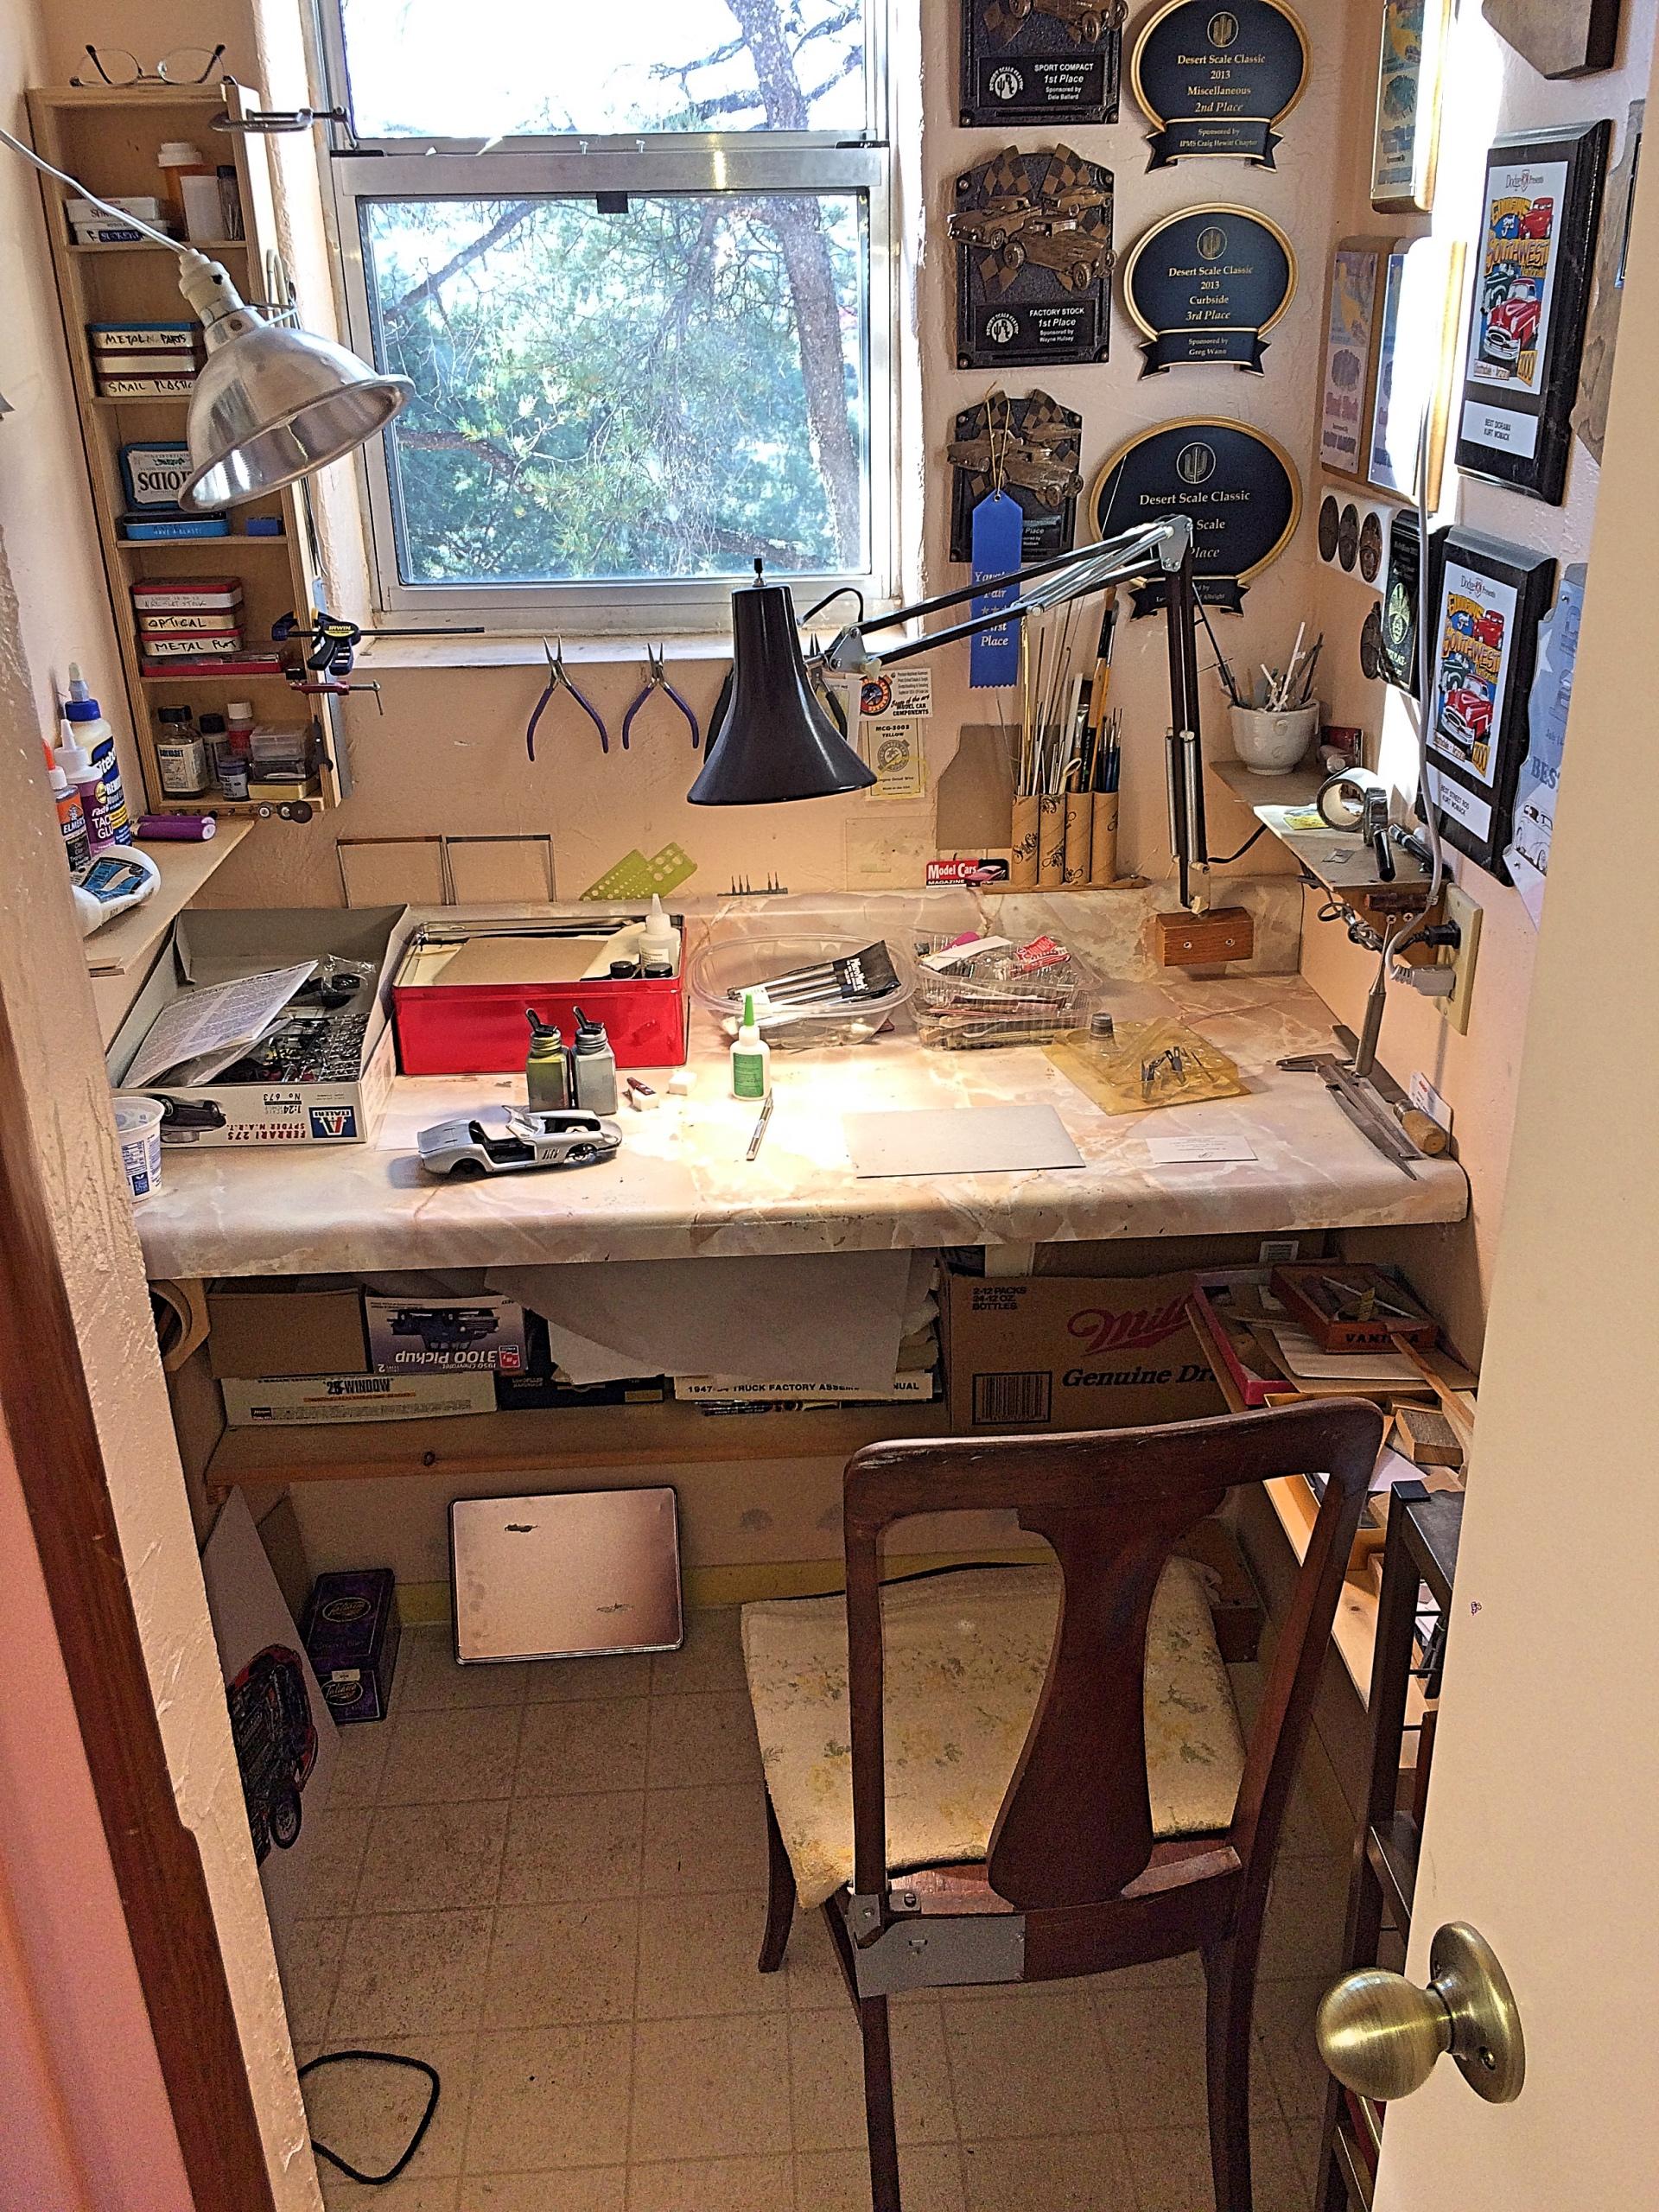
Guess I can say that I prepared for winter. It's still beautiful weather in Arizona, so I could keep the door open between my office/hobby room and wood shop. I cleared off my bench and shelves and paint booth, and made new shelving. Should have done this last century. Bench before: Bench after: Paint booth before: Paint booth after: Amazing what I put up with all these years. Now it can drop below freezing. ?
-
That is awesome work, love the bumpers especially. I know you spent some time creating that, since I did this for another magazine competition. I thought Imperials were also banned for demo derbies, perhaps that's a regional rule, since I read the County Fair rules when I did mine. I also did a "before" version, less work than "after". [/url]
-
How do I get anything done???
89AKurt replied to tbill's topic in General Automotive Talk (Trucks and Cars)
Sorry, I can't get off your lawn..... but as I've said, your topic got me to clean up a couple decades of clutter. Wondered why I put up with it this long. Bookcase that I've had for about 50 years, top is a junkyard, not touching it for now. This is the before shot, will take a picture when I'm done. When I built my detached office and woodshop, have a 3' x 3' closet for a paint booth. I had stored my paint in the little luggage box, PITA to always get on my knees and rummage around. I've seen others have racks for their paint, so I ripped some shelves. I didn't realize they would take up so much length! ? Making more tomorrow, then thoroughly cleaning that space. This has been like a purging of demons. ?
-
due to stubbornness
-
Thanks for sharing. I take it this was a national level show by the sheer volume of entries. Love the rally cars, good to see they are so popular.
-
I second that motion!
-
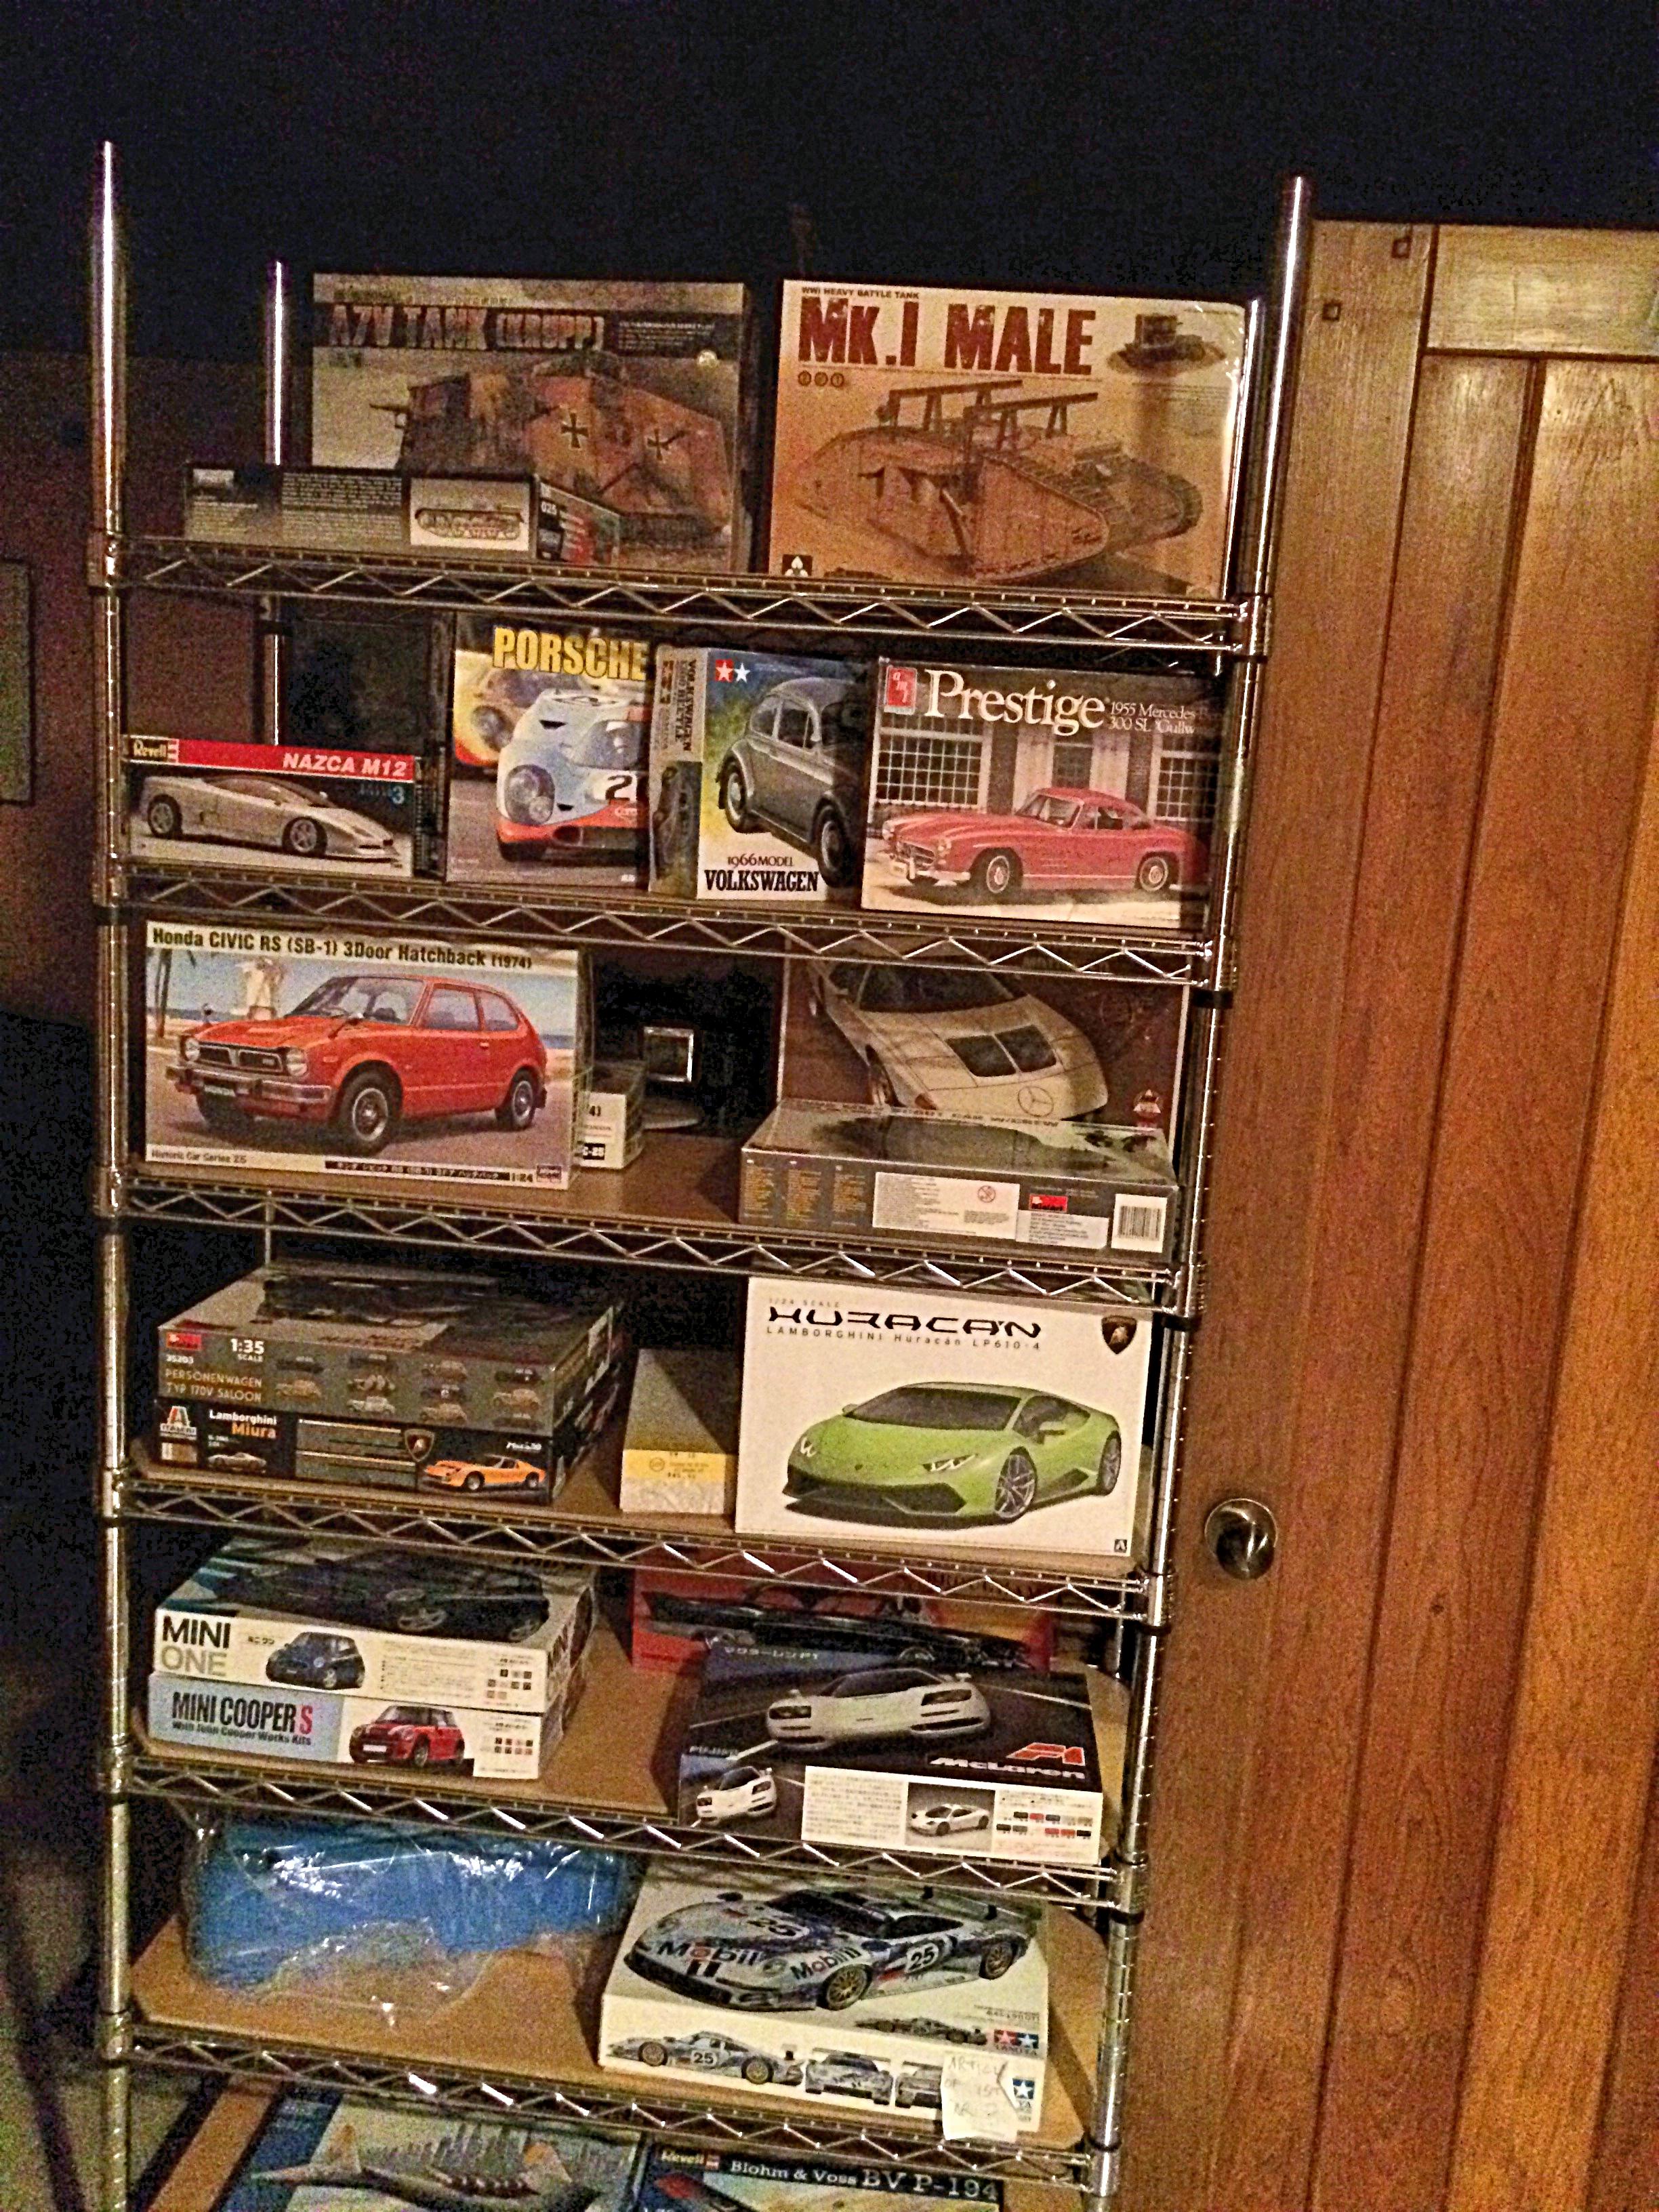
Can we see your model stash?
89AKurt replied to Fifer's topic in General Automotive Talk (Trucks and Cars)
I should become friends with some of you! ? These pictures are a few years old now. A store was going out of business, bought the rolling shelf unit, took some pictures for the "before" shots. ? Thought I had all the models I wanted, but this forum has corrupted me by discovering subjects that I didn't know existed. Have also learned to get something while it's available, because so much is limited production, or there is a tragic loss and you will never see it produced again. I would like to think it's an investment, some kits never gain value, and others surprise me when I look at eBay. Have a list, 155 kits, plus a bunch of aftermarket stuff such as engines and photo-etch; build ratio is about 03%. Today, a goal is to continue de-cluttering my work area, some of you are extremely neat, makes me ill. ?