89AKurt
-
Posts
8,426 -
Joined
-
Last visited
Content Type
Profiles
Forums
Events
Gallery
Everything posted by 89AKurt
-
Looks good from here! And I'm guilty of buying that too, but "regular" version. Thumbs up for building it!
-
made of hemp
-
For some reason, I could not reply in a previous message again, but I could send you a new one.
-
FYI: Can't send messages, says and error and goes to a completely different looking page.
-
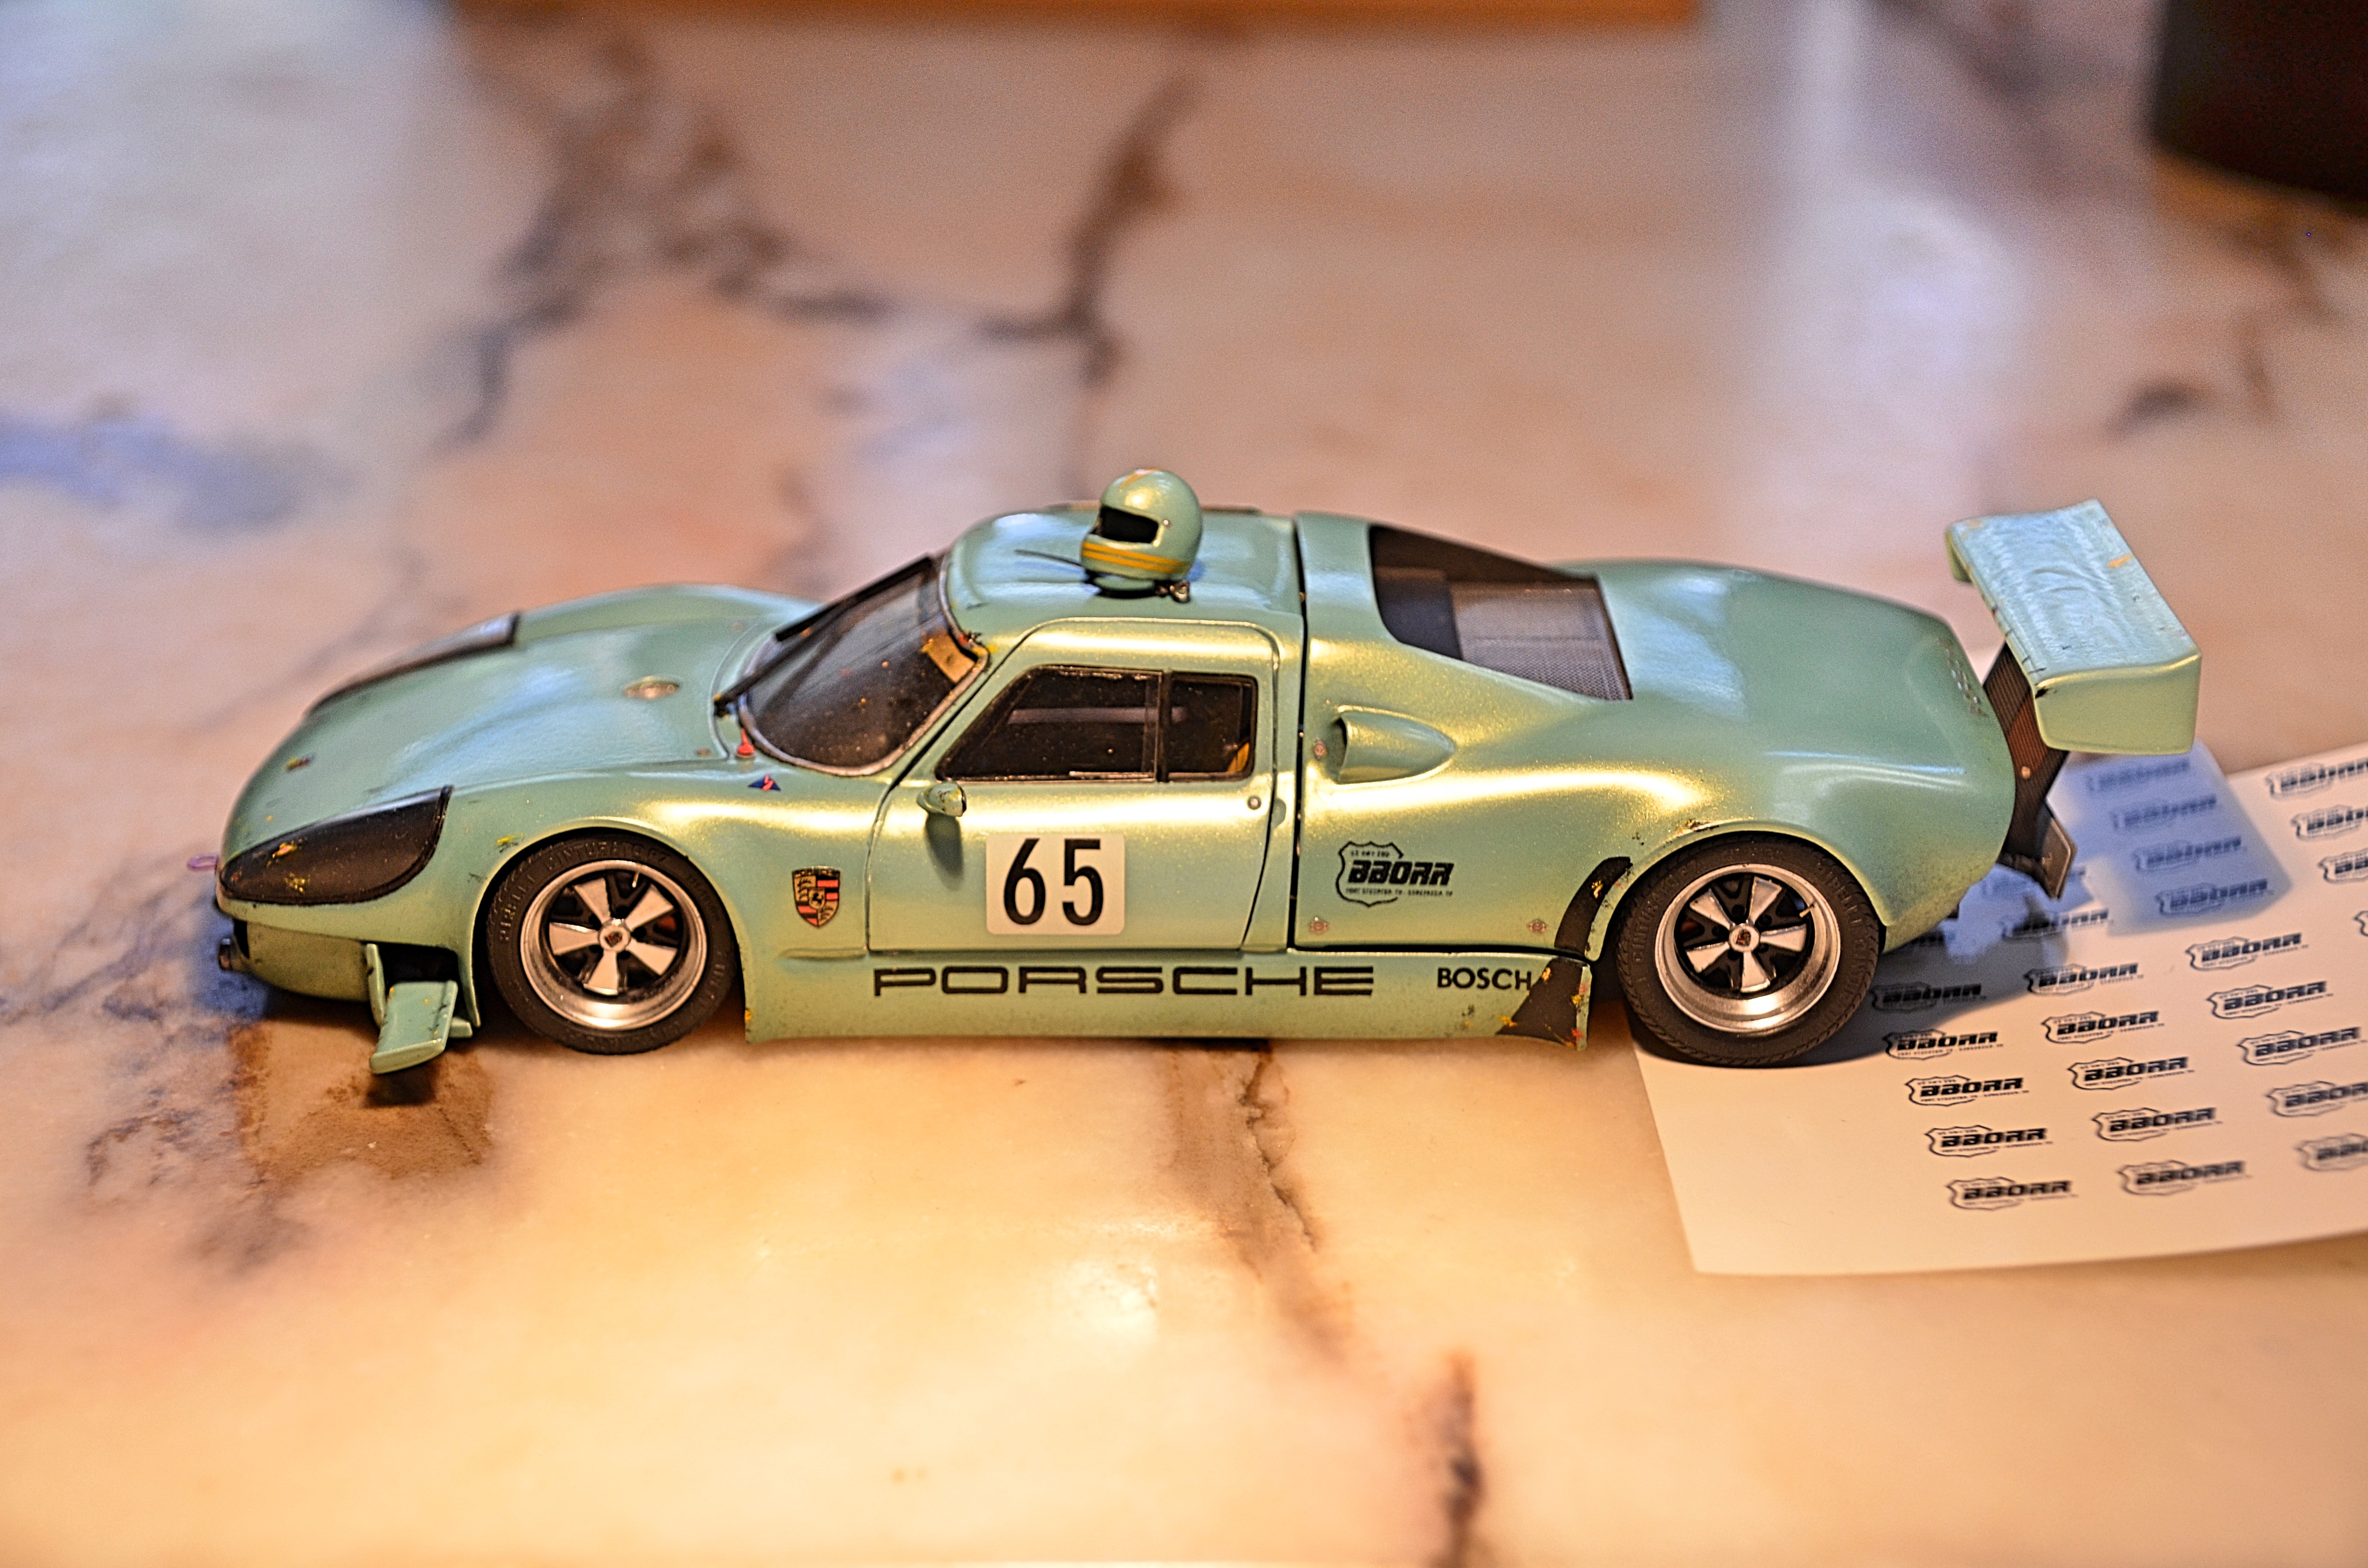
Due to mission creep, added more details, back to 99% complete. Lug nuts are in transit..... Someone on Facebook tracked down the Big Bend Open Road Race logo for me, I got it reduced to assumed size, printed onto Testors decal paper, sprayed with Krylon artist archival flat clear lacquer. If anyone wants some, let me know! cobraman helped me out with race numbers, thank you! I used the Indy driver's helmet, removed the face, hollowed out a little, used up the last of the nail 'polish', used the Indy pinstripe decals which happen to look like double yellow lines, added chin strap. I'm cropping side shots, makes it look a mile long.

-
hoping to find
-
with aluminum bat.
-

1978 Dodge D100
89AKurt replied to tuffone20's topic in Model Trucks: Pickups, Vans, SUVs, Light Commercial
Really nice job! I didn't know such a kit existed. My dad got a used '72, the first year of this body style. When I was a kid and these came out, was excited about the wrap-around taillights. I'm sort of surprised these are not popular for restoring. -
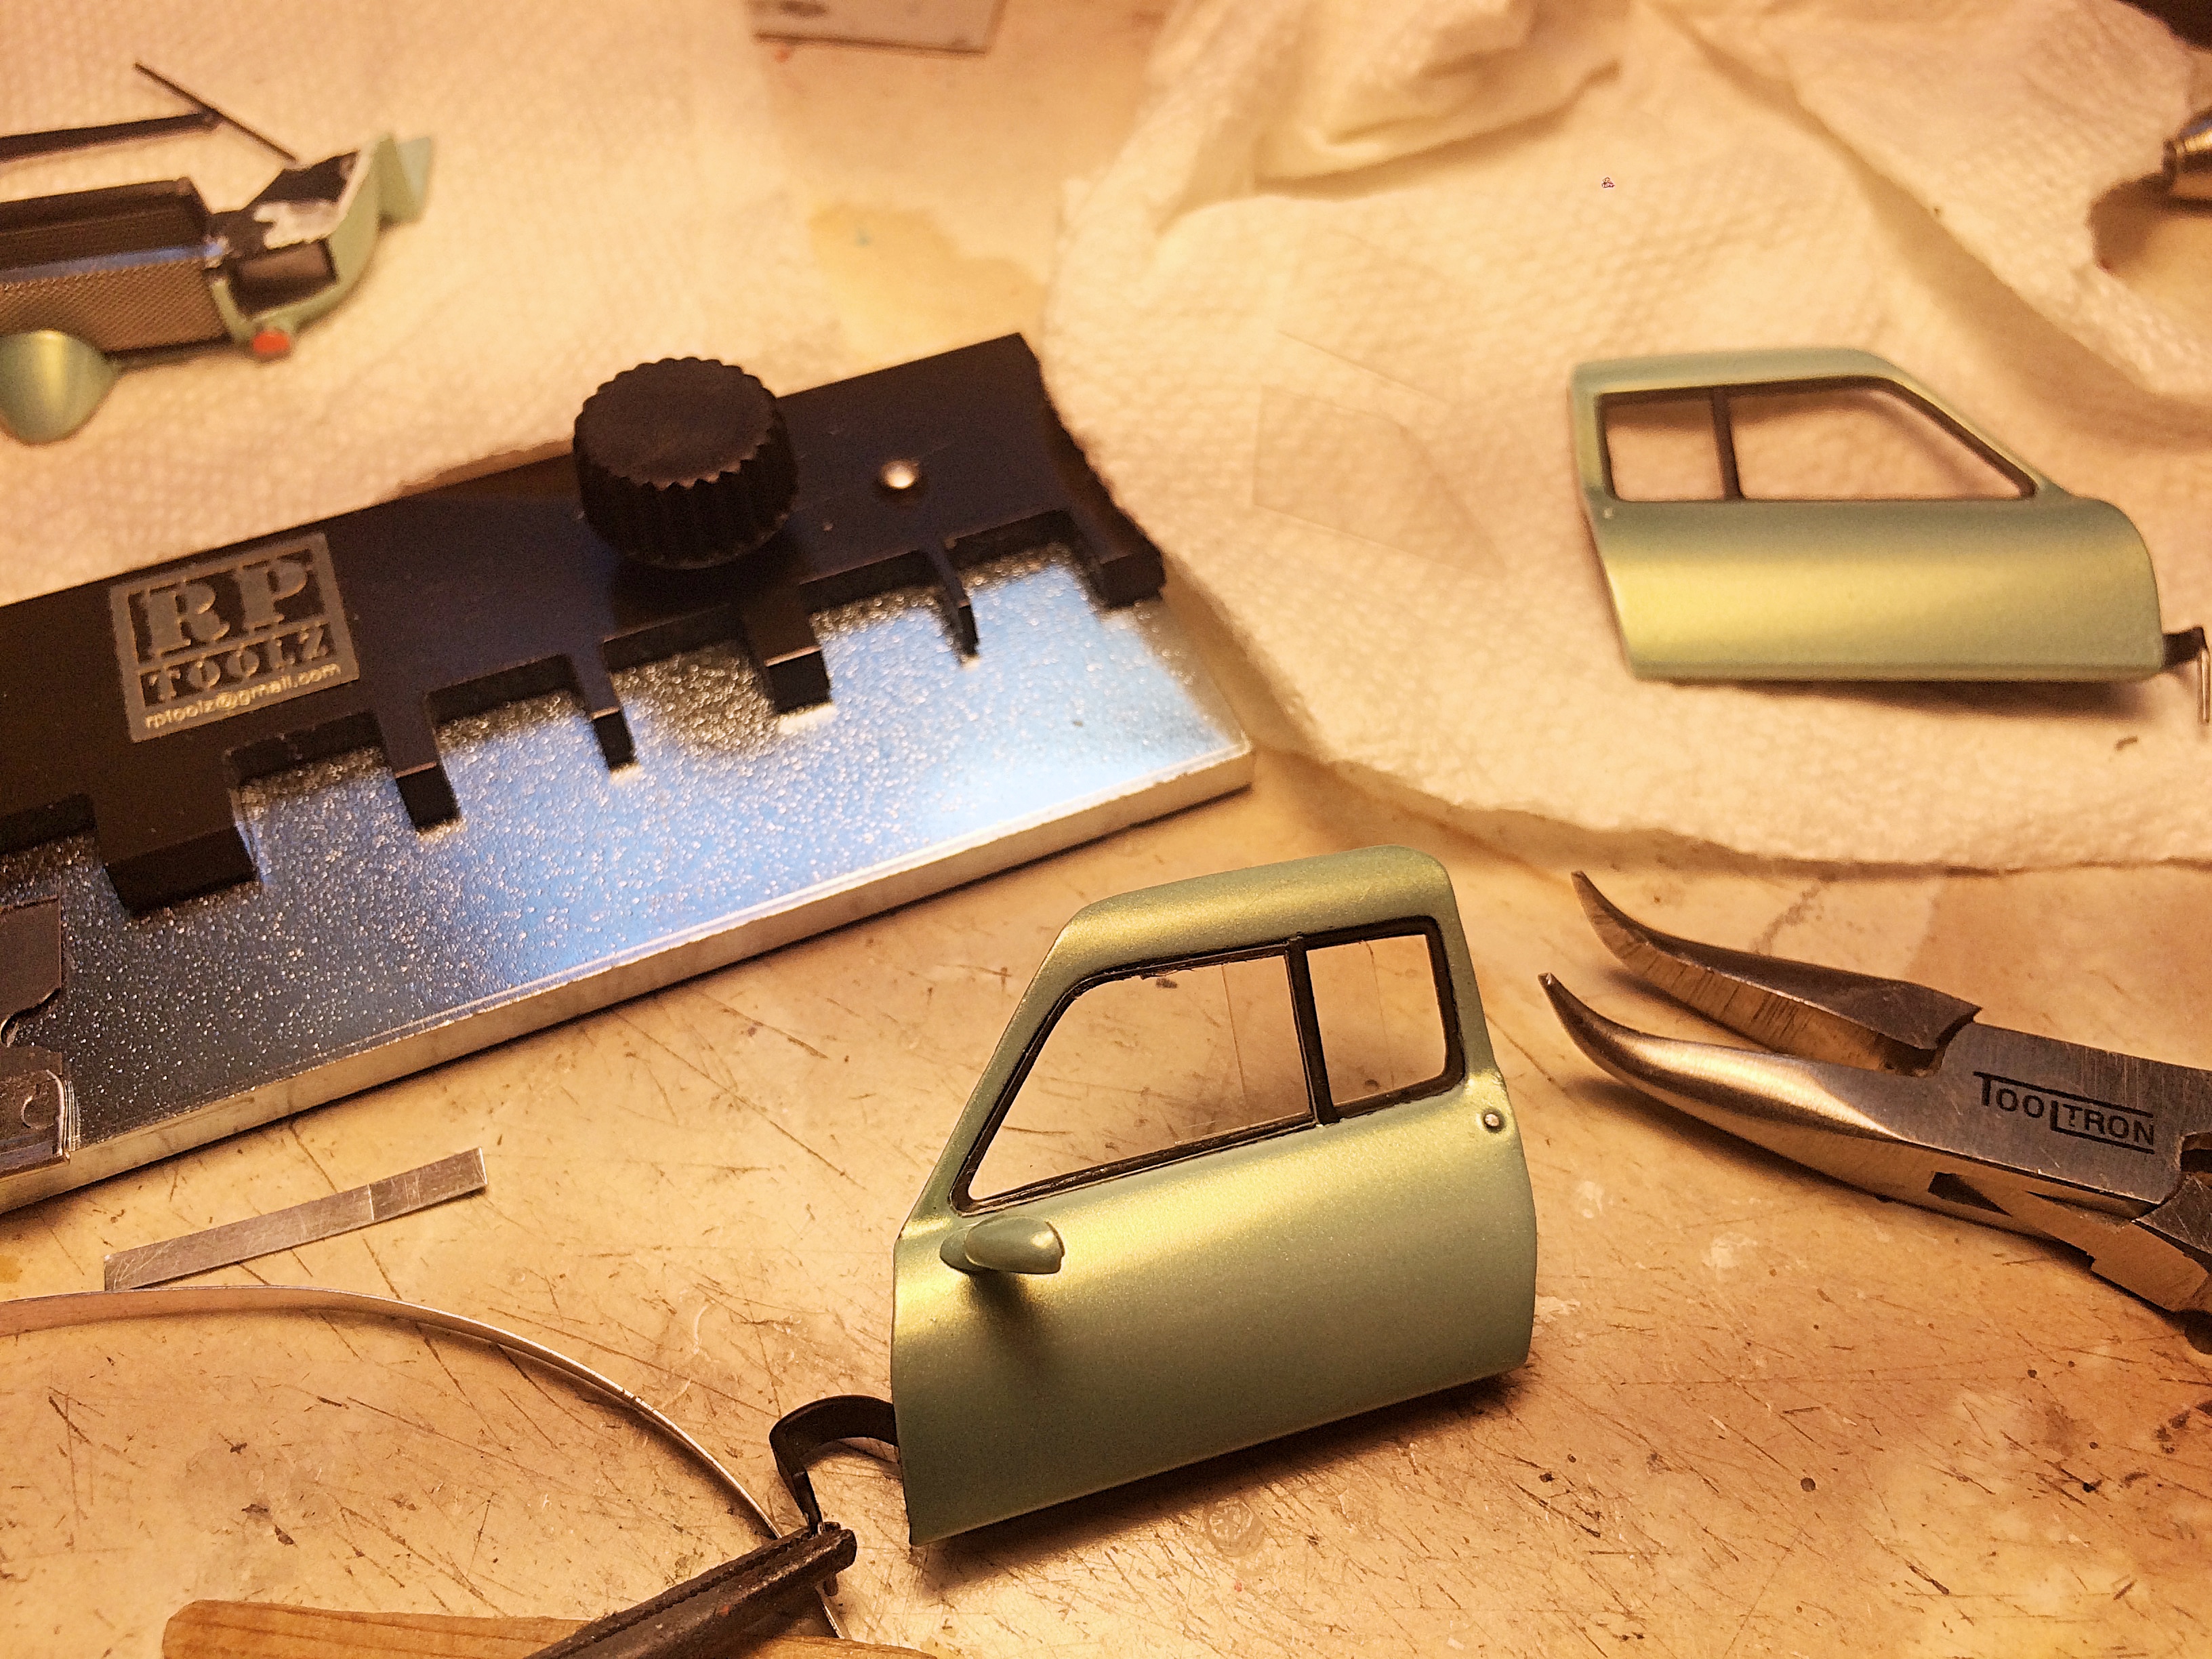
Better picture, I bent two directions in a long piece, no way could I have done that with pliers.
-
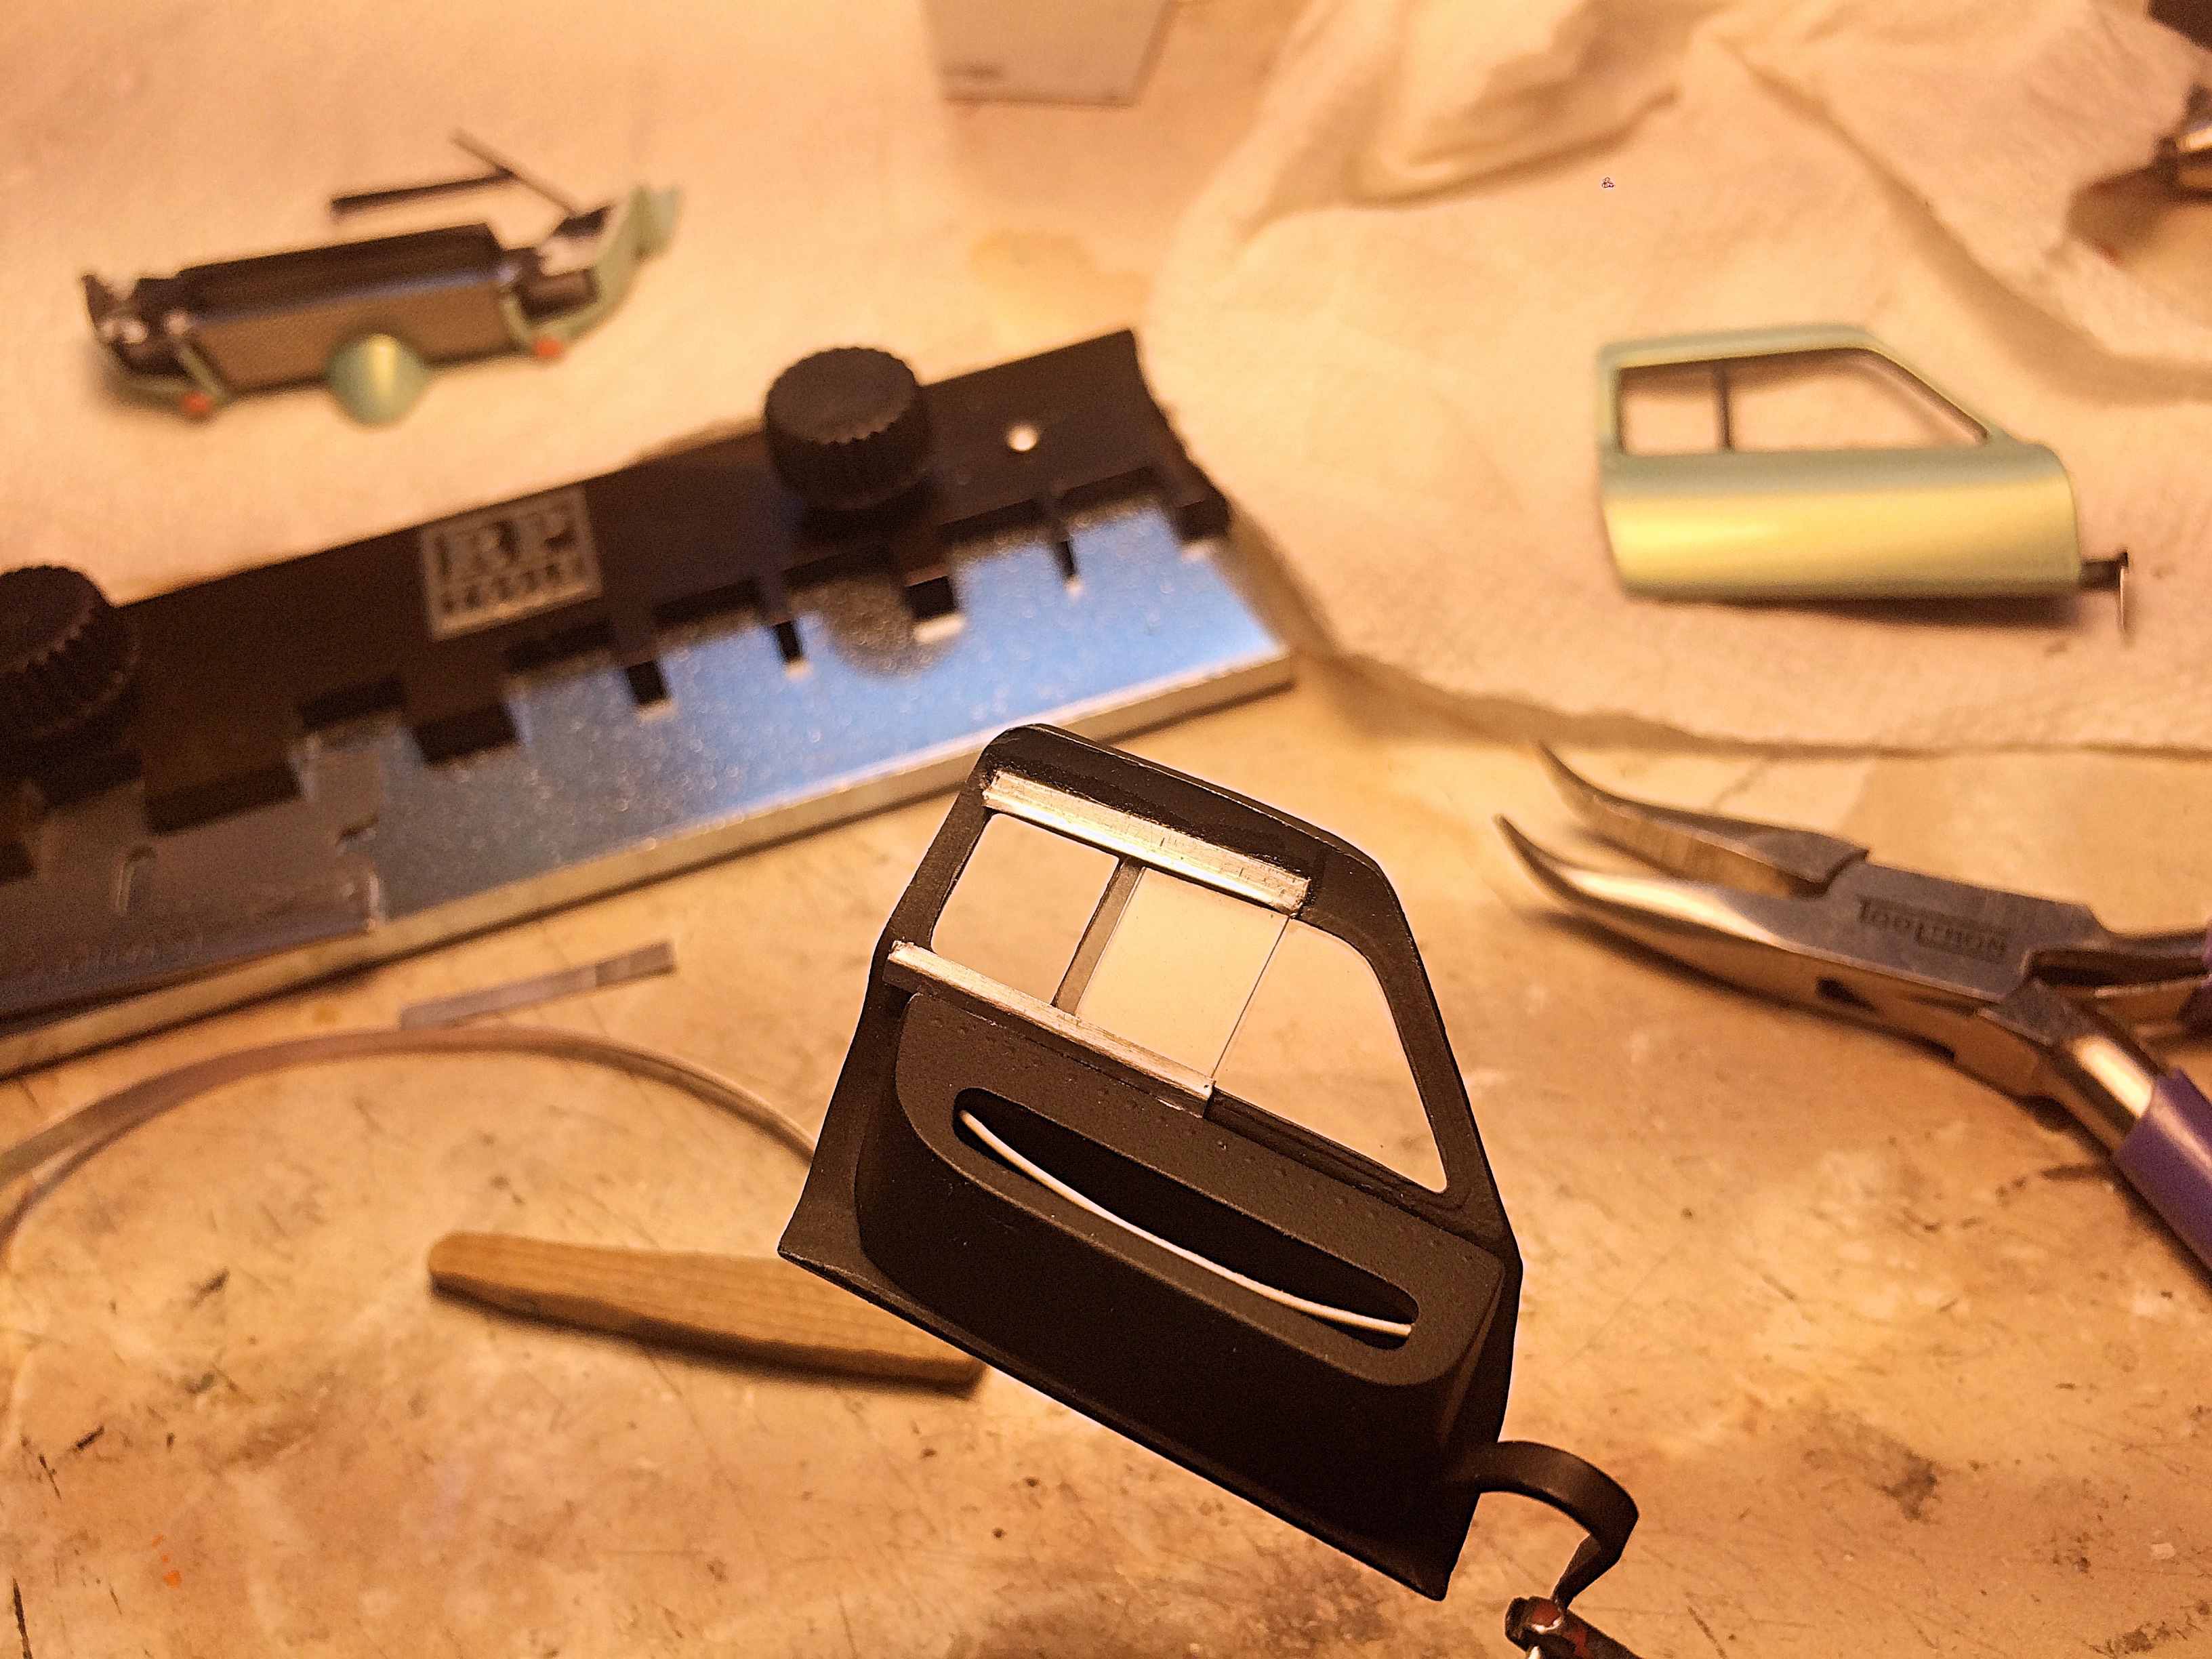
I found out about p-e bending benders last year, didn't know what I needed, but knew I had to have one. BNA Model World had a good selection, I went for the middle of the road and got this one. So far, it works like a charm!
-
with a bat
-
carrying gas cans
-
Porsche Outlaws & Hot Rods
89AKurt replied to afx's topic in General Automotive Talk (Trucks and Cars)
Interesting minimalism details on that last one. The graphics at the back, WTH? Not using the engine lid grill, would look like you lost the part on a model. Military color. I really like it! -
Very nice! I like the headlights, is that vacuum-formed covers? Doing the decals around the louvers must have been fun.
-
They are all awesome! Funny I was looking for something, found a printout of a catalog listing for a Ferrari boat that looks much like this! That collection is something to be proud of.
-
Reality TV project.
-
Chinese translation instructions
-
1964 GMC
89AKurt replied to bill lanfear's topic in Model Trucks: Pickups, Vans, SUVs, Light Commercial
Very nice weathering, and detail work. The wipers look fine, but you think they need to be less beefy? -
Dealing with the Building Department. I don't get paid enough for this! Ron Smith mentioned cutting trees down, if it has anything to do with wildfire mitigation, then be glad. We have what is called the Urban Wildland Interface Code. Doing deck additions is a PITA anymore, if the existing house has 4x4 posts, the new addition or replacement needs to be 8x8, or fire retardant treated lumber. Fire Marshal said it costs only a little more, yea right.
-
Food Dehydrators & Paint Dryers
89AKurt replied to JayVee's topic in Model Building Questions and Answers
The heater control lever was broken, so removed the whole unit, will get a repo someday. So those blocks are connected to the heater valve cable. It's a 51 year old pickup, sunbaked for sure. -
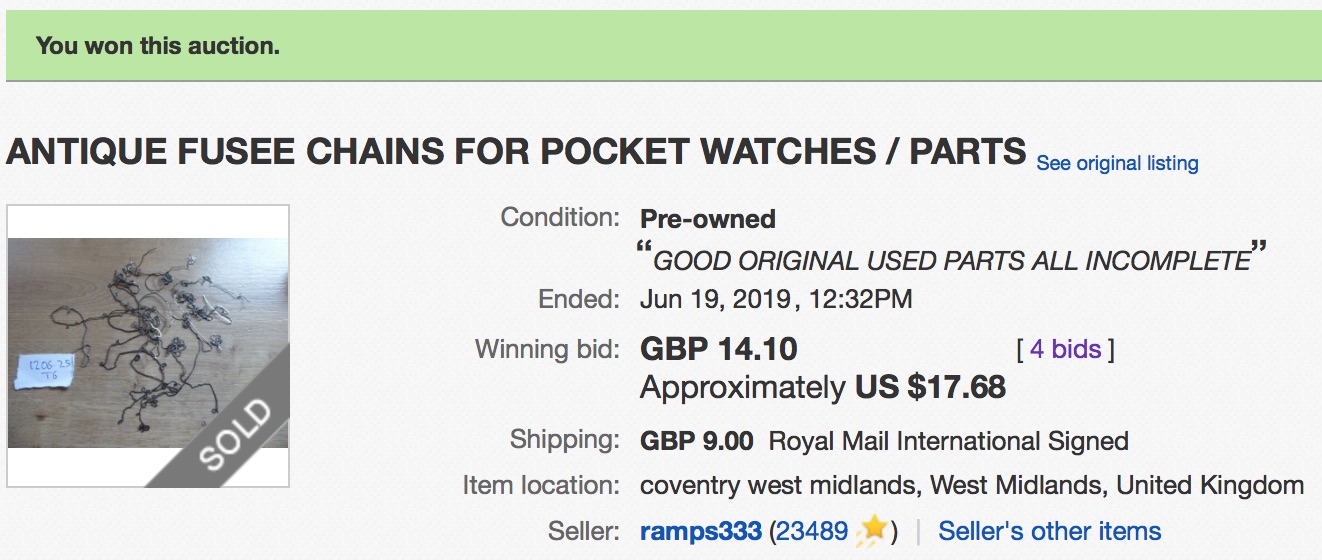
It sure depends on who is selling. I lurked for this one, I know better than to click the 'watching' button. I set my phone alarm, so watched for about 15 minutes, saw no activity, pounced with one minute to spare. Looking forward to actually seeing and touching these.
-
Food Dehydrators & Paint Dryers
89AKurt replied to JayVee's topic in Model Building Questions and Answers
My high-tech facility. Helps to live in Arizona to begin with. But I would not do this during the summer, "it's a dry heat" is not to be taken lightly.
-
legal ad section
-
the Mustang Ranch,
-
Thanks for the explanation. Yes, I've been buying without bidding, if I want something, I'll pay a reasonable asking price.