89AKurt
-
Posts
8,426 -
Joined
-
Last visited
Content Type
Profiles
Forums
Events
Gallery
Everything posted by 89AKurt
-
printed in braille
-
I like Alclad paint, have used the polished s.s. with good results.
-
If you wish.
-
up her alley
-
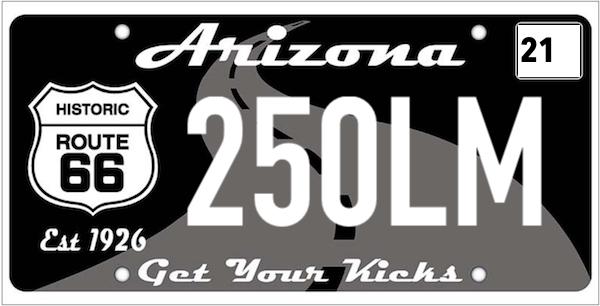
Made the license plate, using the AZ MVD website. They changed it since last visit, didn't see where I could check for an existing #X which is how I did it before, so now I screenshot the blank plate, and use a close font to write the #X. Will have this, and the kit box reduced to scale, and printed. Soon after the third coat of clear. It looked like there was orange peel, but after curing in the "drying booth" it leveled out nicely. One thing I really like about this paint, it cures hard the same day. No more putting it aside for a couple of weeks, worth the money just for that. Used the Detail Master polishing kit (nothing unique about the fine emory cloth compared to what other vendors offer). Last step was the Novus polishing creme, which makes the paint soft enough to leave fingerprints when I space out, which I did. grrr.? I would not say this is to the high standard that I've seen others capable of at contests. Painted the grills with Model Master flat black acrylic, which was immediately dabbed with clean paper towel. Jamb lines done with Micron 005 pen. Started gluing on the chrome parts; headlight lenses are really nice, with chrome reflectors that have a "bulb", glued in with Testors canopy glue. I'm fairly happy with the paint. So my routine goes like this: 1. Wet-sand the bare plastic body after washing with dish soap and hot water. 2. Light wet-sand the primer, two coats this time. 3. For the paint stage, I wipe the bench with a damp paper towel. I try to clean the booth before doing each project. 4. I am* not drying the body with a paper towel, I immediately use the shop air compressor with high volume of 60 PSI to blow dry, which gets all water out of every nook and cranny. I try to avoid touching anything to the body, just get it on the stand. I'm super aware of having a firm grip on the body, asking for disaster doing this step! 5. To avoid static charge which is my culprit, best to not wear clothing that is not 100% cotton. I even take off the shirt and pants before going into the paint booth, I'm that paranoid. 6. Because my hands were just washed from wet-sanding, I chase off all lint with my finger, like it's a tack rag (which I have never used, gotta be something on that). 7. After finishing painting, I take the airbrush apart and put in thinner. I do not clean the parts until later, messing with the paper towel introduces lint. For non body parts during a session with several colors, I don't worry about it. 8. Leave the paint booth for a few minutes, then take the body to the pickup cab if it's a sunny day. I've only been doing this for half a century, still learning what to adjust.* ? Next scratch-building is the vacuum-form headlight covers, side windows, front grill, fender mirrors, door handles (which were removed and saved). Bare Metal foil a few things. Still debating about seat belts.

-
for her horse
-

Le Mans Ferrari 275P
89AKurt replied to Bodnarus's topic in Other Racing: Road Racing, Salt Flat Racers
Totally understand about being motorvated (sic) in getting something done, I'm in the middle of such a project. Came out beautiful! Nice to see one of these vintage kits get properly built, I went nuts on my Ferrari 275P/360M Mongrel which is a little inaccurate. -
Considering what you started with, came out great! I think Gofer makes NPS decals too, my dad was a Ranger, but had the Dodge pickup for a patrol vehicle. Dust adds to this, don't worry about it.
-
Thank you for chiming in. I did notice some cars running the alloy wheels, I have a set from the Fujimi Daytona, but they are the same width. Had to do something for those wheels. Yum! Thank you. If this was a Fujimi Enthusiast Series, would still be in the starting blocks.
-
I was just shopping on eBay, saw this listing in Russia, looks like a scam to me. They found a picture of a real car with the newer Cromadora wheels, no brake duct, fender mirrors, not at all what I know this kit looks like.
-
Very cool concept! Your design is better done than some I found when searched for 'station wagon Continental', surprised how many there are. The woodie trim works well with the design too.
-
Porsche Outlaws & Hot Rods
89AKurt replied to afx's topic in General Automotive Talk (Trucks and Cars)
FYI: First picture does not show up for me. I have not seen that, and I've been watching the Hoonigan You Tube channels. You better start the Lamborghini Outlaws & Hot Rods topic (I've done the Mercedes topic) ?. -
Very nice job on that! Really like how you photographed it too.
-
and no credit
-
A favorite subject of mine! I've done a few models with nail 'polish' paint, there is a great selection of colors, the metallics are finer grain than (now discontinued) Model Master, and the pearls are nice too. Very nice restoration.
-
Today I wet-sanded the first clear coat. Used the hot-wire to cut off the side windows. My OCD kicked in, the mirror location is way too far back. Pictures show it was almost against the windshield. Another thing, seems like Ferrari sent an apprentice to the local salvage yard to get mirrors, every car is different, some are black, some aluminum, some mounts are chrome, some black. But why did they have the mount on the chrome tree, and the wiper not? Since the "headliner" was getting painted flat black, did the mirror too. Now a pet peeve, the axle shaft did not fit in the wheels. No way was I going to hammer them home. First I found my drill index was missing the next size bigger, so mounted the axles in the drill press to sand the shafts down. Instructions don't show which long/short axle went where either. LOL Sprayed the second coat of clear. Not as smooth as I wish, but one more time of wet-sanding, then a light coat of clear again, and then the polish routine. Forgot to say I got this paint at the Phoenix IPMS show, ScaleFinishes.com from Salt Lake City. Maybe I've learned how to lay down exotic paint, but no issue with it dissolving or melting like another paint I've tried. It was ready to use, no thinner needed. Since Model Master is history, the cottage industry will step in, so maybe it's for the better. /end rant/ In order to park my impatience, and not screw anything up, baked cookies. Here I flocked the coat of chocolate with walnuts, and didn't worry about cutting into perfectly sized squares (after taking the picture).
-
Porsche Outlaws & Hot Rods
89AKurt replied to afx's topic in General Automotive Talk (Trucks and Cars)
Thanks for posting that, and Bill for the pictures. I love ❤️ this concept! I like how the article is done, a paragraph, picture, repeat. Those guys are living the American dream. Screw the 'purists', they can shove it where the sun don't shine, with a sharp twist to the left. Most Porsches are a dime a dozen, people with imagination scare those sticks in the mud. That's why I love this particular shop. Makes me want to get an Indy car, and mate with a ..... I already have! -
to pick up
-
Failing eyesight, join the club! I'm finally getting an eye exam, several years past due. Awesome work on the engine details (everything else too for that matter).
-
This morning got to this stage (except painting the clear), before the model meeting. Explained my OCD about exhaust tips, so everyone afterwards made a crack about whatever being drilled out. ? Interior is Model Master German Silver, engine is Alclad white aluminum, second coat of Dullcote. No matter how hard I tried, still got junk in the clear coat. Seems like this plastic gets static charged easier, or it's the weather, but made sure I'm wearing a 100% cotton shirt, and took off the polyester sweats. Drives me nuts! ? My high tech drying booth. Something I'm going to do more, is polish photo-etch. Tires got the tread sanded. These are good looking tires, have not looked at pictures of the real Dunlop tires, but does not seem to be generic. I usually despise spoke wheels that you can't see through, but the front are accurate with a row at the outside of the rim. The plating didn't get to the deepest areas, but still painted Model Master flat black acrylic, and cleaned up with a cotton swab. The decals worked great. Being so old, was concerned, but I'm also not using the yellowed roundels anyway. Solvaset was compatible, Microsol didn't touch them. This is the first model with gold lettered tires that I've done, digging the look. The main gauge cluster doesn't really fit well, the top of the center gauge goes onto the hood. Got the interior done, unless I add seatbelts. Had the Modelers seat belt for years, been intimidated about putting it together. Didn't know it was only one seat, thought it would be funny to have only a lap belt for the passenger, just to add to the thrill of going for a ride. ? Somewhat happy with the texture on the dash. Added steel wire for the shift linkage, with some hypodermic tubing for added detail that isn't accurate, but just for eye candy. "Plug wire" for the door pull. Shirt pin for the shifter, one of the oldest tricks for detailing. Must have been an uncomfortable cockpit, with the parking brake handle to hit your knee on, steering wheel way forward, and the pedals in the middle. No cup holder either.
-
Came out very nice! You did the jamb lines, which is a something I forgot to do on a current project. Looks good in that color too. Also have that kit in the stash, great to see one finished.
-
bored to death
-
slippers, stunk bad.
-
That is so sweet! Love the color choice. Built the Roadster (windshield frame had the lousy chrome sticker, used Bare Metal instead) last century, in the same color, so I'm biased. Yours came out better.
-
Not disagreeing. If you knew all the other projects I wish to go nuts on..... ? Knife pointing to a stupid thing to OCD about, the chassis tube was cut, obviously for the way the mold had to work. *Had to* stretch sprue, cut, and superglue with a little baking soda to fill the gaps. Exhaust tips are done. I have about used up this size of stainless steel tubing, going to get at least 2 next time (12" long). First light coat of Tamiya primer, because I used up the bottle. I'm really liking this paint, compared to the (now unavailable) Model Master. Alclad polished chrome sprayed on the bare black plastic. I masked the steering wheel rim, to help with brush painting the wood so it won't mix. Quick wet-sanded the primer, second proper coat sprayed. Model Master flat black done on all those parts! Testors blue on the seats, didn't wish to get flat blue, so it's covered with Dullcote (should do another coat). Kind of fun dealing with so few parts. All I did was wrap the tips with BLAH_BLAH_BLAH_BLAH purple masking tape, can clean off with a toothpick later. One of my top OCD items is exhaust tips, started when I was 5 years old, looking at my drawings. ? I've seen too many really well done models, to spot the lack of attention to not drilling out the ends, or painting flat black inside the hole, come on man! Tomorrow is a model club meeting, they will be shocked to see I'm building a model, after about half a year of silence.