89AKurt
-
Posts
8,426 -
Joined
-
Last visited
Content Type
Profiles
Forums
Events
Gallery
Everything posted by 89AKurt
-
 Ew, this hurts. Only 3 of those got built.
-
That is a killer build! I like the white background better too.
-
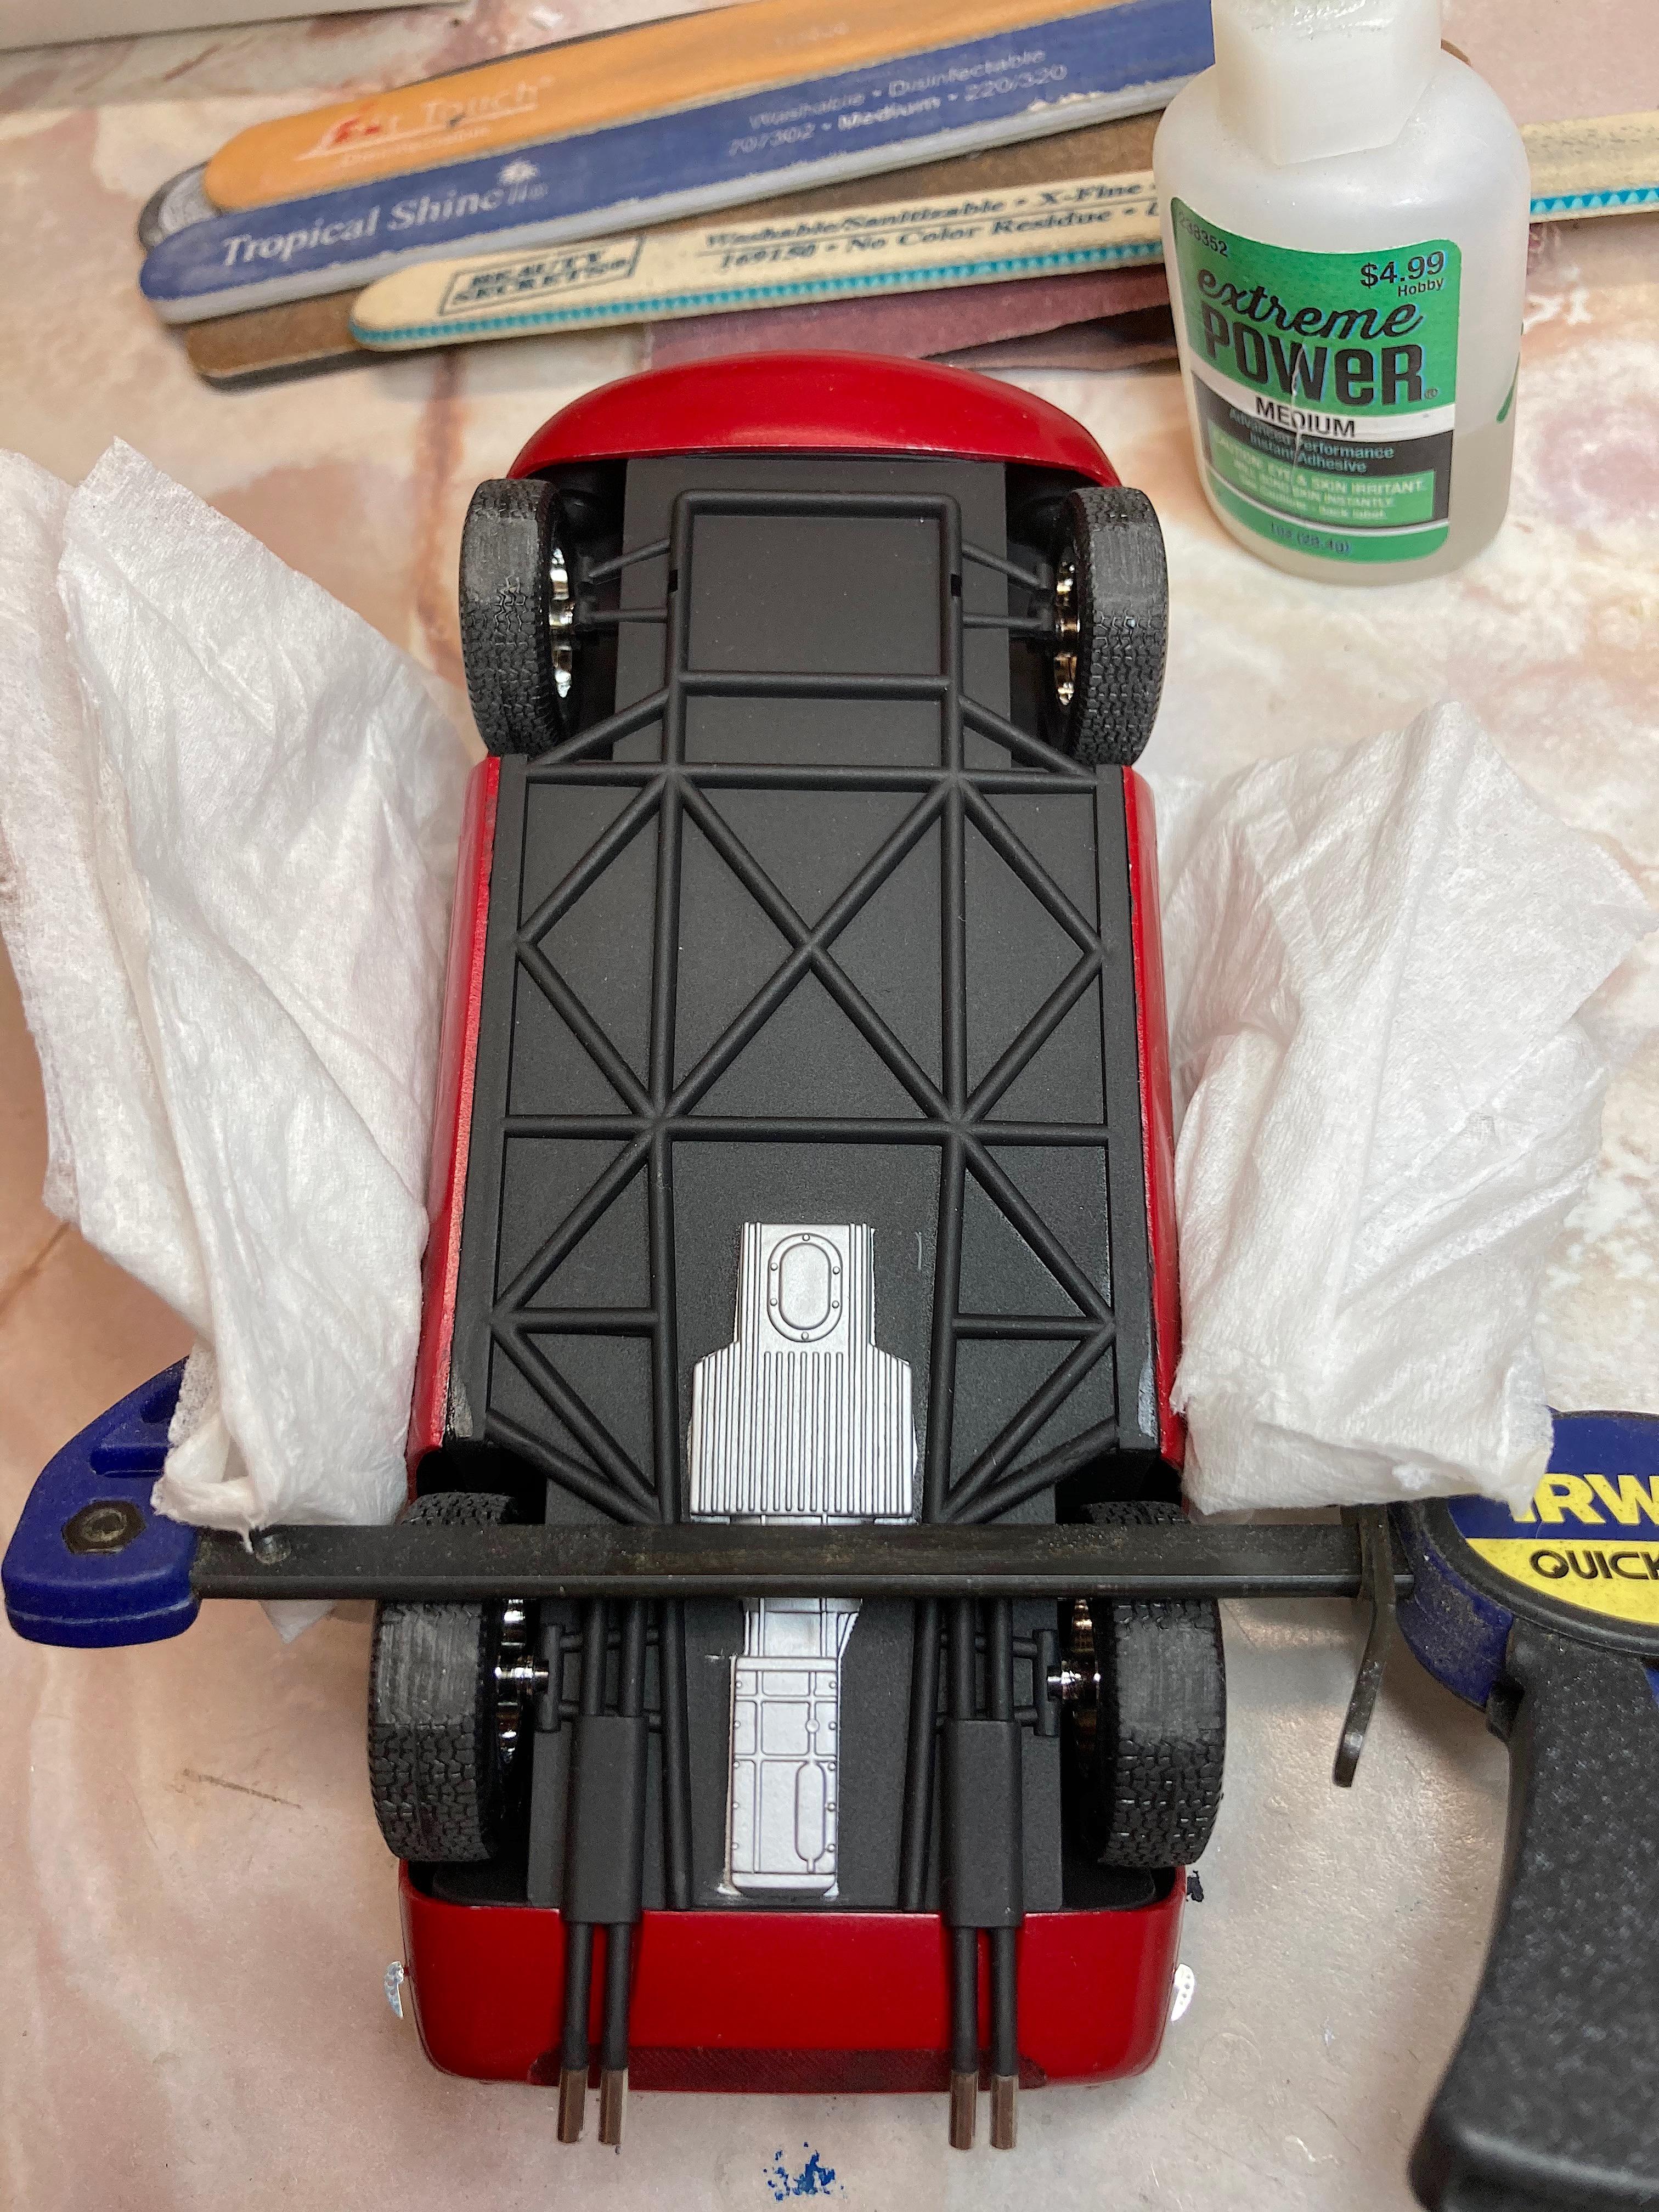
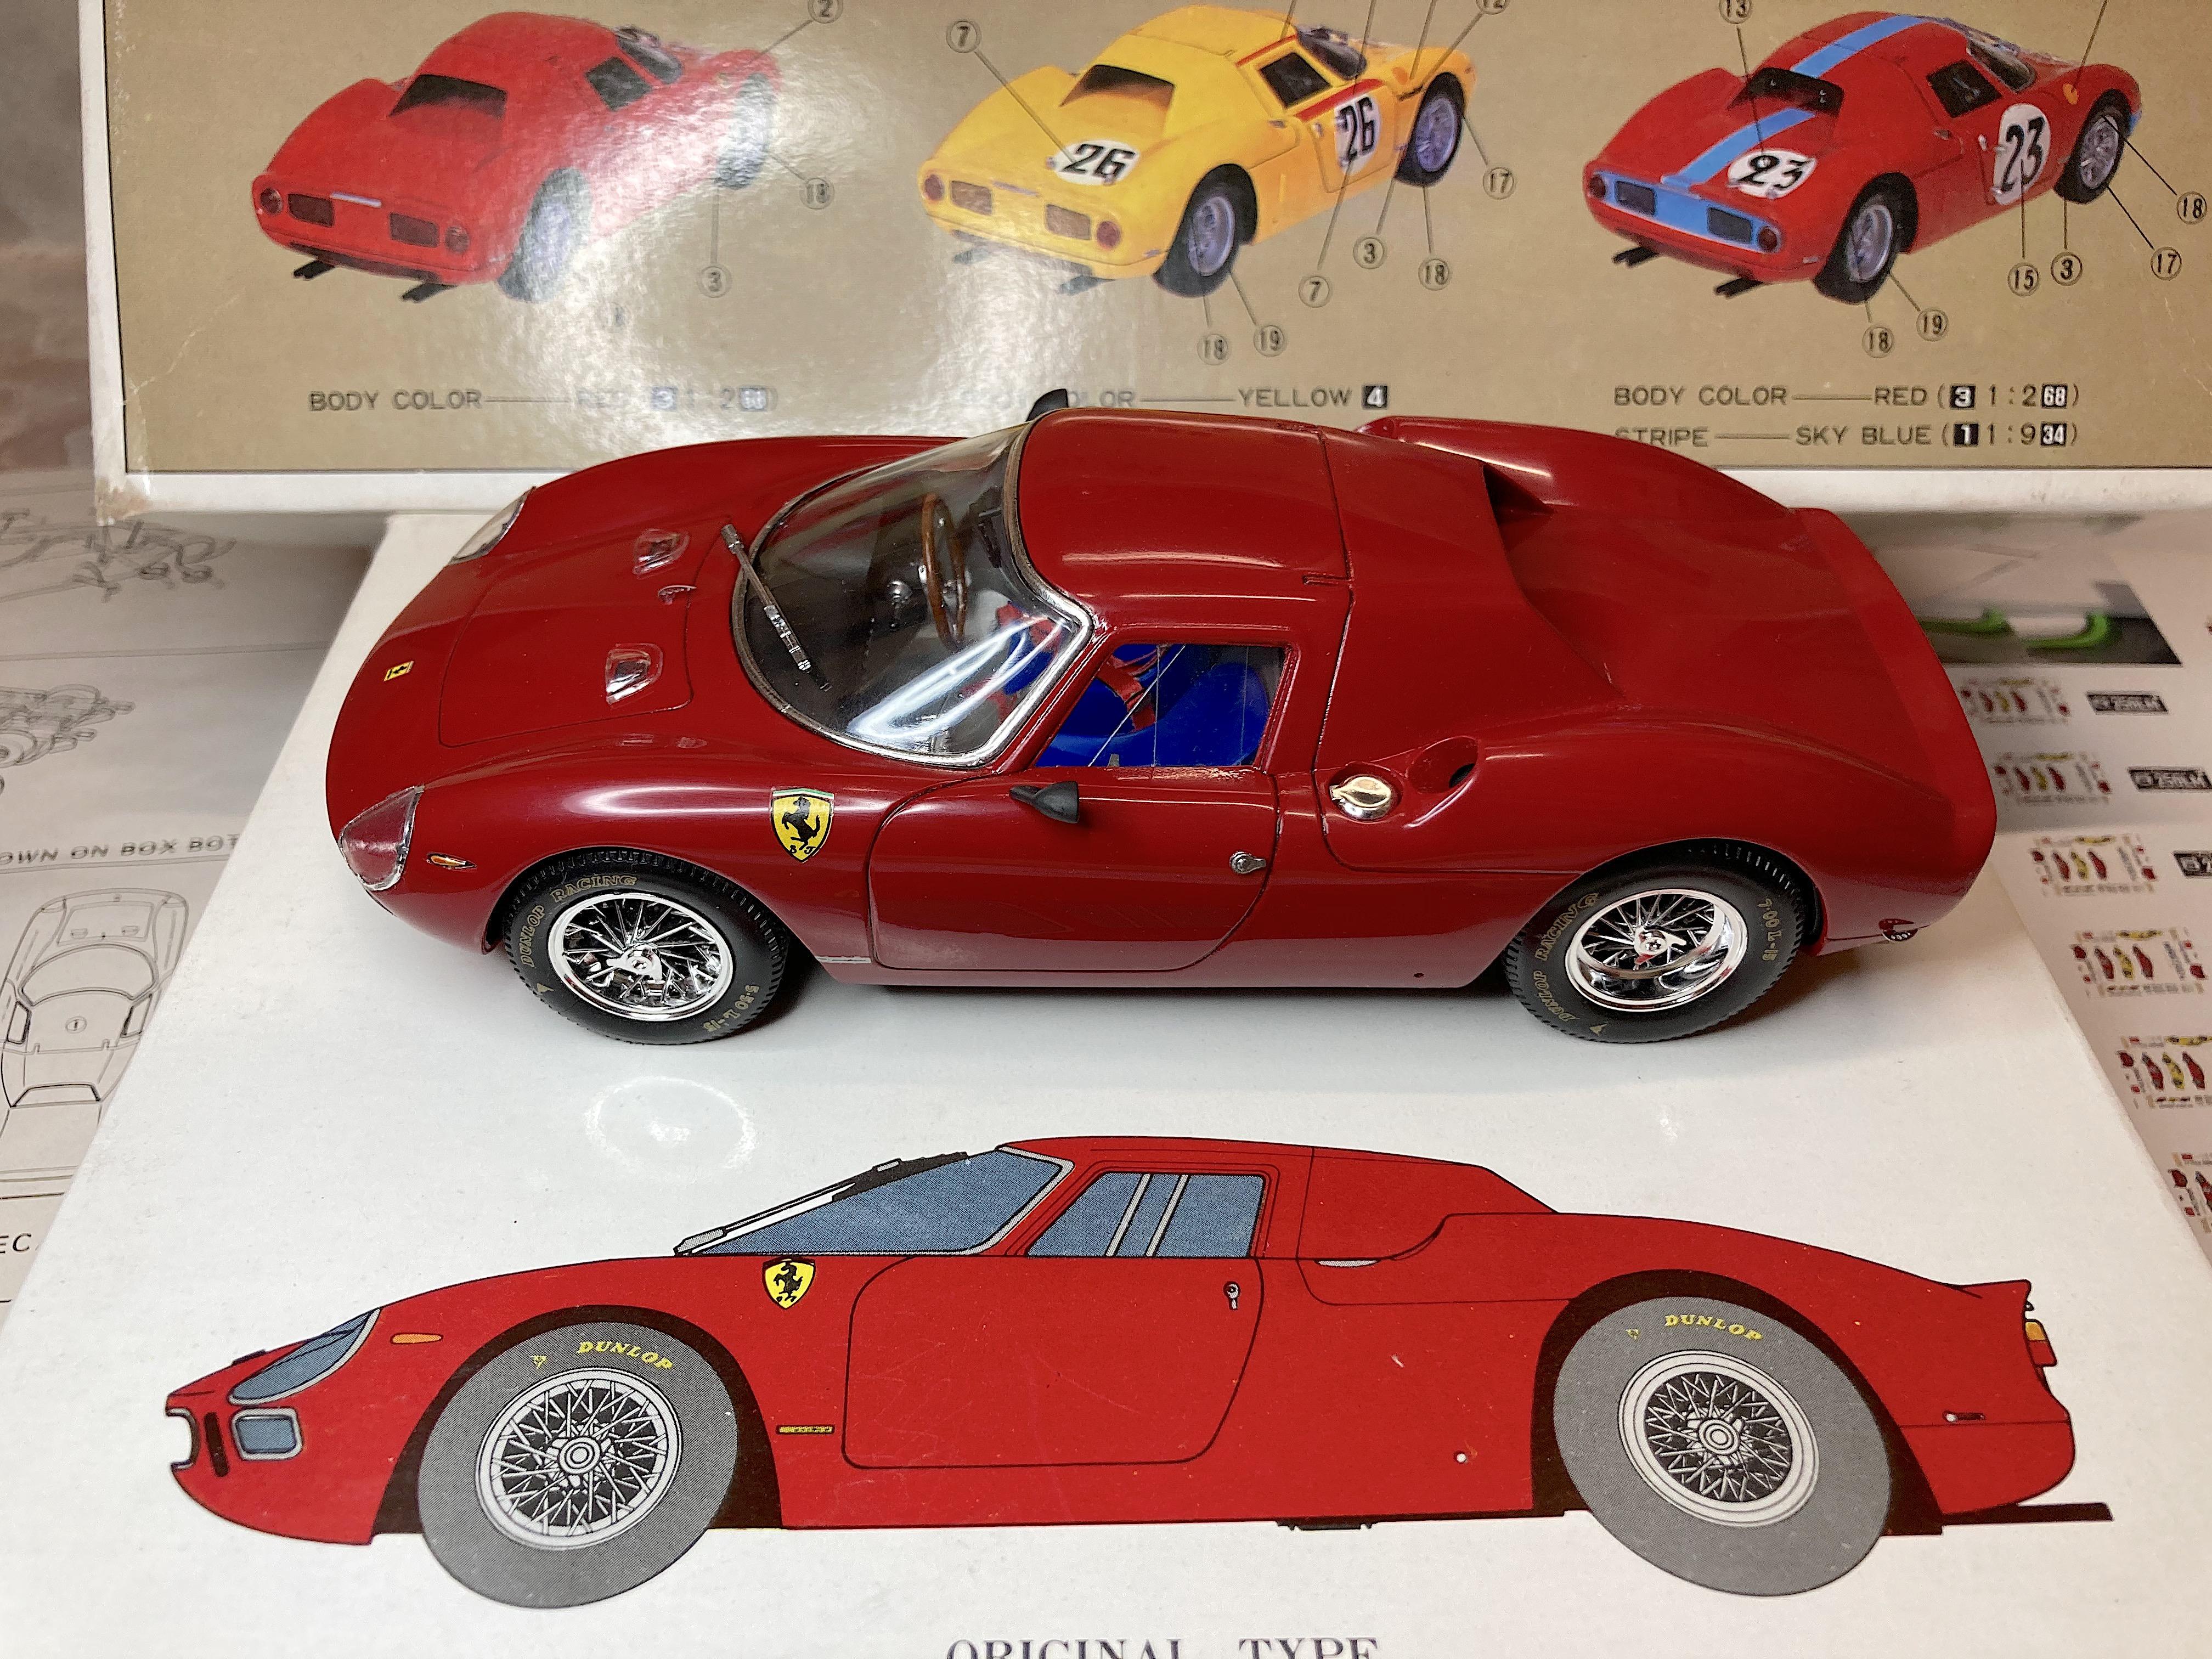
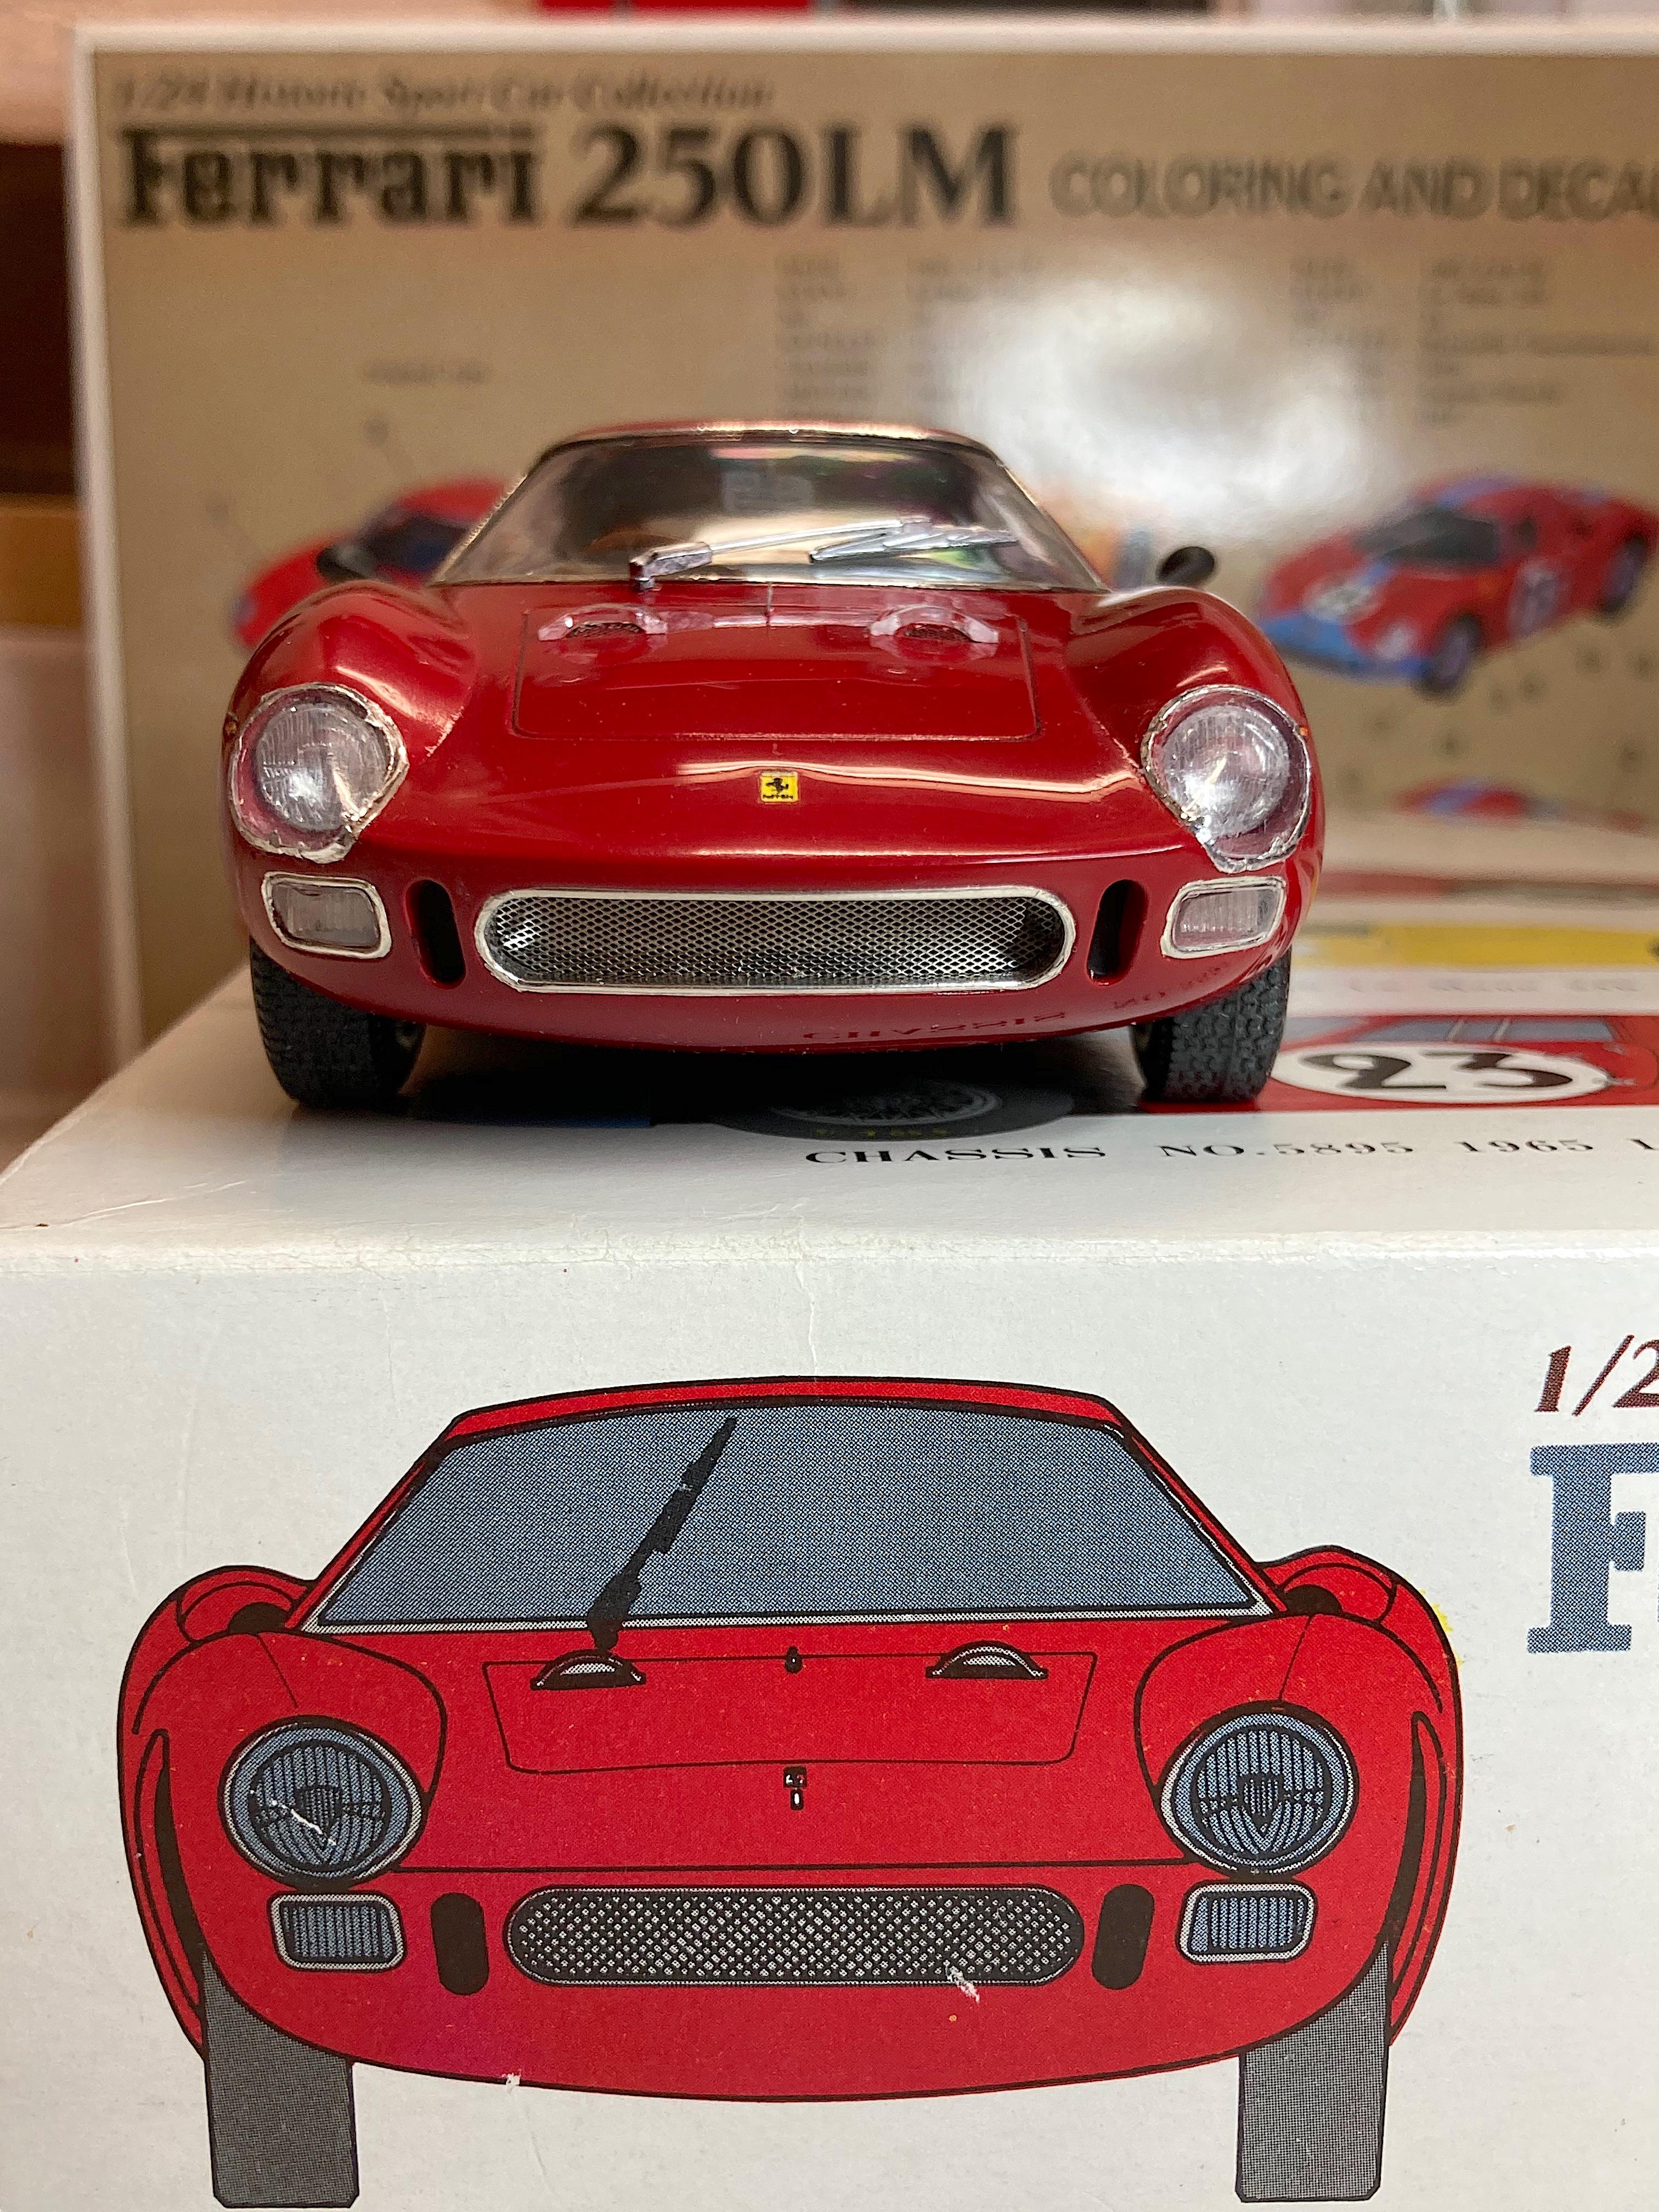
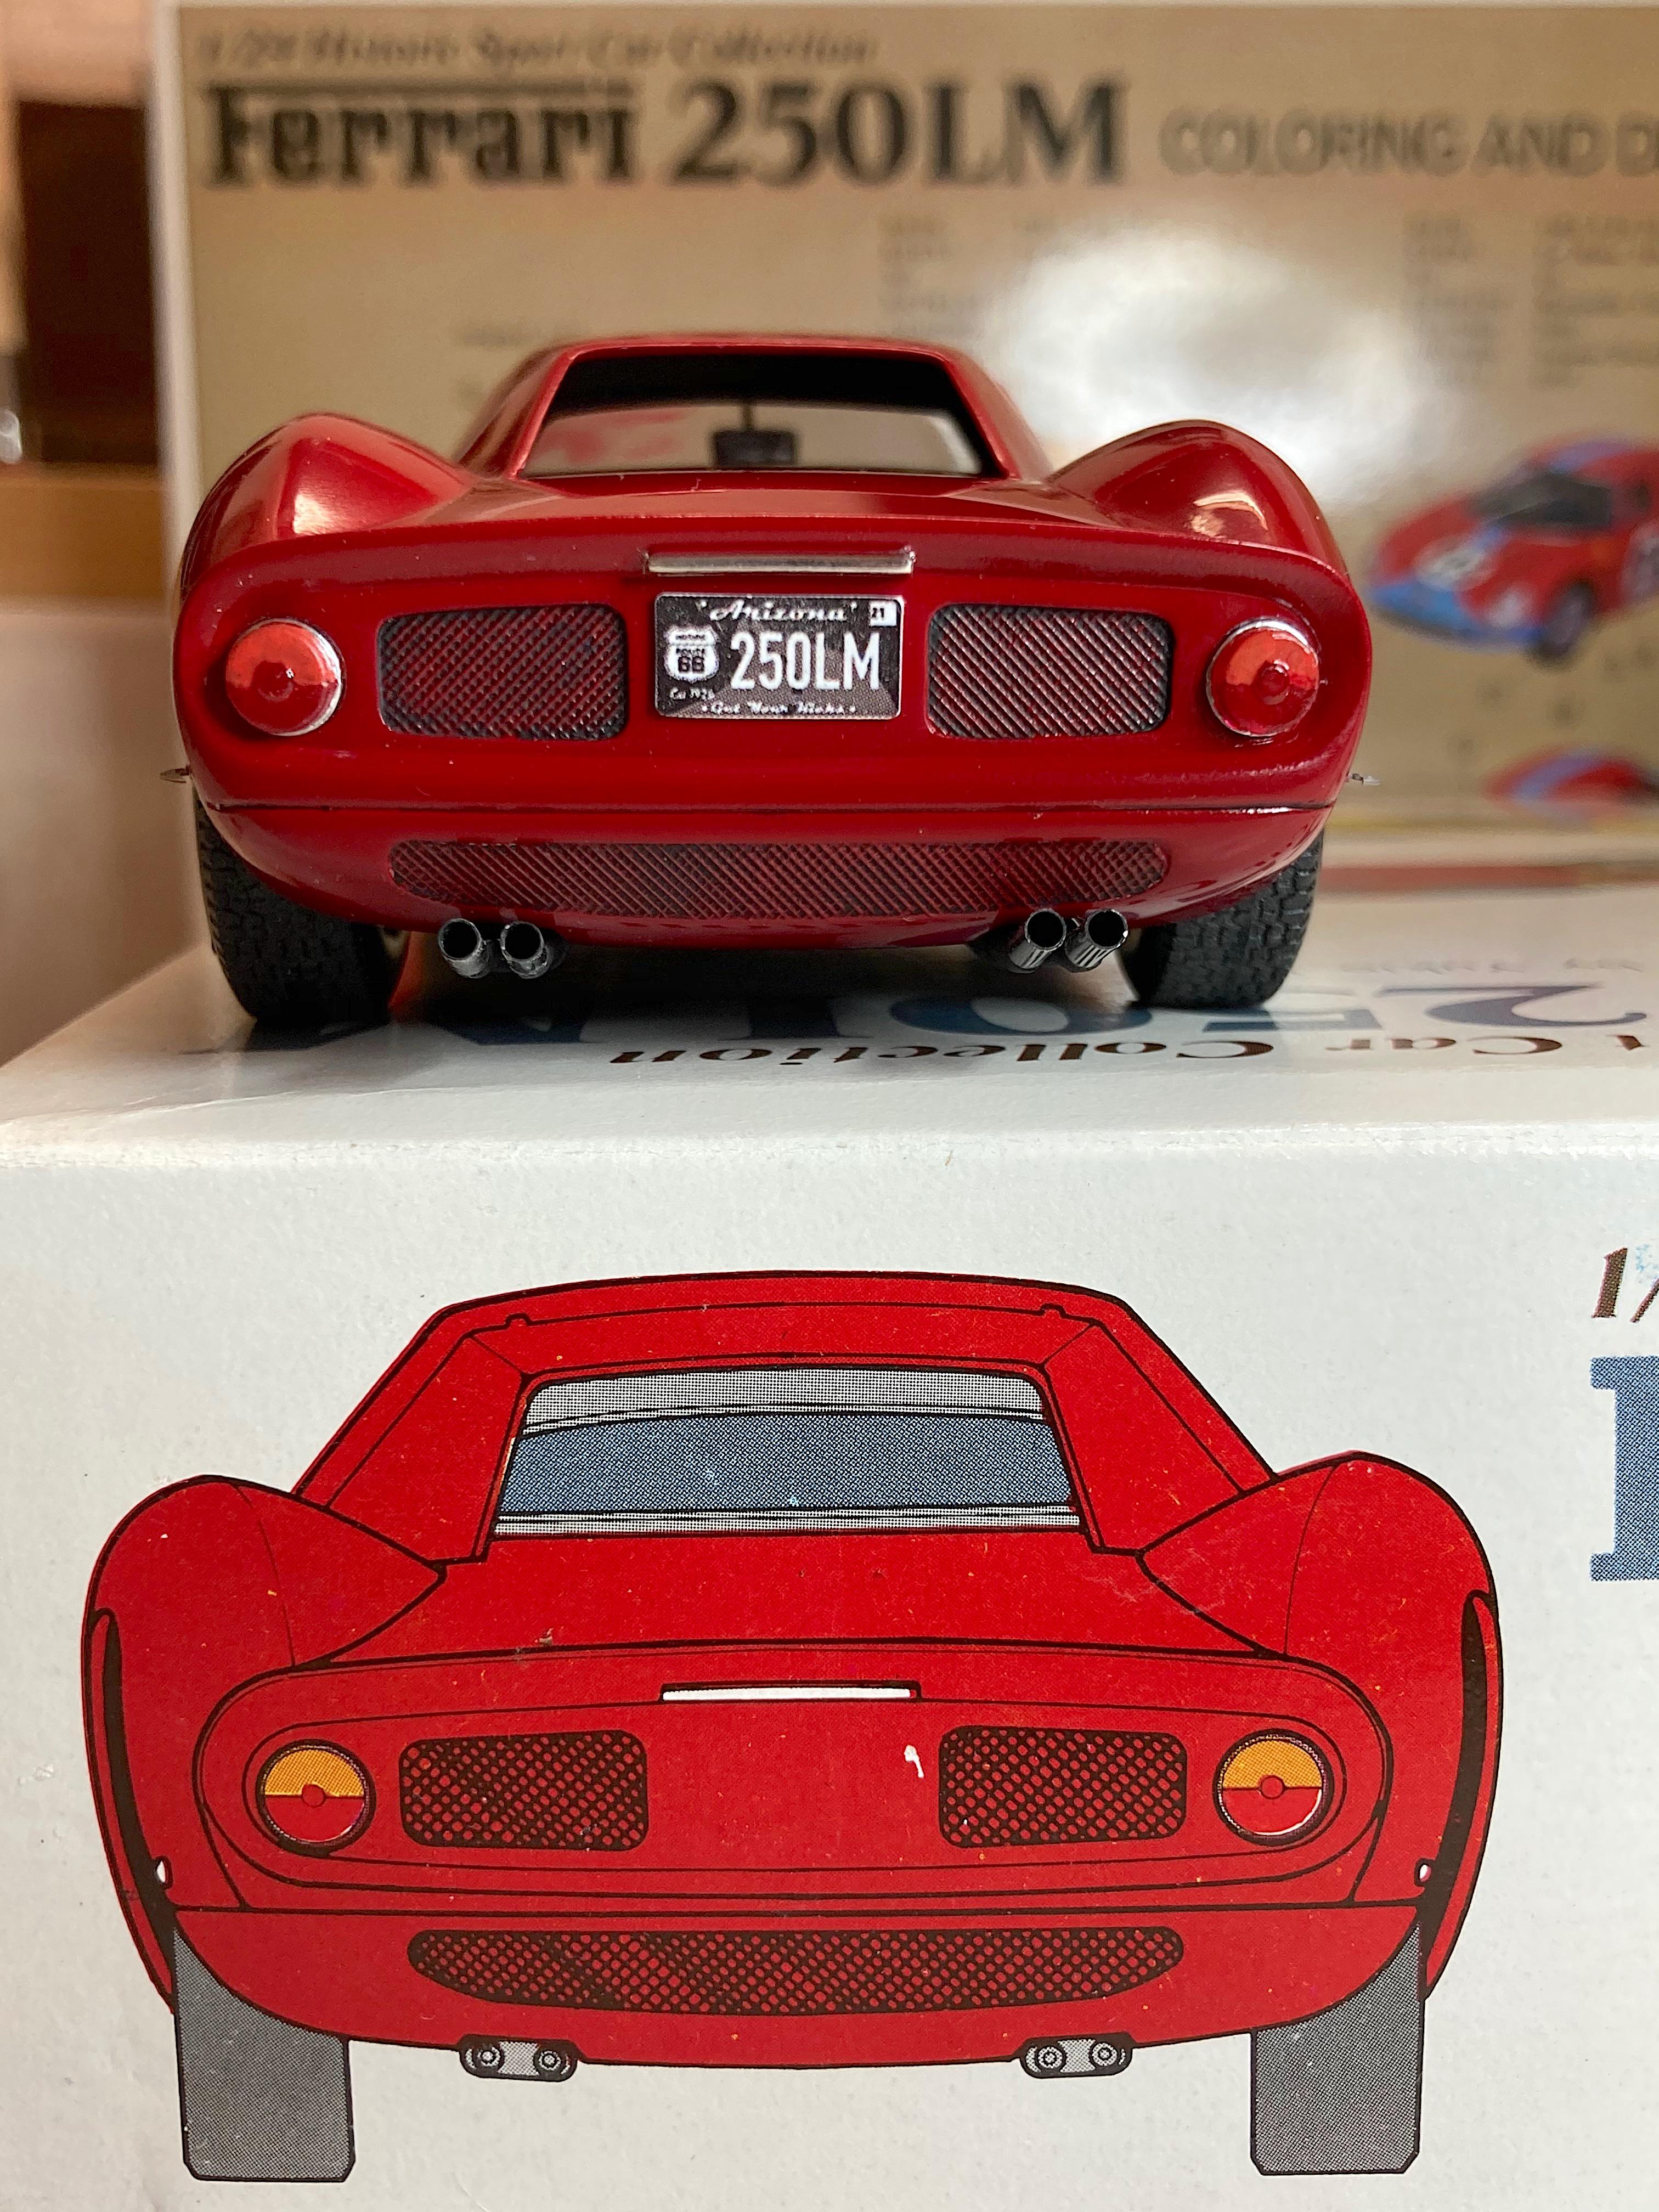
Thank you Carl! Appreciate your comment. I'd still be working on this if there was a suspension. ? I cut the pin on the wiper, flattened the tires, and glued the body to the chassis pan. Last step was the taillights. No paint at Hobby Lobby would suffice, so I used regular Testors. I have used Tamiya clear acrylic, never liked how it didn't cover evenly. So what is there nowadays? I tried to use Bare Metal foil for the bezels, gave up and painted silver. Always been a pet peeve of having to color lights. So this model ran the gauntlet of getting boogered up with too much errant glue or scratched with sharp objects. ? 45.5 hours, finished before New Years. ? IT IS DONE! Funny thing, all this time I never looked on the bottom of the box. Still have the receipt, look at the prices on eBay today. ? We are scheduled for snow, so no gas station diorama pictures, but might take studio photos for the Under Glass posting. Thanks for the comments everyone. ?
-
with many spikes
-
Since I've been absent much of the year, missed seeing this project. I have 2 WIP stalled because I'm challenged by the suspension, this is great inspiration!
-
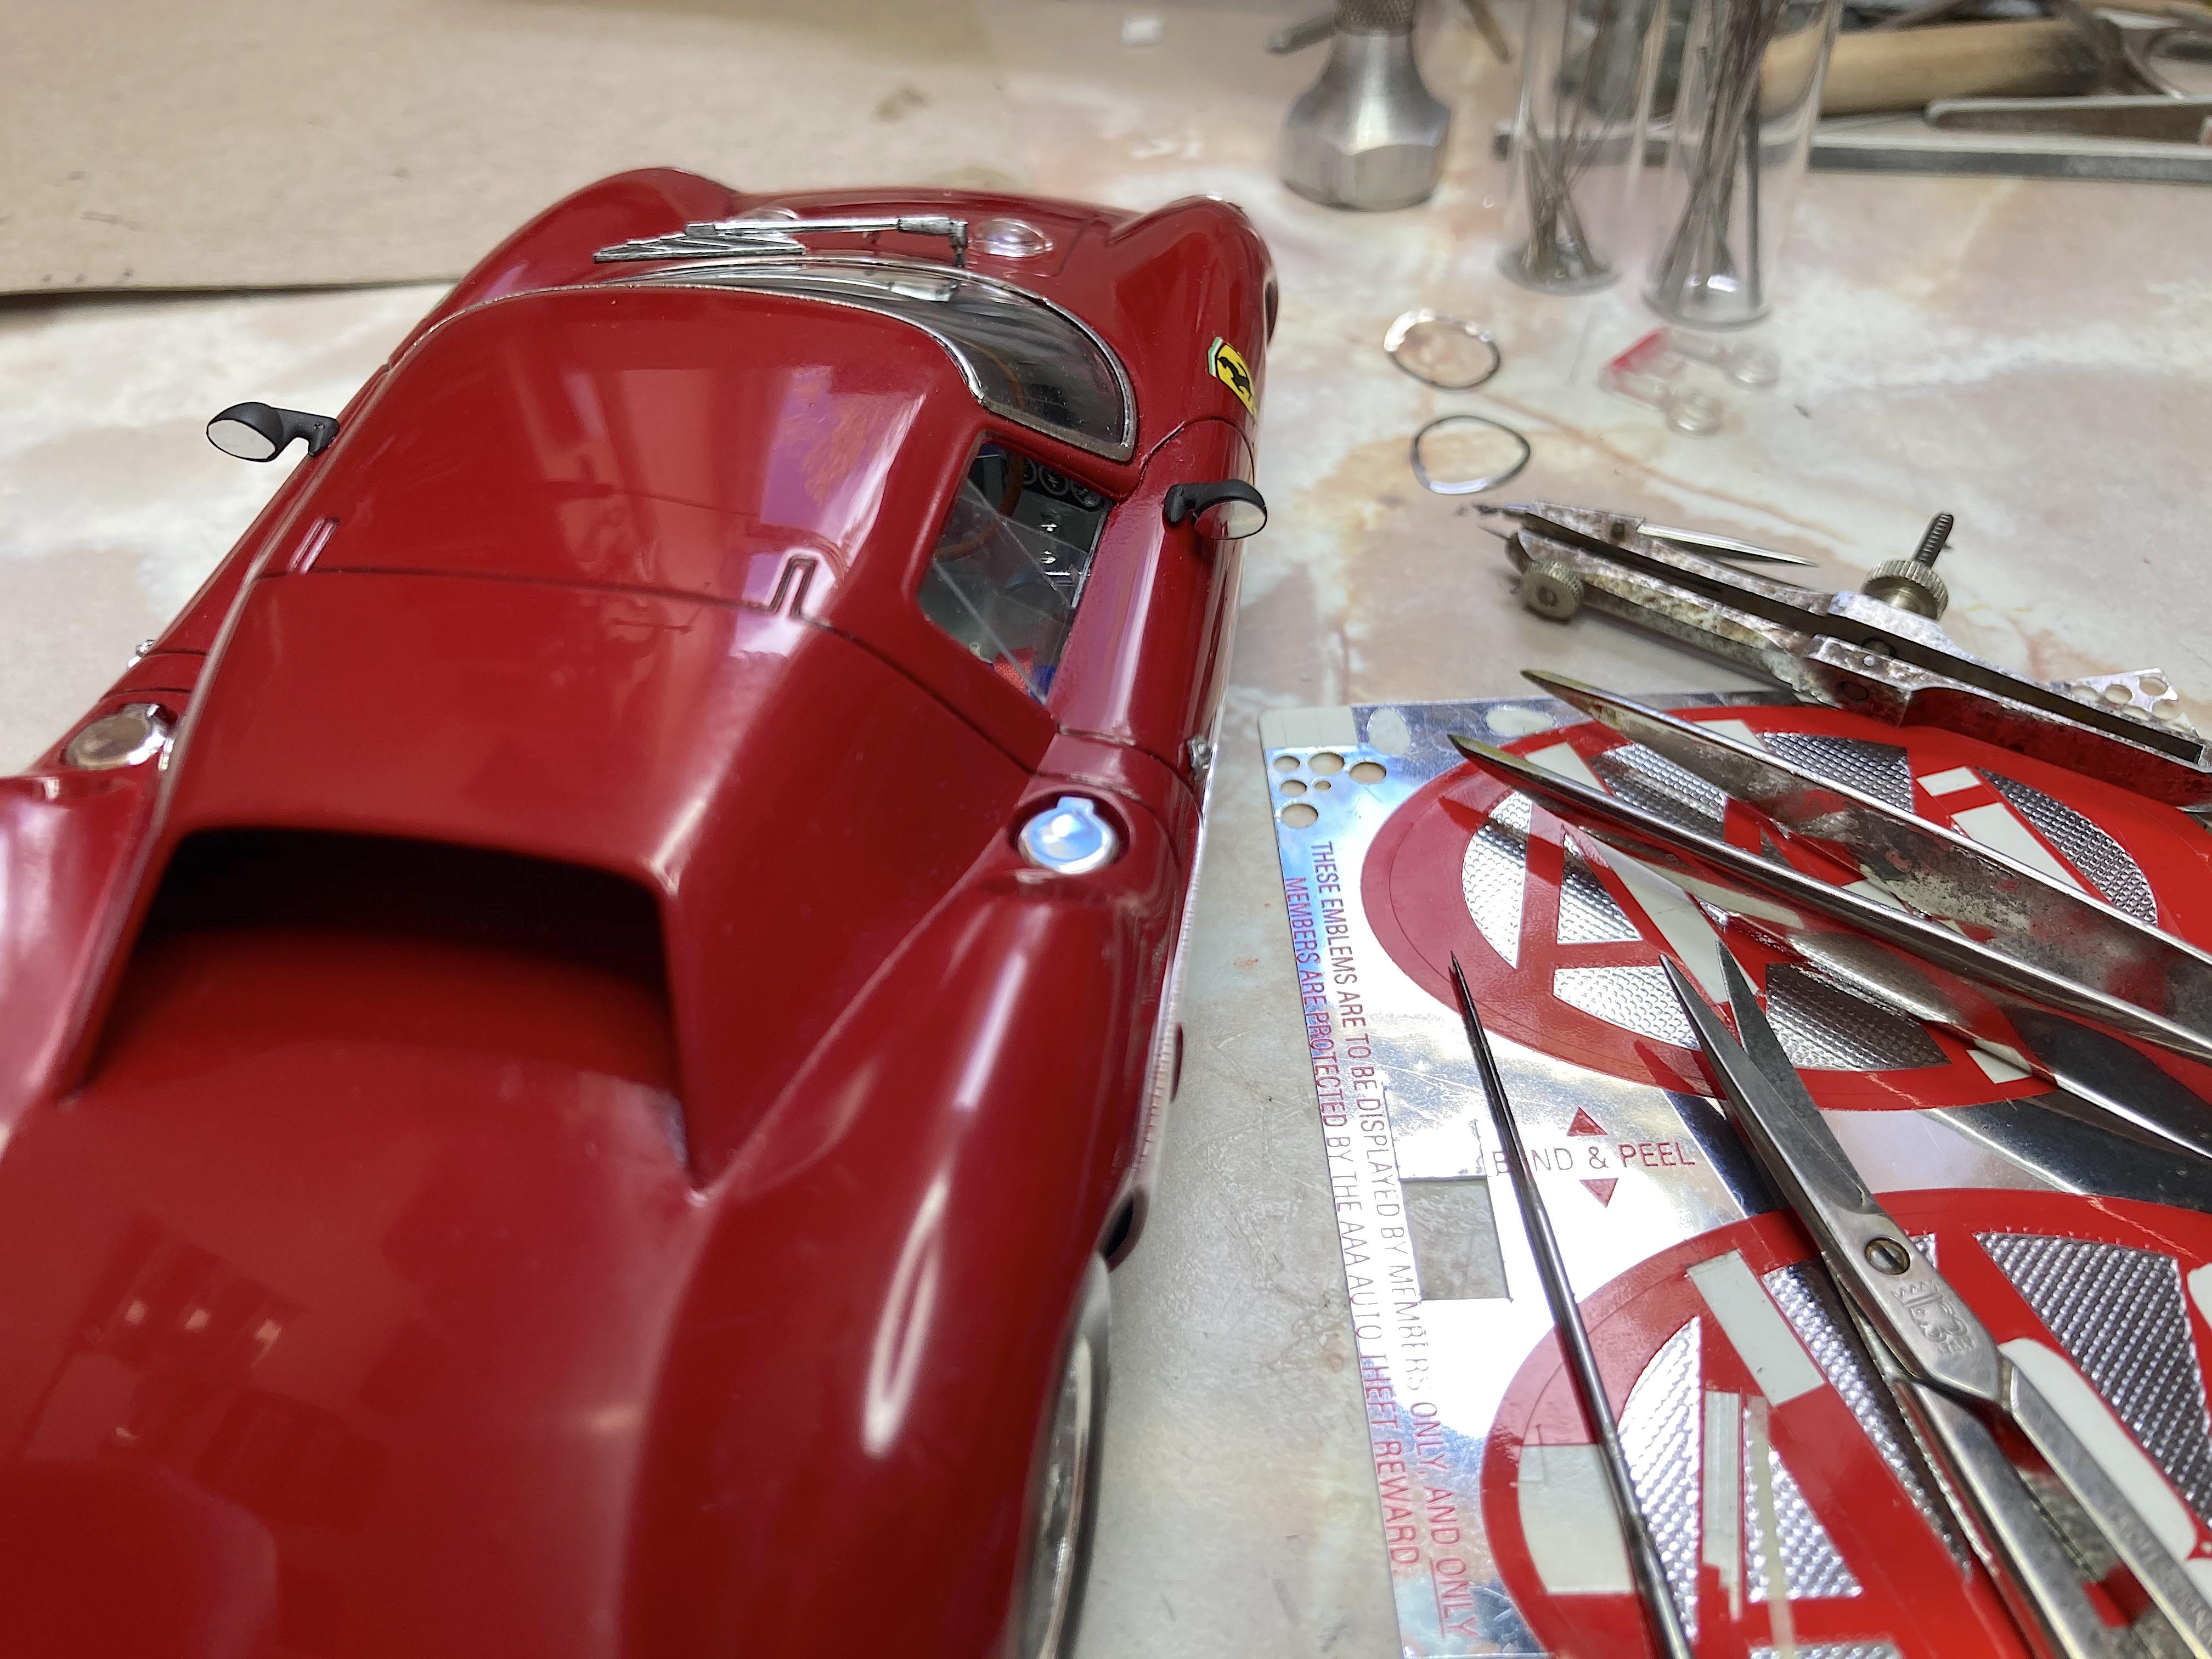
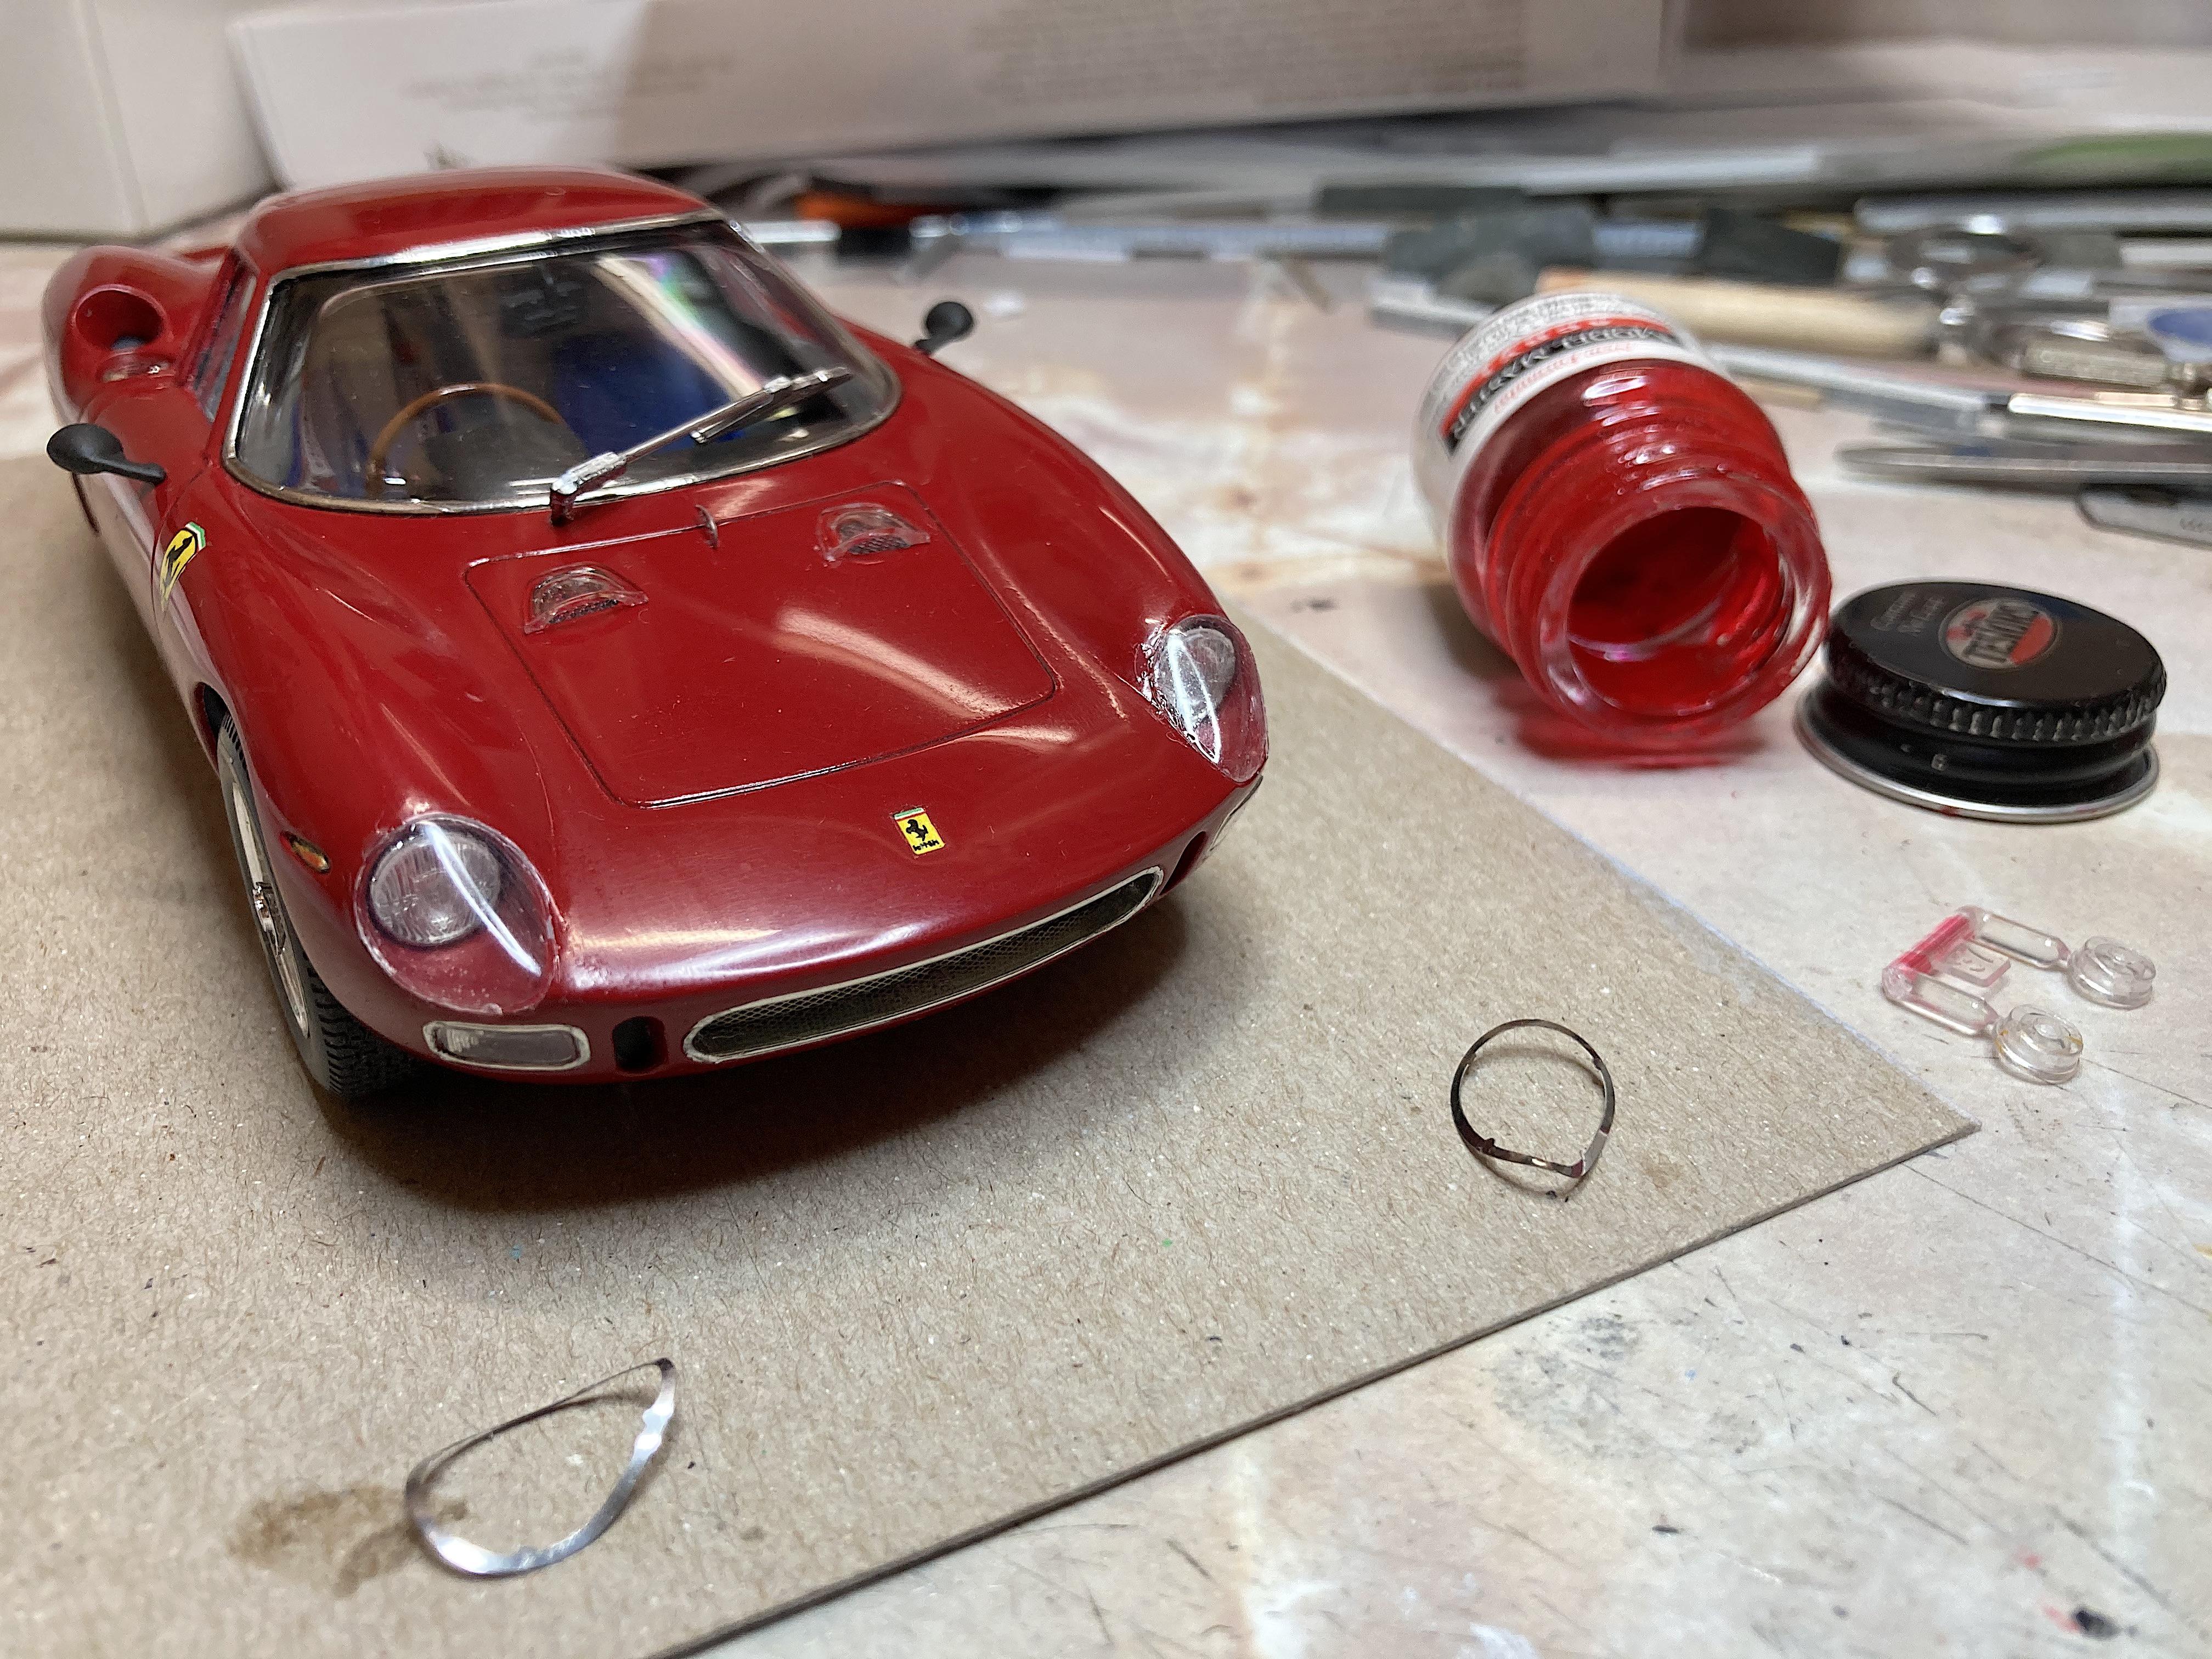
Thank you very much! You would think that since those photo-etch parts were included, they would add to the model. I couldn't stand how they did not conform with the contours, and were too big. I've done this on previous builds, the difference was having a really good cutting template. First step was sticking a piece of aluminum tape (used for HVAC ductwork) on self-adhesive foam core. Then I polished with Blue Magic (see photo-etch earlier step). Stuck Scotch tape (dull type) on the p-e ring, then onto the aluminum, which holds it down great. Used a new #11 blade to follow around the inside first, starting with the bumps first, then around the outside. Carefully peeled off the backing (take the outside off first), then stuck on starting at the top. I cut about 3 MM off the bottom curve, so it conforms all the way around, no massive gap. Worked into place with a balsa wood stick. It's not as flat as the p-e, but at a distance at 100 MPH it works. Last scratch-building, really just getting the parts box mirrors done properly. Drilled for wire in the mounts, then in the door. Used the AAA sticker for the mirror, cut with scissors, by eye. Taillights are the last thing to do! Oh wait, the last picture, the wiper needs finessing. ?
-
1965 Ferrari Delivers to Le Mans - revised
89AKurt replied to Gramps46's topic in Other Racing: Road Racing, Salt Flat Racers
Thank you for the explanation. -
Ferrari 410 SA Ghia 1956 by Fernando Pinto Portugal
89AKurt replied to 89AKurt's topic in Car Kit News & Reviews
Don't get me going about "influencers". ? Ferrari and other manufacturers have always had special customers, who seemed to have more money than sense. Best wishes back to you! -
during a hailstorm
-
Thanks for sharing. That poor kit, you did well considering. I've amazed myself about what a difference the primer color makes.
-
1965 Ferrari Delivers to Le Mans - revised
89AKurt replied to Gramps46's topic in Other Racing: Road Racing, Salt Flat Racers
I don't care about accuracy, had to comment about the cars, specifically the 250LM that I have almost finished. ? What is the truck pulling this trailer? -
Ferrari 410 SA Ghia 1956 by Fernando Pinto Portugal
89AKurt replied to 89AKurt's topic in Car Kit News & Reviews
When I saw his announcement on Fakebook, I asked if he had it on eBay, he said to just order directly from him. If you can't make out his email on the box end, on the eighth picture of my original post, let me know. The reason I love this car, so American. ? It's much like the McLaren, I love the machine and it's capabilities, but the styling is complex, and don't care to build the model. -
Thank you for checking in. Hope everyone had a great Christmas! Daughter has a break from the Navy, so had just a little time the other night to put the big parts together. Not at all happy with the photo-etch, removed. Will try using them as templates for cutting out foil tape. Also my clear red is shot, so now begins the search for an alternative. What do you think of the mirrors?
-
exacerbated with mothballs
-
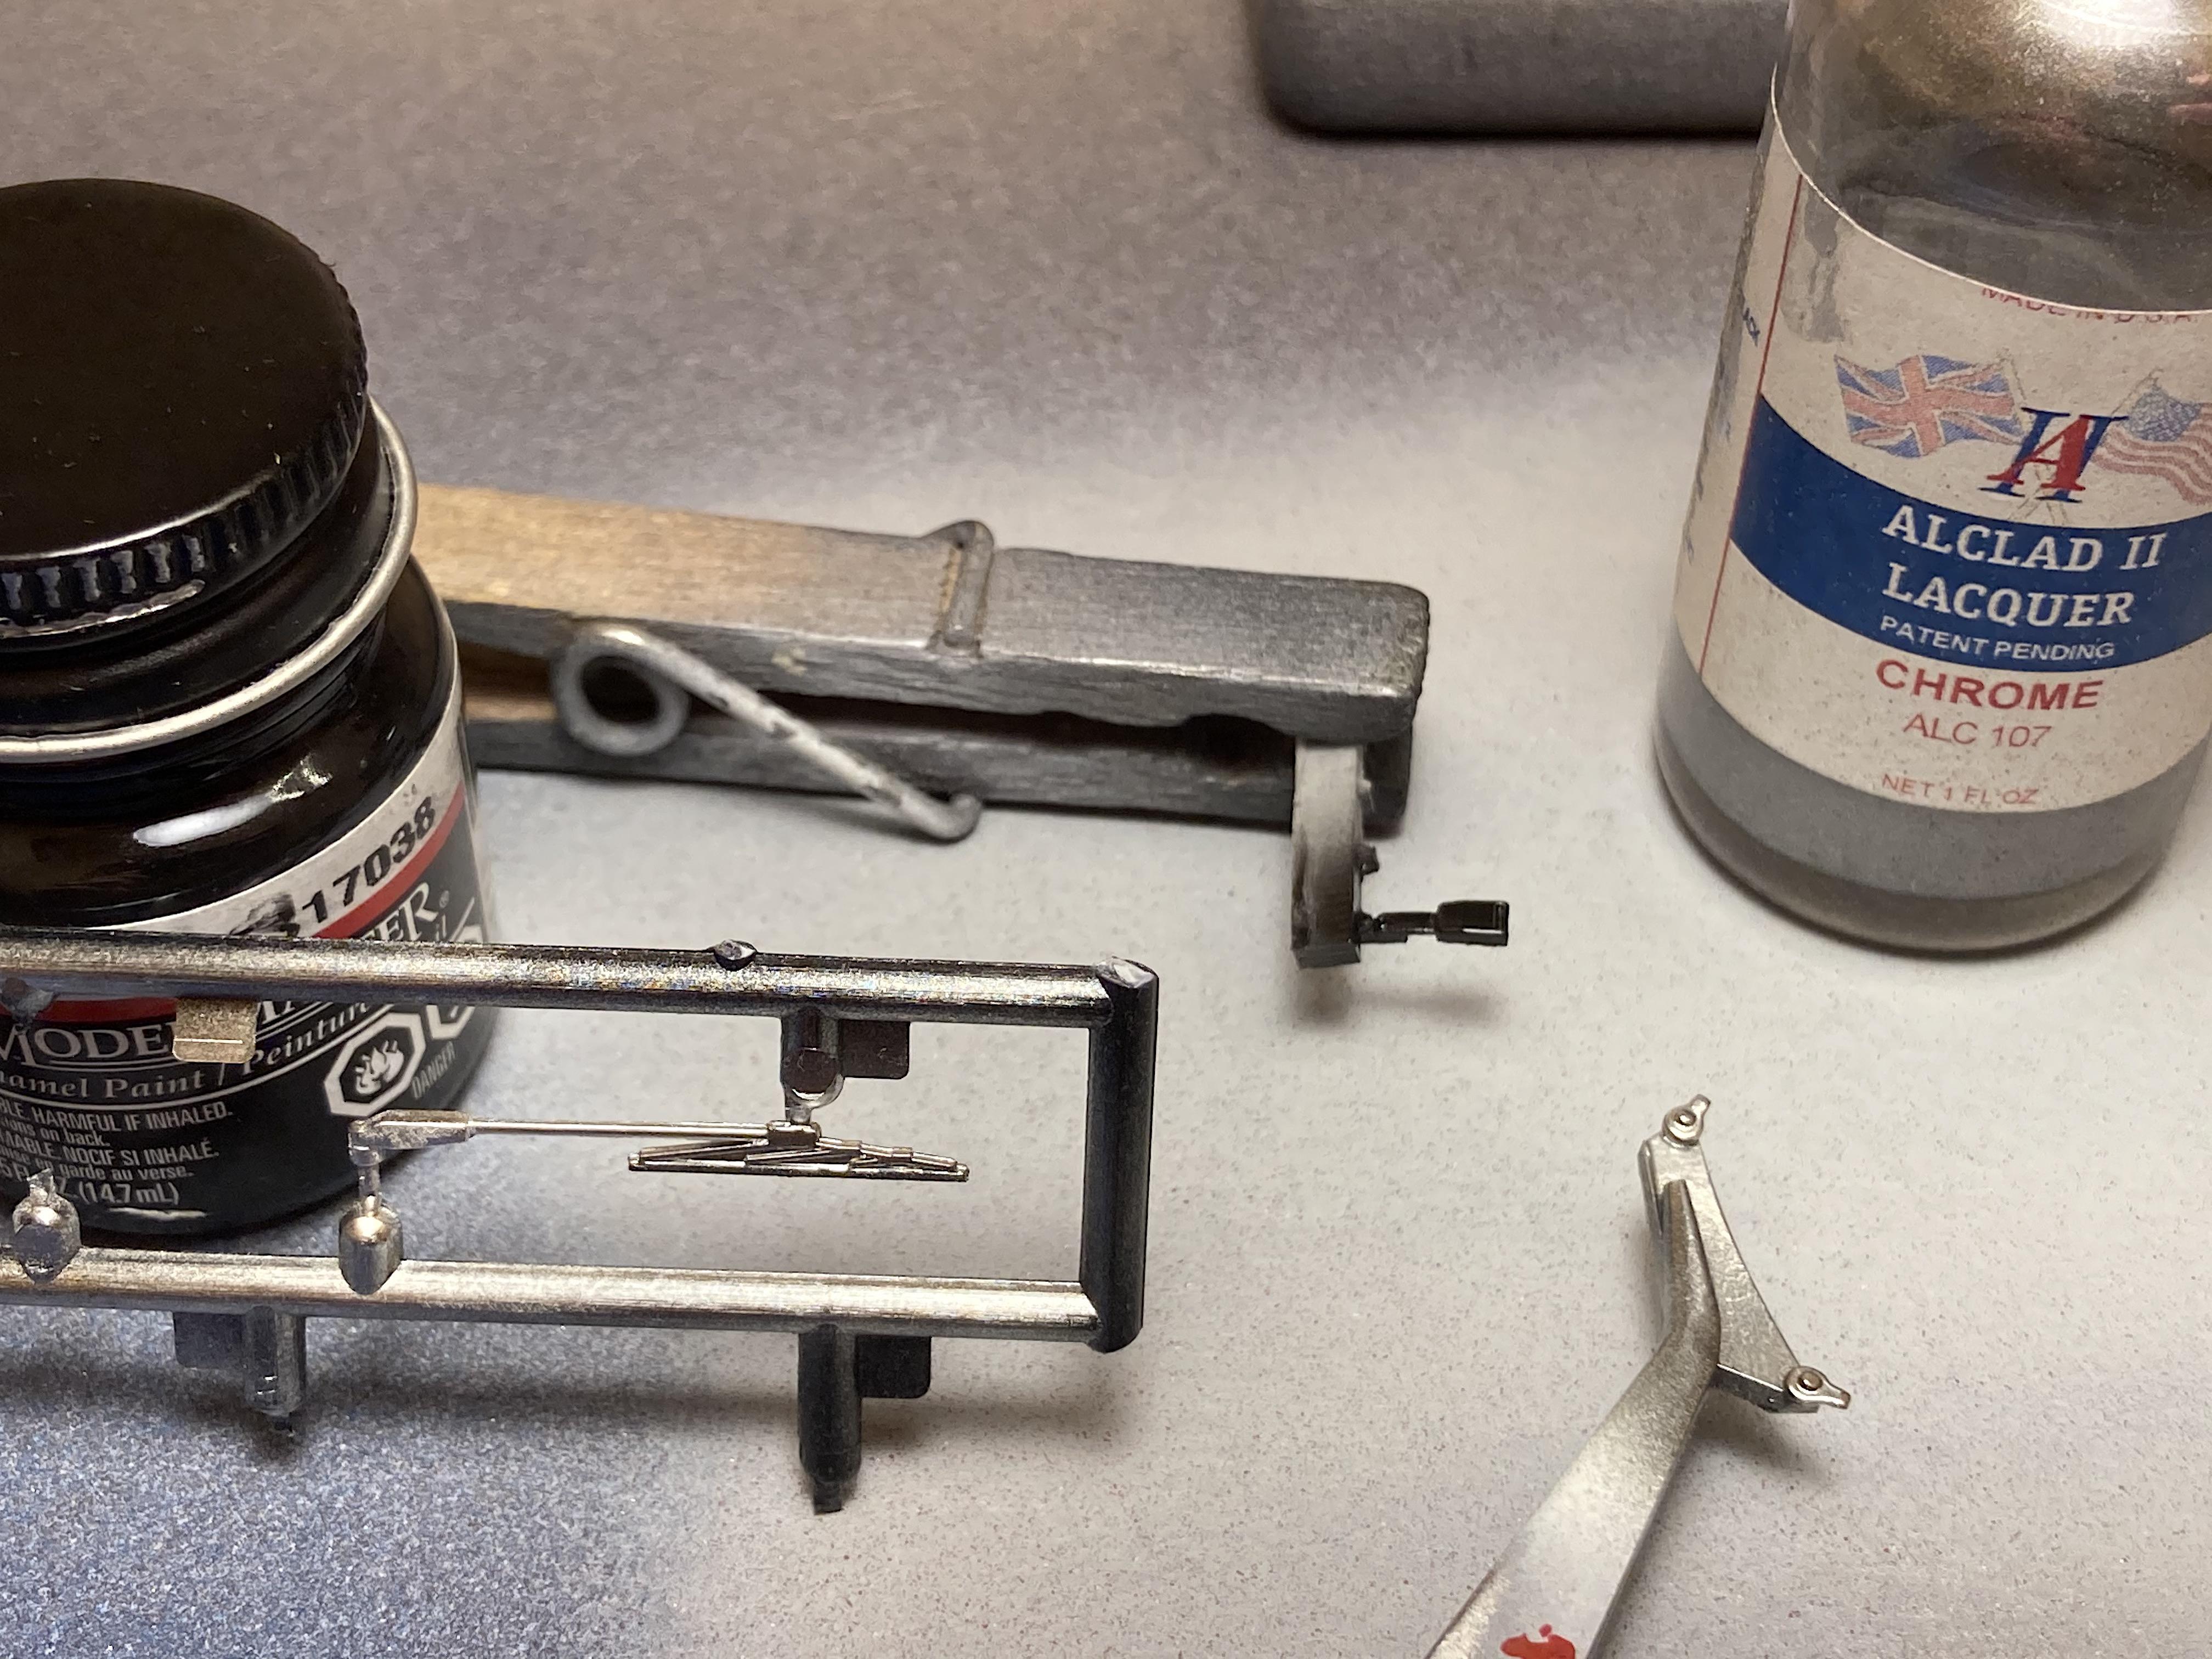
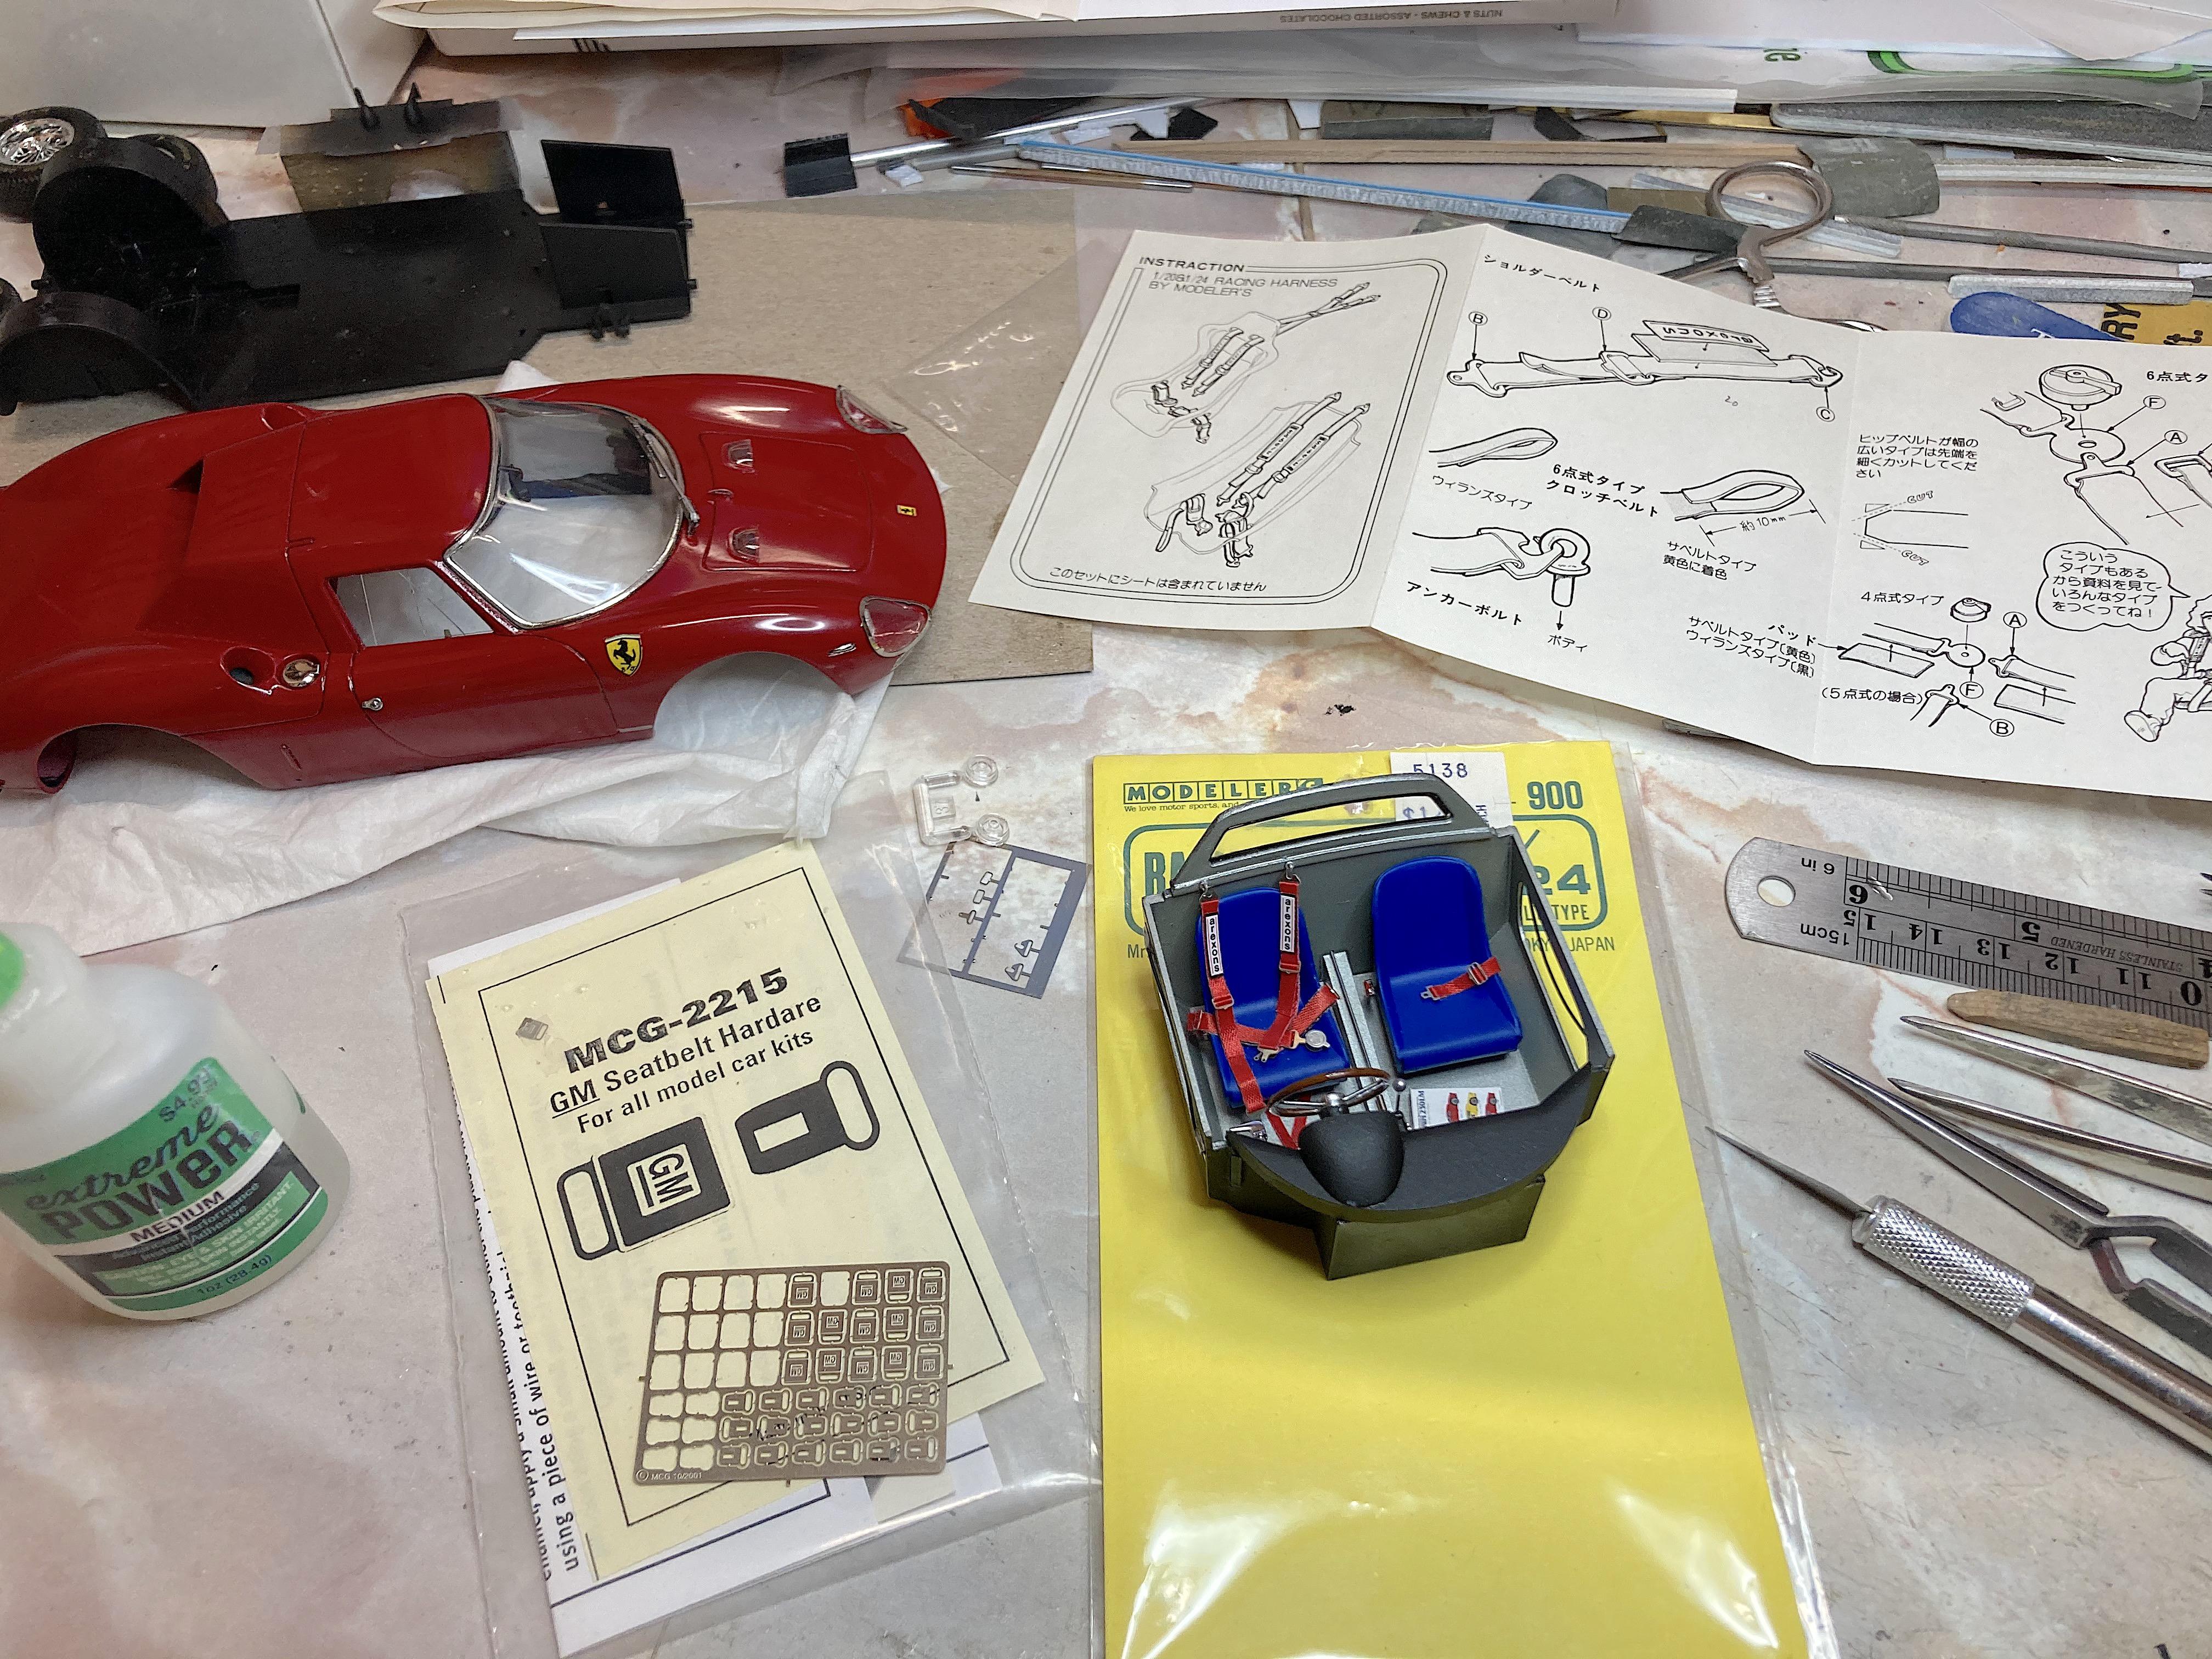
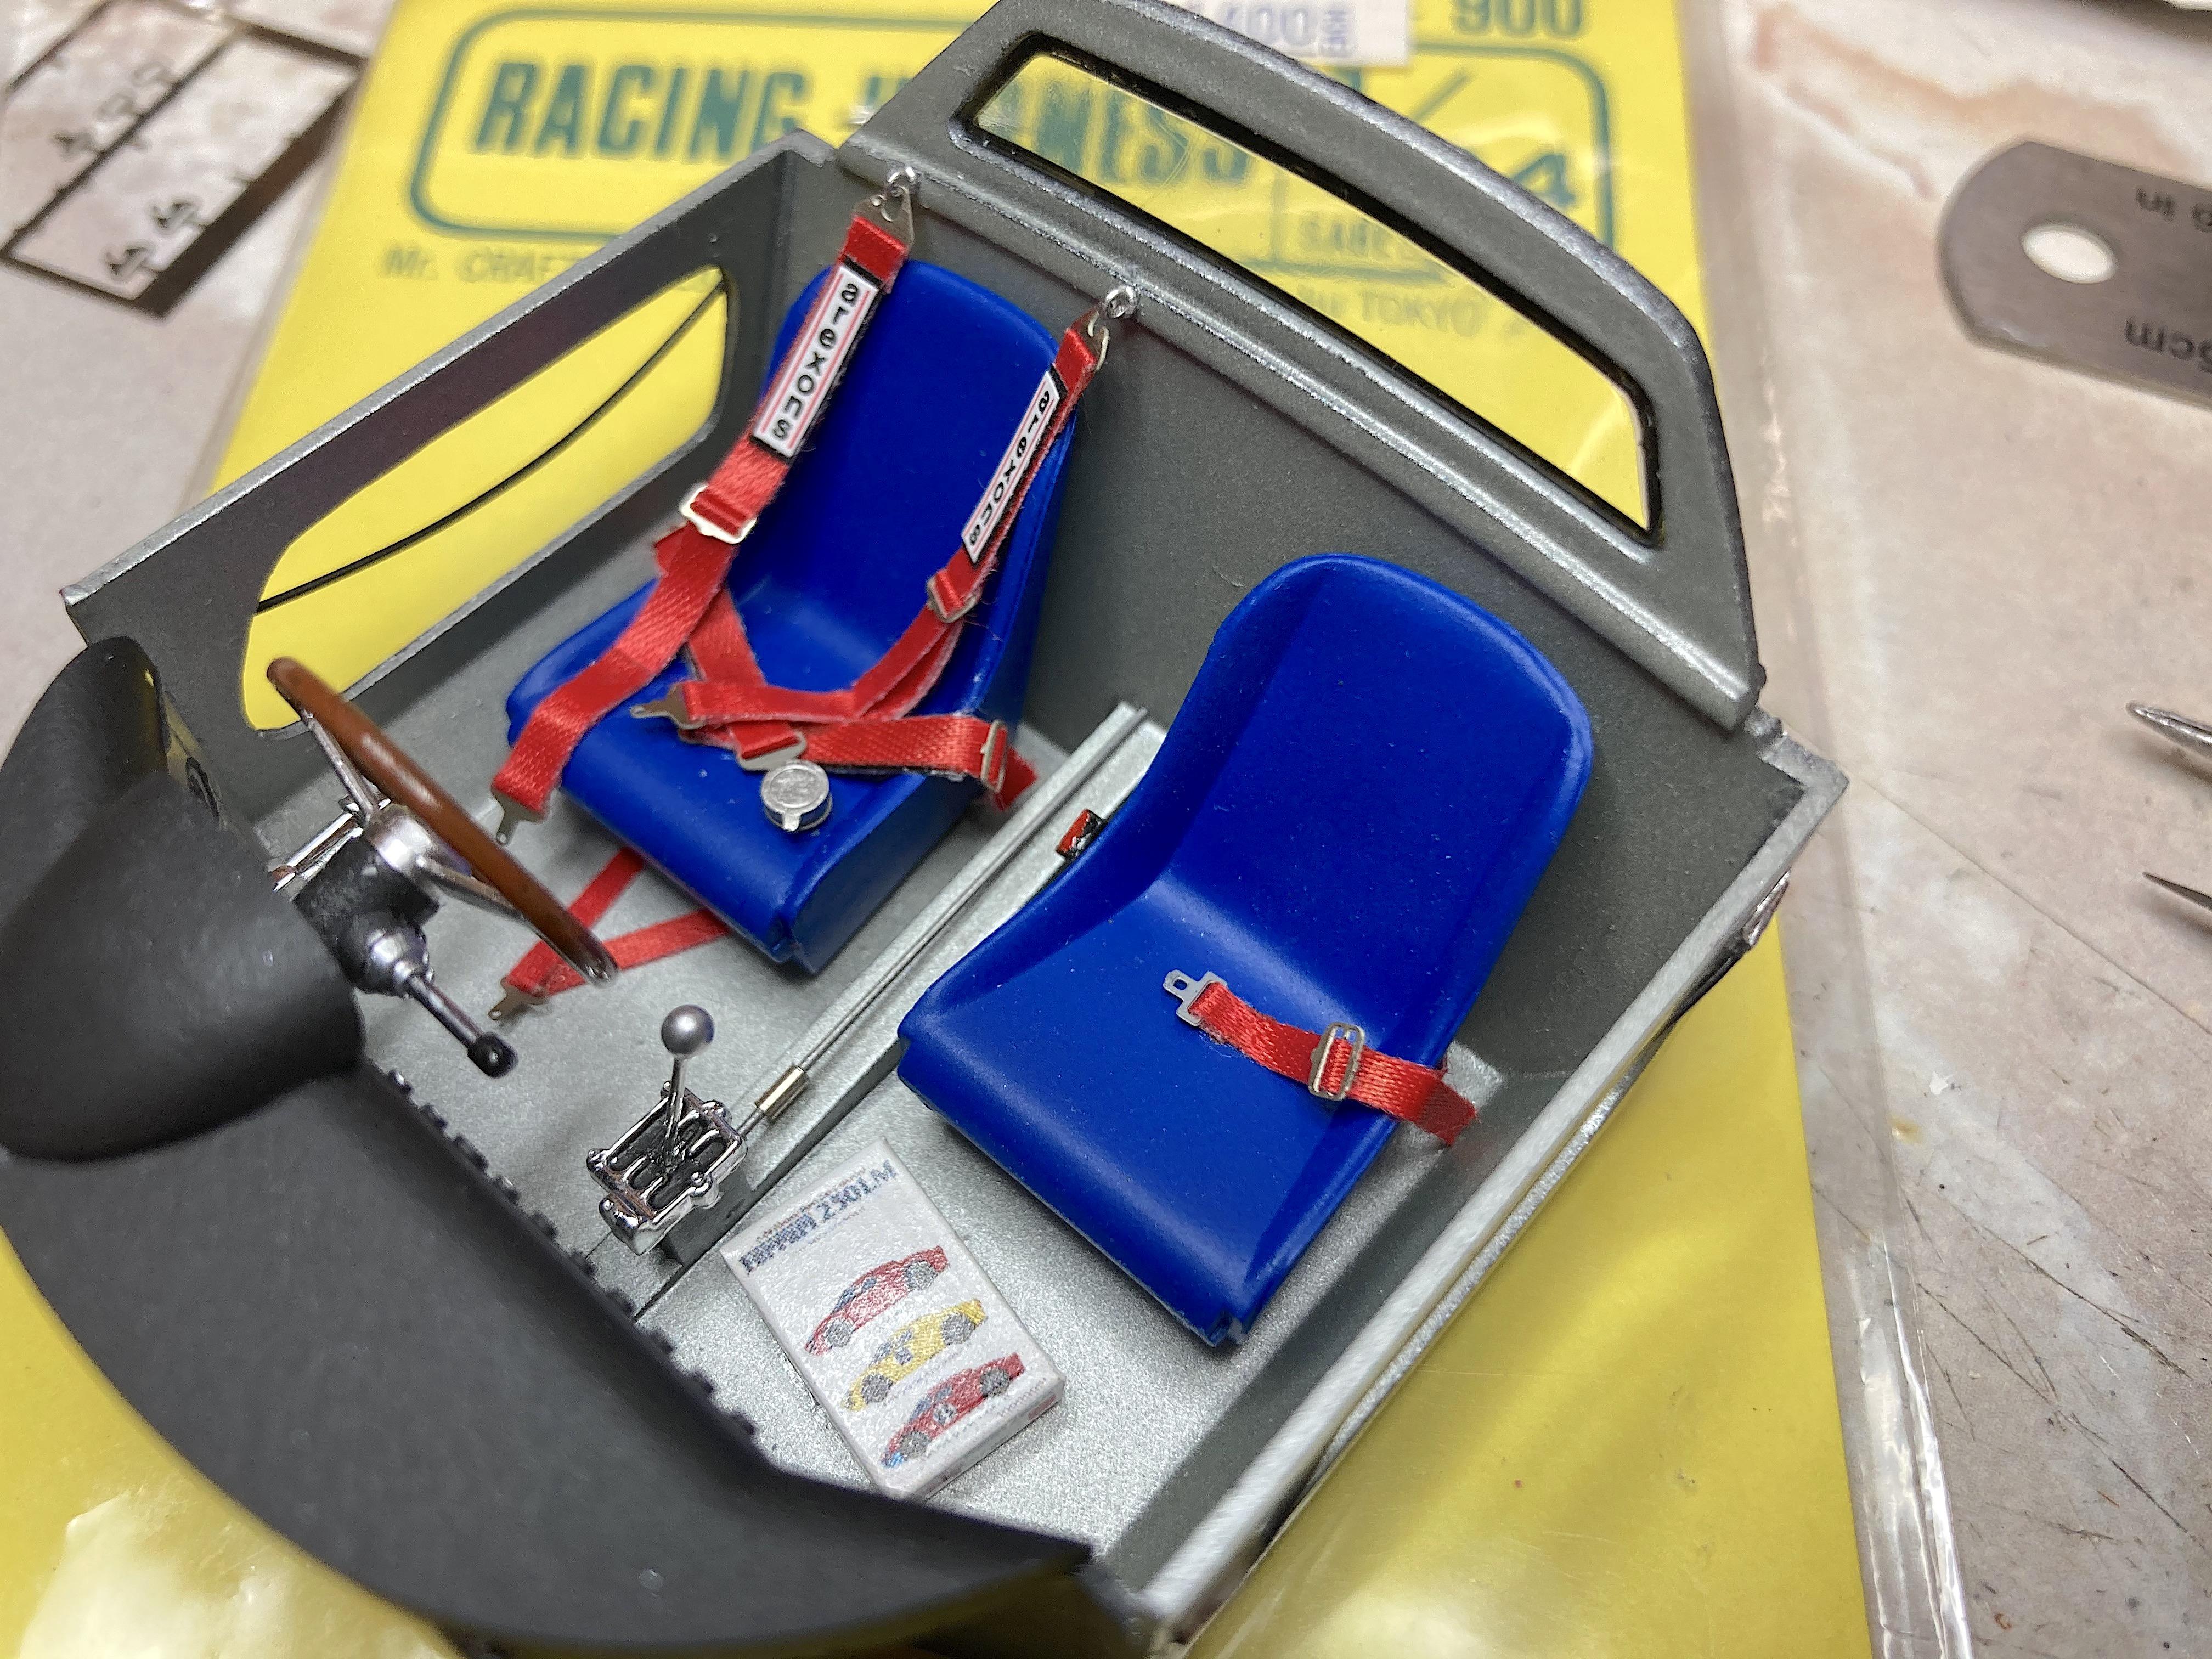
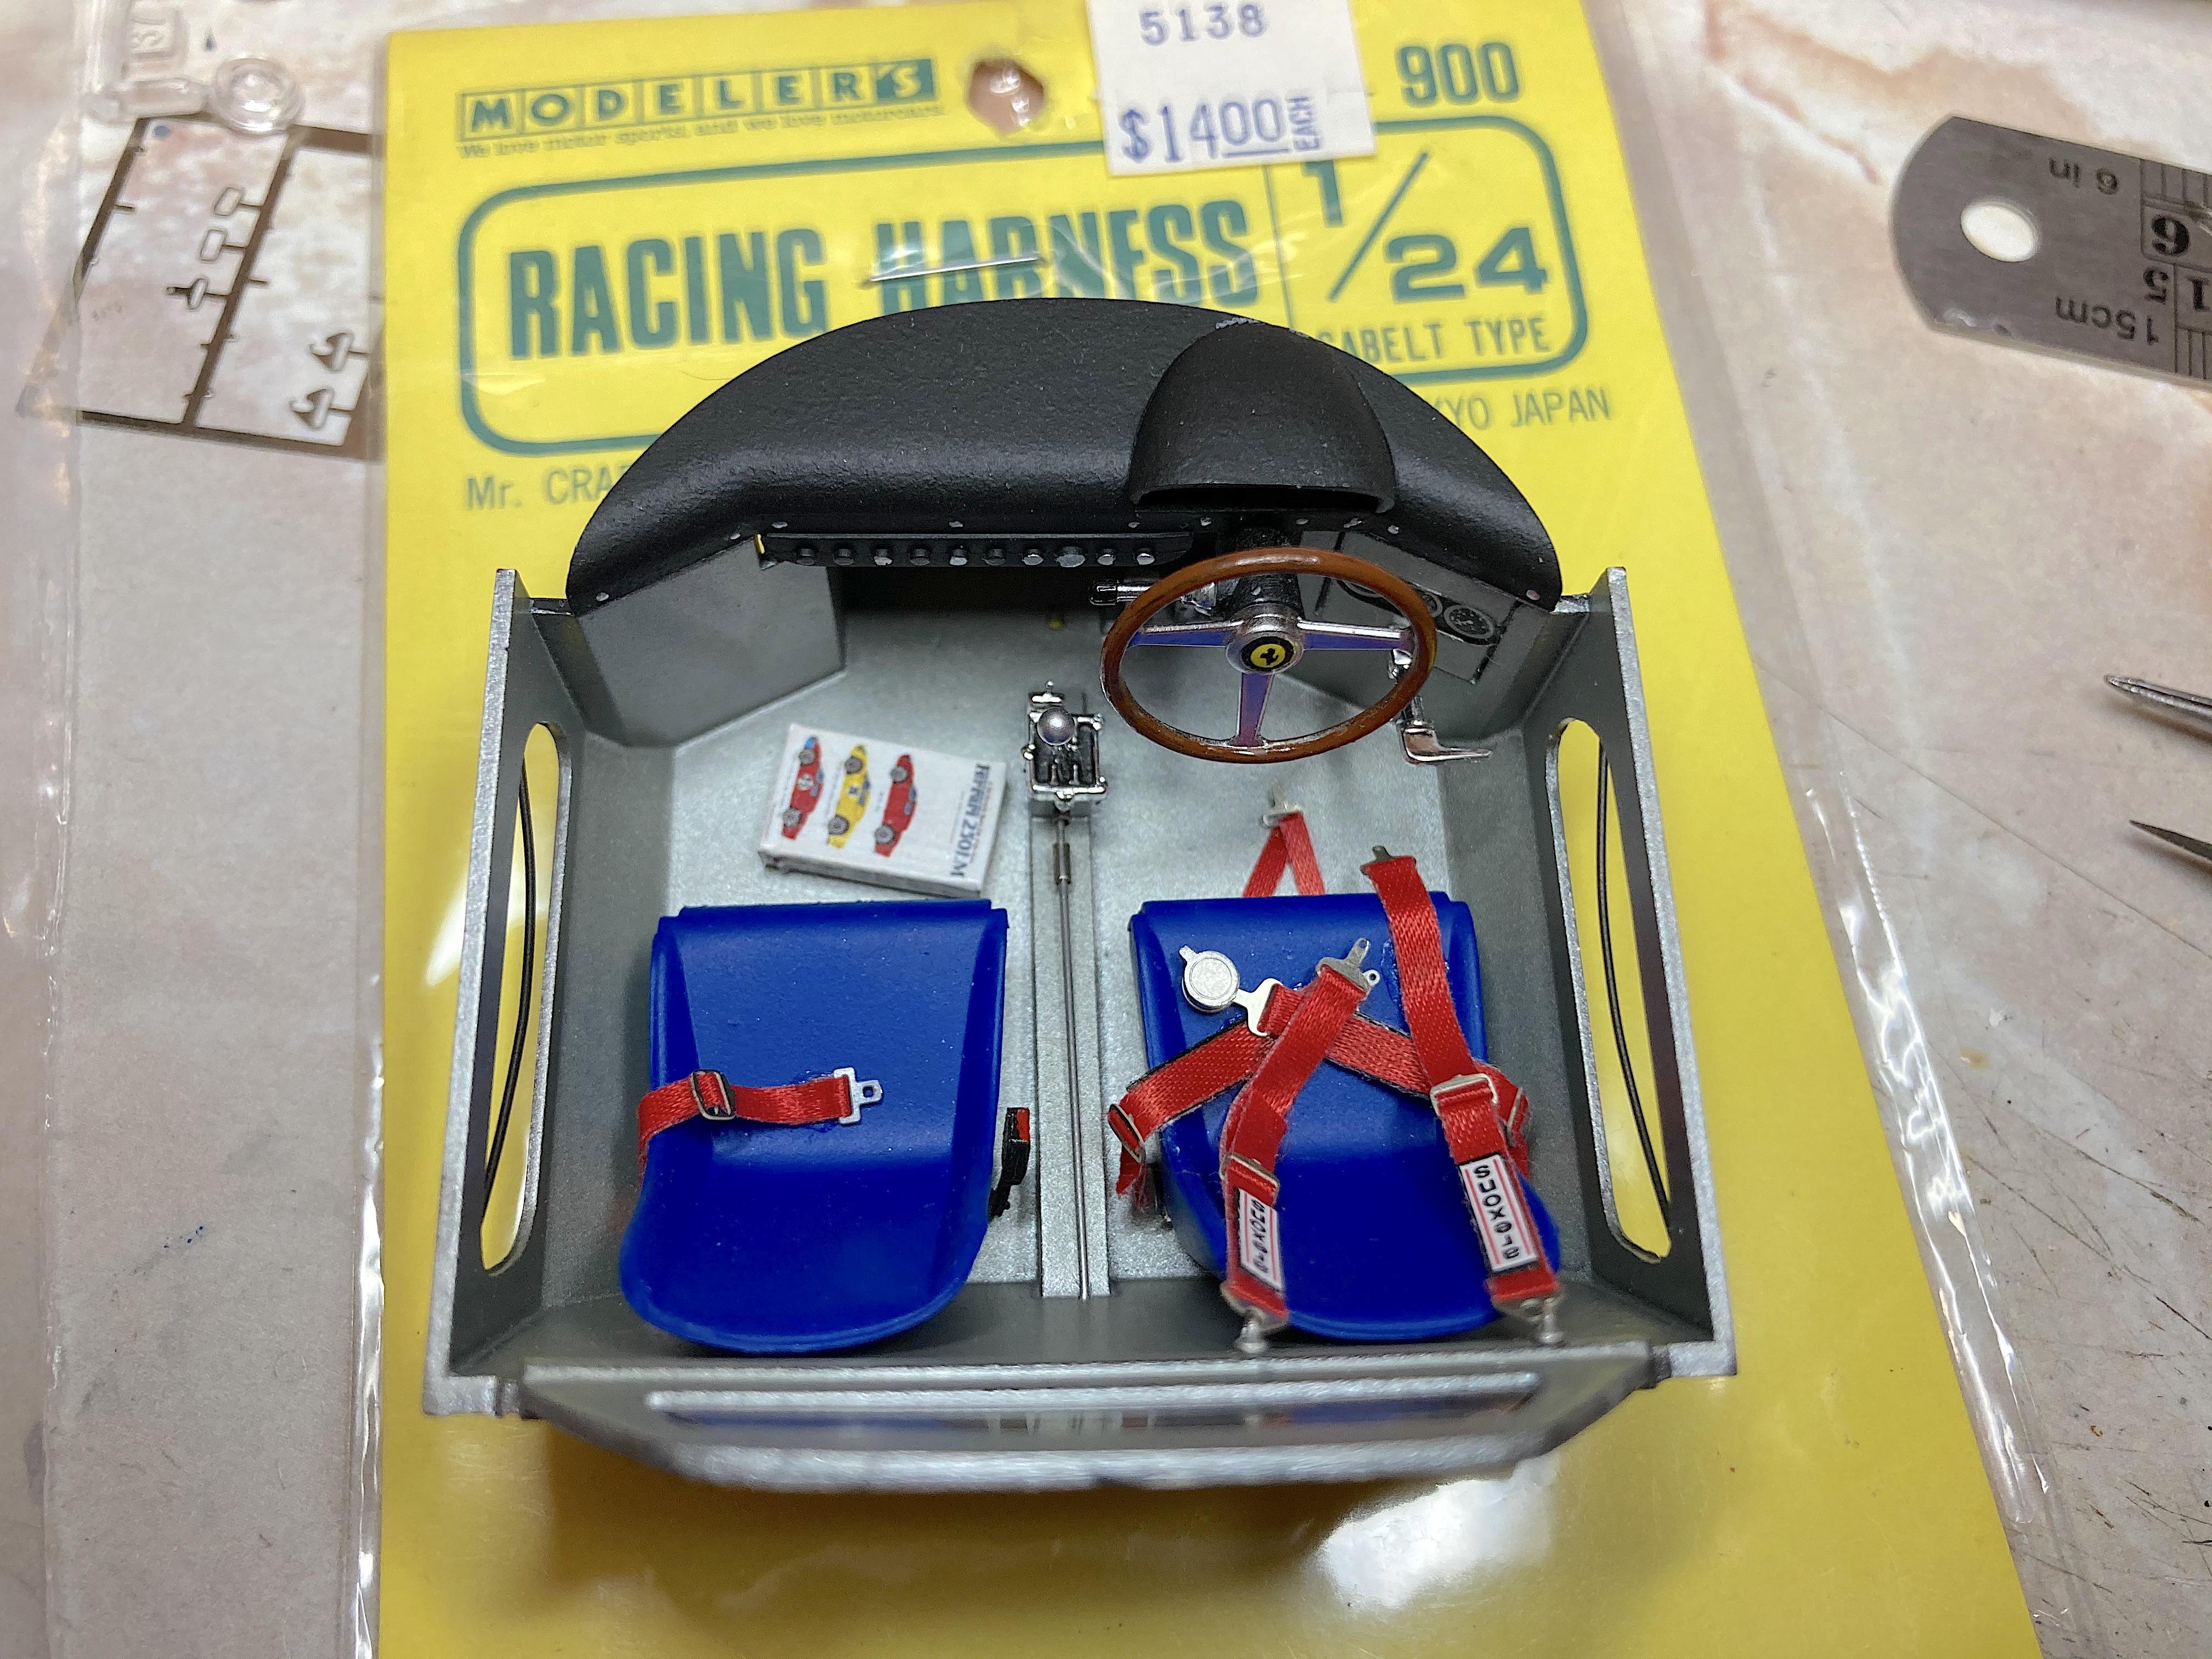
Last airbrushed parts, seat belt buckle and door "handles". Seatbelts are done. Forget why I got the Modelers set, glad to use it on something. I chose the simpler variation that was shown in the instructions, that was in Japanese. Mixed in some Detail Master photo-etch, the connection to the seat is the backwards "GM" buckle, bent to fit. I'm still cross-eyed from working on that seatbelt! ? The photo-etch headlight parts, what a pain to get those to look right, which do not.
-
to Pandora's box
-
from 1950, minus
-
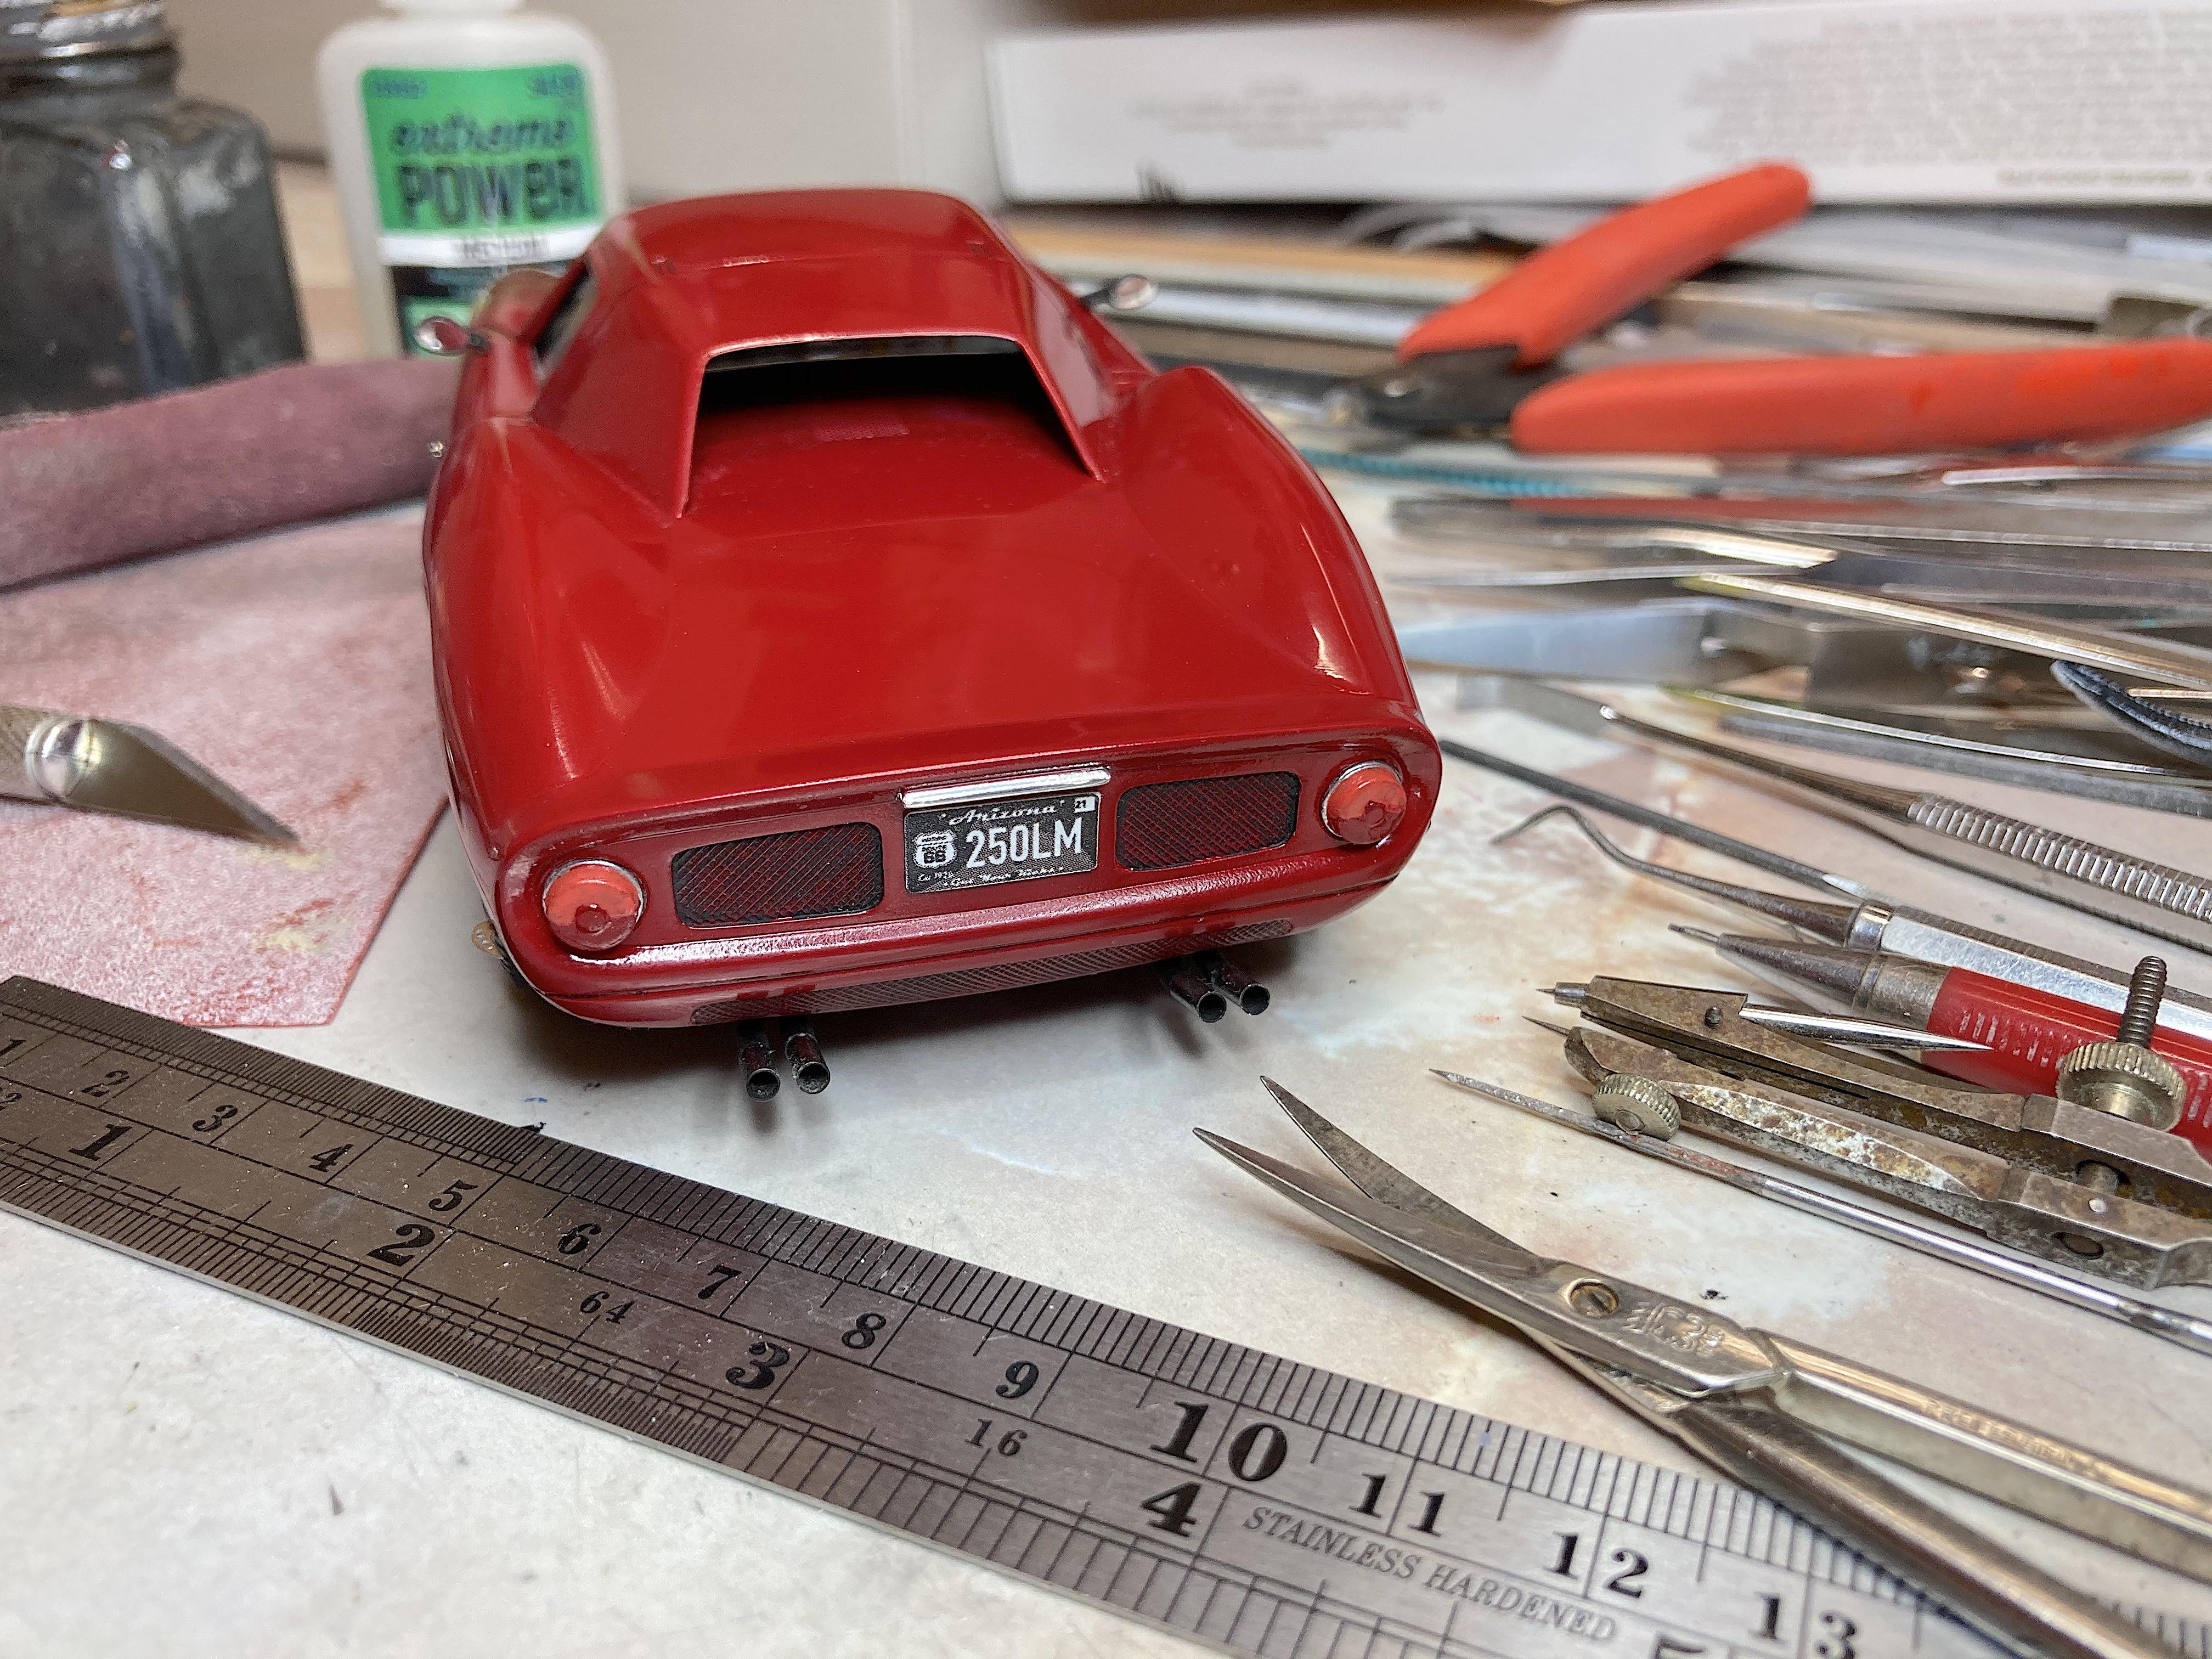
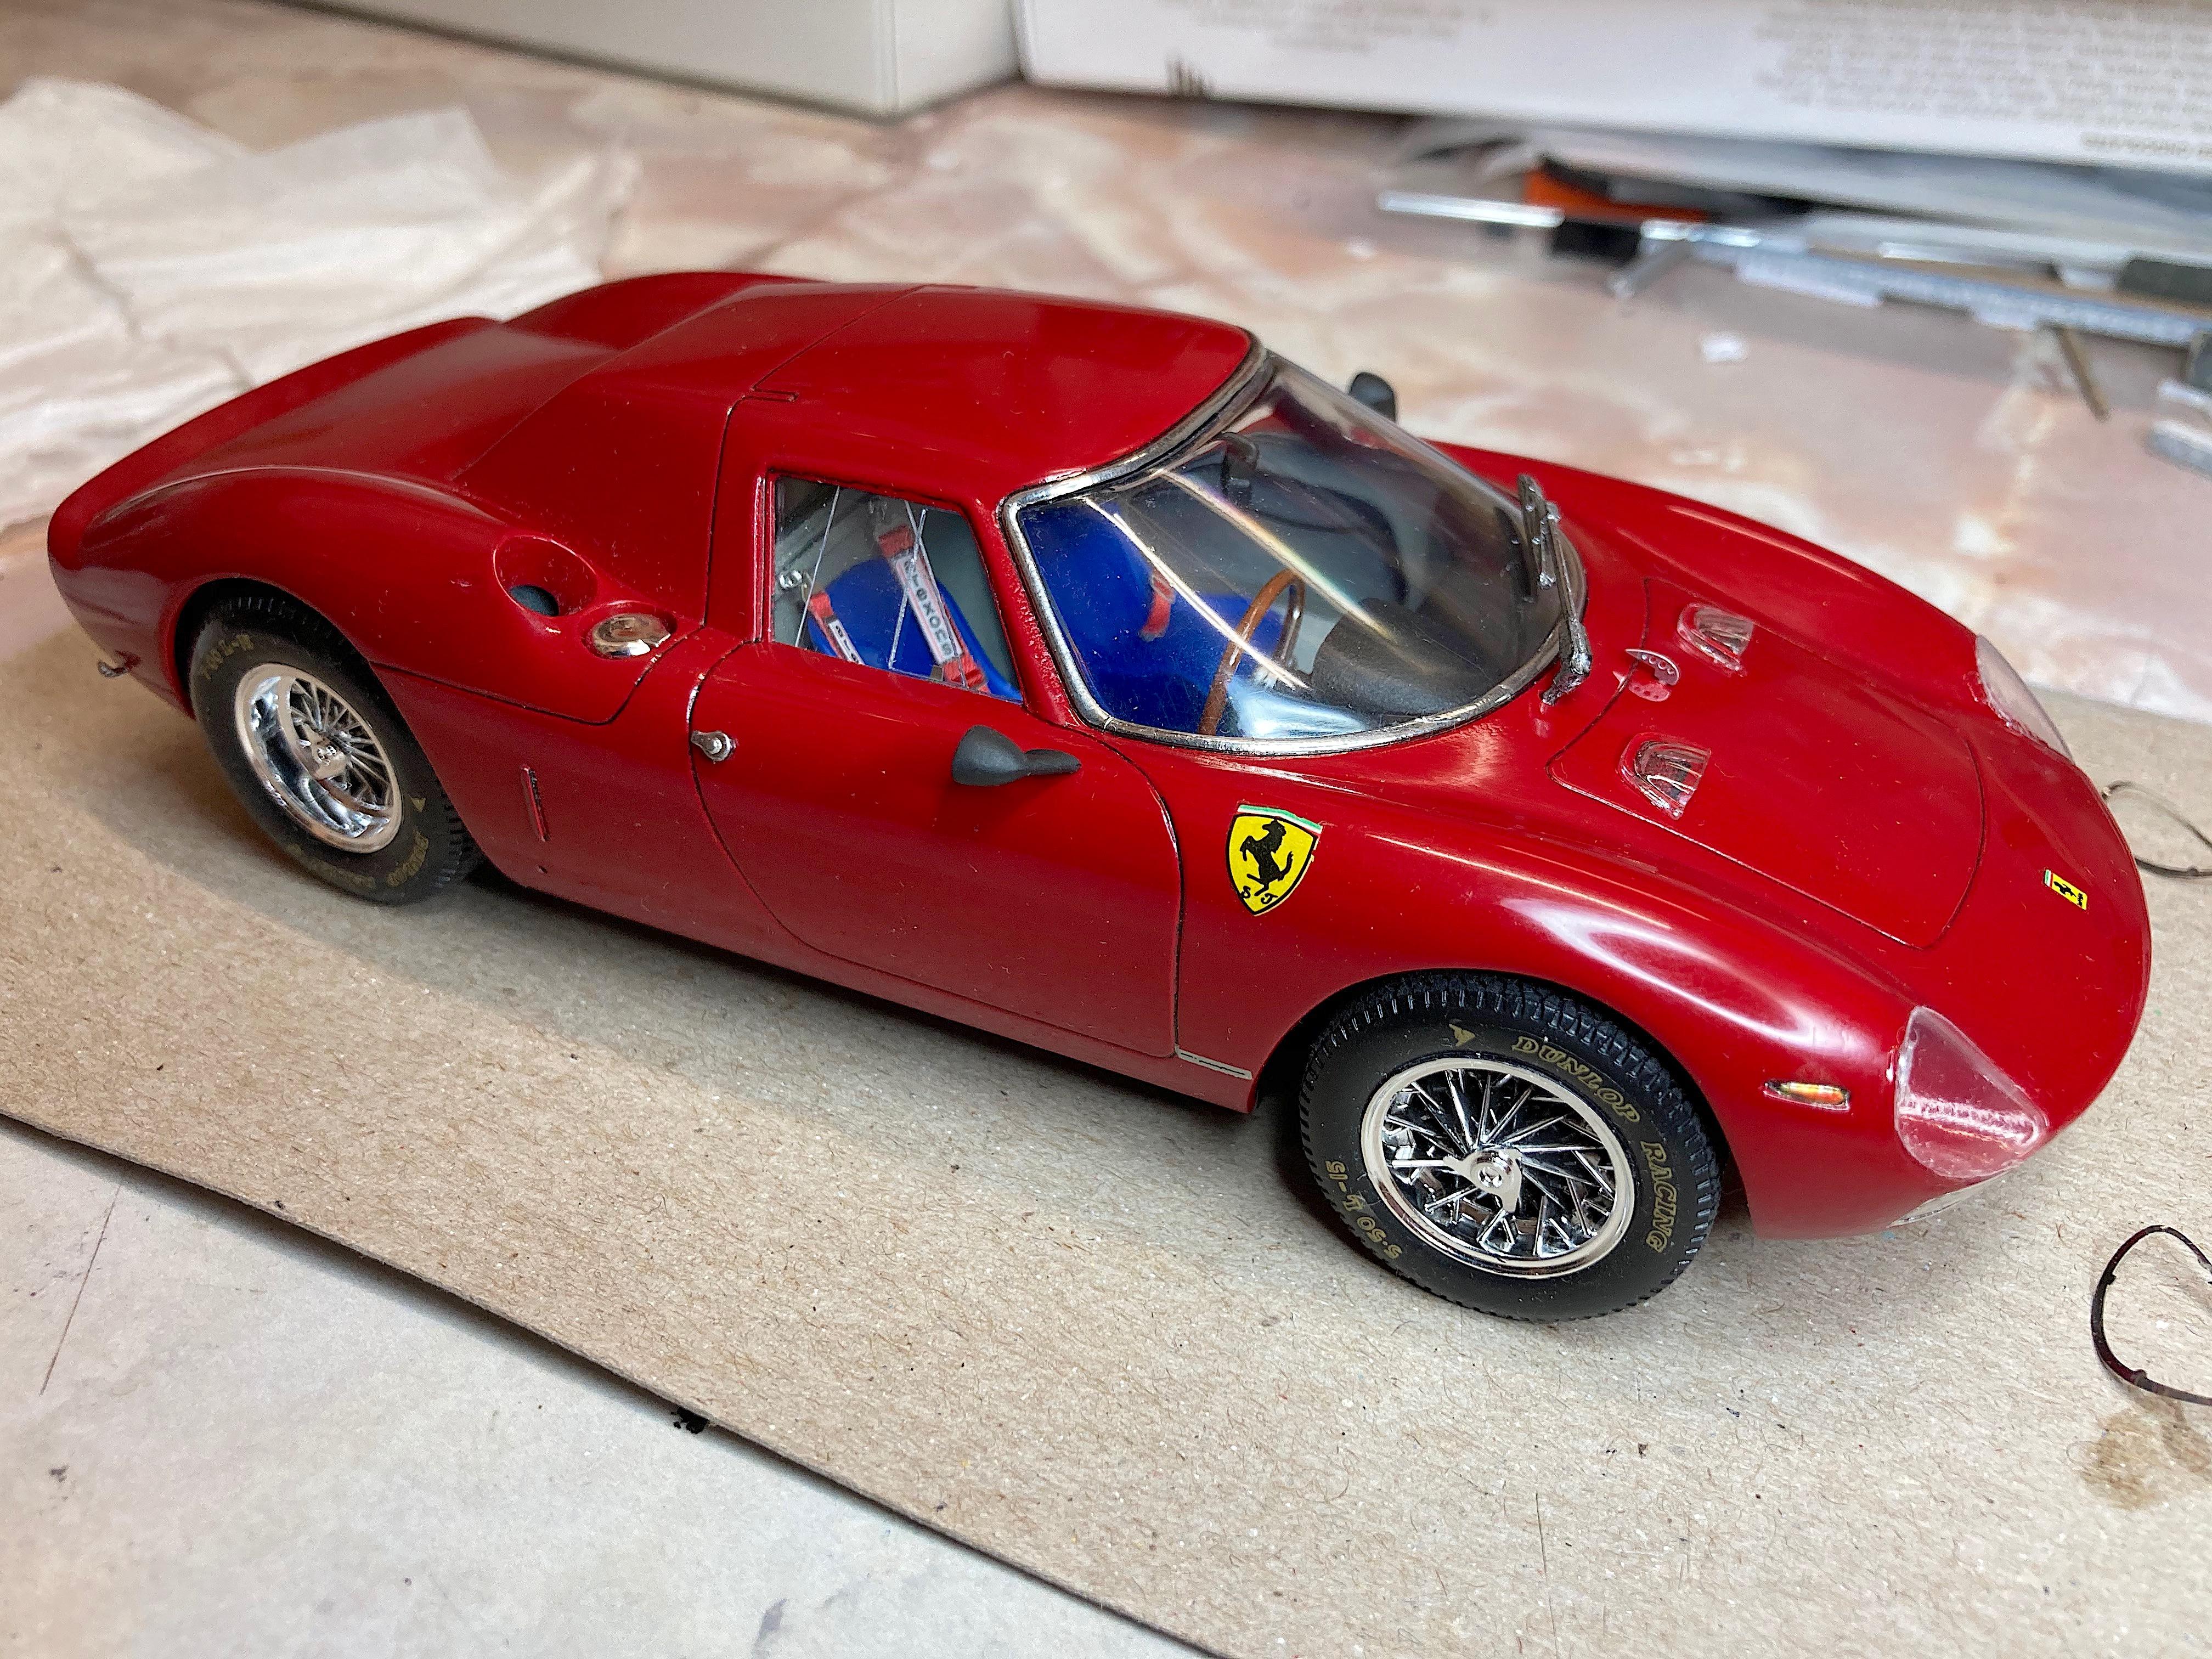
Appreciate you leaving the comment. ? Good, thank you. ☎️ But shoot me now. Botched gluing one of the air scoops on. My mistake was using the canopy glue, should have used the Elmers clear glue. Might have to make a feather duster, and set on the that mistake, too big for bird poop. ? Made the kit box, and license plate. Side windows were something I *had to* fix, they should have made the part with steps instead of raised lines to fake the two panes, and they were not angled. First made a couple of cardboard patterns; the outer pane is the rear fixed window which I extended to the front, then the slider pane was glued in, did not make it moveable. Cut tiny photo-etch fret latches, can barely see them. Last scratch-building is cleaning up the door "handles". Still thinking about the seat belts. Taillights need to get painted, and might Bare Metal foil the bezel.
-
enough to start
-
Ferrari 330TRi62 1962 #6 Le Mans
89AKurt replied to Gramps46's topic in Other Racing: Road Racing, Salt Flat Racers
I assume it's a resin kit? Too funny that you can do a shiny paint job that easily. ? I like the settings for the photos. -
What everyone else already said. ? Has good bones, could be restored with lots of $$$$.
-
Vacuum-forming time! I made the box last century, and use an old Oreck vacuum cleaner with the dust bag removed. The clear plastic is a package that a game camera came in, it's thick enough, and more clear than Plastistruct's product. The frame is masonite, could use hobby plywood. I use aluminum duct tape because it sticks really good and won't come undone when heated up. First time I have used Simply Tacky, that I found at Hobby Lobby. Managed to get it the first time! I have a glass top electric range to heat the plastic, wore a leather glove. The trick is to watch the plastic first get soft, but keep over the heat, then watch it shrink and get tight, almost to the point it starts smelling but not smoking. Then the quick flop over the box, this is usually when I screw up. The exciting moment, looks good! (I wolfed all the cookies while posting this) I'm not excited about this part, so will keep the kit parts. Can you tell the difference? Yikes, these close-up pictures make the model look terrible! ?
-
I am digging myself into a bigger whole
89AKurt replied to junkyardjeff's topic in General Automotive Talk (Trucks and Cars)
This wholesome topic looks safe. I never have this problem. ? -
Cool subject, I like what you have done! I'm preferring to focus on the old vintage classic (whatever the youngsters call these LOL) cars, the new exotics are amazing and interesting, but the complexity is too much for me. In my opinion, way too over designed. Nice choice of wheel/tires, I assume they are Fujimi. Seatbelts look great too, a detail that is annoying to accomplish, but adds so much to an open cockpit.
-
I must be faking you out with pictures of every excruciating step. ? Thank you! Thank you too. I see below...... Thanks for showing that. I wonder about the taper of the cabin, seems extreme. Has suspension parts, thats amazing for a smaller scale. The headlight covers would really drive me nuts. Thank you! Bare Metal foil is applied. After reading some recent comments elsewhere, glad this sheet sticks. The photo-etch grill is also glued in, so glad I did this. Too bad more manufacturers don't do headlights this nice. Note the air scoops..... Taillights and license light done. Now that I look at the picture, might work on the grills, this is why I prefer using real screen. Black paper is put behind the air scoops and front grill. Painted flat black behind the window edges. The inside of the doors need to be painted, either aluminum or flat black, that will be a last minute decision. I should brush paint flat black in the wheel well areas. Seat belts, I have Scale Motorsport photo-etch hardware, if I wanted to have both seats match.