Oldmopars
-
Posts
2,058 -
Joined
-
Last visited
Content Type
Profiles
Forums
Events
Gallery
Everything posted by Oldmopars
-
The leveling "levers" are a joke on the 359 kit. If you want the to look real, you will need to scratch build something. You could just cut them off, or leave as is and just ignore them. When I did mine I cut them off to scratch build something in their place, but never got to it. I had to extend the frame as it is a log truck. In the end I never got around to making anything as I forgot. In the end, you don't miss them. So, its up to you.
-
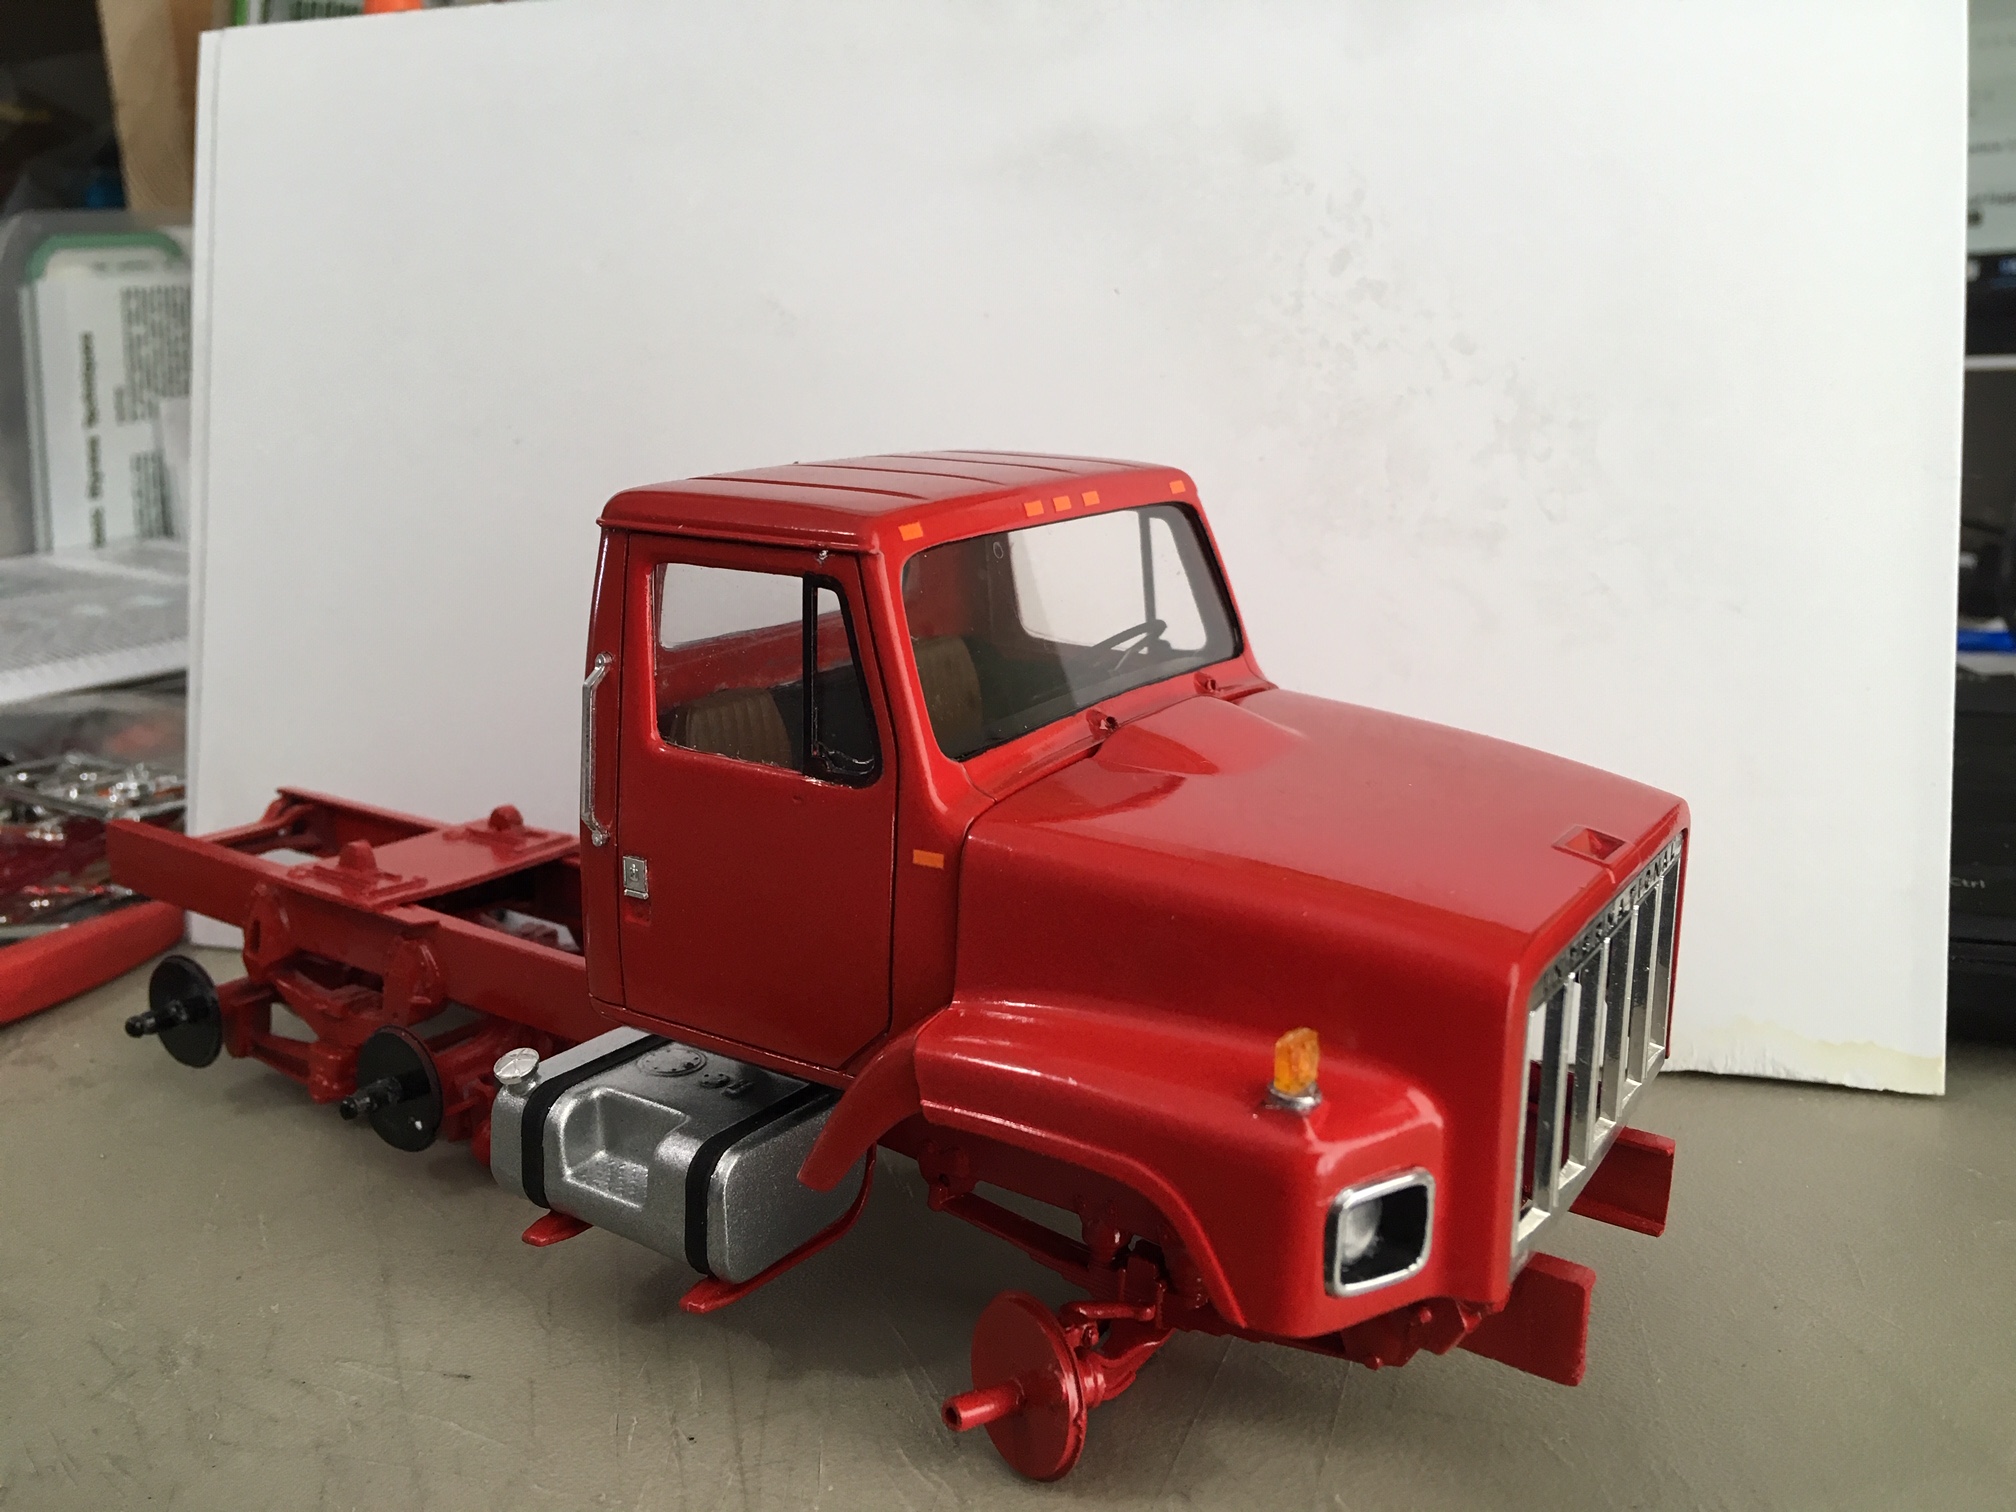
I have made some progress on the truck. I have it about 90% done. I still have some details to do and install the decals when they arrive. Need to make a Suzi tower and wires. Need to do something about the front bumper, it is just sitting there and is in the original paint from when I got it. It is OK, but just not as good as I would like. I put the other mirror on after the picture. I made some spring style mud flap hangers. I drilled out the muffler and used some 3/16 Aluminum tube polished for the stack. I added a diamond tread plate form the parts box. All lights are from the parts box, none of the originals were in good shape, or missing. I drilled the 5th wheel and have it so it will pivot. I don't like just gluing it in one spot, I want it to pivot like the real thing. So it does. All glass was destroyed in the disassembly due to the massive amount of glue used. So, it is all thin sheet from Hobby Lobby. To mee it looks better because it is closer to the thickness of the stock glass in scale. Anyway, it is getting there.

-
Rustoleum Goss Apple Red. I sprayed it, let it cure for almost 2 weeks and then sanded it with 8000 to get it really smooth, then hit it with some Future. It looks pretty good.
-
AMT GMC/Chevy van Question.....
Oldmopars replied to ranma's topic in General Automotive Talk (Trucks and Cars)
I am in the process of doing that very thing right now on the Rescue van. I am installing a camper interior in it and needed some interior walls. I also made some door panels for the front doors as there are none in the kit. I just used sheet styrene and some ribs I cut out to make the walls flat. In the real world the walls would not be flat, but have a curve to them, but I am doing a camper interior and the flat walls work better for that. I am also doing opening doors on the rear and side, so that adds to the complexity, but you don't have to do that. -
The paint on the Cab and hood are now dry and I was able to make more progress on them. I had to make all new glass, the glass that was in it had to be removed with a Dremel and nasty cutting bit. I was able to save enough to use as a template, but could have done without it. It is all flat sheet clear. I had sanded off the marker light that were molded into the cab. I am glad I did. Trying to paint them would have been hard, and the 1:1 lights are flush with the cab. So, Italeri Scania 143 had some perfect decals that I did not need, and even gave me the ones on the side of the cab. Some decal are in the works thanks to a generous member here and those will go one when they arrive. Once those are on, I will decide if I will add some other decals from the AMT rescue van set. There are some fancy scrolls and numbers, stripes and other details. If I do, they will go on the truck and trailer, not the dozer. In the picture it is mocked up, not glued. I still need to correct some fit issues. Its close, but off by about .030. The windshield wipers are not on right now, because they are missing. I don't remember if they were there in the beginning or not, will have to go look at the pictures. If I can't find them, I will cast some from another kit. I have a Ertl 4300 and they should be the same. A few more details and the truck will be done. A long way left on the Dozer and the trailer is just a bag of parts right now.
-
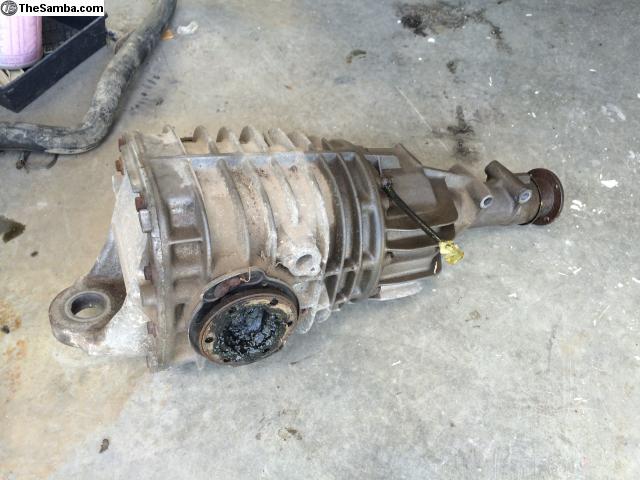
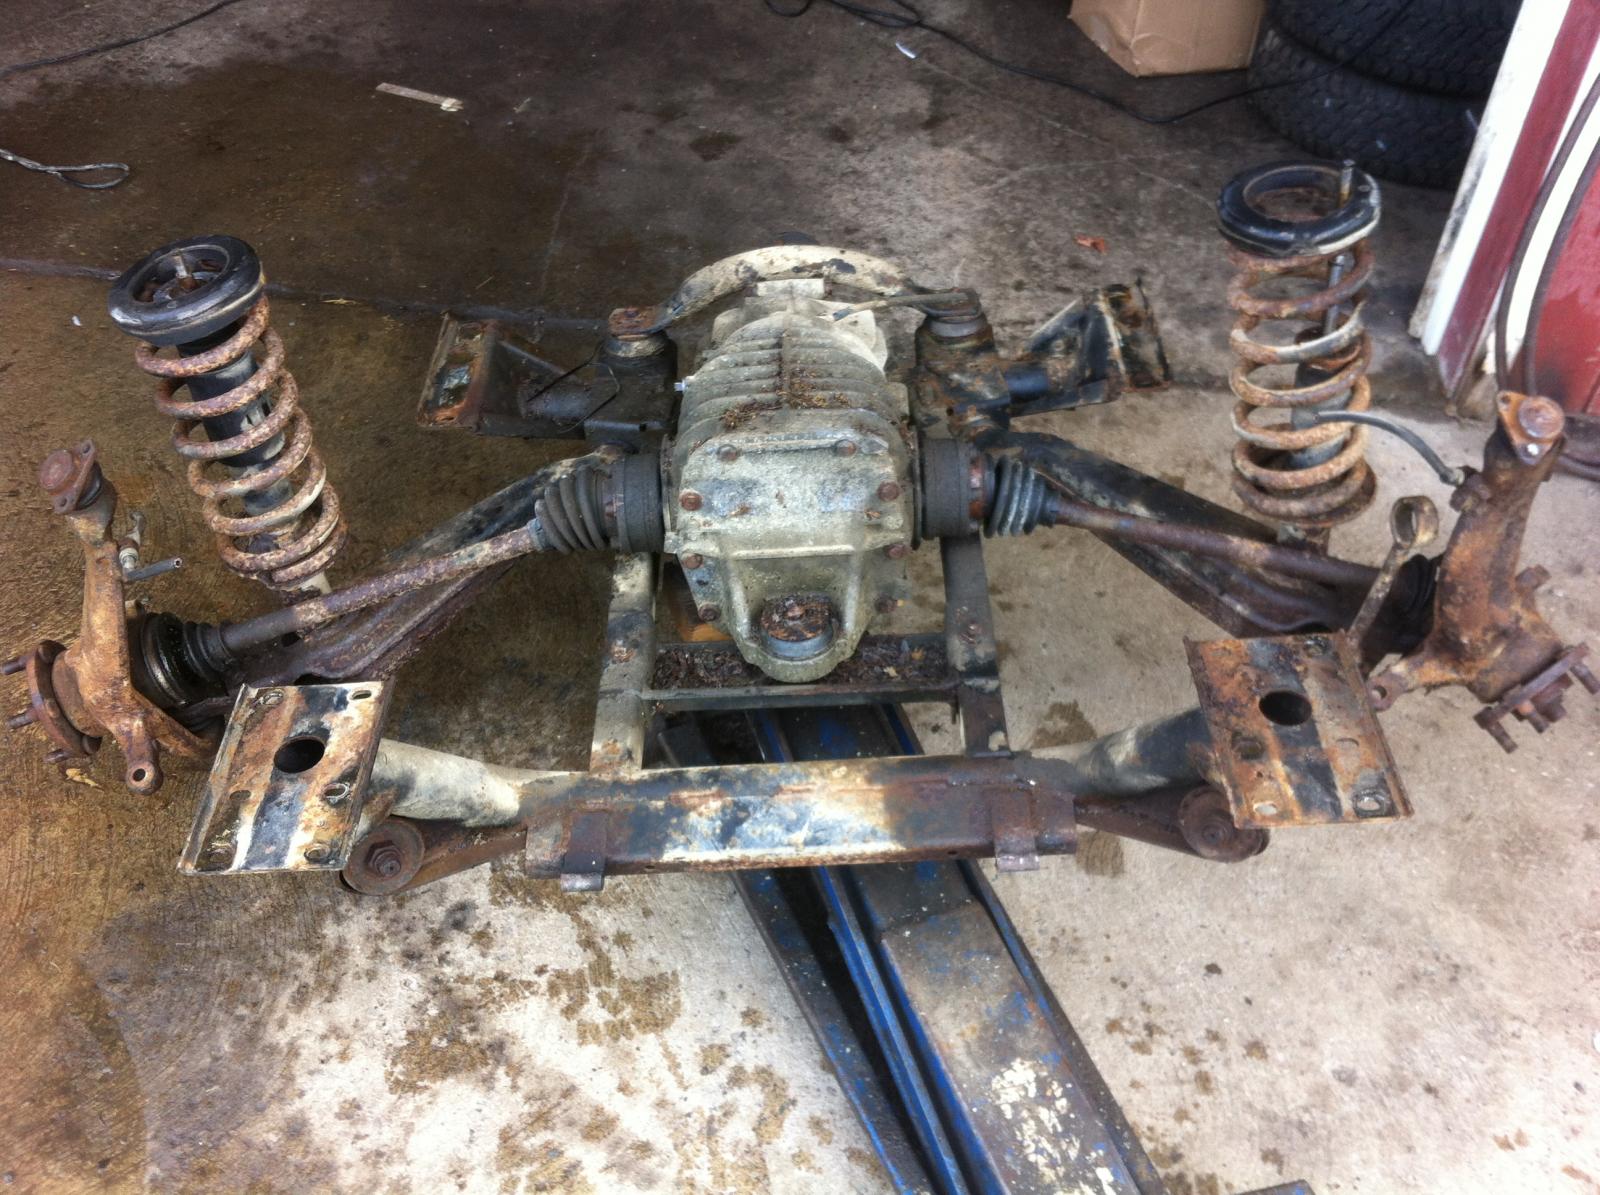
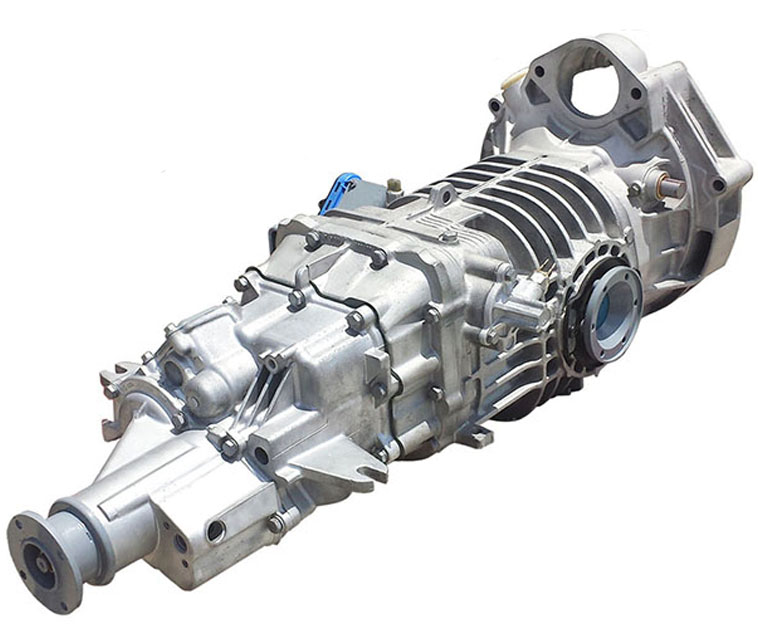
I used to work for VW and I have always liked the Vanagon and I have owned a few. The Syncro(4X4) uses another partial transaxle up front. So, if you could get 2 kits, cut down one of the transaxles and use the CV shafts, you would be mostly there. The rear transaxle would need some modifying and you would need to make a driveshaft. It would not be that hard. See the pictures of the front and rear diff/transaxle. First one is the bare diff, the second is it in the cradle, the third is the rear.
-
I would worry that the cooker would either not get it hot enough, or get it too hot and destroy it. I would be more inclined to use hot water. This way you have more control. Get the water hot, dip for a little bit and tweak. If it is not enough, you hold it in longer, but you are in control. You could do the same with a heat gun, but you would have to be VERY careful, not all heat guns let you control the heat output and could get it way too hot.
-
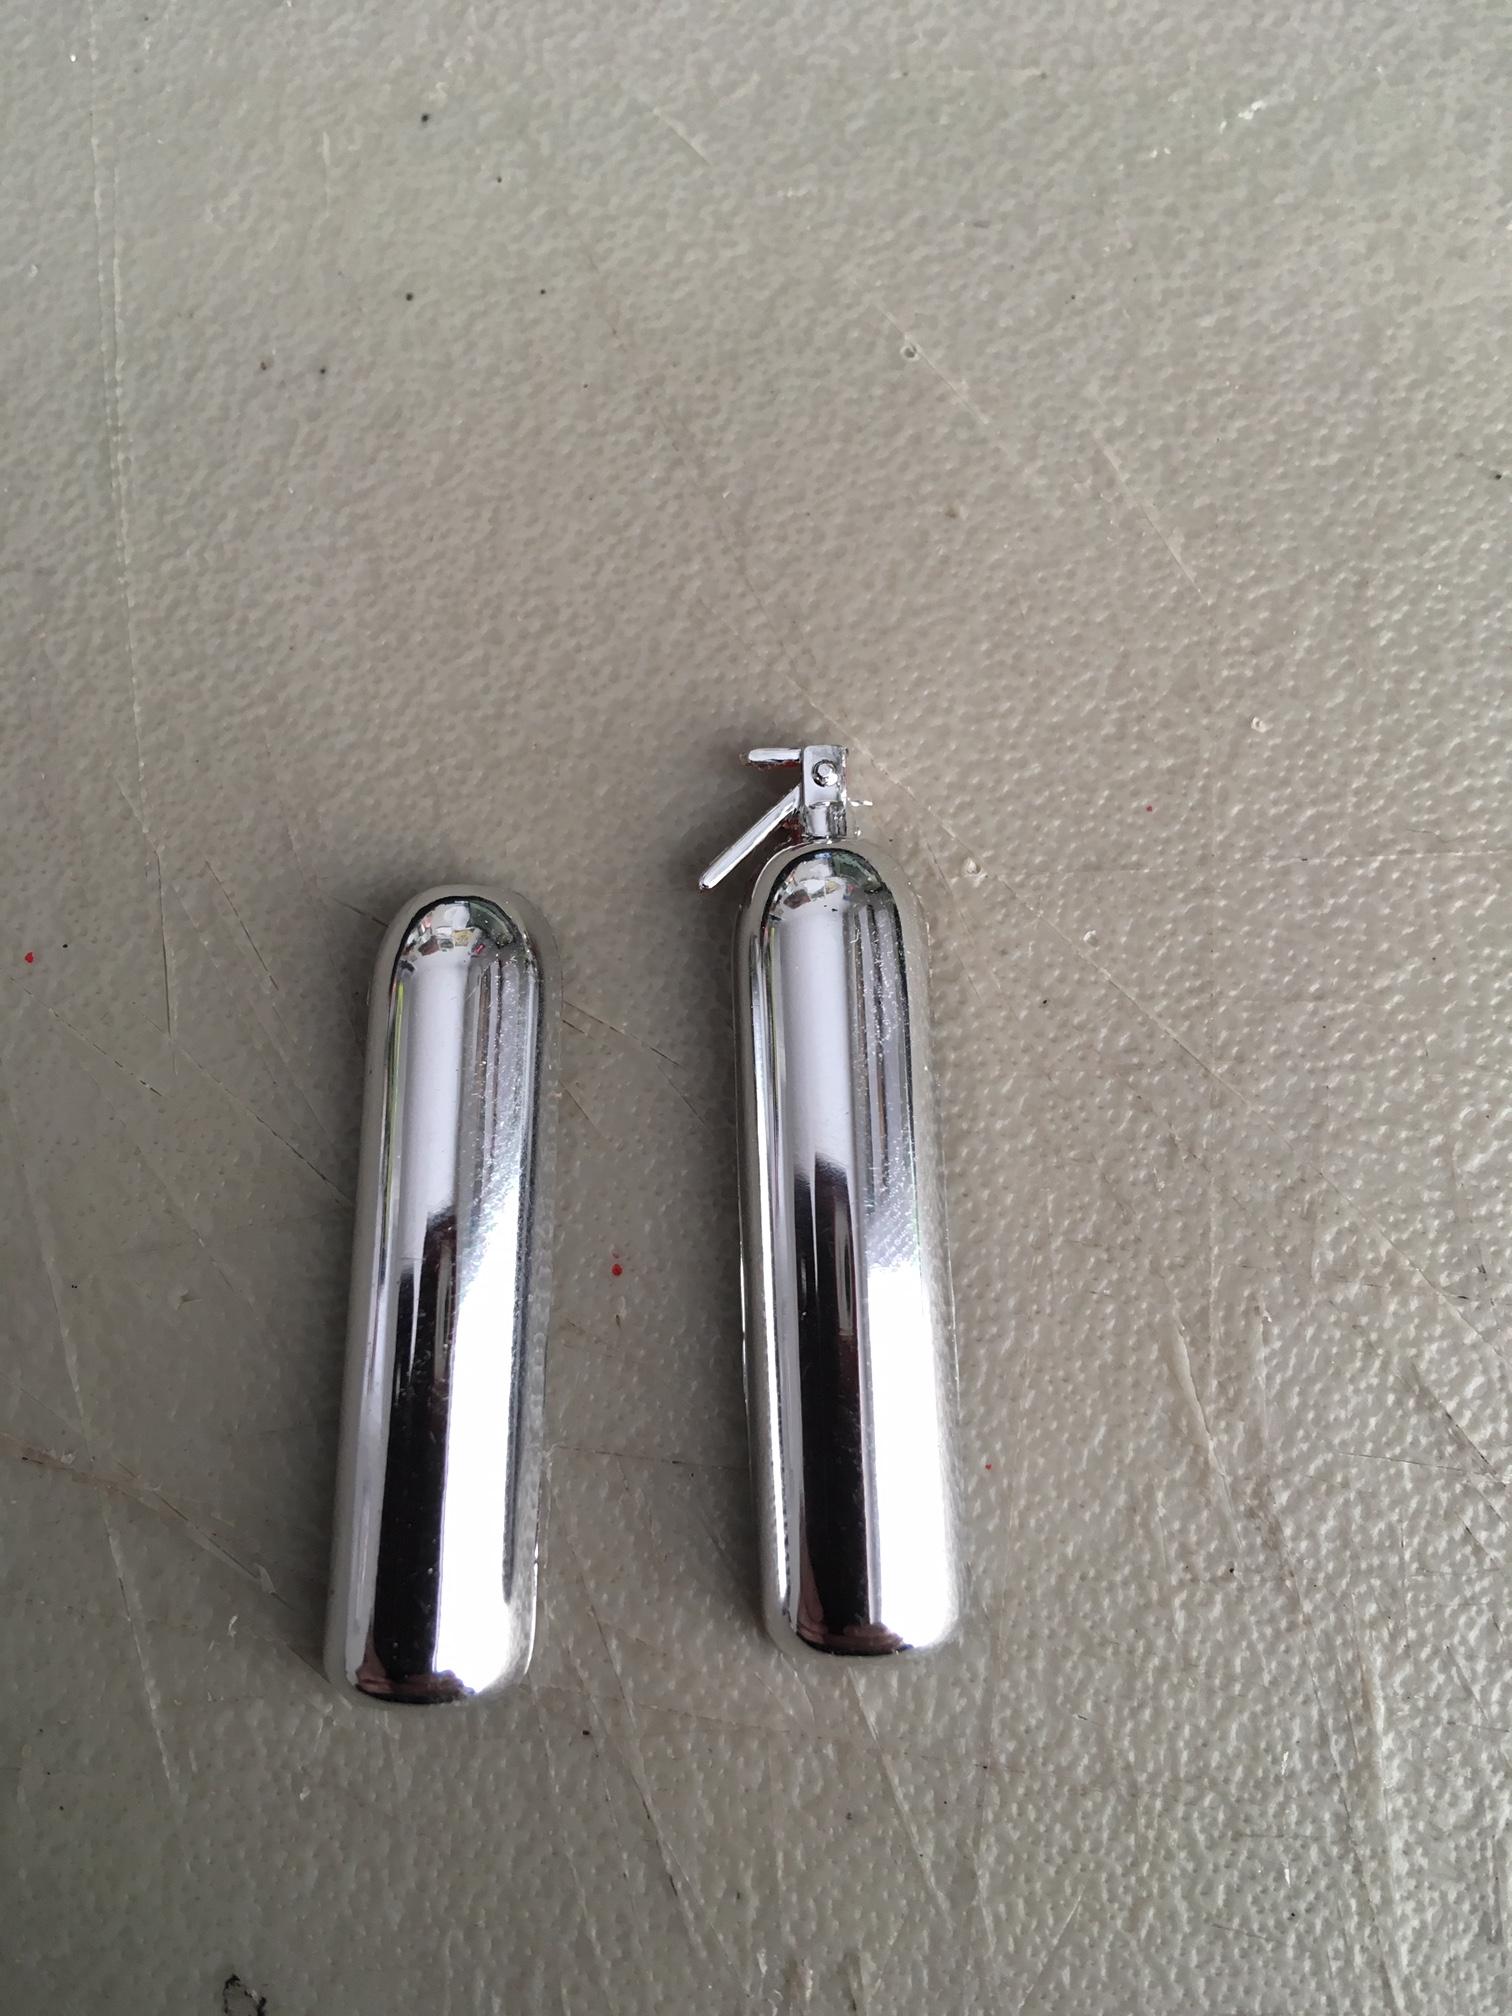
AMT Rescue van and Police van have a large fire extinguisher that if shortened is perfect for a NOS Bottle. I have 2 if you need one.
-
I love the Escort you did, looks great. I have always loved those cars, too bad they never made it to the USA. The "Escort" we got in the 80's was a rolling turd.
-
I am way to fumble fingered to even attempt to use a solvent glue. I use Elmers Clear Glue. Takes a while to dry, but if I goof it up, I can just pop it out, clean it up and try again. No harm done. My current project is a glue bomb. The glass had to be dremeled out. I was able to break out the chunks after I cut out the glue. Lucky for me it is a Semi truck and all the glass is flat. I used clear sheet from HL and gluing that in place. Solvent would not work on it either. But, if it works for you, that is awesome. Best served for those with good skills and steady hands. I use MEK as a "thin" glue. It works the same as Plastructs glue and is 100 times cheaper. I get a Quart (32oz) for less than I pay for 2oz of "thin" glue. So, maybe 50 times cheaper.
-
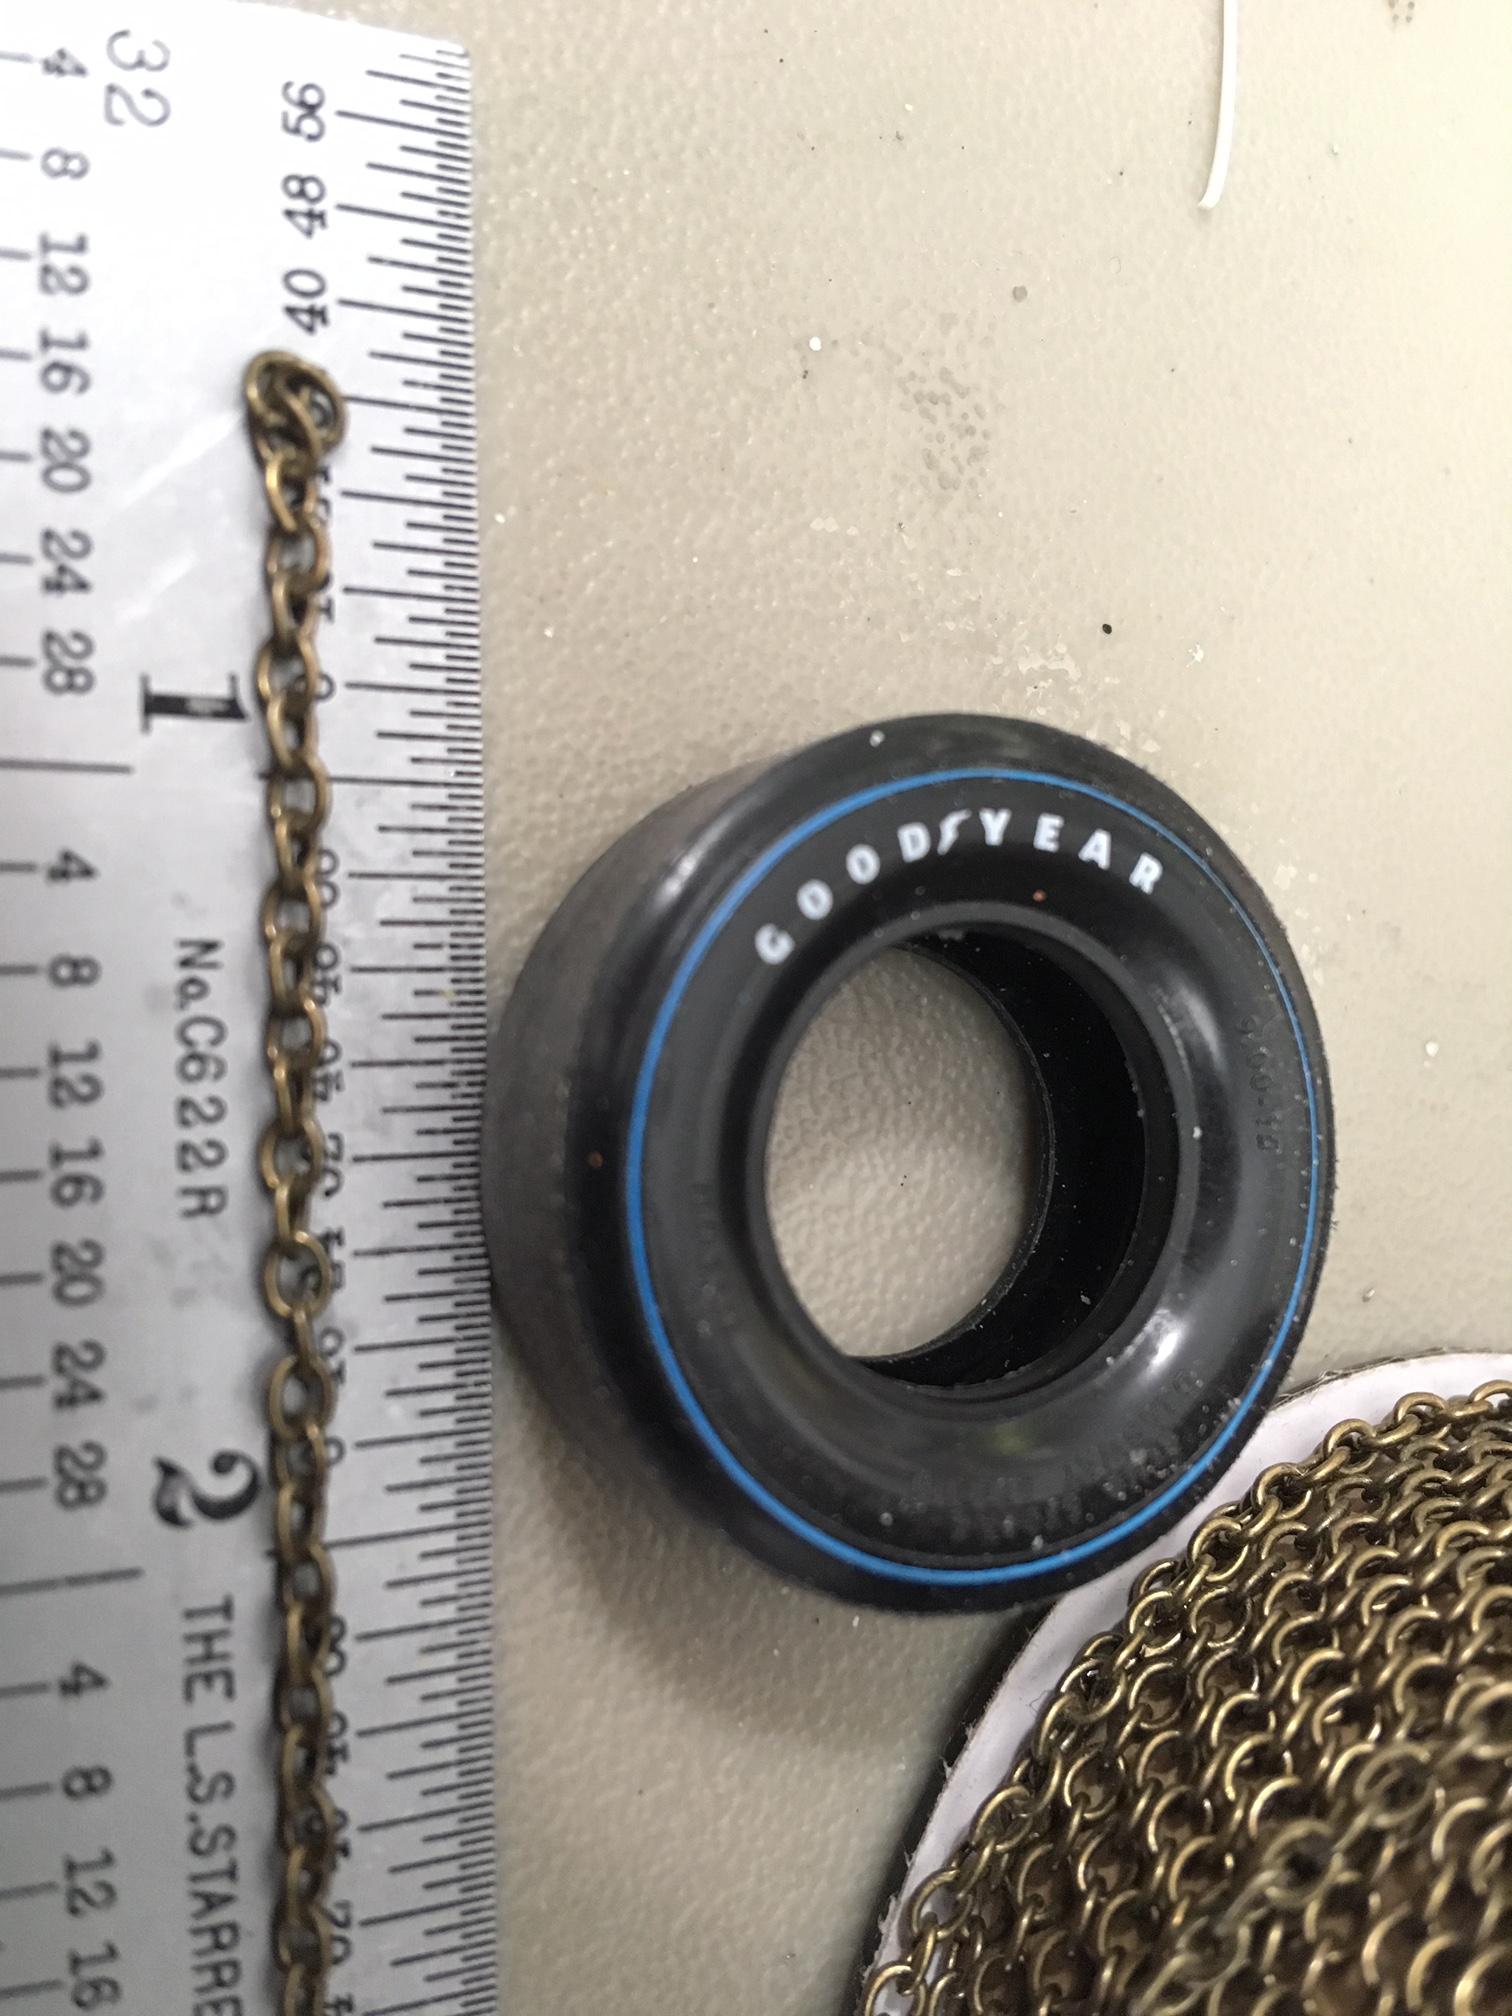
Everything here is looking great, except that chain. It is just not to scale. It looks like something off an aircraft carrier instead of something found to recover a Sunbeam. I found this chain at Hobby Lobby and it is much better scale fit for 1/25-1/24 scale cars and trucks. I have used it as chain in my P2P car and on a log truck I did. Give it a shot, I think it will look much better.
-
Italari American wrecker truck
Oldmopars replied to kpnuts's topic in WIP: Model Trucks: Big Rigs and Heavy Equipment
I have nothing against the weathered look, I have done several that way myself and it is fun and different. Just be sure to think about how the real thing would be weathered and to keep it realistic and not overdone. Things like a fibergalass hood won't rust, but can be cracked and missing the paint or even have chunks missing. The white/grey fibers may even be showing. Aluminum parts do not rust, but they do corrode, this would be chalky white and have bubbles in the paint like rust. Rust is most often found in the lower areas, like the bottoms of doors, cab corners, under the windshield, seams, etc. Very rare to have rust holes in the middle of a door or roof panel. Google is your friend. Look for pictures of the truck you are making and see if you can find old crusty ones, replicate what you find on the pictures of the real thing. Weathering is easy to over do. Keep in mind the location of the truck too. Don't rust the heck out of a 25 year old truck and put California decal and plates on it. West coast stuff does not rust near as fast. However a truck from the rust belt may have rather large holes in it after 25 years. Oh, and the Armor and military modelers are a treasure trove of info for weathering. These guys know what they are doing, so troll You-Tube for how-to's. -
Assembly of AMT Detroit 8V questions
Oldmopars replied to Goodwrench3's topic in General Automotive Talk (Trucks and Cars)
No, you have it right, that is just AMT poor quality. You can either move the blower back, or add to the shaft to make it look like it is connected. I guess we should be happy things are as nice as they are, this was long before the days of Computer aided design and 3D printing. Picture is from my Pete 359
-
53' ford AMT update 1/30/19
Oldmopars replied to Breezy's topic in WIP: Model Trucks: Pickups, Vans, SUVs, Light Commercial
I think the panel lines look fine. Some suggest that you take the body color paint, mix a little black or dark grey with it so it is darker, but only a little and use it for your panel lines. -
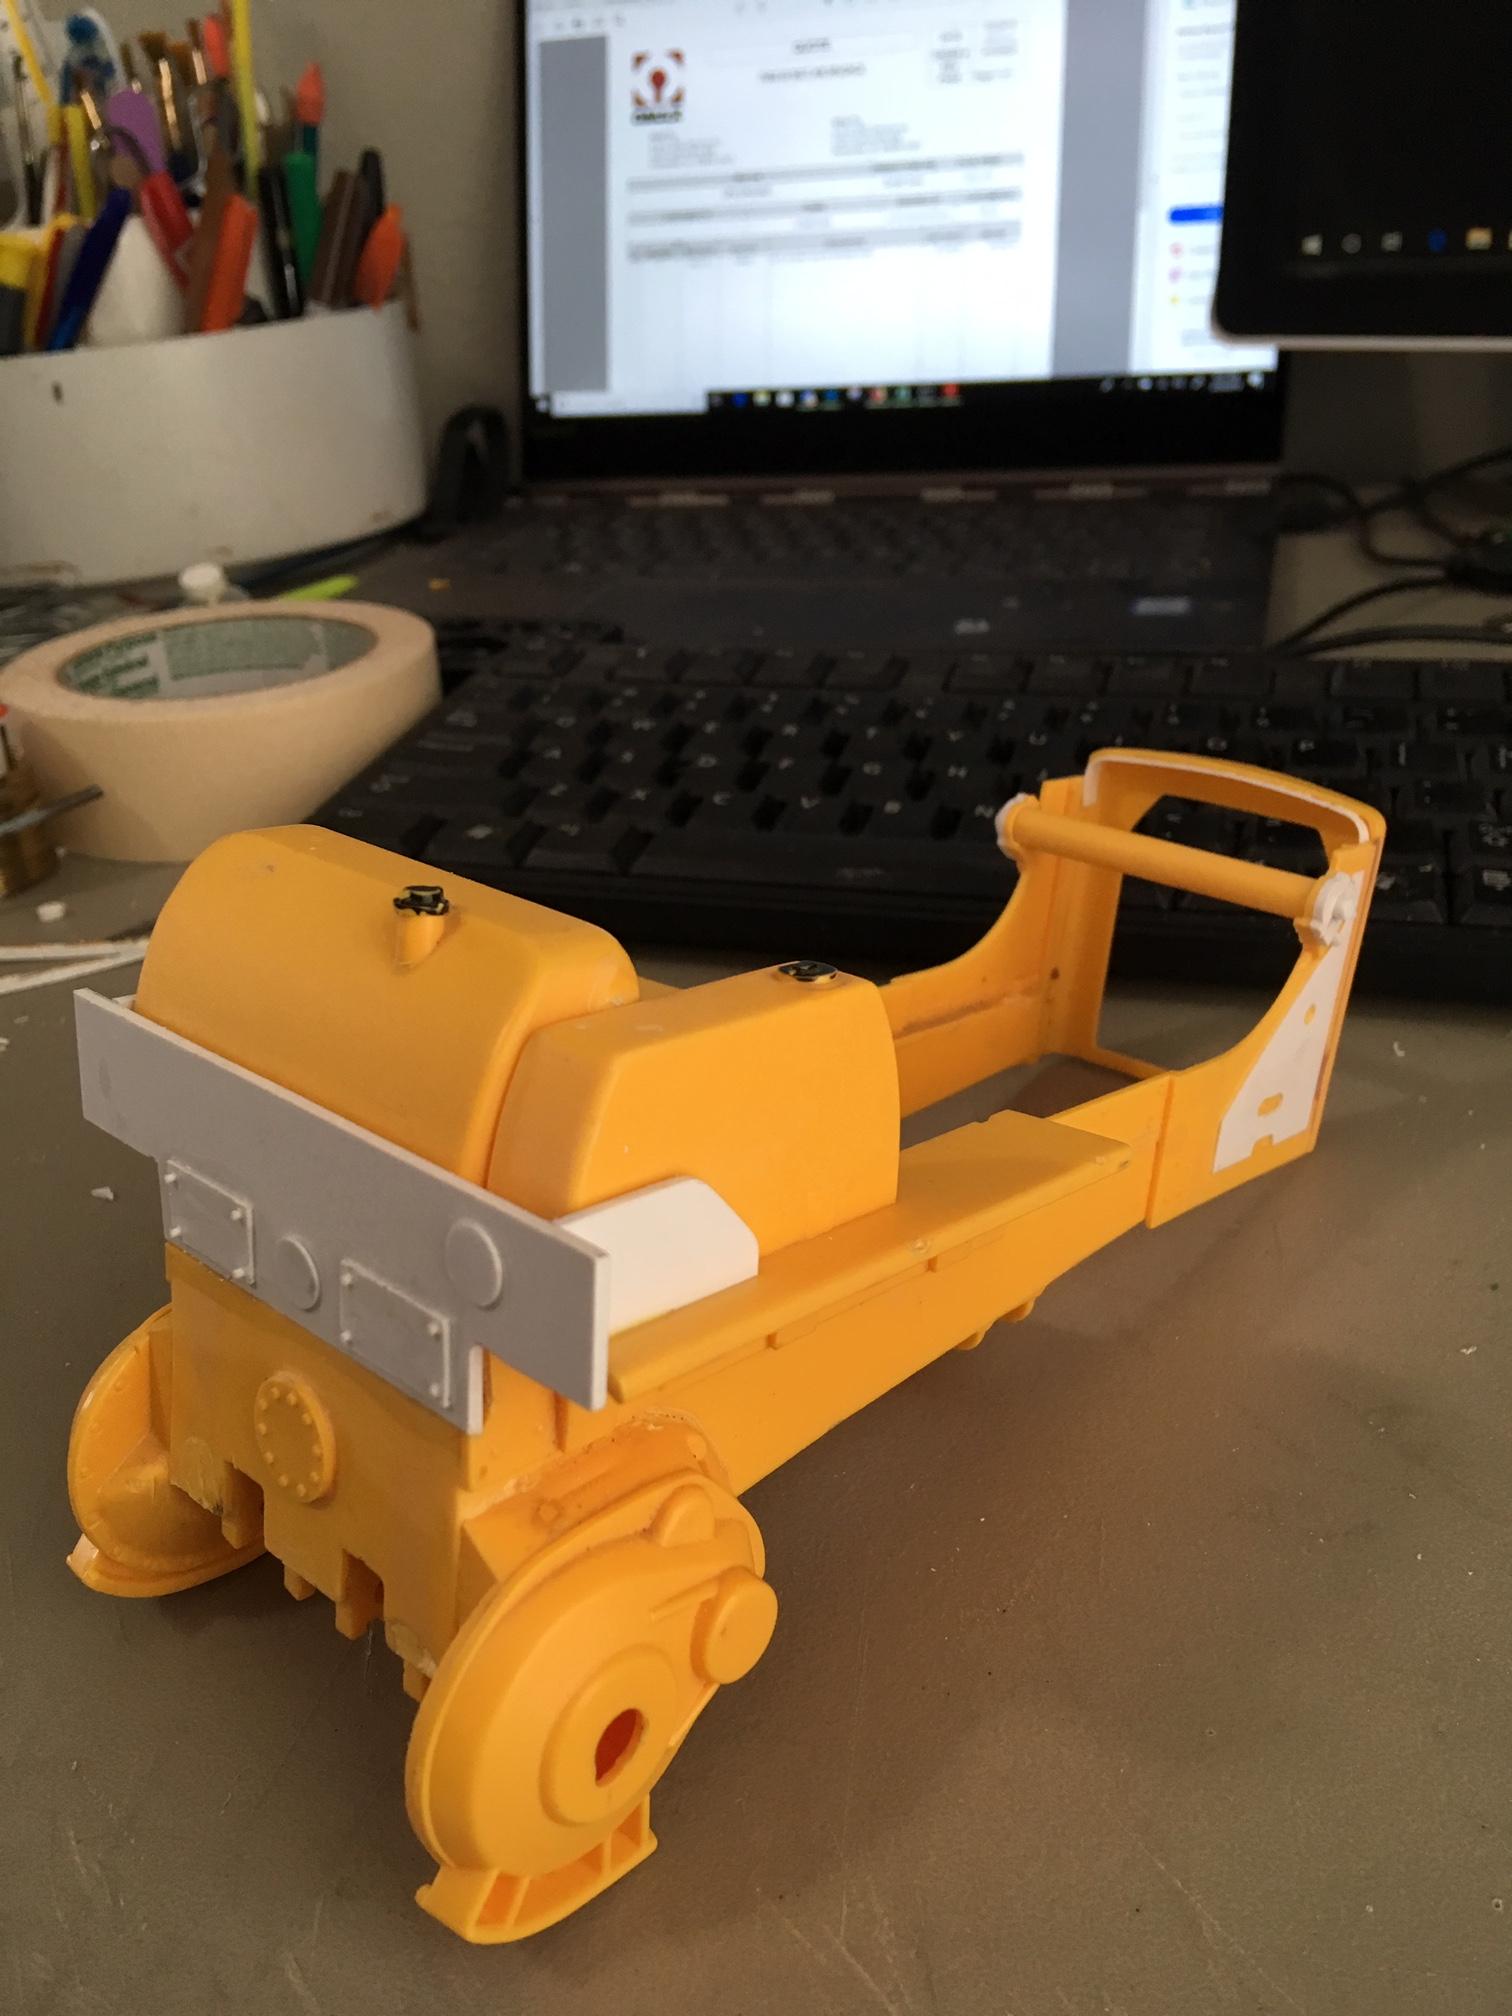
Construction begins on the R.O.P.S. I had to cut some stuff off and add a thick .060 sheet, this would be a scale 1 1/2 in thick plate on the rear. It is as close to what I can find pictures of as I can get. They used a very heavy plate as the foundation for the R.O.P.S. At this point I am not sure about the back. I have looked at over 100 pictures of Dozers used in fire fighting. Some have a winch, some have a ripper and many have nothing. The ripper I have for this Dozer is pretty bad. Broken and missing parts. So, I may try to make a winch, or I may just leave it plain, either would be correct. I still need to fix the bottom between the track mounts where the old ripper was glued on with half a tube of glue. I have also done some work on the arms for the blade. I added some details at the rear mount area. I have also added some metal foil. The idea here is that I will paint over the top of it, then when I weather it I will sand/scratch down to it and expose the "Metal". This should give it the fresh use look. There will be slight rust, but I want it to look like it just finished dozing fire lines. In this case the rust would all be rubbed off and there would be clean steel exposed.
-
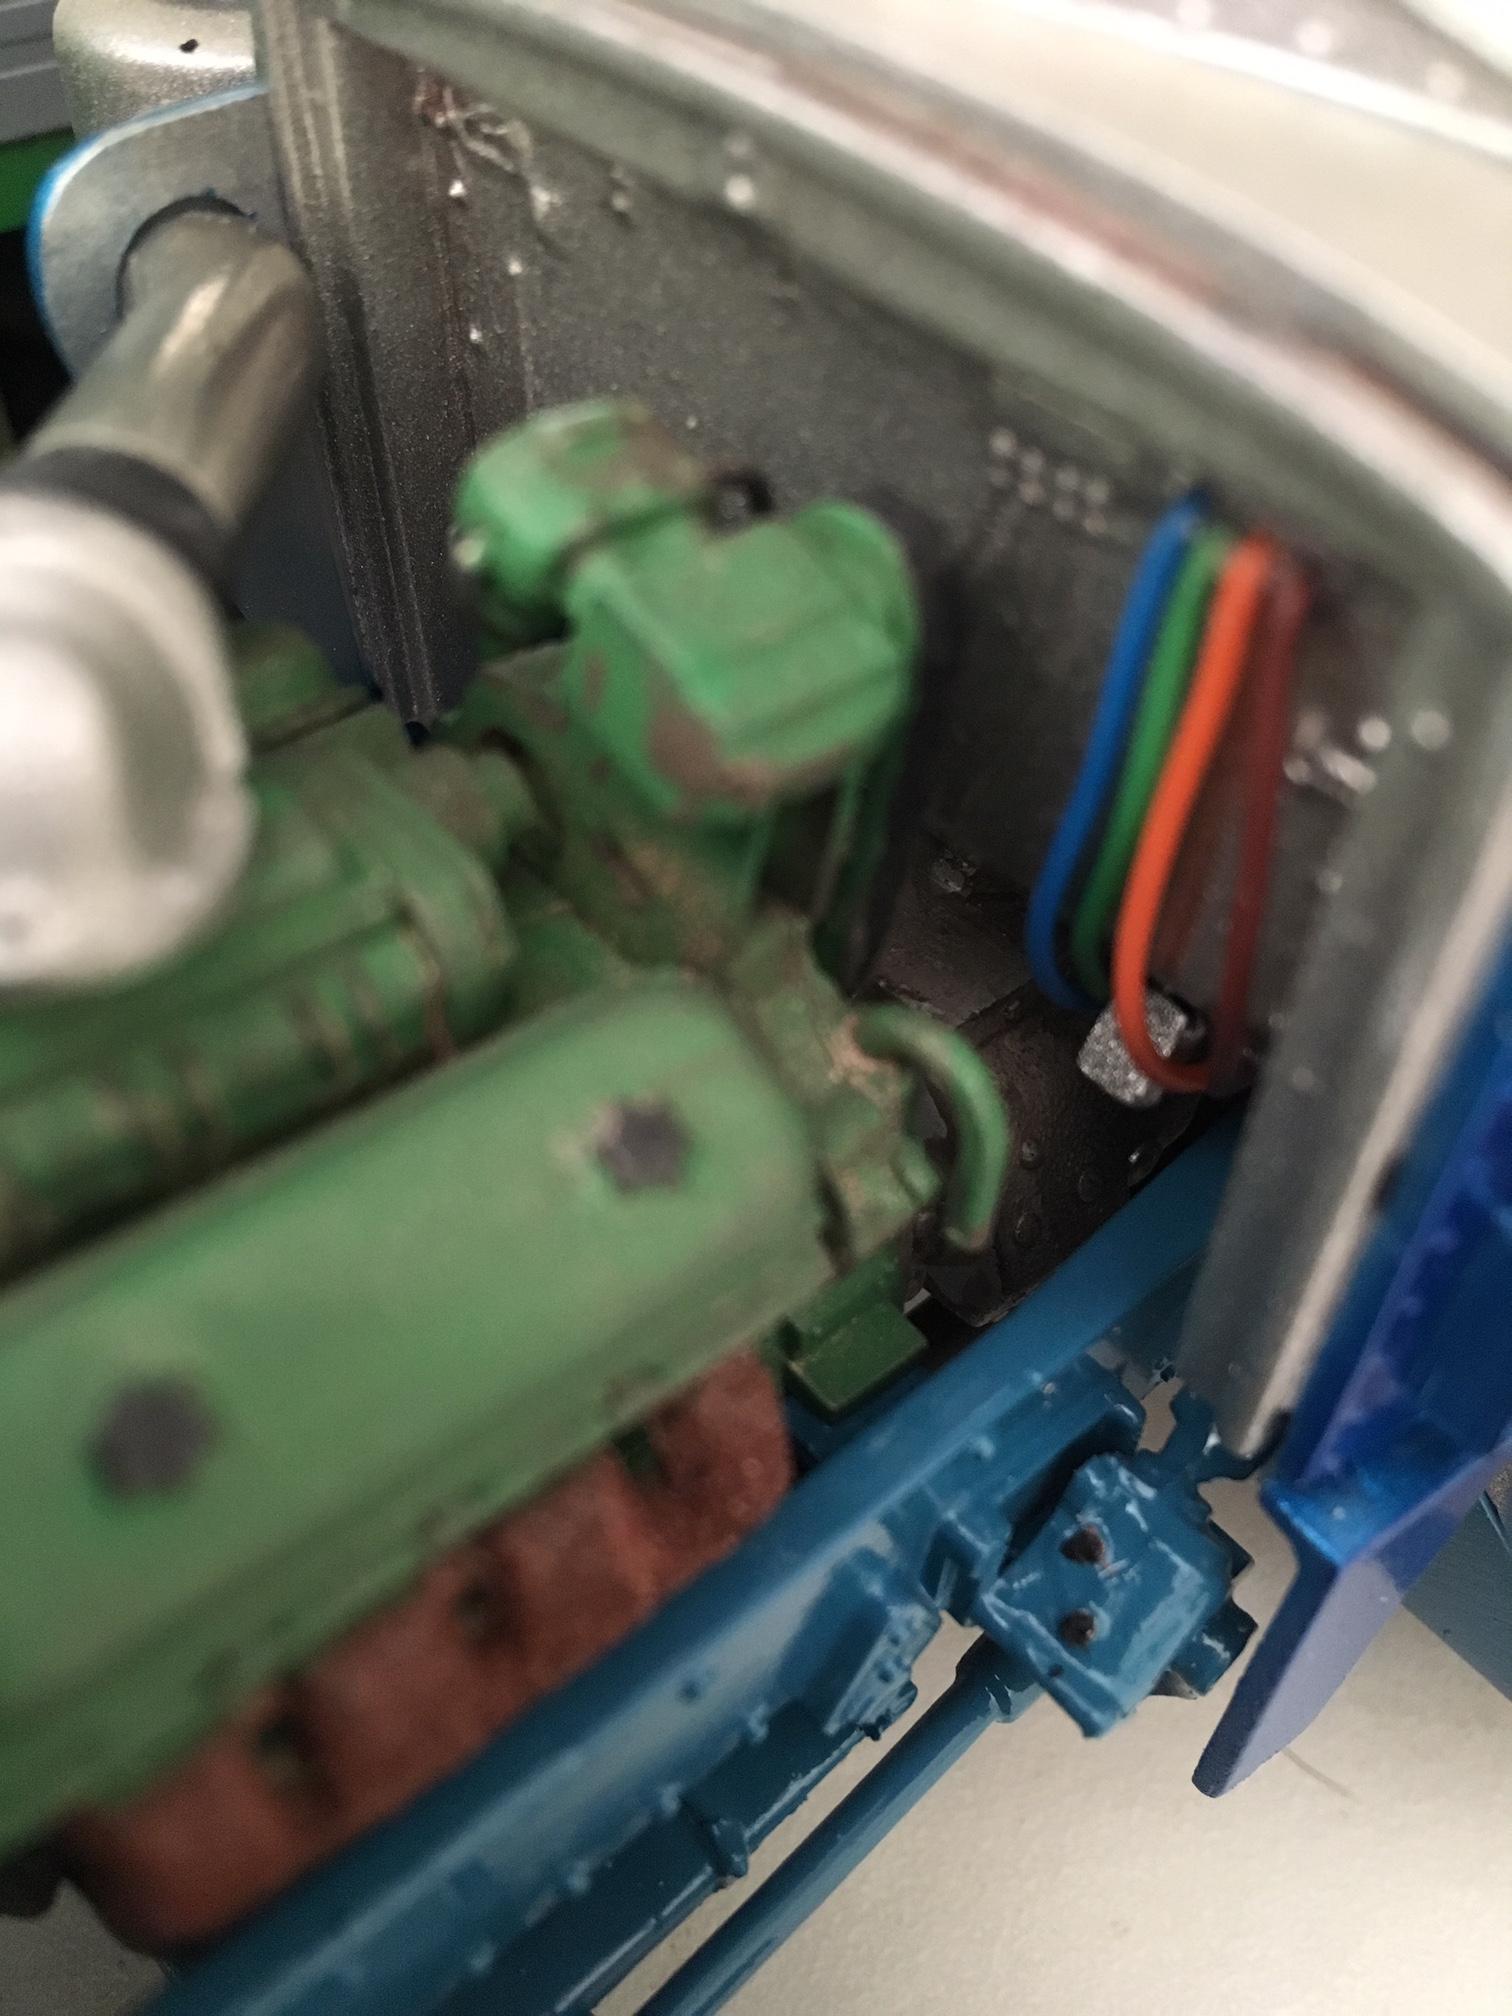
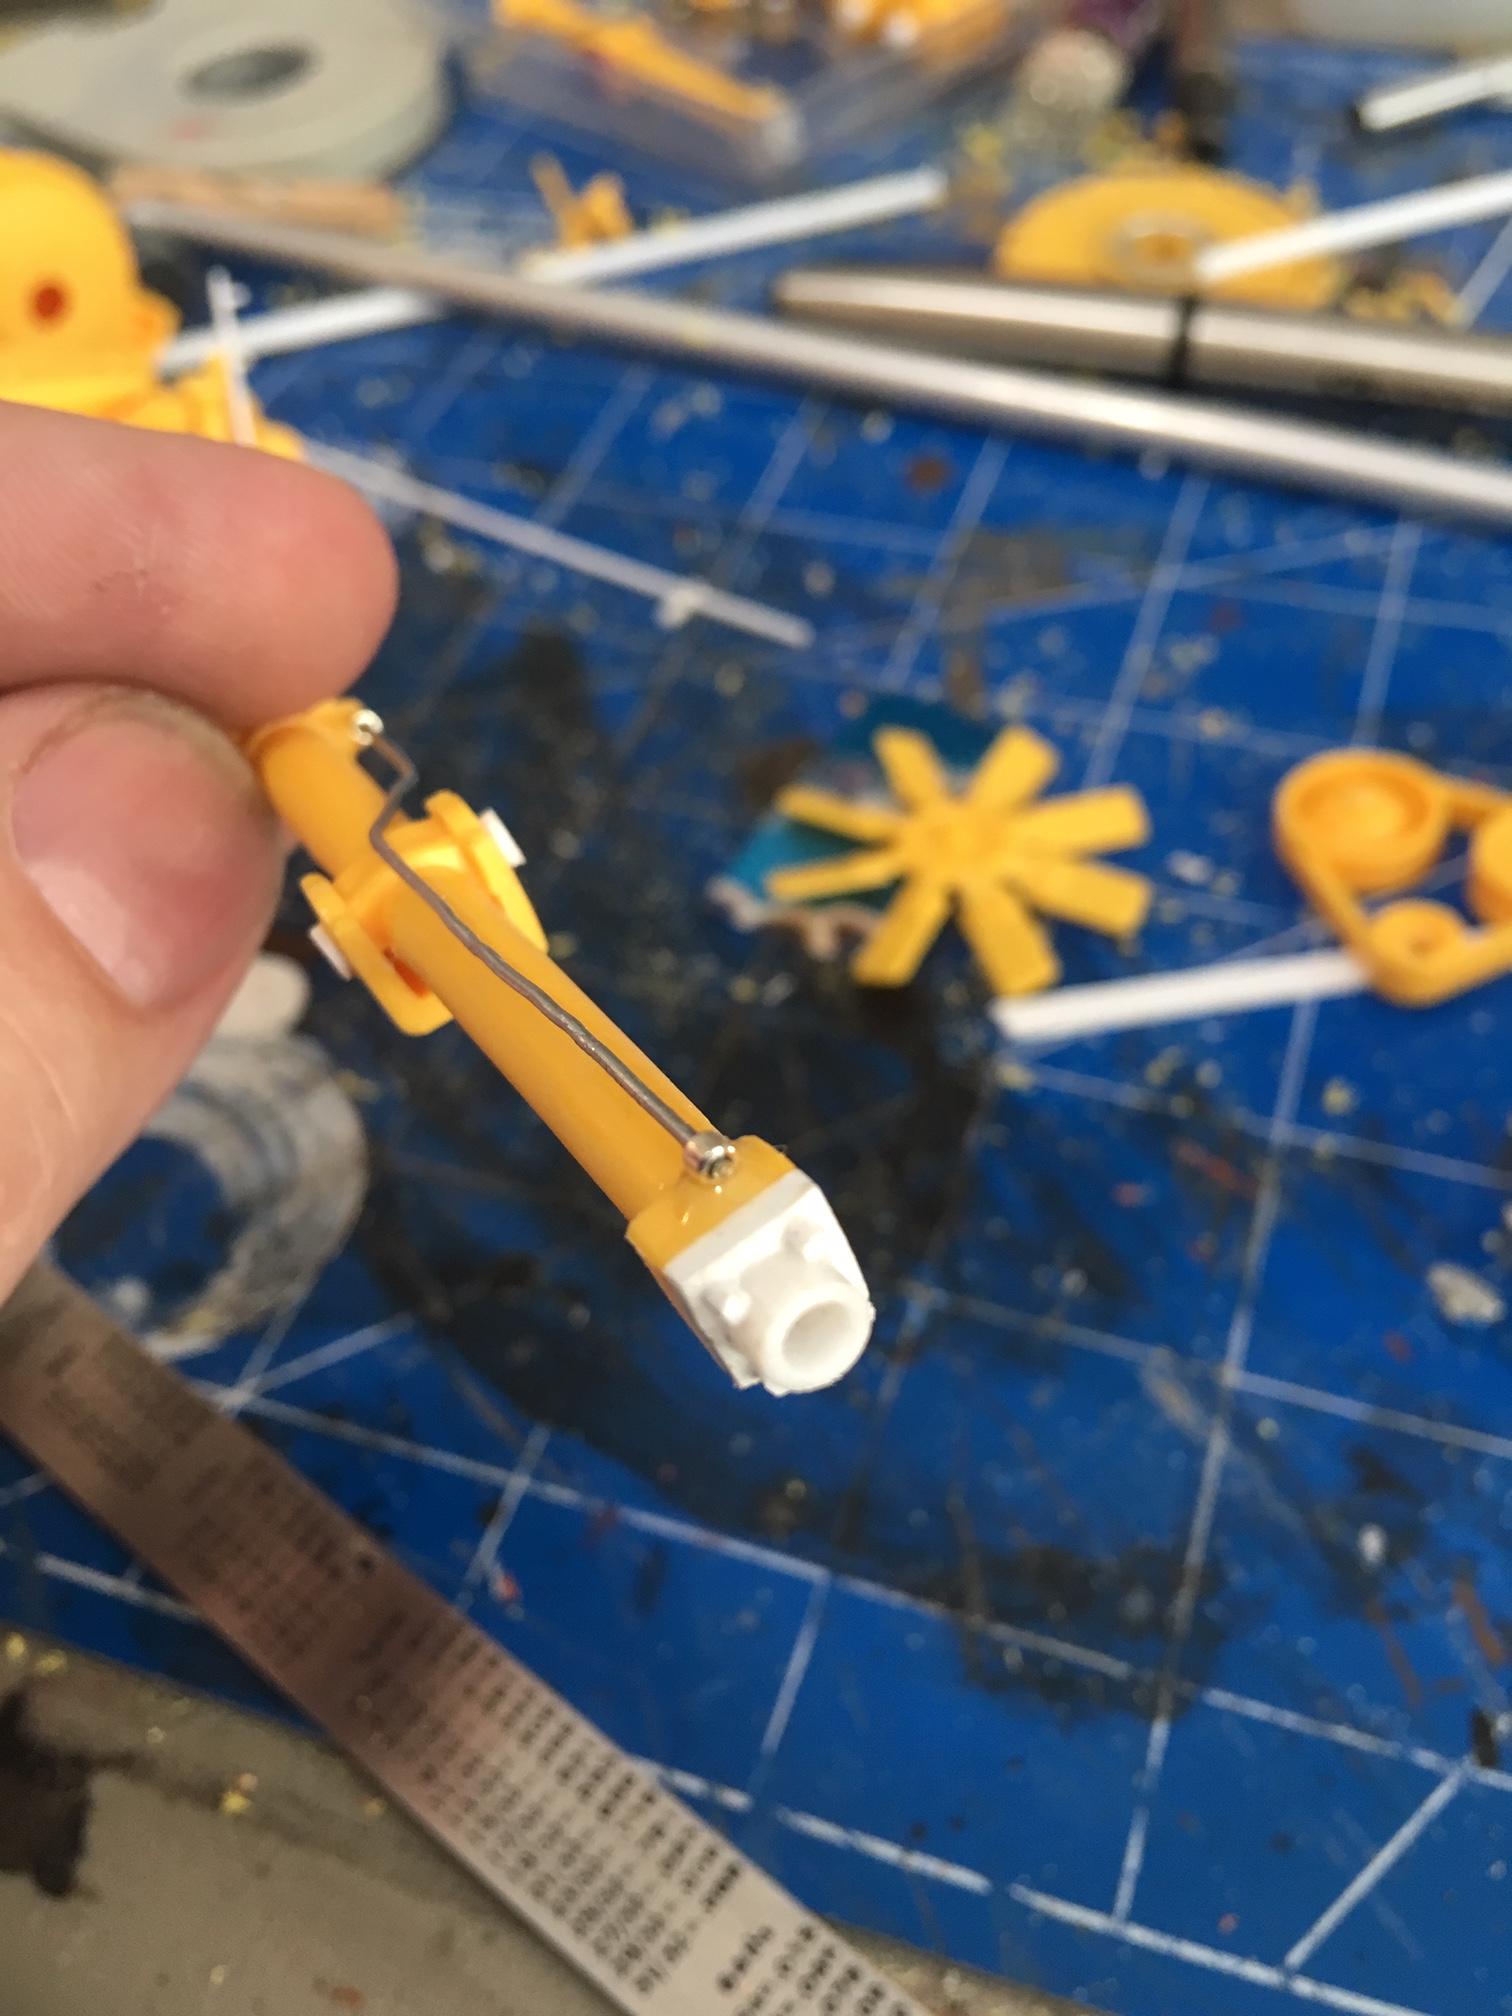
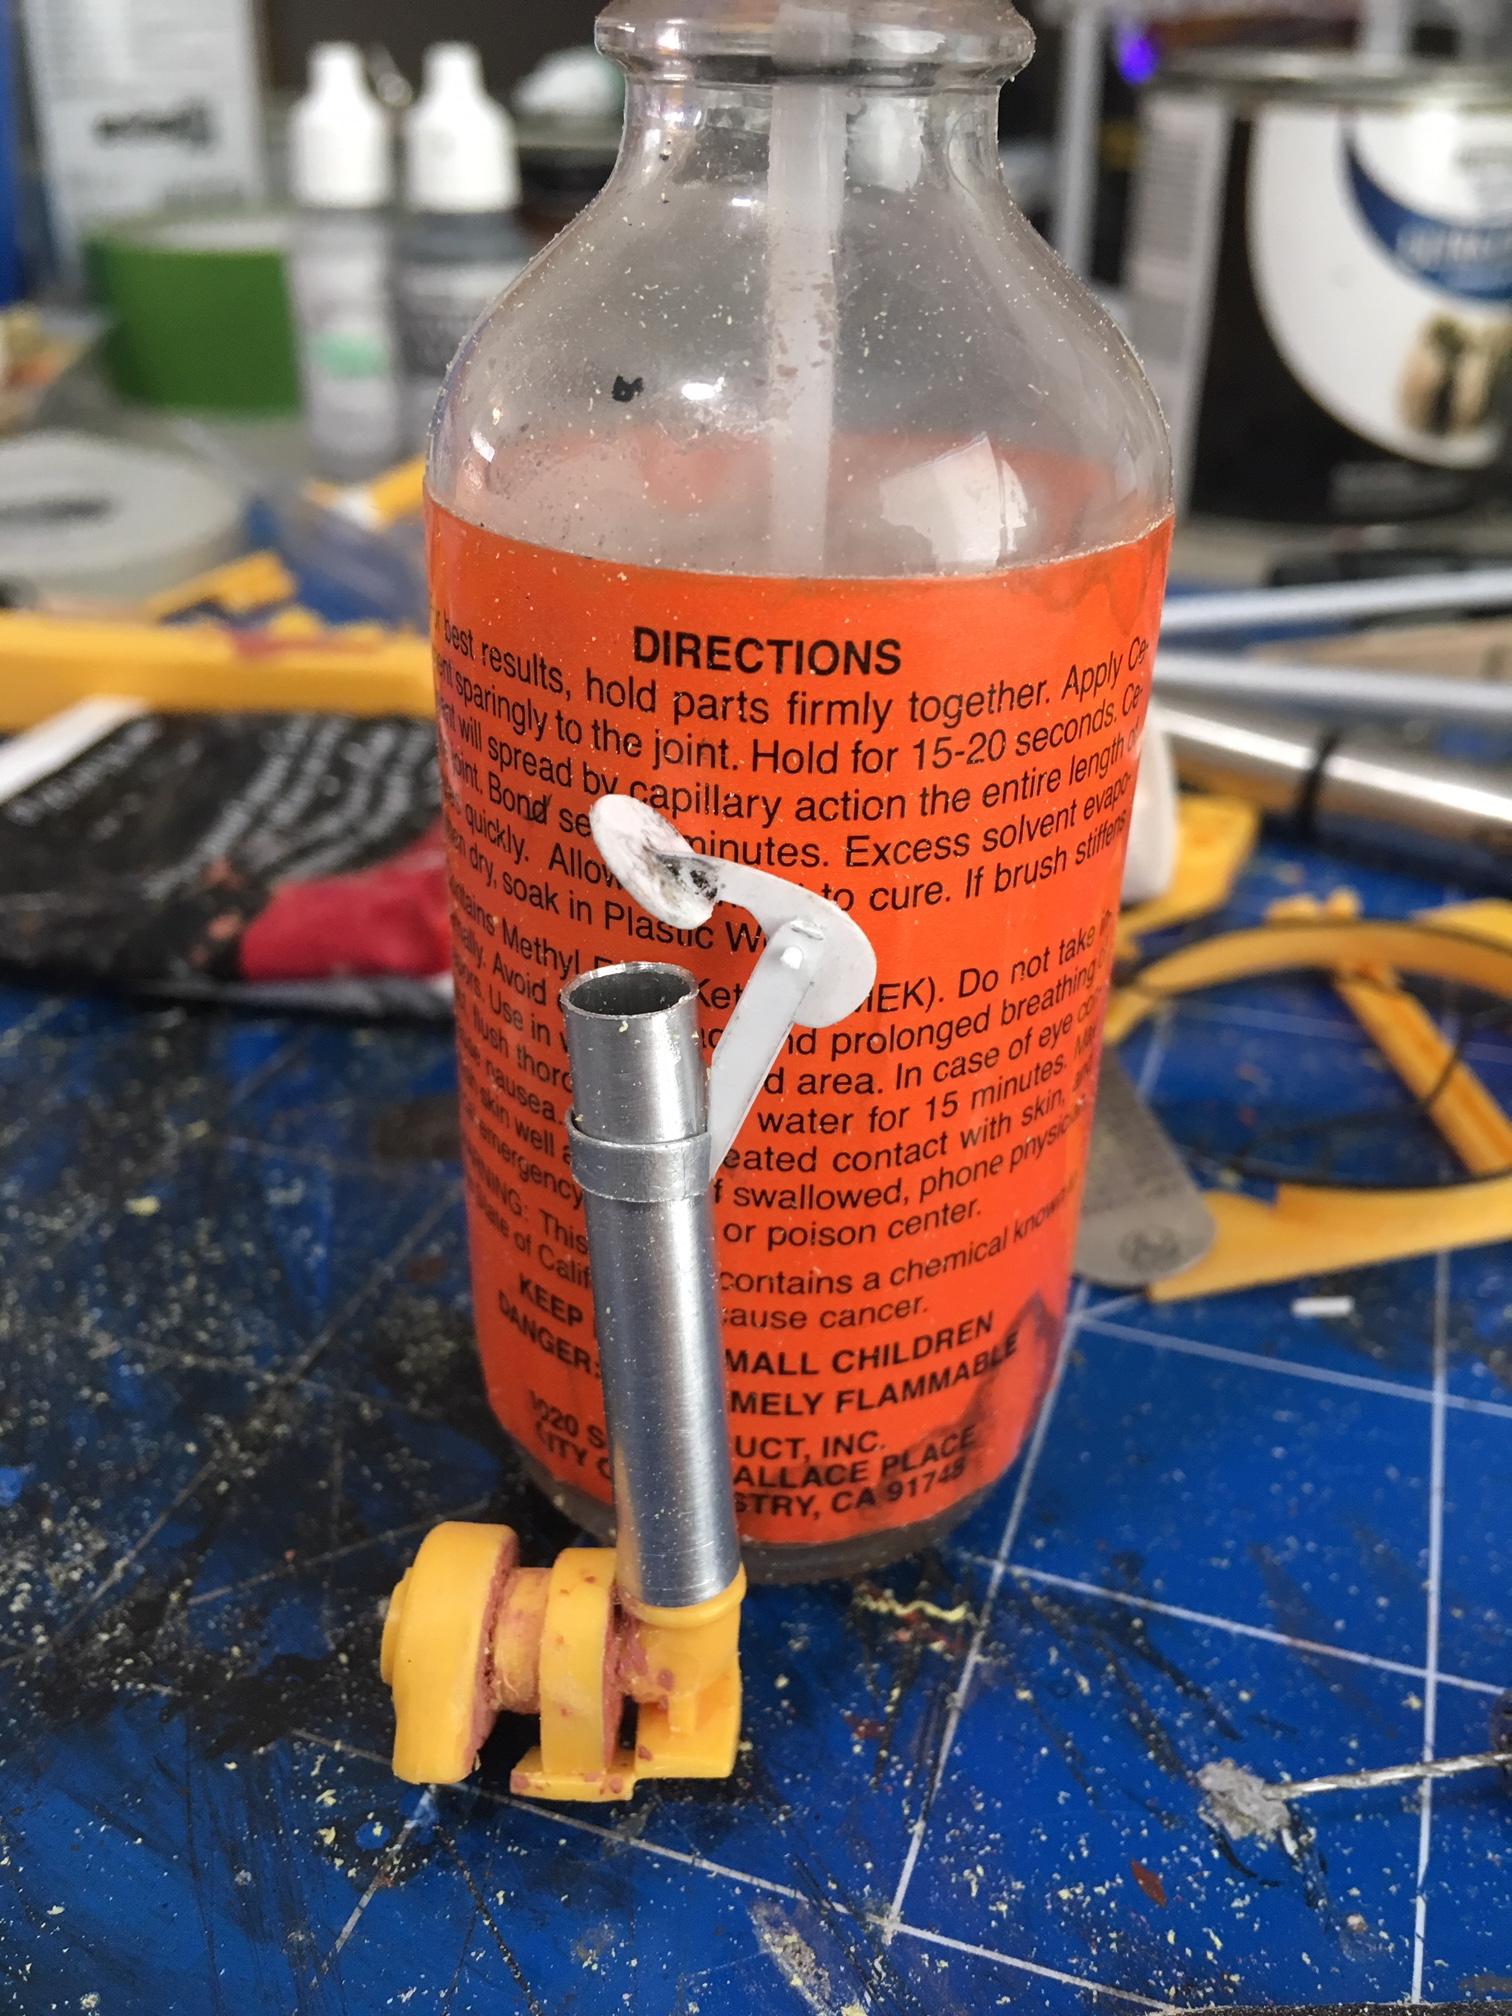
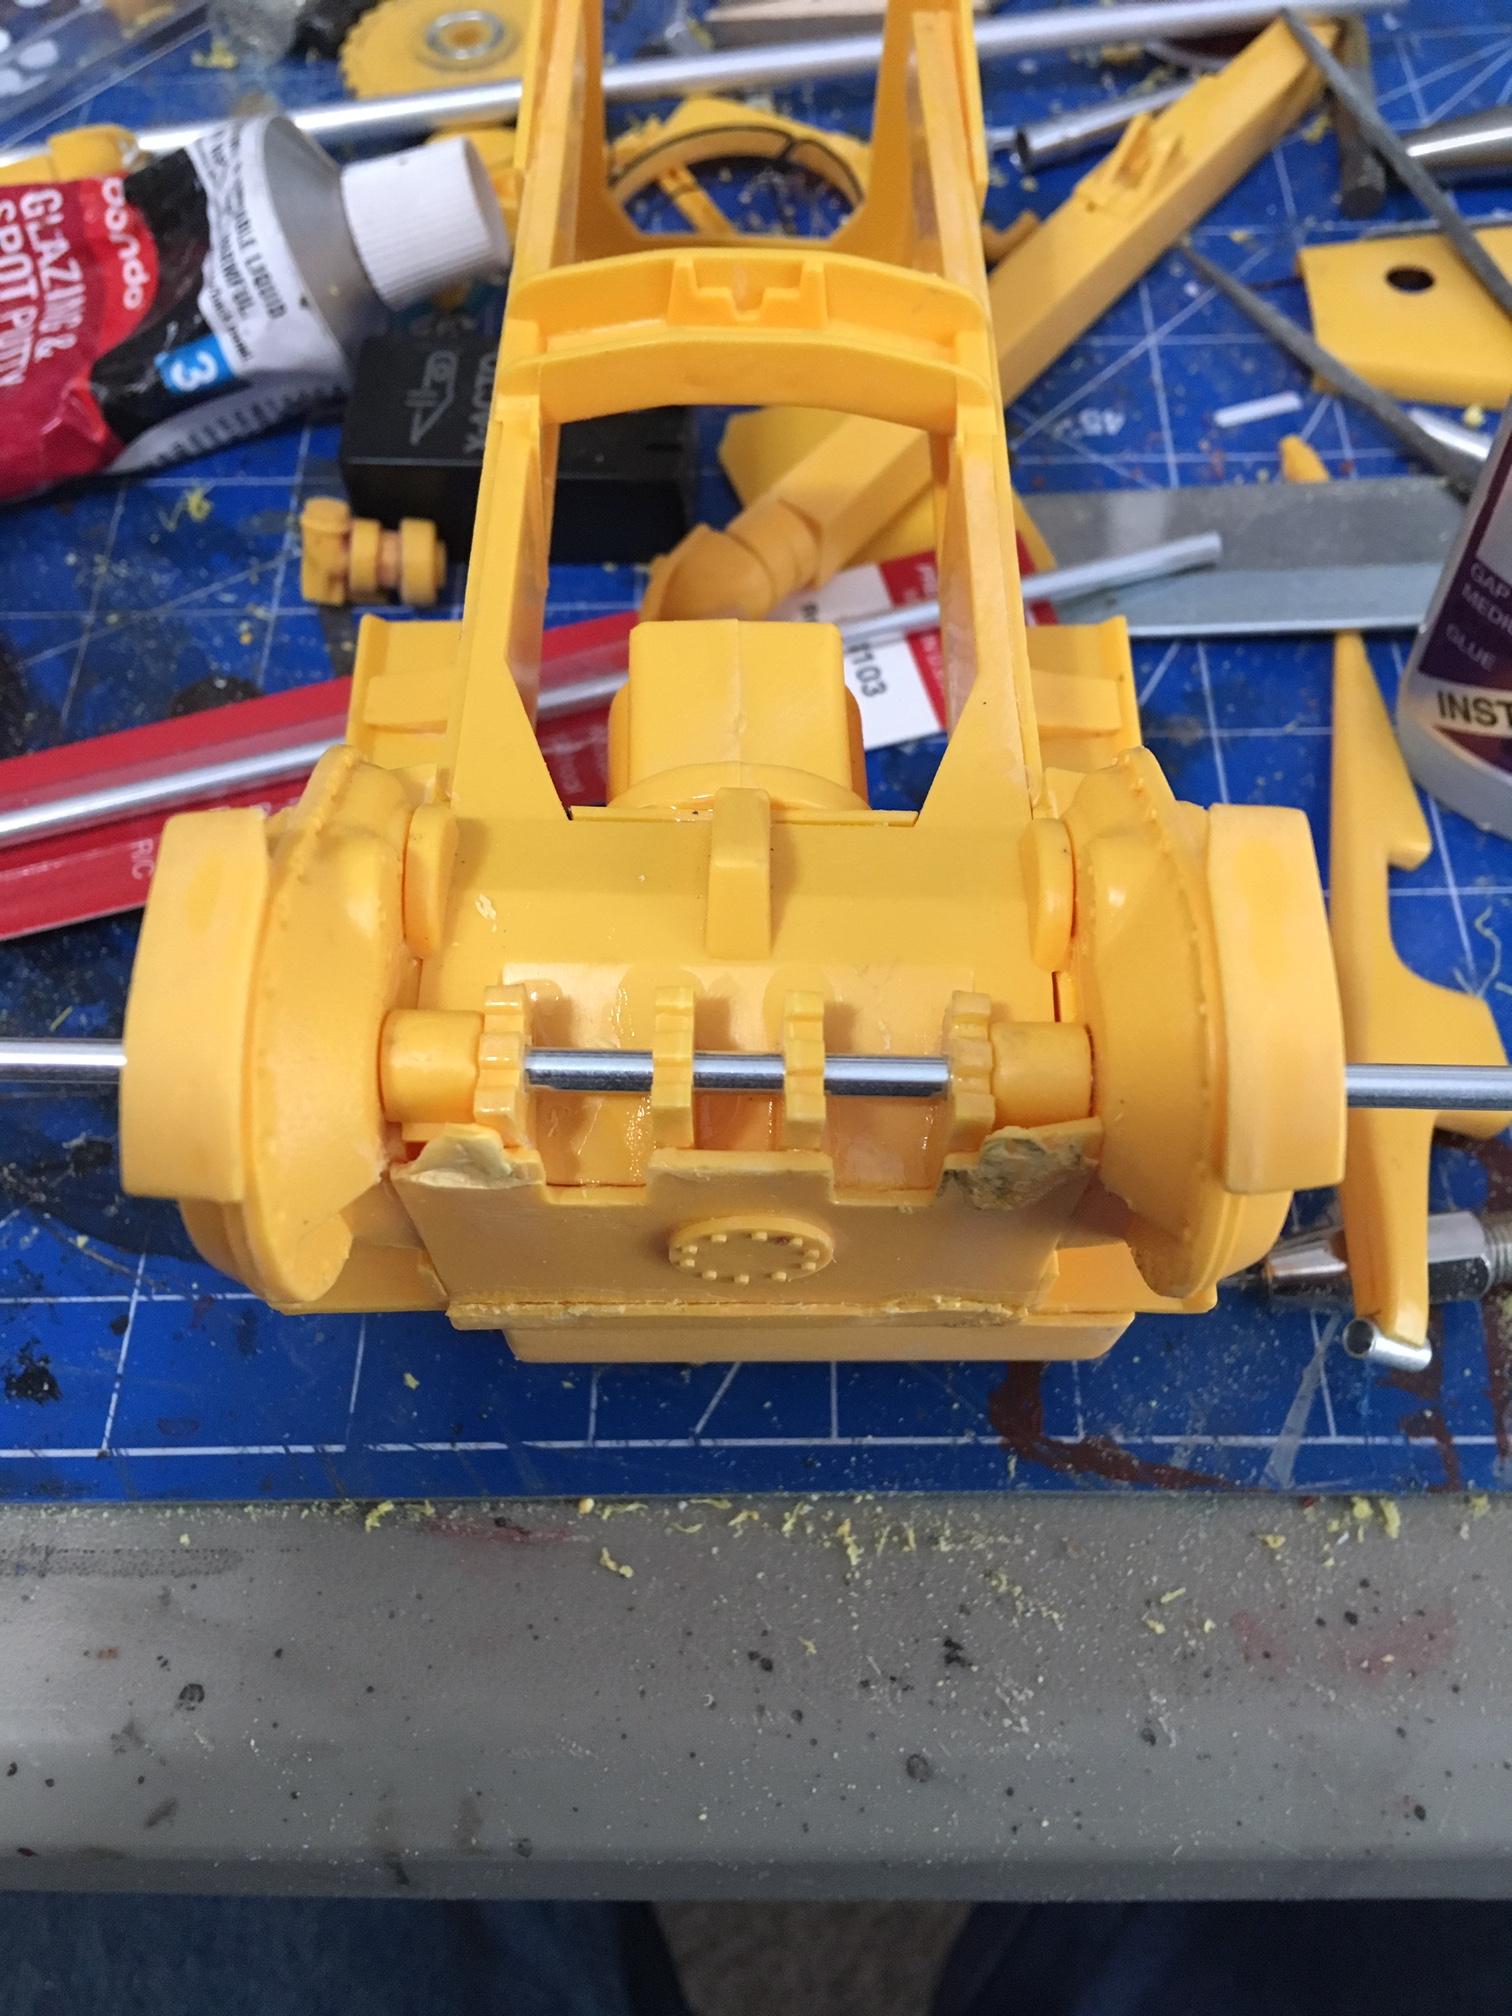
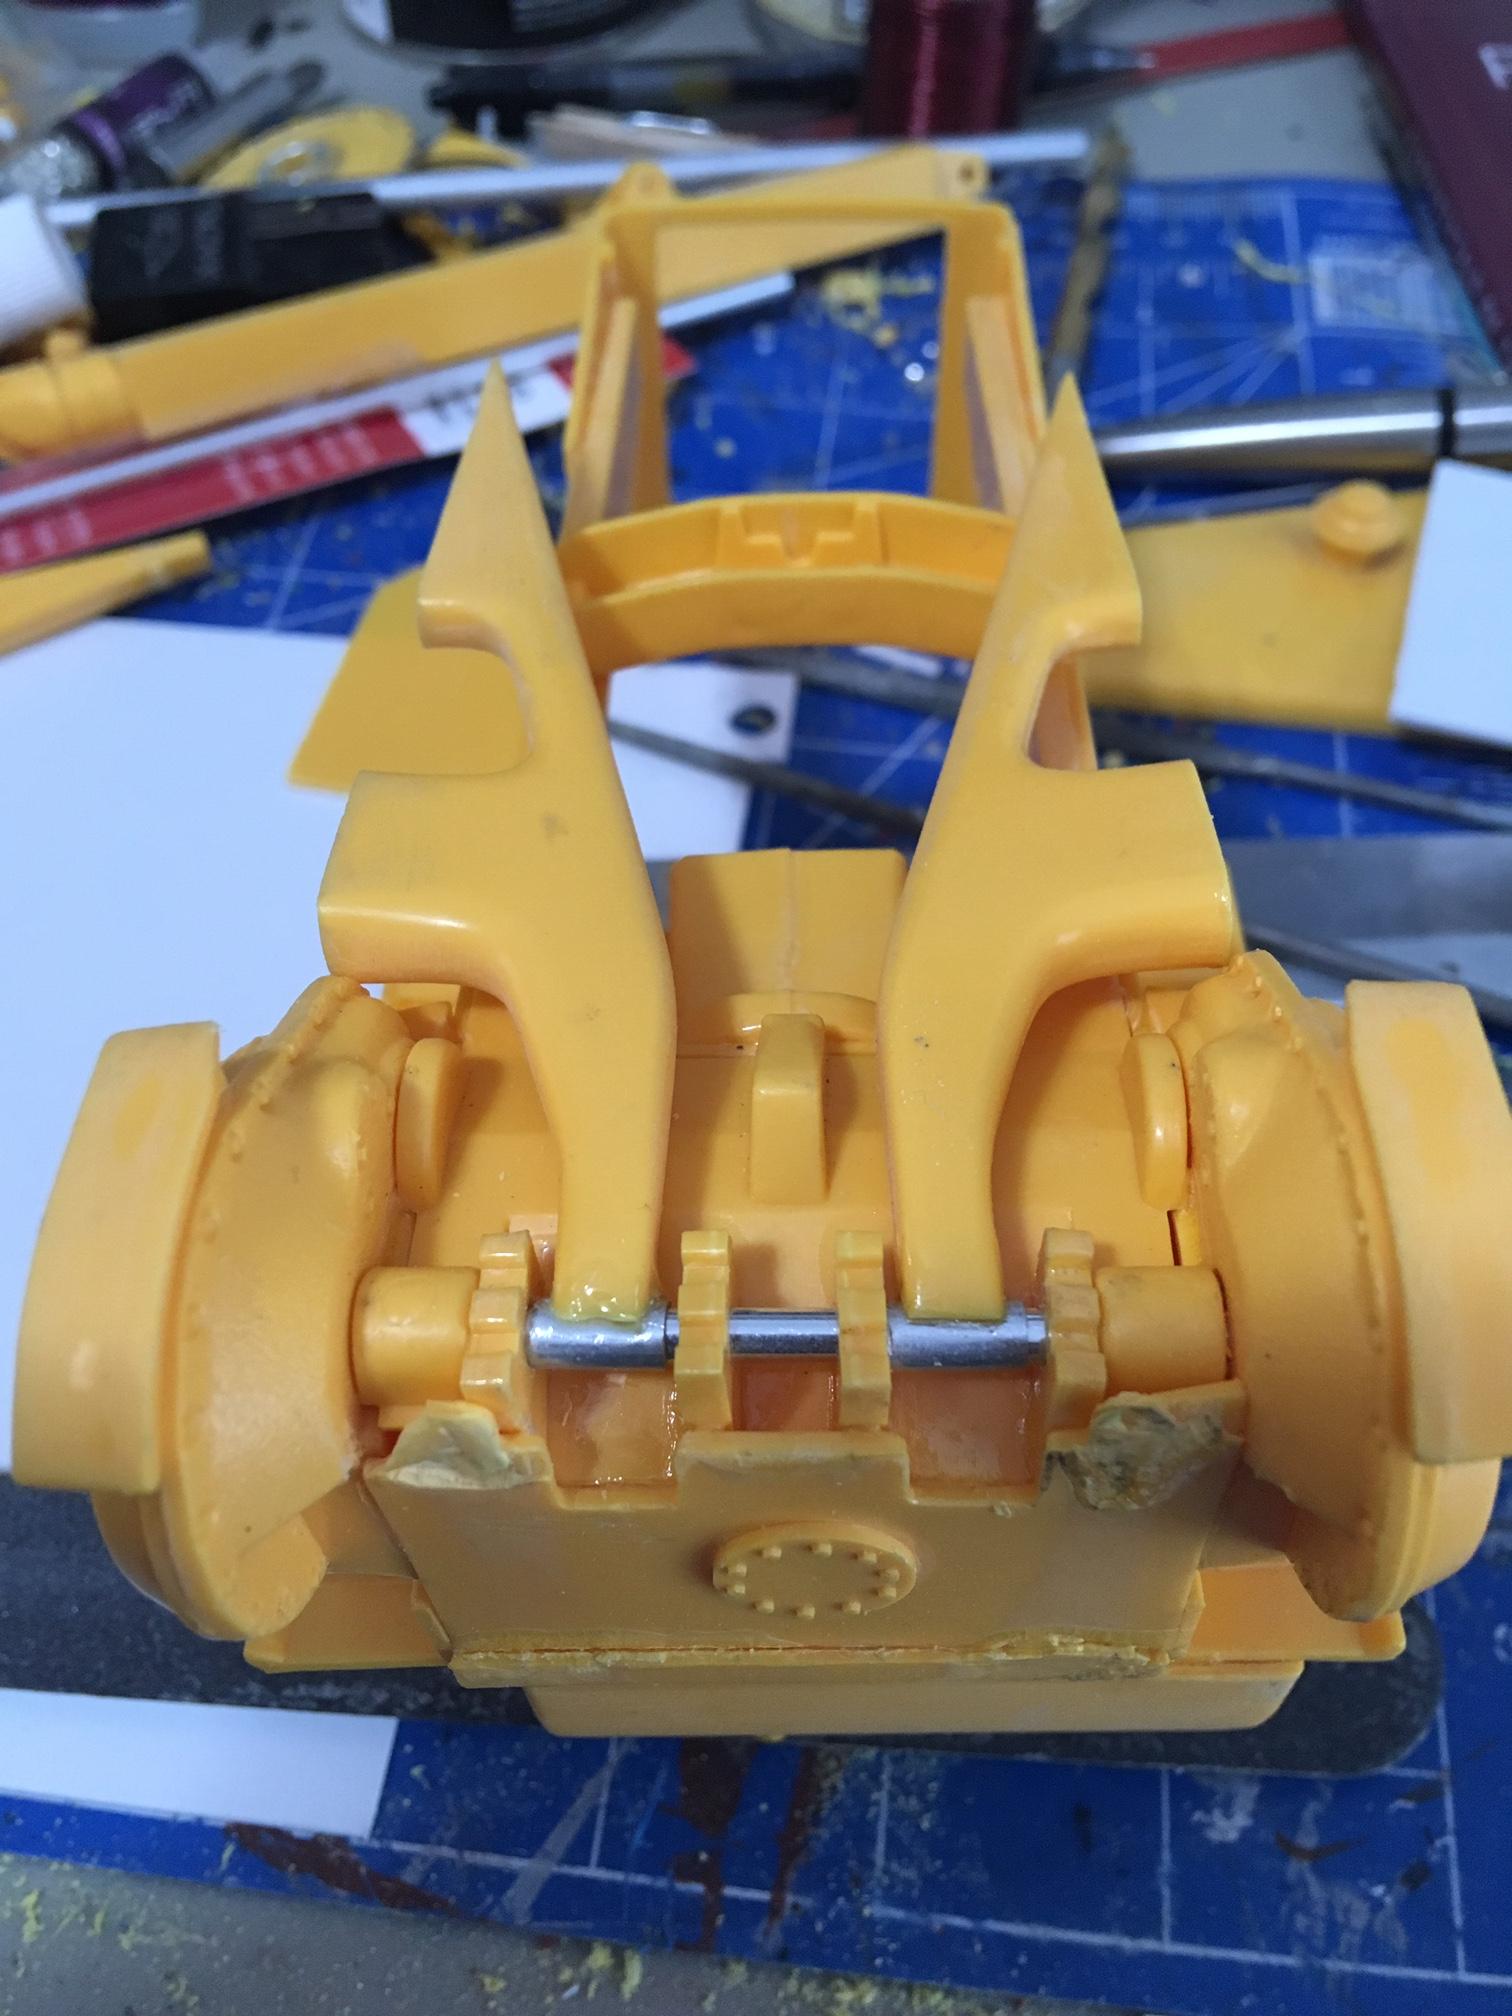
I guess the advantage of building 3 kits at once is that while you are waiting on one thing, you can work on another. Right now I am waiting on the paint on the cab and hood of the truck to fully dry. Due to the weather where I am at, this could take a while. So, this has allowed me to get back to the Dozer. I needed to modify the lower rollers, the shaft that comes with the kit is just too small and leaves a huge gap and just looks bad. So, as you can see from the pictures, I cut off the old shafts, drilled them out and installed 1/8in styrene shafts that fit tight. The engine is getting some details, fuel lines etc. I had to remove the turbo to do this, and it lets me make a copy of it for another Dozer kit I got that is missing the turbo. The Hydraulic cylinders for the front were in bad need of some details. I redid the ends, added some bolt detail, added some beads for the hydraulic lines, added a hard line and pivot pins. The shafts for the cylinders will be 3/32 Aluminum tube. It fits nice and looks great. They will be long enough that I do not need to put stops on the ends, they will not come out far enough to pull out. I made a new exhaust stack. This will attach directly to the top of the turbo instead of the hood like in the kit. A little flapper finishes it off. It will be hit with some rust to make it look right. The design of the track pivots was not what I wanted. It was difficult to get it all together and painted and work right. So, I replaced it with aluminum pivots. I will make pins for later. It also helps to get everything aligned the right way. I will have more pictures soon of the other stuff I have been working on.
-
I love this, not only is it a great subject, a turbine 4070, but the build quality is outstanding. 4070 is my favorite truck ever and this one is amazing. I never knew that made a turbine 4070. Very cool and very well done.
-
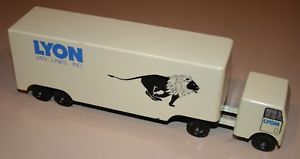
When I was a kid a family friend worked for Lyon Van lines, moving and storage company. He gave me a truck like the one in the picture. I wish I still had it. I would like to build one like it someday so this is good info. Anyone happen to may these decals?
-
Not sure how you would strap a wench to the bumper, she would really block the view, but a winch would be handy.
-
Holy Cow! you got that thing done quick. It looks great, I love the color combo. It has a very classic look, I like it.
-
MB New Actros Lowliner
Oldmopars replied to Hermann Kersten's topic in WIP: Model Trucks: Big Rigs and Heavy Equipment
I love the details on this one, keep it coming. Can't wait to see the finished truck. -
So, in trying to keep up with the at least one update per month rule, I am adding this. I have been really bad this month about documenting things, but here goes. The engine was mostly assembled, I took apart what I could without breaking anything and cleaned it up, put it together and repainted what needed it. I finished the chassis shortening and had to make some new brakes cans as I lost one, then of course found it after I painted it. A lot of work on the fuel tanks, wheels, and other parts. The original builder saw no need to sand or scrape off any flash, sprue connections or mold lines. Spent a lot of time fixing that and then painting. I tried really hard to get the seats out of the interior, but they were going to break into a million parts if I kept at it, so I painted them in place. Also repainted the interior tub. As a fleet truck it would likely have been white, but due to the difficulty and lack of interior details, I went with basic black. I have several coats of primer on the cab. It was not too bad, but there was a spoiler/deflector on the roof and it left behind some holes and glue marks. These needed a lot of attention. Decal removal also left behind some roughness that needed sanding out. So, the truck in moving along. If the snow would stop I might be able to get the cab painted. The trailer is in the bag, literally. I broke it apart so I could fix many issue that the previous builder created. I will have to remove a ton of mold lines and fix fit issues before paint. I should have started with new kits, it would have been easier, however I did not have an extra $120-150 to go get new kits. Anyway, these needed rescue. As for the dozer. Not much done there other than getting another one. The one I have has quite a few broken parts or missing parts. I needed a way to recreate them without spending huge time or money. So, I was offered another full built kit for a trade of something I had. Now I have everything I need to copy any broken or missing parts for the first kit and still be able to build a second one down the road.
-
Stretched Big Rig question
Oldmopars replied to iamsuperdan's topic in General Automotive Talk (Trucks and Cars)
If the suspension was left stock, the long wheelbase might help smooth things out. But most all of these trucks are lowered and have very little travel. In my mind, the long wheelbase can only be for looks, the ride I'm sure is not as good as a stock truck. I am of the age when mini trucks were popular in the mid 80's. I had one and they rode like garbage, but it was all for looks, forget your back and kidneys, we were young. -
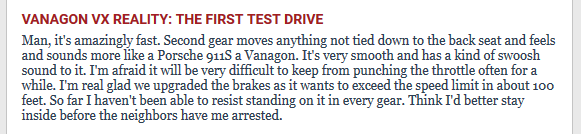
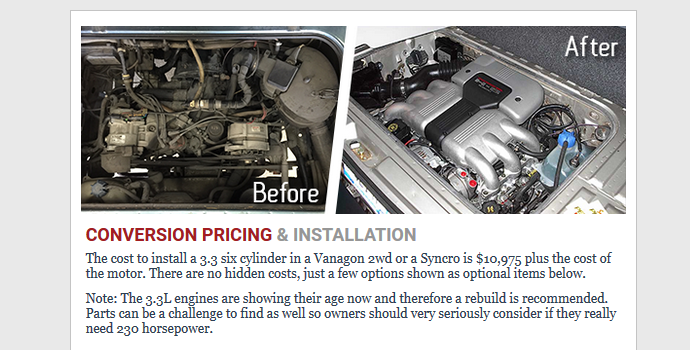
The Vanagon from the factory is not fast, the air cooled (1980-1982) were slugs that had a bad F.I system. The 1983+ were the Waterboxers, they were better but still only 1.9l, and 2.1l. However, the aftermarket has come to the rescue. A popular swap for these things is a Subaru engine (EJ?) But, I have seem a guy in Tacoma Wa. install a Subaru H6 in one. I understand this thing is SCARY FAST! A friend took a ride in it and he about wet himself. Good news is, swapping a Subaru, or even a Porsche engine in one is way cheaper to do in 1:24/1:25th scale then the real thing. Check this out, 230HP Vanagon! See this: https://smallcar.com/conversions/the-230hp-vanagon-vx.html Small clip from the article:
-
Rusty92, great trader. Thanks for the great transaction