Misha
-
Posts
1,032 -
Joined
-
Last visited
Content Type
Profiles
Forums
Events
Gallery
Everything posted by Misha
-
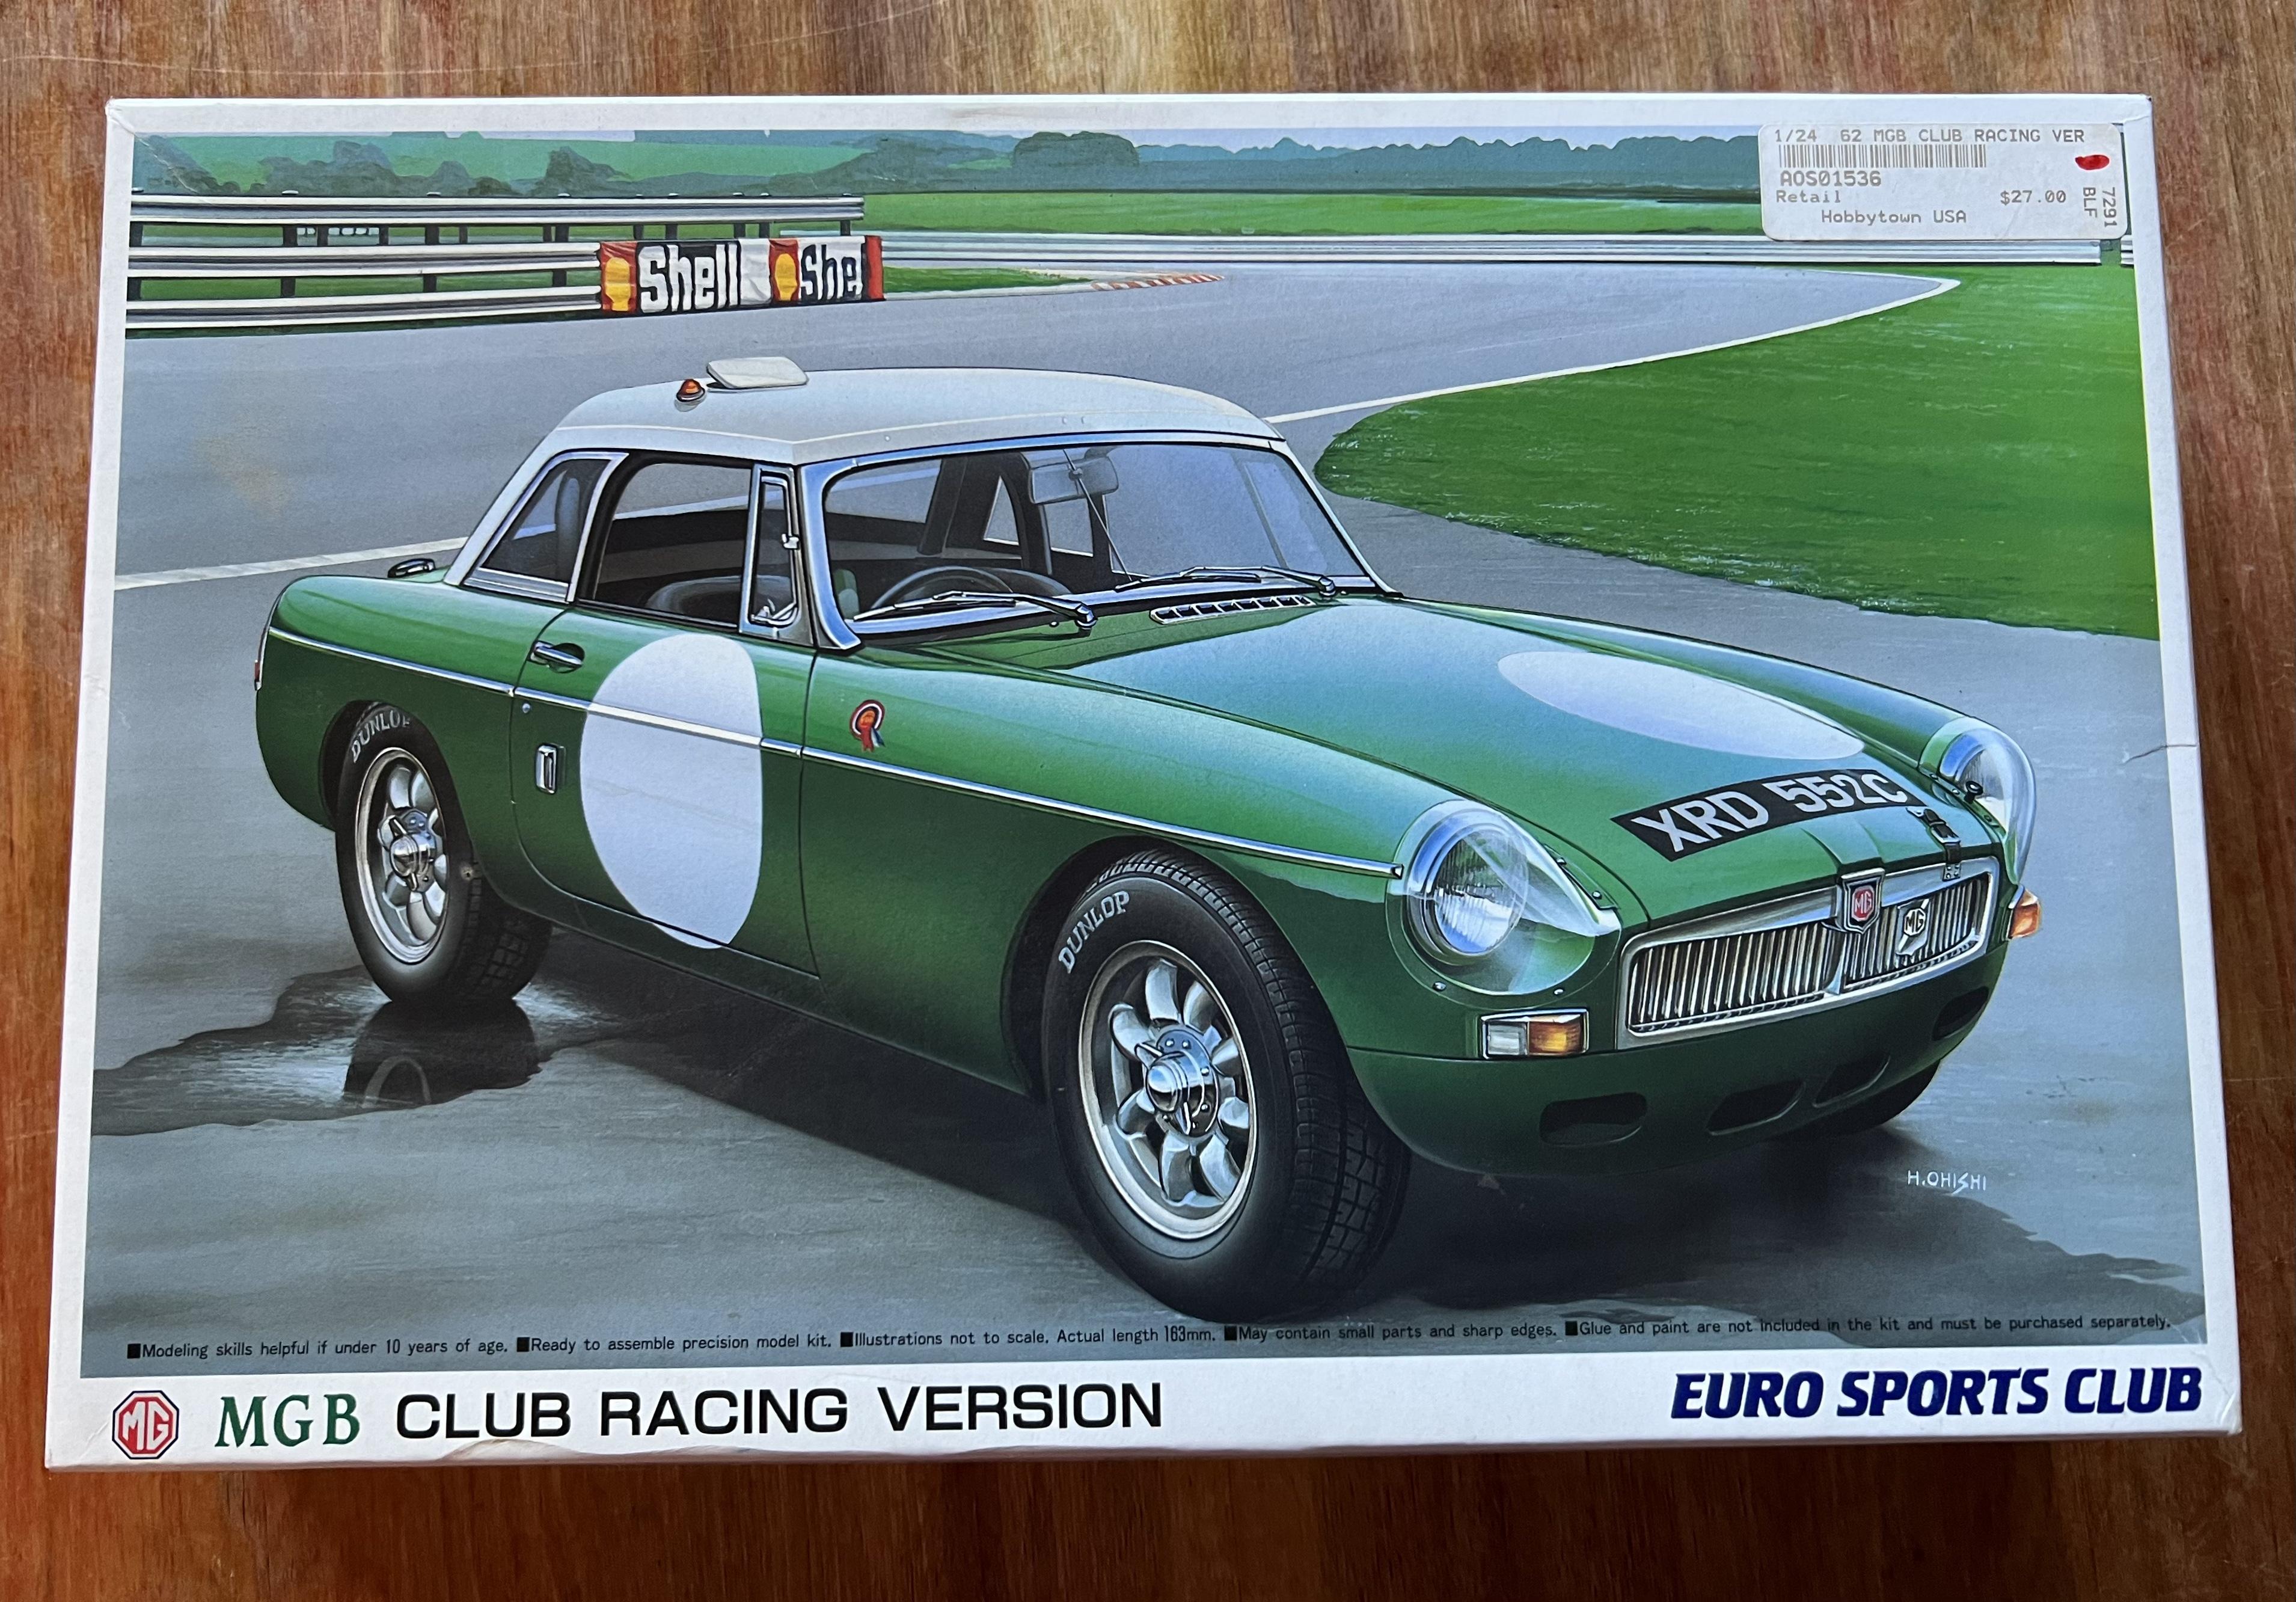
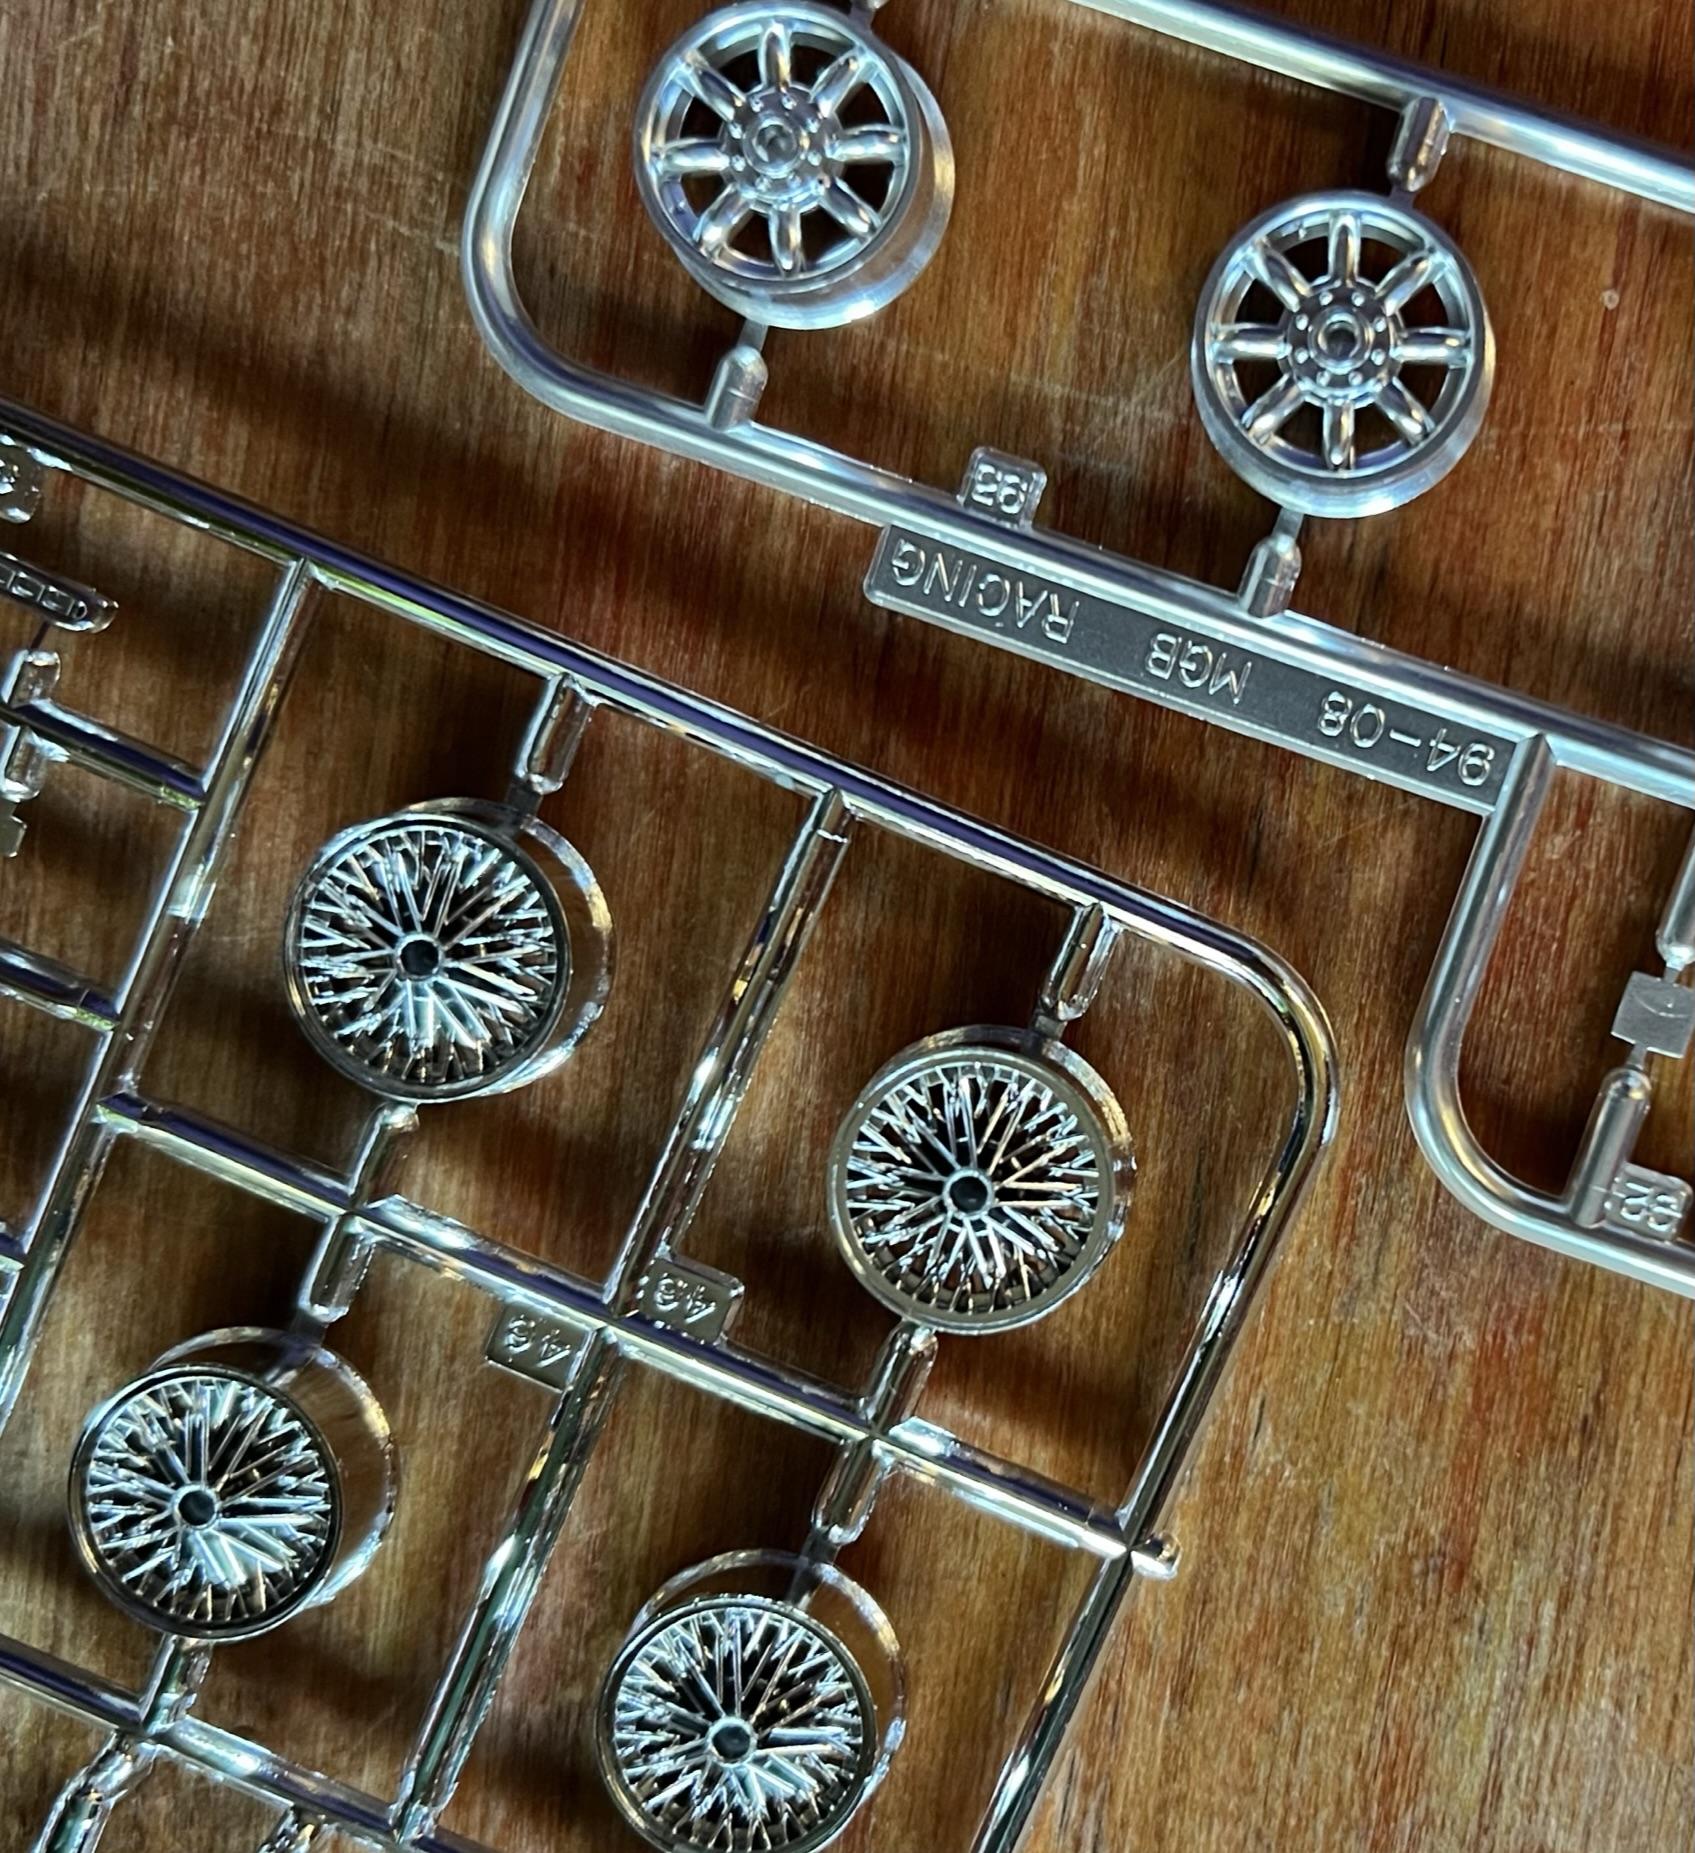
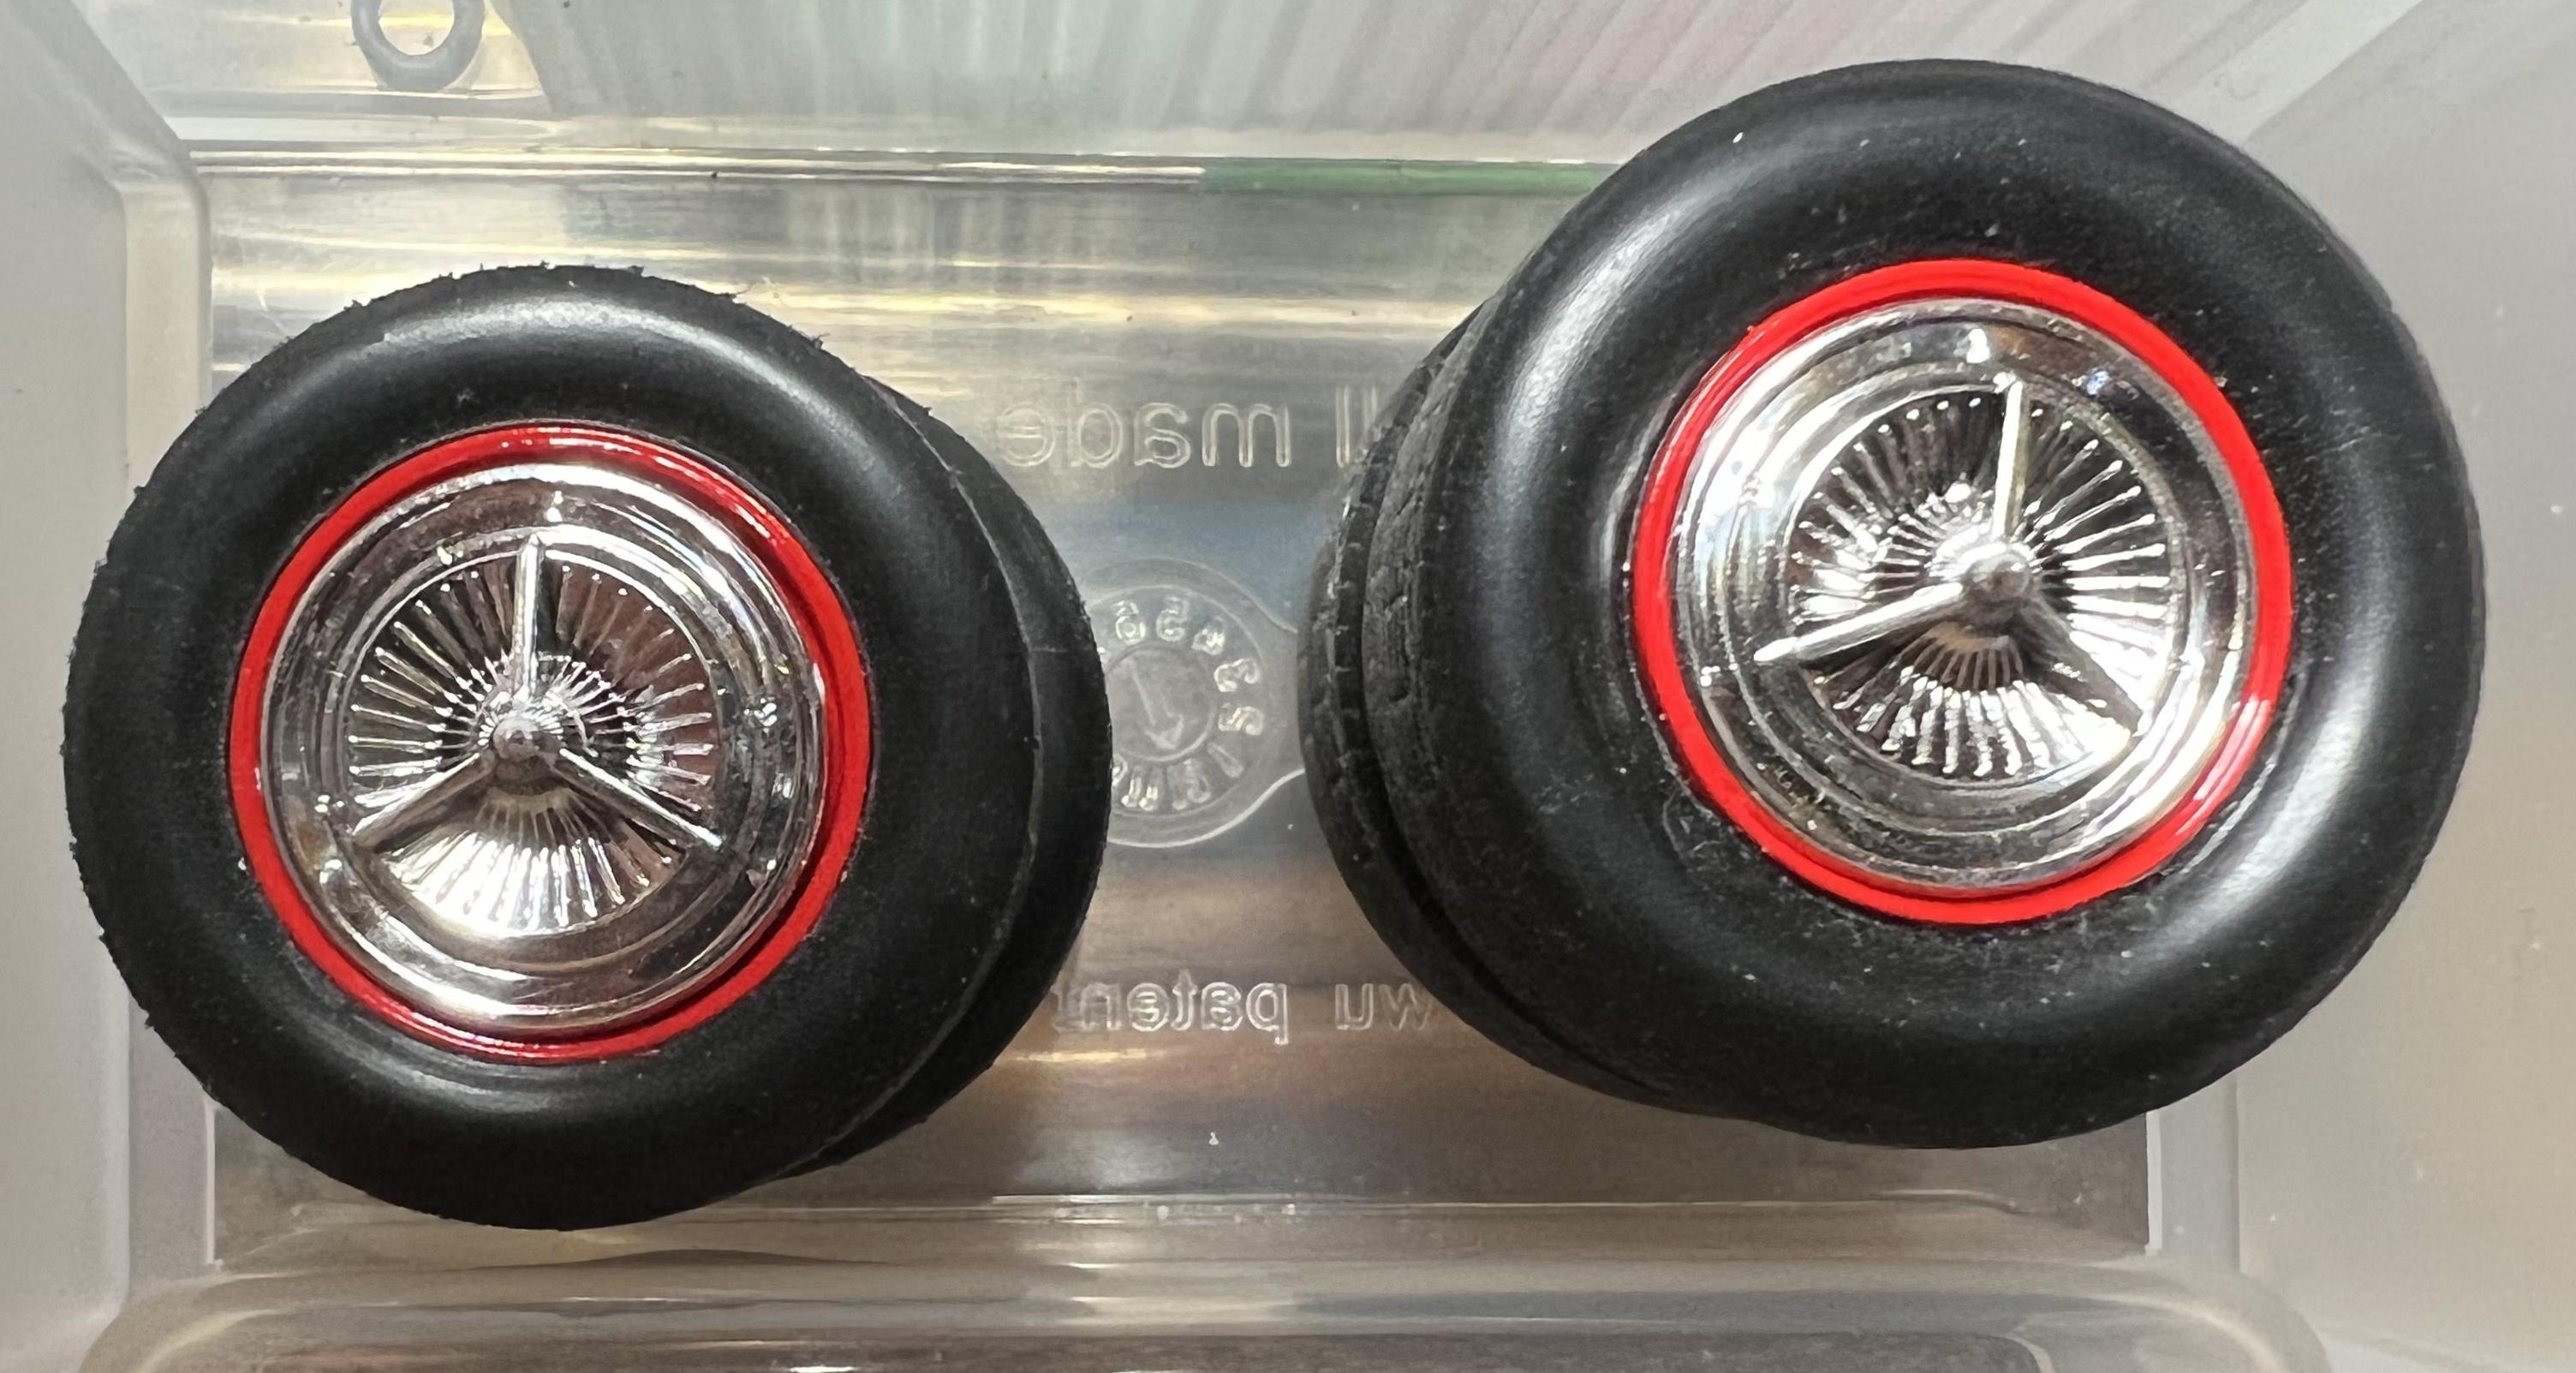
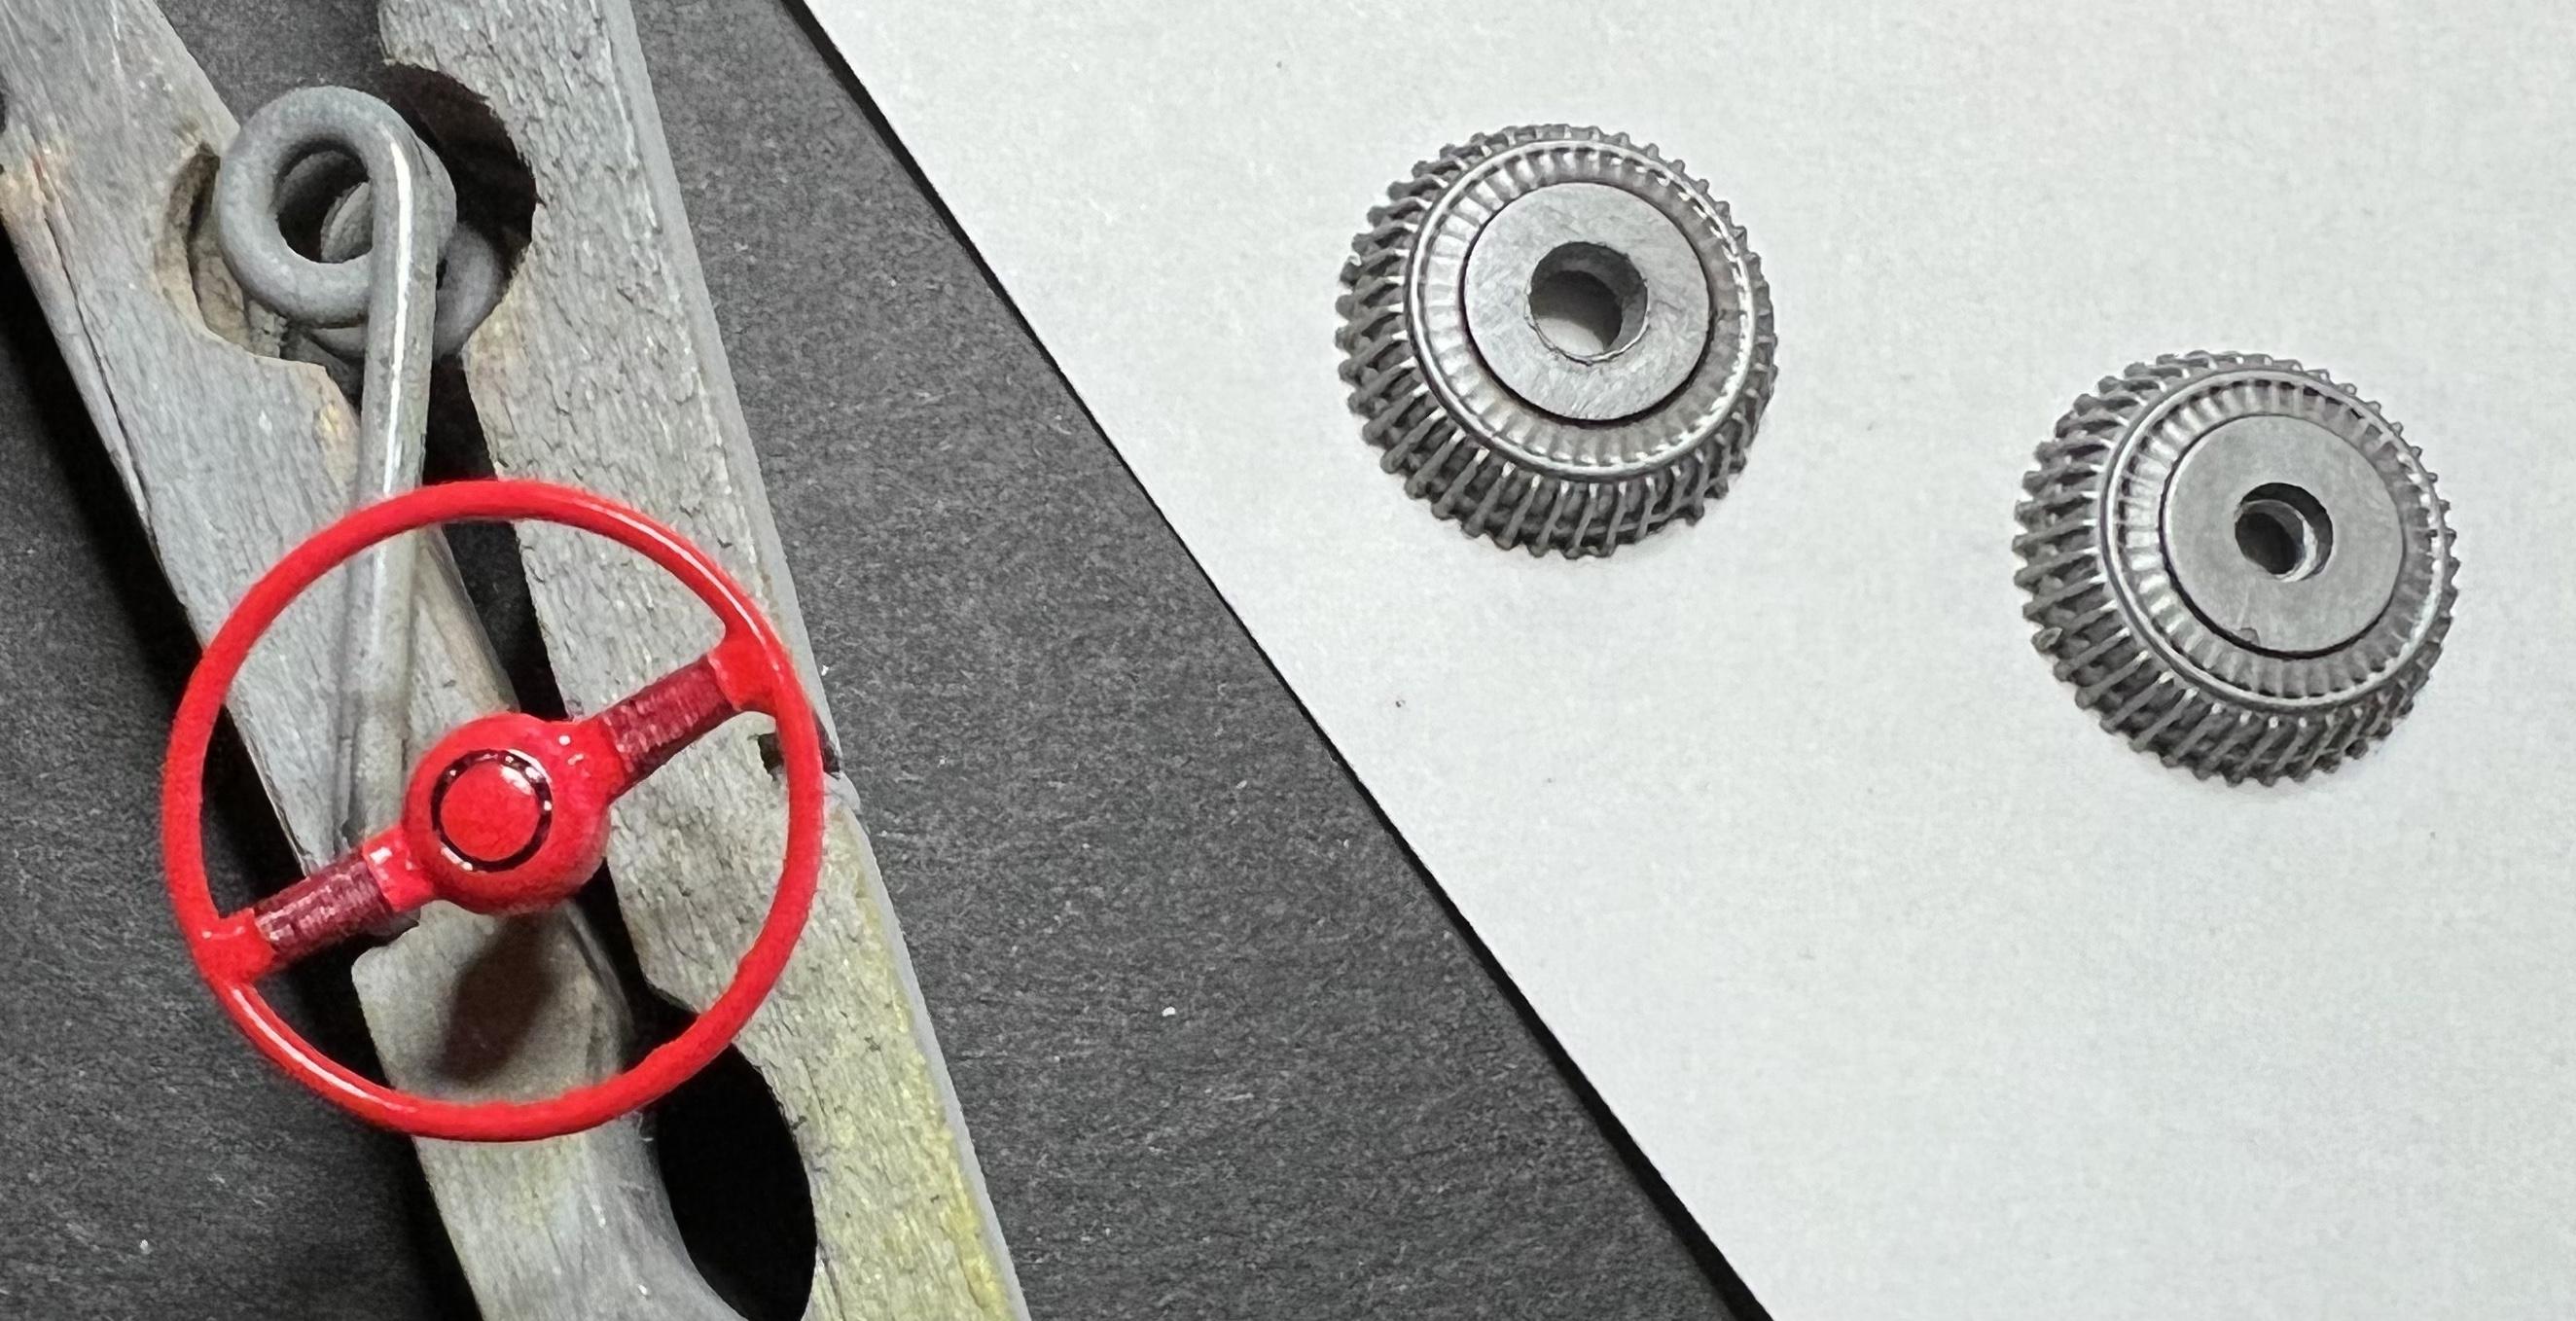
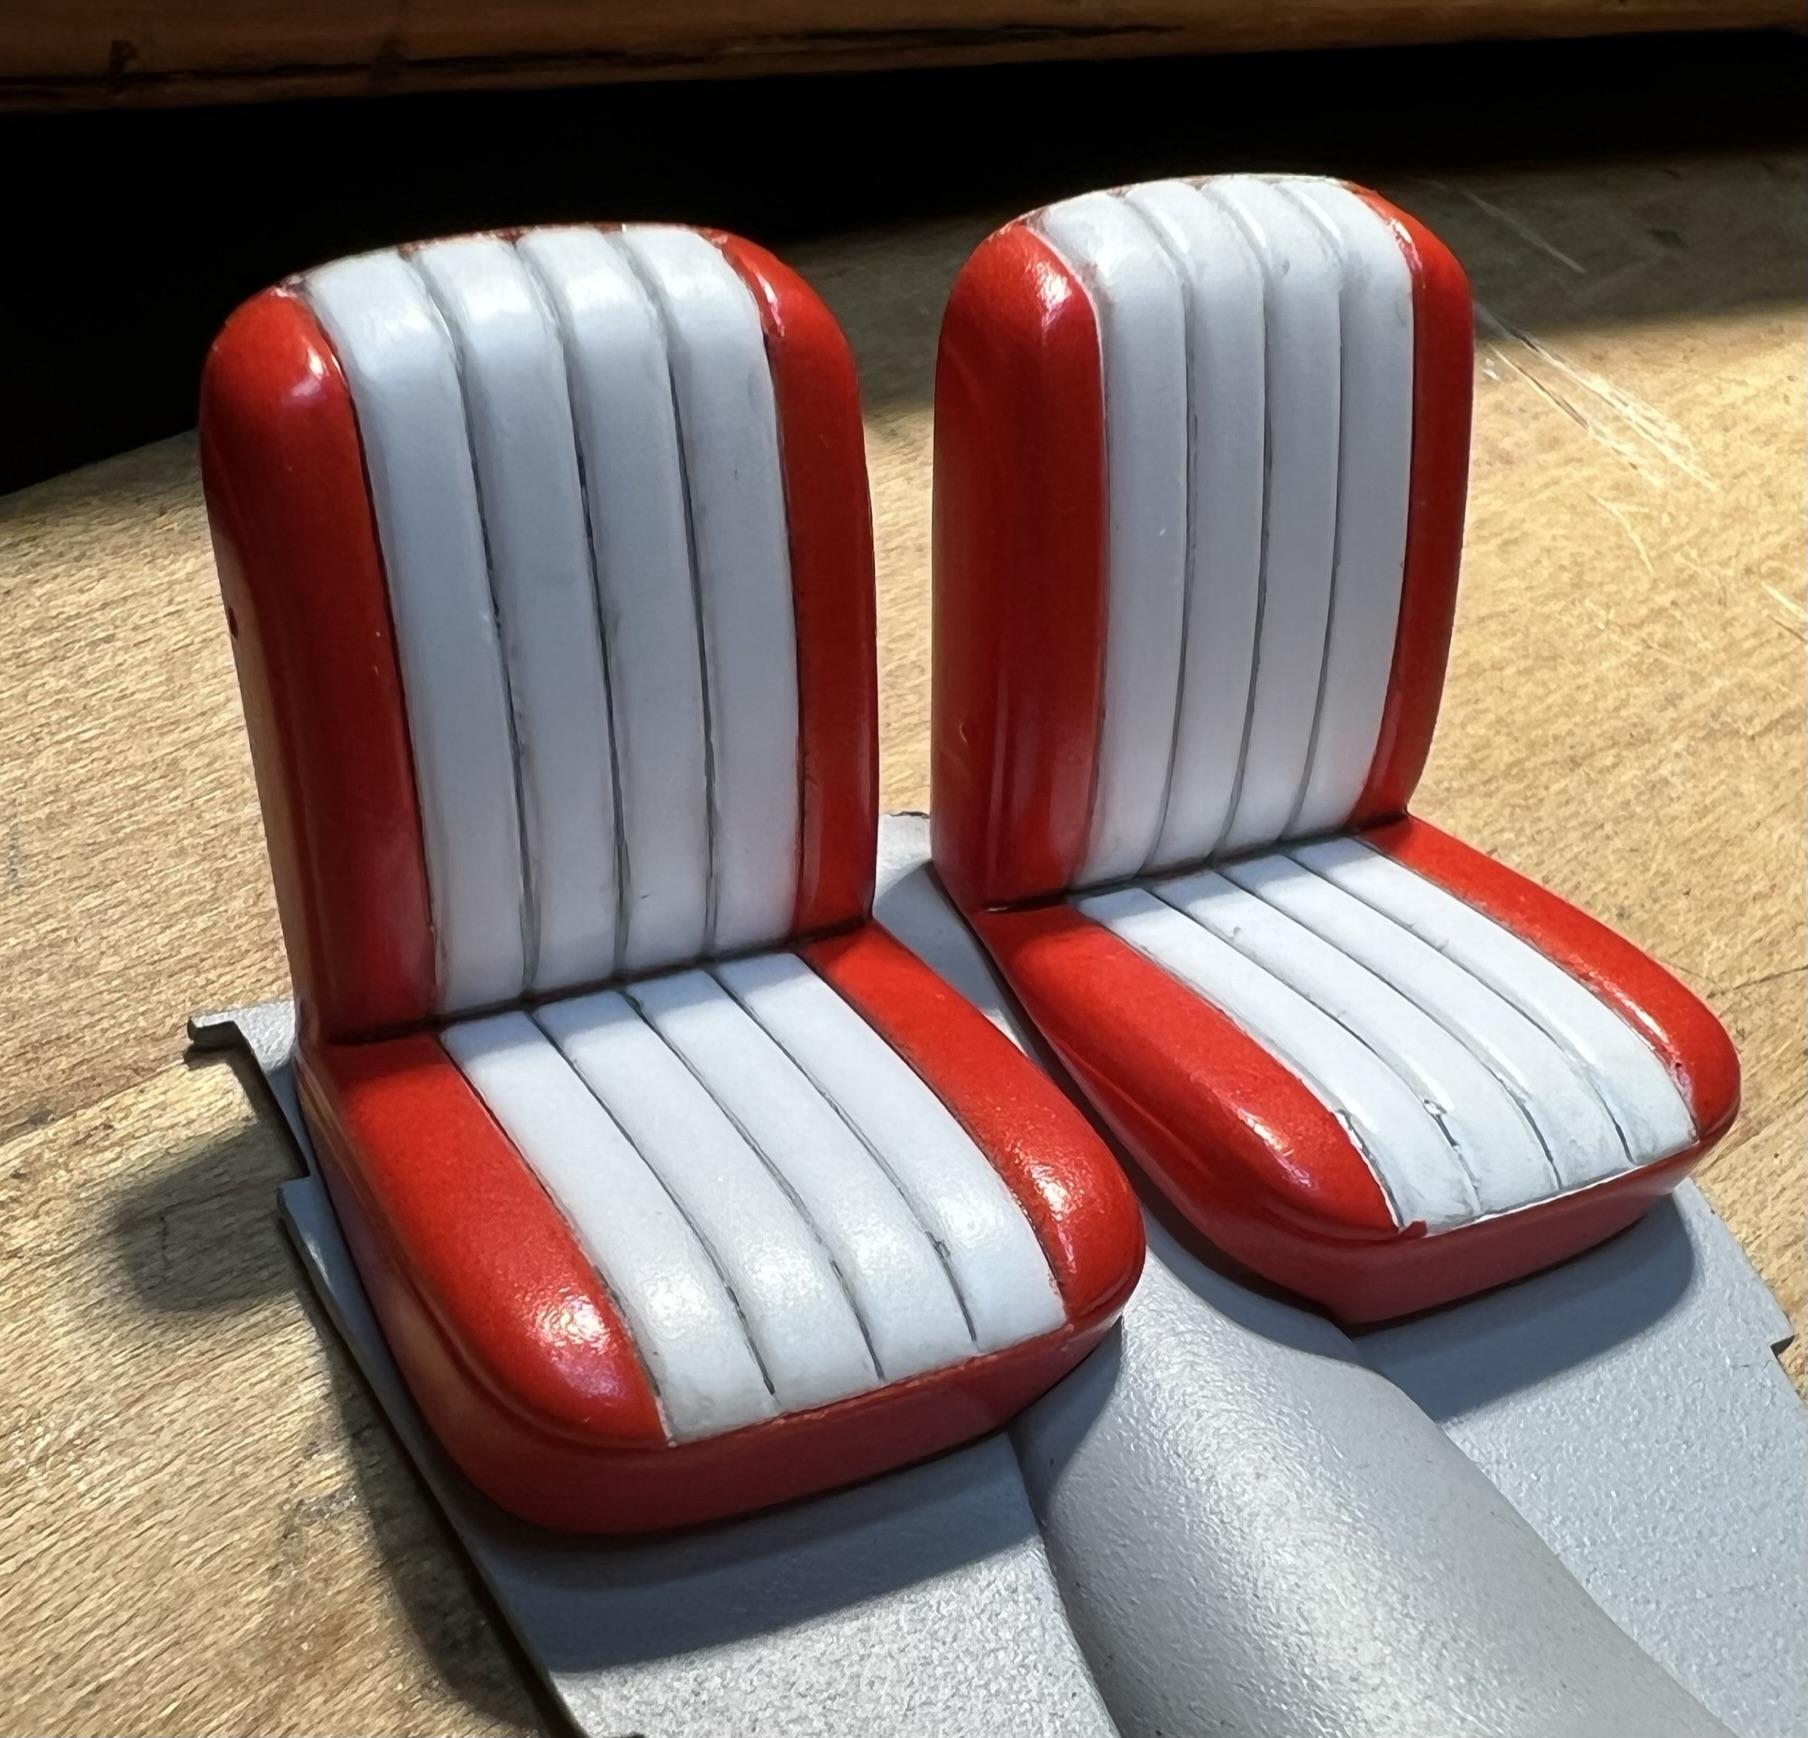
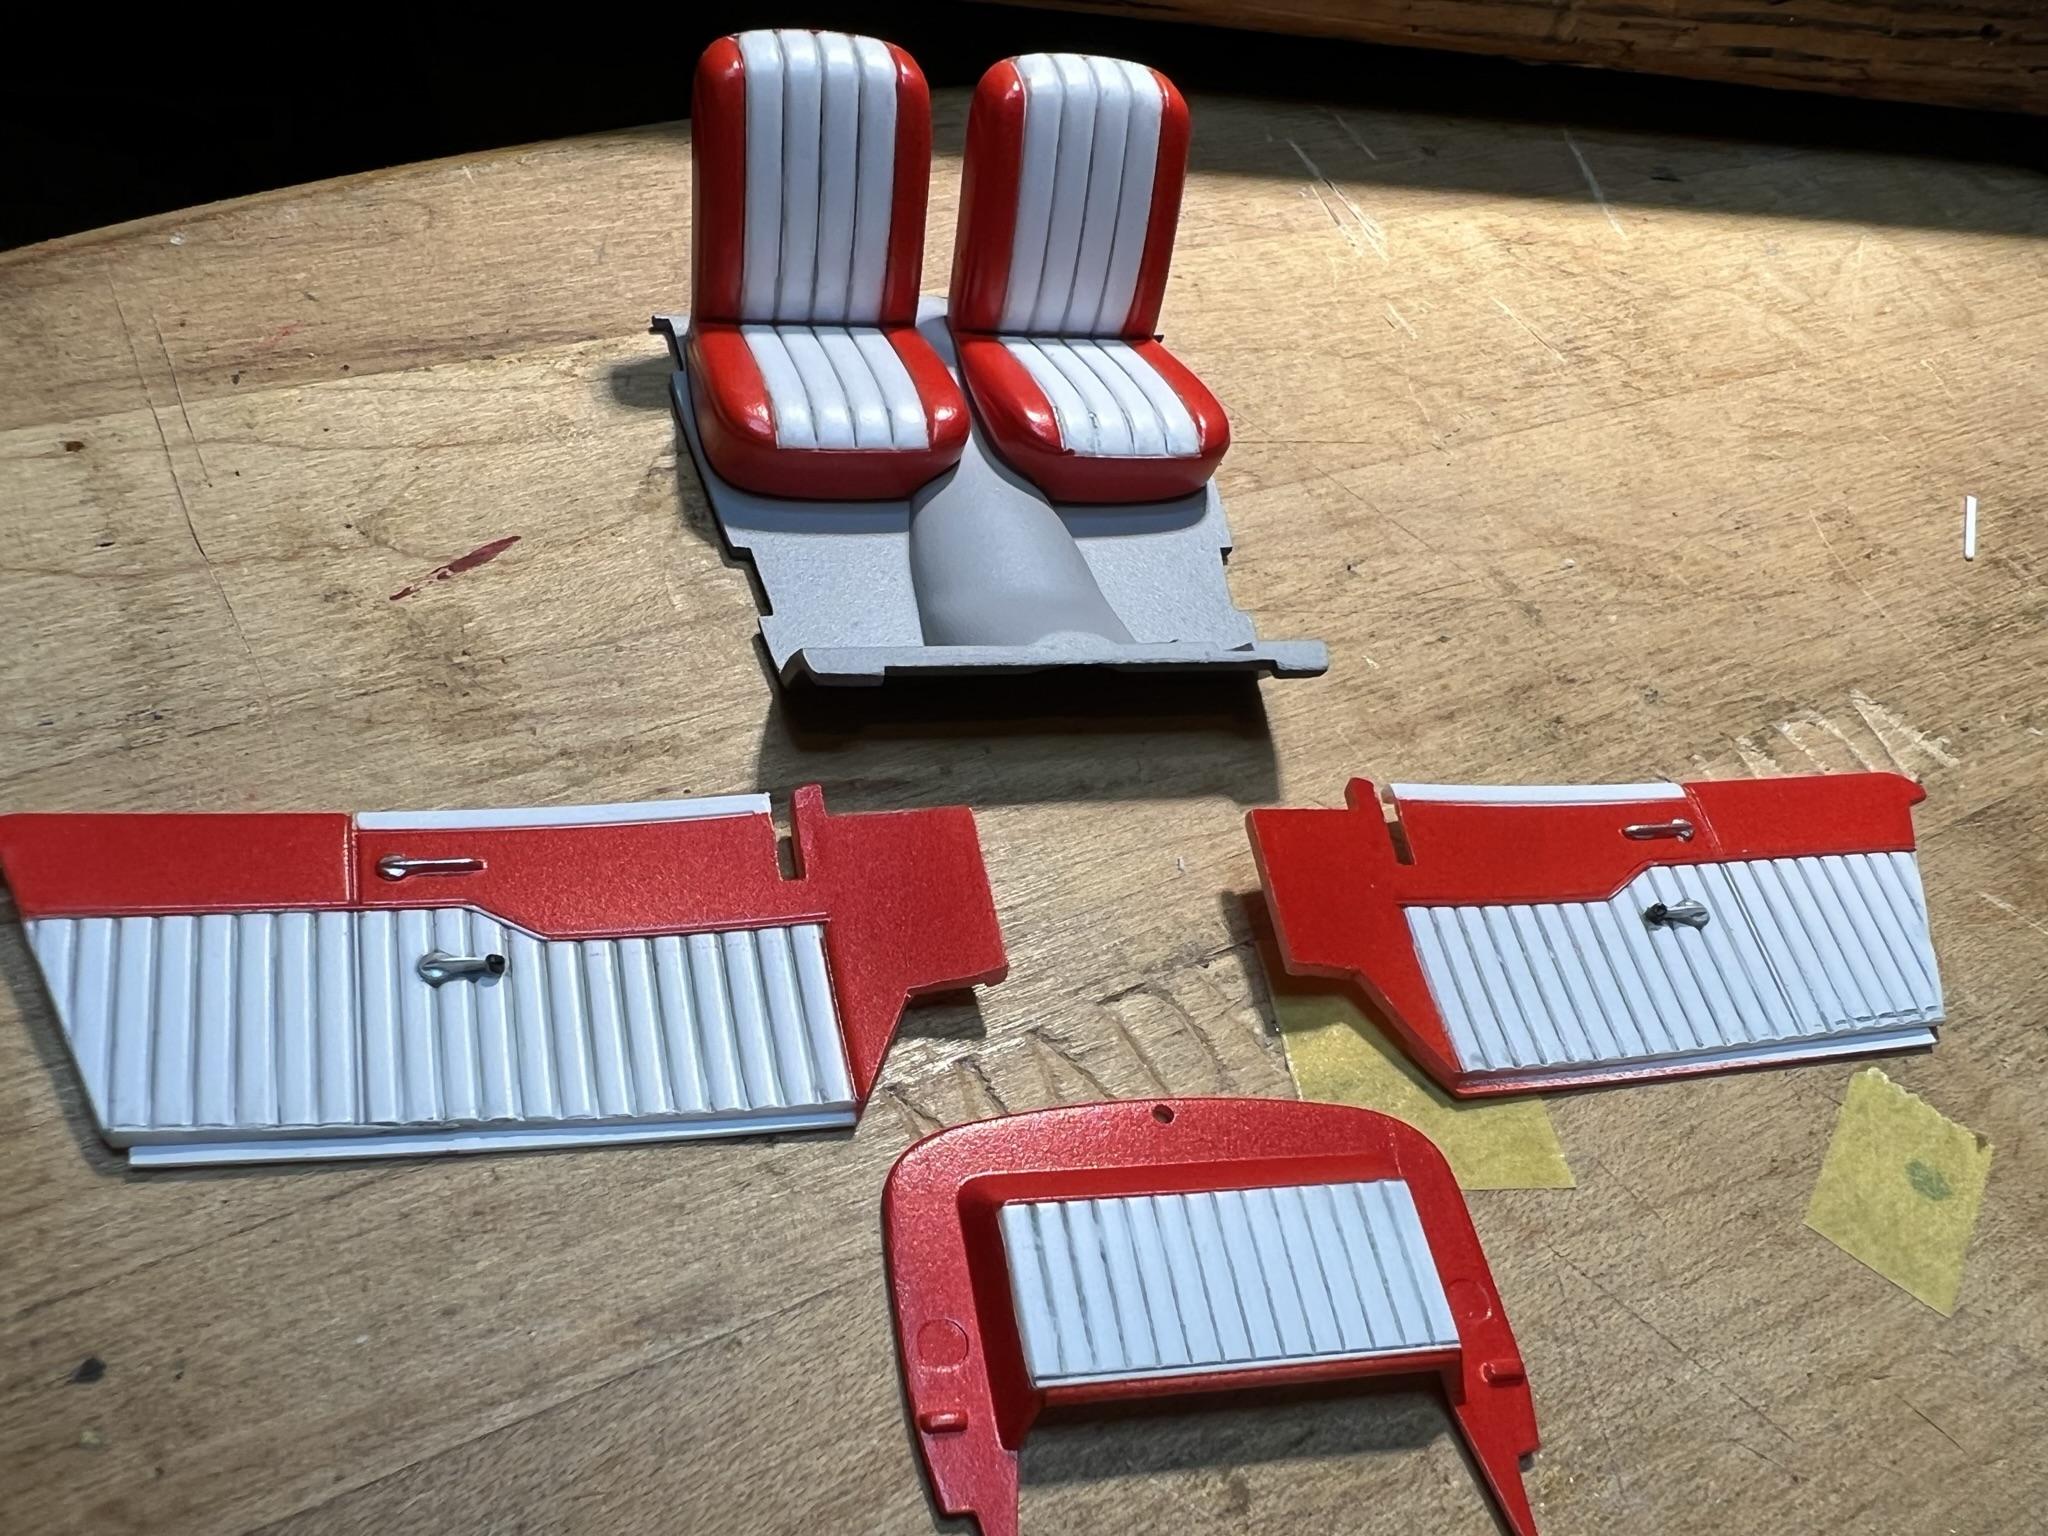
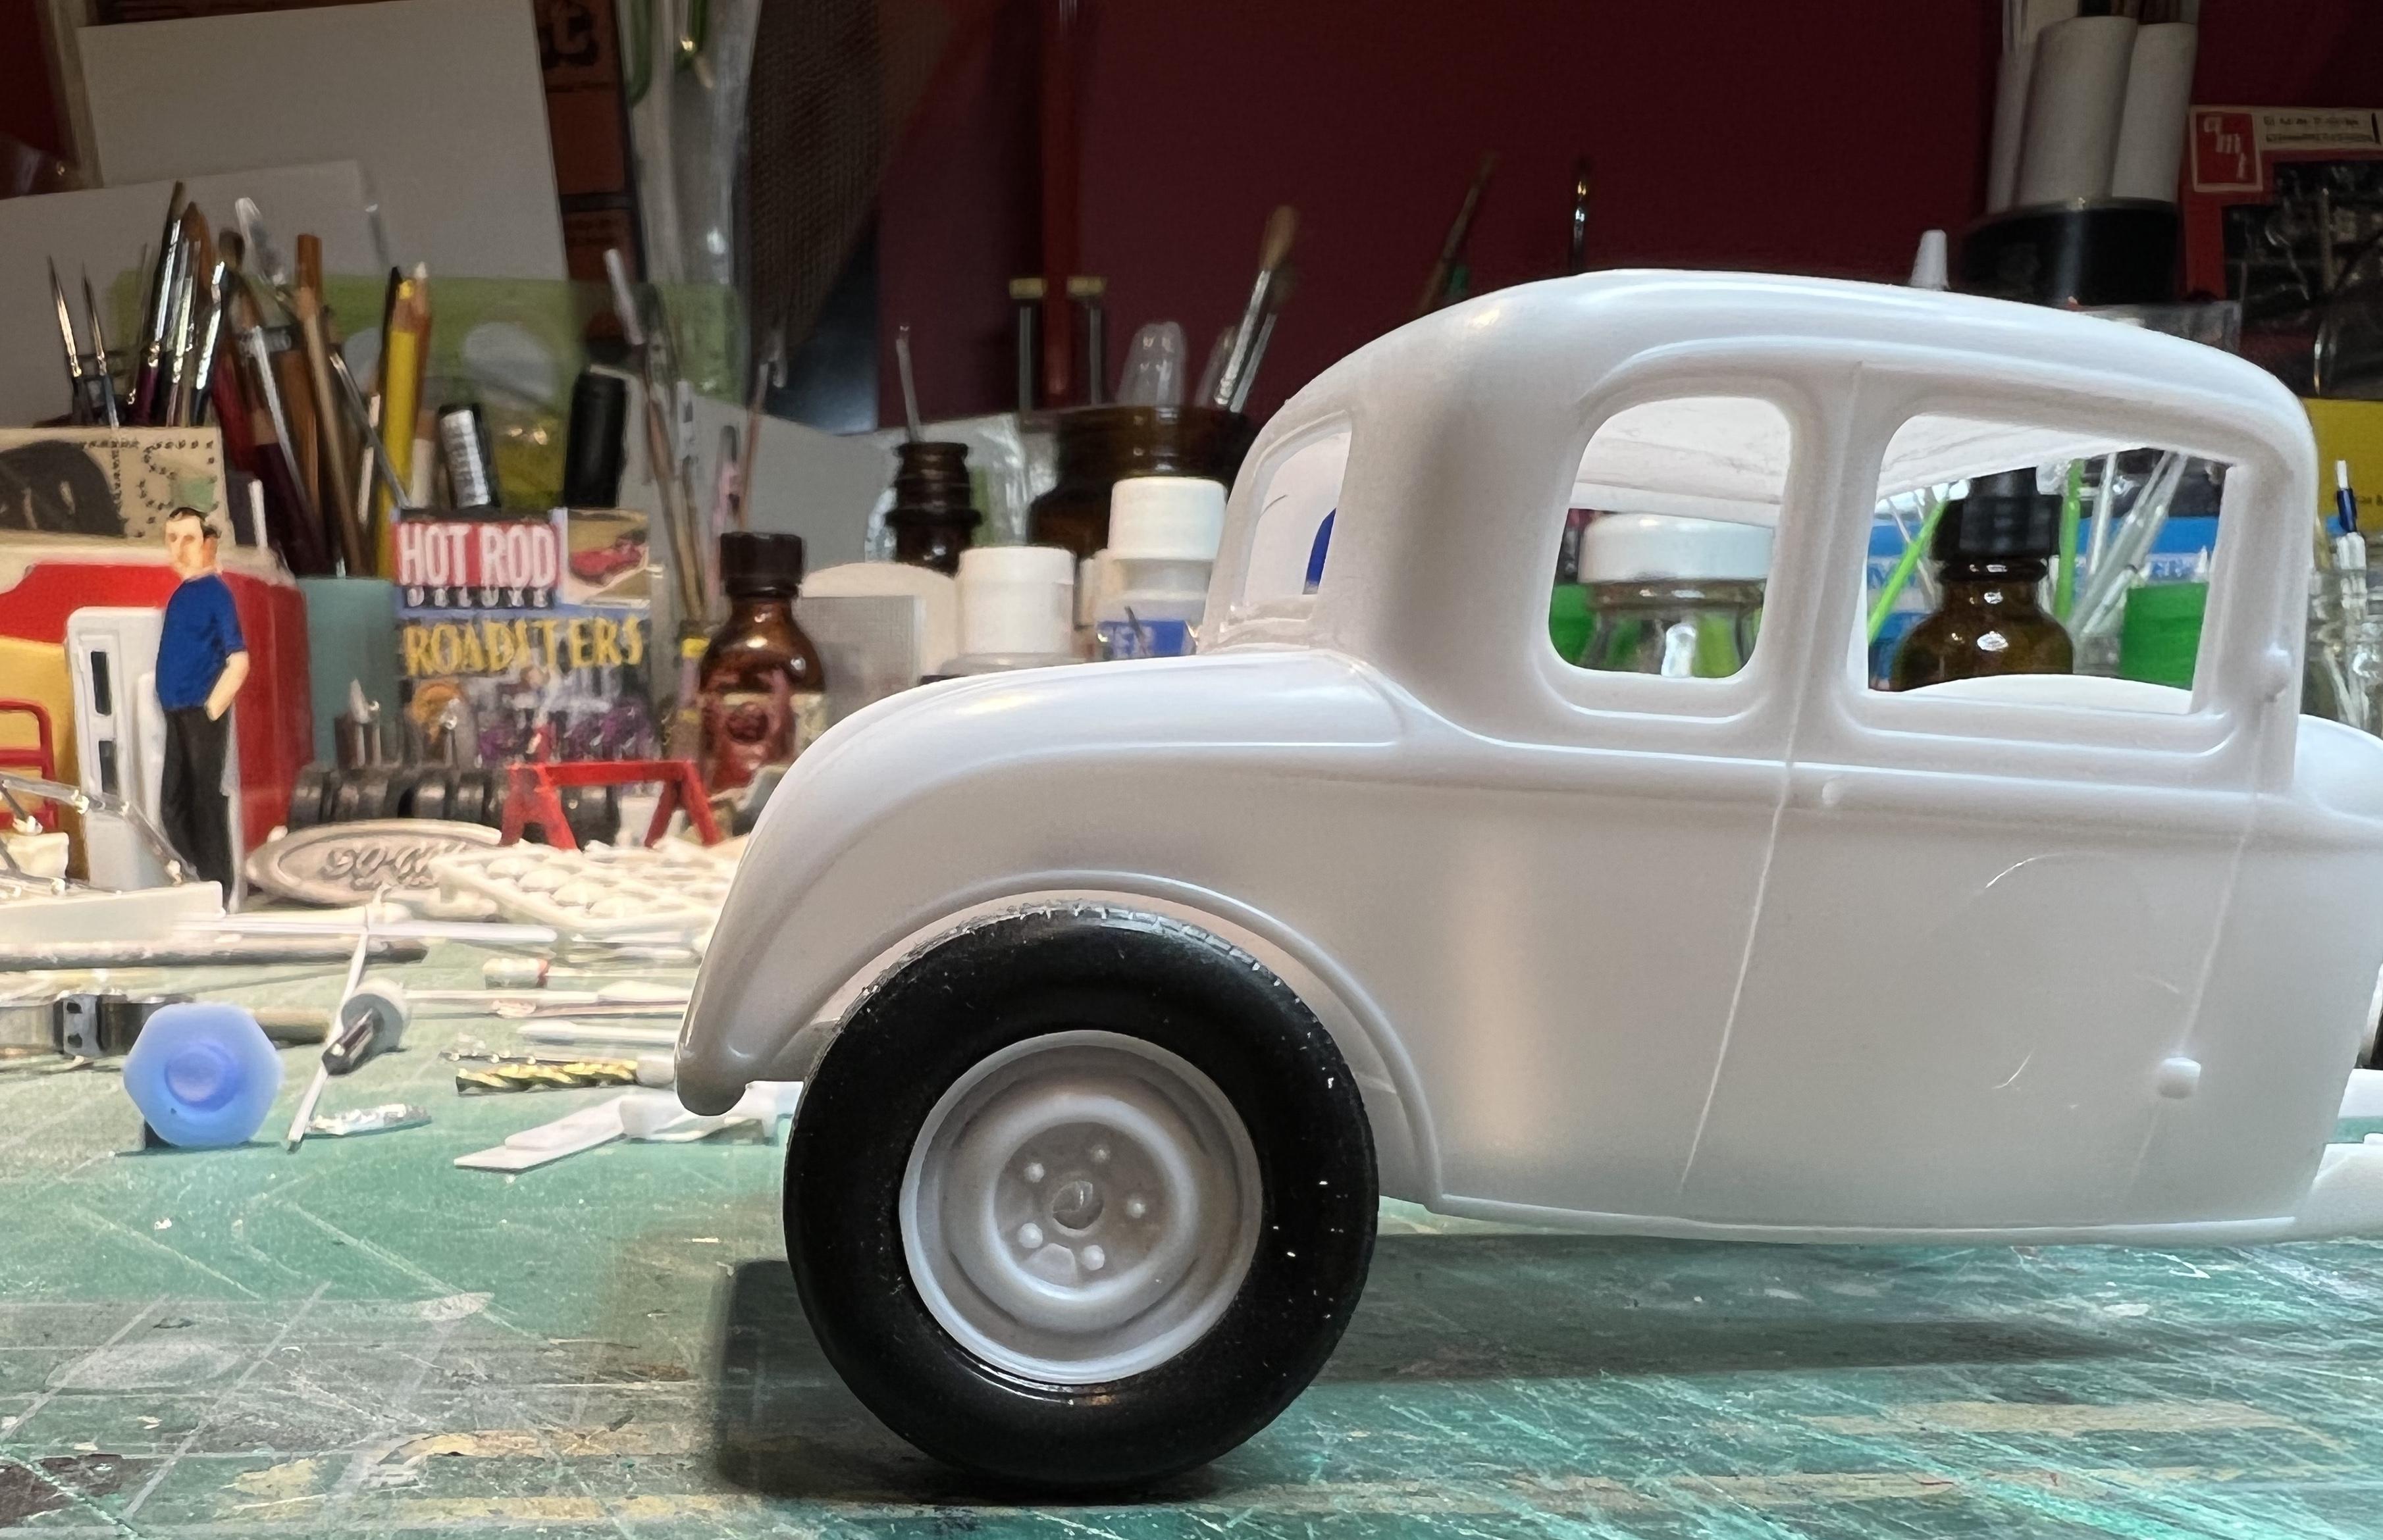
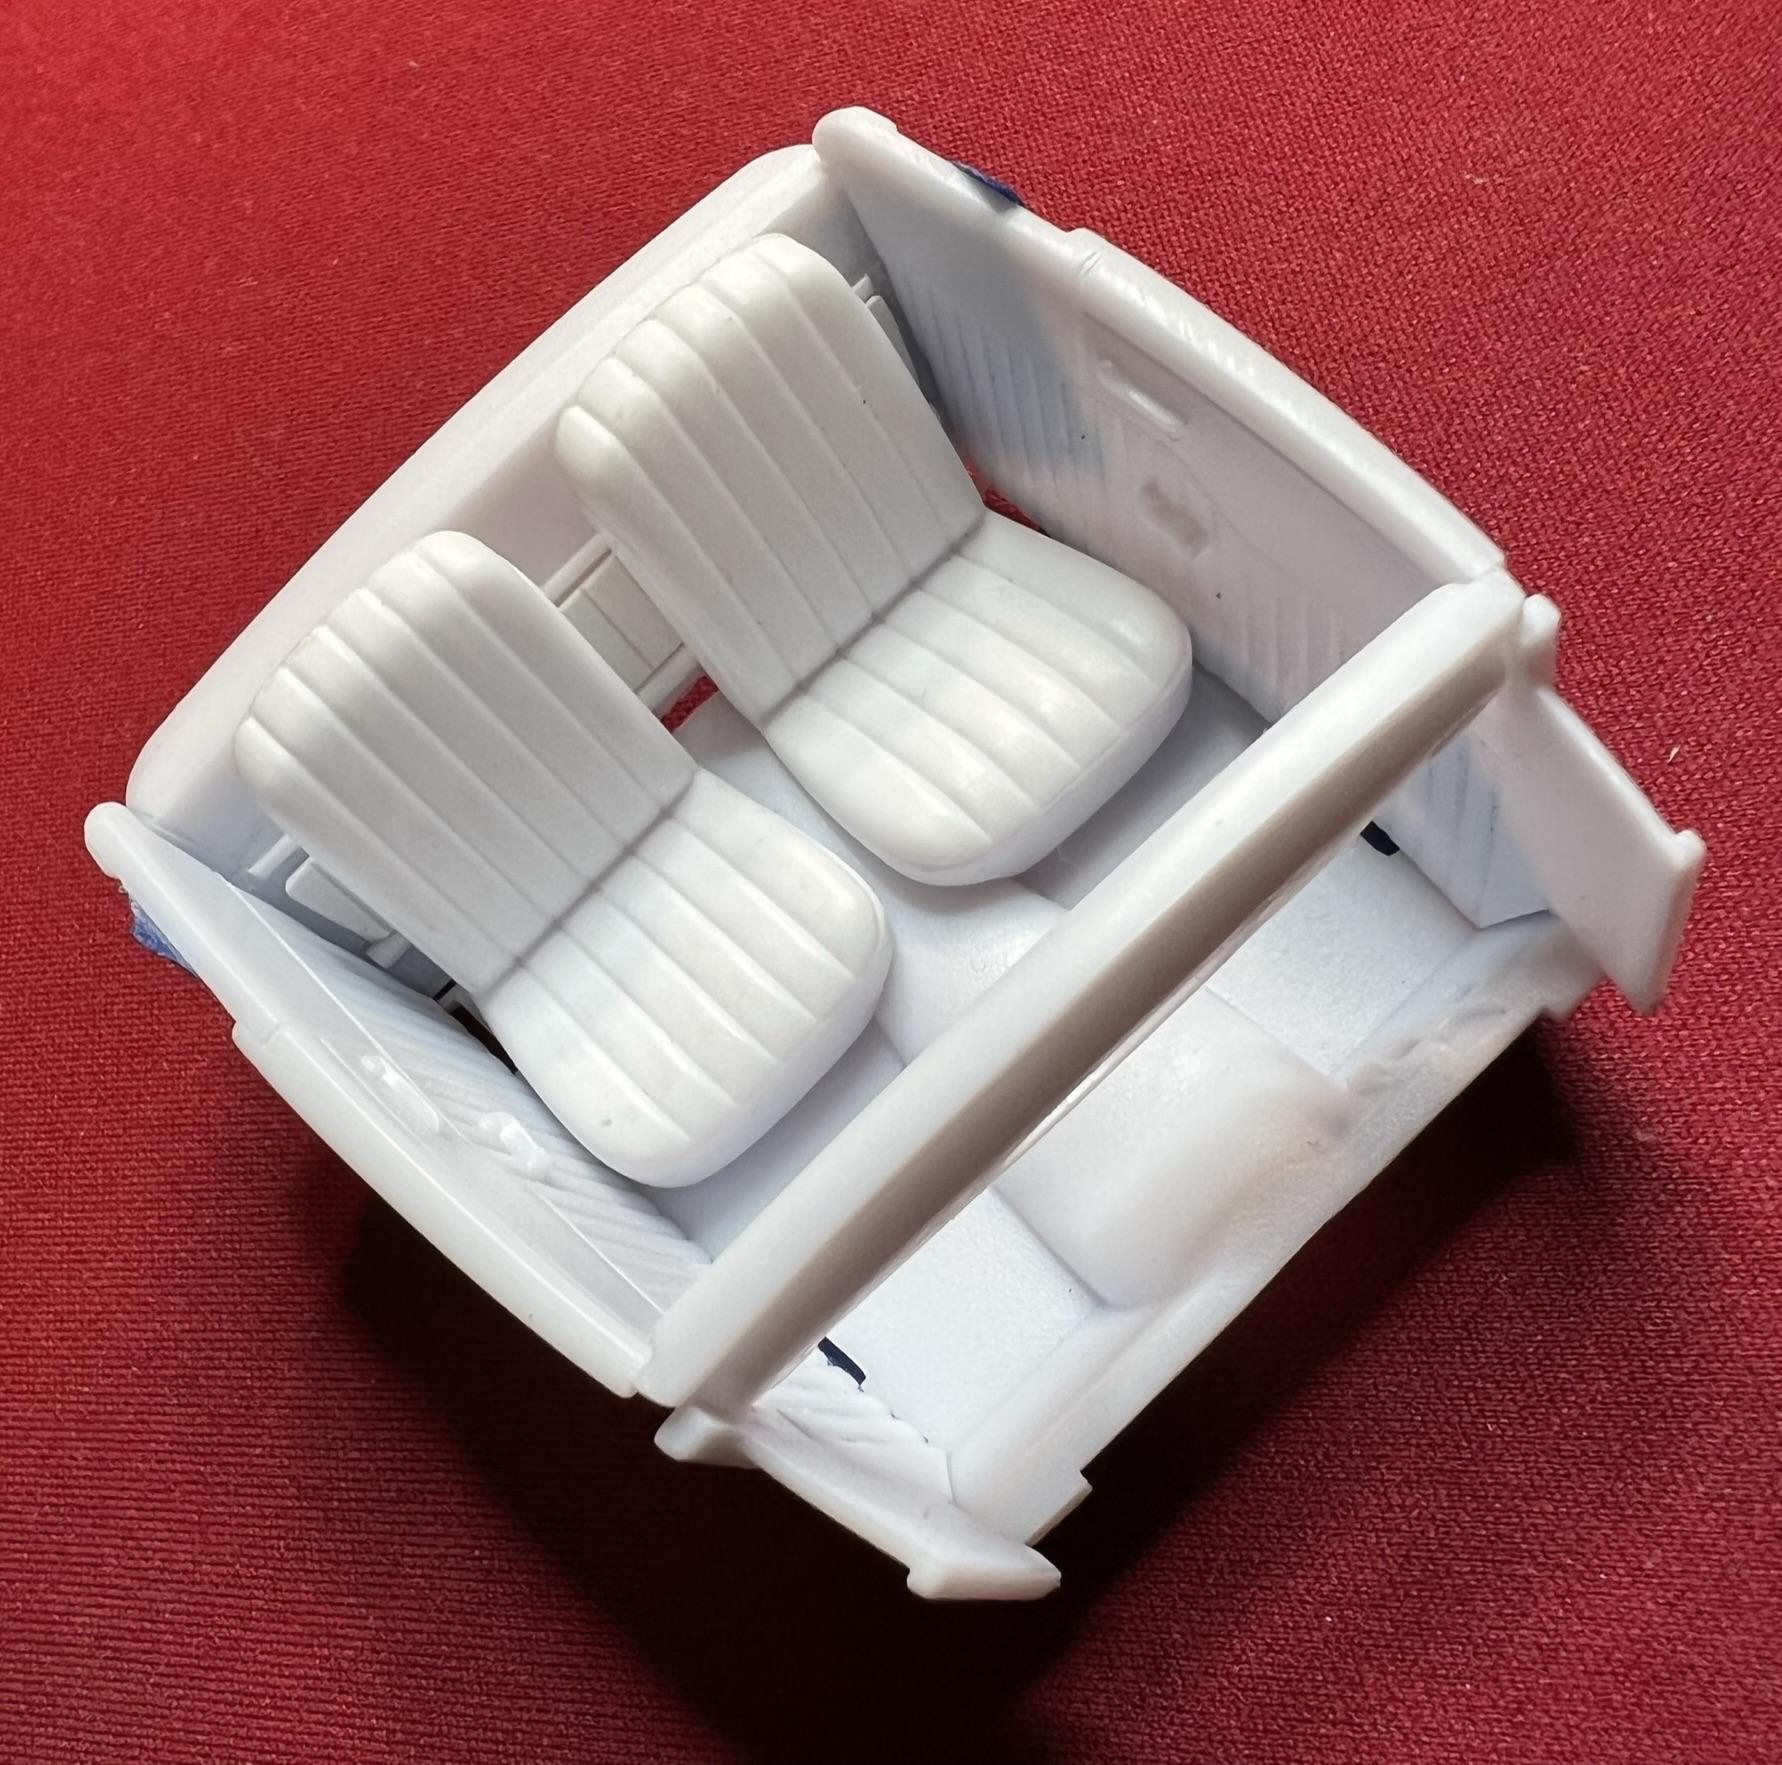
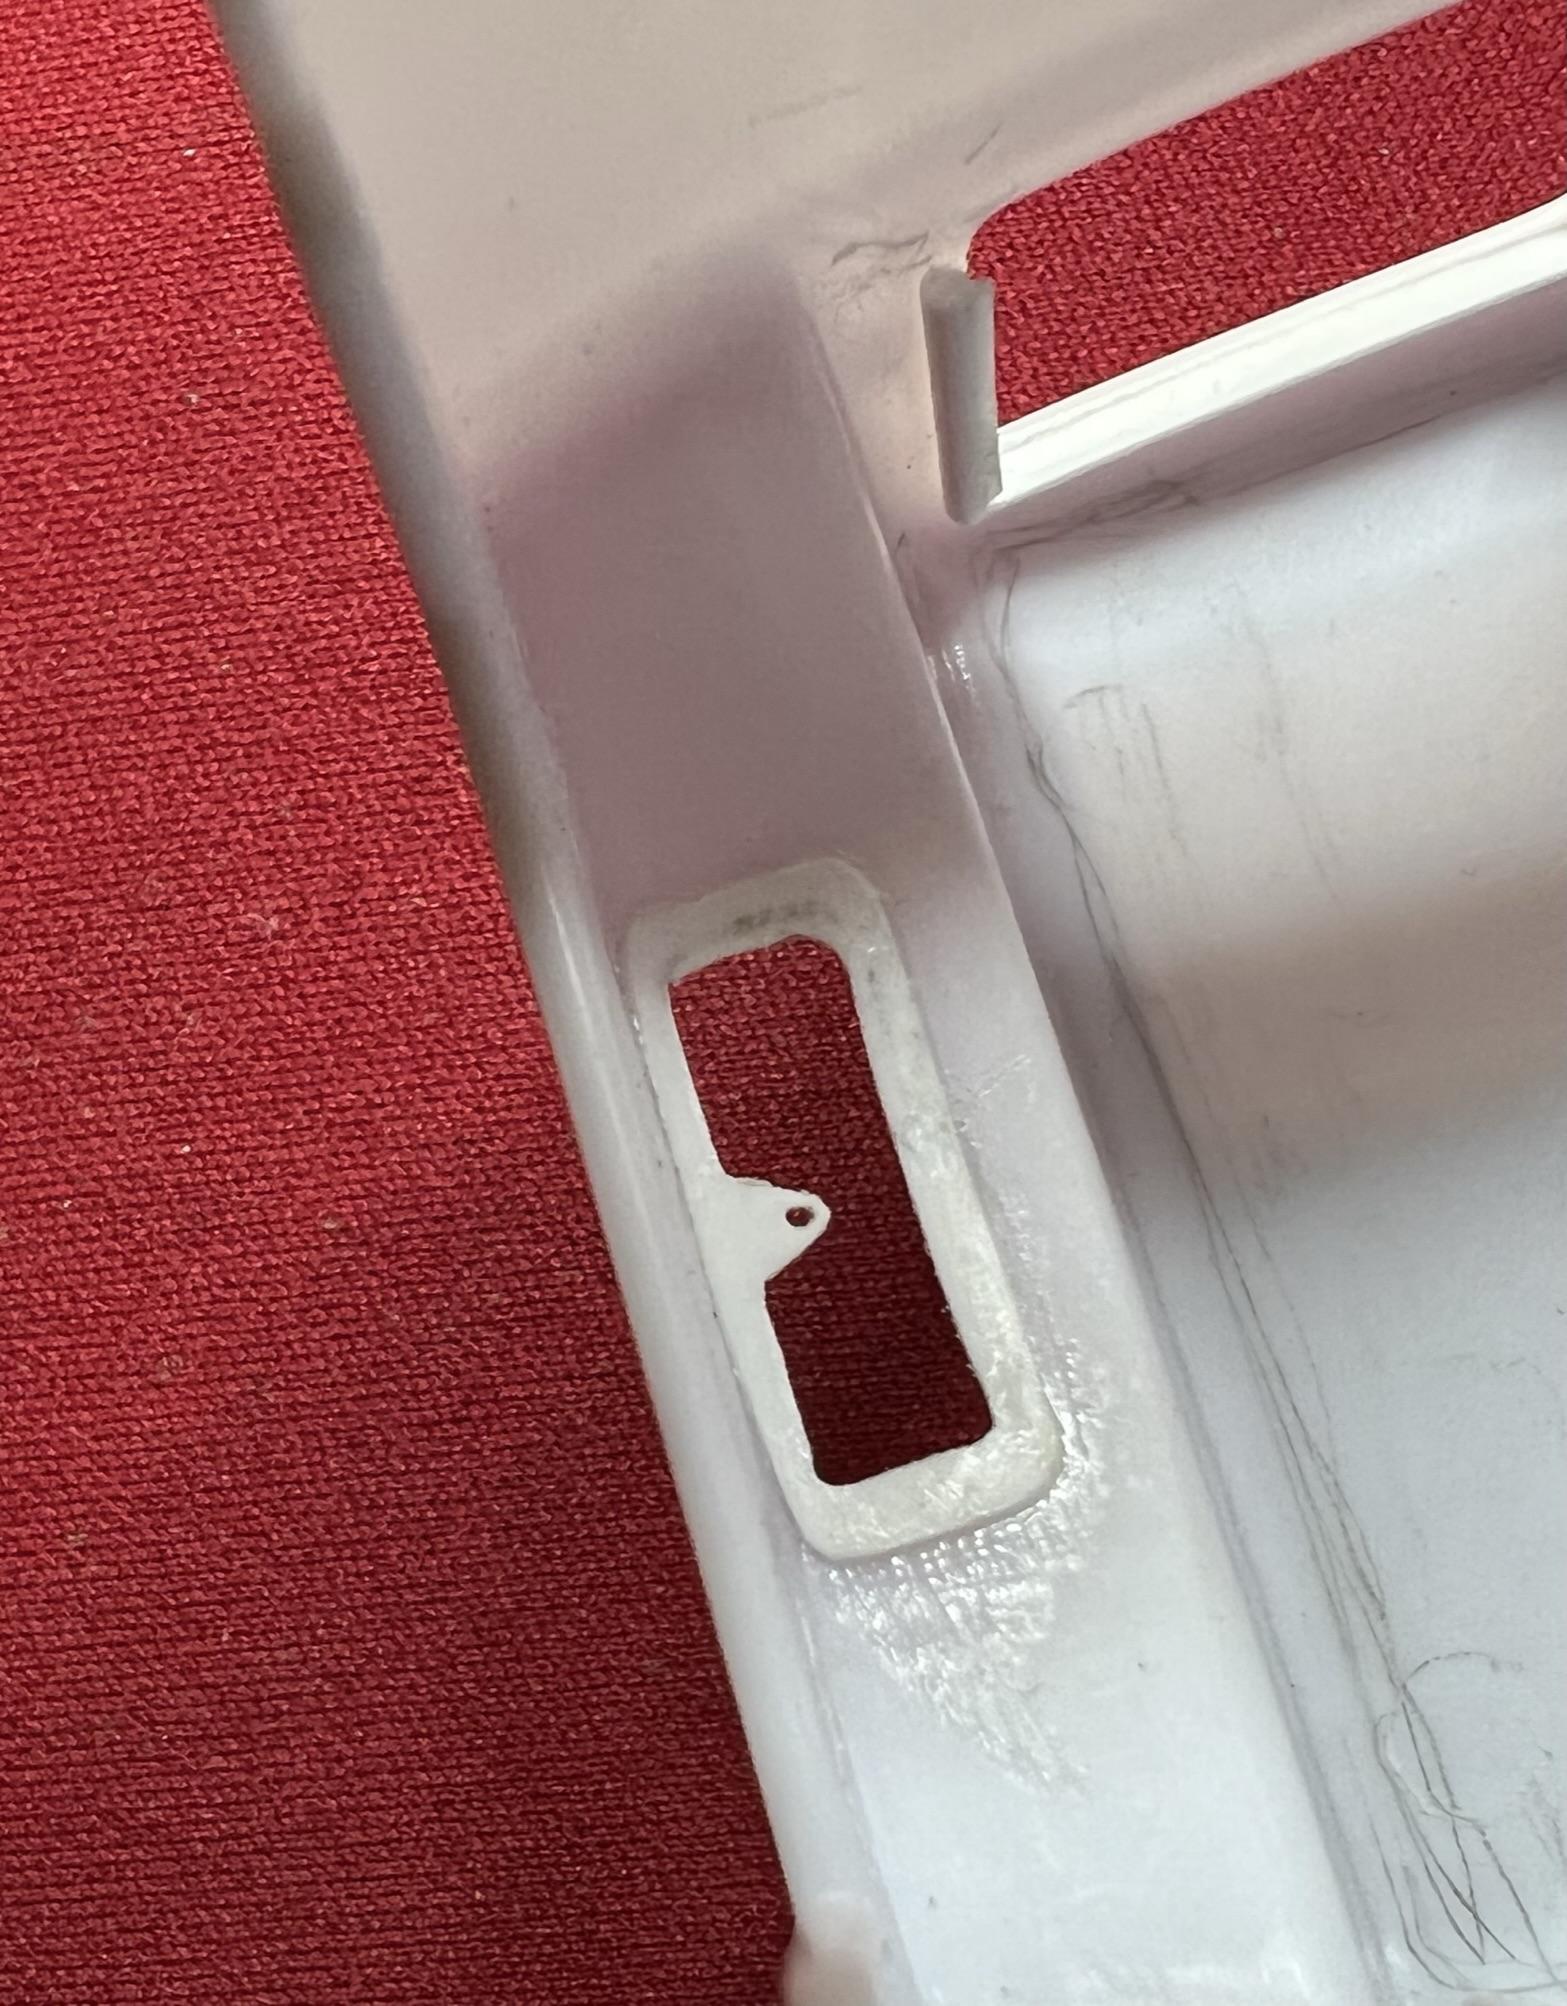
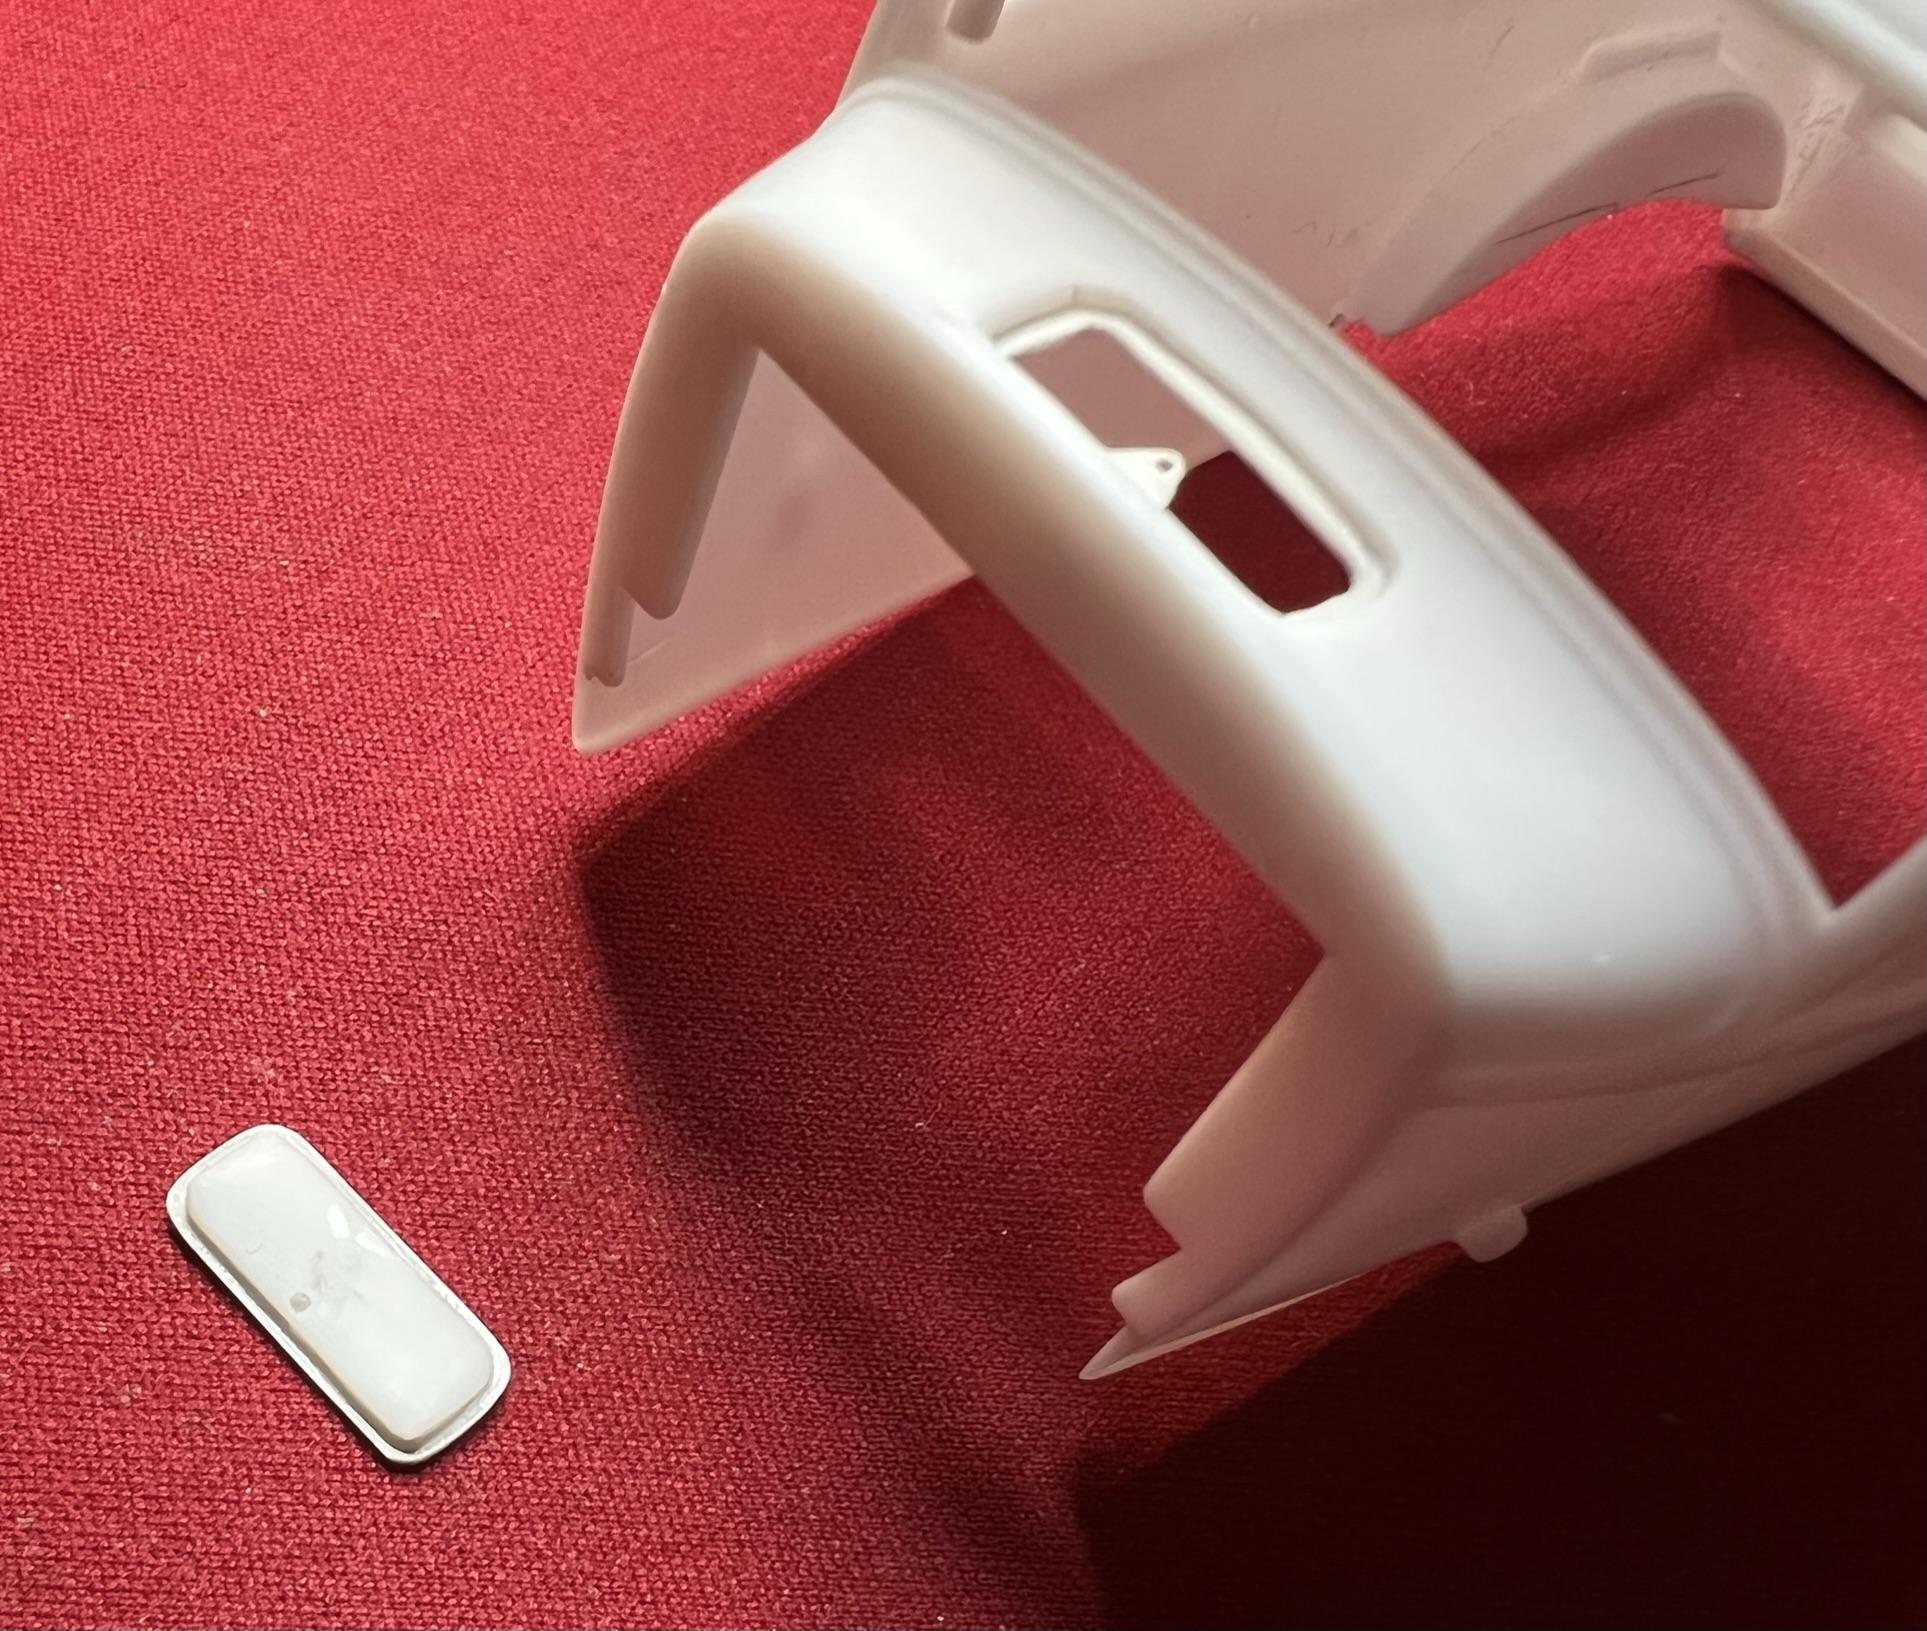
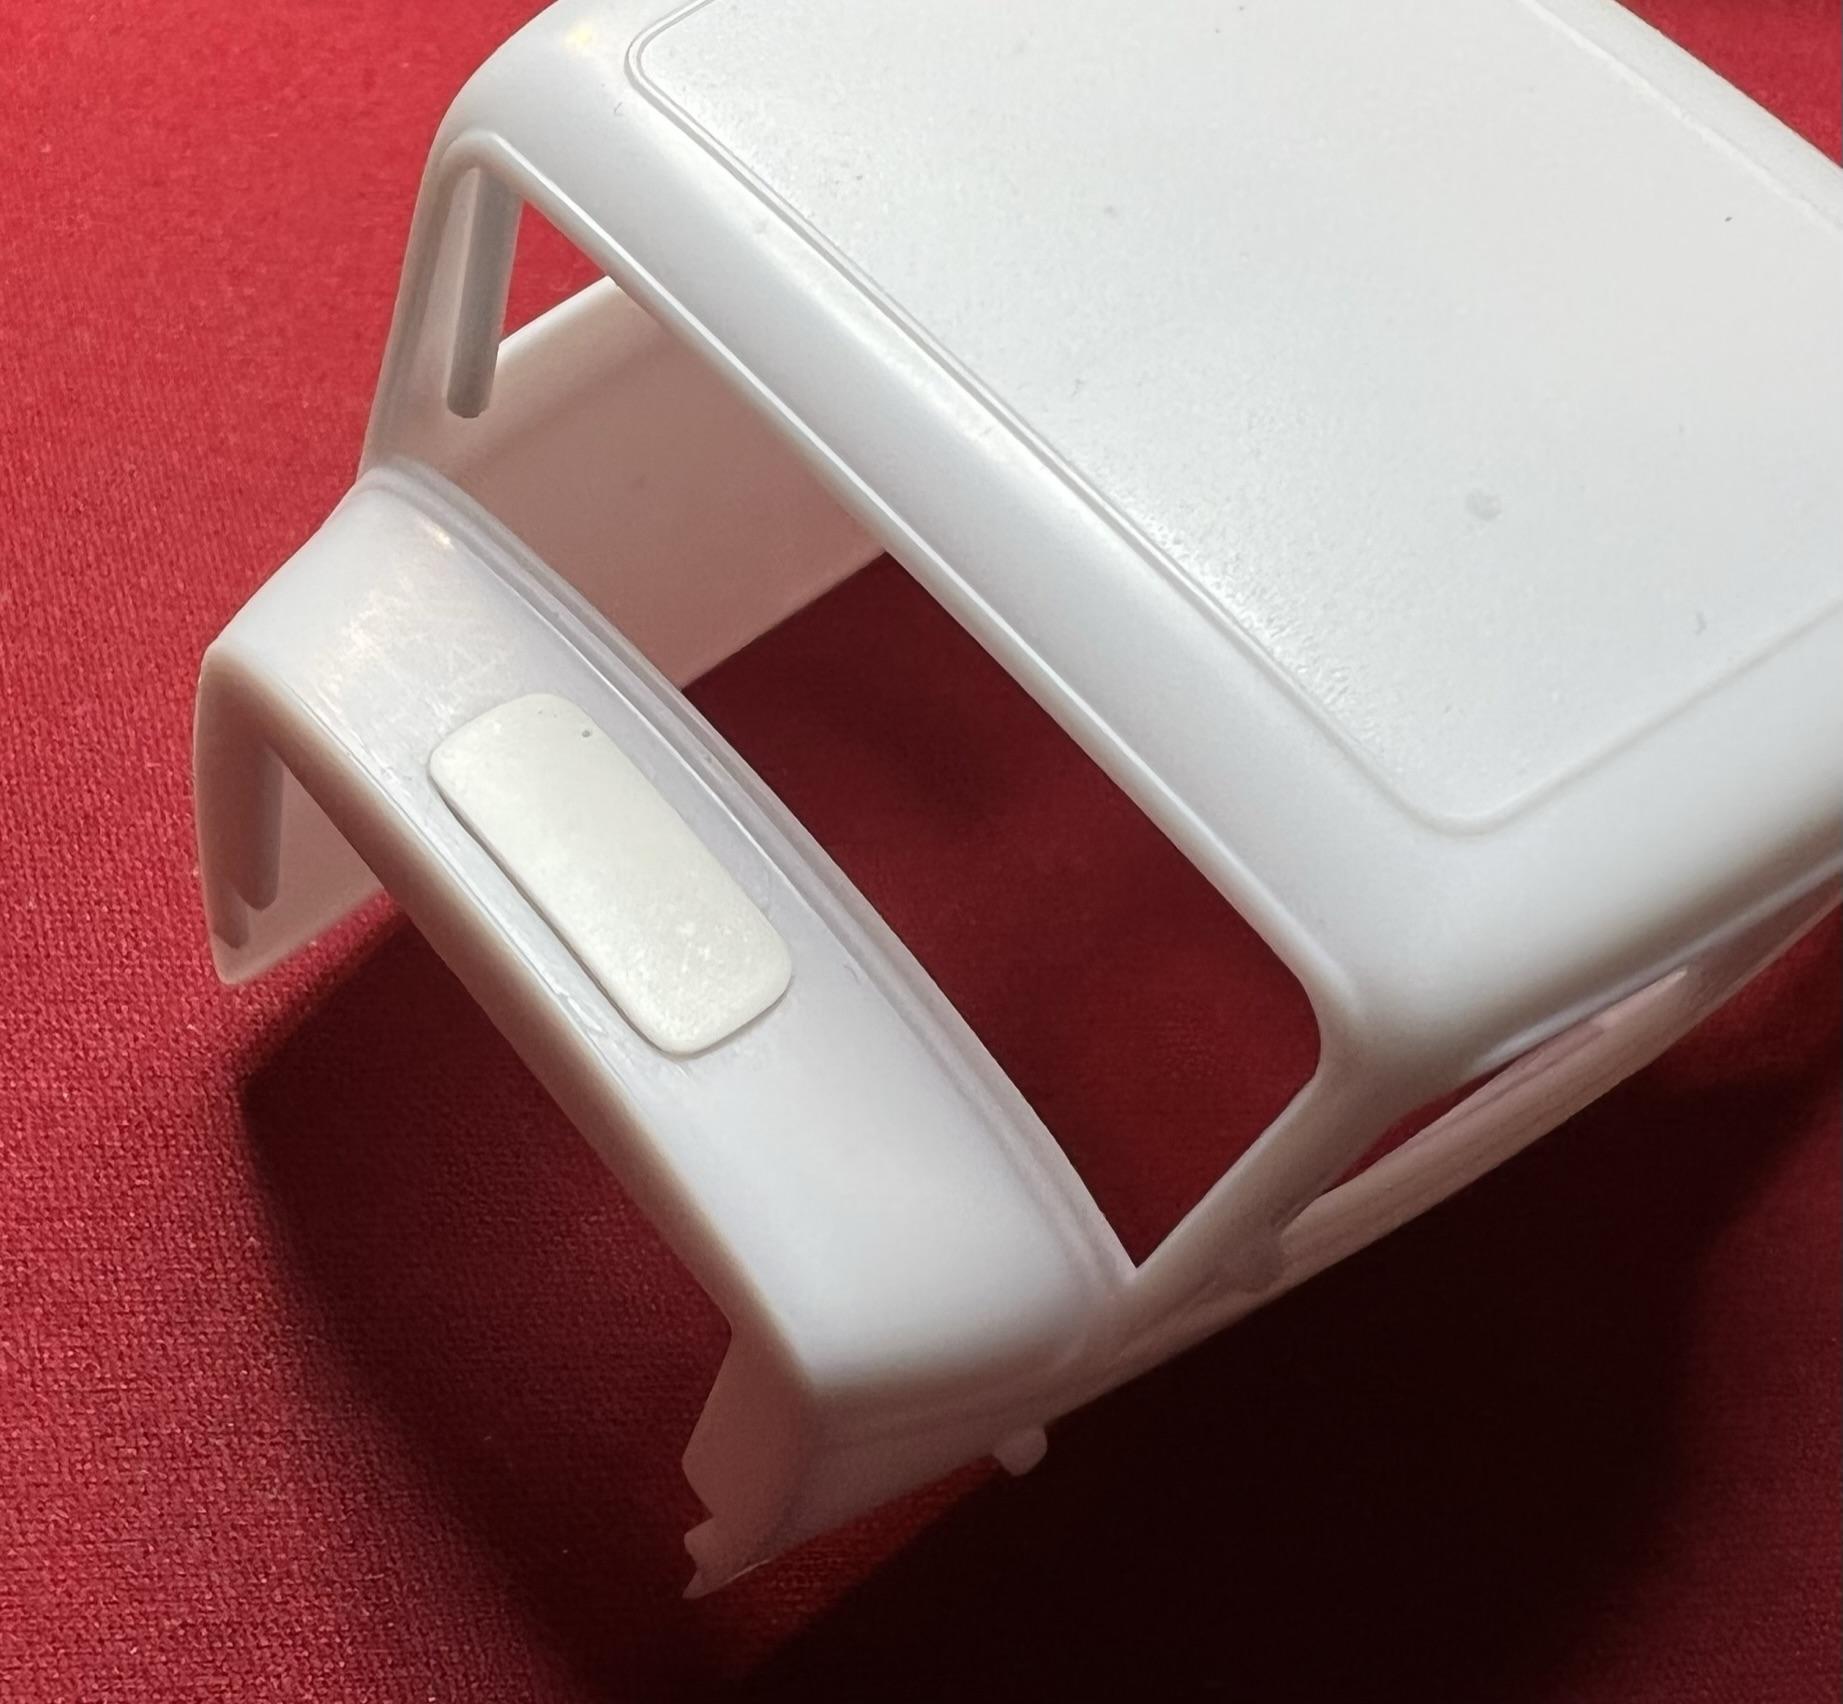
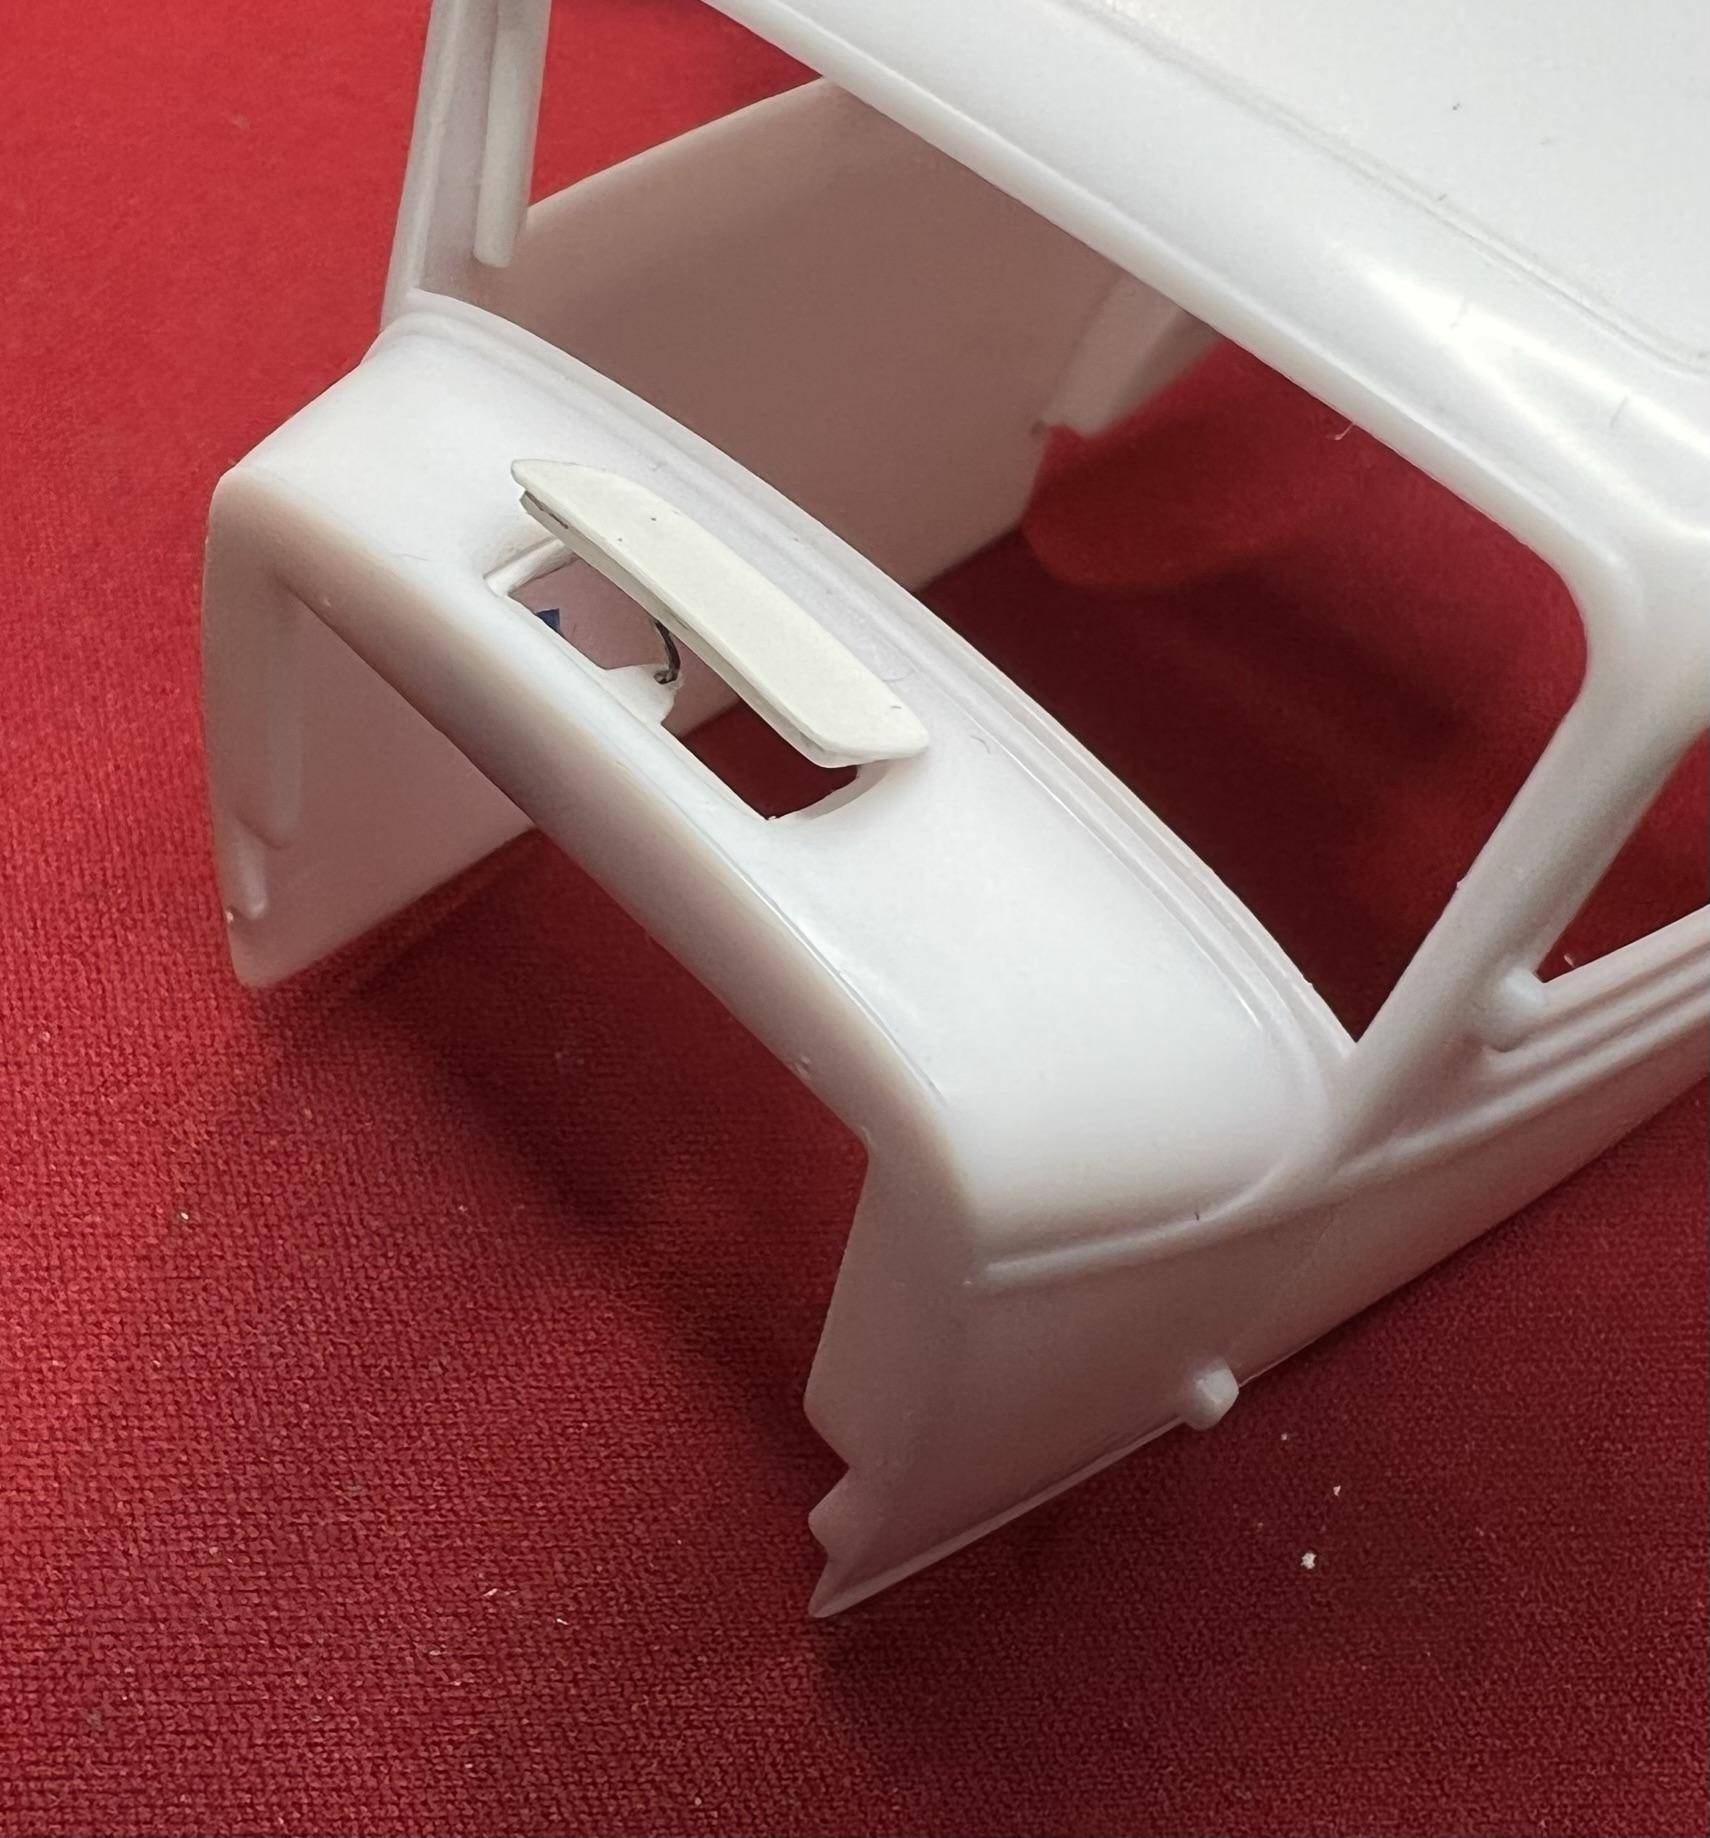
 1964 MGB Sebring 12 Hour Over the weekend I pulled out the Aoshima kit of the MGB Club Racing version to have a look at it. This was a special edition that contained extra parts such as the hardtop for the race version in addition to the regular stock parts. I was especially glad that the wire laced wheels were there as well as the stock seats, as the Sebring racer only had the race seat for the driver. The only sticking point was the lack of a LHD dashboard, yet a bit of scratchbuilding will fix that up. Being a curbside will be a plus for me, as I often go down the rabbit hole with driveline detail. Let the build begin! Cheers Misha
-
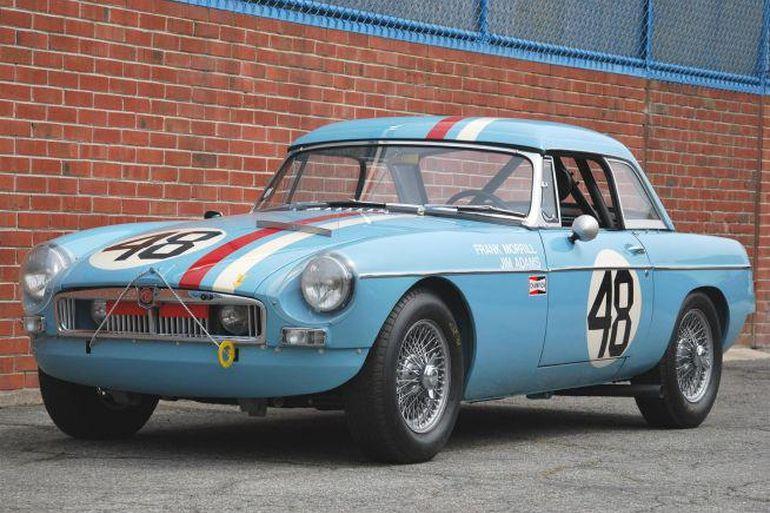
Great idea! Gary beat me to the Cunningham 904 by just over 16 hours, so I would like to take up the MGB # 48, one of three MG entered, it being the blue one. A shot of #48 during the 1964 Sebring 12 Hours A more current photo of #48 with additional mods for vintage racing added, such as tow hooks. I’ll be in the stash later today to pull out the kit and posting it. Cheers Misha
-
AMT Chaparral 2A
Misha replied to FordRodnKustom's topic in Other Racing: Road Racing, Salt Flat Racers
Bit of a goof on the copy above with the Chaparral and the McLaren-Elva being mislabeled. These were unique kits in that they offered then current racers, while being curbsides they do build up into decent replicas with a bit of extra detailing. I’m fortunate to have three with the Lola being the exception. Cheers Misha -
What did you see on the road today?
Misha replied to Harry P.'s topic in General Automotive Talk (Trucks and Cars)
Saturday in the Cowichan Valley, Blazer K-5 with the top off and laying low.
-
Wow, that really brings back the memories! I was a young teenager at that time and Dad always bought gas at the Esso station. 1967 was a very celebratory year for Canada and the promotion fitted in, especially being offered only here. There was talk of someone winning one north of Regina who promptly sold it, perhaps urban myth? It’s also great to see the pull up cards for the contest, I hung on to them for years afterward with a rubber band - no winners. Still have a couple of mint tiger tails that one would attach to the gas cap, now that one had “A Tiger in the Tank!” Thanks Steve and Richard for rekindling the memories! Cheers Misha
-
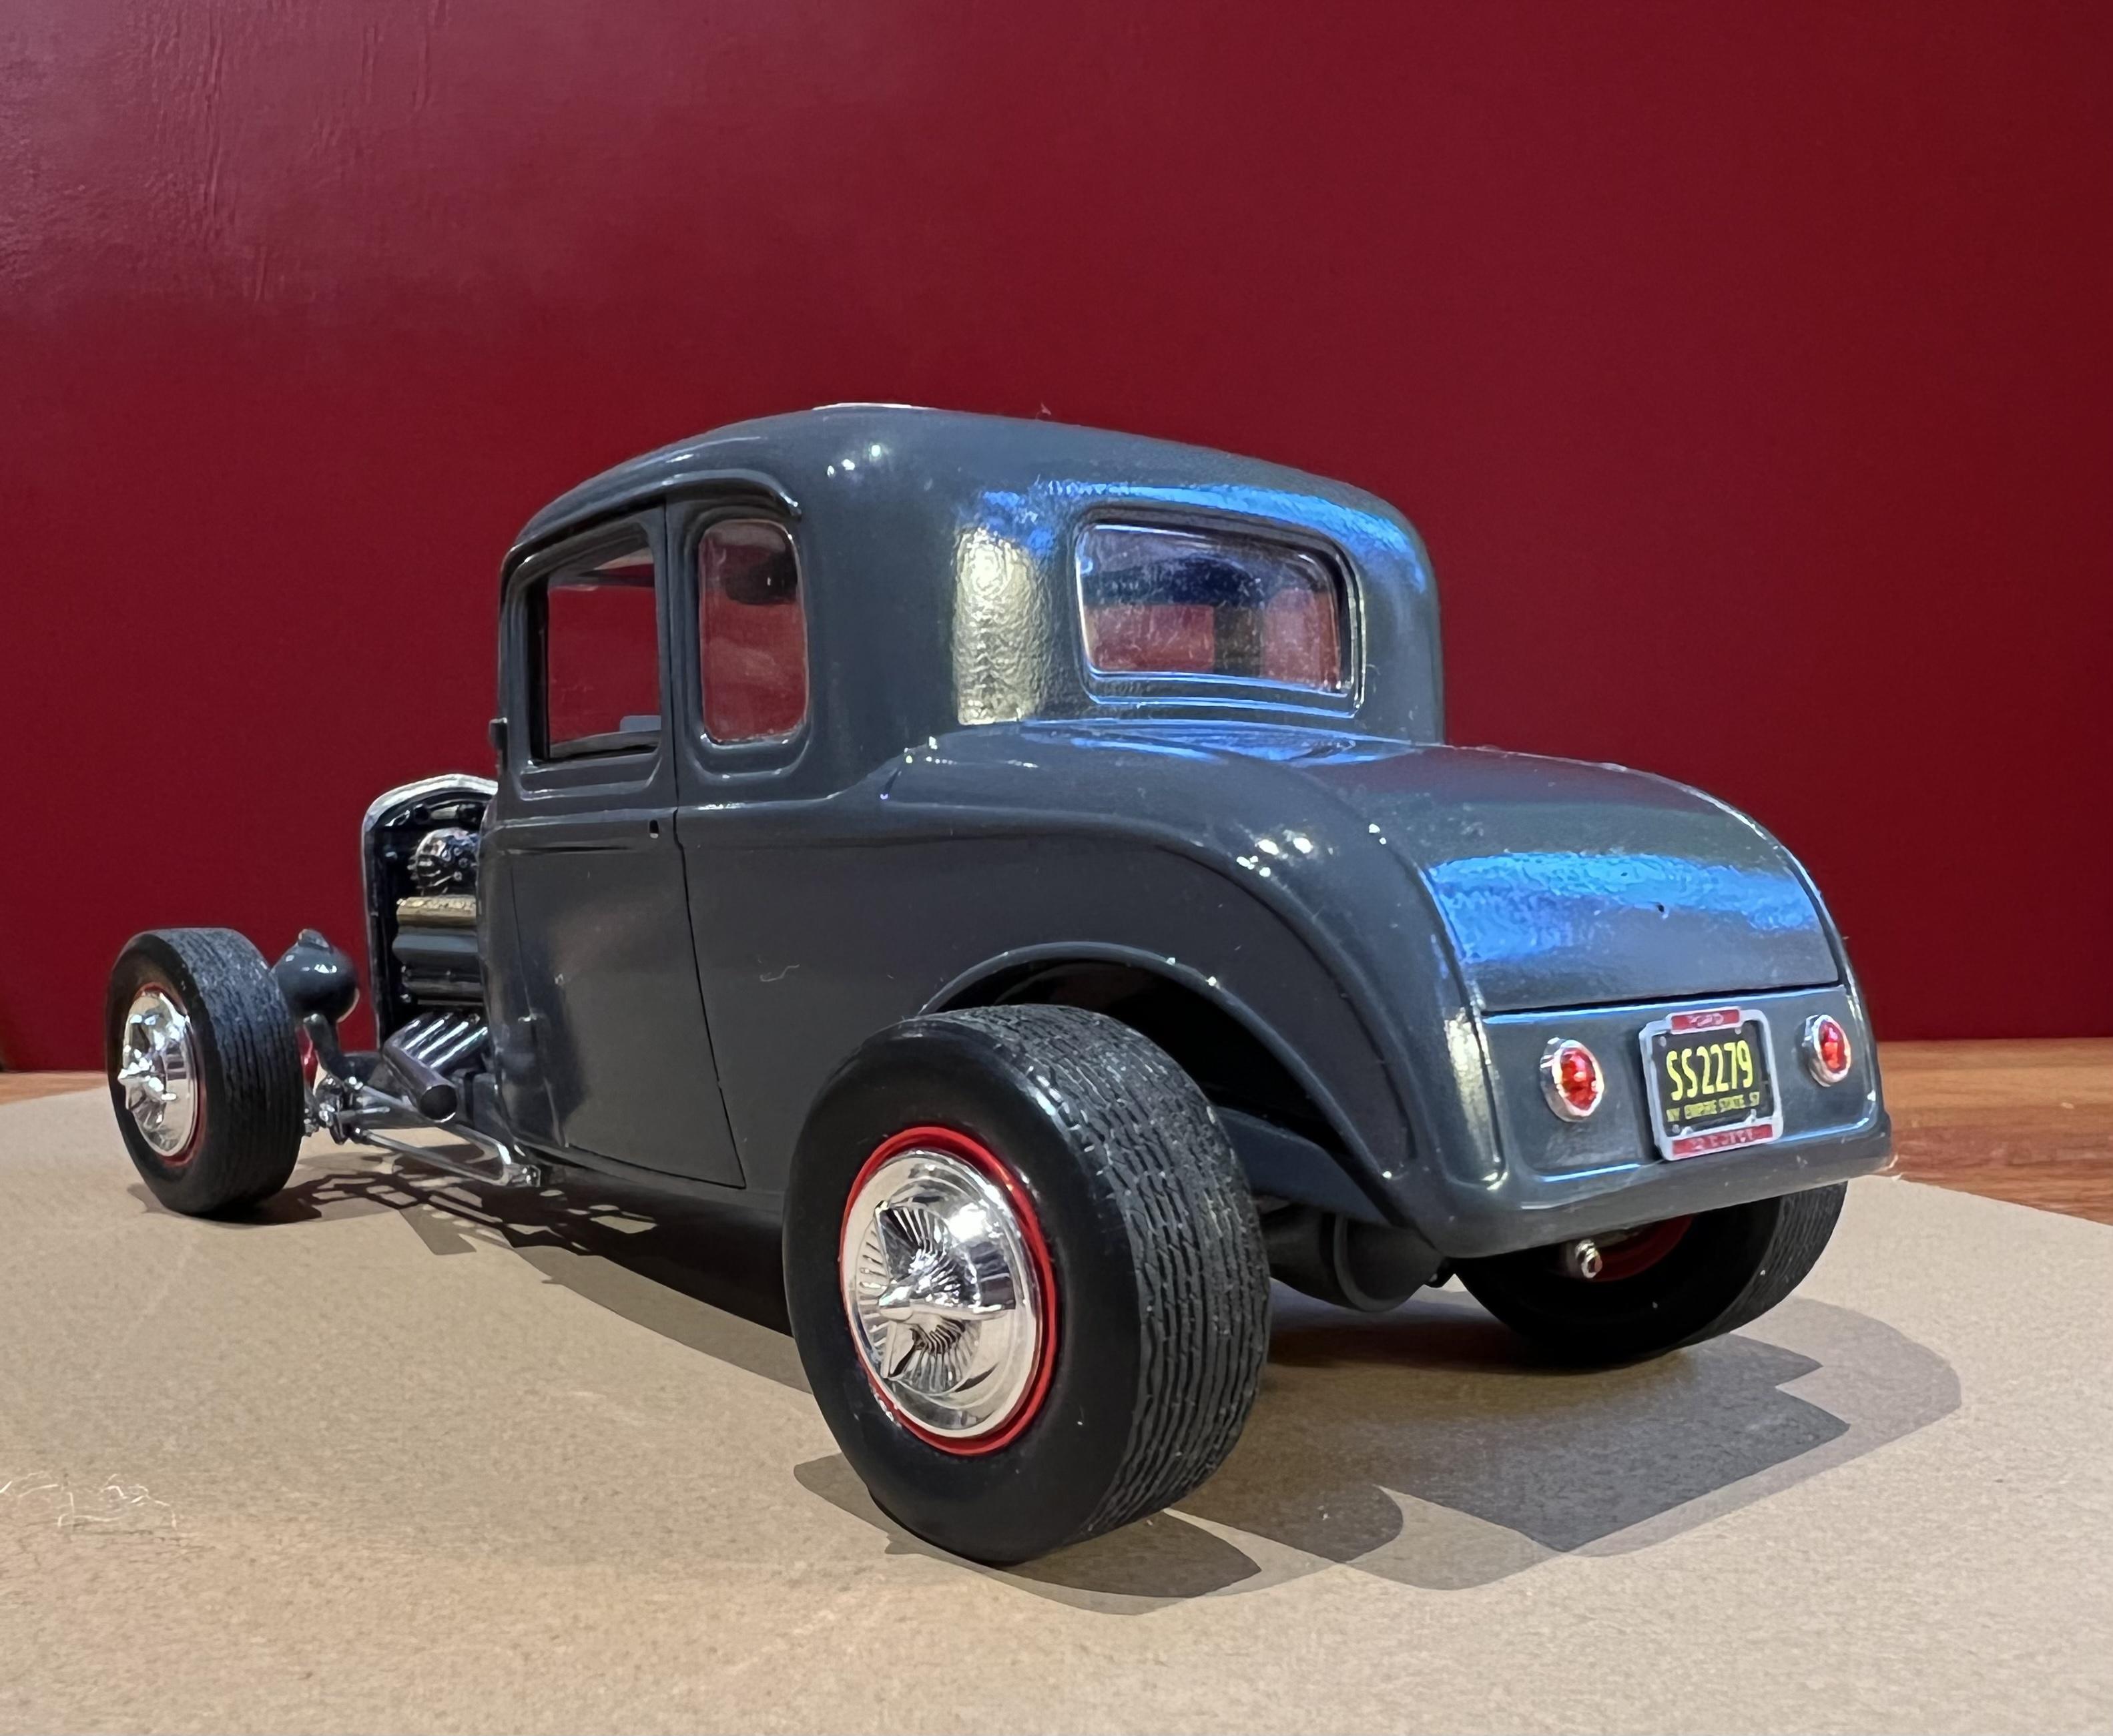
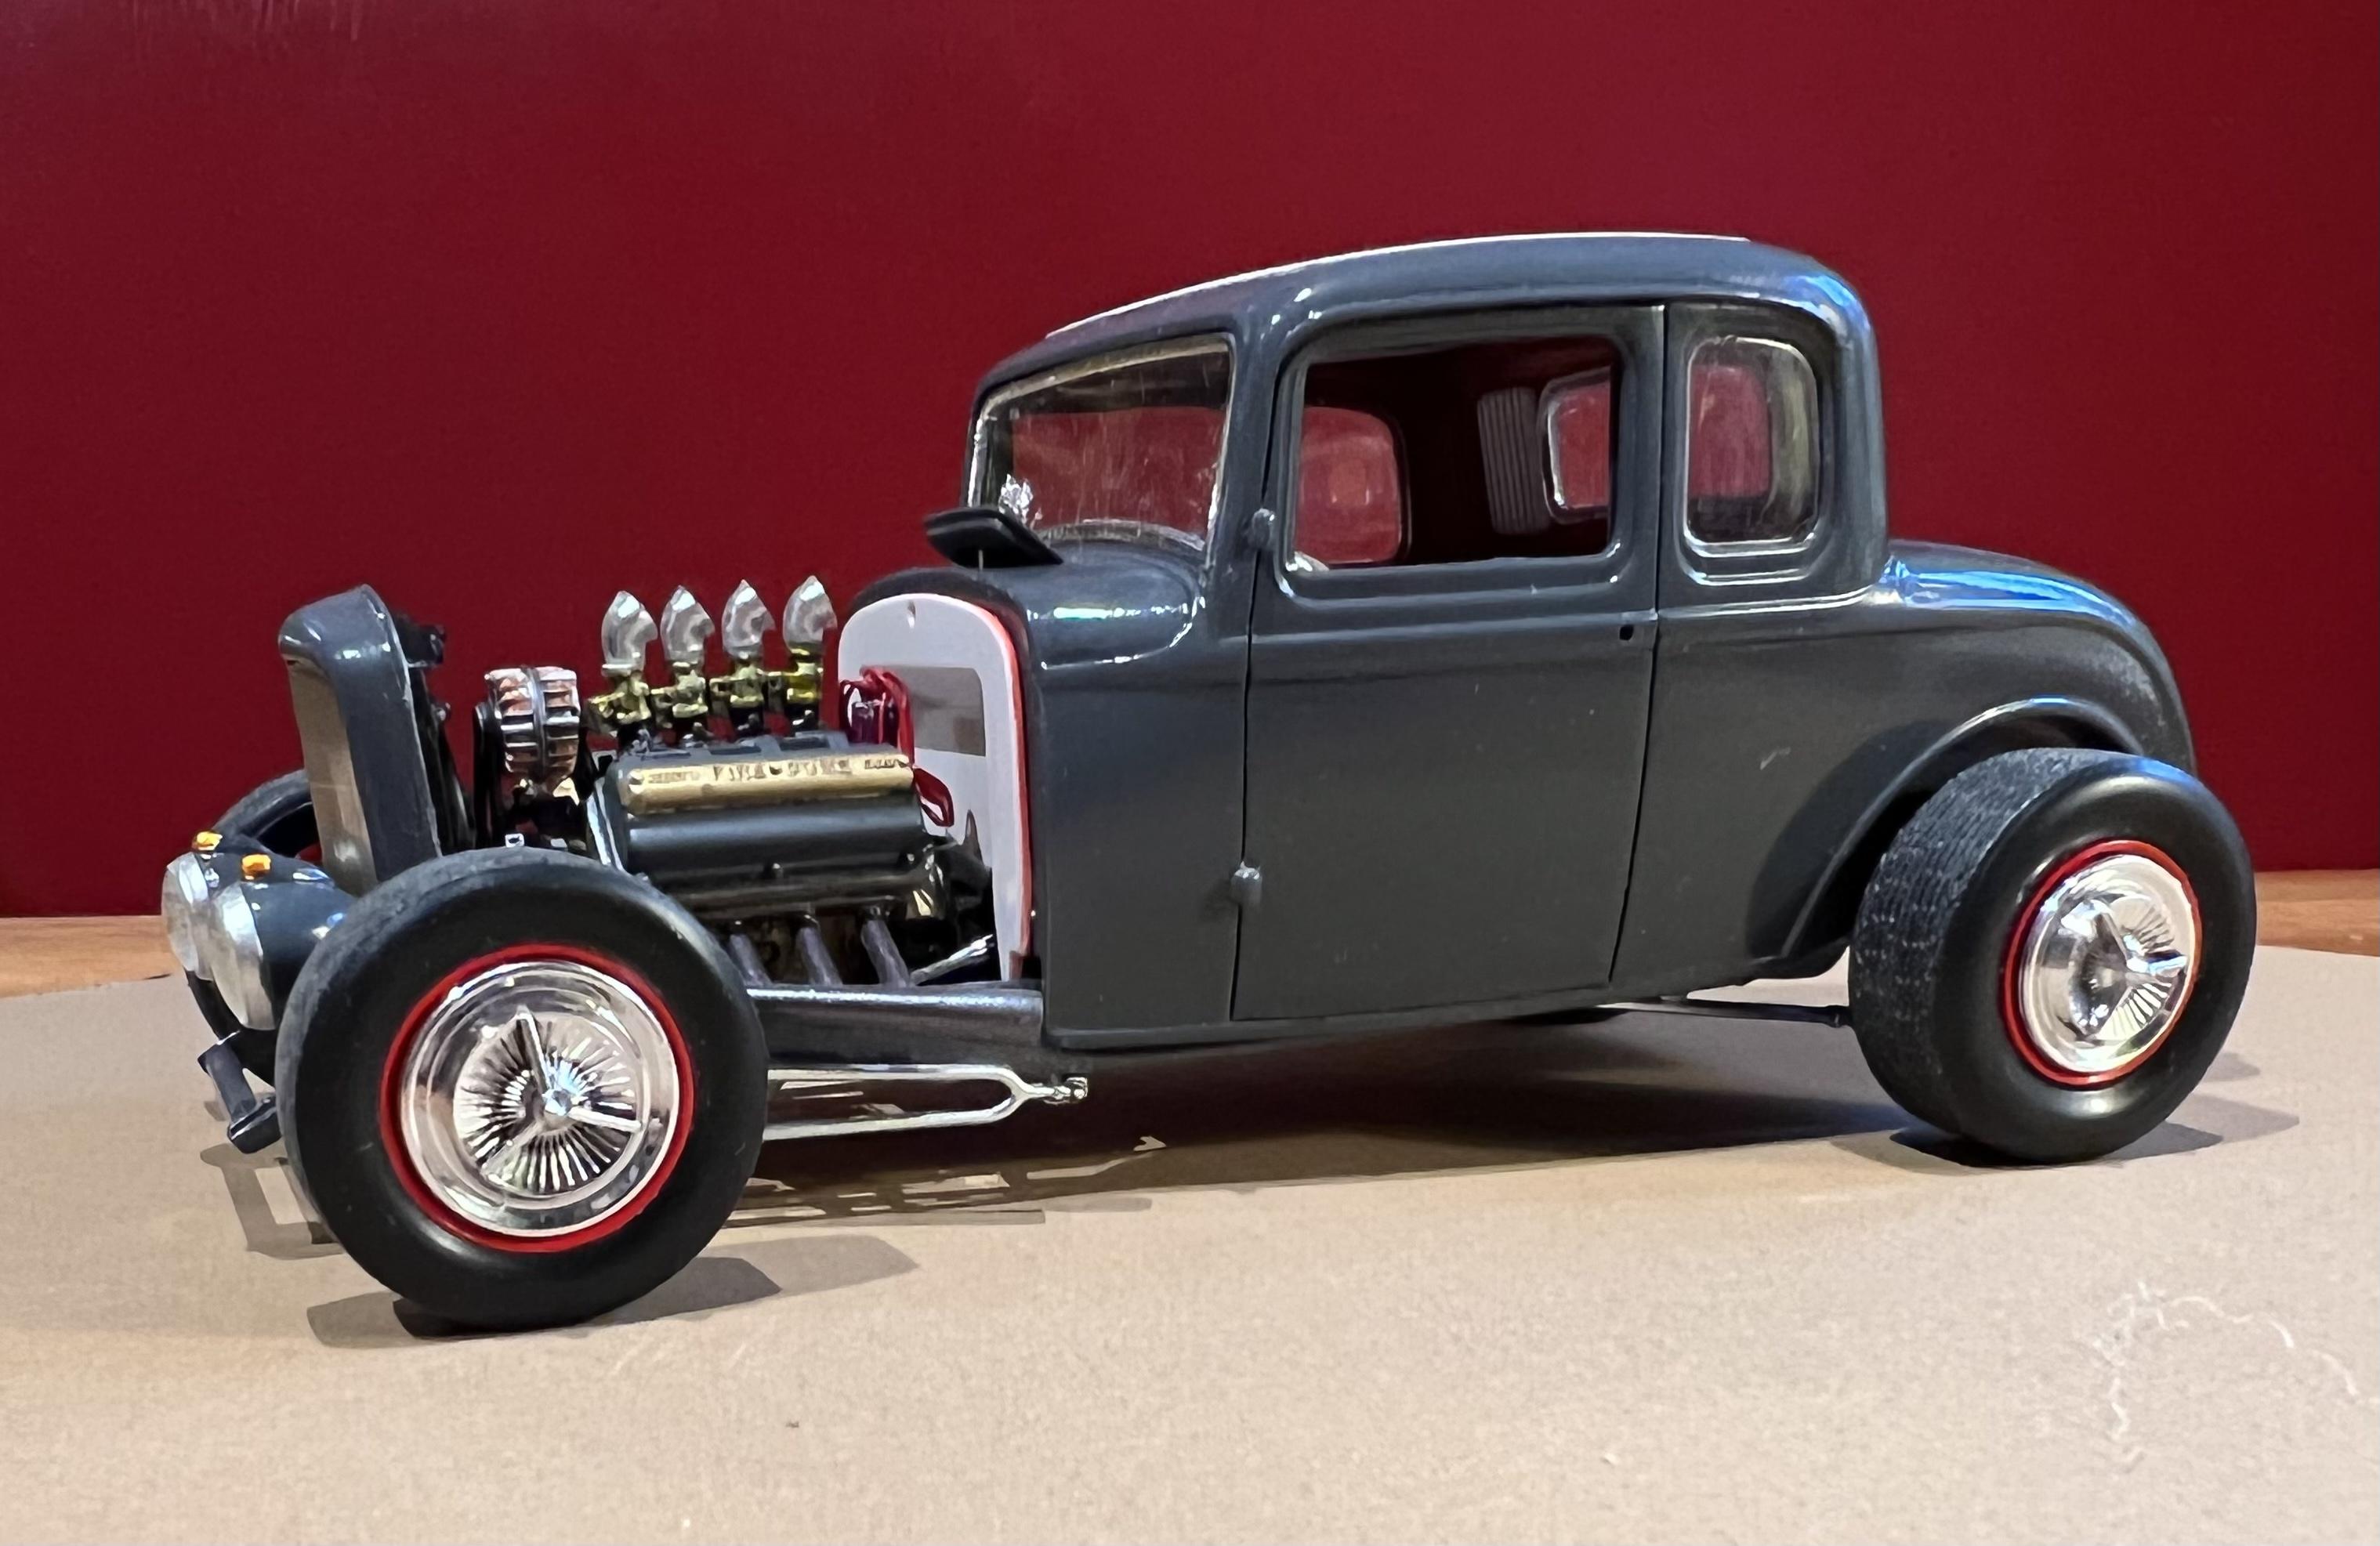
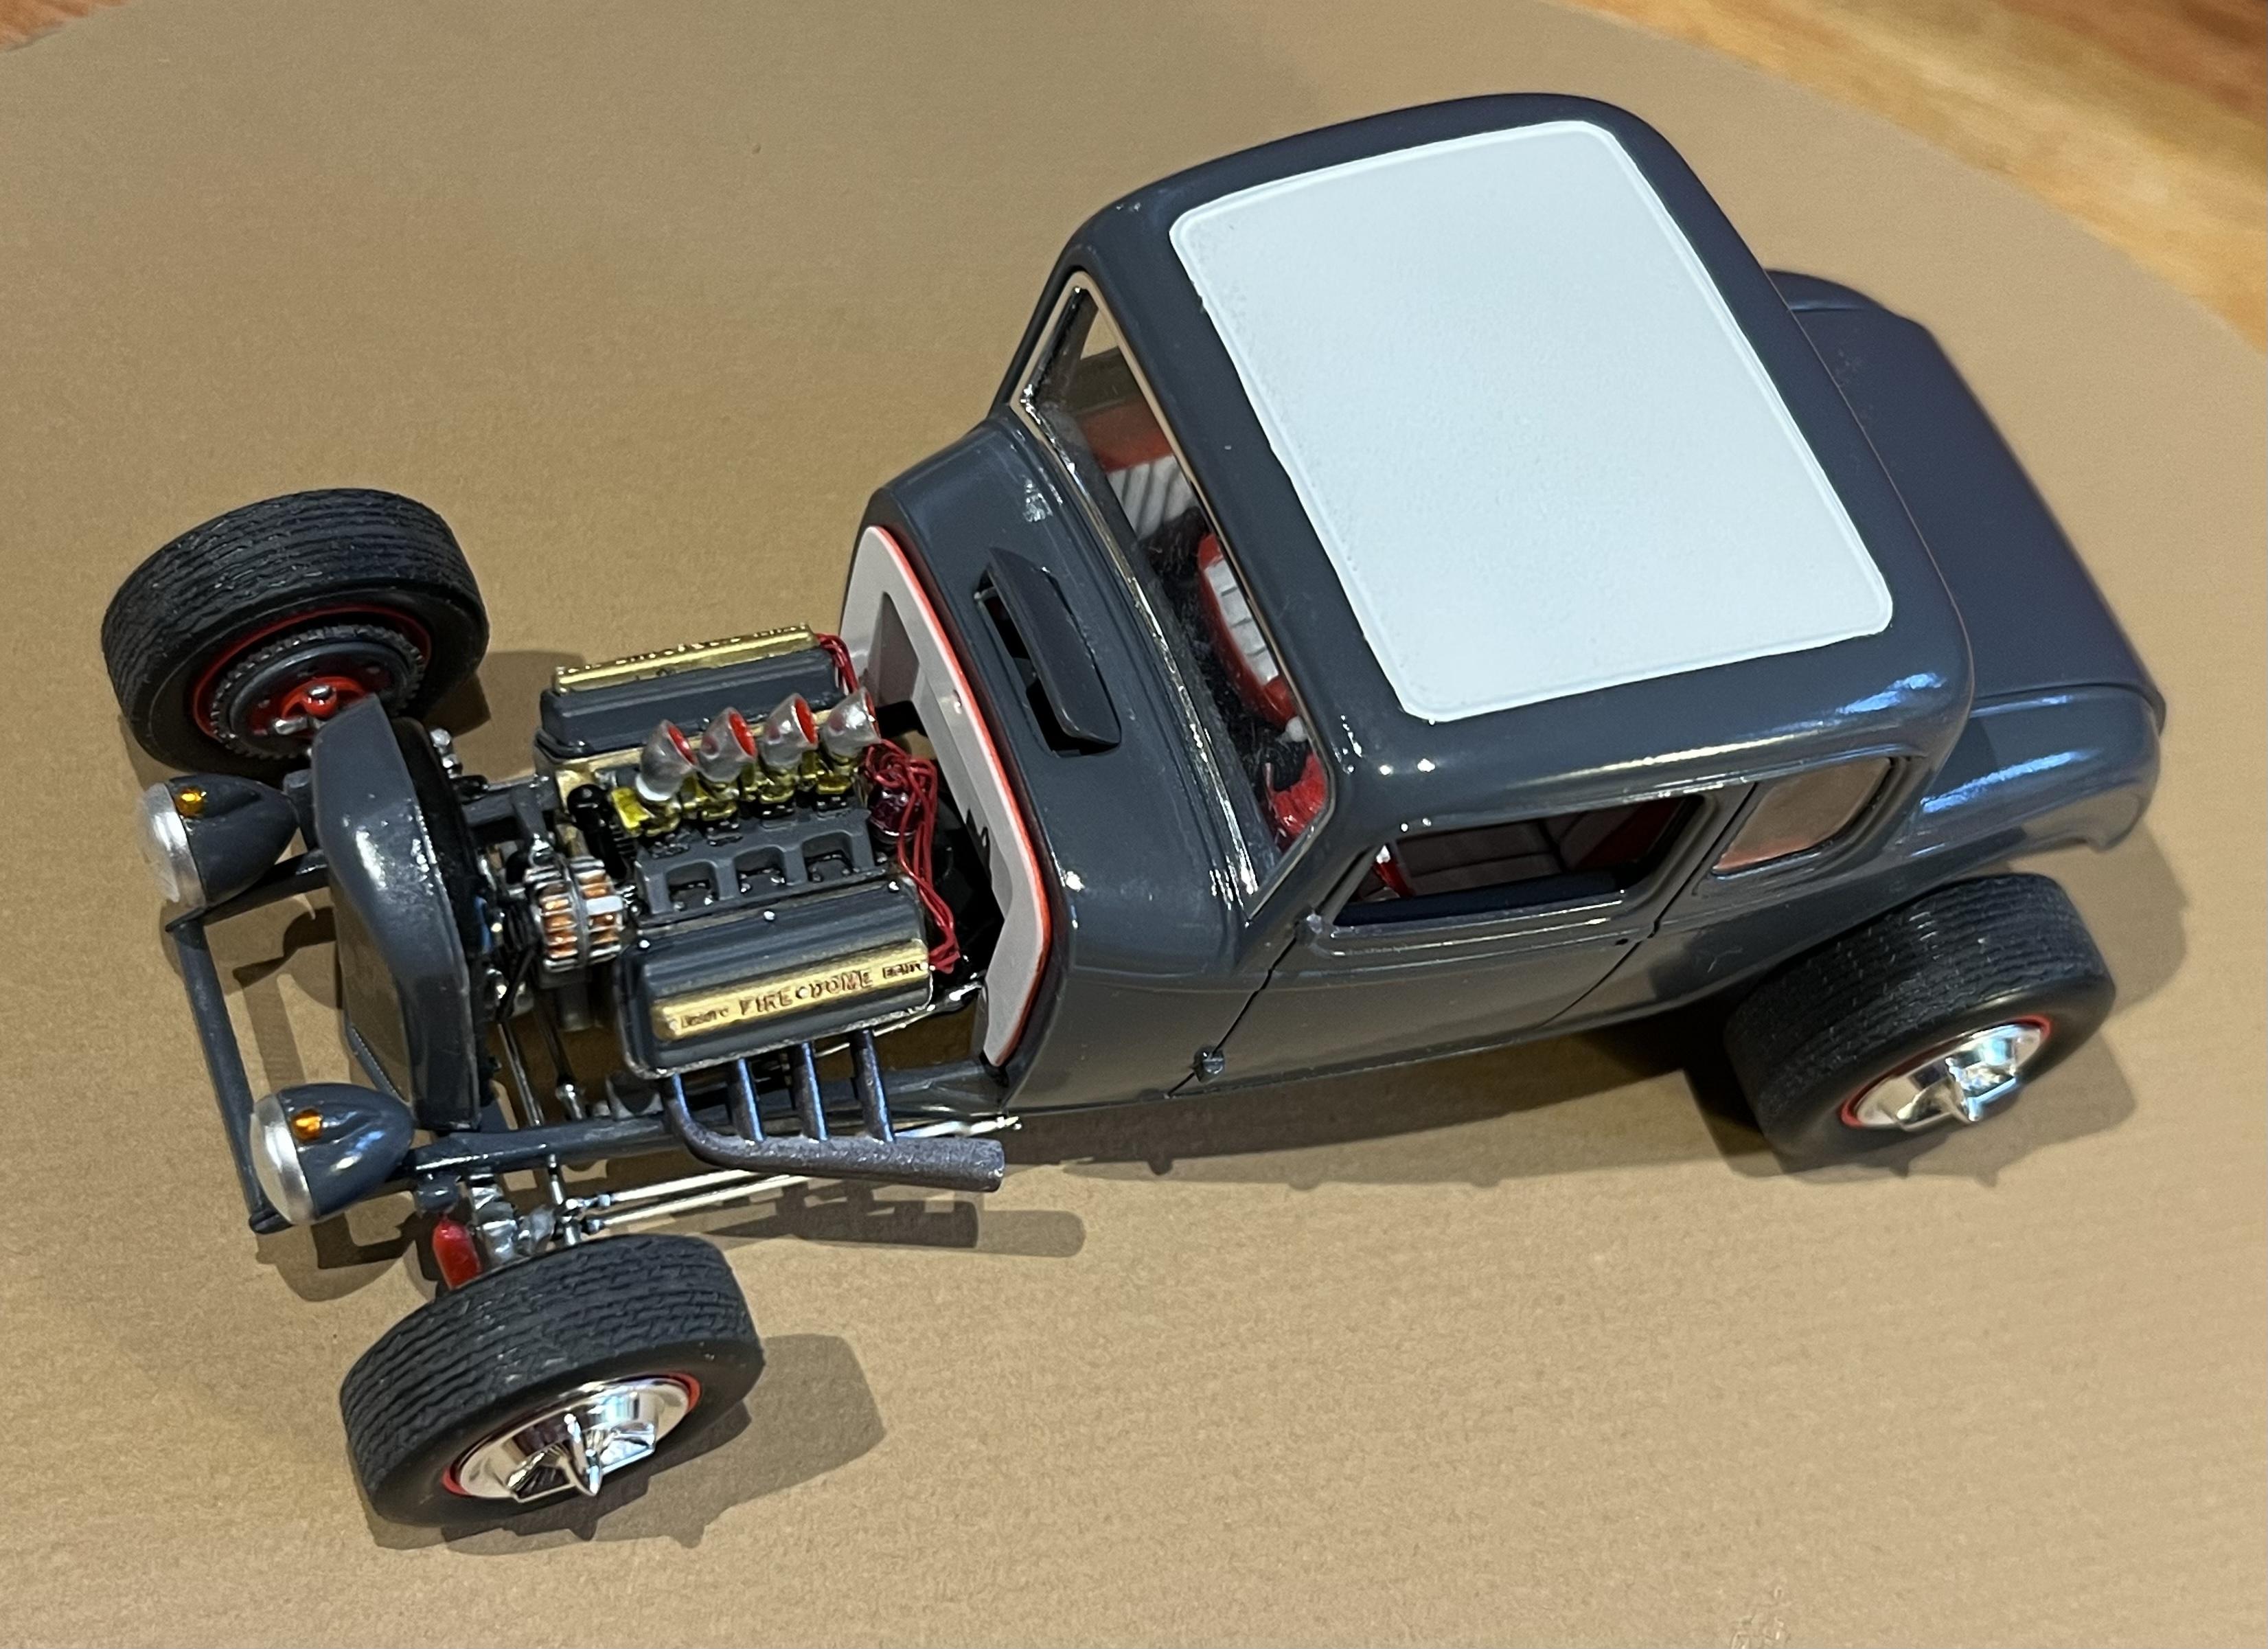
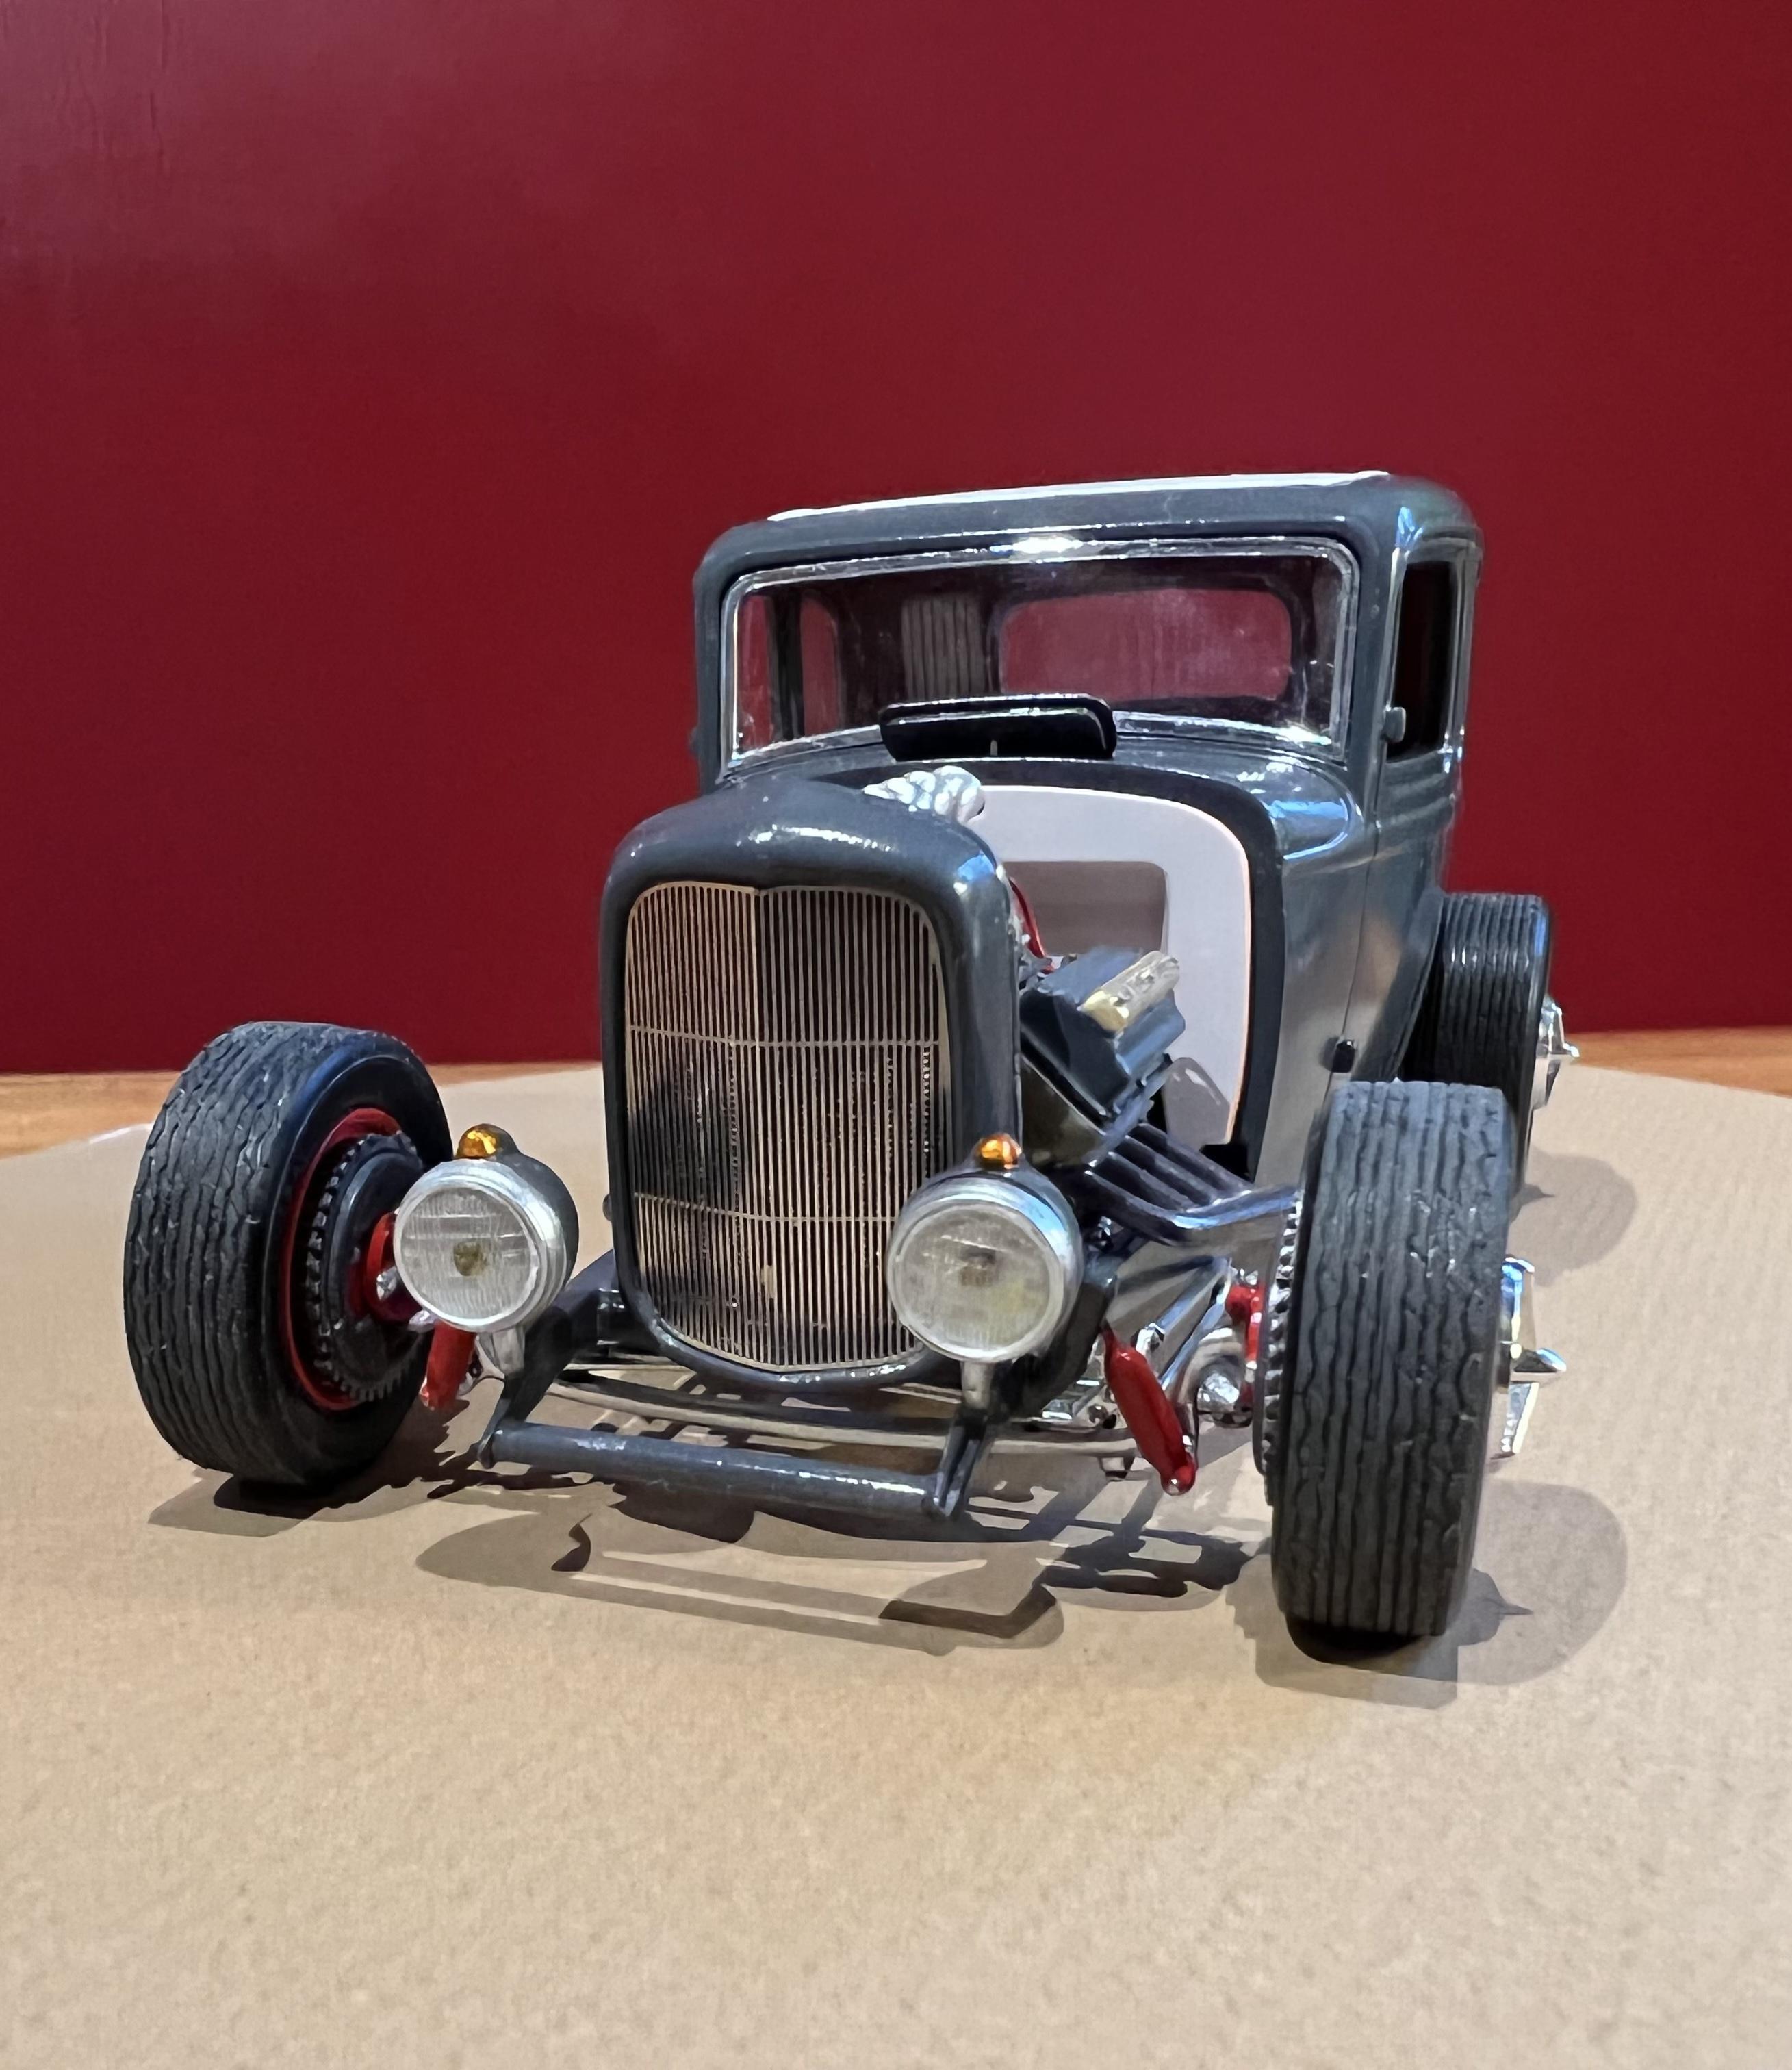
Off to Deuce Days! At 12:30 this morning the coupe was assembled and more or less ready for DD in Scale III. There are a few items still to complete such as nerf bars, door handles and, oh yes a driveshaft, yet that may happen after the display, at least the paint is dry?. Overall I’m happy with the build’s fit as there were many alterations with the channeling for the interior and chassis. The grill has a forward rake to it that I’m unsure about. The electric fan bumps up against the water pump pulley, even after trimming as much as possible. The coupe certainly evokes the East Coast image while enjoying a modern suspension underneath. Off to Victoria! Cheers Misha
-
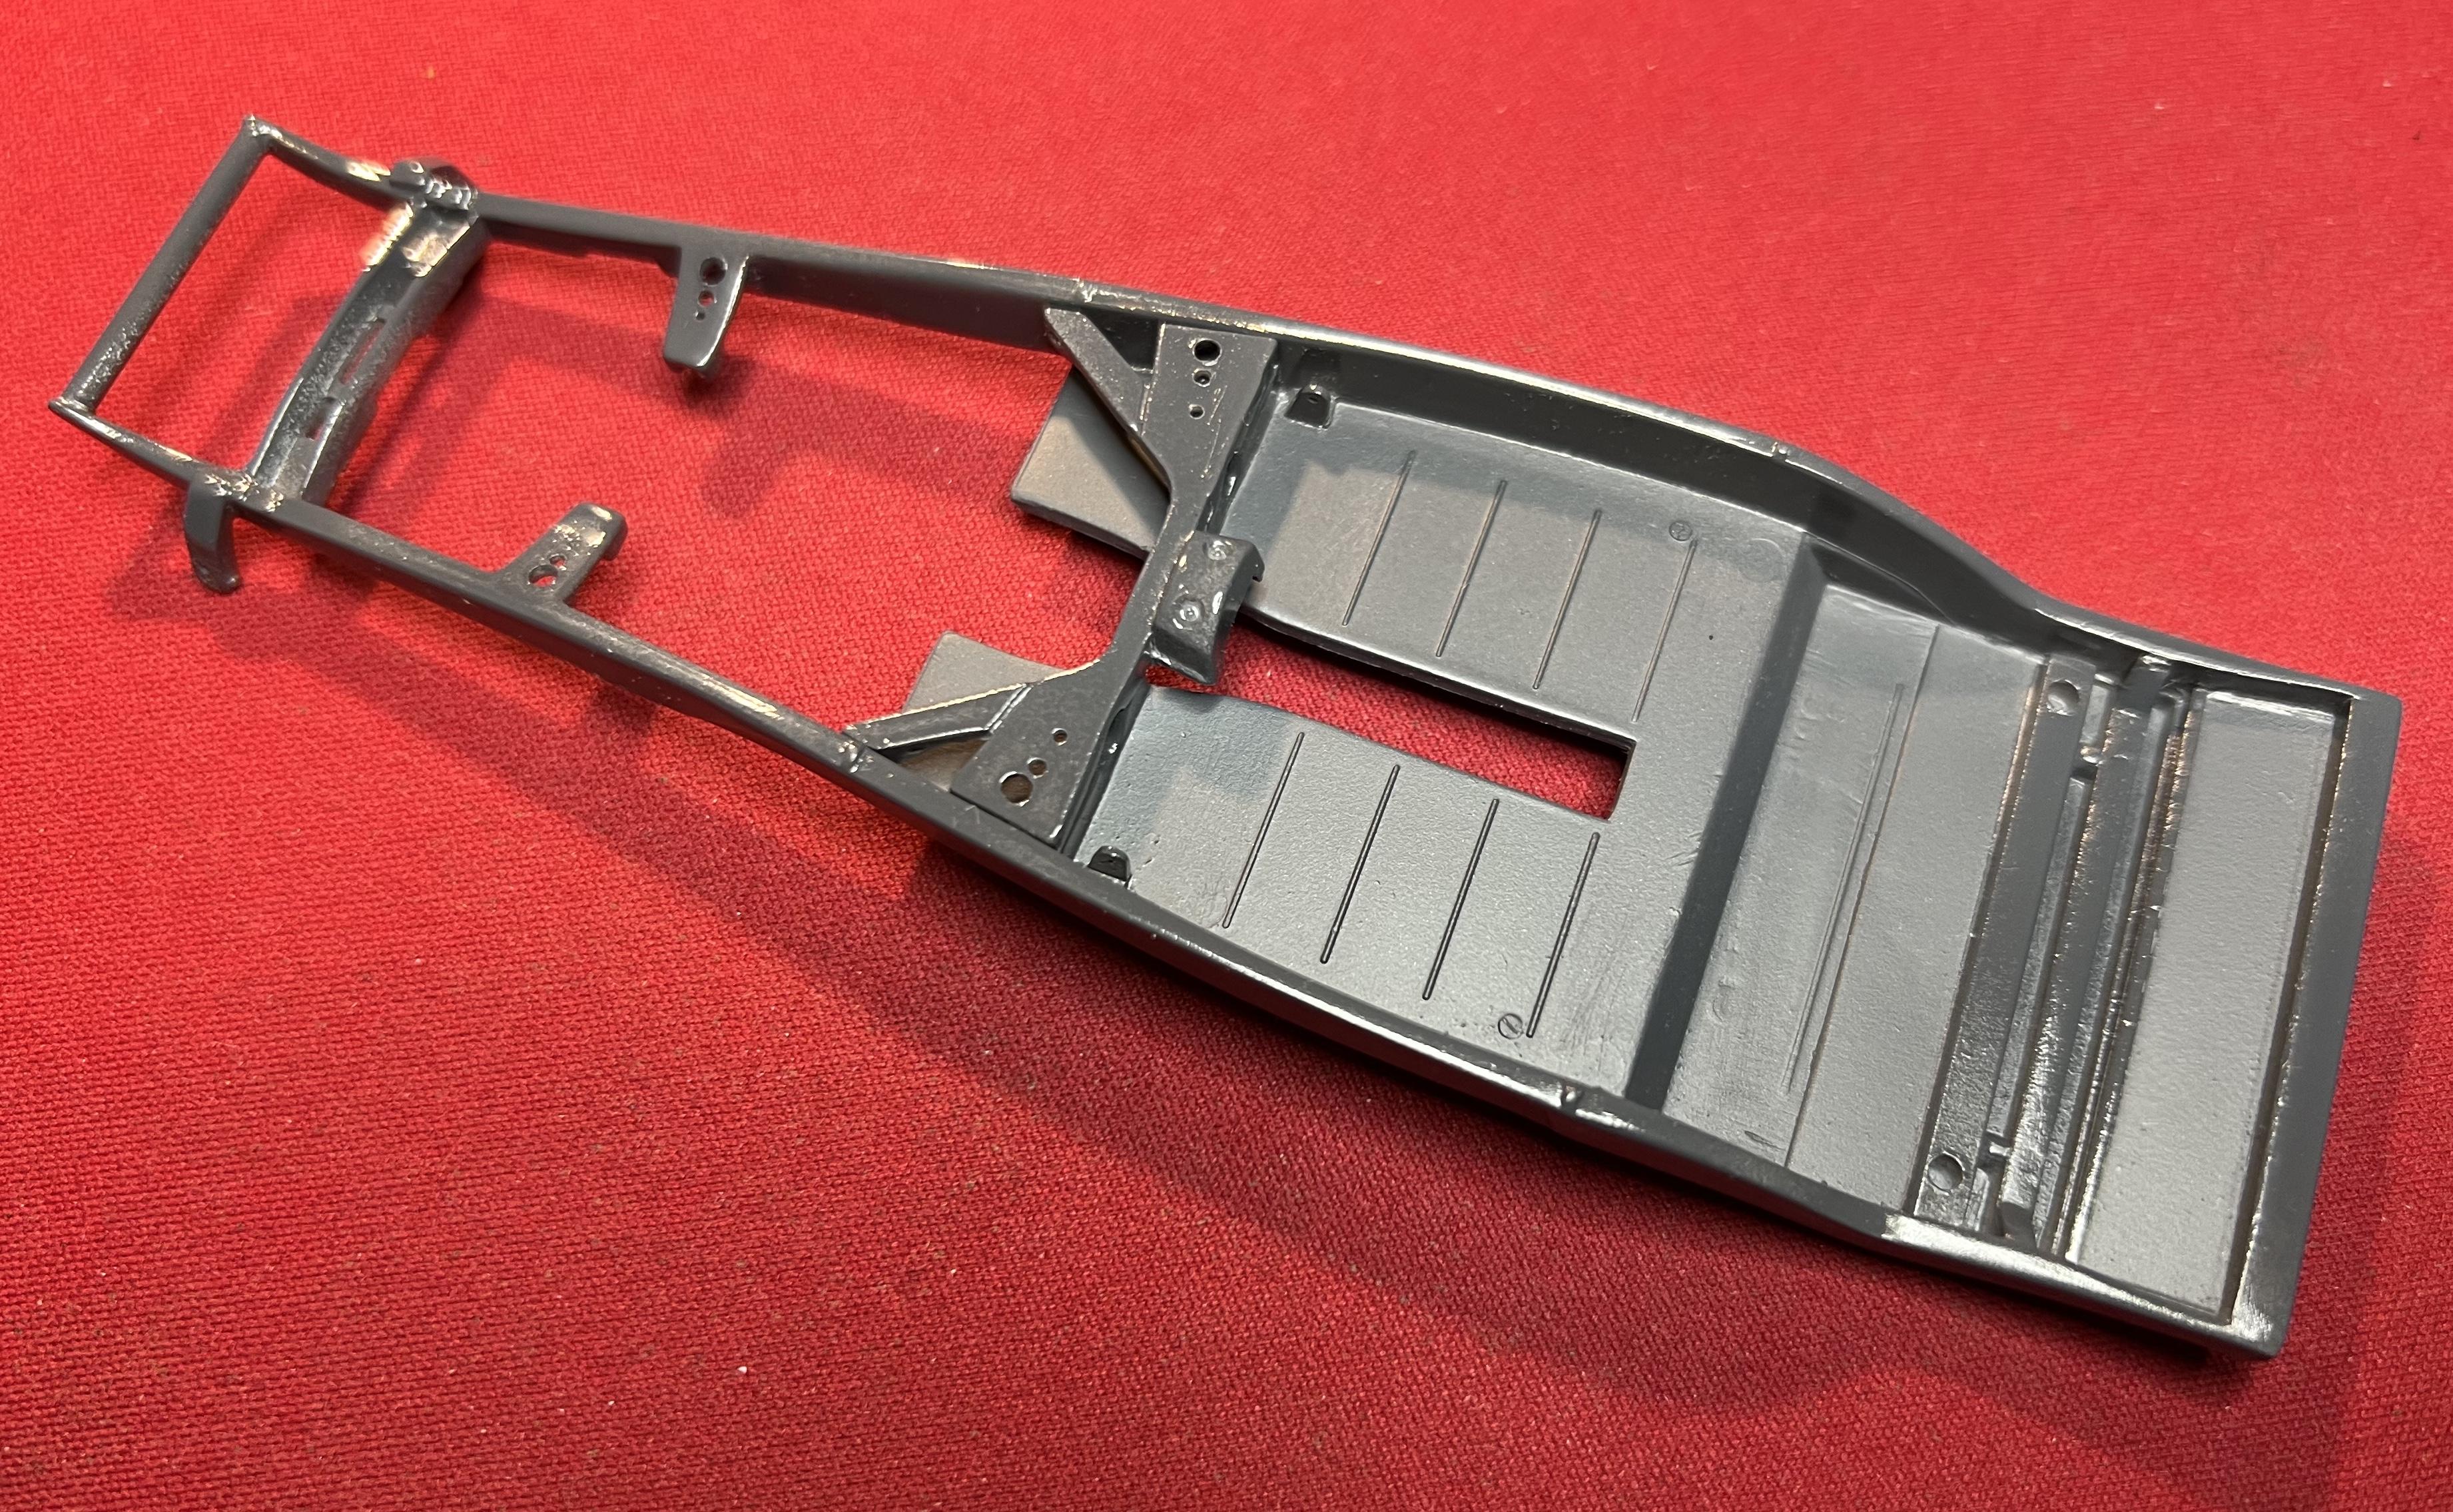
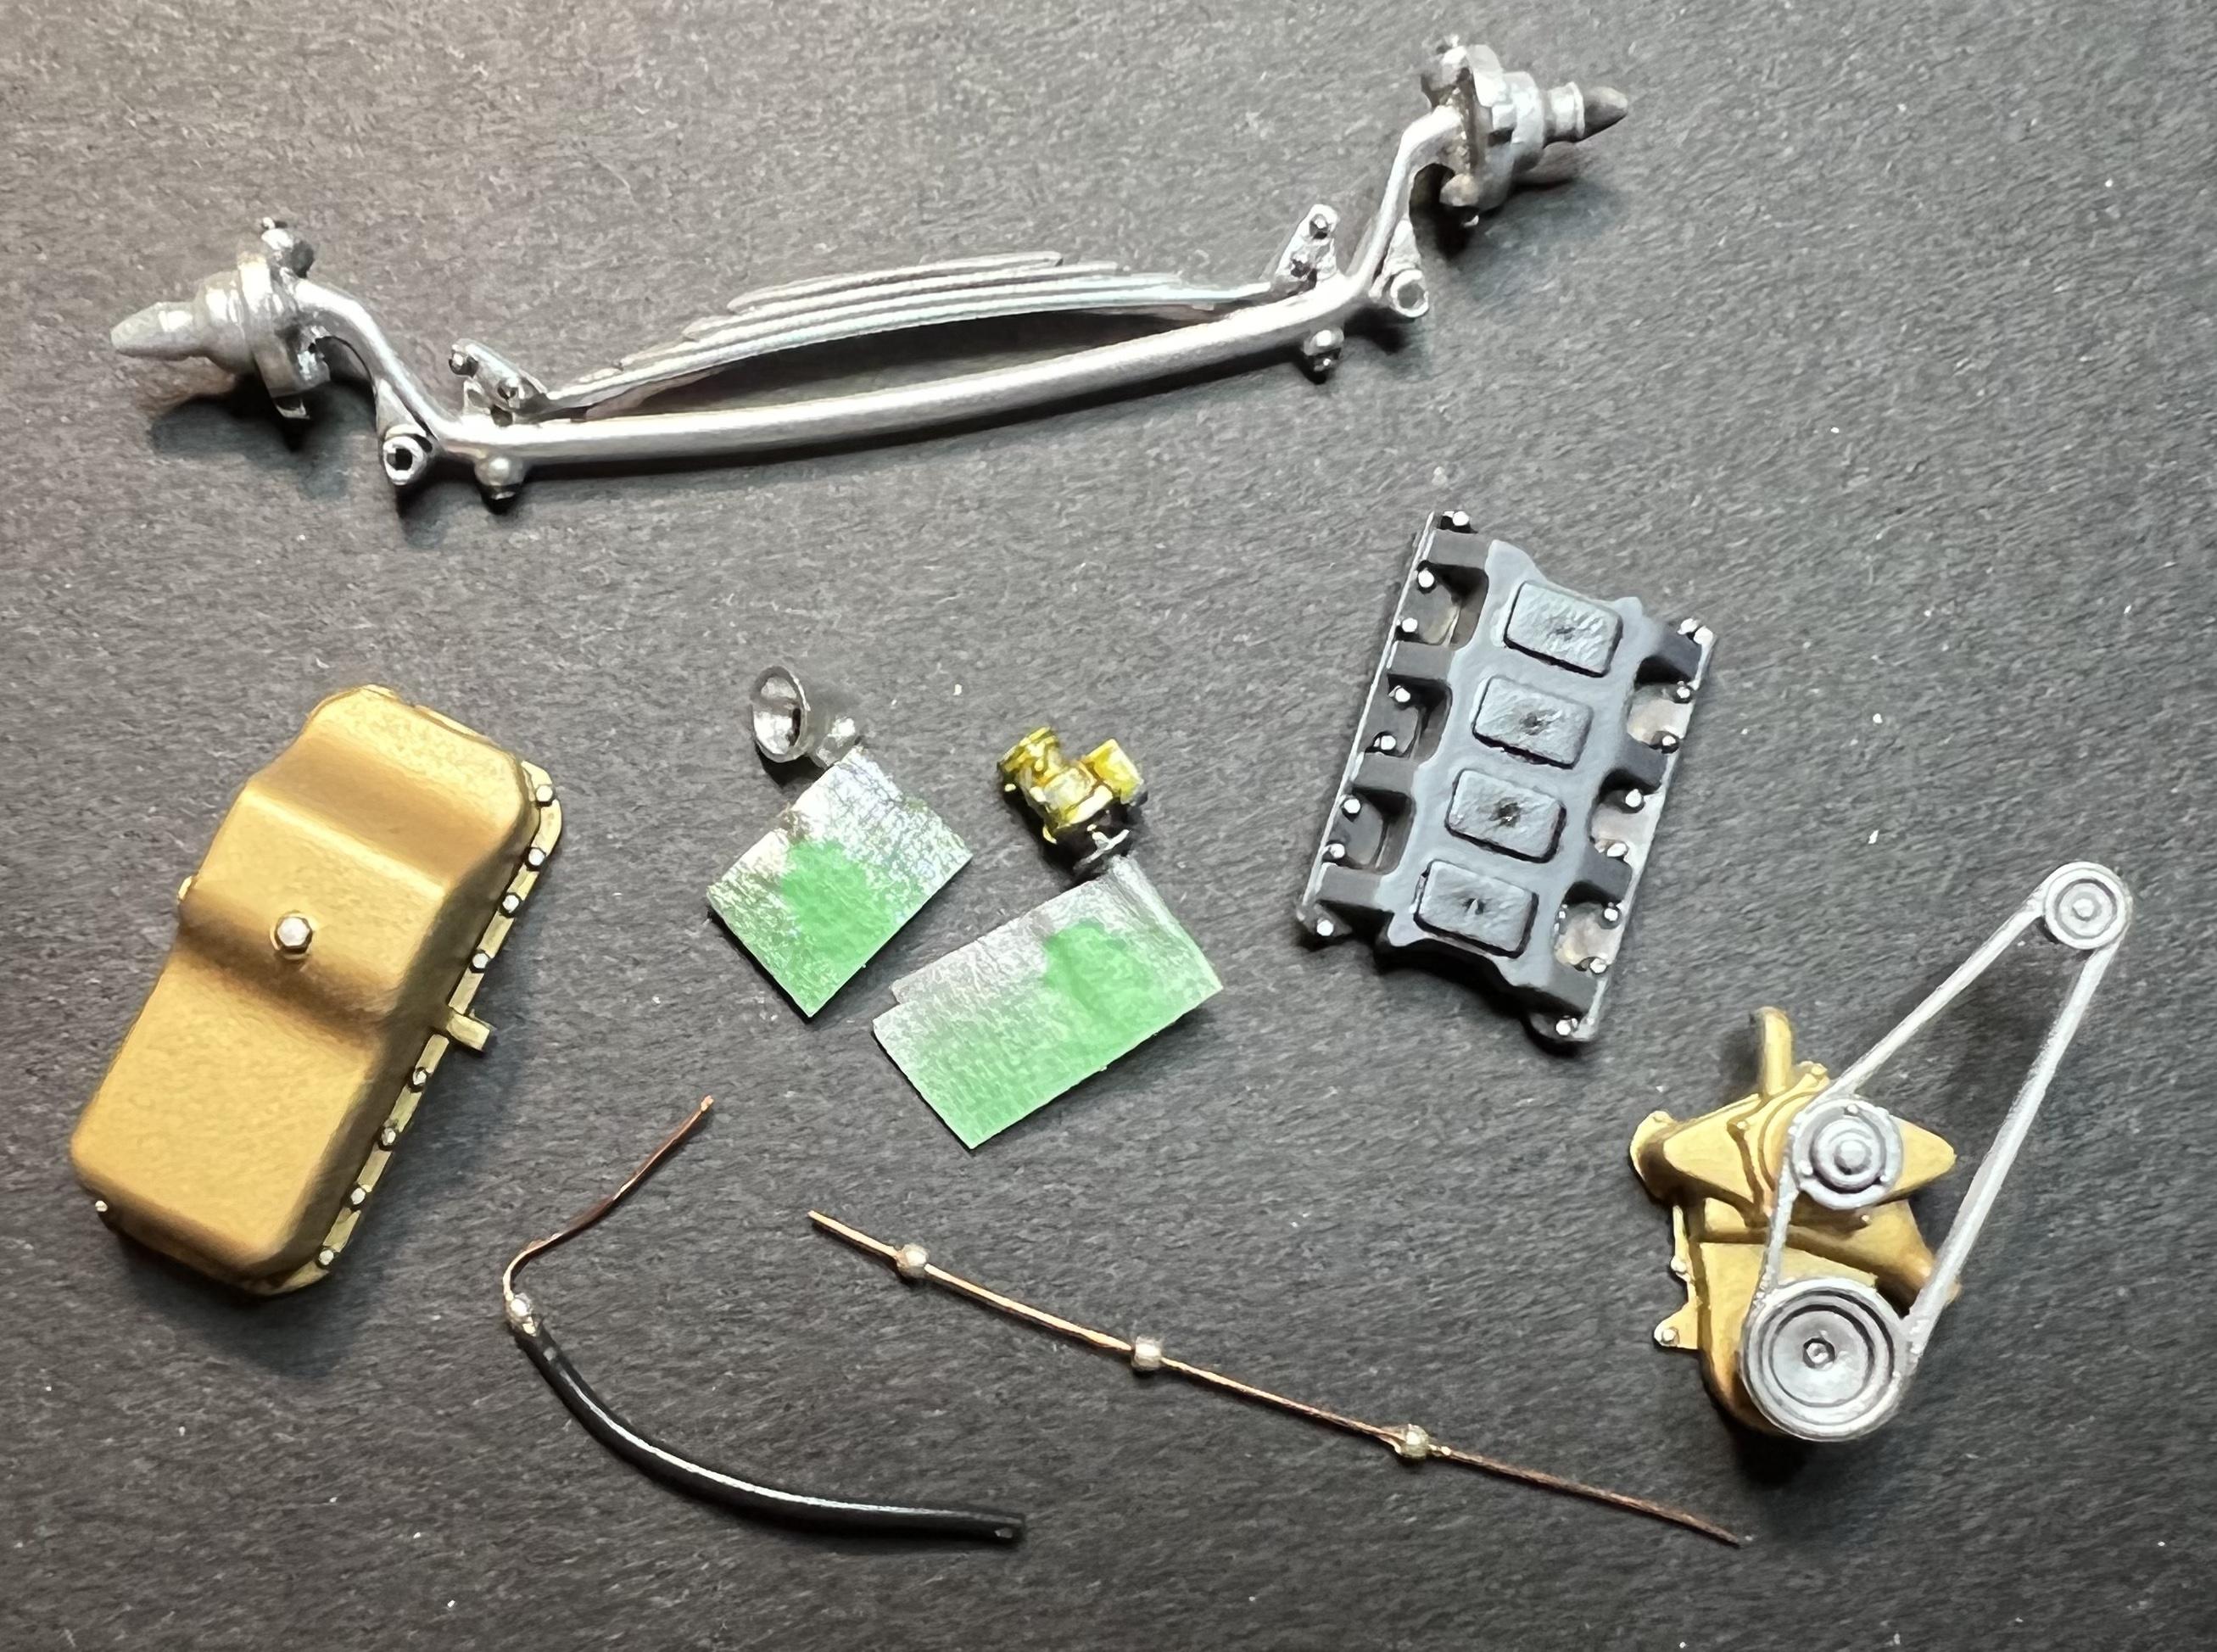
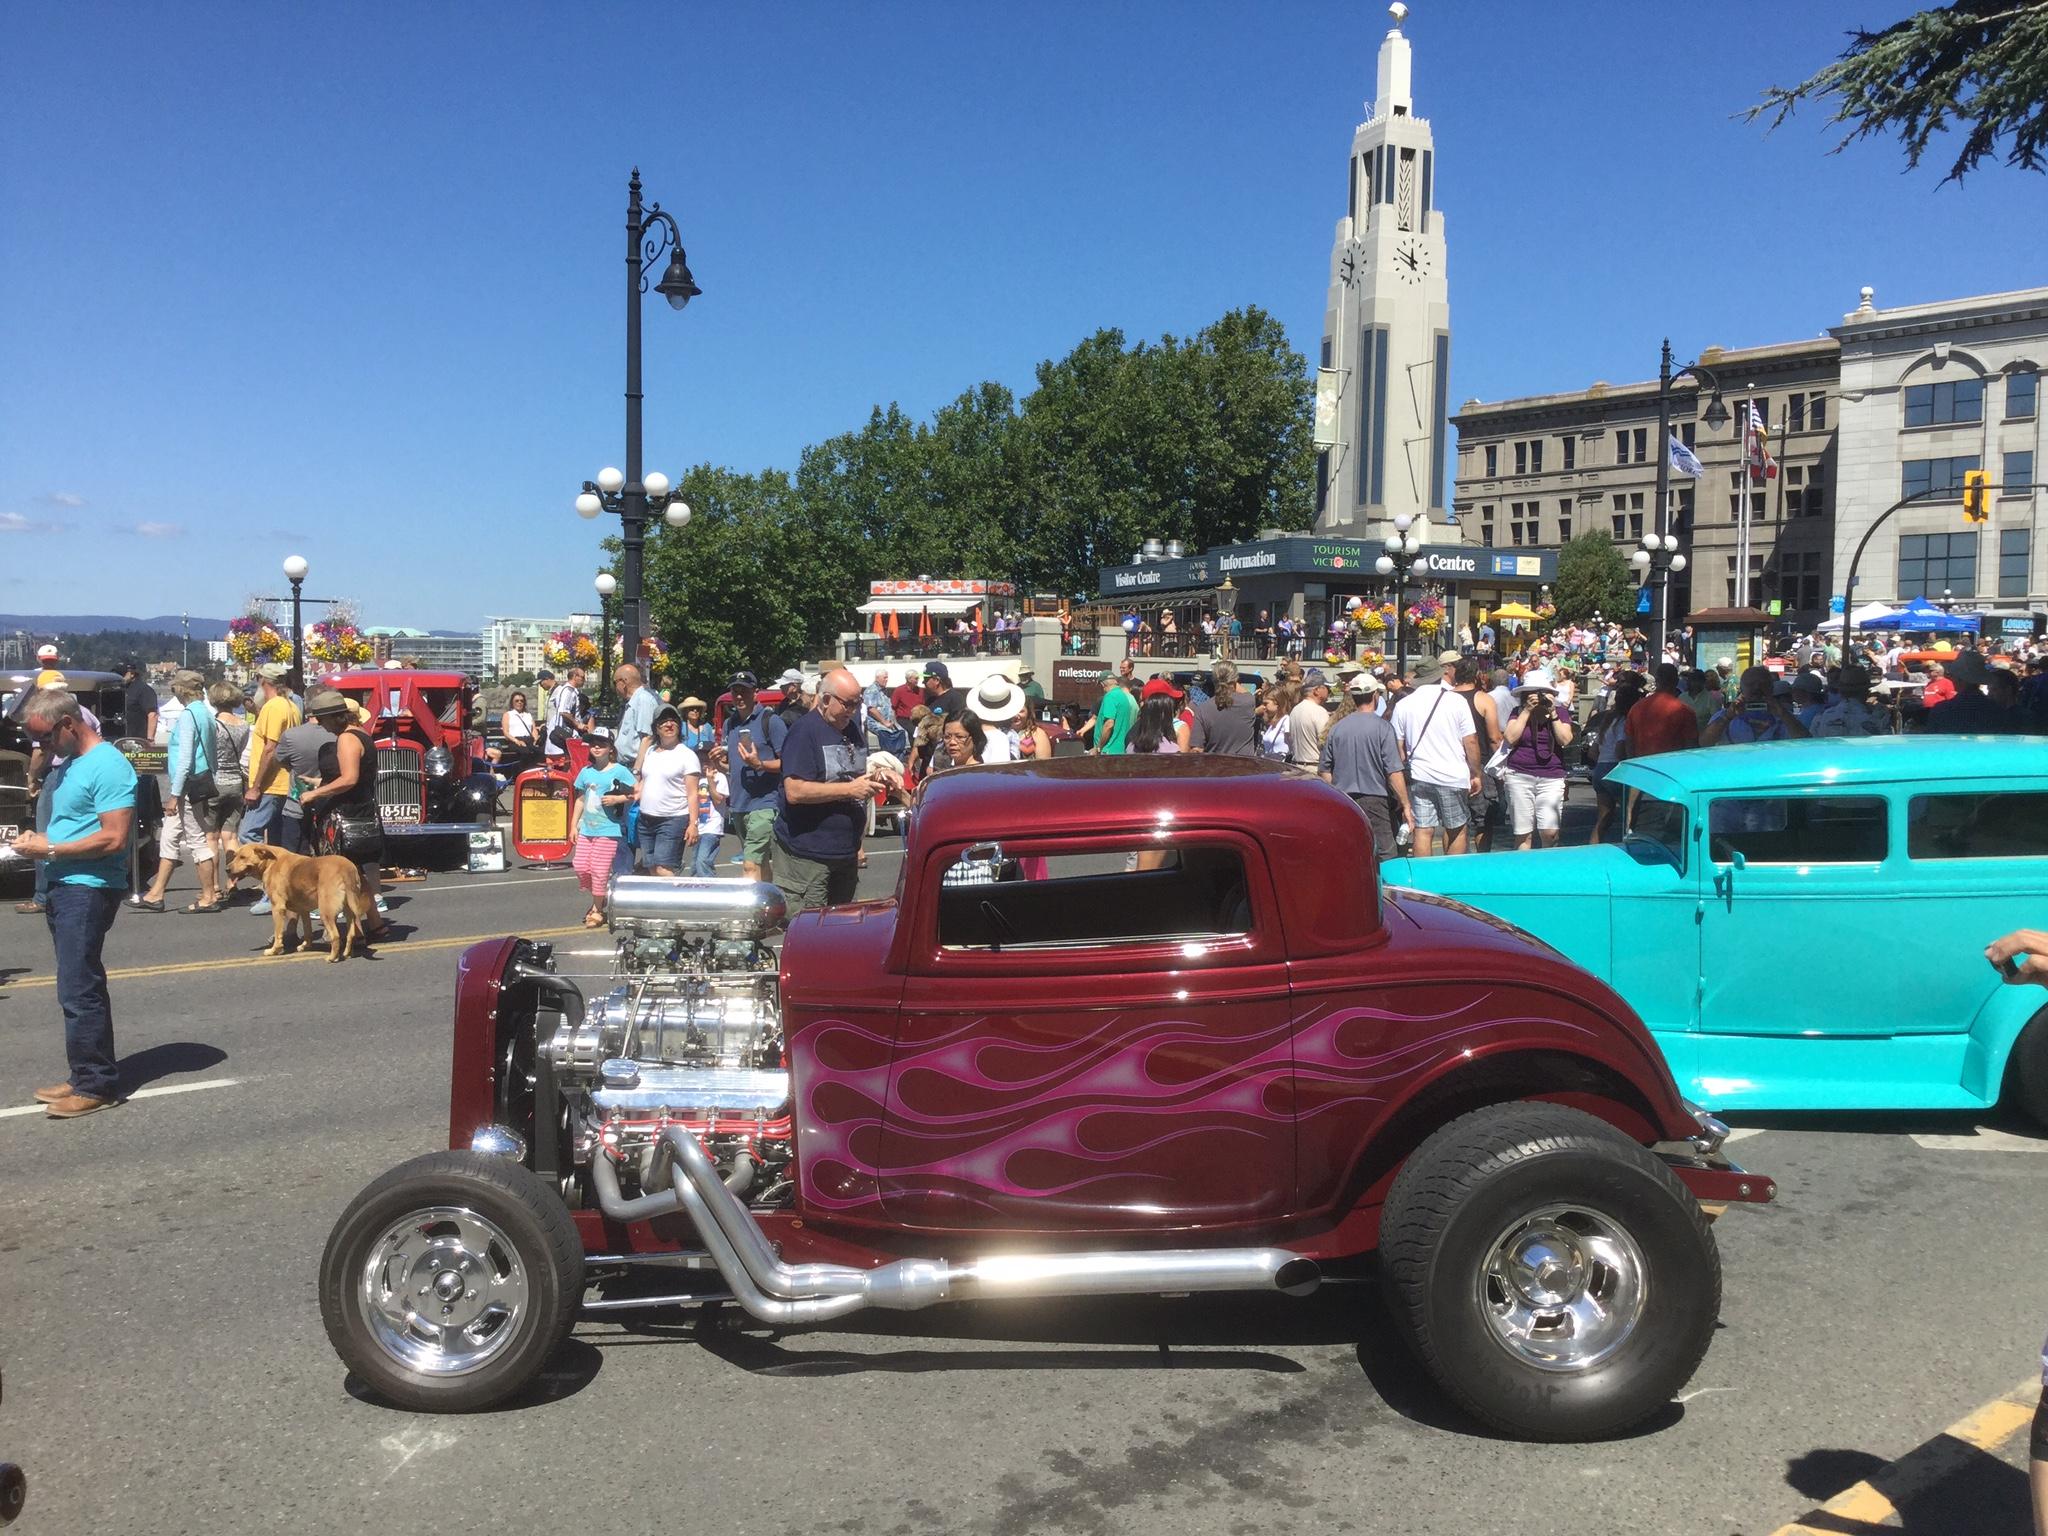
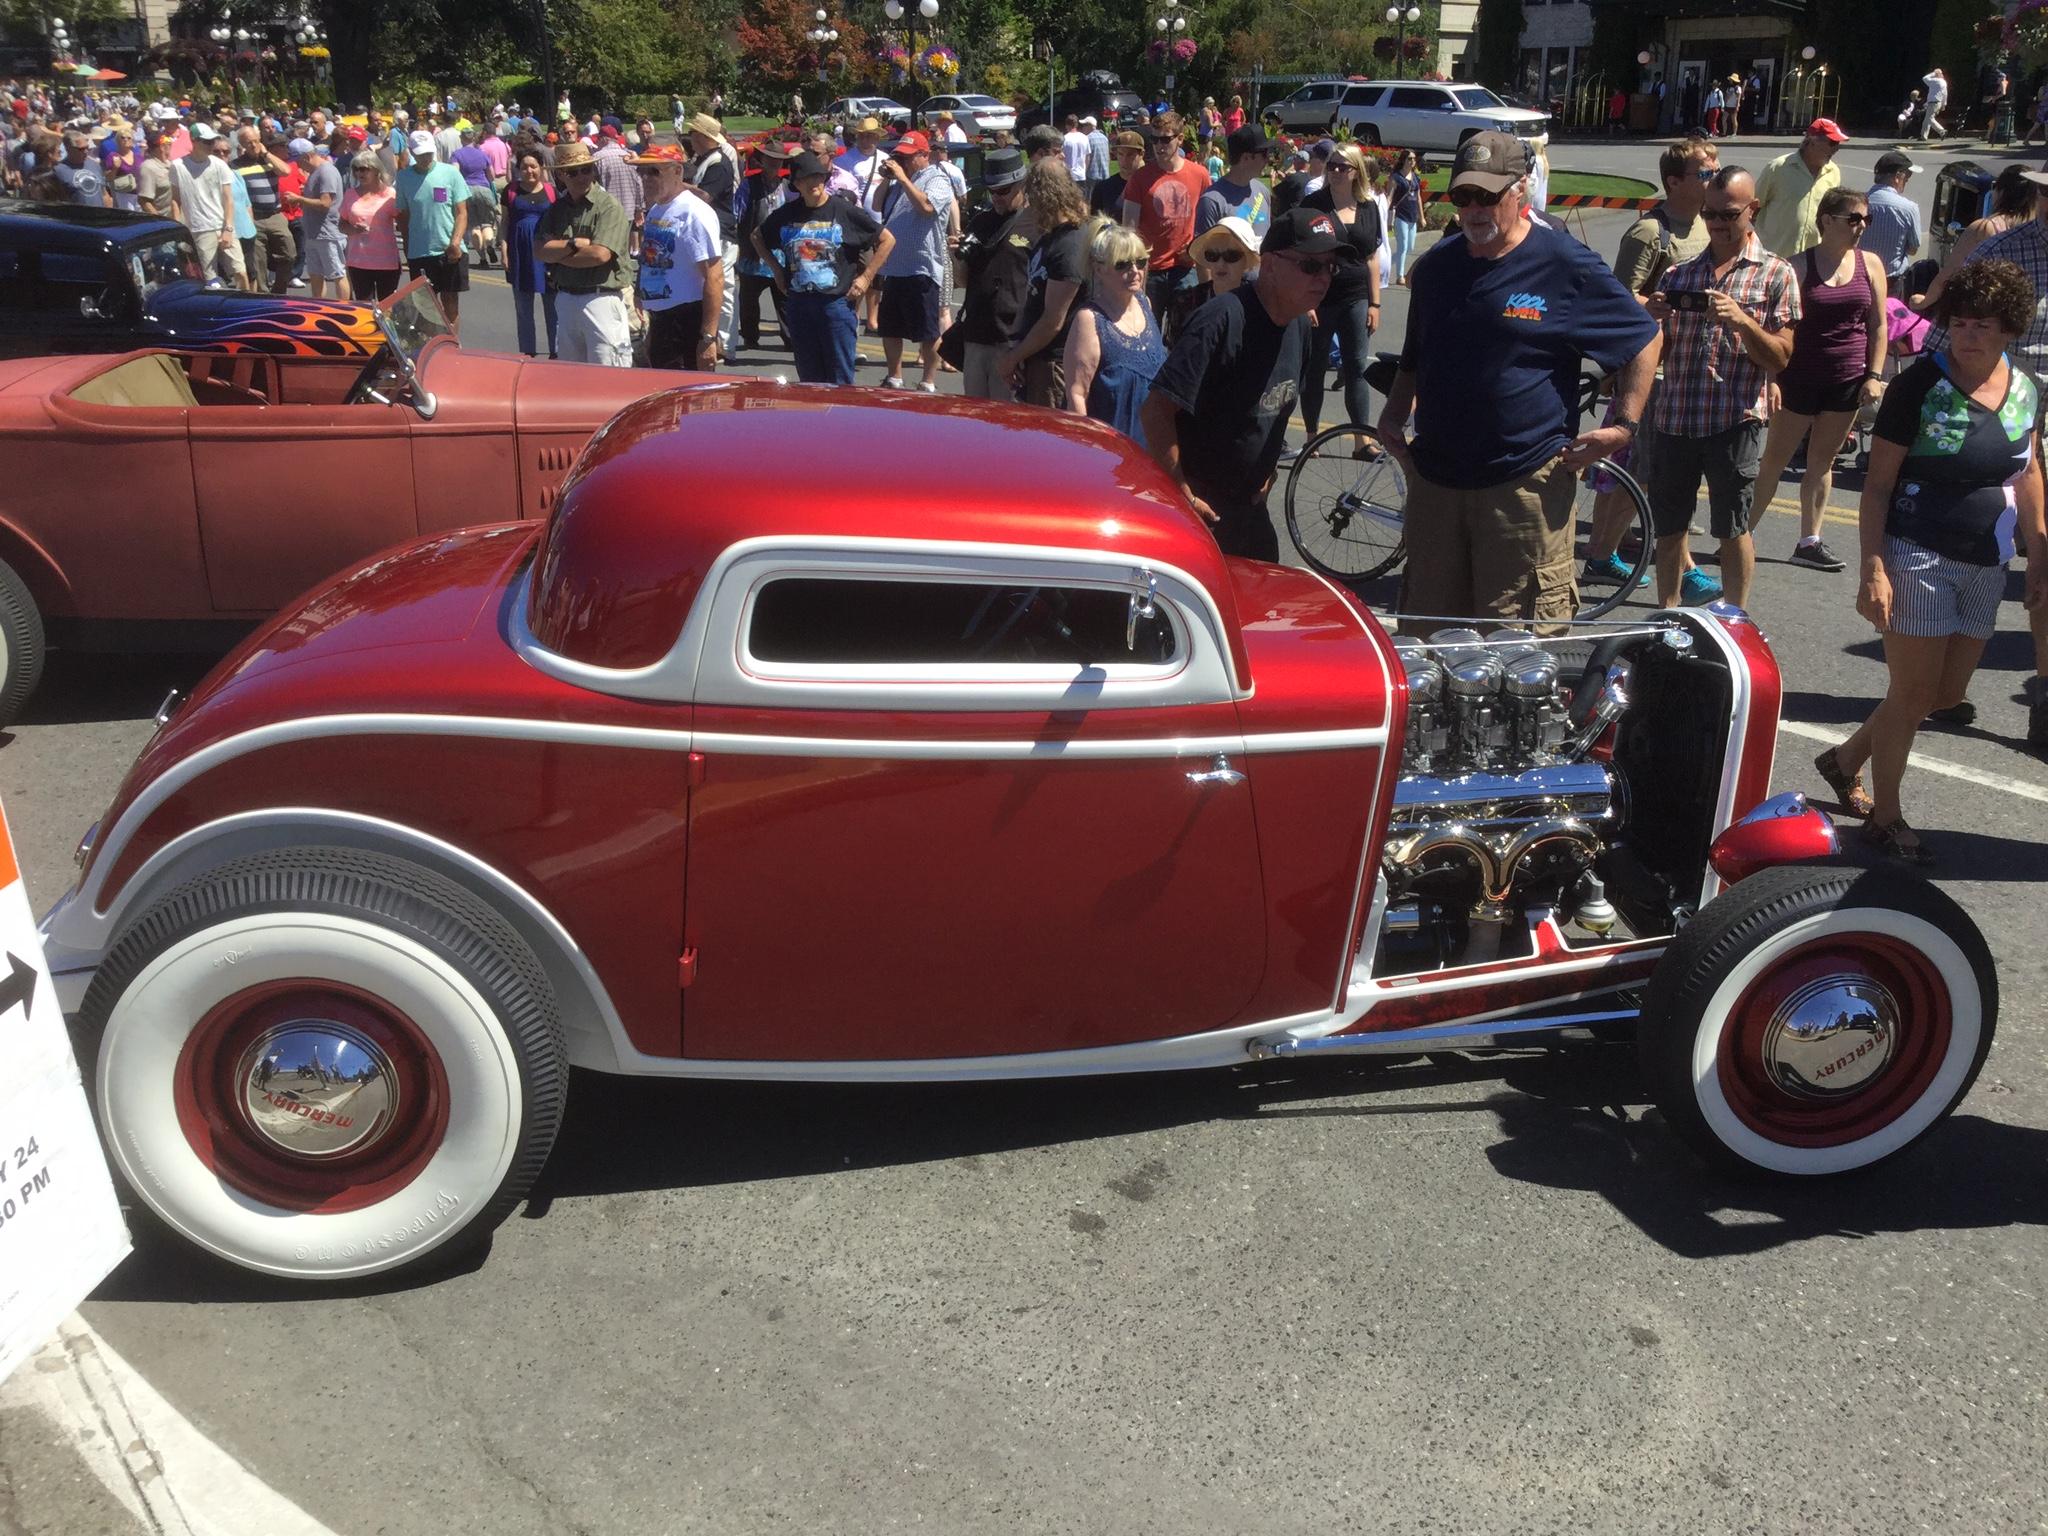
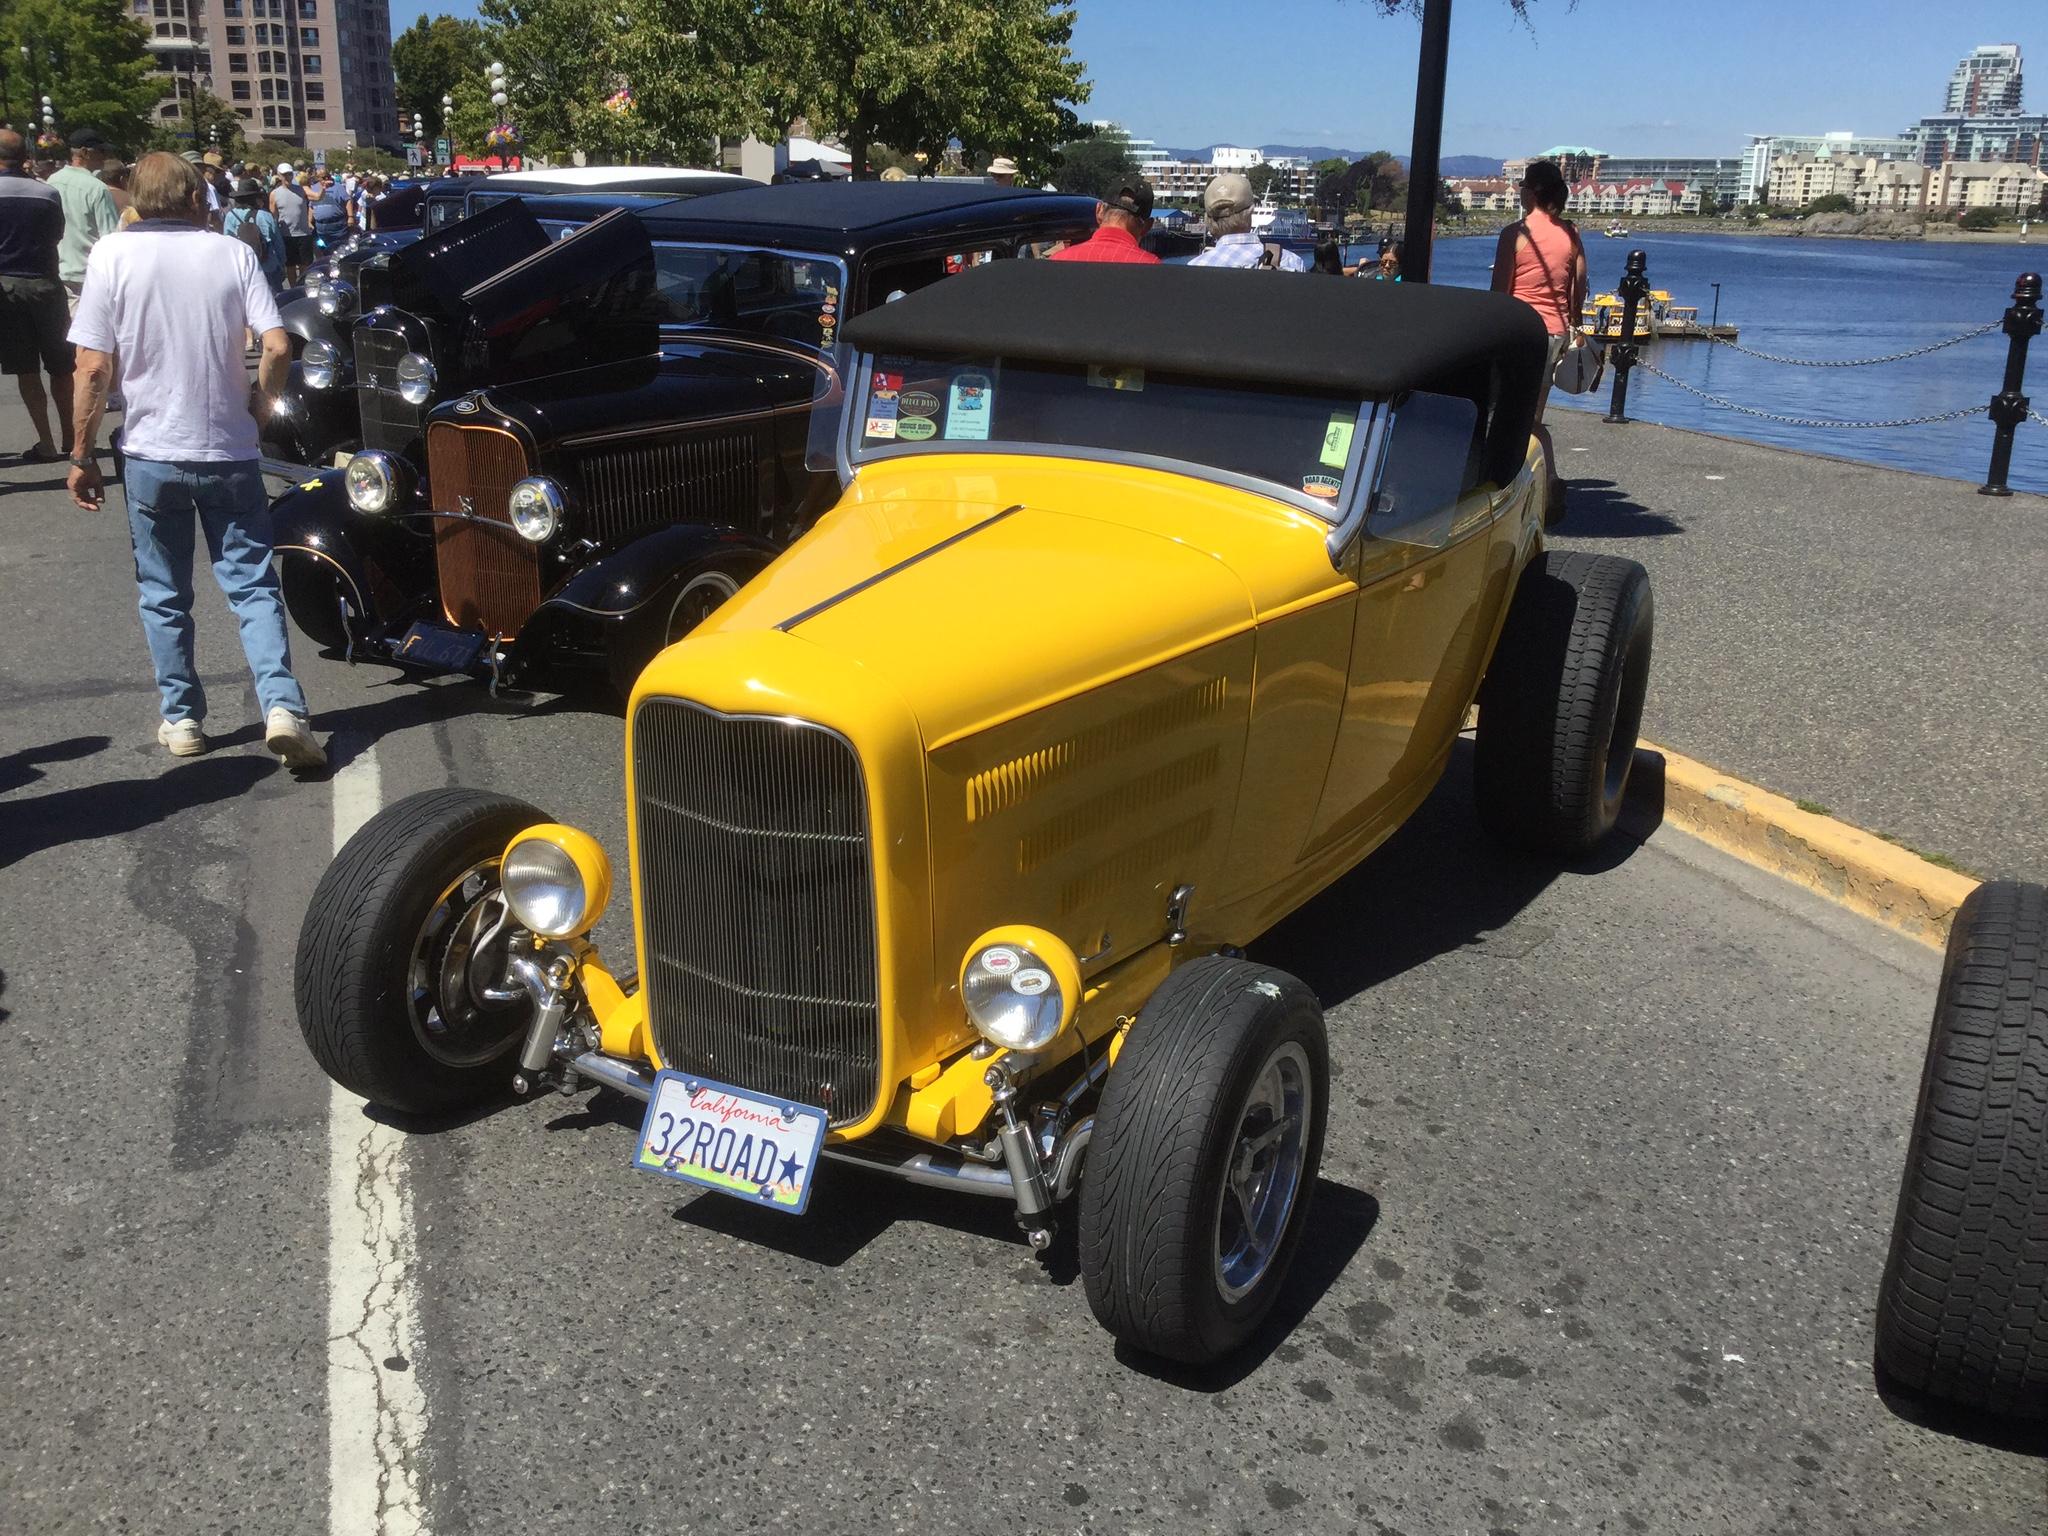
The Rods are arriving! The 1:1 Deuces have been making the crossing from the mainland, arriving at Victoria’s Inner Harbour off the Coho ferry. Meanwhile I have two days left to get my build into the show. Been making progress, nearly all the parts have been painted and major assemblies are on their way. Going to be tight! Main body parts are completed with a clear coat of TS 13, please excuse the dust particles which I missed swiping off. The chassis shows the difference between the gloss coated areas and the matte. The one piece axle responds well to detail painting after having the kit chrome stripped from it. The Hemi required a Mopar alternator that isn’t included in the kit. Fortunately the one from the 62 JoHan Plymouth kit has an exceptionally well detailed one, quite amazing for a kit over fifty years old! The 392 is near completion, some more wiring, front pulleys, headers and it’ll be ready to fire up! There is still a lot to do, so back to the bench! Thanks Michael and Phil for your comments above, Cheers Misha
-
Great weather, great shots! It all promises to be a knock out weekend. Thanks Phil for the photos, great variety which makes the Deuce such an iconic Hot Rod. Cheers Misha
-
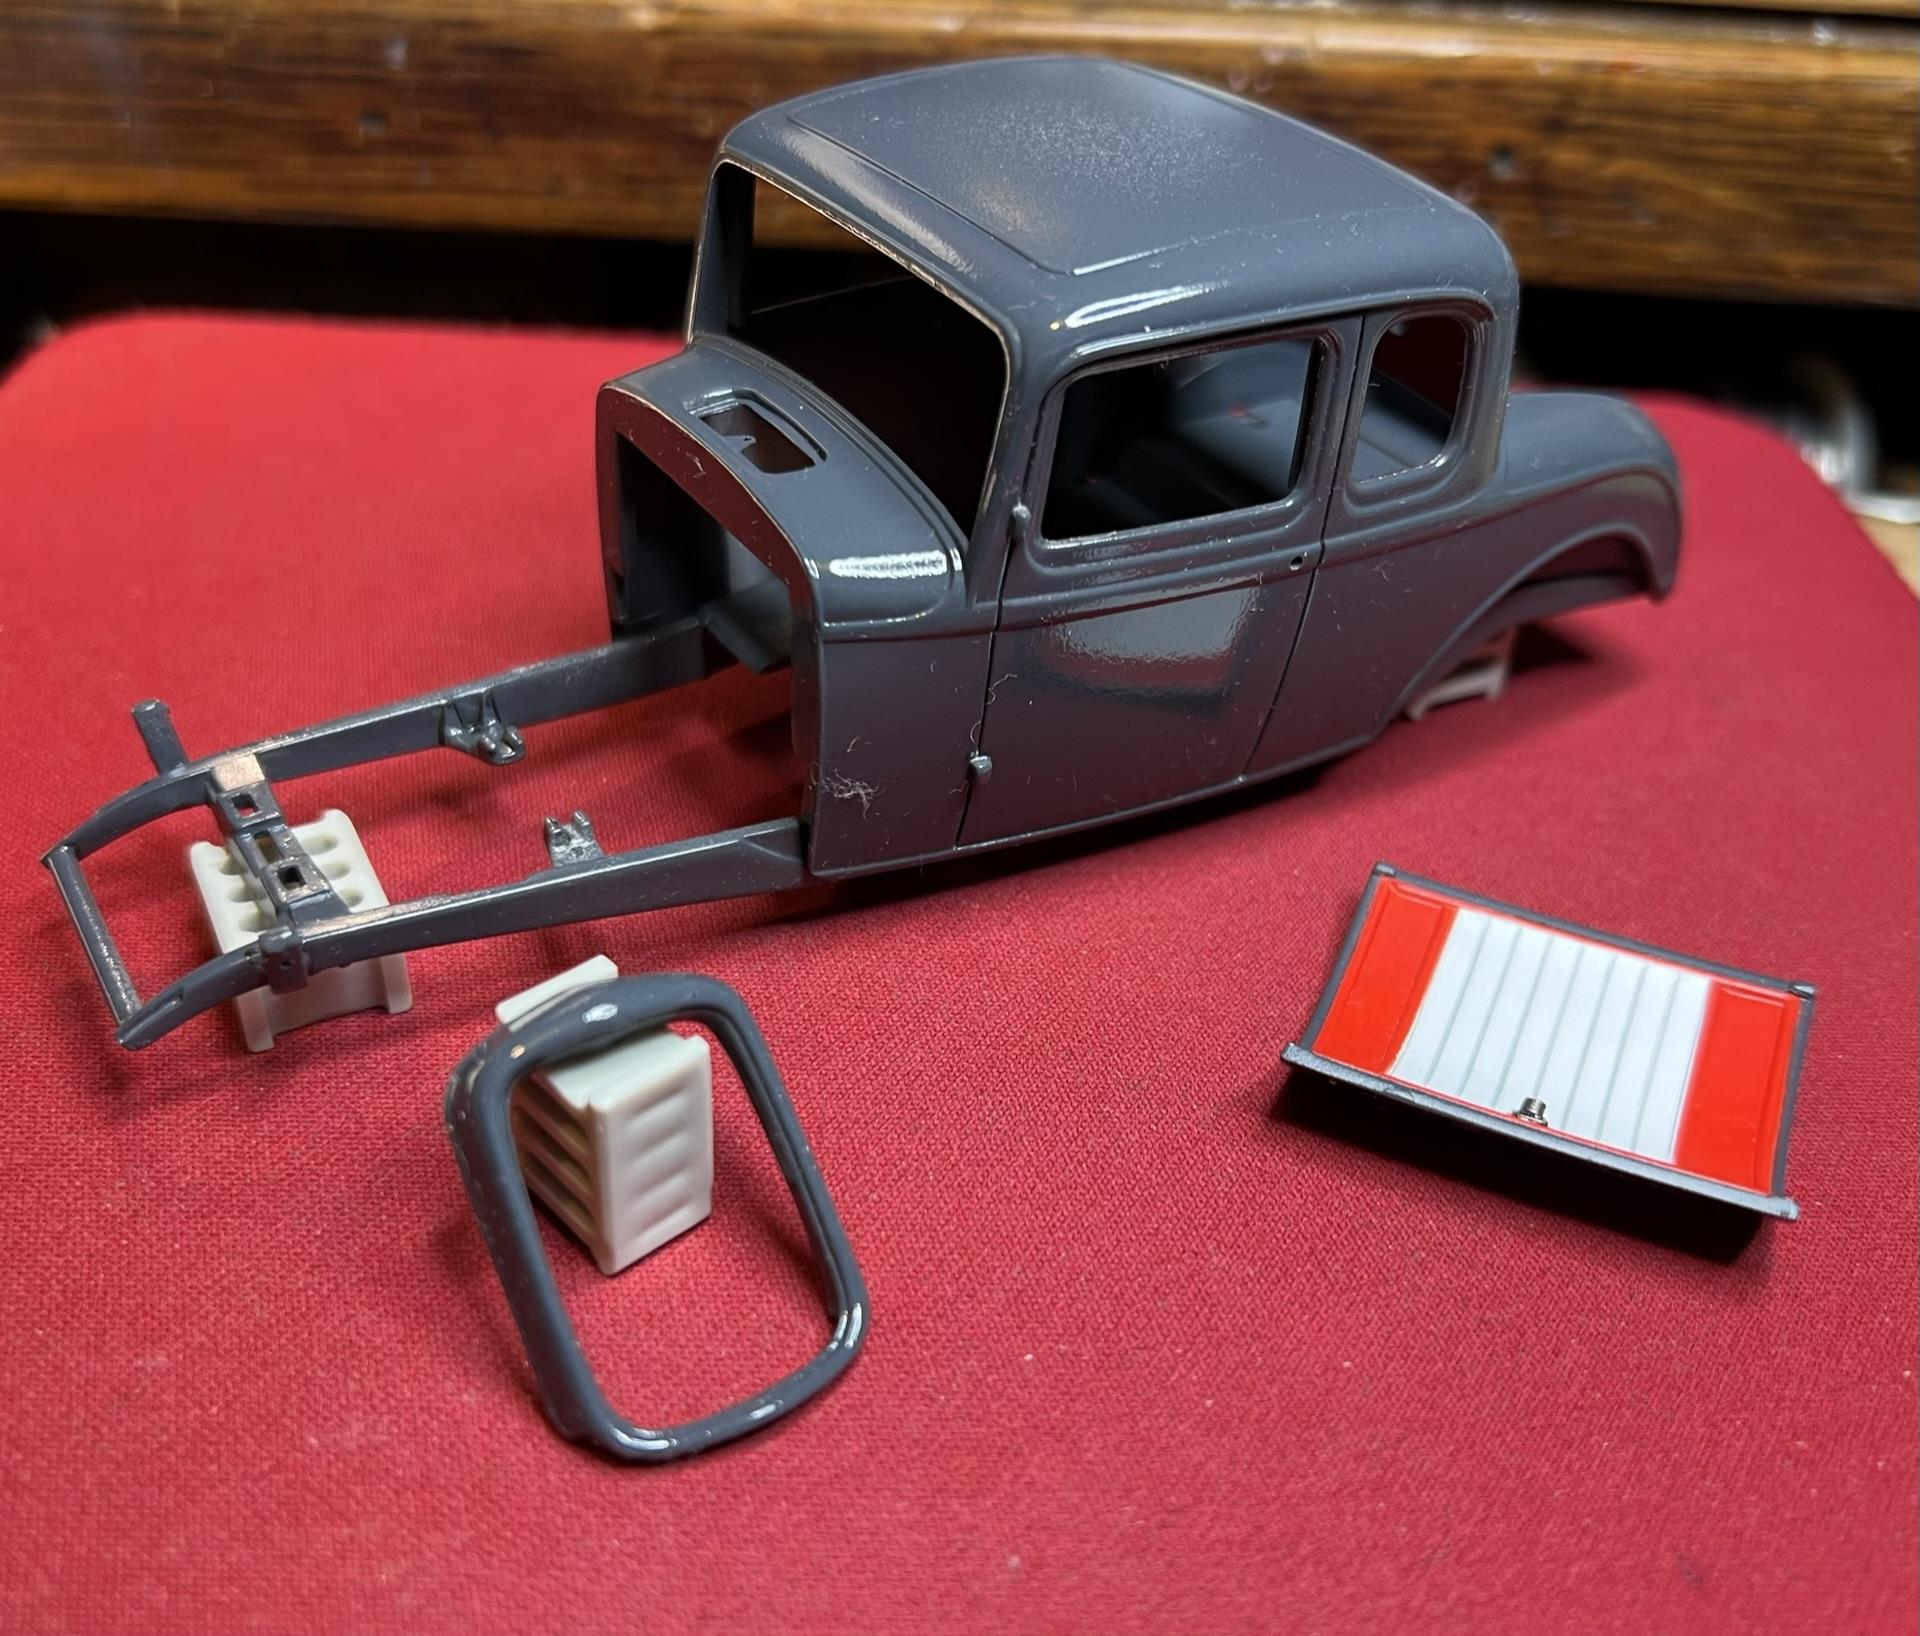
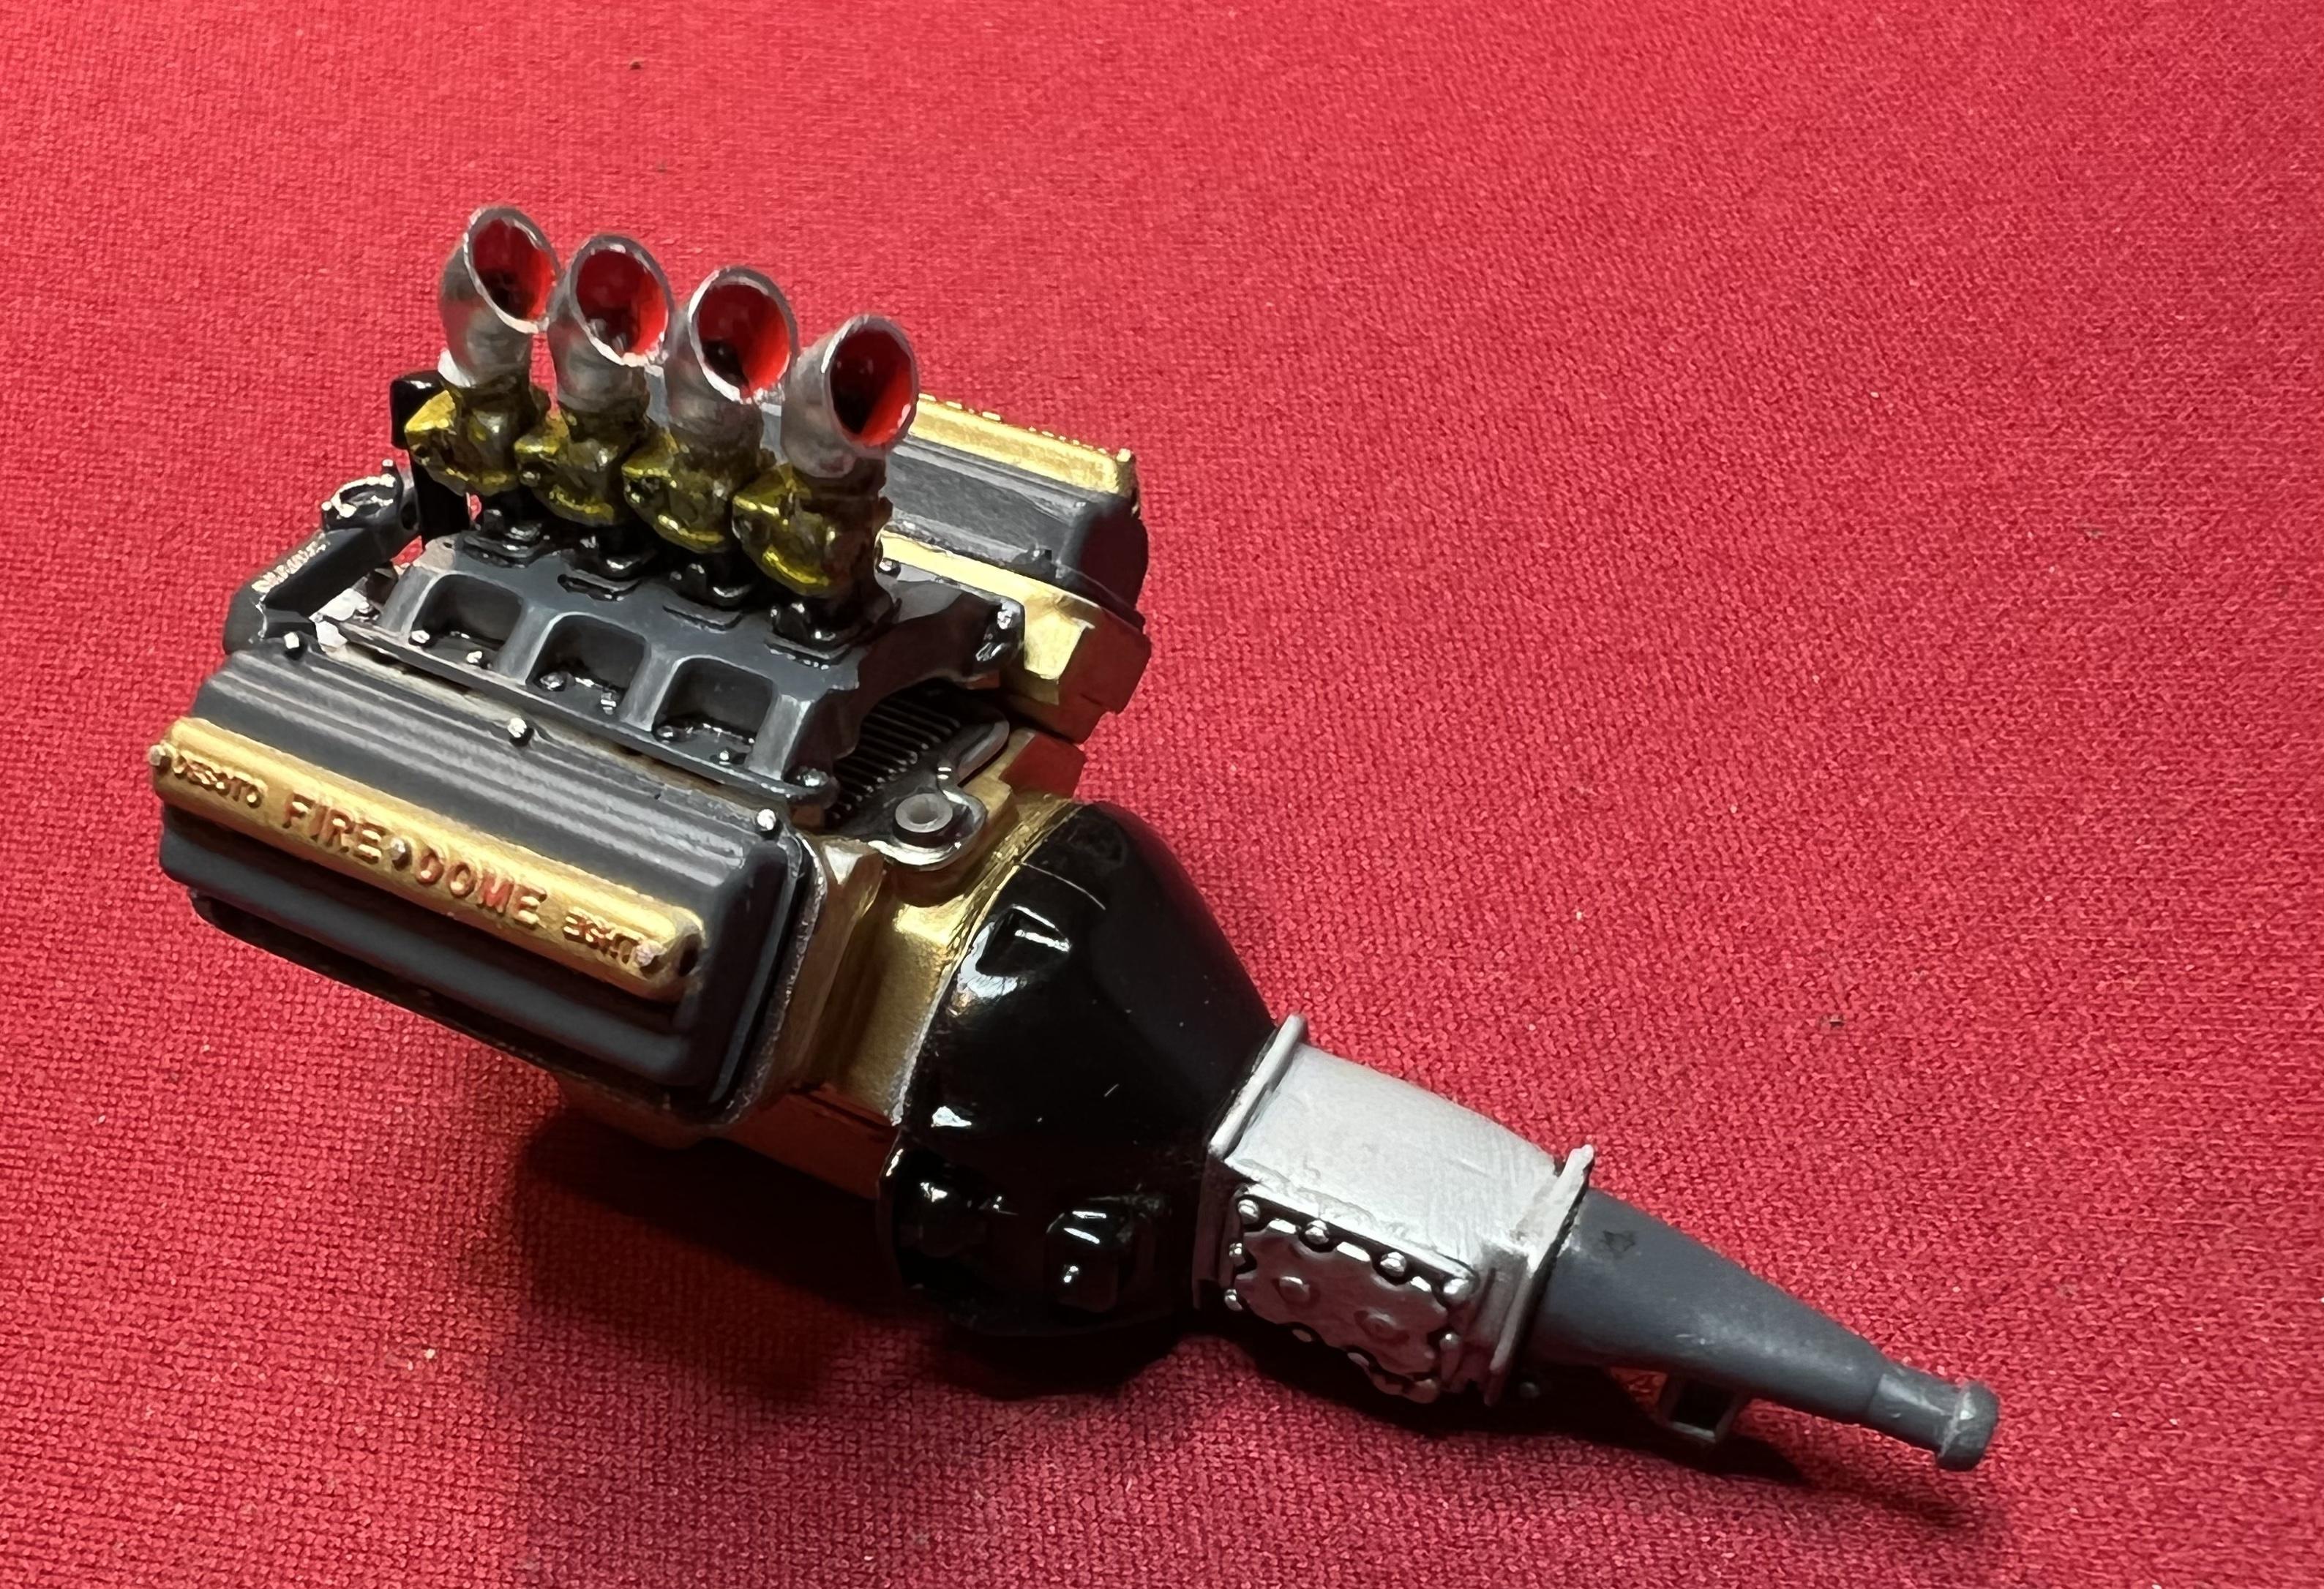
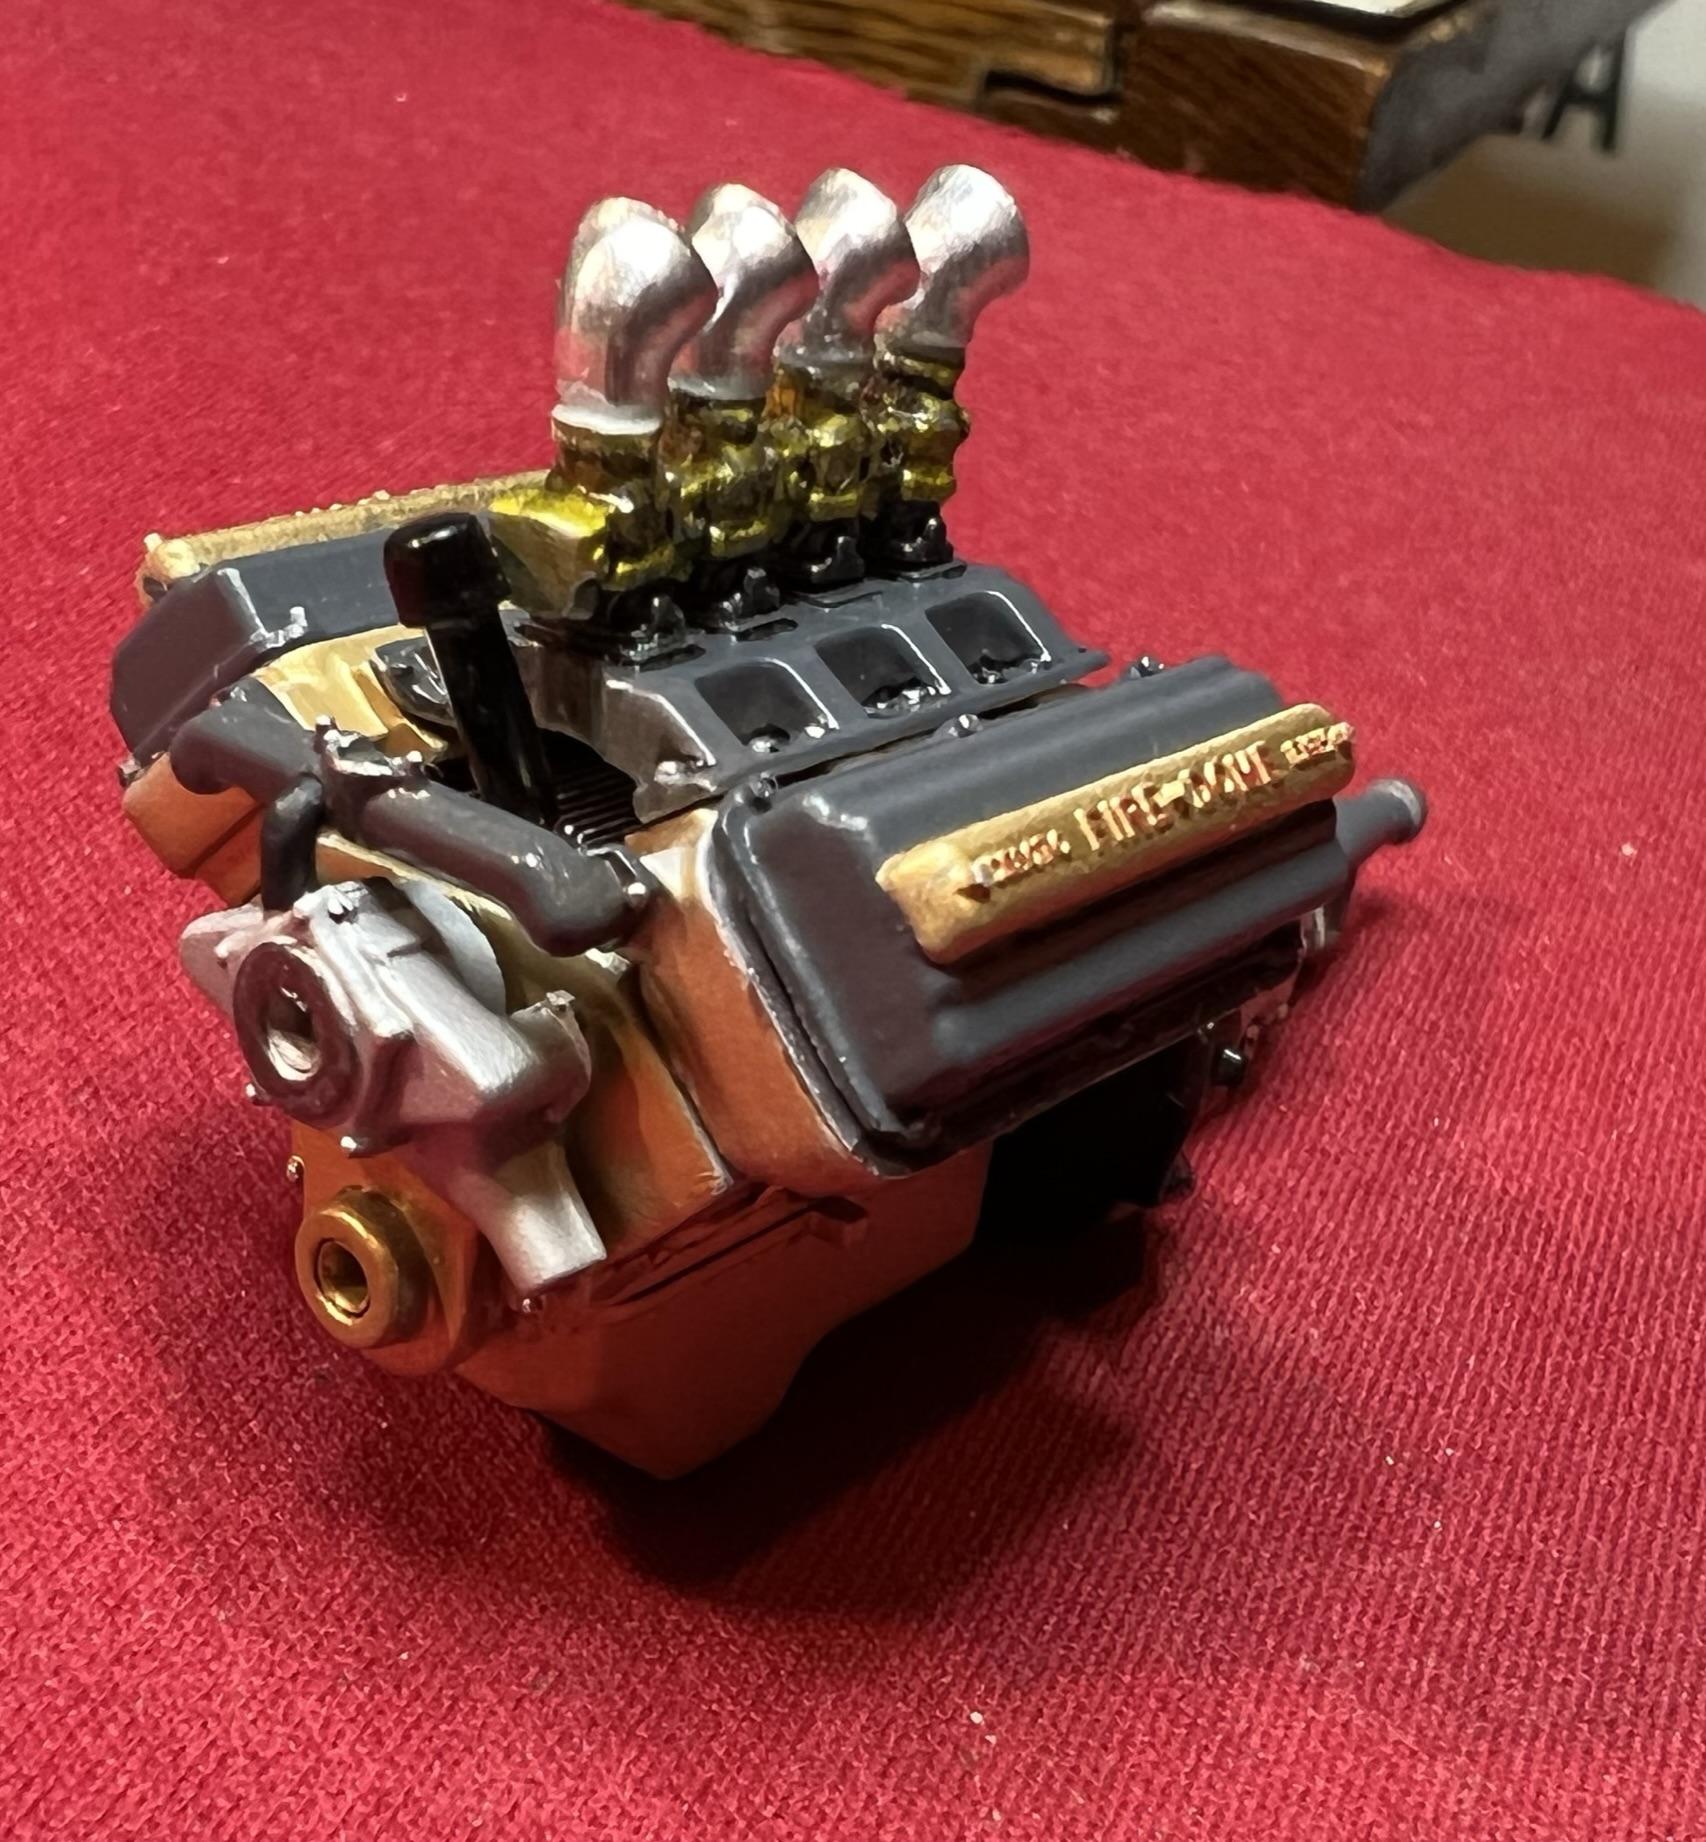
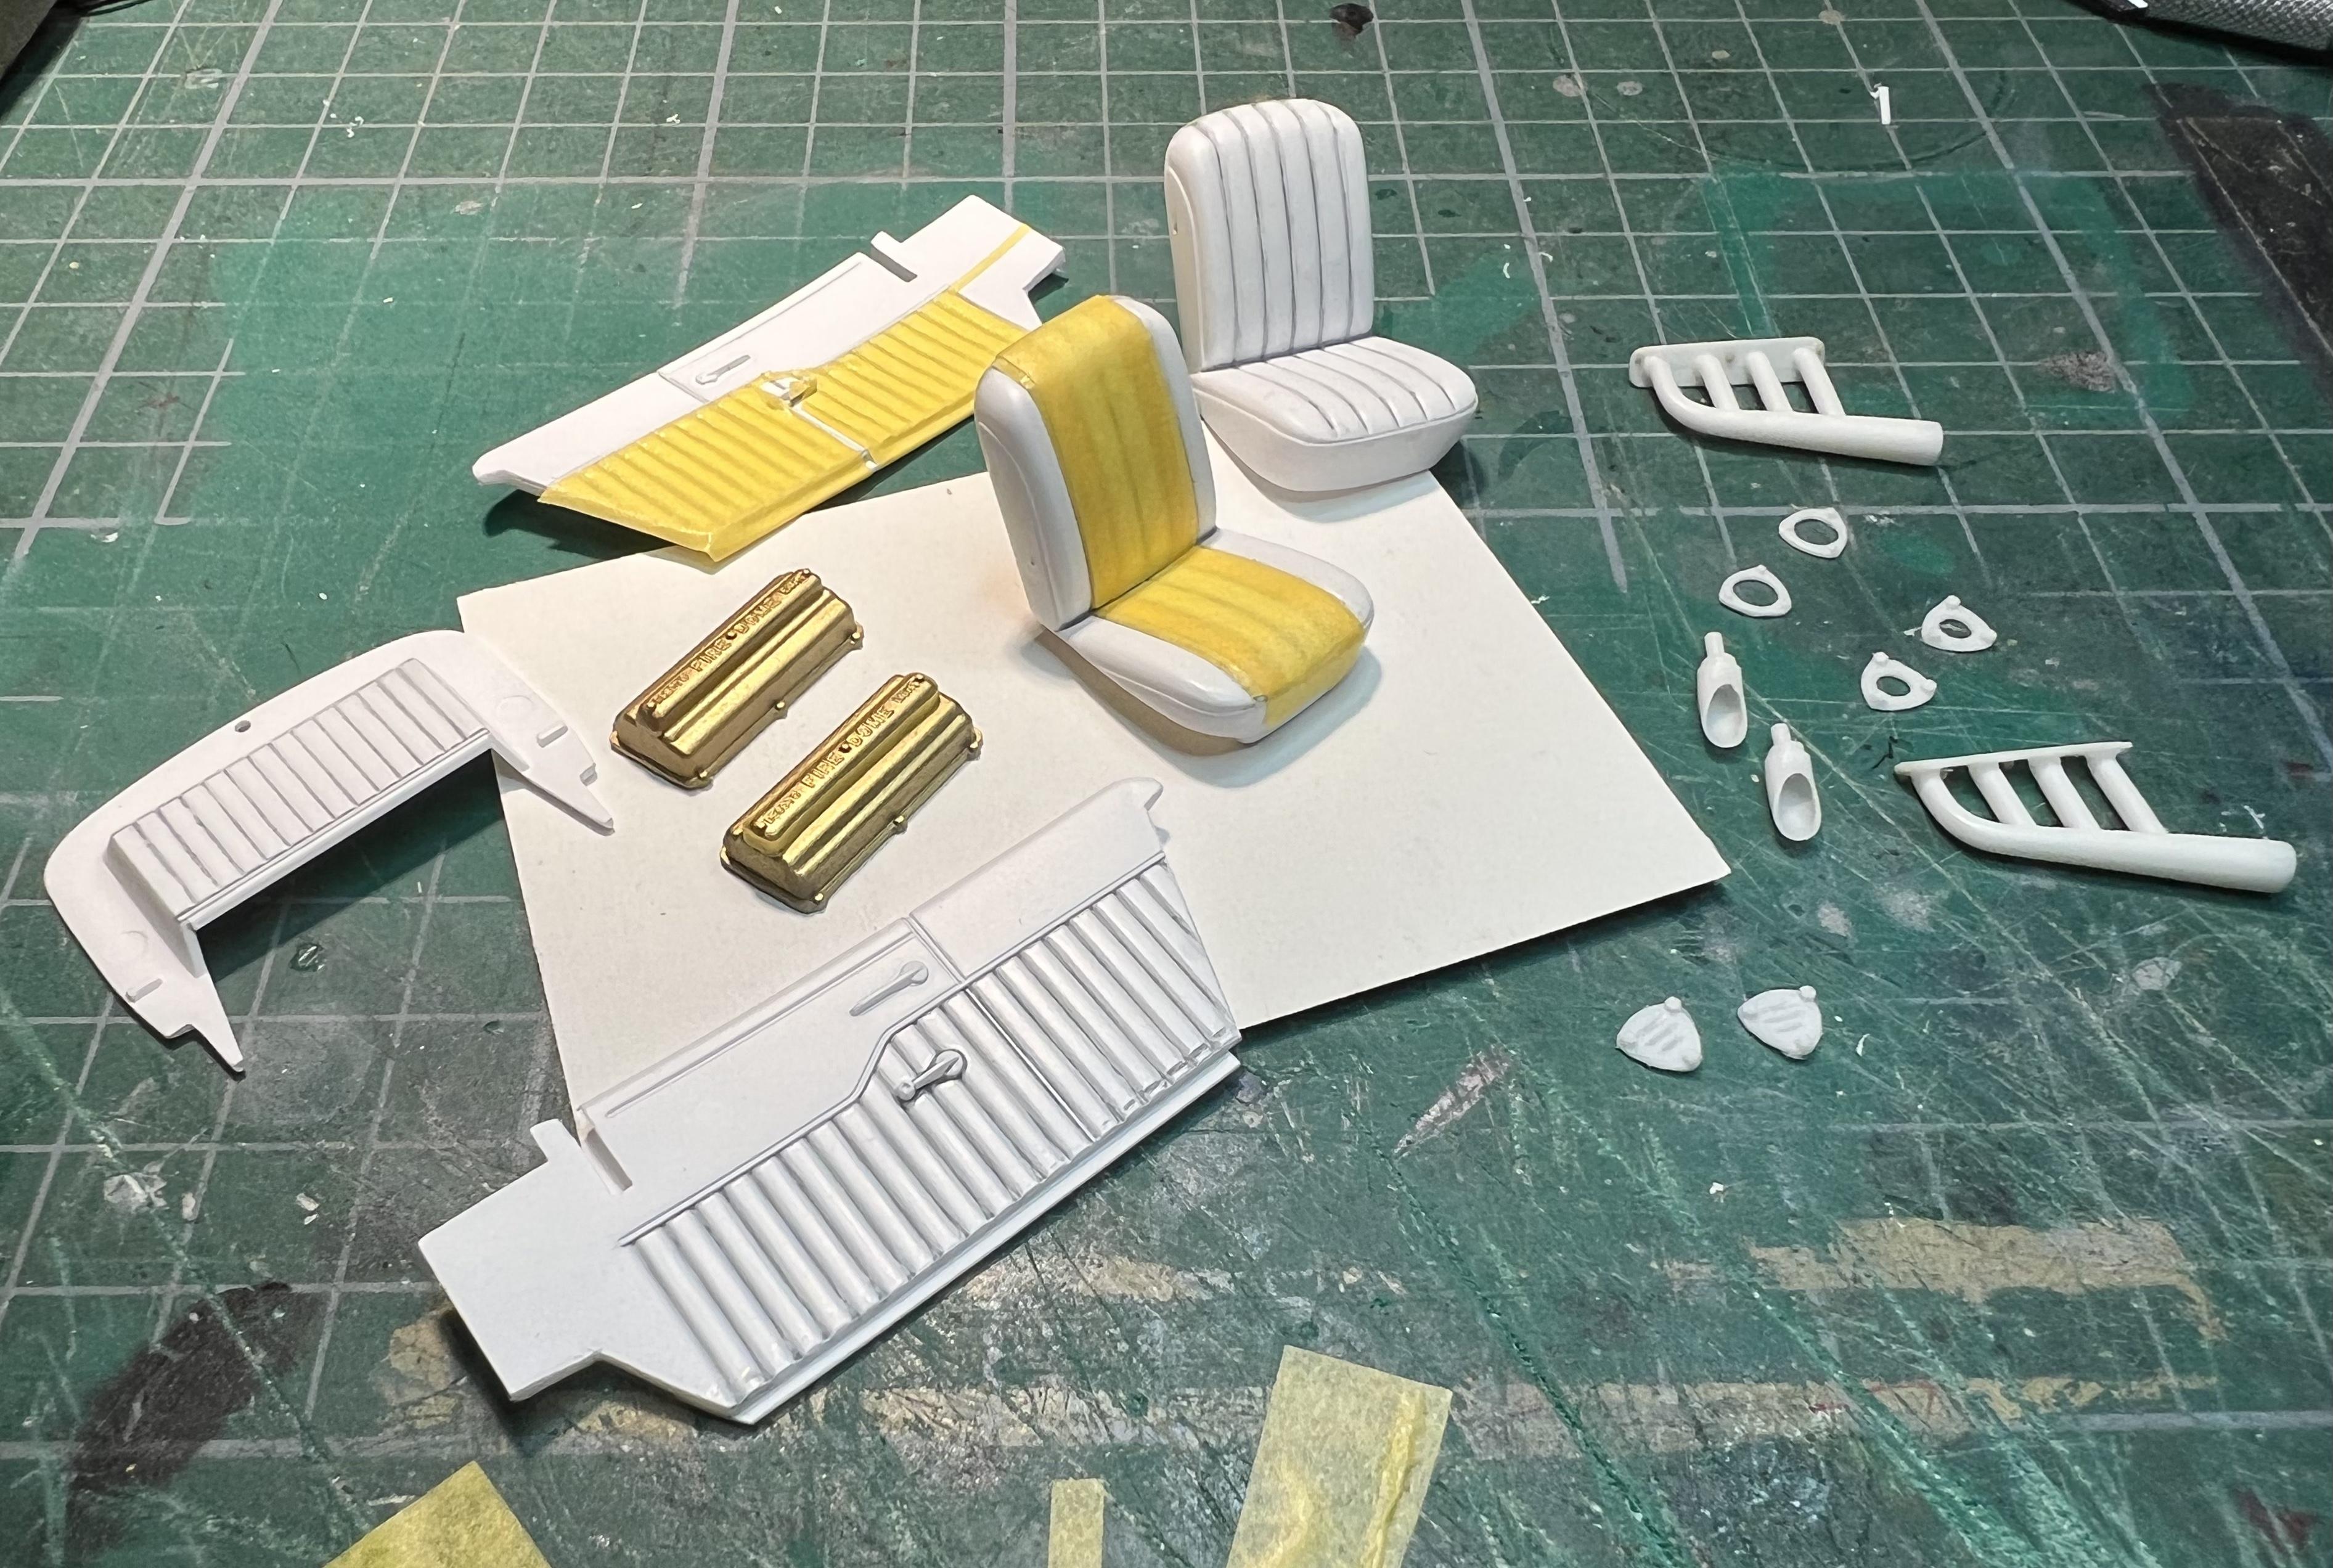
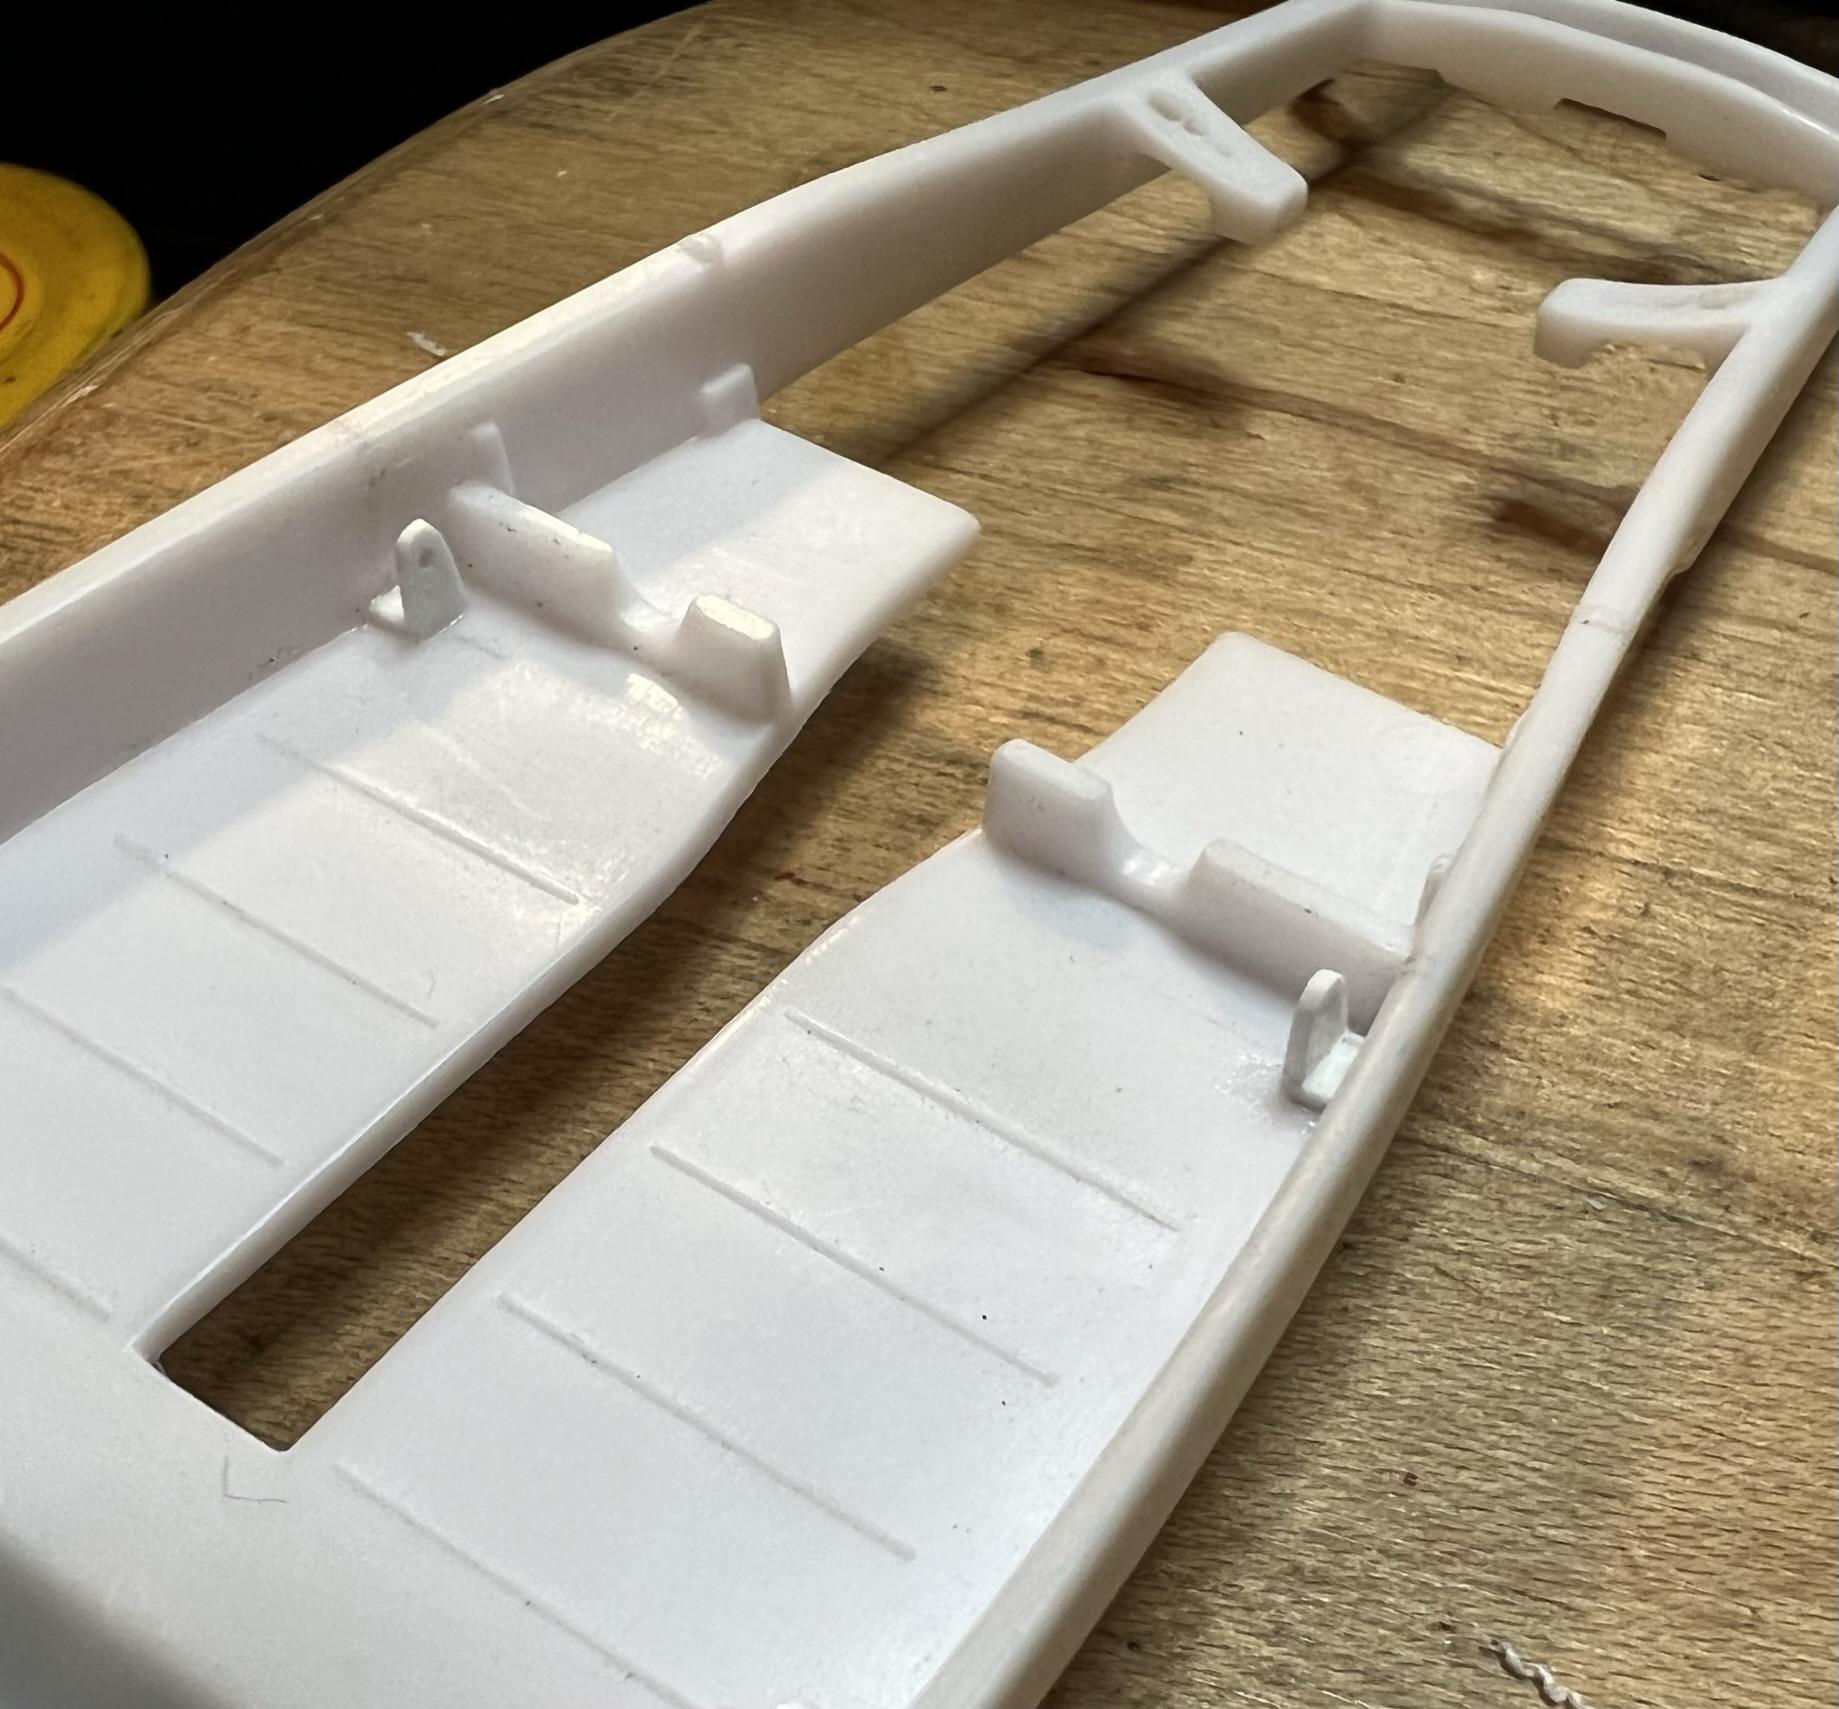
Since the last update I’ve been able to throw some colours onto the Deuce. I have less than a week to “git it done” so it might be one of those cases where the paint is still gassing out while on the display table! Began with a lot of masking of the parts. Depending on the final finish they were primed in either grey or white Tamiya rattle cans. The white portions of the interior were treated with light grey panel wash to add to the depth of the upholstery. I typically strip the chrome off in order to dress the parts, eliminating mold lines and the heavy chrome that tends to hide finer details. As an example the front axle has been stripped, detailed and refinished with LP 48 Sparkling Silver. The kit’s oil pan and timing cover have their gold engine block colour applied with a black wash and paint accents on the bolt heads. The Strombergs and air scoops along with the intake manifold are resin pieces from R&M Co. The carbs were treated with a dull aluminum, and detailed with a dark finish on the lower portion and with a clear yellow finish to suggest the patina that develops on them. The manifold is in body colour LP 27 Panzer Grey with bolt heads detailed. At the bottom are the parts for the fuel lines from the four carbs to the fuel log mounted on the fire wall. The lines are made from thin wire insulation that is very flexible combined with copper wire and crimps for the connectors. Pure Red, LP 7 is the accent colour for the build and is being used on the wheels and LP 46 Metallic Red for the inside upholstery to simulate the vinyl material used back then. For the interior the white primer and the red paint are over coated with LP 24 semi-gloss clear to blend the two finishes together. Overall I was quite pleased with the finish. The body parts received their first coat of the Panzer Grey to be followed by a clear gloss. The gas tank shows the colour much better than the body under the glare of the spray booth lighting. Combining the conservative outside colour with the interior upholstery will hopefully create an interesting contrast, much in the style of the East Coast Hot Rod community of the time. Now back to the bench! Cheers Misha
-
Two jewels ? ? Michael! Beautiful execution on both coupes while completing two distinctive styles from one kit, difficult to pick a fav as both are so well built. Congrats, Misha
-
Great work RRR! I’m following your build closely as you have offered very practical solutions to improve this kit. As a kid I picked up the new Revell series of Thames, Anglia, Willys, yet the Henry J has eluded me until this recent release which I picked up couple of weeks ago. The interior changes look great with the rear seat removal. Gluing the doors shut is certainly the plan to follow I agree. The pulleys look great, what is the origin? (Haven’t looked closely at the kit yet). Always a pleasure to see your work, cheers Misha
-
Wow Michael, that is master craftsmanship you are achieving with this build. To finesse the interior while tackling the thick Flintstone body is quite an endeavour which you perfecting! I’ve often rebuilt the interiors of the early AMT releases that lacked detail, yet I would be hard pressed to thin down thick resin. This will be a worthy addition to your Deuce collection. Congrats Misha
-
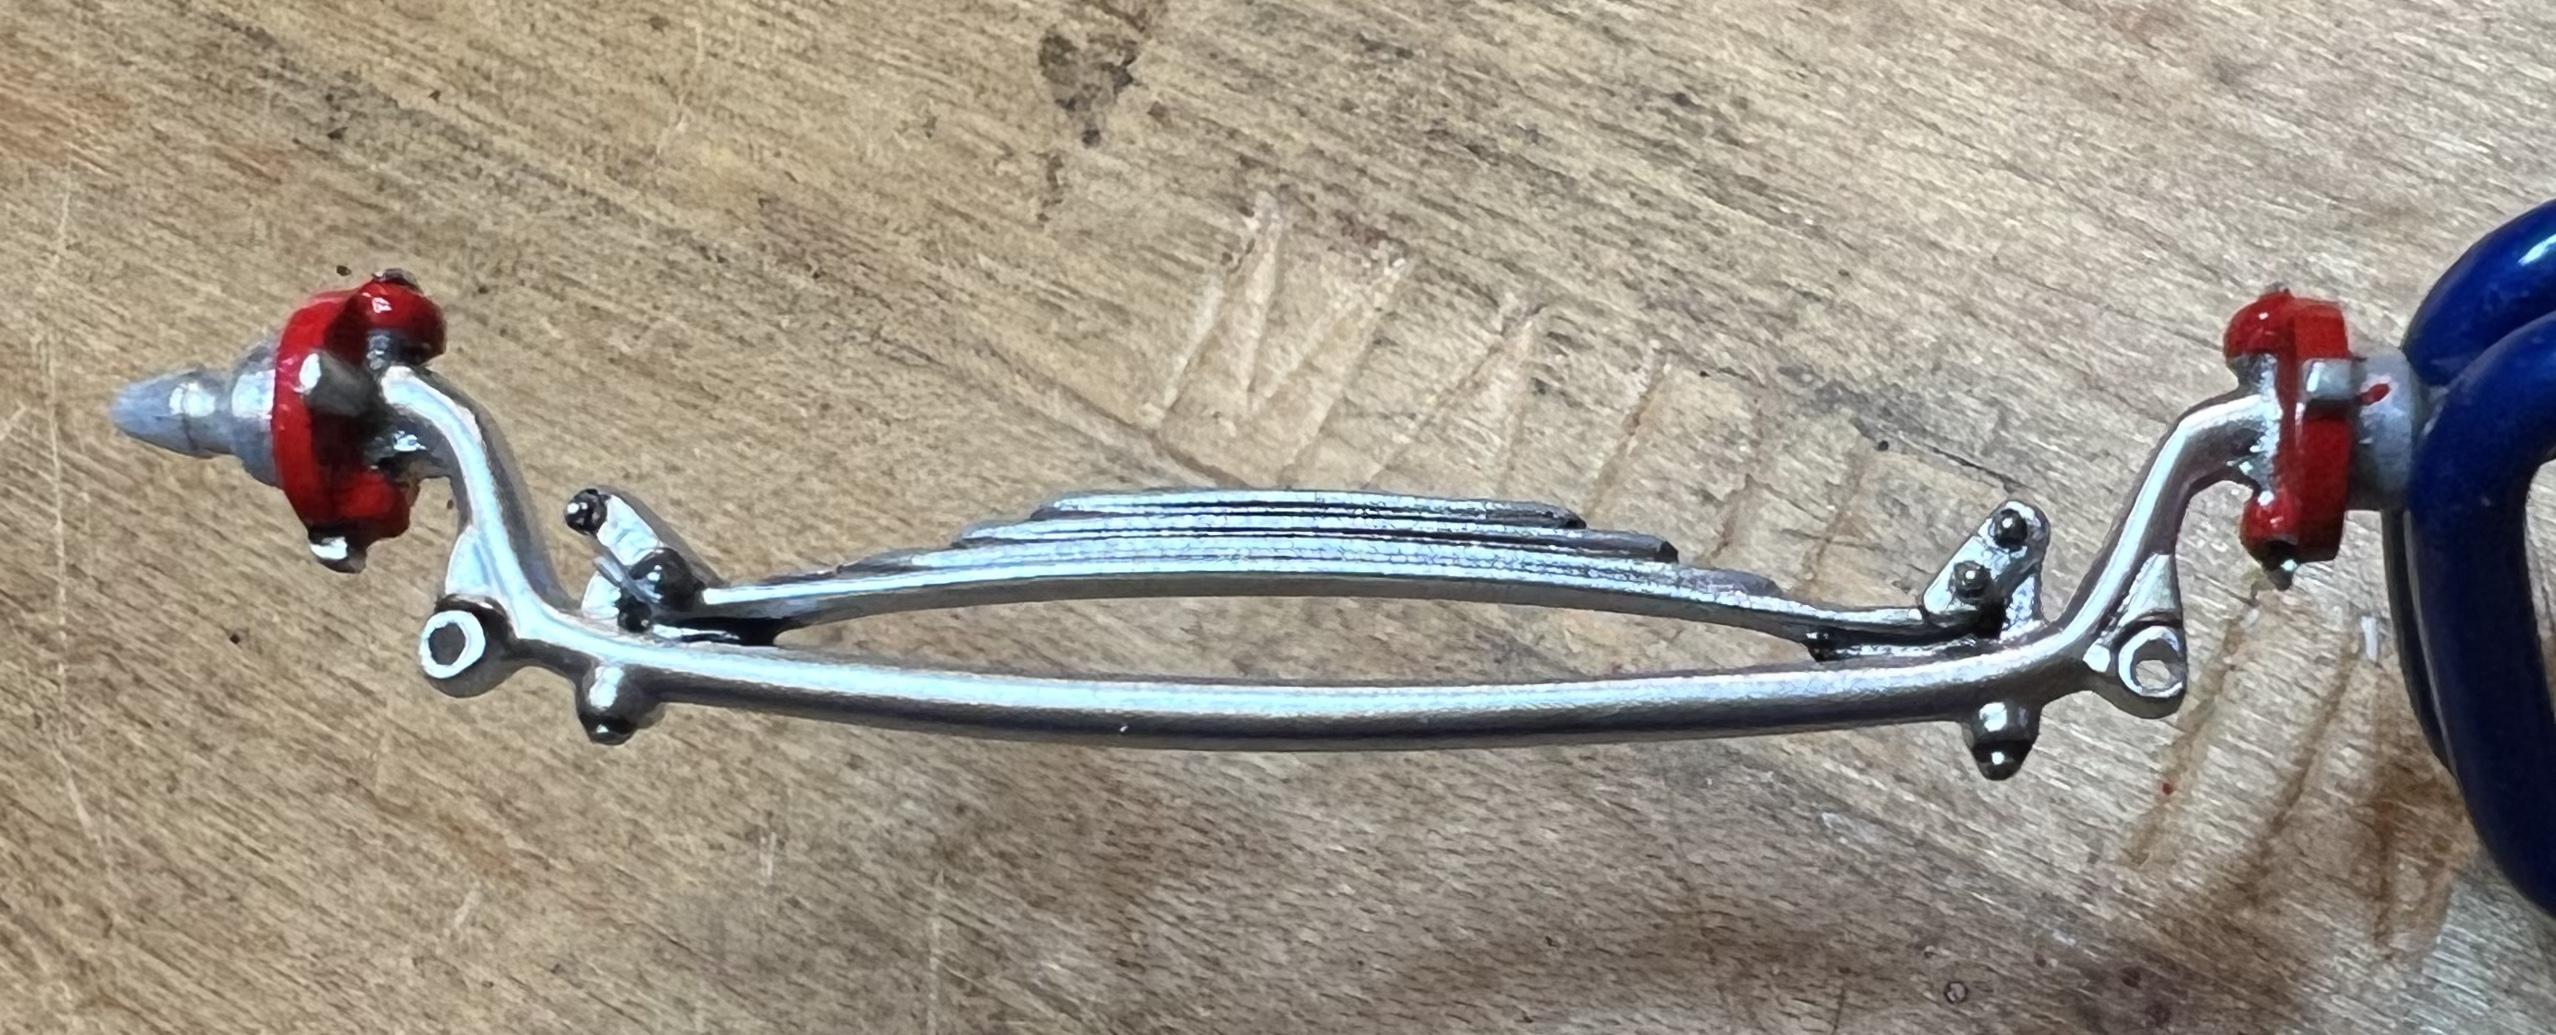
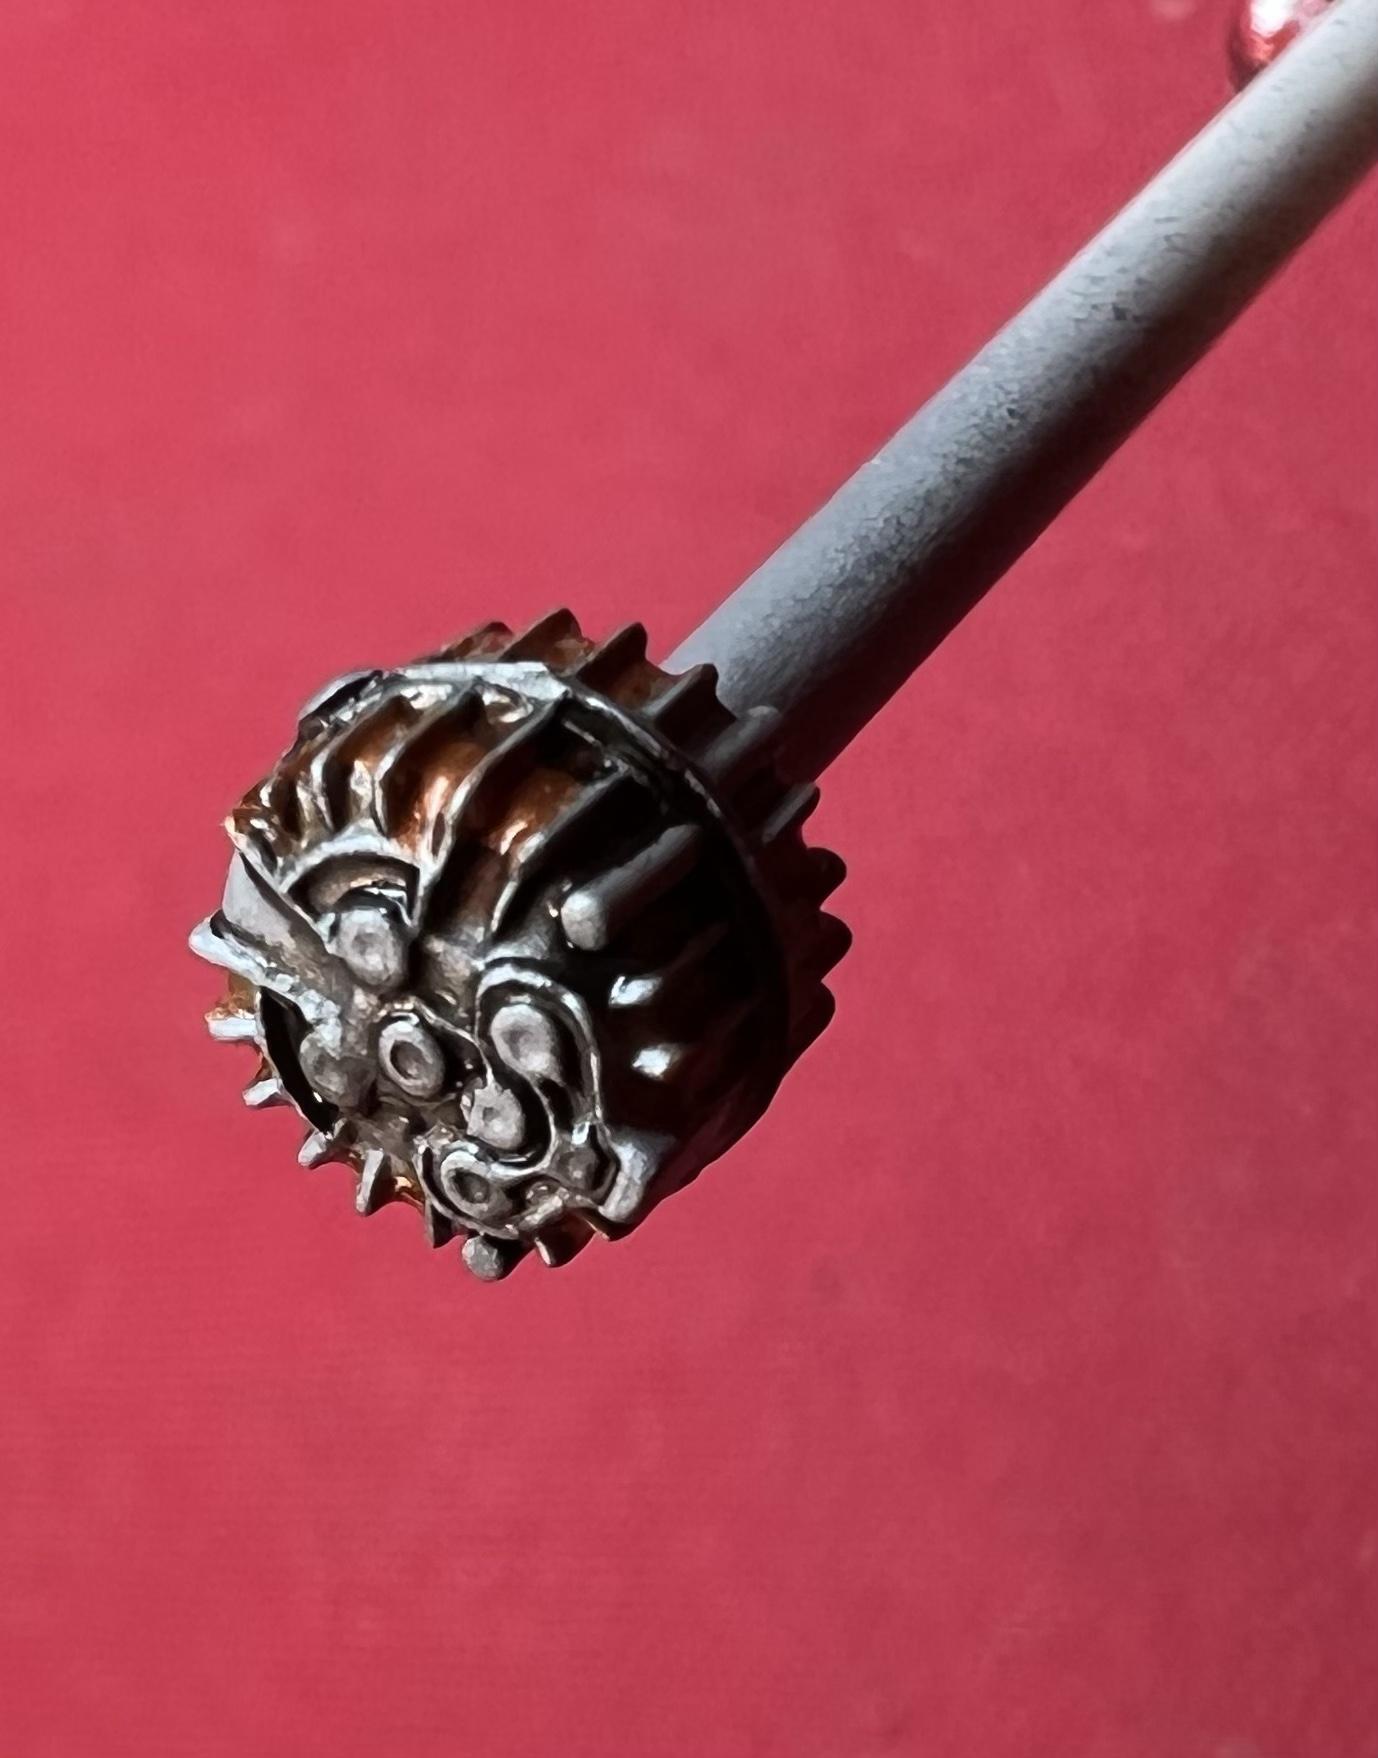
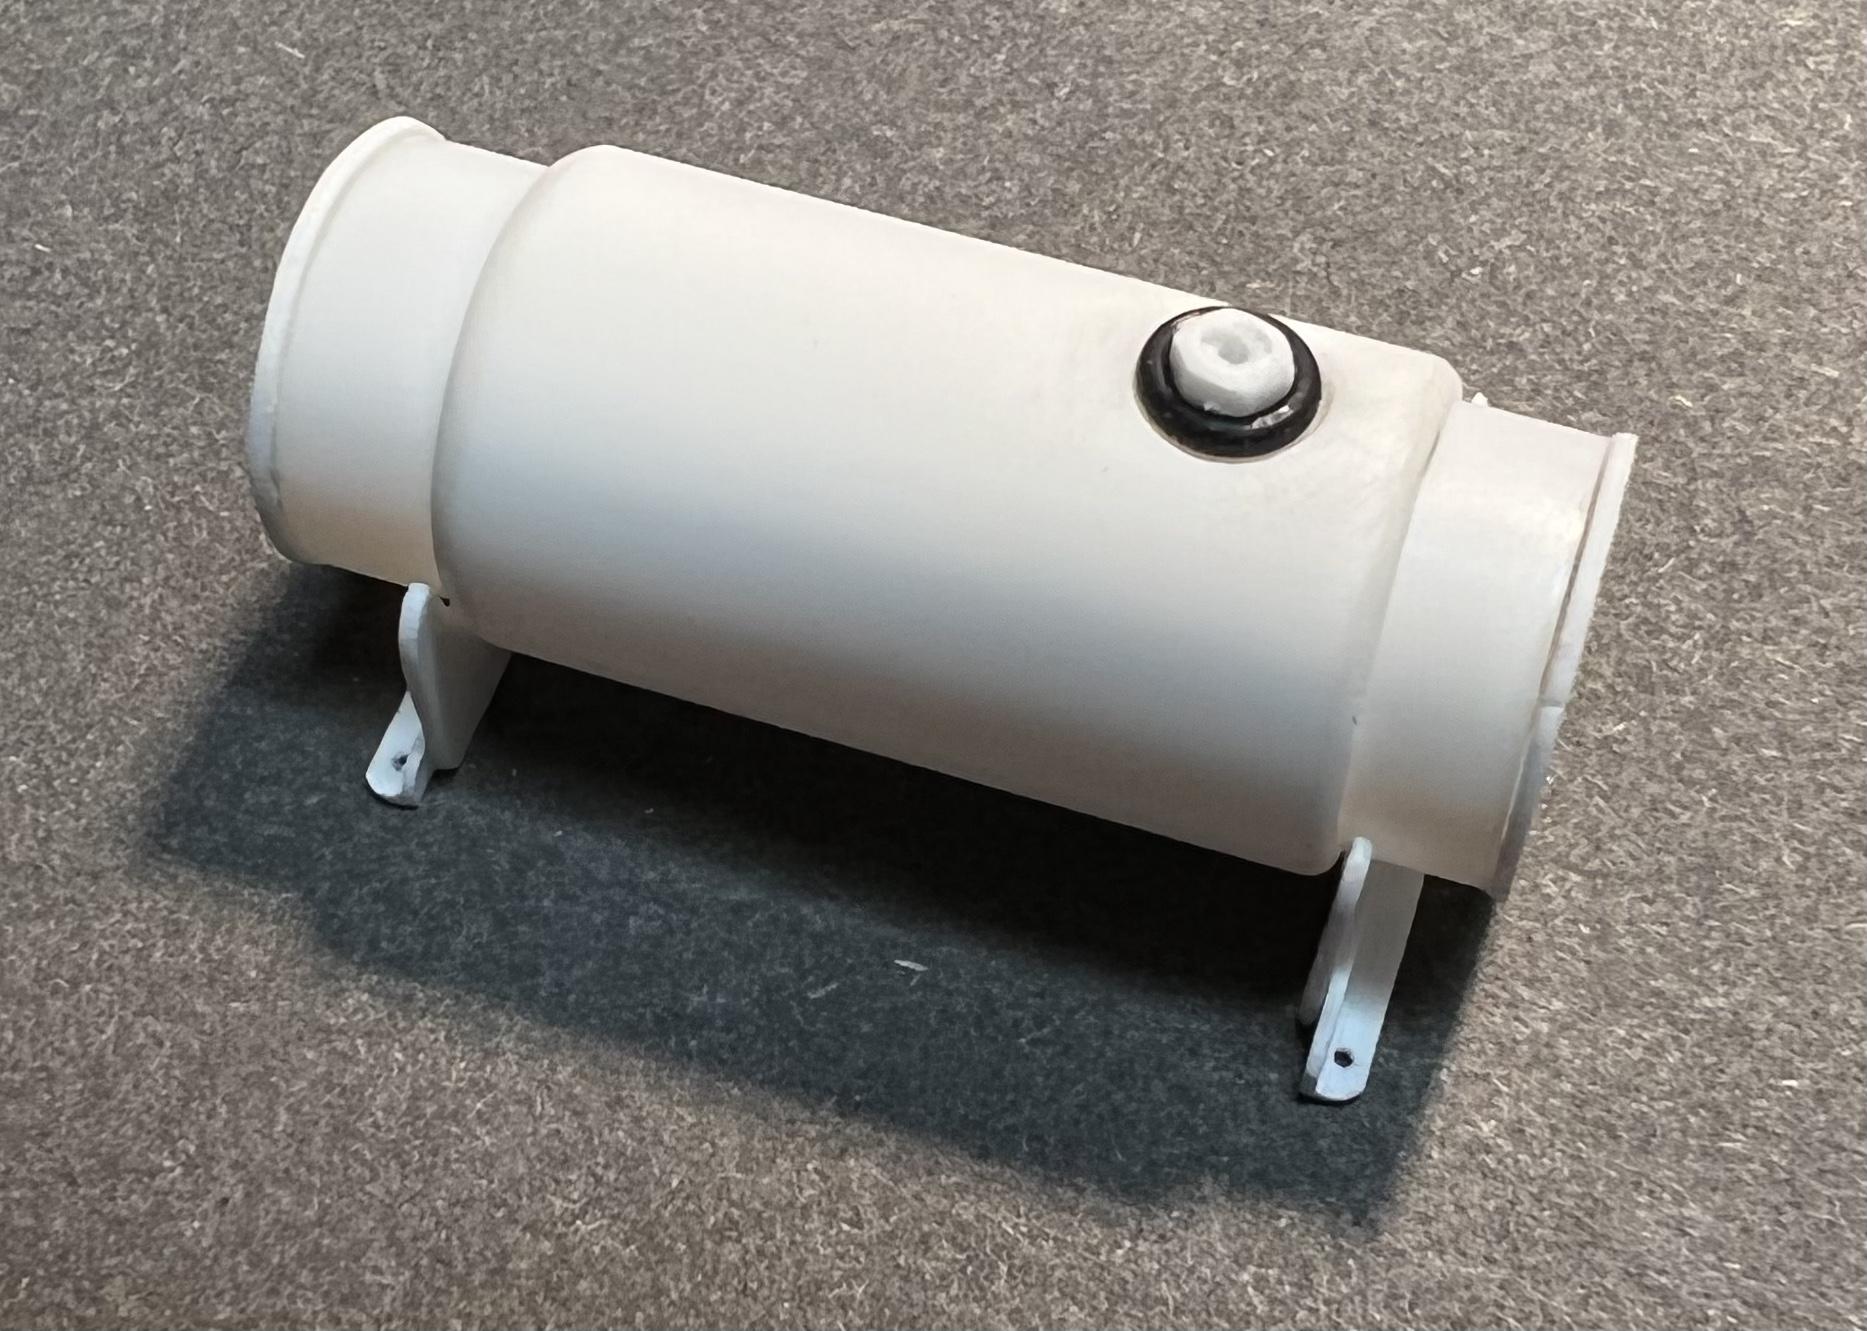
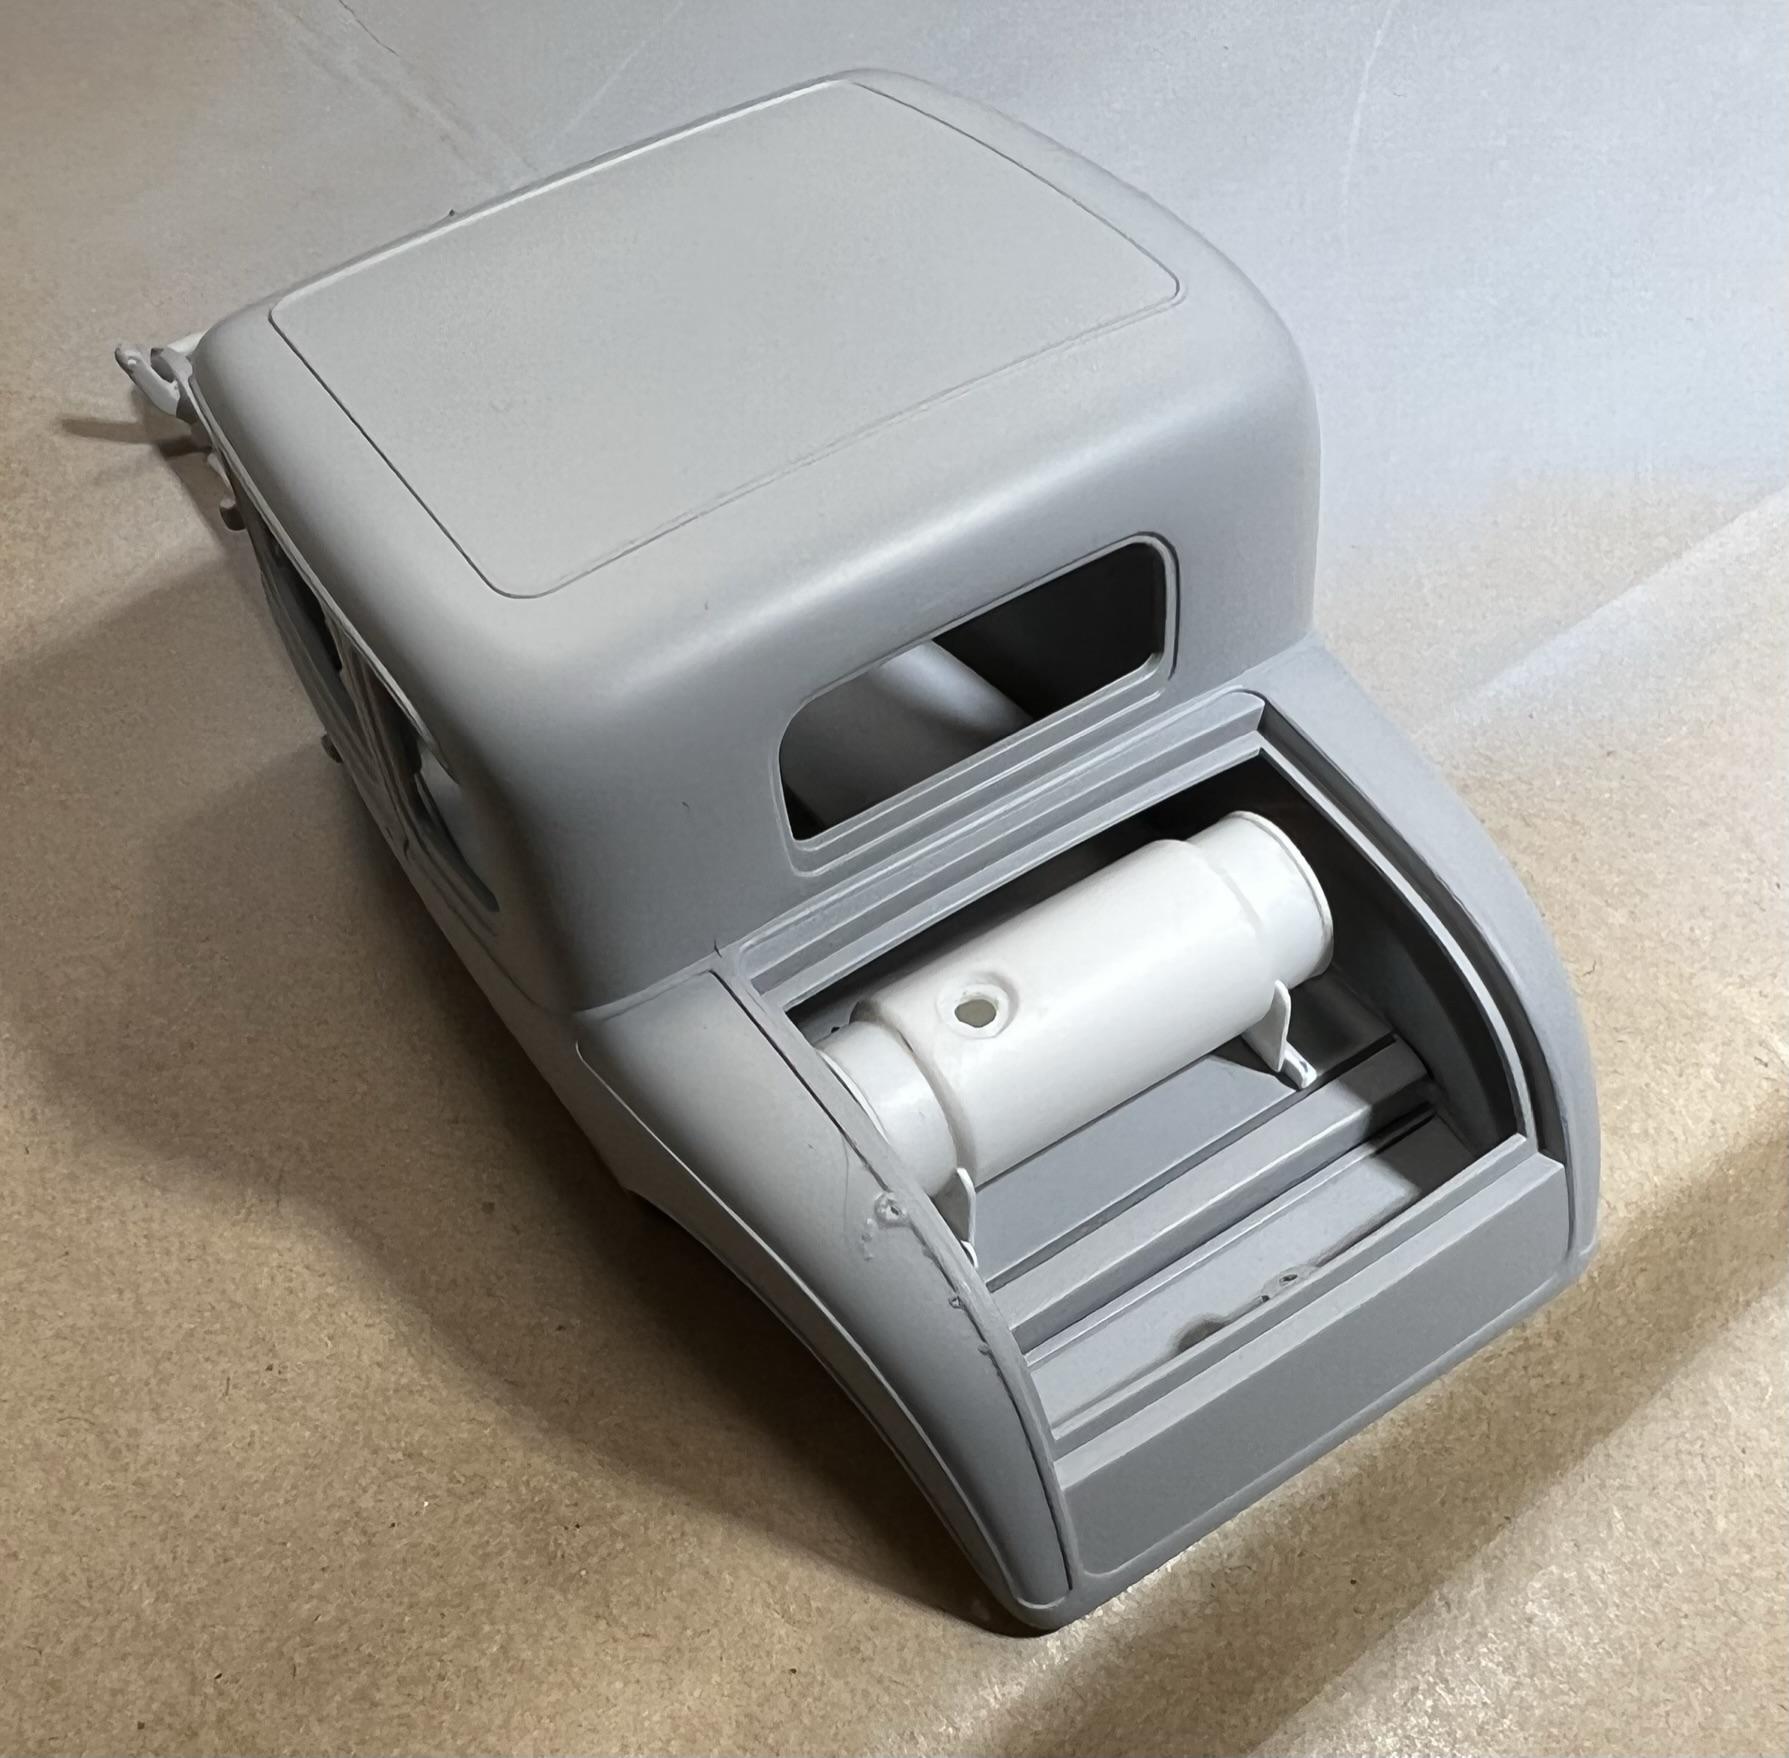
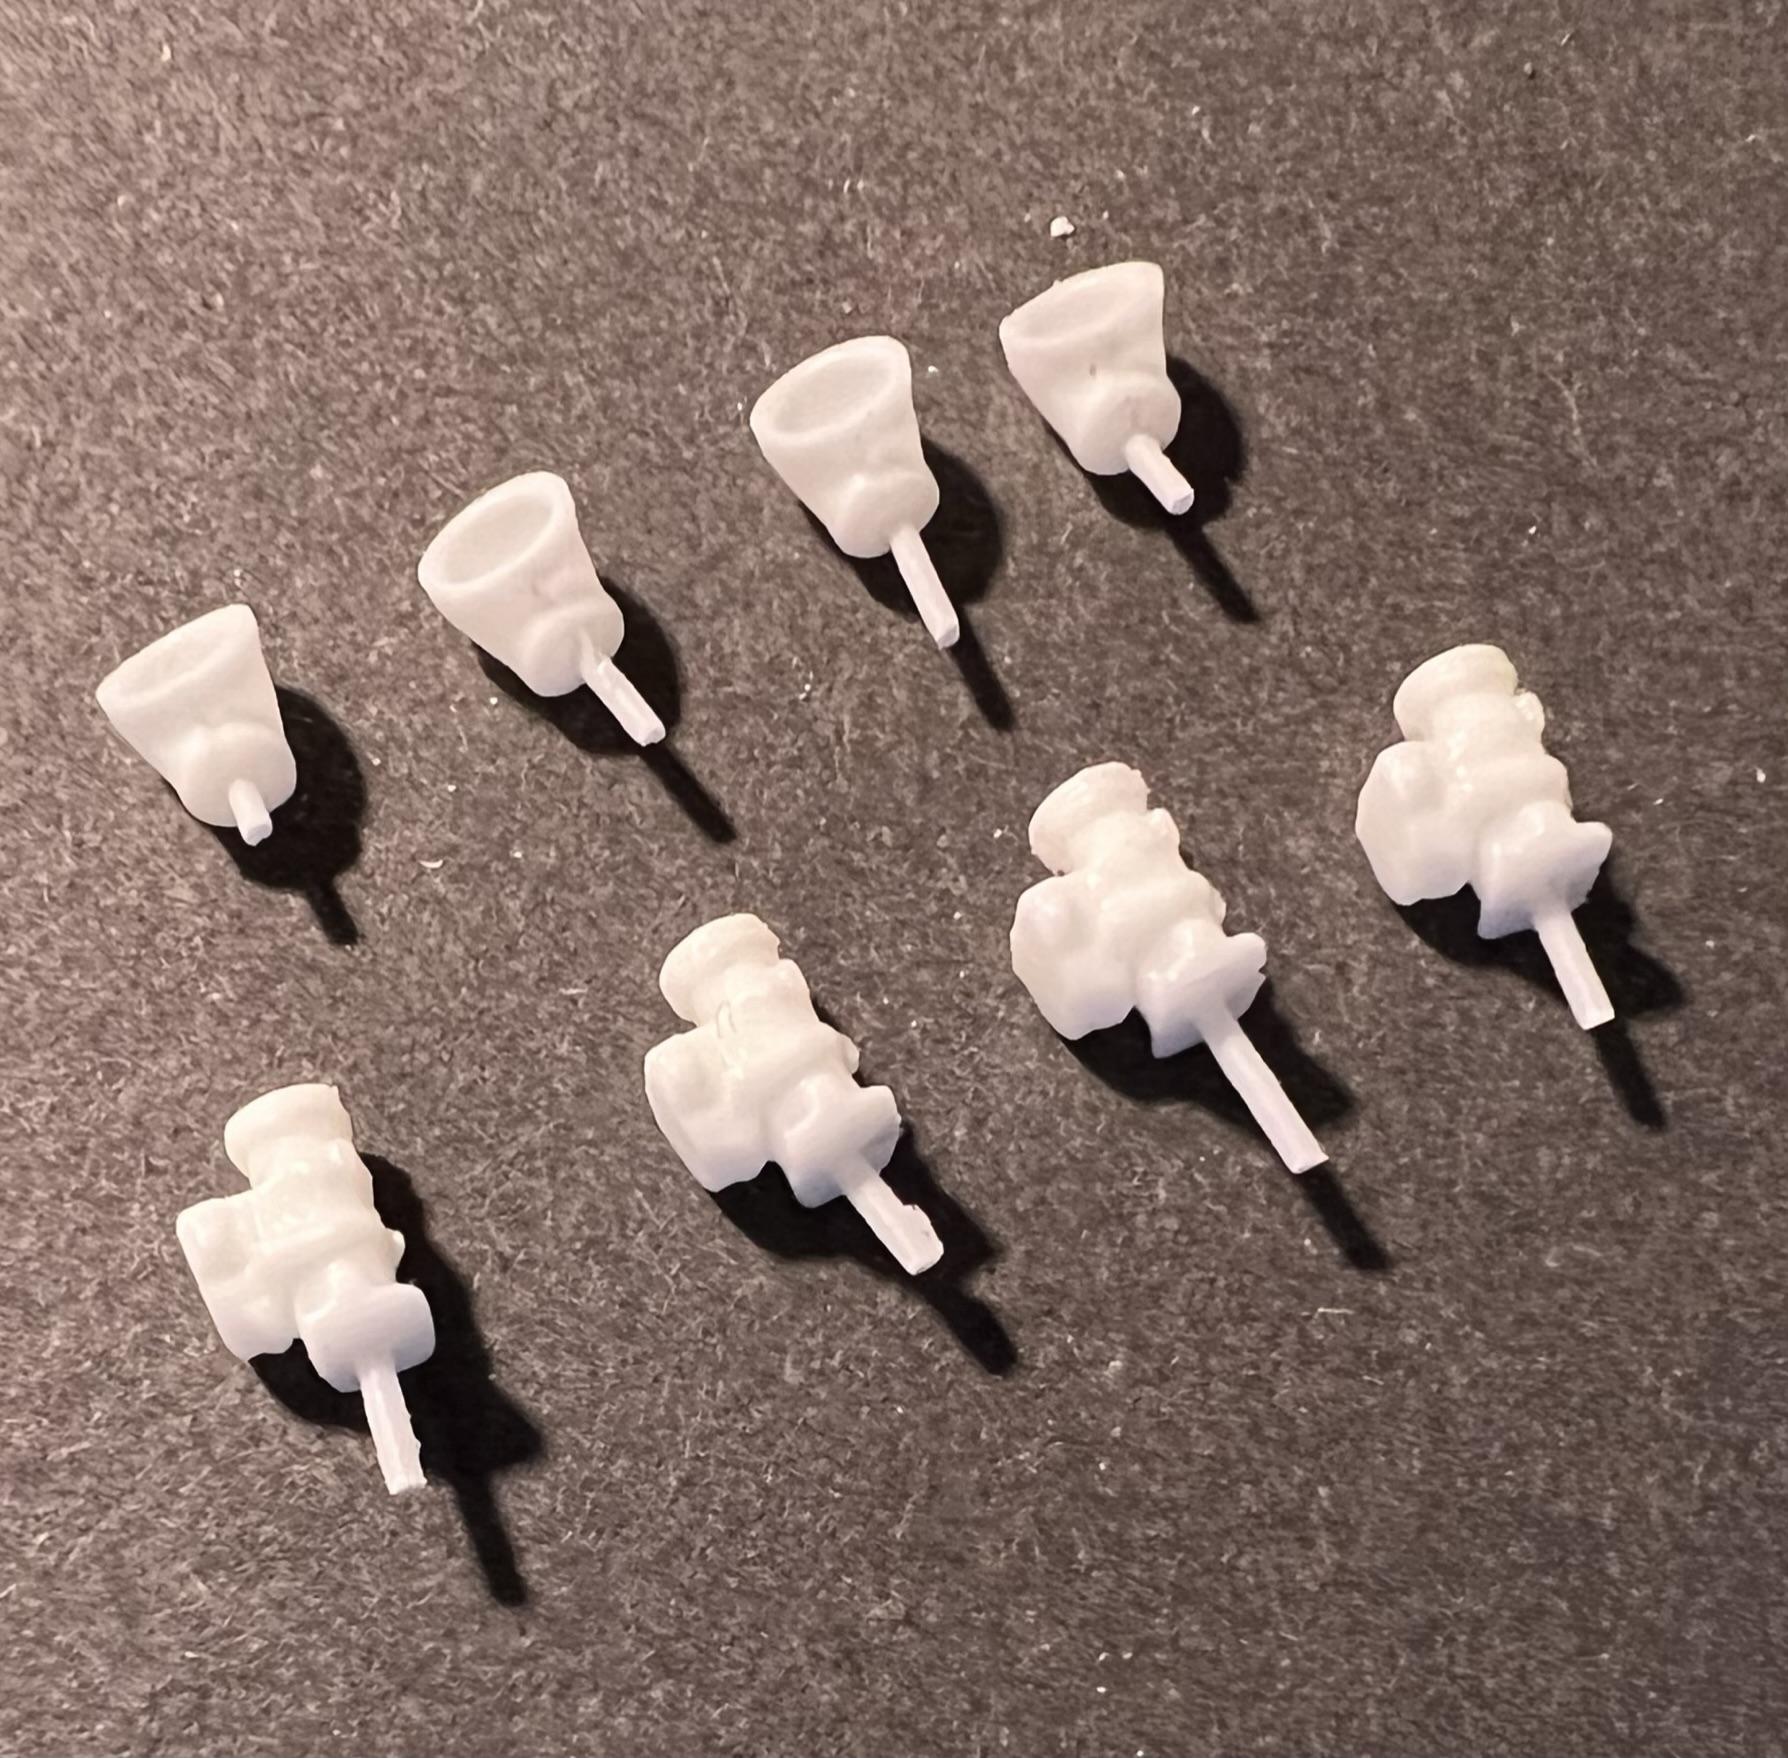
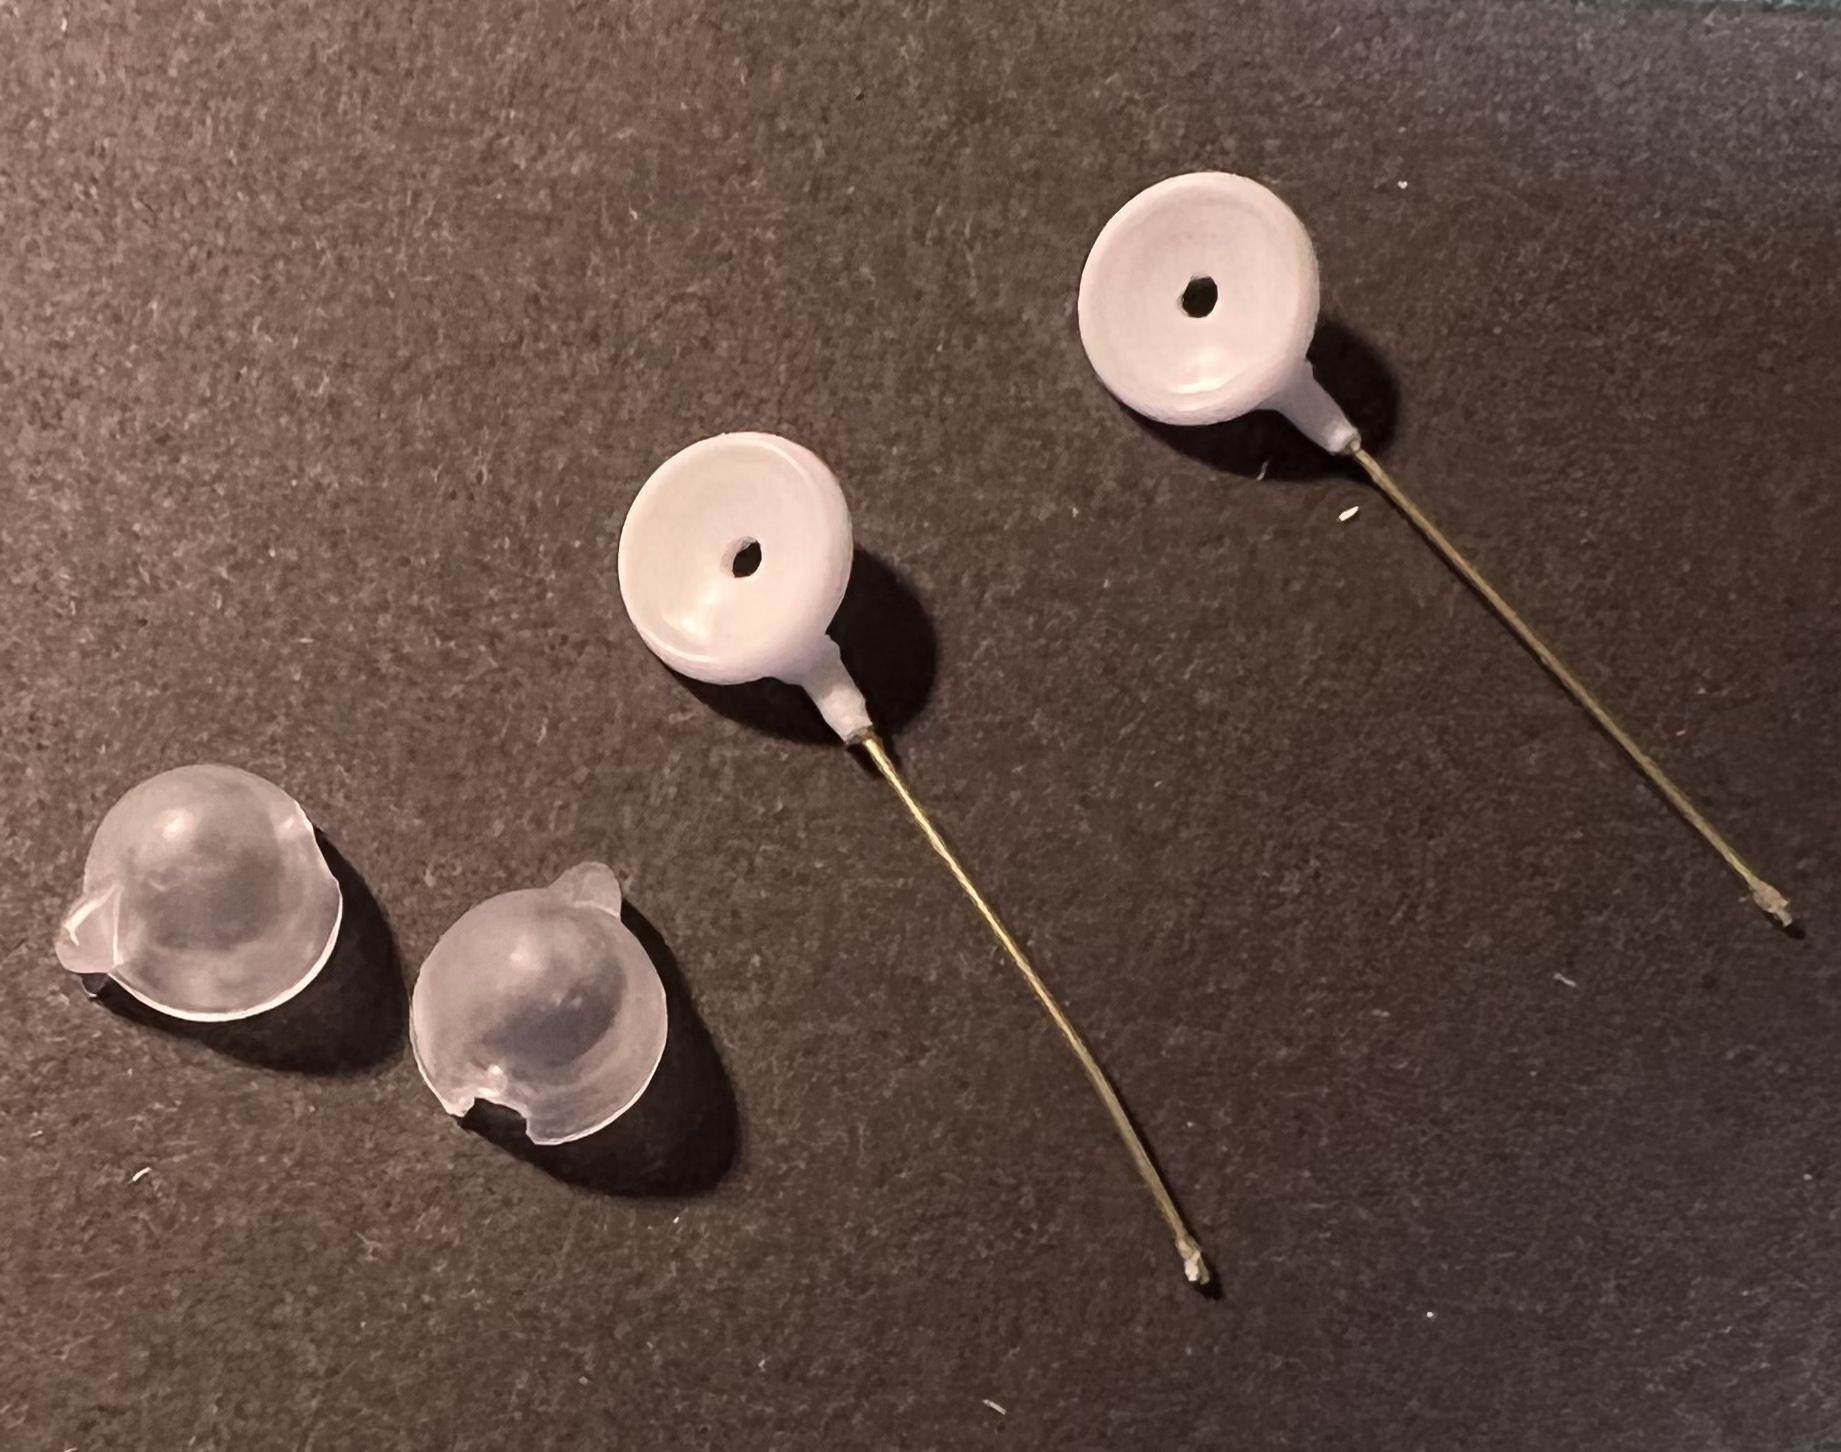
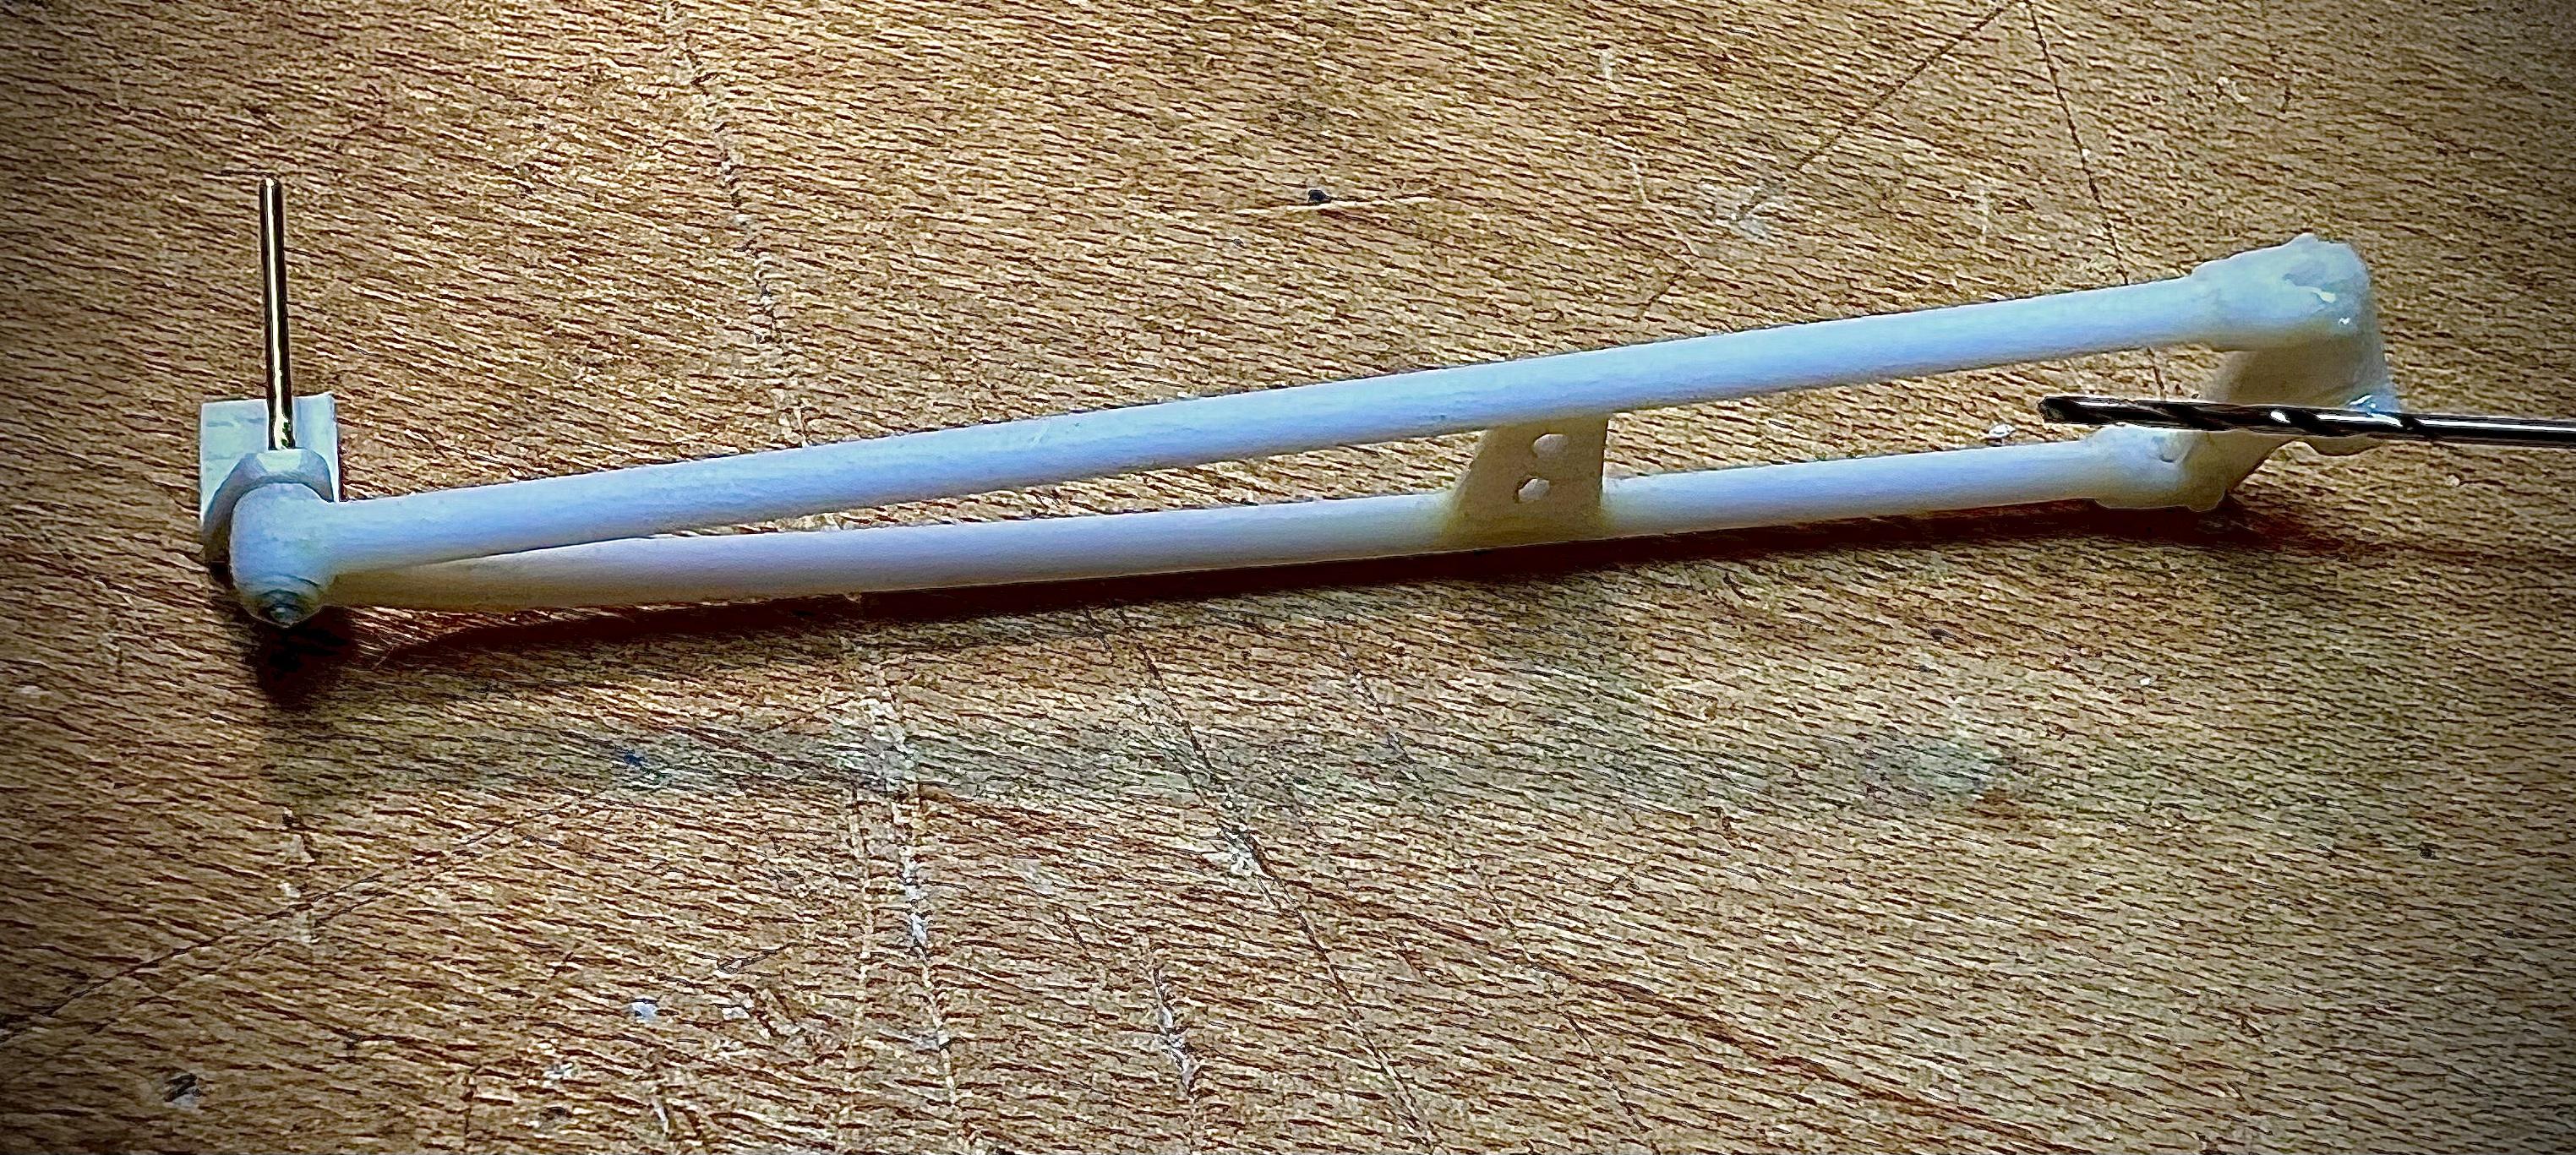
Yesterday tidied up the paint room, vacuumed, and lay down new paper in the spray booth to get it ready to roll today. Spent most of the day getting all the prepped pieces primed and further work on remaining parts. Had a great time finishing off the gas tank which will reside in the trunk. It was scratchbuilt using Evergreen tubes and shapes, including angle iron and sheet for the support bracing, round and hex rods for the filler cap & tube, and Grandt Line bolts to attach it to the trunk floor. (The photo showing the installation also shows a bit of primer blob on the right rear quarter that will be addressed.) My attention was next focussed upon the Stromberg 97s and the airscoops. These wonderful resin parts are from Replica & Miniatures Co. in their P-113 package of a 4 carb & intake manifold for the kit’s early Hemi. I drilled openings for the fuel lines in the carbs and deepened the air scoops throats with a drill bit. Also experimented with a prototype for the four fuel lines that will terminate at a fuel block on the firewall. Another item from R&M Co. is a set of vintage G 82-C headlights that are cast very cleverly with the rear bucket being separate from the chrome ring and with detailed lenses to complete the look. This allows the builder to have the housing either painted or chrome. I separated the headlights from the light bar as they will be mounted individually on the front chassis forks, drilled a hole in the rear for the housing for the cable, and drilled a hole in the reflector to mount a light bulb. Note that the housing are cast in a clear resin to help fashion the turn signal light atop it, a welcome touch.. That’s the update for today, perhaps it will rain tomorrow again and I’ll spend the day at the bench! Cheers Misha
-
Thanks for checking in Michael, Street Rodder and Rod & Custom were my go to mags for inspiration, sad that they are gone. Yes, do drag your build out, the more the merrier! Thanks Carl for the vote of confidence, time is tight! Hi Russ, I’m on the opposite end, with the mock ups I’m confident about fit, yet I still need to paint anything. Today the primer begins to go on! Keeping fingers crossed for both of us. Cheers Thanks Bob, opening the cowl vents has been on my mind for awhile with this being the first try. So far, so good ? Thanks Phil, your west coast deuce sure turned out well! Hope to have my companion piece sitting next to yours! Thanks Rob, Deuces are a favourite of mine, have quite a few on the go! Thanks Bob, building straight out of the box has always been a challenge! Thanks Steve, keep looking for the rainy days as I can spend the entire day at the bench! The countdown is on, I can see the calendar pages flipping day by day. Plan on making it for Thursday. Thanks to all who have looked in and especially to those who have left comments! Spent yesterday vacuuming the paint room and getting most of the parts cleaned and mounted for white or grey primer. Regardless of weather today, it’s going to be a paint day! Cheers to all on this holiday weekend! Misha
-
'32 Chevrolet Cabriolet....Traditional-ish...Update 7/23/22
Misha replied to Plowboy's topic in WIP: Model Cars
Originally the kit was brought out by MPC and I believe it was part of the Gangster series. It was accompanied by a sedan delivery with open double doors at the rear, would make a decent paddy wagon. Unfortunately the panel was heavily modified to unacceptable standards and has remained lost. It’s a decent kit with it’s fit issues regarding small parts yet Roger you’re taking it further with your mods, bravo! The wheel choice looks great and updates the ride past the wire rim era. I’ll be following, cheers Misha -
Great looking replica Gustavo from the iconic Beach movies. As a youngster of around eight years old the combination of cars and sand could not be beat! I was still learning English at the time, yet the films captivated me with the images even if I was unable to follow the dialogue. Your model brings back memories of those carefree days. Congrats on a a clean and evocative build, cheers Misha
-
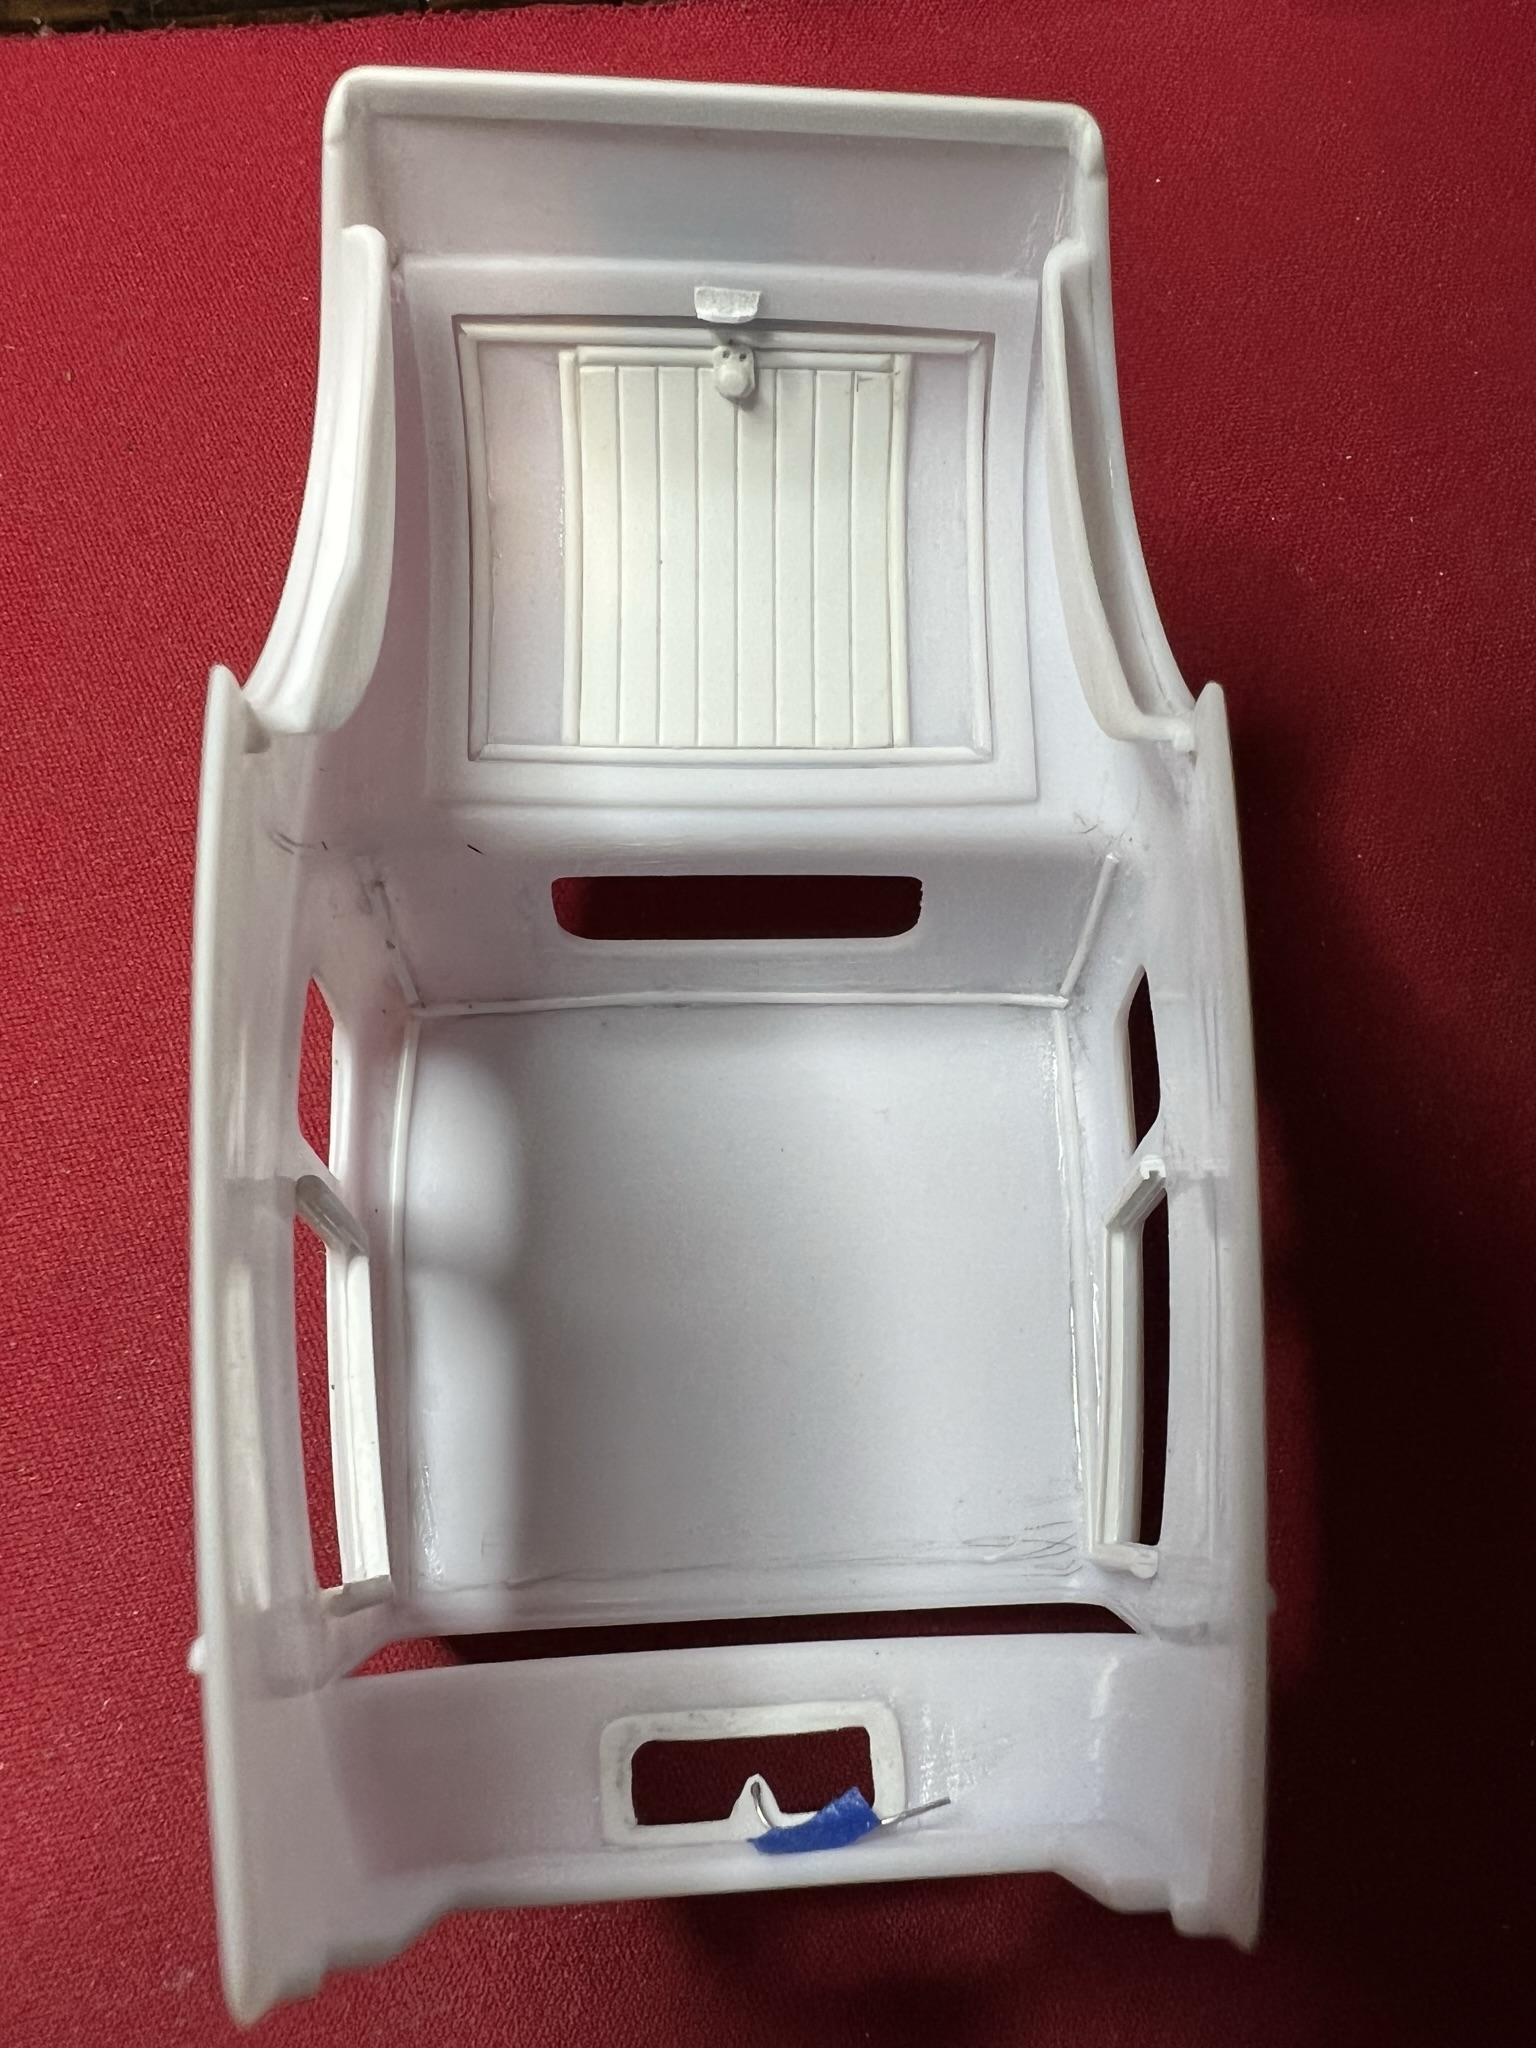
Been nearly a month since the last posting during which I have struggled to get to the bench in light of garden work and other duties at this time of year. Yet the time spent has been productive, time is slipping as three weeks remain till Deuce Days! I mocked up the body/frame with the suspension to check the stance to discover that the channeling caused a severe mismatch in locating the the rear tire correctly. It’s position was remedied by moving the axle back roughly three inches. The result was a much better appearance and was accomplished by adding a new cross piece for the air bags and raising the height by an inch and a half. The change also required constructing new locating positions for the axle’s truck arms moving the front location from the tranny support to the inside of the frame. Rear axle relocated to centre the wheel Crossmember added relocating axle rearward 3” and raising it 1 1/2” Brackets added to locate the rear axle control arms Control arm and bracket The tranny cross member has been drilled out for lightening and the locating points for the control arms removed While limiting some detail work in order to save time, I was unable to resist opening up the cowl vent on the body. I first scribed out the flap with a #11 blade and attached it to a thinner strip of styrene to form the new detailed flap. The opening in the cowl was also fitted with a lip underneath to hold the flap in place and provide the mount for the rod holding the flap in position. The last bit of work was a final mockup of the interior, adding some detail to the rear bulkhead and upholstering the trunk lid underneath. Next step this morning will be to wash a tub of parts in preparation for primer. I need to focus now on this build in order to have it on the display table on Sunday, 17 July, three weeks ? Oy vey! Thanks for checking in! Comments are encouraged and welcome, cheers Misha
-
What did you see on the road today?
Misha replied to Harry P.'s topic in General Automotive Talk (Trucks and Cars)
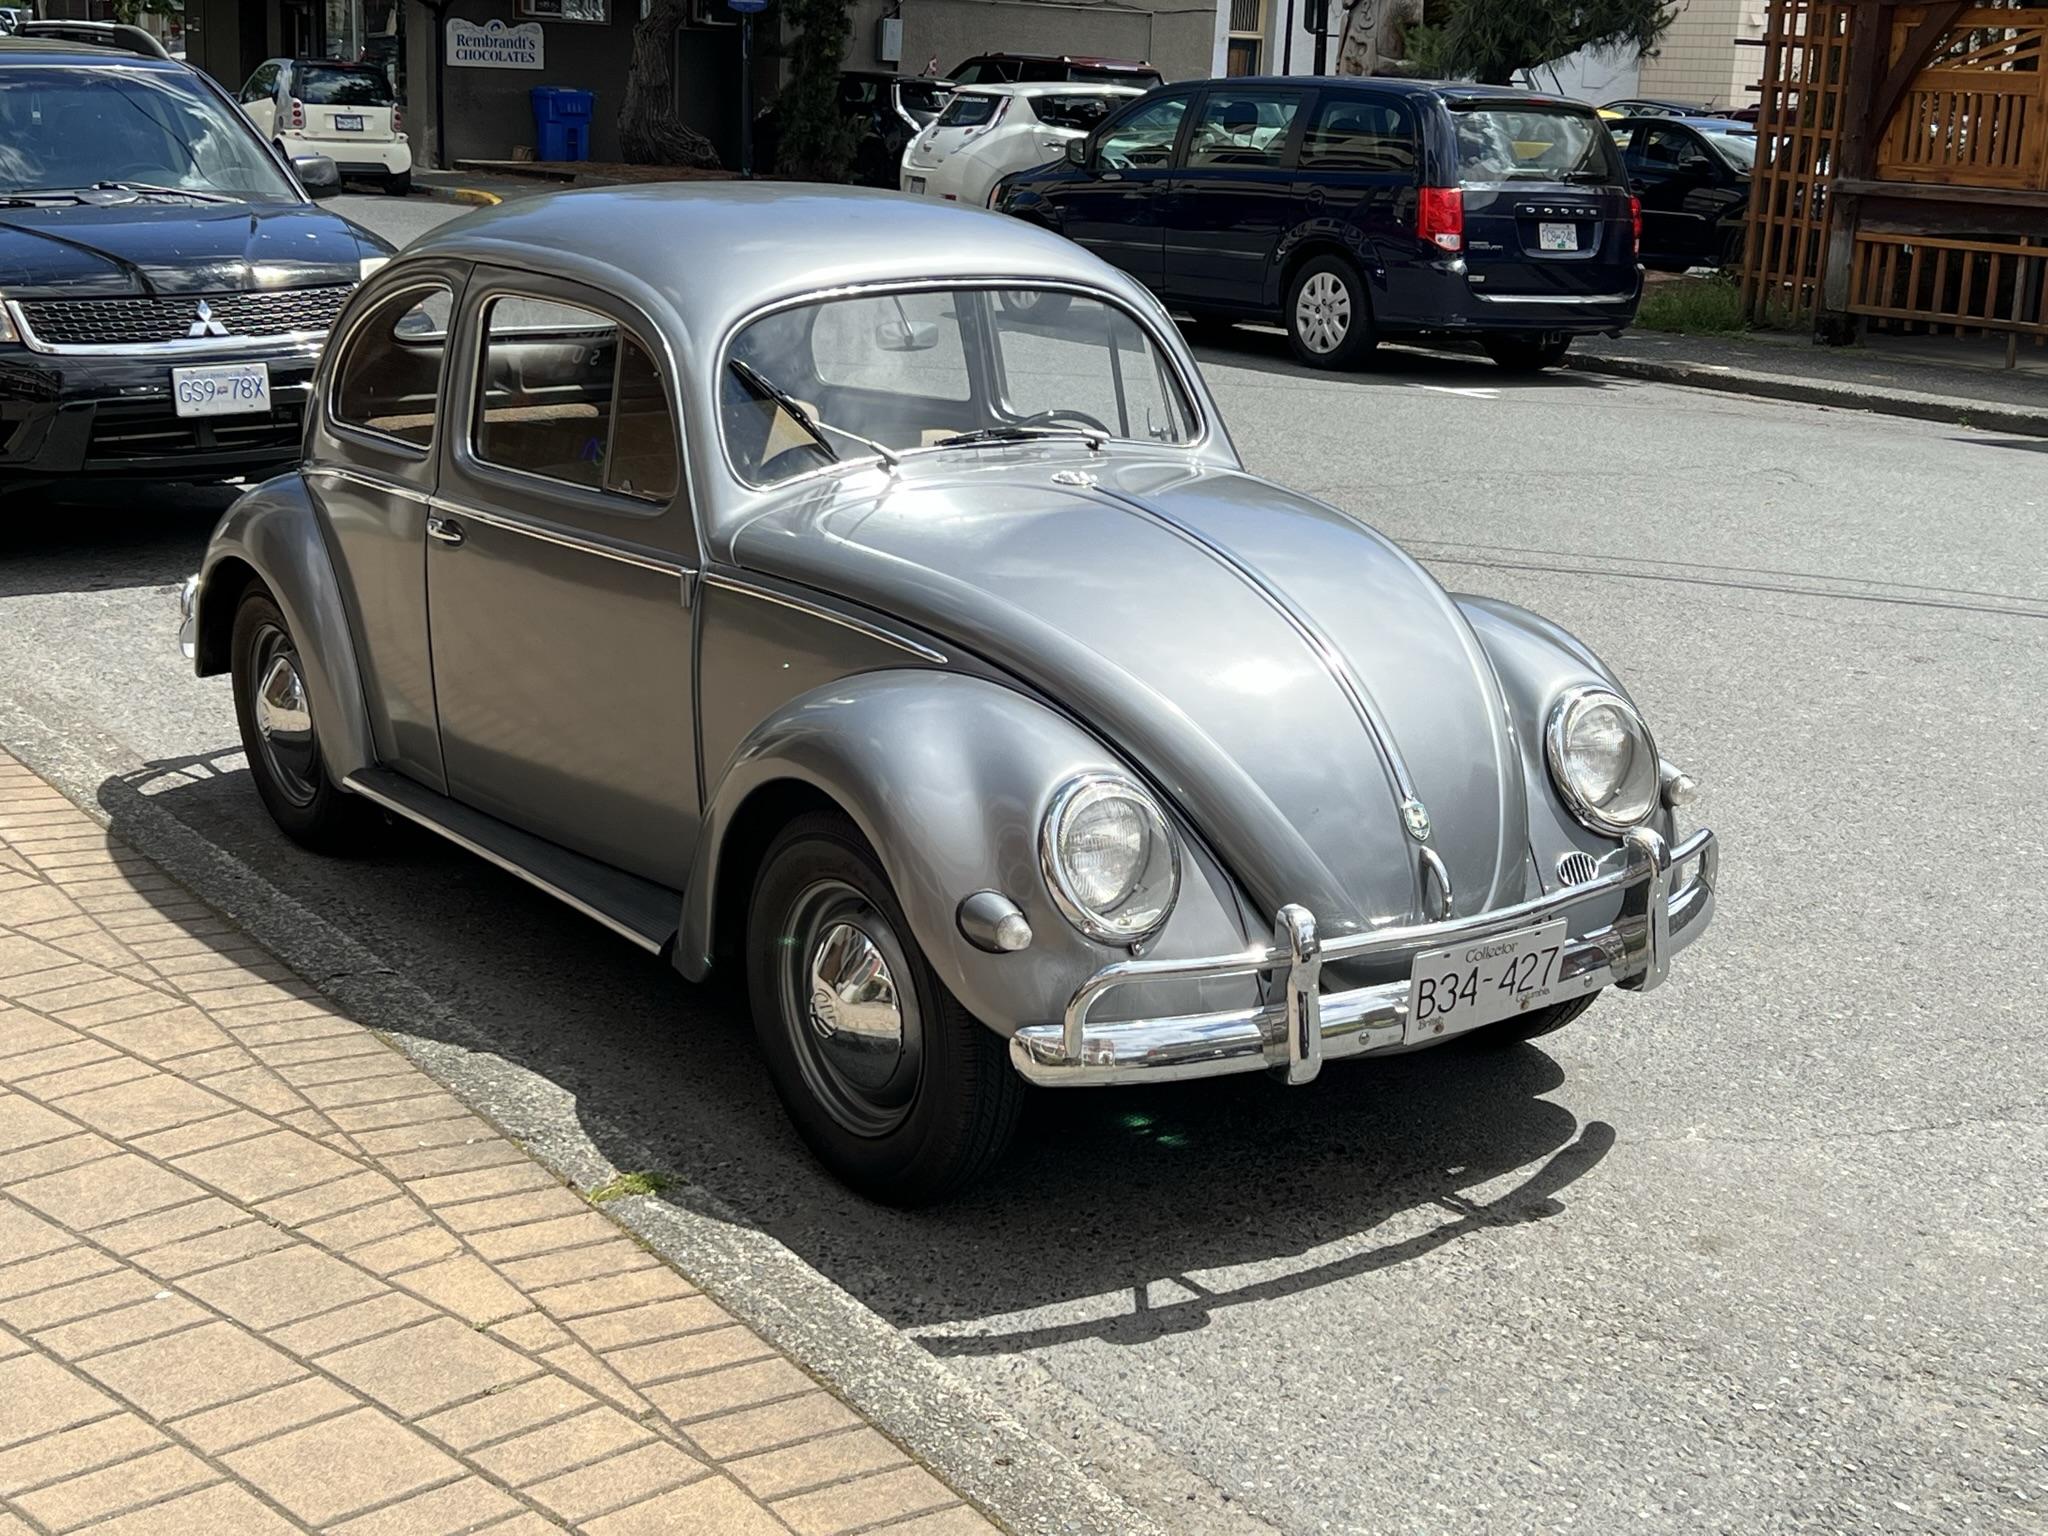
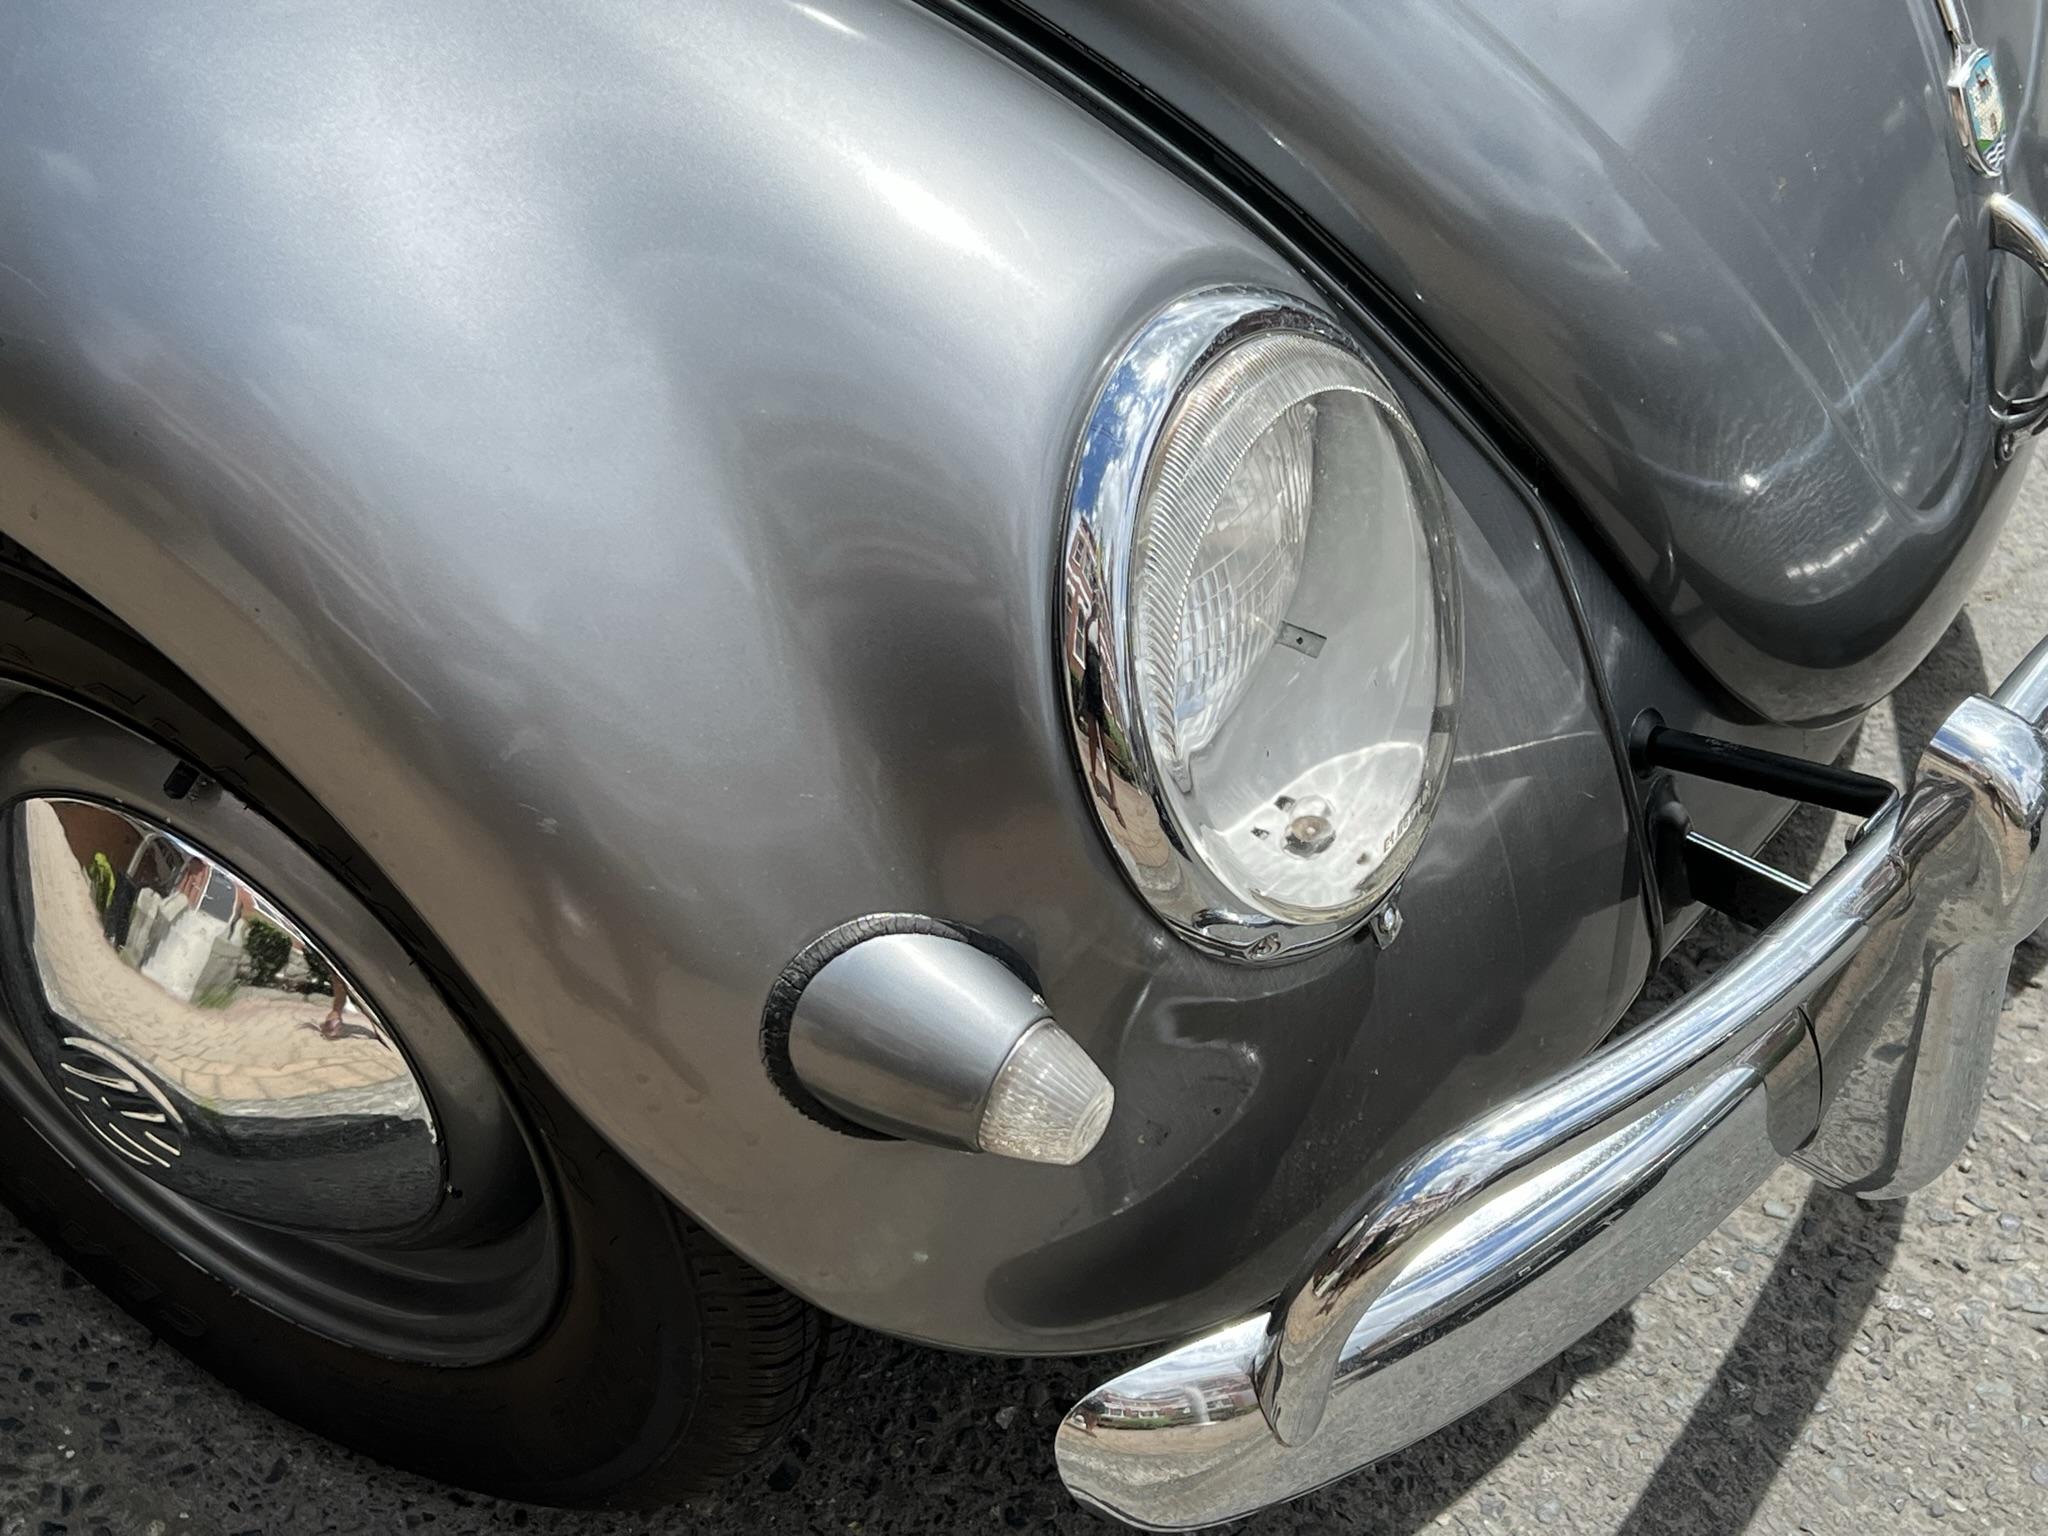
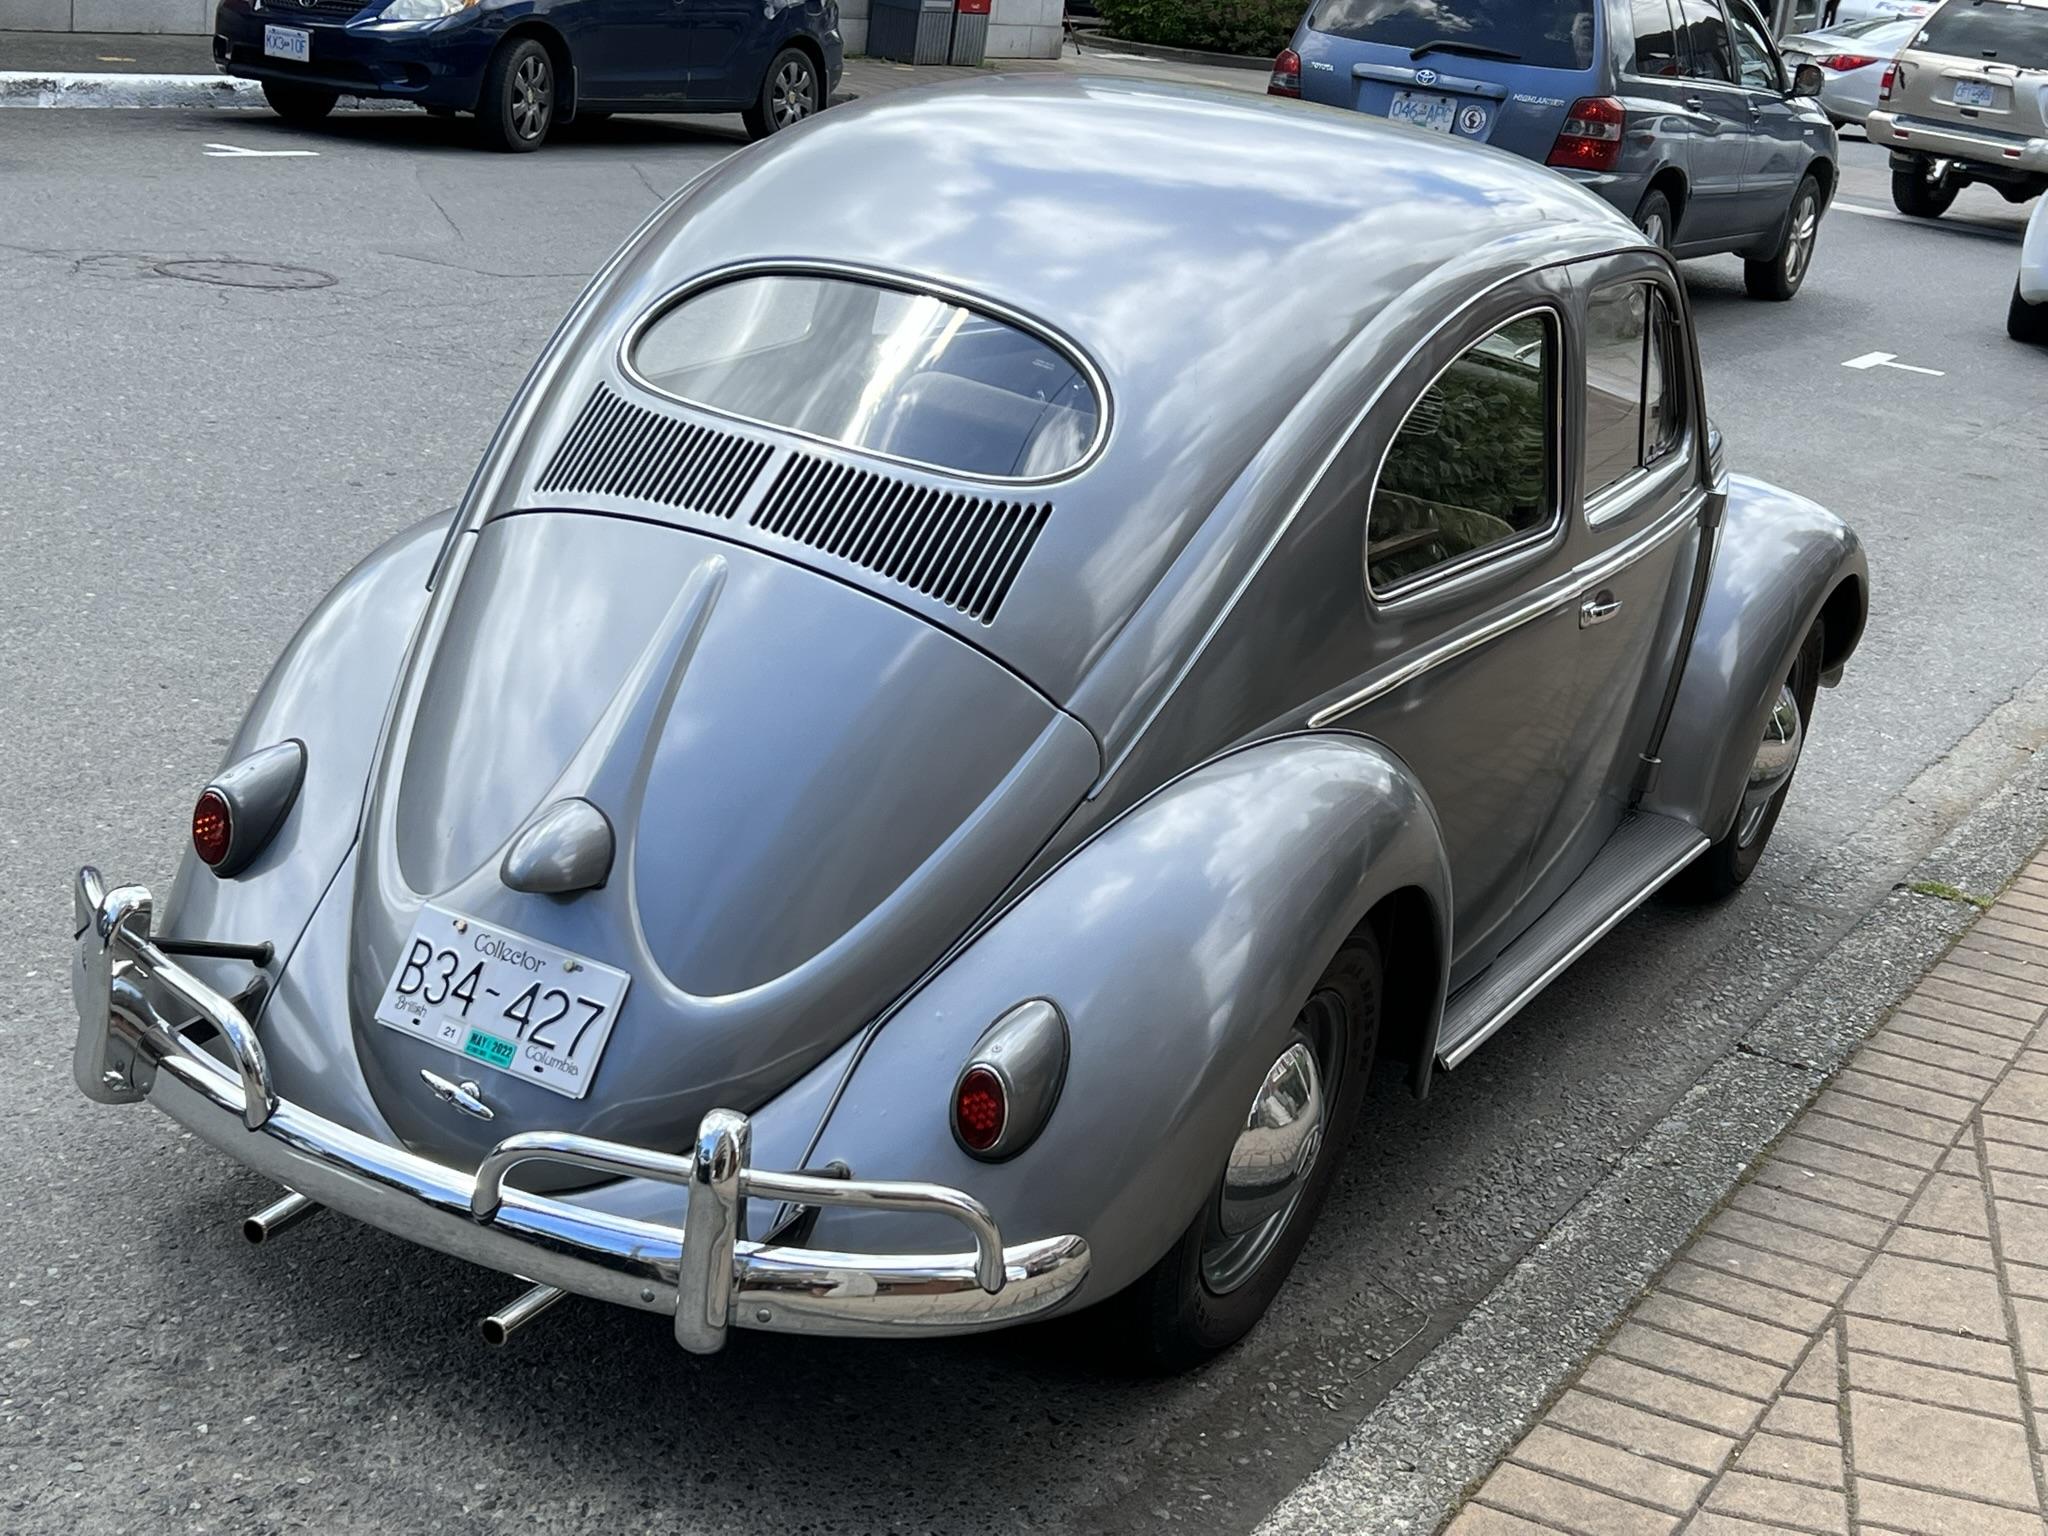
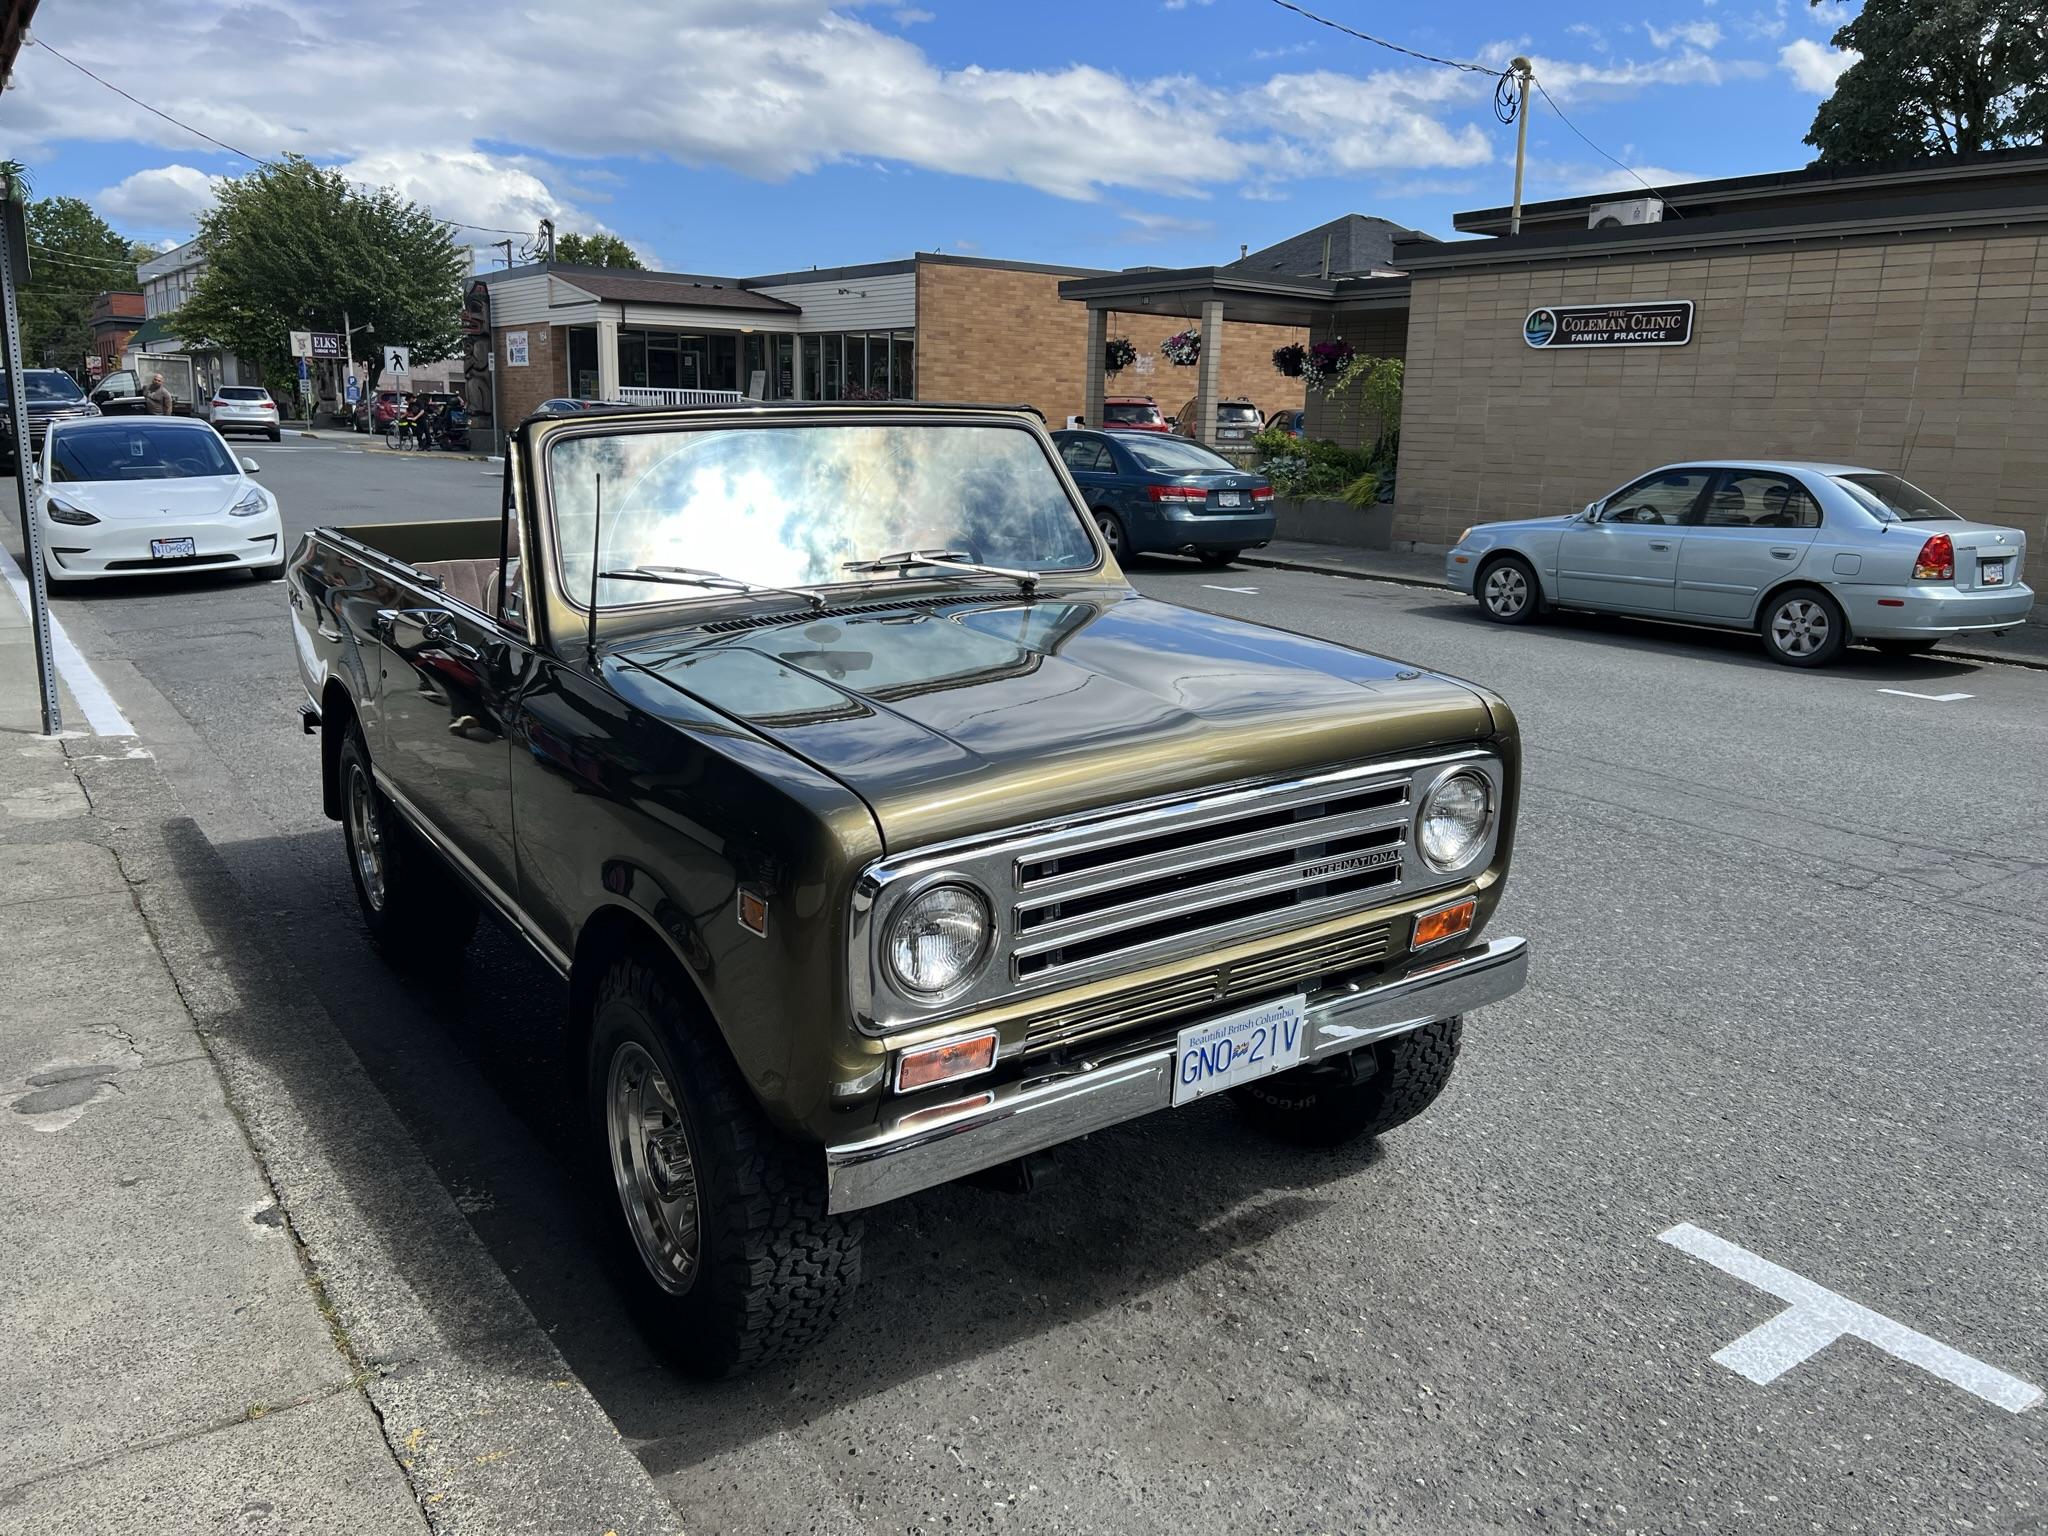
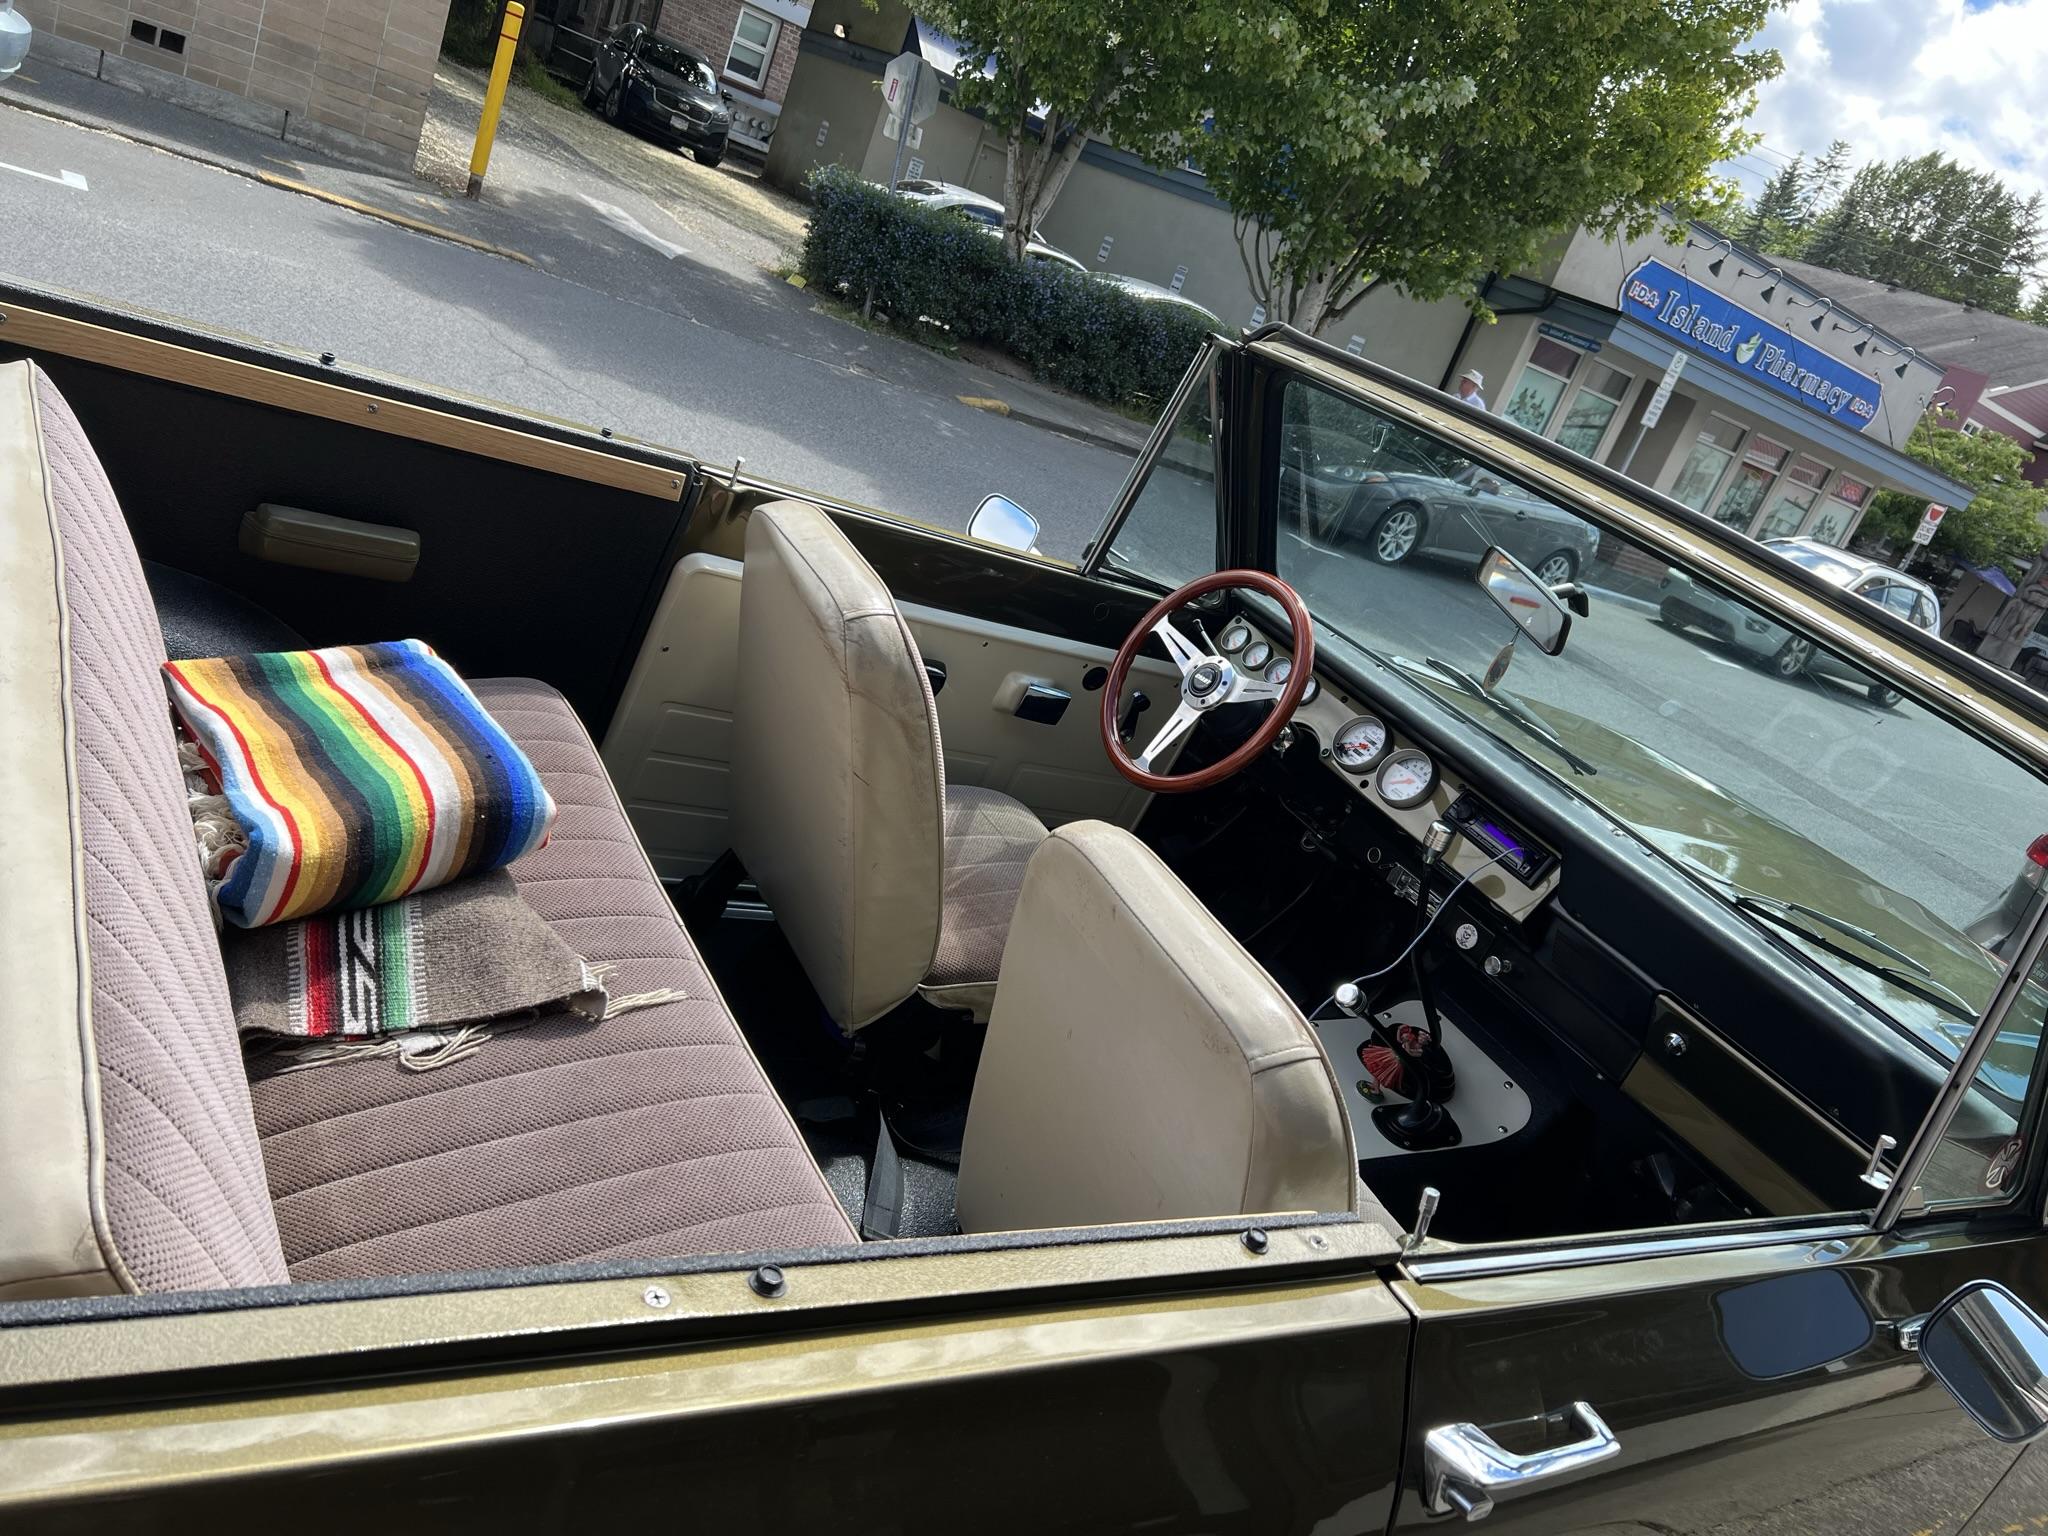
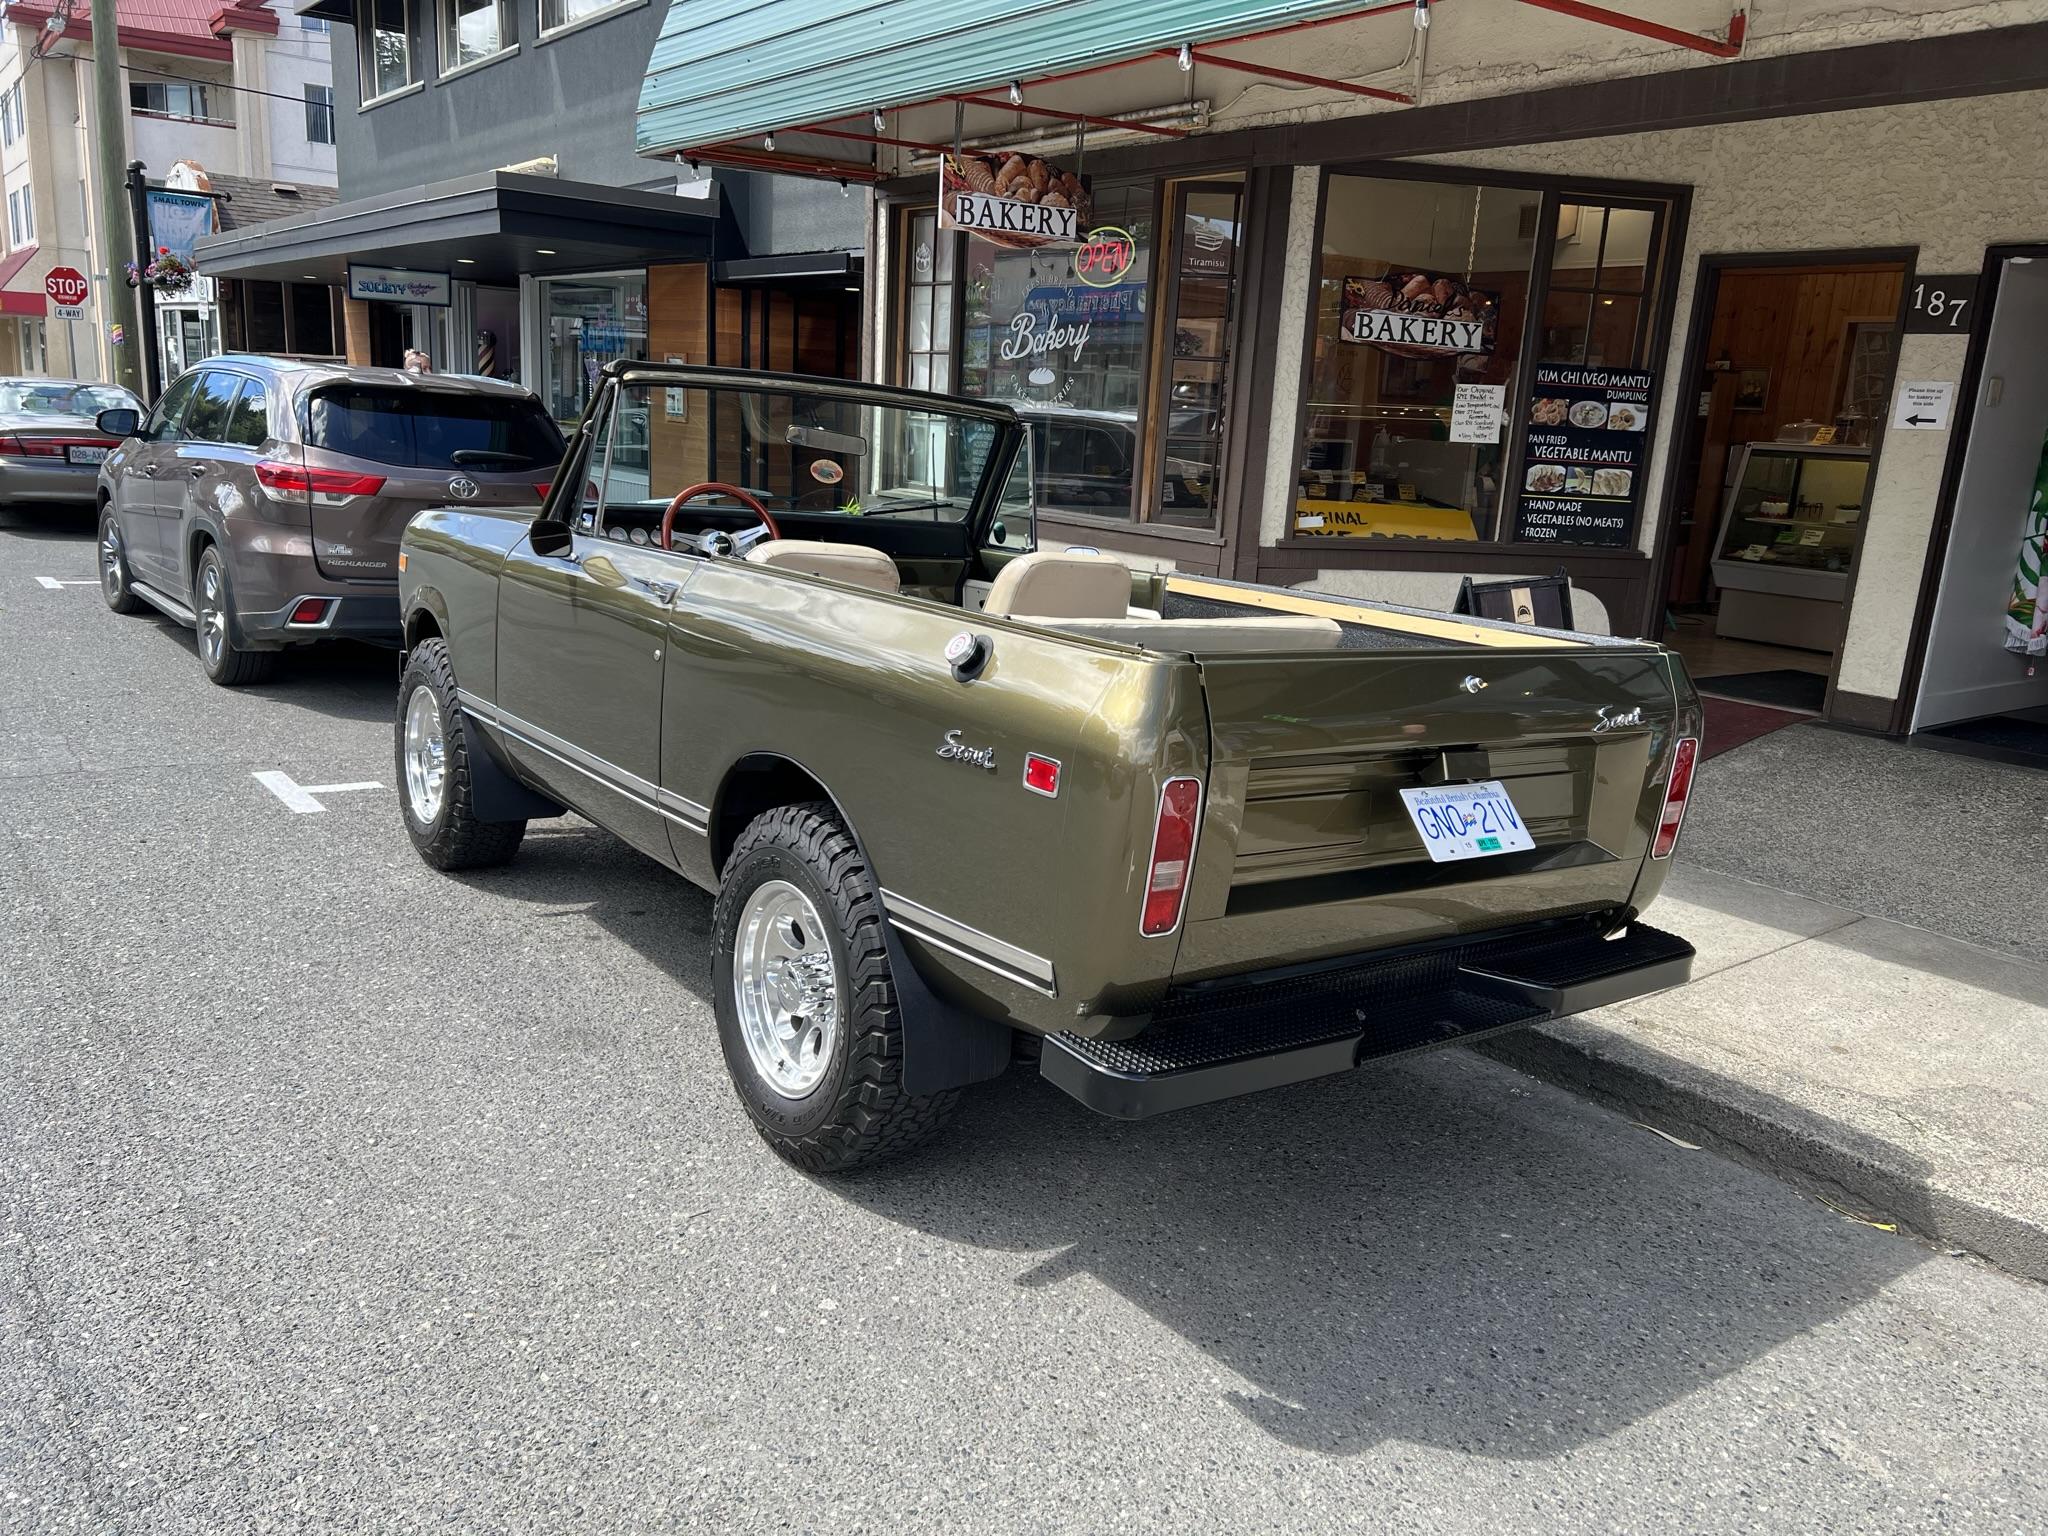
I continue to be surprised by the variety of cool vehicles in the Cowichan Valley on Vancouver Island out on the west coast of Canada! Strolling along the streets of Duncan I spotted this immaculate mid-fifties VW oval window in a gleaming pewter finish. Back in the day I had a rather rough oval window with a factory sunroof, had to park it on an incline as the starter was shot. Then I came upon a great summer vehicle, an IHC Scout all decked out for cruising to the beach! Seems that each time I come into town there’s something to catch my eye! Cheers Misha
-
Great finish on this one Dave! I really enjoy the what ifs that our hobby allows, it’s all about imagination and this one is a winner. Cheers Misha
-
What did you see on the road today?
Misha replied to Harry P.'s topic in General Automotive Talk (Trucks and Cars)
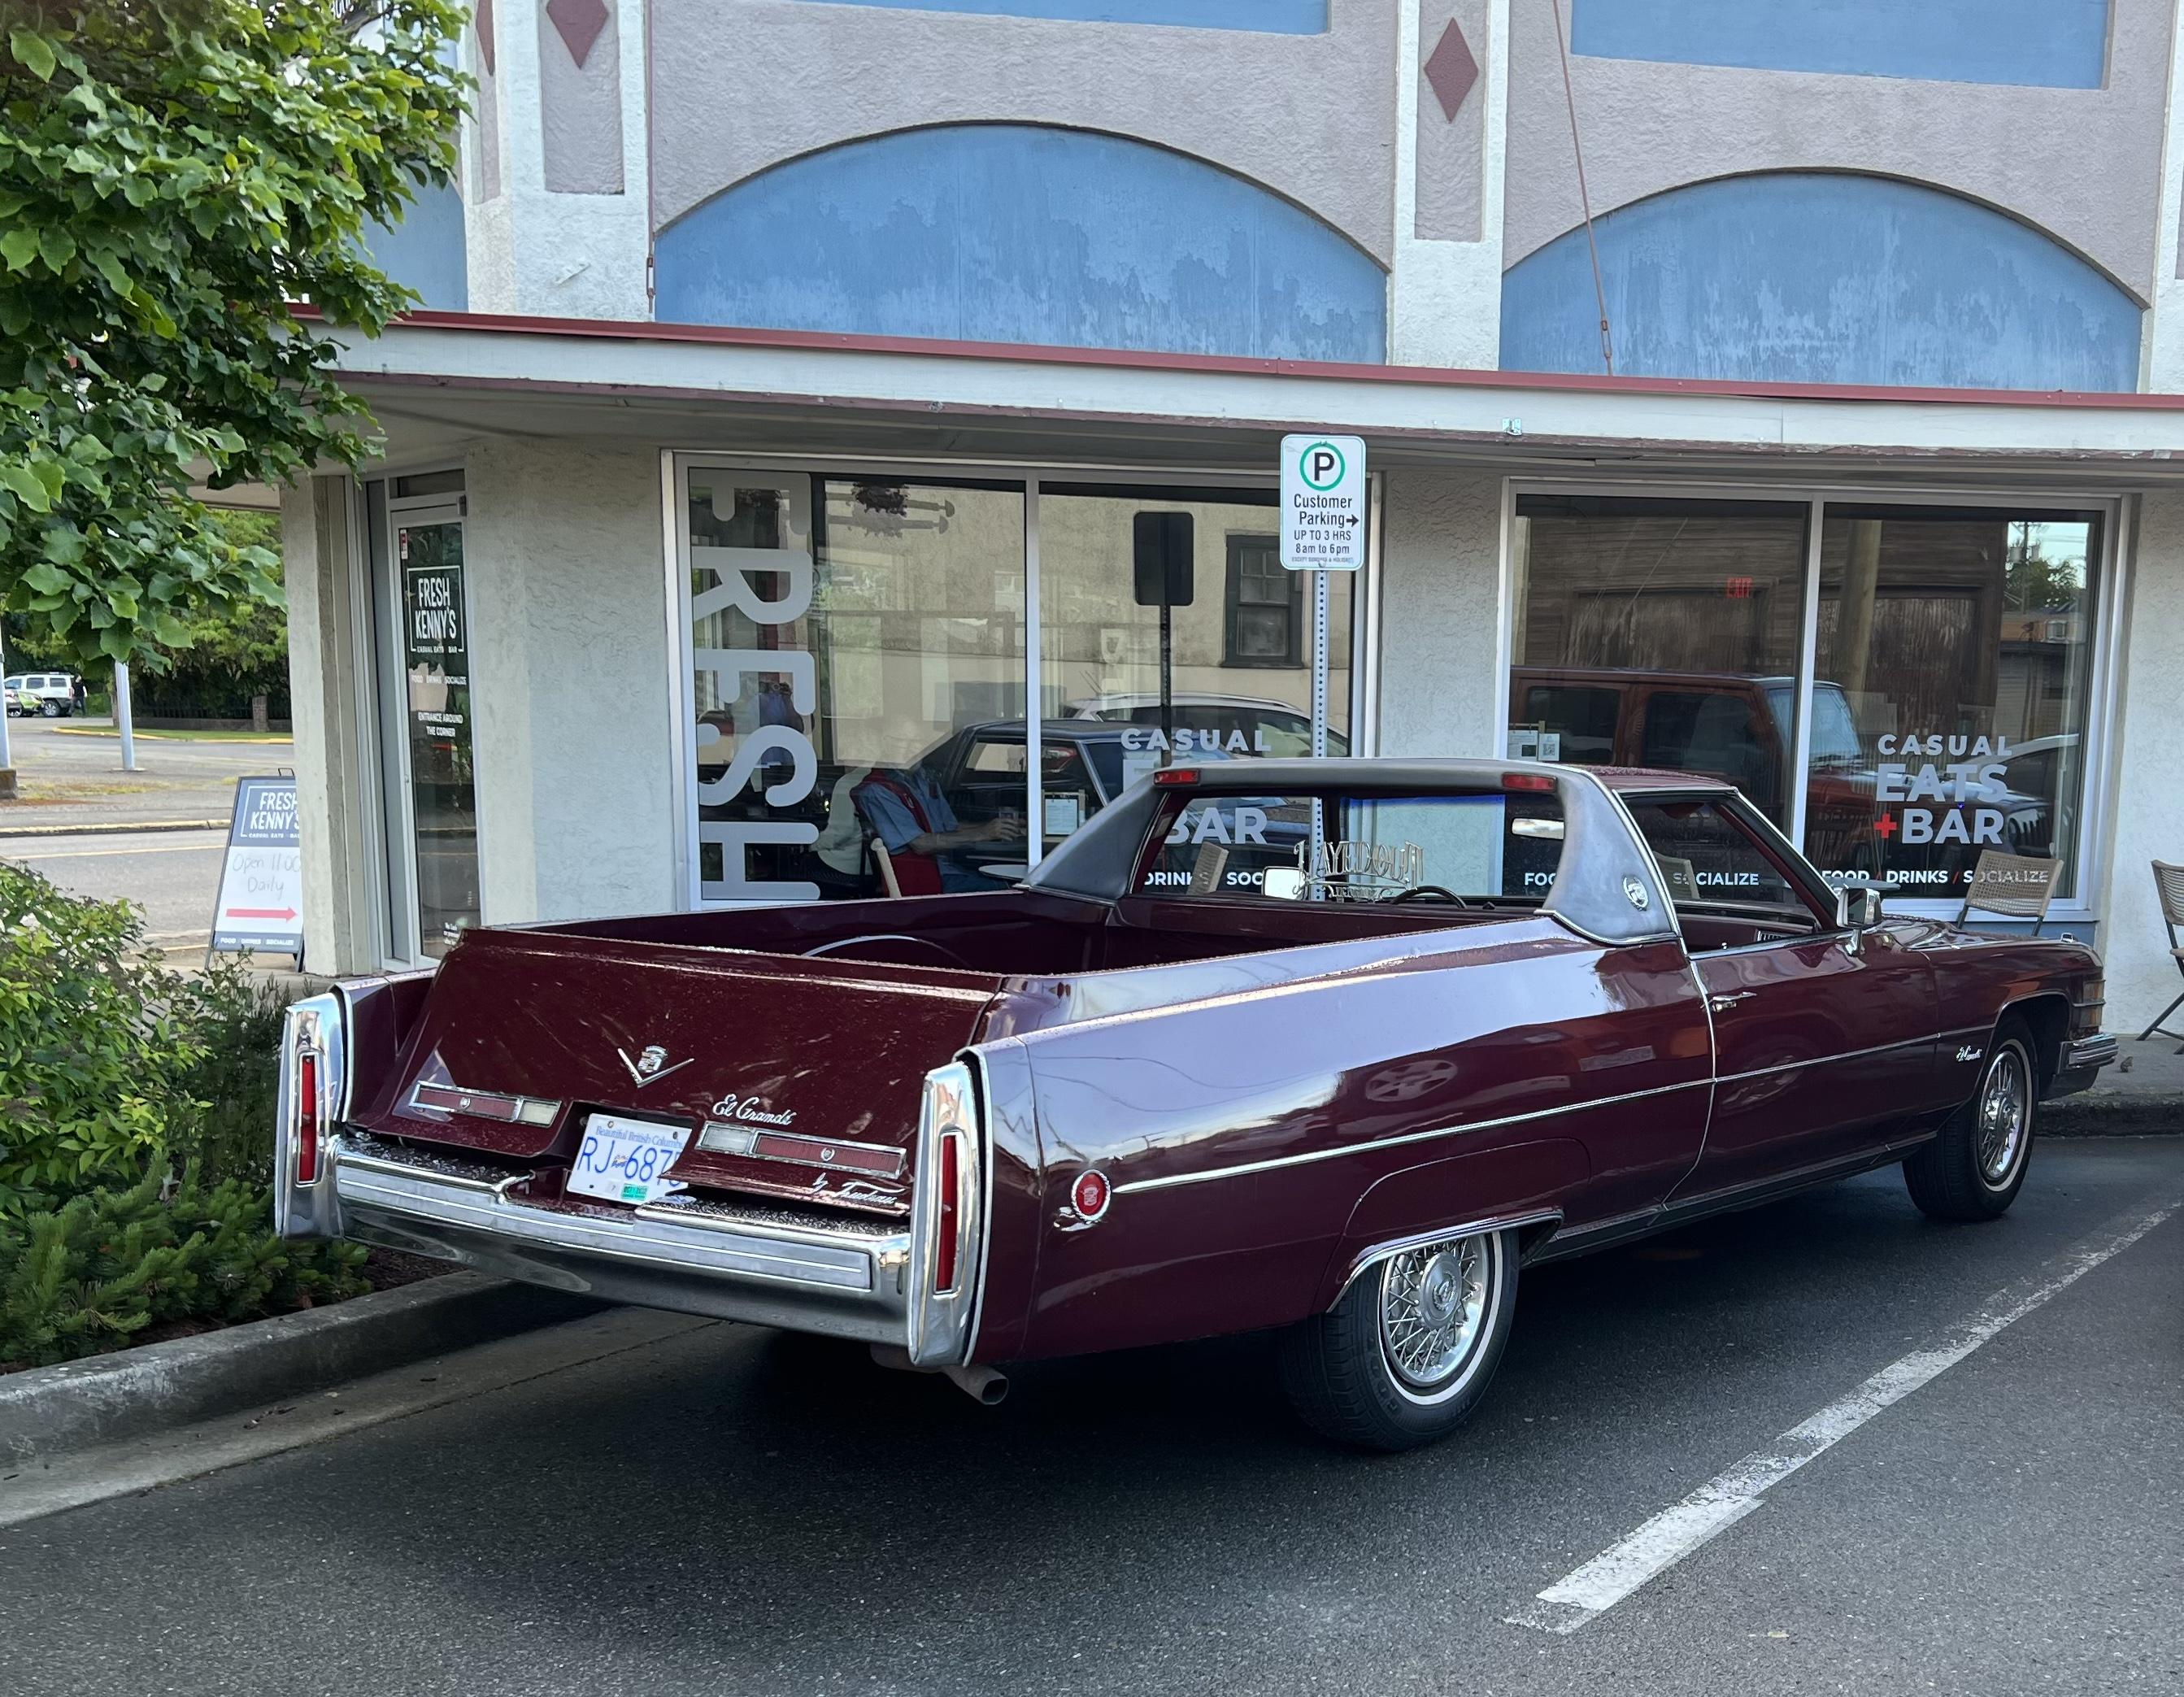
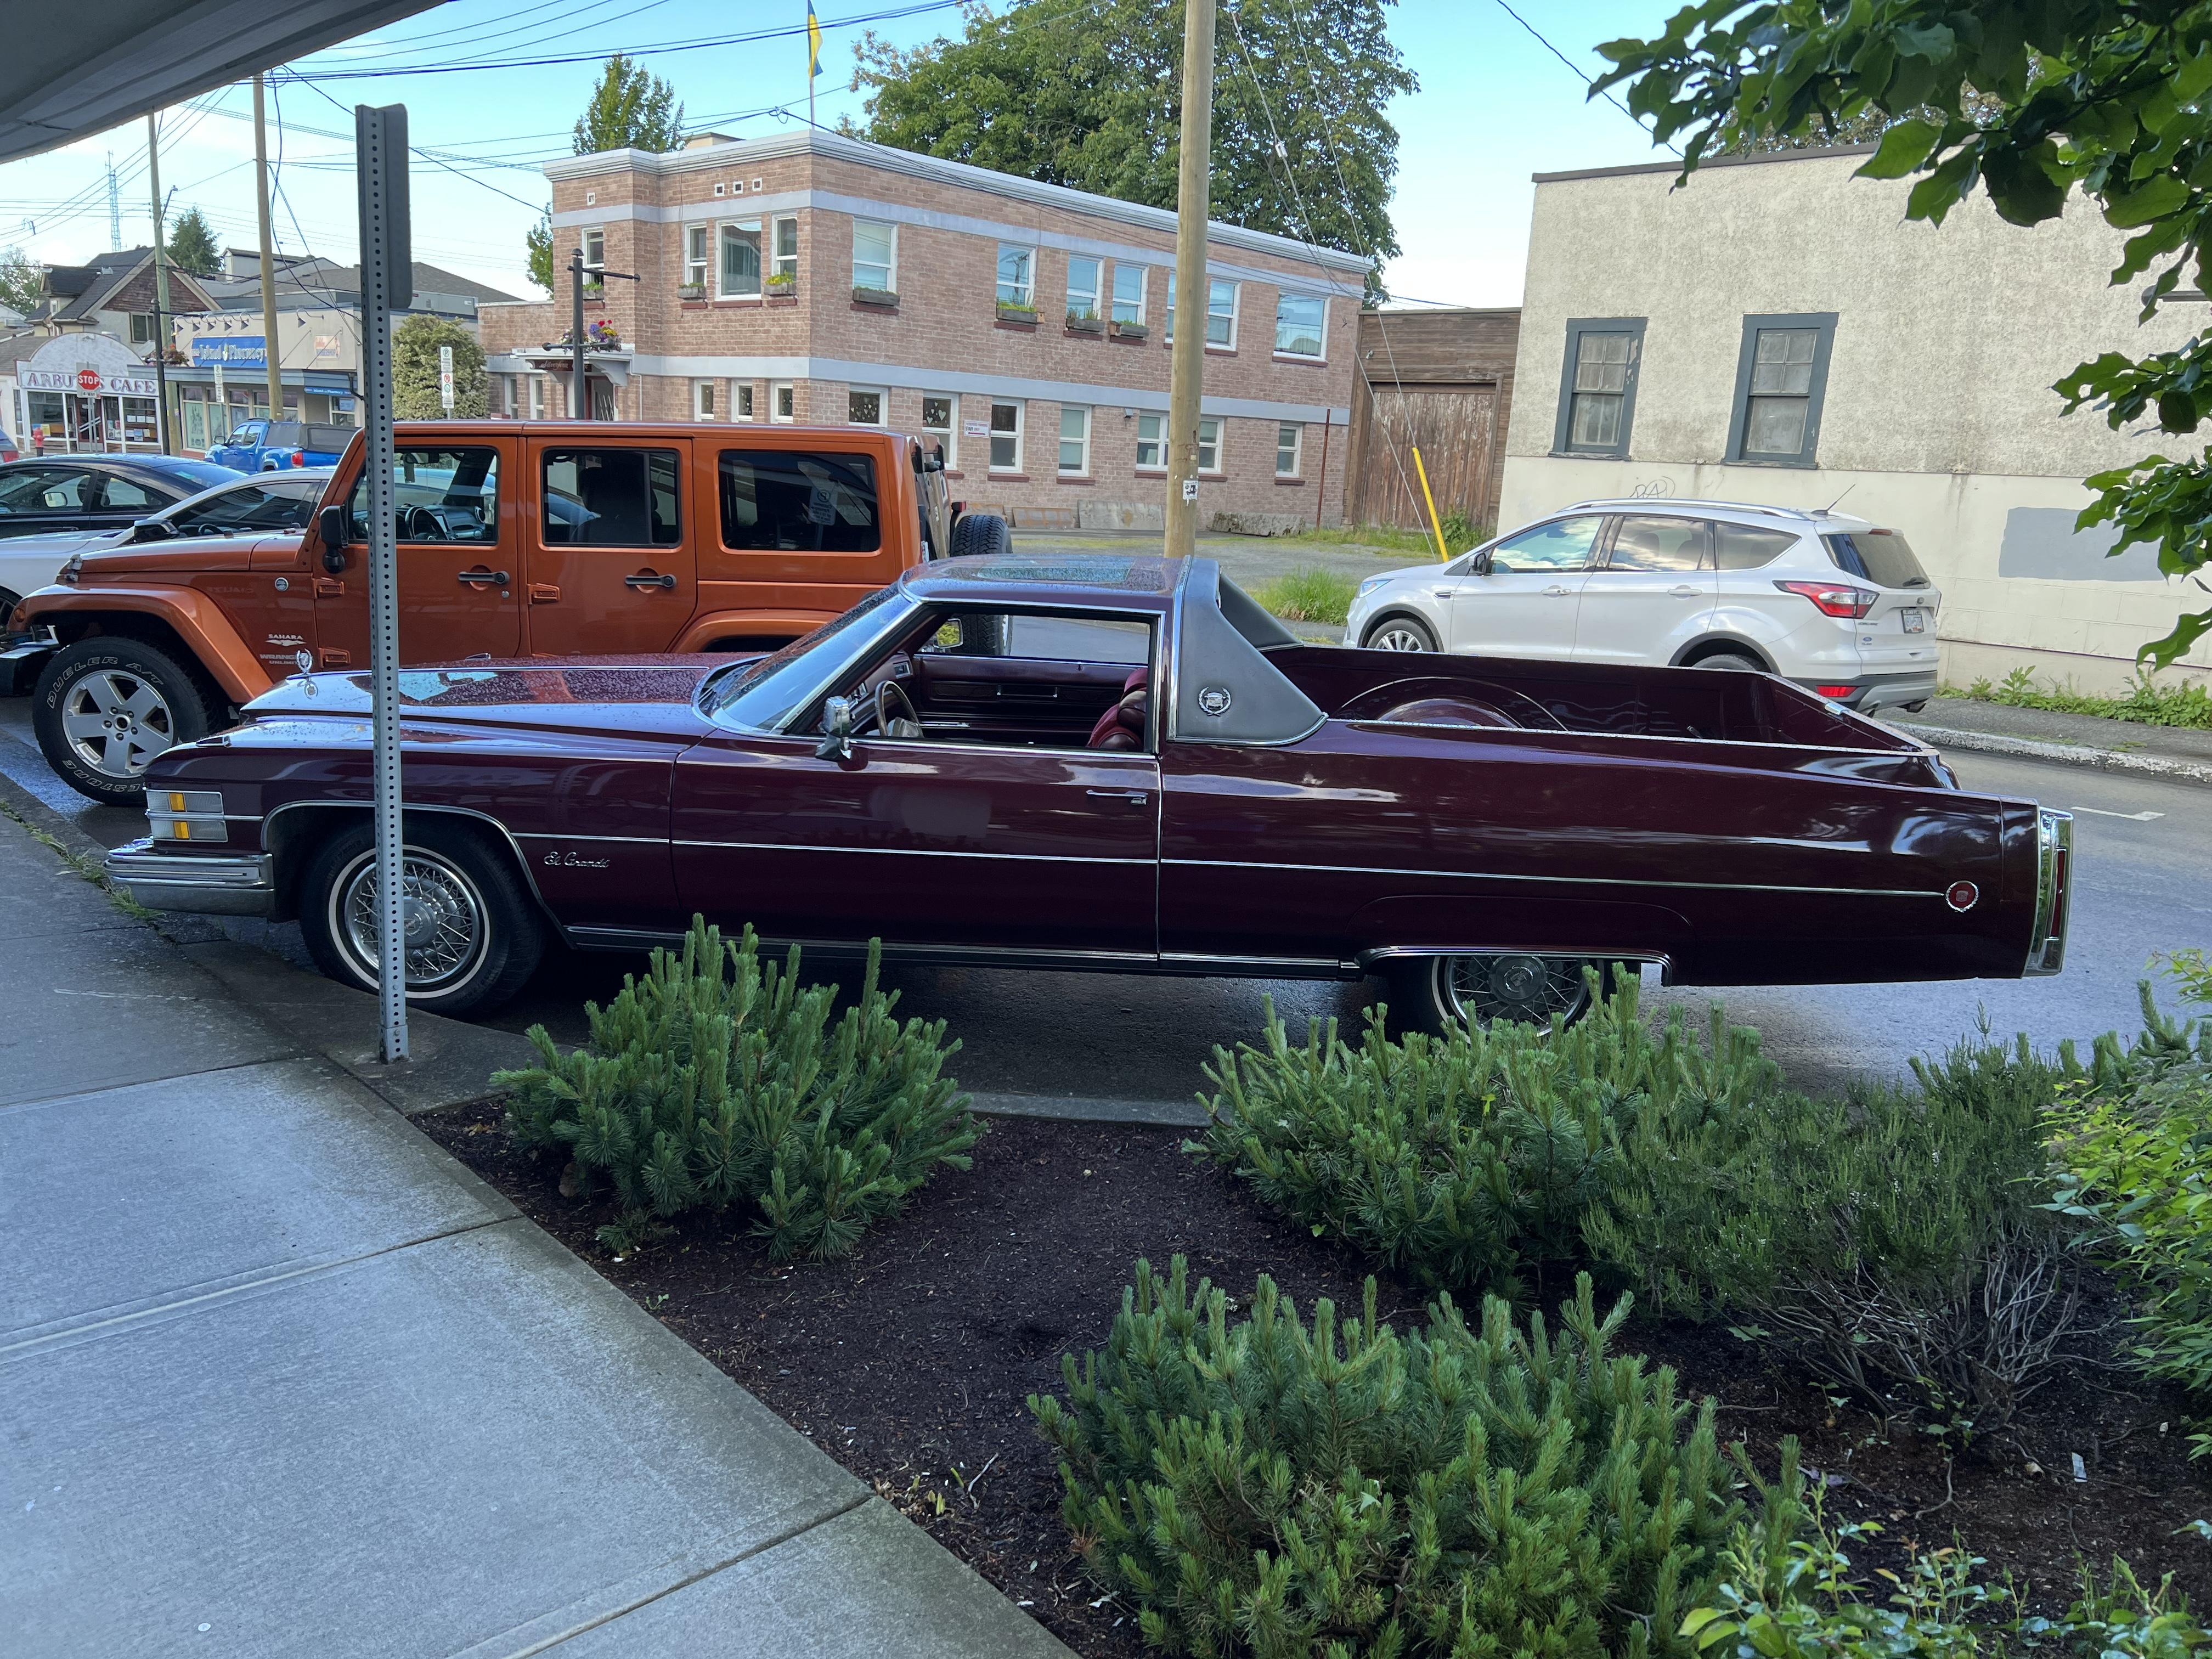
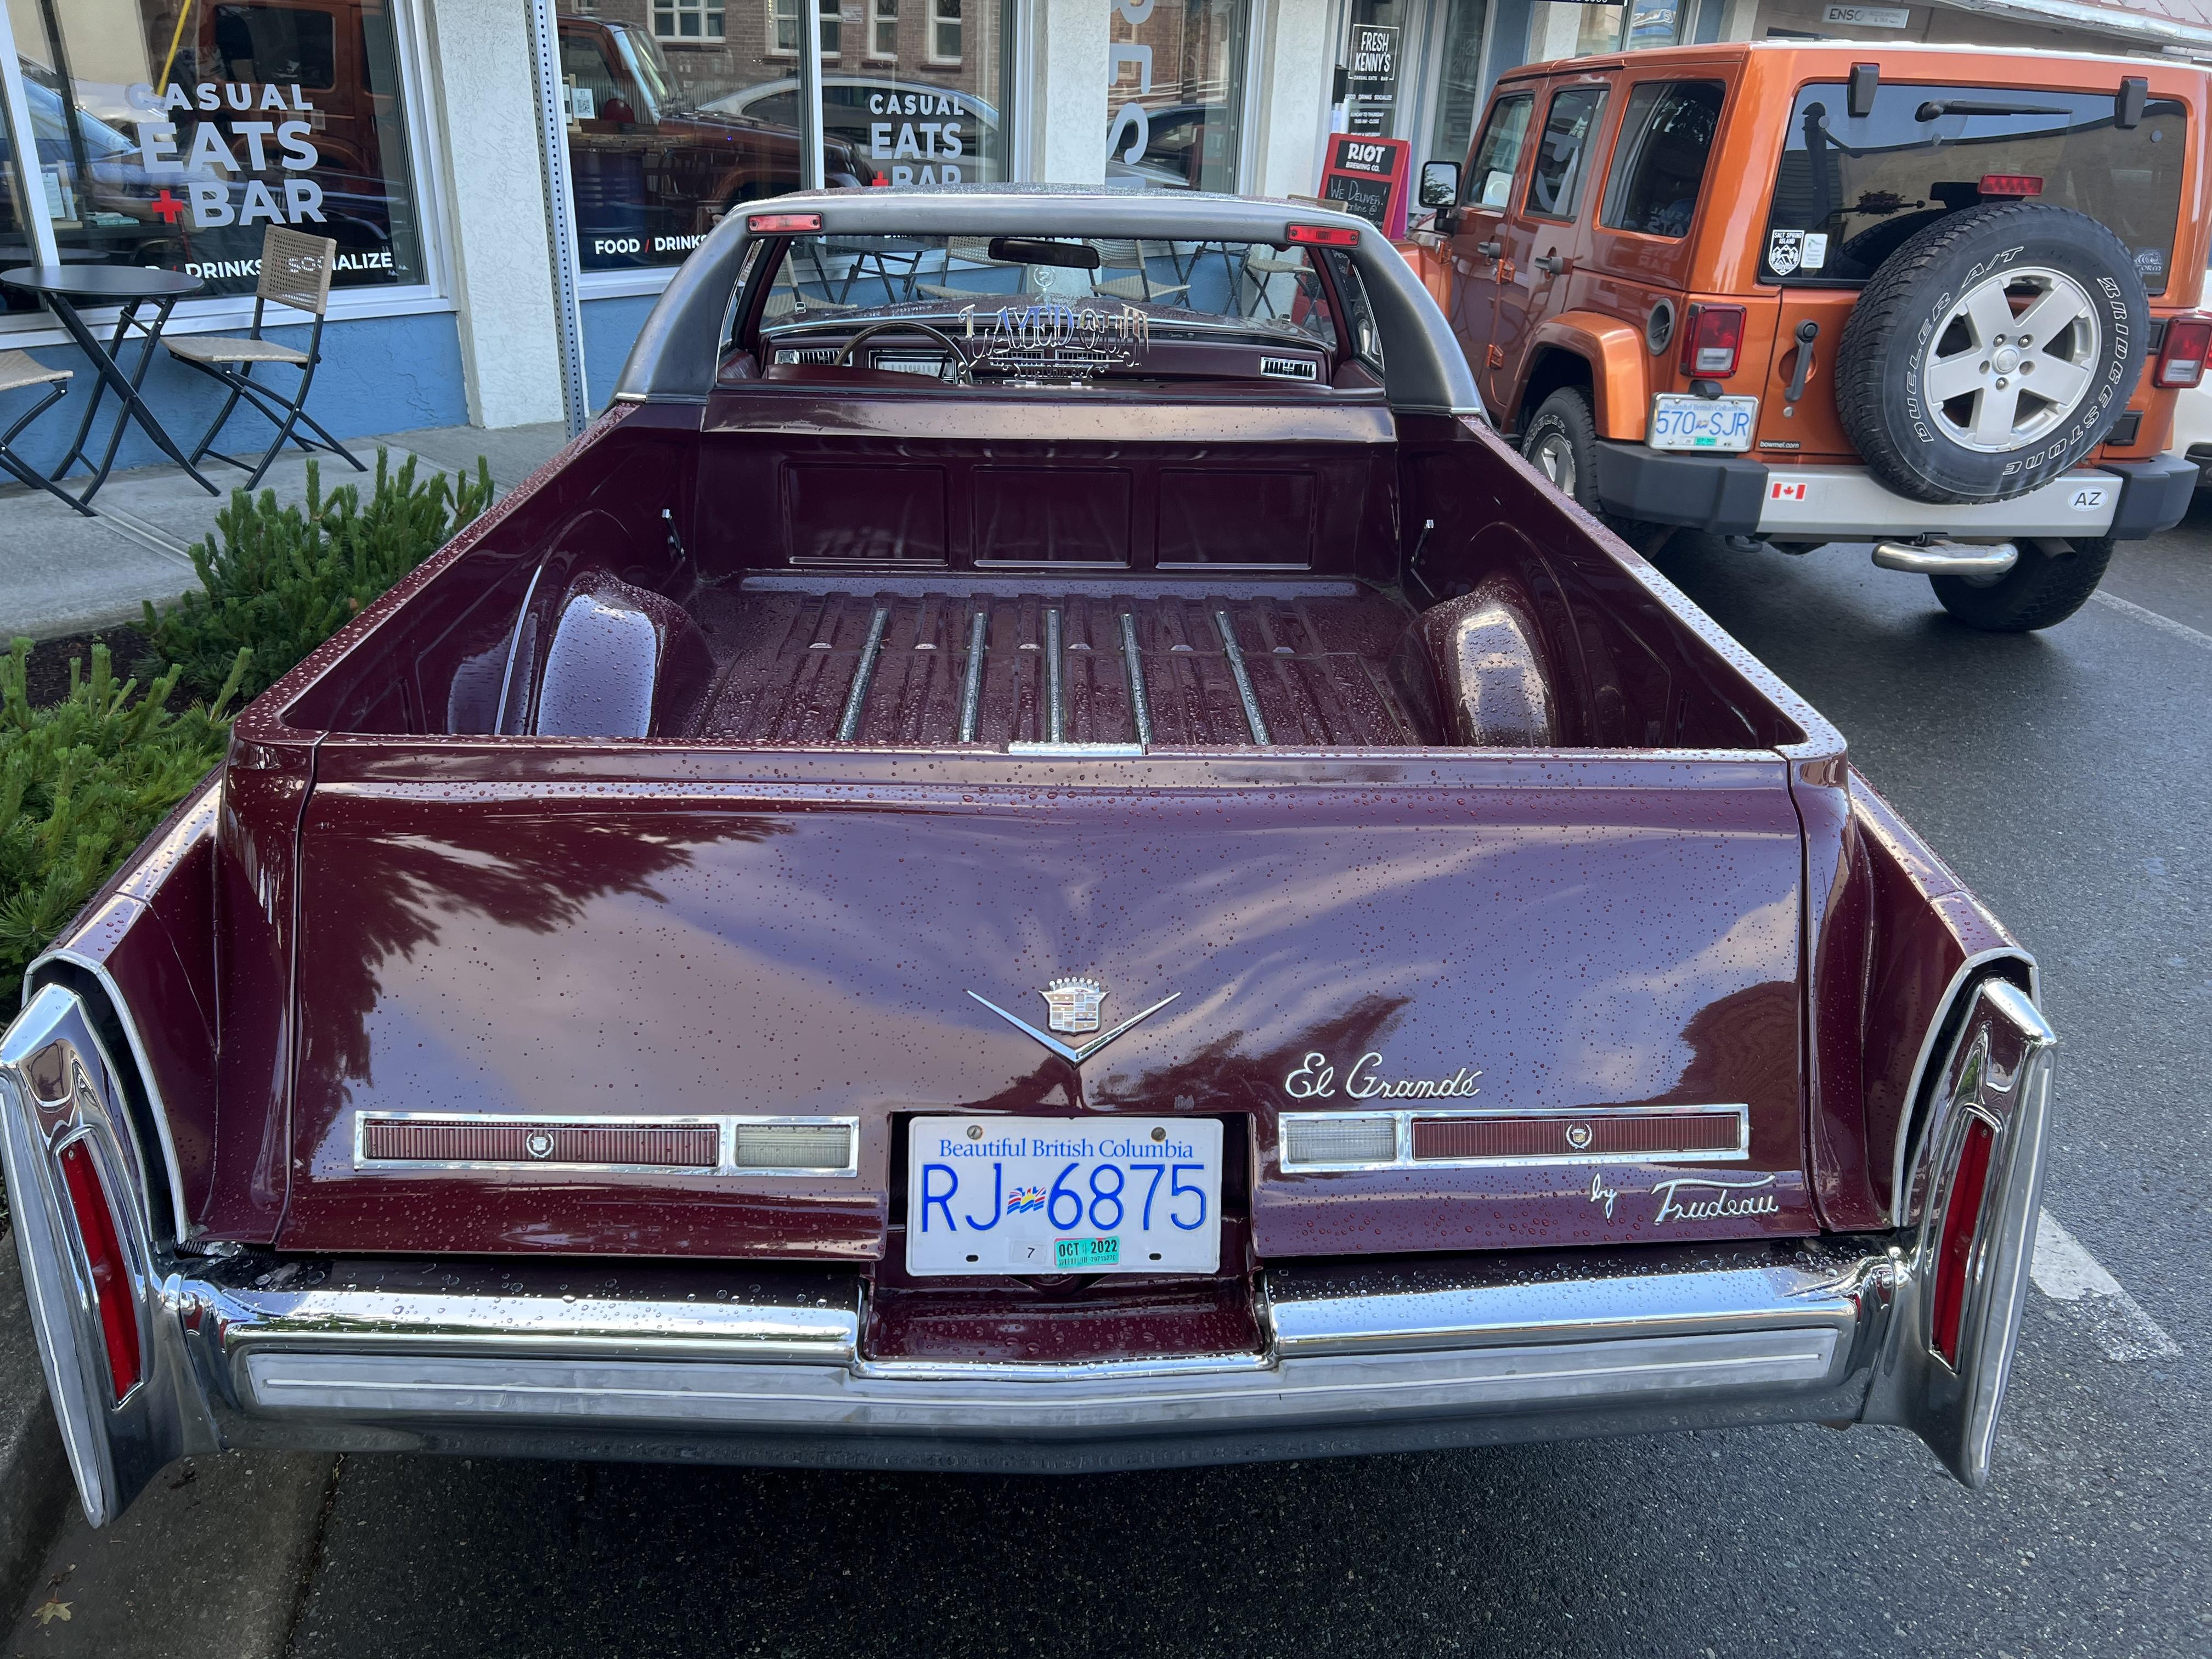
Went to the local fish&chip shop and parked next to stunning 1974 Caddy flower car. Owner told be it was a local conversion done in Victoria by Trudeau. Plans are to lower the ride. The conversion was named “ElGrandé” and the builder name Trudeau is on a script under the reflector.
-
Great build Tony! The colour choice is perfect for it and the wheels really set it off, especially by showing the discs. Cheers Misha
-
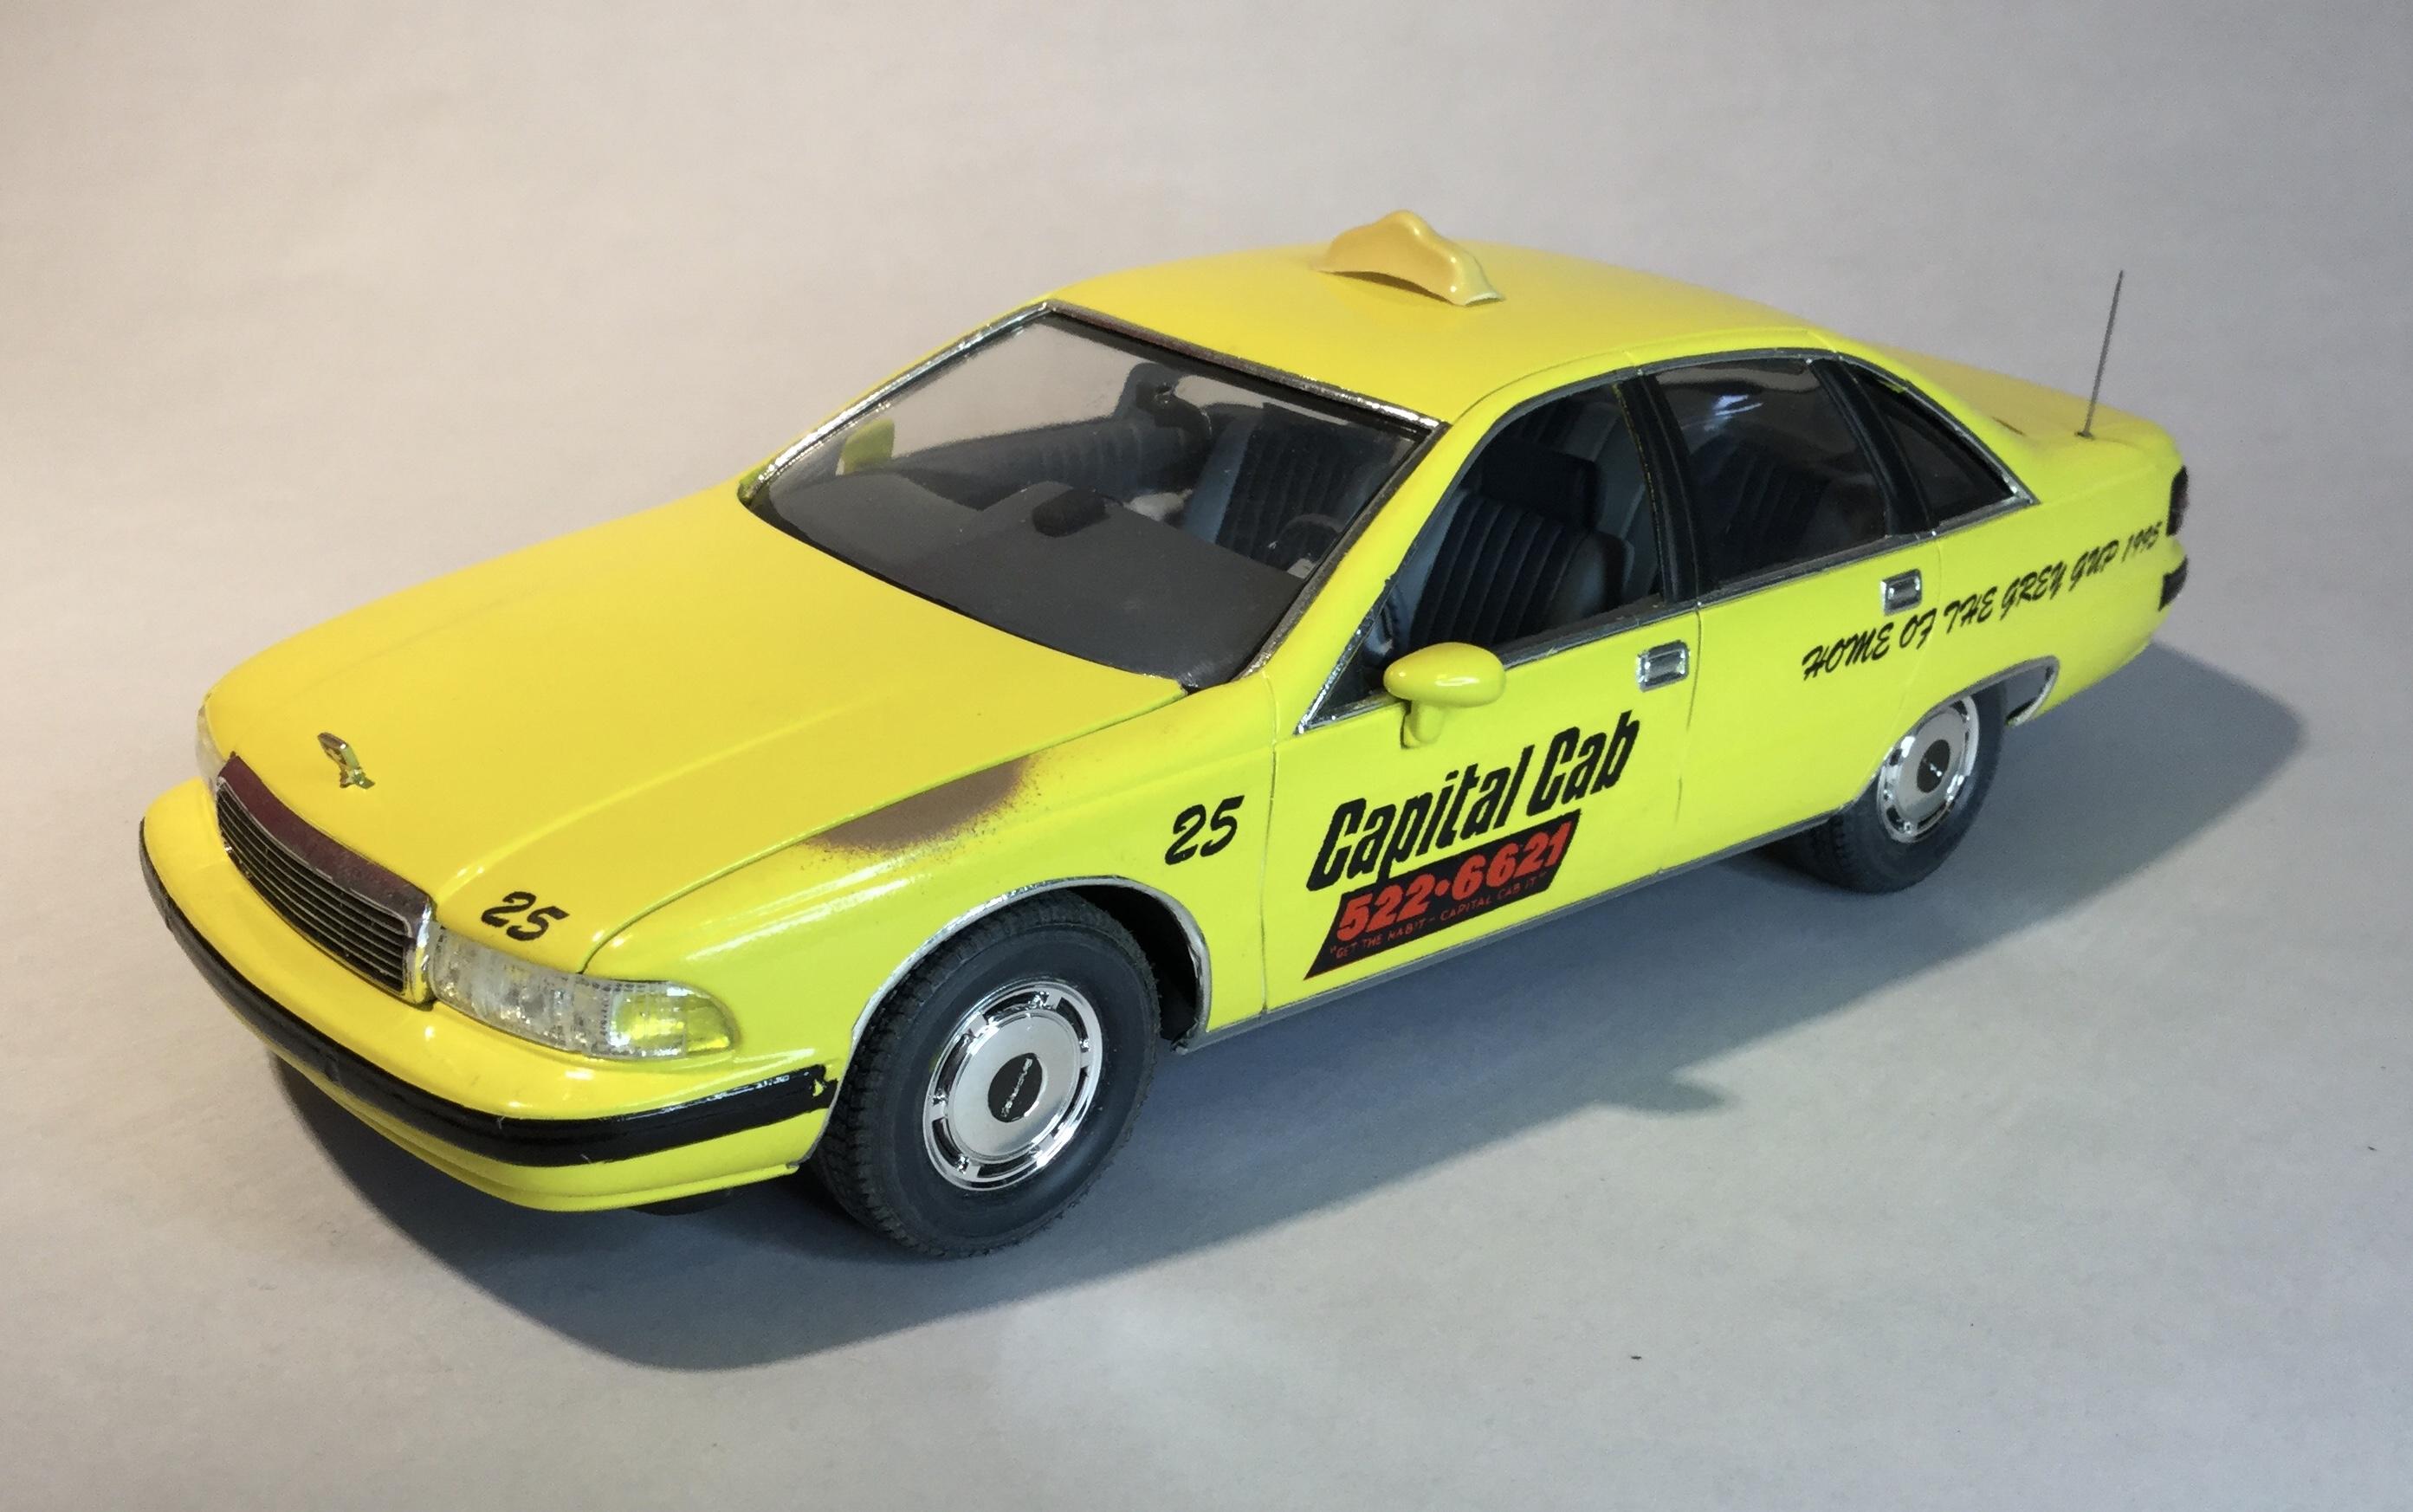
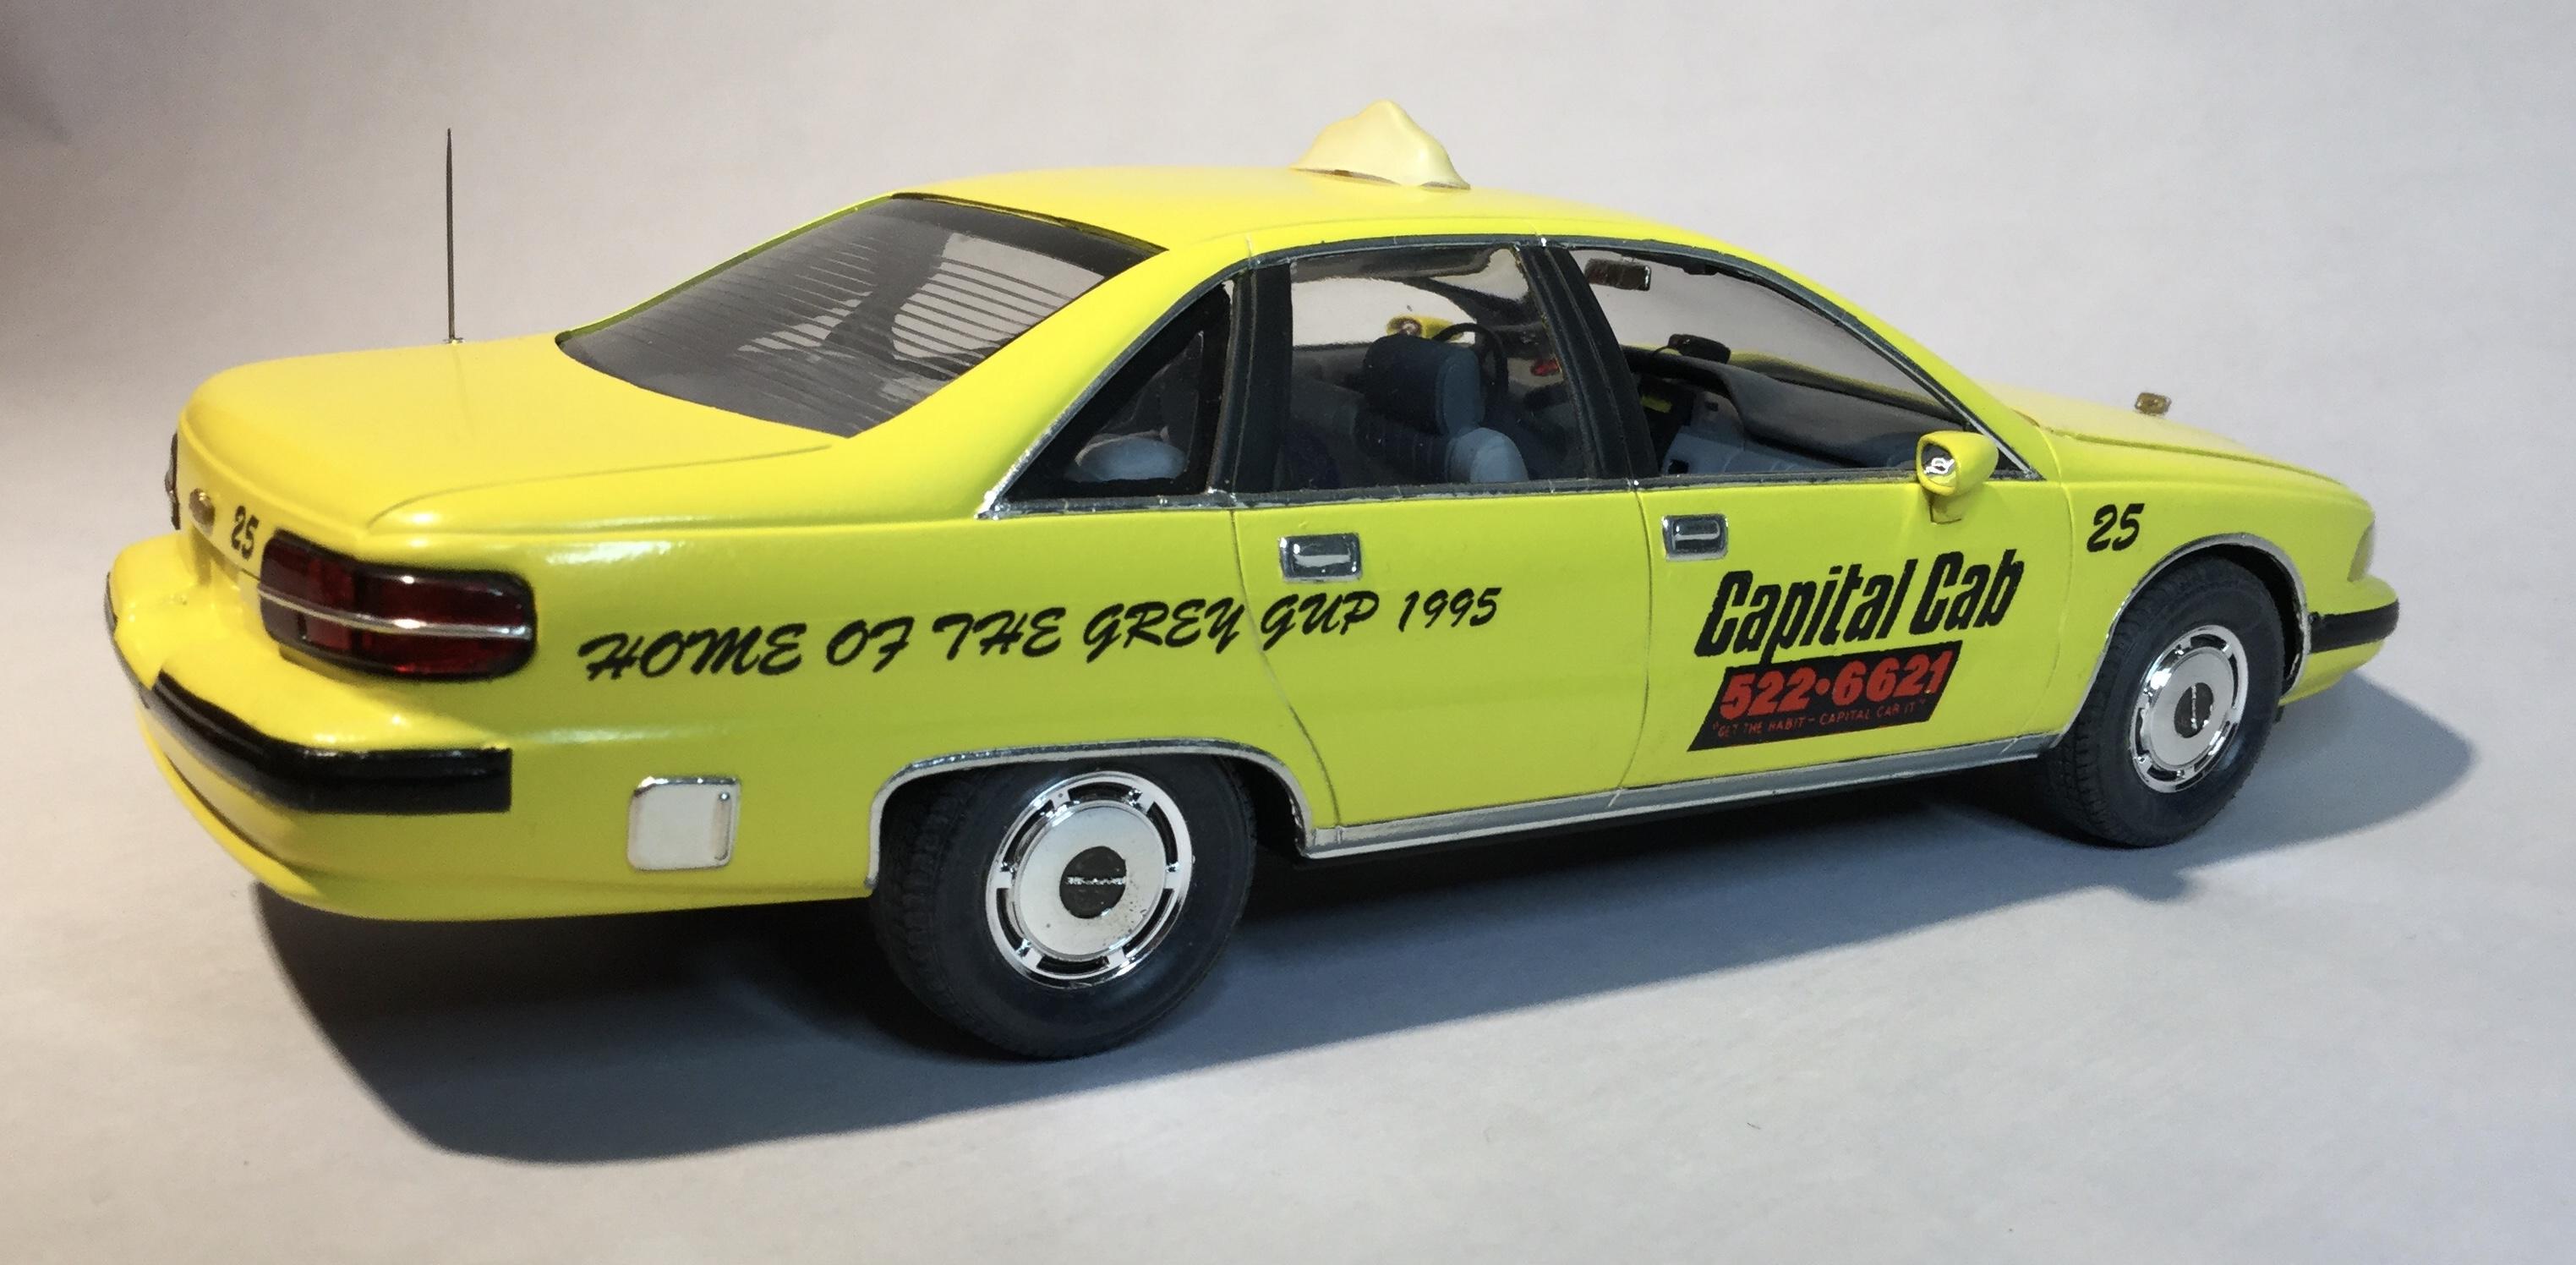
1/25 Revell SnapTite Taxi/Fire Chief Chevy Caprice
Misha replied to Casey's topic in Car Kit News & Reviews
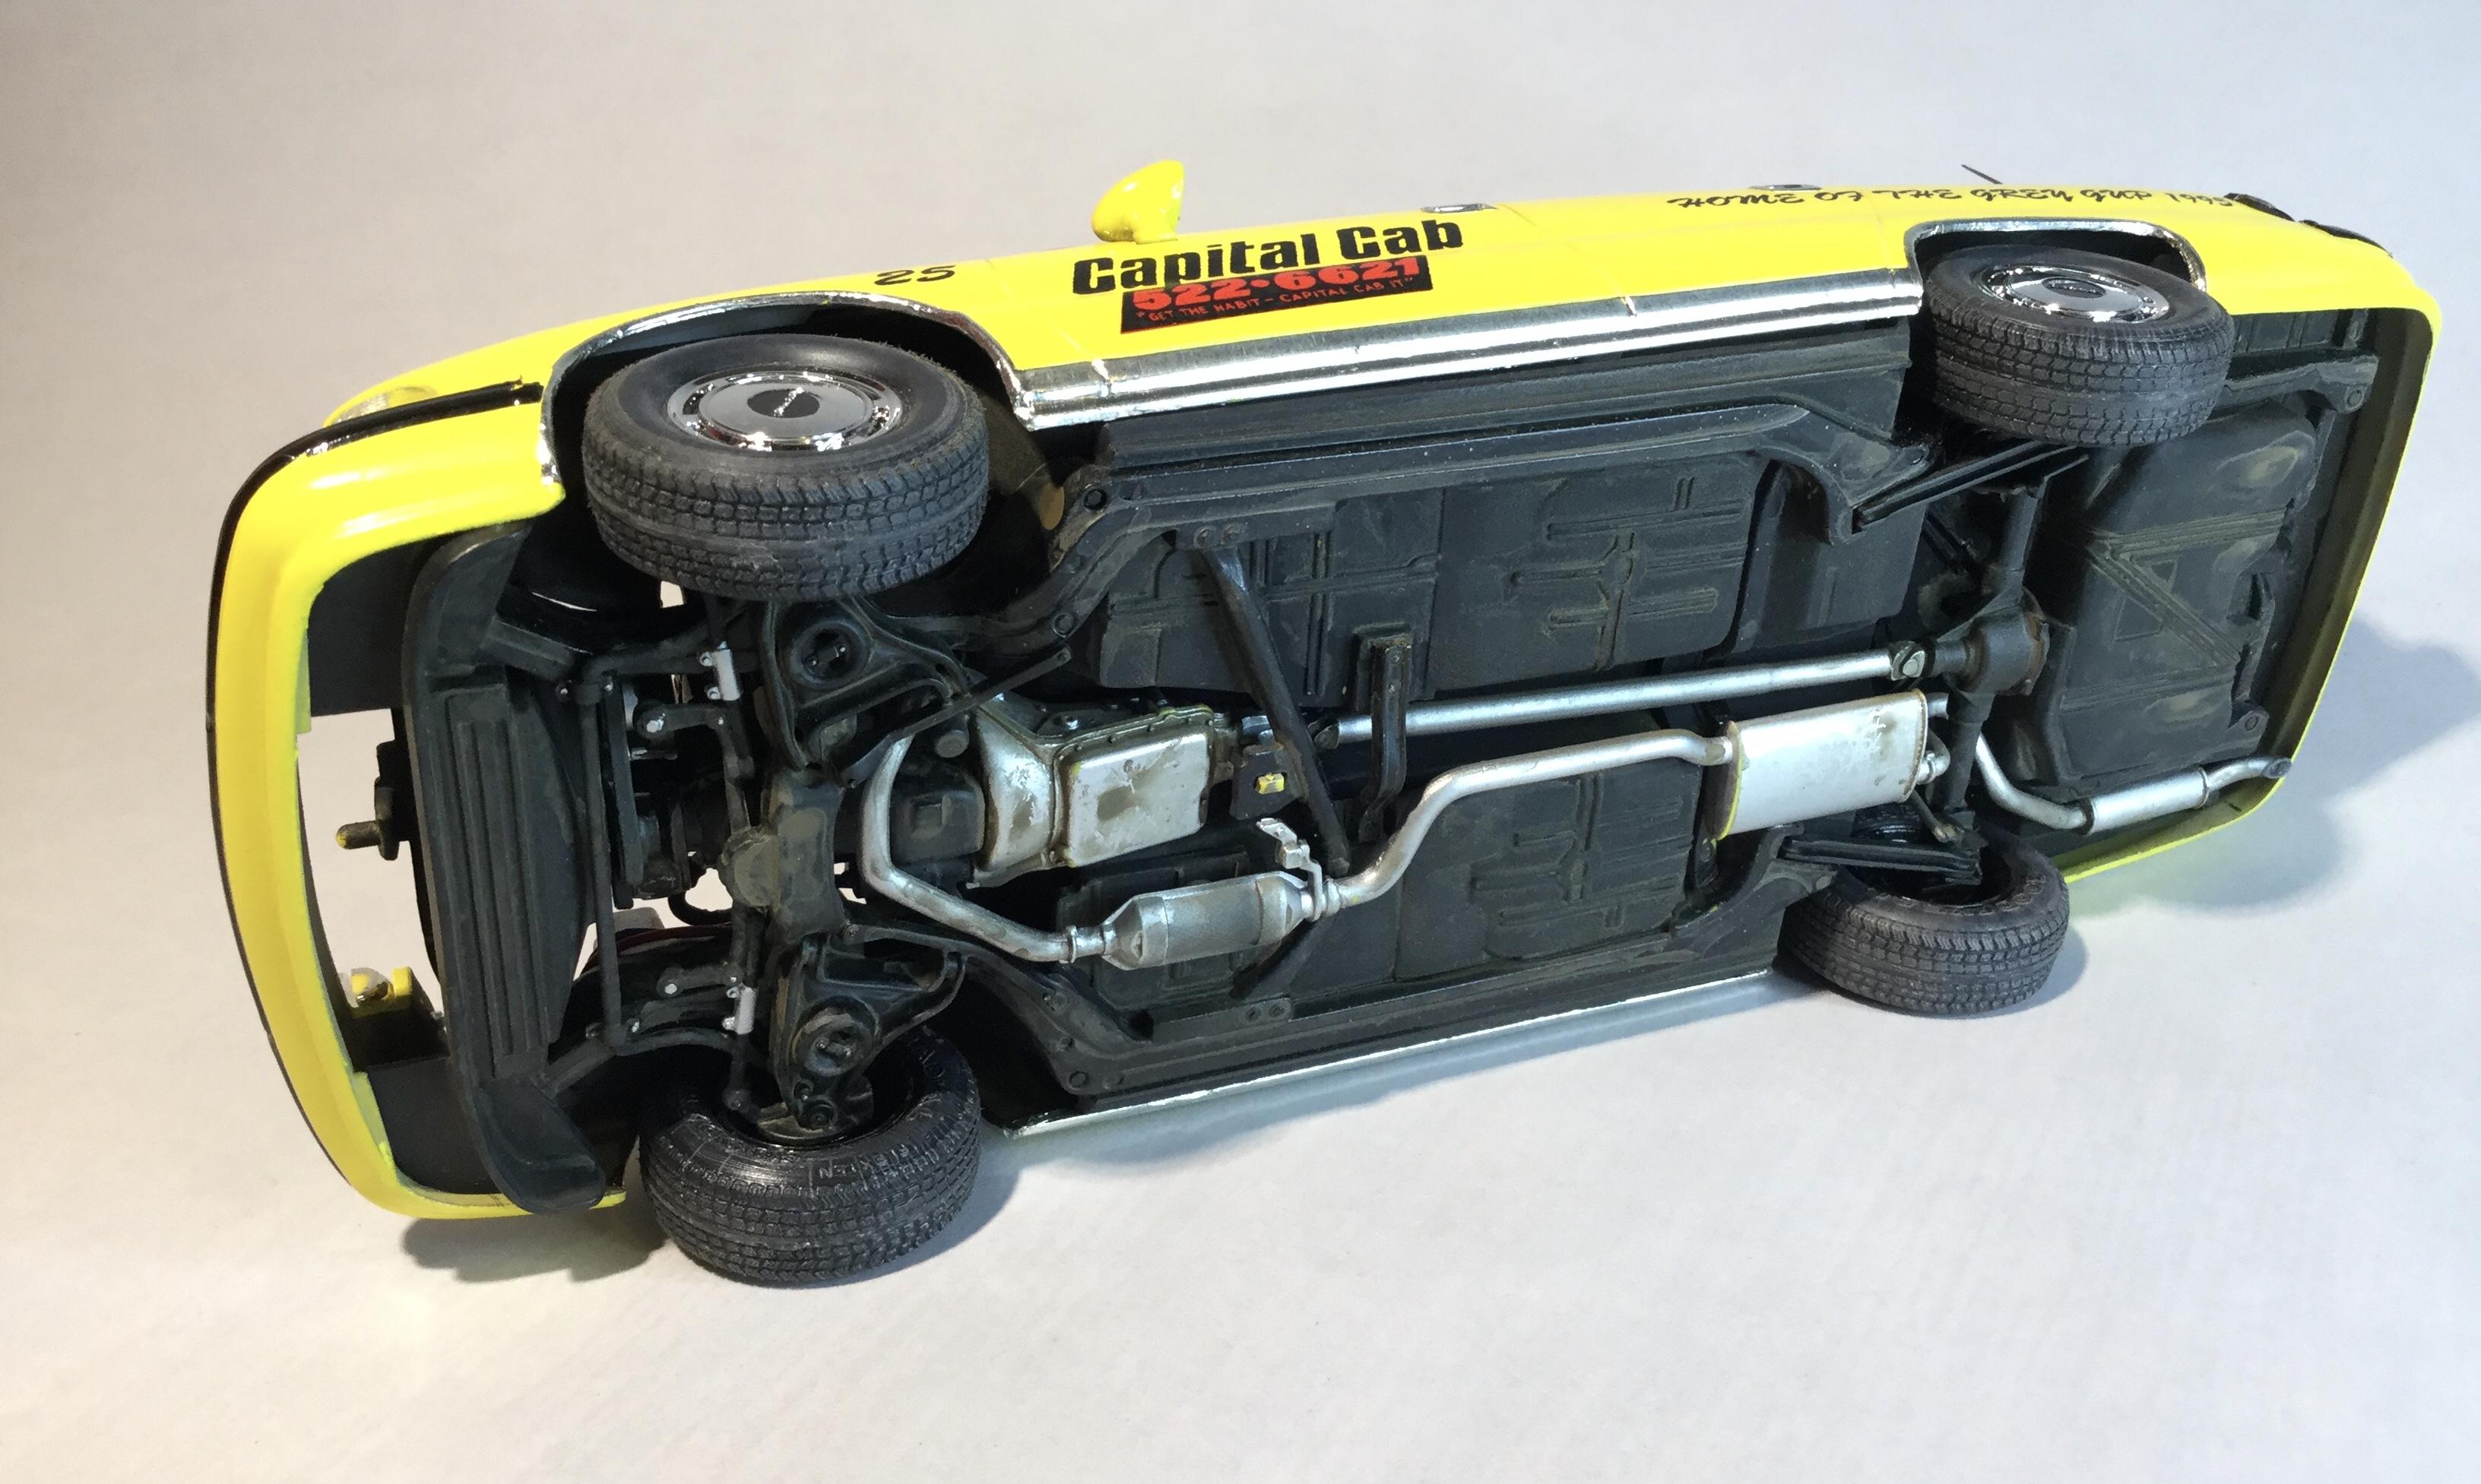
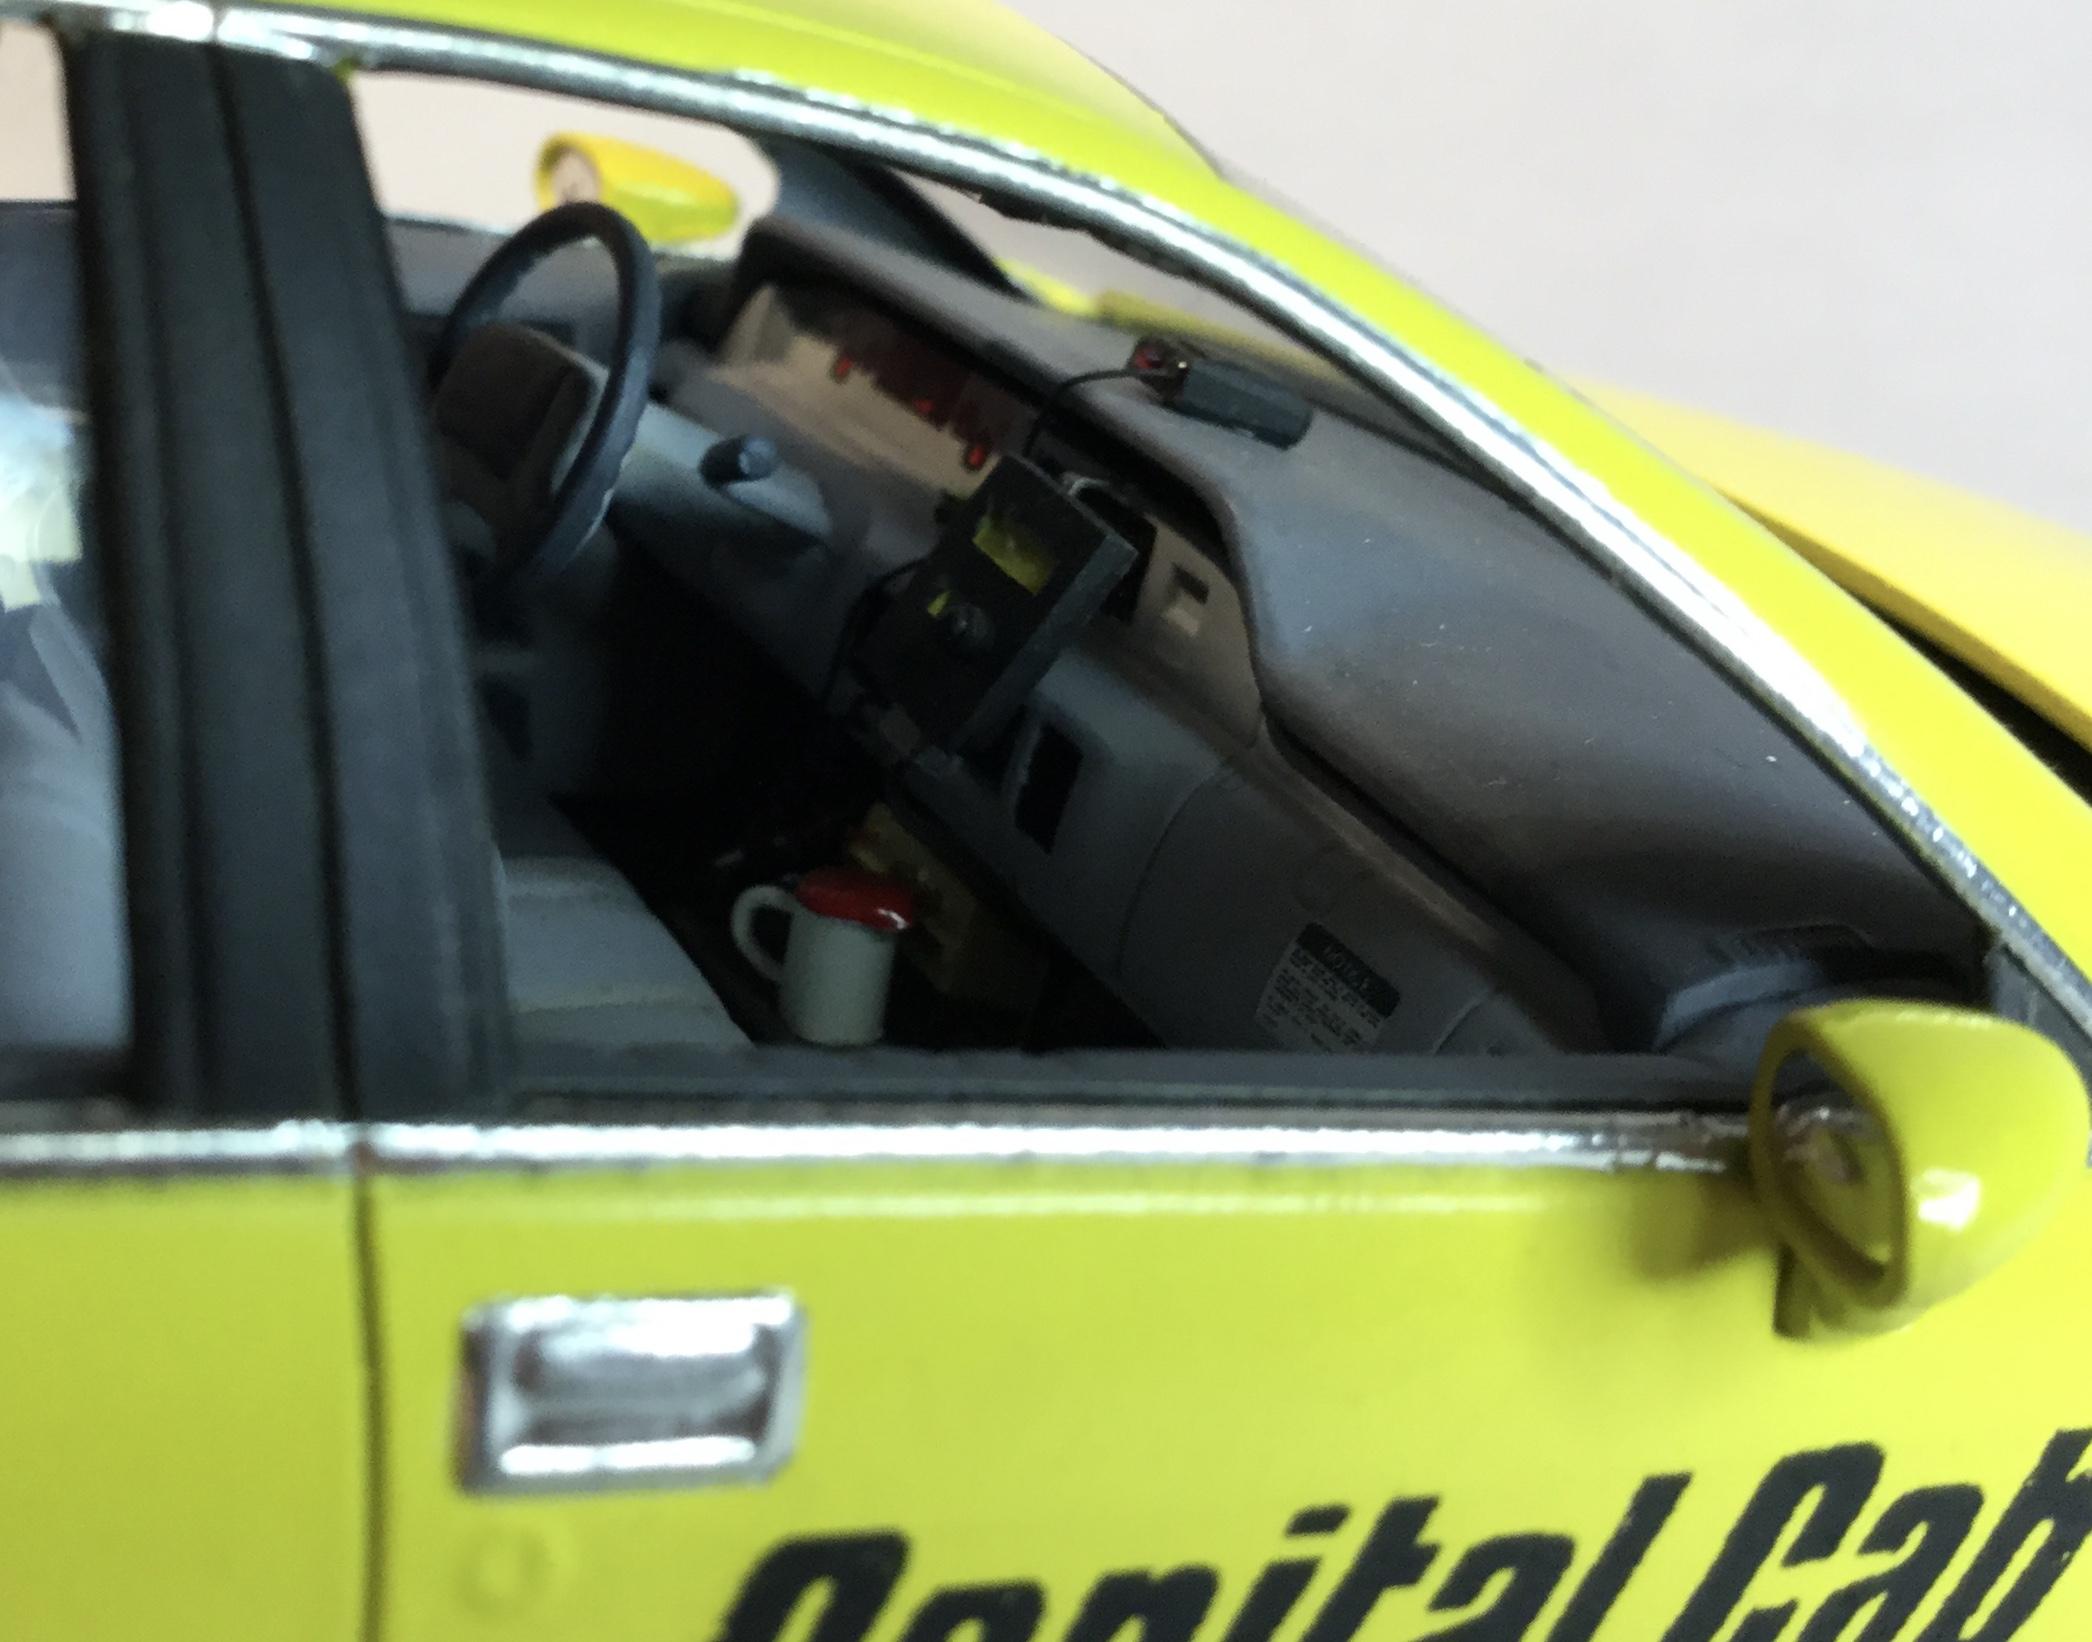
Here is my example built thirty years ago based on Cab #25 “TwoBits” at Capital Cabs in Regina, Saskatchewan. Always found this generation of Caprice to be attractive and at its introduction to have bold styling. The various reissues illustrate the various commercial and service roles it has served. The early version was modified into the later one with enlarged rear wheel housings. The kit itself was an easy build in its basic form which benefited from detail painting especially under the hood and chassis. A number of scratch built details added to the typical hack version such as the meter, Tim Horton’s coffee mug, map on the armrest and the all important radar detector on the dash! On the outside the top sign was vacuformed, a propane conversion is evident by the refill flap on the passeger rear quarter, a popular fleet conversion at the time, recent body repair with the primer on the front fender and finishing it off with homemade decals based on a matchbook logo and featuring the Canadian Football Classic the Grey Cup game being hosted in 1995. I also have the later Impala version with plans of hot rodding it, lowered stance upgraded motivation. Another companion vehicle is the Ultra Nomad for which I plan to convert to a hearse. Overall a pleasing series of kits that build up easily. Cheers Misha
- 32 replies
-
- 4
-

-
- revell 6294
- chevy caprice
- (and 1 more)
-
Hi Billy, it would be a great time to visit your home town! Victoria is a great setting for the event with cars arriving on the ferry starting on Thursday and events planned for the entire weekend. Sunday is the finale with the show and shine around the harbour. It’s been home for nearly forty years and has grown from a sleepy town into a thriving city! While the event is held every three years, this may be the last edition, largely due to the aging population of the participants, it would be very sad to see it fade away. Hope you’ll make the drive up the coast! Cheers Misha
-
Nor West Deuce Days - Inner Harbour, Victoria, Vancouver Island Deuce Days in Scale III Photos from 2019 Deuce Days in Scale II … and outside the 1:1 scale! Hope to see you, cheers Misha
-