bill-e-boy
-
Posts
859 -
Joined
-
Last visited
Content Type
Profiles
Forums
Events
Gallery
Everything posted by bill-e-boy
-
The last time I used MM enamel I thinned with cheap lacquer thinners and the result was very bad orange peel finish. I may not have used enough thinners but not too sure of that. Anyway I sanded it down and repainted with MM thinned with Testers thinners in the red tin - and it does not smell like mineral spirits. I have about enough Testors thinners left for one model and about 40 jars of MM so I need to revisit what thinners I will use in the future. Mineral spirits works but is slow drying so I avoid it. OK for clean up but lacquer thinners is better for that. Lighter fluid works well too. I think lighter fluid is clear spirit that I have used with success. And I believe a product called Two Way thinners works too. This can be used on enamels and some lacquers. I suspect this is what Testors thinners is - the stuff I have is a PPG product and I must give them a sniff test. It is not as hot as lacquer thinners. A little confusing but I think erring on the side of caution is best when you do not have a lot of raw product avaialble. The problem is that I have mostly moved away from MM enamels to Tamiya acrylic enamels and now Tamiya (and others) lacquers. There were some cool colours in the MM range that are not readily available elsewhere.
-
We made the pilgrimage (from New Zealand) last October and the Petersen was one the highlights for me. The main display was low riders. Not quite my cup of tea but cool all the same. The Hirohata Merc must be in the current revolving display as I would not have missed if it was there. Saw the others in the pix above though. The Vault was cool - so many cars to drool over such as the Aluma Coupe, Lil' John's 26 T, the XR6 that Tx Smith built and won AMBR and other AMBR winners. Just too many cool as cars. I took a zillion pix to remember the visit by.
-
New hot rod project featuring 1936 Ford Model A "Wide Five" wheels
bill-e-boy replied to tim boyd's topic in WIP: Model Cars
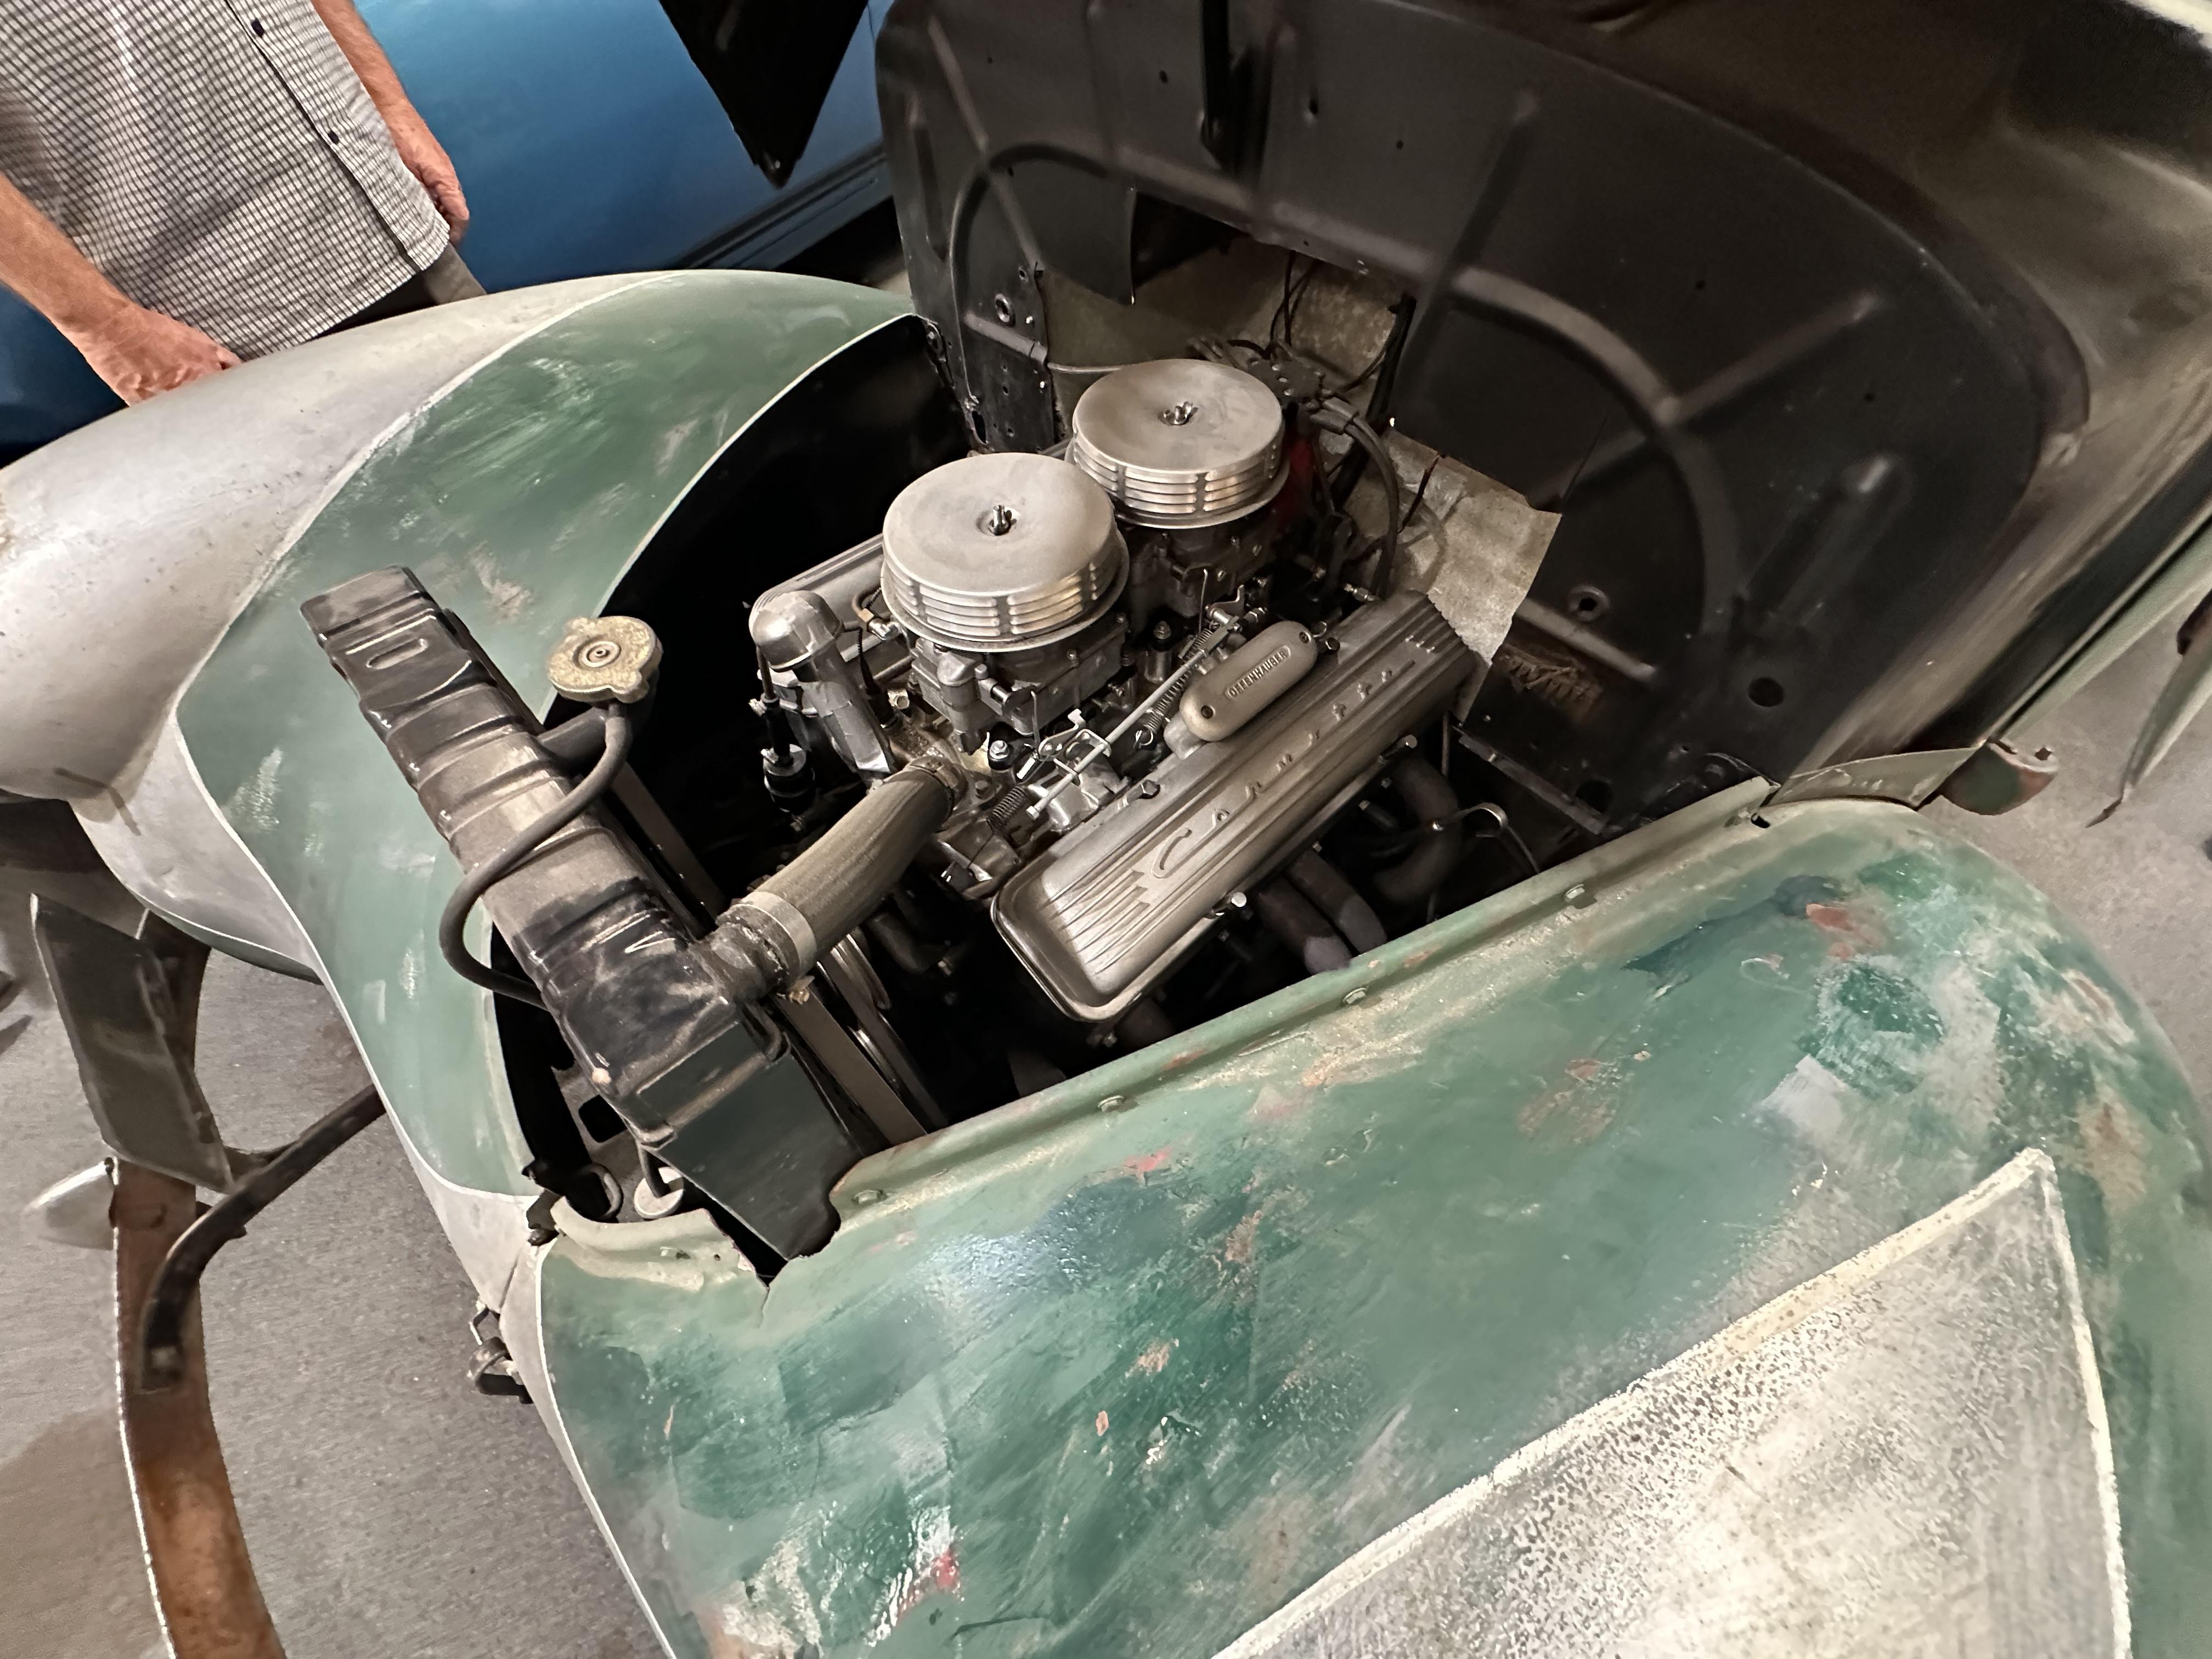
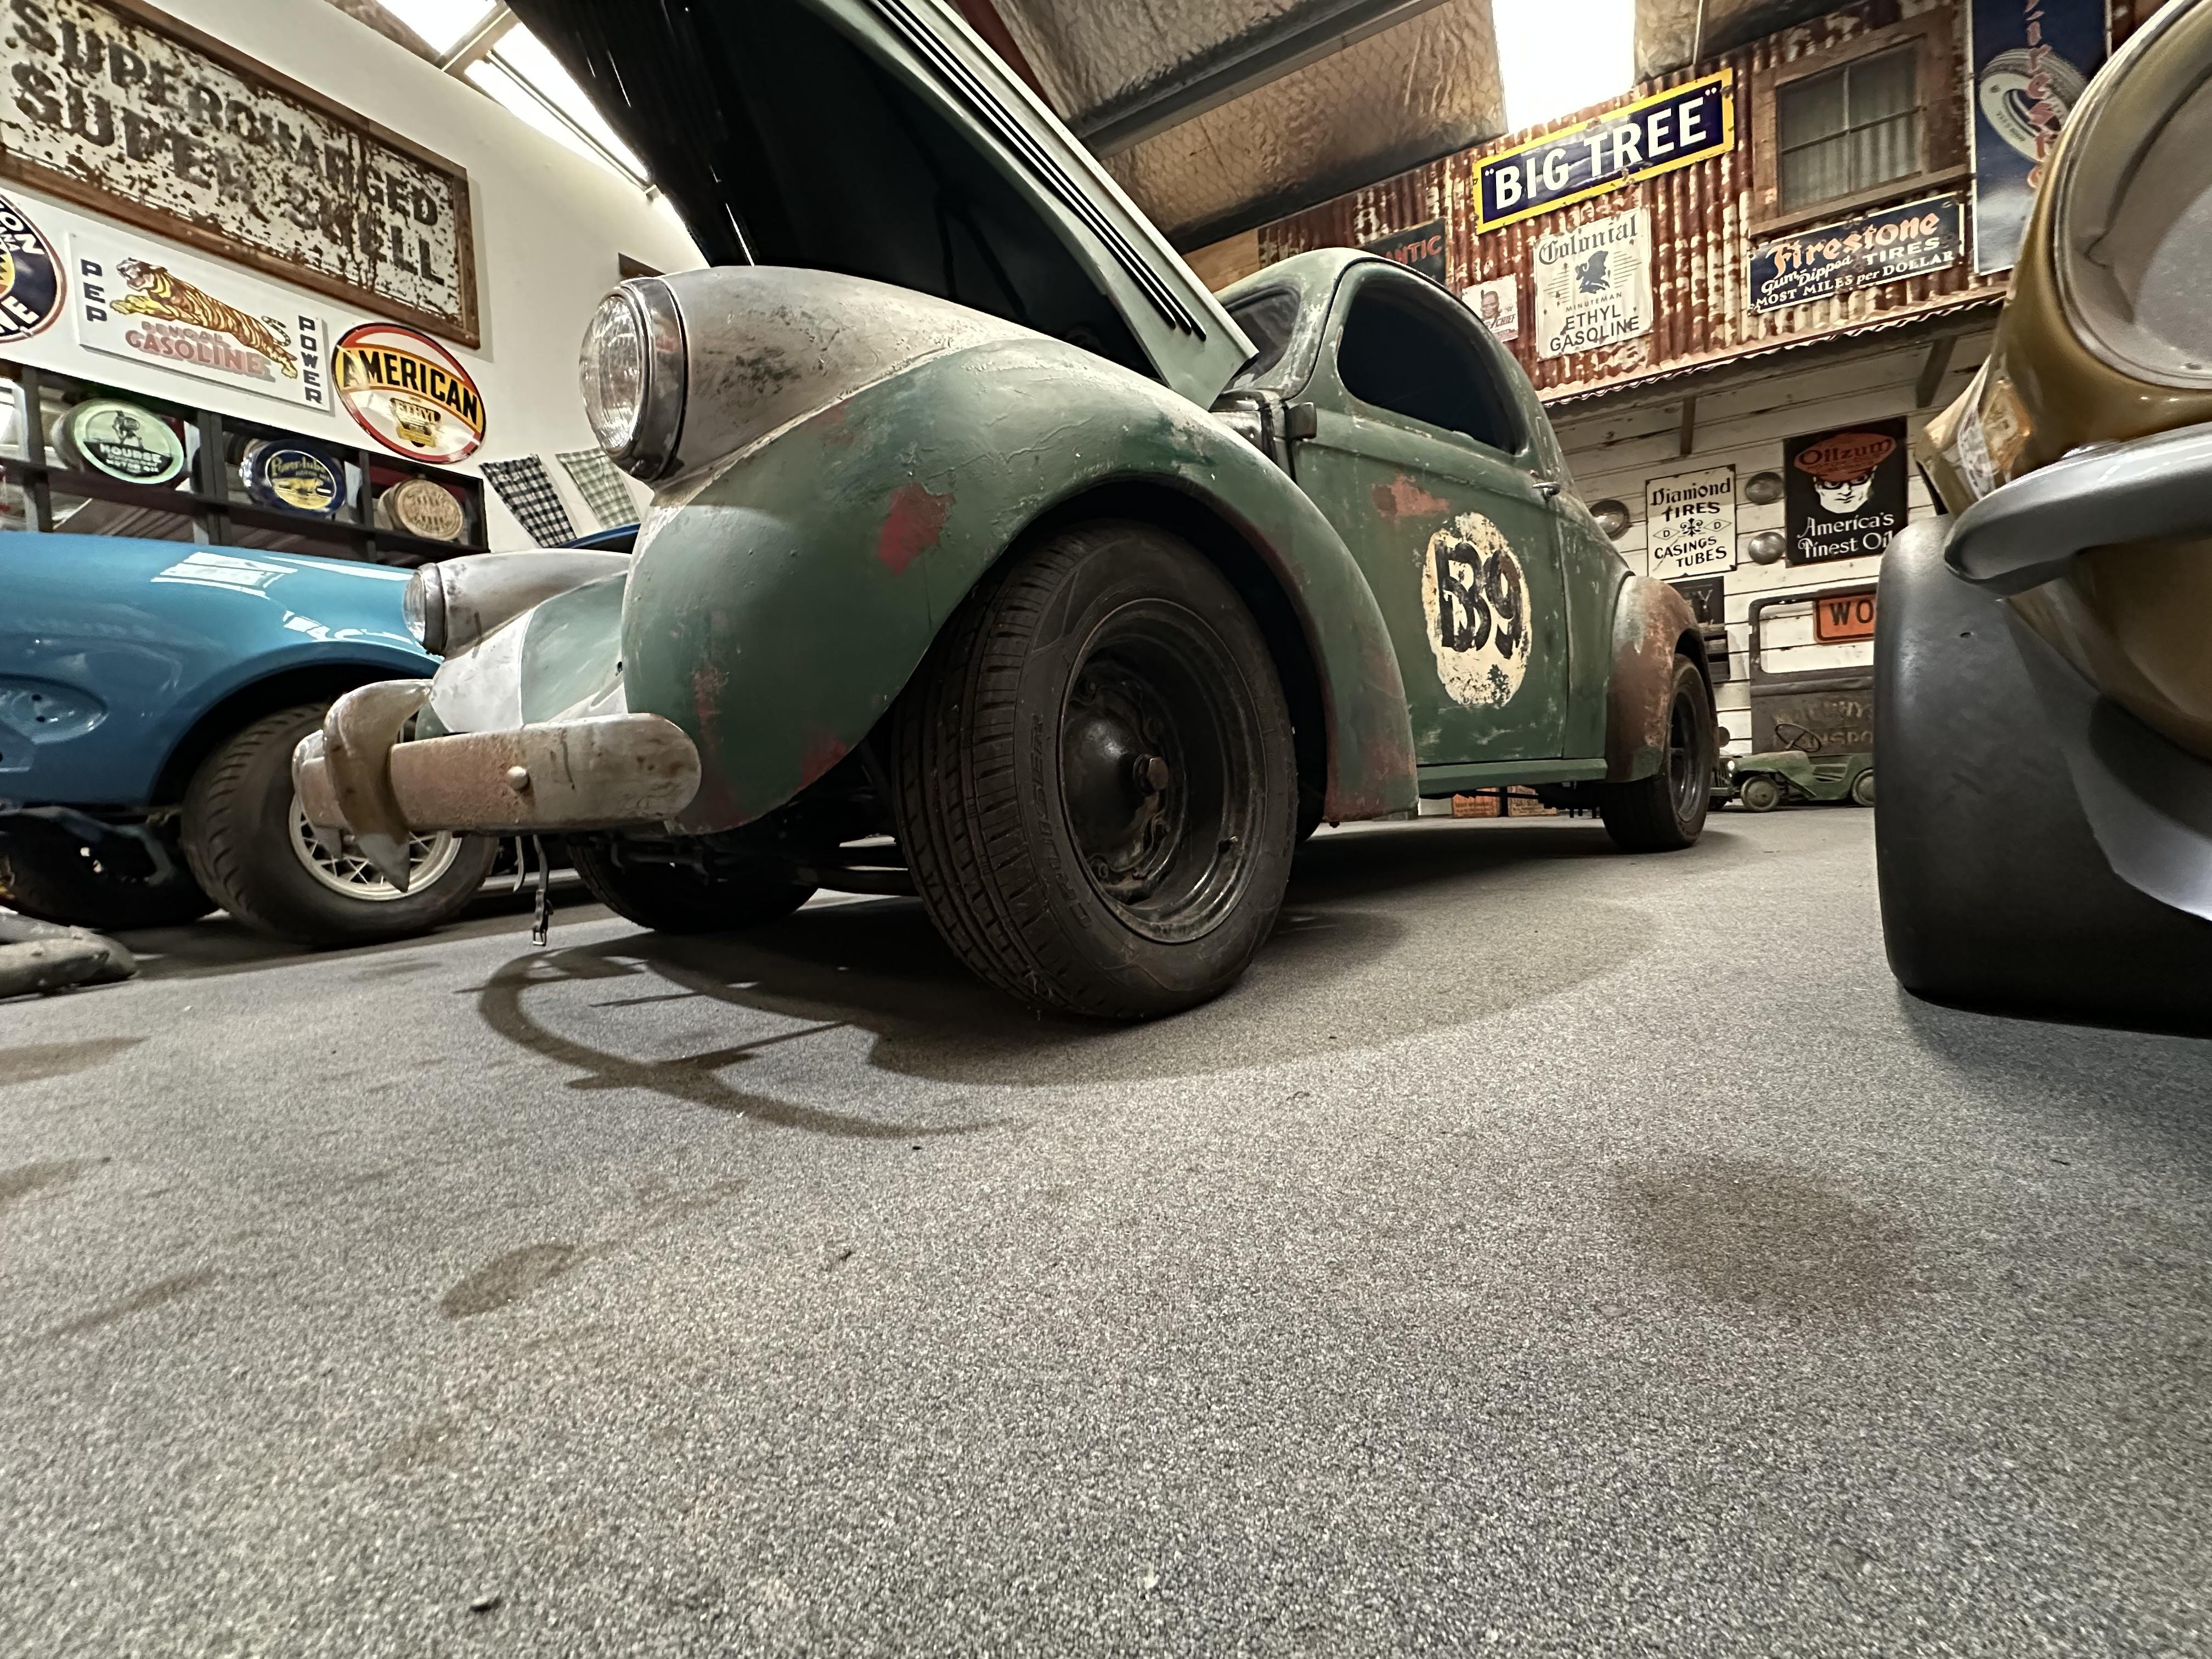
Saw this today on or monthly Gold Cruisers run. Gold Card - retiree - we get one when we turn 65 in NZ. An excellent starting point for some wide five wheels and lots of patina. The Willy's has wide fives front and back. A 327 up front with an open banjo rear. Not sure of gear box but more than likely a Muncie. The car has a history dating back to 1958 as a circuit racer by a guy by the name of Rod Coppins who was big down this way. Also in the collection is a Camaro that Rod raced. Looks like the car may have had some strip action too with remains od A/GAS lettering on the roof A cool old racer using what was to hand back in the day and may have started out race career with a flat motor using some left-over bits from other race cars. As could be expected for the day the car would have evolved over time
-
Thats a bold move Paul. It's going to look cool too
-
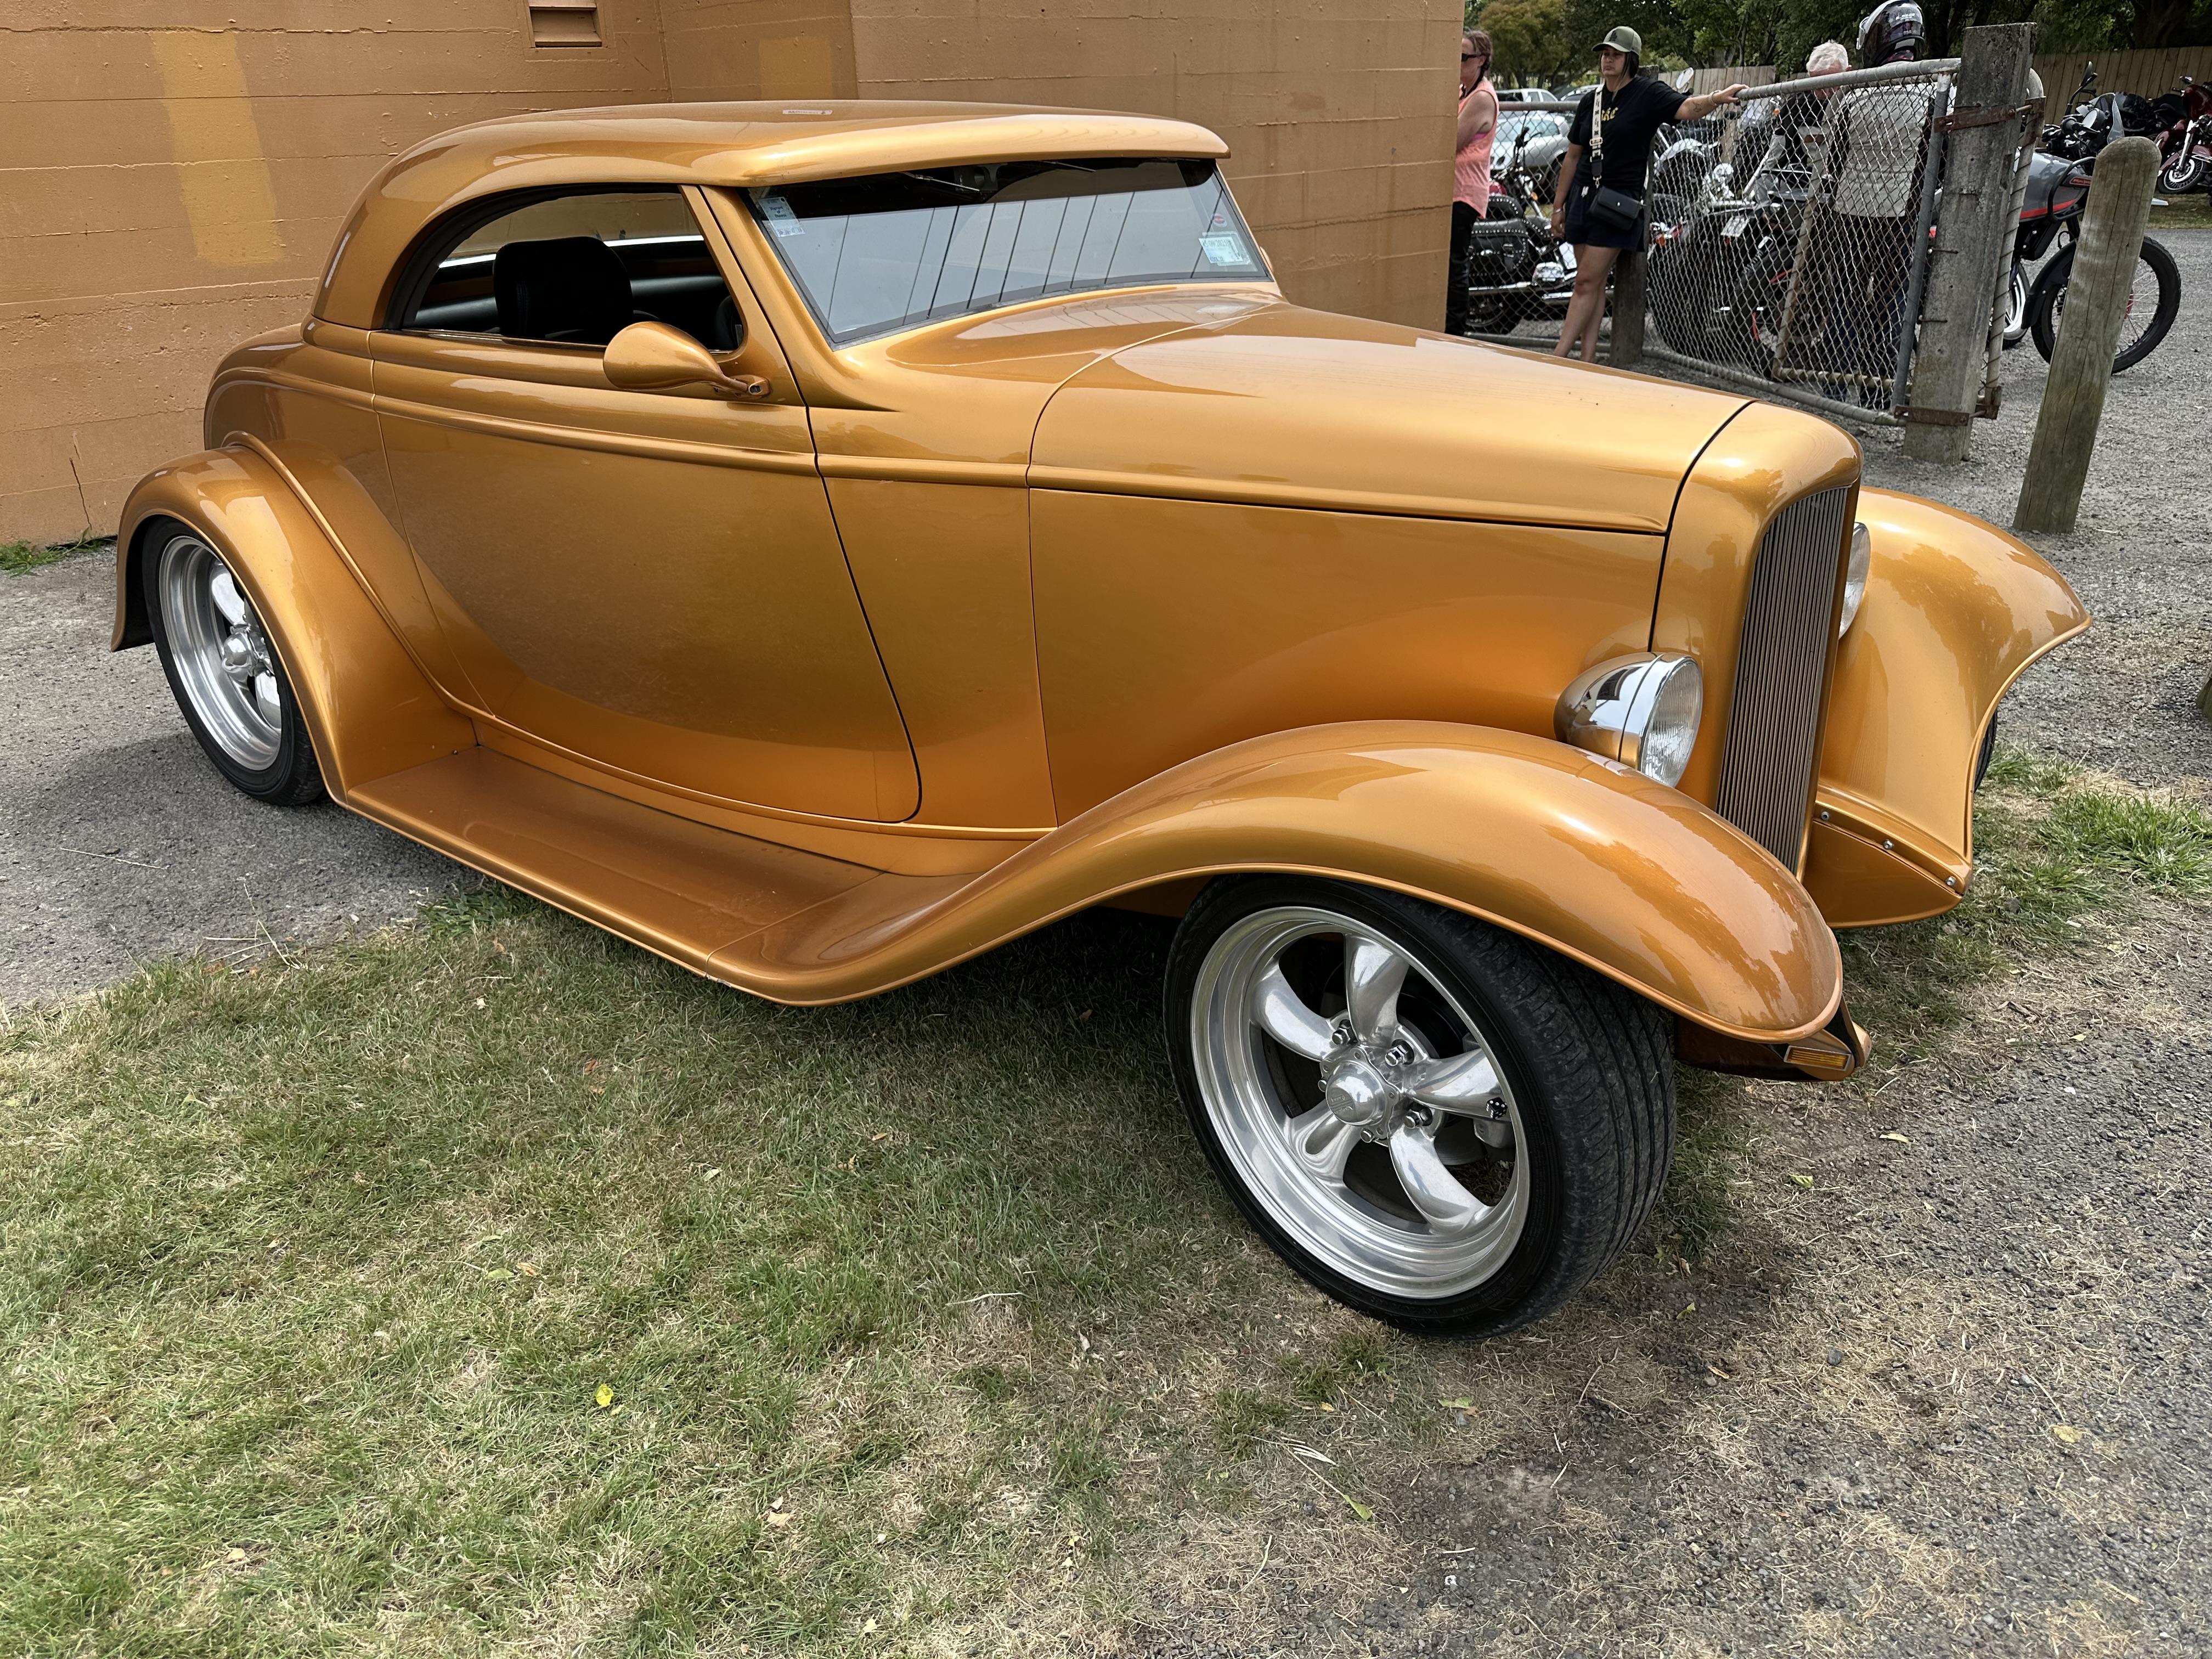
And a little off topic but relevant. Pix of a 32 Cabrolet with a similar tasteful roof line treatment that Speedpro has given to his sedan. Pix is from a car show in a little town about 30km from where I live
-
Looking good Paul. I love your attention to detail which ends up as looking like it should be there and not an obvious add on or afterthought. The example is the altered hood sides due to the body being channeled. Once painted the underlying work will disappear and will look like it came in the box that way. The ultimate deception.
-
Coming along nicely. The AMT fender sets have huge tubs in the rear so you can fit a big tyre in there. Maybe too big for a flat motor. And yup the belt line moulding is very vague on the AMT 40 series with little fading to none on the hood. Makes it a challenge to foil - or just sand it off and go de-chromed
-
Looking good Bob. I built one years ago and they do come out good. Nice start with the (very) BBC. The one I built I scraped away inside of the hood side panels and opened up the vents so you could see into the engine bay. A nice way to show off your multi-carb VBBC
-
I saw a great source for silicone tube - some re-useable silicone straws that I saw at the supermarket last week
-
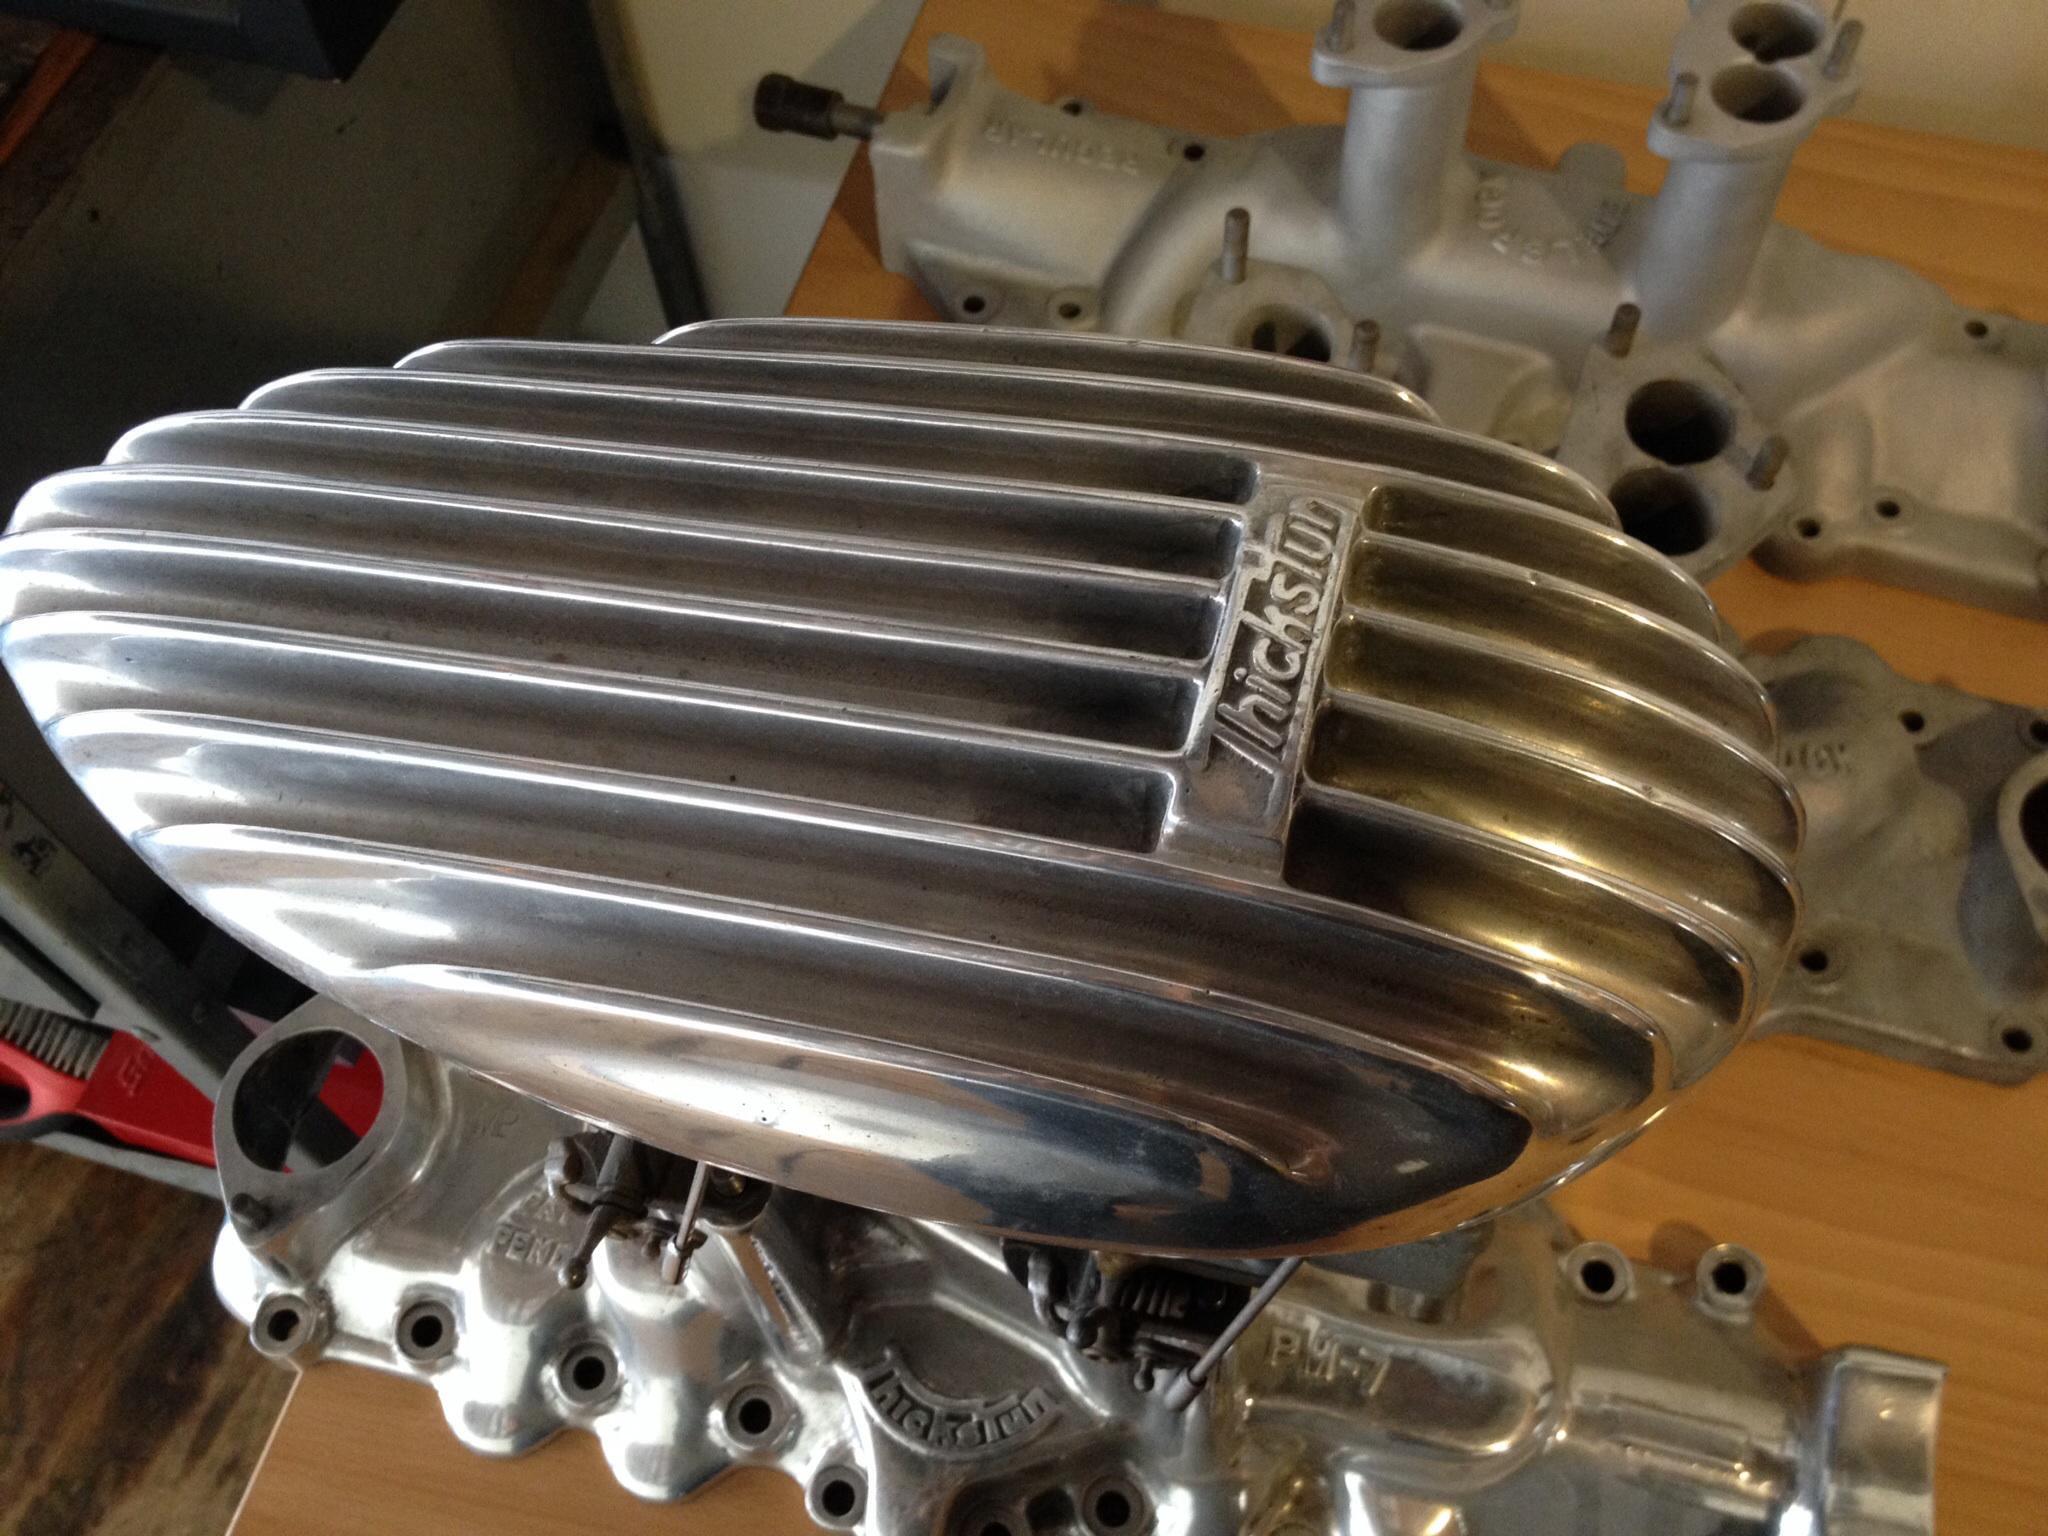
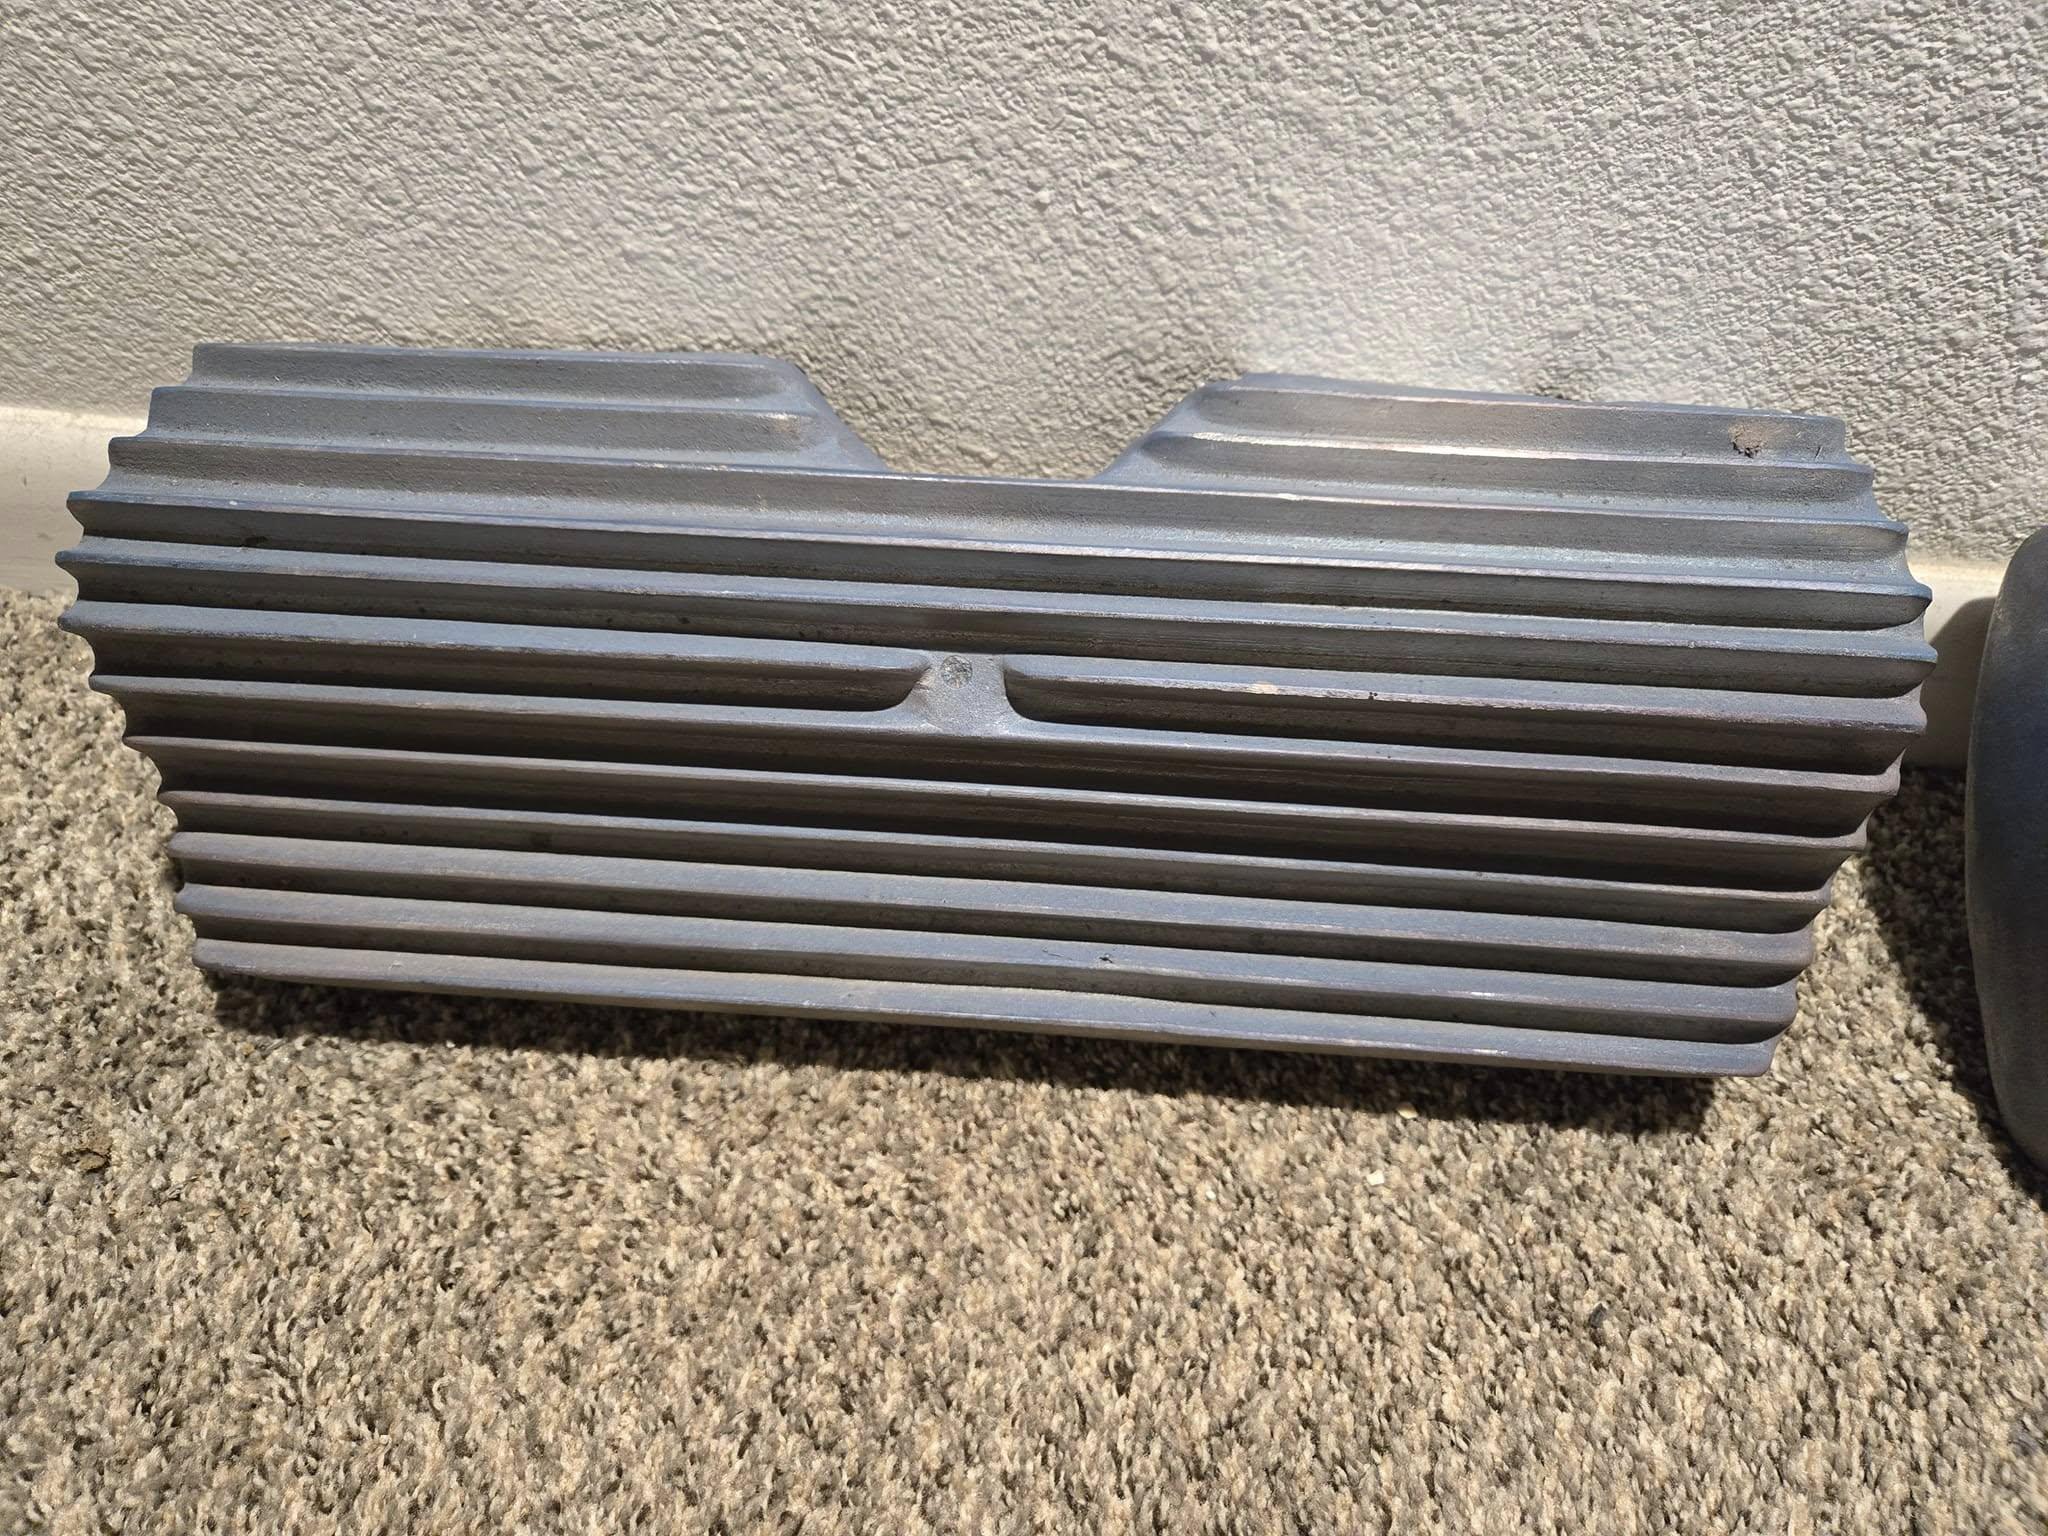
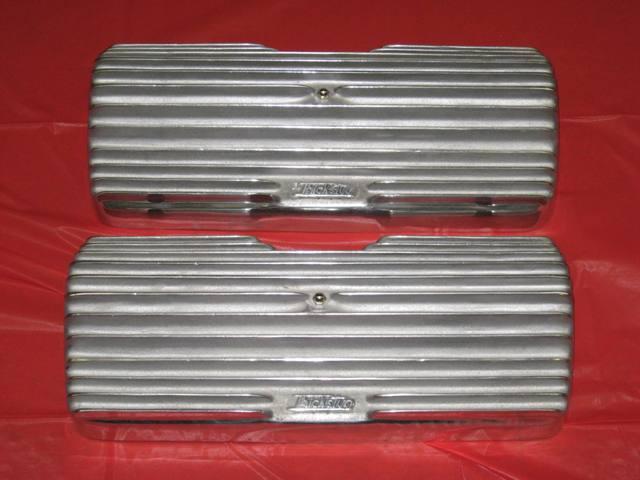
Kool project. What is the gearbox you are using as I have a chopped 5W I am gathering parts for and they are very similar to yours, eg Thickstun gear . I am looking at using the Sedan flat motor but don't want to run with the attached auto. By using a long tail shaft manual box you don't need to move the Revell chassis K member as it is quite a bit further back than on a stock chassis. Will be watching with a lot of interest Some Thickstun ref pix for you that I sourced from the interweb. The black and red motor is from the Speedway (Bills) collection. A wee photo bomb
-
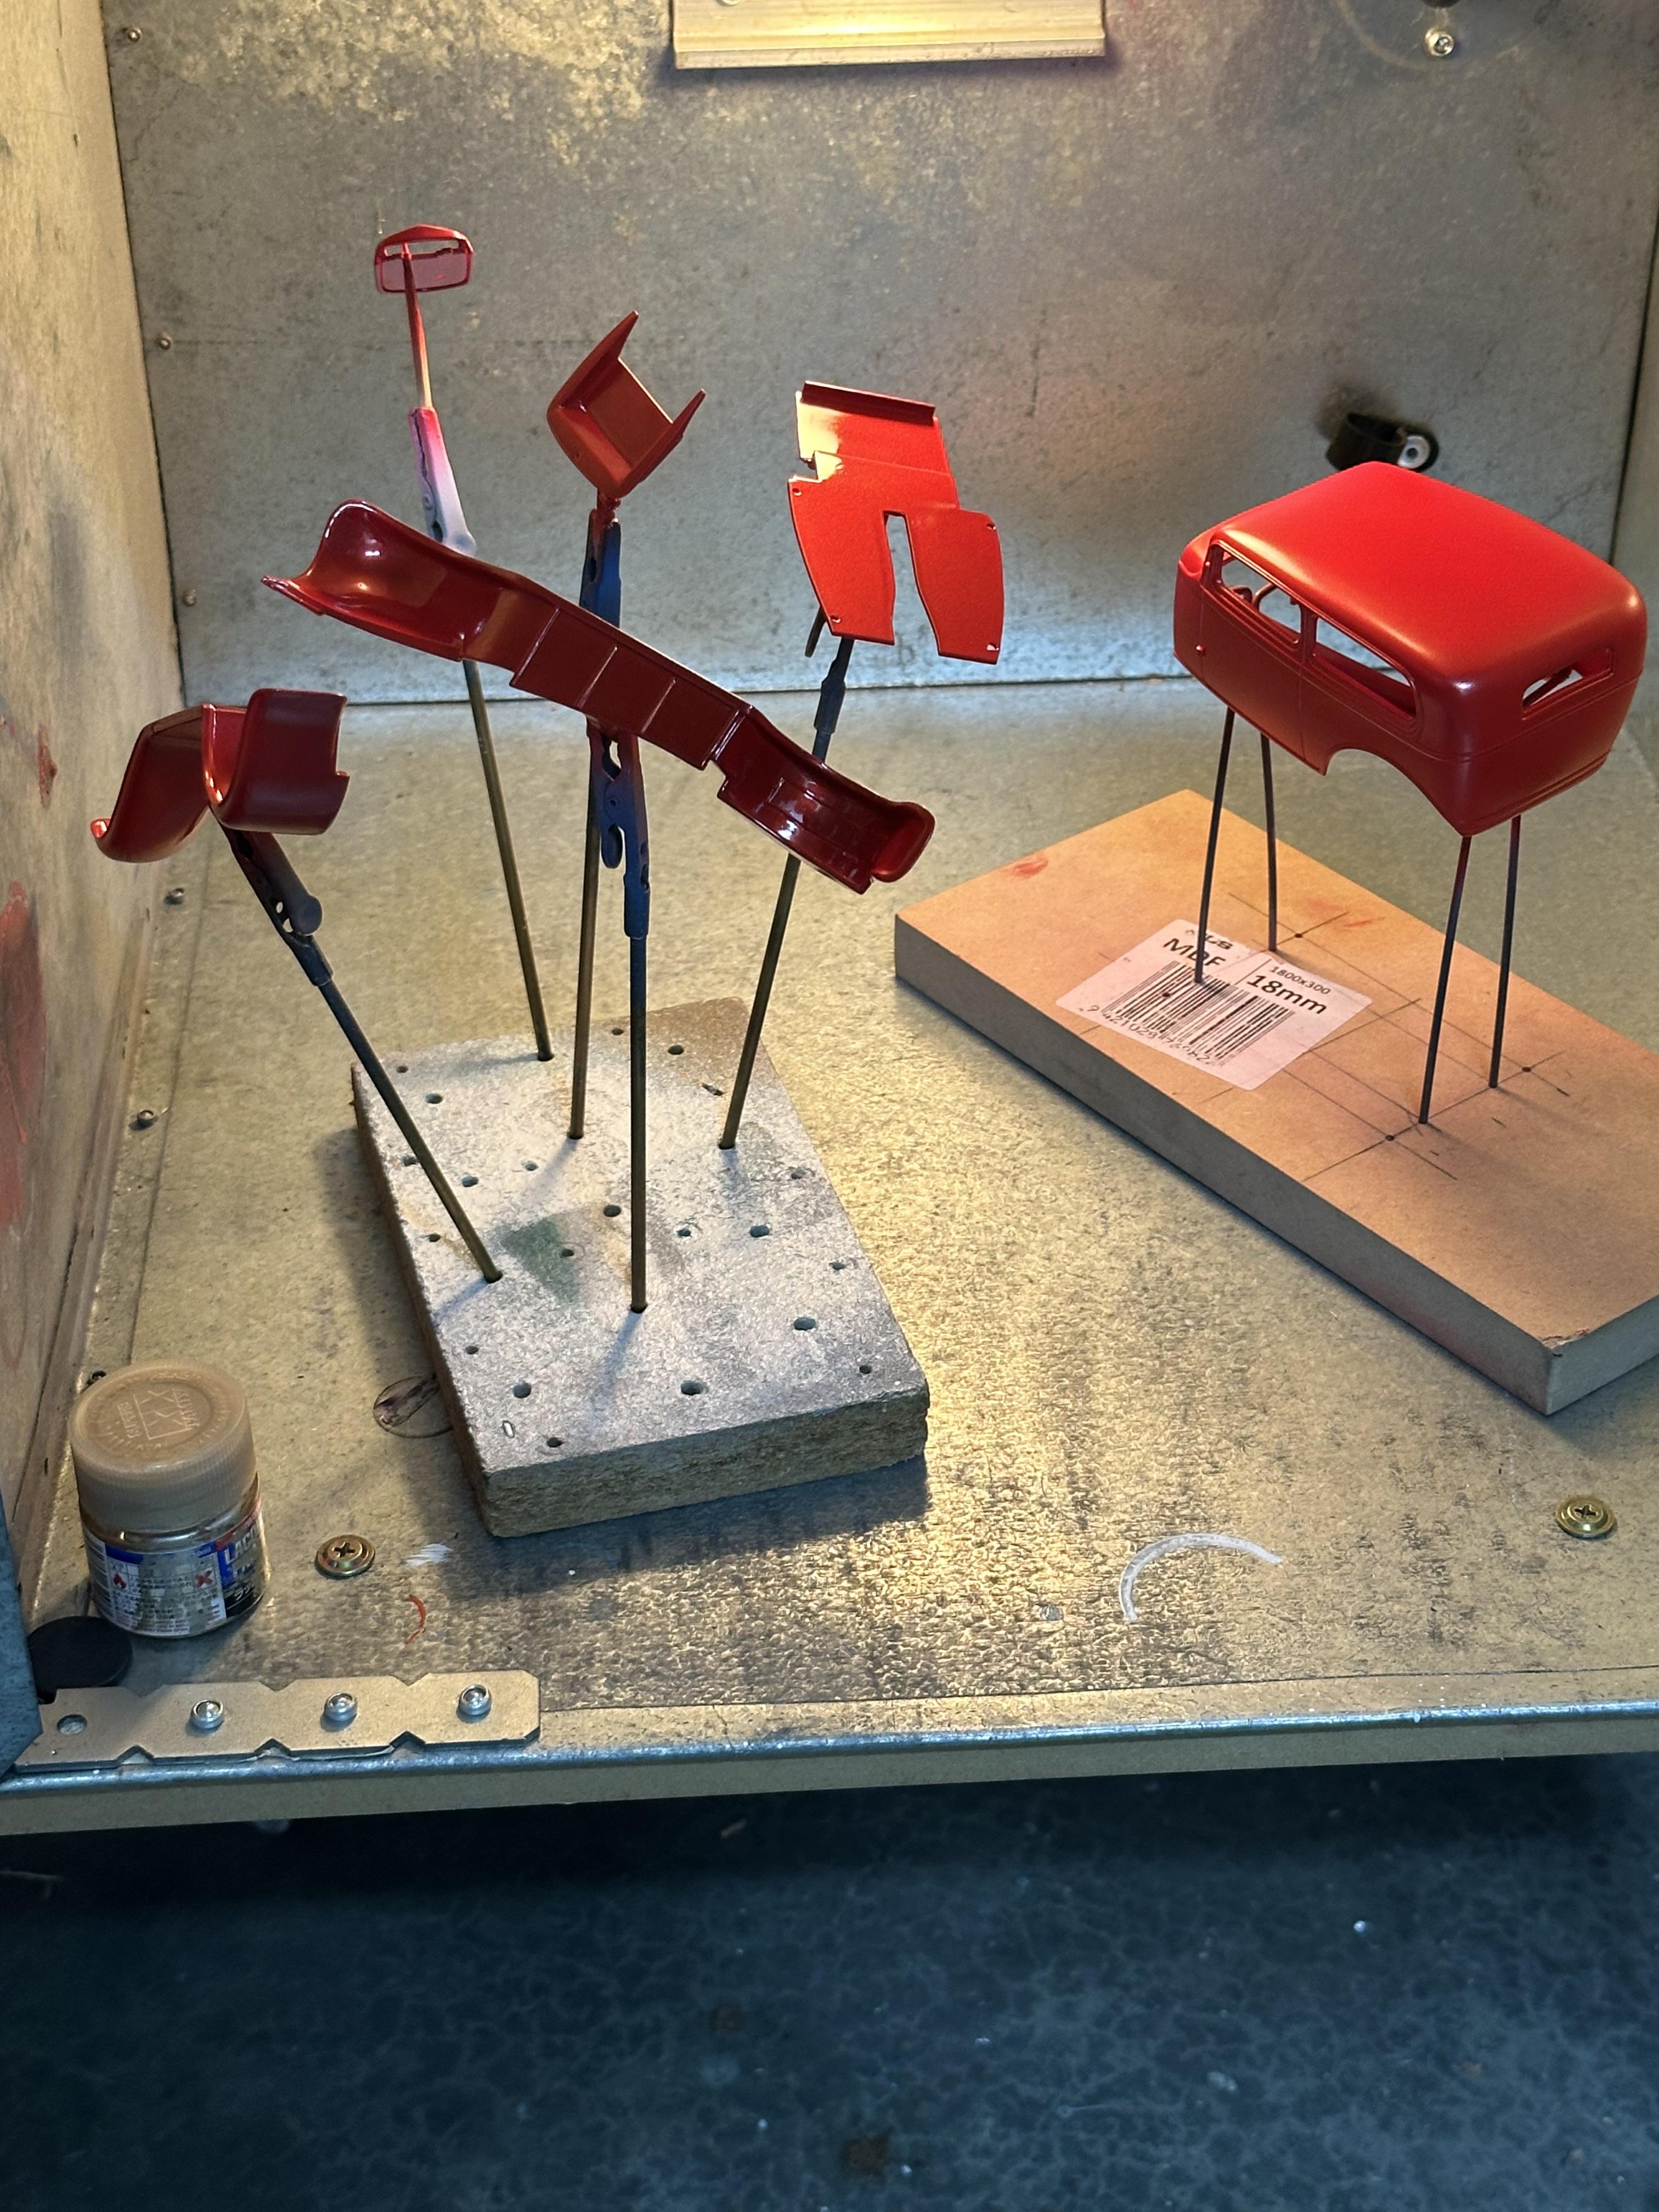
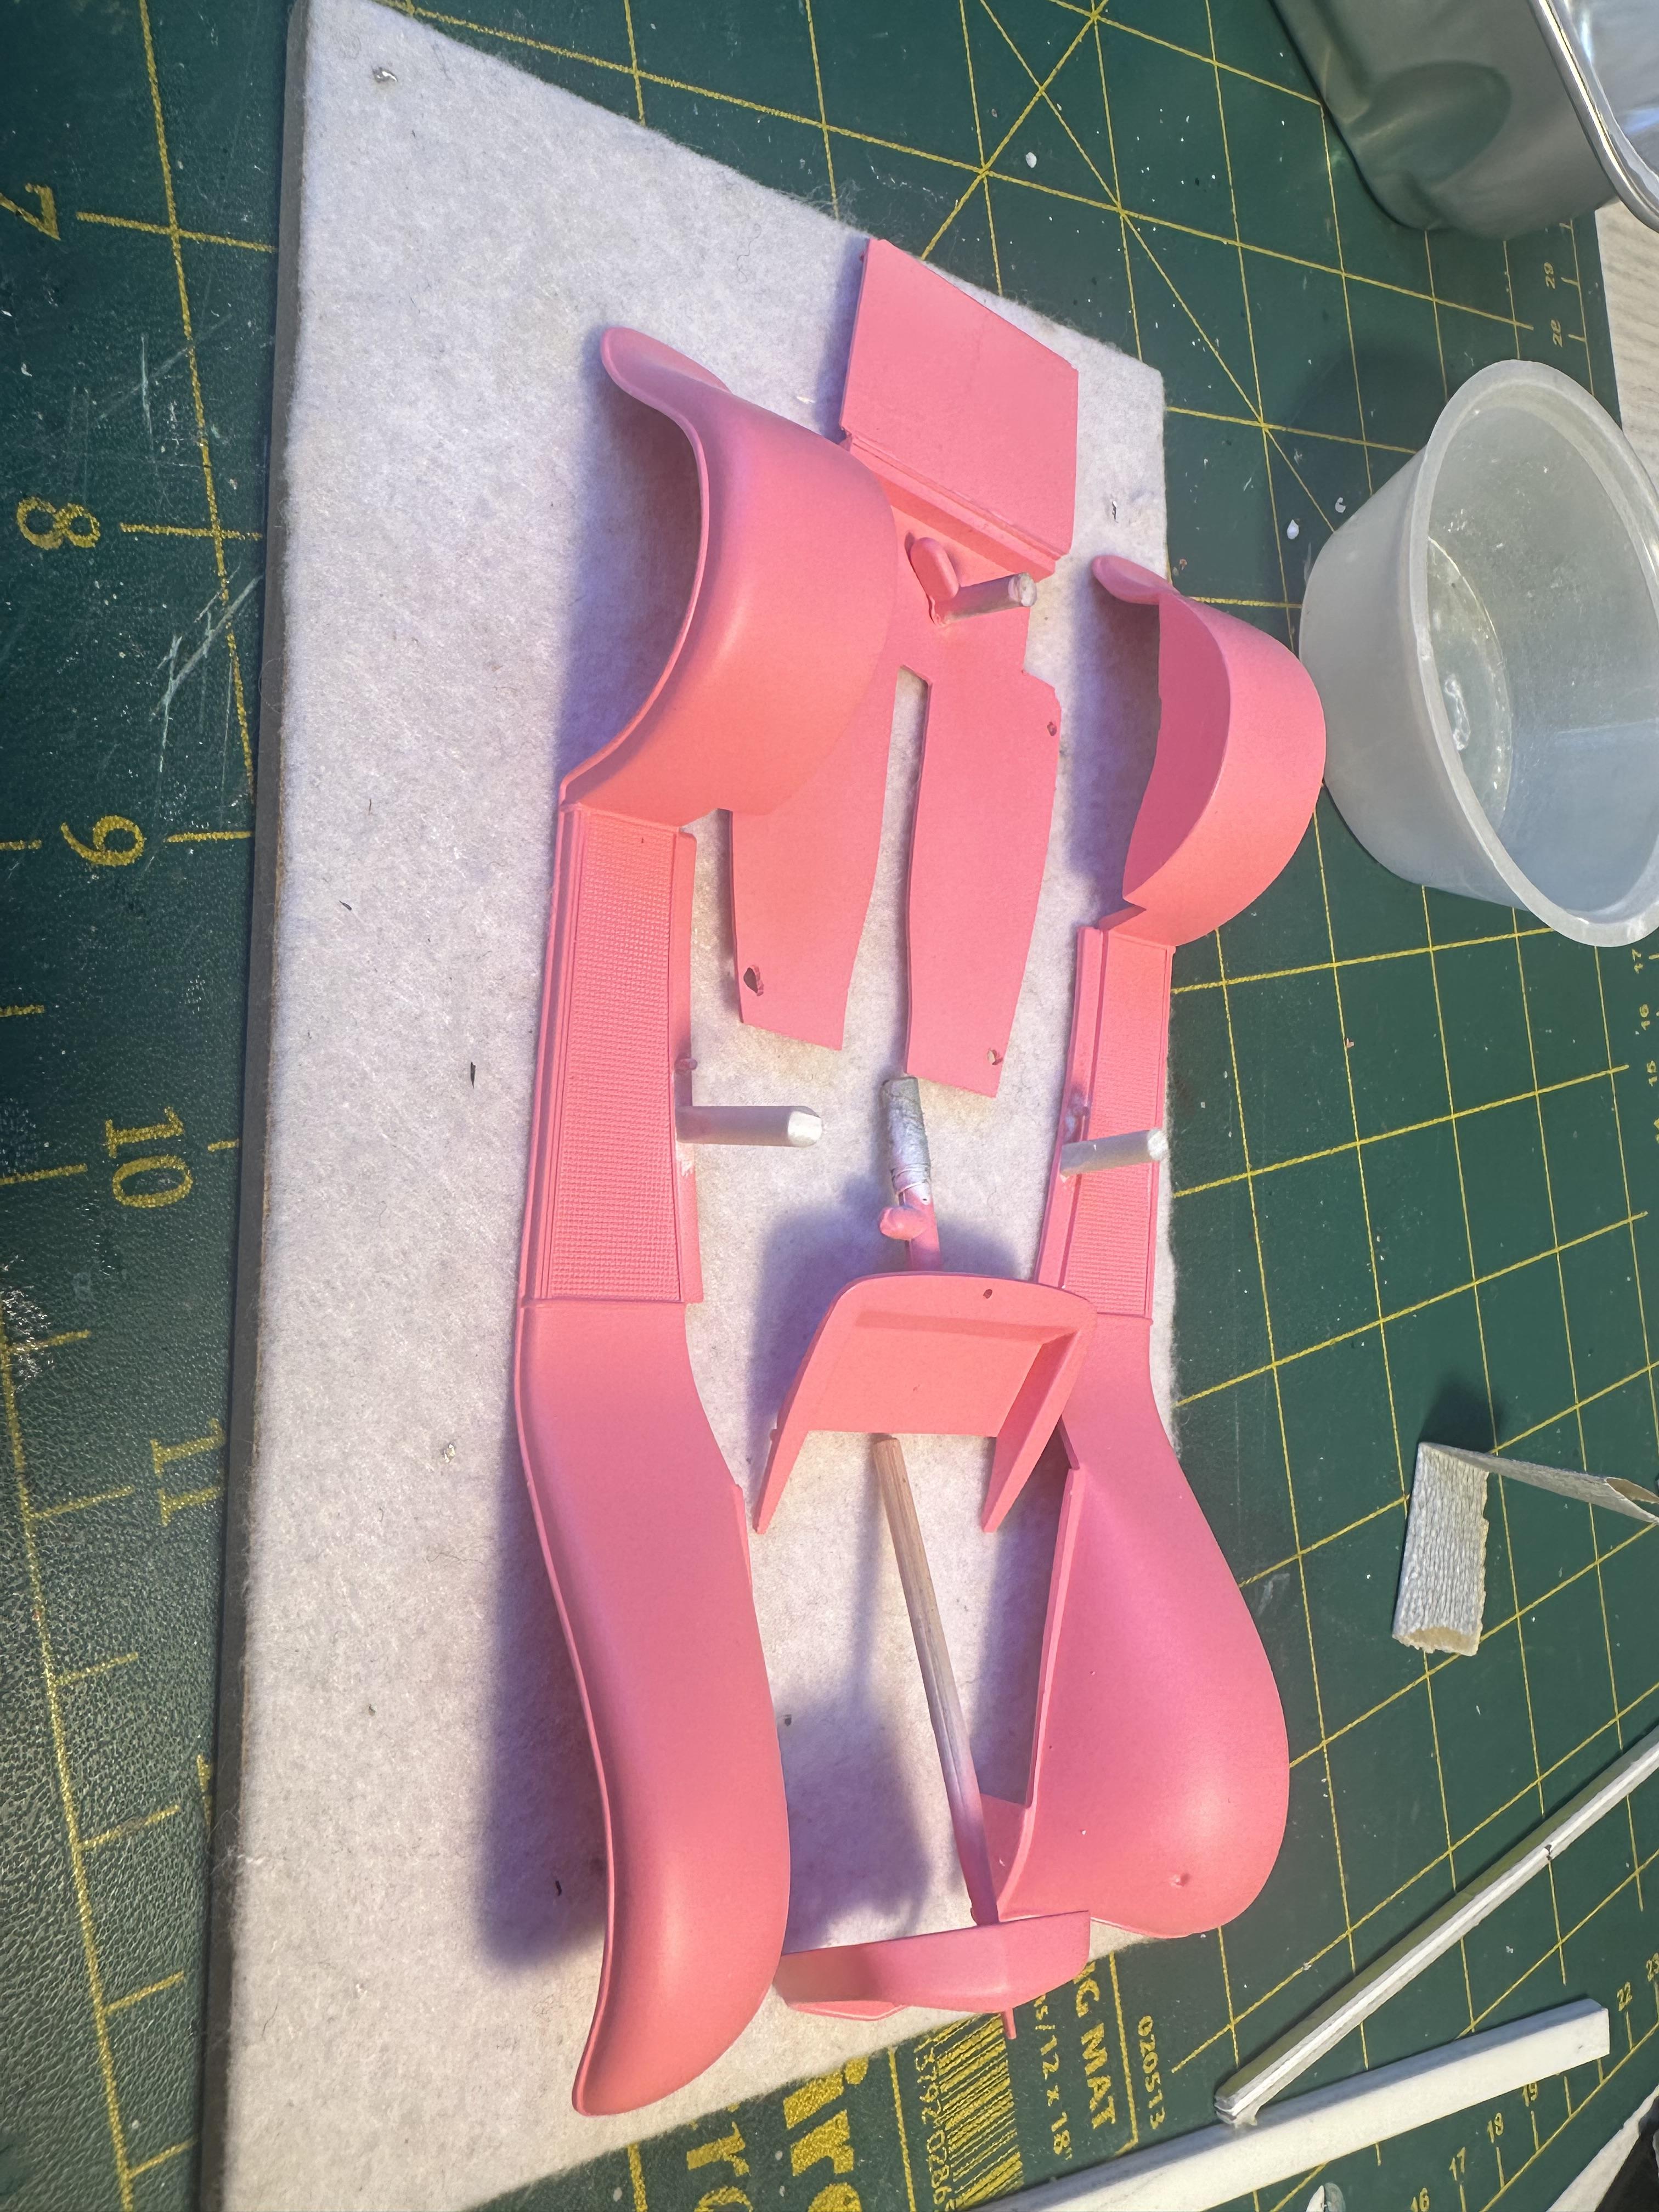
Body in the paint shop Fenders, firewall, floor boards have been clear coated. The body is in colour after a pink guide coat and a flat red base coat. I need to sand some goobers out before next coats. Meantime curing in the hot box
-
Looking good Kit
-
1966 Dodge Monaco 500s...what was, and what might have been....
bill-e-boy replied to tim boyd's topic in Model Cars
A couple of nice Mopar builds Tim along with a good informative back story -
Lots of good work happening here. Will be following
-
What they all said. I did one years ago based on an article in one of the hot rod magazines and it is exactly as how you have done yours. Good work
-
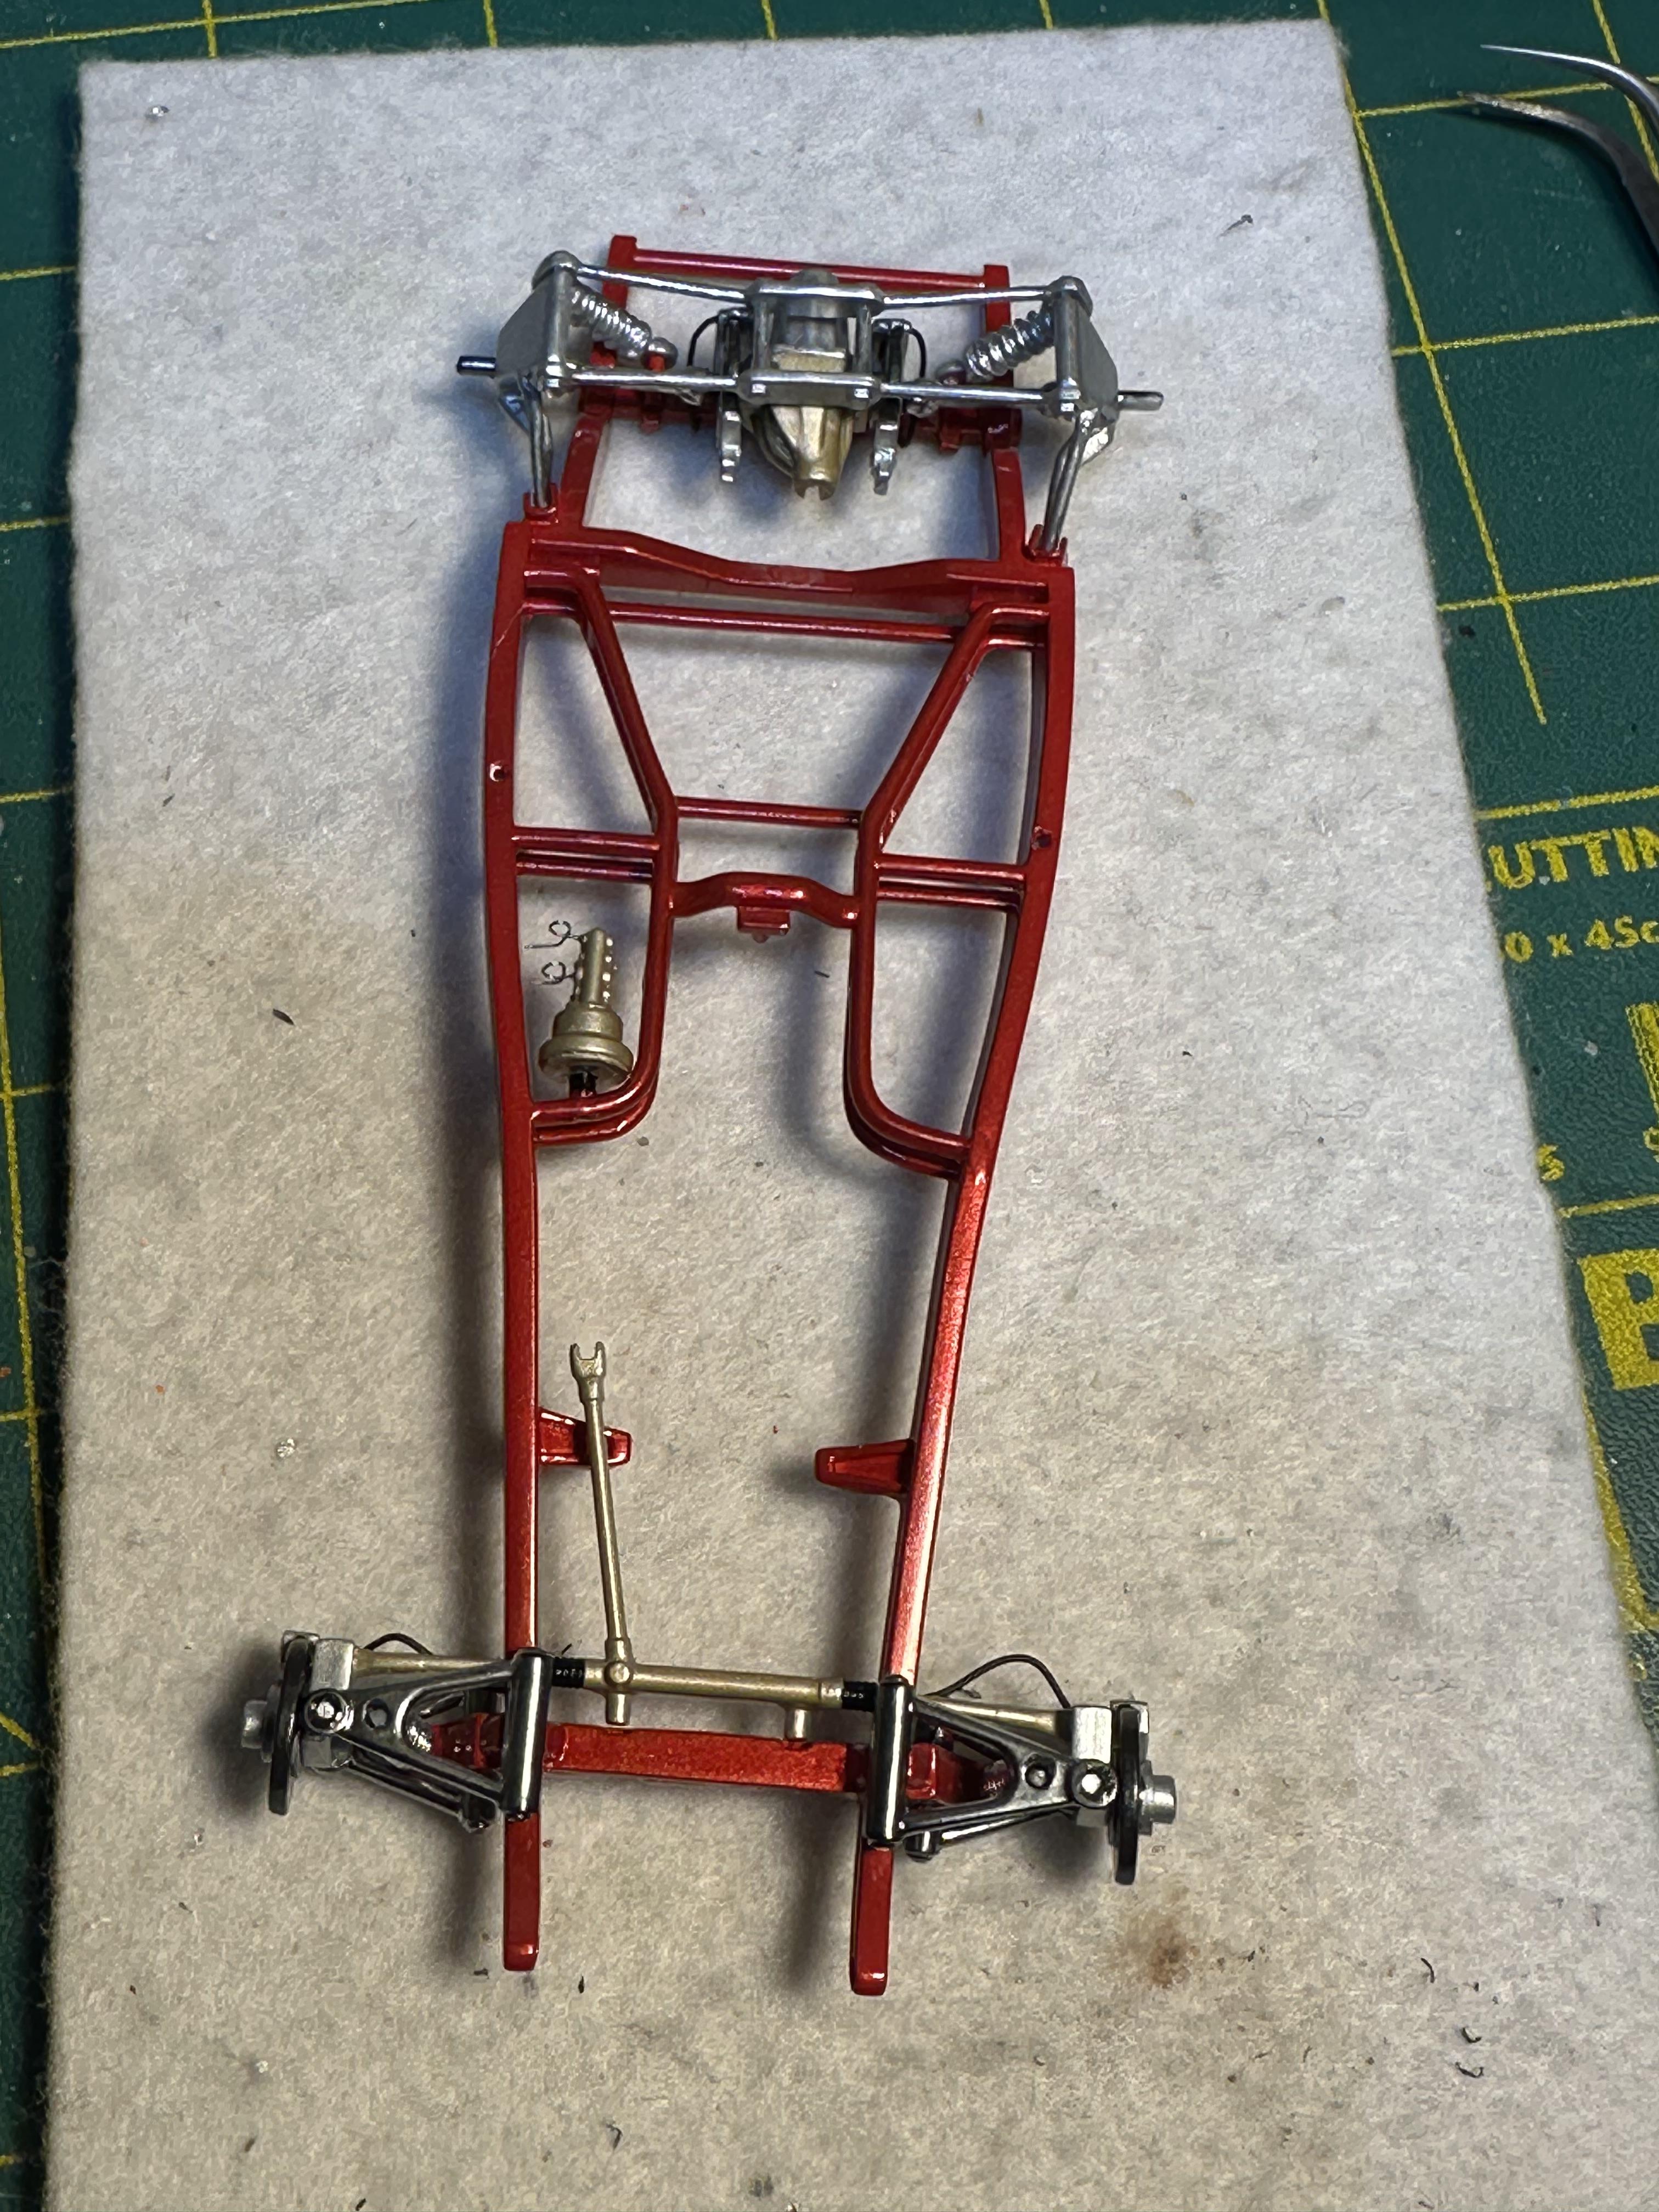
Getting chassis assembled. Front wheels need help in keeping them in alignment. I used Revell glue on wheels as it is slower drying as this allows you time to get the wheels aligned. The chassis is on an offcut of sheet metal with some magnets used to keep the wheels in place. I did not have any issues with the rear wheels. Now up on all fours The front spreader bar is some 2mm stainless steel filler wire polished and cut to length. I had drilled the holes for this in the chassis prep stage The photo shows wheels a bit wobbly but I think the phone camera does that Side shot I am working on completing body work and have some paint on the guards and other smaller body parts. Waiting while paint cures Thanks for looking
-
Yup - fish eyes for sure form some sort of contaminant. Strip, thoroughly clean down as above and repaint At tip for Tamiya metallics and pearls - us a flat as a base of same or similar colour to the top coat and you will find you will get a deeper colour with better coverage. Less creeping away at high points and better cover in the low points. Obviously the flat will not be metallic but a solid colour.
-
Sorry - went bad. I meant so much chrome everywhere you just have to have chrome plated spark plug wires too
-
Thanks for your kind words Chassis is 32 Phantom Vickie with narrowed rear for tubbed rear fenders. Rear end is a Li'l John independent from a 34 Coupe - that horrible out of scale thing that Revell did by shrinking a 34 body to fit a Model T chassis.
-
Chrome plated wire LOL
-
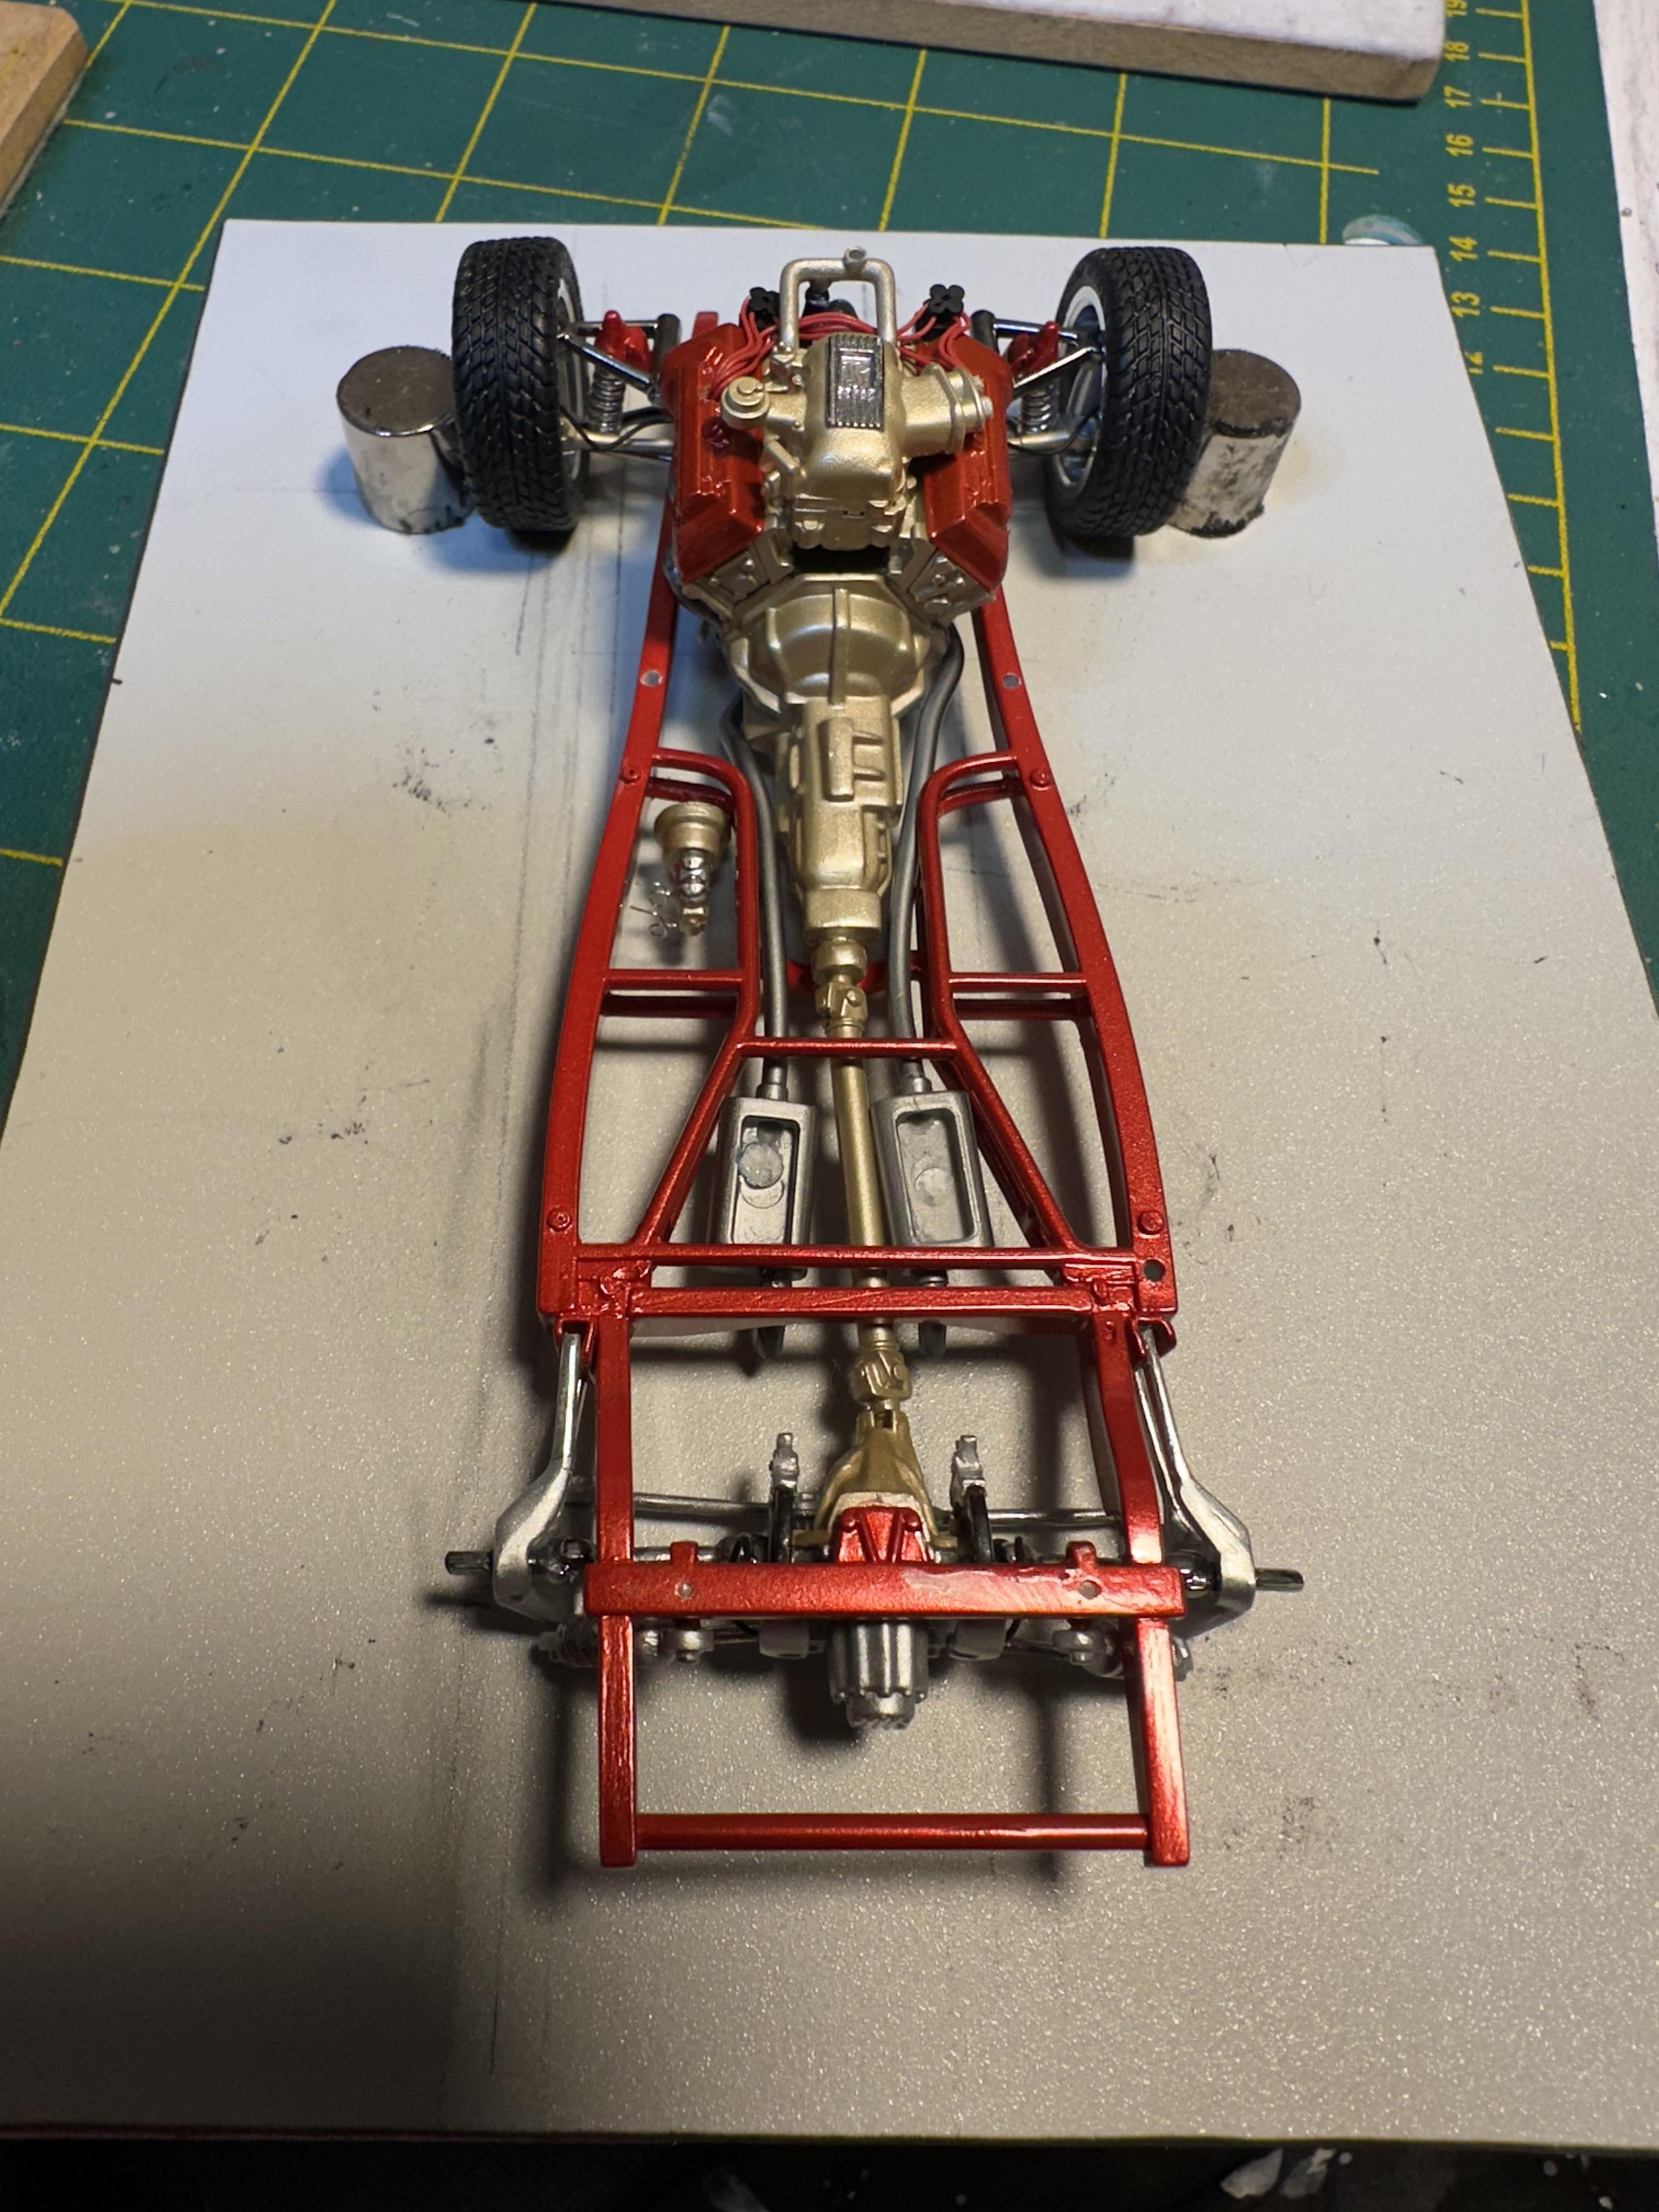
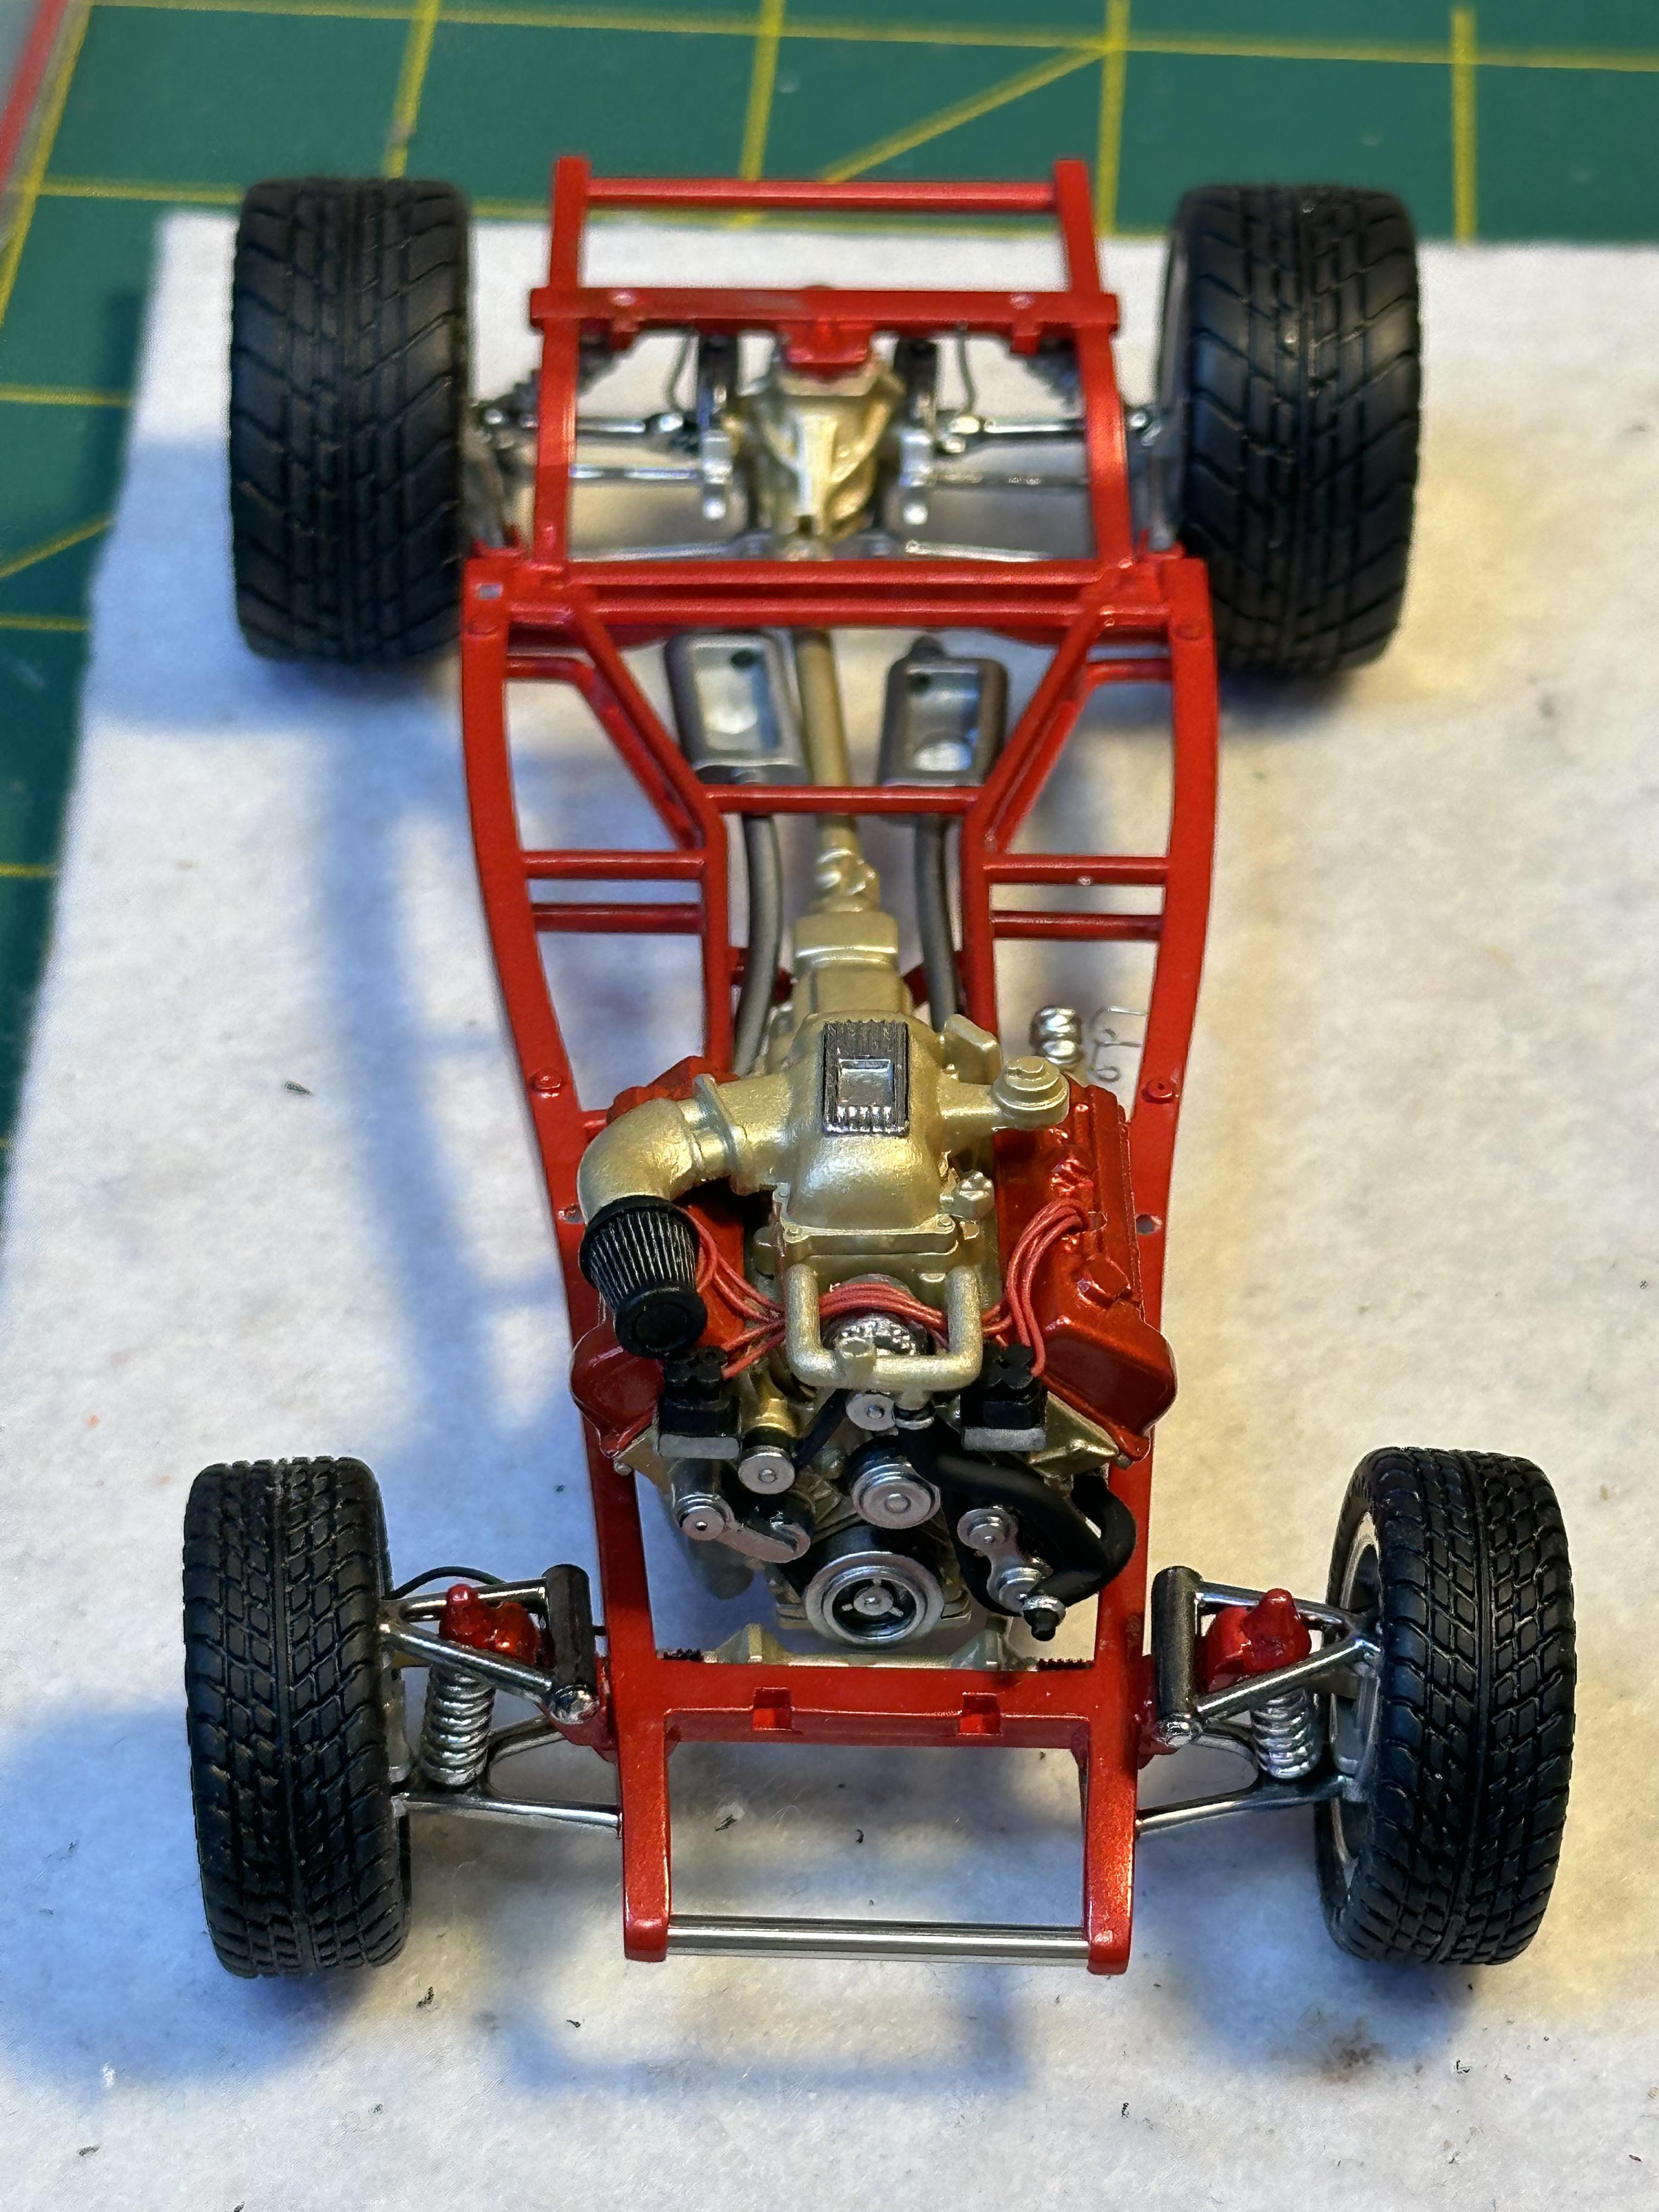
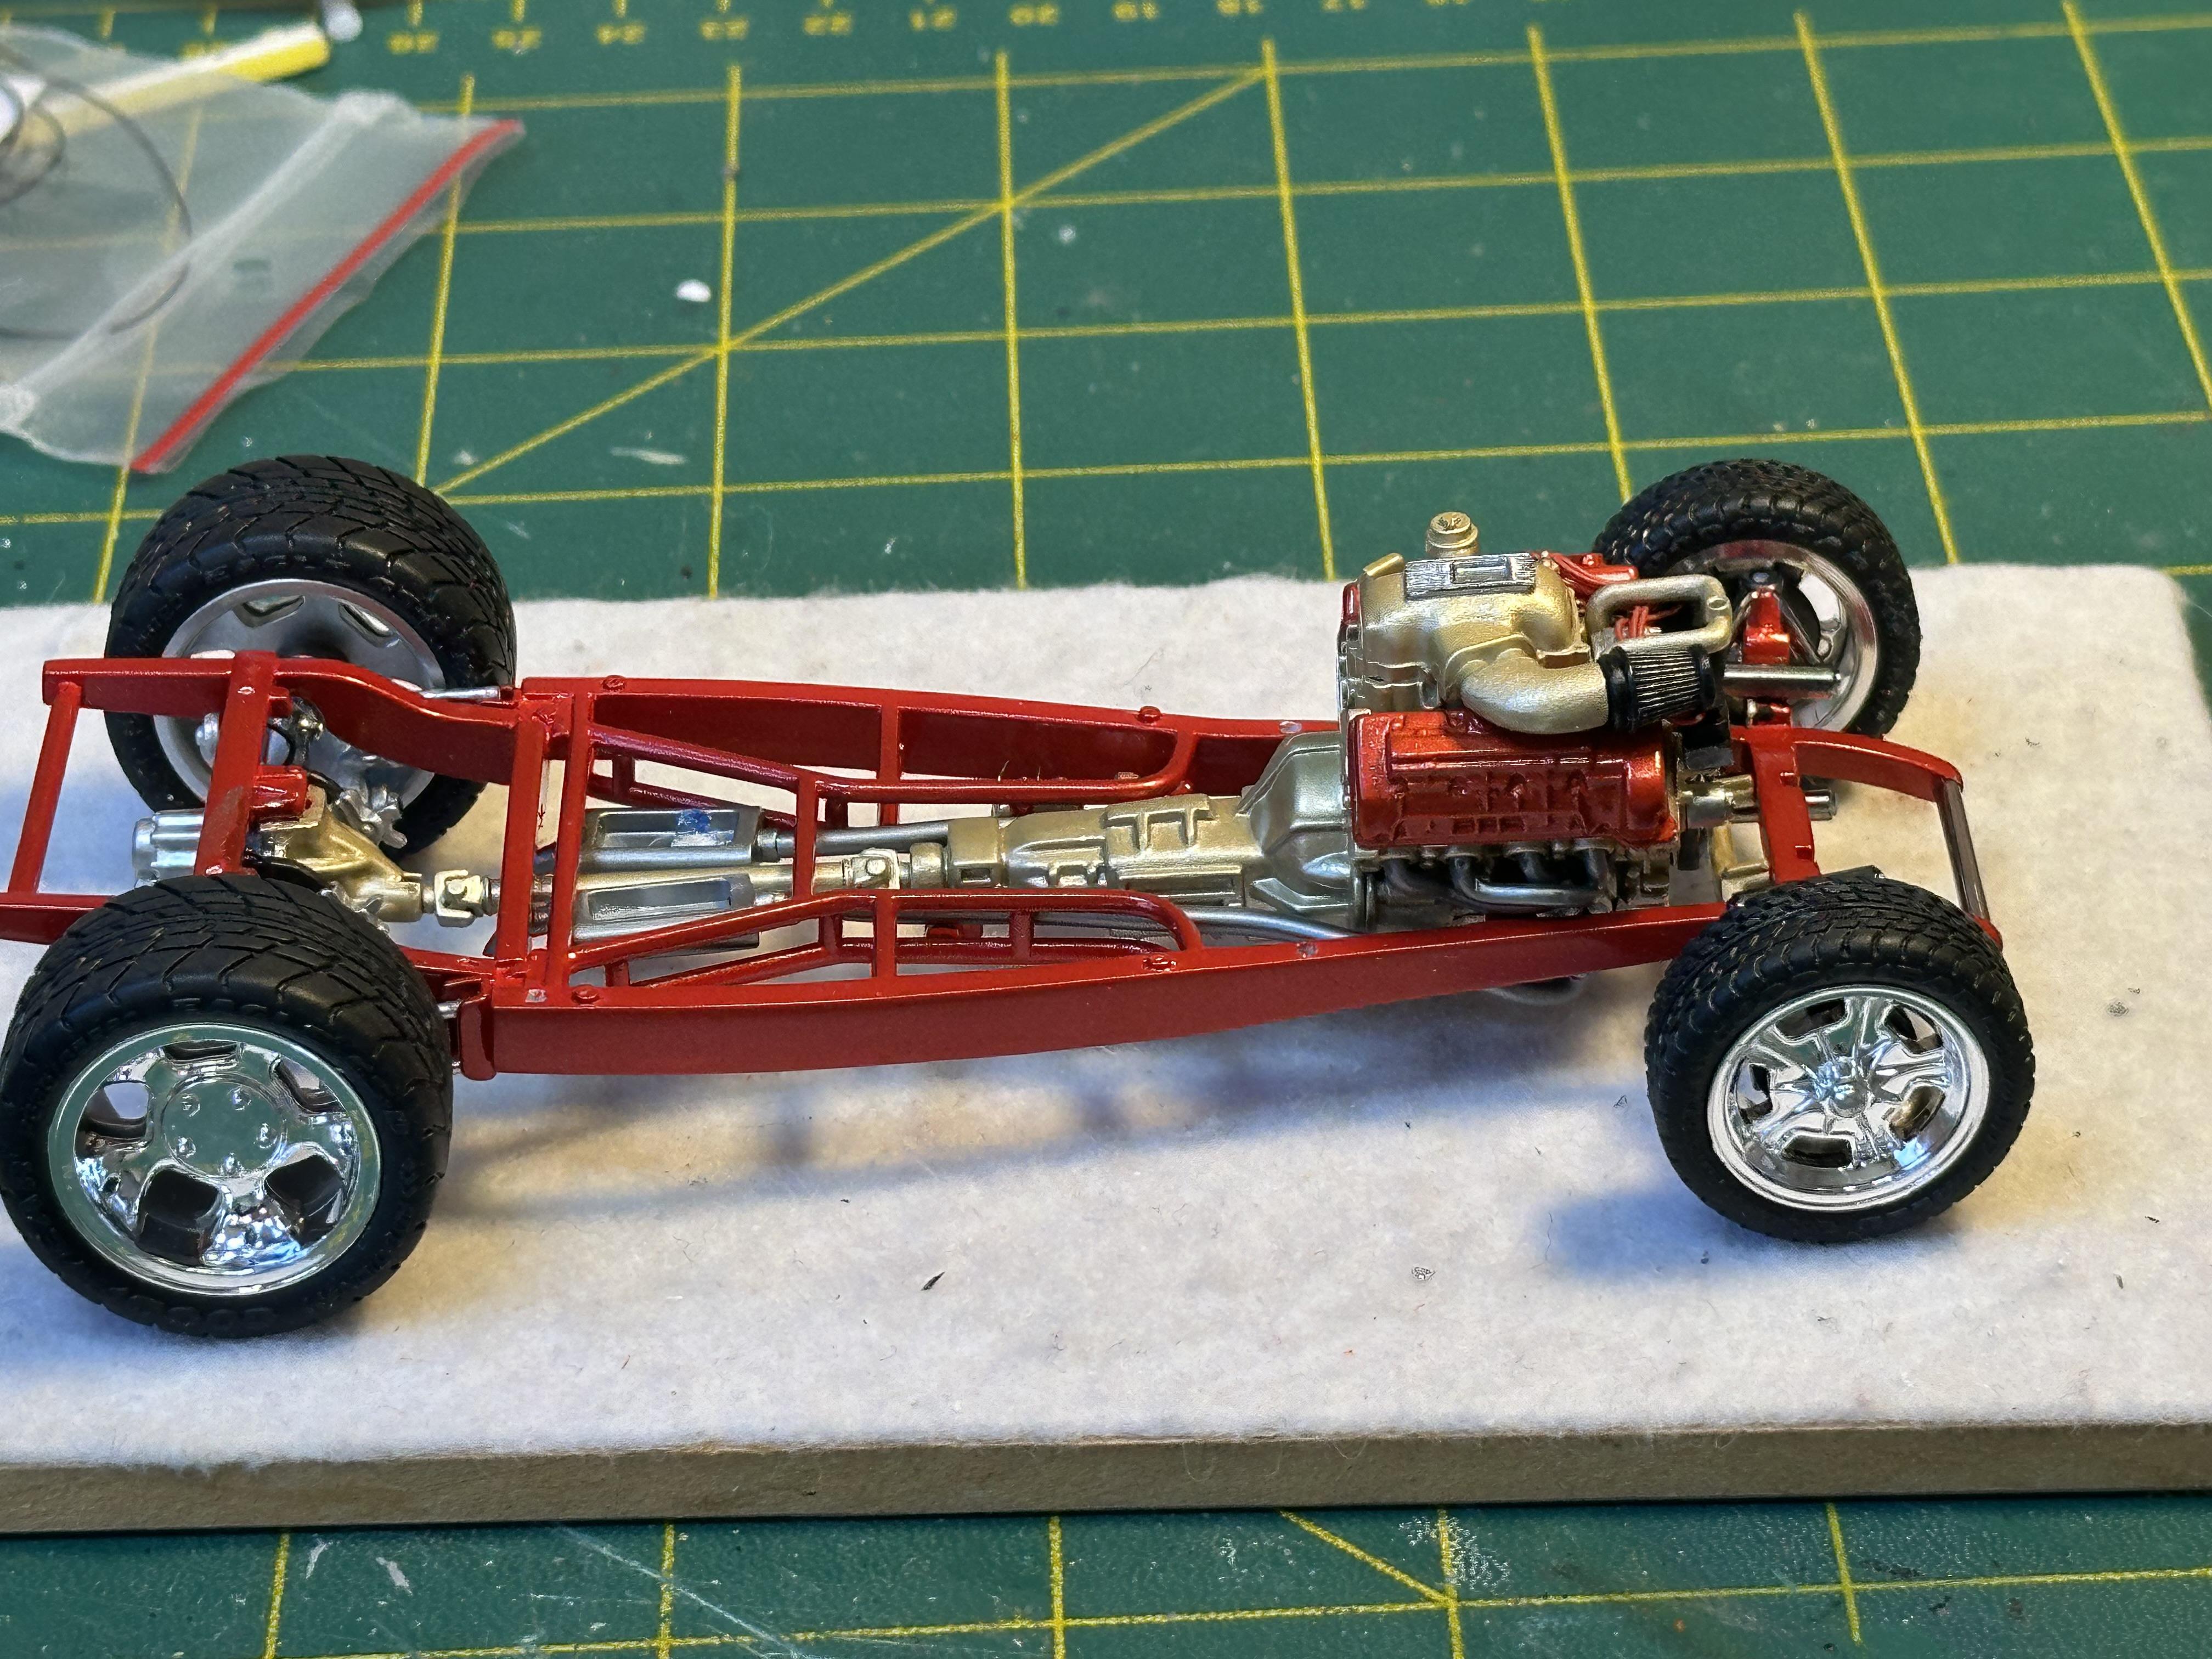
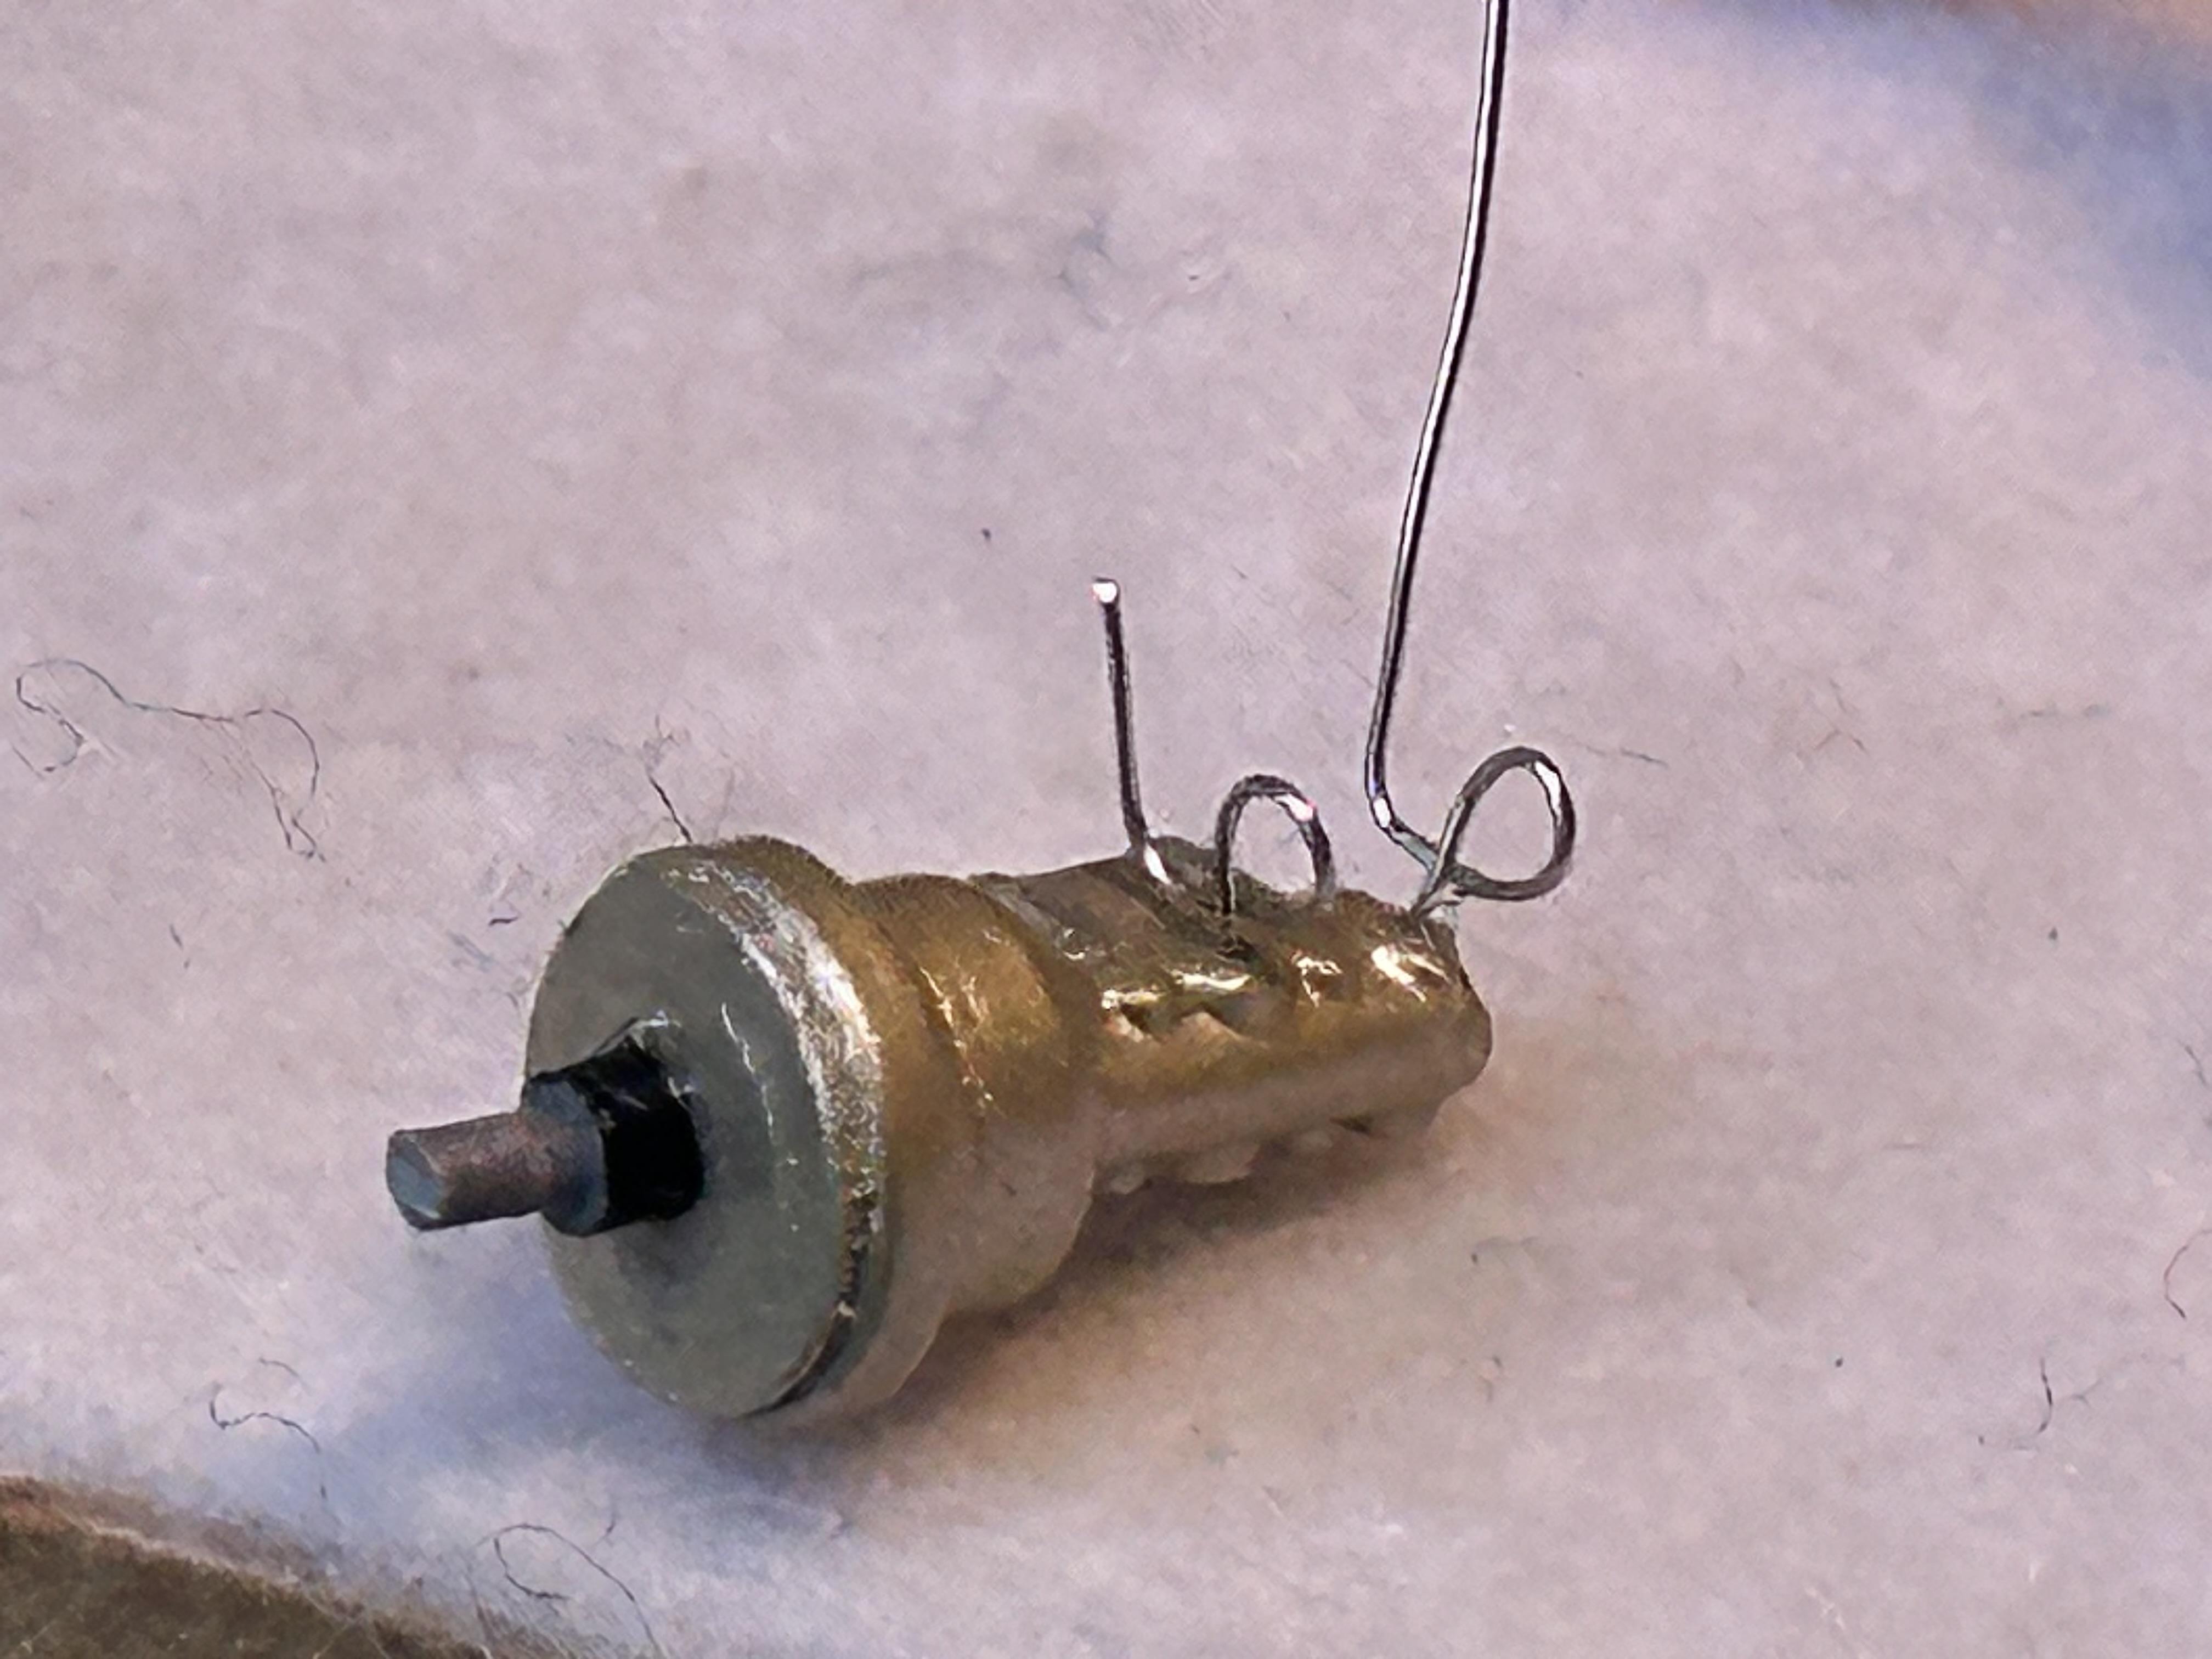
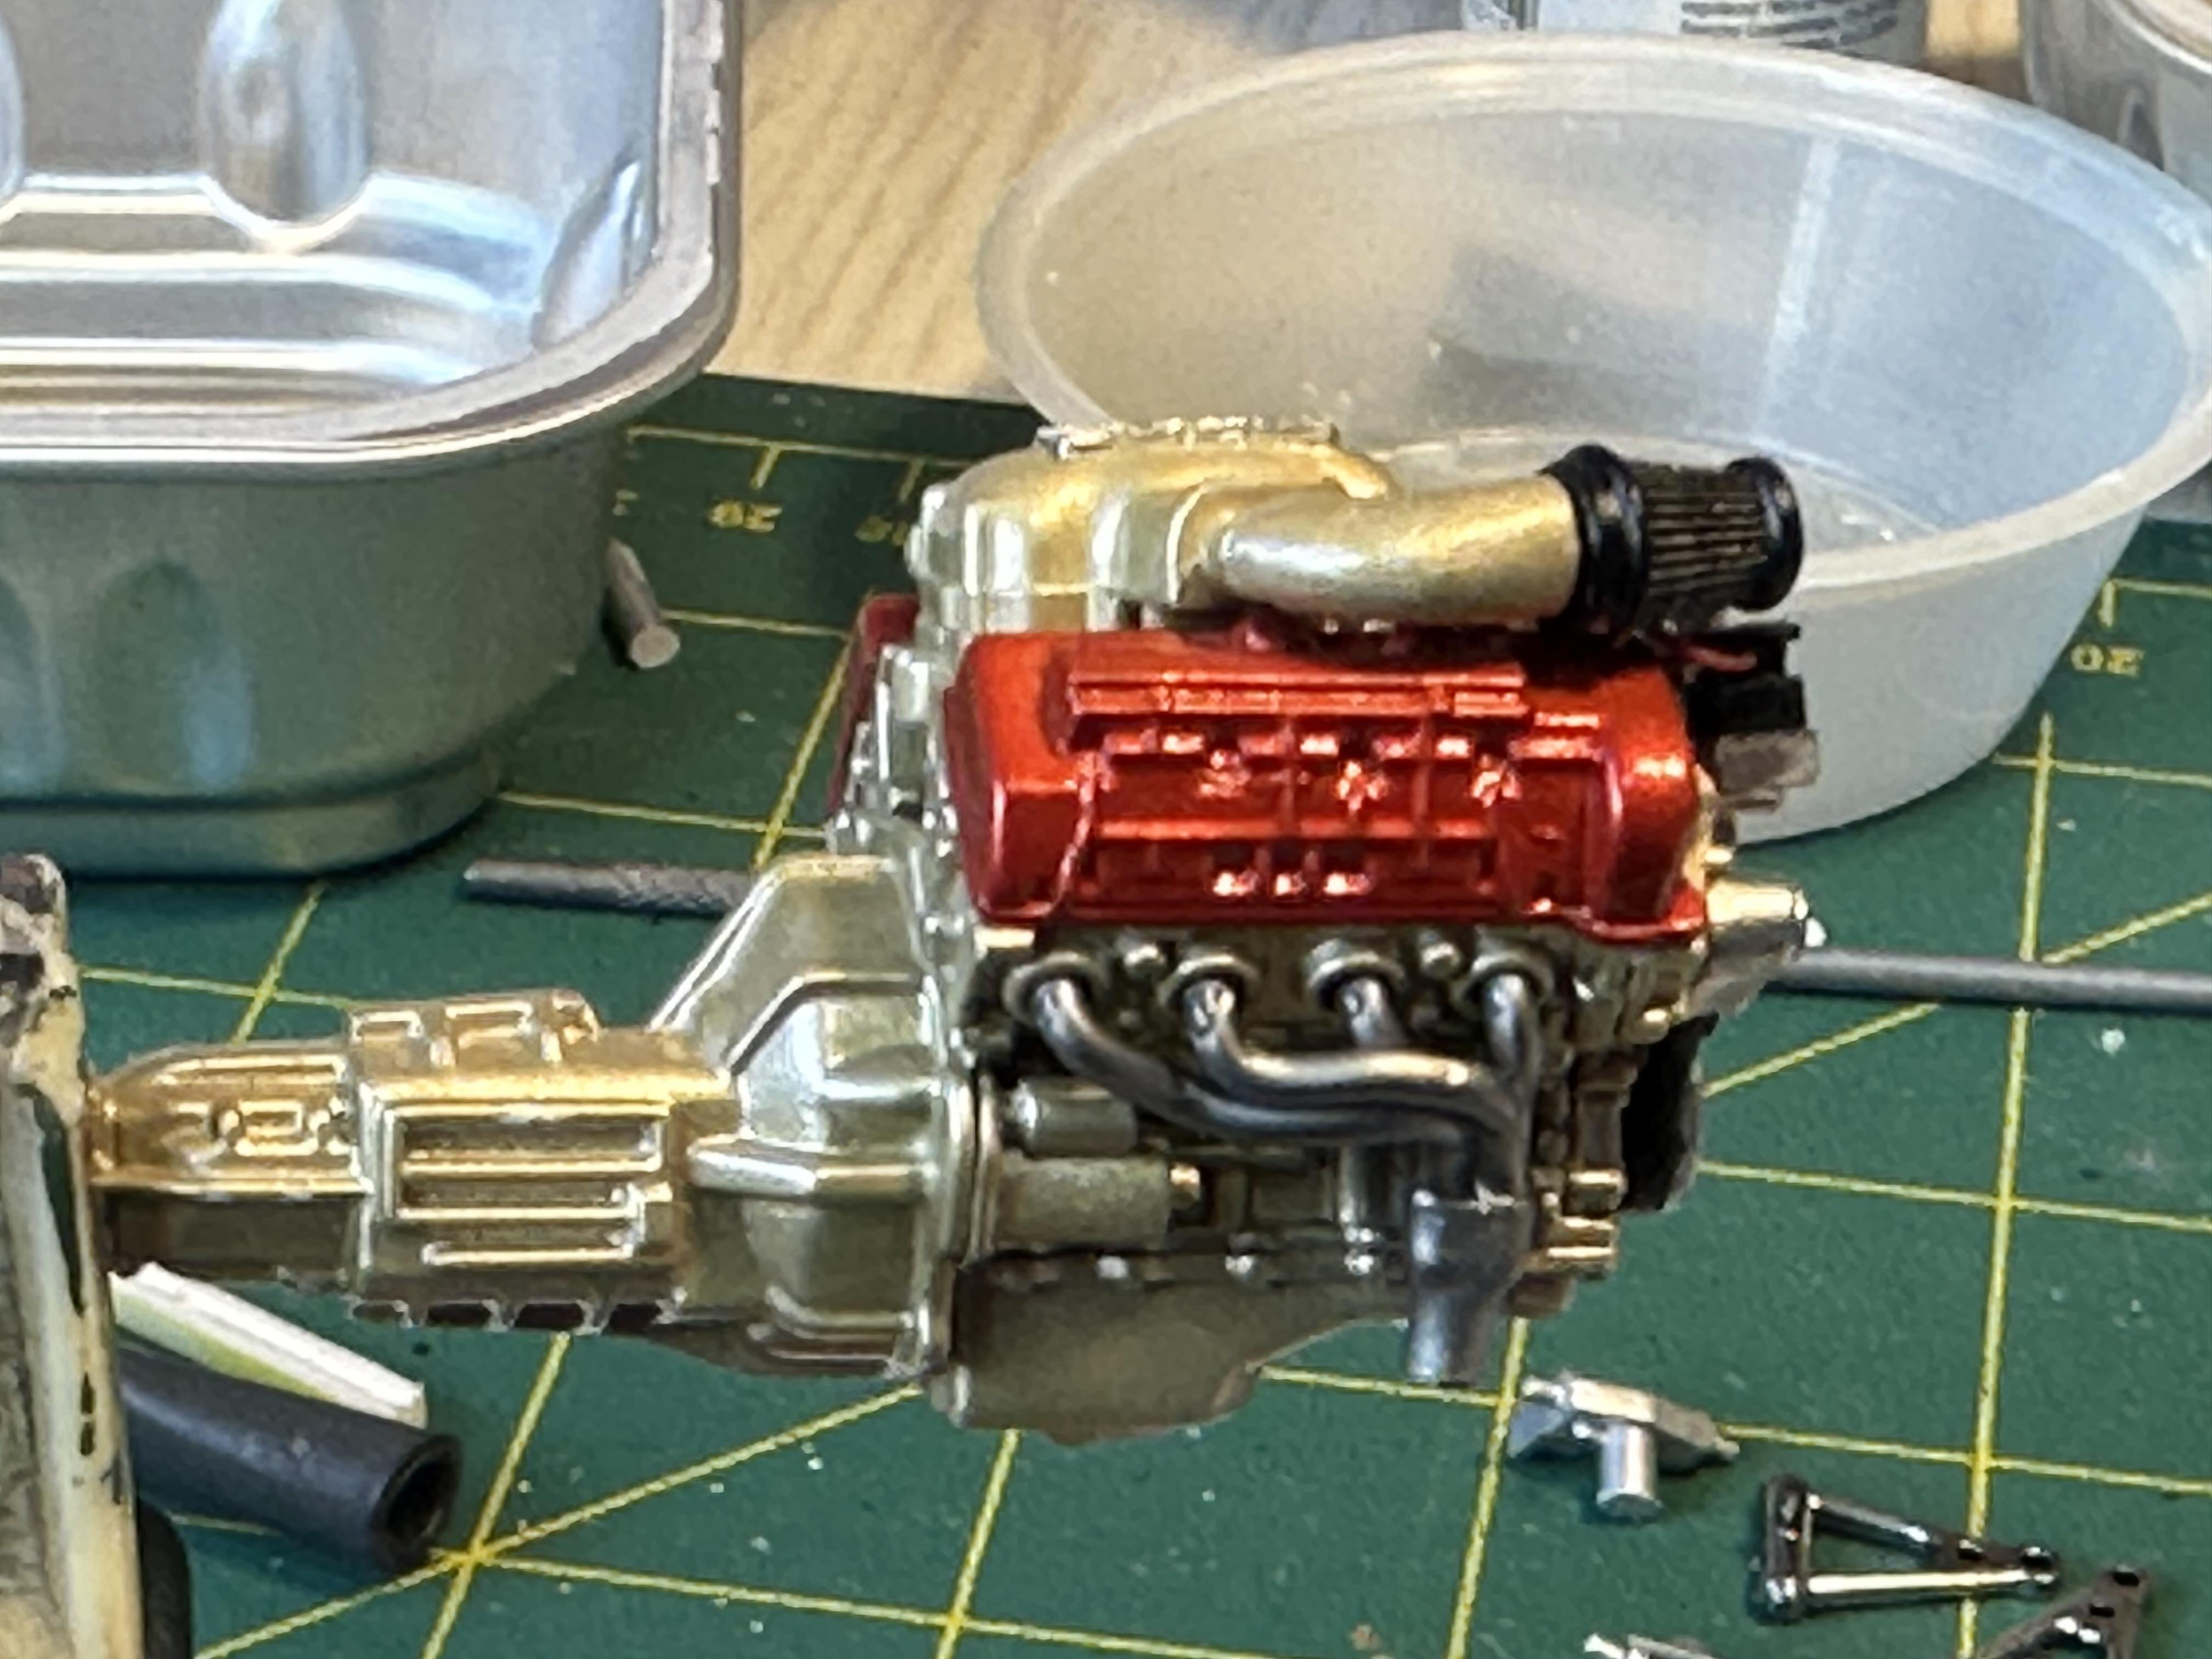
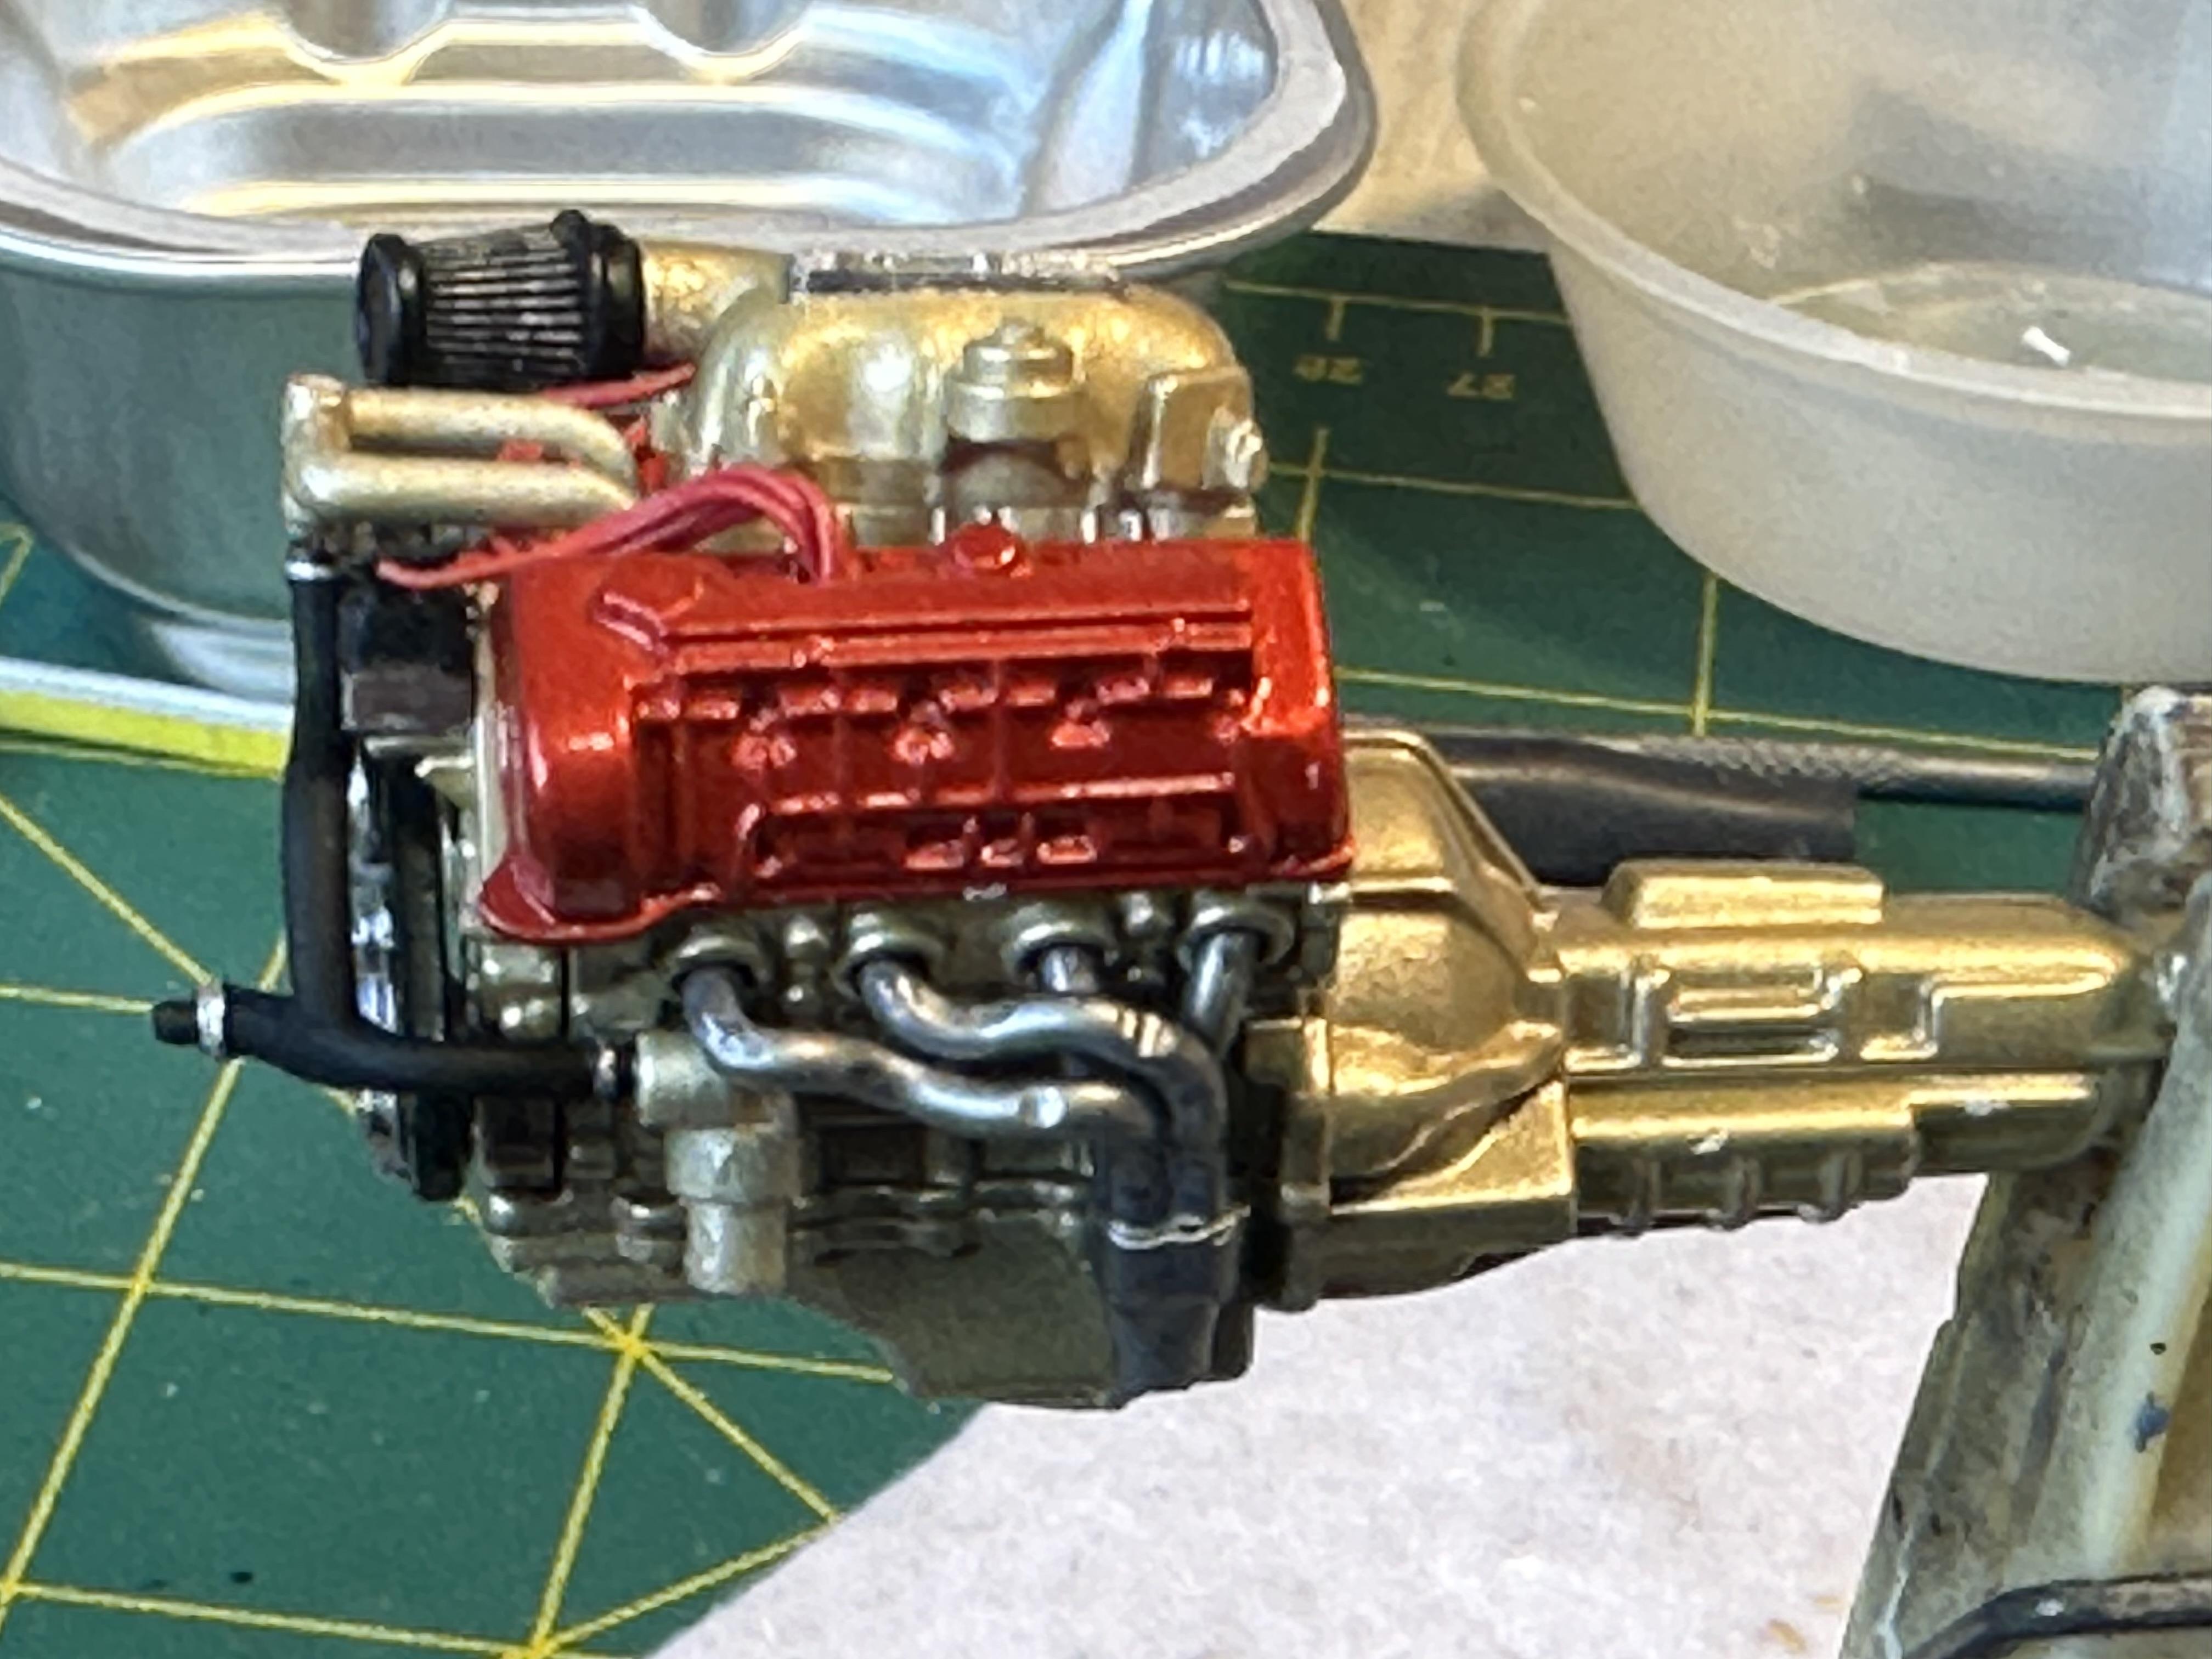
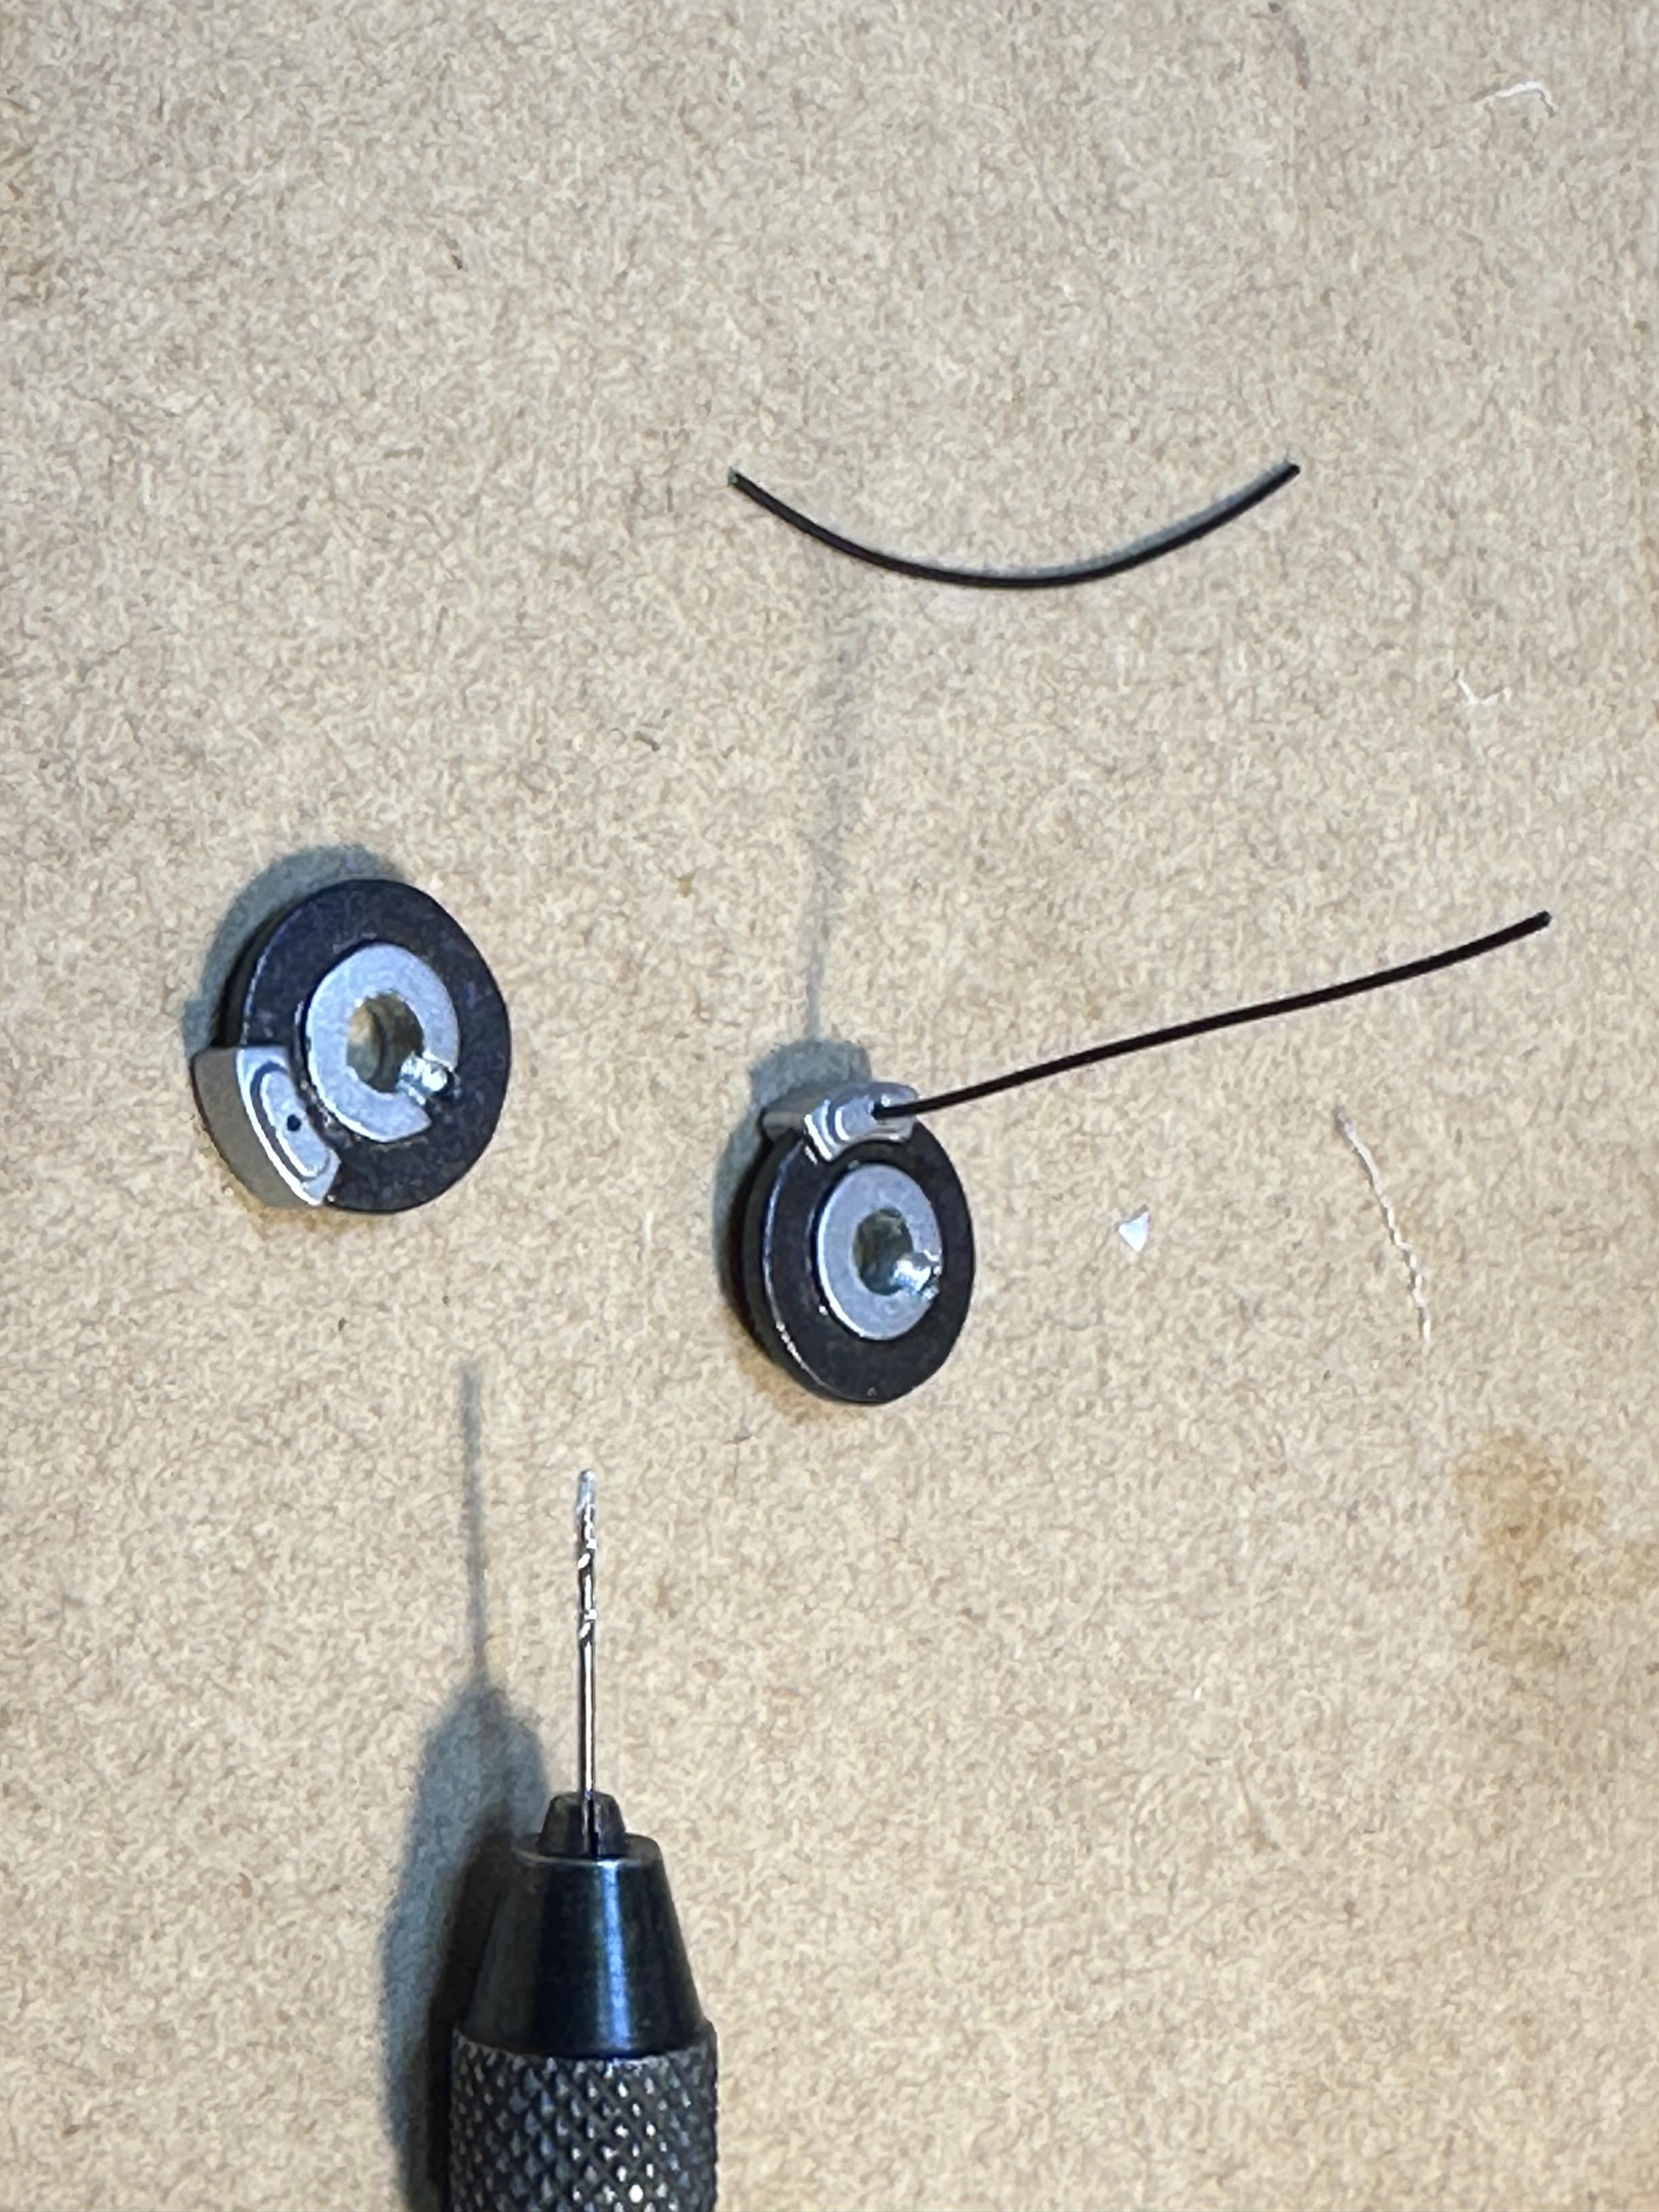
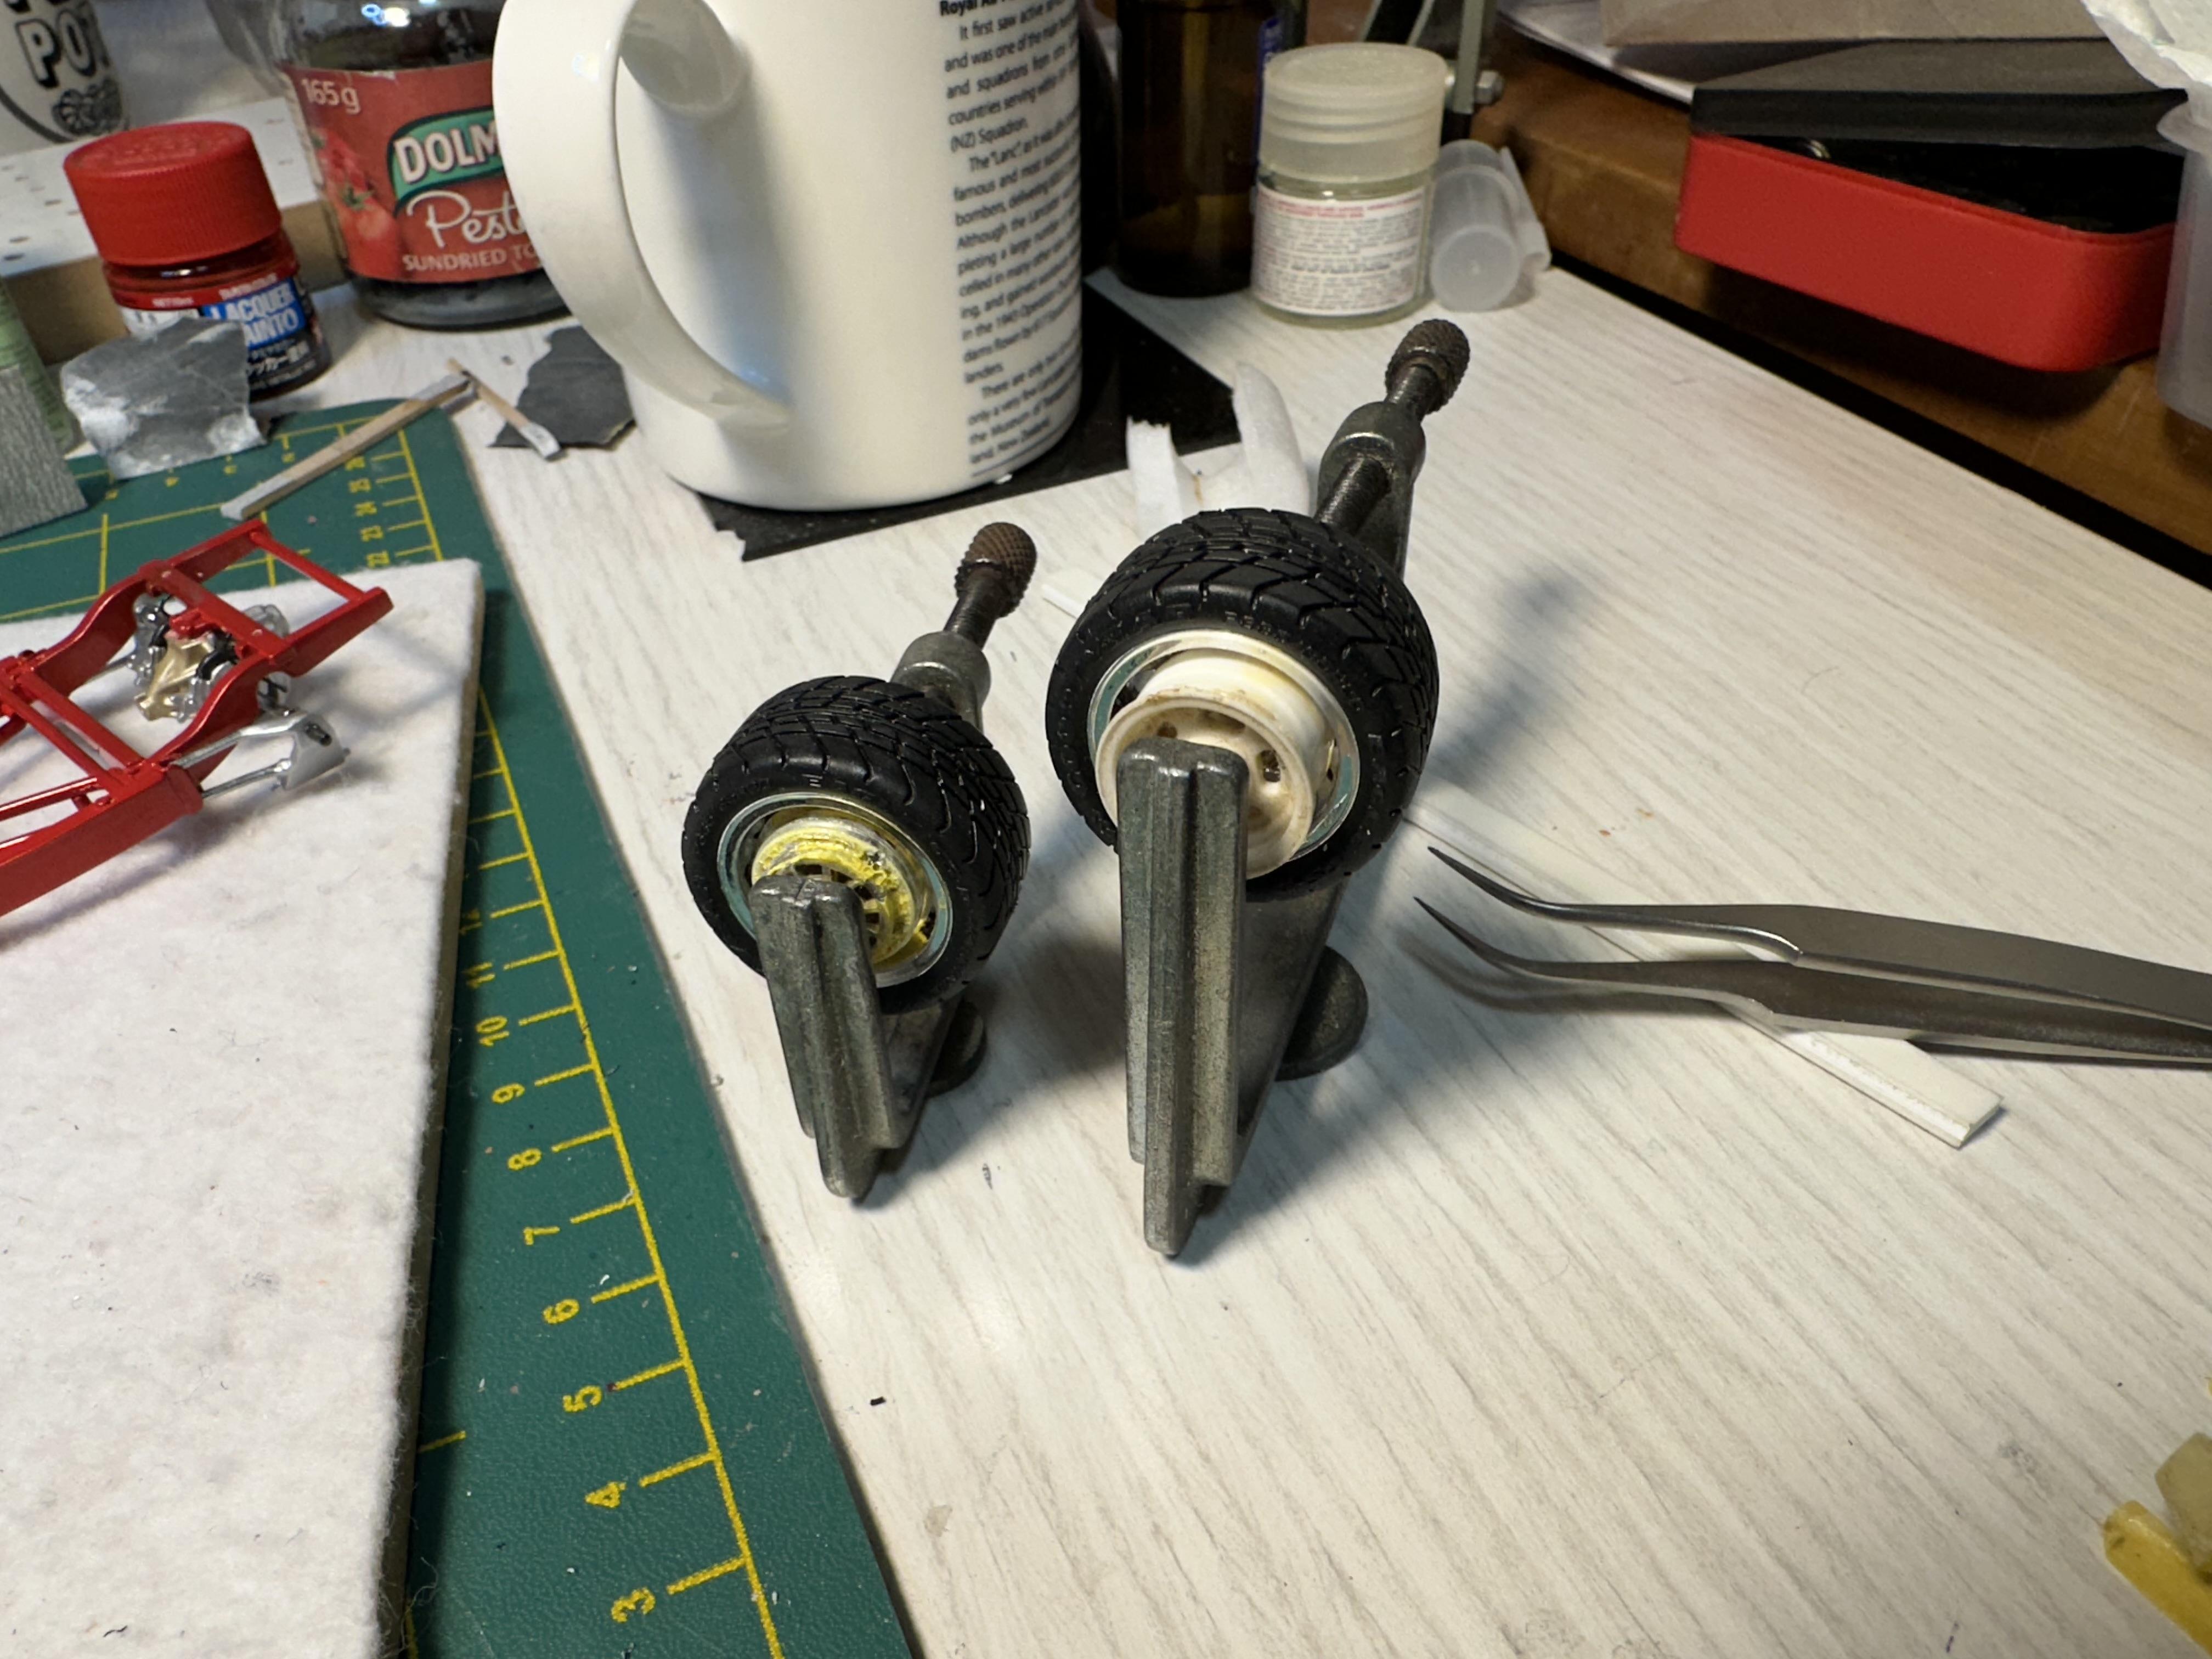
Bashing away at my build. Details, details and a few more details Added brake lines to the master cylinder. The lines are 32g hobby/bead making wire Motor is now assembled with the headers fitted. Headers painted with SMS stainless steel Prepping front brakes with hoses. Hose is 0.48mm and holes are 0.52m. Wire held in with superglue I had an oops when I went to install the rear coil over assembly and found there was nowhere to mount them to. I had to make a little bracket to mimic where the coil overs mounted on the Li'l John chassis. Installed the new mounts and finished off the rear end assembly. Also got the front end all together as well. The rear wheels halves needed clamping together and are now waiting for glue to dry. Fronts have been assembled Next up is install motor and wheels - whoopee Thanks for looking
-
Looking good Kit. The fix around the passenger compartment doors has tidied it up heaps
-
Another of your great left field builds. Great job Claude
-
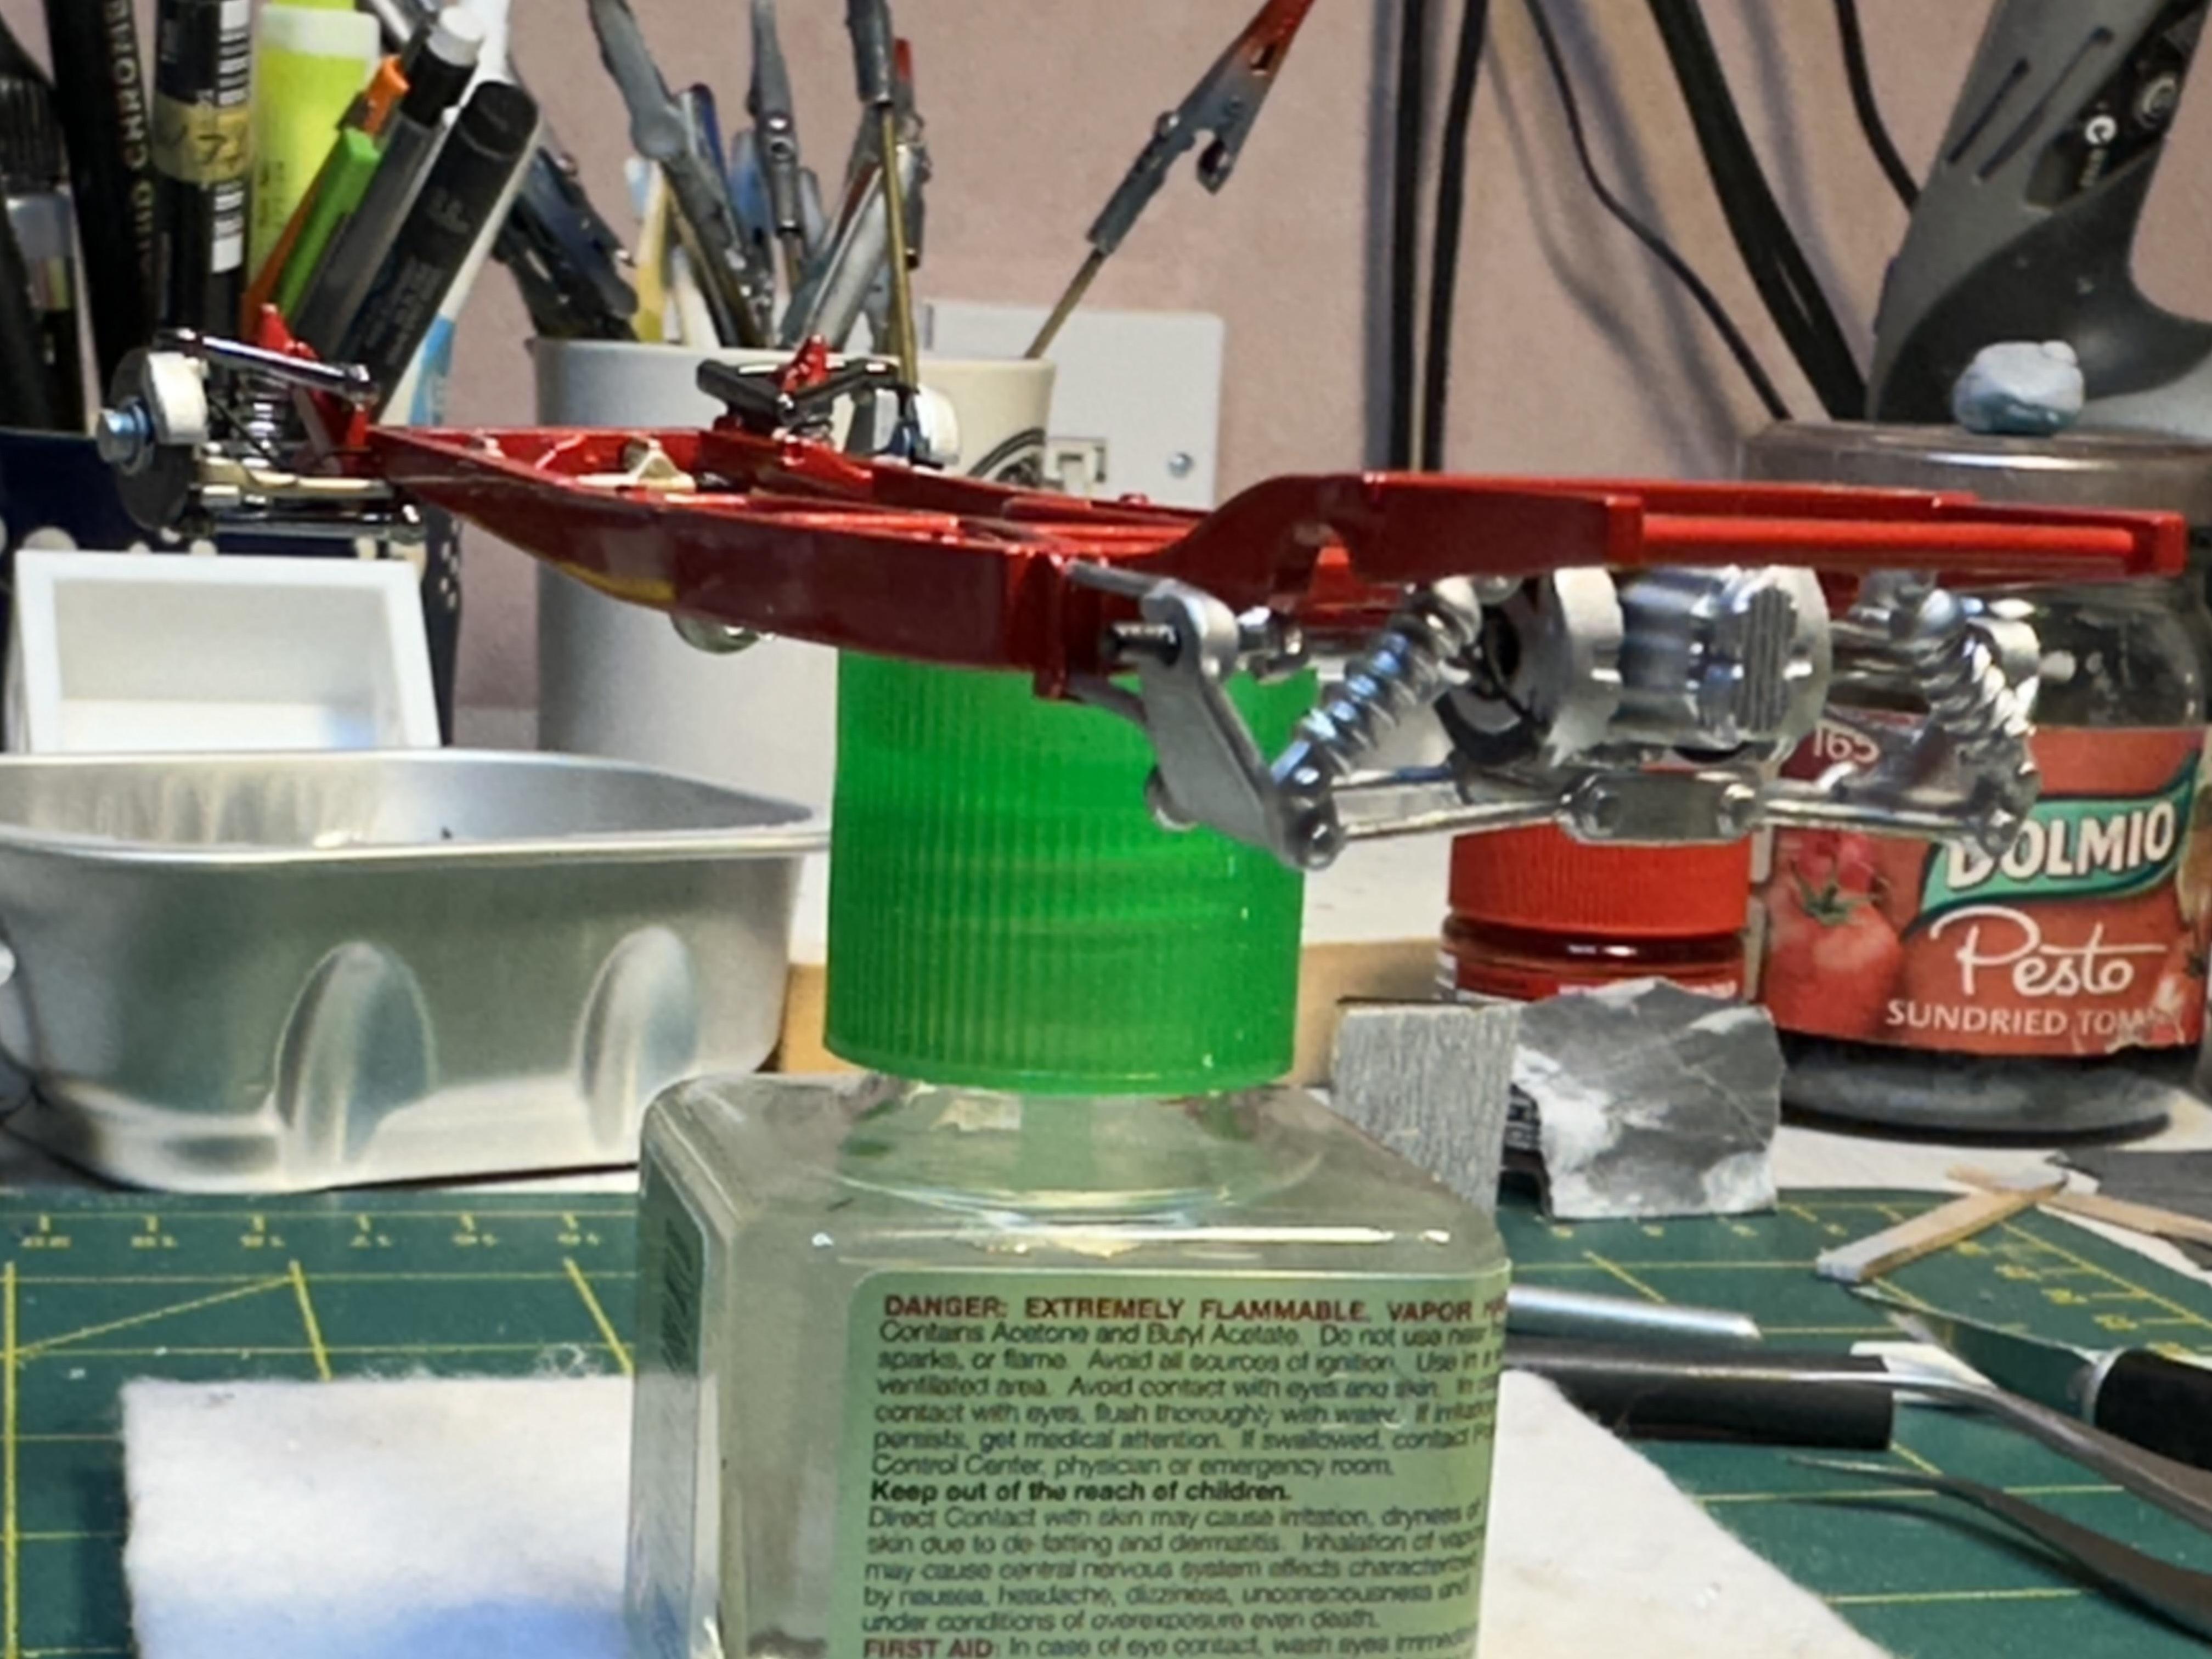
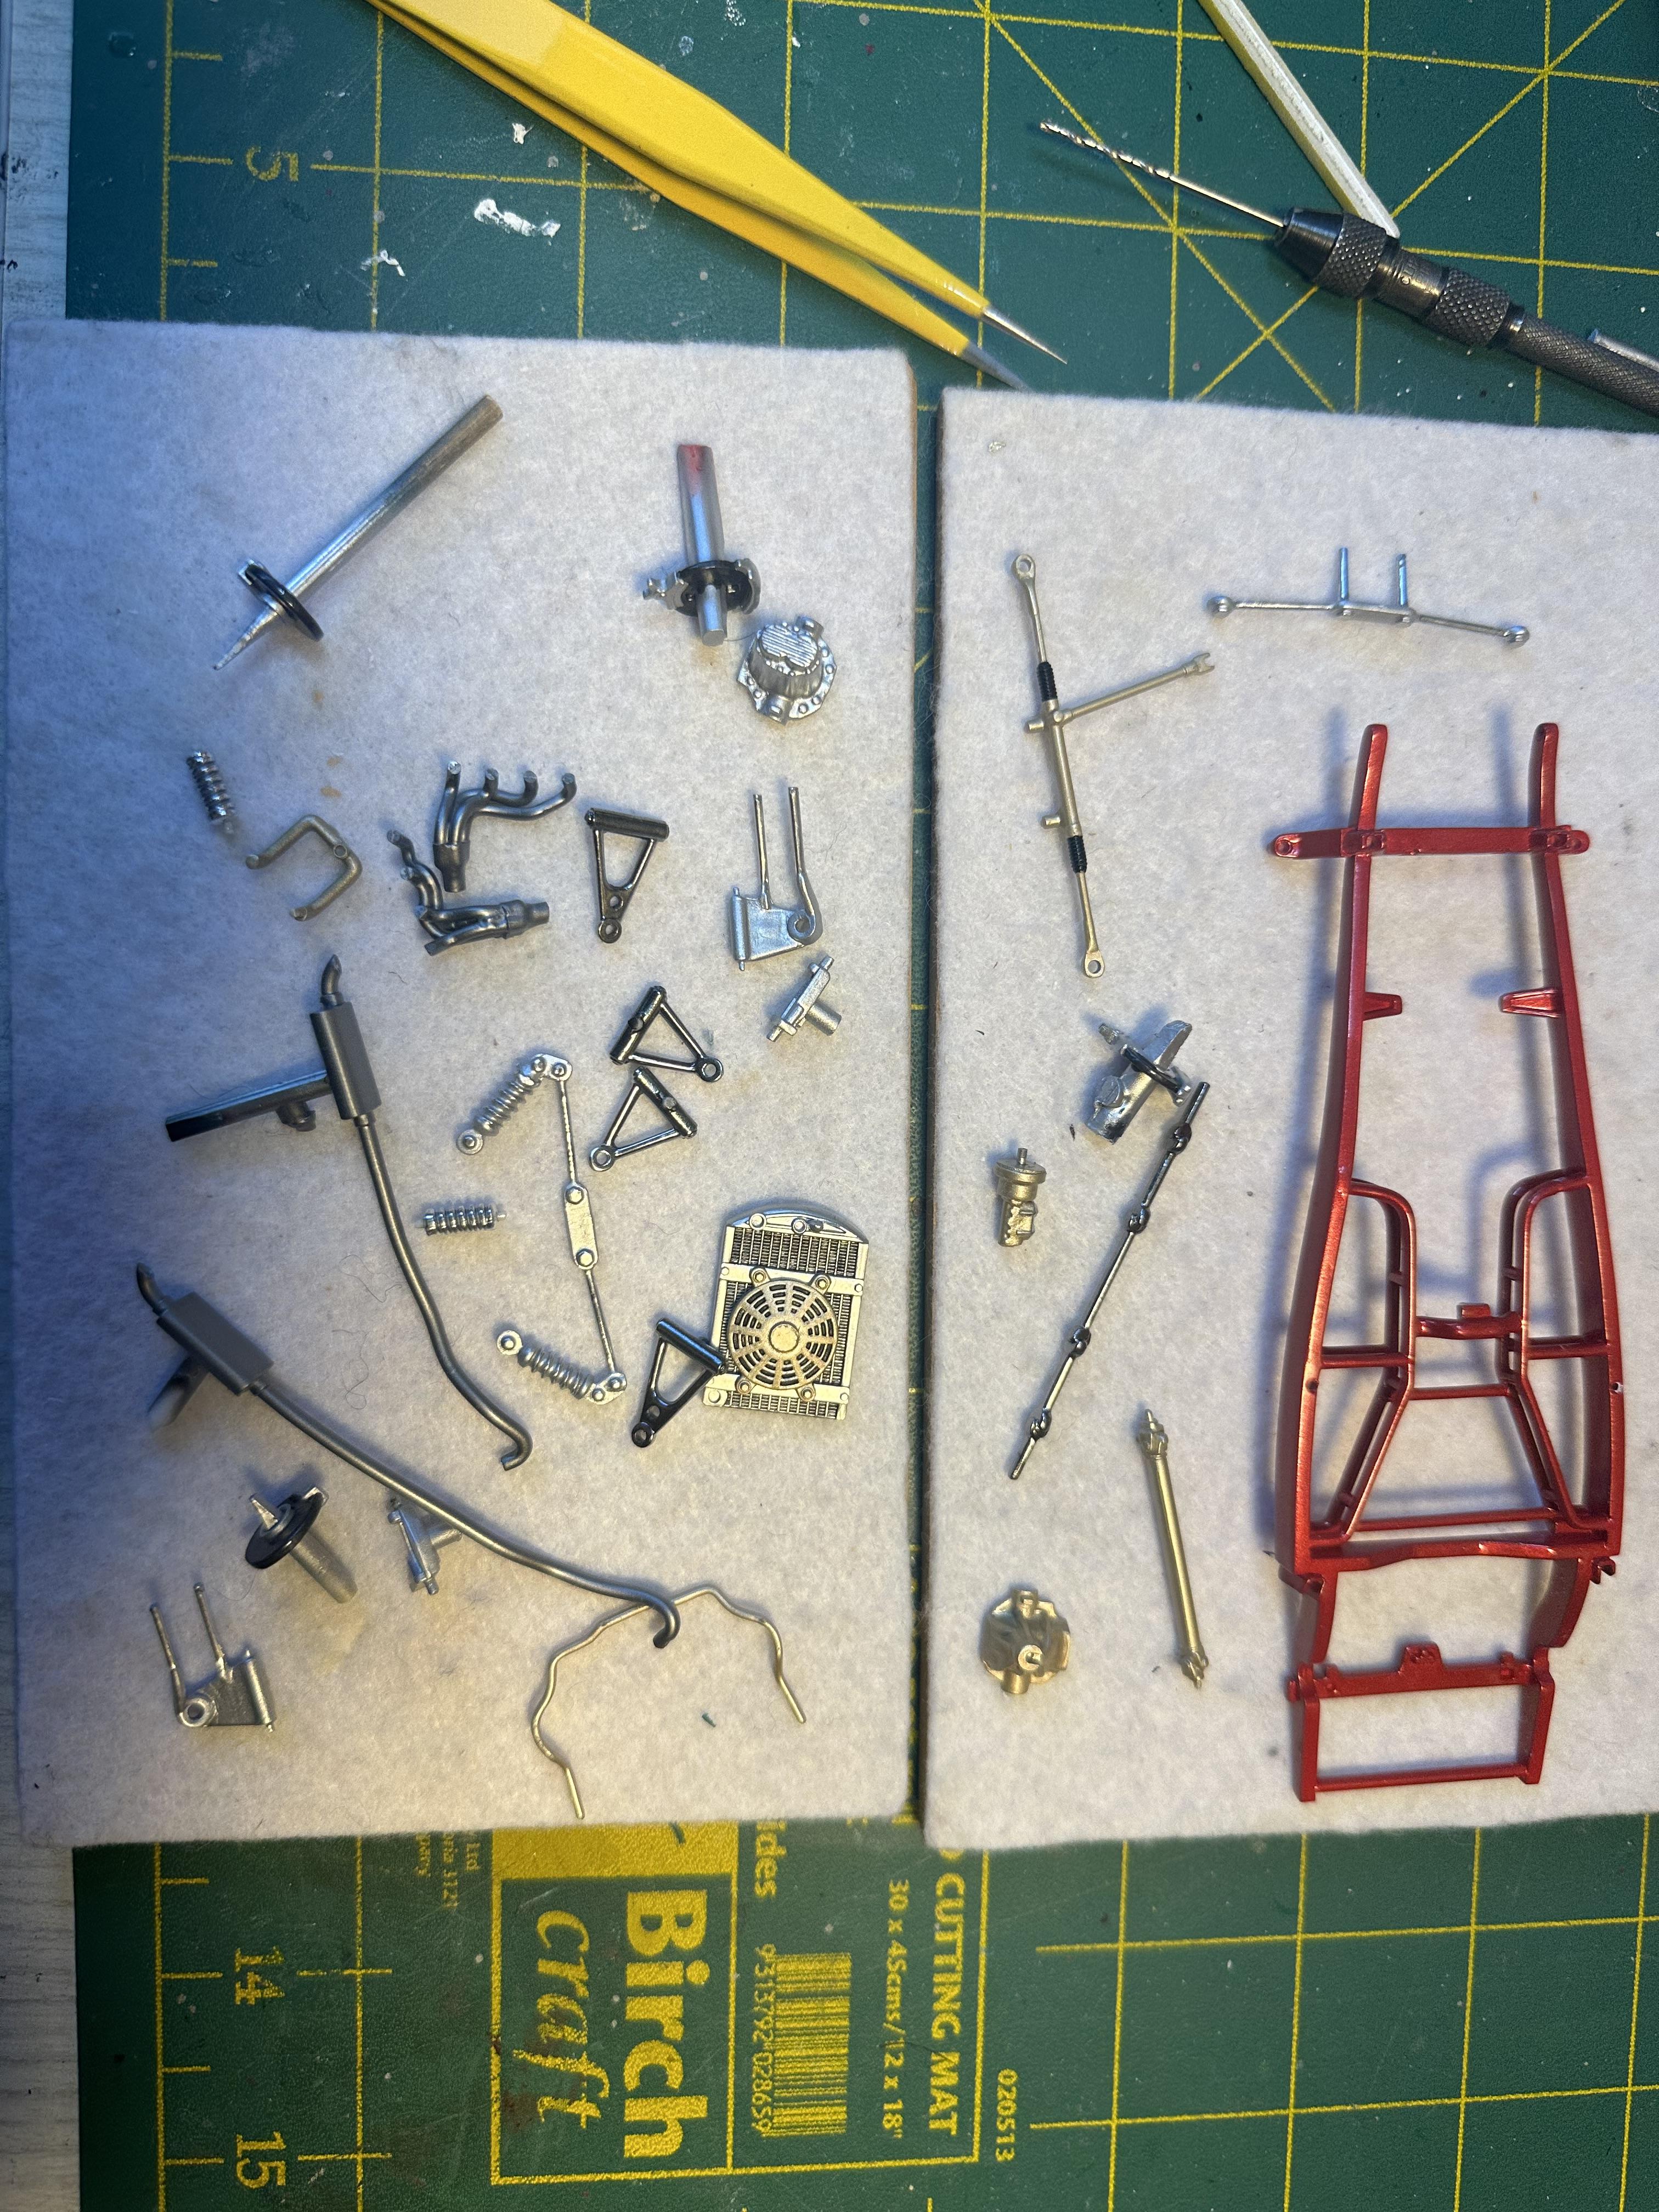
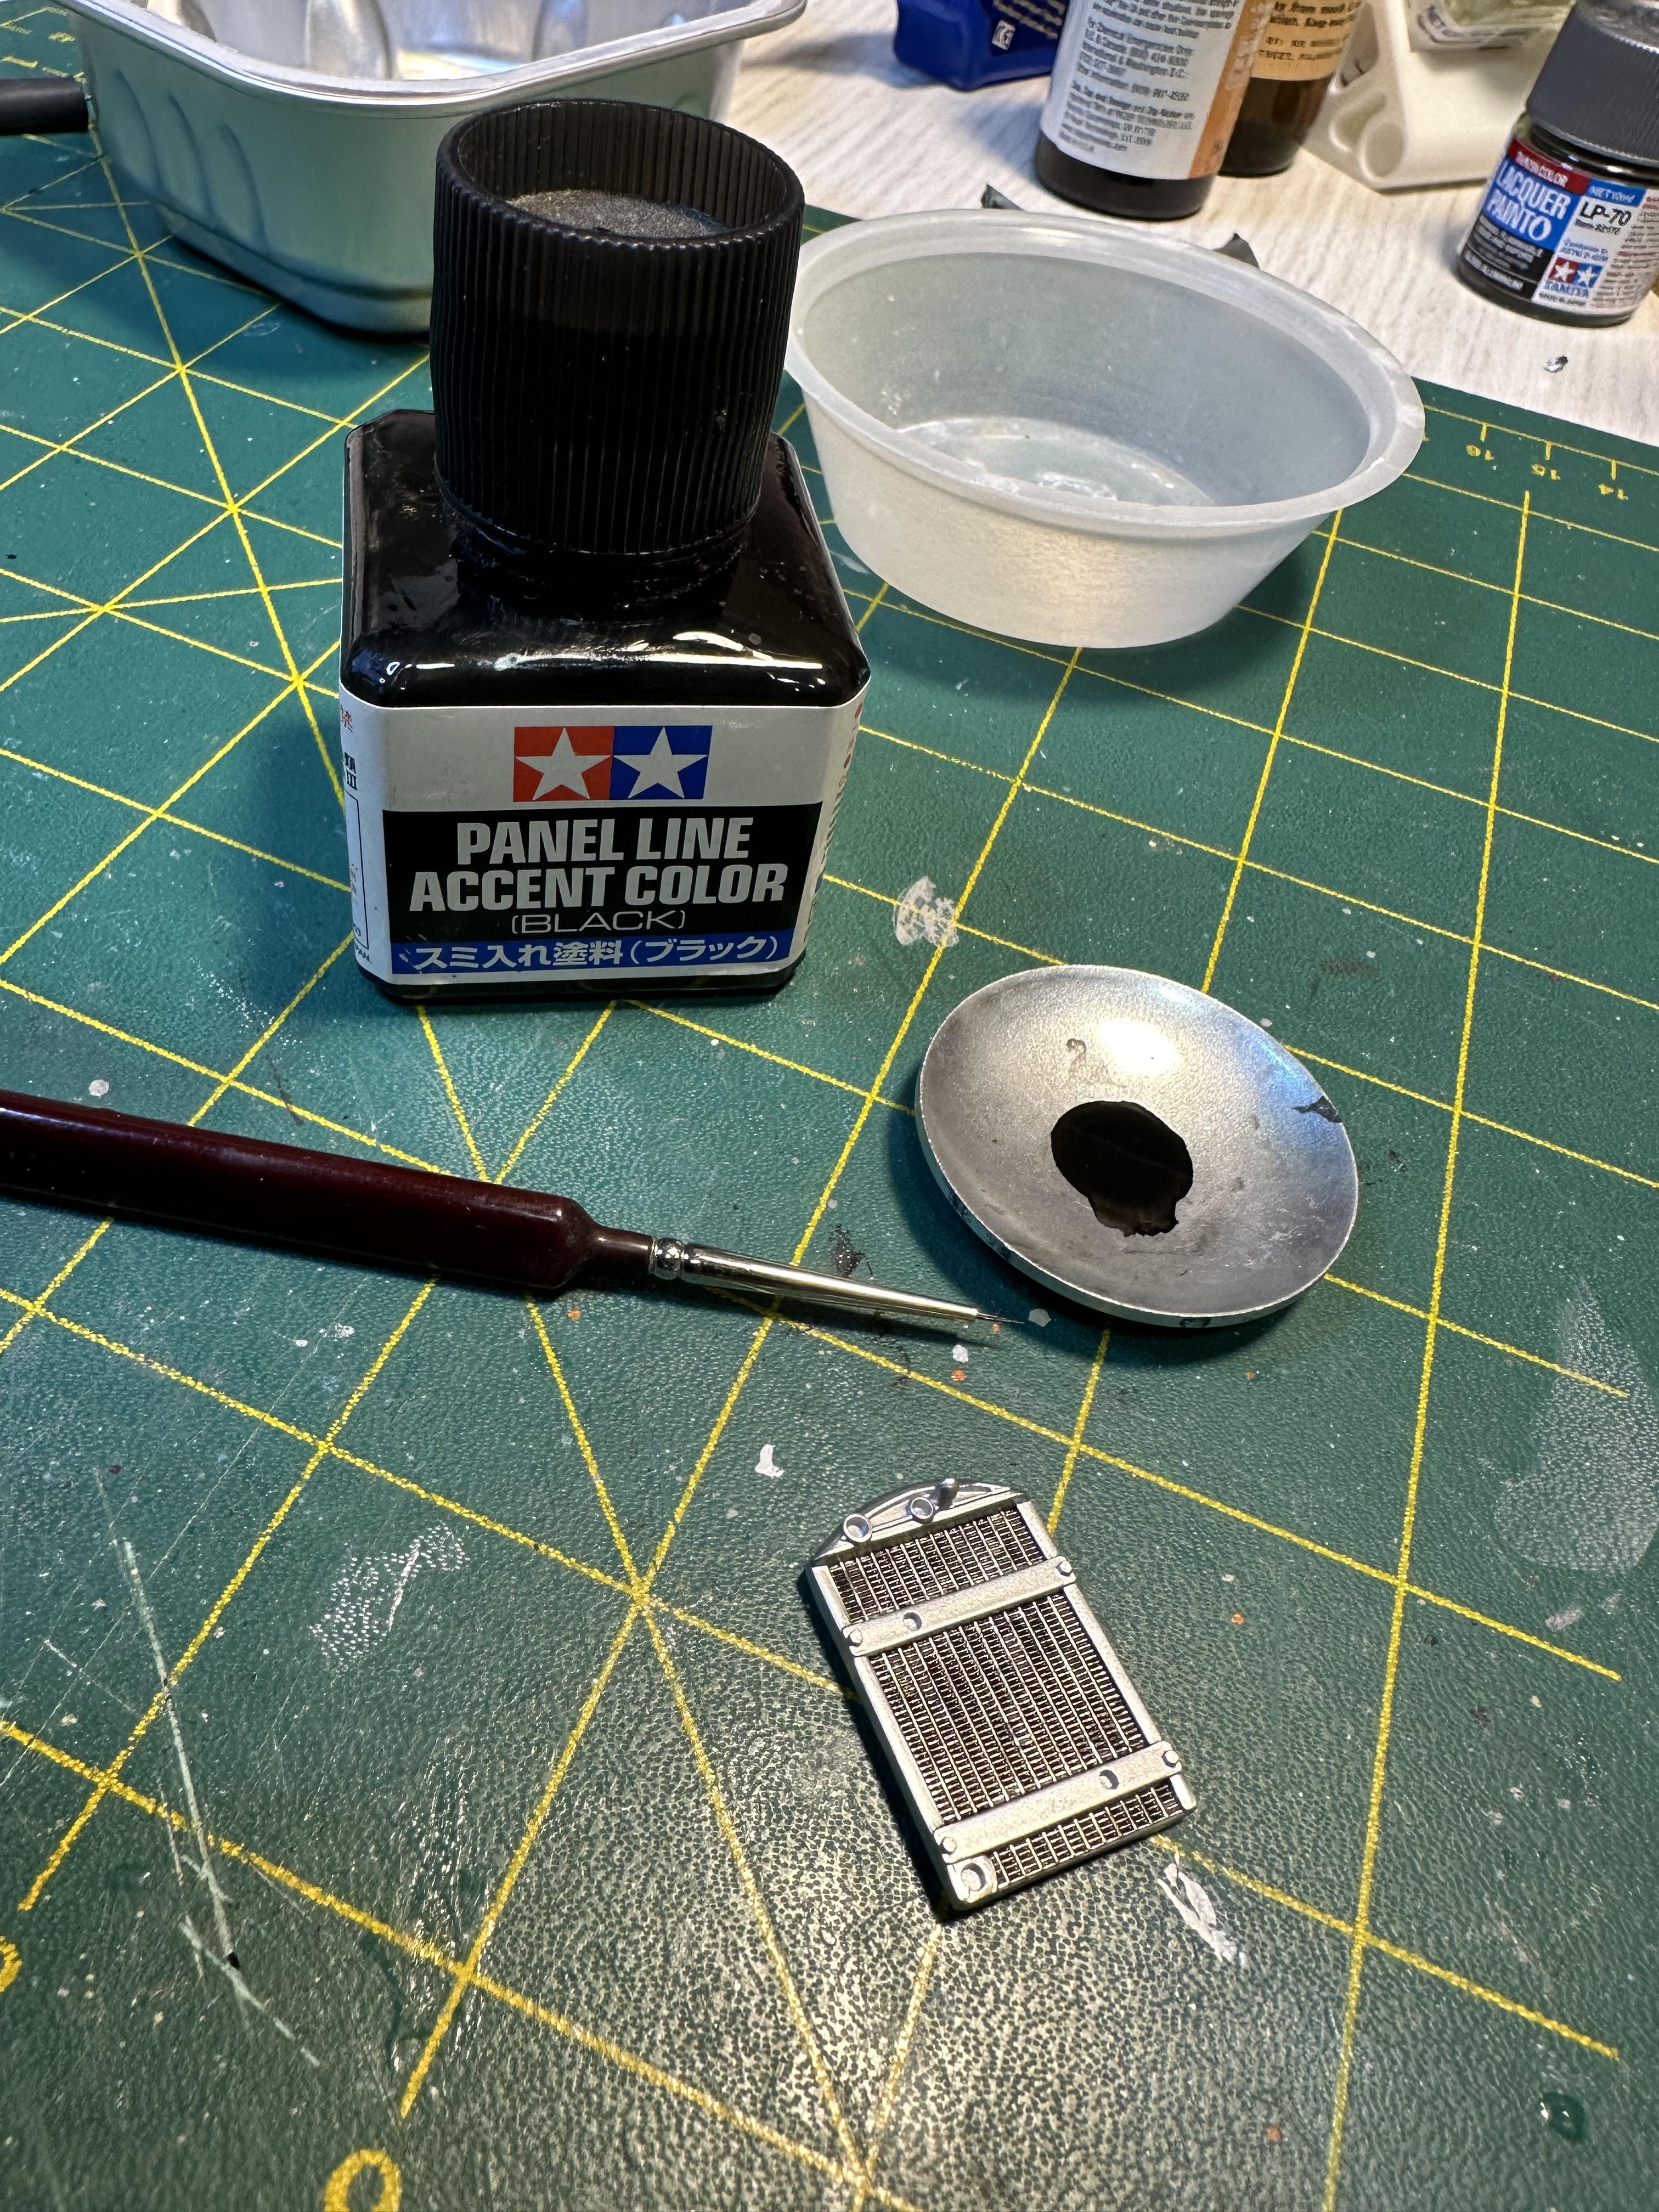
I have been chipping away at my sedan. I sprayed the tinted Tamiya primer on the guards and floor boards etc in preparation for a final sand before colour I cleaned up the Lil' John rear end. My version is from a 34 Coupe and had really quite bad flash so all of the chrome had to come off. On Lil'Johns 26 T where the rear end originated from is mostly billet ally so all of the parts were painted in SMS aluminum. The traction bars and tie rods were highlighted with Molotow chrome pen. The front end was stripped and cleaned and painted with SMS cold tone chrome over gloss black. All of the chassis components shown here ready for assembly and some more detailing Detailing the radiator. Main color is SMS aluminum with Tamiya Fine Line Accent flowed in between the fins. A final dry brush with some aluminum (not shown here) to complete. Thanks for looking
-
Thanks Tim, we have missed you. Hope all is well