bill-e-boy
-
Posts
899 -
Joined
-
Last visited
Content Type
Profiles
Forums
Events
Gallery
Everything posted by bill-e-boy
-
I think the problem is that you opened the jars and let the air in when you put the BB's in. I to have a whole bunch of Testors square jars and the majority are still OK. If the lid is hard to get off chances are the lid will not reseal properly so I never open a jar until it is needed. I use a nut cracker to open tight jar lids
-
Thanks for the kind words Michael. I kicked my frame rails up so that I could get the Lil John rear end in and have the wheels fill the rear guards. Then came the question of where to put the fuel tank. As usual one modification here then creates a whole bunch of issues there Build time over the next couple of weeks is going to be patchy as it is now the summer silly season down these ways Merry Christmas and a happy New Year to all Cheers Bill-e-Boy
-
I too am thinking where best to put a filler as I have done away with the original tank. The tank location would be under the rear seat. My thoughts are below the belt line as then the fill pipe would be behind the seat - about a third of the way down. Being a modern take on the build a filler door would be good or one of those flashy filler caps like Kindig does.
-
Mopar headers for wedge engines
bill-e-boy replied to gtx6970's topic in Model Building Questions and Answers
I thought was differences it is just how I overcame a problem -
Chopped 40 Ford Sedan Delivery Traditional Custom
bill-e-boy replied to Ferbz's topic in WIP: Model Cars
You have nice proportions with your chop and lengthened doors. Well done -
Recommendations For Iphone Photography?
bill-e-boy replied to oldcarfan's topic in Tips, Tricks, and Tutorials
I use something similar to Ace's set up for working with and taking construction pix. I only have two "Equipoise" swing arm lights but they have higher LED wattage lamps in them. Also use them with a plain backdrop for glamour pix I use an Iphone 12+to take pix and use the zoom function to crop the image to what I want to portray. I would much rather uze the zoom function to crop the image than piss about cropping in Photoshop. The file size from the phone is fine to post here. The file size from a DSLR is too big and hase to be downsized using Photoshop or other photo editing app -
Mopar headers for wedge engines
bill-e-boy replied to gtx6970's topic in Model Building Questions and Answers
I did a hemi engine swap into a Revell 68 Dodge Dart before the Hemi kit was released. I used the motor from a Revell GTX. I could not fit the GTX headers into the dart so used the 383 cast iron manifolds which fitted. The moral of the story - look for both wedge and hemi headers as they seem to cross fit - maybe with small mods The Revell Chargers have them too -
The AMT 69 Cobra is dire. Lots of fitment issues with the worst being chassis to body alignment - it doesn't And the chassis has moulded in everything - really a kitted promo If you dont mind building slab style though it comes up OK. Dont know the differences between Cobra and Talledega though. No the Monogram unit but anything would be better than what AMT offered

-
I am back on this. I have been posting updates in the 32 Sedan Build thread so I will close this one off Thanks Bill
-
Yup - suicide front end - best left for T bucket IMO I had missed this - you a doing a fine job Greg. I like the strakes on the roof and the front end treatment. Lots of engineering going down . And the GMC engine - just a bit different to the belly button SBC and flat motors and looking kool too
-
New project on the table, sure to be a “Thriller”
bill-e-boy replied to BDSchindler's topic in WIP: Model Cars
This is looking good. -
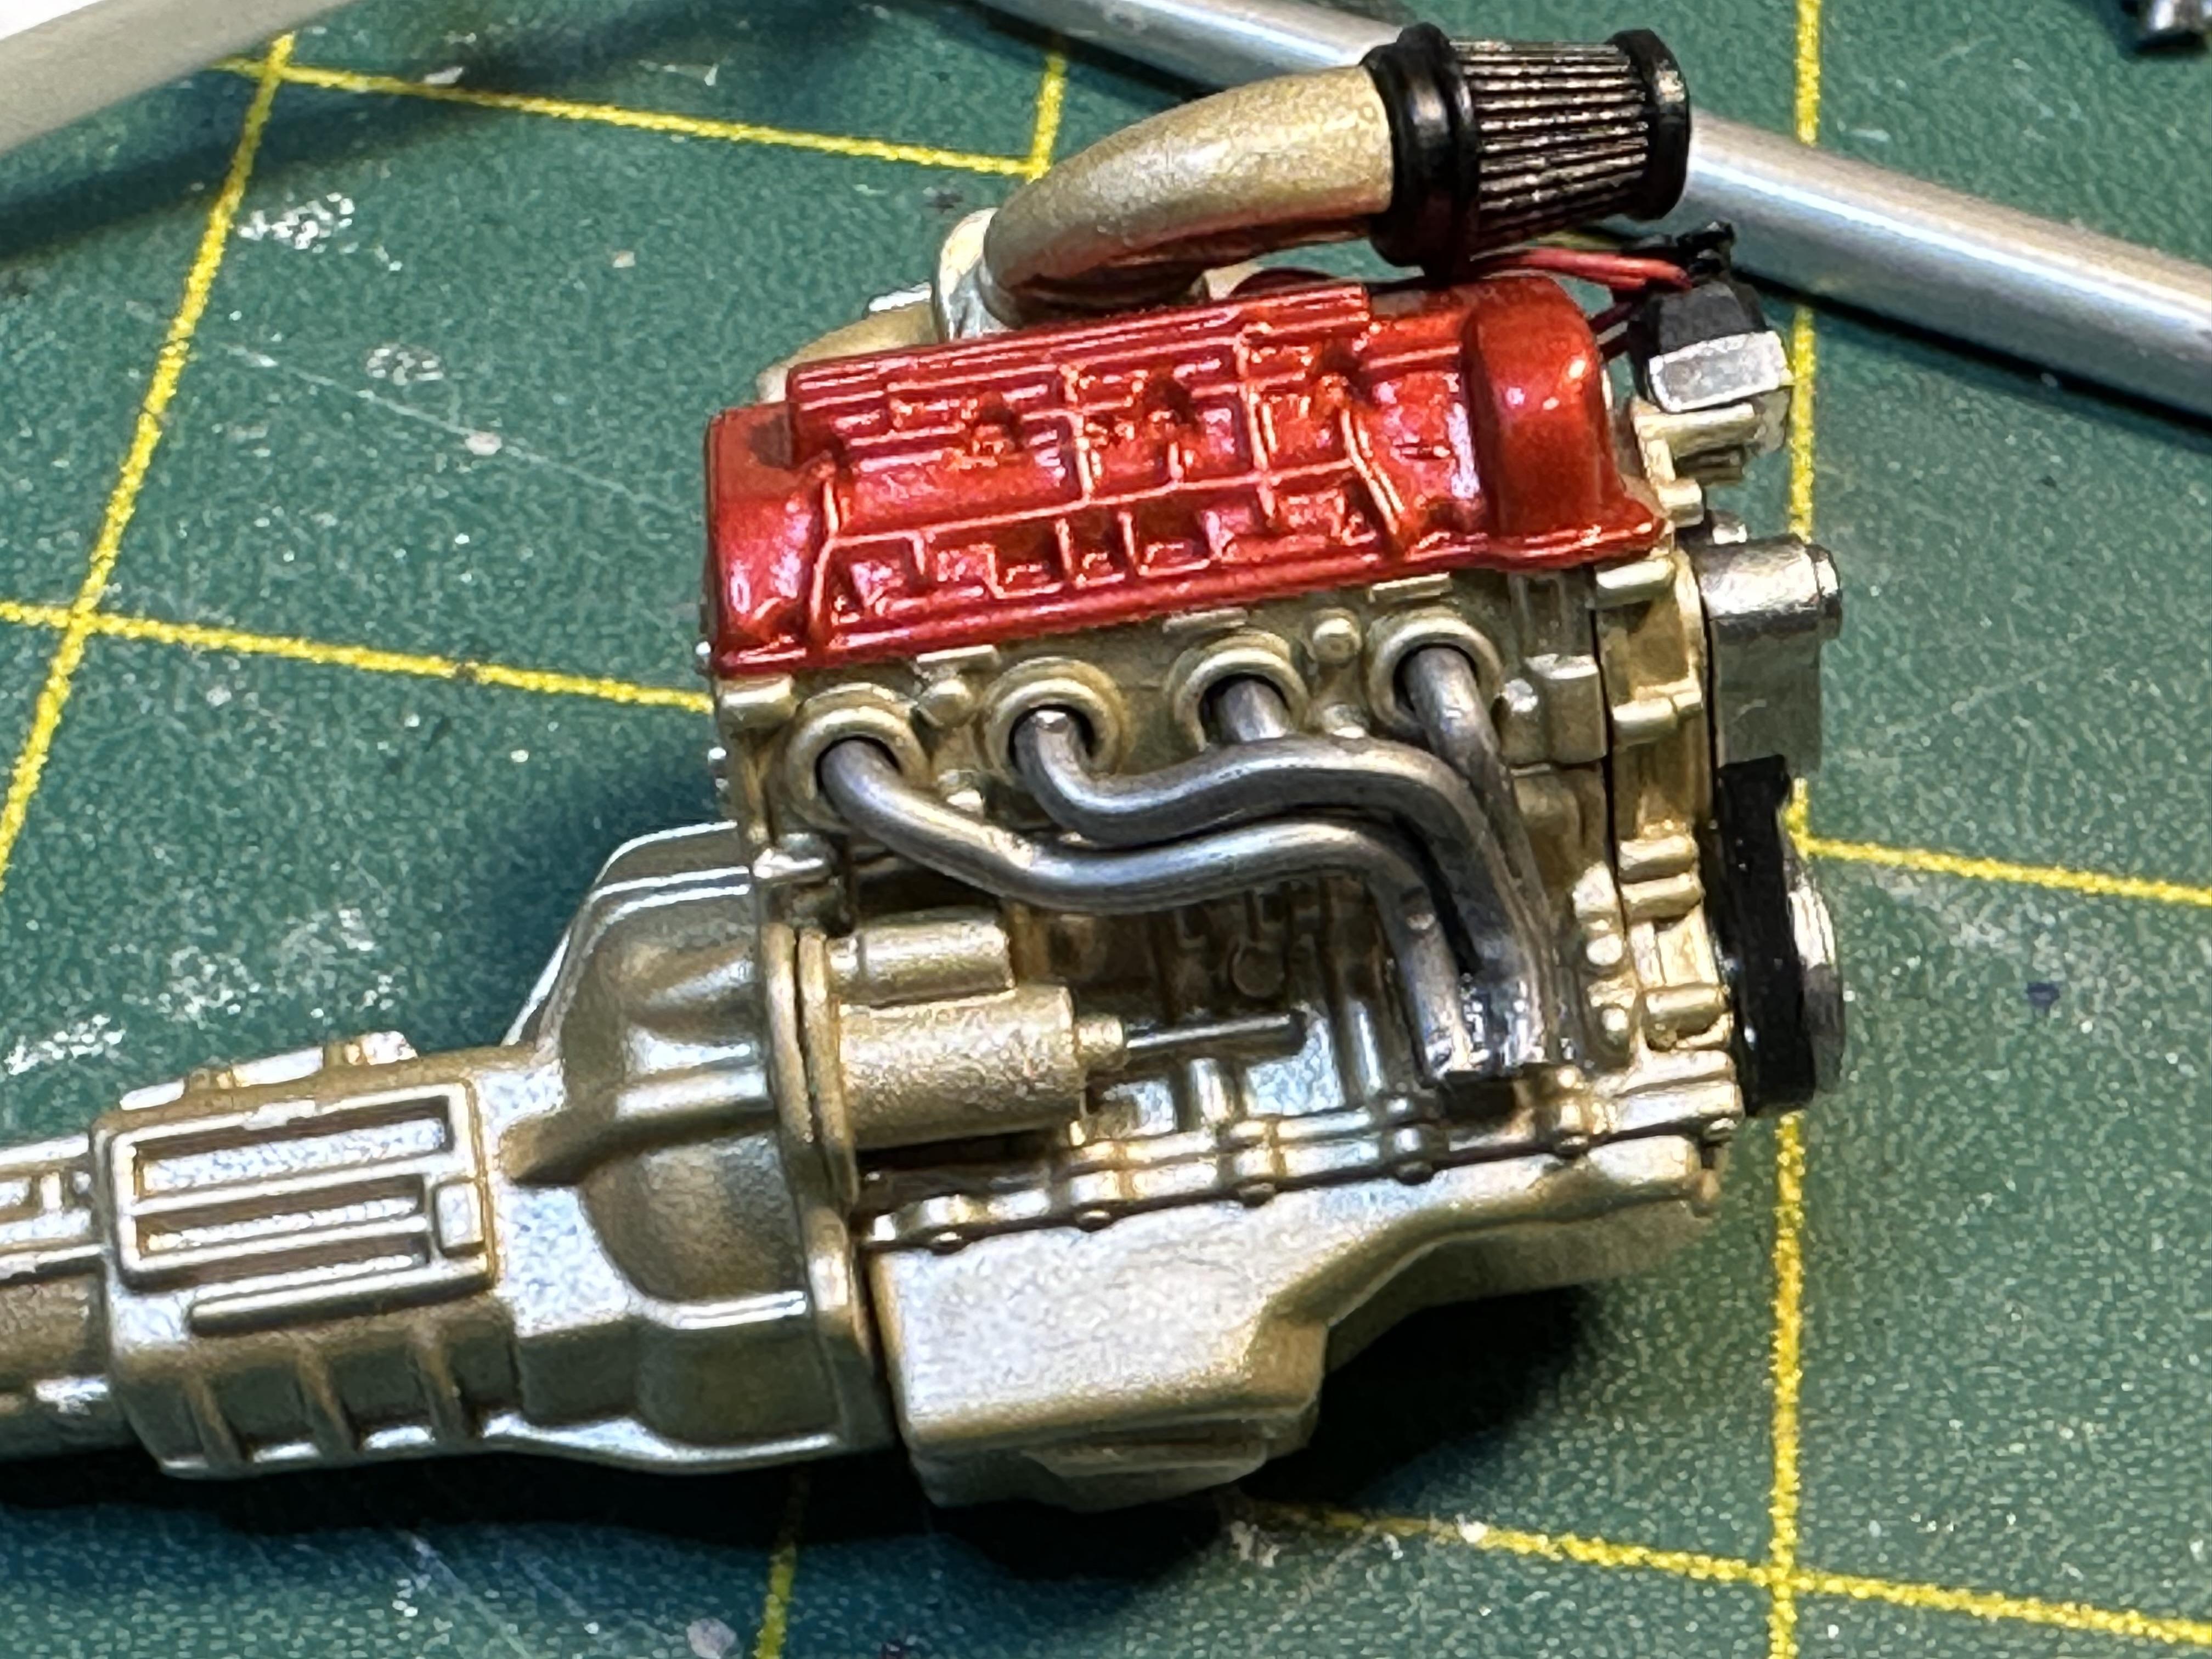
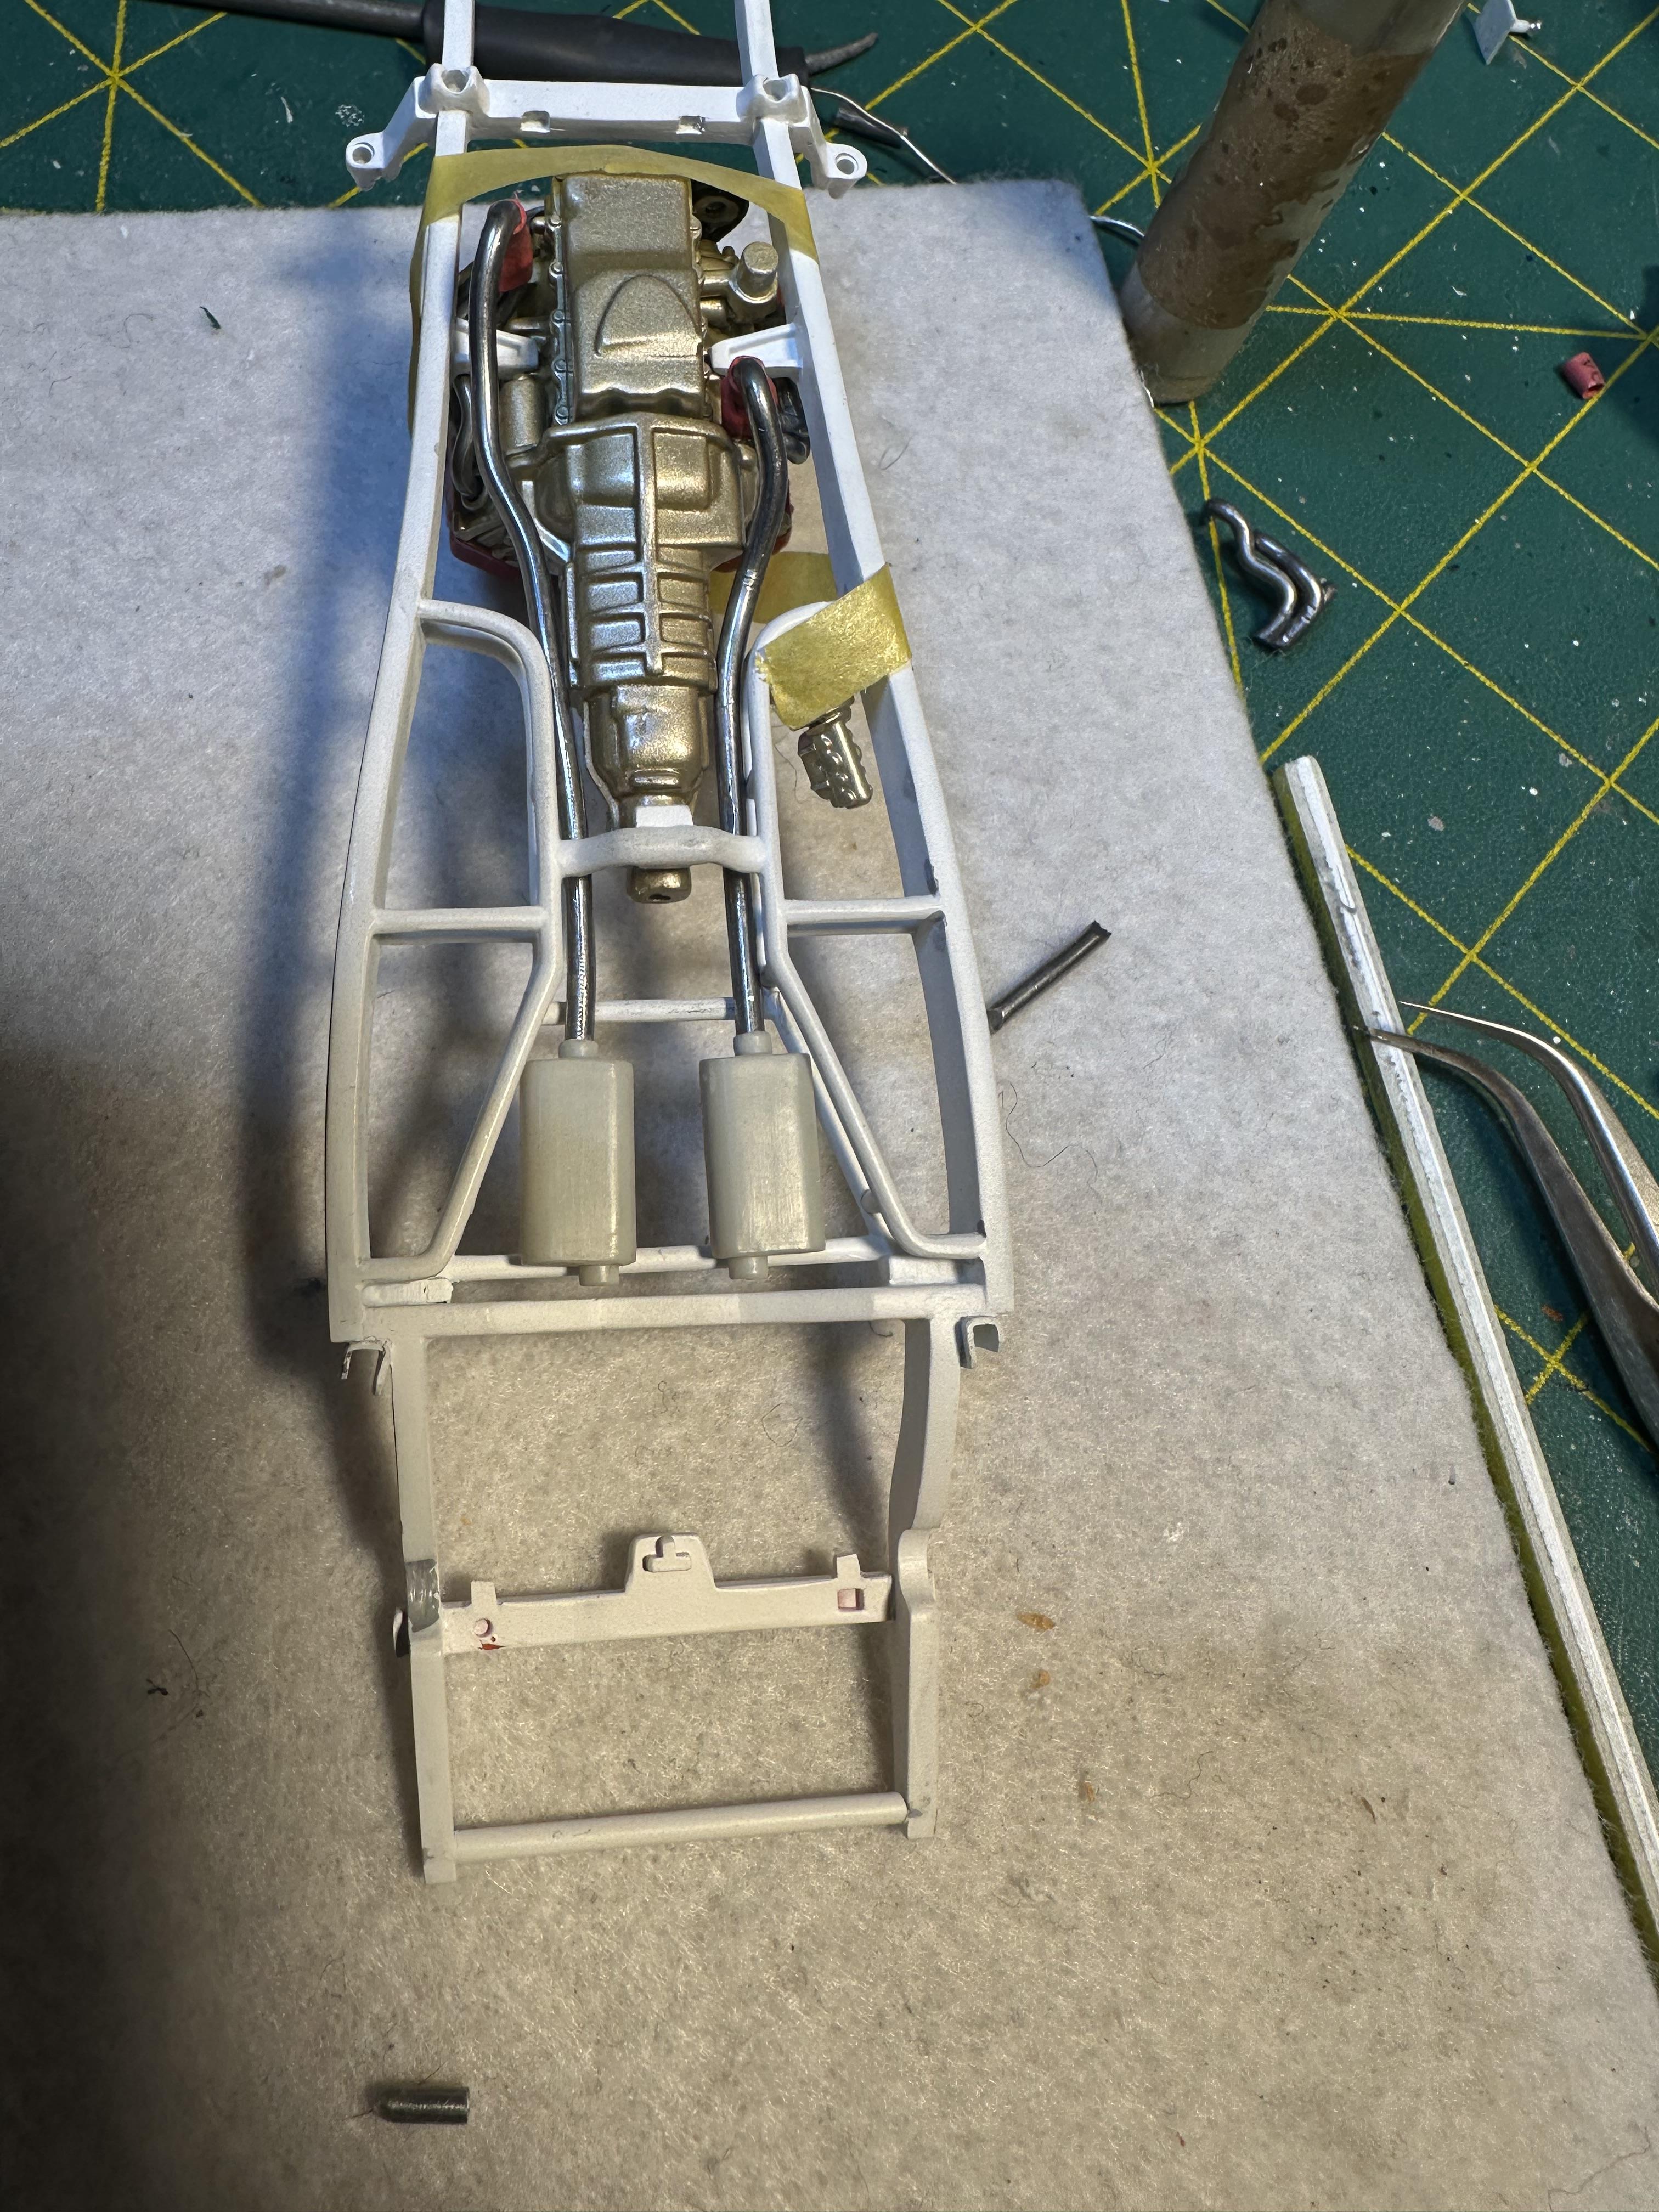
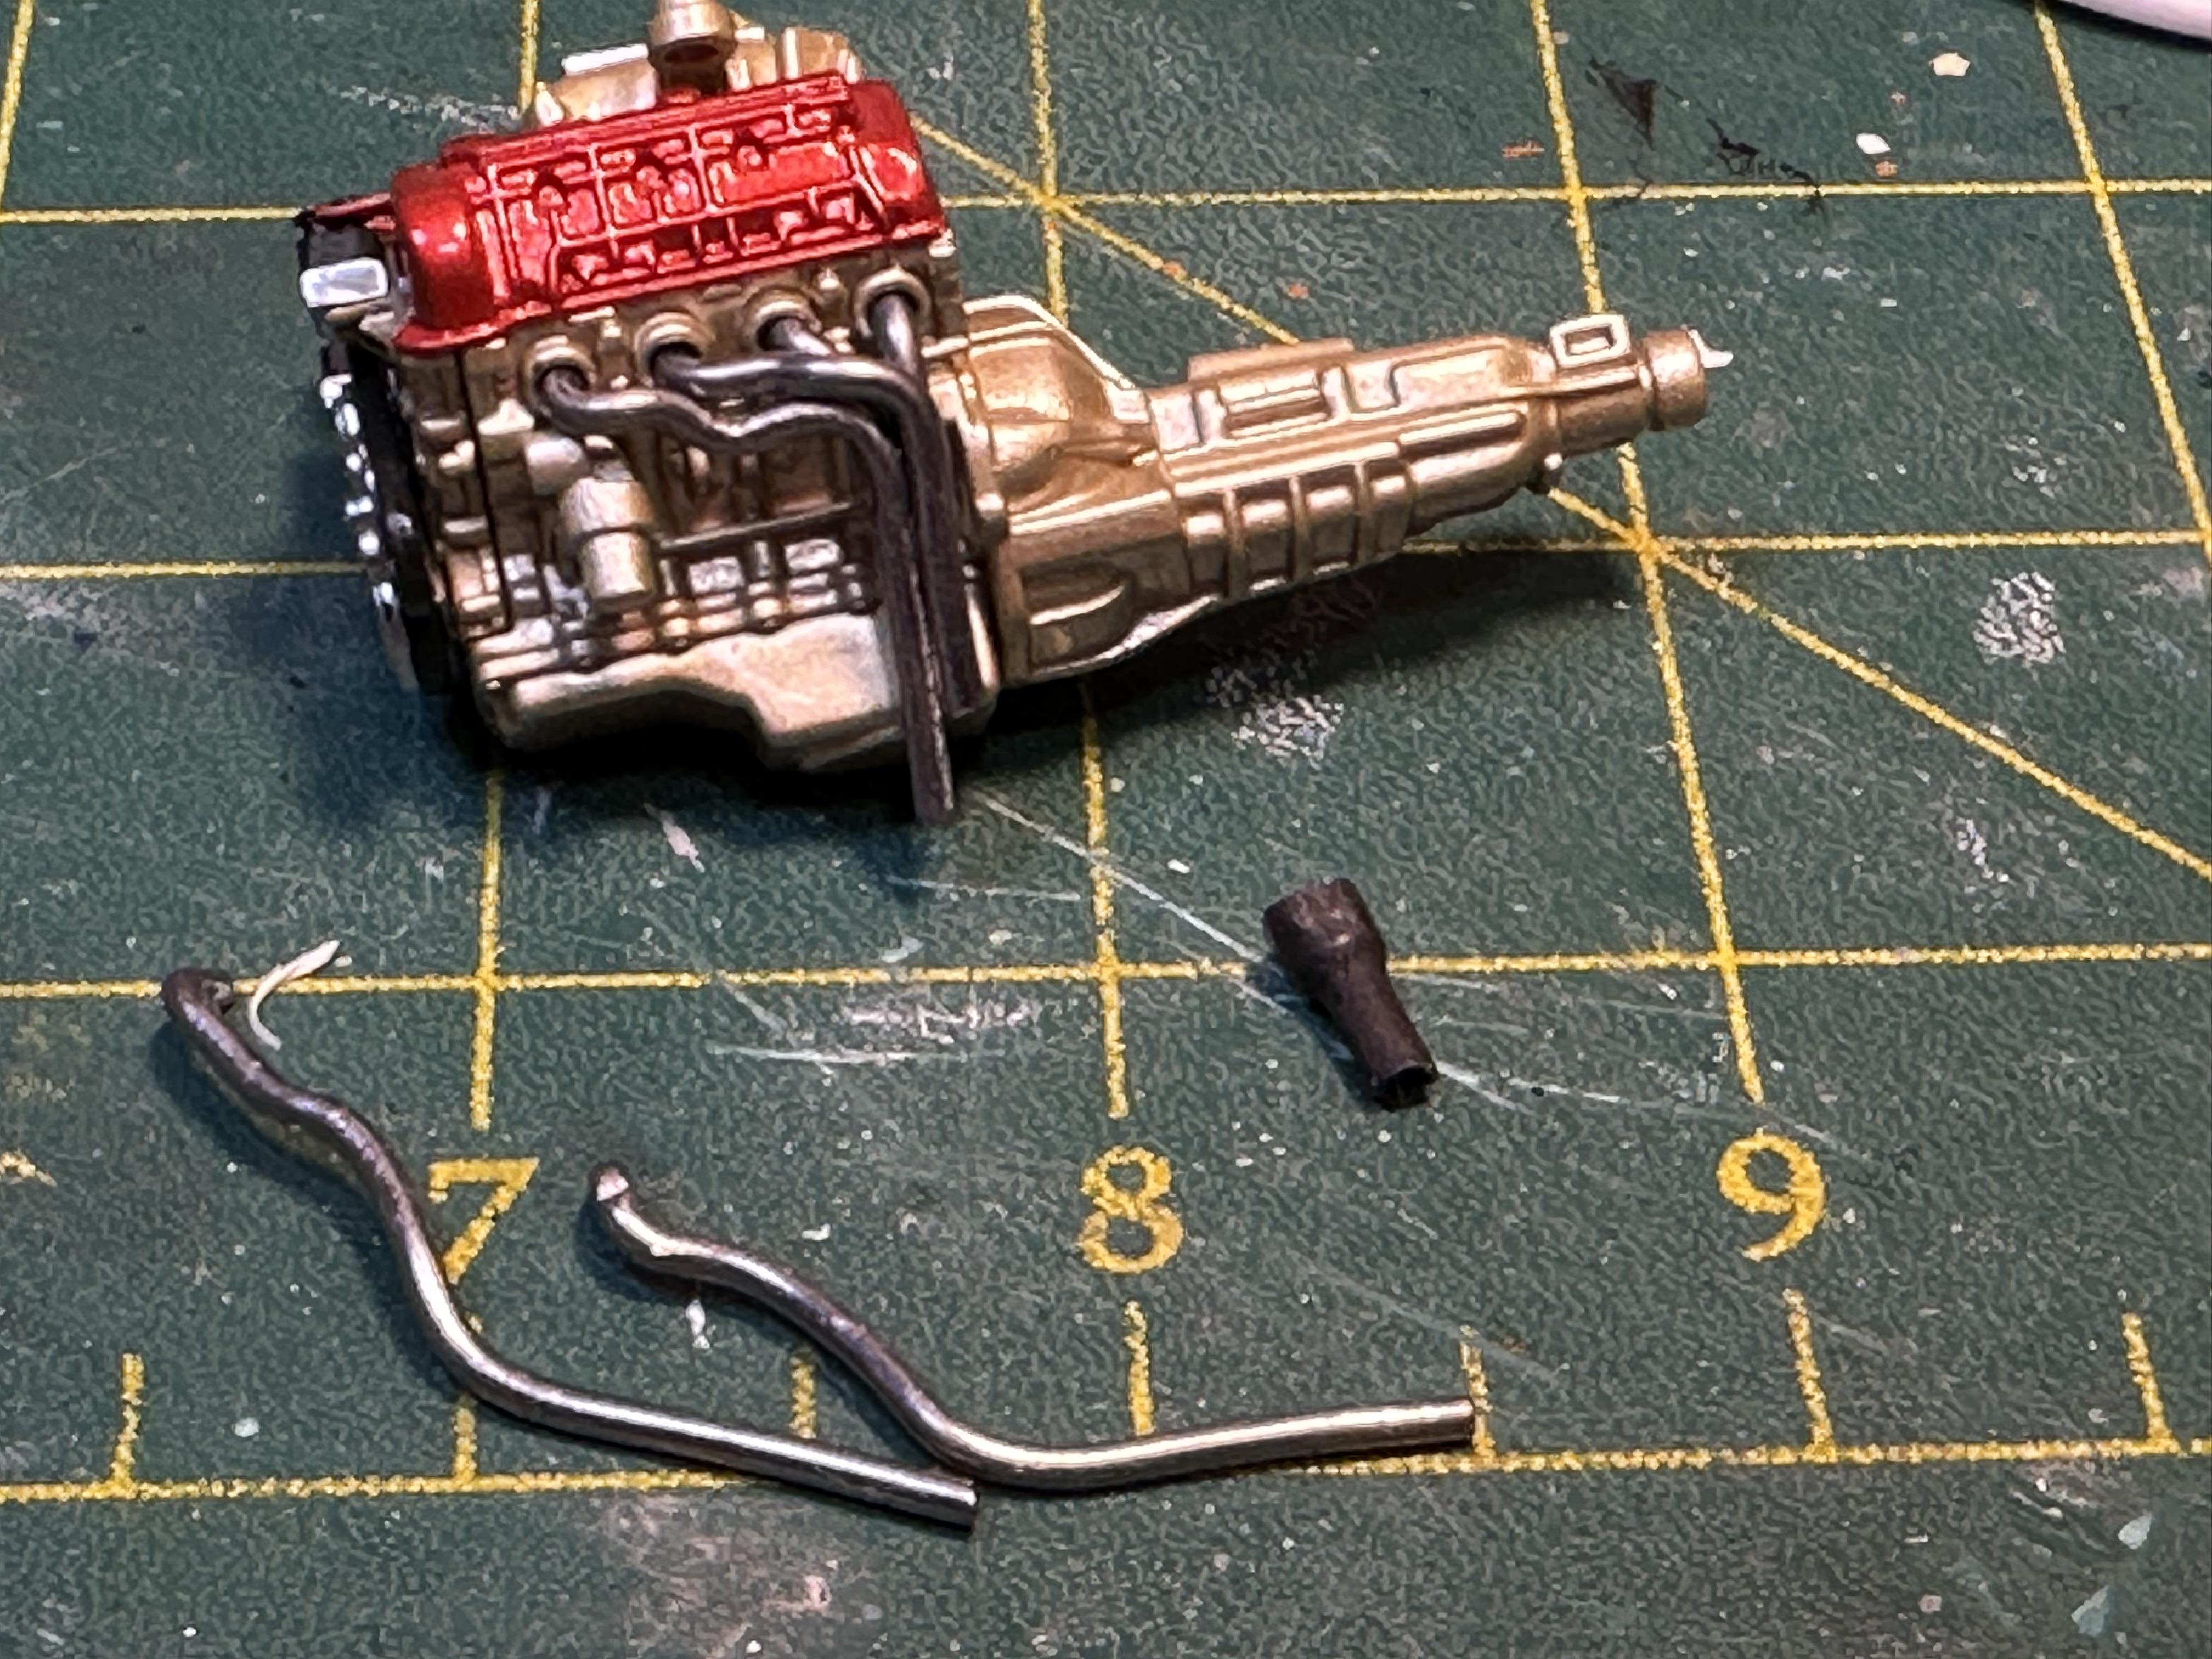
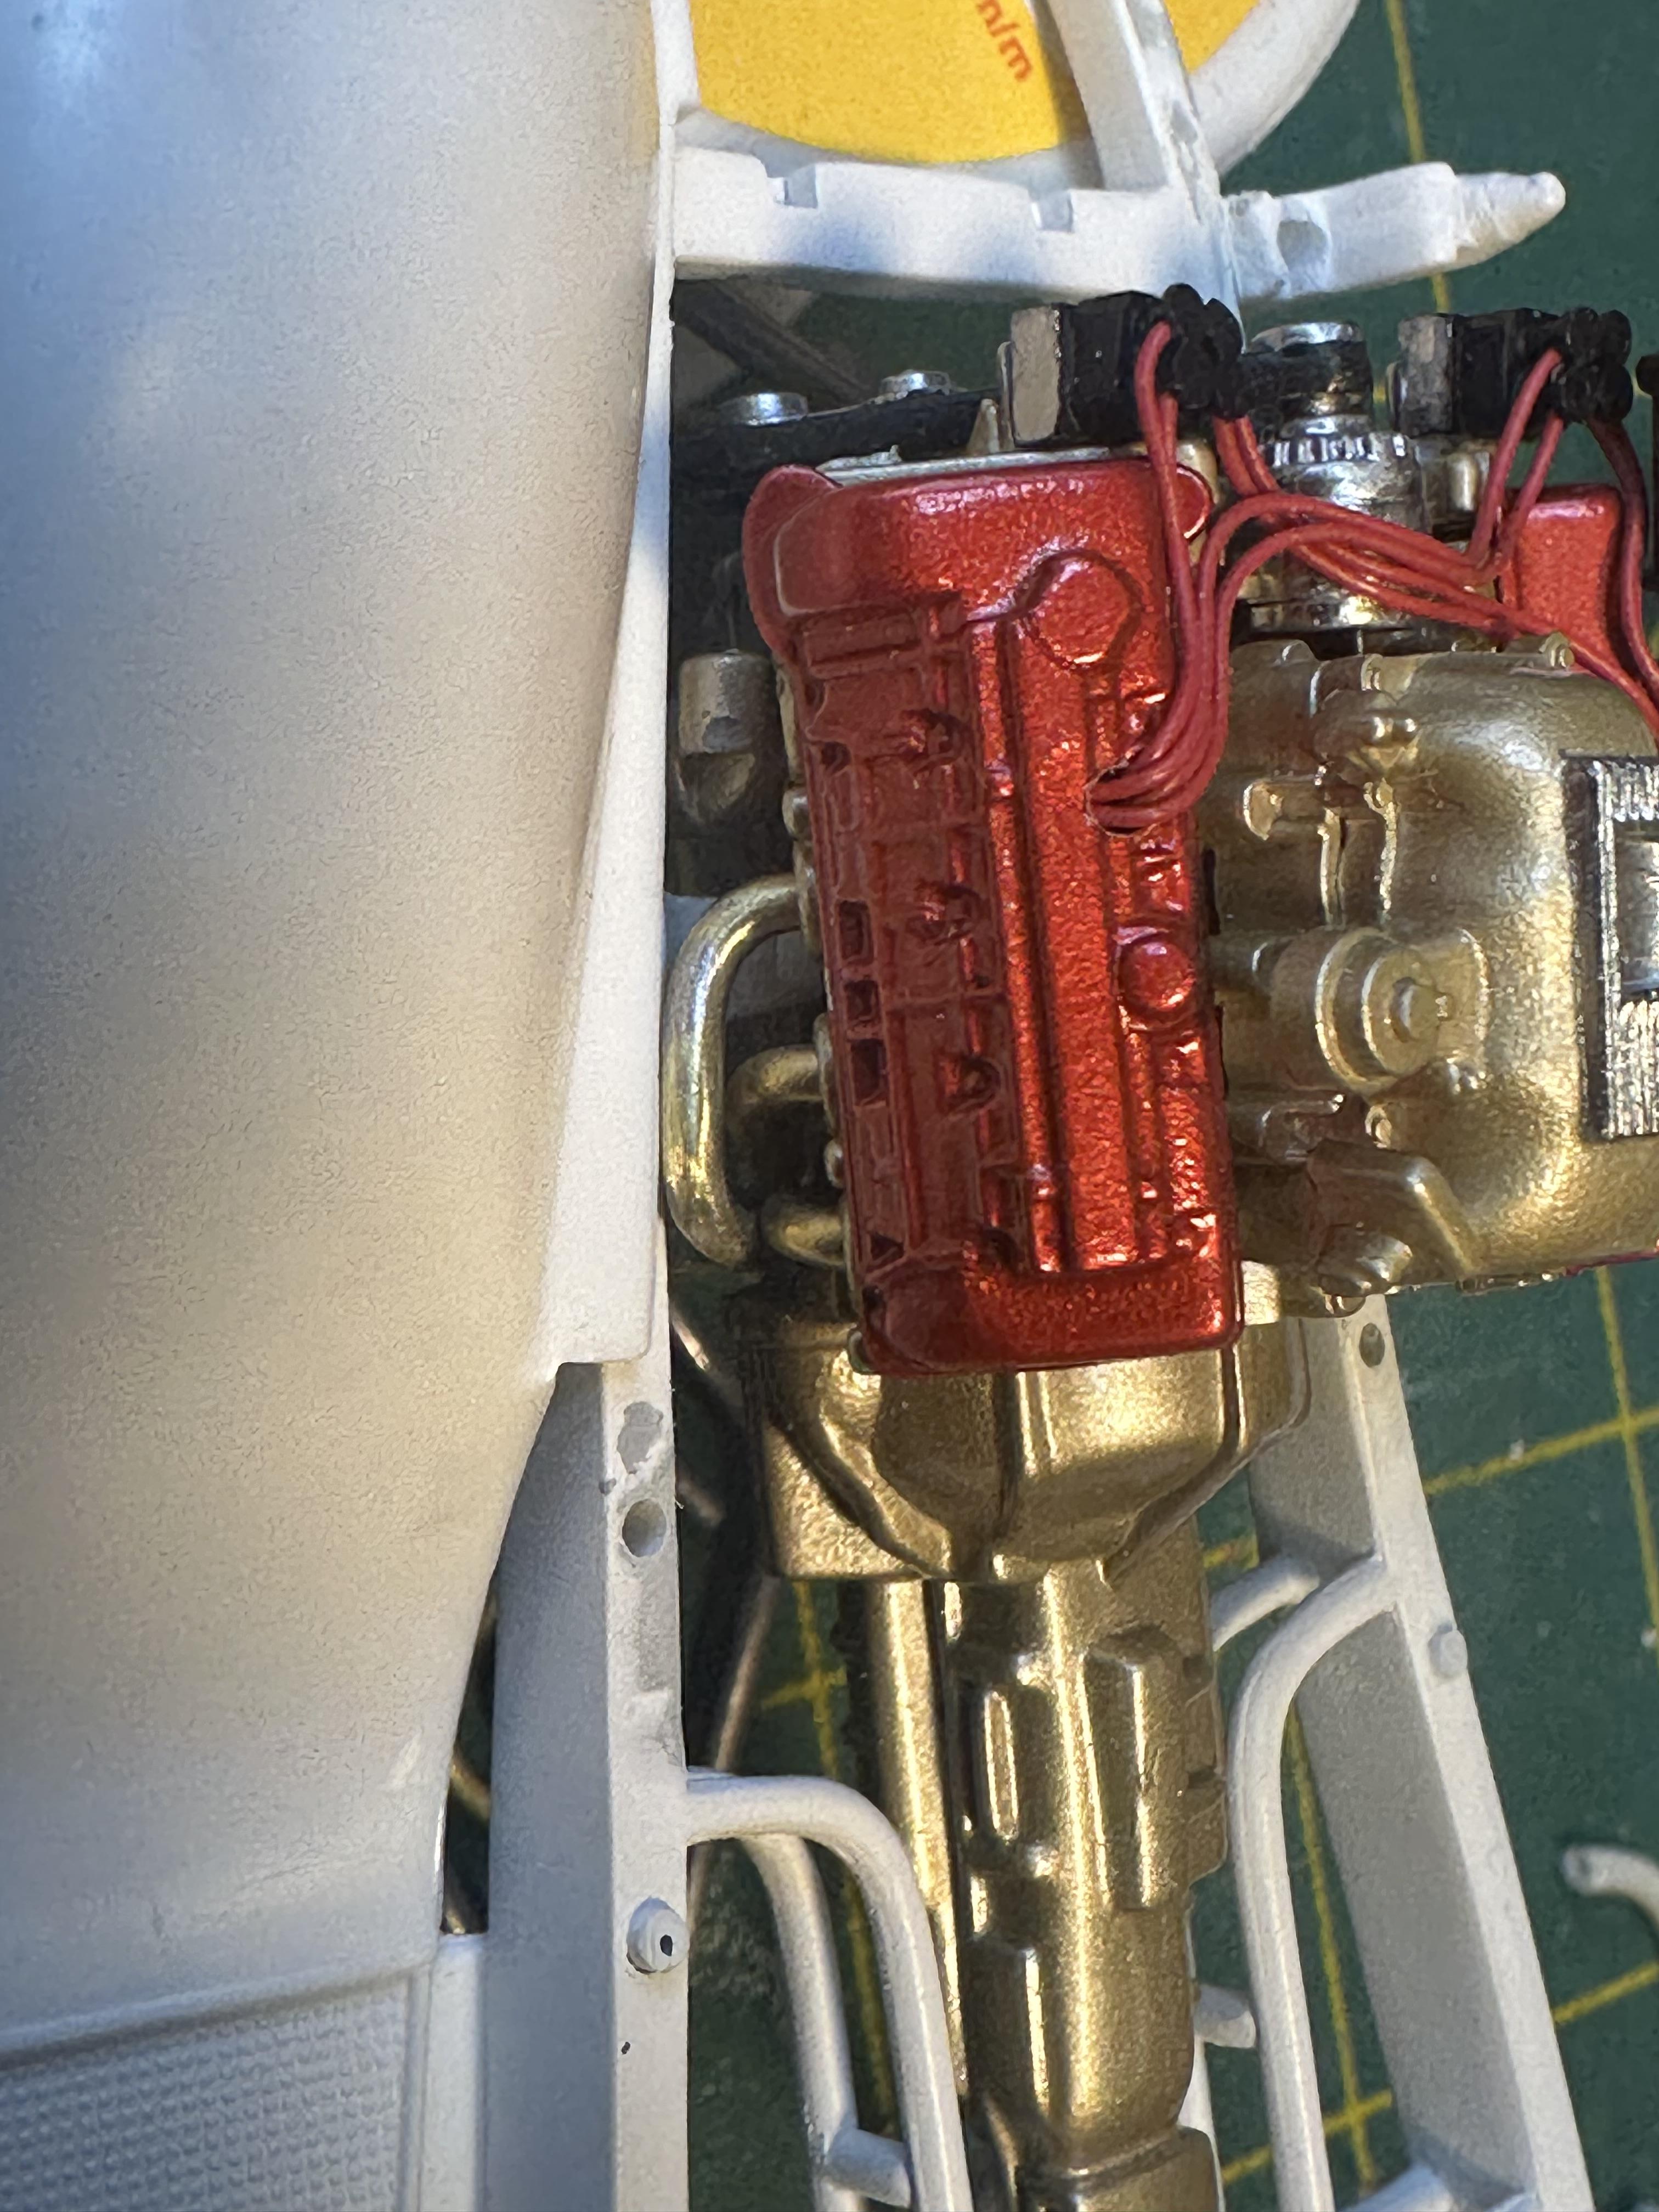
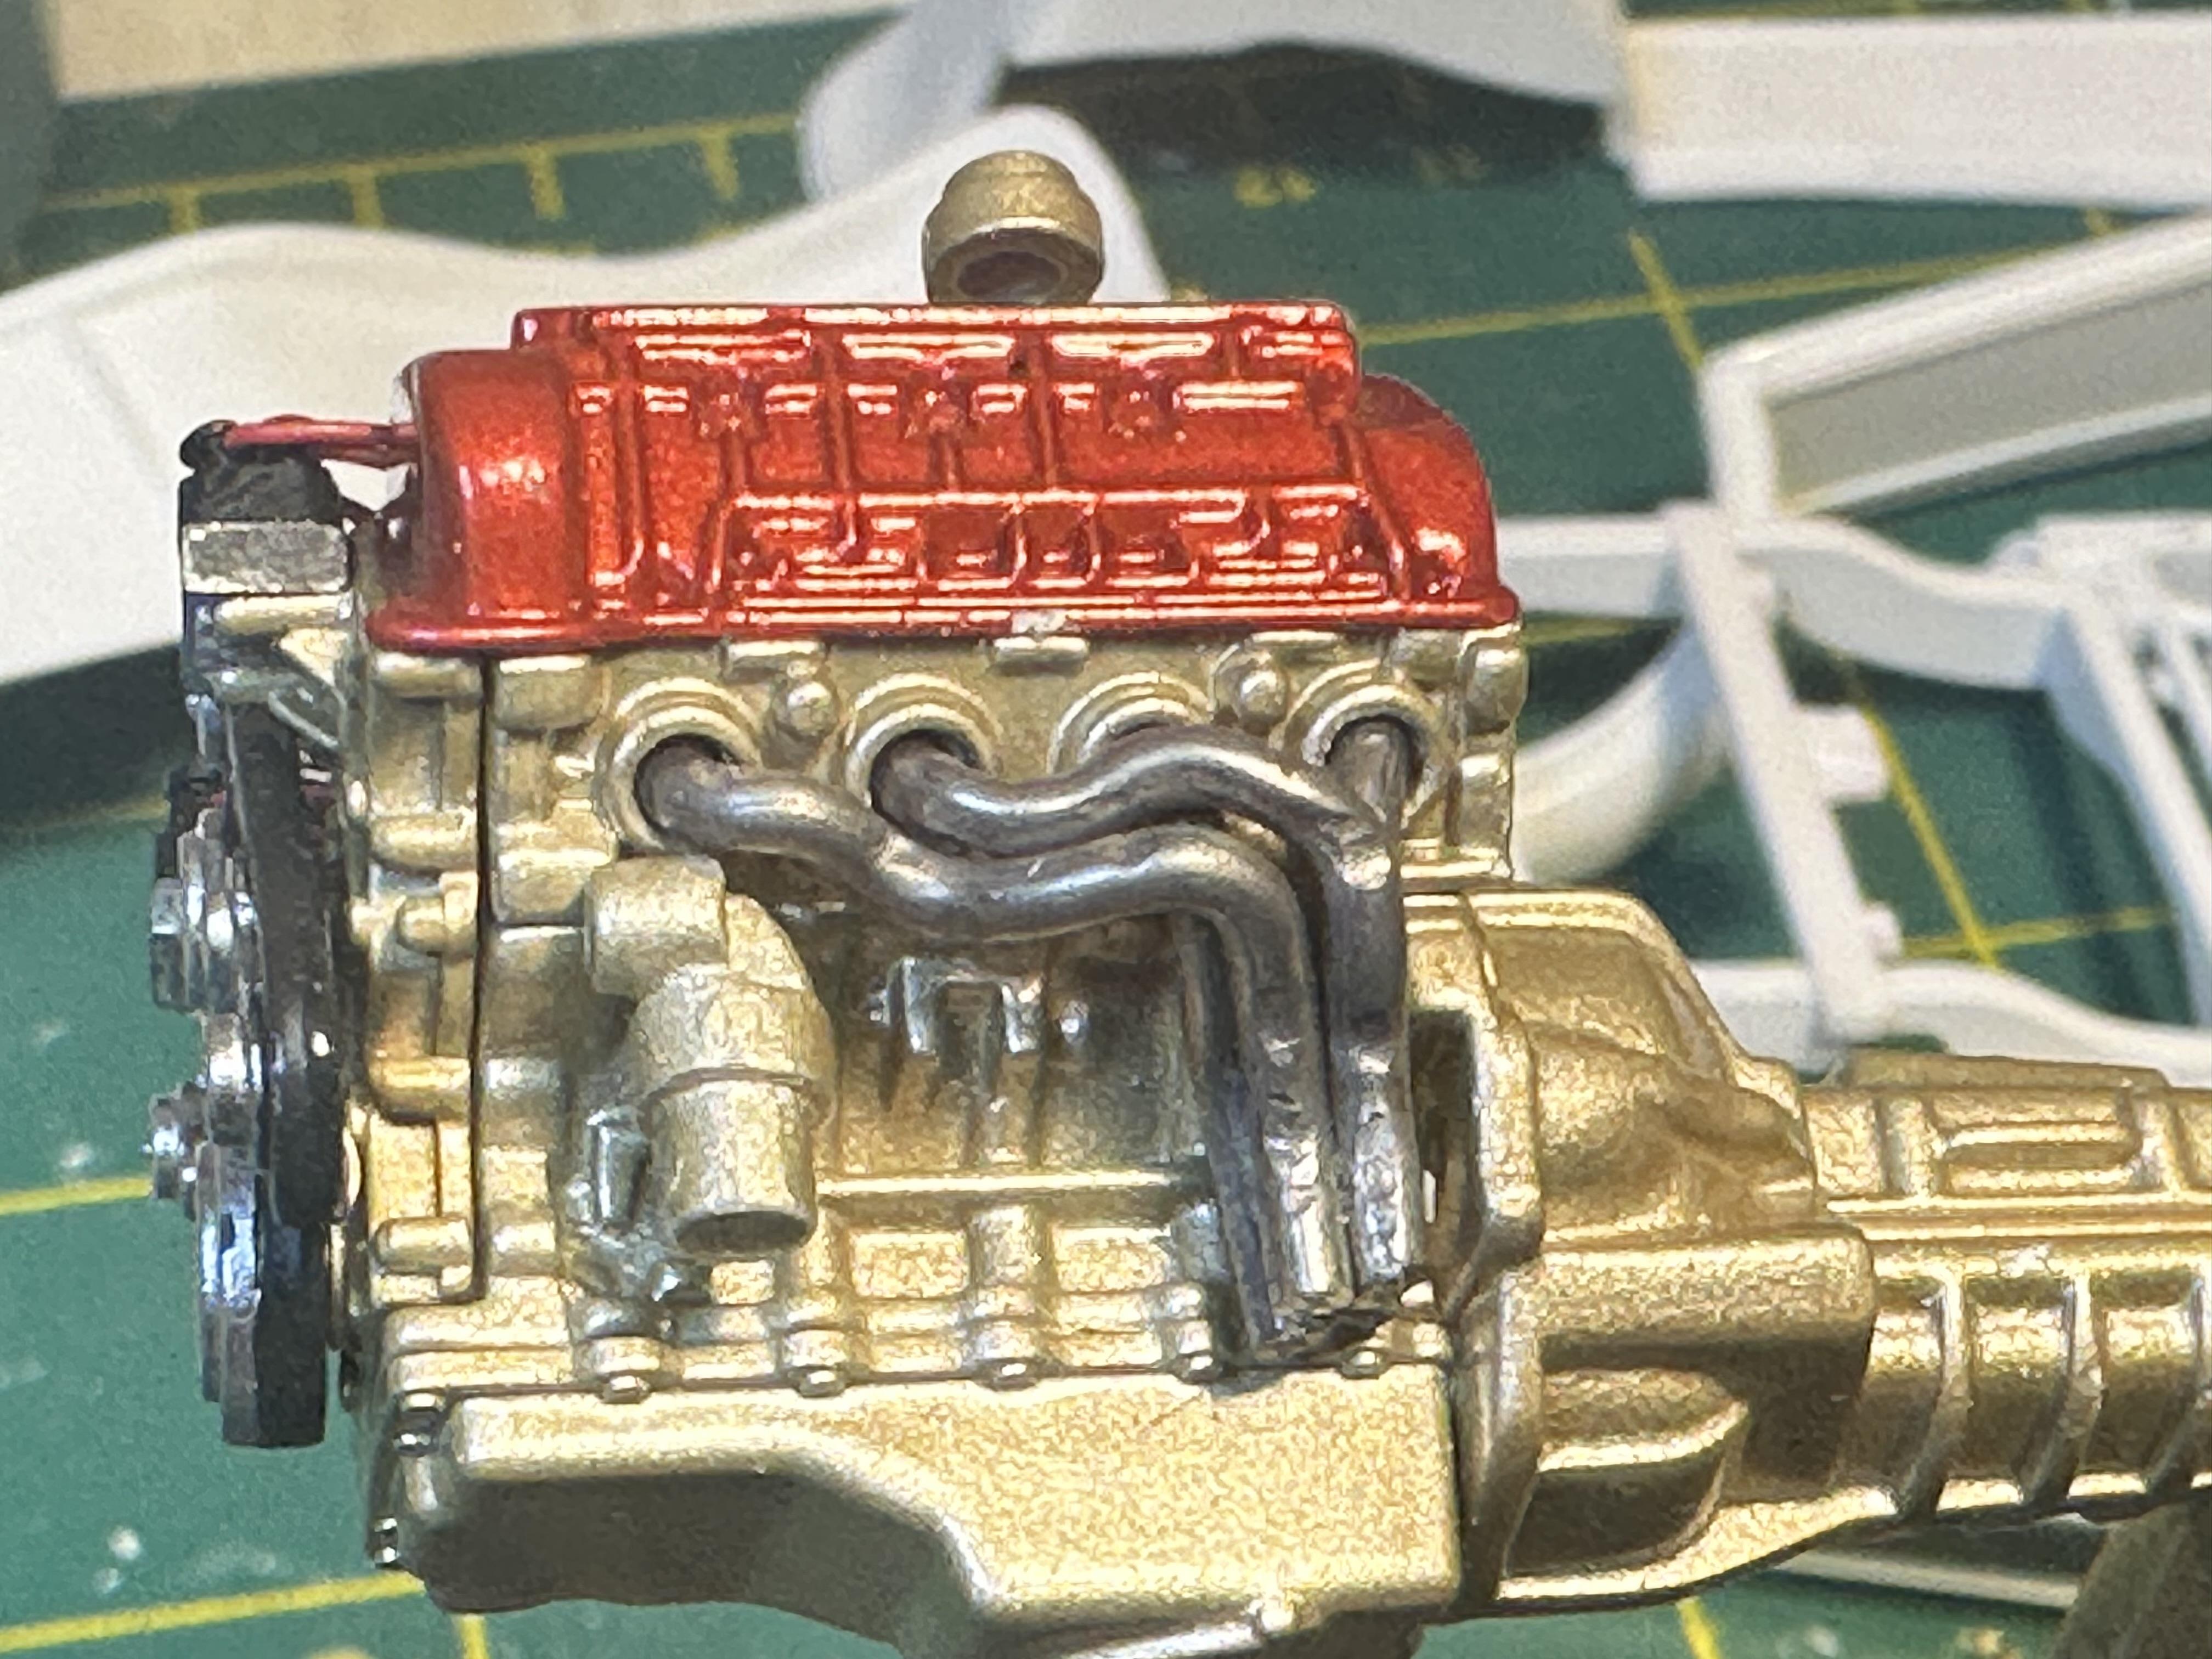
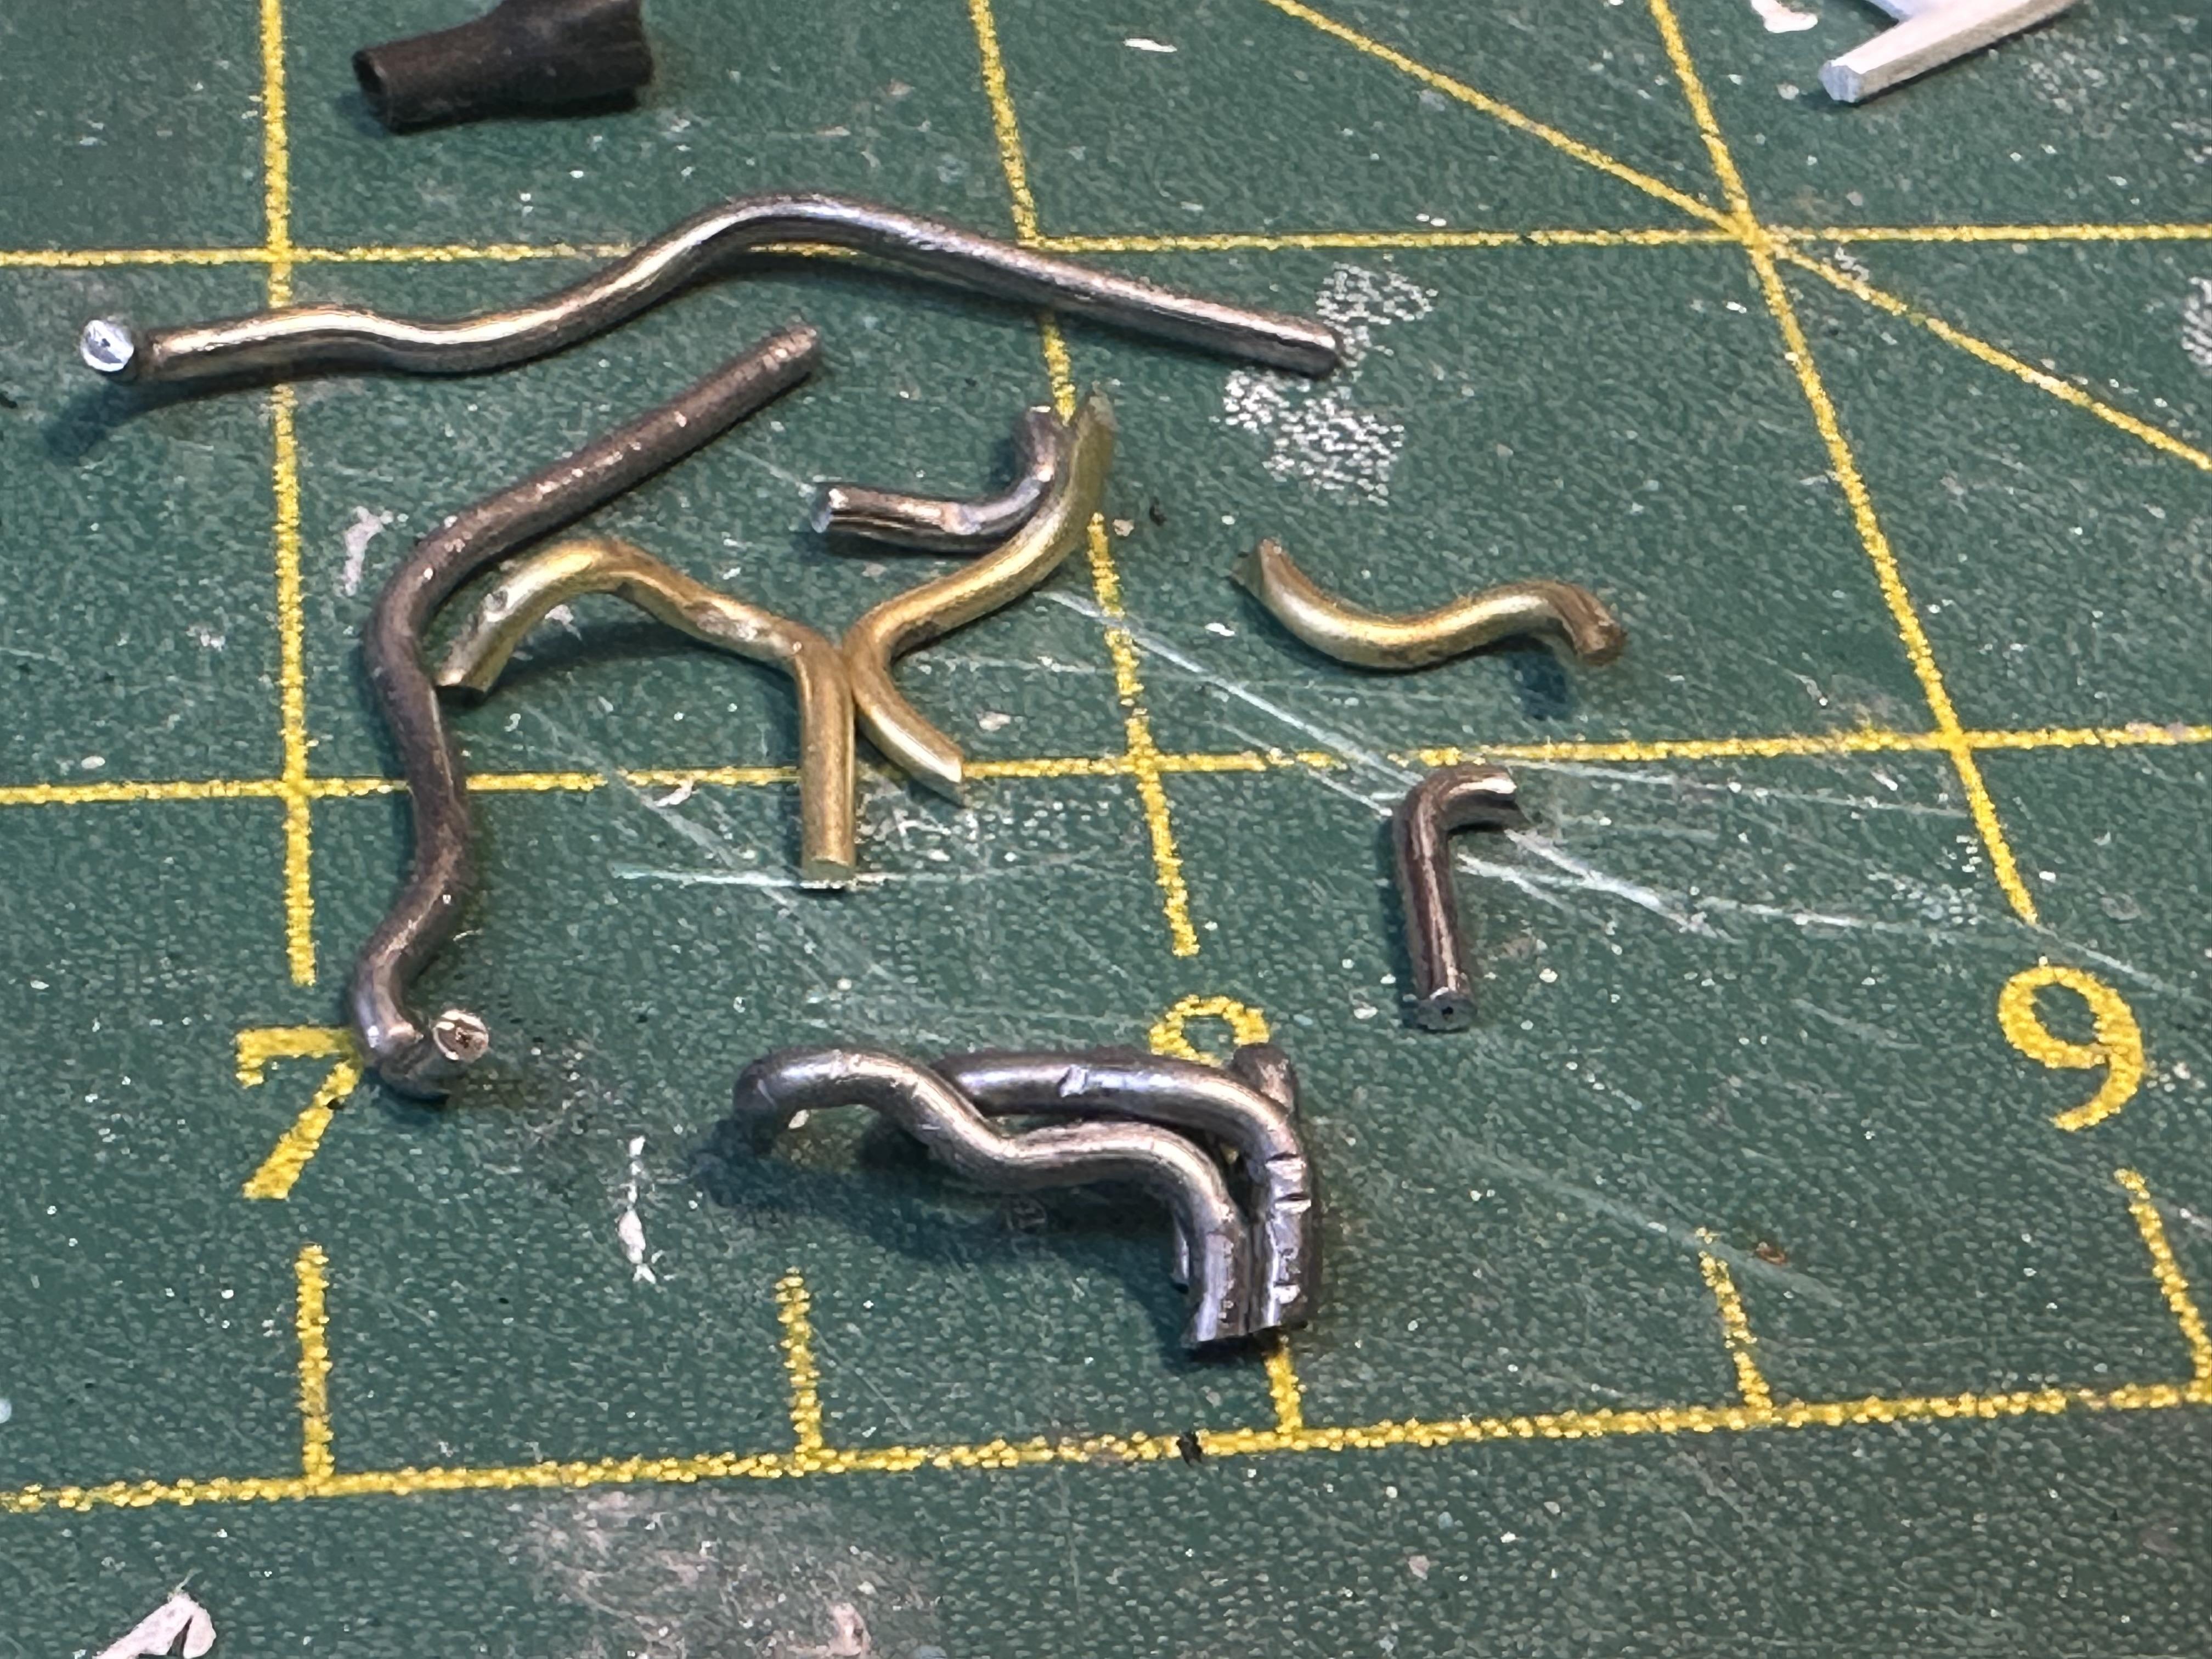
Worked on the RH side headers. Different challenges such as starter motor and engine mounts dictated that the dumps would be at the front so the headers are not symmetrical. Got some collectors made up from heat shrink shrunk over a former. Collectors being made up RH side header with super tight clearances. I had to notch the motor mount and relieve guard a little On a roll so I made up the front pipes from 2mm solder. I had prepped the kit mufflers by drilling out the inlet and outlets to 2mm after cleaning up. I am liking using solder for exhausts as the dimensions are consistent, round and easy to bend. Time for a mock up check the engineering. Thanks for looking
-
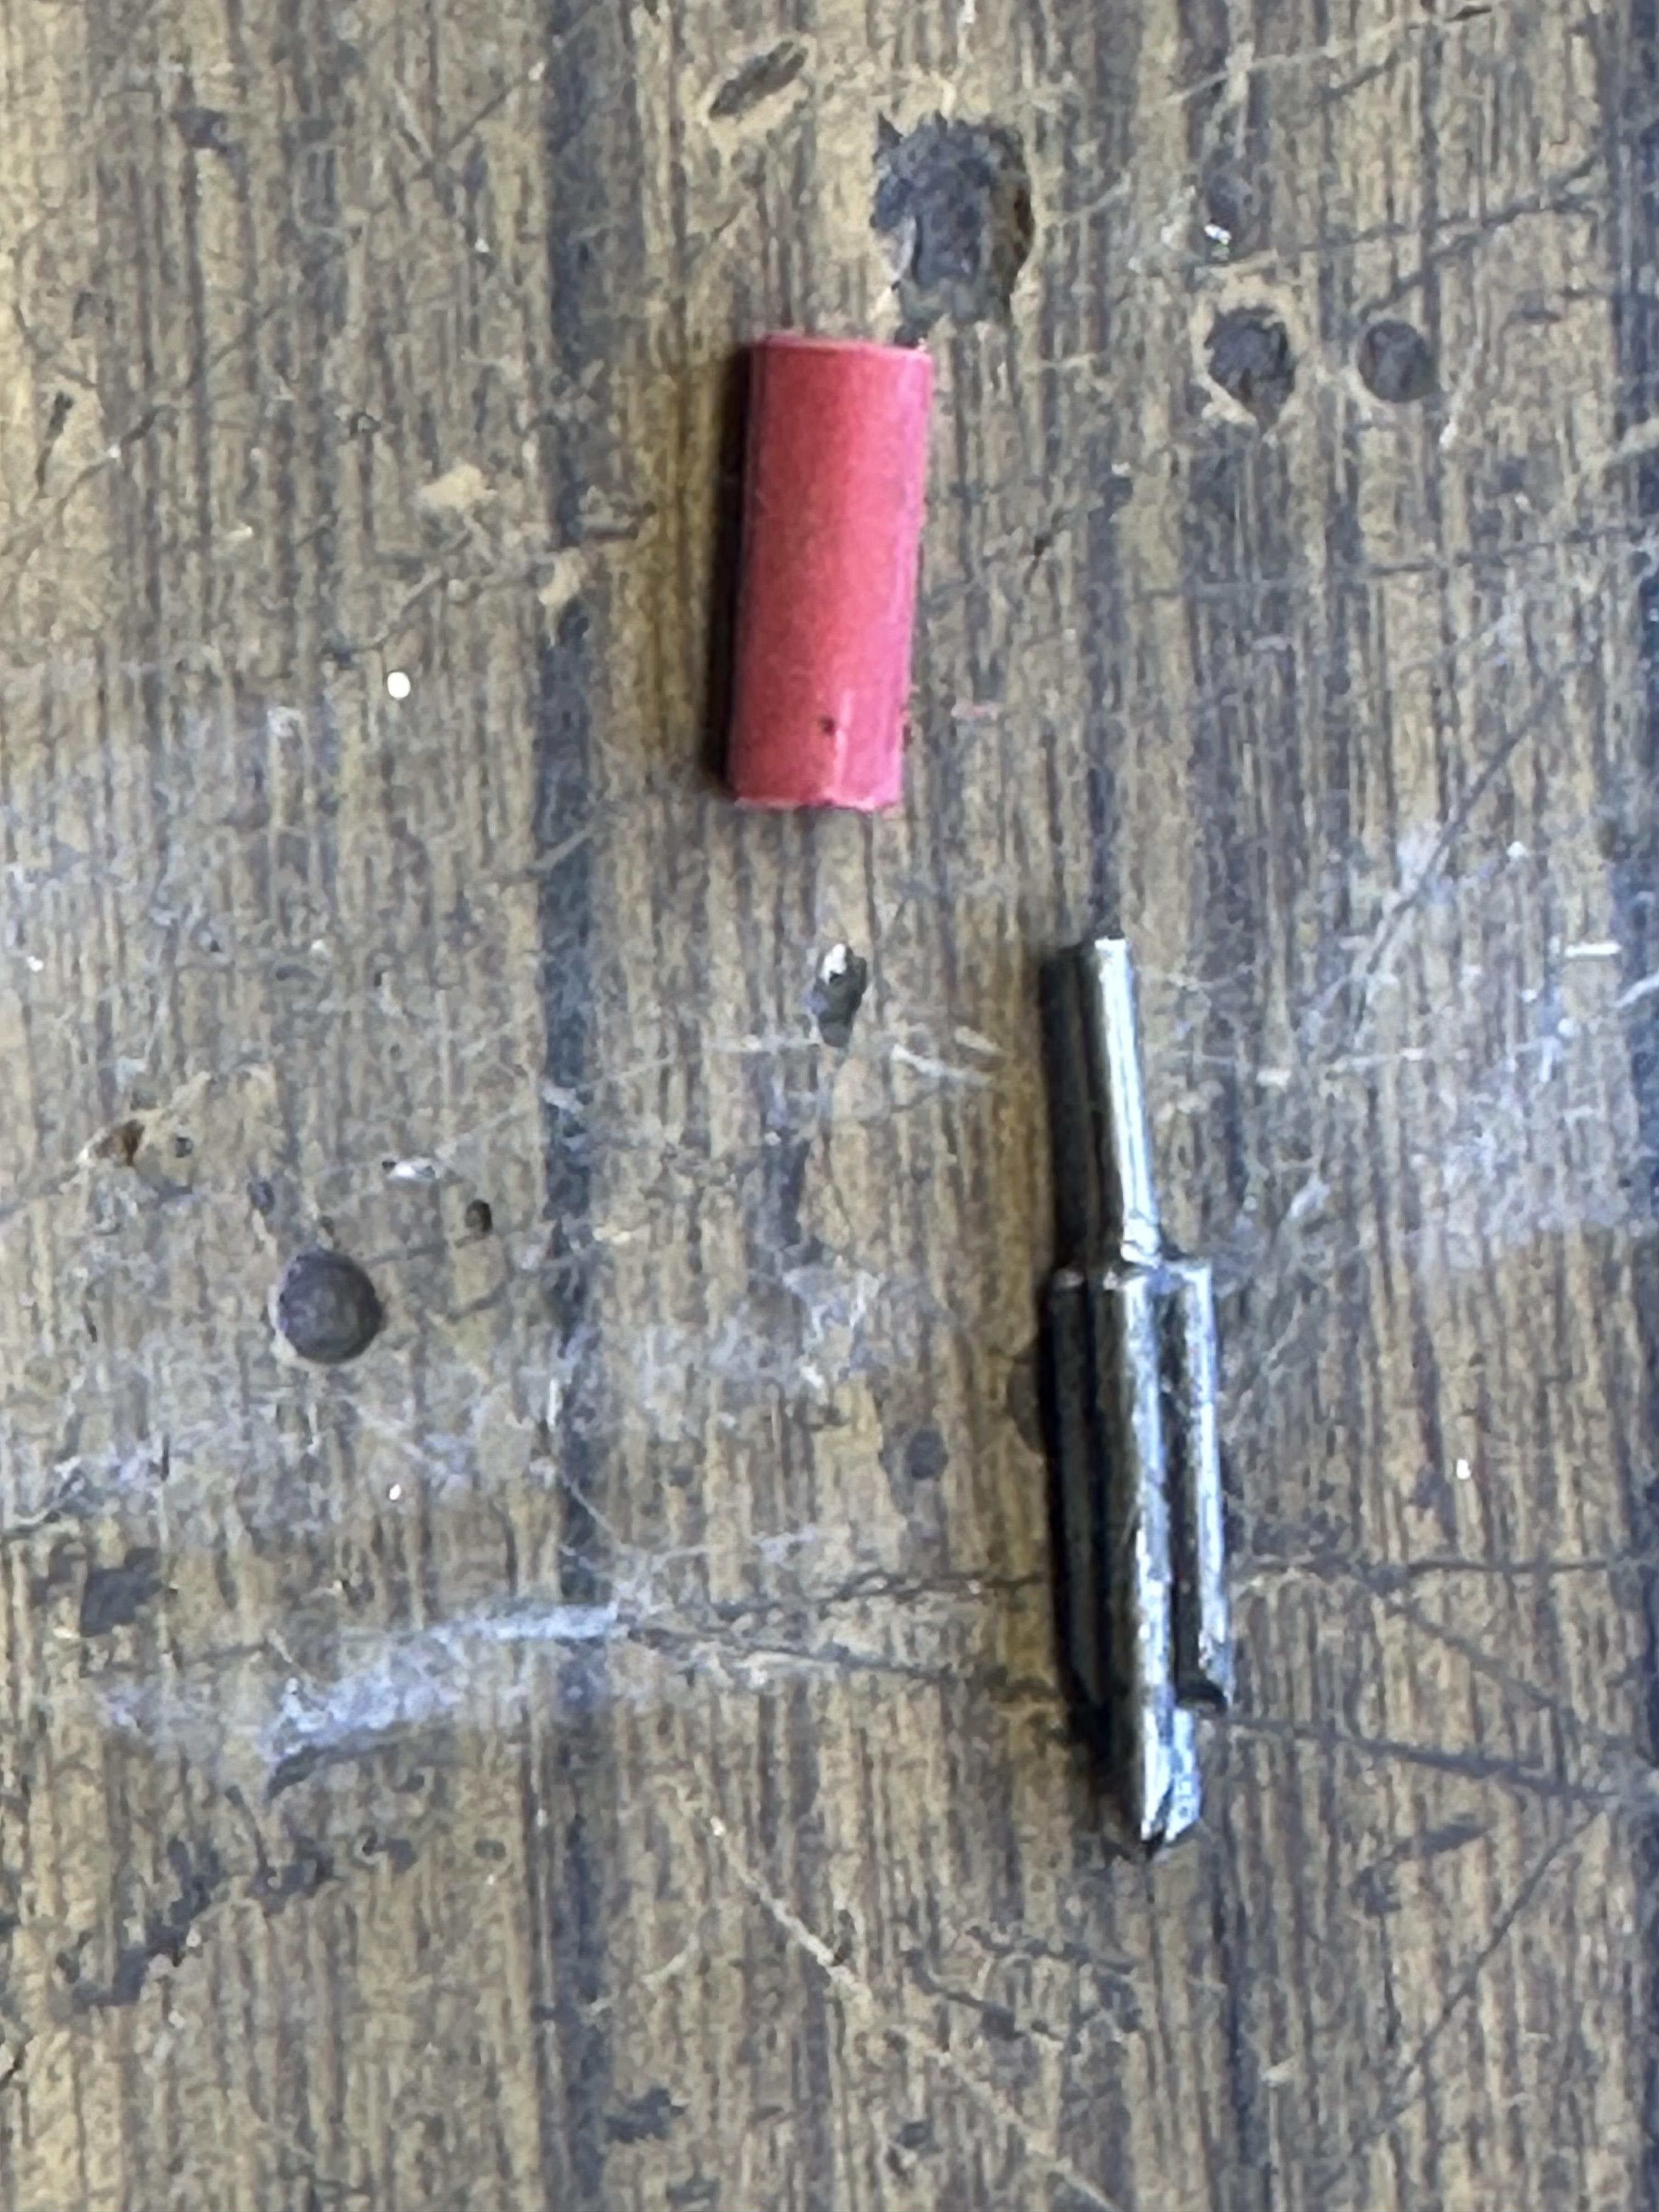
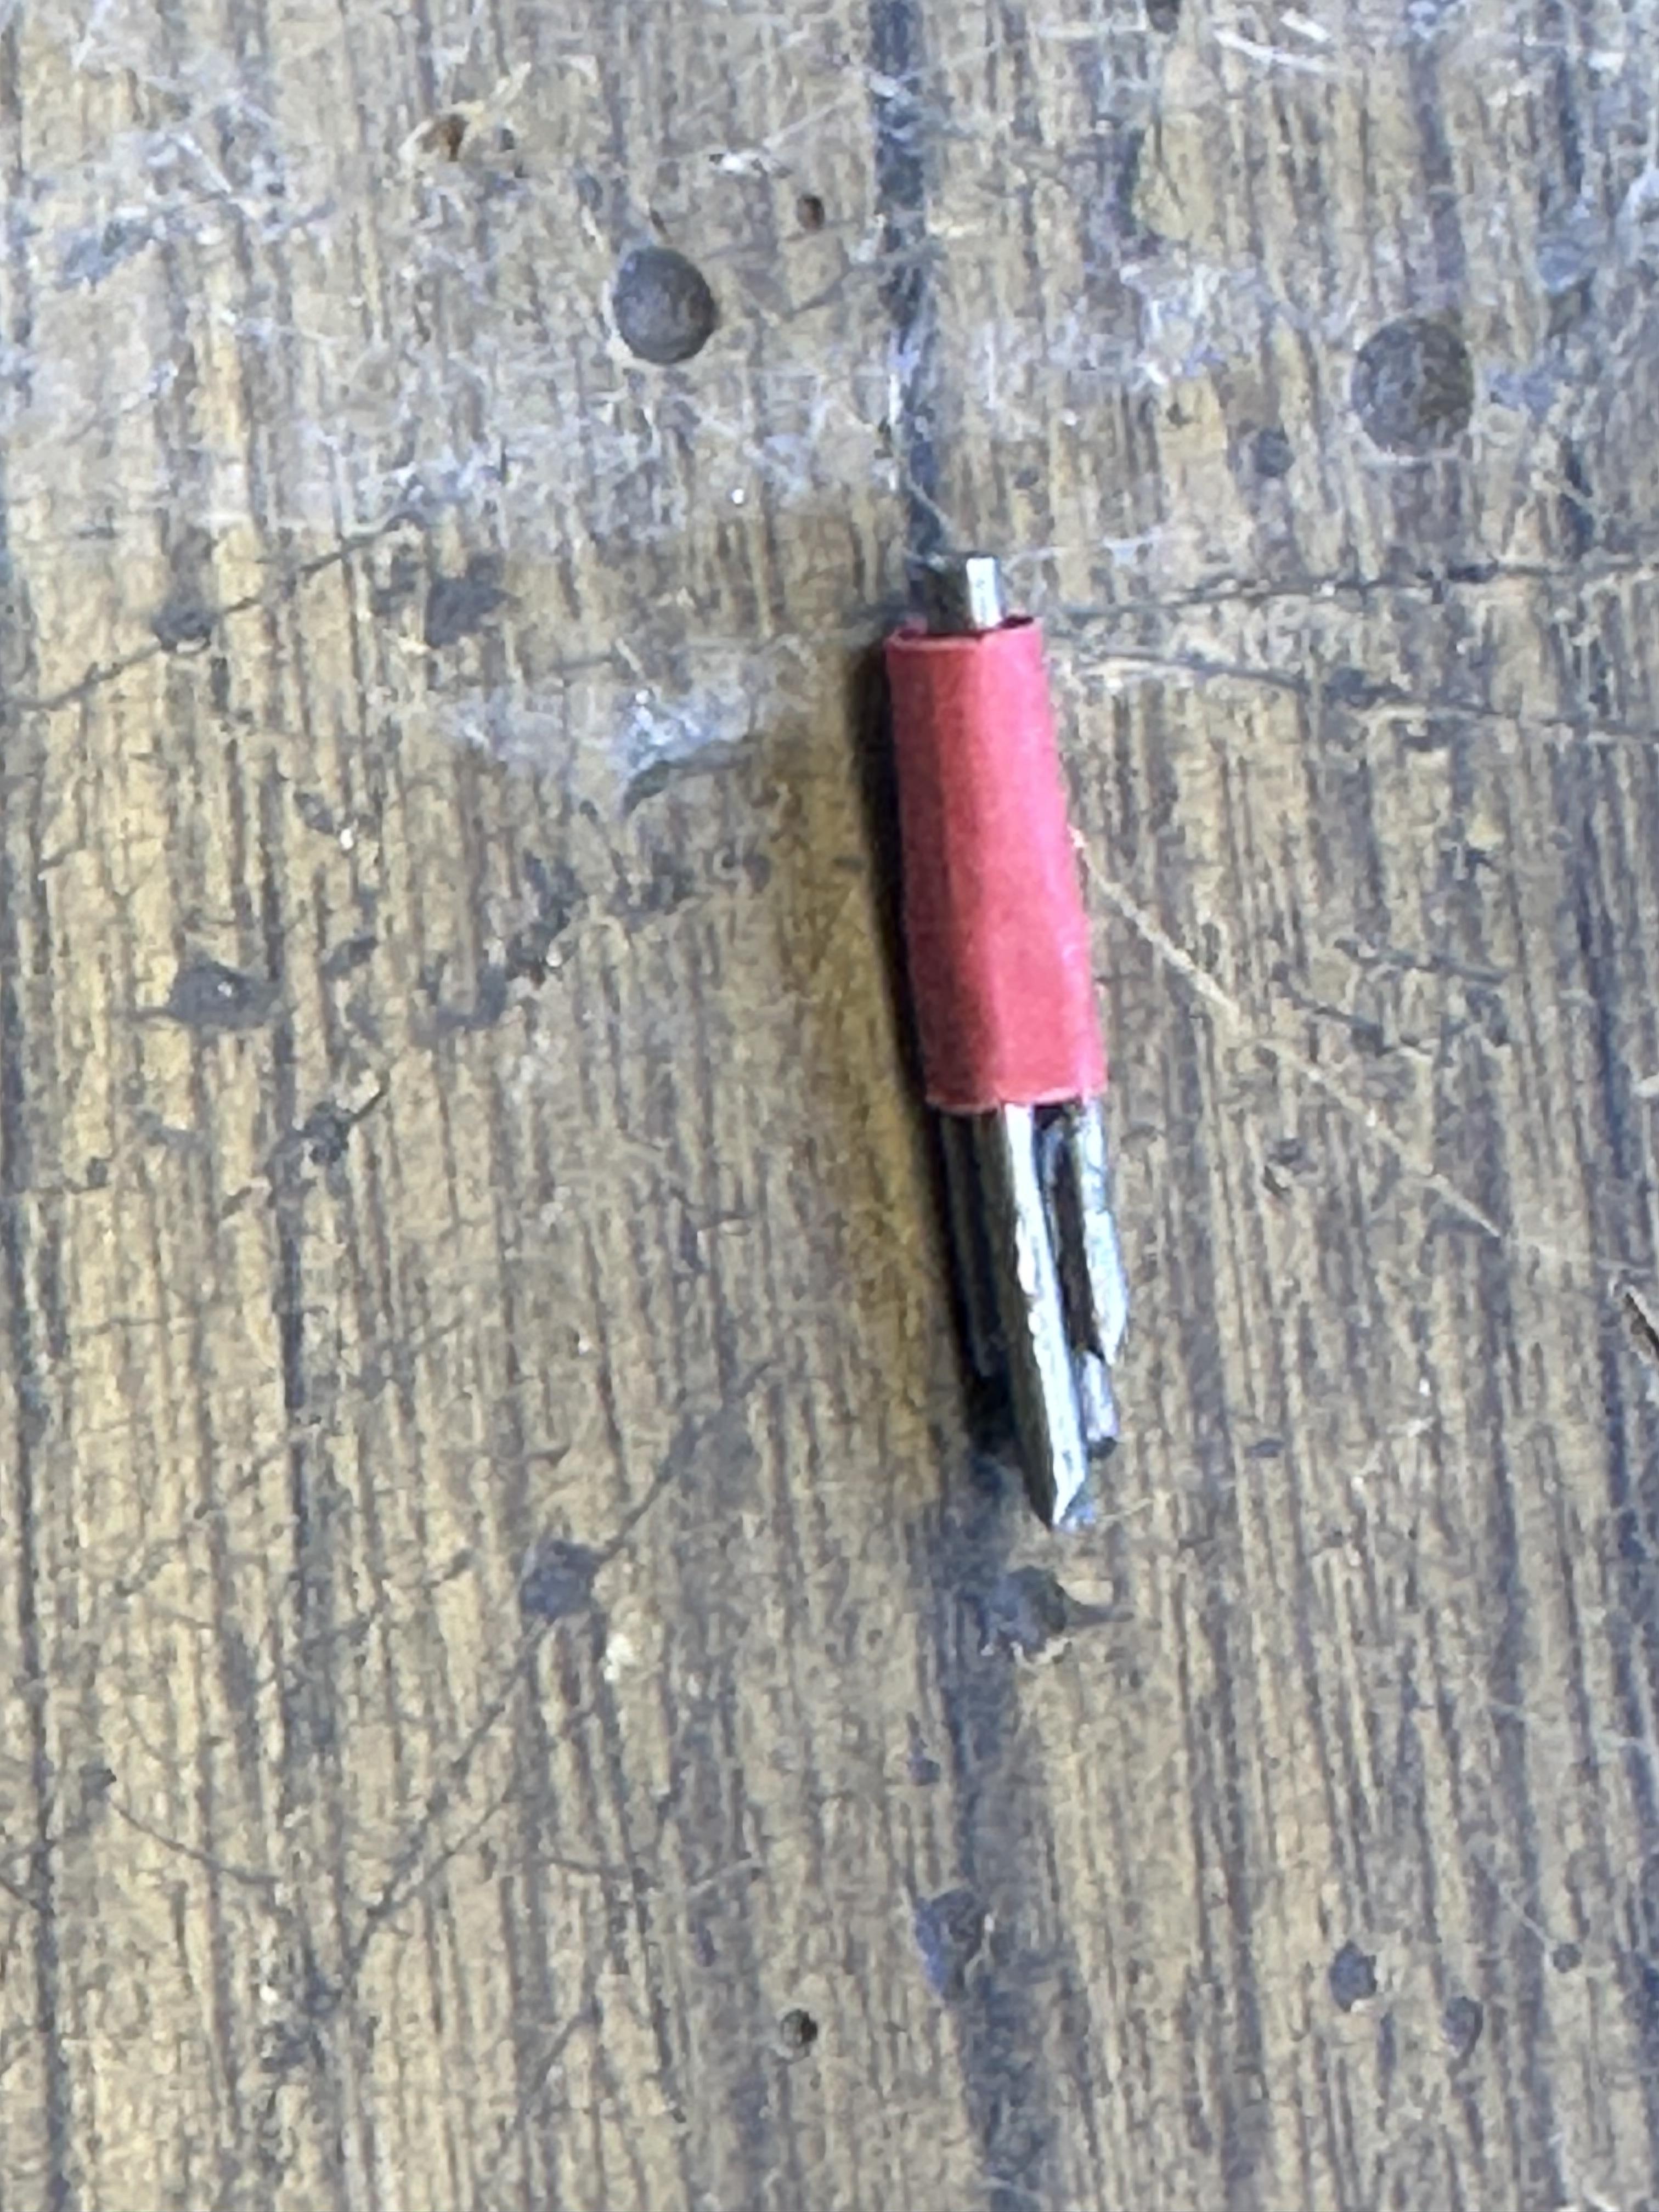
As per my last post I need to get some things sorted before I can move onto paint as is typical for a 32 the chassis is the same colour as the body so I want to paint it all in one go. The main thing is the headers and exhaust system I am on about my fourth attempt at getting headers made up for the modular motor. I got hold of some 1.7mm solder for the primaries and spent a couple of tries to get all the bends to line up. I thought I had it made but I did not have enough return to mount up the collectors AND they fouled the chassis and the guards where they sit on the chassis so I had to make some clearance, and then I found the motor was not seating down onto mounts. I looked for some 1.6mm solder but lucked out so tried some 1.6mm brass wire but that was just way to stiff to get the tight radius bends I am after. I located some 1.6mm solder and had another go - just clears on the LH side so now time to move onto the RH Attempt #2 - 1.7mm solder - looks good but fouls chassis and guards. The long tubes are from attempt #1 but the collector fouled the chassis x-member rails so went to downward facing dumps Attempt #3 - 1.6mm brass Attempt #4 - 1.6mm solder - Yahoo!! Just clears all on the LH side at least - just need to make up new 4-1 collectors from heat shrink. I have made up the former to do this And all the left over bits so far - still have the RH side to go yet It would be a real battle in the 1:1 world to do this engine swap I reckon Thanks for looking
-
The chassis in the AMT 23T series - chopped coupe, fruit wagon, roadster - has a better chassis for this build than the Lil' John T series IMO The AMT chopped coupe has the bonus of a body ready to use and I have seen them on shelves recently - along with just about anything AMT has made
-
Recommendations For Iphone Photography?
bill-e-boy replied to oldcarfan's topic in Tips, Tricks, and Tutorials
I have used a DSLR in the past. Great pix with lots of opportunities to crop and set up the pix in the camera. The downside is the size of the file is usually way too big to post on a forum such as this. You have to re-save the file with a lower resolution. I now use my iPhone for posting here and elsewhere online. I still use the DSLR to take the glamour shots as this what they are best for. As for cost - most of us now have reasonable cell phones and they do a capable job taking pix suitable for posting so the added expense of a an additional digital camera may not be justifiable to most of us As an aside went did an overseas trip recently and I took along my DSLR and looked well and truly out of place as most people use their phones for holiday snaps these days One thing that is common for all types camera be it DSLR or phone is to spend that extra second or so to check that what you have is in focus and presented well to convey your intention -
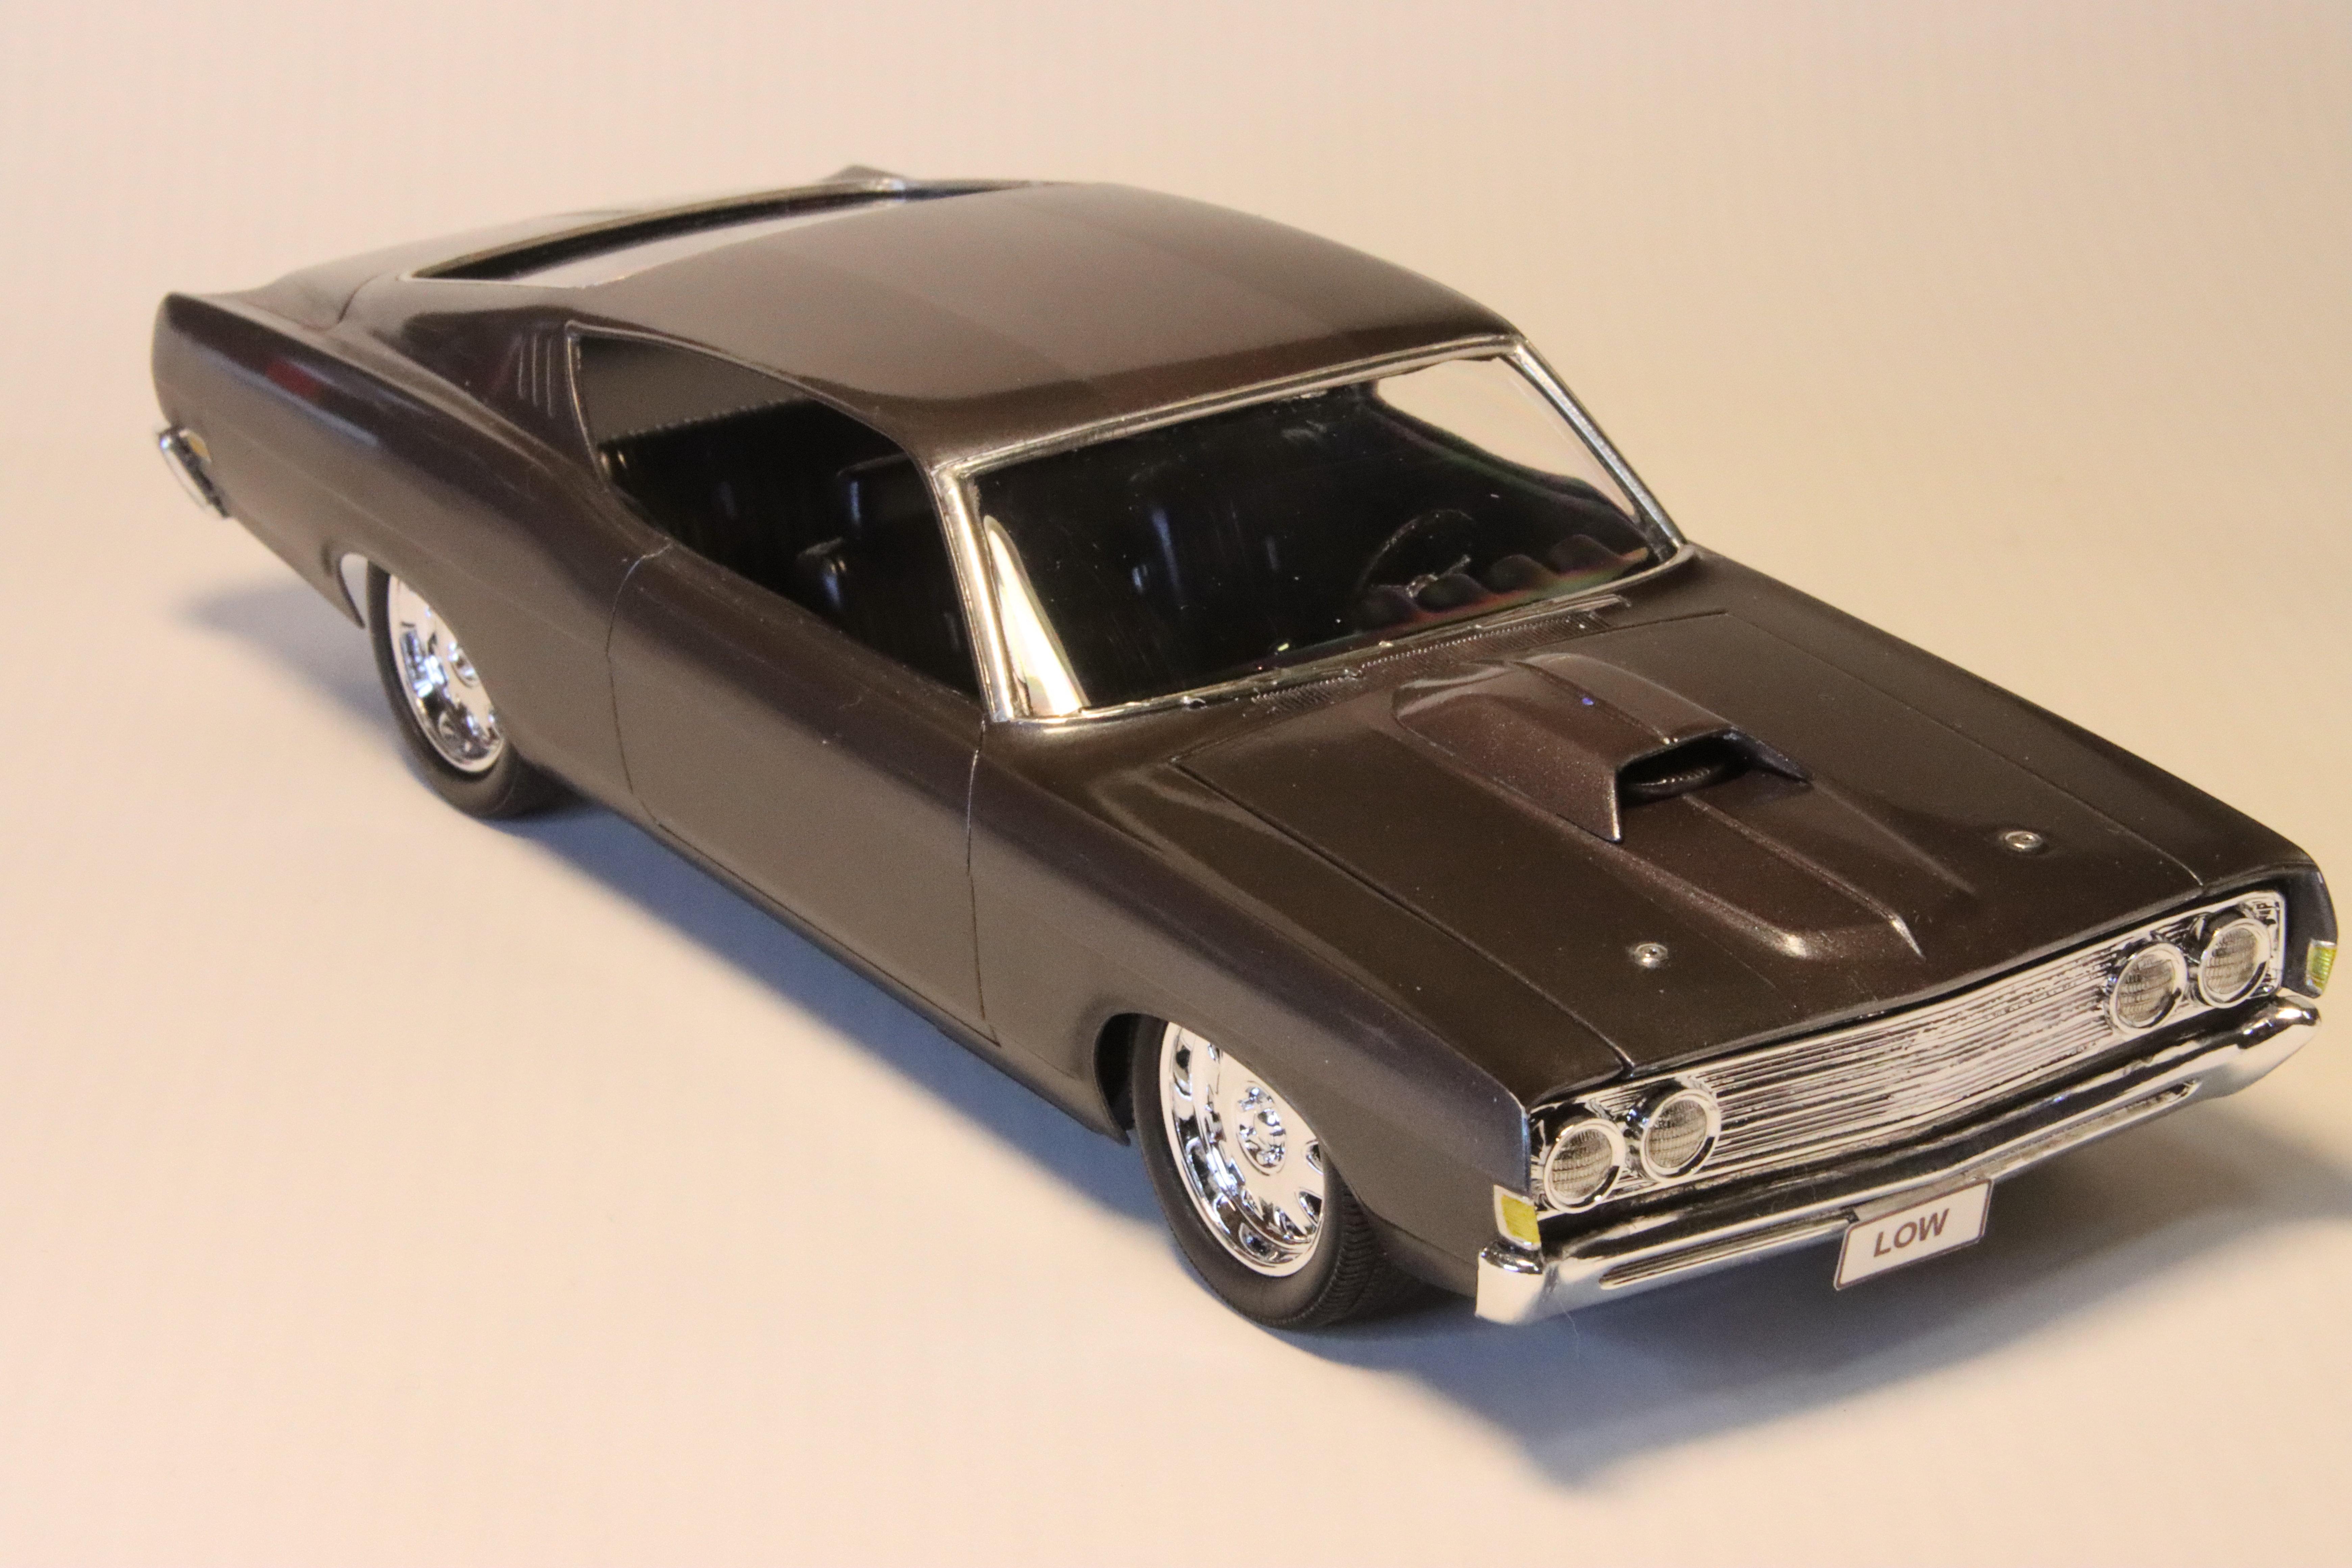
Or these aftermarket oldies that I am using on my 68 Charger build
-
He is a very talented builder and kudos to him for sharing it with us
-
I think the AMT 37 Chev Salt Shaker has Cragars. Not sure about the tyres you are wanting - aftermarket resin or 3D prints would be best
-
This is a cool subject and I will be following. Only one rule - all parts must come from your parts bins I have built one model from my parts stash based mostly around left over parts from an AMT 29 Mod Rod/Ala Kart and AMT 23 T parts. Built Rat Rod style with flat paint which was Tamiya primer with some green added to get the colour I was after which also gave it a little shine. Inspiration came from a magazine feature at the time of build (2008). The cool beer keg was from an old AMT Surf-n-Go (Surf Wagon in the US) like I recently completed but I could not find an extra keg as the kit one was missing - but not this one, this was from the parts box.
-
Thanks for the fine comments guys To answer a couple of queries They are AMT hollow slicks and were quite common in the older issue kits that always seemed to have a pair - or least 3-in-1 kits. If you mean the wheels - they are cool Ansen mags and this is the only kit I have seen them in and they have cool knock off too Sometimes - enamel paints are smelly and the smell lingers for ages but a cool blast from the past. And they don't always work In a lot of ways, it is crude - like the way the body goes together and the frame rails being split. And the mould lines are horrendous. BUT - Cool motor - Cool wheels - Cool chassis - when you take the time to clean it all up - Bonus surfboards - a longboard and a shorty - and looks cool built up IMO
-
Cool, nice build
-
"32 Ford Roadster - Tribute to Gray Baskerville's hot rod
bill-e-boy replied to Phildaupho's topic in Model Cars
An awesome rendition of an iconic rod (and Rodder). Well done -
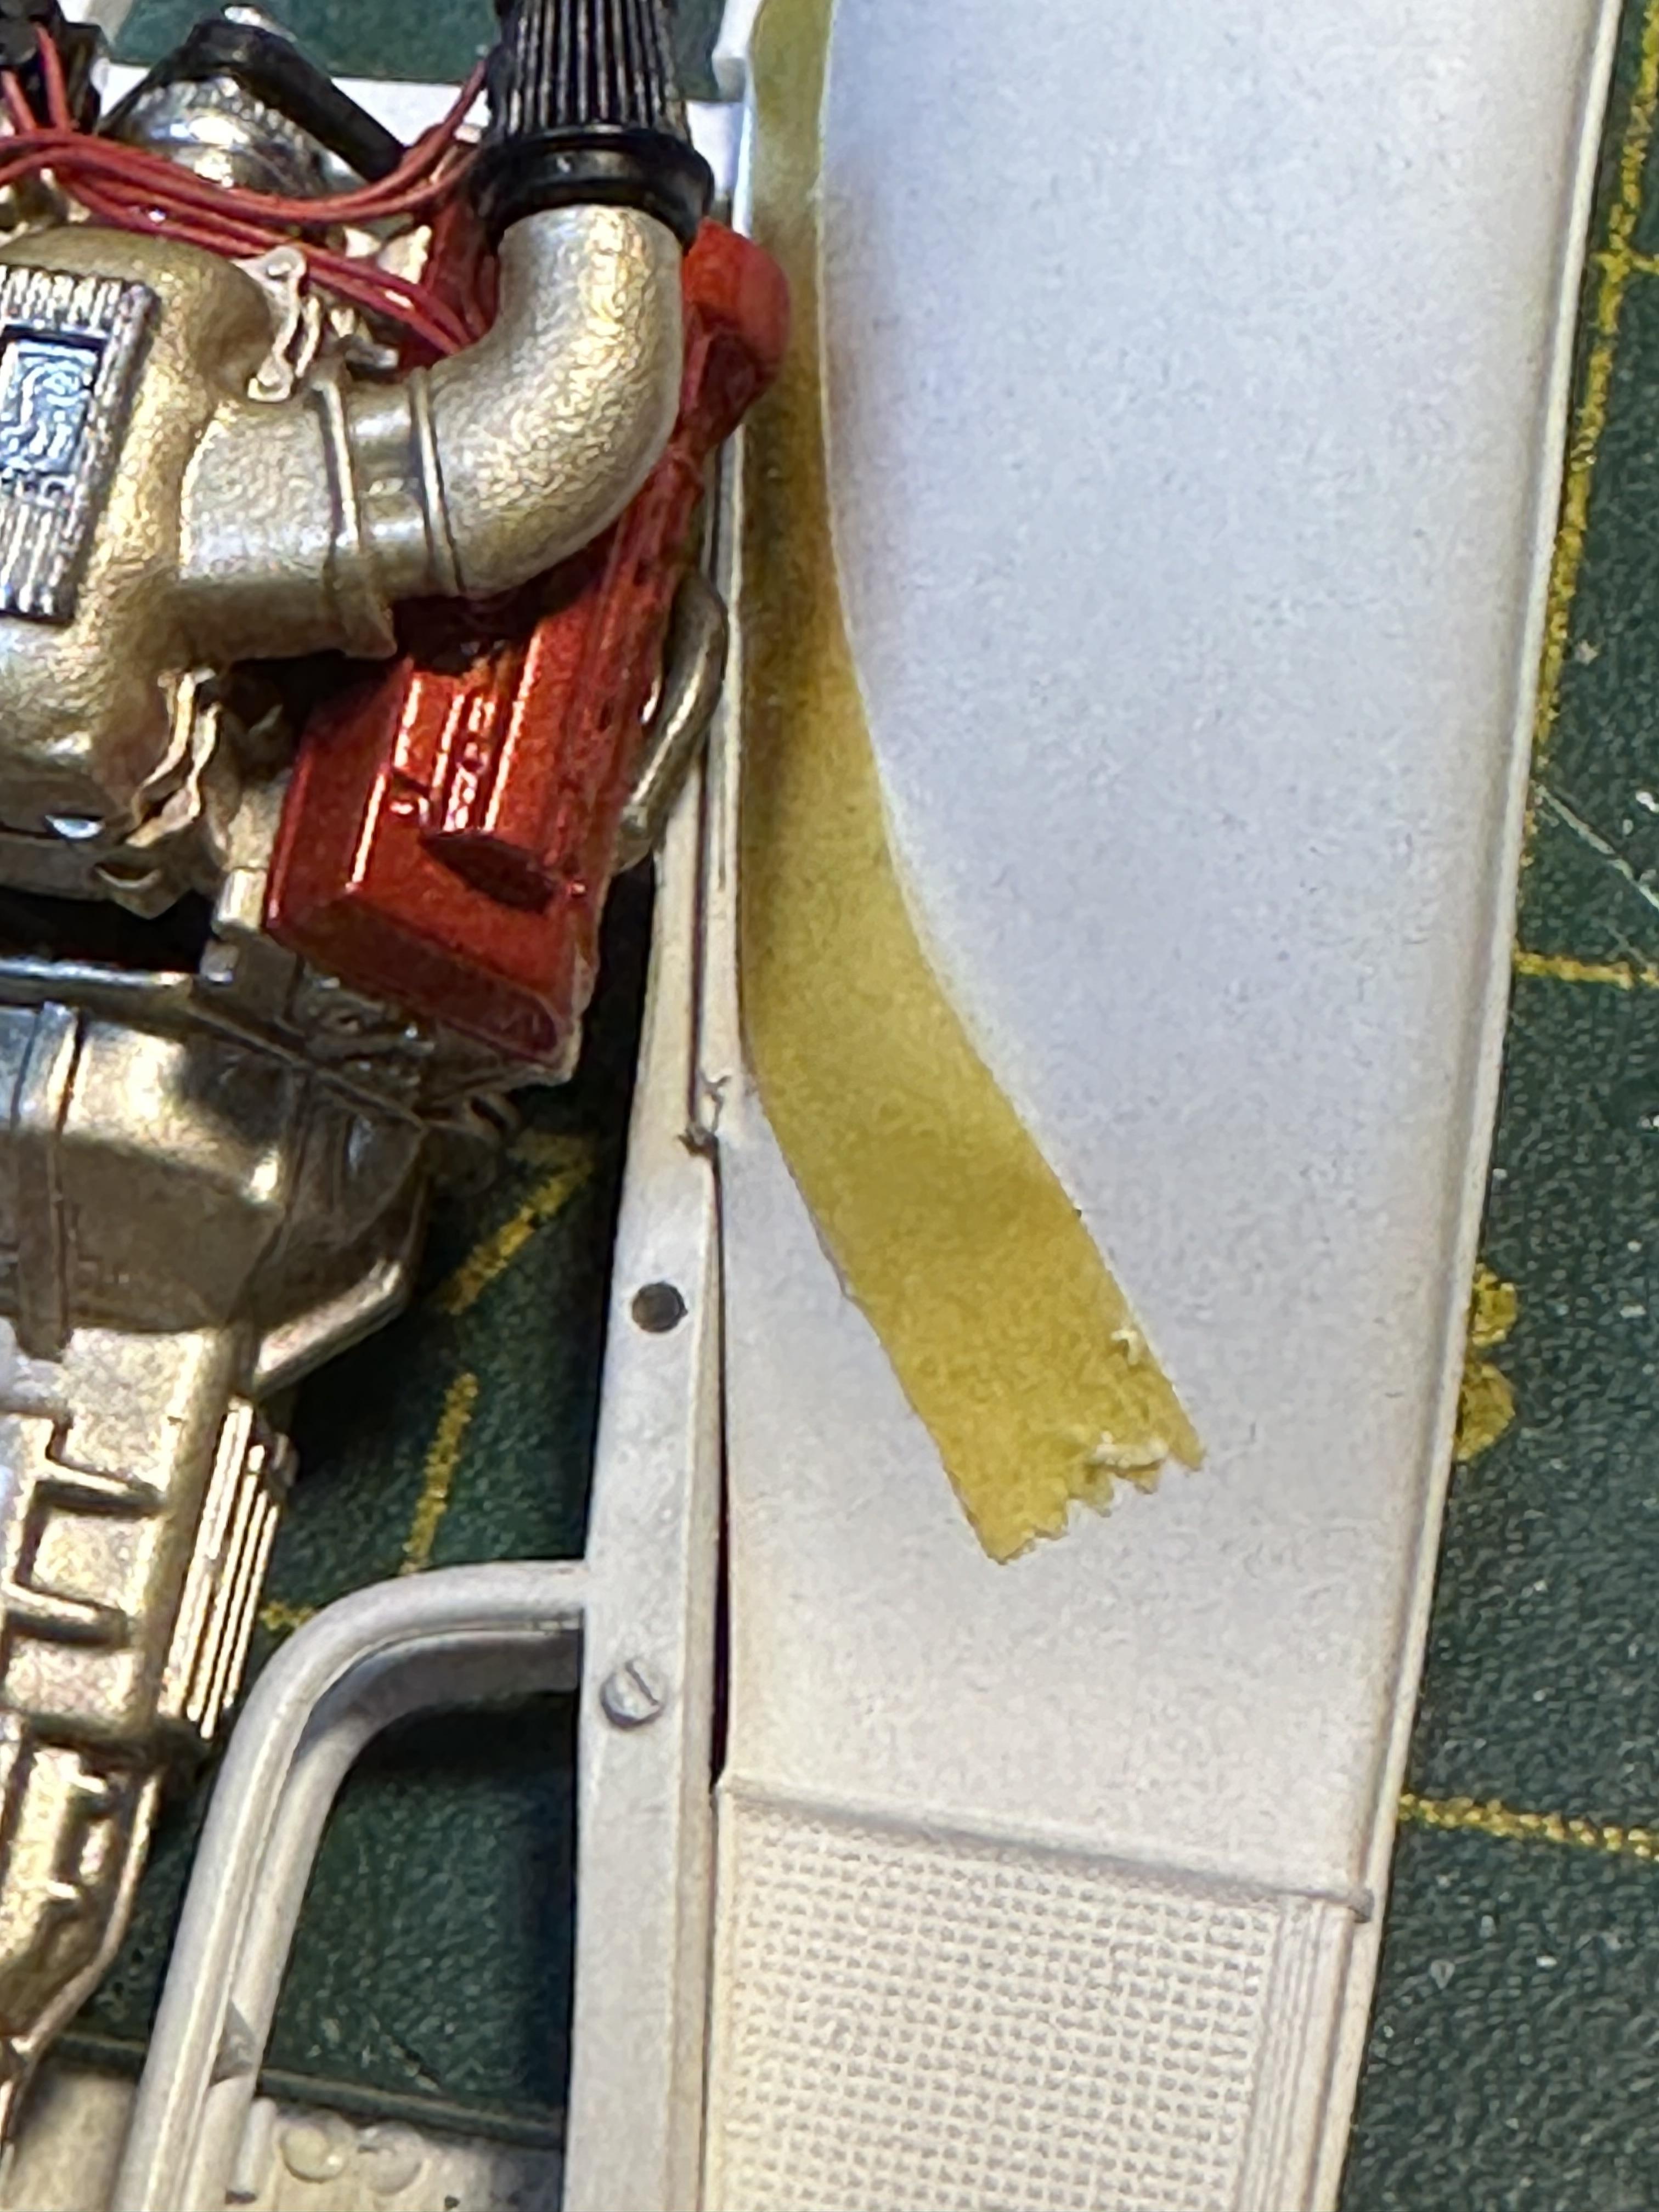
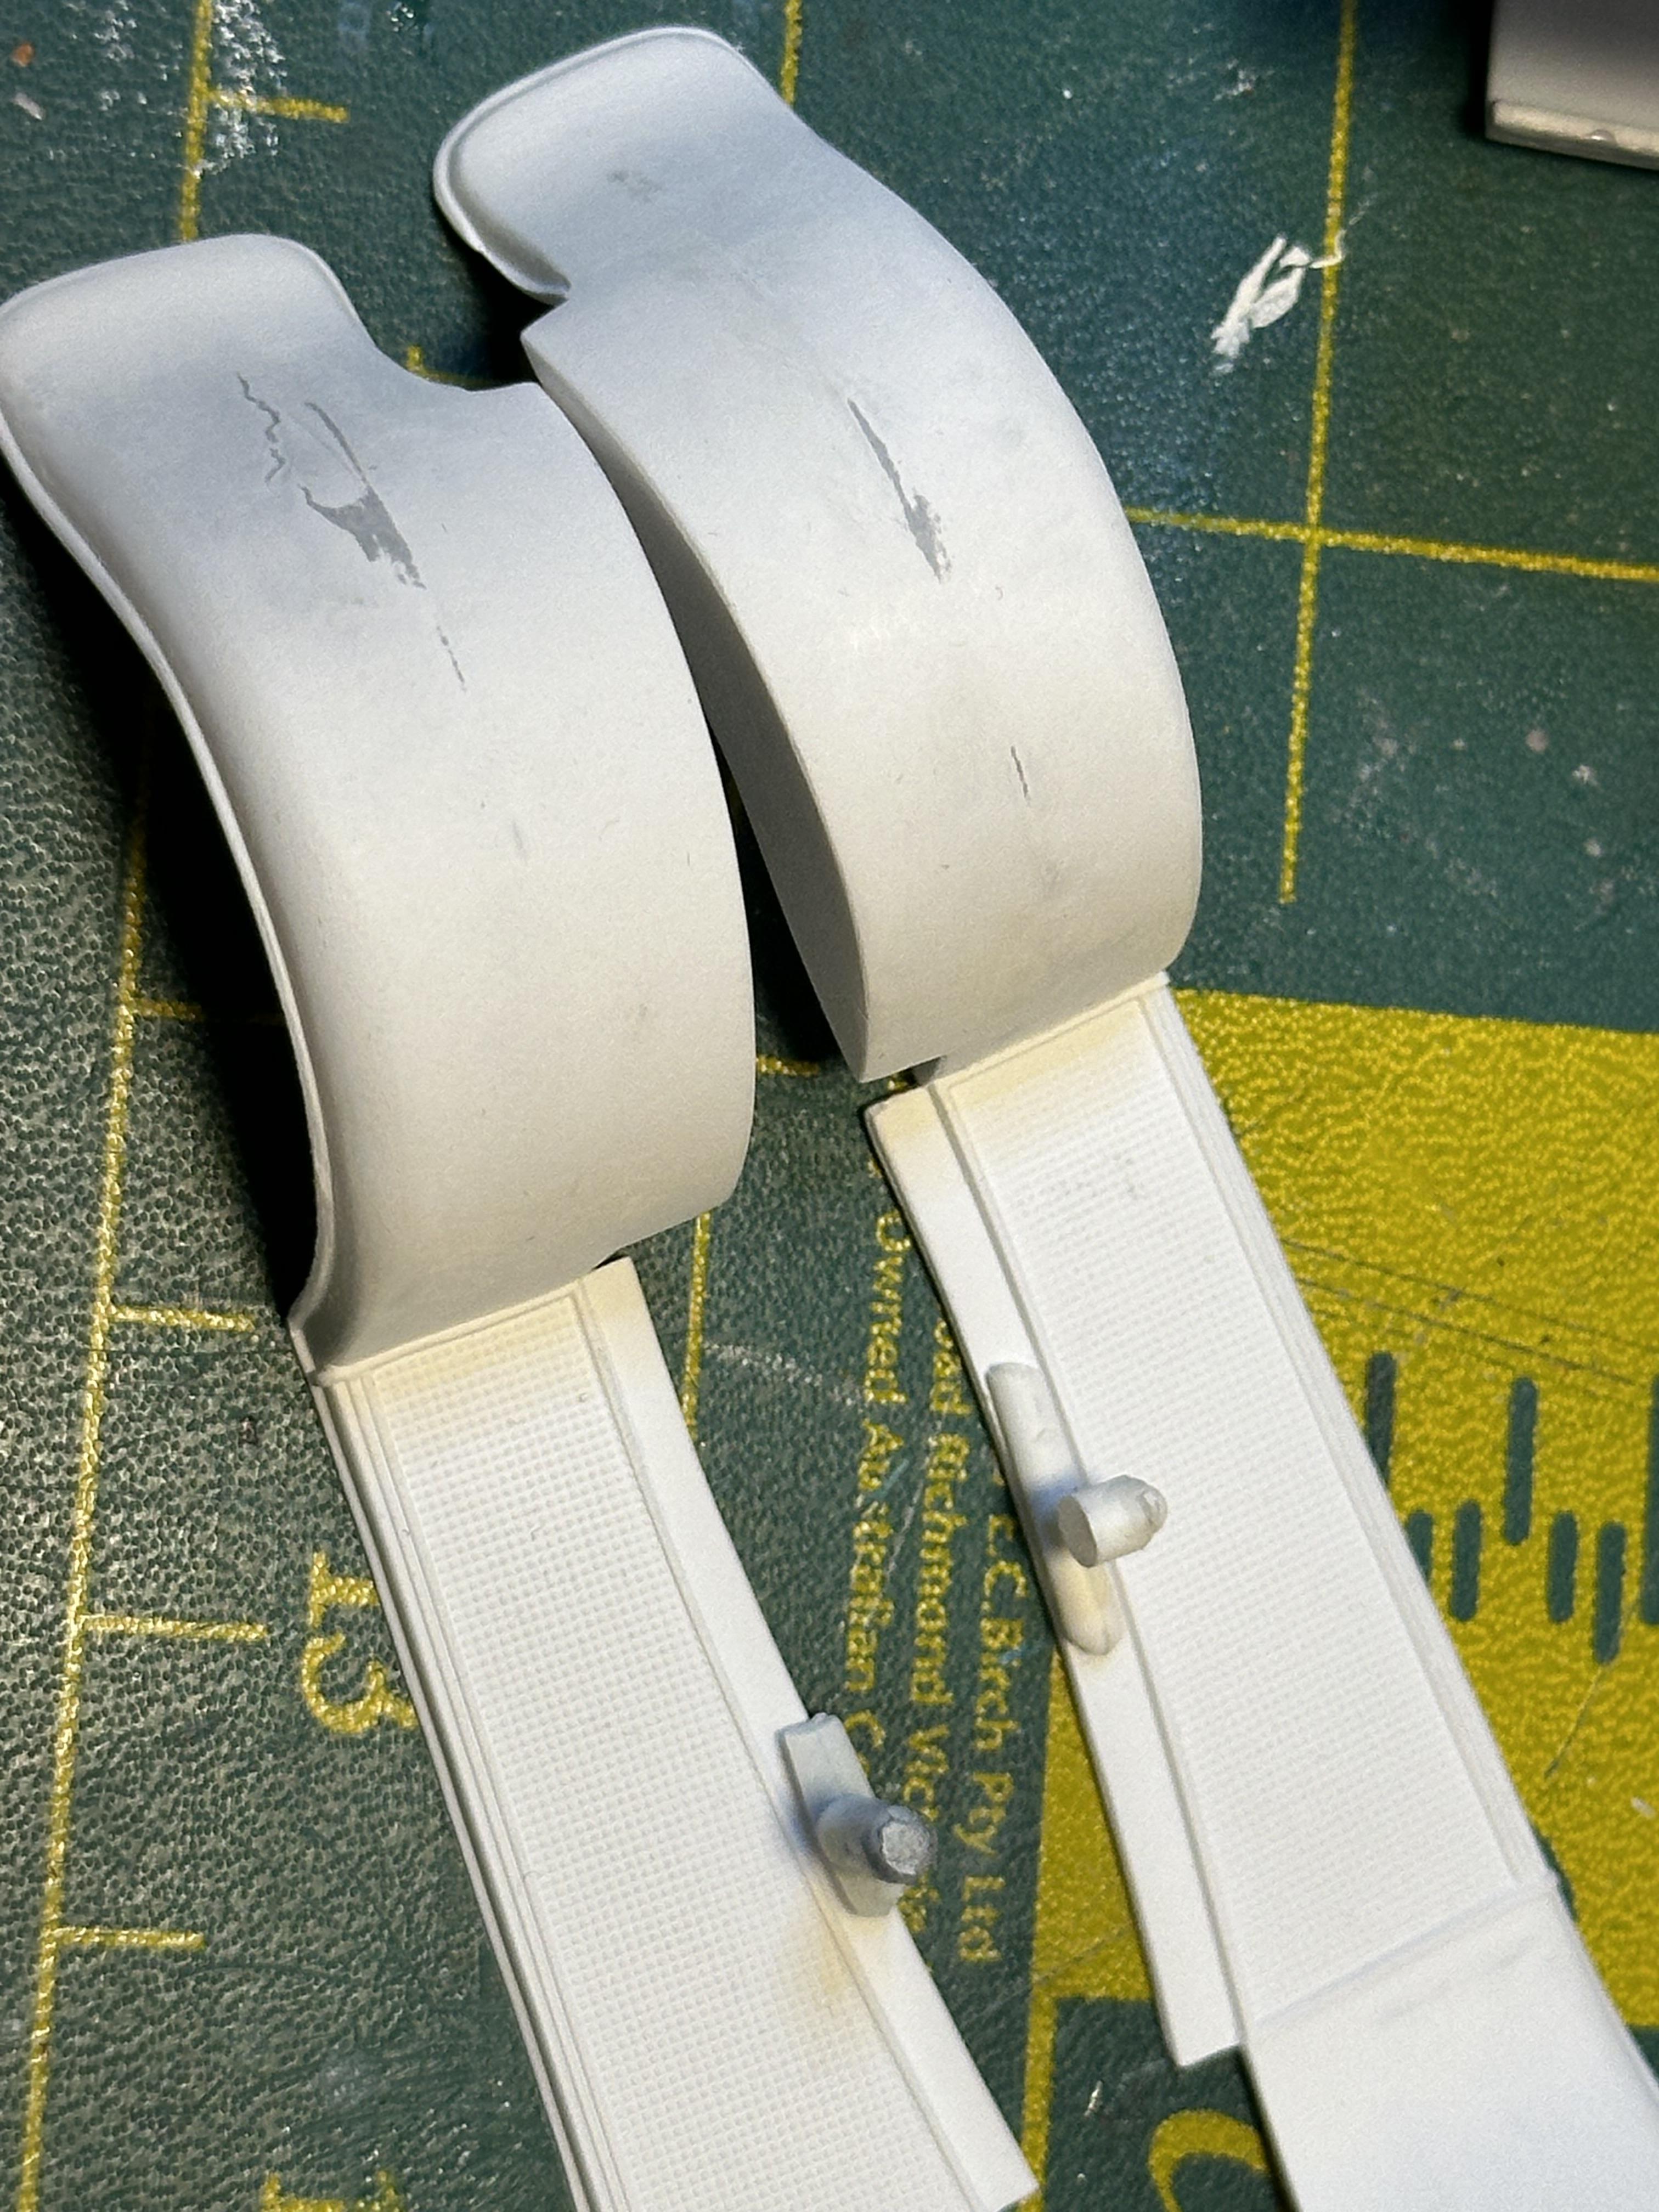
Spent a couple of evenings cleaning up the body. Had to refill the join in the rear guards after I shot it with SMS primer. Not too successful and I am not too happy with the finish so will go back to Tamiya fine primer The body just needed lots of love but it is now ready for another coat of primer along with the chassis and other body components. Next on the list is to finish off the headers before I head to the spray booth Thanks for looking
-
Get well - look foward to seeing you back
-
Thanks PappyD340, Phildaupho and Bondo Bill