bill-e-boy
-
Posts
899 -
Joined
-
Last visited
Content Type
Profiles
Forums
Events
Gallery
Everything posted by bill-e-boy
-
That is a cool build up of the model and thanks for sharing.
-
Almost finished with my chopped Revell '32
bill-e-boy replied to the60falcon's topic in WIP: Model Cars
Nice clean build - lovely flat motor there too. Liking it -
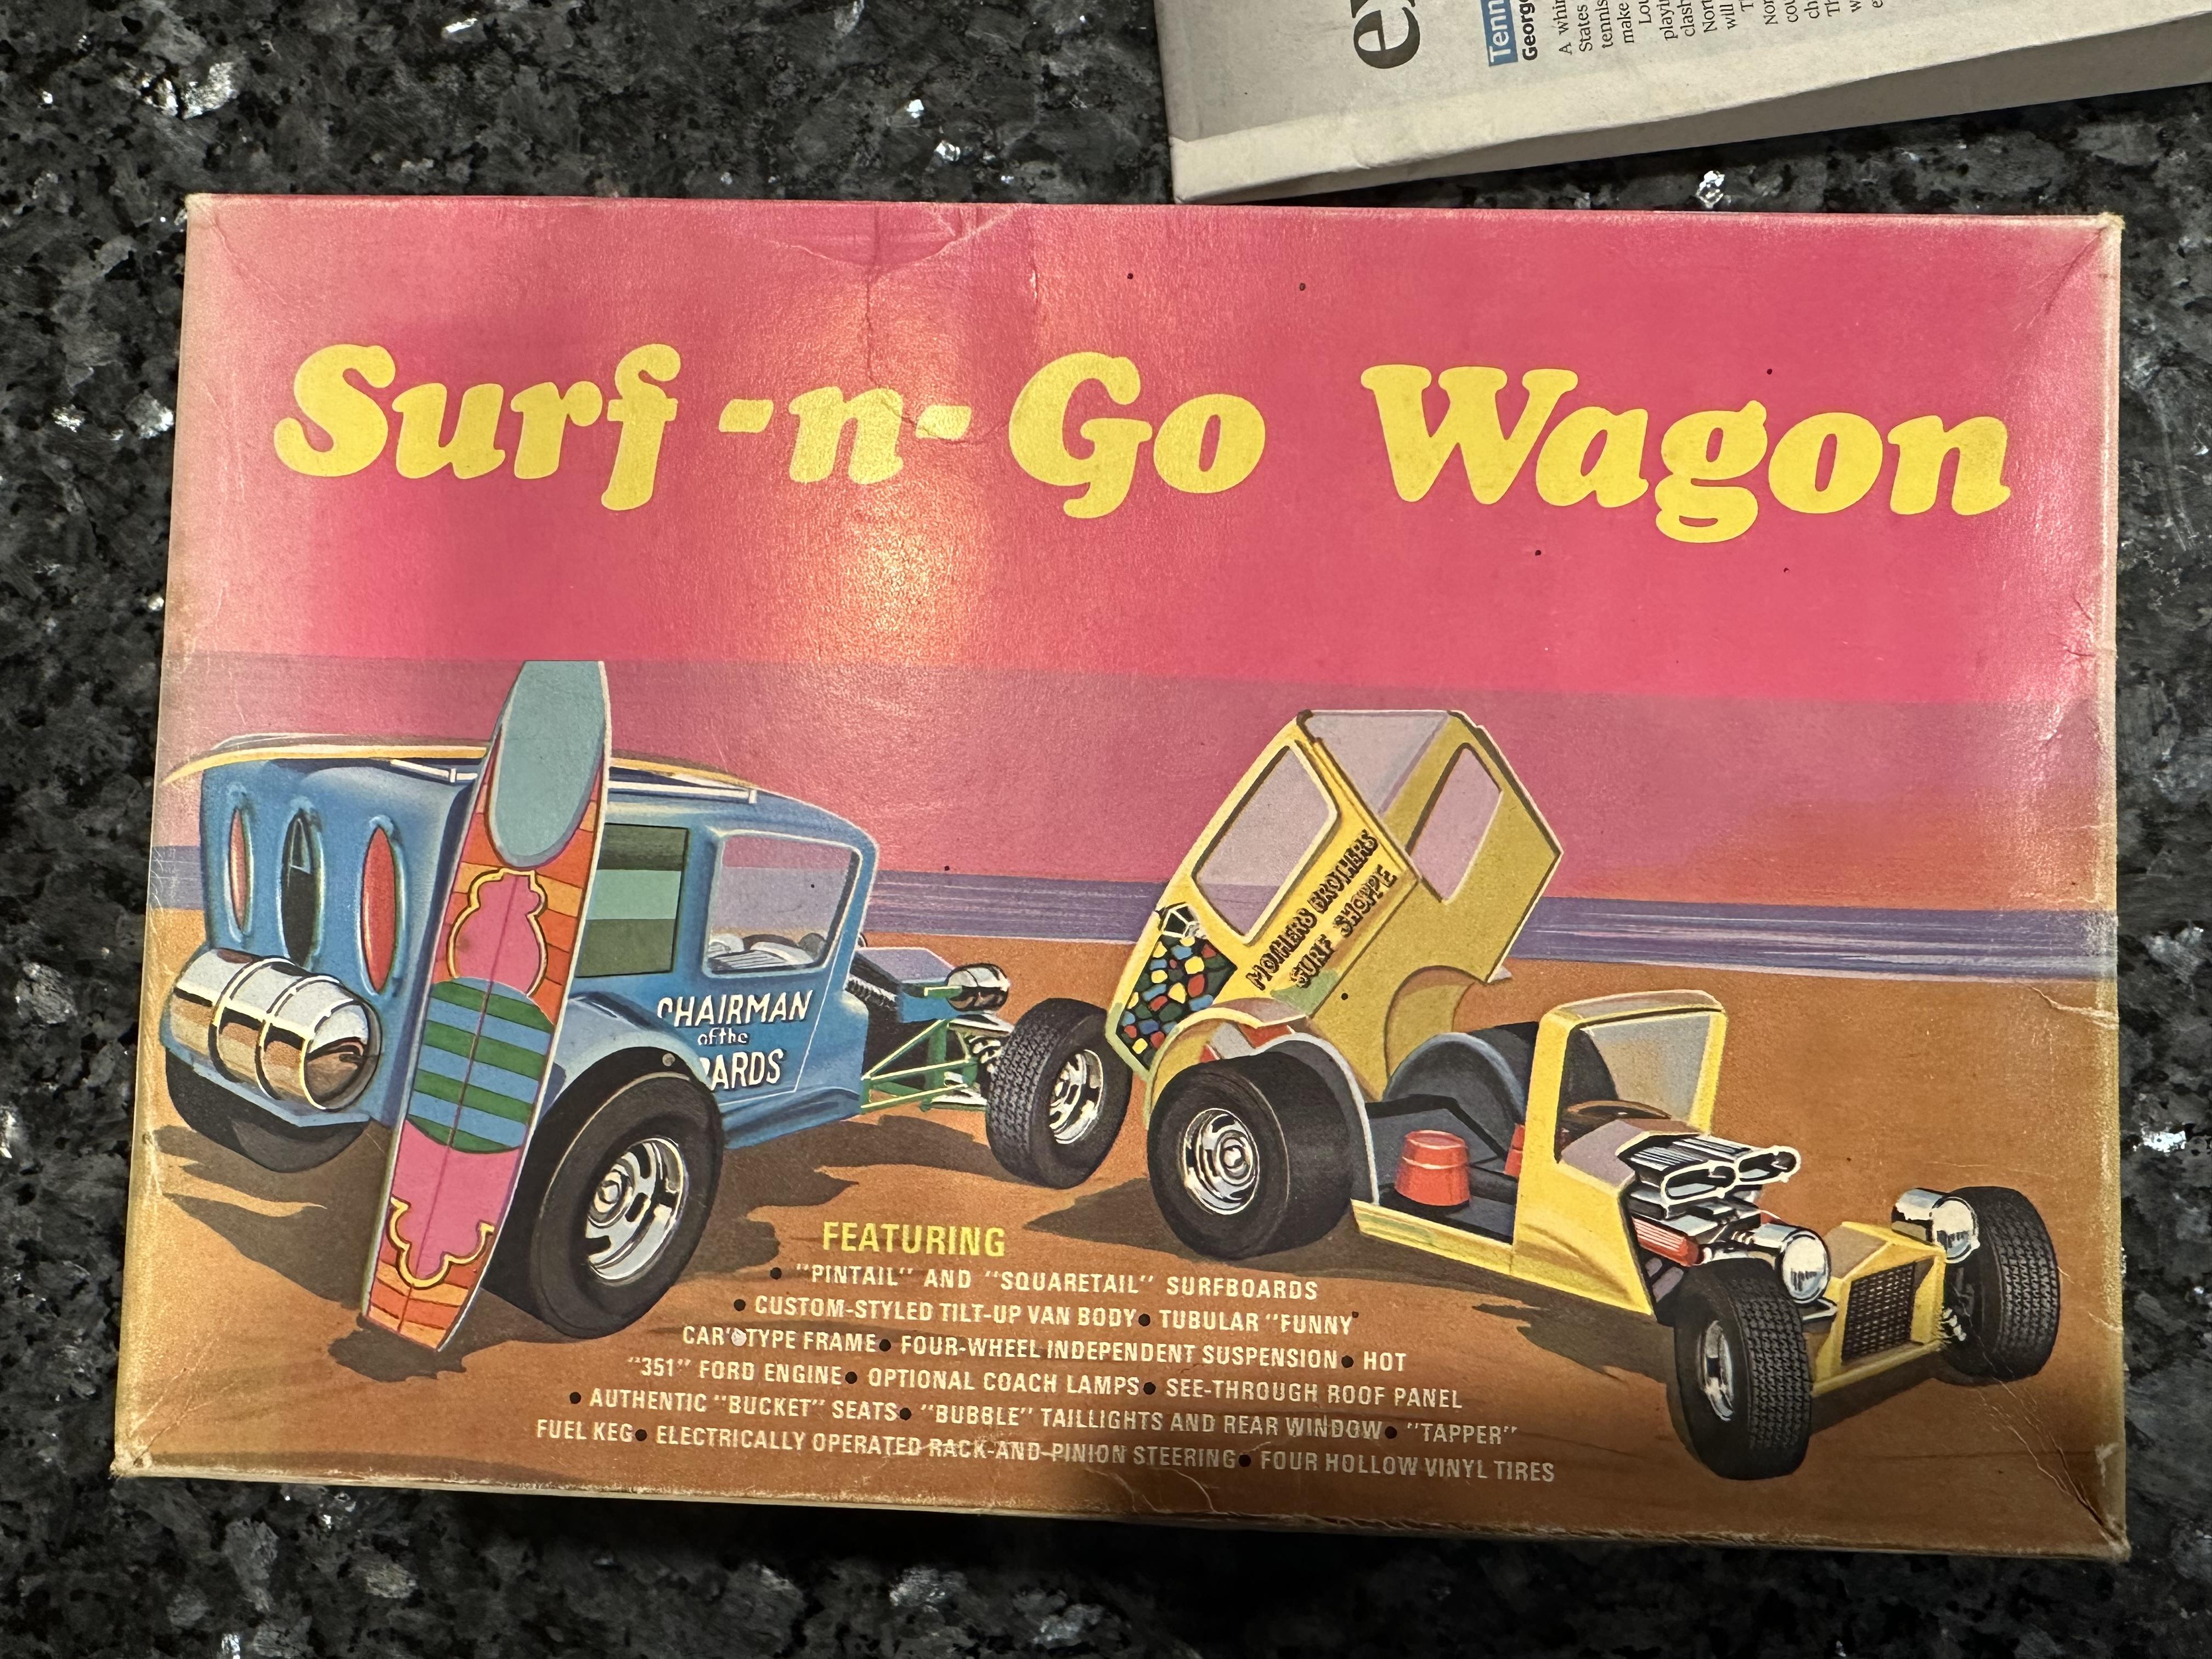
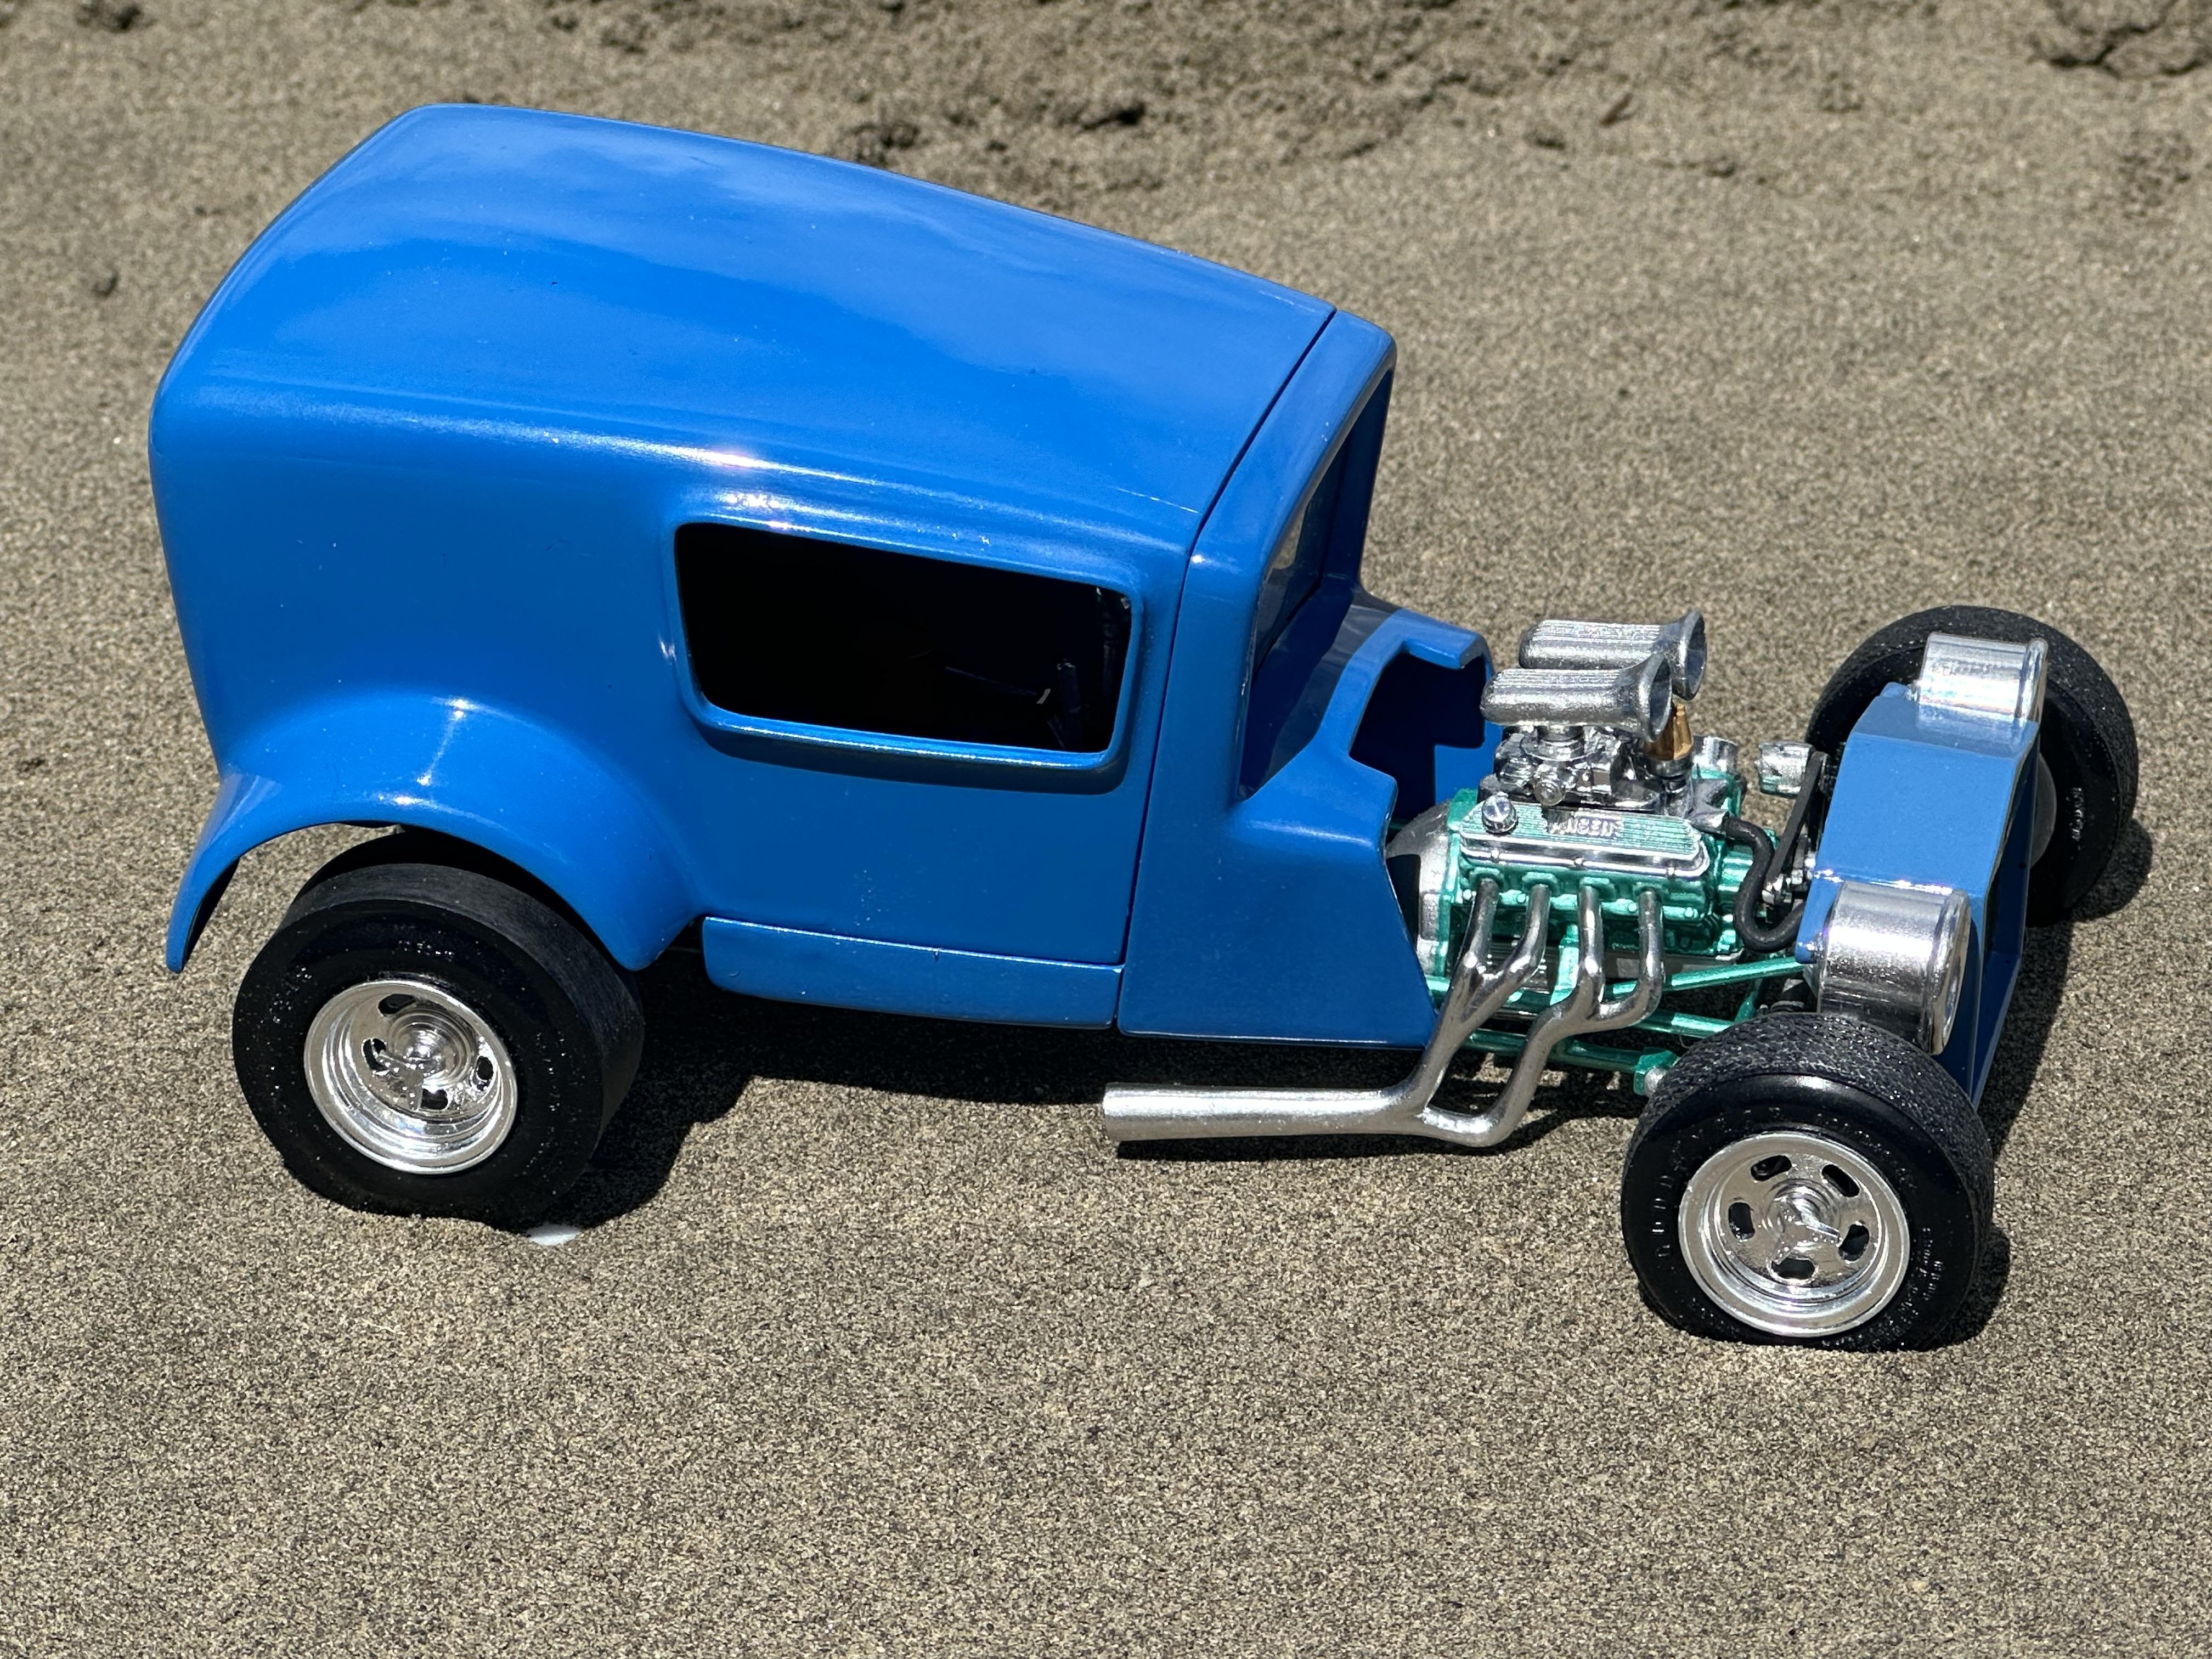
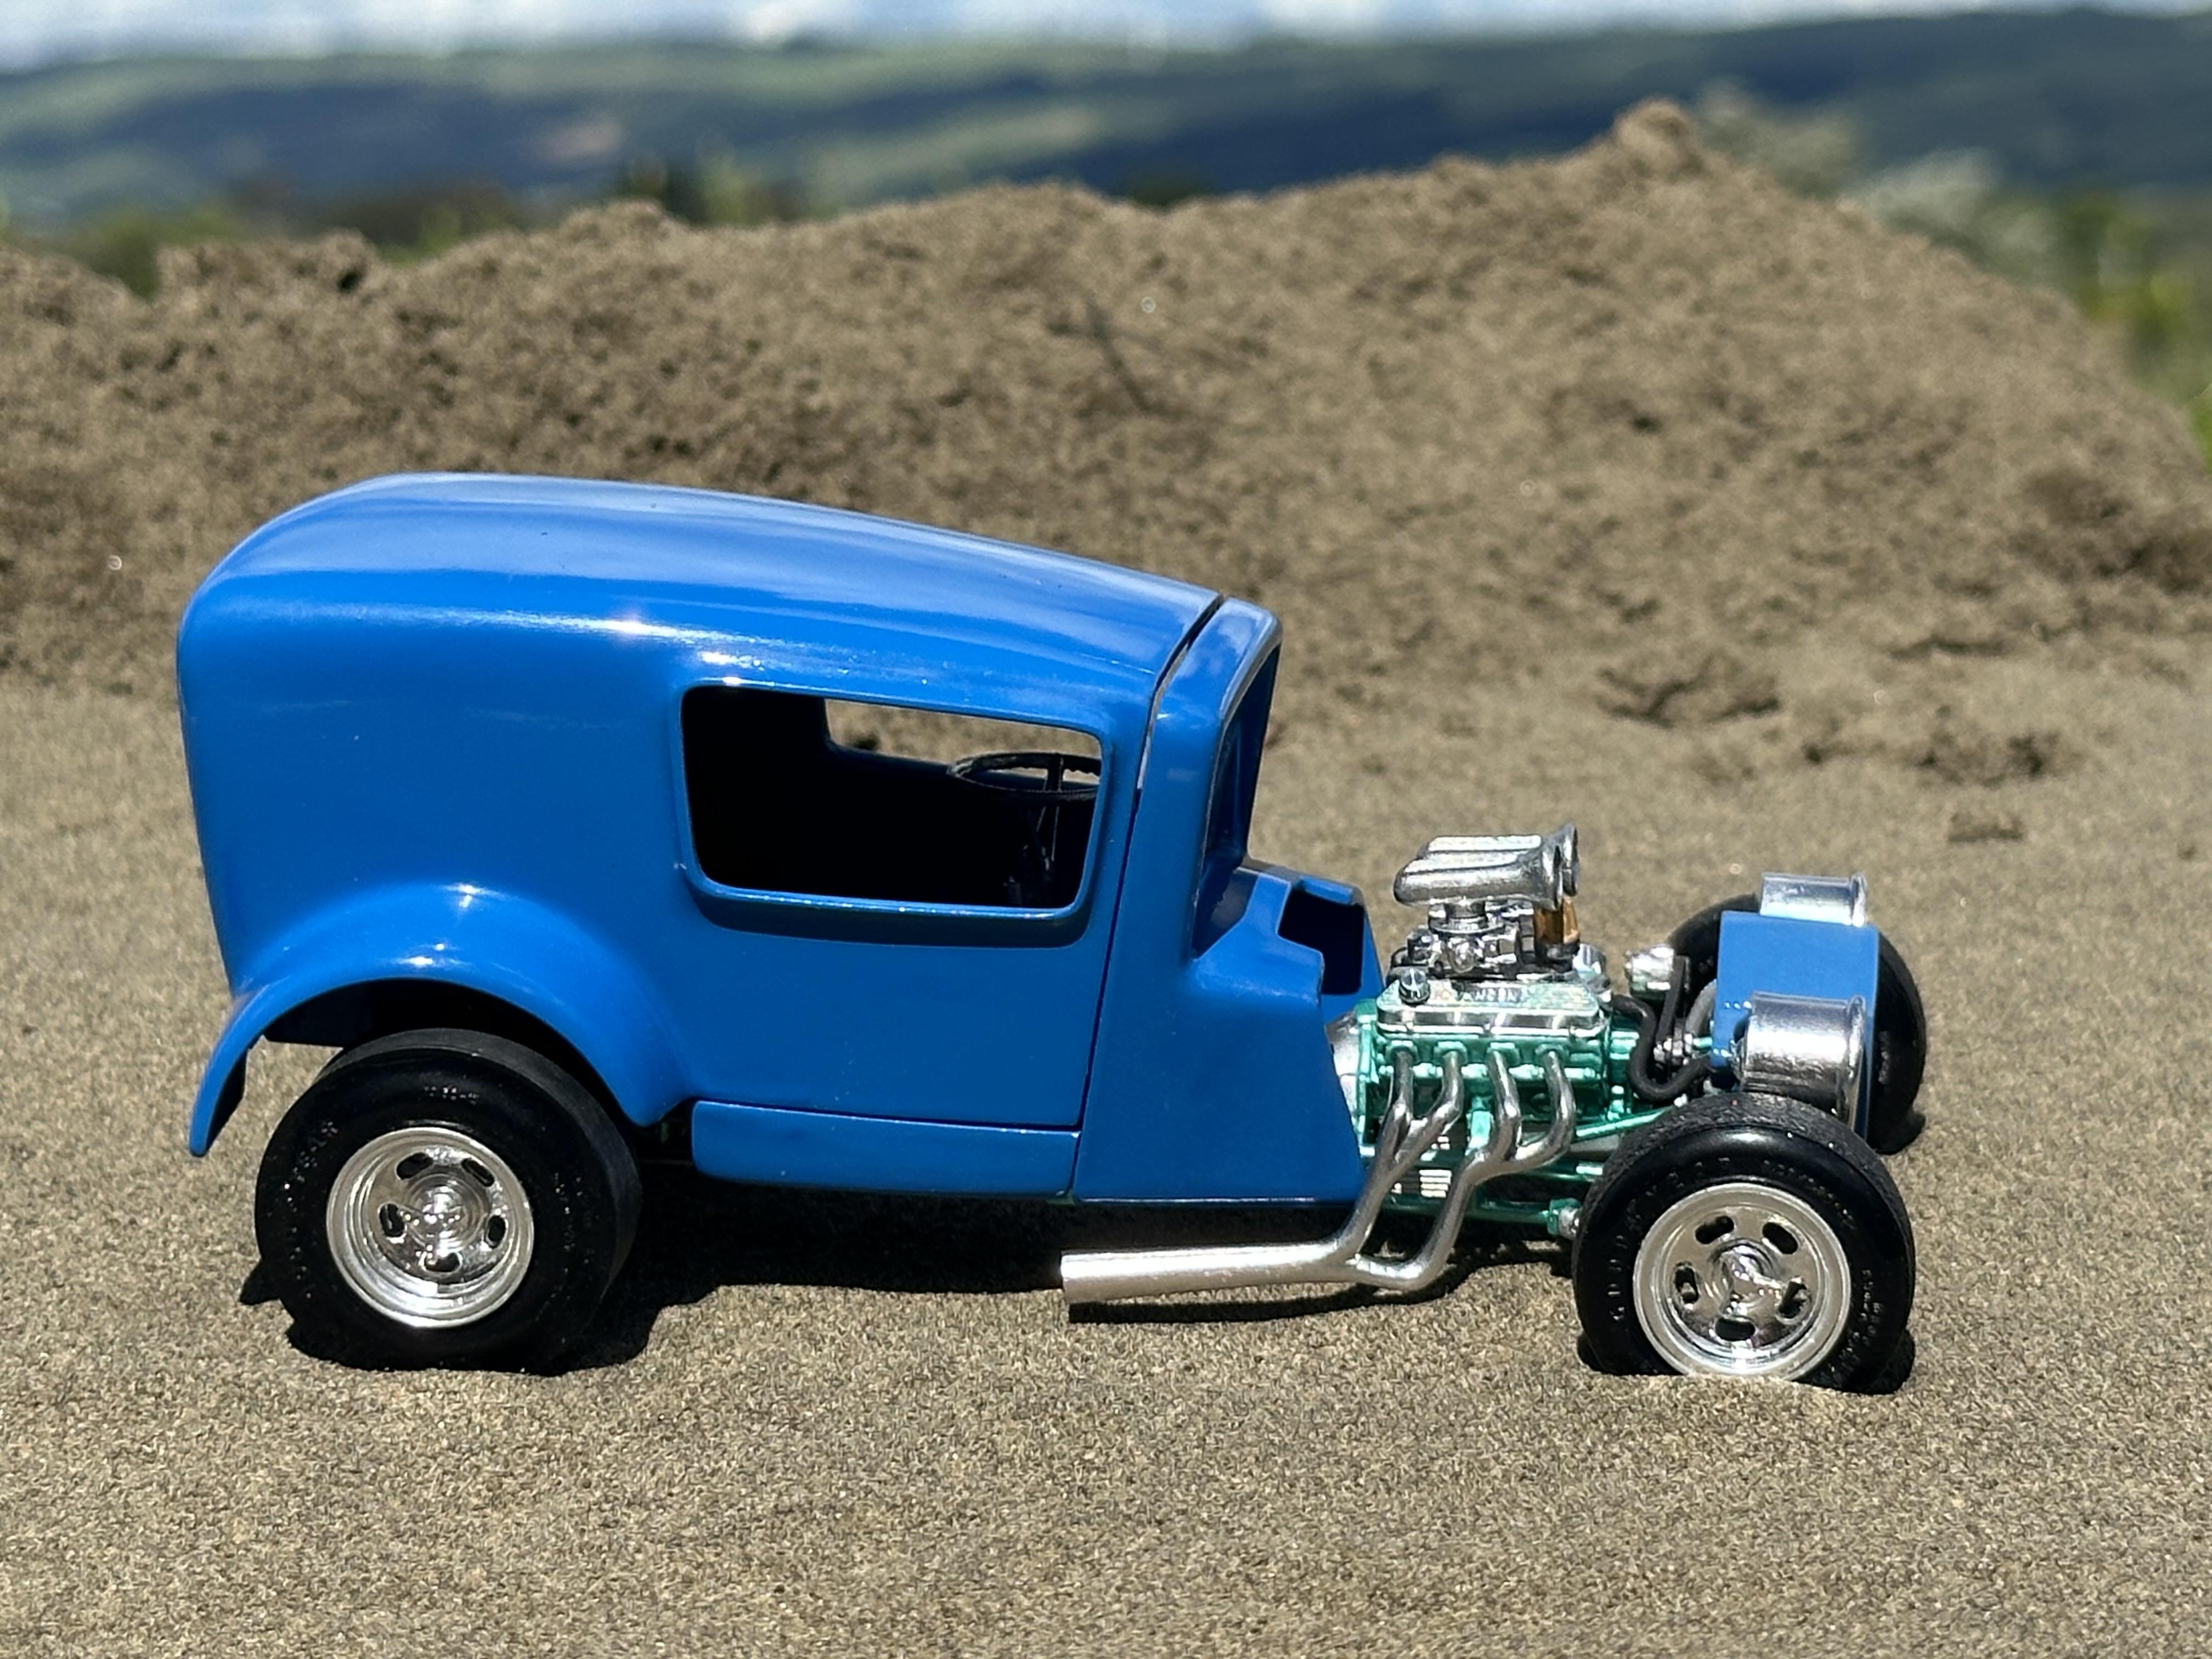
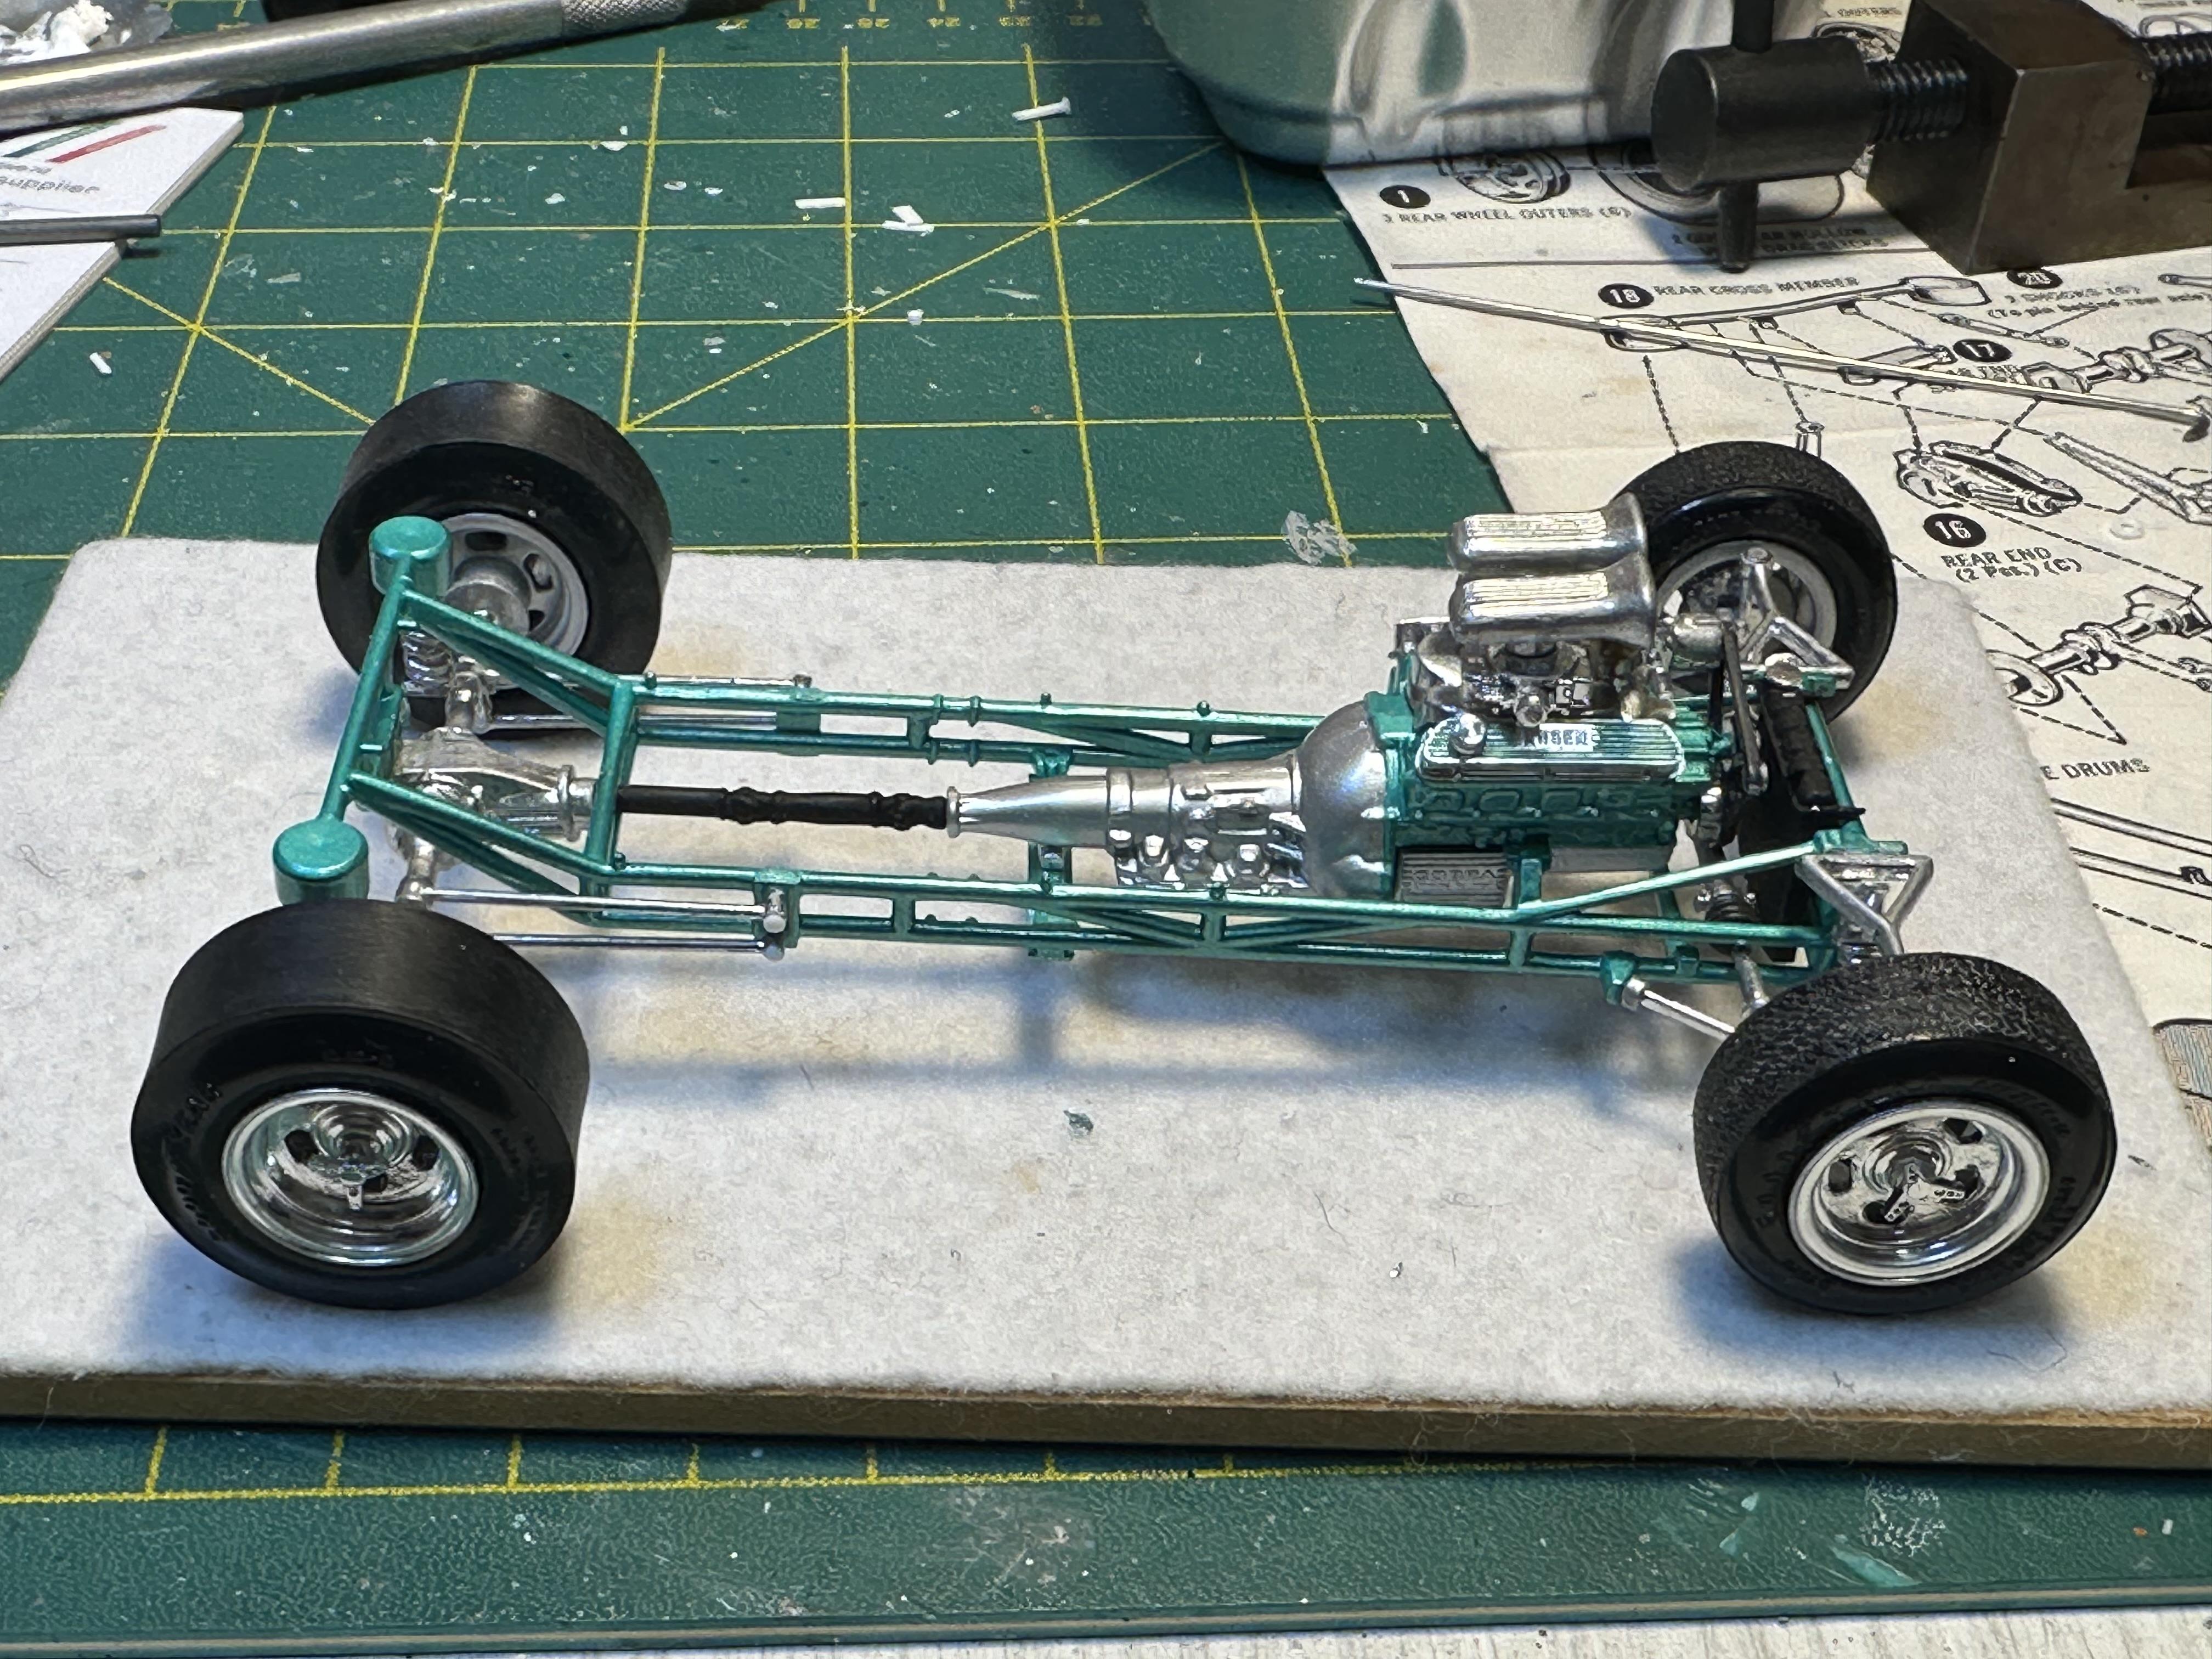
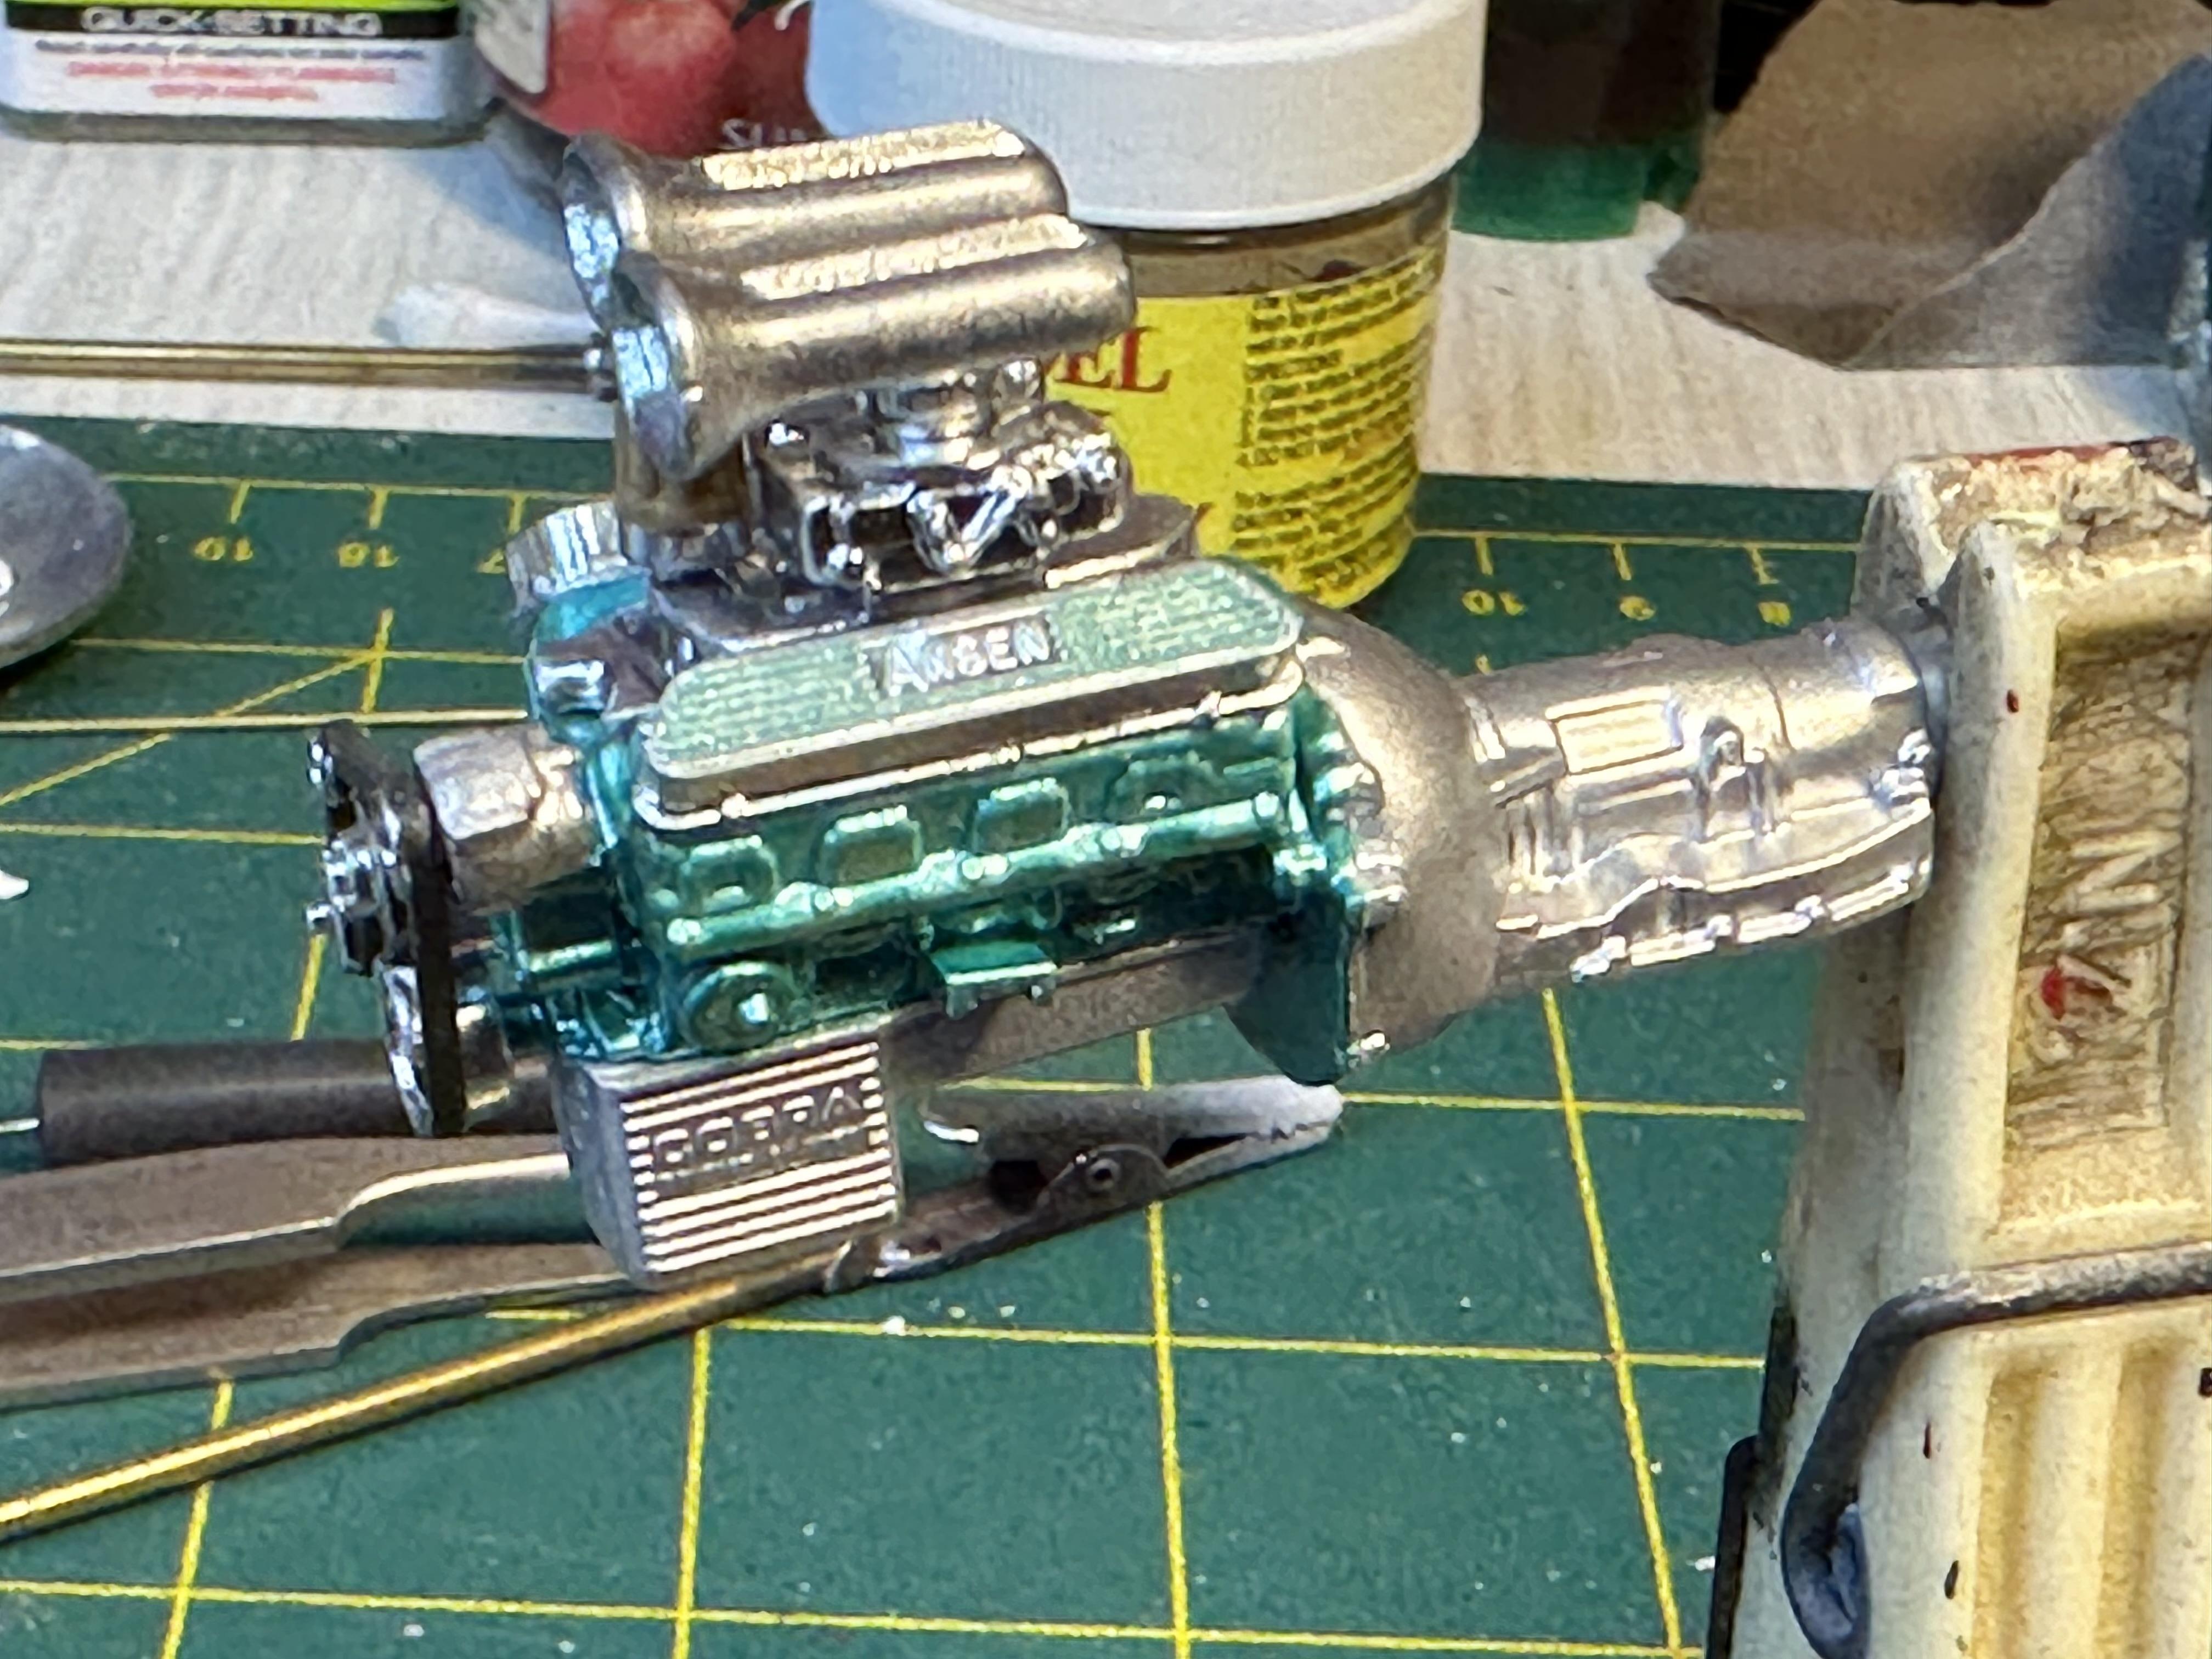
New Zealand made AMT Surf-n-Go from 1969/70. This kit was originally released as the Horse Hide Hauler in the US and has been re-released as the Surf Wagon but a long time ago. This one made under license by Tonka NZ an I remember building one way back then, I fact it was my first rattle can paint job - very rough by todays standards The kit had been started with the body glued together including the clear roof. I was not about to beak up the body so prepped it for paint - and it needed lots of work too. Paint is vintage Testers French blue. The chassis rails had been assembled and painted that needed a lot of cleanup to get ready for paint. Colour is Testors Met Green from the little square jars. I figure vintage kit why not vintage paint. All of the chassis parts including all of the chrome parts suffered from poor mould alignment and needed a lot of attention to bring up to my standards. Most chrome parts rechromed with Molotow pen. Missing were the rear radius rods but I made a new set (twice) The motor (SBF) was missing so I substituted a SB Ford from a Revel 32 Ford. Luckily the motor bling was present so I was able make use of that - and nice bling it is too. Other than poor registration of all of the body panels I think I got a reasonable result from what I think a poorish kit. Build up here

-
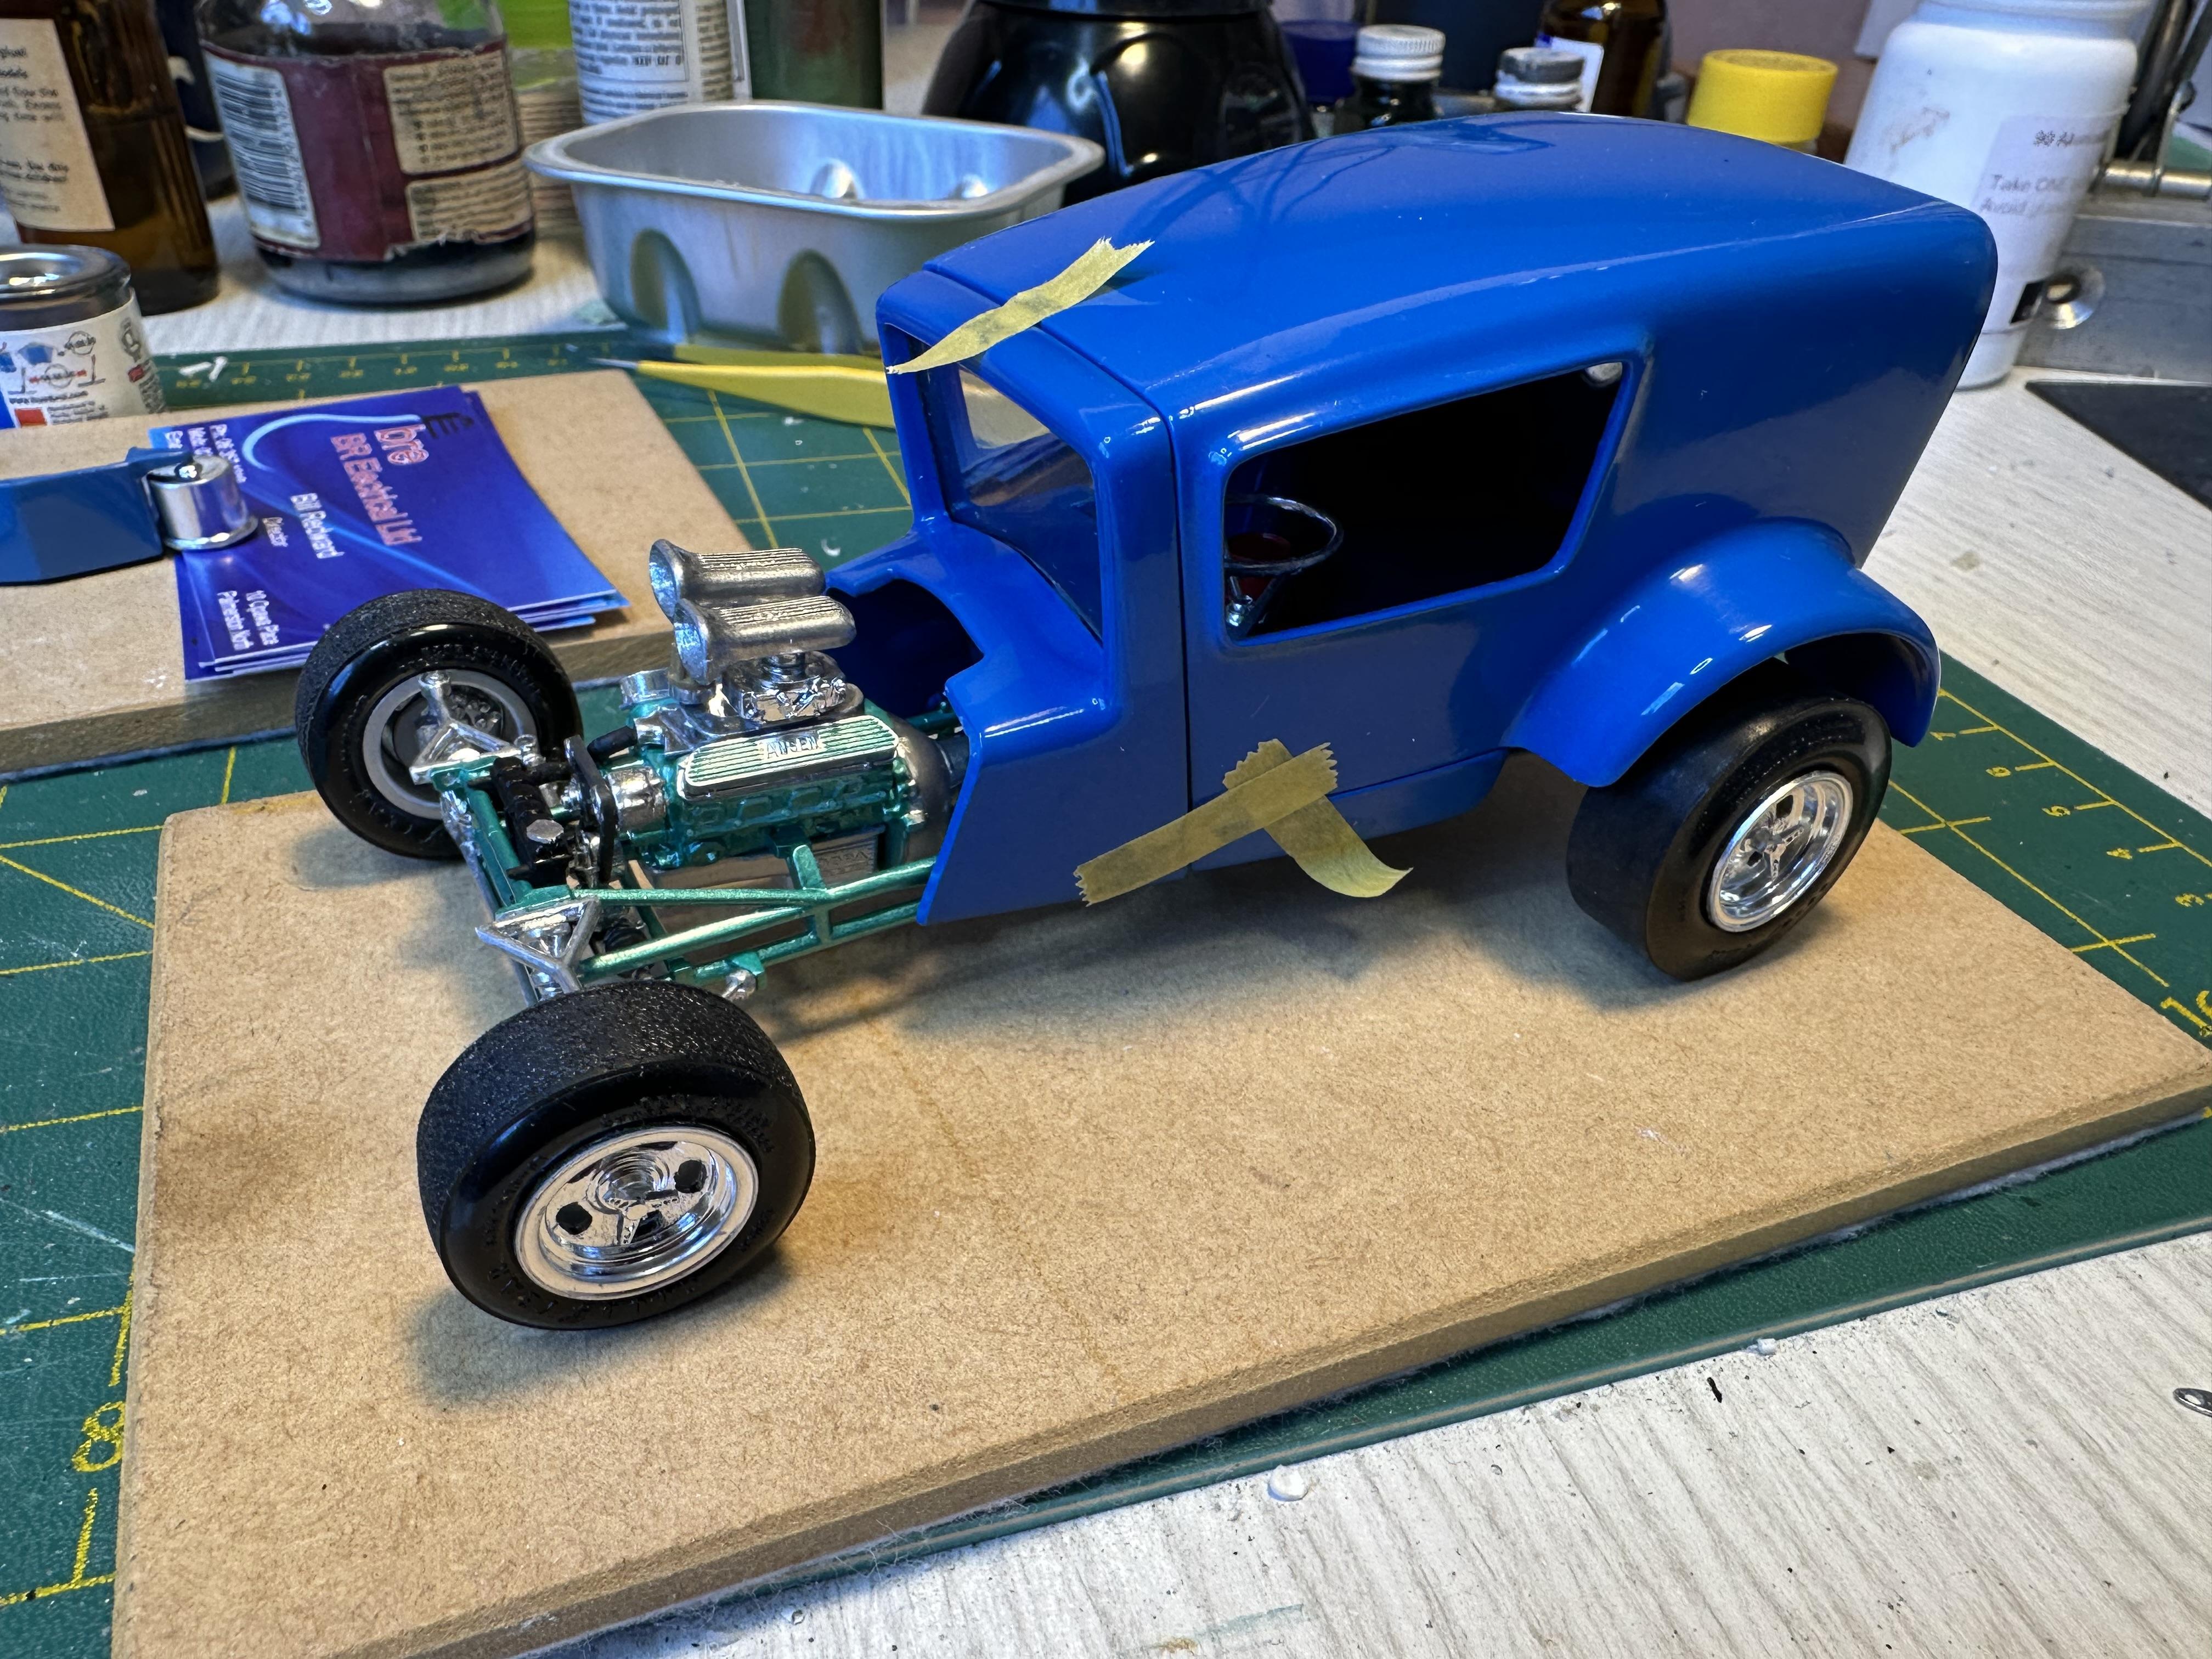
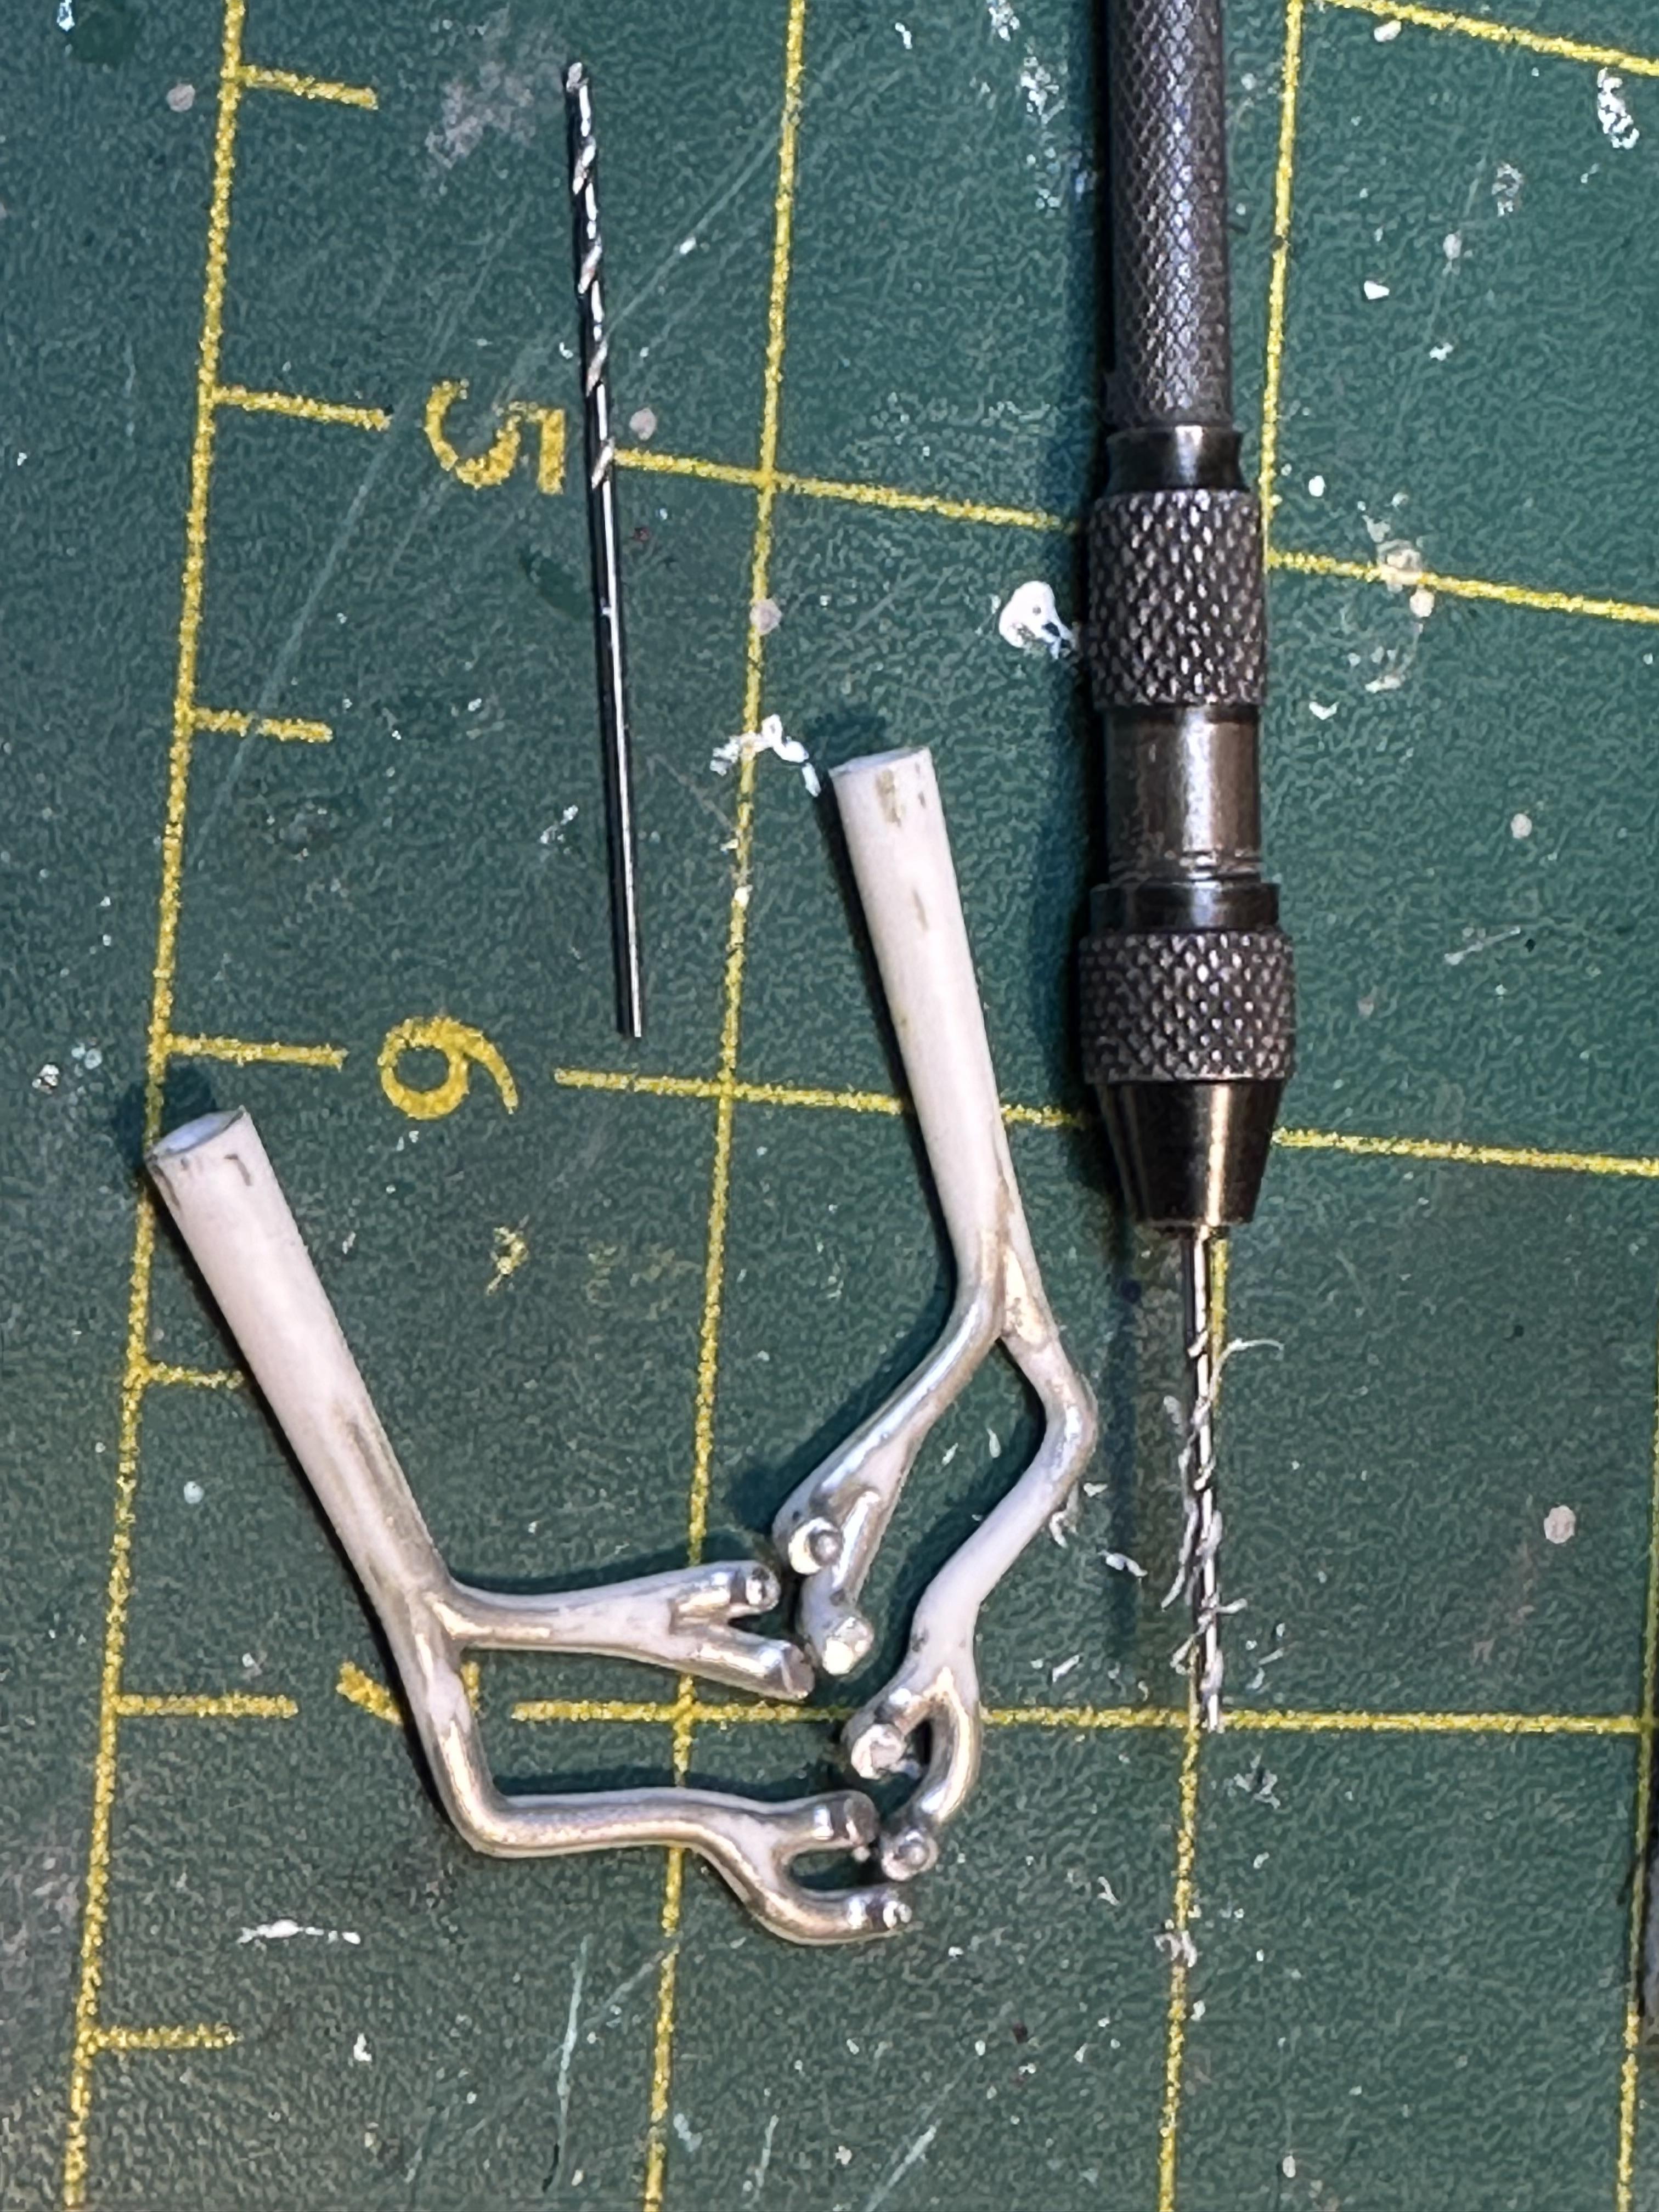
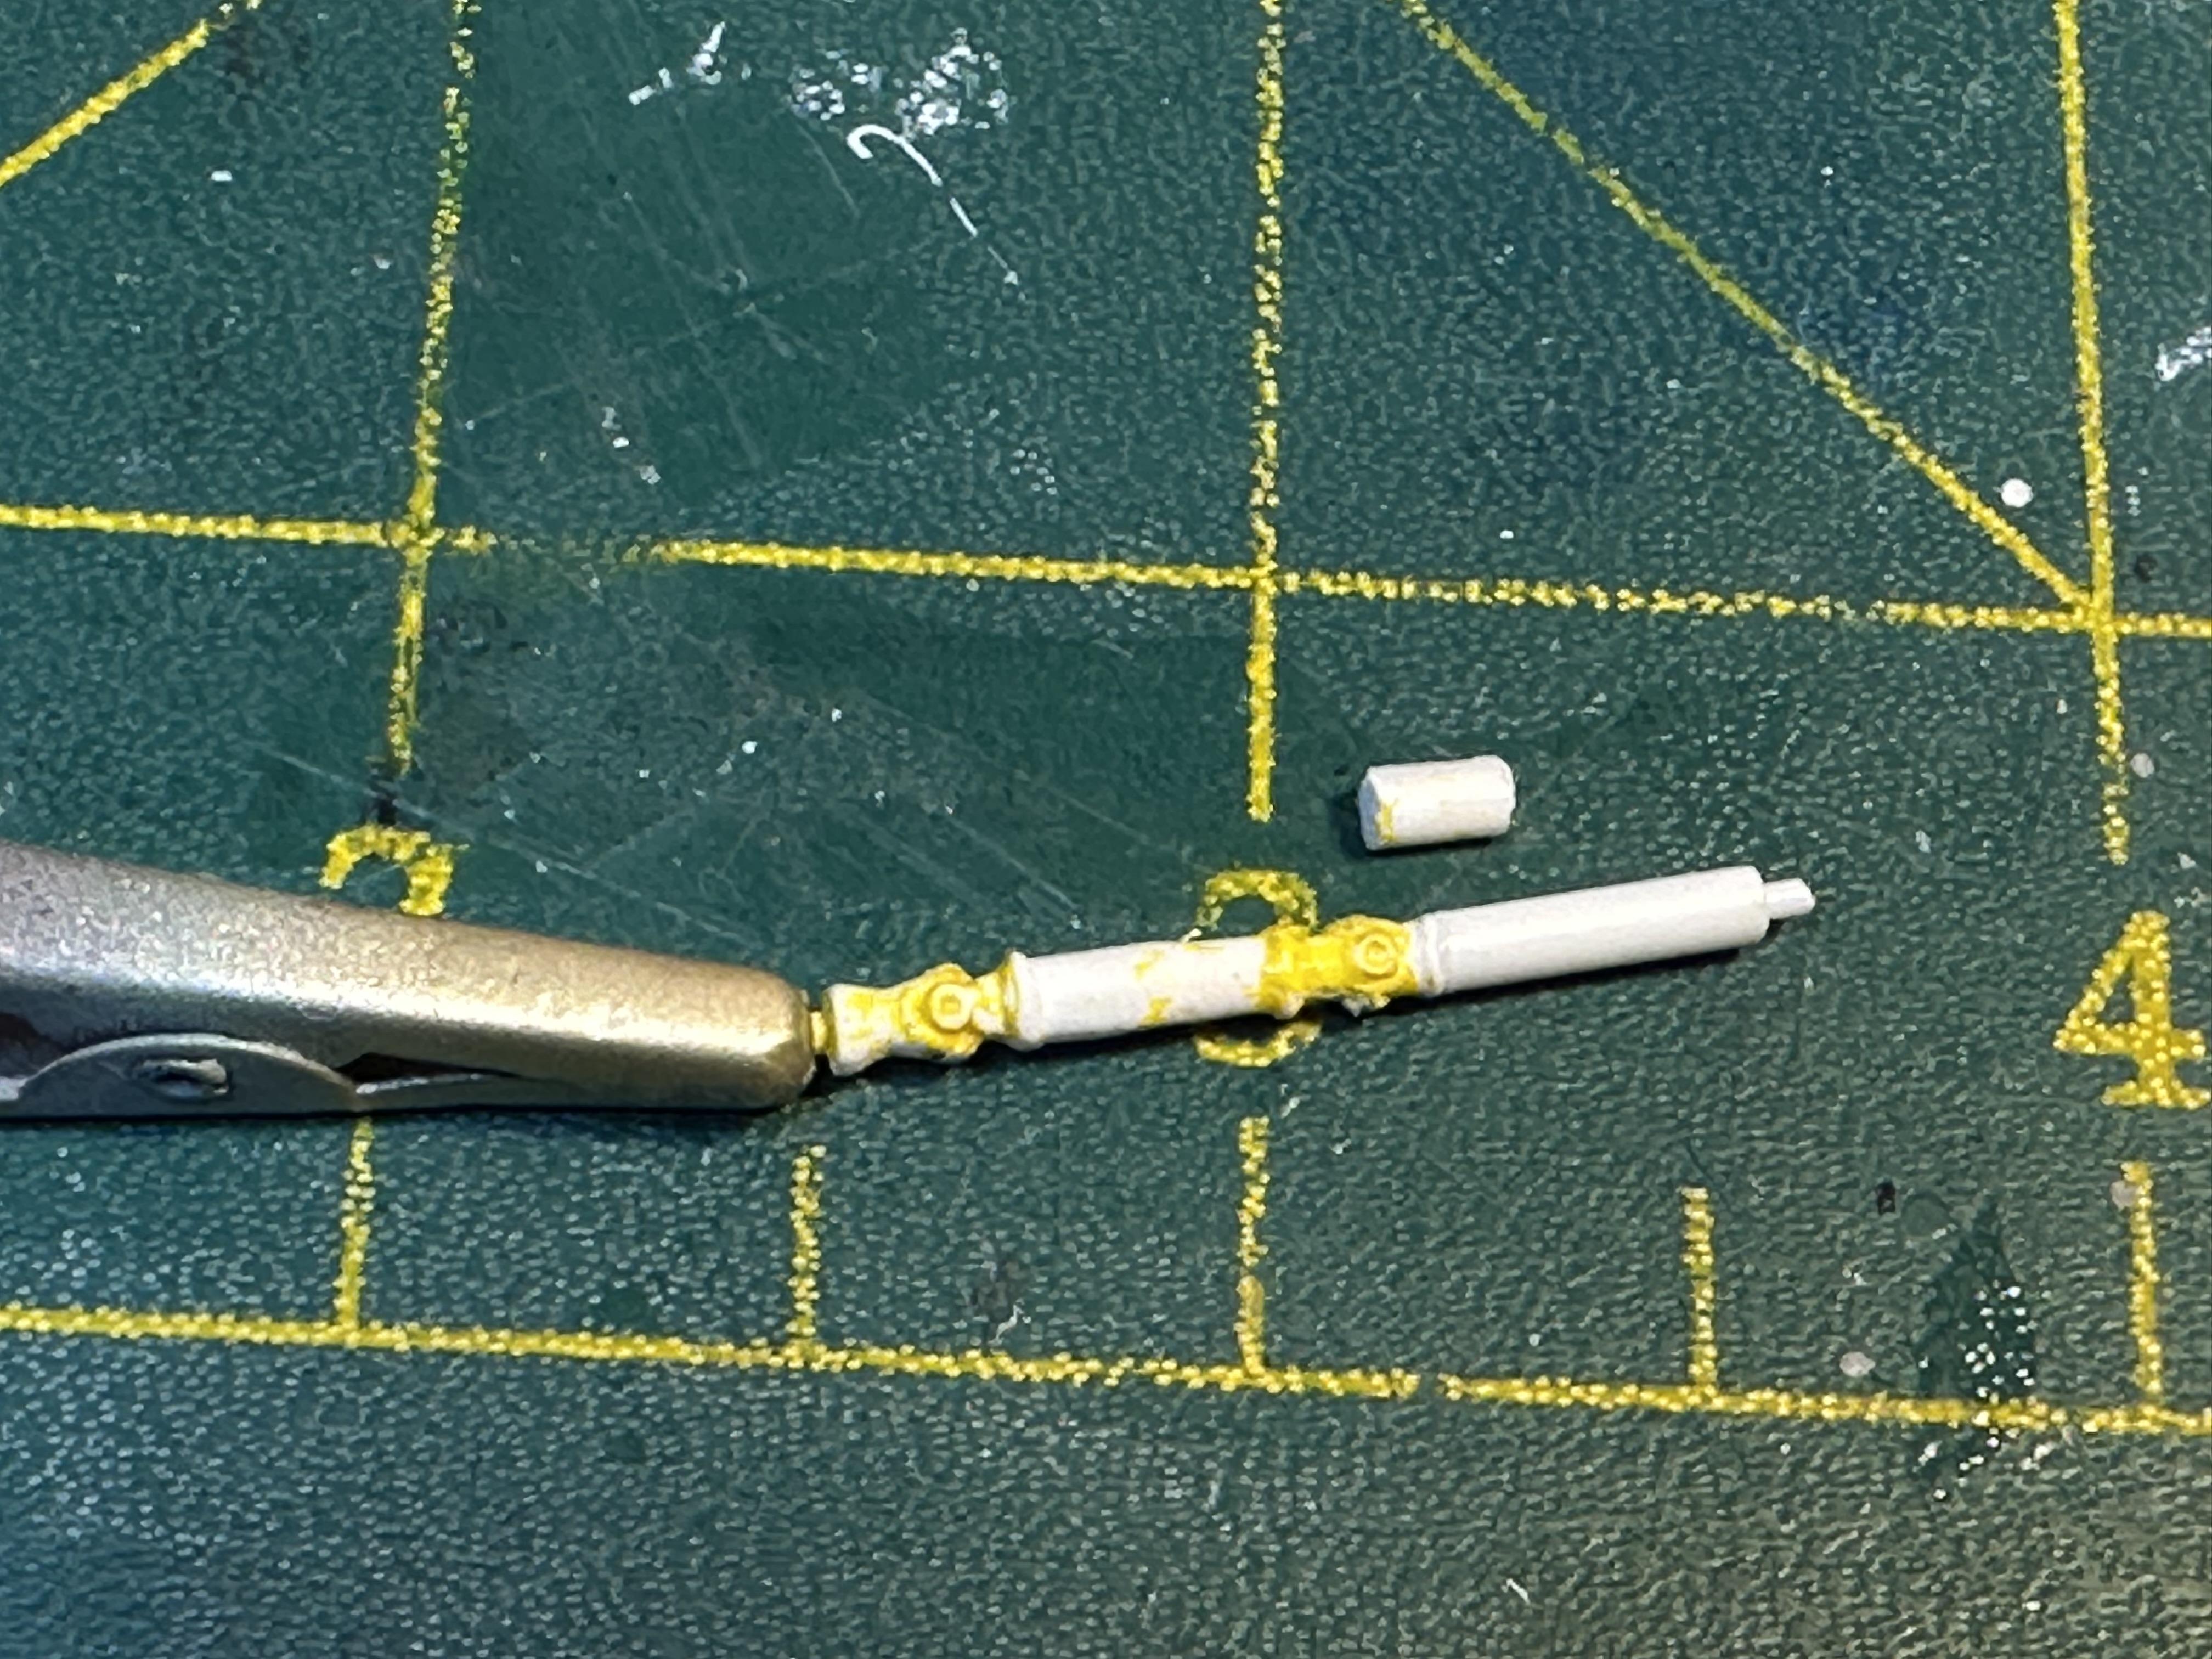
Been busy getting all of the last things ready for final assembly. I had to remake the rear radius rods but this time I made them from plastic rod. 1mm for bars and 1.6mm for the ends. Nicely chromed with Molotow. I was not happy with the look of the kit headers and found some nice ones in the parts bin but had to shorten the gap between the 2nd and third primaries. Also found the original headers did not align up with the SBF motor I used And the chassis on all four. Heading towards final assembly, waiting for PVA glue to dry on windows Waiting for headers to dry after I had to extend the primary tubes outwards to clear the body. I used SMS chrome with their jet black under the chrome. Have found that this is quite a durable paint finish - maybe not quite as chrome like as Molotow but way more durable More glue wait time - my we are a patient bunch And done Off to under glass Thanks for looking
-
I finished my FB Theme build for the local group and am back onto the Sedan. Also been busy with travel a holiday and supporting wifey who ended up in hospital for two weeks ten days after we got back from hols. All eats into leisure time. Work too but that is a part time thing these days
-
Looking good Michael. Am liking the chassis works with pie cuts front and rear along with the added x-member Chop is coming along nicely - just lots of cleanup now😬
-
Looking good. And a rescue from you earlier issues. I find that yellow is the hardest paint of all colours to paint. First coat over primer OK but next coats are difficult. Just so hard to see what you are doing
-
H Alan Yup I knew that the Surf Woody is based on the predecessor to the Surf-n-Go - the Horse Hide Hauler. There may be some engine differences as I have some spare parts left over that are not in the instructions. The Surf Woody had dual rear wheels too I believe Typical of AMT to re-release as I am building the kit but rarity is where it is manufactured - and you have one - what a hoot Bill
-
Tape Residue Frustration
bill-e-boy replied to That Plasticated Guy's topic in Model Building Questions and Answers
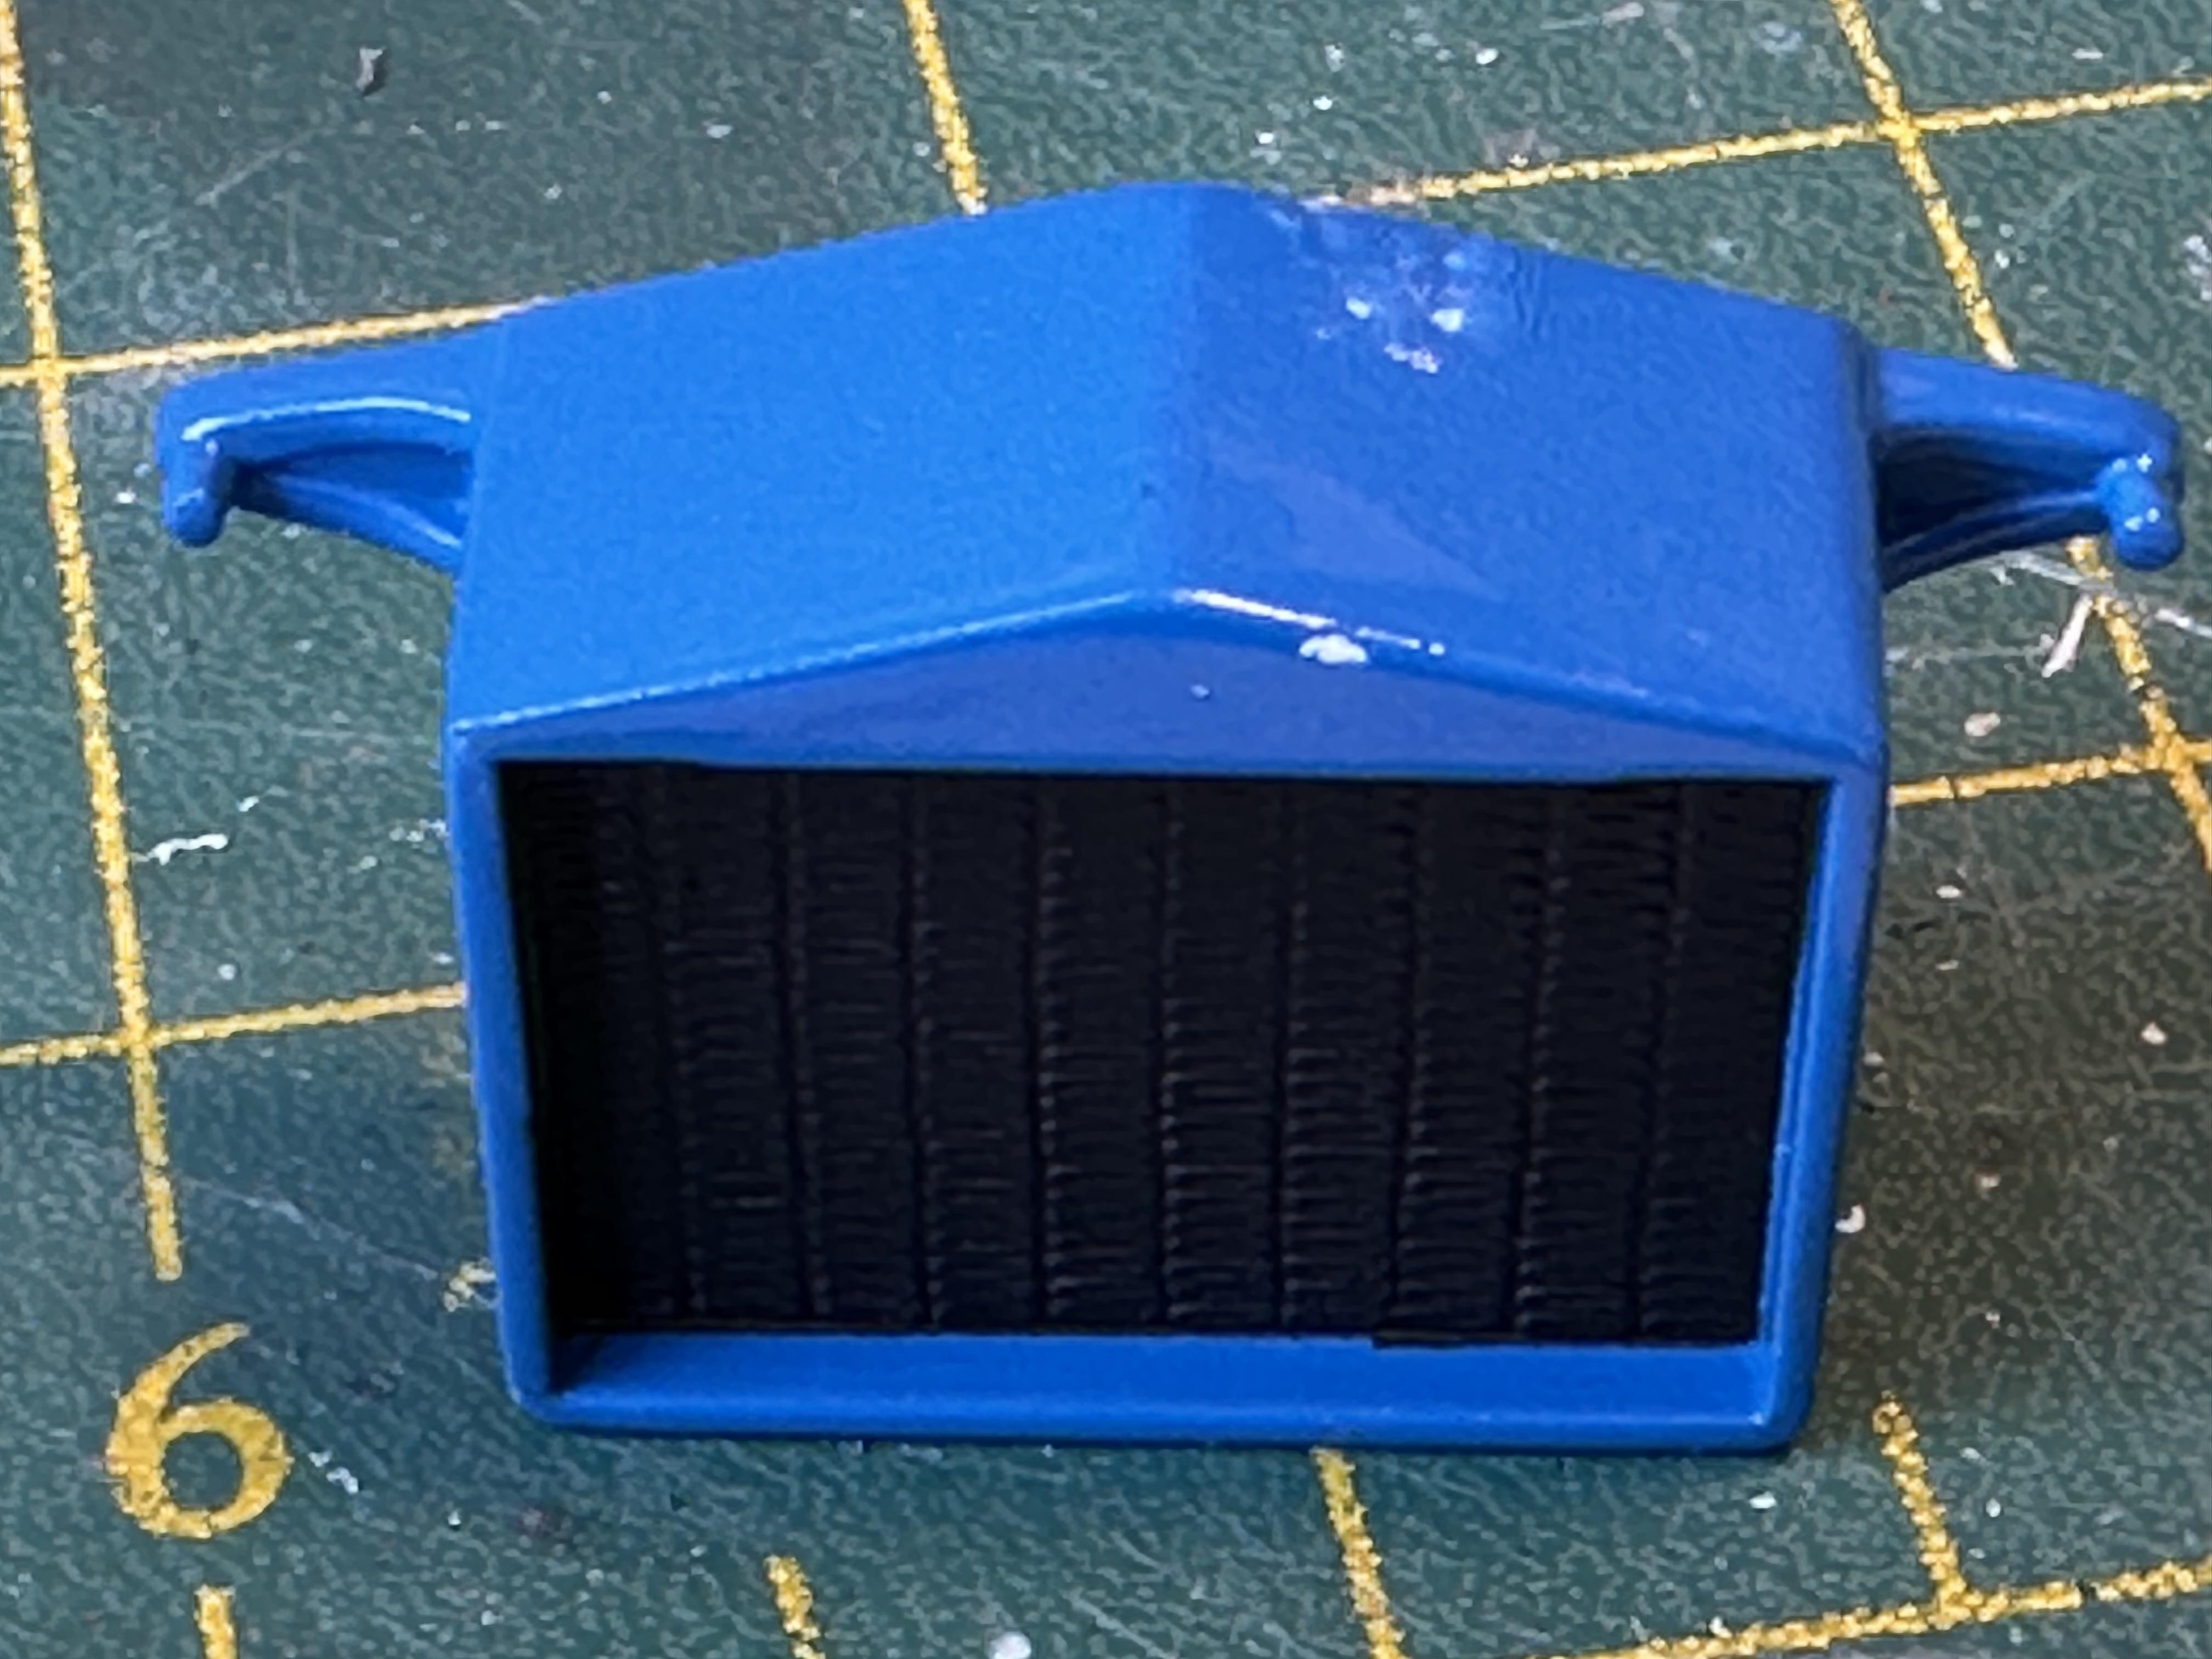
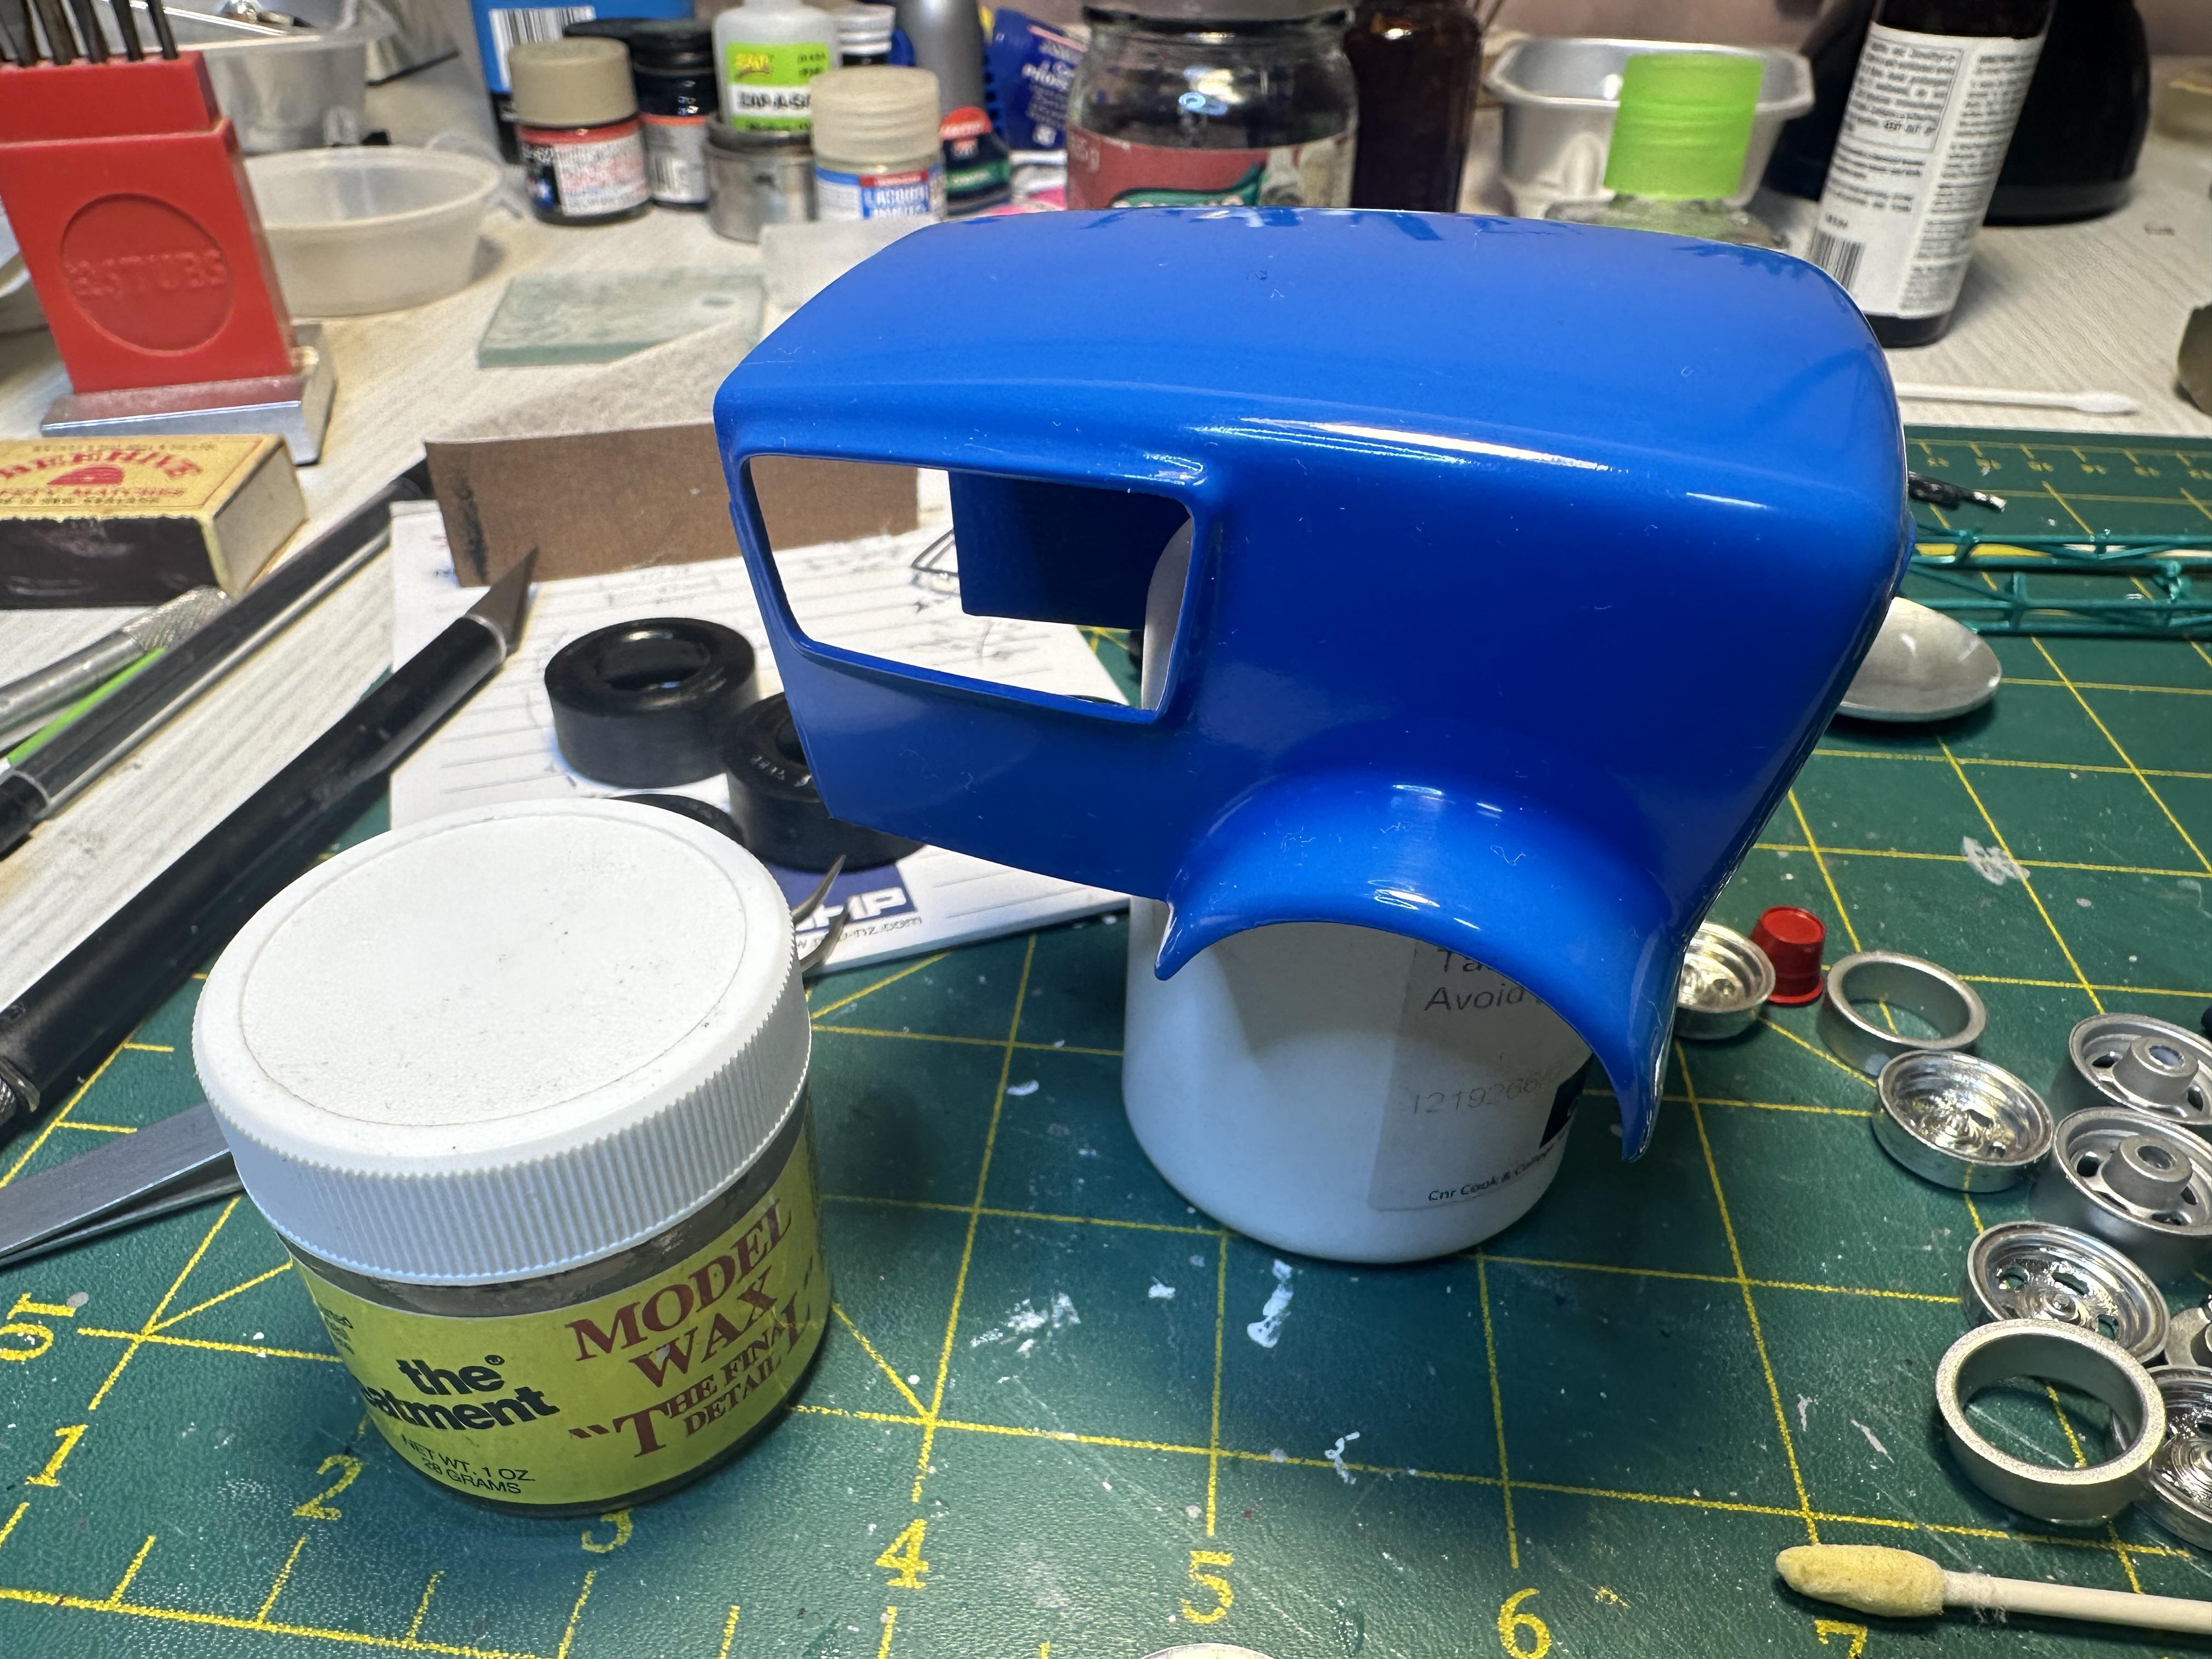
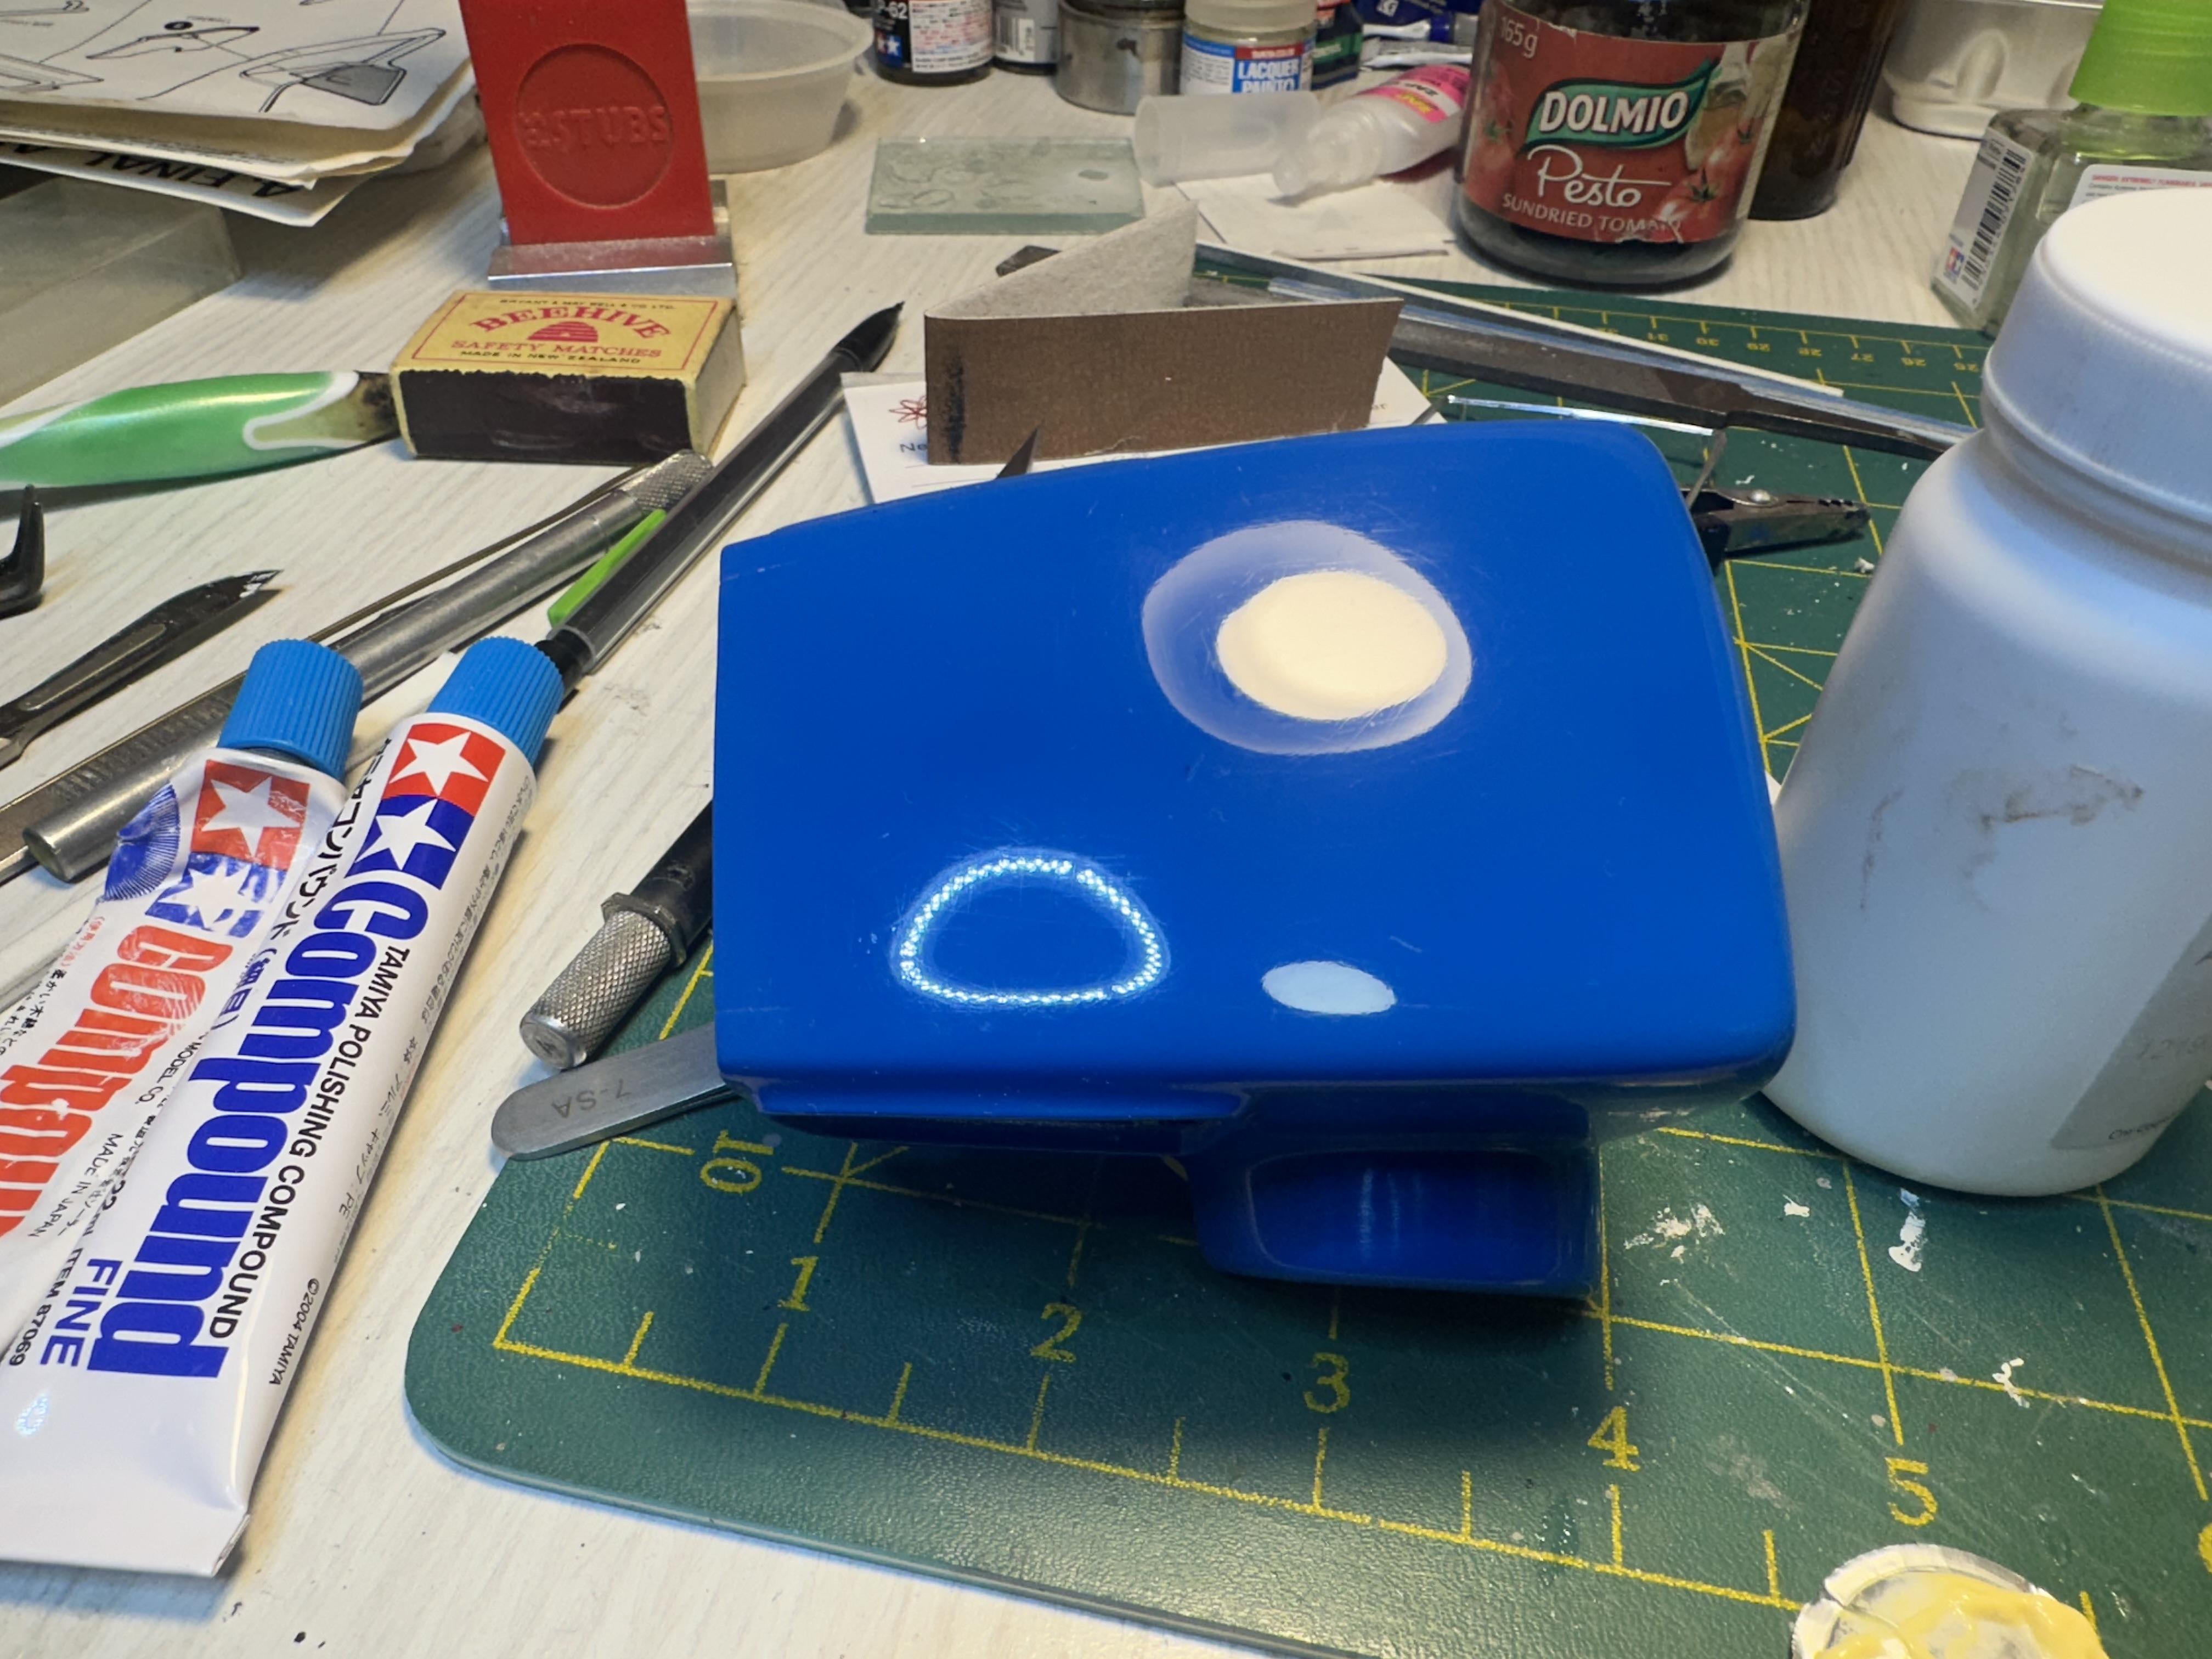
A few things from the above that I agree with - The issue looks like the tape adhesive burning into the tape not tape residue - And yup - keep it out of a hot environment. Put it in the dehydrator by all means but leave the heat off - Cheap aint always the best - Letting paint cure before masking helps - all about patience - Dont rush it - patience again - And Tamiya masking tape can burn into a paint job This was done recently - Testors enamel thinned with Testors reducer through air brush. Tamiya masking tape - factors that I see that caused issues are fresh paint and heat in my paint curing box (like a dehydrator). I masked the blue to paint the flat black - just a bit hard to see the manky result but it looks like orange peel and the white was where the The whole issue of masking tape affecting paint jobs is debilitating to say the least
-
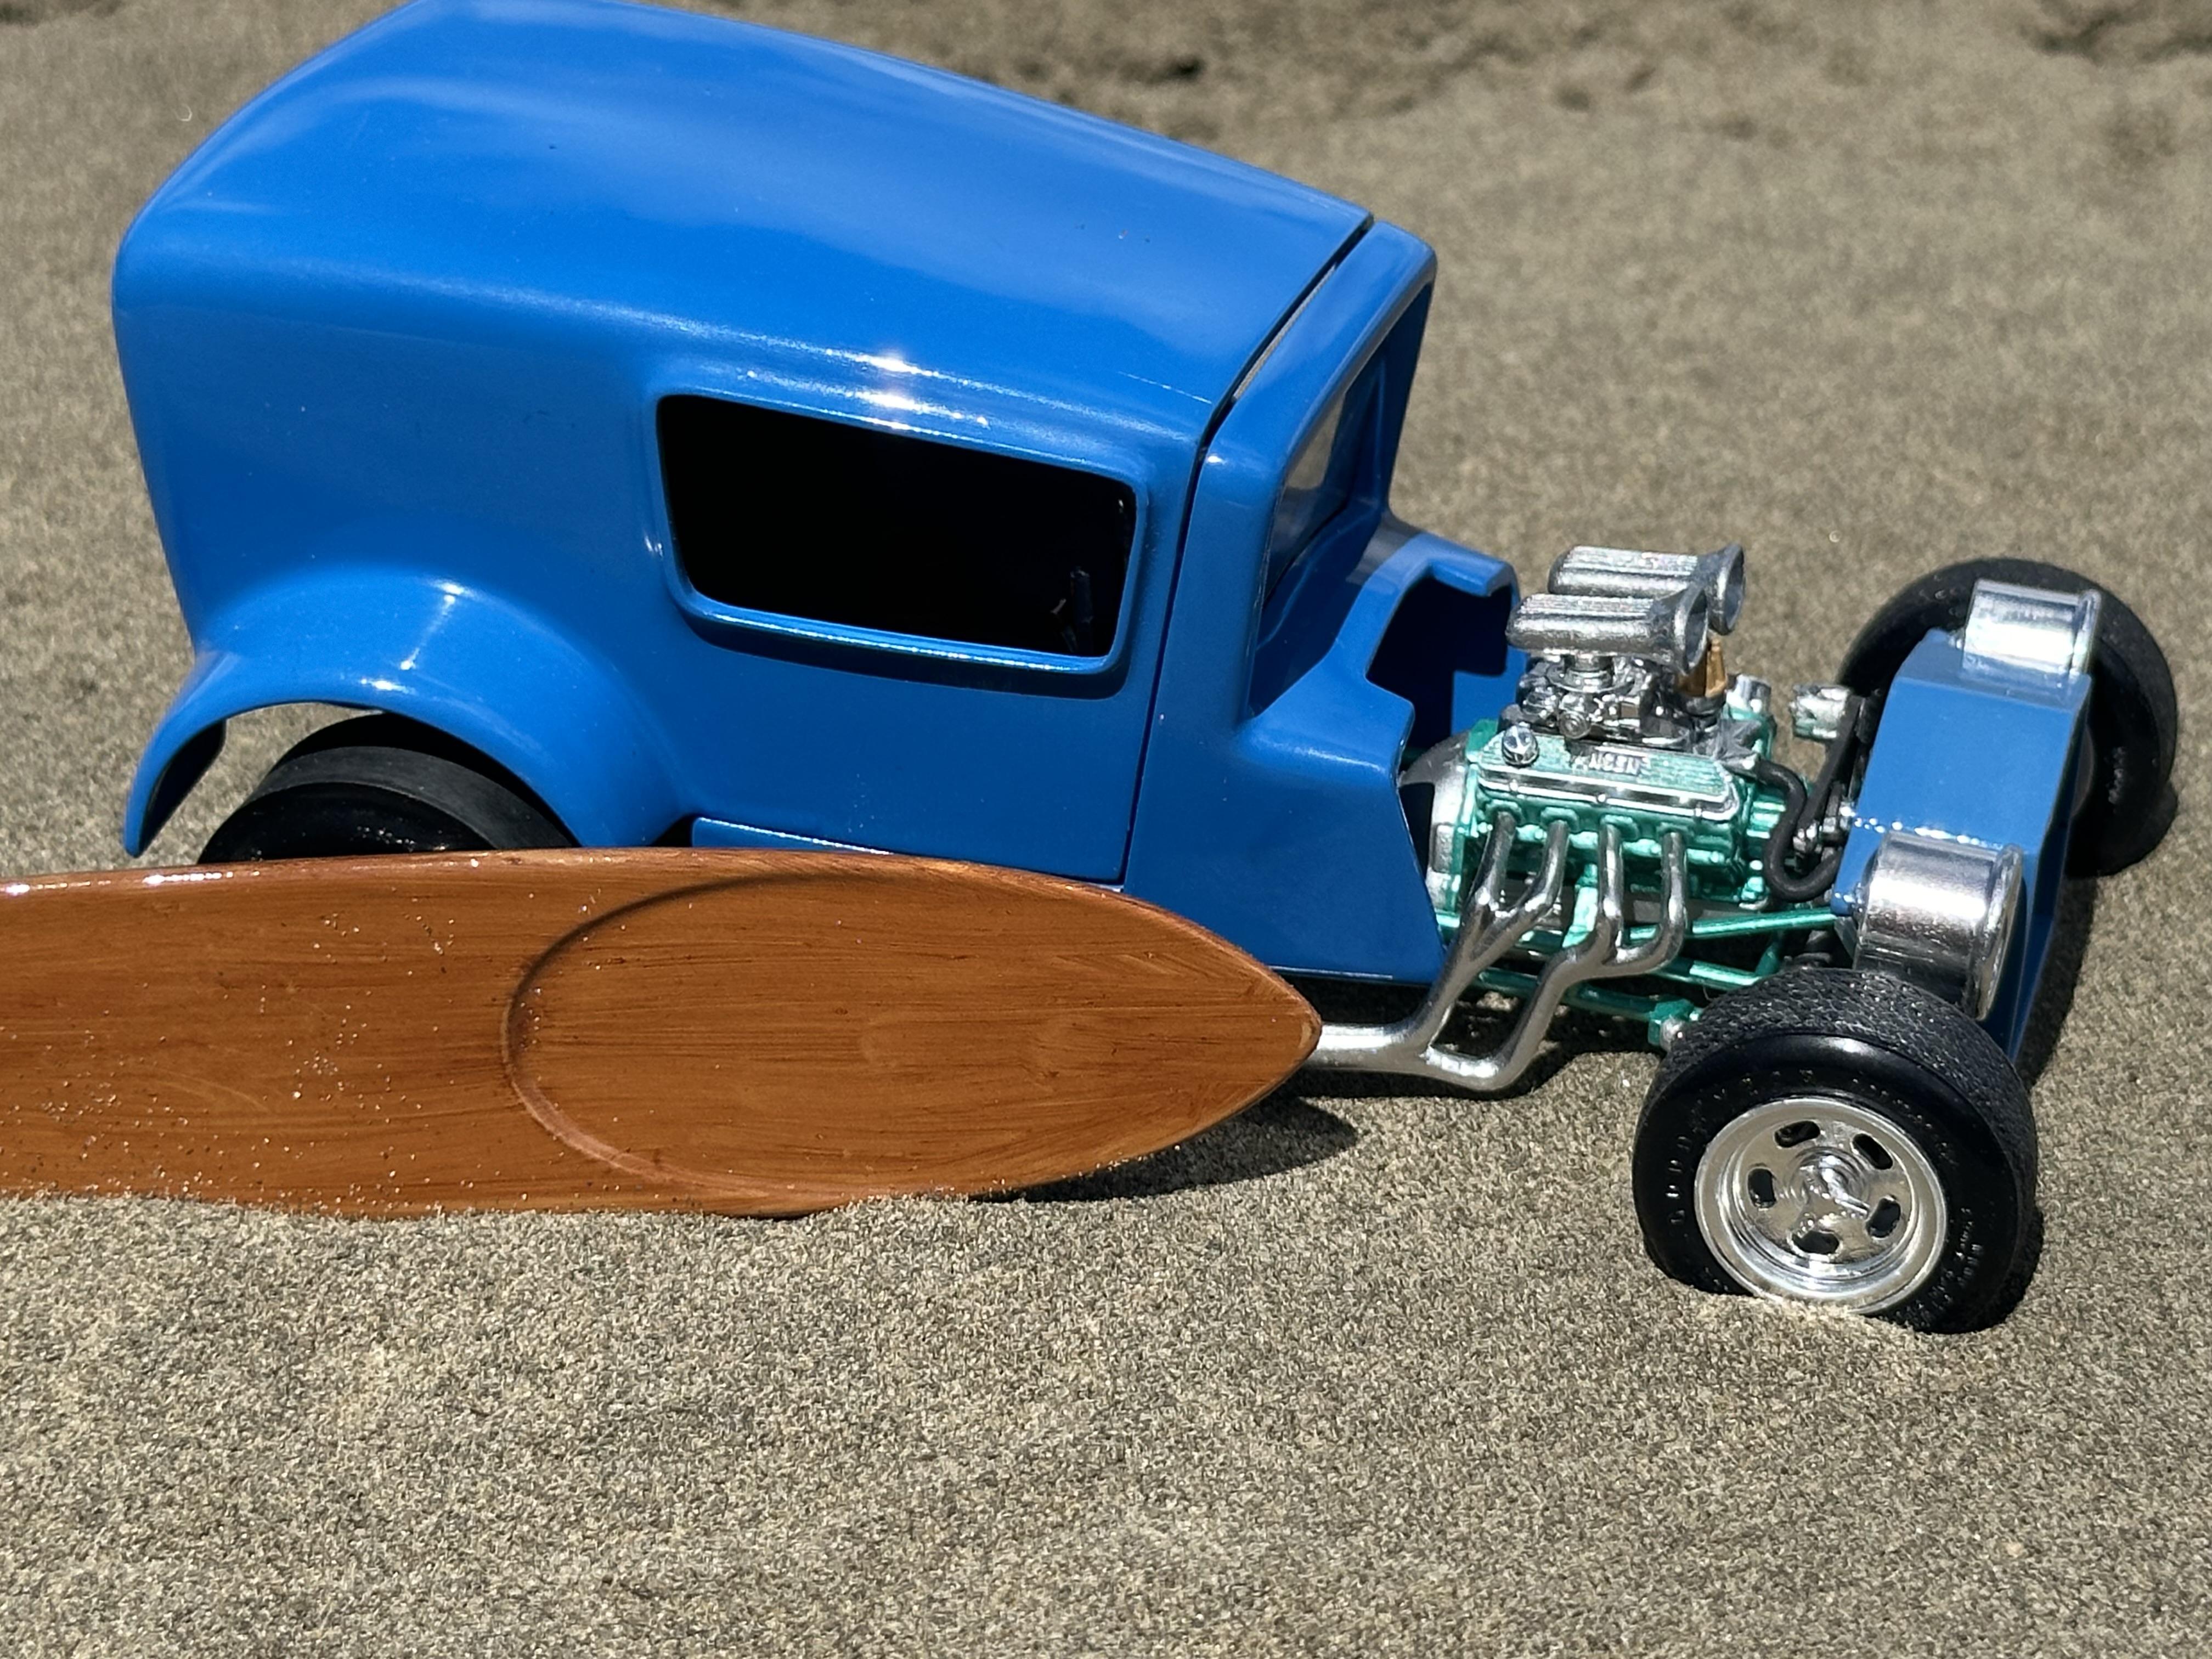
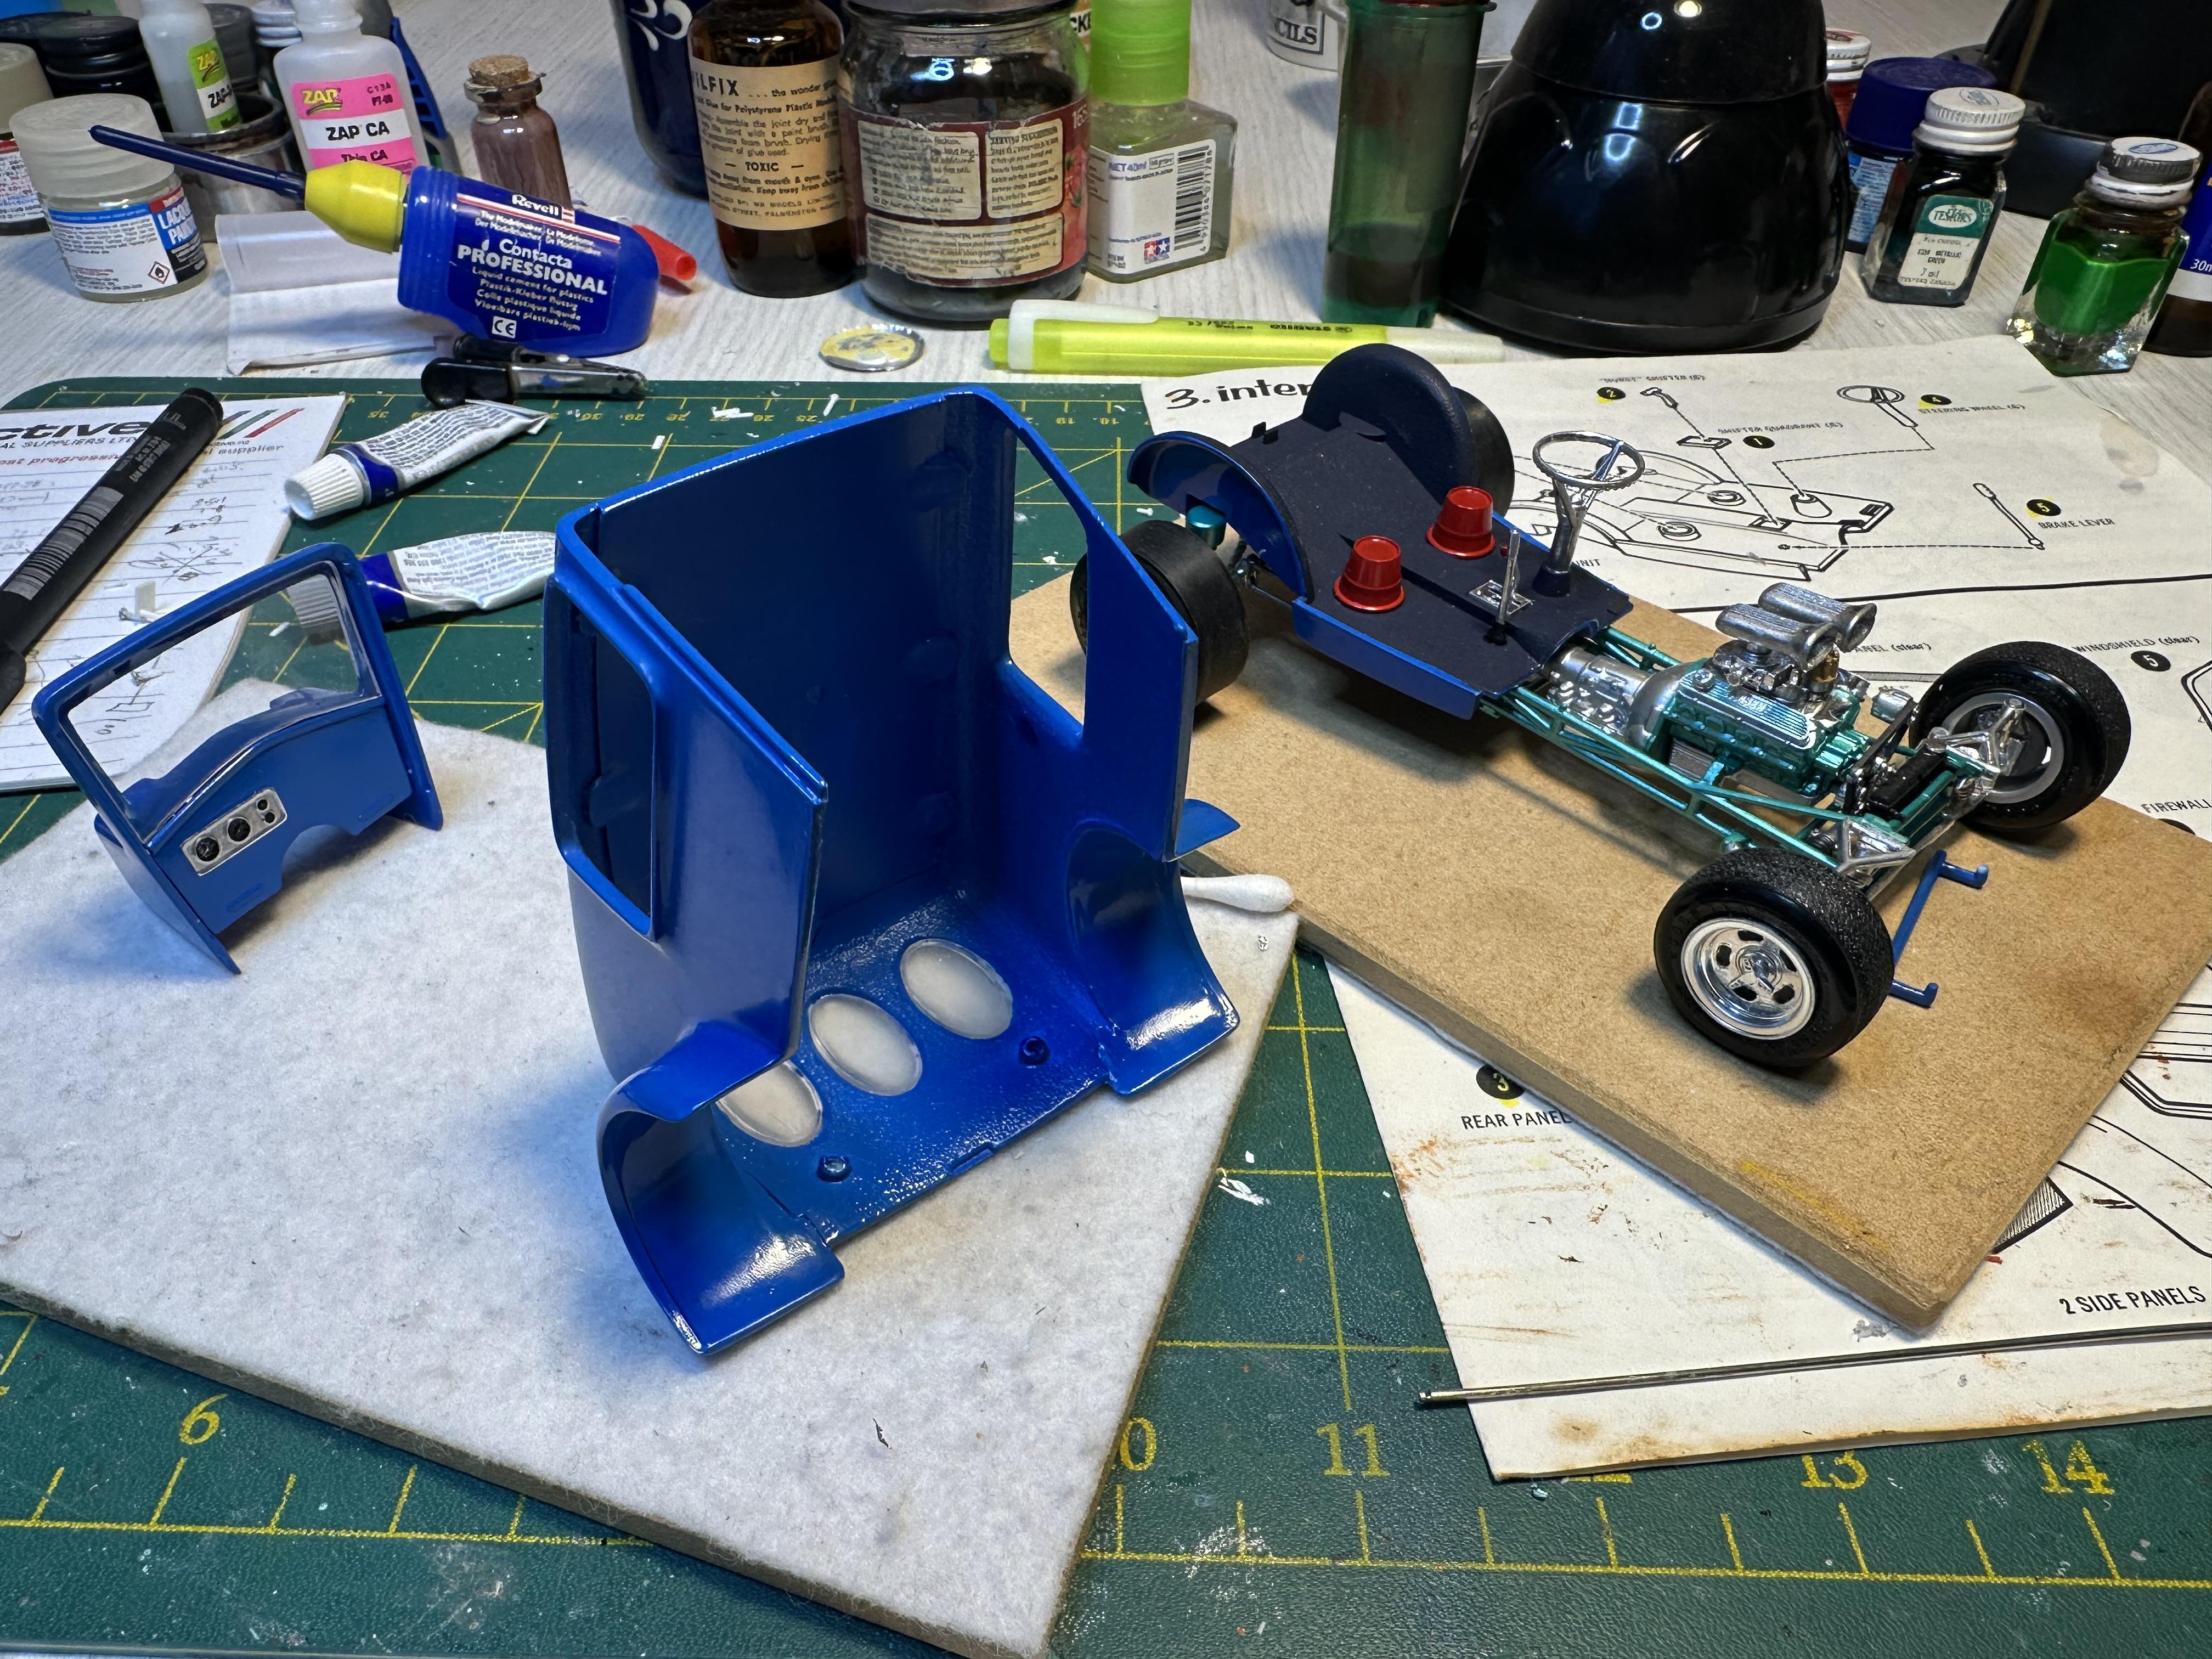
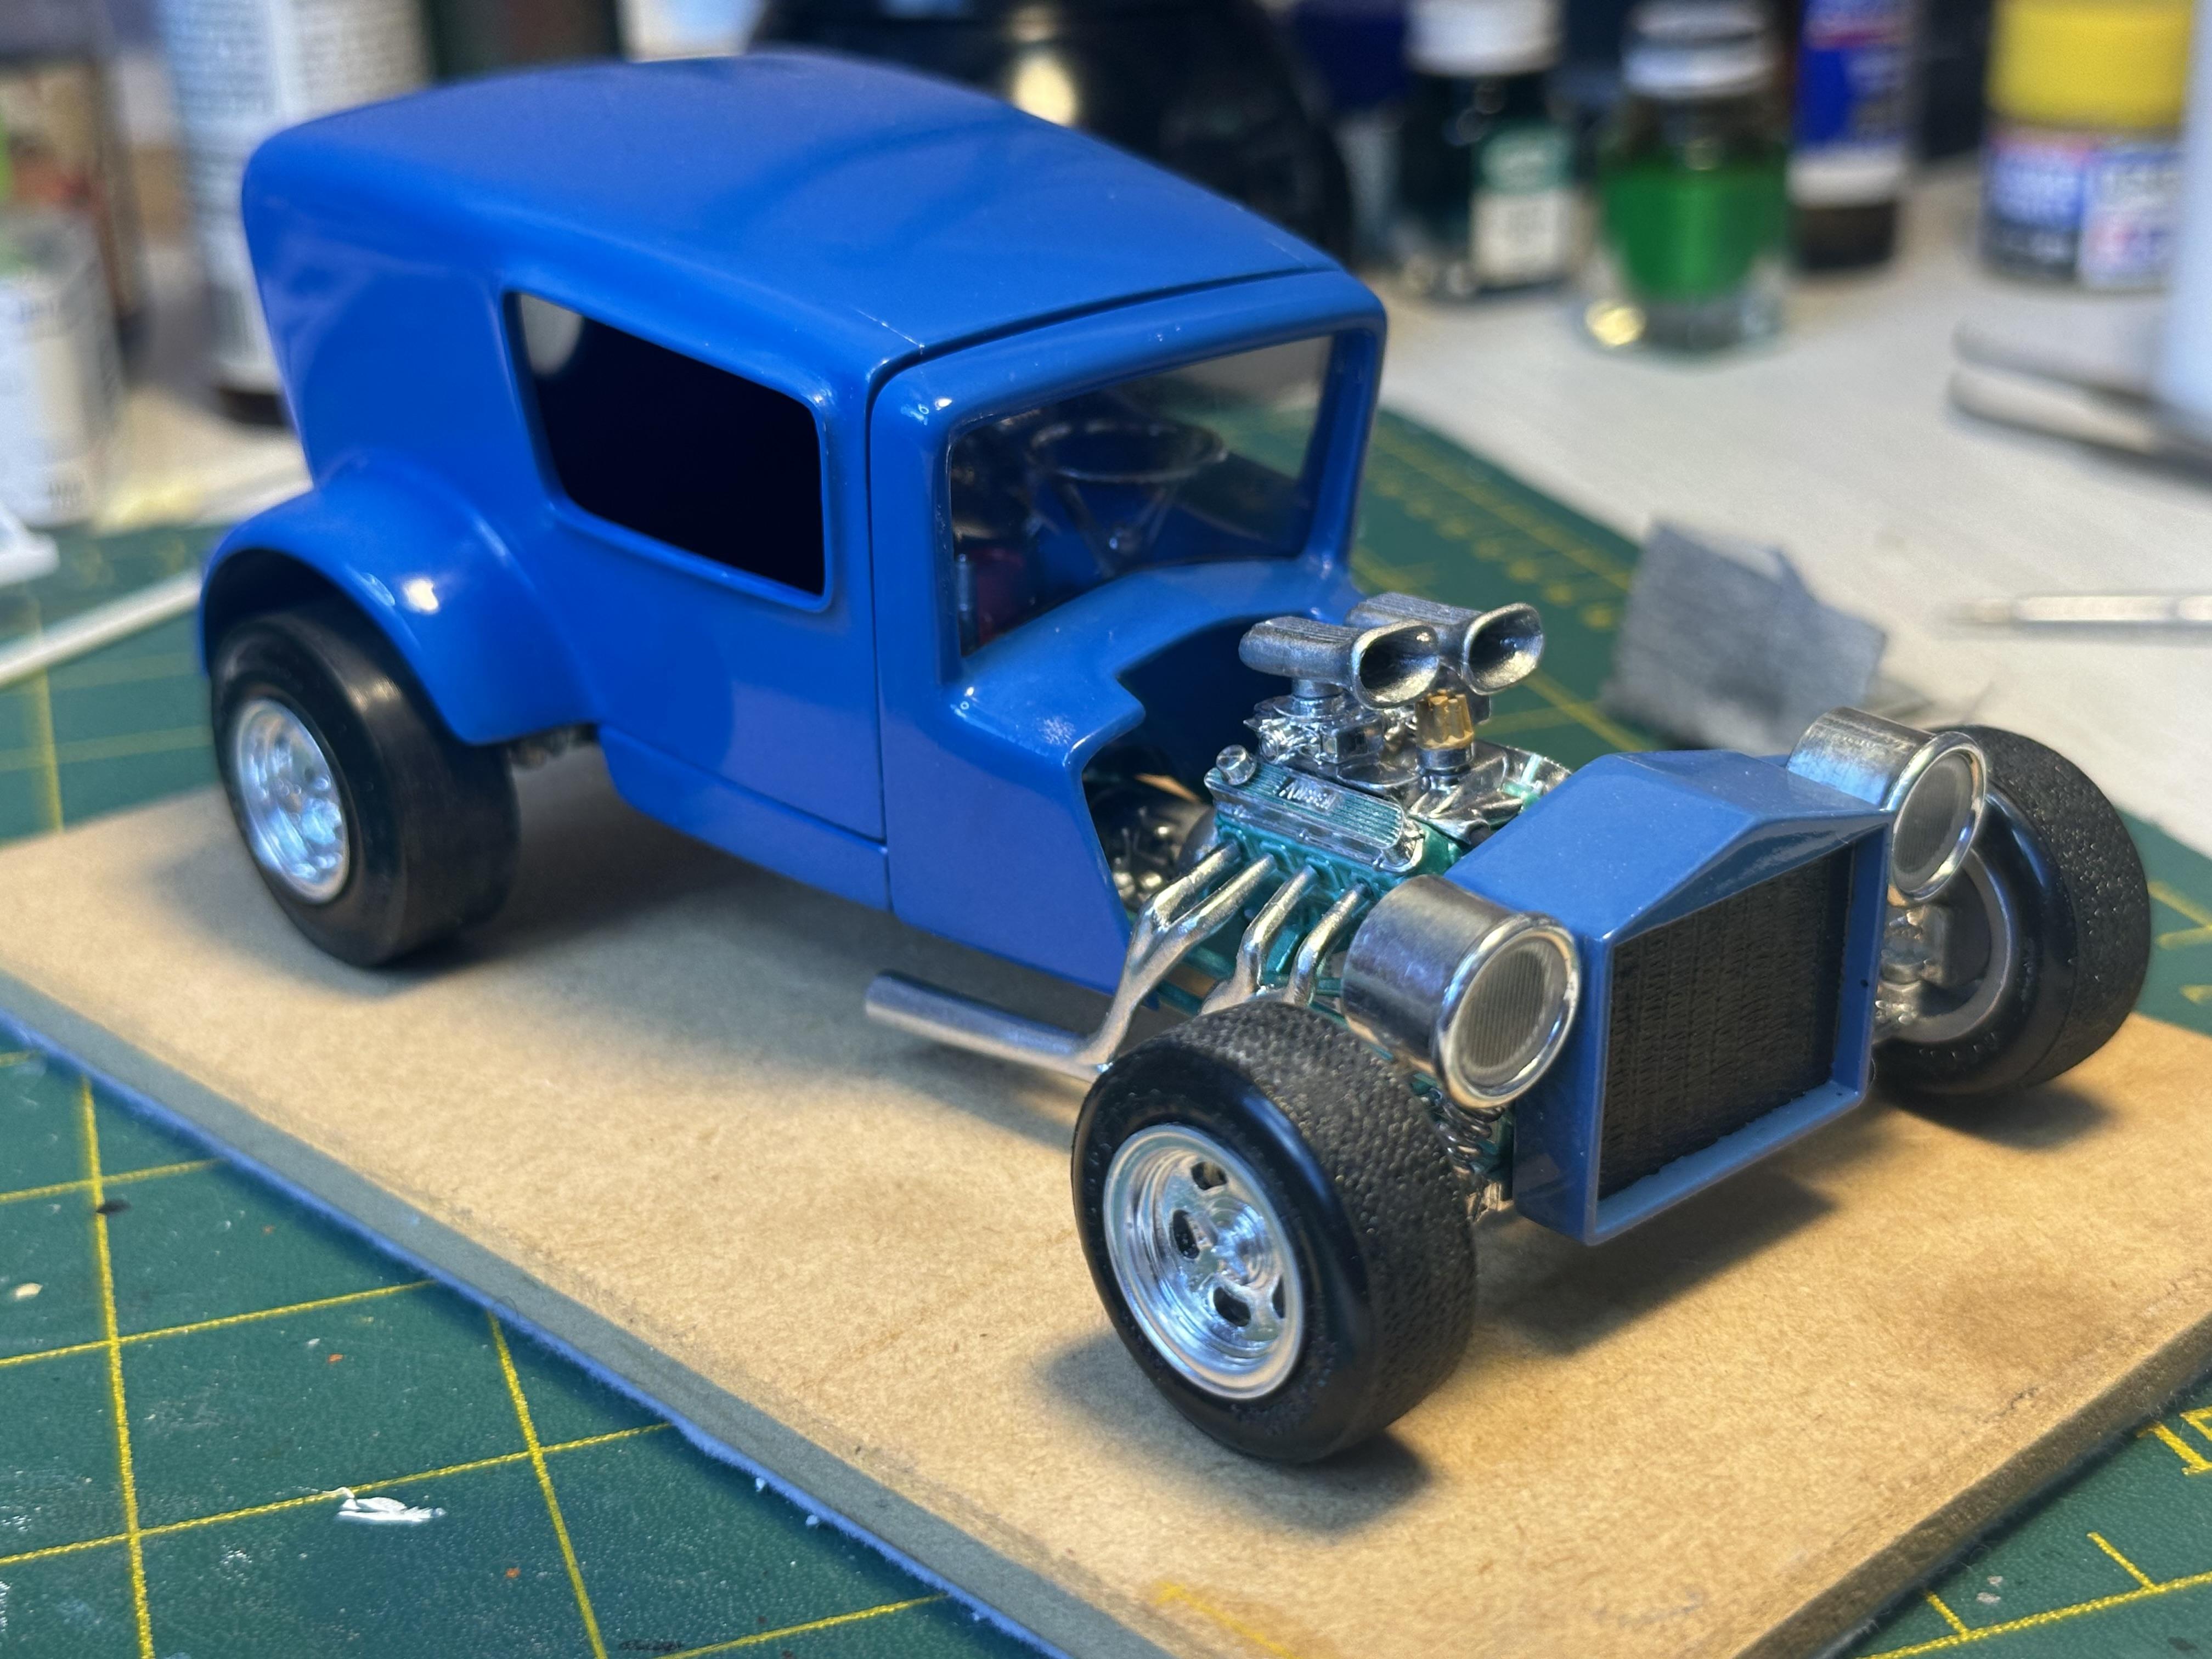
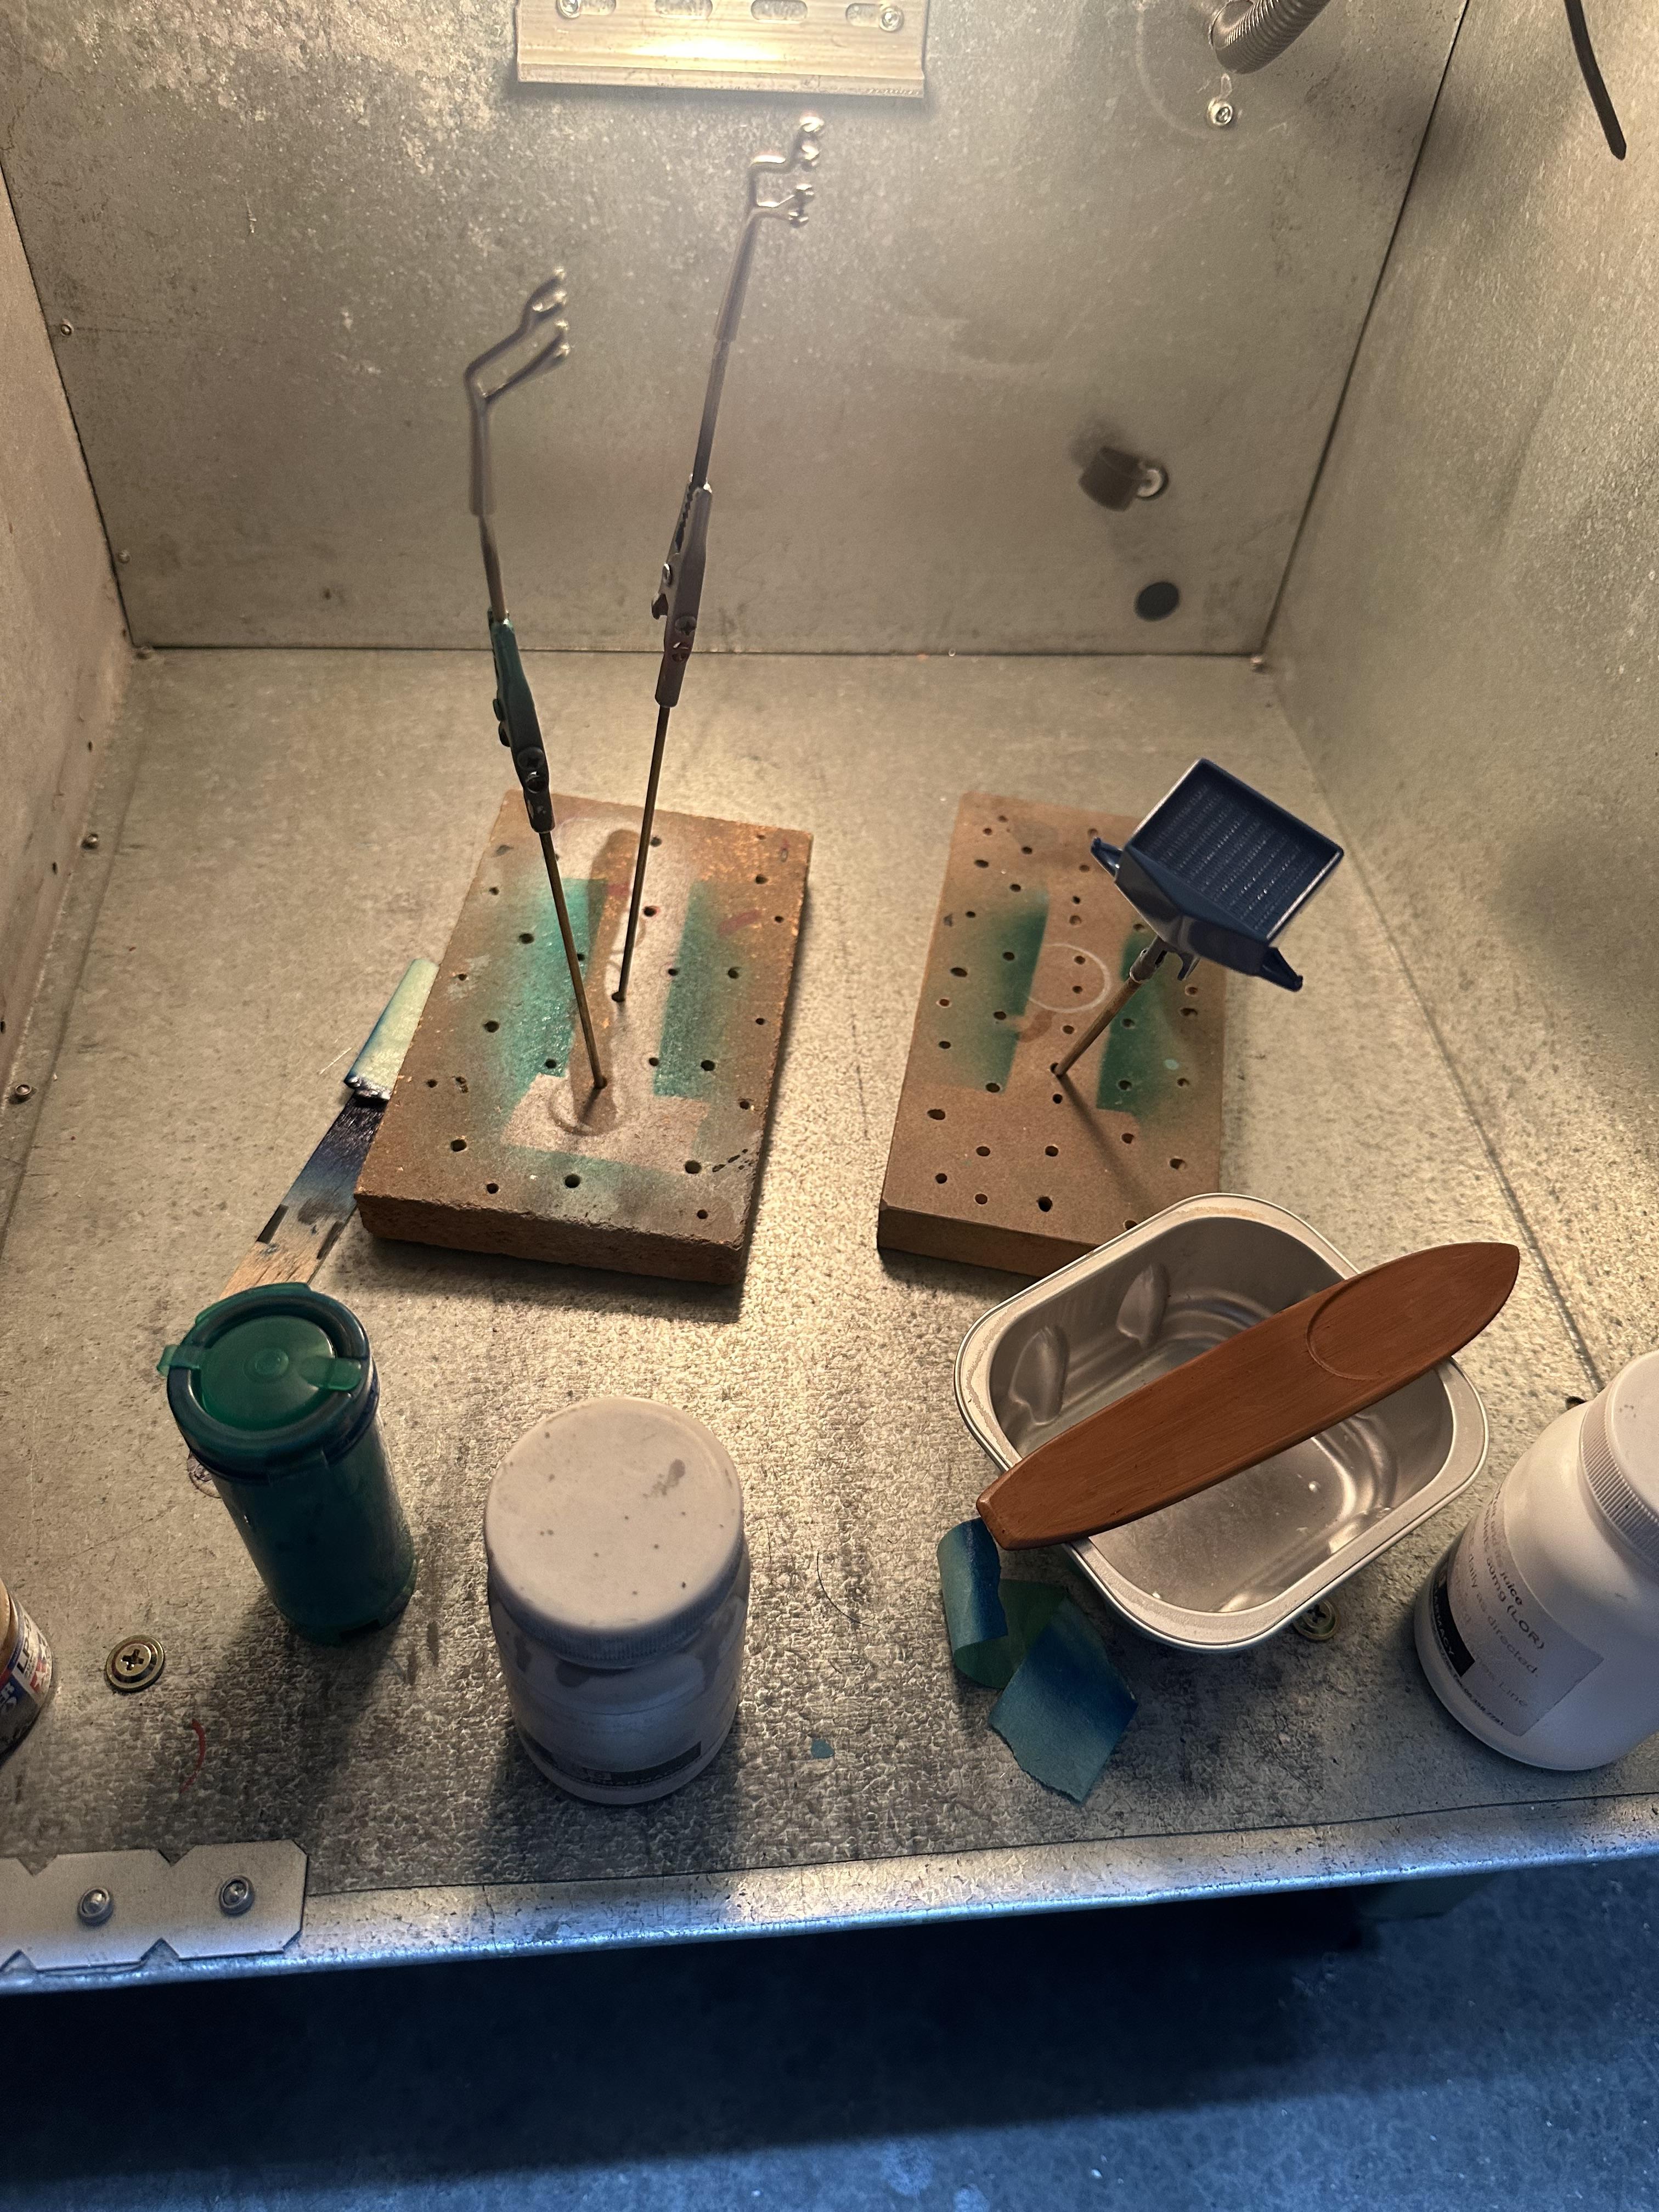
Been progressing with the build and it is now up on all fours. I had to remake the rear radius rods as the ones I made earlier were too short - oh well!! Made the replacements from round plastic rod and they are now just fine. I was not happy about the original header pipes and found a suitable replacement in the parts bin. Just need to be shortened a little between the down pipe sets. Cleaned up and now painted with SMS chrome. Just waiting for the paint to harden up before handling And windows installed and waiting for glue to set before handling I am in the process of repainting the radiator surround after the paint was attacked by masking tape glue. Also working on woodgrain finish on a wood long board. Used a medium flat brown as base coat and dry brushed some burnt siena oil pant for wood finish. There is a thread elsewhere on this board covering the process. Again waiting for paint to cure so I can hit with some clear enamel. And dont empty pill bottles make great paint jars Thanks for looking
-
Thanks Zippi, Dave and Speedpro. I do believe it is a rare kit but it was in my stash and our local FB group are having a Summer Build Off in the lead up to summer down here at the other end of the world. The kit had been started and it was a bit of a glue bomb so I do not have any issues with building it. And it was not complete either.
-
An excellent build. I know it is not easy to pull off adding all the extra detail convincingly but you have done it - in spades. WELL DONE
-
What everyone has said above. A very nicely built rod in a cool colour with a lot of attention to detail and excellent building skills show through
-
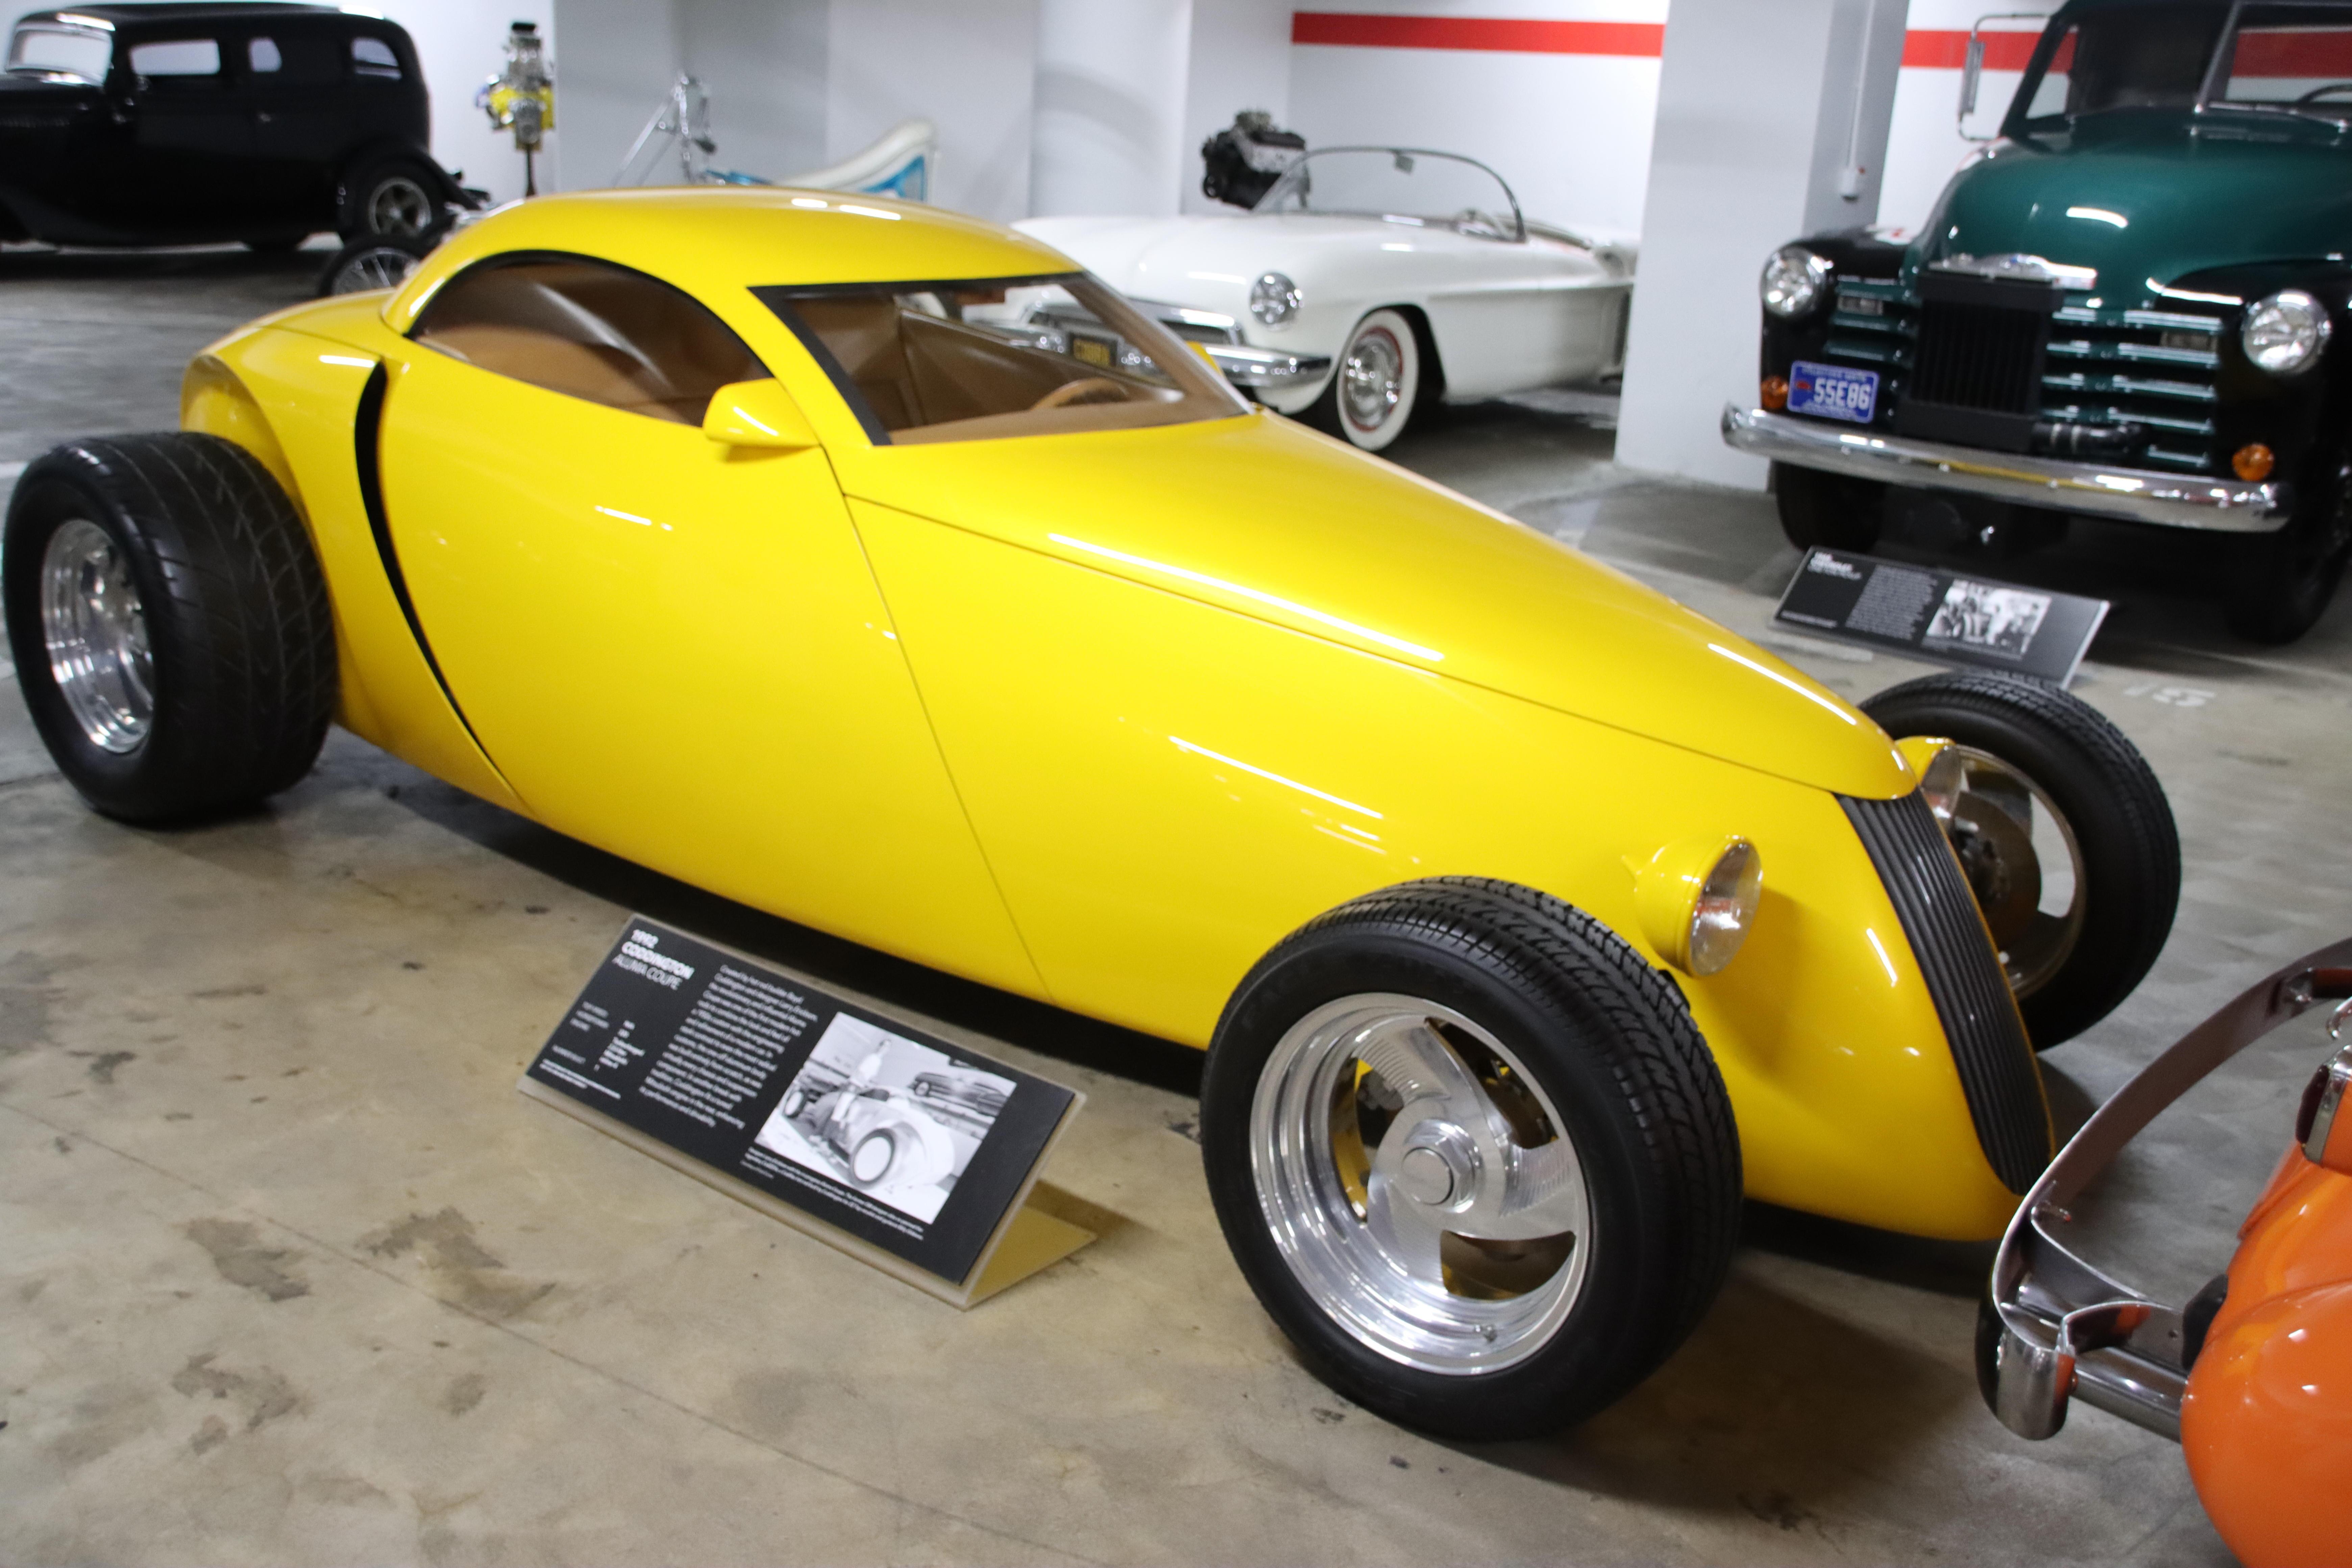
Saw the Aluma Coupe the Vault at the Petersen Museum recently. As cool in the flesh as it is in all the media. Of note model wise is the Lil John Buttera 26 Tudor is there as well.
-
Coming along nicely. Nice red Ken. Good choice - well I think so anyway as it is very similar to the colour I will be painting my 32 Tudor when I get there
-
I have been progressing the build but it has been a battle. Crucial bits missing saw me dumpster diving the parts bin - some bits I found some I didn't. I have found bits for two more of these kits but not one complete model out of three. Oh darn Got the motor together which is a plus And the front end assembled onto the frame Next up drive shaft - guess what - had to go looking and I found one from one of the parts kits. Yahhoo. It was a bit short as the Revell 32 SBF that I used must be a bit shorter - easy enough to make longer after a clean up - you can see the bit I cut off above the lengthend shaft Assembly for the rear end is now in WIP Thanks for looking
-
Michael, that is an interesting way to make the top cuts but I can see that it would help with alignment and strength. And keeping the back window full height The Rolling Bones is an excellent build of the Tudor and a good subject to replicate Speedpro - looking good
-
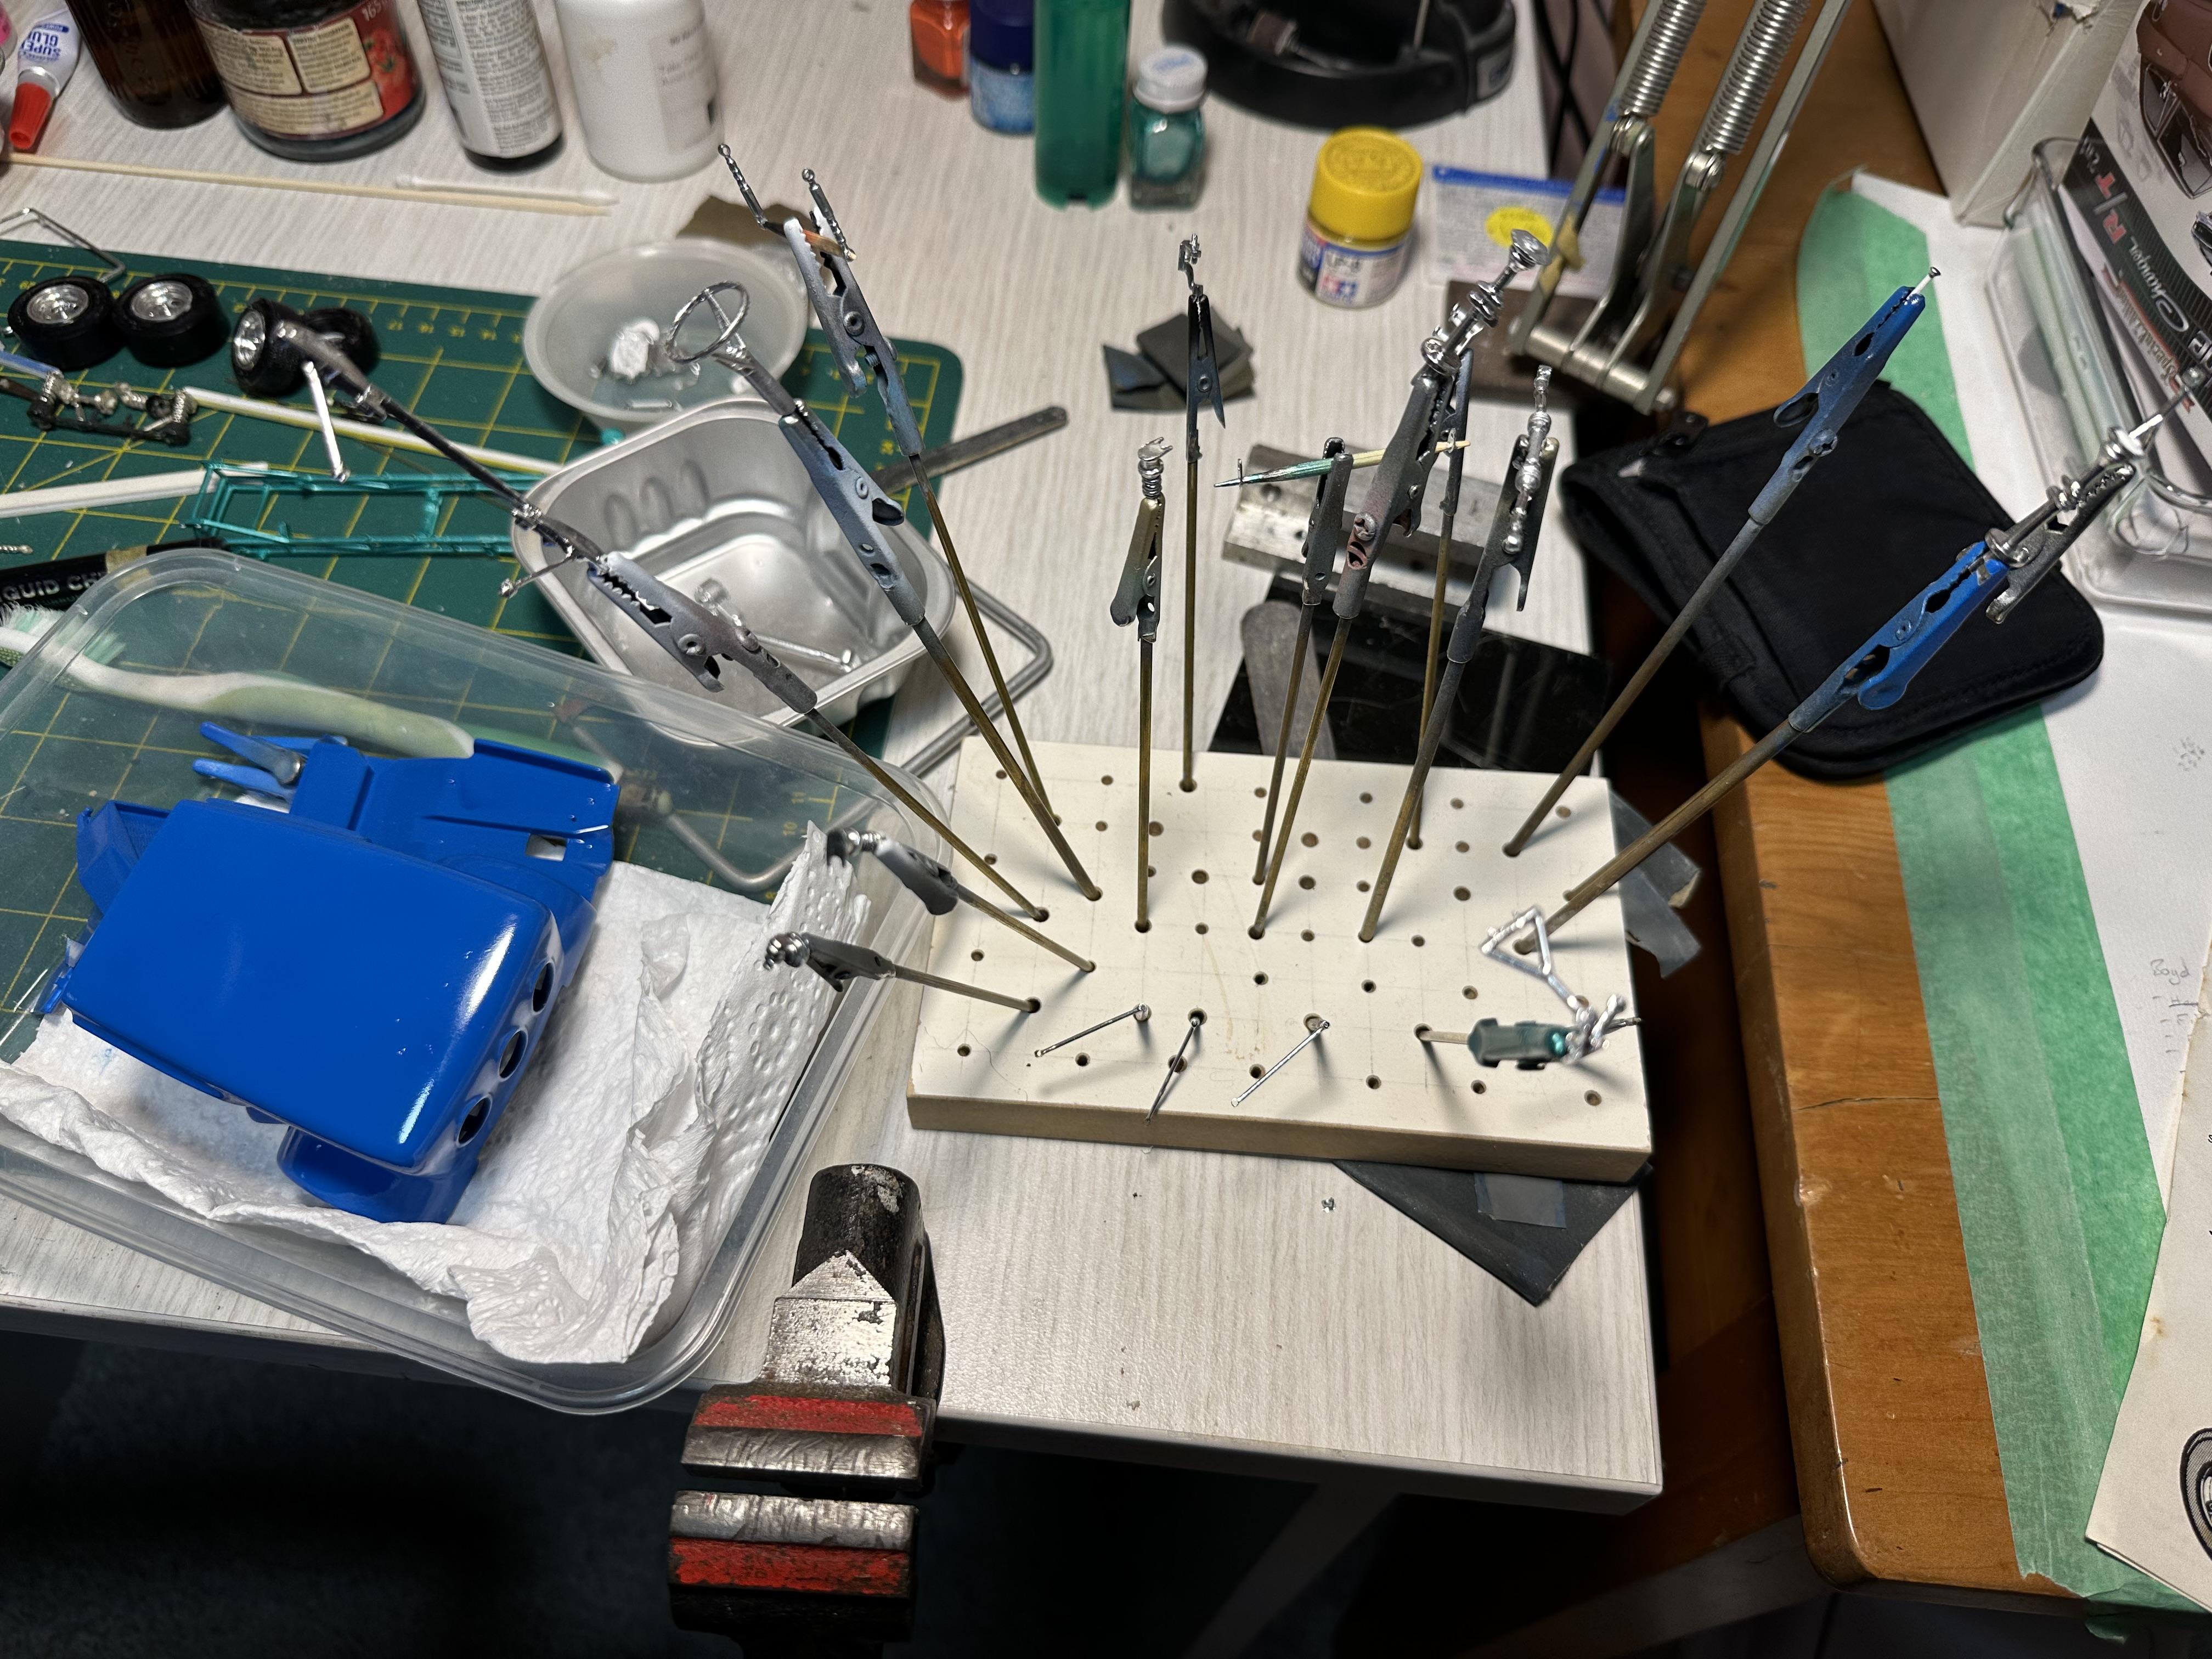
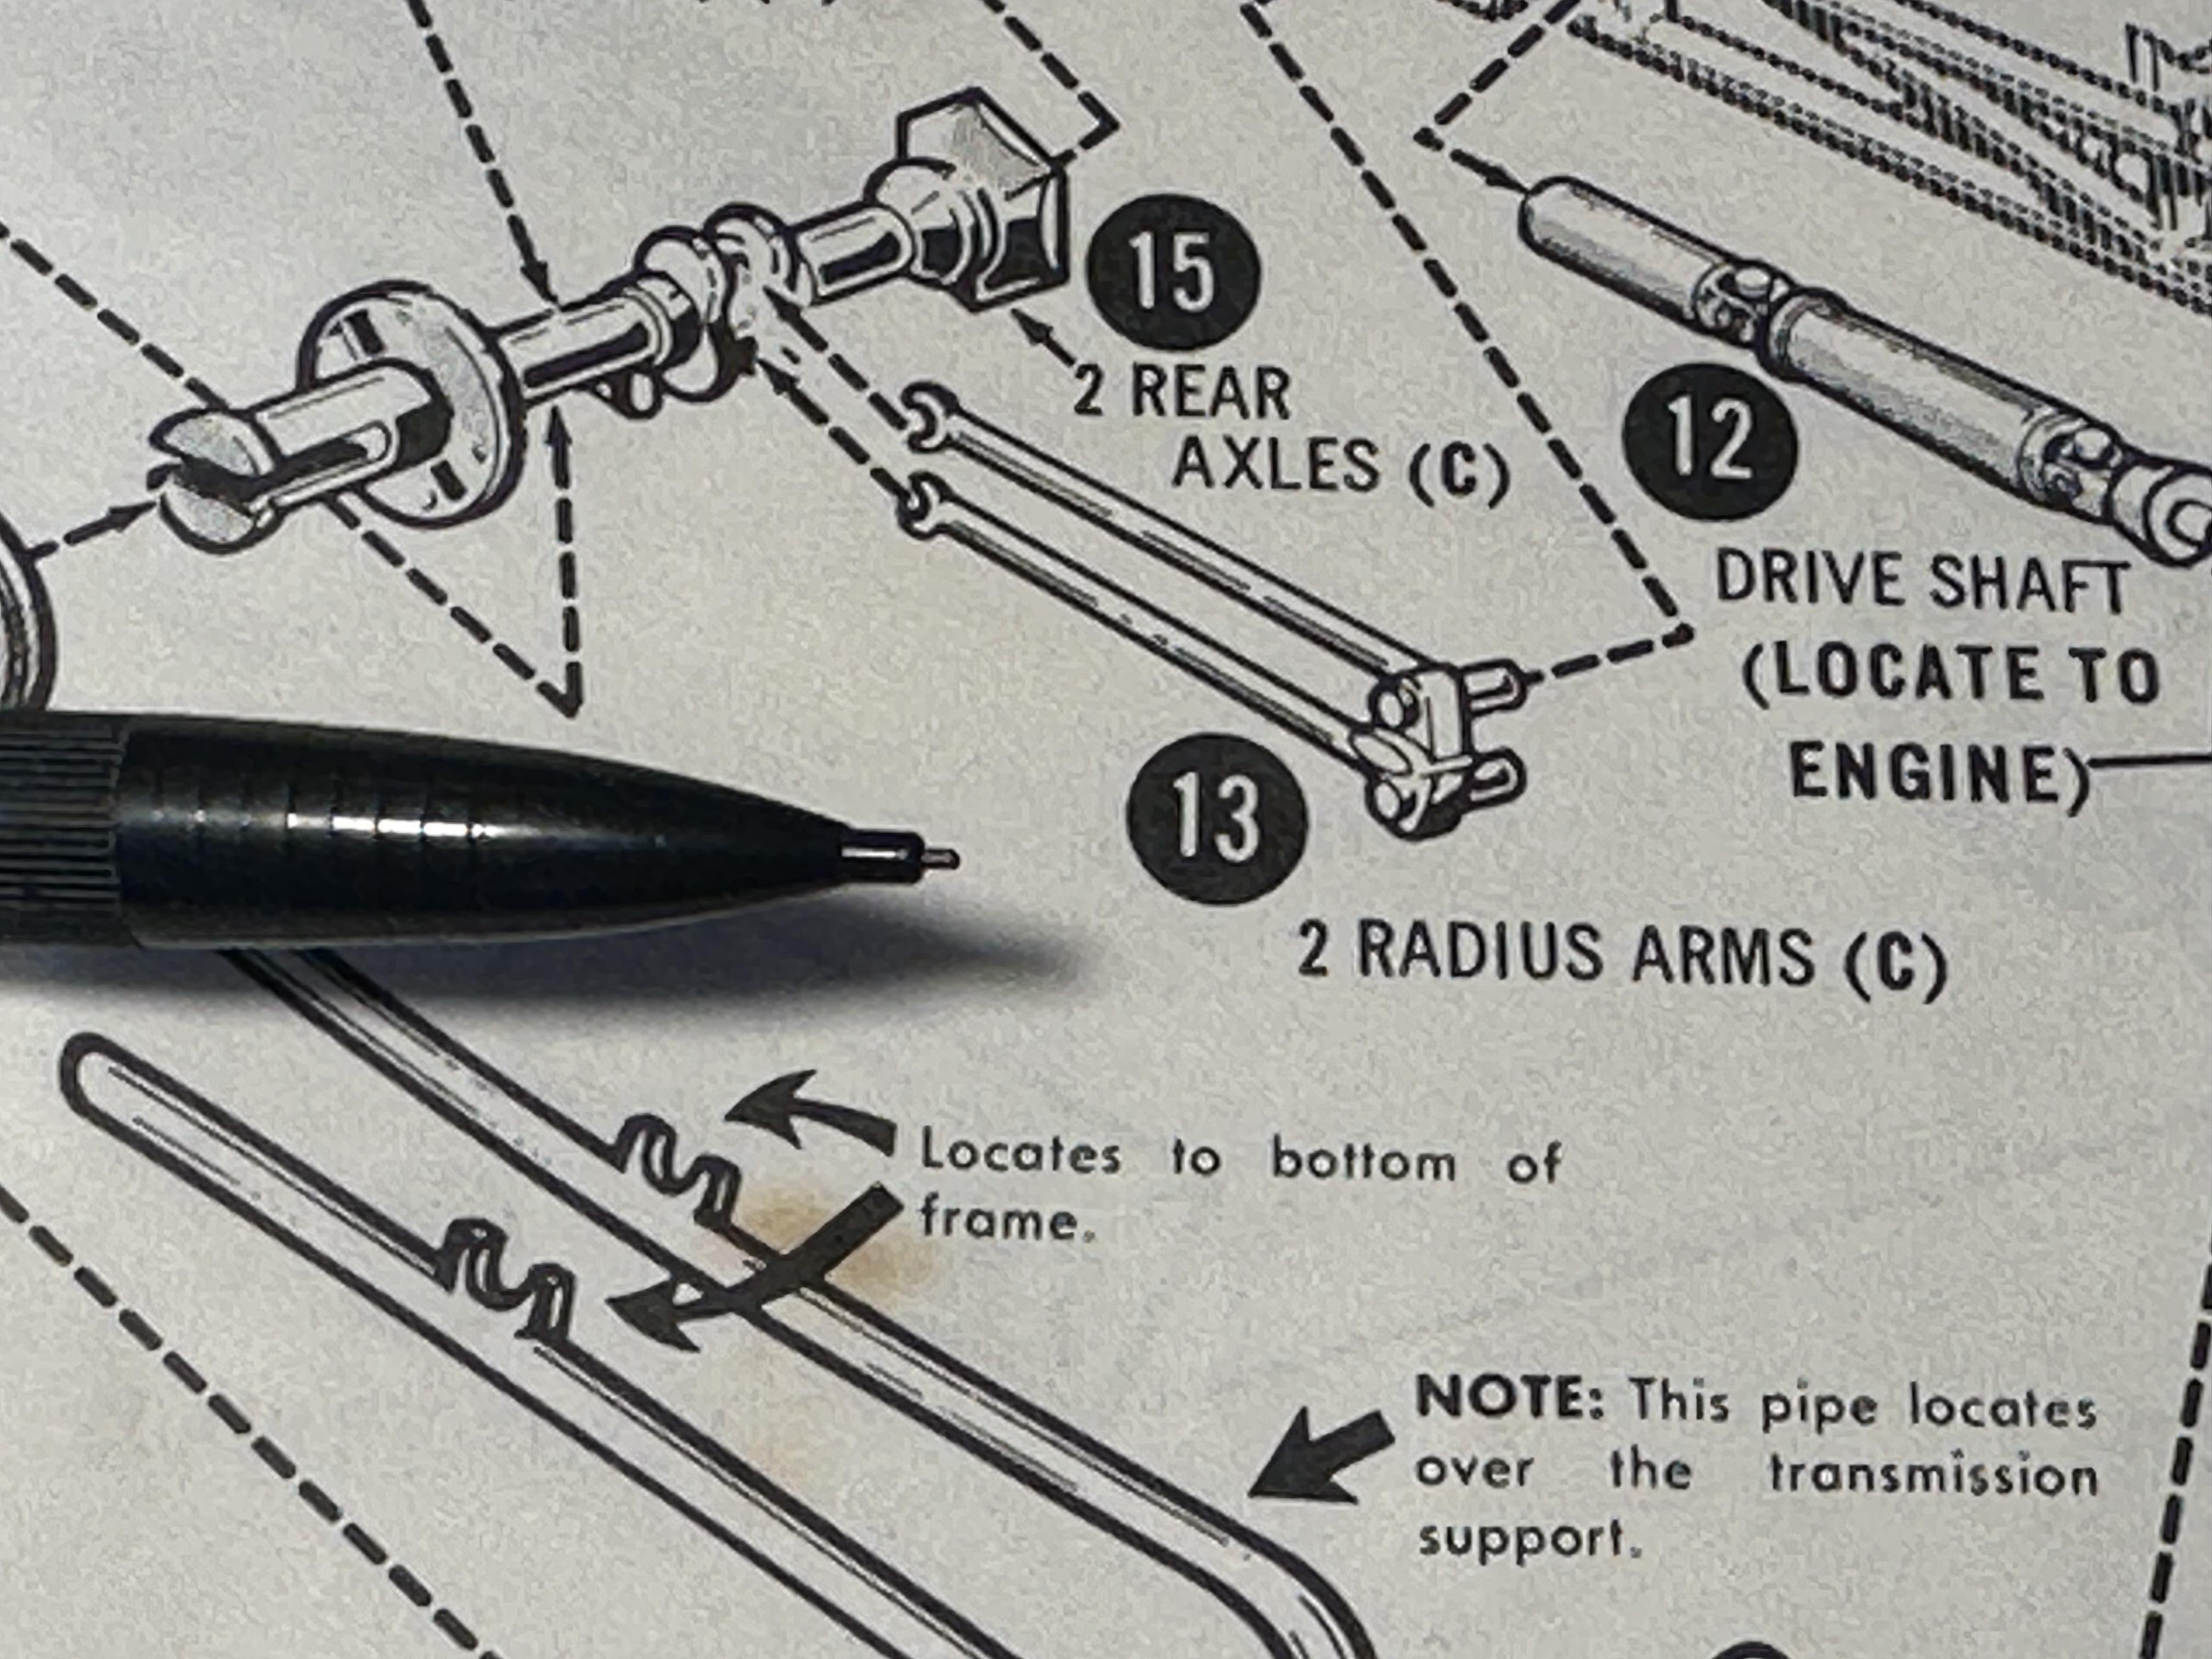
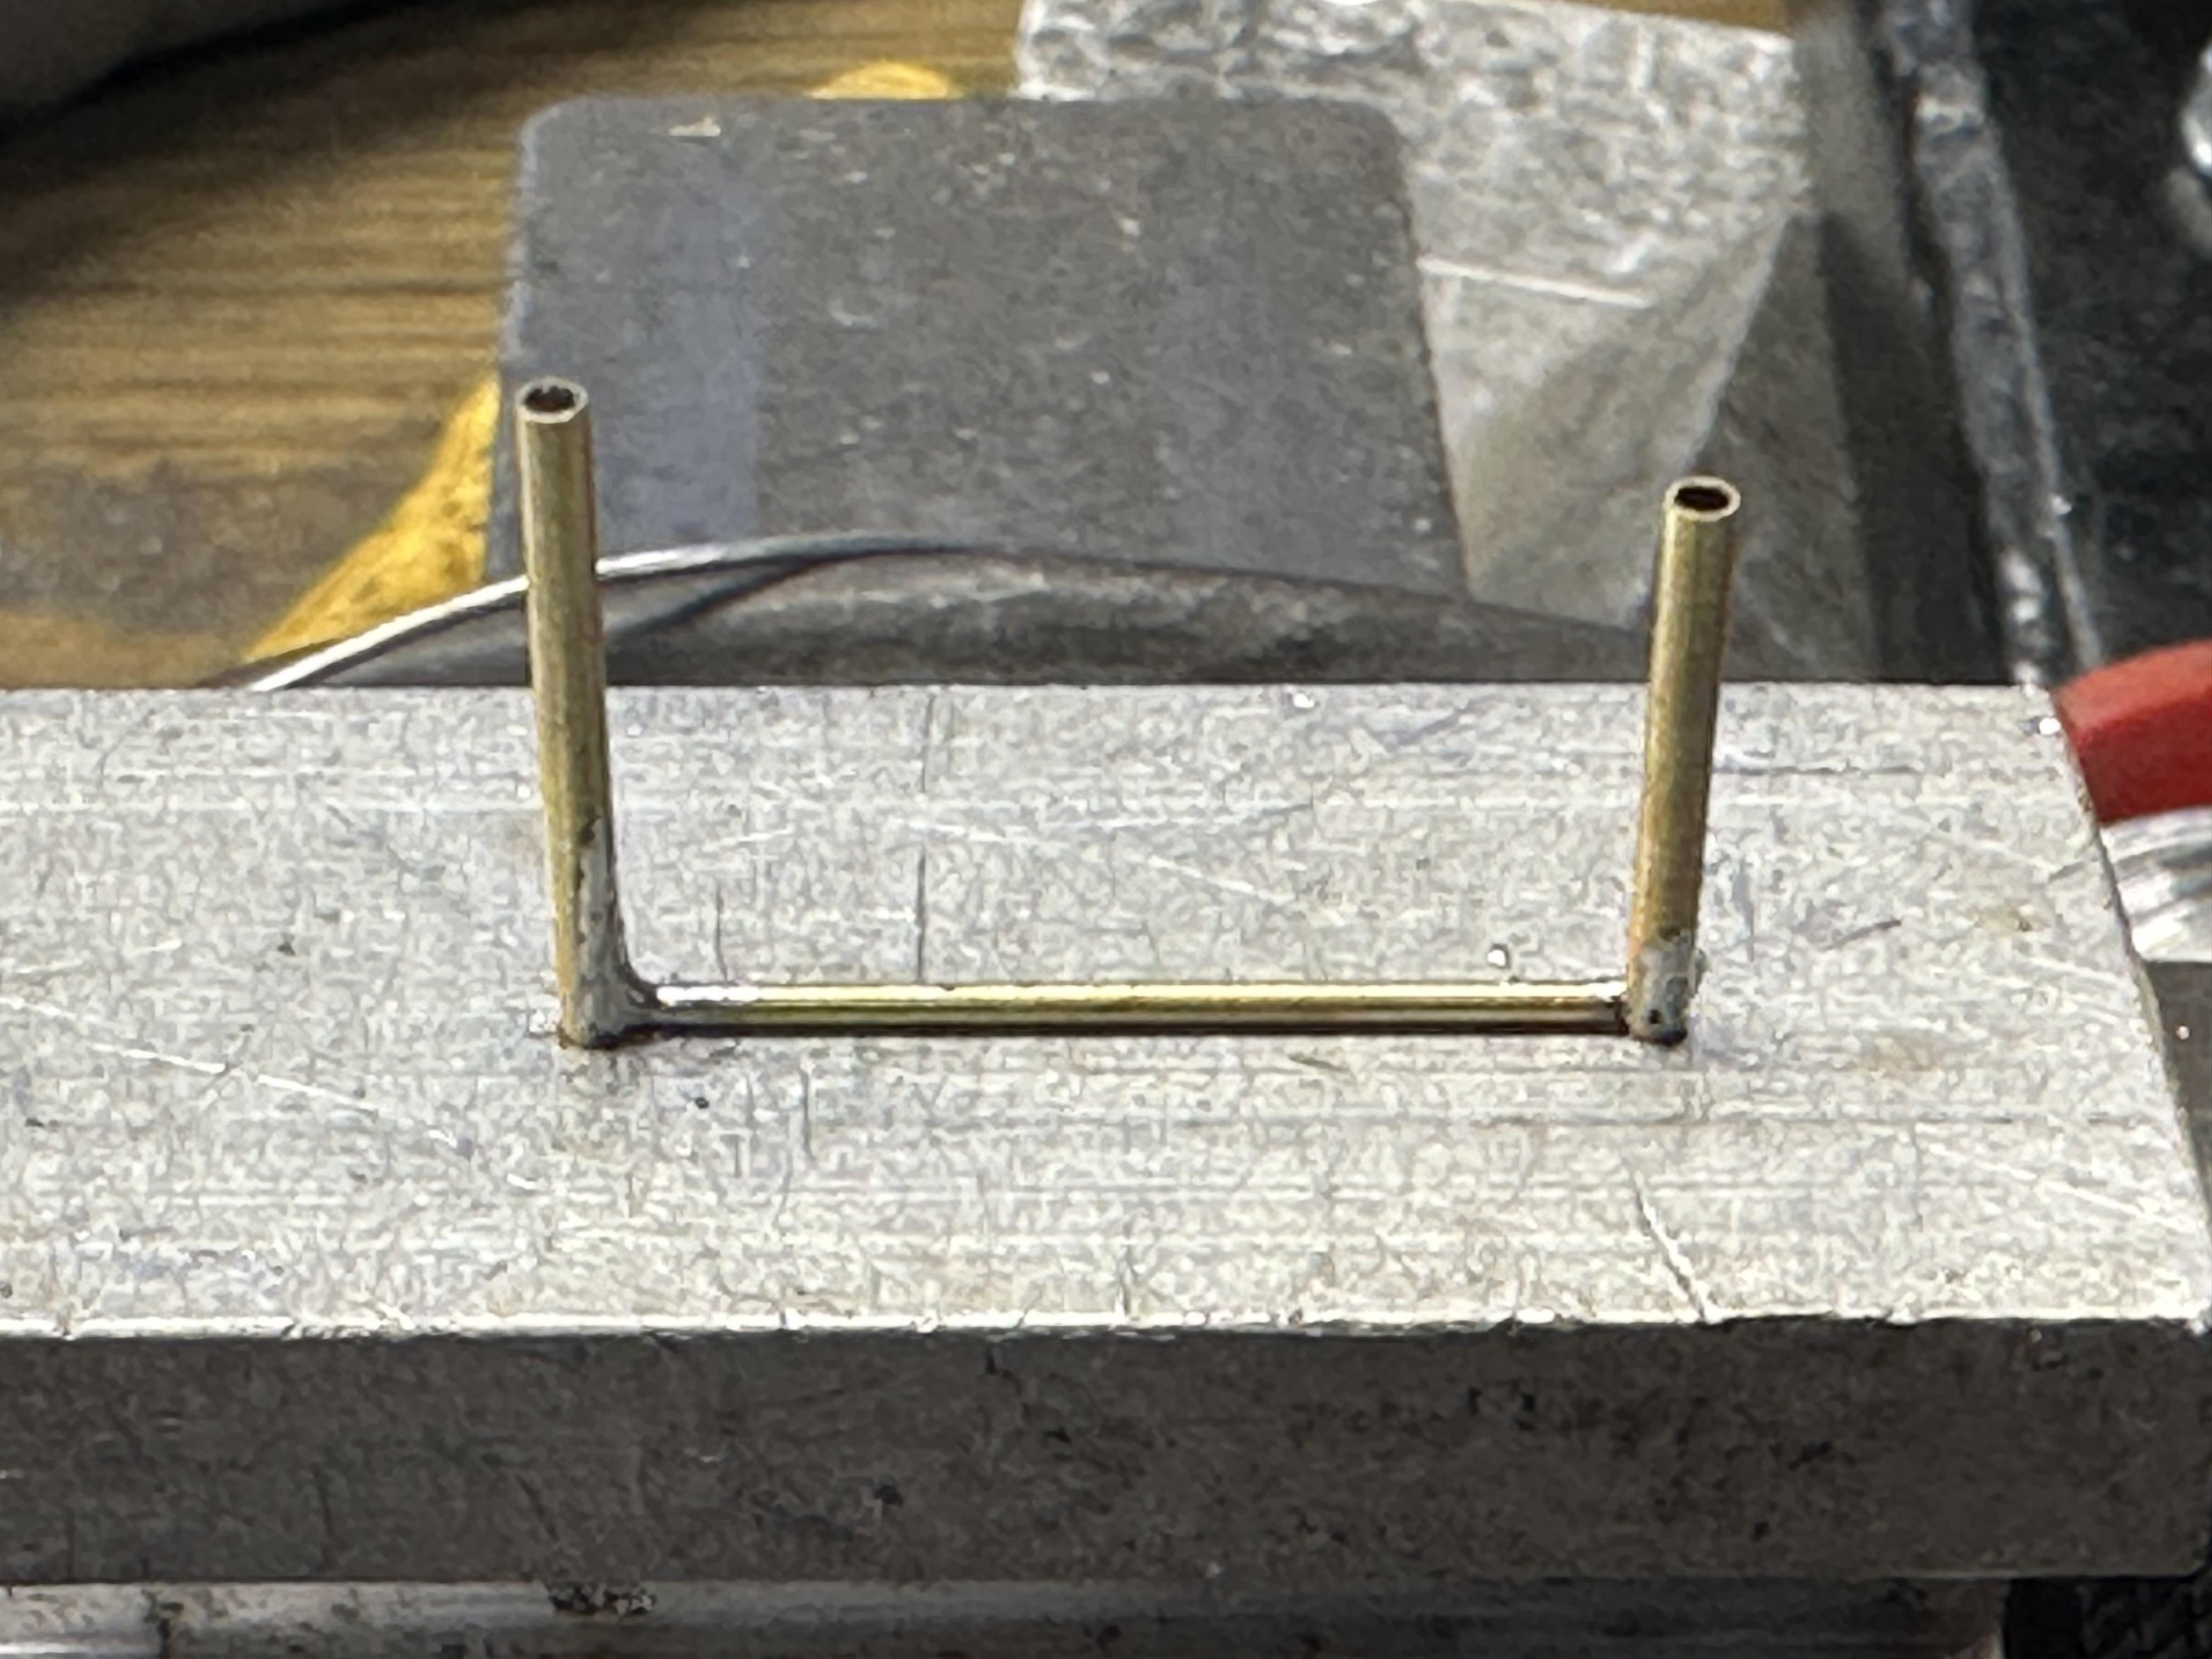
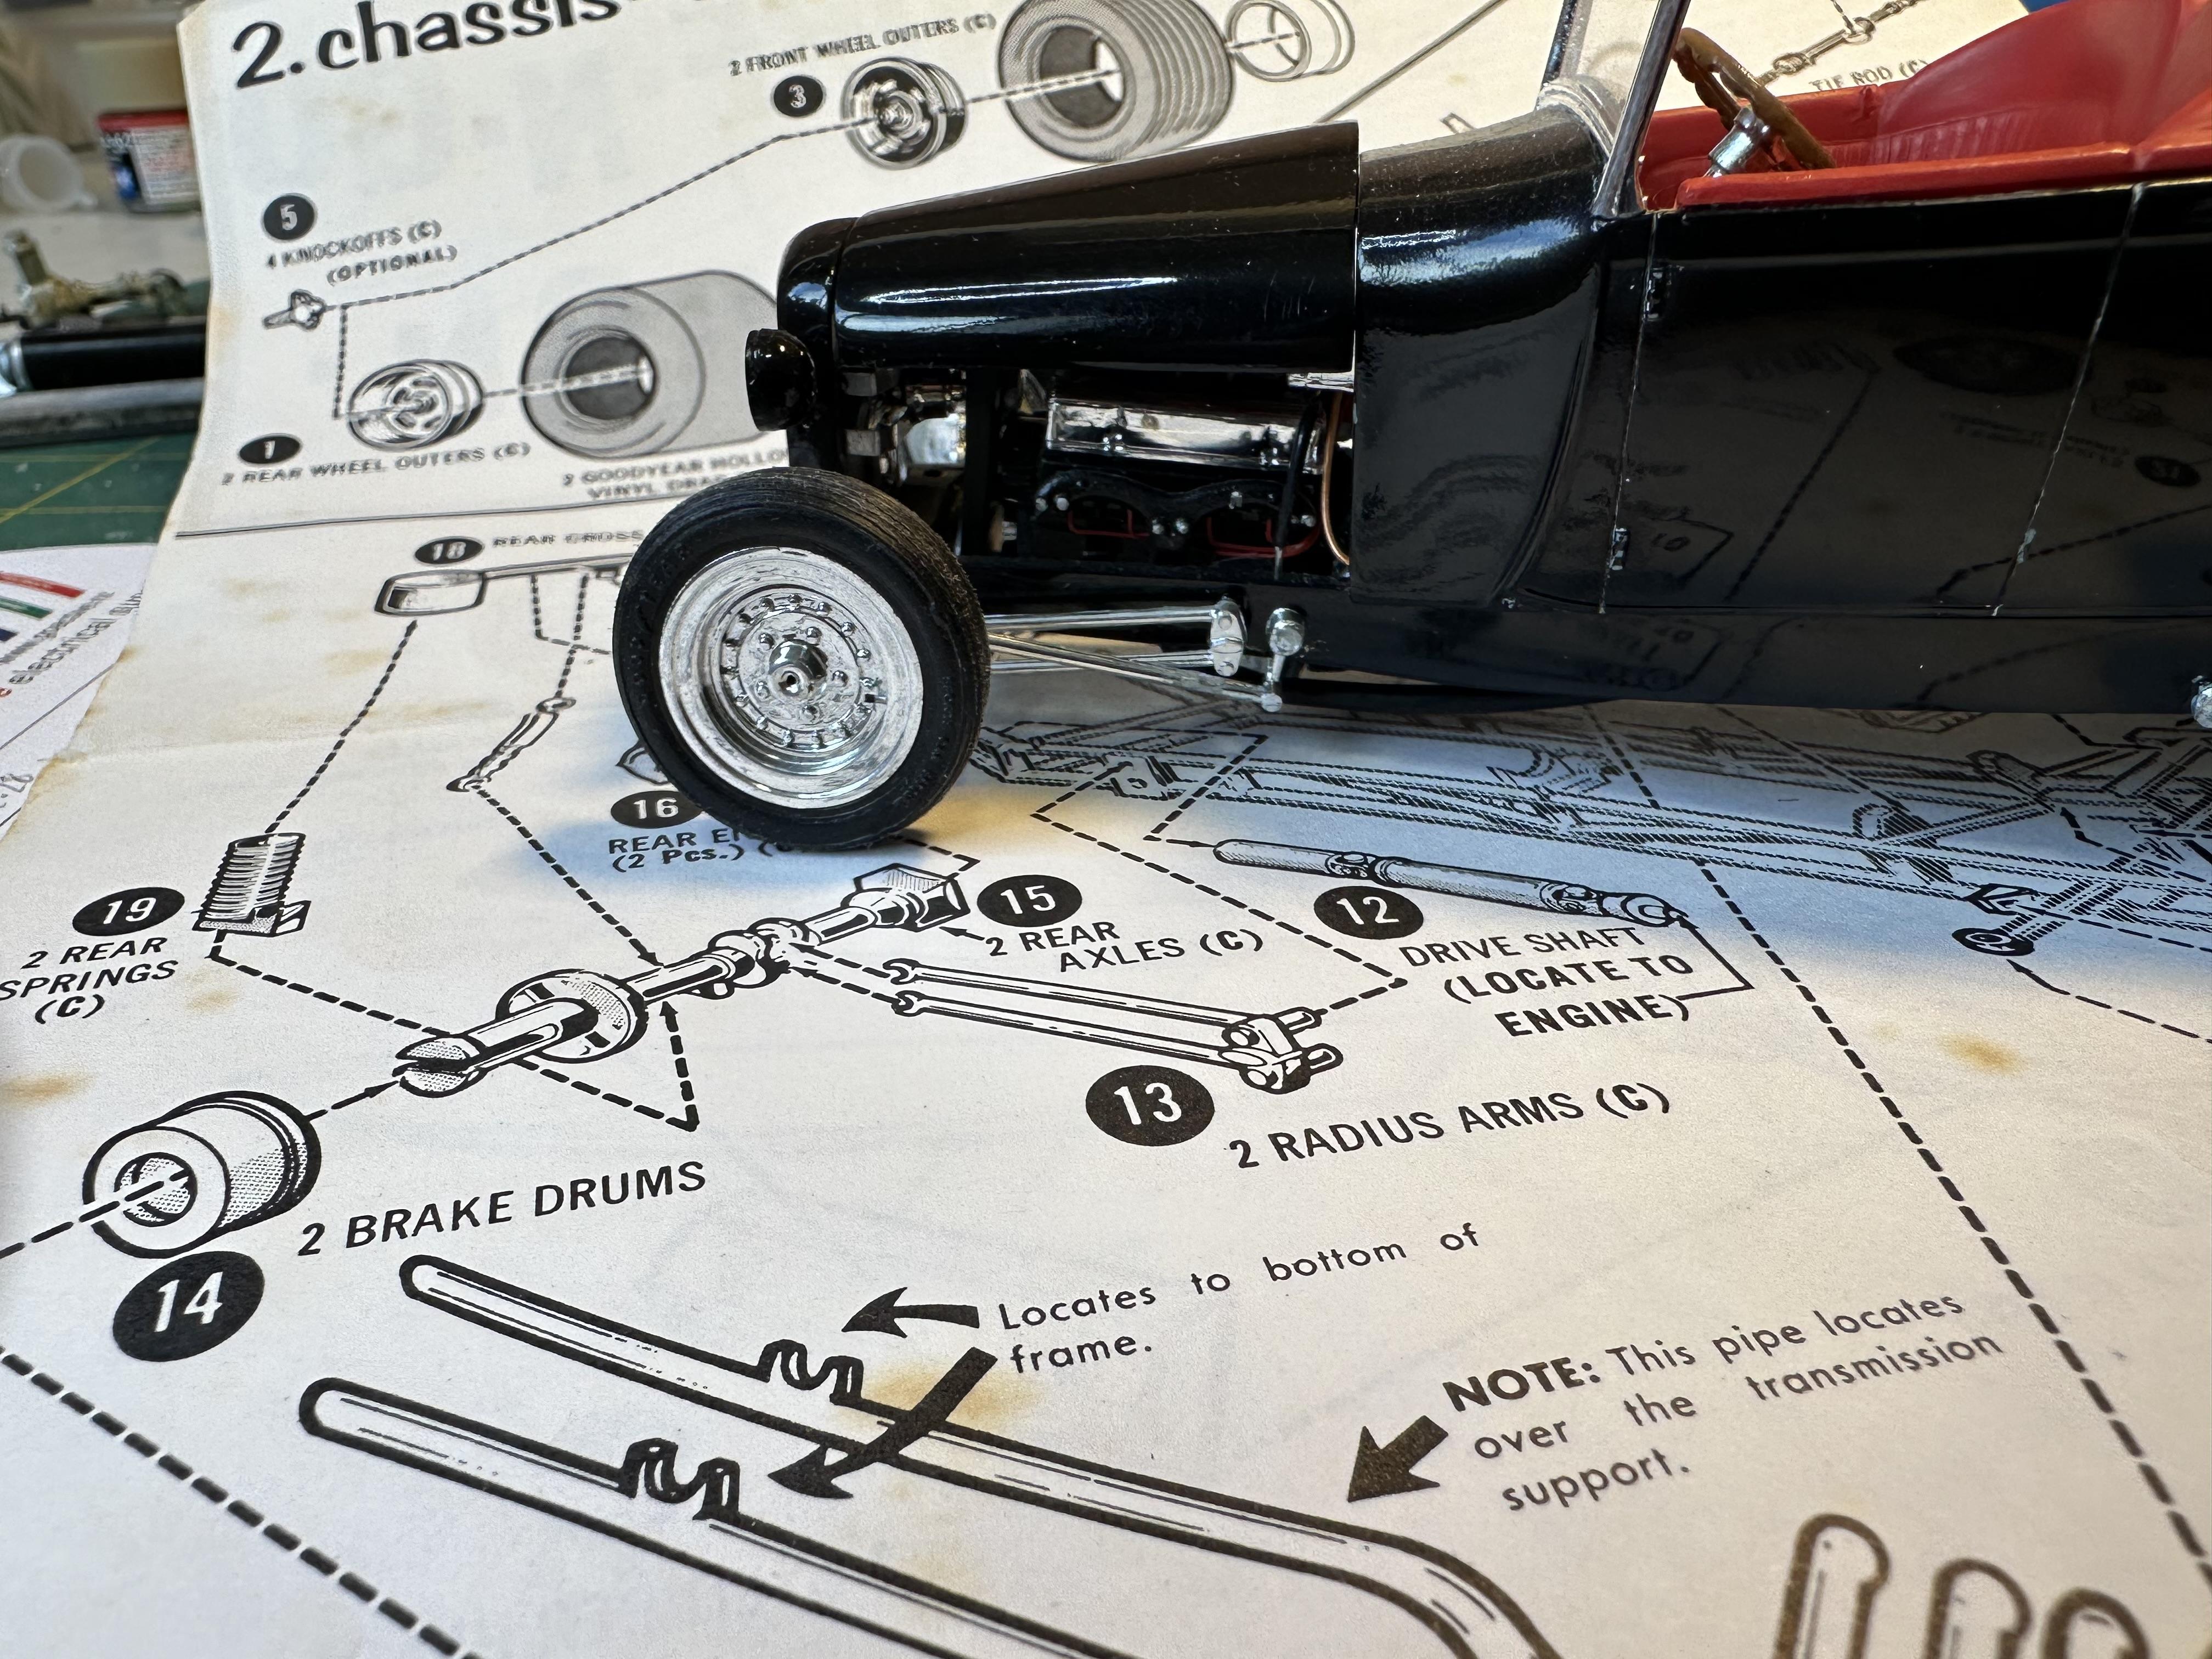
Its been a while since I last updated this post. Been on holiday and my wife has been in hospital so that pretty much took up all of the time. I have been plugging away at it mostly background stuff. Got 2K clear on the body and it has been colour sanded to 12k grit and I have the body rubbed out and polished I had to spend an inordinate amount of time cleaning up the chrome pieces - just about all of the suspension is chrome and a lot of the motor goodies too. There is a lot of chrome. The chrome tree had a real issue with mould alignment - not too much flash just poor alignment. So a lot of sanding was called for. Then a going over with a Molotow pen - my bulk refill has gone off so could not airbrush it successfully. When I was doing a head count of all the chassis chrome I found the rear radius rod missing from the box. So much for thinking it was complete. Any way I found where a set was used - I have this and two other parts cars in my parts bins and there none there either. So I made some up from brass rod and tube. I made a jig so that I could solder them together. Also made some pins by heating the end of a styrene rod to give me a mushroom head that I chucked in the Dremel to clean up This is where a set of radius rods ended up but is a way good of a build to go steeling them - and they have been modified Til next time - thanks for looking
-
Just when you think you are getting somewhere your model gets acne. Coming along nicely
-
‘21 Dodge Charger chassis color?
bill-e-boy replied to shoopdog's topic in Model Building Questions and Answers
Bill - that pix is just worth so much Is this same/similar to the Challenger as well? -
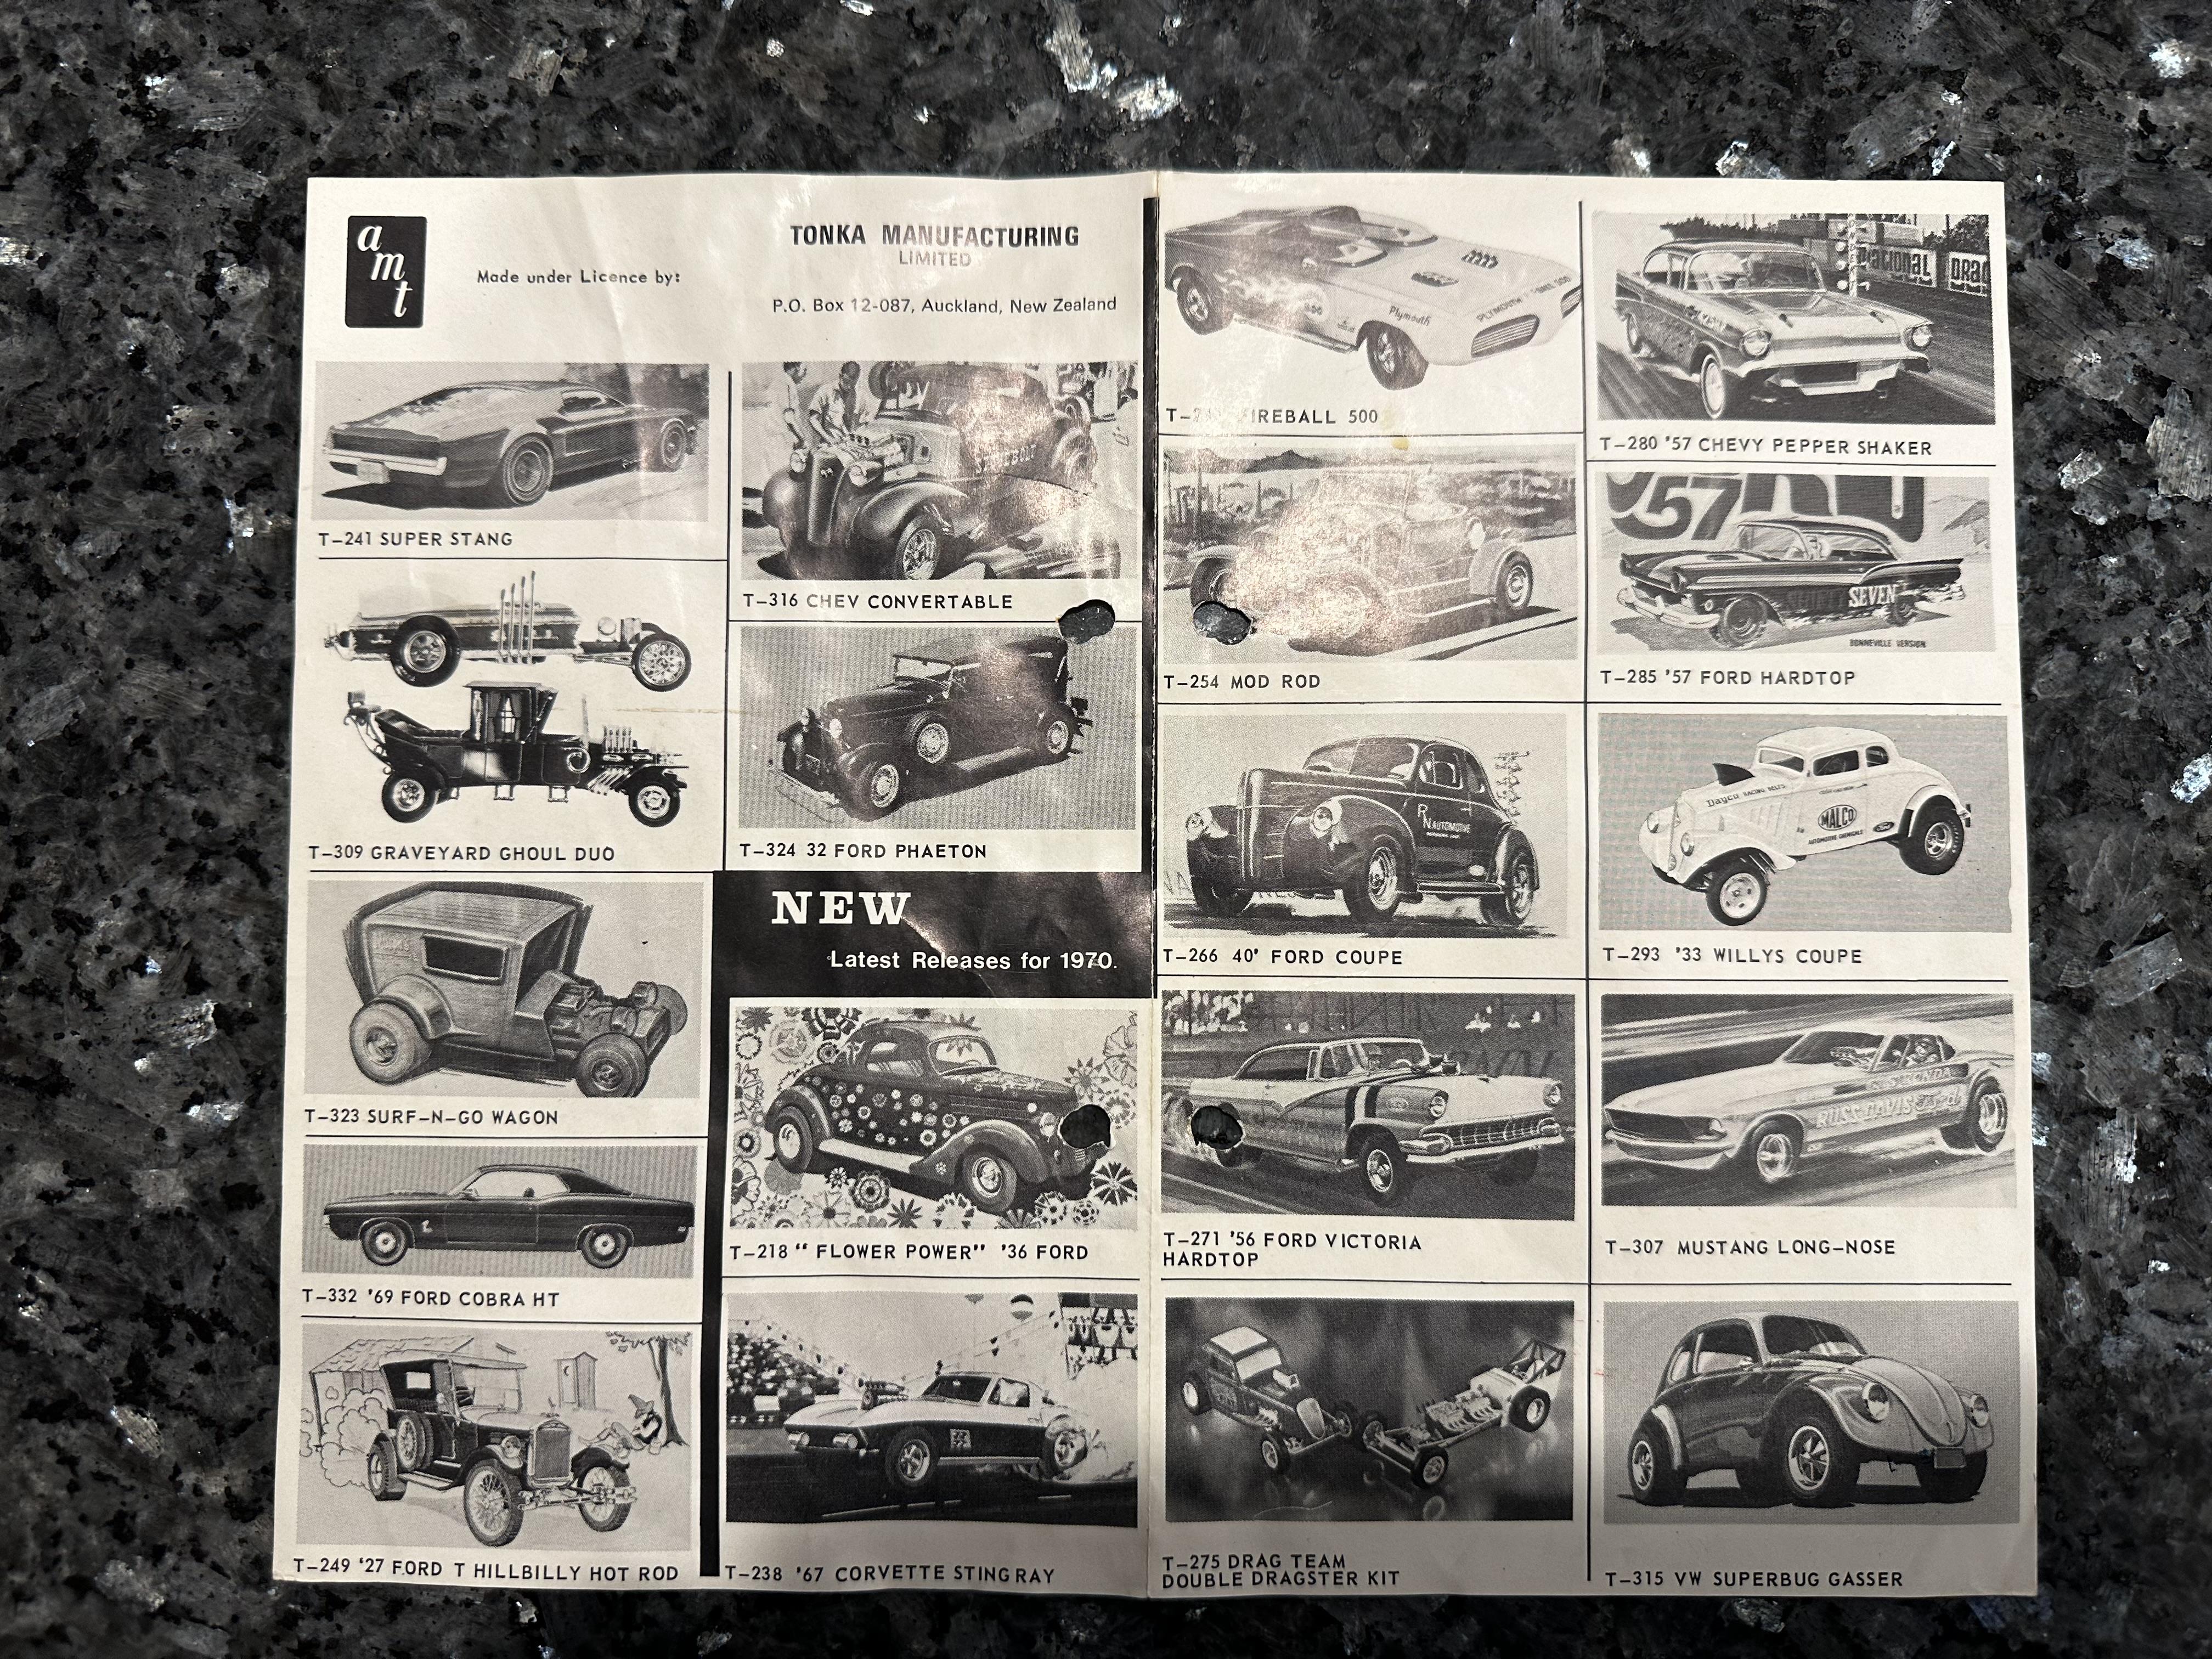
I am building this at the moment - rare to Americans as it was made in New Zealand by Tonka. We know these releases as NZ-AMT down here. I picked it up as a started kit and it has some parts missing. I have been able to get most of everything as I have a couple of incomplete built ups in my parts bins It was part of this catalogue available late 69 through 70 Of those I have built the following Surf-n-Go - two built and smashed now in parts bin and the one under construction 32 Phaeton - 1 in bits and one rebuilt and under glass 27 T Hillbilly Hot Rod - under glass 37 Chev Convert - under glass 56 Ford - rebuilt and under glass 57 Ford - smashed and in parts bin Mod Rod - one built as fendered roadster and one as an updated Ala Kart and at least one in the stash Double drag team - one pirated for parts and one unbuilt in the stash I have bits and pieces of a few more as I have scored a few parts boxes over the years I also have a couple that were built by my brother but they are broken and live in the parts bin Super Stang Grave Yard duo Long Nose Mustang There was later NZAMT release but I will need to dig that info out
-
Looking sharp Tom
-
And difficult to heat up to red heat too
-
Sometimes we set the bar too high but it is where we should be I feel. I like the rear roll pan - I fitted one too my Tudor with the Vickie chassis as there a big void to fill. With your wiggly rear end and roll pan it should make the look of rear of the car come together
-
The rear end looks very advanced as you suggest and looks kinda cool. I picked up a 3d printer a few months ago and have had a little play with it. First attempt was a bomb out but second showed promise. Problem is for me to get over the "short arm/long pocket syndrome" and fork out for some files and to come to grips with all the software palaver. Also being a digital agnostic to some degree does not help. In another world I live with a TT that plays those old (and now new!) style 12" black and round things and hate those little shiny disc thingies with a passion. With tubes I might add. I use computers more than most of my contemporaries but are at an age where I have lived in both worlds with and without. I suppose we would not be communicating with likeminded people on the other side of the world if we did not have access to computers and the interweb - but!!!