bill-e-boy
-
Posts
900 -
Joined
-
Last visited
Content Type
Profiles
Forums
Events
Gallery
Everything posted by bill-e-boy
-
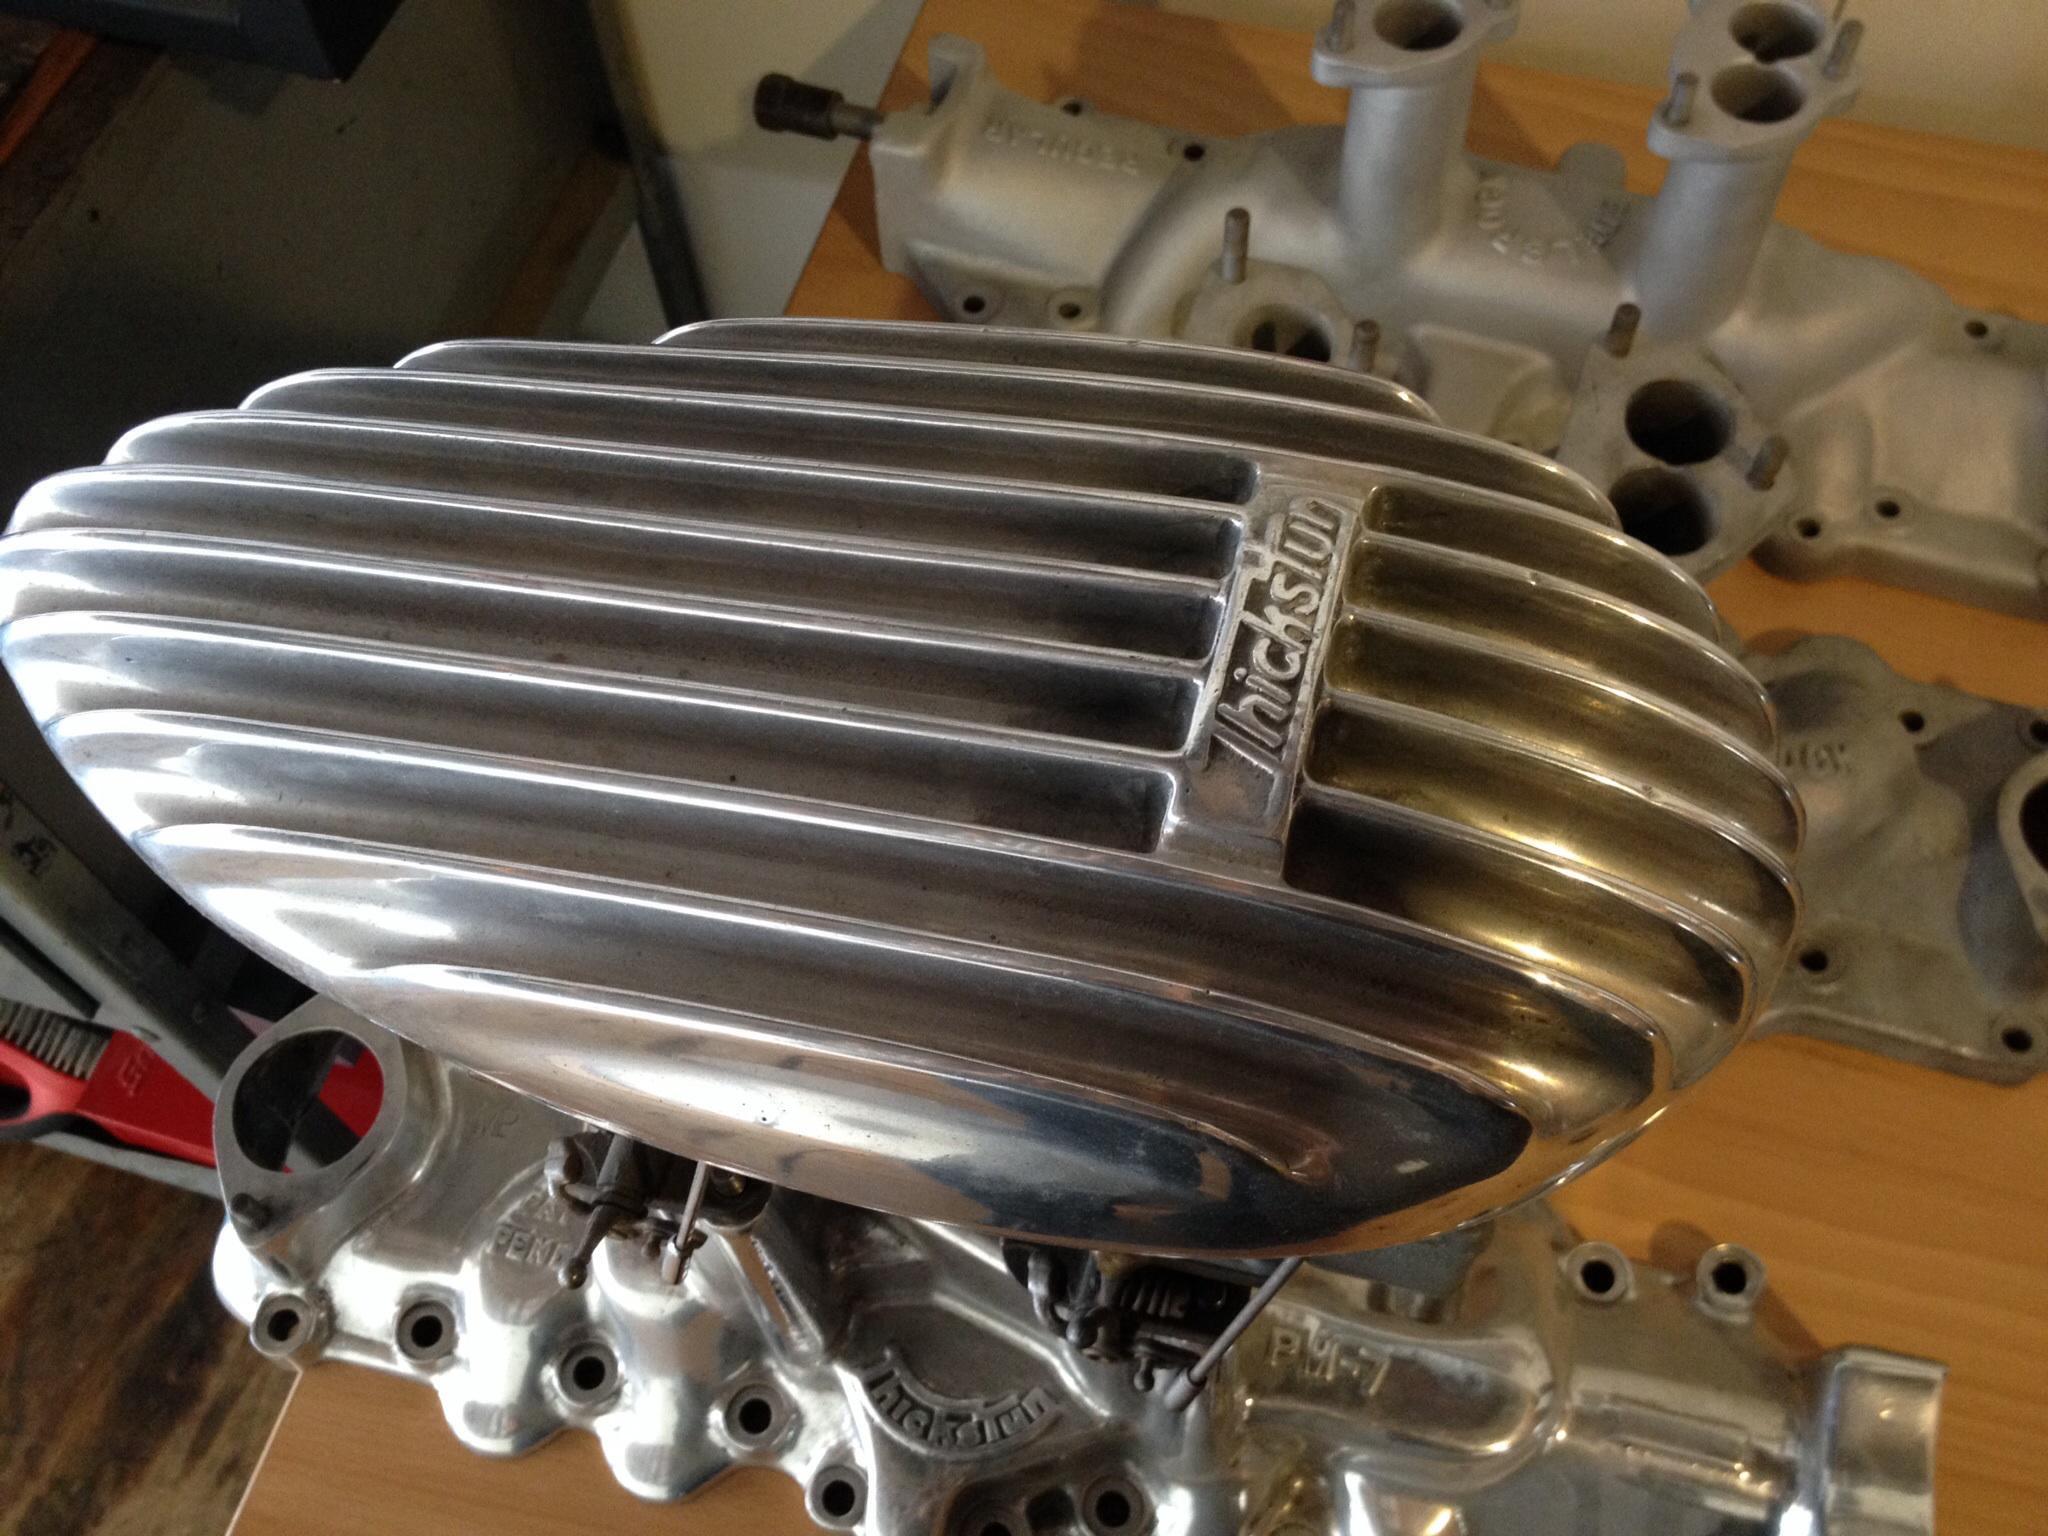
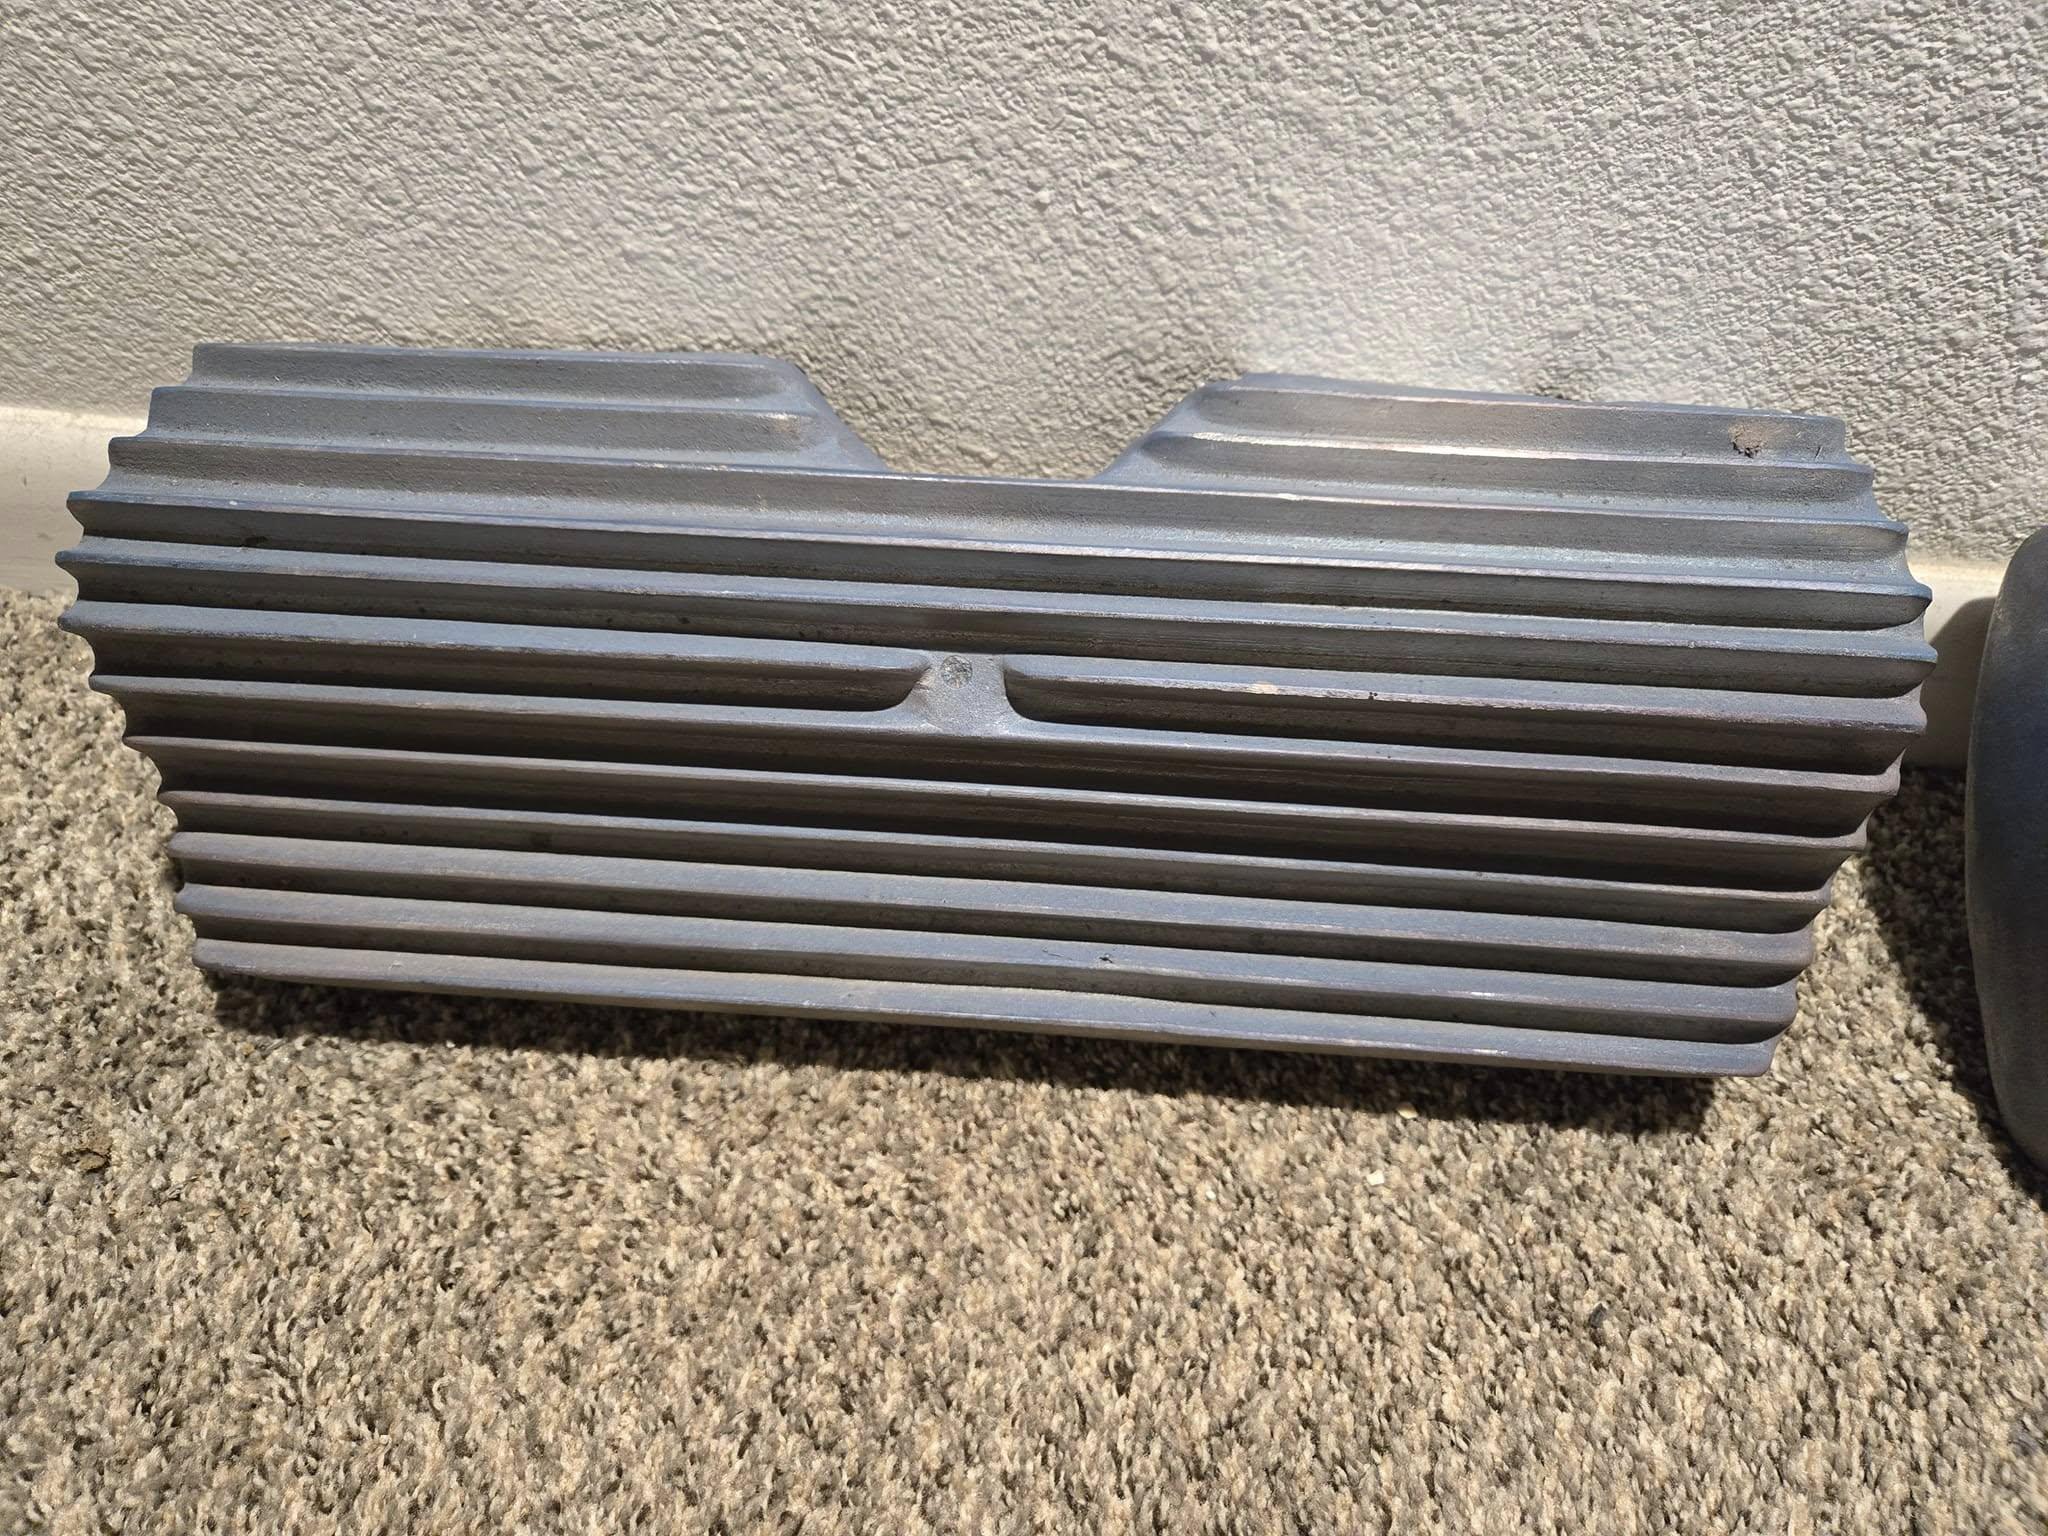
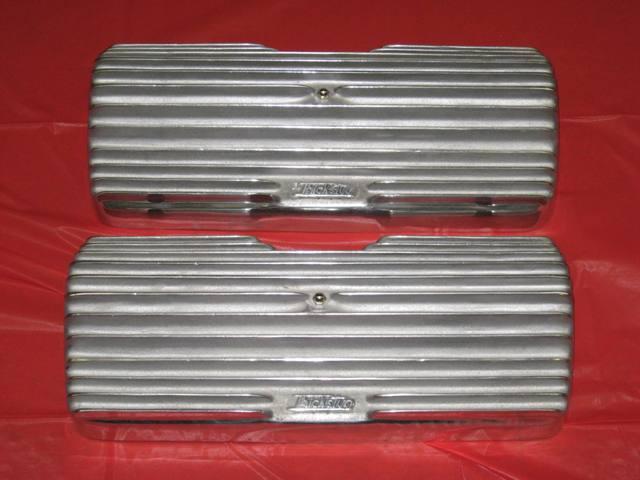
Kool project. What is the gearbox you are using as I have a chopped 5W I am gathering parts for and they are very similar to yours, eg Thickstun gear . I am looking at using the Sedan flat motor but don't want to run with the attached auto. By using a long tail shaft manual box you don't need to move the Revell chassis K member as it is quite a bit further back than on a stock chassis. Will be watching with a lot of interest Some Thickstun ref pix for you that I sourced from the interweb. The black and red motor is from the Speedway (Bills) collection. A wee photo bomb

-
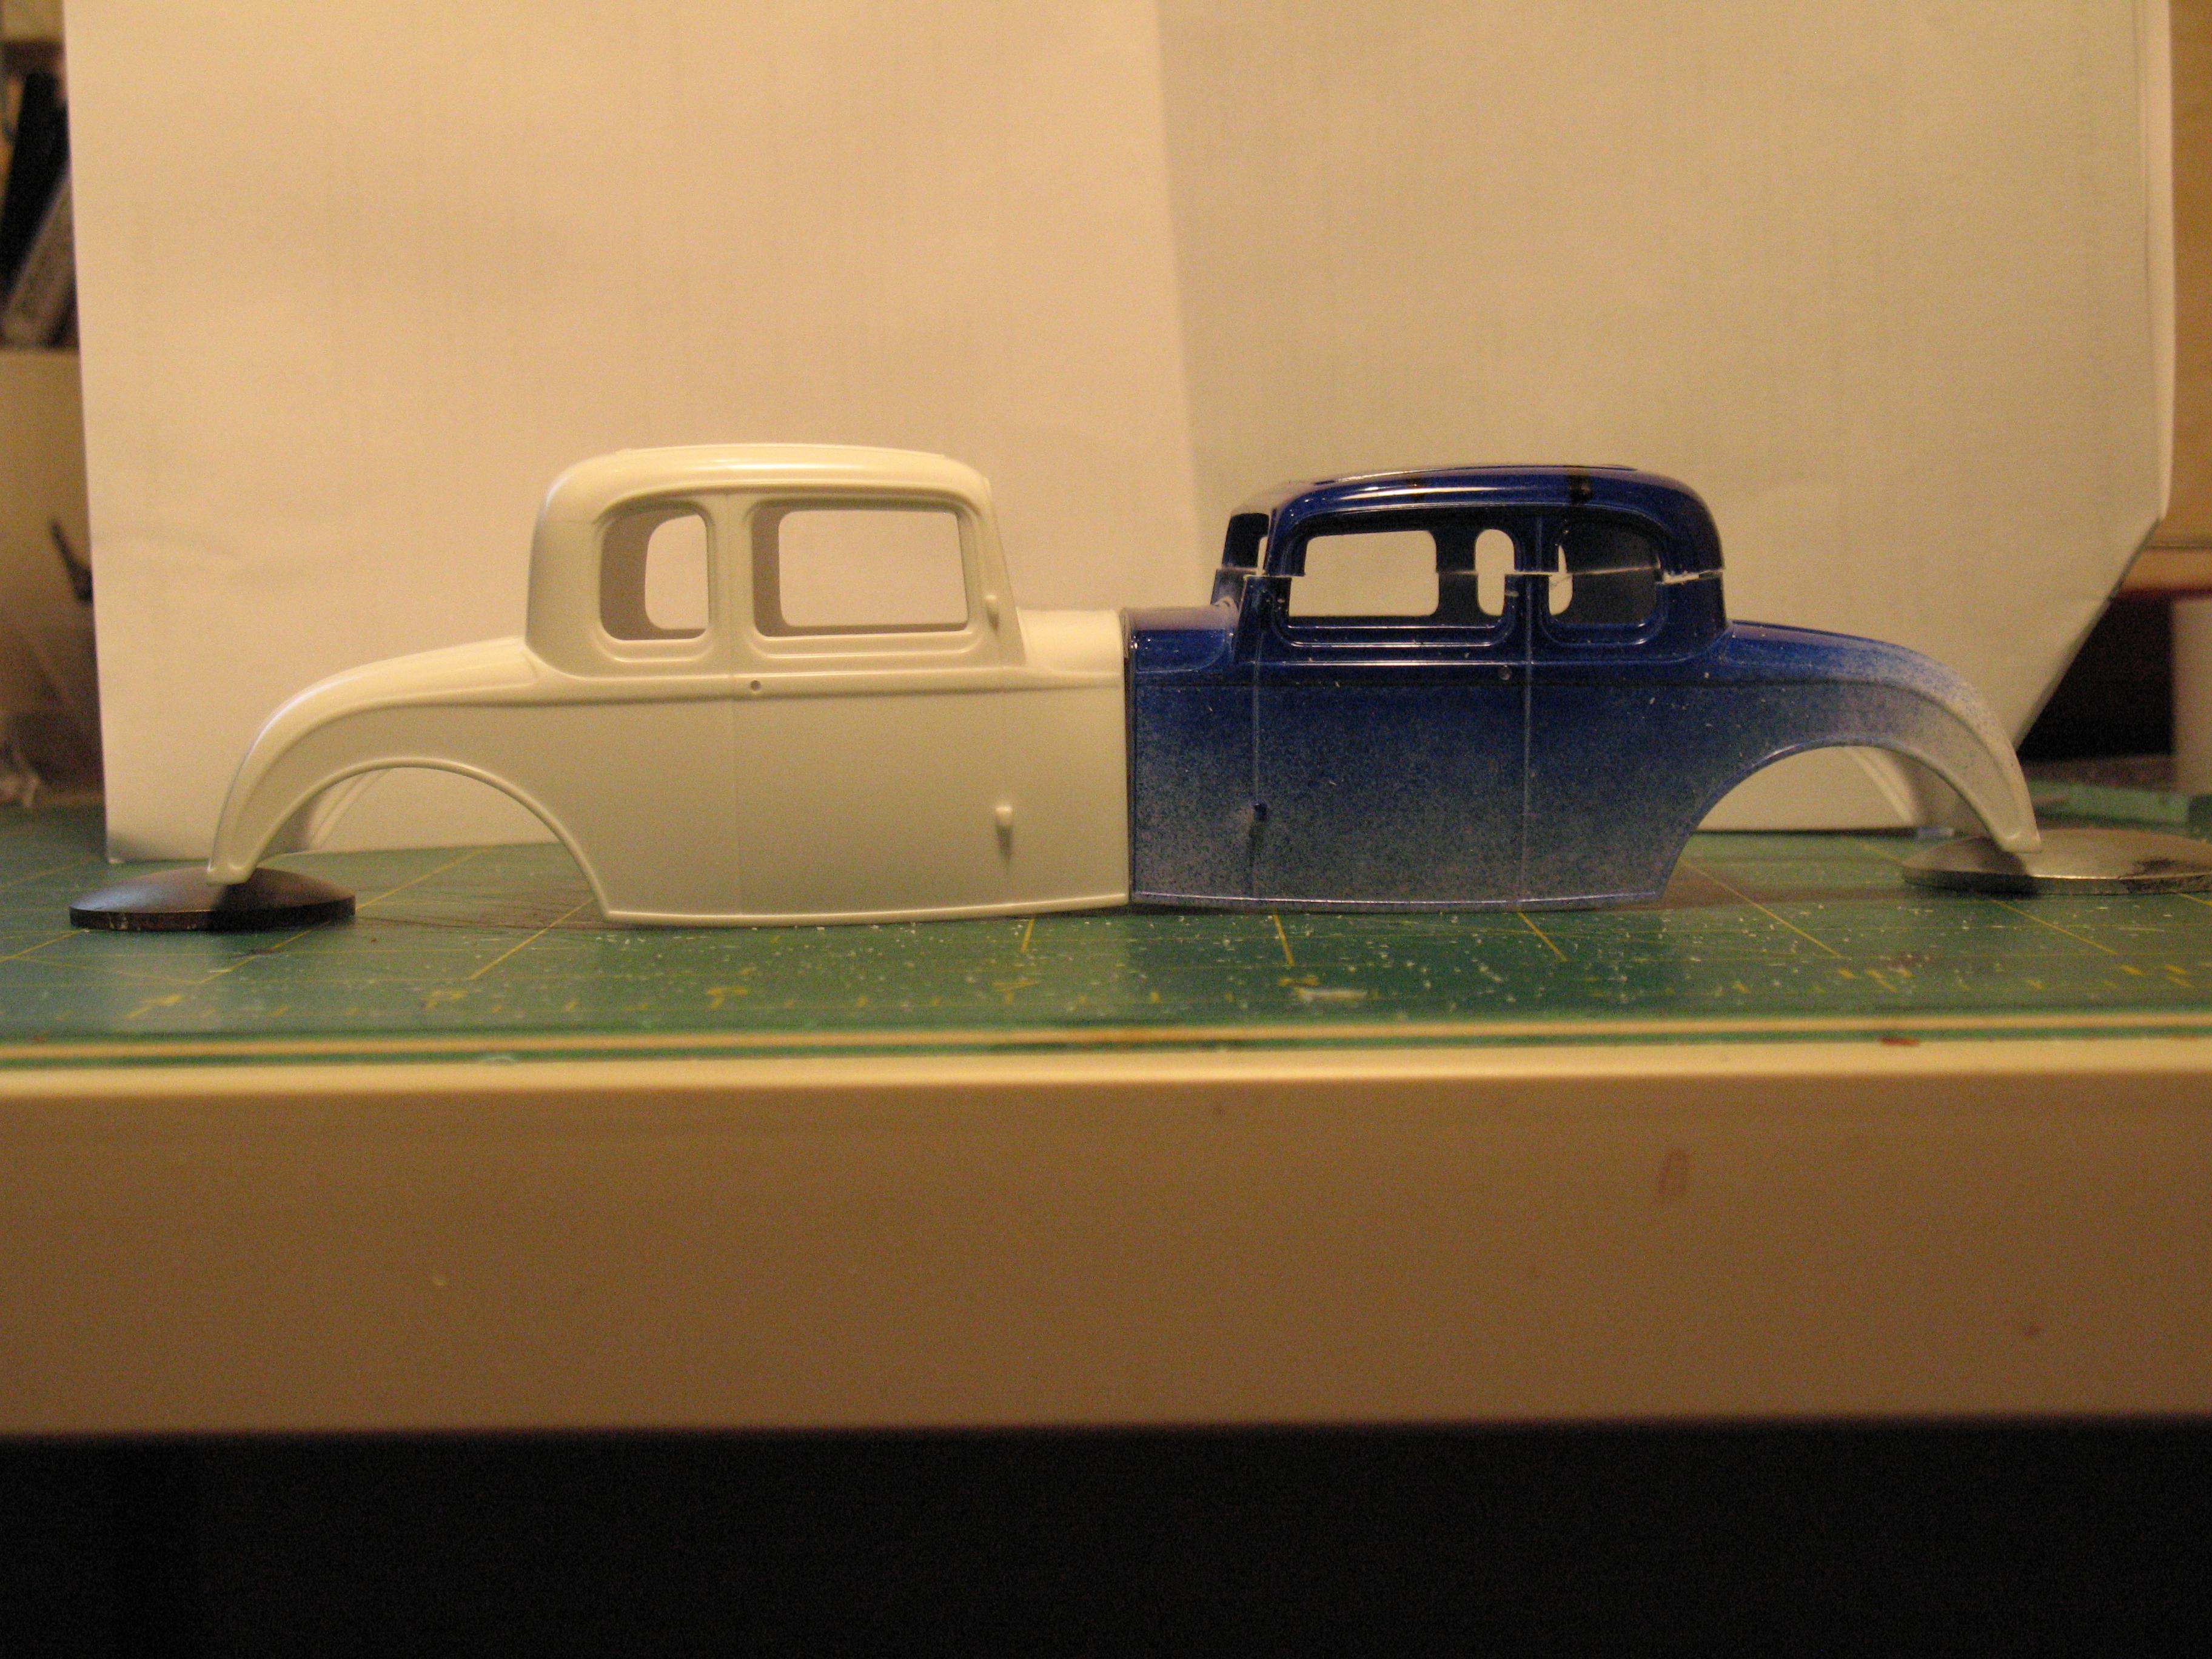
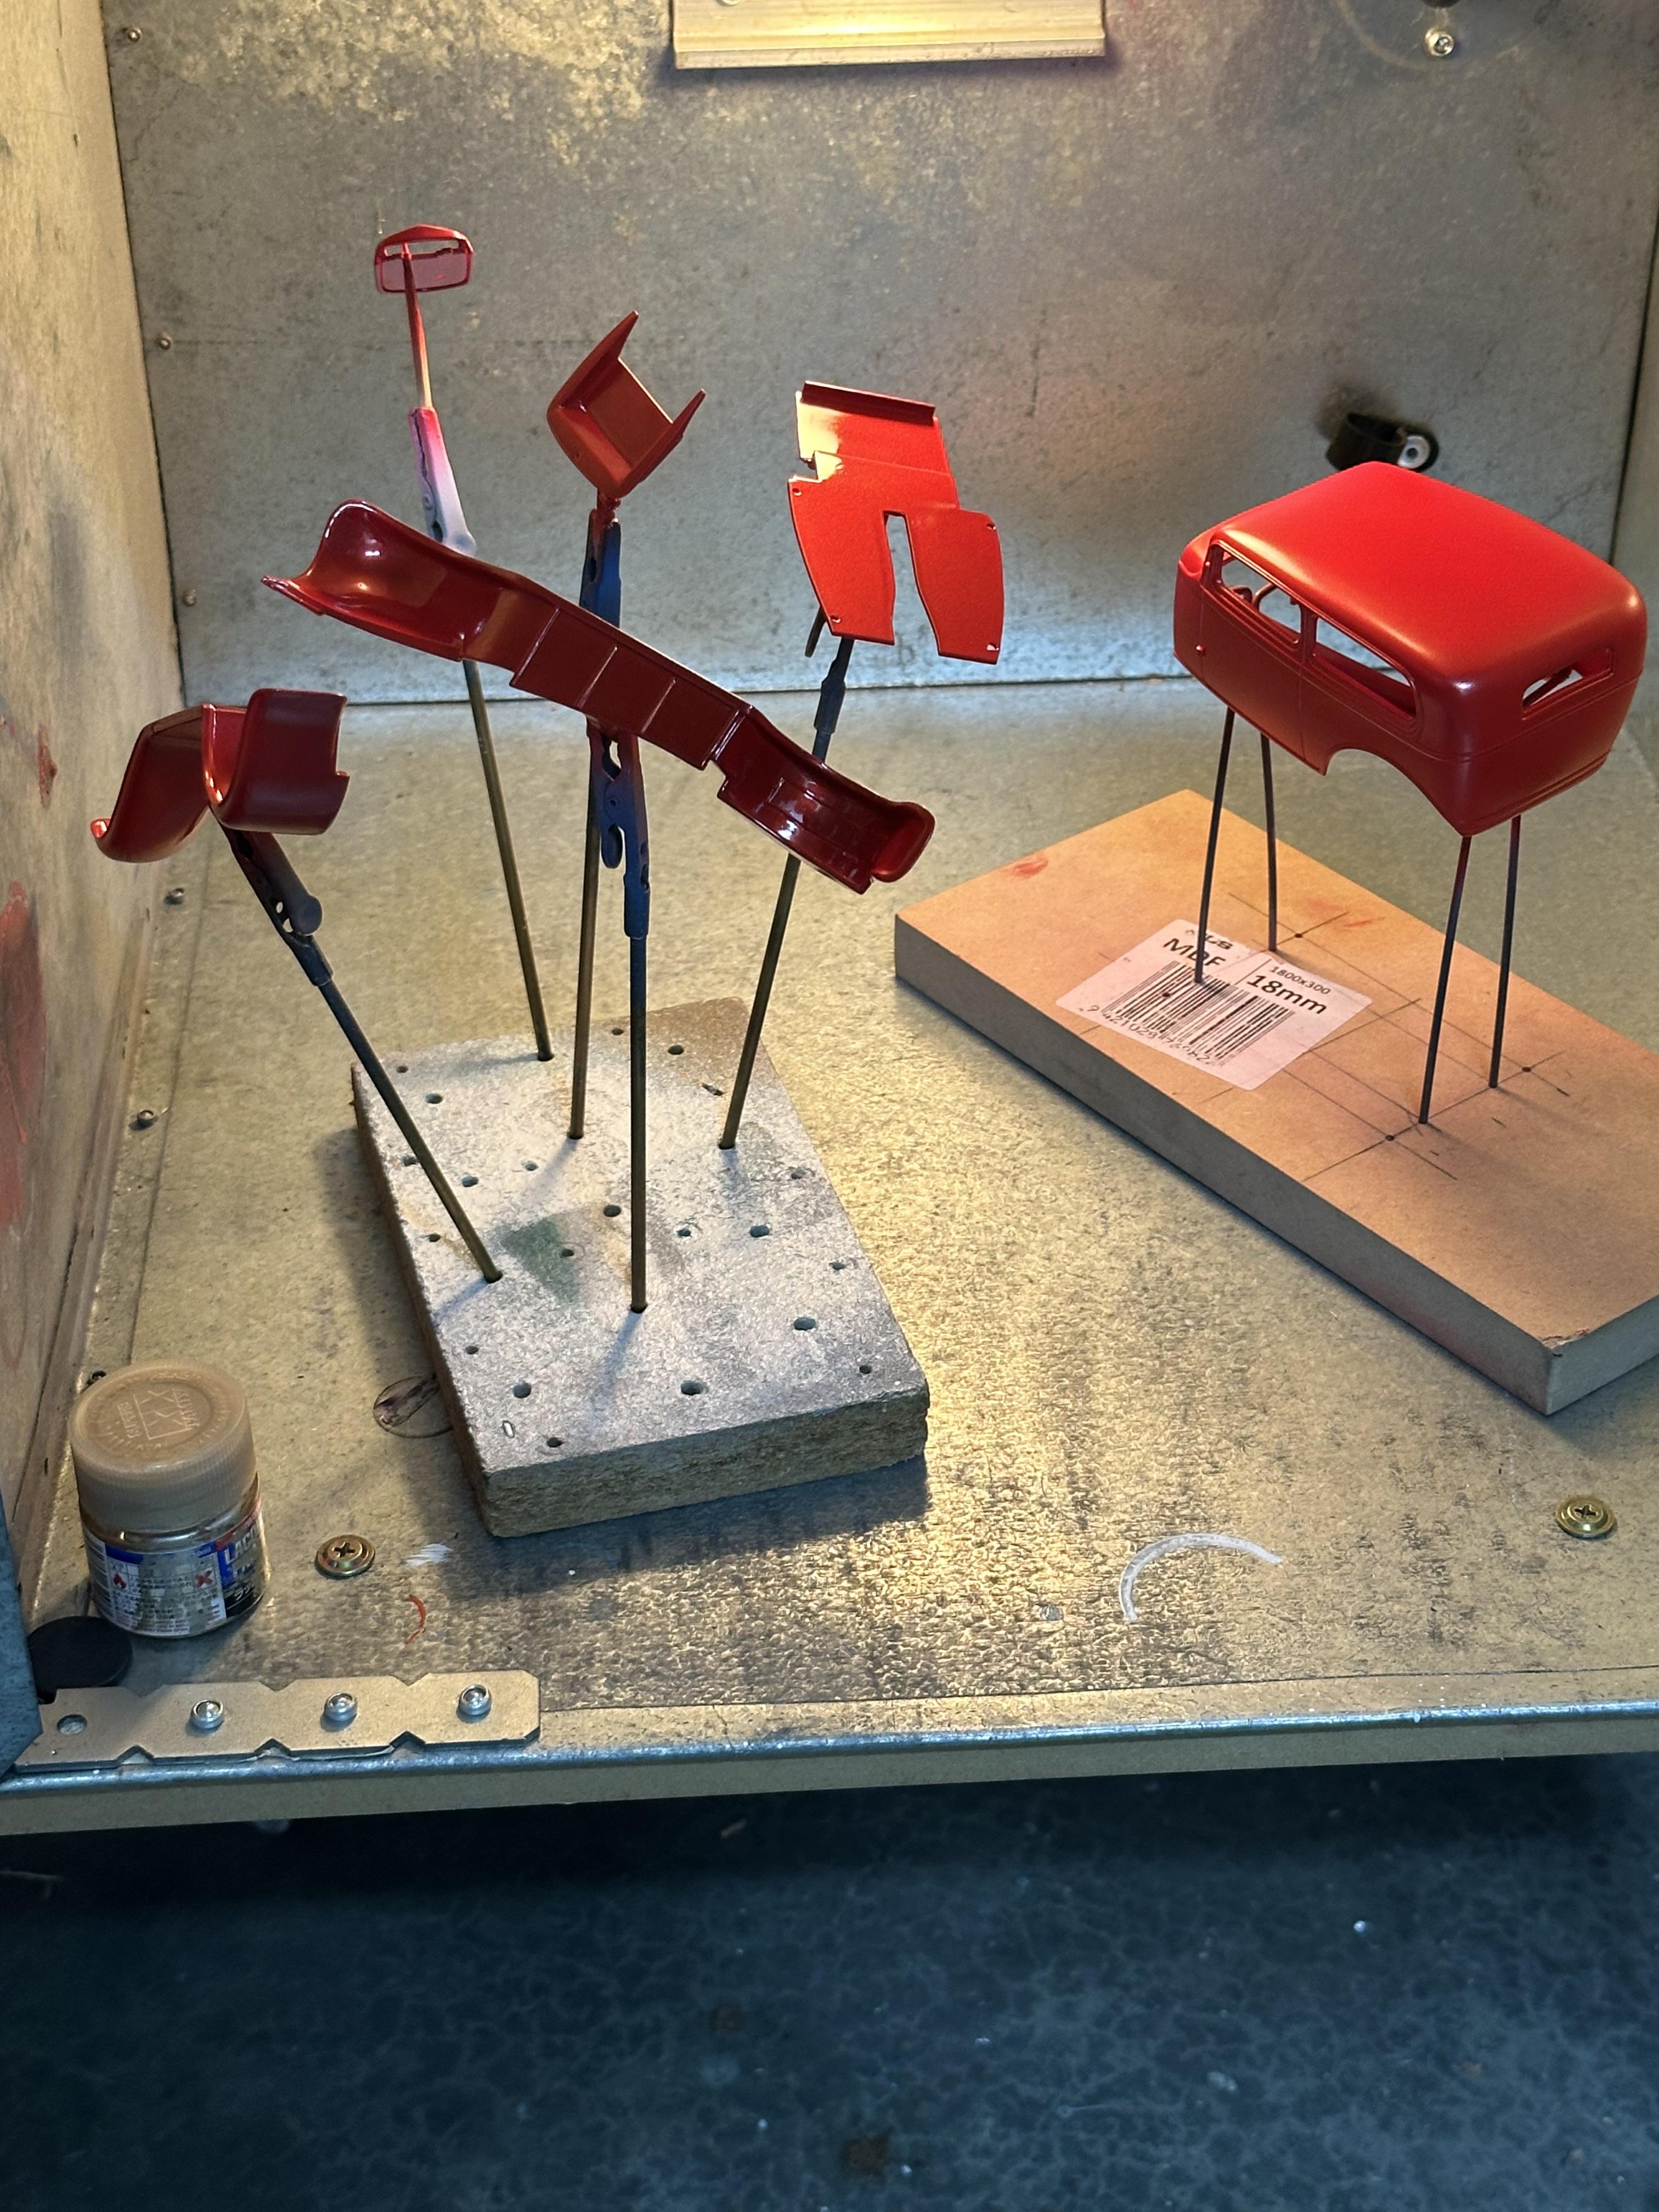
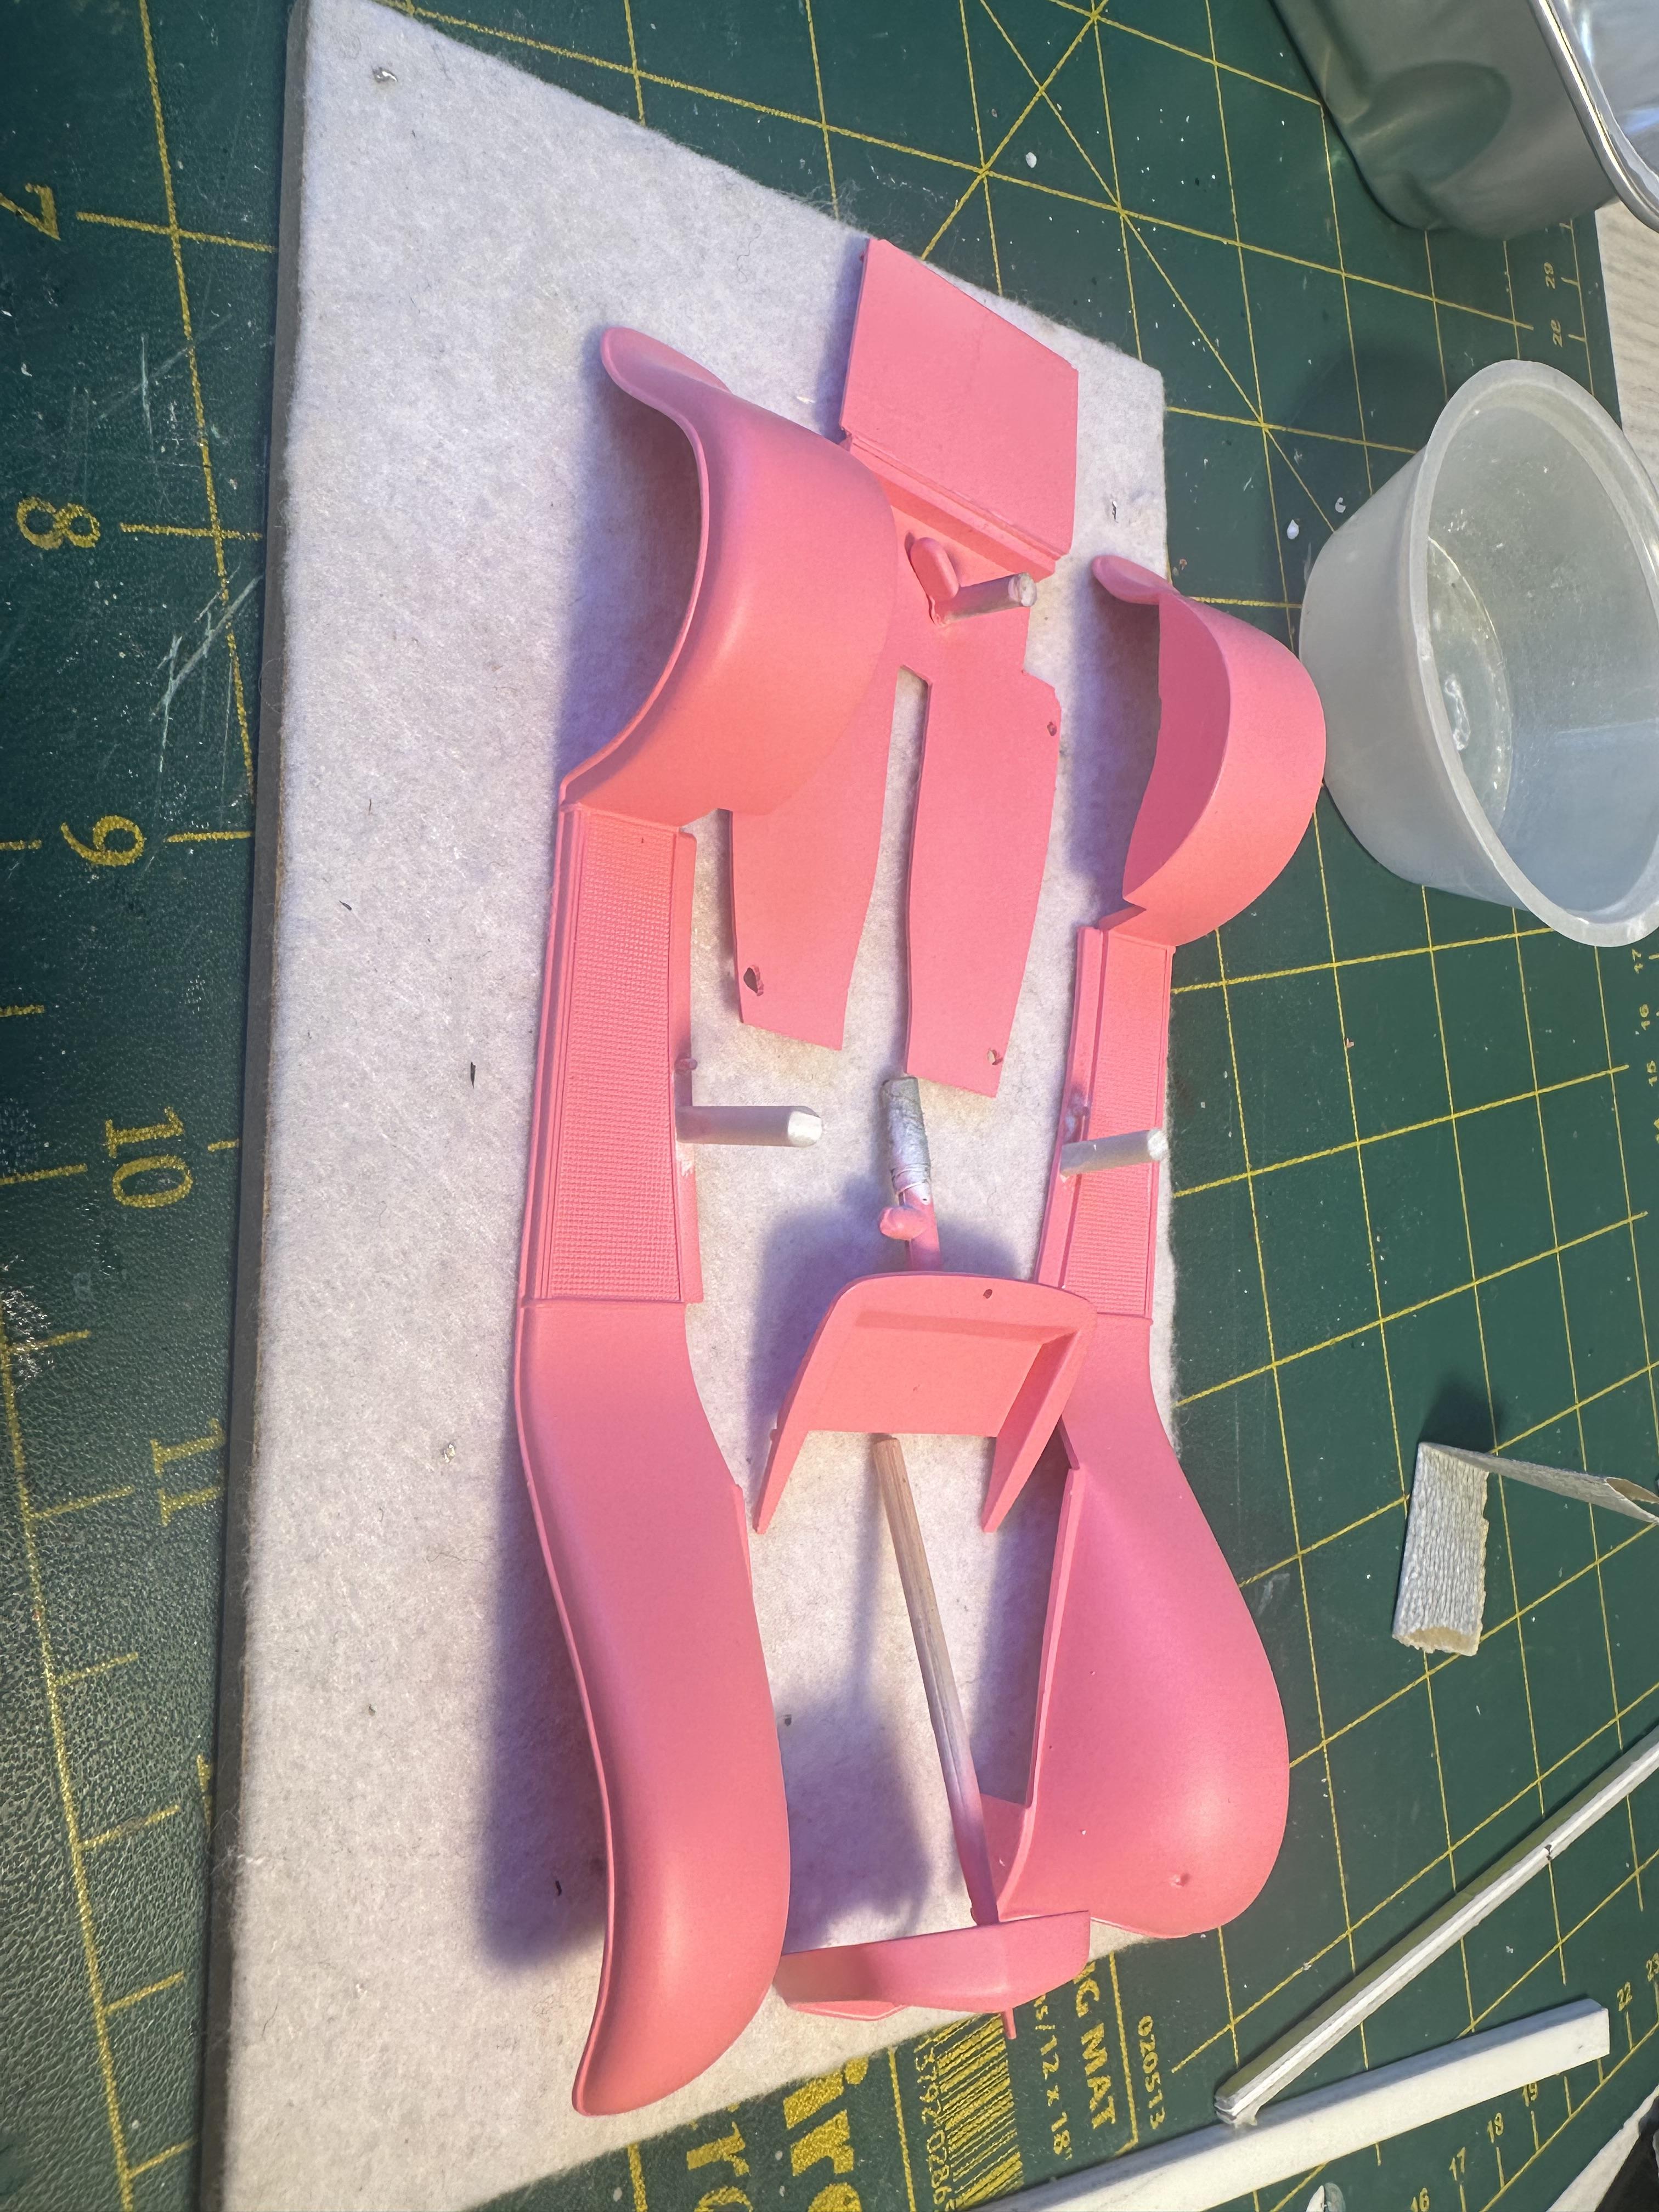
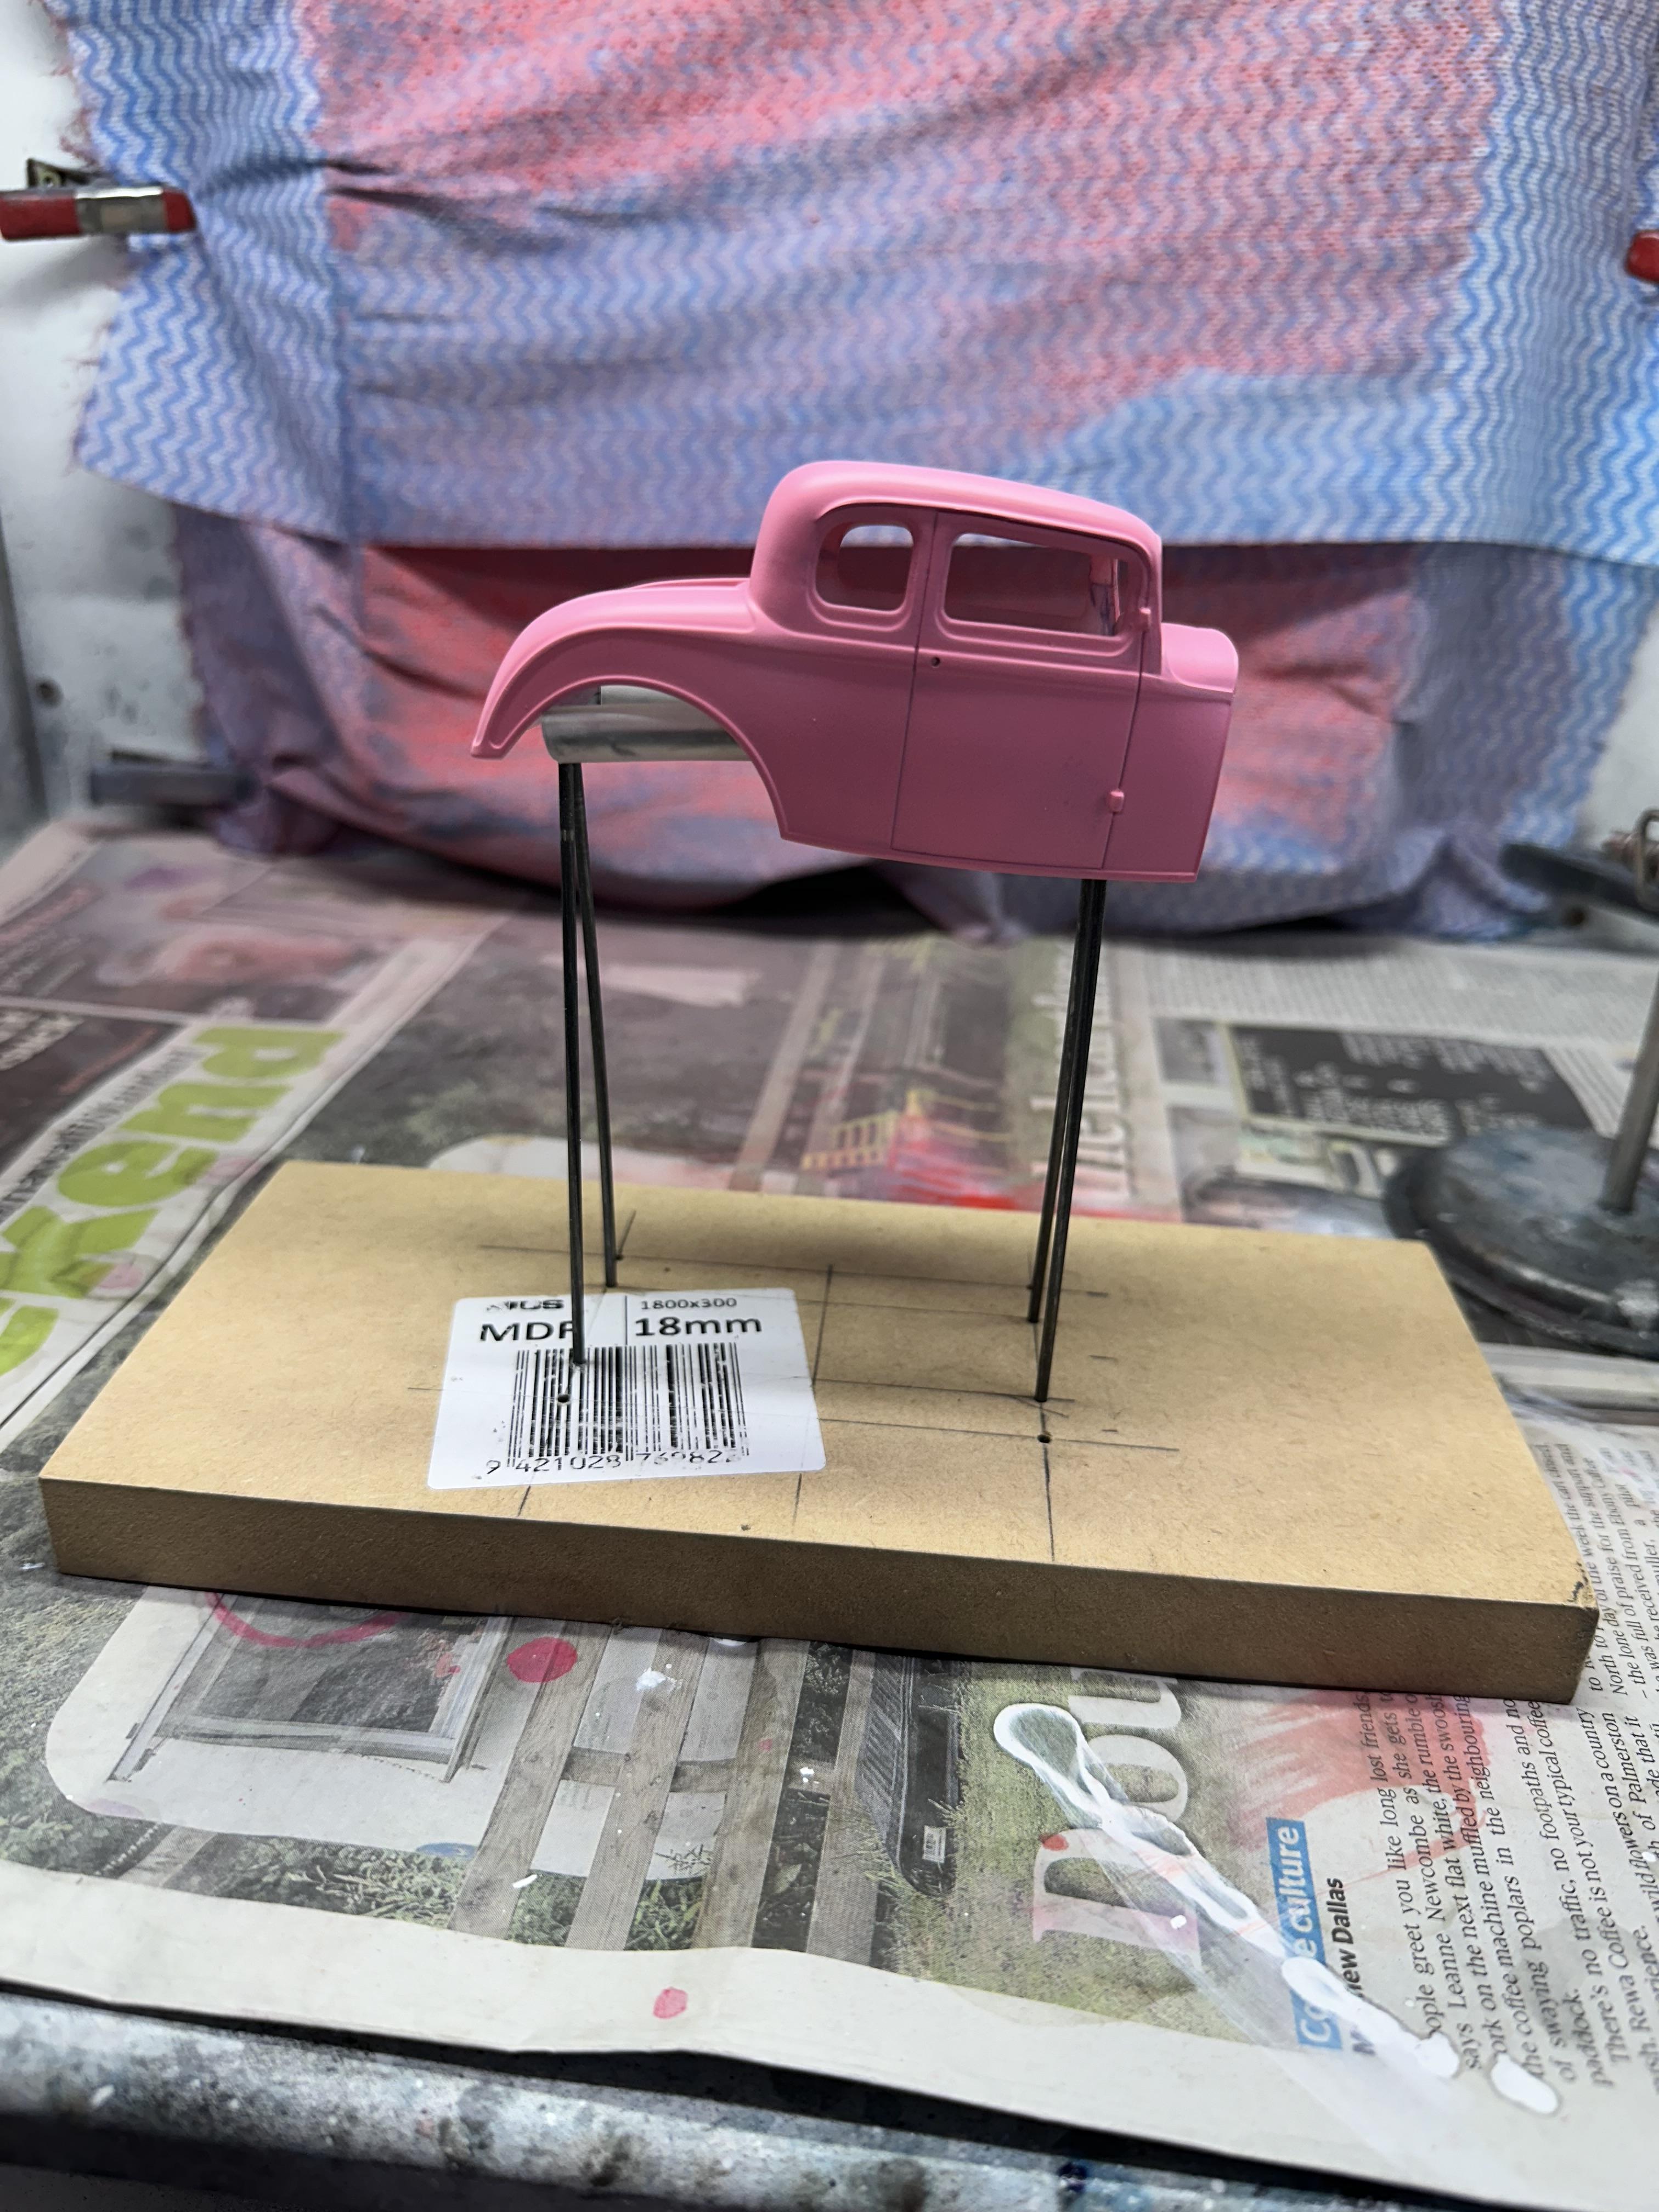
Body in the paint shop Fenders, firewall, floor boards have been clear coated. The body is in colour after a pink guide coat and a flat red base coat. I need to sand some goobers out before next coats. Meantime curing in the hot box
-
Looking good Kit
-
1966 Dodge Monaco 500s...what was, and what might have been....
bill-e-boy replied to tim boyd's topic in Model Cars
A couple of nice Mopar builds Tim along with a good informative back story -
Lots of good work happening here. Will be following
-
What they all said. I did one years ago based on an article in one of the hot rod magazines and it is exactly as how you have done yours. Good work
-
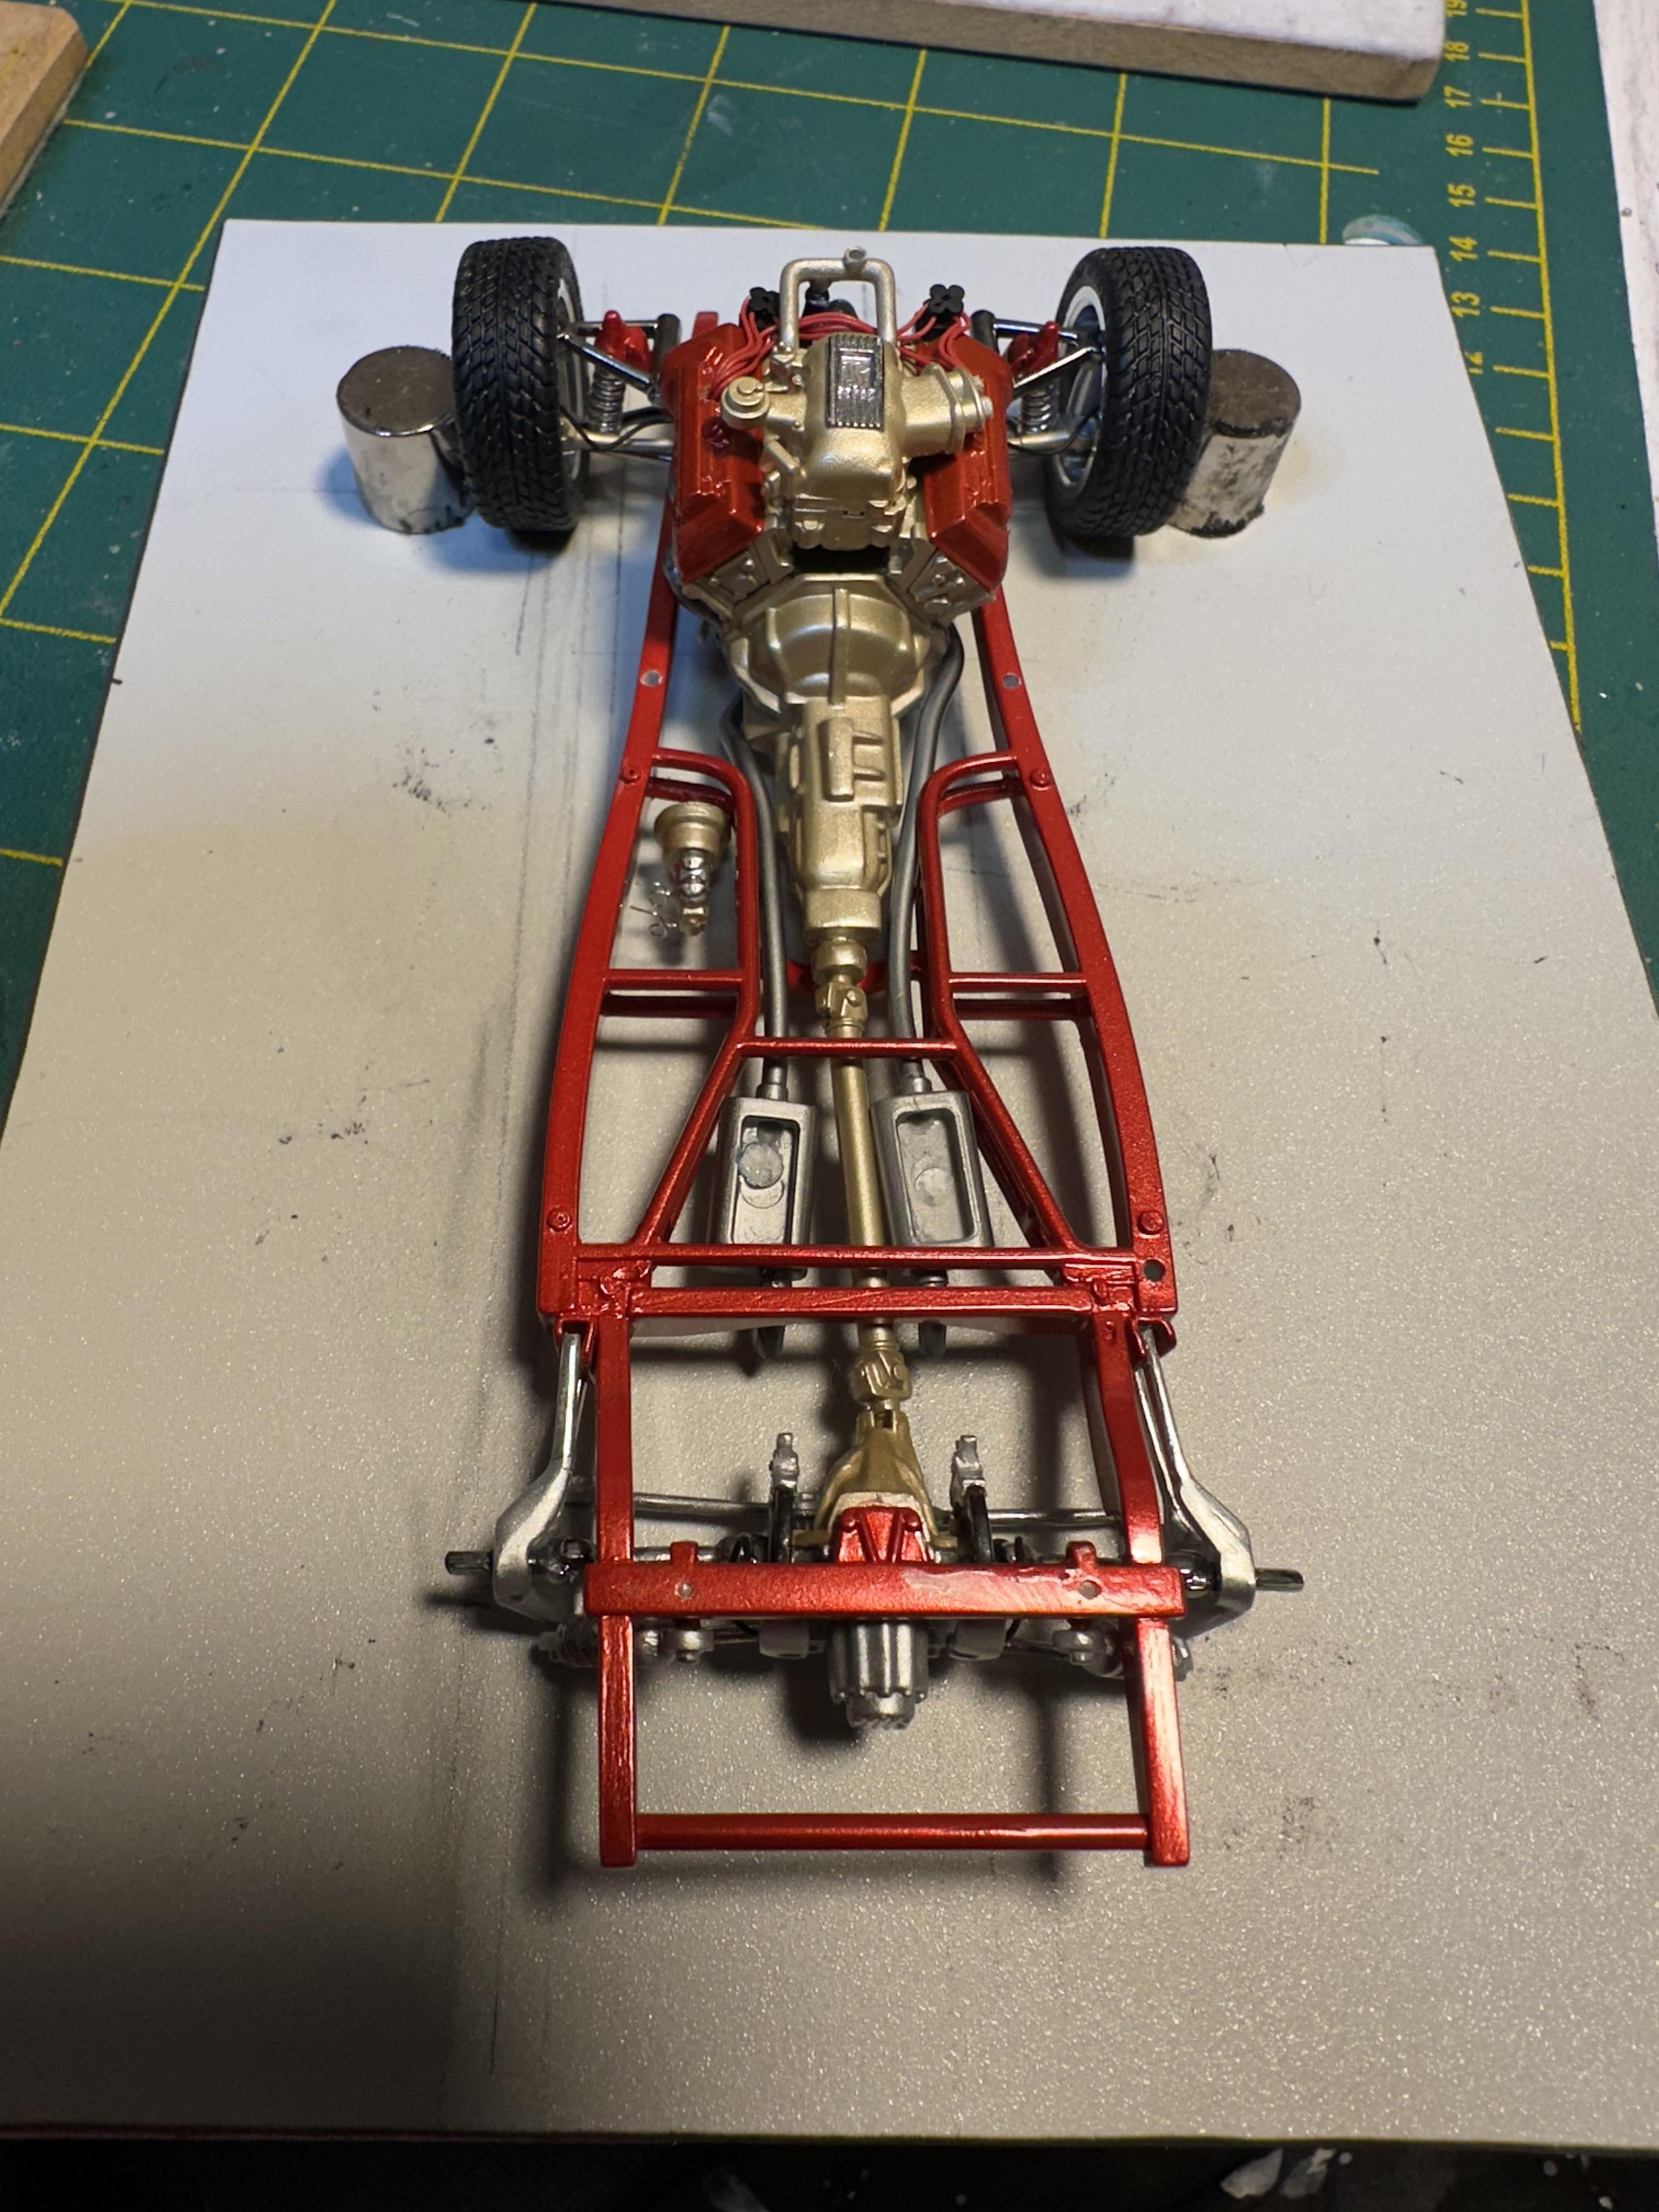
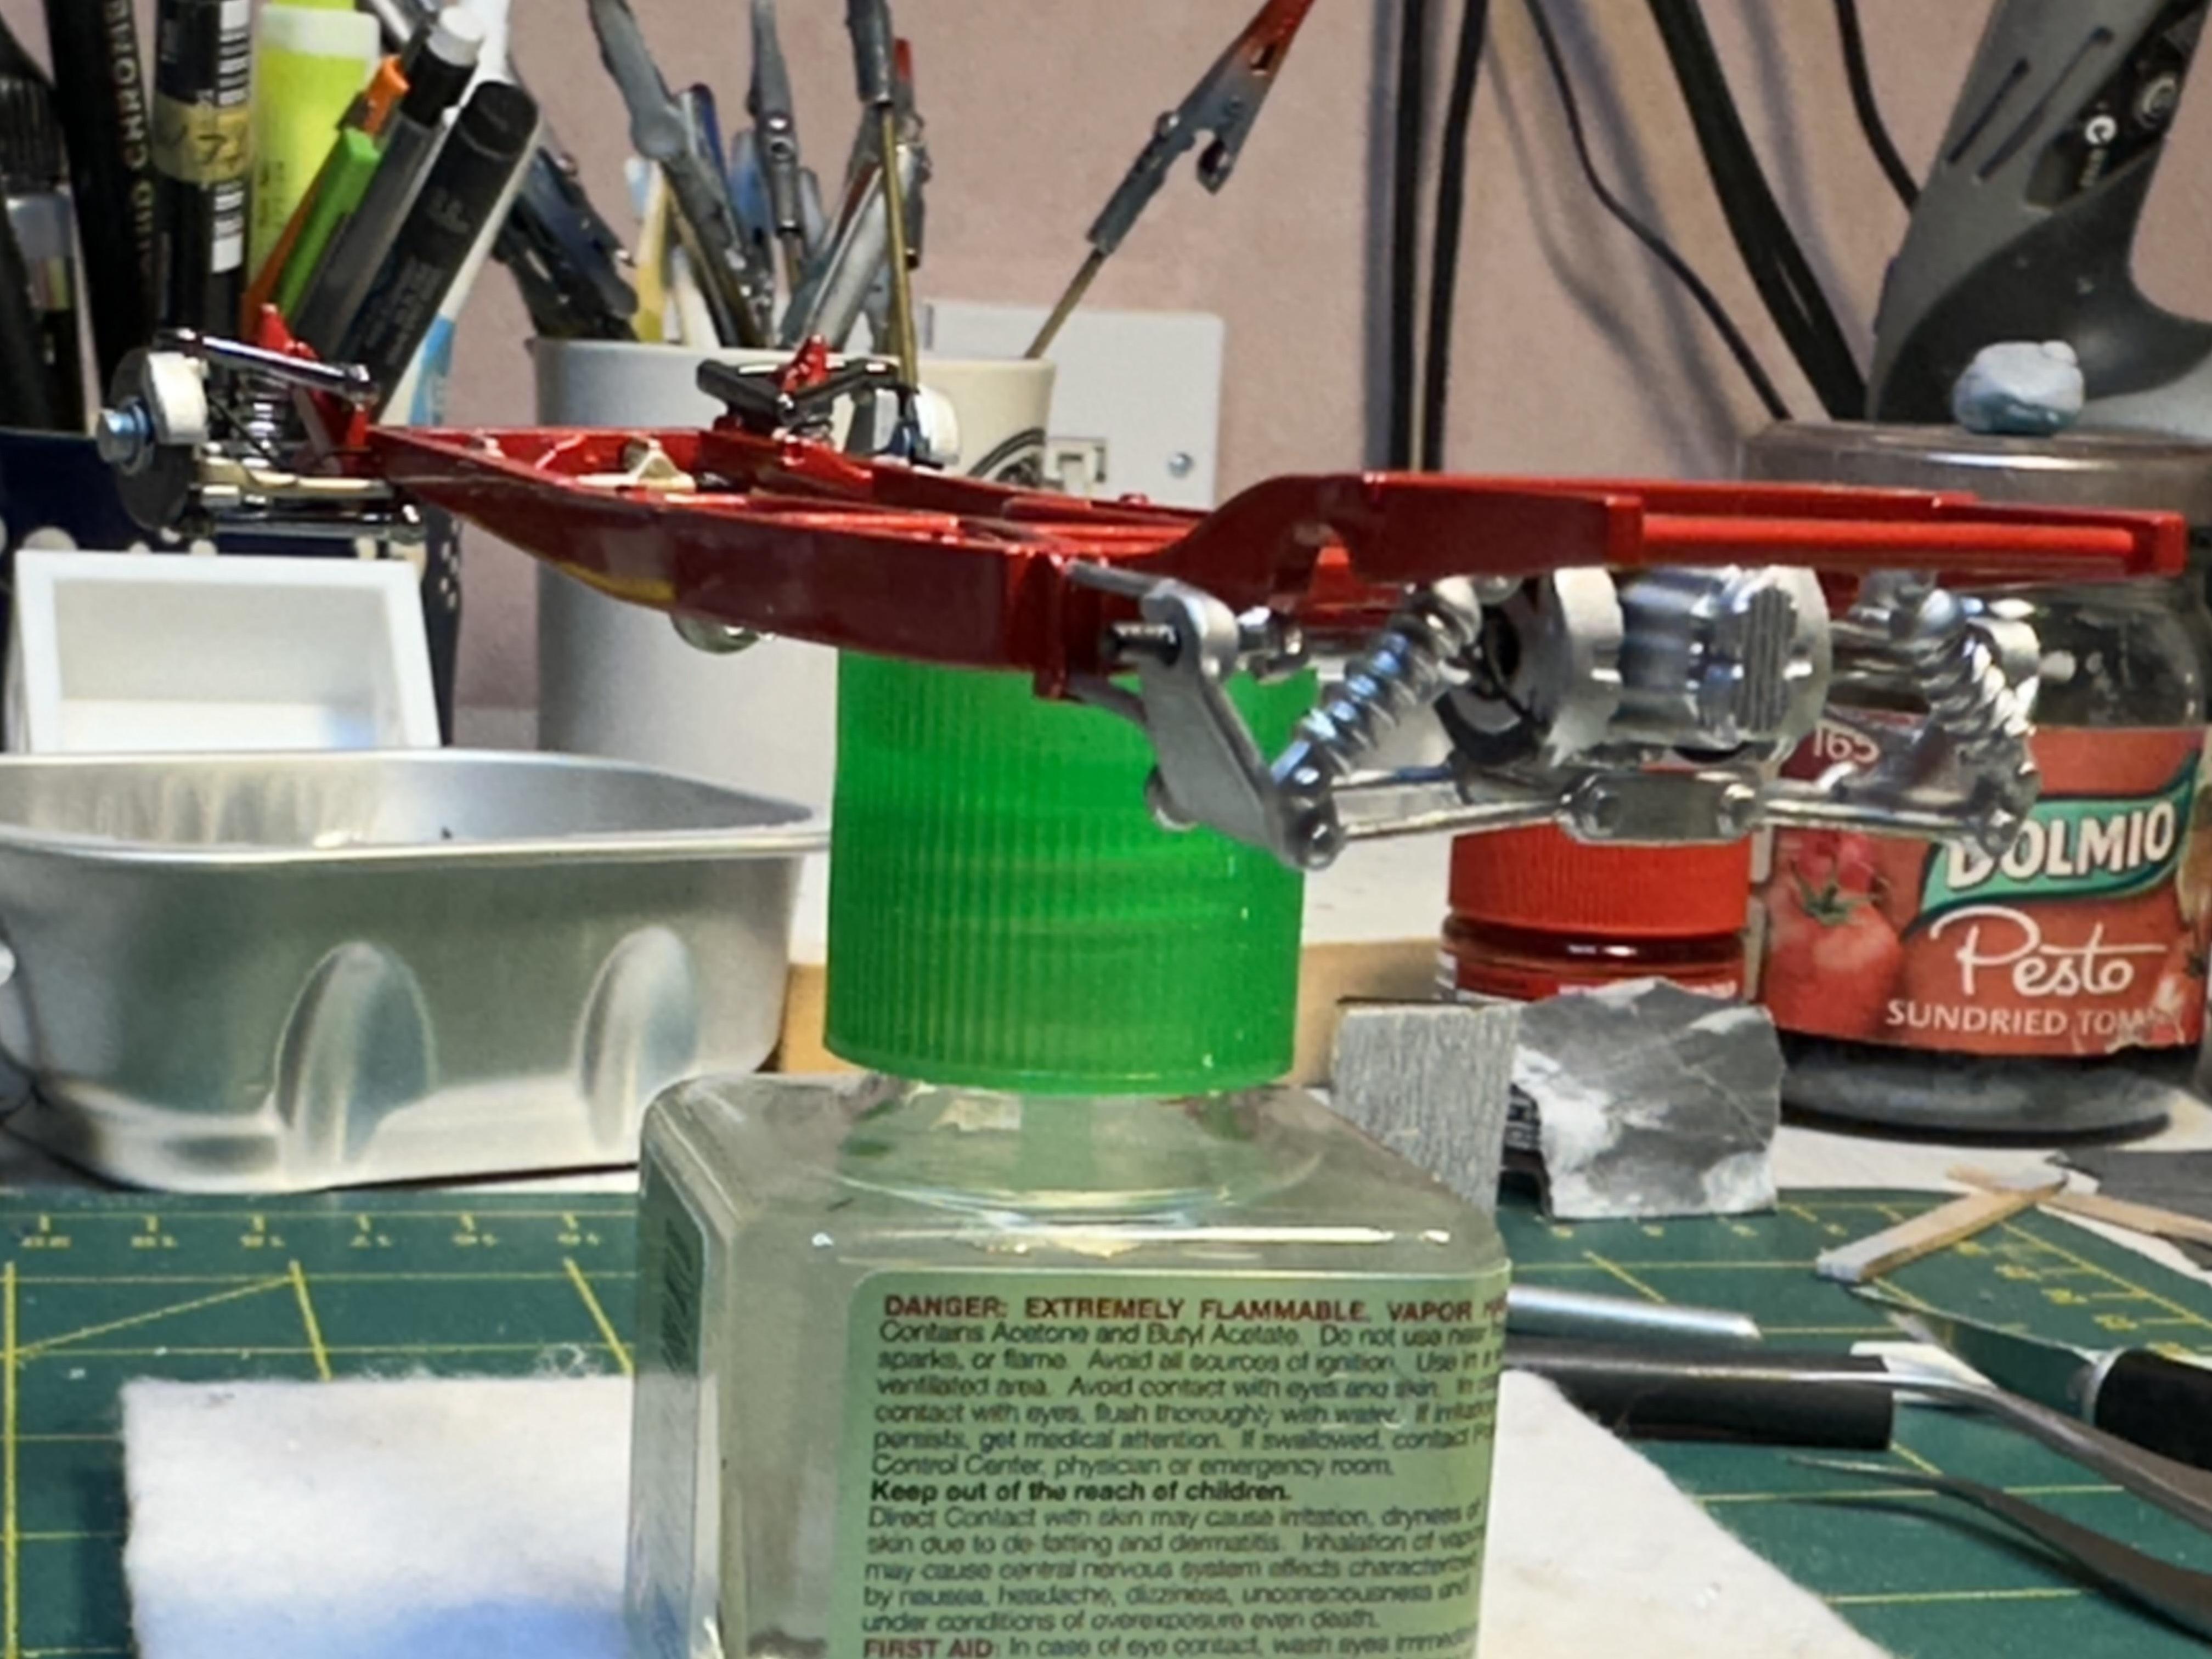
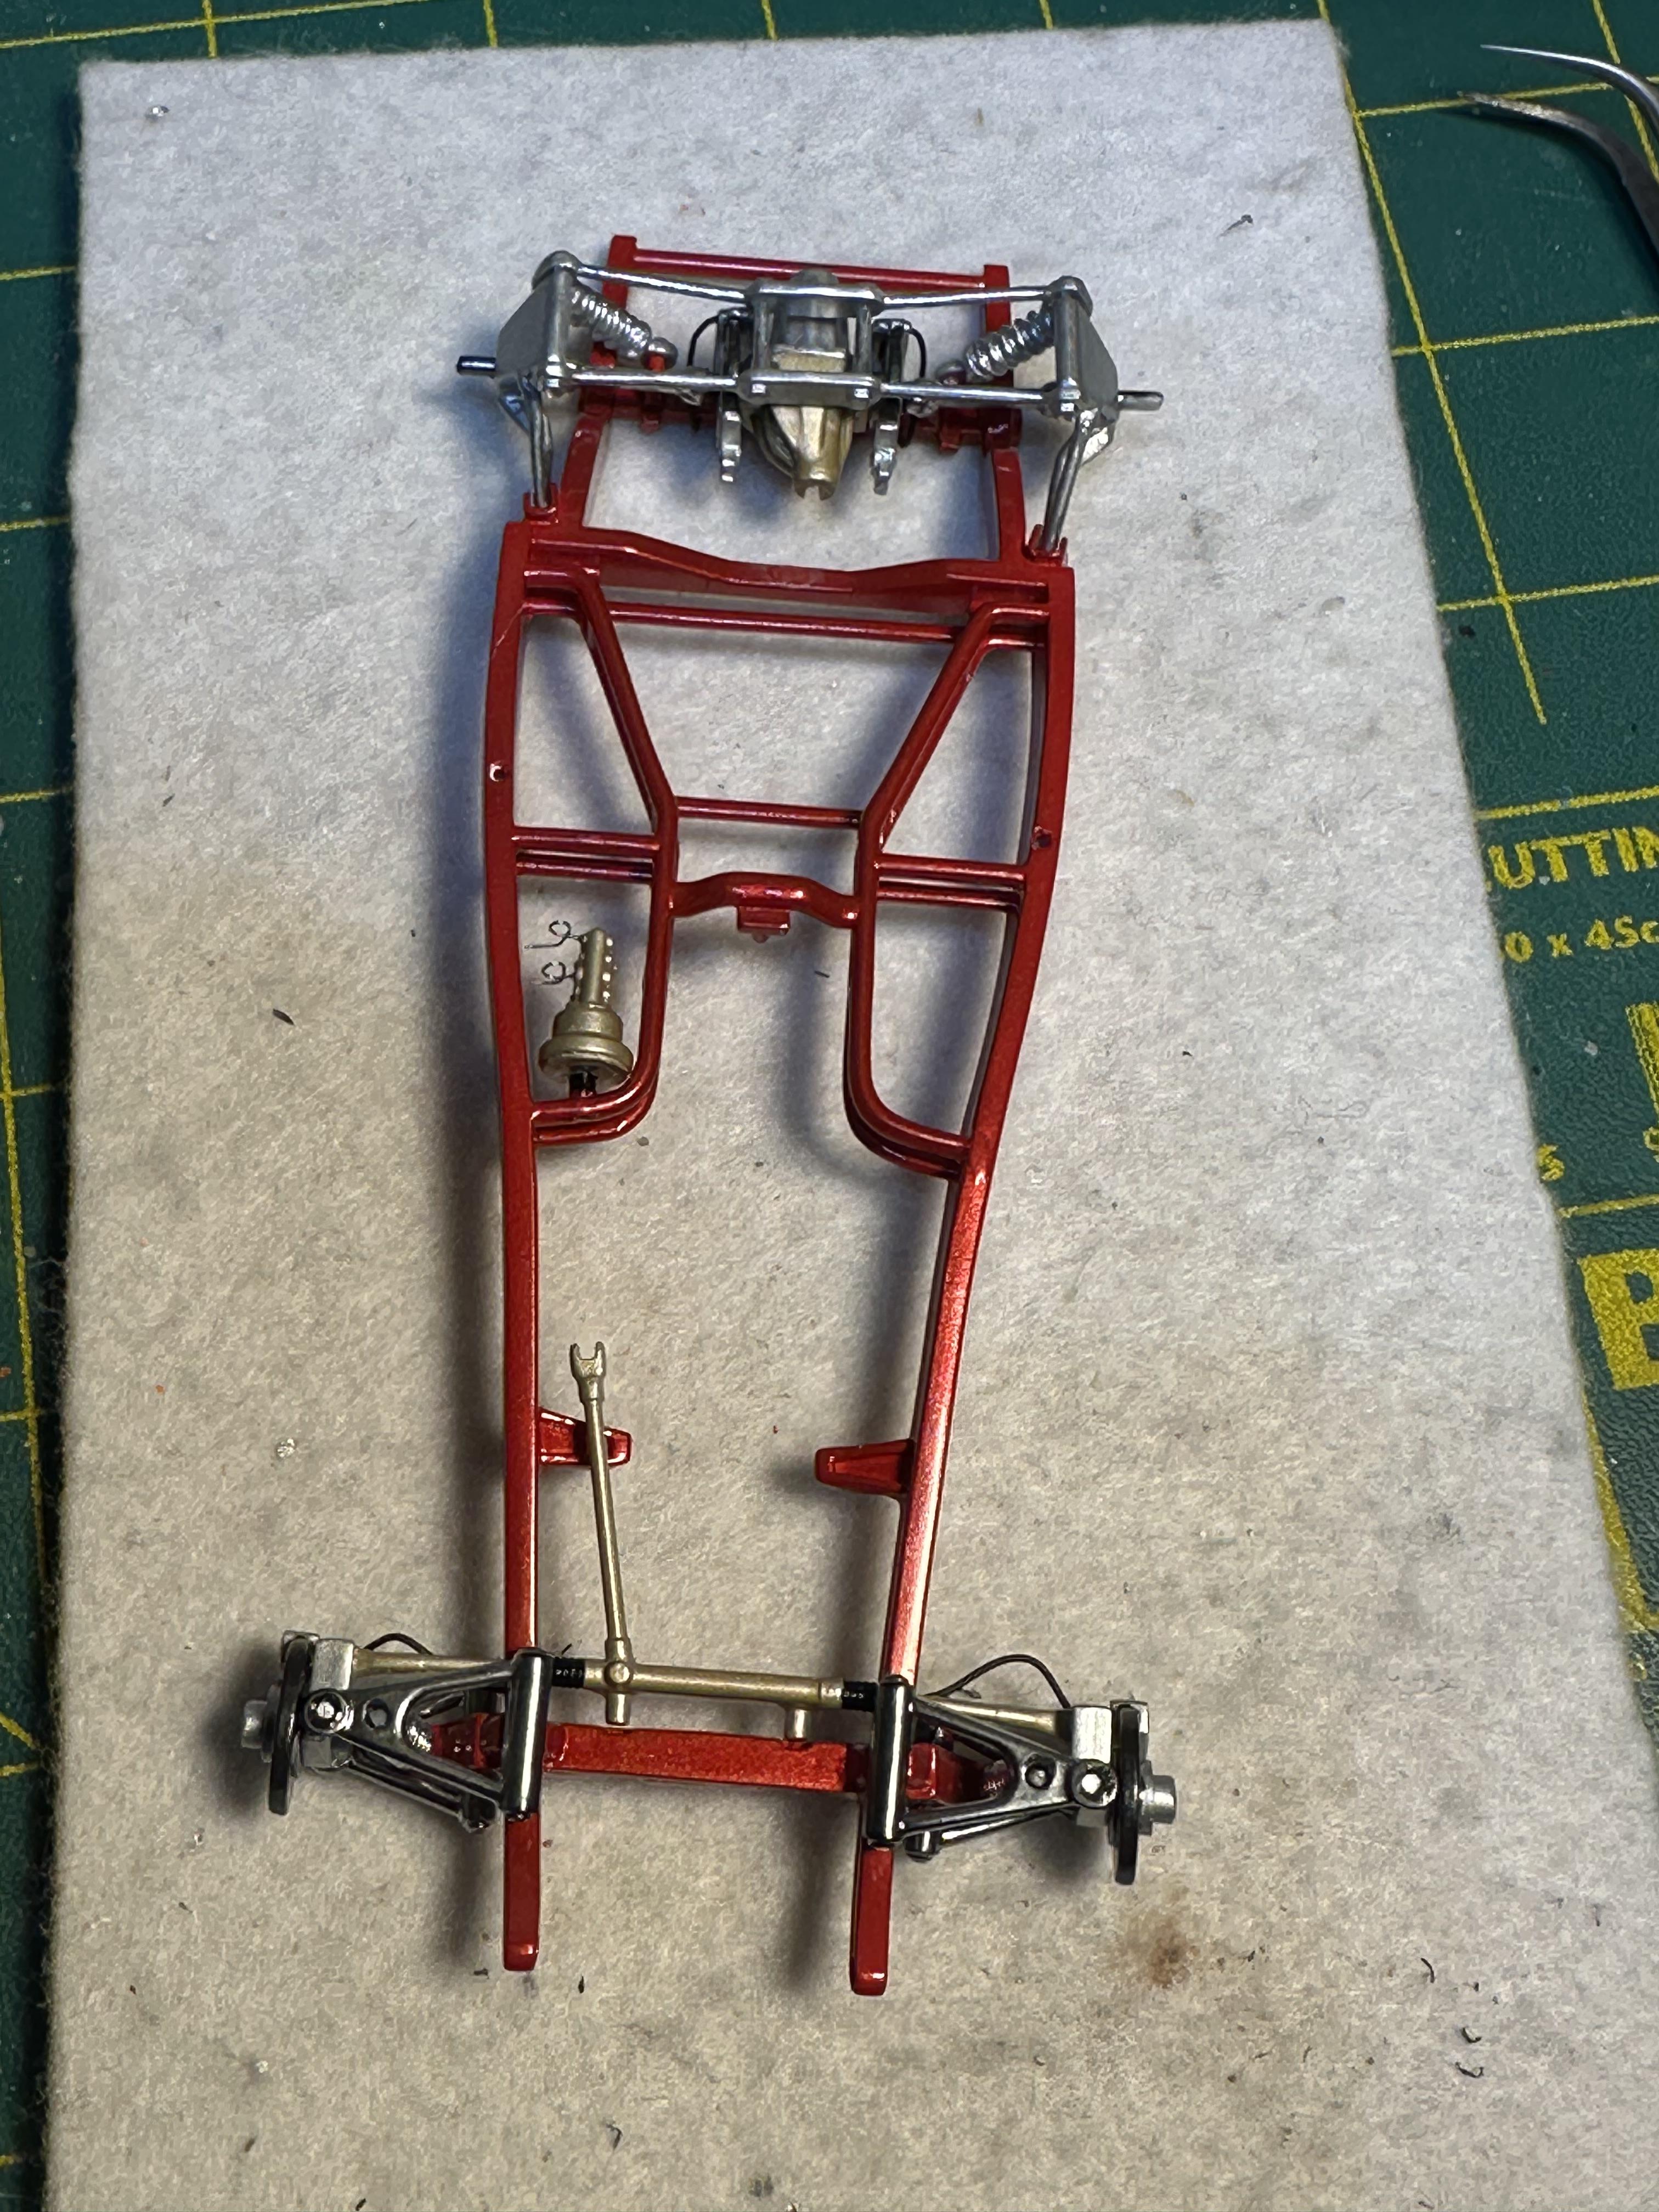
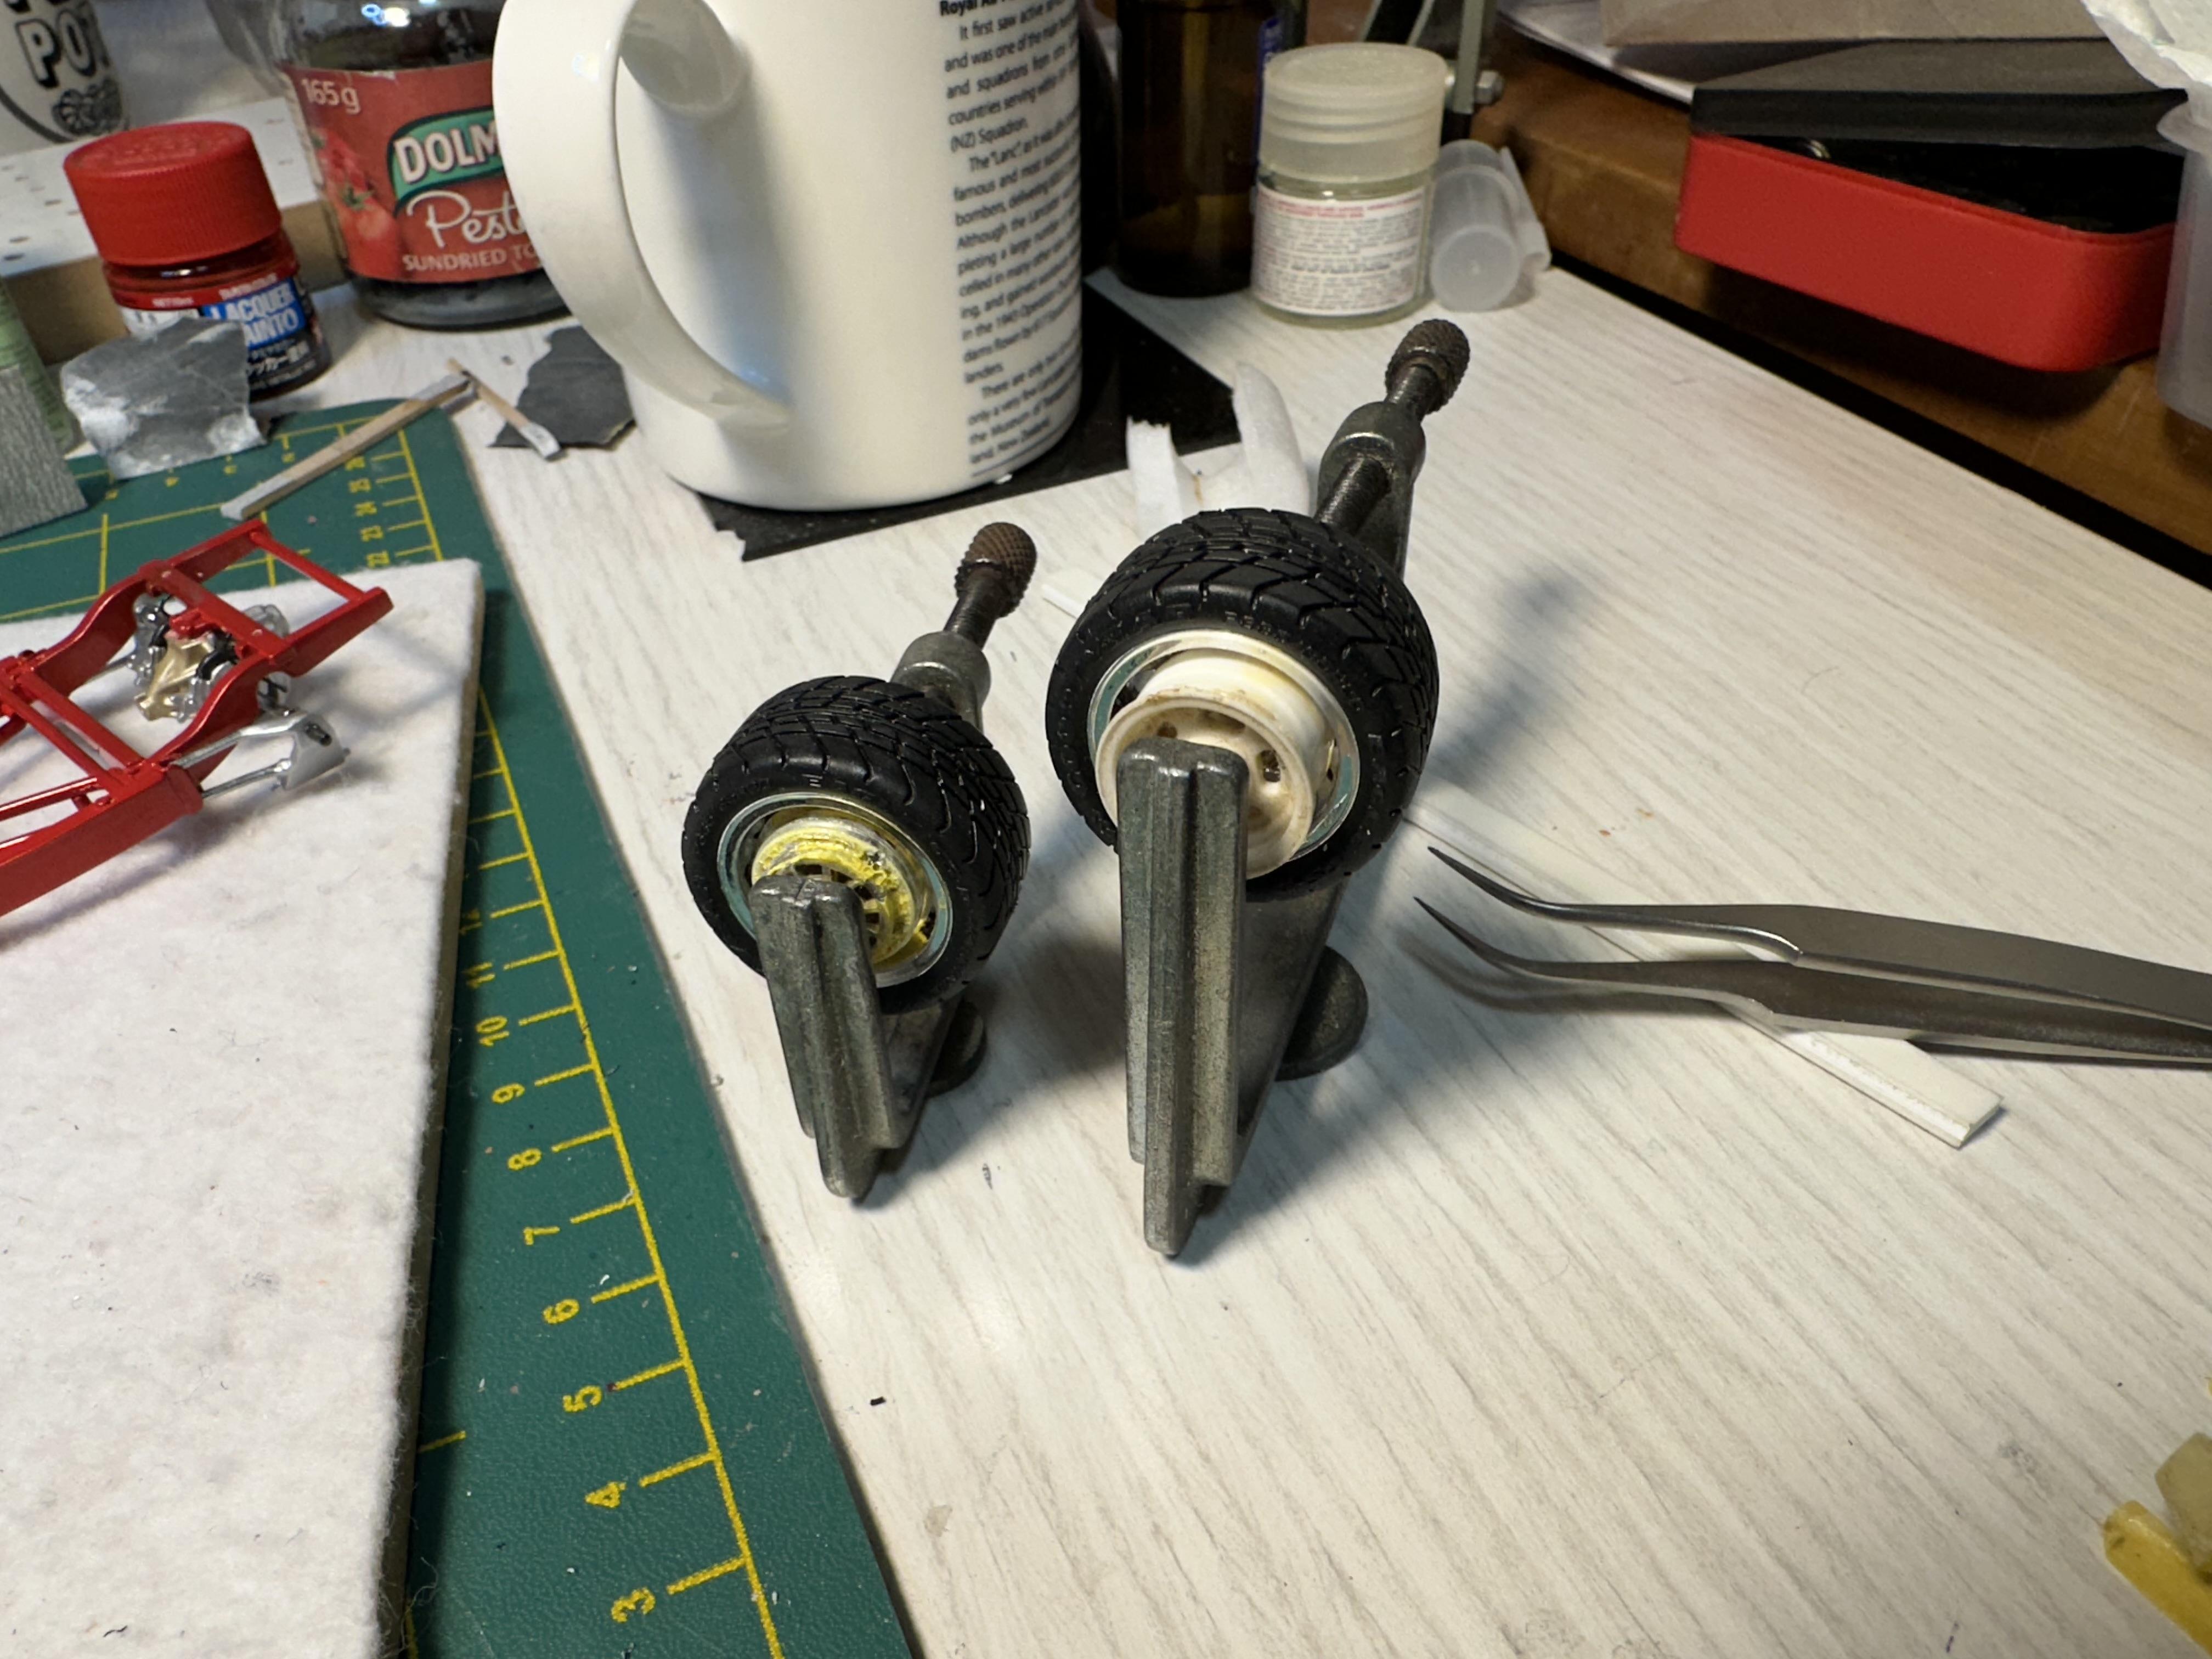
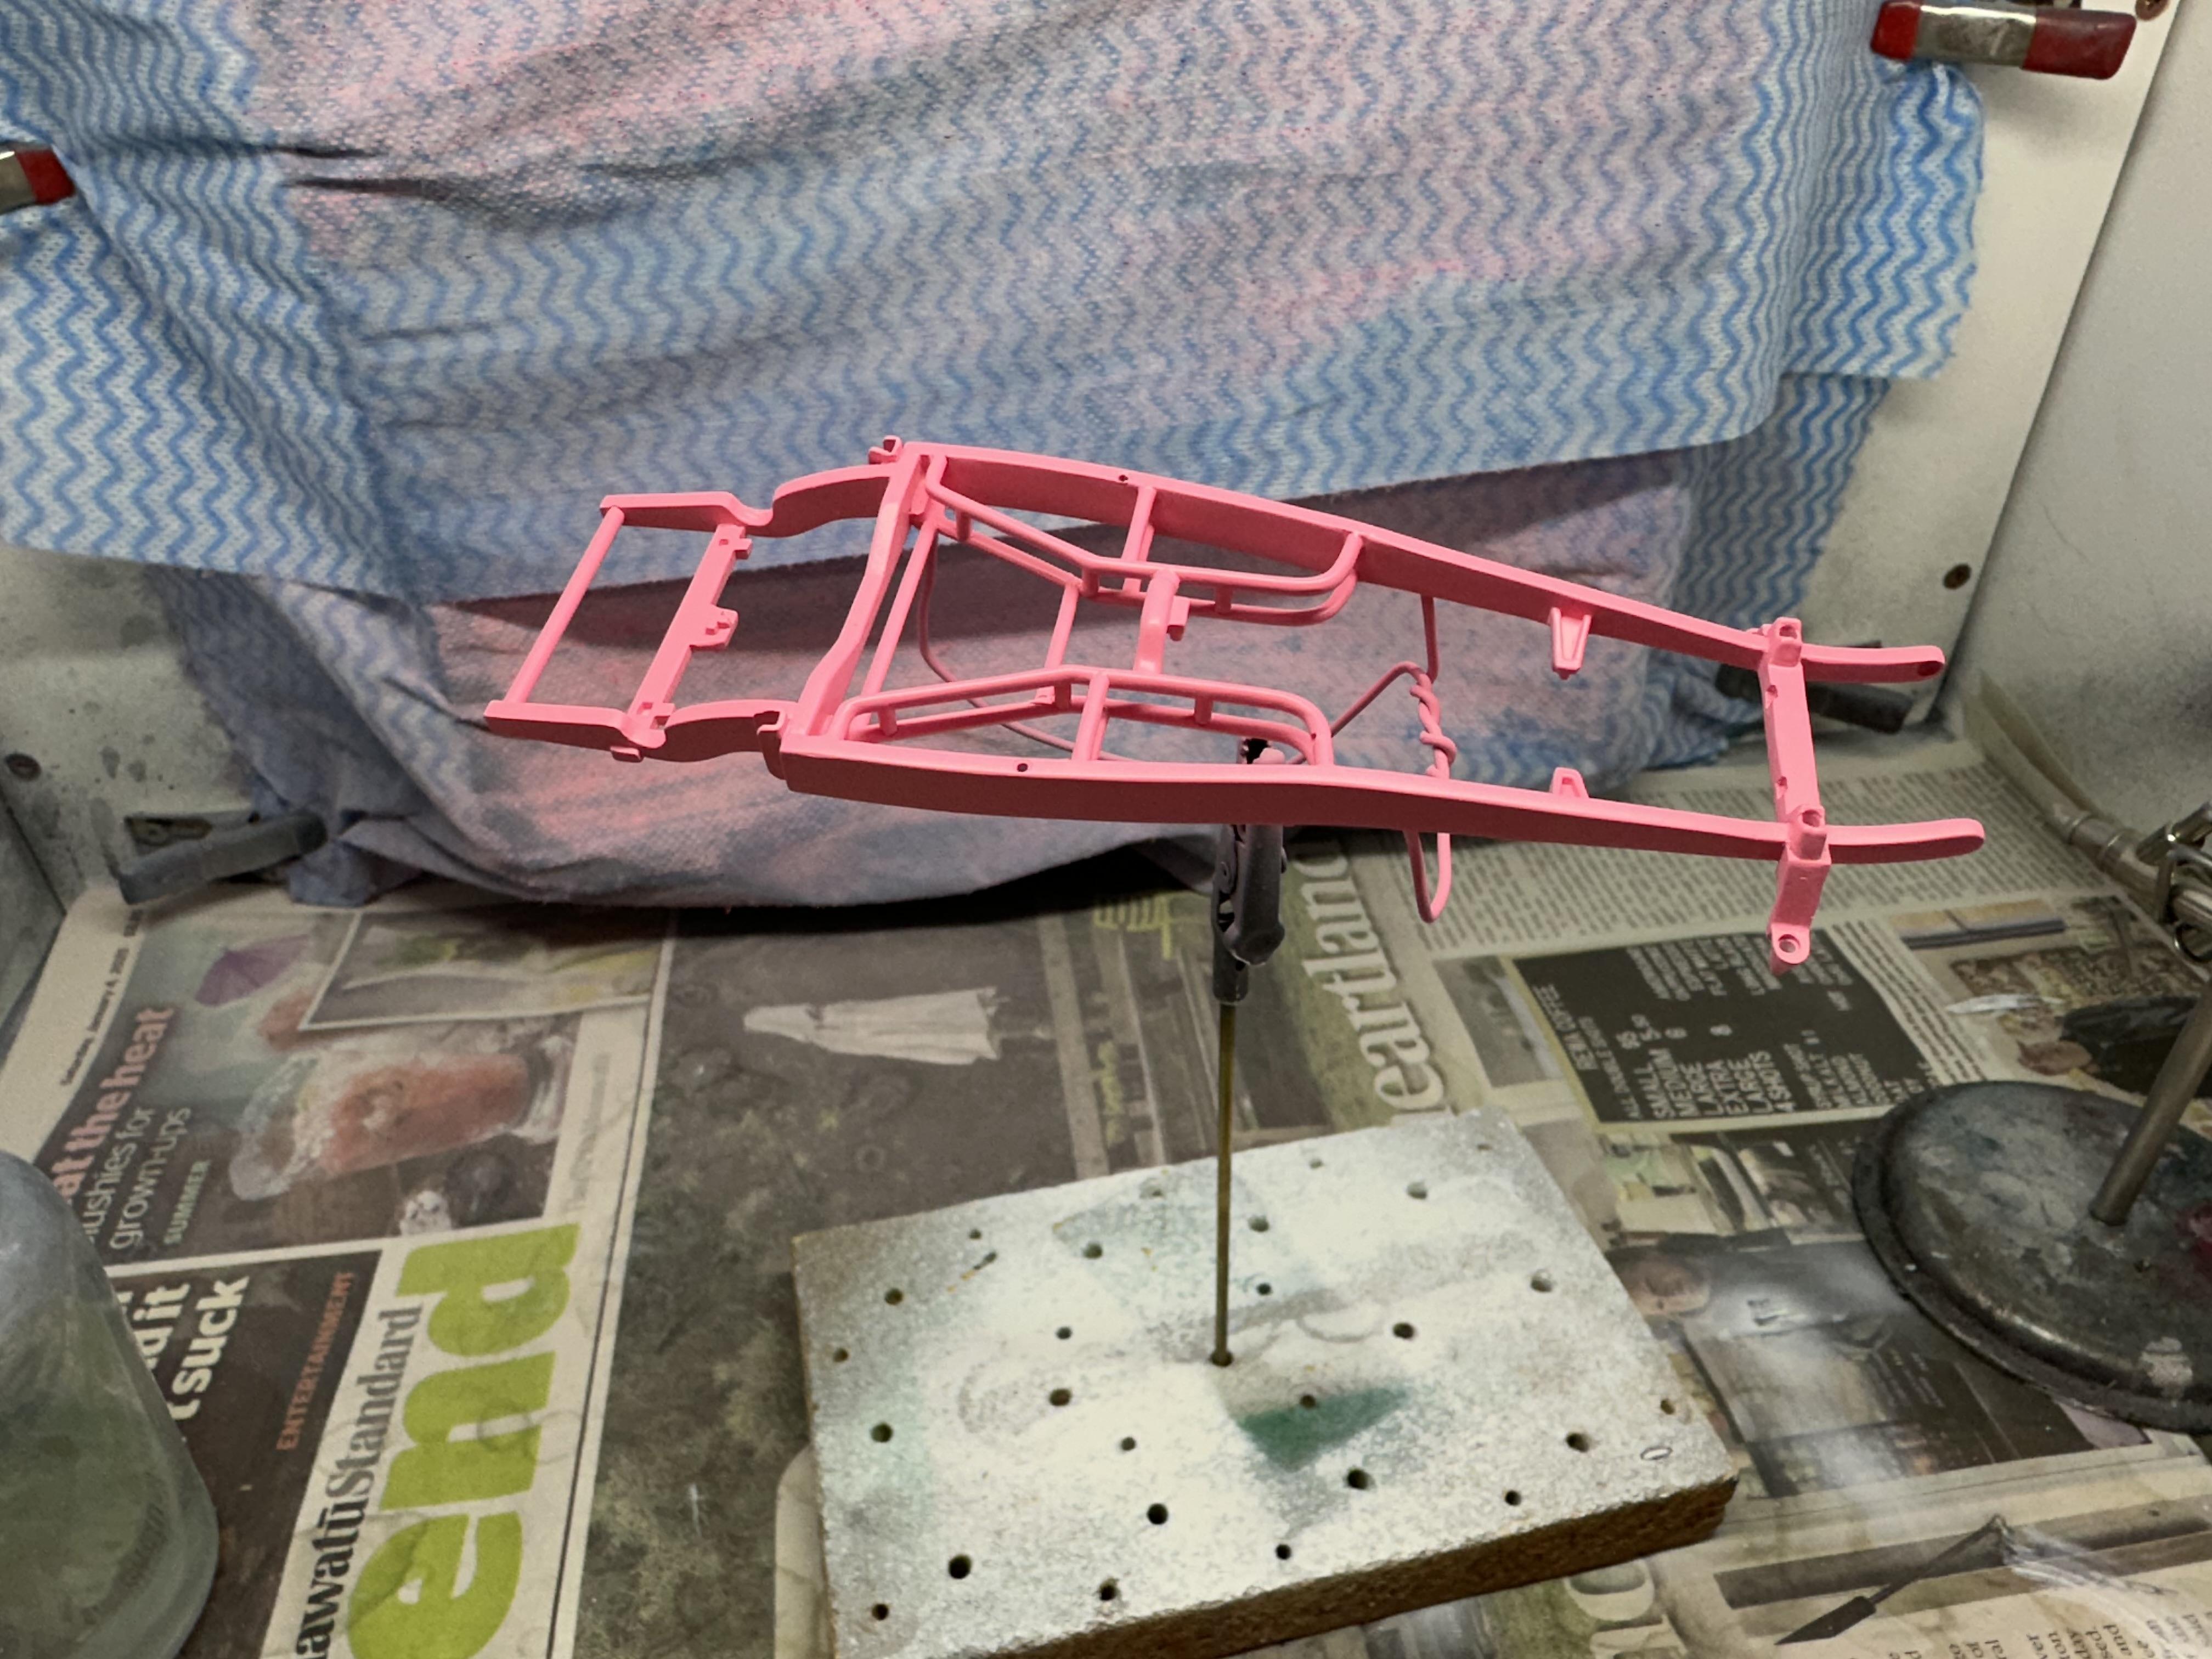
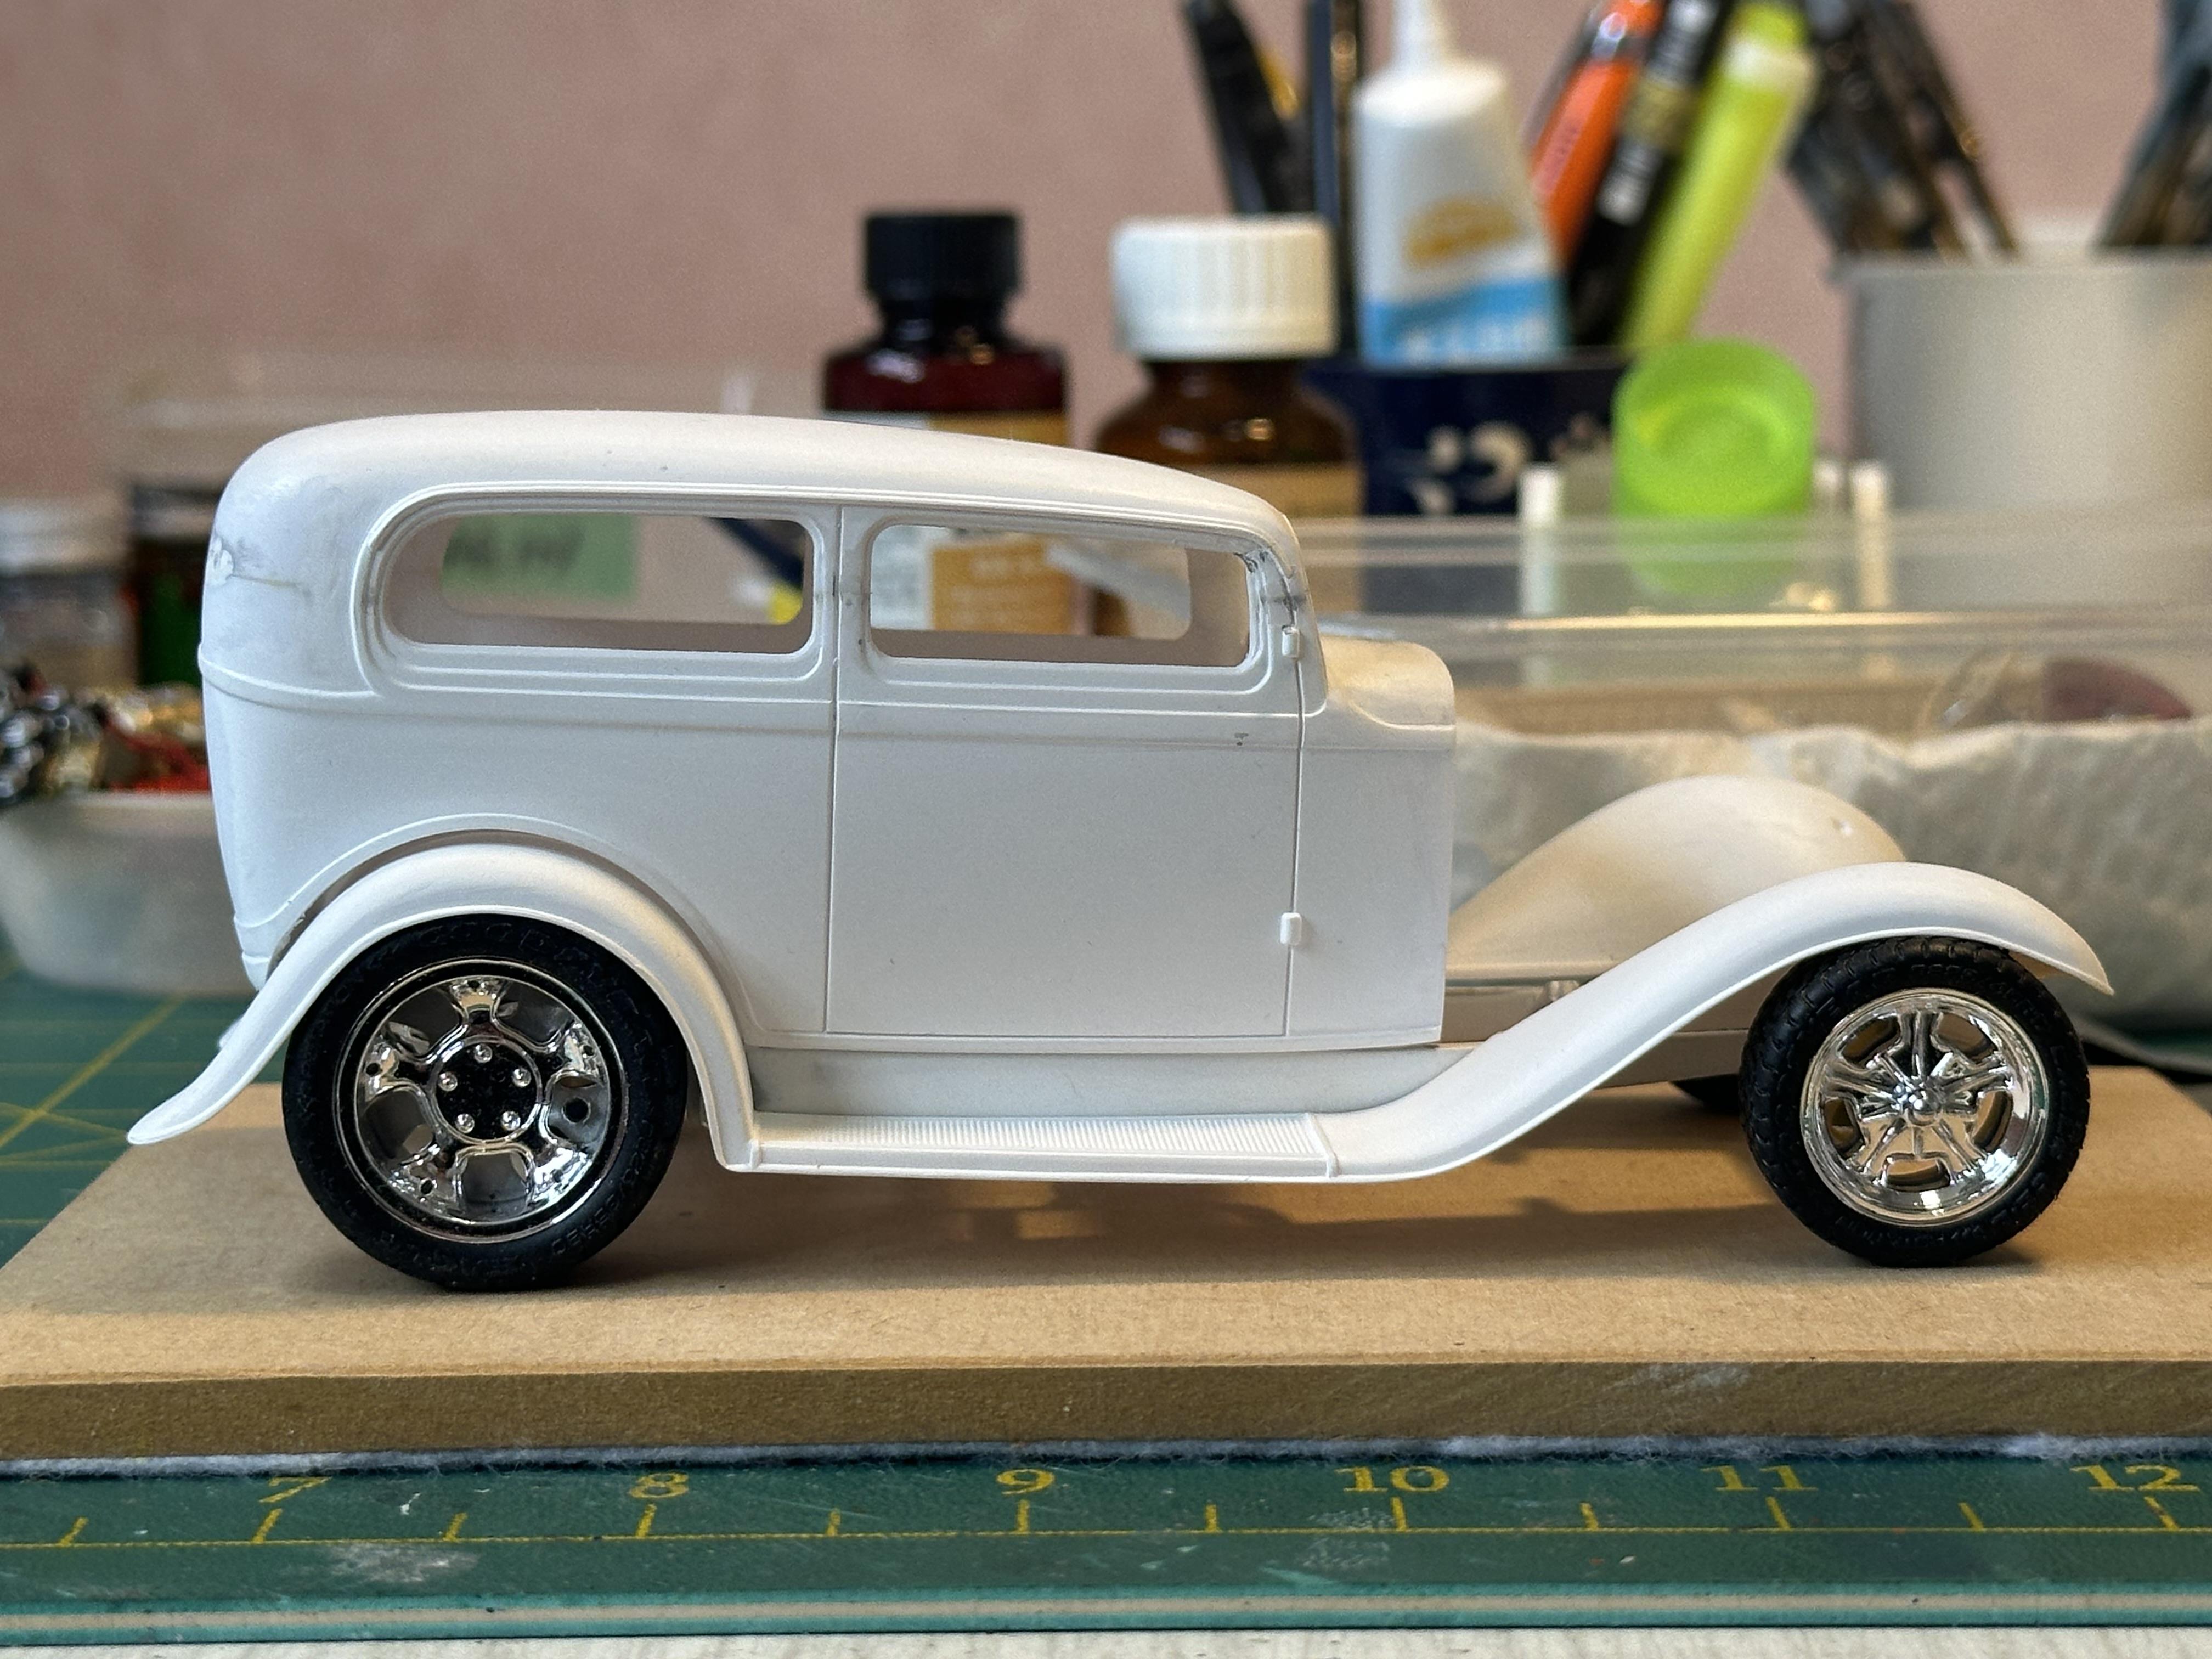
Getting chassis assembled. Front wheels need help in keeping them in alignment. I used Revell glue on wheels as it is slower drying as this allows you time to get the wheels aligned. The chassis is on an offcut of sheet metal with some magnets used to keep the wheels in place. I did not have any issues with the rear wheels. Now up on all fours The front spreader bar is some 2mm stainless steel filler wire polished and cut to length. I had drilled the holes for this in the chassis prep stage The photo shows wheels a bit wobbly but I think the phone camera does that Side shot I am working on completing body work and have some paint on the guards and other smaller body parts. Waiting while paint cures Thanks for looking
-
Yup - fish eyes for sure form some sort of contaminant. Strip, thoroughly clean down as above and repaint At tip for Tamiya metallics and pearls - us a flat as a base of same or similar colour to the top coat and you will find you will get a deeper colour with better coverage. Less creeping away at high points and better cover in the low points. Obviously the flat will not be metallic but a solid colour.
-
Sorry - went bad. I meant so much chrome everywhere you just have to have chrome plated spark plug wires too
-
Thanks for your kind words Chassis is 32 Phantom Vickie with narrowed rear for tubbed rear fenders. Rear end is a Li'l John independent from a 34 Coupe - that horrible out of scale thing that Revell did by shrinking a 34 body to fit a Model T chassis.
-
Chrome plated wire LOL
-
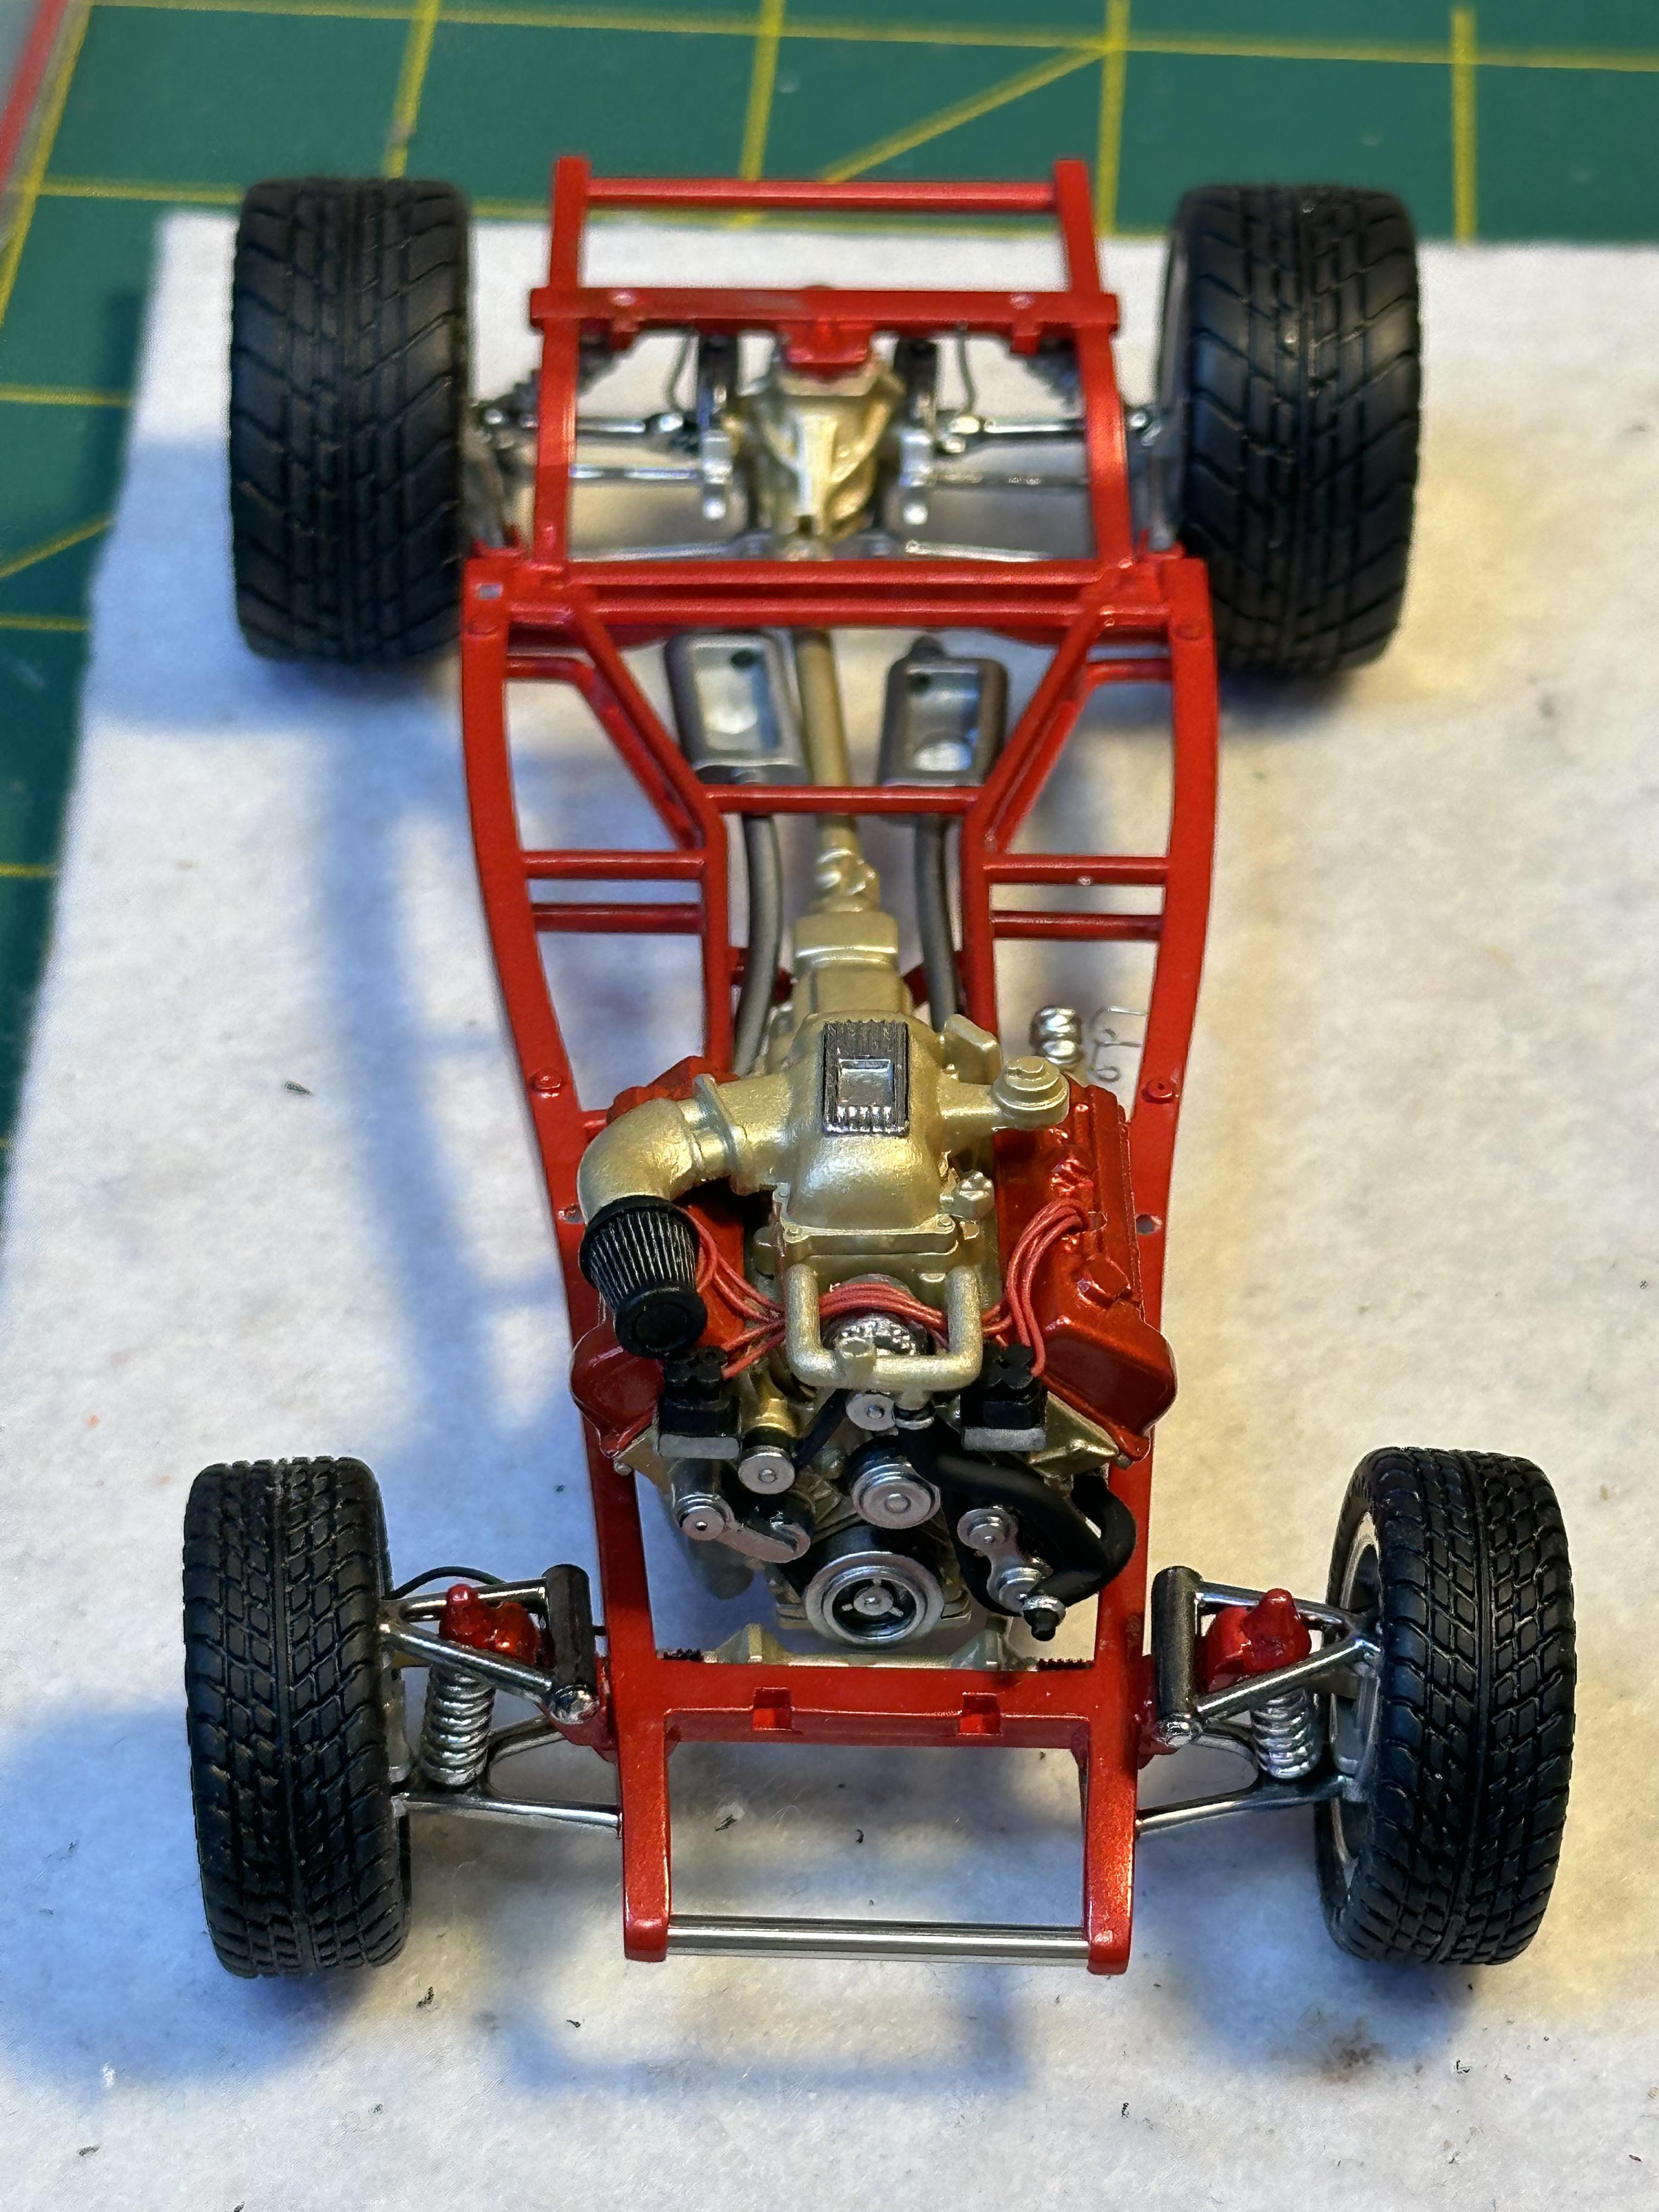
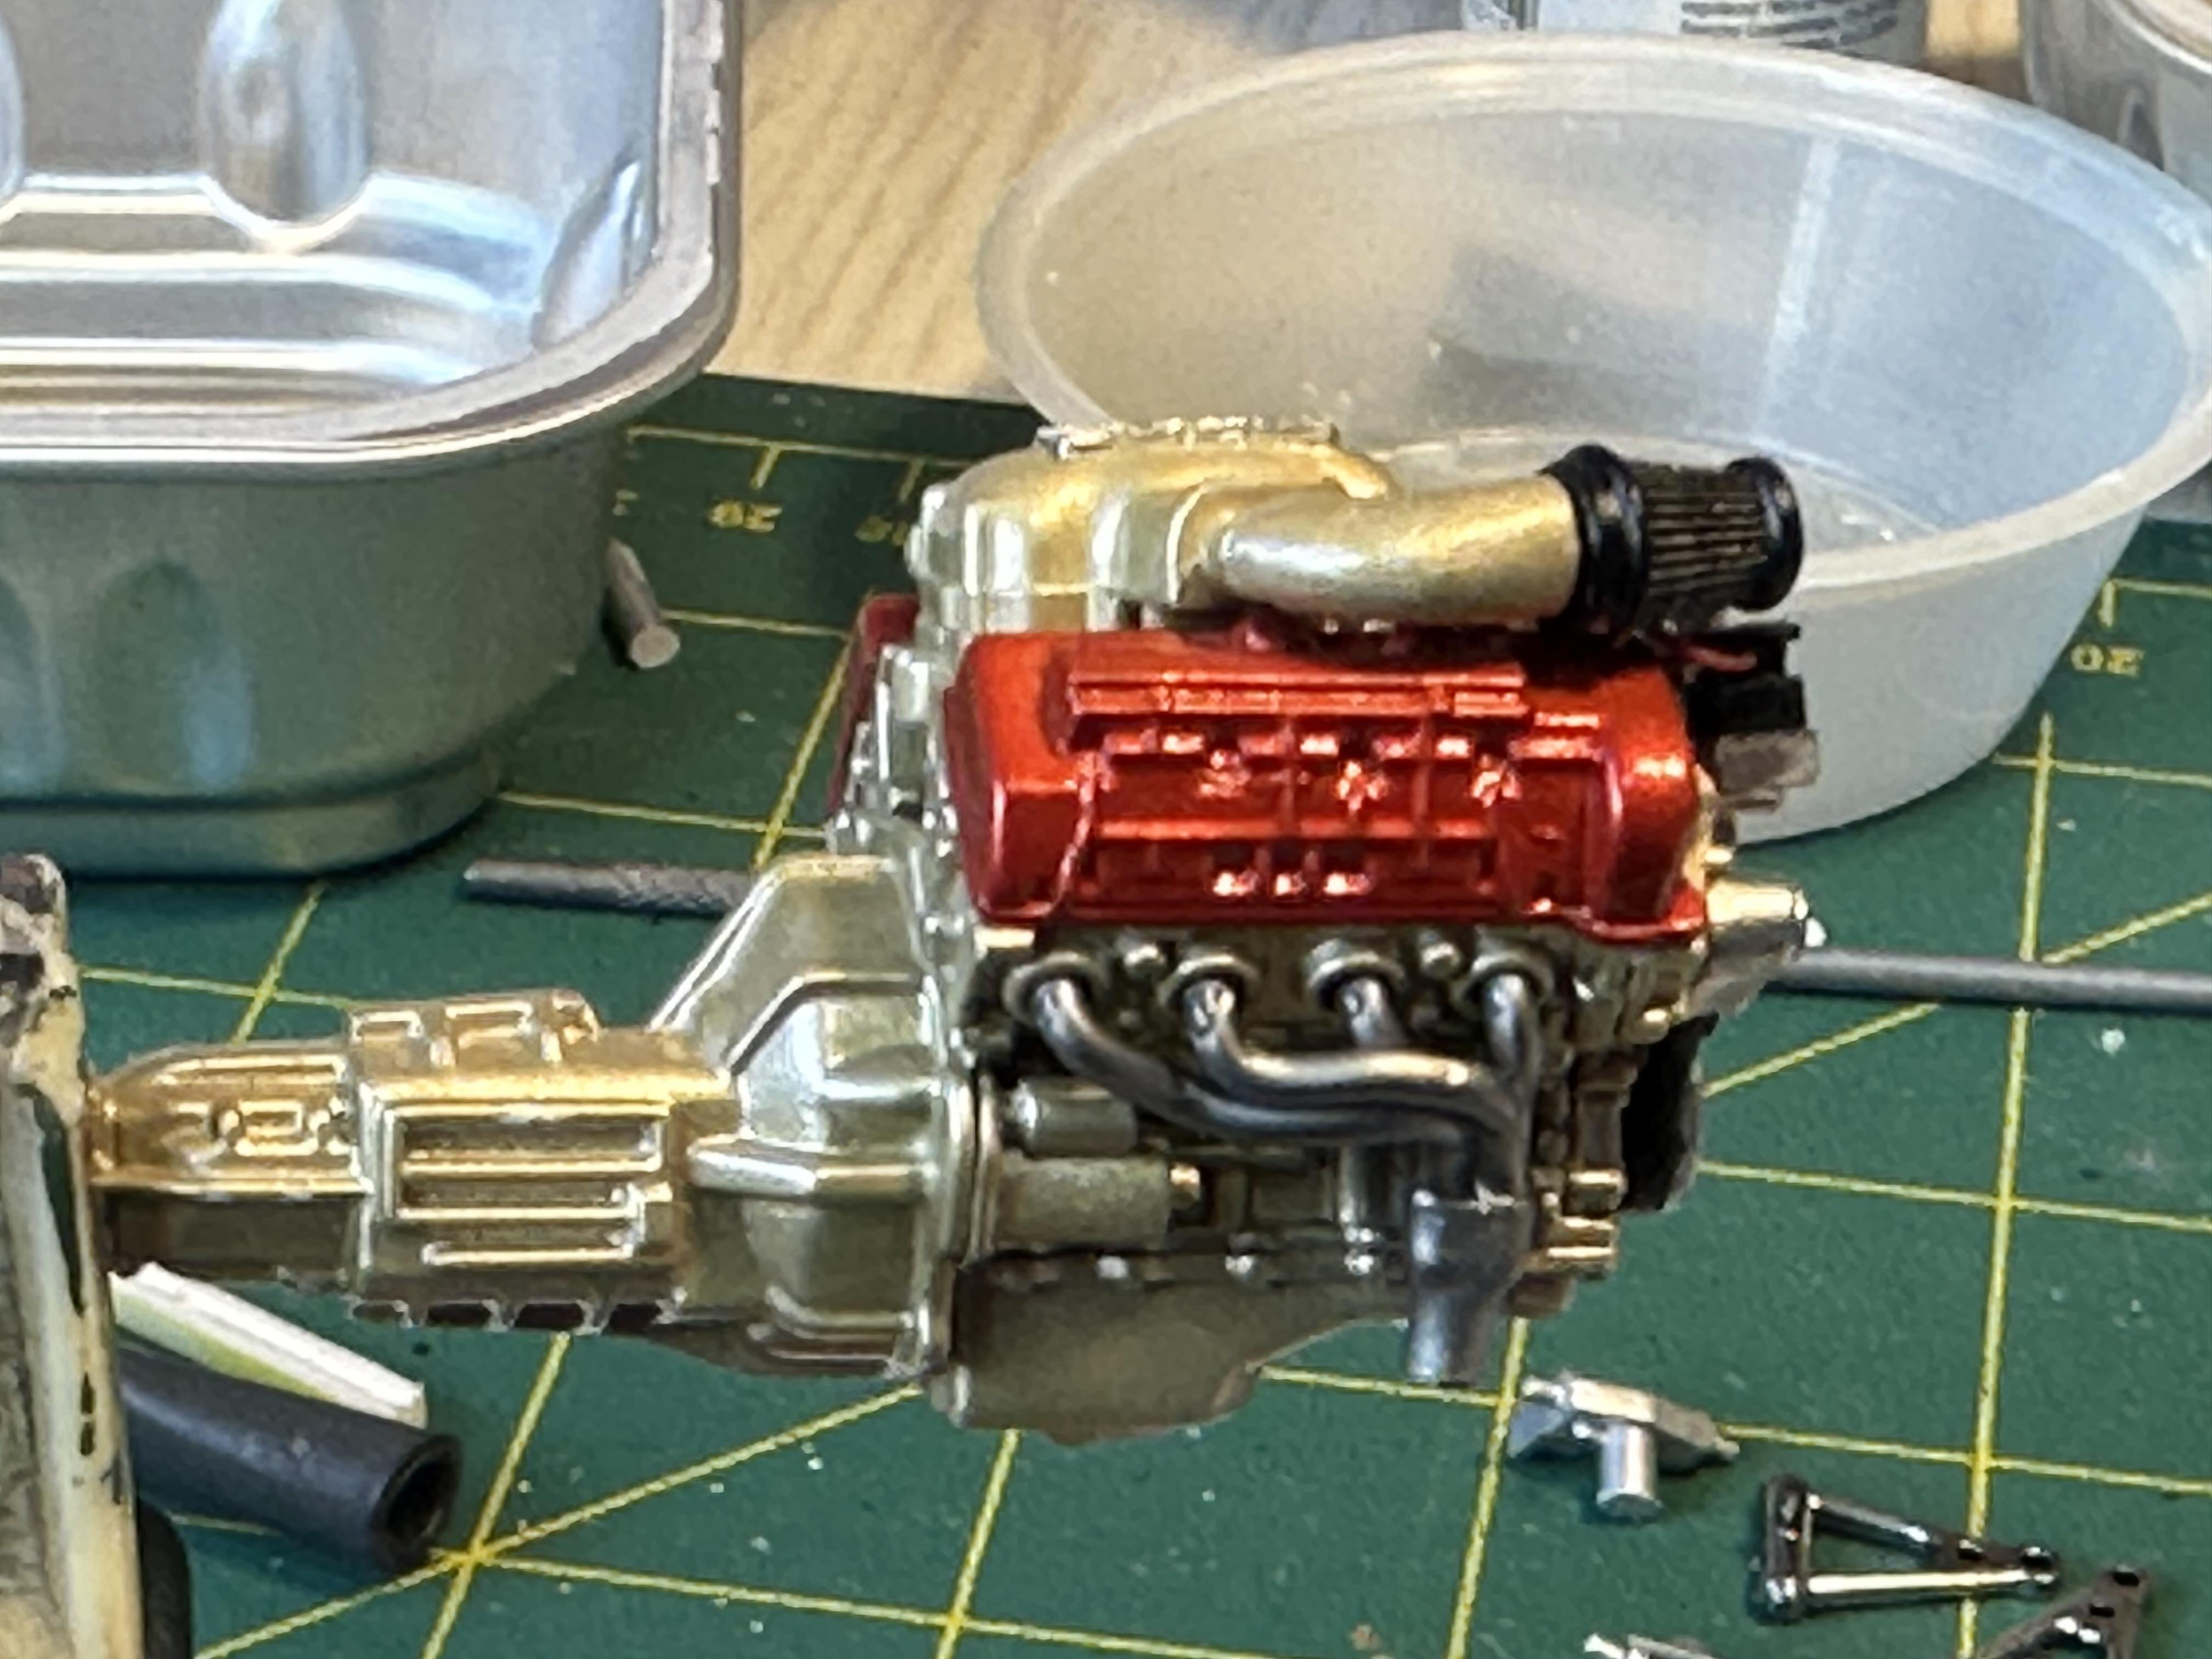
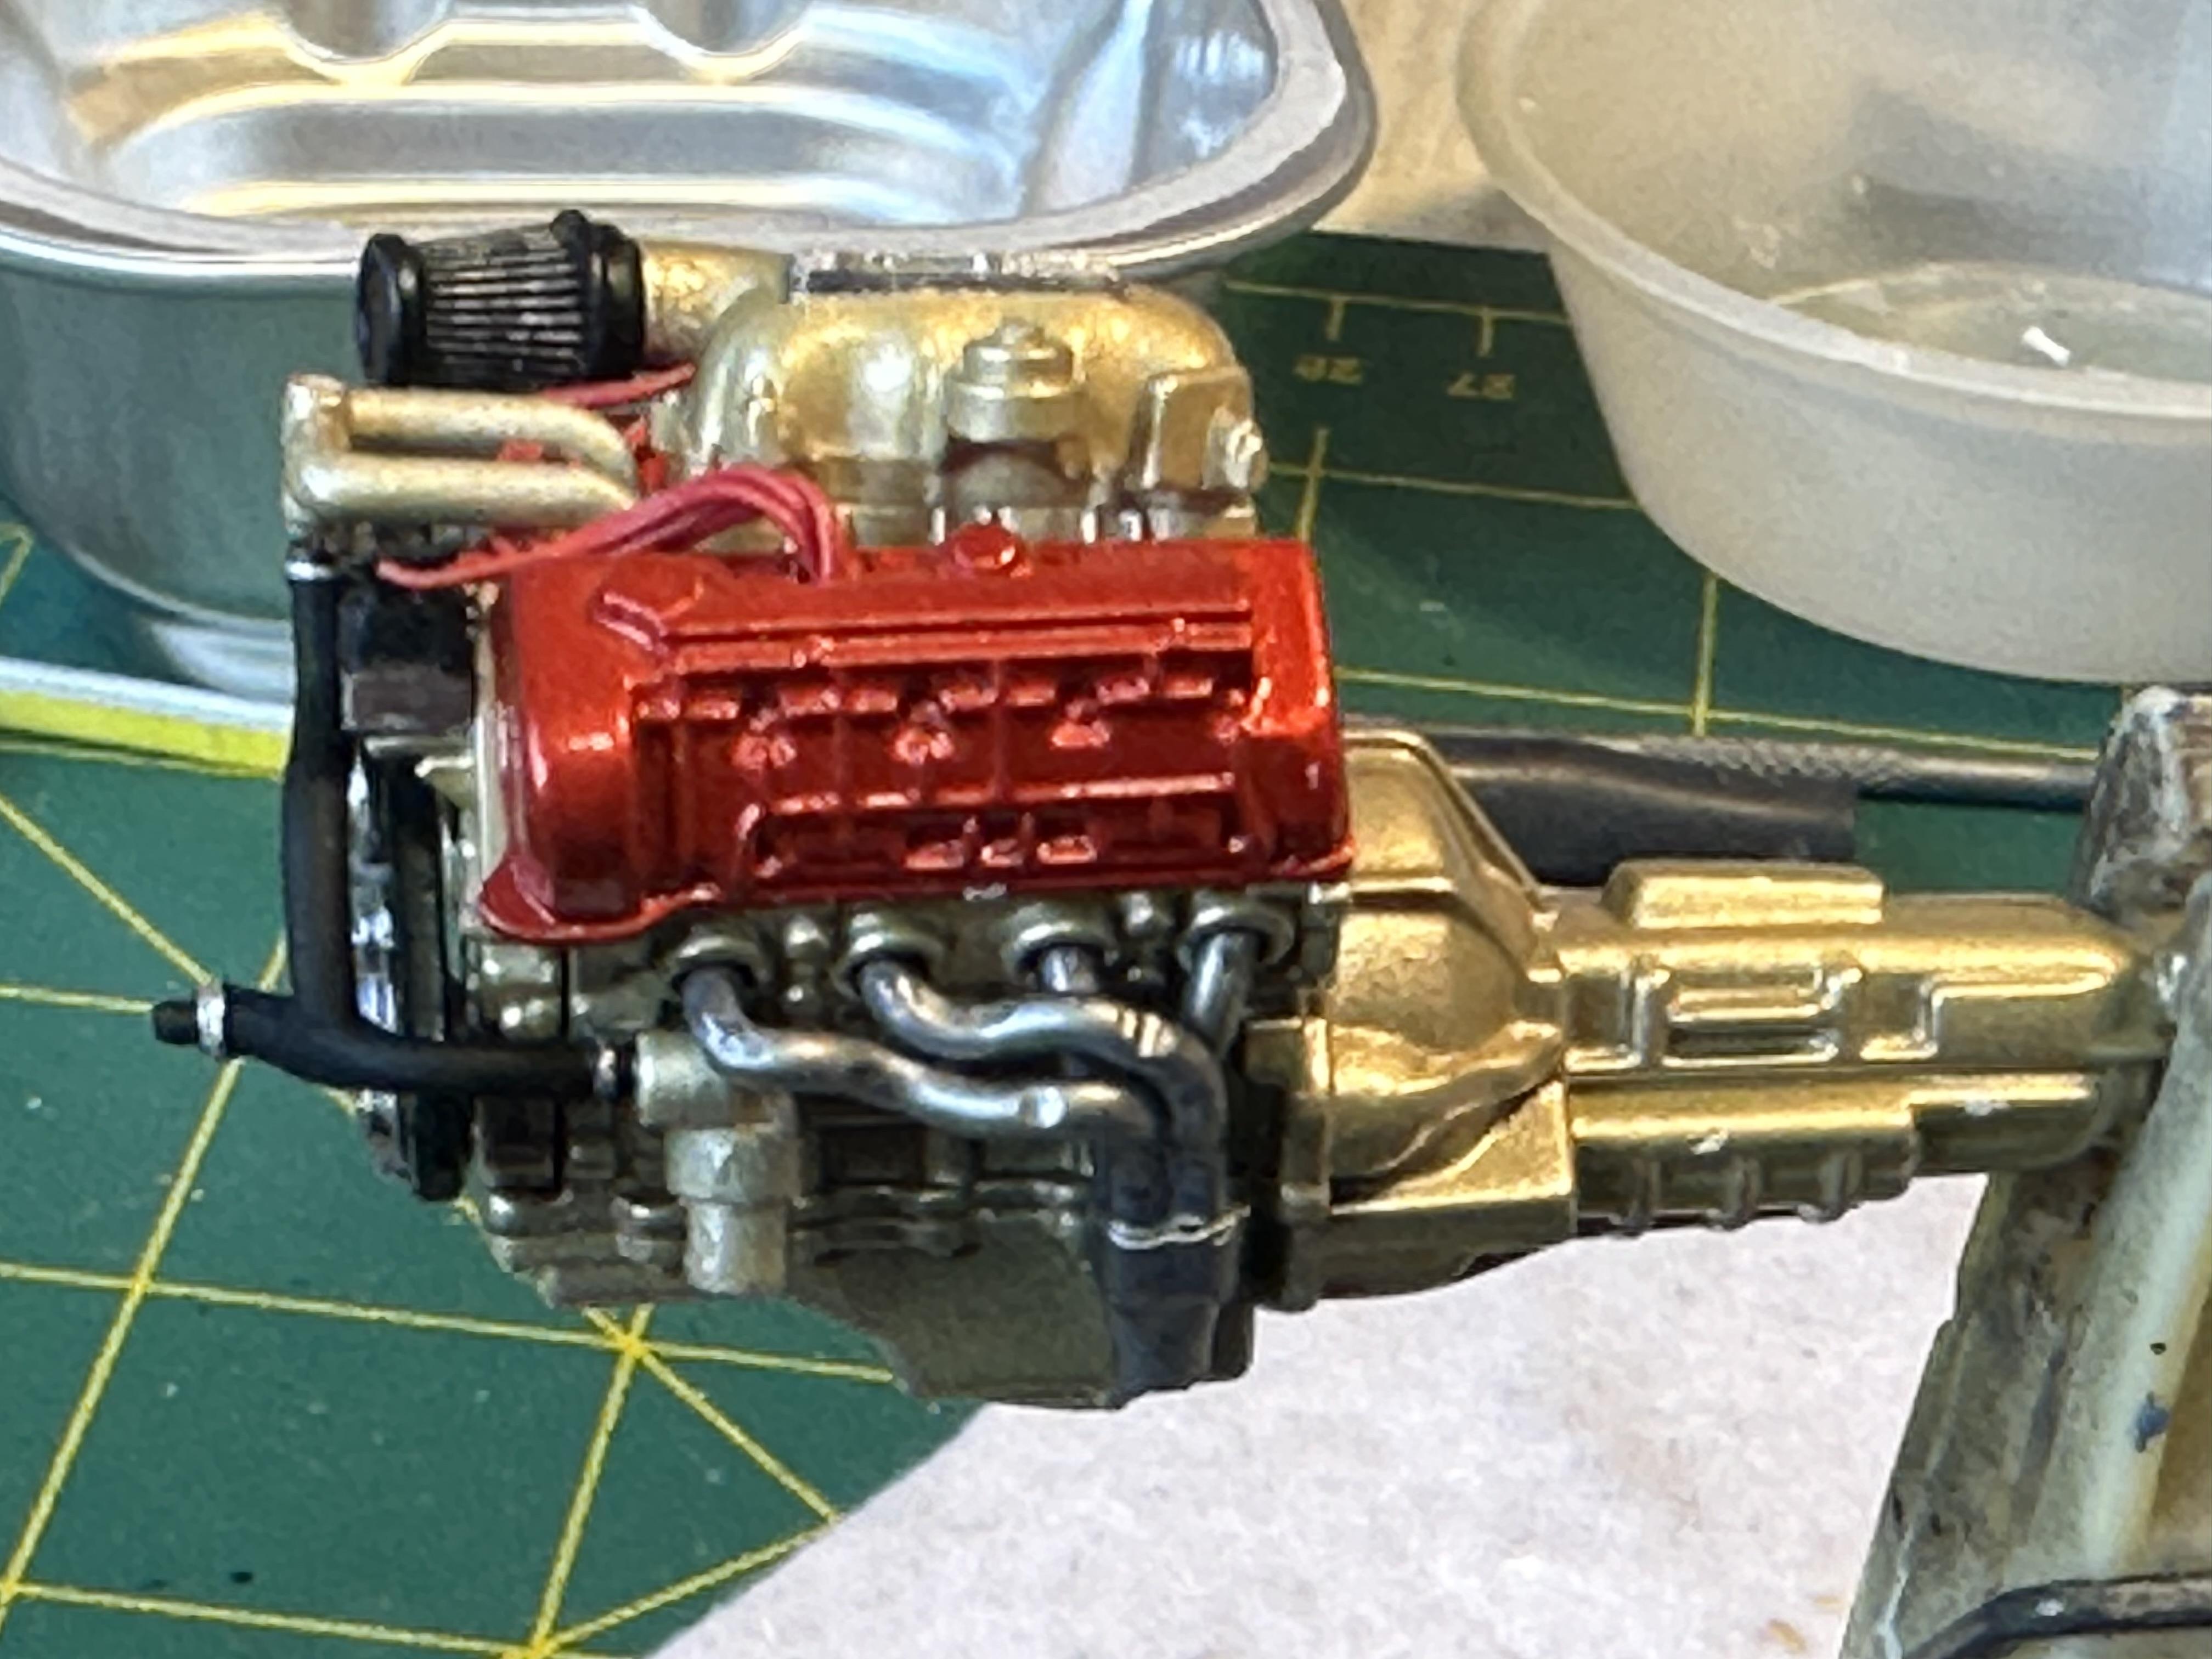
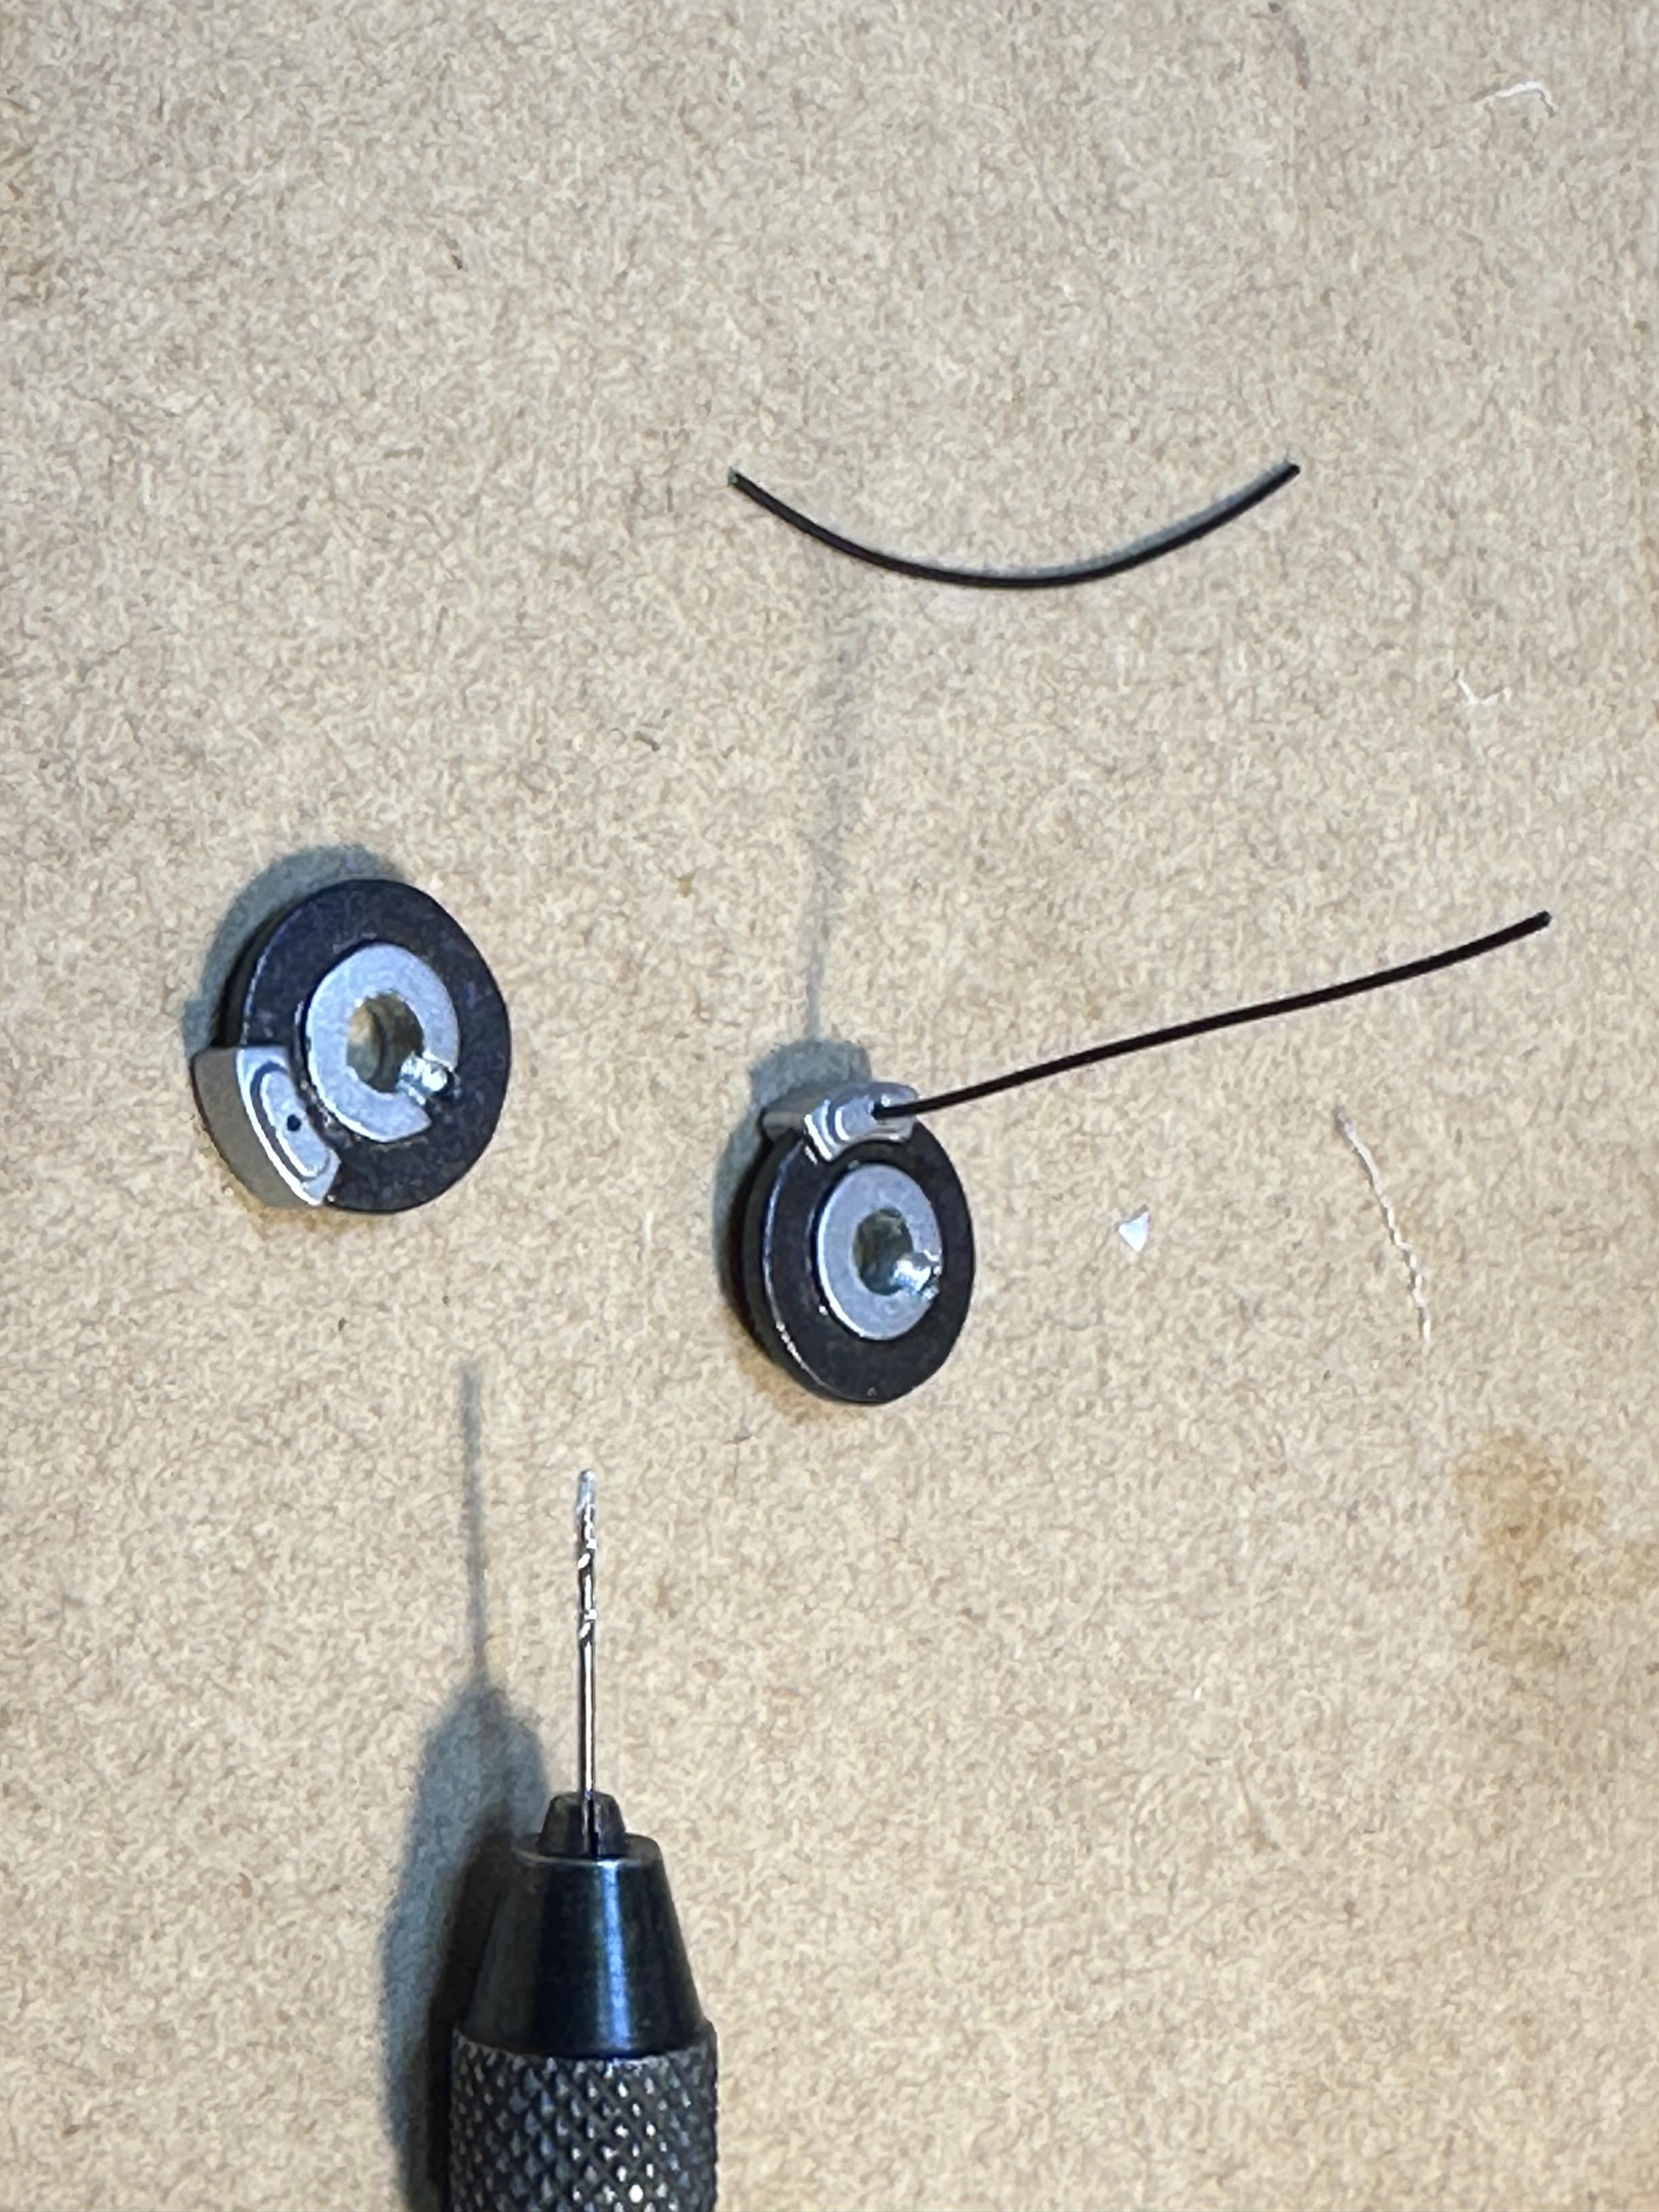
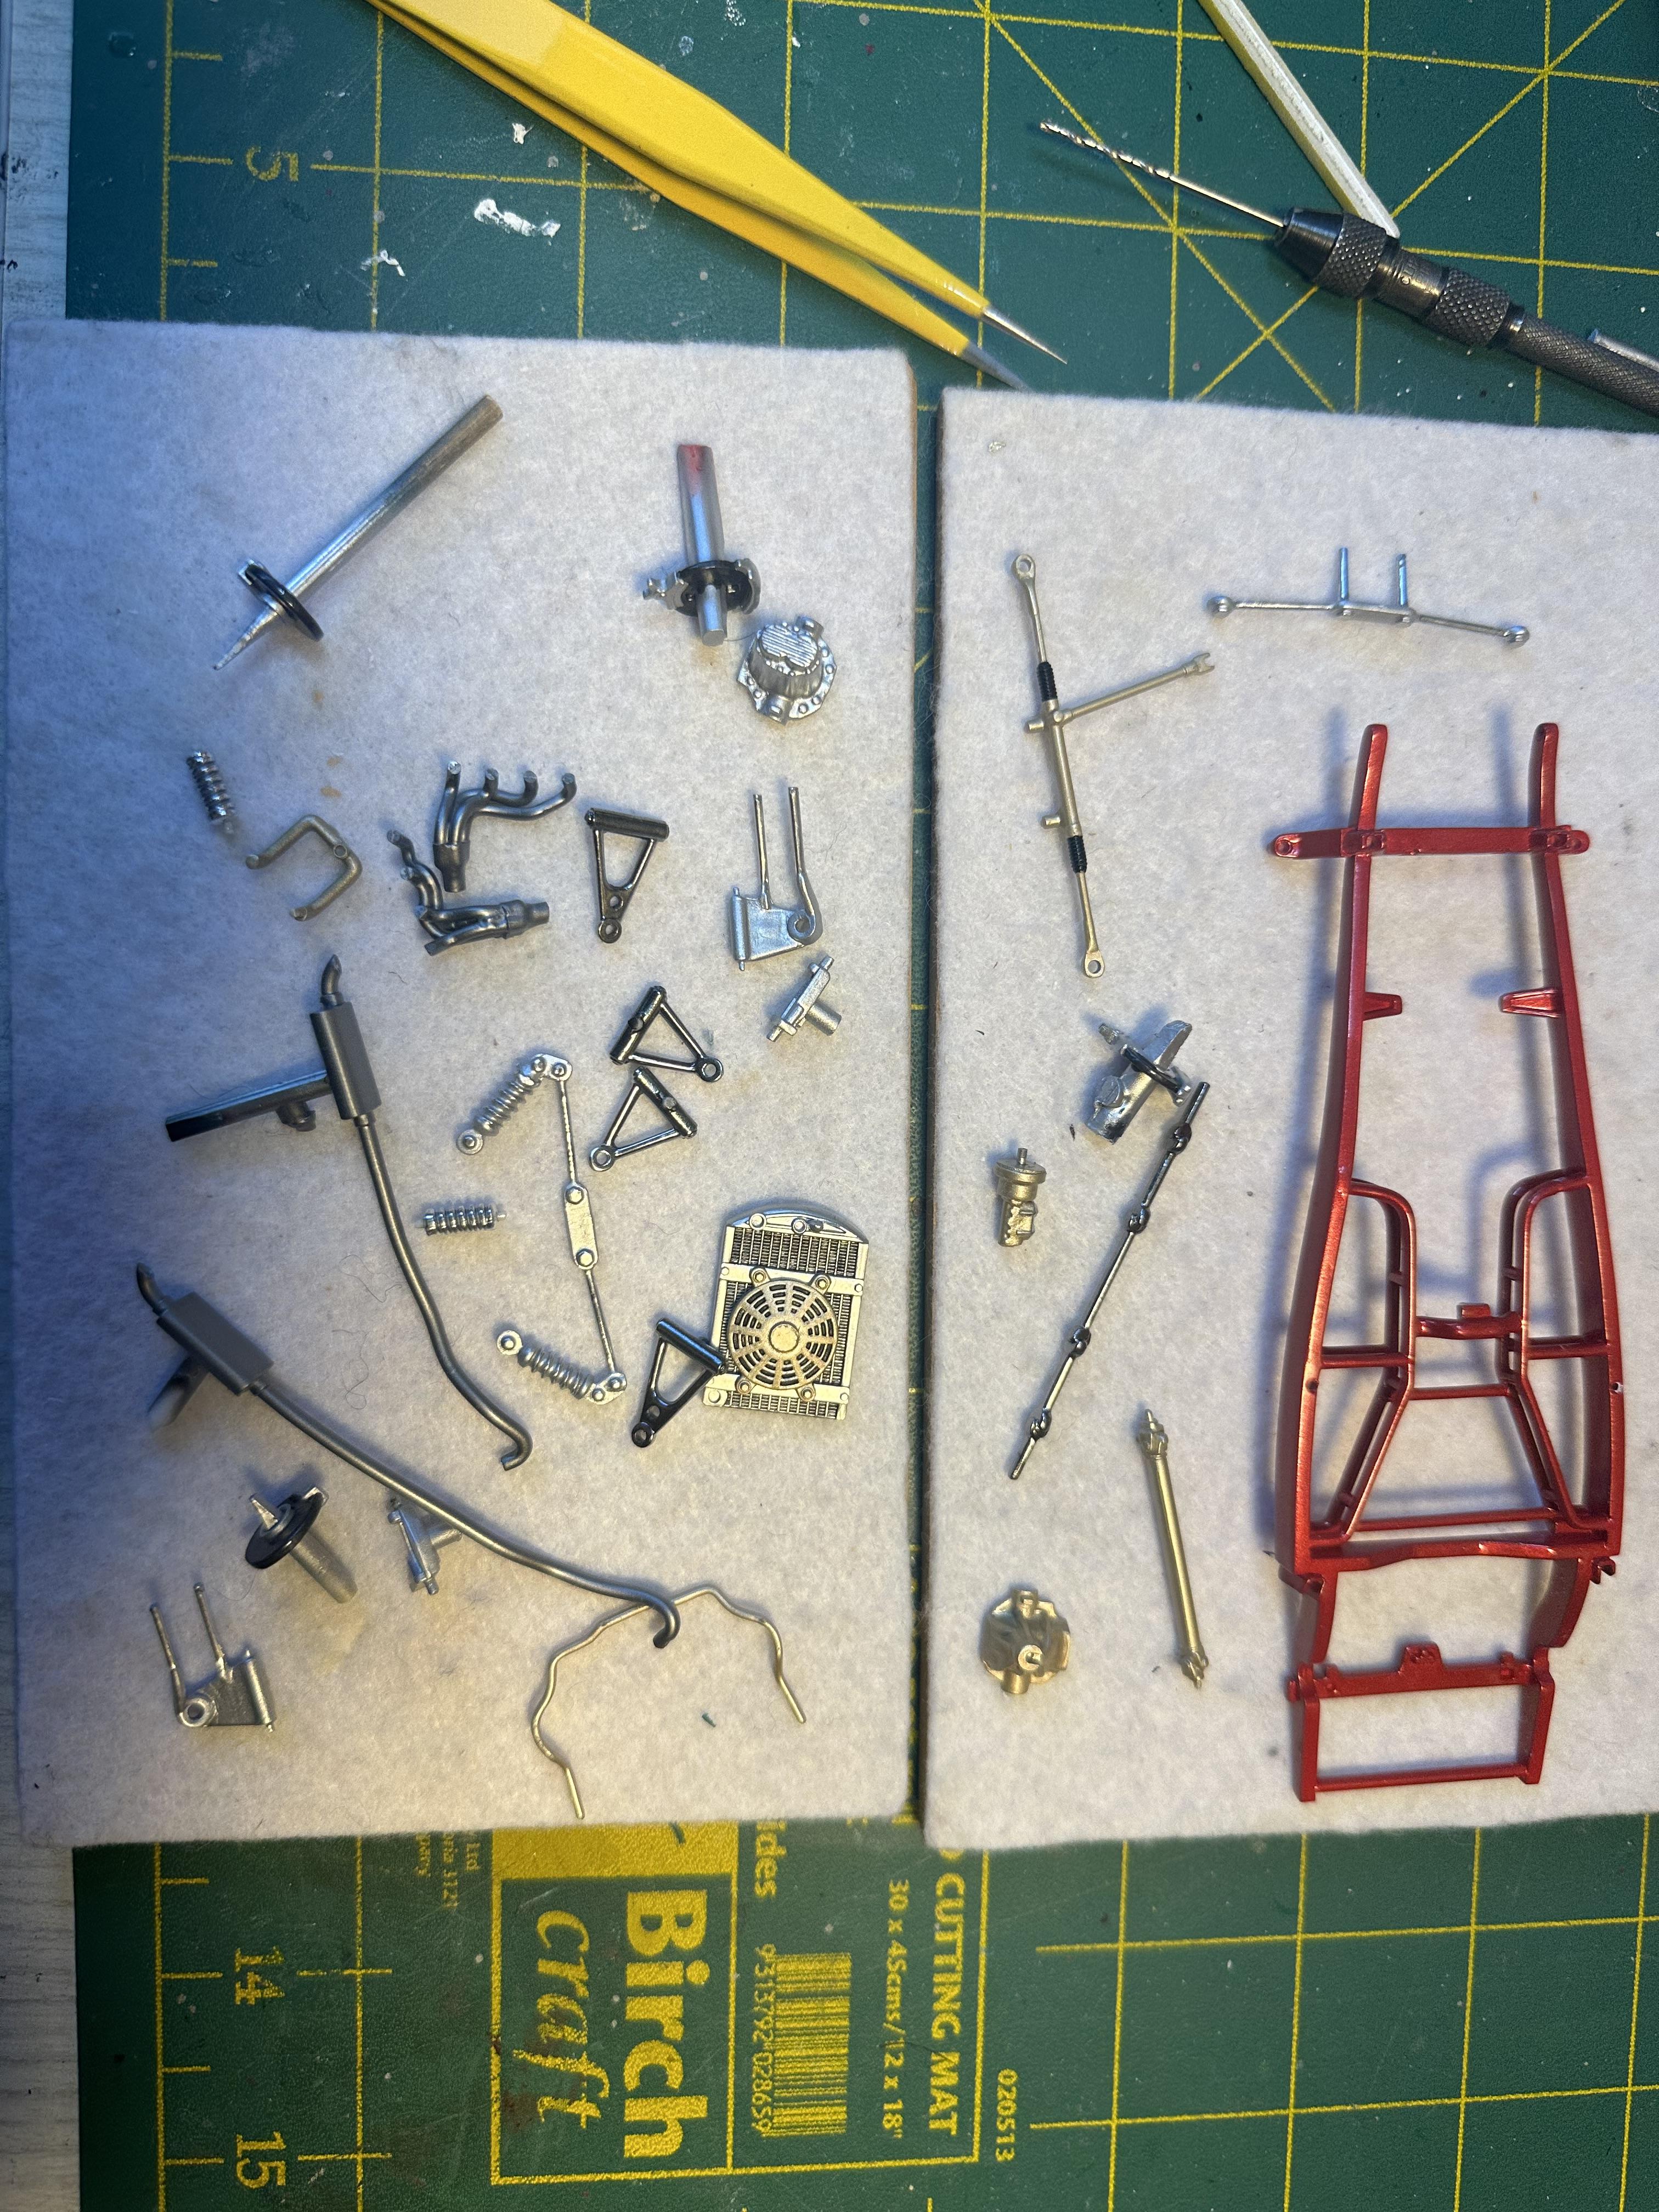
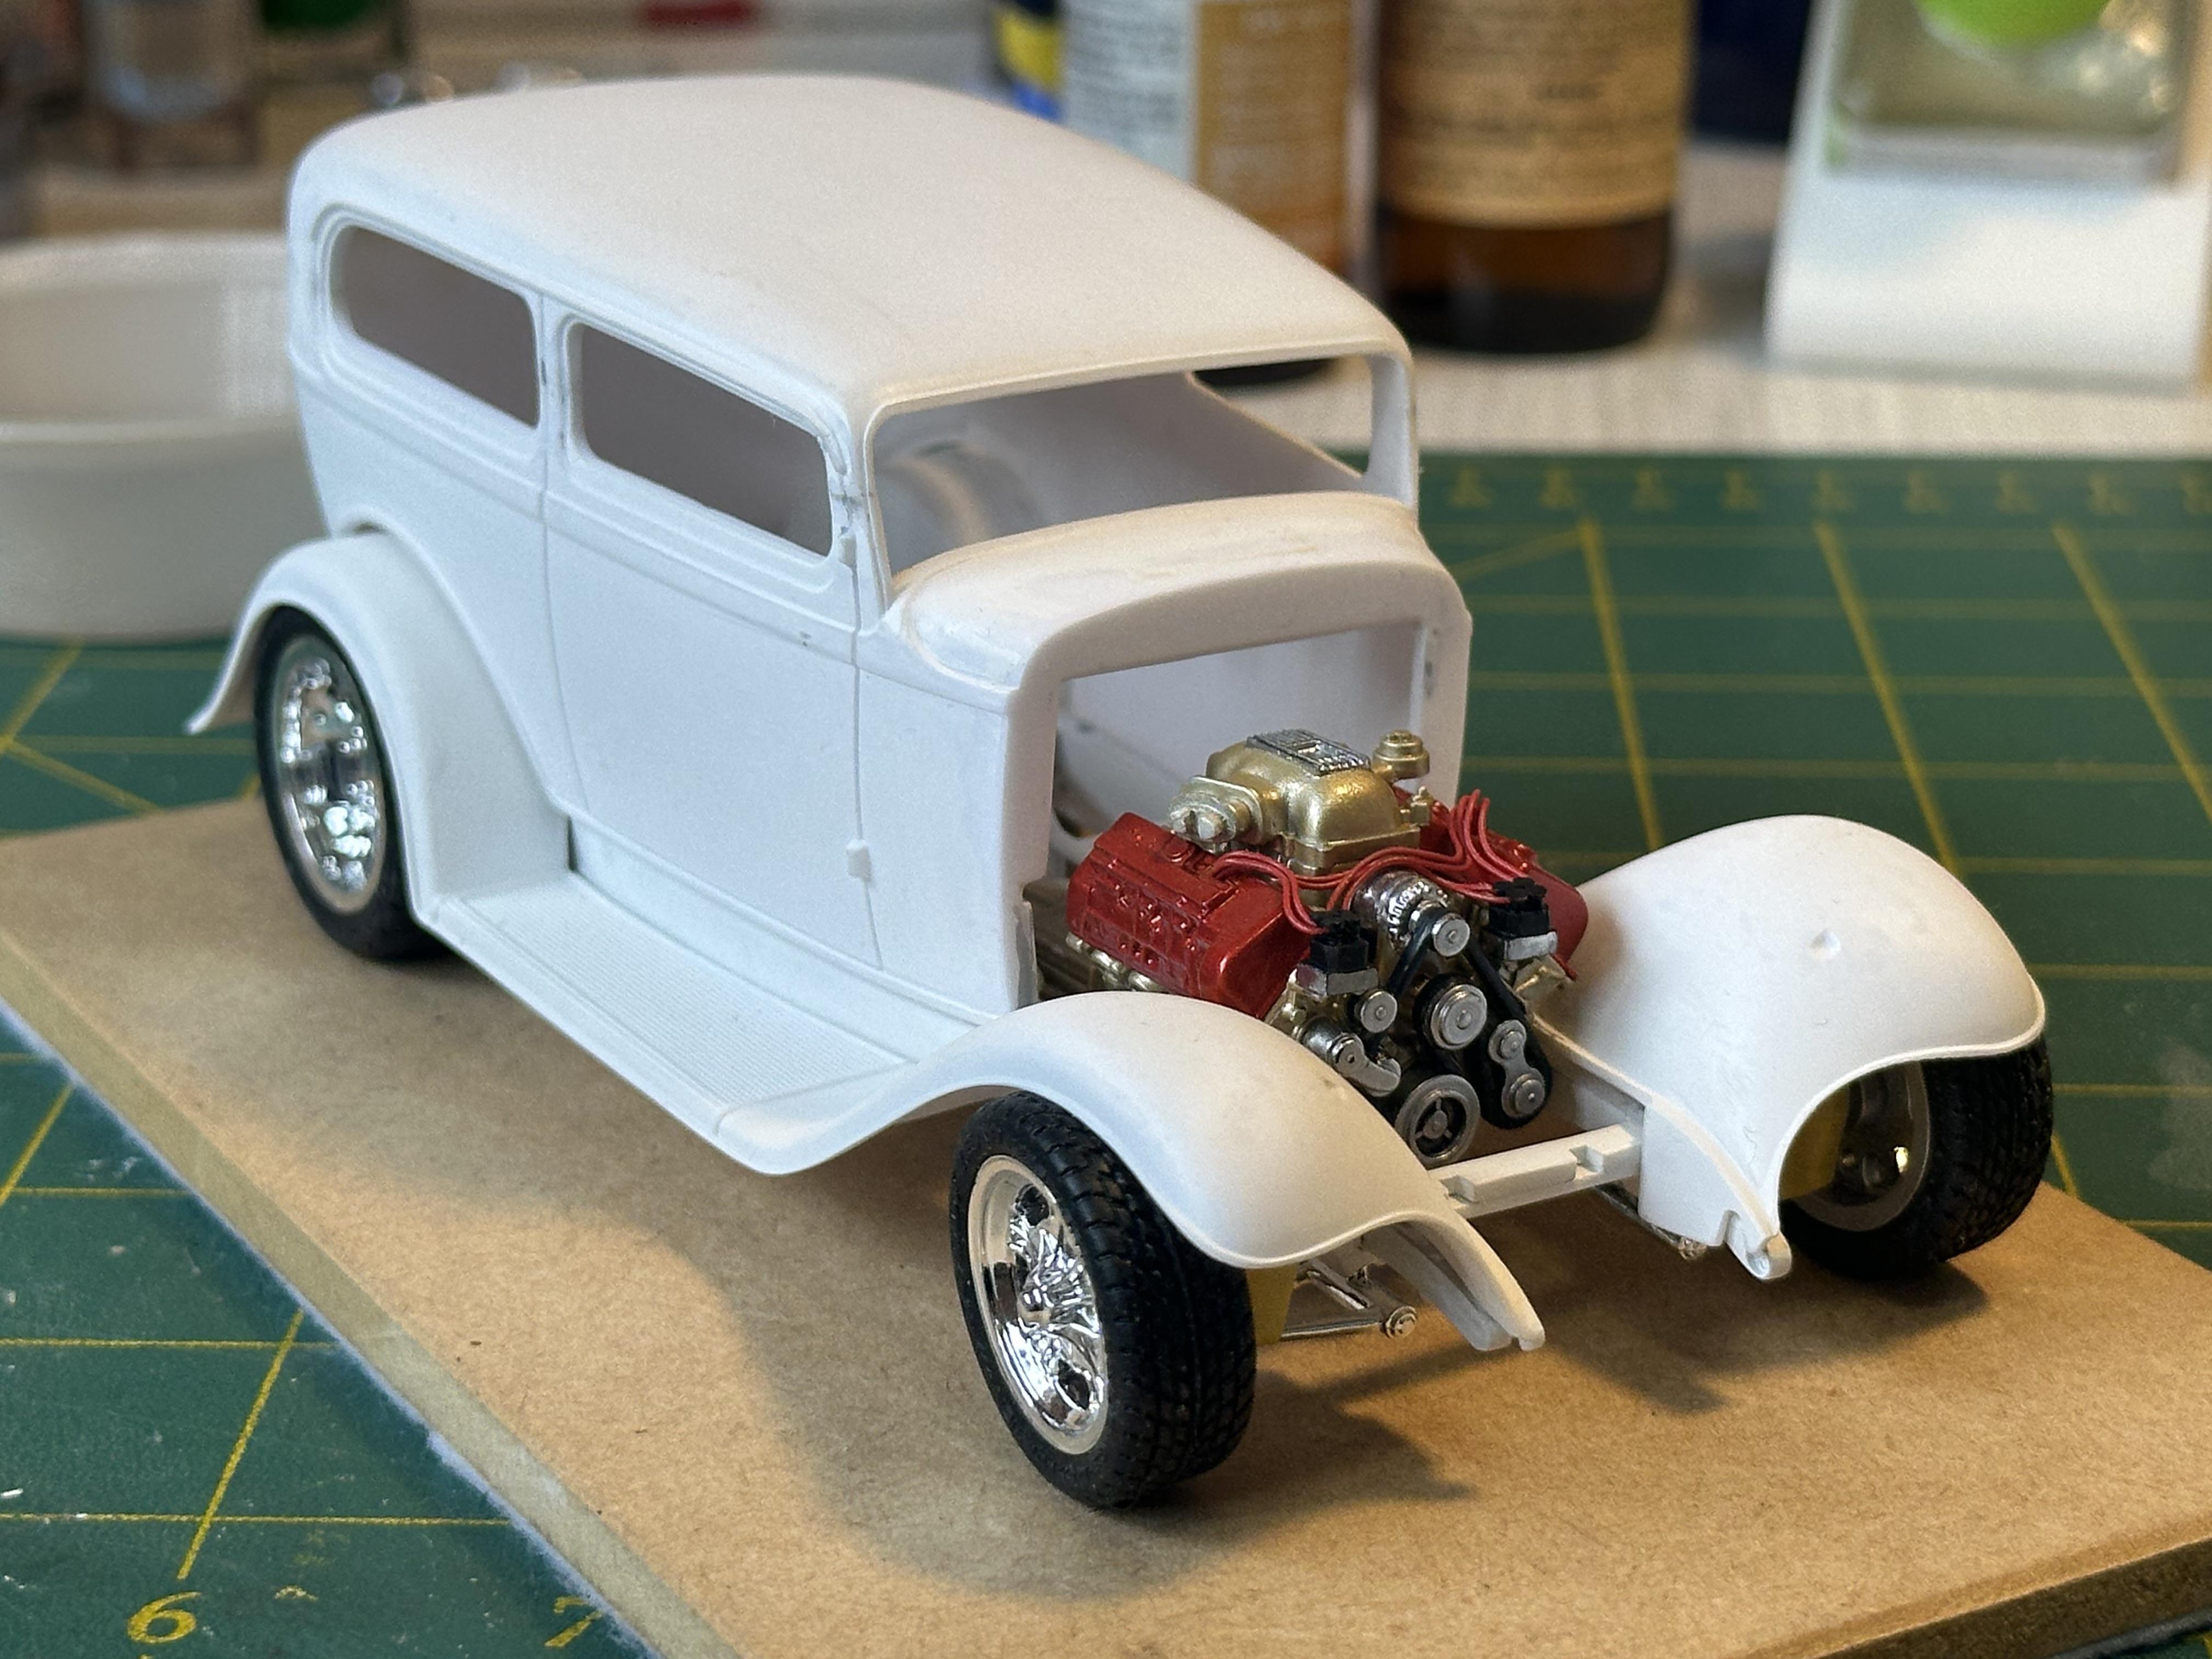
Bashing away at my build. Details, details and a few more details Added brake lines to the master cylinder. The lines are 32g hobby/bead making wire Motor is now assembled with the headers fitted. Headers painted with SMS stainless steel Prepping front brakes with hoses. Hose is 0.48mm and holes are 0.52m. Wire held in with superglue I had an oops when I went to install the rear coil over assembly and found there was nowhere to mount them to. I had to make a little bracket to mimic where the coil overs mounted on the Li'l John chassis. Installed the new mounts and finished off the rear end assembly. Also got the front end all together as well. The rear wheels halves needed clamping together and are now waiting for glue to dry. Fronts have been assembled Next up is install motor and wheels - whoopee Thanks for looking
-
Looking good Kit. The fix around the passenger compartment doors has tidied it up heaps
-
Another of your great left field builds. Great job Claude
-
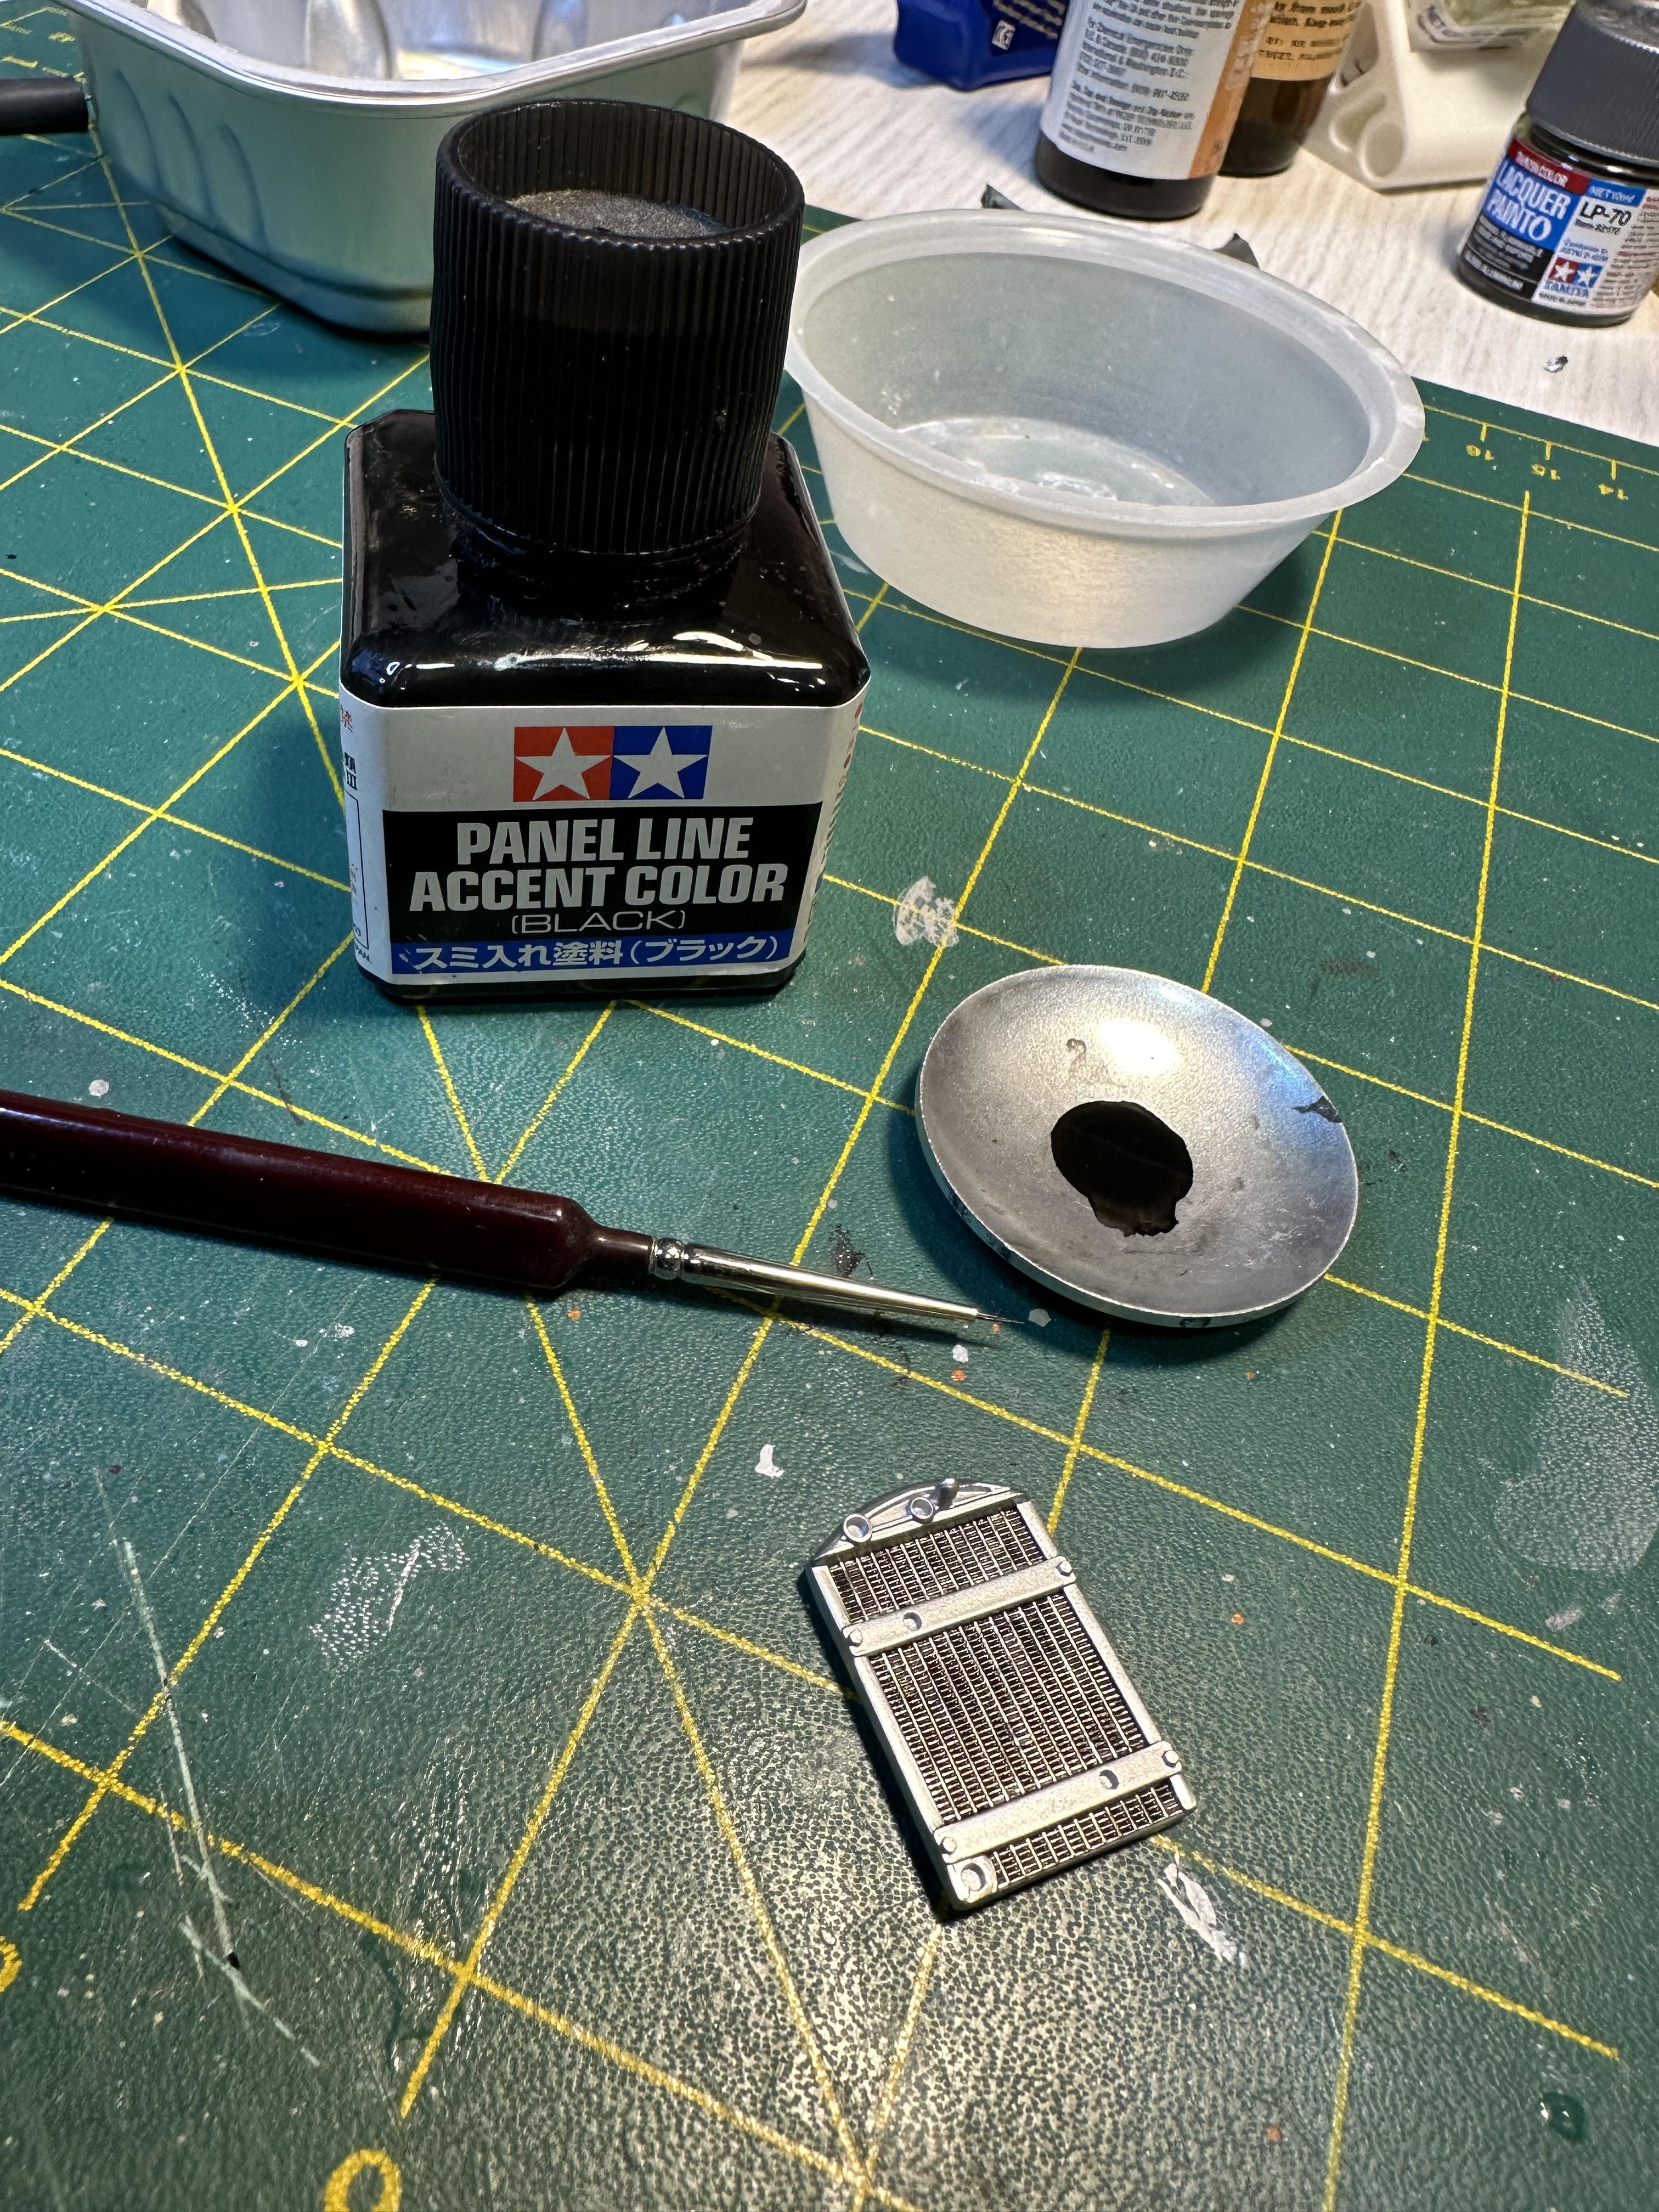
I have been chipping away at my sedan. I sprayed the tinted Tamiya primer on the guards and floor boards etc in preparation for a final sand before colour I cleaned up the Lil' John rear end. My version is from a 34 Coupe and had really quite bad flash so all of the chrome had to come off. On Lil'Johns 26 T where the rear end originated from is mostly billet ally so all of the parts were painted in SMS aluminum. The traction bars and tie rods were highlighted with Molotow chrome pen. The front end was stripped and cleaned and painted with SMS cold tone chrome over gloss black. All of the chassis components shown here ready for assembly and some more detailing Detailing the radiator. Main color is SMS aluminum with Tamiya Fine Line Accent flowed in between the fins. A final dry brush with some aluminum (not shown here) to complete. Thanks for looking
-
Thanks Tim, we have missed you. Hope all is well
-
Steve, I used to use ones like that too, but wire coat hangers are rather rare around our place. Like everything they have turned into plastic BAH!
-
A most useful tip. Sweat the small stuff and the big stuff looks after it's self
-
Glad to share and happy you have solved your dilemma
-
Oh, I forgot to add - total cost was NZ$3.00 for the piano wire. All else as found in my workshop
-
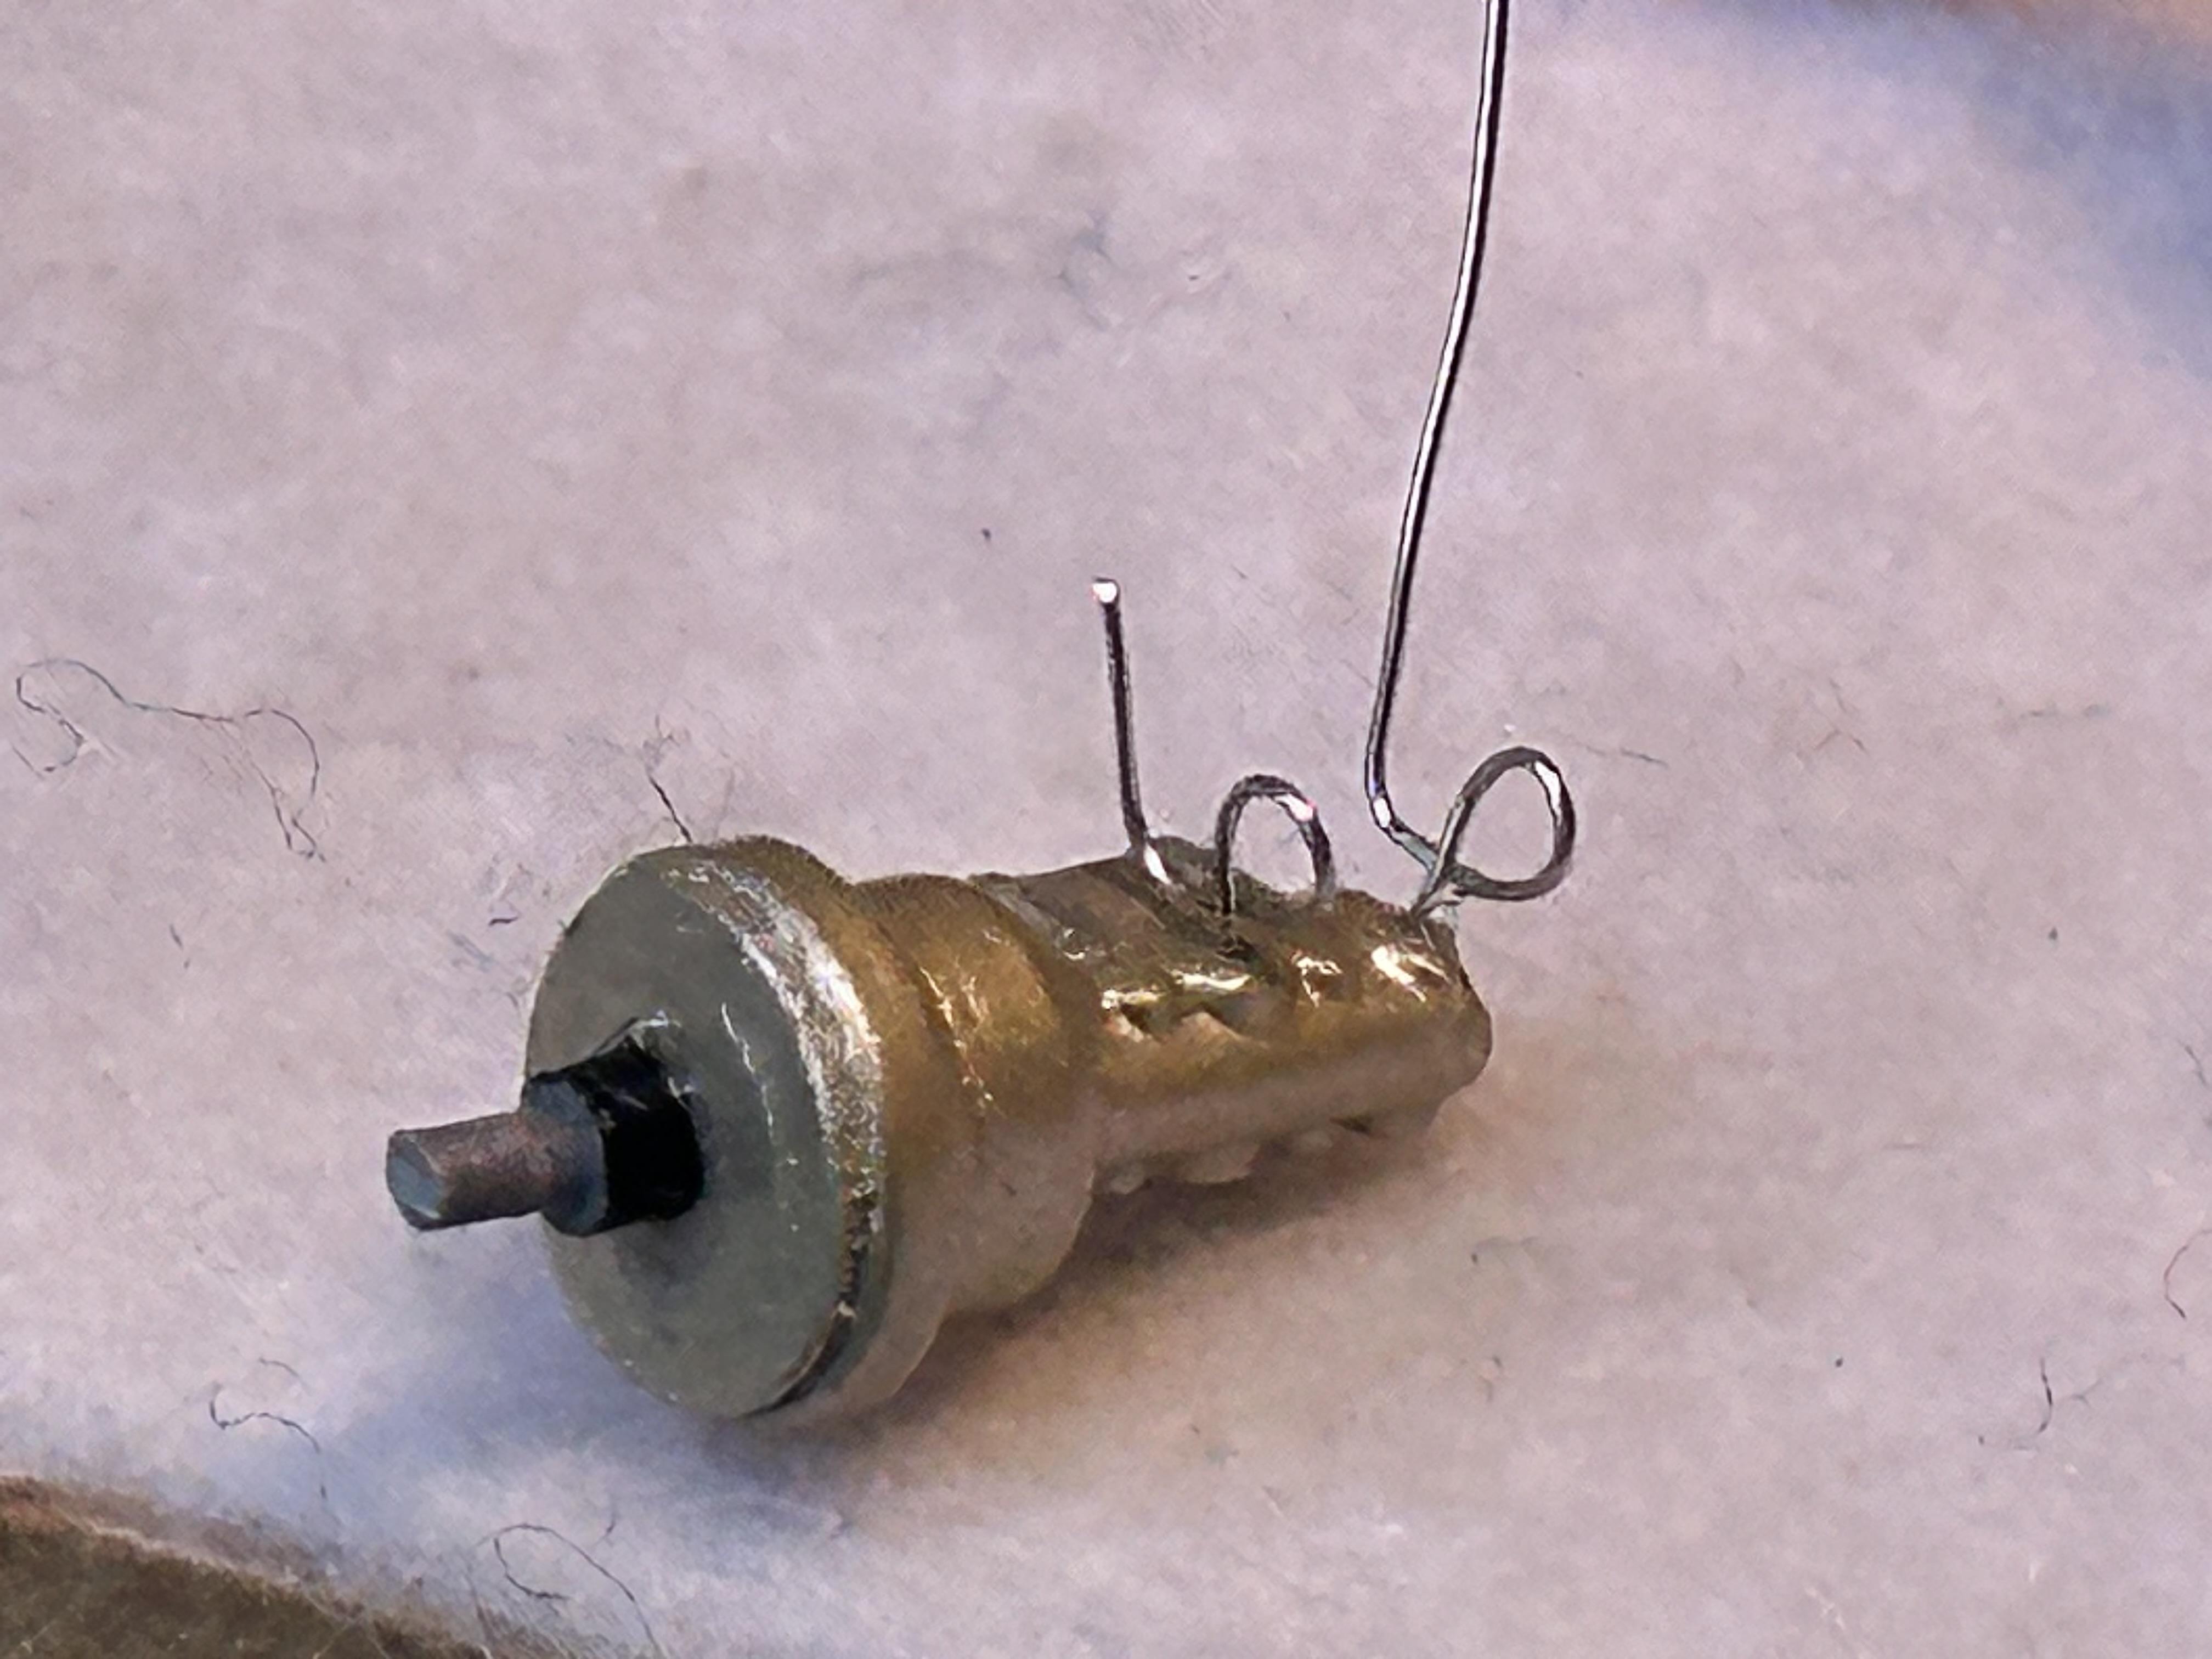
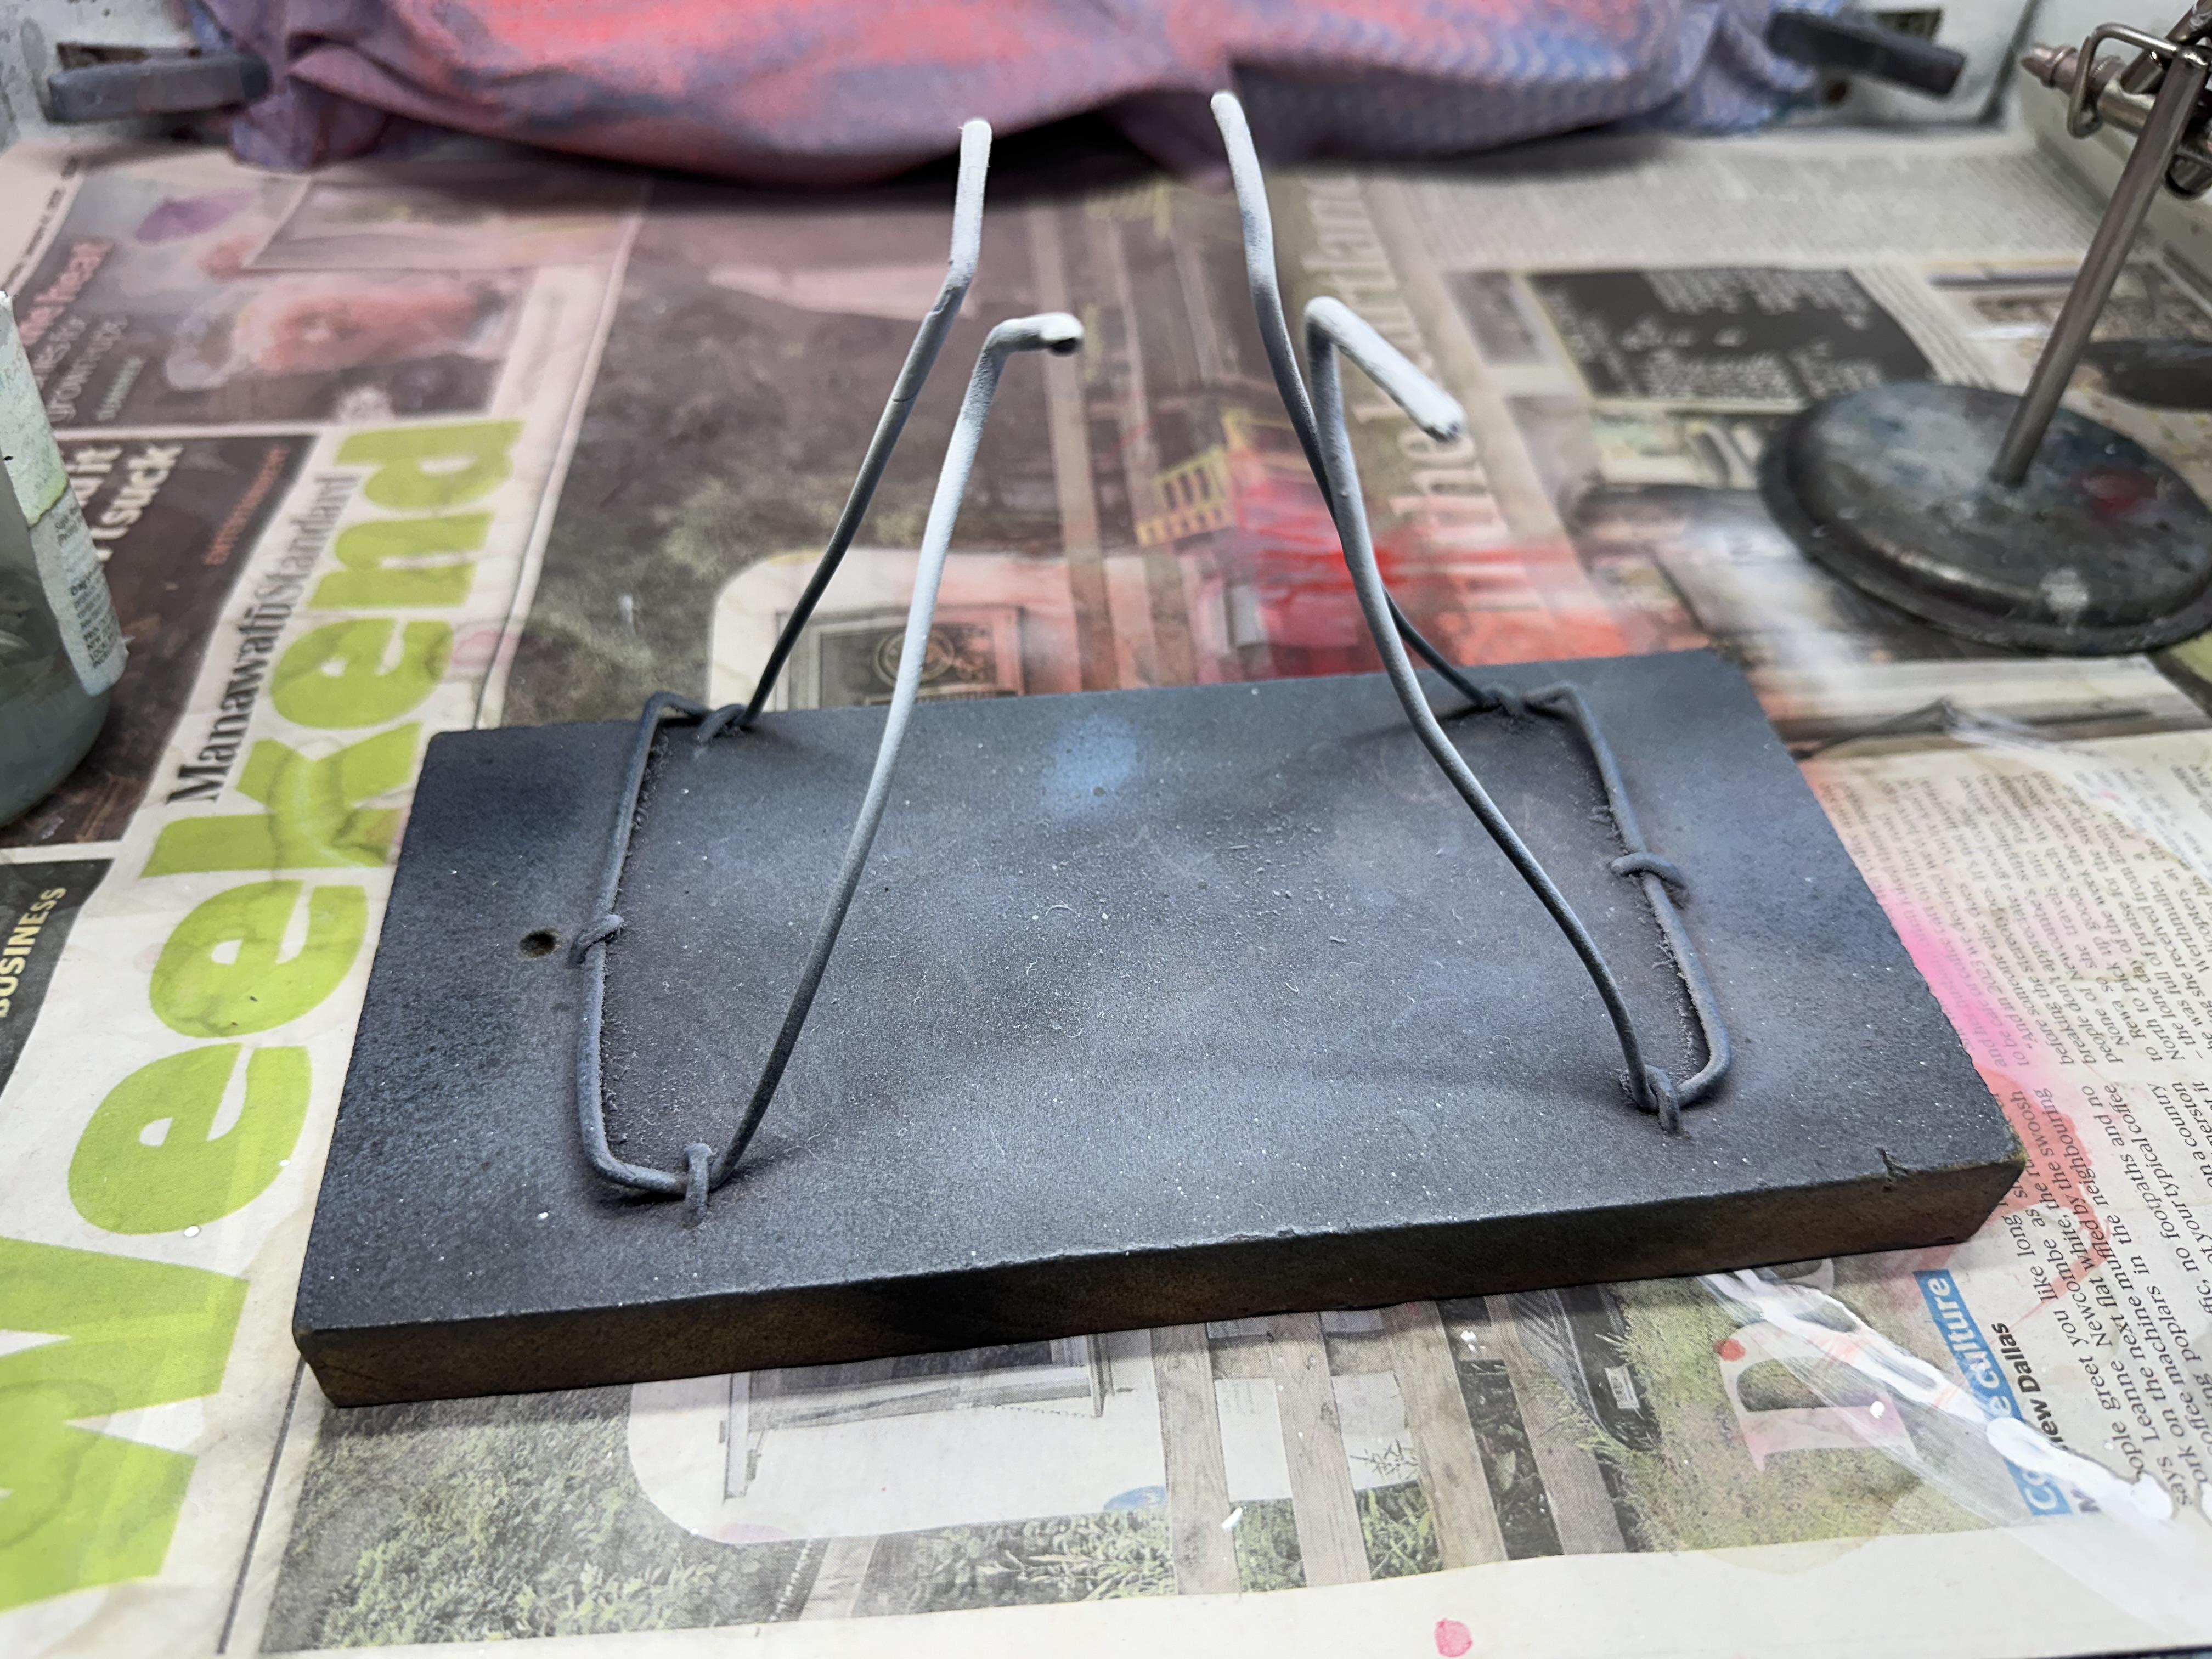
My latest shot at making a body holder Materials - - 2mm piano wire - customwood Base - cut to suit - mine was a piece as found - Silicone tube - found and is about 1/4"od I have used piano wire as this is easy to get from a model shop and has a lot of spring, and it is quite hard. Bend up the piano wire - I used a vise and a soft hammer and cut to length. Unbent legs were 130mm and top is 75mm. Return is about 15mm. The ends have been cleaned up to allow ease of changed holes to suit body. The slicone tube is slid over the tube and is cut at 75mm I set out for drill 2mm holes on a 20 and 40mm wide spacing Body holder as made In use holder with a body fitted - in this case a 1/25th 32 coupe. Note 20mm spacing holes are being used And a very, very old and well used holder ready to be chucked out. Was made from coat hanger wire which is too soft IMO. The point contact did not always hold the body steady when in use
-
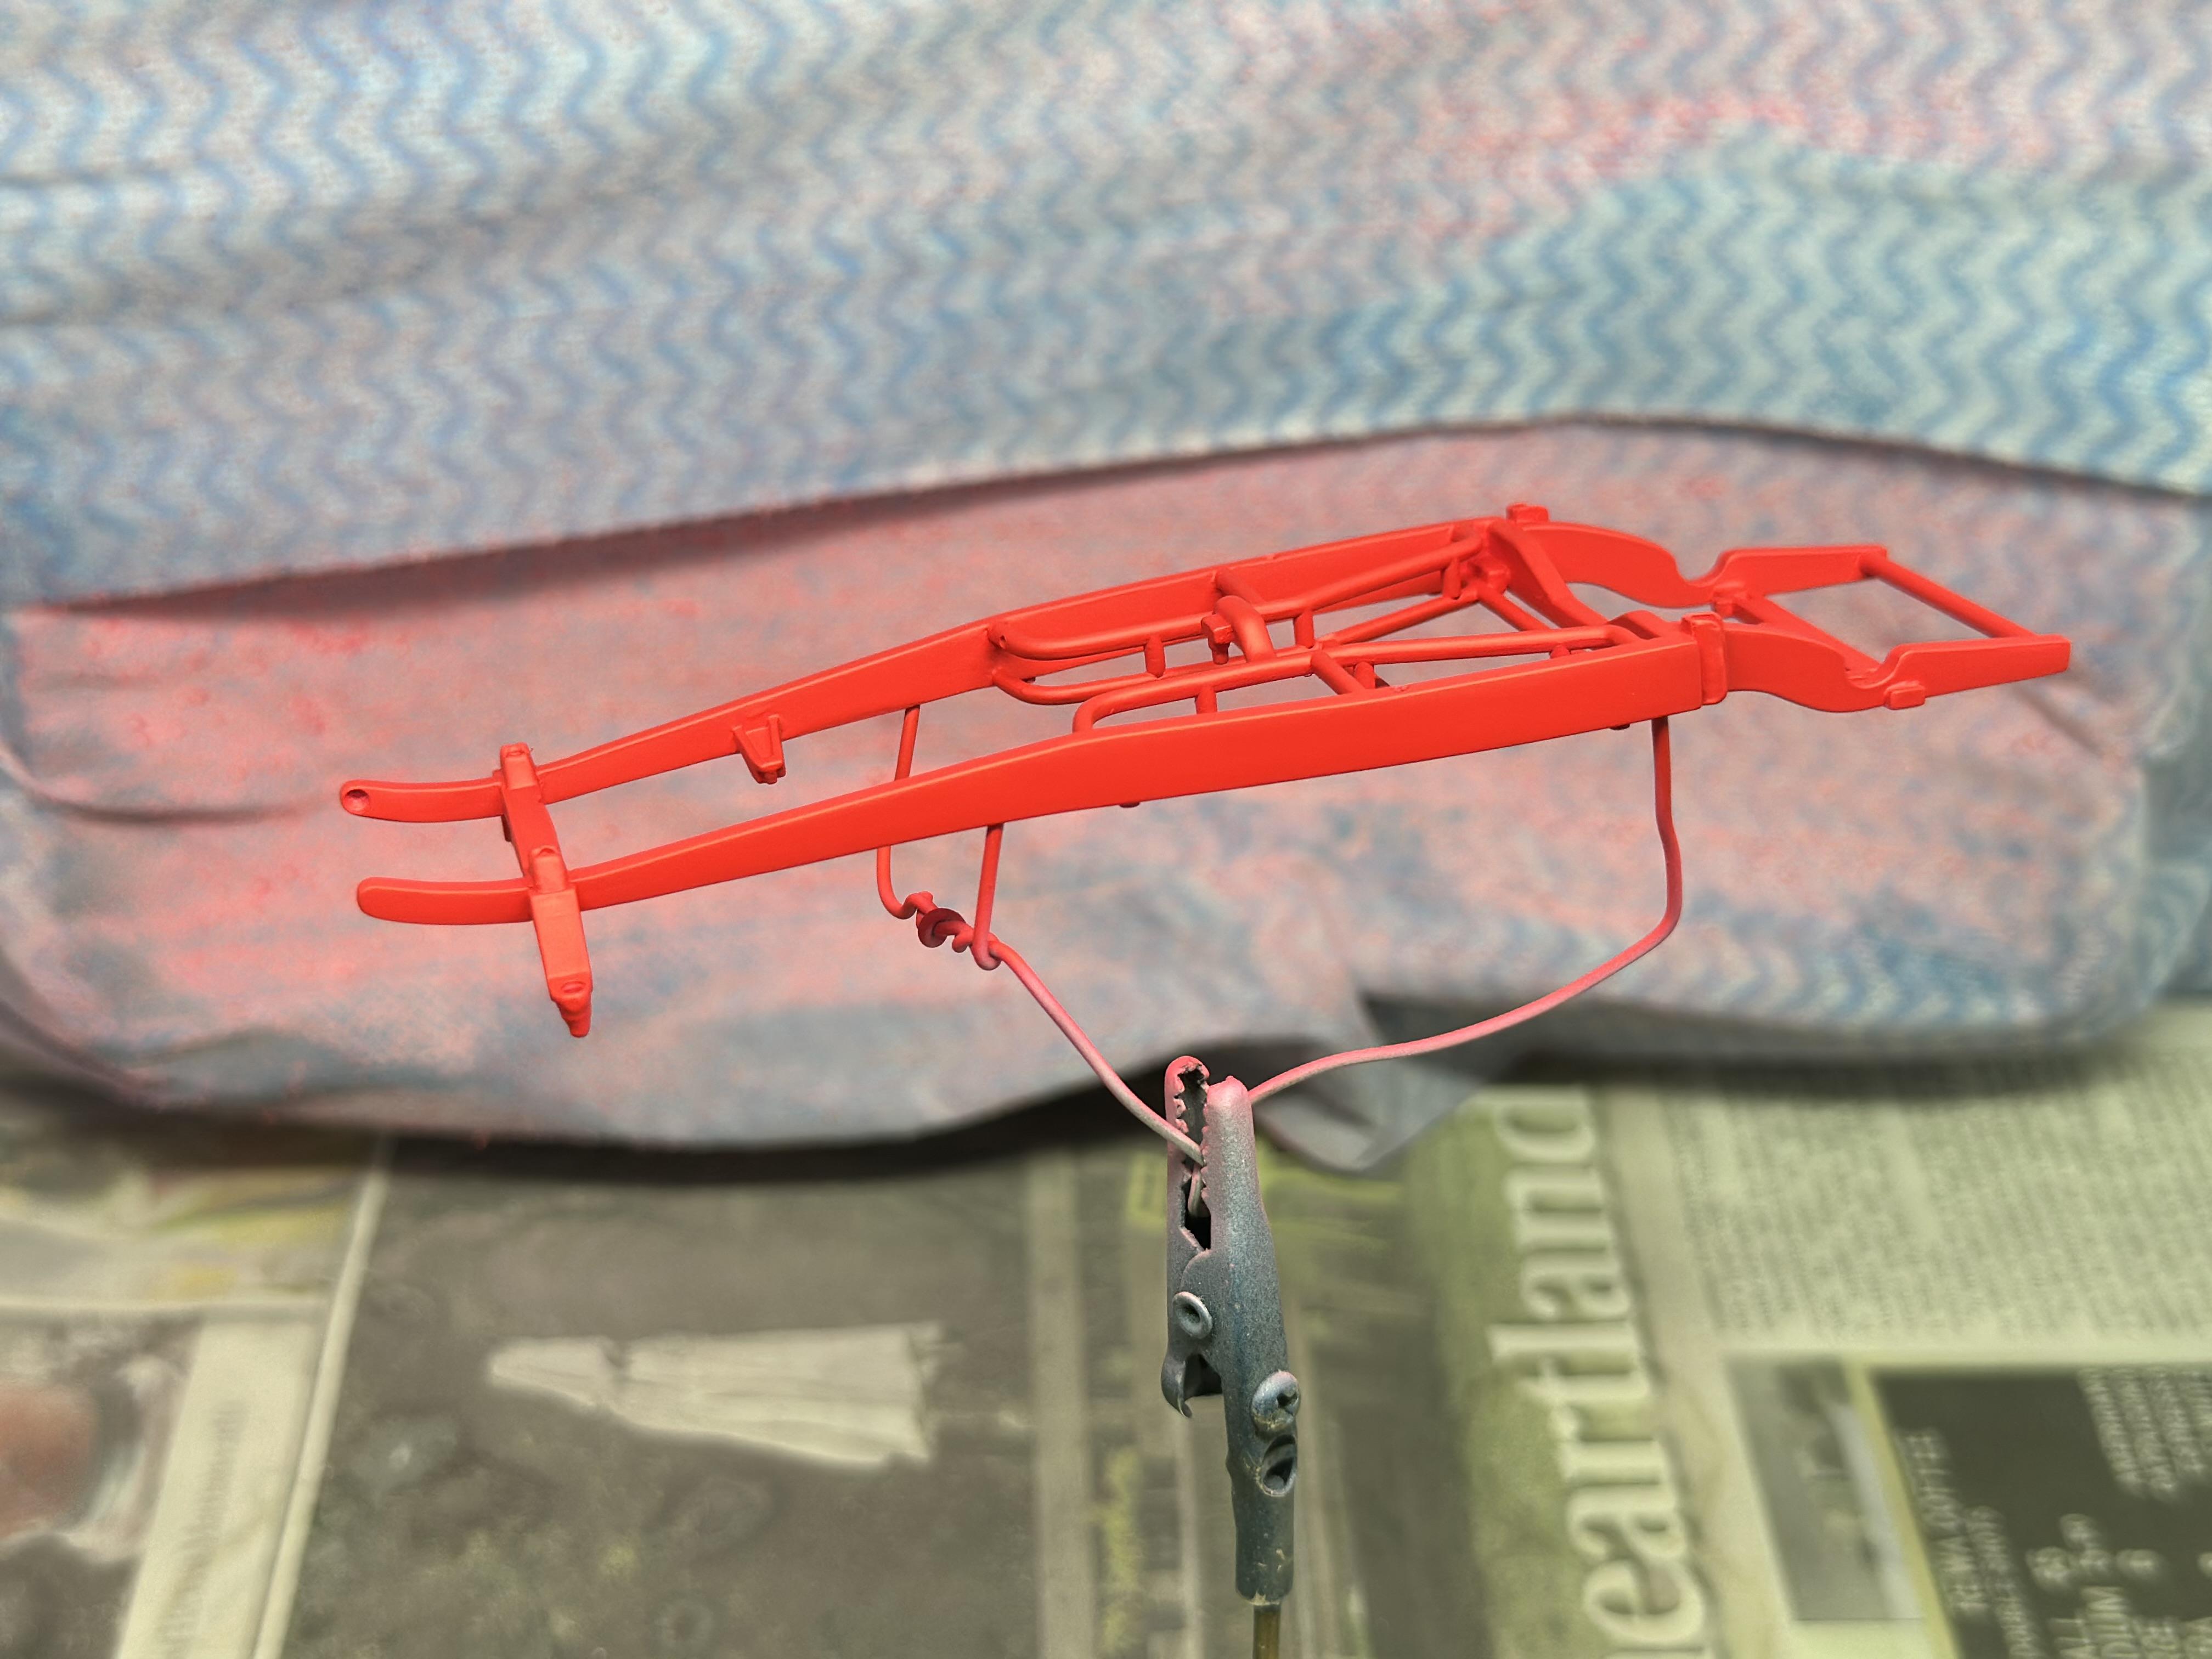
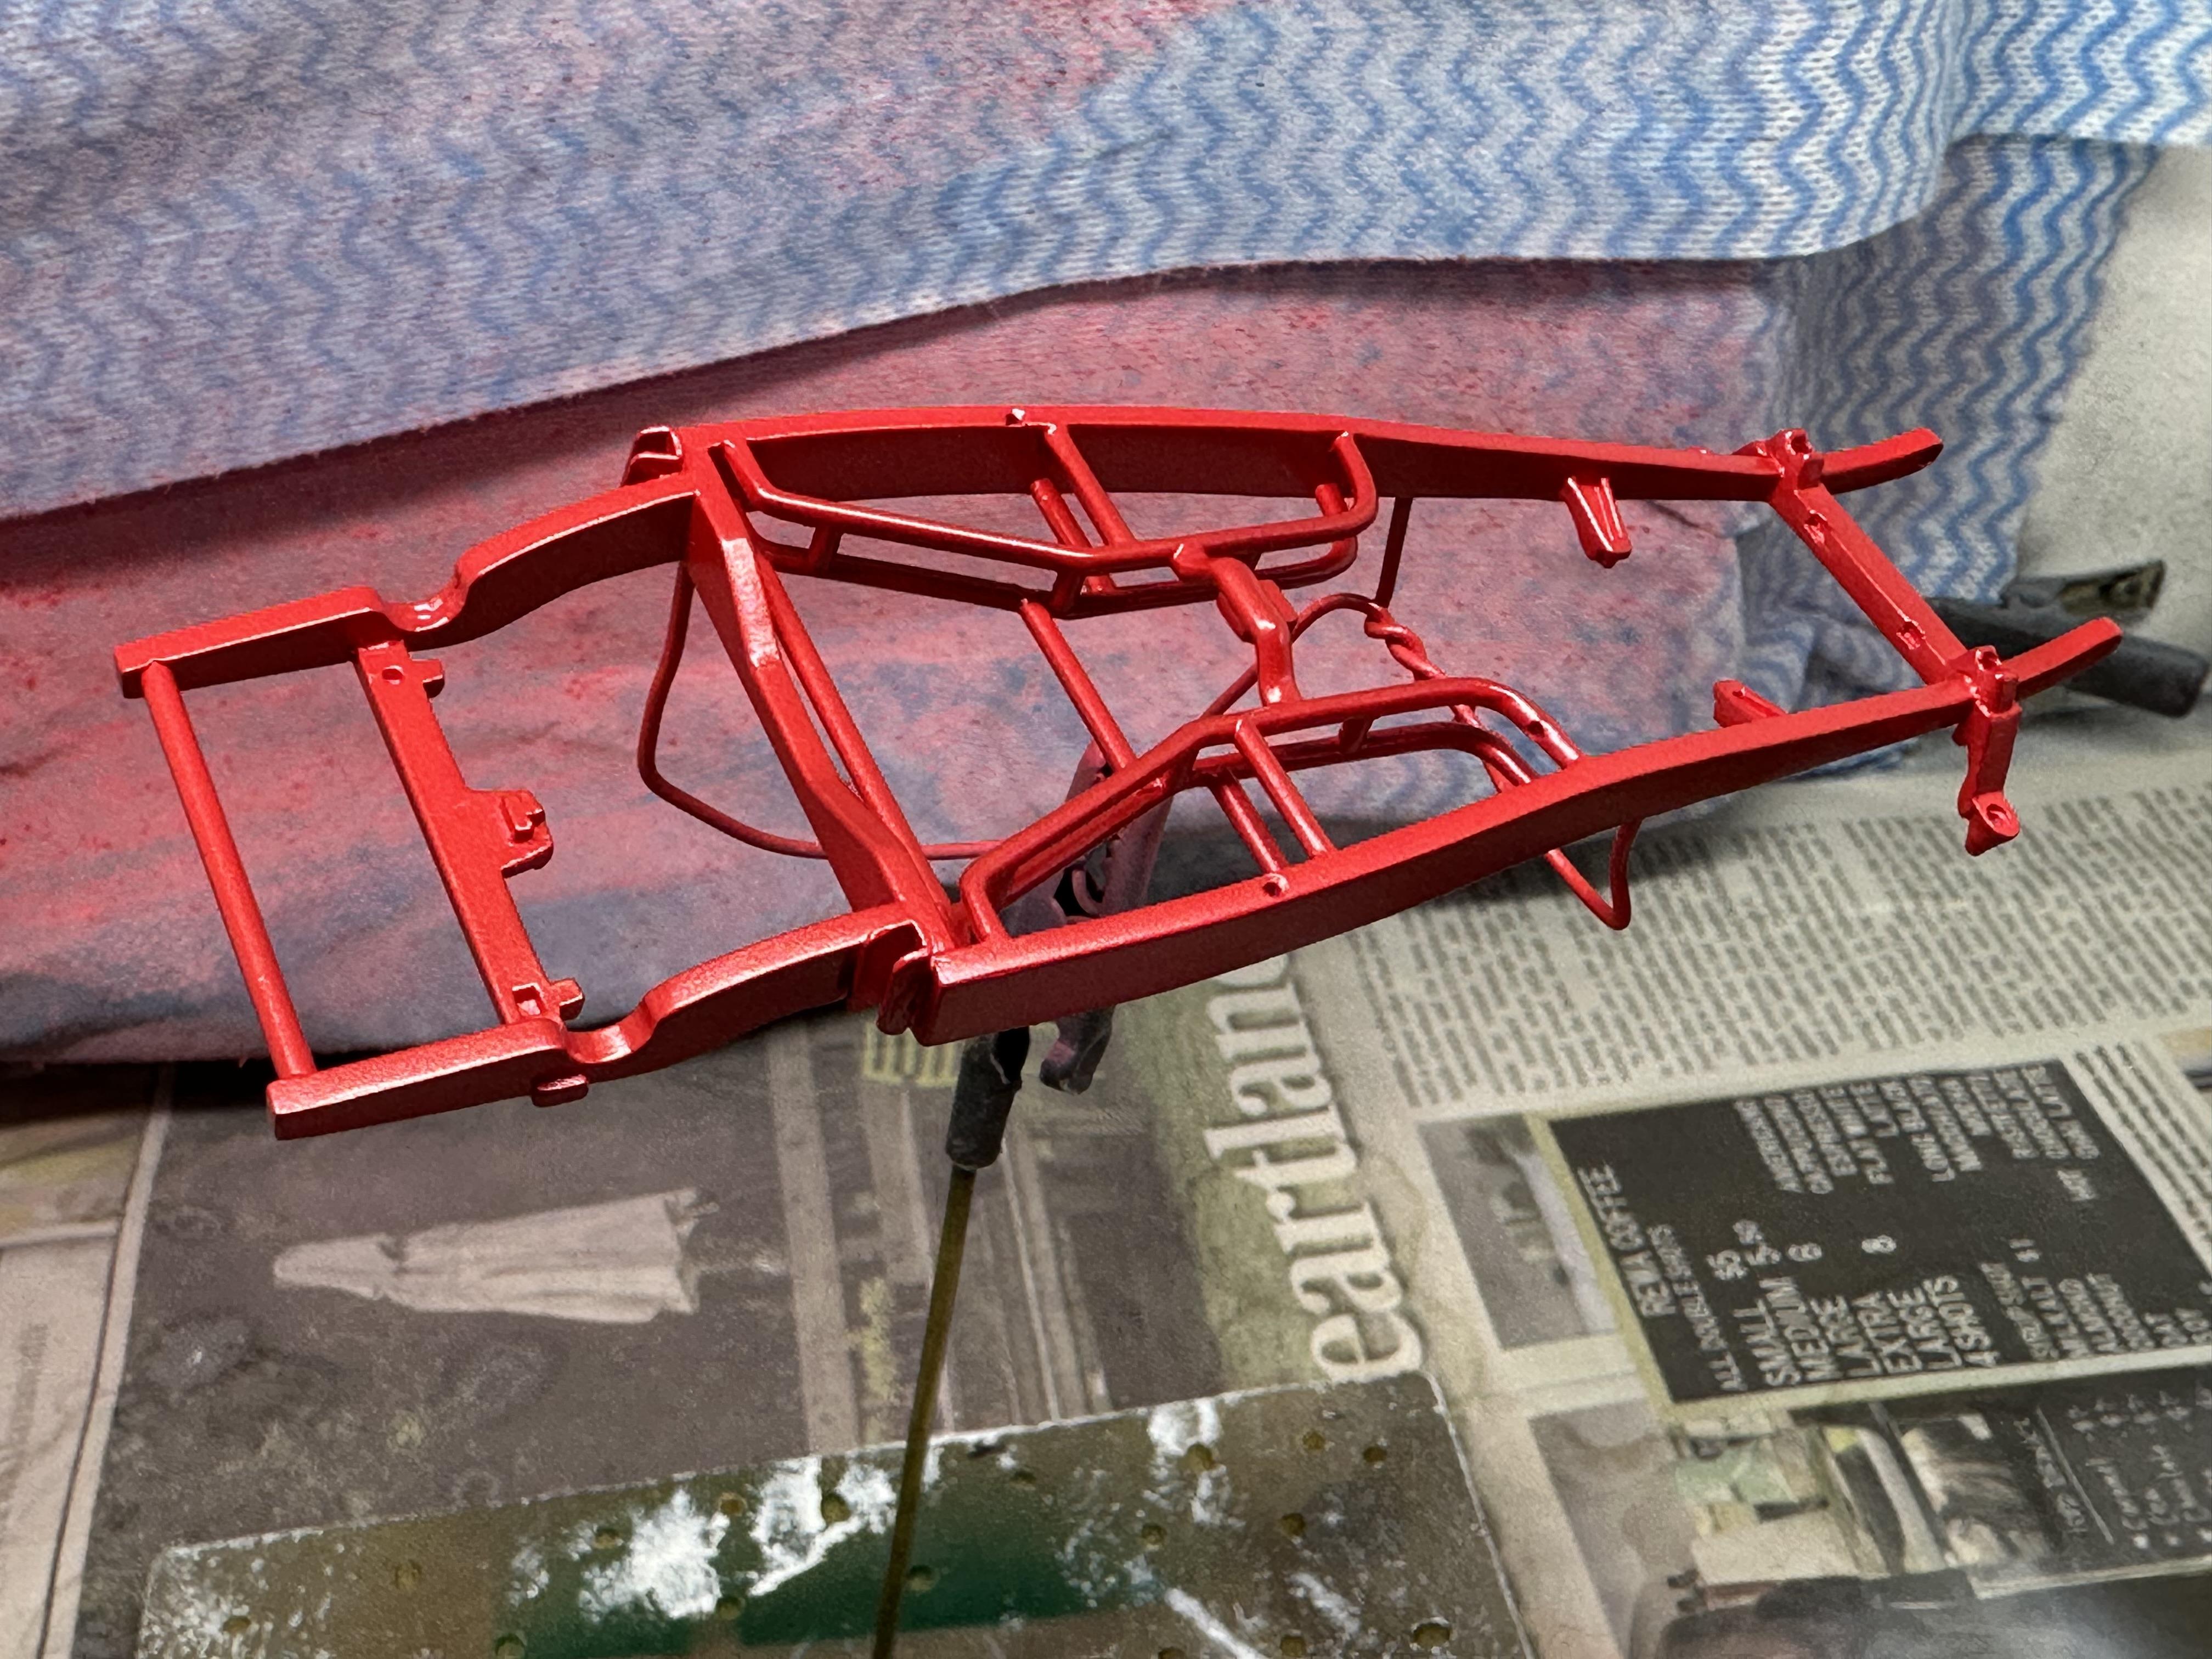
Been working on the bodyworks. Cleaning up and getting a coat of primer ready to clean up hopefully for the last of the primer coats. I mixed some red into the Tamiya white primer as the end colour is to be red. Shot some on the chassis and body And then a coat of Tamiya LP-79 flat red as a base coat. I have found Tamiya metallic colours do not cover that well so any help we give them hopefully the better the outcome - anyway looks better than pink and finally some colour Clear to come Thanks for looking
-
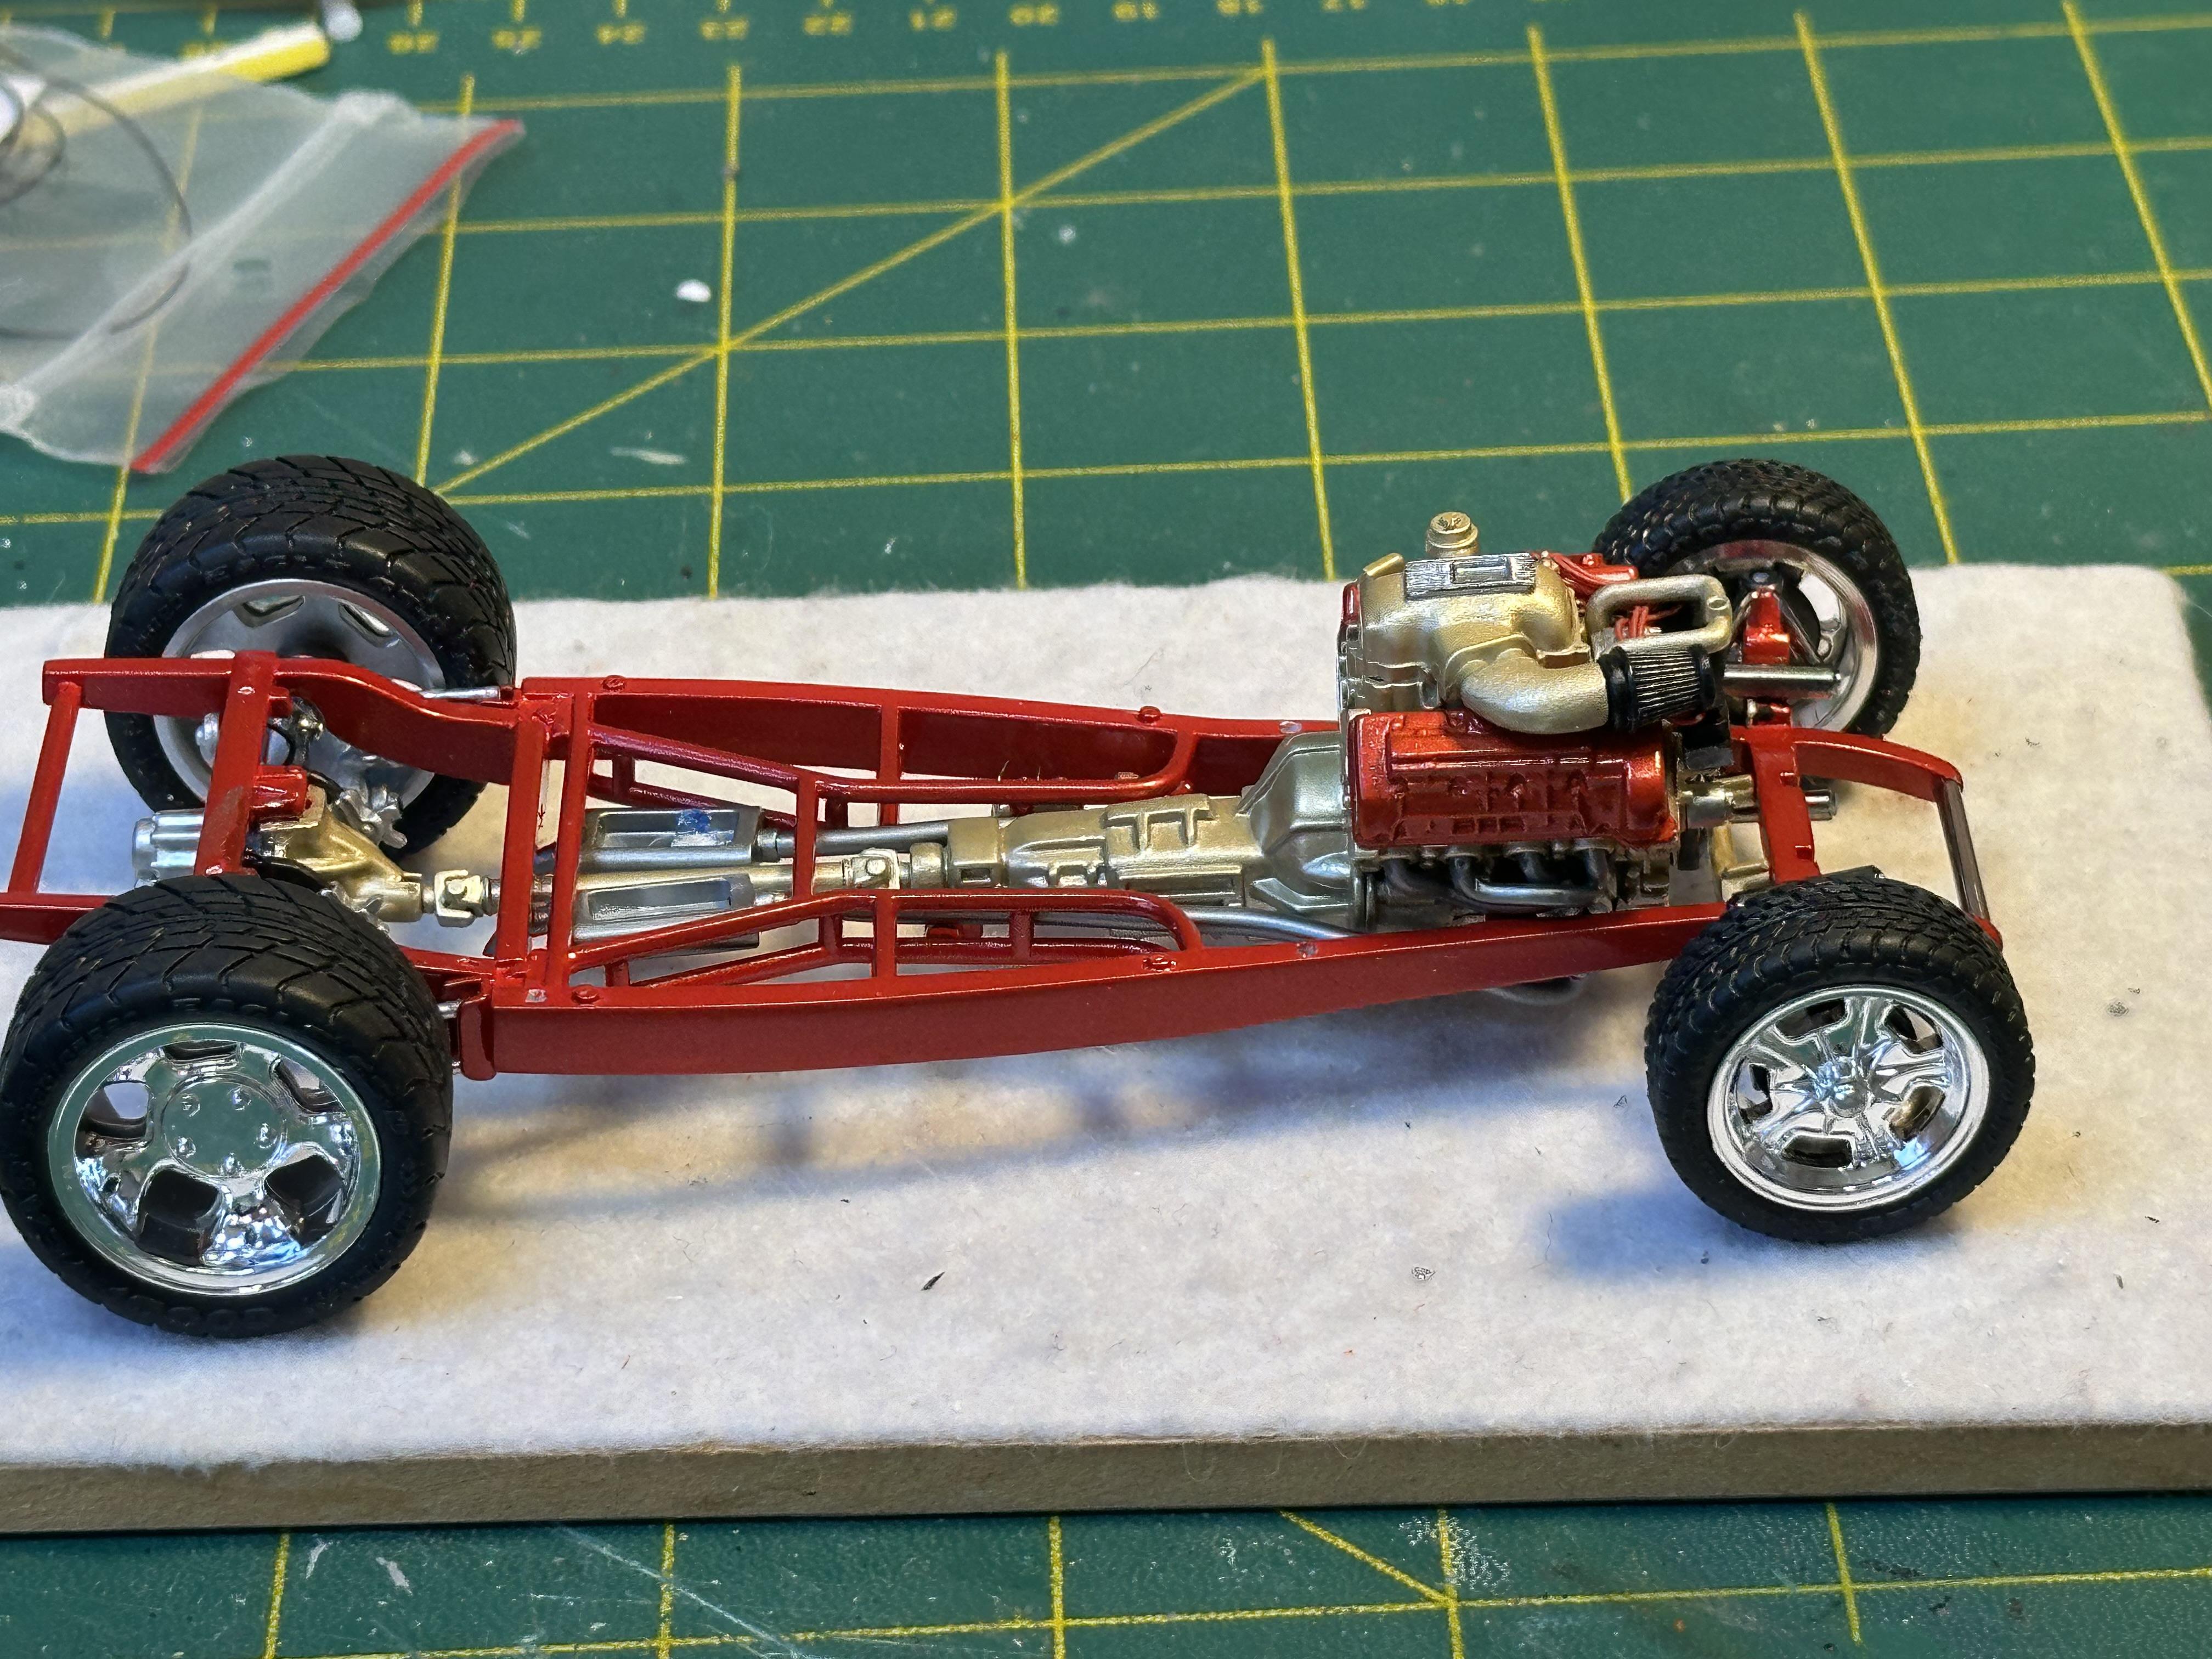
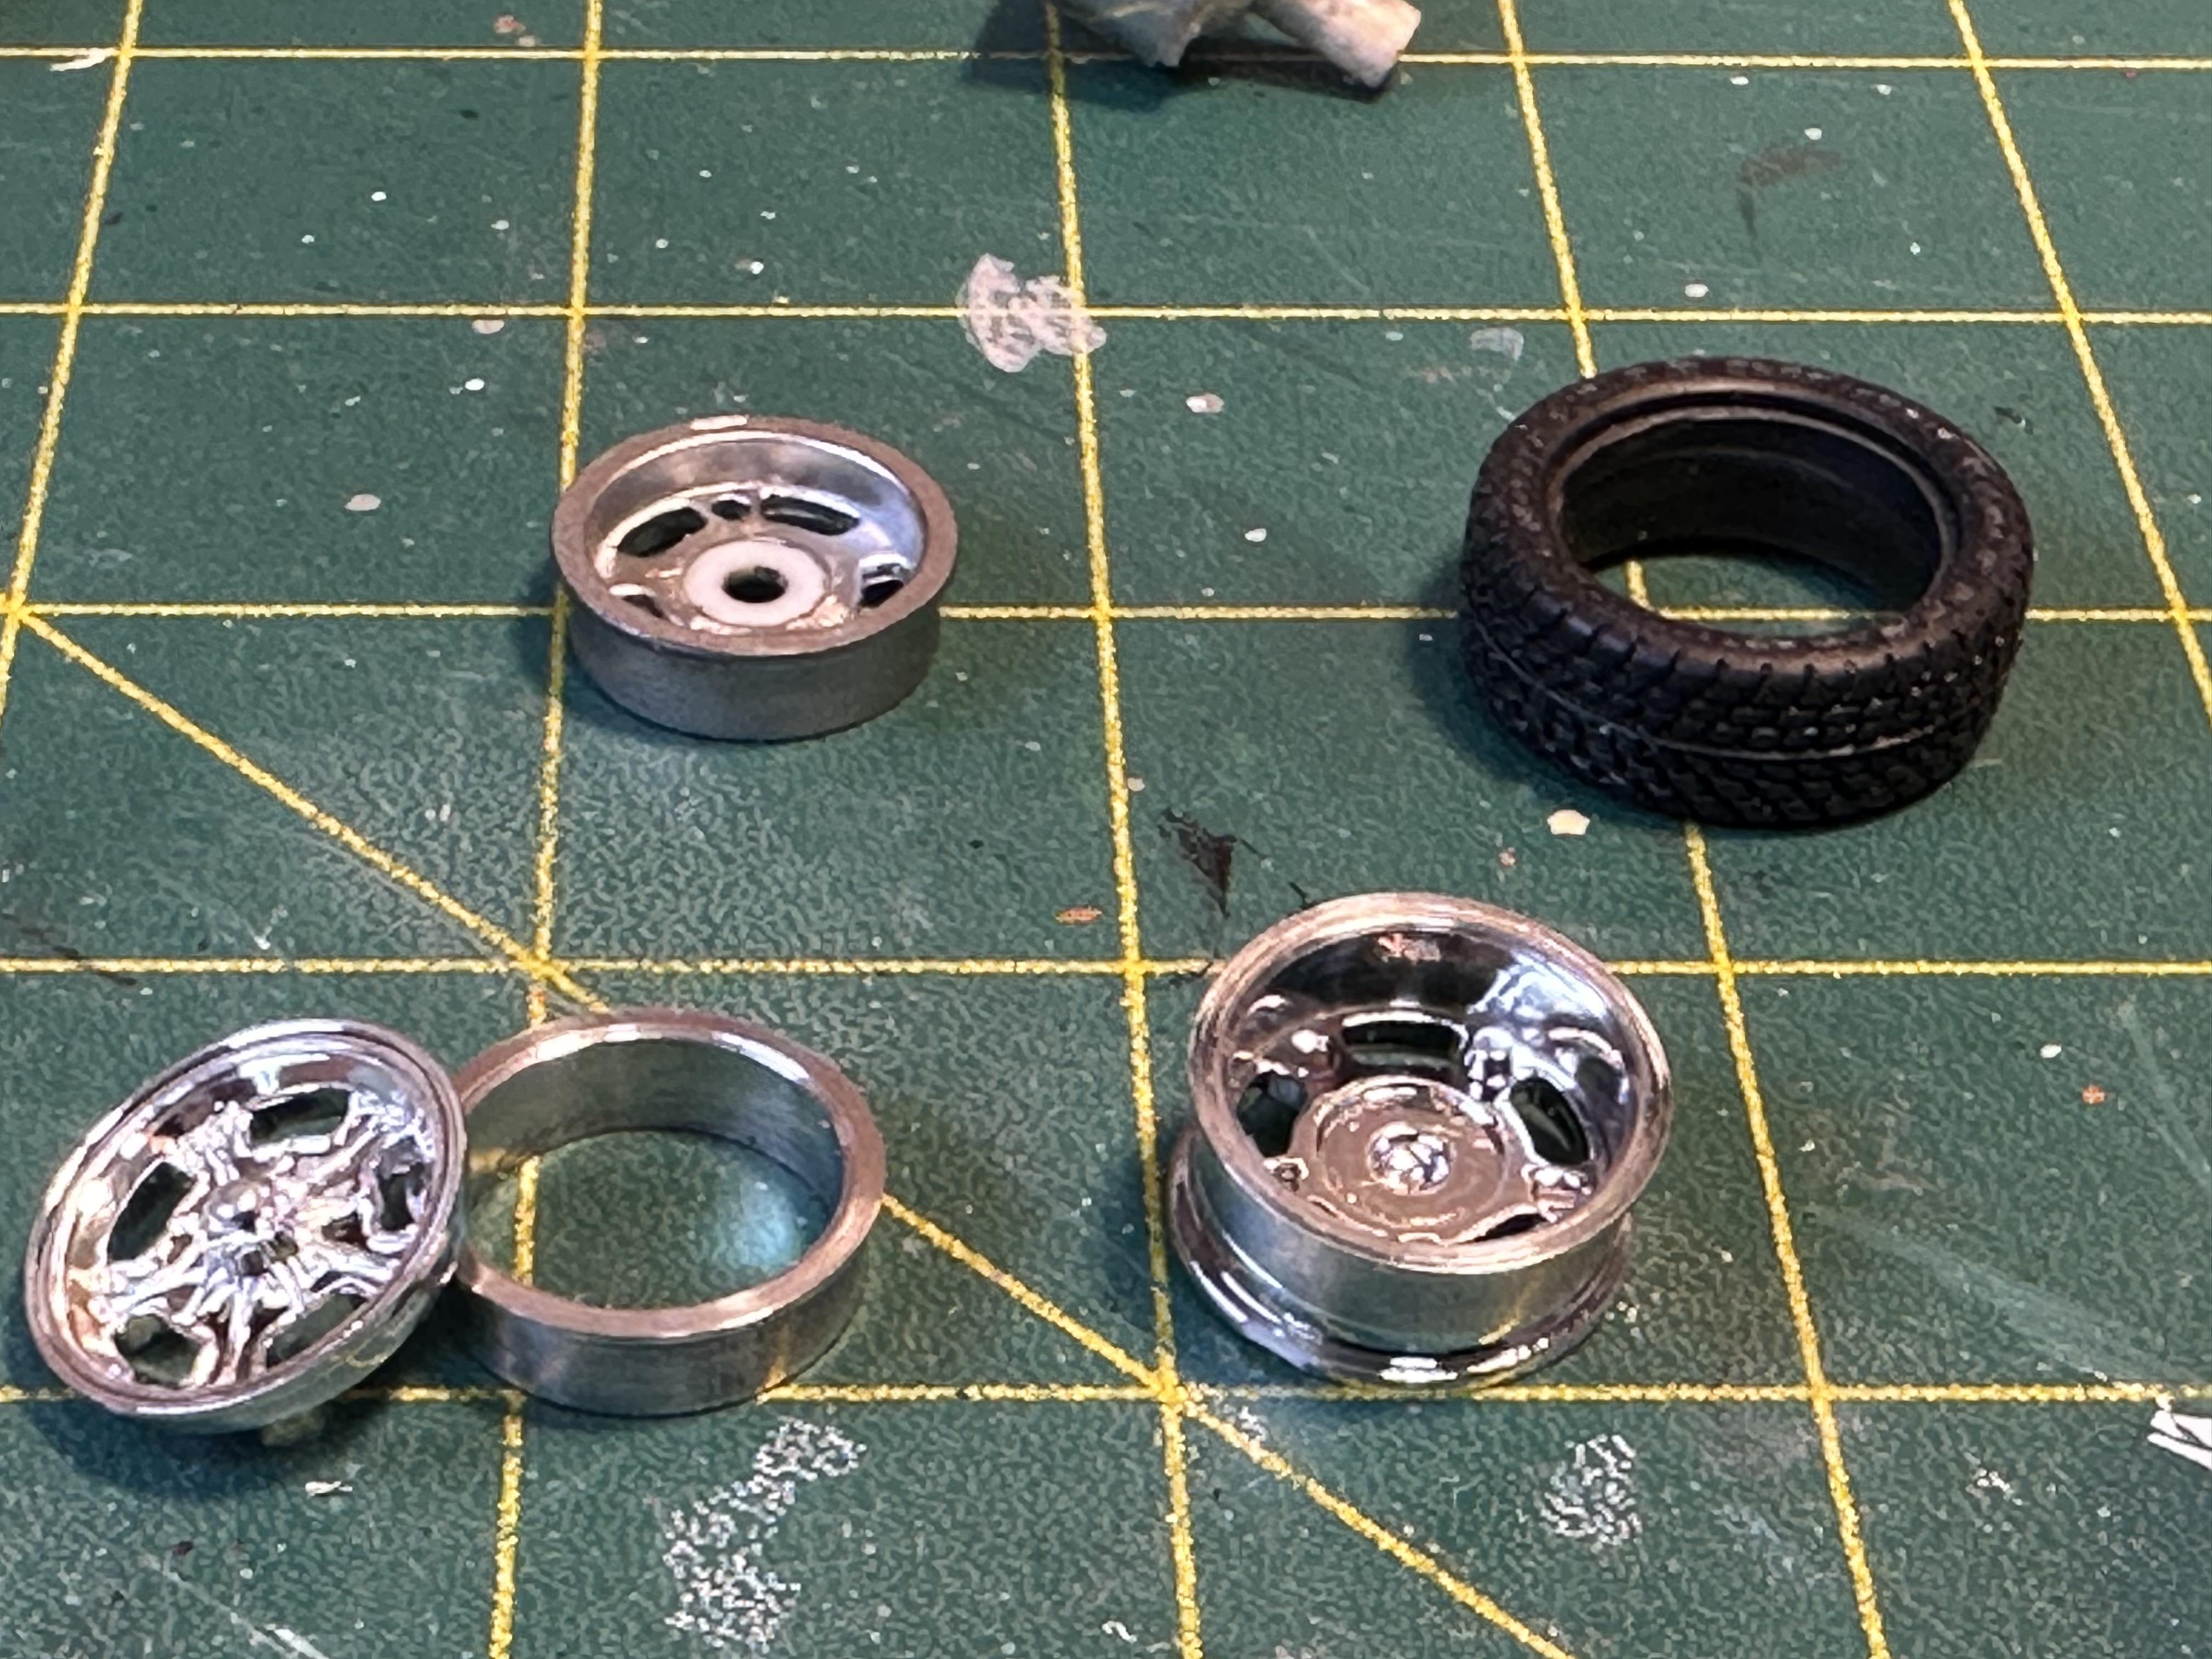
The front track of the AMT 32 Vickie was way to wide and the tire stuck out side of the guards - good for a 70's look but nowadays not so. I removed the boss from the Vickie wheel inners and messed with the disc brake spacing but I could not get enough back space. Then I looked closer at the Vickie wheel inner and it spaces the wheel out by about 2.5mm. That needed to go. I had a quick search through the parts bin but could not find a suitable rear inner or an outer I could modify to suite. The tyres are 17" and the id needed to be 17.3mm and most of my old wheels are in the parts box are 15"so no surprises there. So, I went to my lathe and turned up some wheel inners which is a fairly simple operation. After parting off at the flange end I cleaned that end up and put a small step like real wheels have and then polished them with some aluminum polish. They fit like a dream and really look the part and I now have enough back spacing to get the tires inside the guards and a bonus is a little more drop in the front because the tires aren't hanging up on the guards Nothing can beat the looks better of polished ally than real polished ally Thanks for looking
-
Looking good Scott
-
I trust everyone had a pleasant Xmas and New Year Have got back to the Deuce and assembled chassis and body for a mock up to check all is well From the pix it looks like there is a little finessing required around the rear of the body where it meets the guards. The front track is way too wide so I will narrow that down a bit - looks a little bit too 70's for my liking. The stance is good, so I am happy there. I have been working on the body cleaning up all the little gnarly bits from the chop and getting ready for paint Thanks for looking - till next time
- 730 replies
-
- 10
-