bill-e-boy
-
Posts
898 -
Joined
-
Last visited
Content Type
Profiles
Forums
Events
Gallery
Everything posted by bill-e-boy
-
29-31 Ford Firewall Question
bill-e-boy replied to Calb56's topic in Model Building Questions and Answers
Pix of 4 sources for future reference L-R Revell 29 (R)PU, Revell 29 Roadster, AMT 29 Roadster (Mod Rod, Ala Kart) and top the chrome AMT Ala Kart (original version) The Revell (R)PU is the most accurate although the top half is attached to the body. The others are all just wrong for a stock 28-29 A-Bone
-
Been messing with the motor-gearbox interface as I was not happy with what I had. I could not resist the temptation to line up a few flat motors that I have L-R - Motor for this build with 3x2's, Thickstun valve covers and 6 speed manual, repop with Ardun heads, repop with Offy heads, Revell 40 heading for a 26T pickup which I must get back onto.
-
Pix of some 1/25th flat motors L-R Resin repop with 3x2's and Thickstun head covers, resin repop with Ardun heads, resin repop with Offy heads, Revell 40 Ford Closeup of motor with Thickstun head covers - headed for a chopped 32 5w coupe Closeup of the 40 Revell motor headed to a 26T pickup (converted from a 26 Tudor)
-
Good job on the glasshouse. My wife builds similar models and has now quite a collection. It was good for her to find something to while away her retirement hours. I get roped in when there is an issue and to do the wiring (I am a sparkie). Will be good to see the 32 Phaeton project up and going again after the hiatus. The AMT 32 Phaeton was the first car kit that I built so I have a soft spot for them. Sadly it is not a survivor - or maybe not.) And I hope your health issues are sorted
-
Nice build Ron. For a "quickie" it turned out well
-
Nice build David. Good to see some well executed effort to fix up some of the shortfalls of this kit. Colour choices are cool too. And that hot rod stance.
-
Thanks John
-
Just caught up with this build thread and I am liking a whole lot of what I am seeing. Definitely some points to remember like the engine seams and the bobbed guard treatment. I dont have this kit, only the original release that I have a couple of. Will need to hunt one down. Unfortunately we don't have an Ollies or anything like it down these ways so will have to fork out big money for it. Typically Revell 32's are about $85-95 NZ dollars so we tend to spend wisely (mostly) And the Mica red suits the 32's well - it is what I used on my recently completed 32 Tudor build - must get it to Under Glass. Tamiya XF-59 Desert Yellow which is a light tan is another option for the interior. Gloss it up a bit with SG clear.
-
Forgot to add pix The battery caps I mixed up to match a pix I have of a battery. It looks like Mopar turquoise but is darker The red on the alternator is clear red to represent windings. The rest is out of the bottle stuff - flat ally, gloss black and matt blue You sure have to have a good range of colours for stock models. With Hot Rods just paint every thing the same or matching colours - much easier
-
An evening of fiddley paint details for the engine bay Thanks Jim. It is the low level diff for sure, so suits the weezy stock 2bbl 383. But ripping it out is extreme. Were you trying to lower it
-
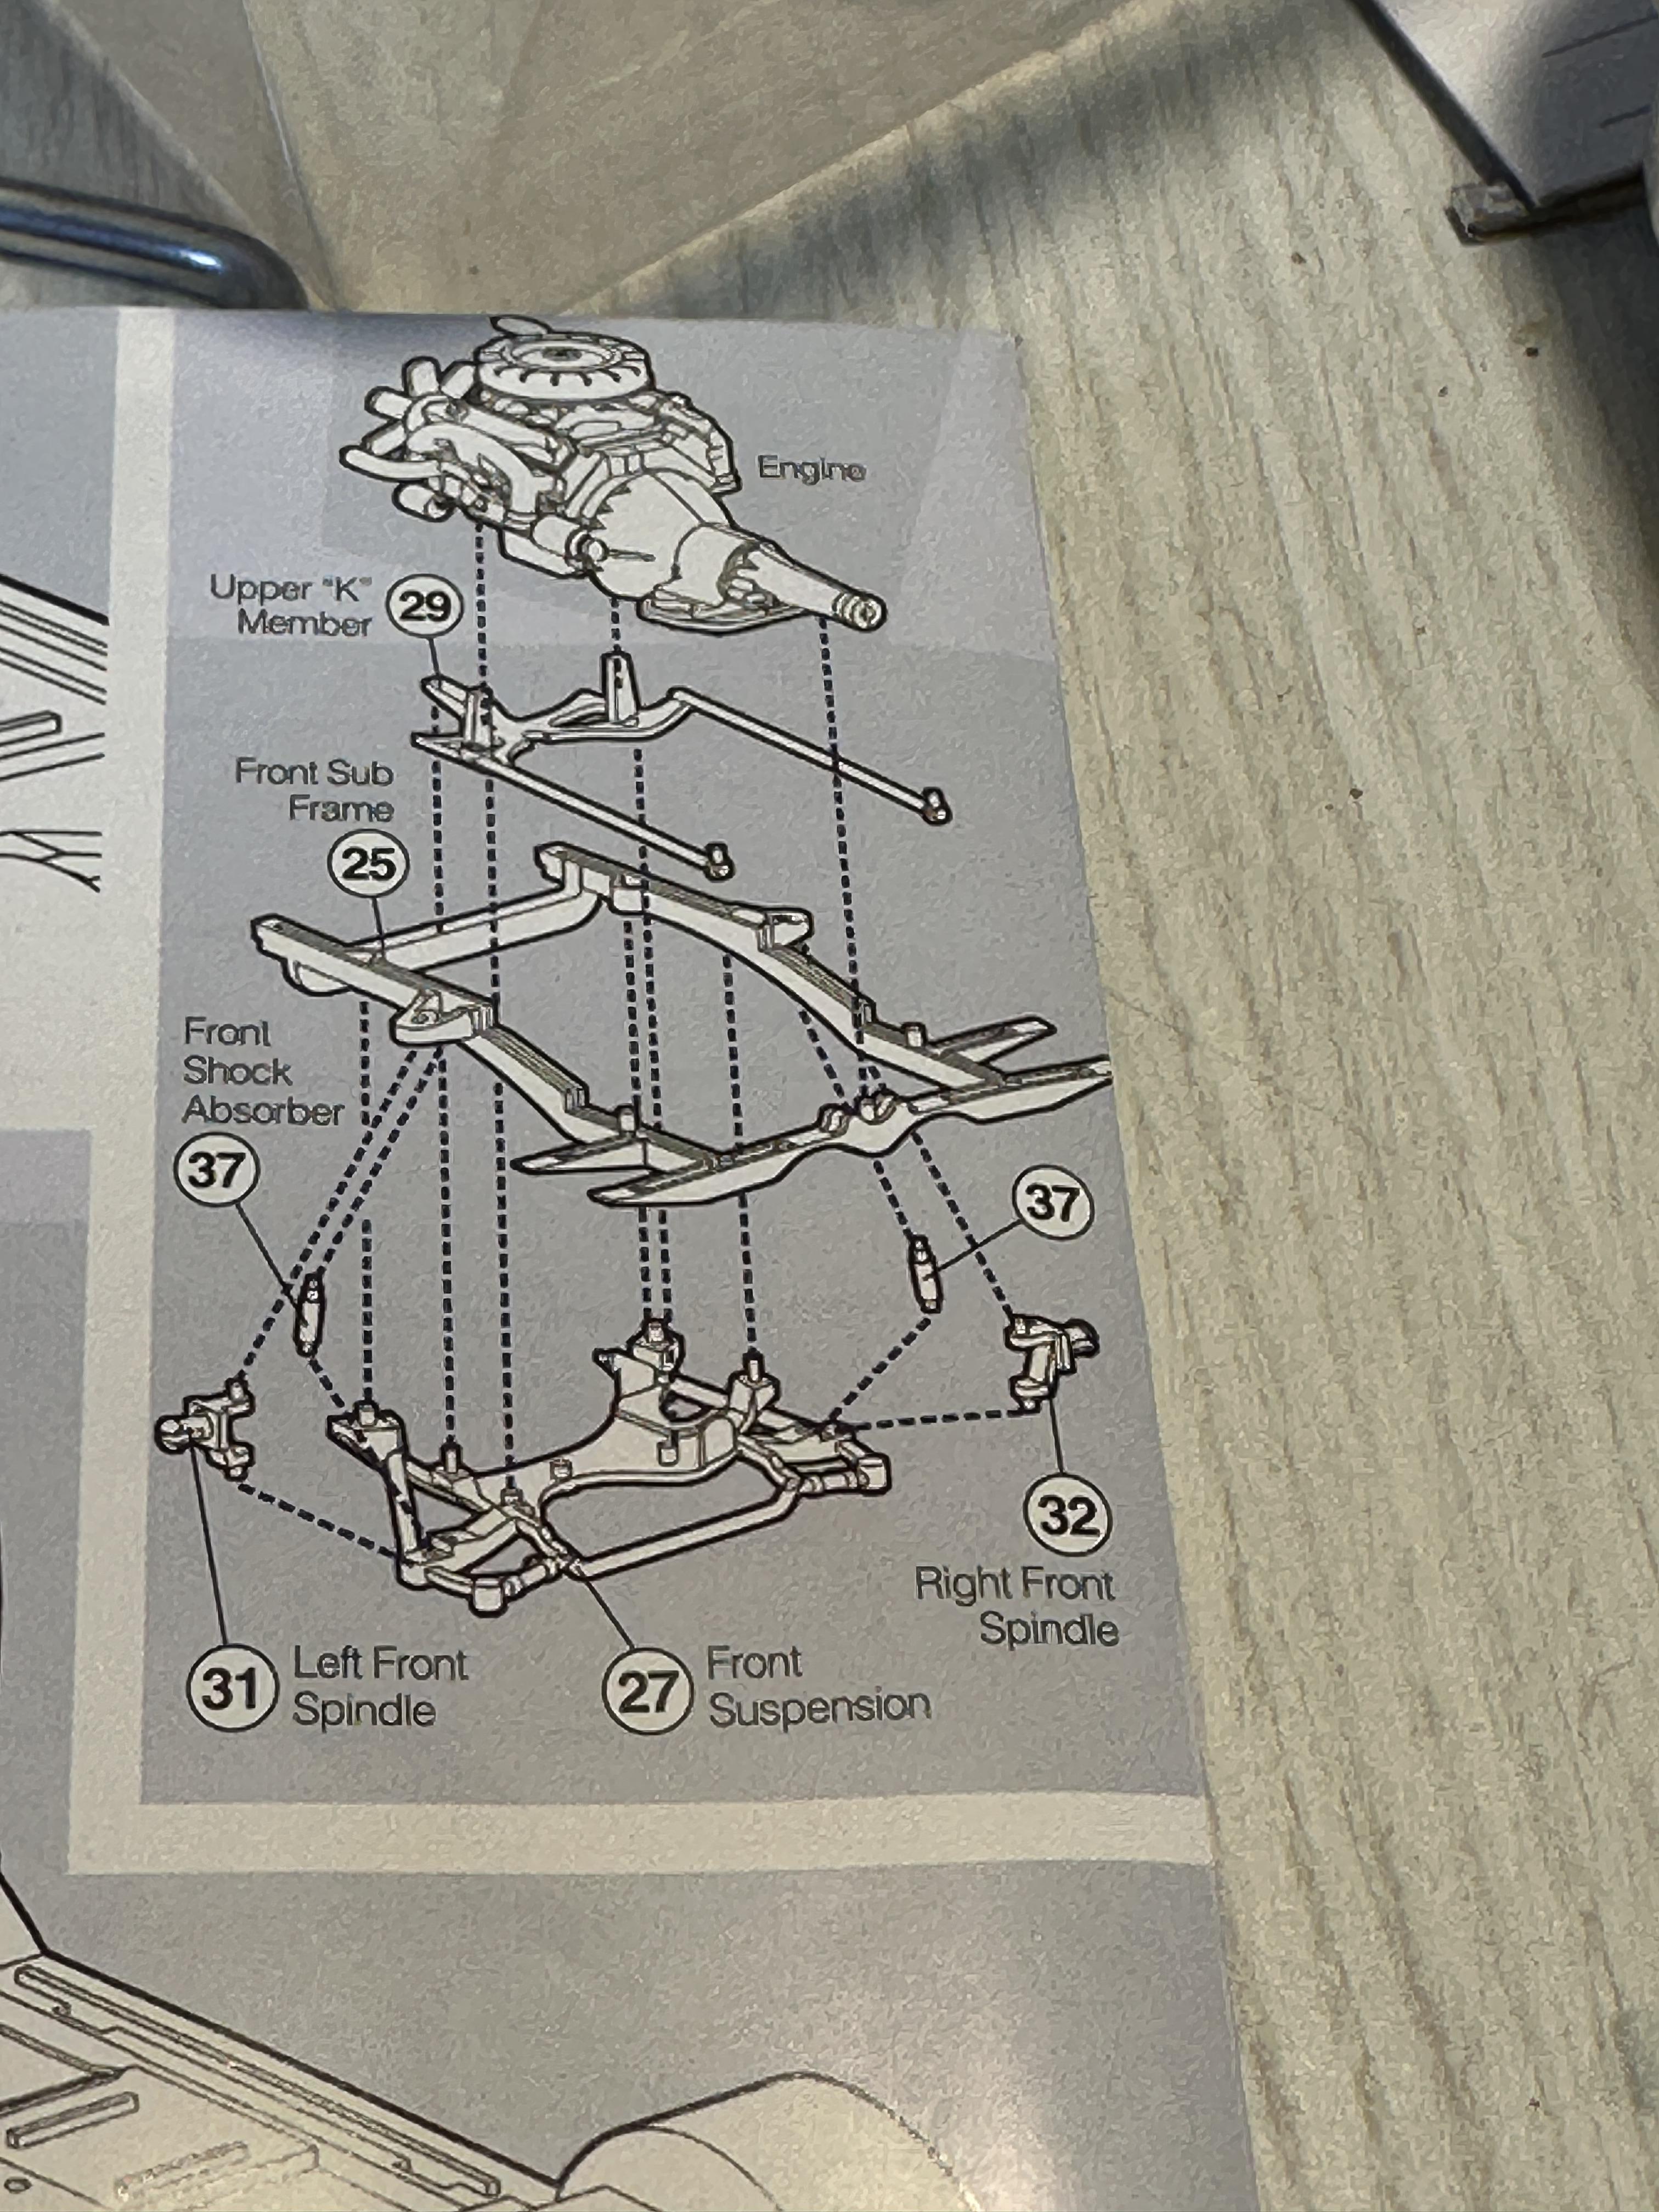
And yup Greg I do read the instructions - see this post. Just sometimes we just know better. I think the 32 Sedan is the one where you really have to install the inner guards last as it is a bear to the interior to fit at the best of times
-
Well with a head full of self doubt I checked the instructions and pix of the real car. The instructions show the angled part of the spindle on the lower side - my lowering method is good. Whew. So I did a mock up and it looks OK to my eye.
-
Aren't they someone else's opinion😬 I wanted to finesse the body to chassis fit hence the change of sequence. The inner guard fitment is a little imprecise and needs work. Too late after paint.
-
Thanks Michael and Trevor Not sure about others but I do spend a lot of time thinking about colour choice and whether not to have colour combinations. I try not to have colours that clash like in the old days - think red running gear and say a yellow body. More subtle these days.
-
Thanks Craig.
-
Thinking about it I may have raised the ride height instead of lowering it. I may have read the instructions wrong and saw the spindle the wrong way round. I did consider flipping it but the way I read the instructions I did it the way I did. Oh well only plastic and not too hard to redo it.
-
Thanks Andrew. Glad I can pass something on. I have been doing this for a jolly long time and a lot of the things we do we take for granted. Even I take tips from here and I am always open for a better way to do it
-
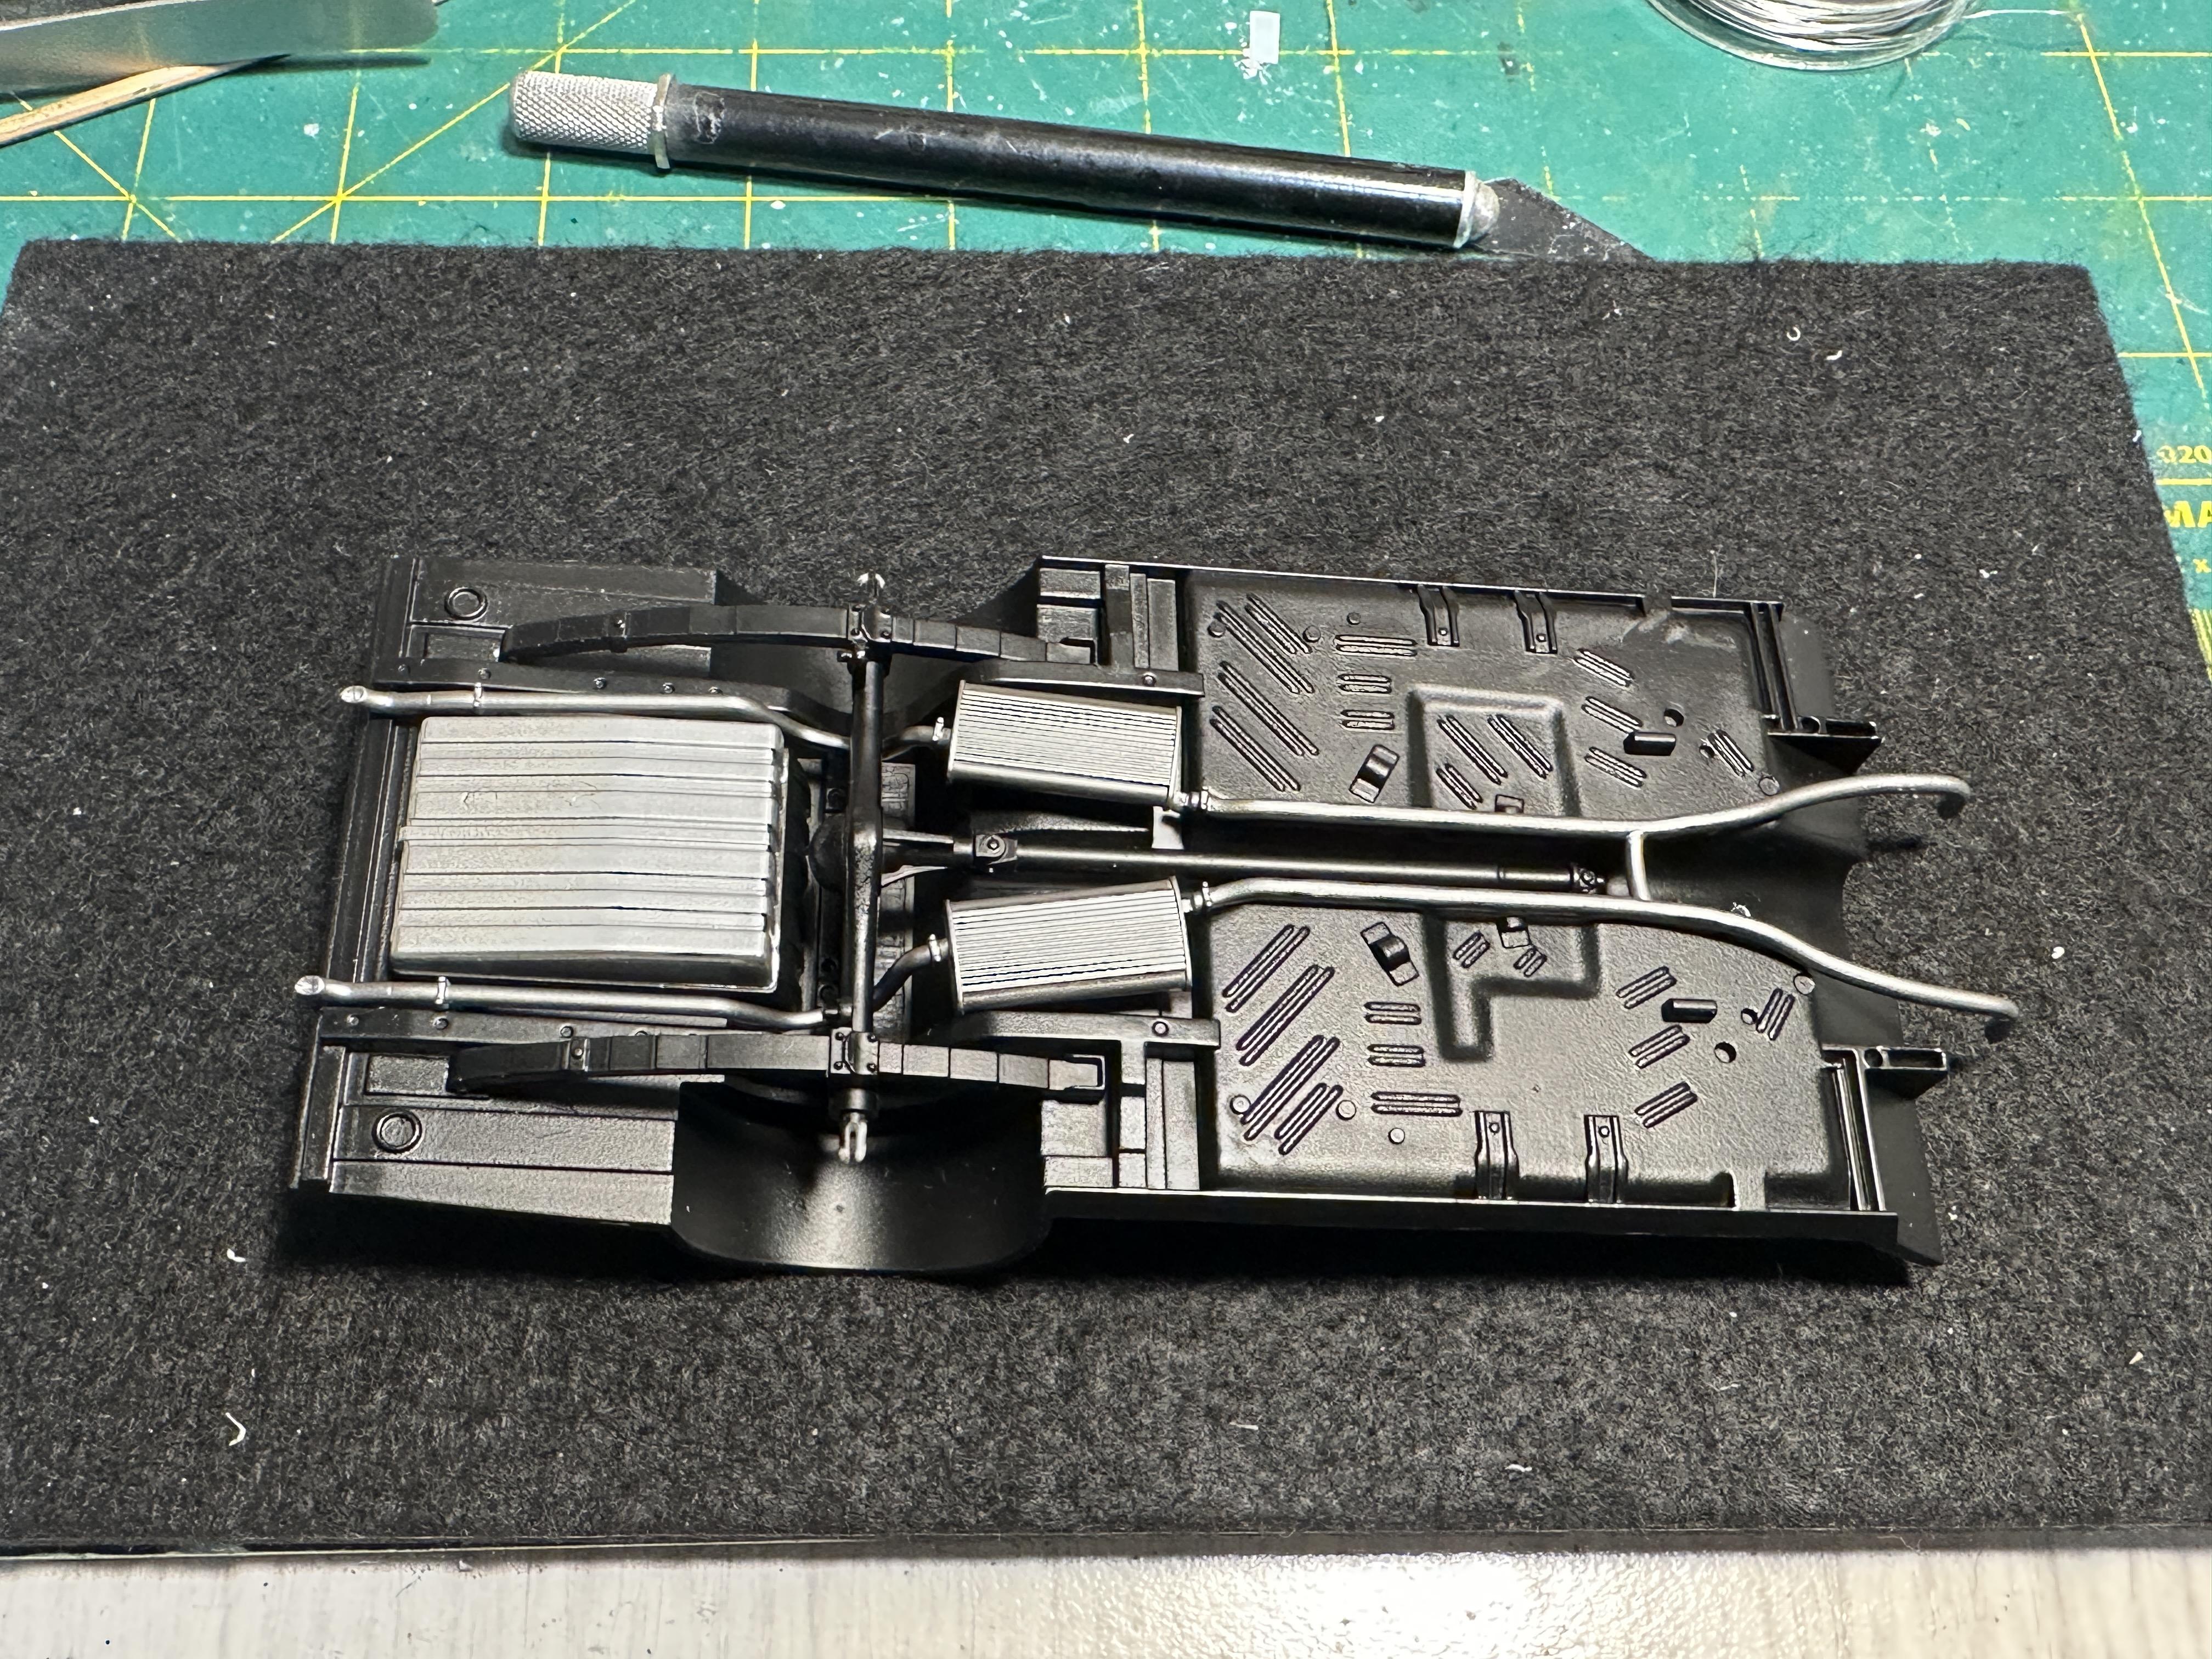
Been sharing my time between this and my 65 Plymouth build I have worked out the motor fitment and have made up some new motor mounts that push the motor back a tad. This necessitated some massaging of the floor pan to get the trans to fit Got some work done on the brake lines on the axles and master cylinder. Hard lines are 32g craft wire and the flexibles is spark plug wire. I made up a junction block on the rear axle and chromed it with Molotow
-
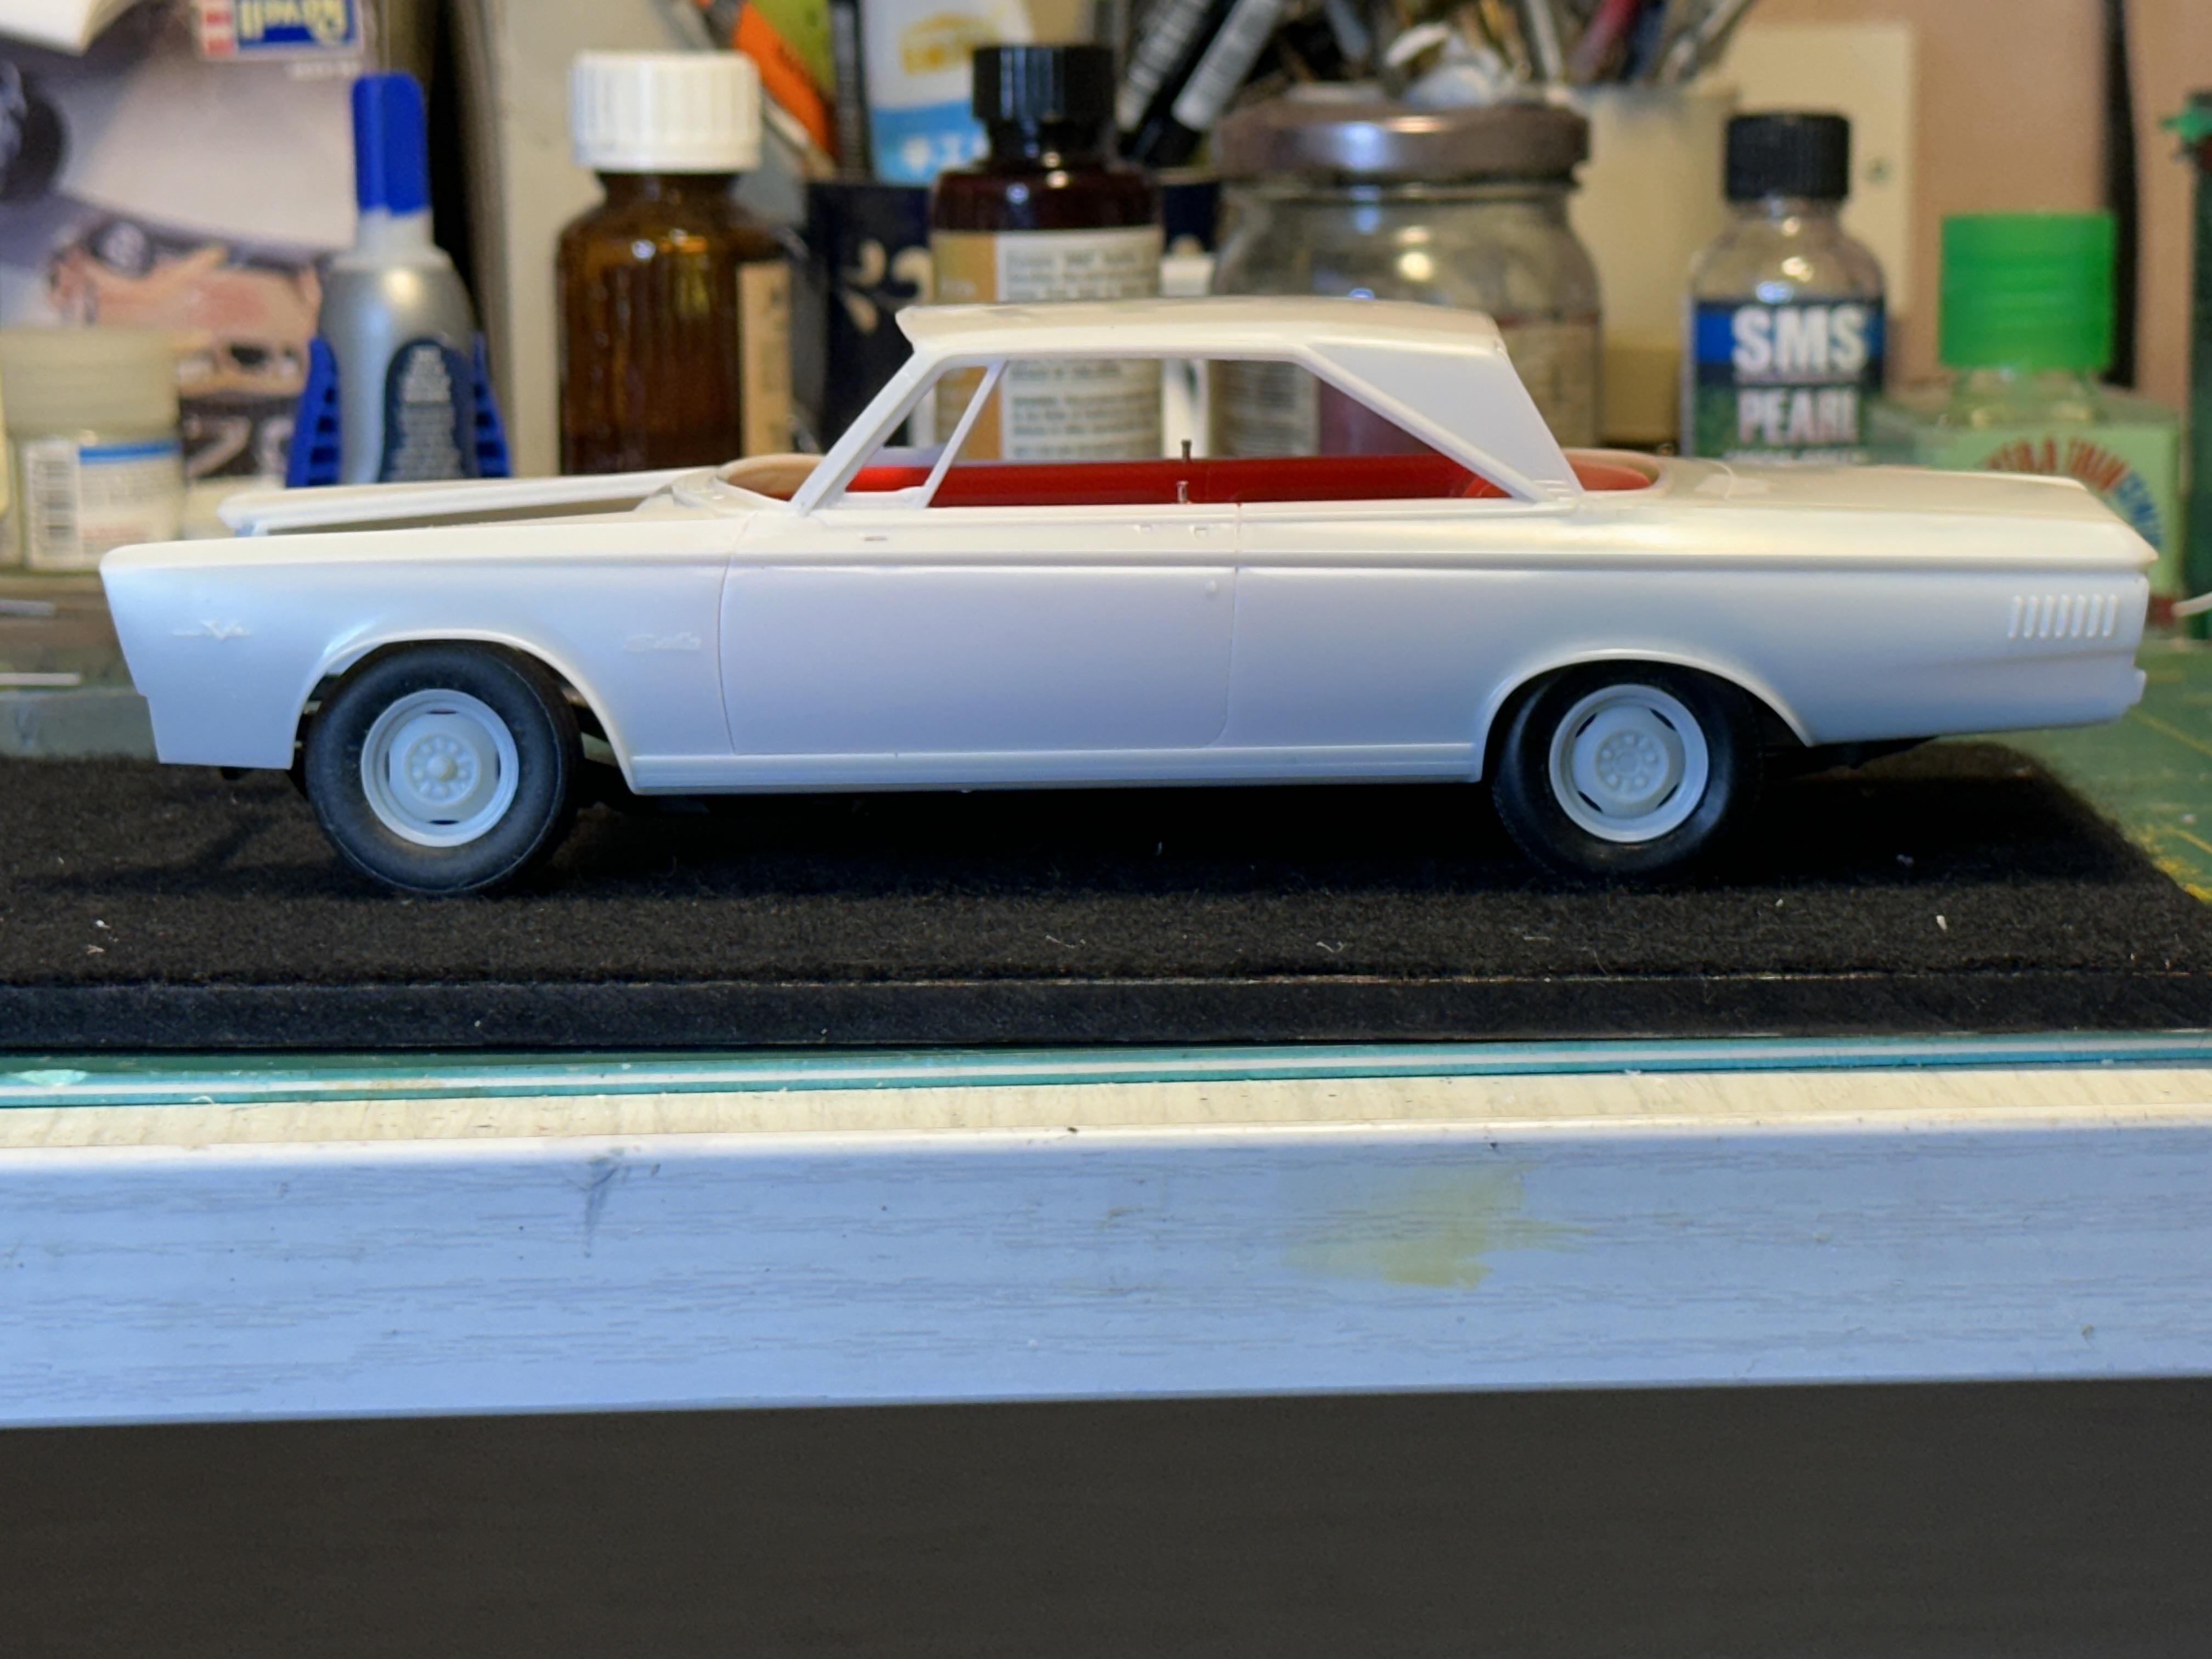
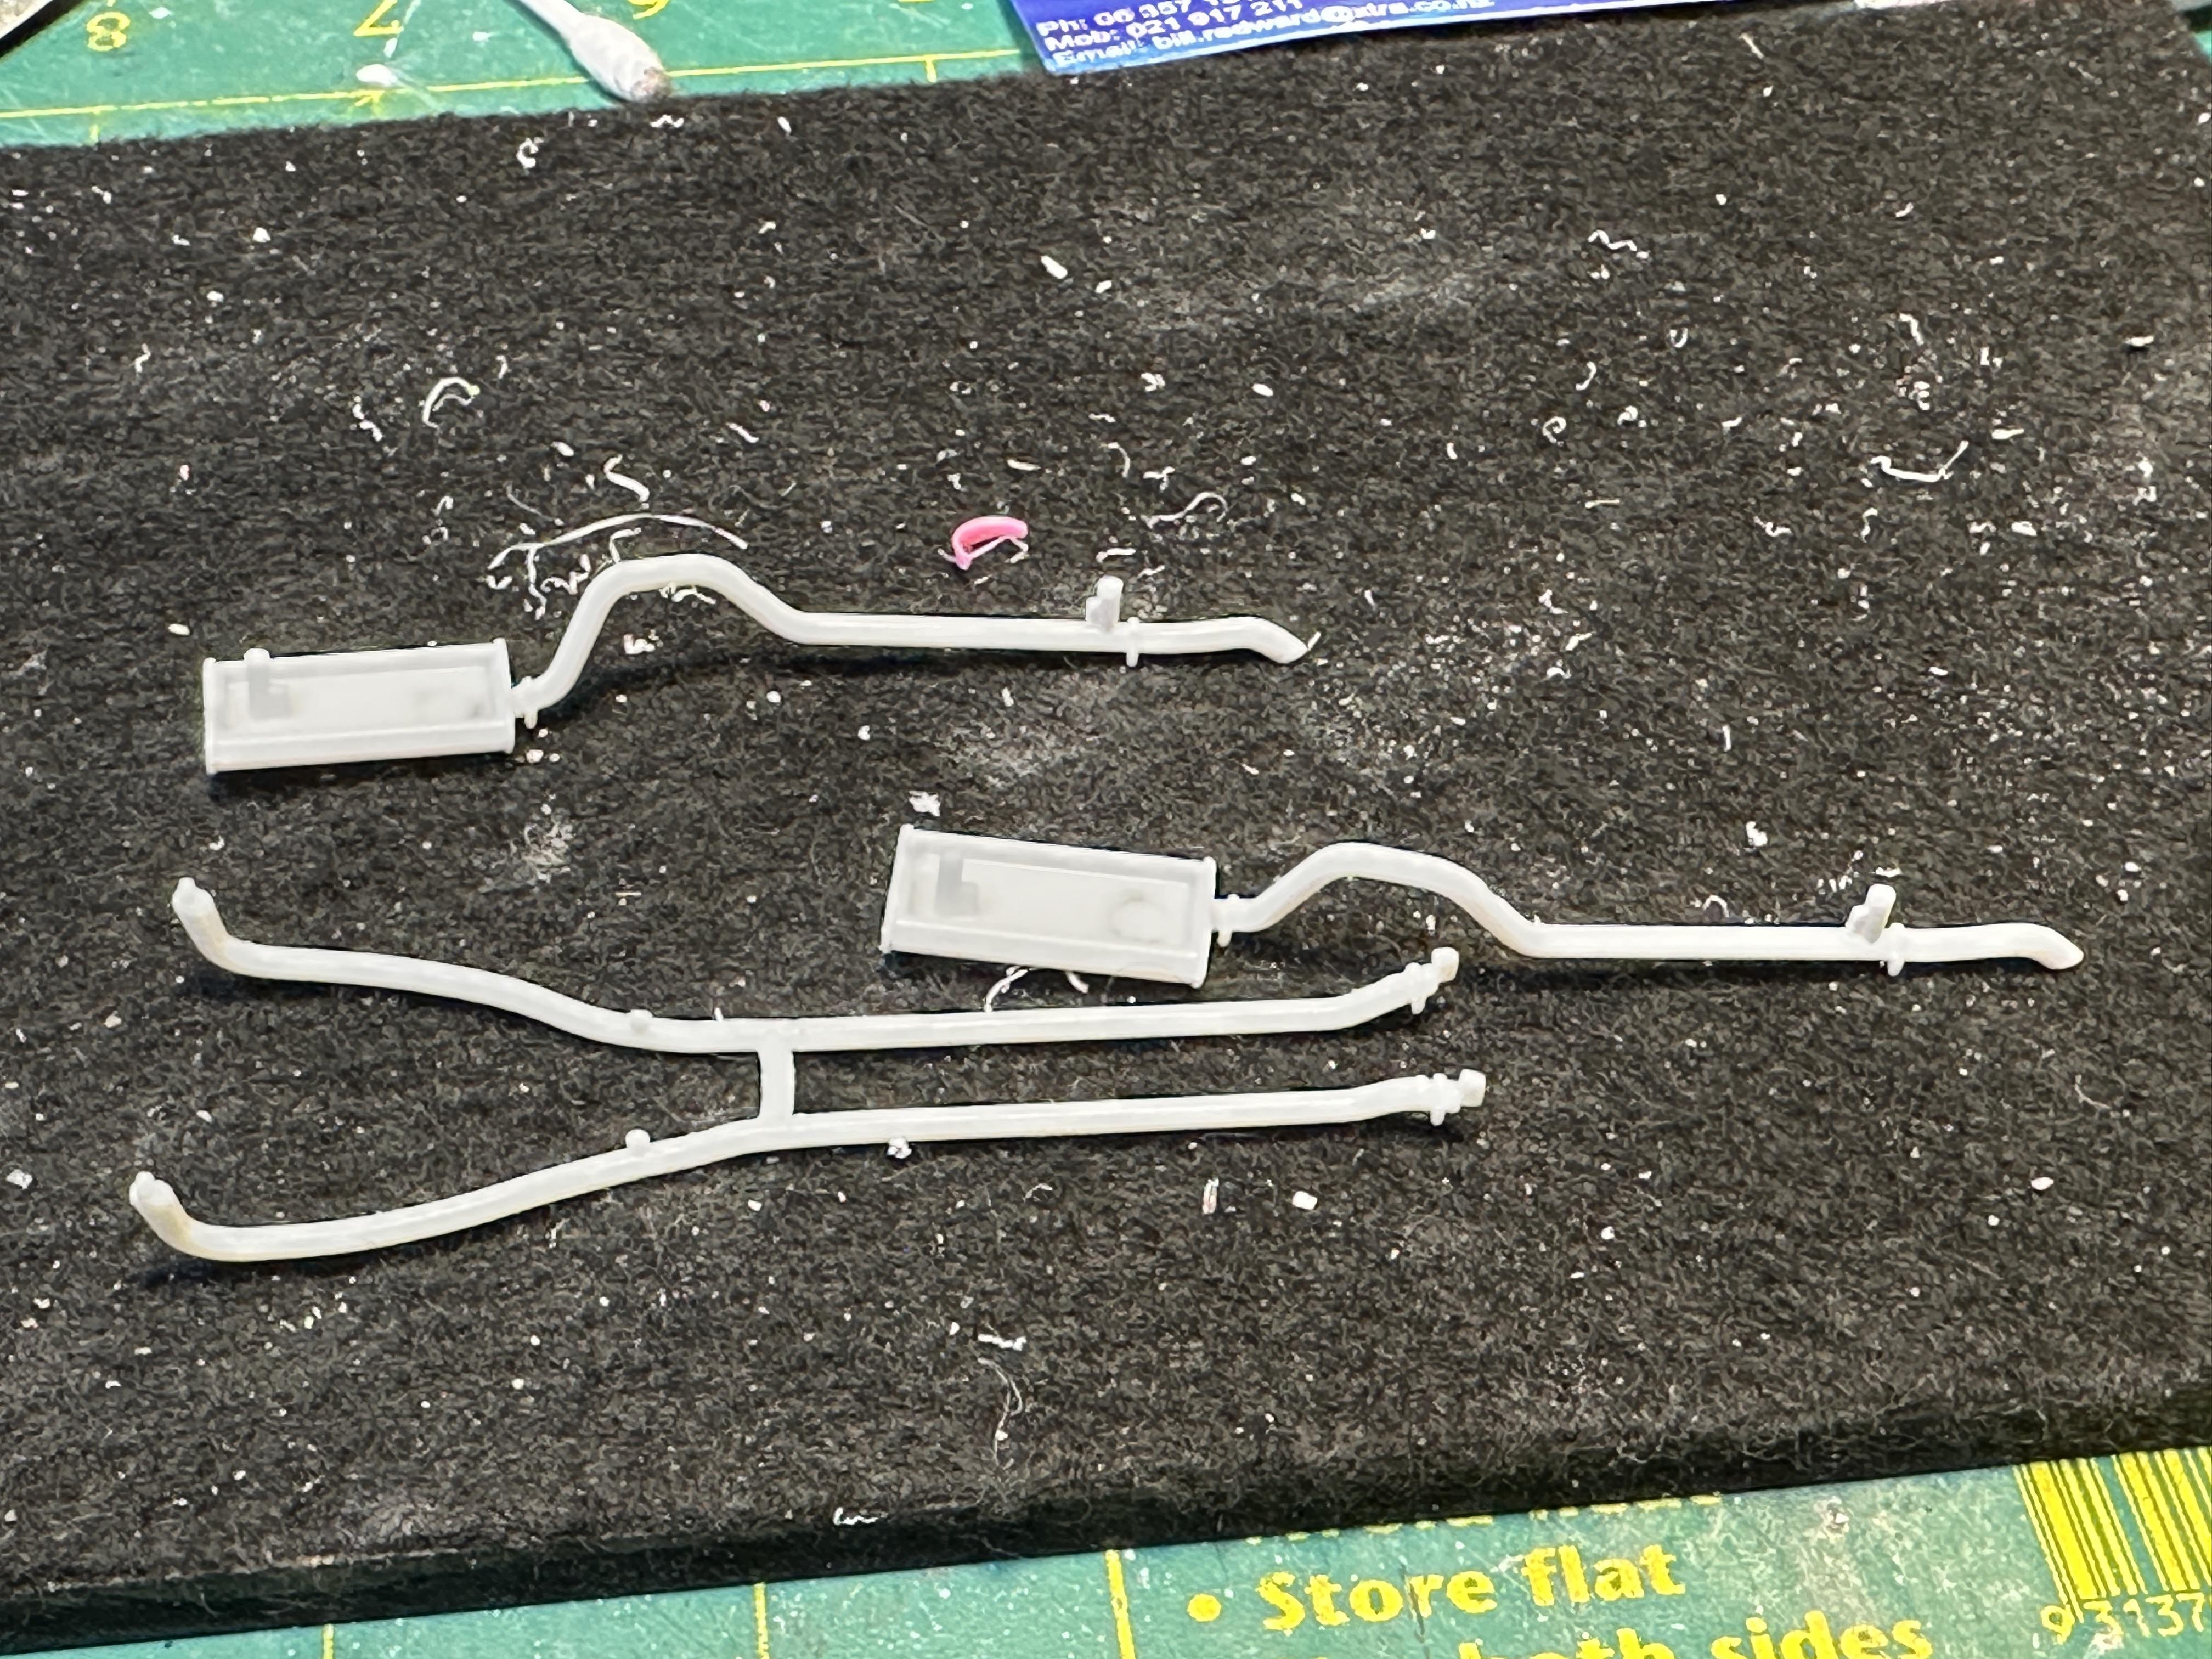
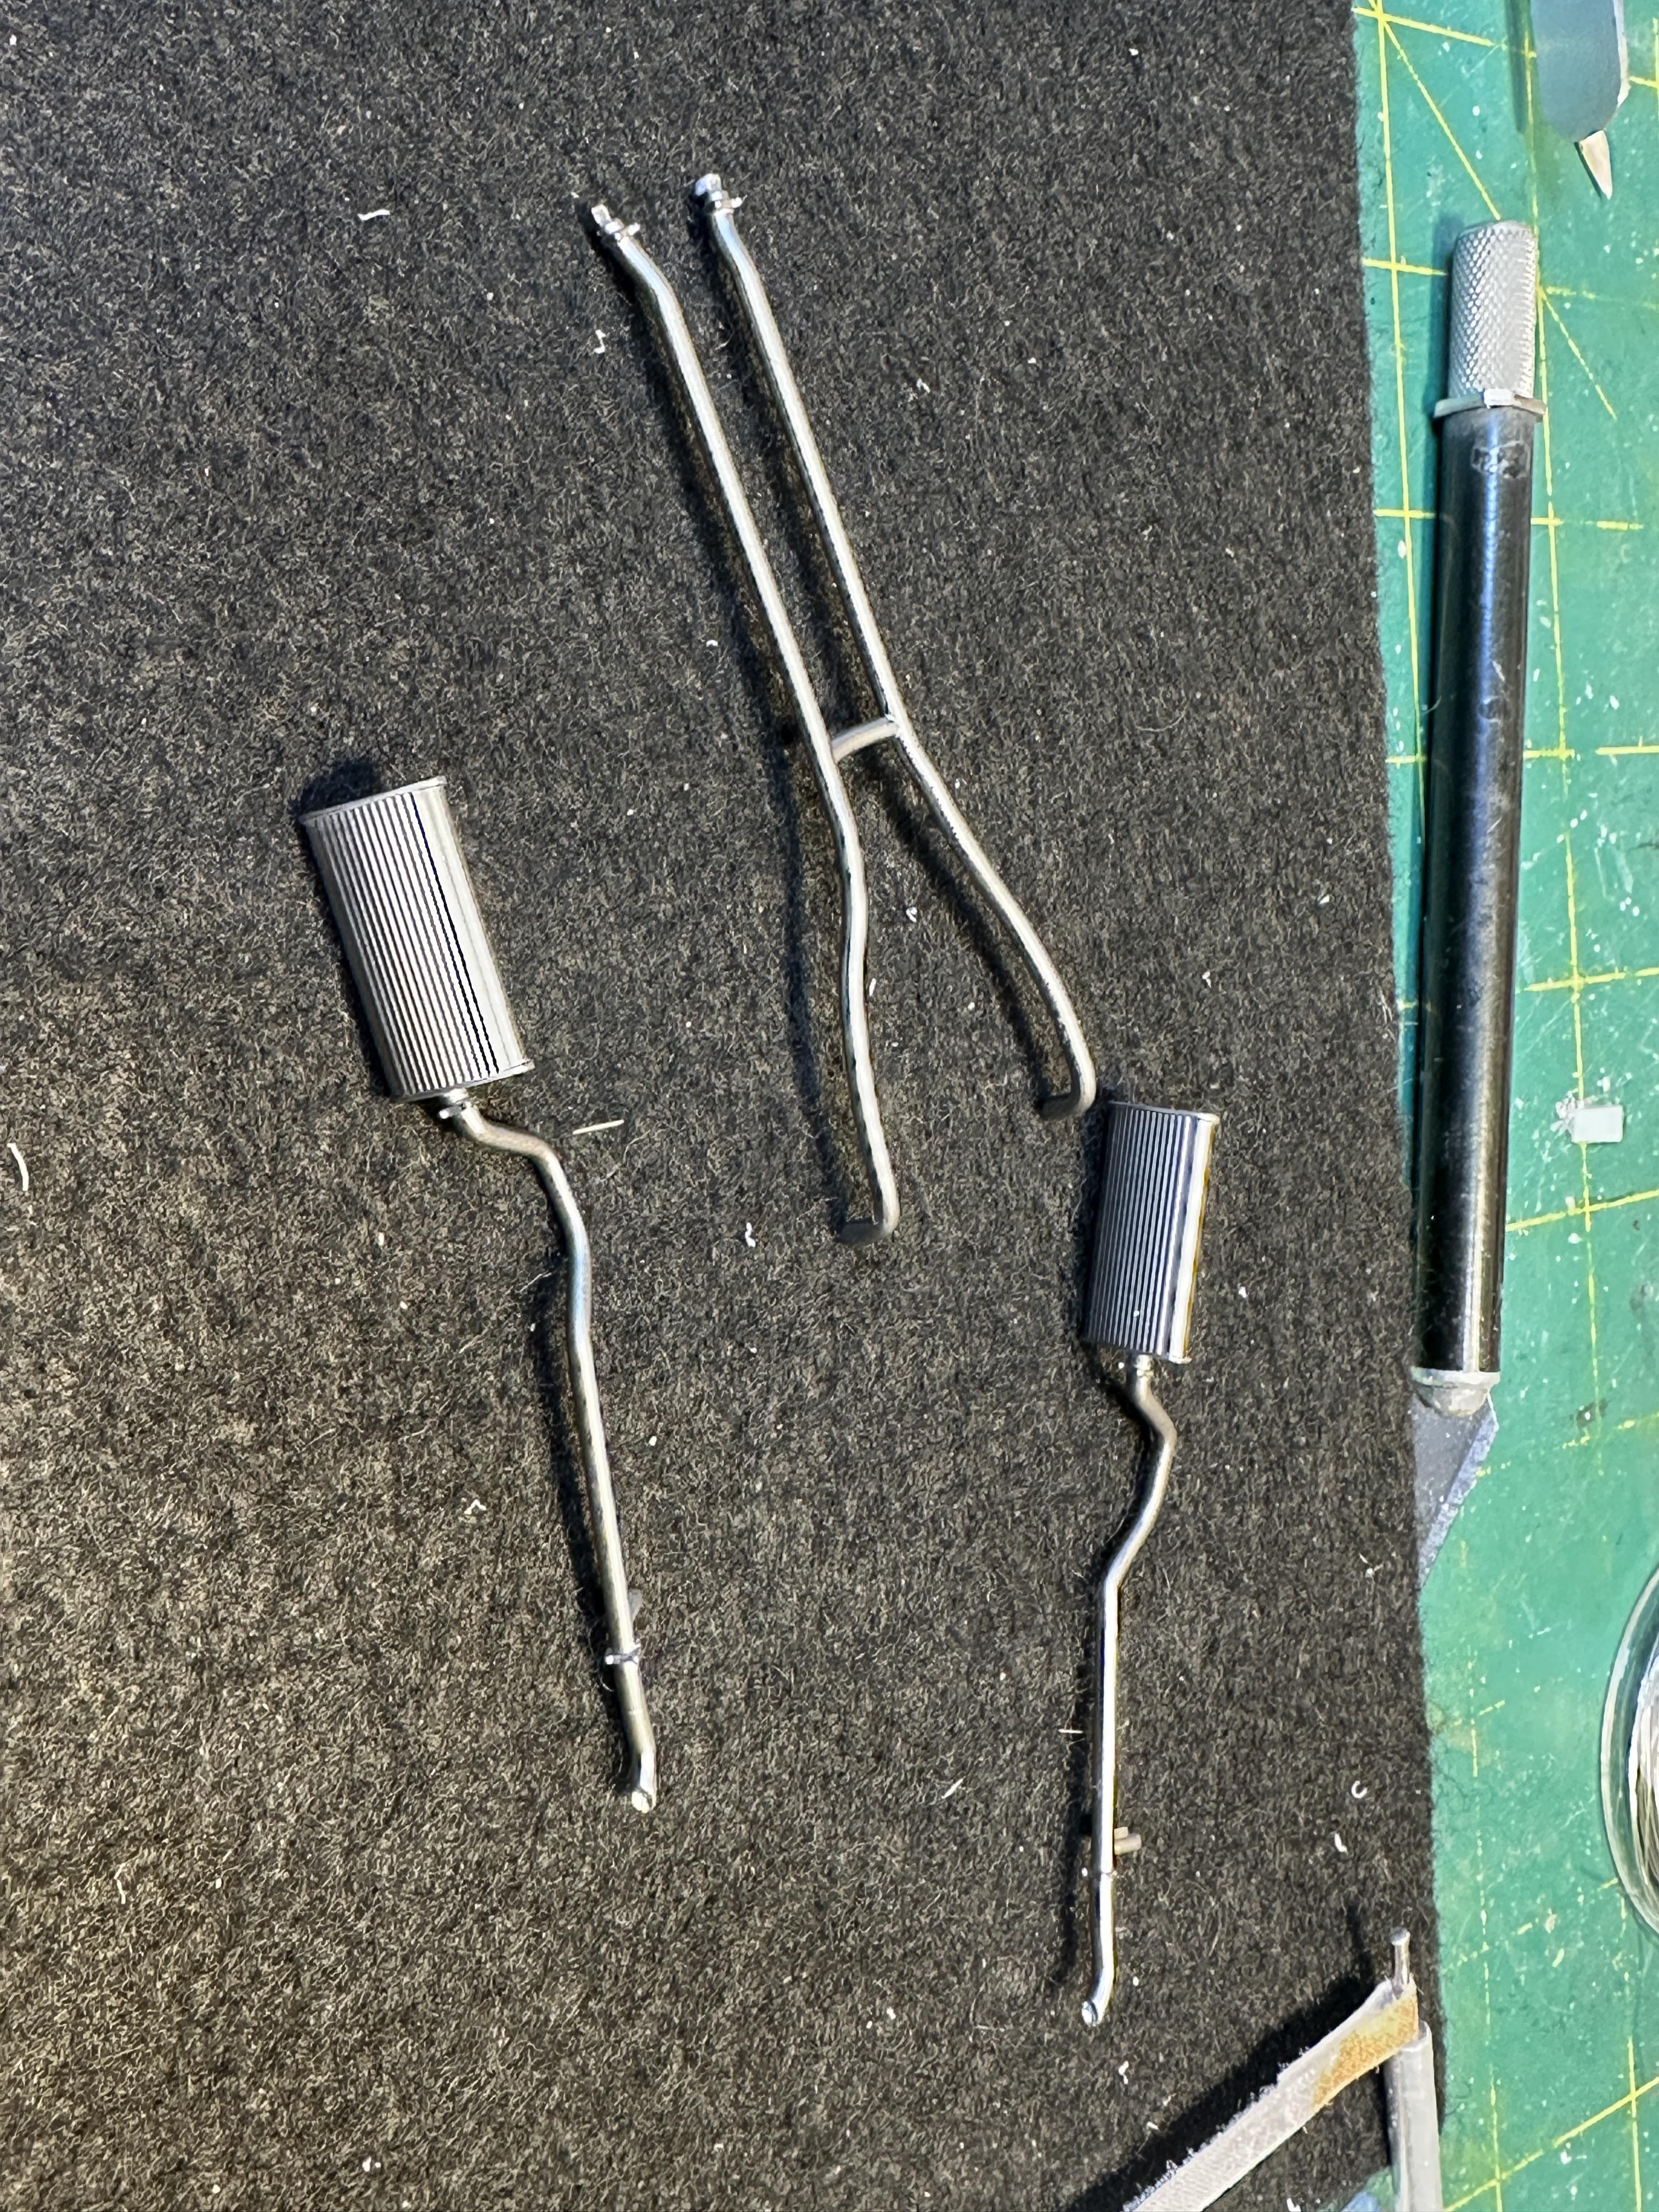
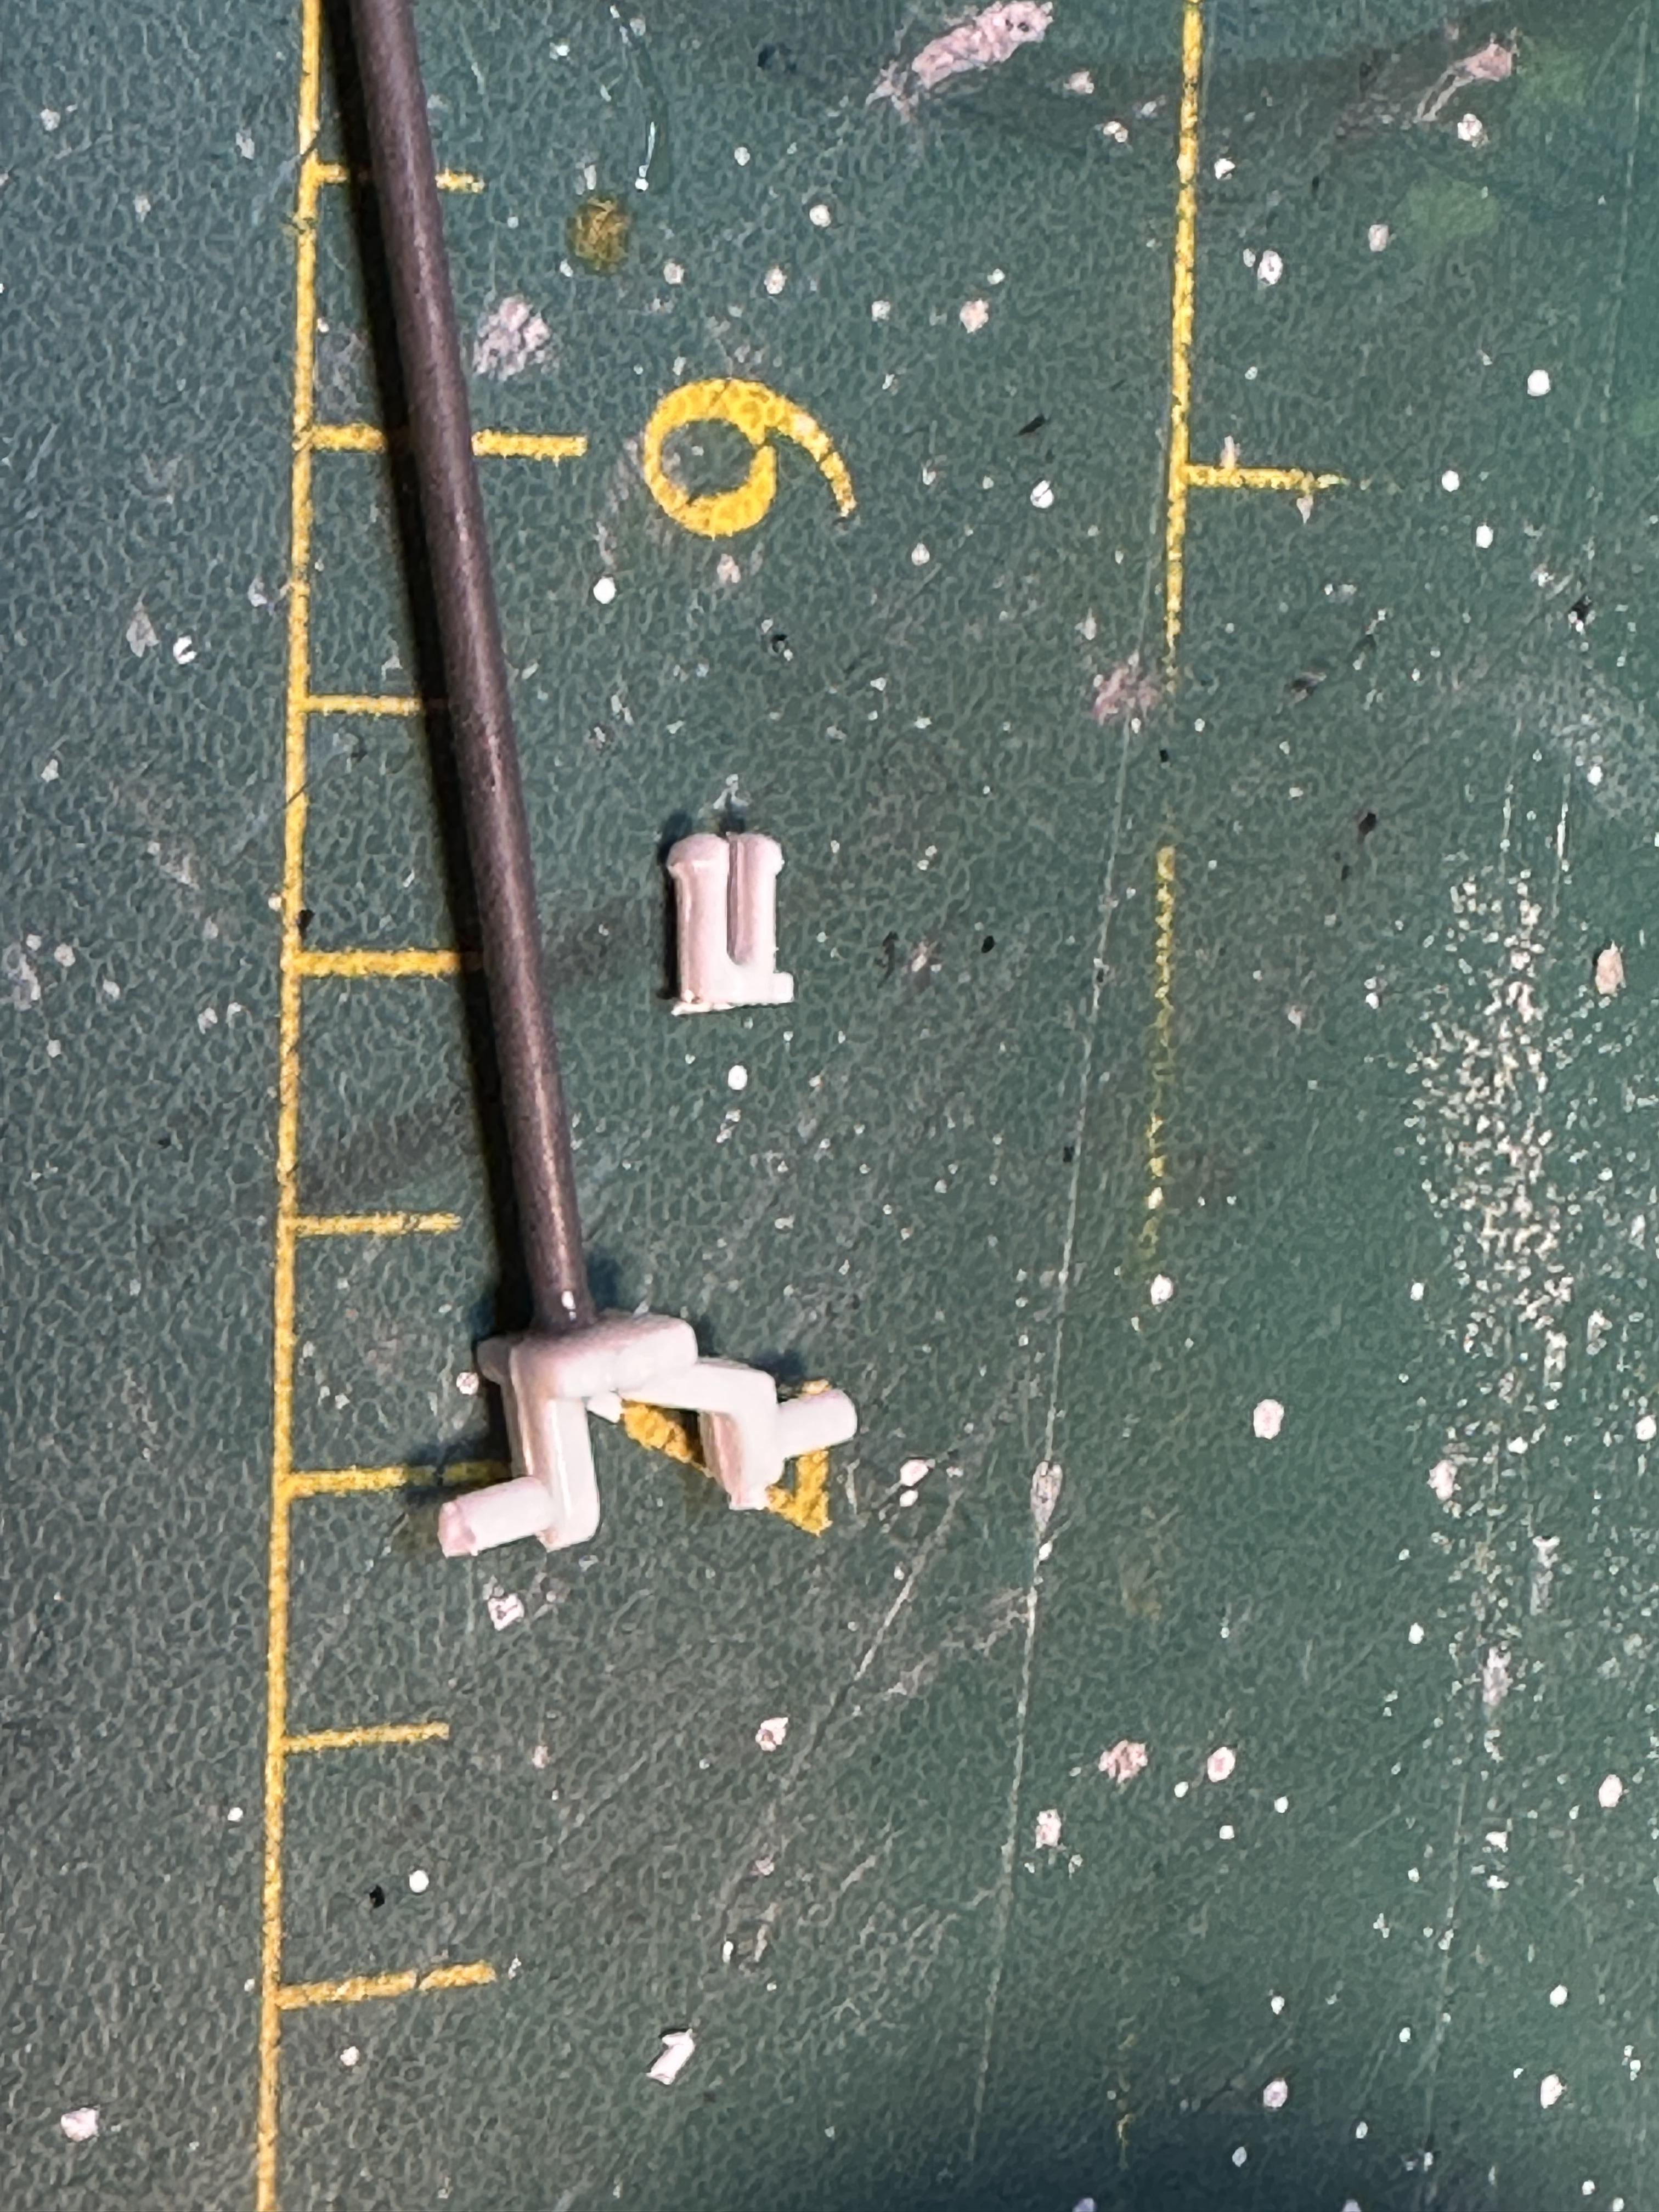
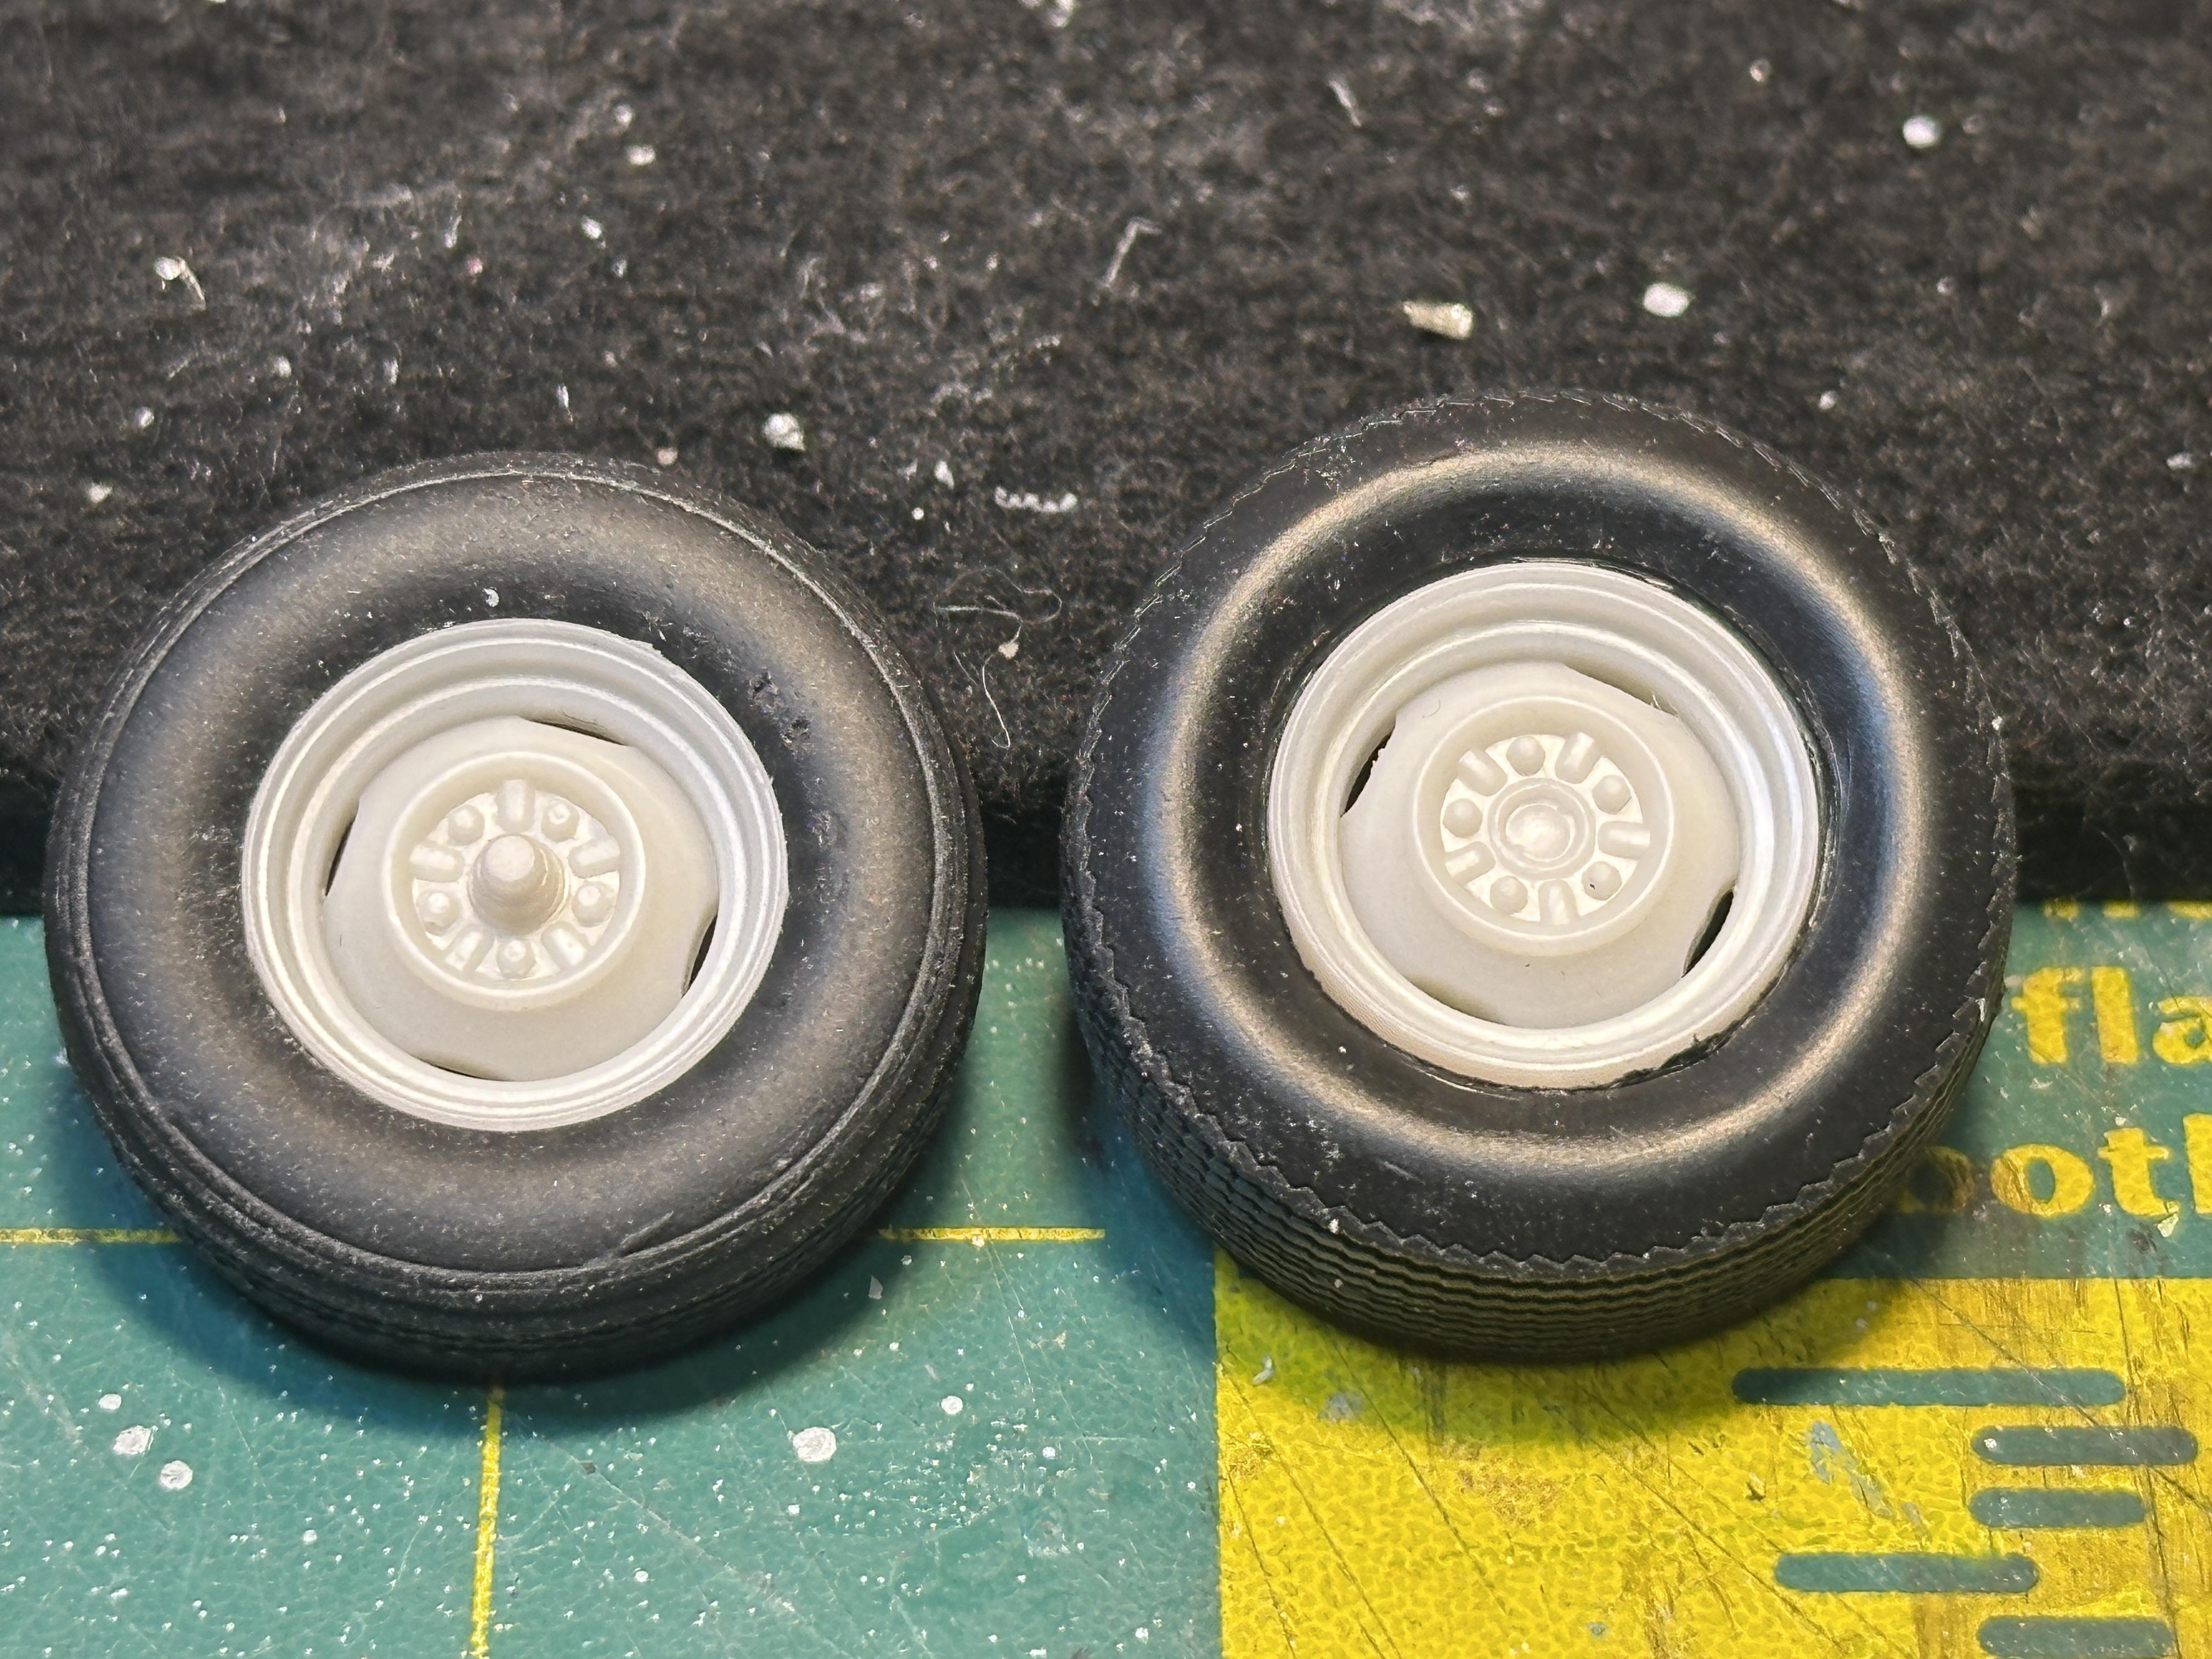
Did a bit of work on the exhaust. Needs to be done before I assemble the rear end of the chassis. Although a new kit and should not have nasties like 30-50 year old kits have but it still needs time to tidy up the mould parting lines. Go to tools here are a sharp blade for scraping and a flexi-file for finishing off. So after an hour or so of scraping and sanding its off to the paint booth for some undercoat and a couple of coats of SMS stainless steel. I also opened up the outlet a tad with the point of a #11 blade. Clean up work - what a mess on my felt pad. And straight from the paint booth - and I cleaned up the felt pad. I mocked up the exhaust and rear end into the chassis. The rear end has had a bit of lowering by de-arching the springs a tad. This necessitated slotting the rear spring mounting holes and will mean the shocks will need some love to fit up too. By dropping the back end I needed to visit the front end Wasn't too difficult. I cut the original axle pin off and drilled a new hole as far up as I could for a 1.4mm rod. This will have a 2.4mm OD tube glued to it to mate up to the wheels. I got about 1.5mm lowering by doing this. Any more would require a fair bit of work and does not fit into the build theme. Will certainly look at lowering the front end in more depth in a future build. The pix shows the original axle cut off and the new mounting pin glued in. And to add to finish off a little tire rake. The wheels are from the Moebius 65 Belvedere with Satelite front tires and rear tyres from the parts box. Still undecided on whether to chrome the wheels without caps or to paint body colour with poverty caps Thanks for looking
-
I concur with @Dave G. I now only use hardware store LT with Tamiya acrylics - it was the plane guys that put me up to that years ago. A recent paint job I did I left for at least a month before colour sanding and now it is nice and hard - see below I have found using the X20-A thinners that the paint does take a long time to harden and a good few days in a dehydrator does help. But here is the trick - after clear coating and dehydration time and when it comes time too colour sand put it back in the dehydrator overnight after the first cut and before sanding with the next grade. And the same process for each grade. It takes a few days to get from say 3600 to 12000 grit sanding cloths but it is worth it. Then leave it a few days before hitting it with polish. It would seem that the paint gasses out faster when the glossy coat is sanded back and will go hard. At least that's my story. I have had issues with fresh Tamiya LP lacquers misbehaving under masking tape too. The same goes for acrylics. It just takes time I have not tried Mr thinners yet as it has not crossed my radar I know the acrylics are water soluble but don't ever try thinning it with water - it just don't work - sprays horribly, and I mean horribly I use the LT for clean up too
-
Thanks Jim, but that would be an expensive exercise being that I live at the other side of the world and with the expensive shipping costs these days. Shaping the masking tape is very much like foil - you need good guide lines and a fresh (and very) sharp blade and a truck load of patience
-
With resin 3d printing with us these days it is a wonder a subject such as this has not popped up. I have friend who is into large scale models and he has printed all sorts of 1/8 scale stuff - mostly early drag stuff.
-
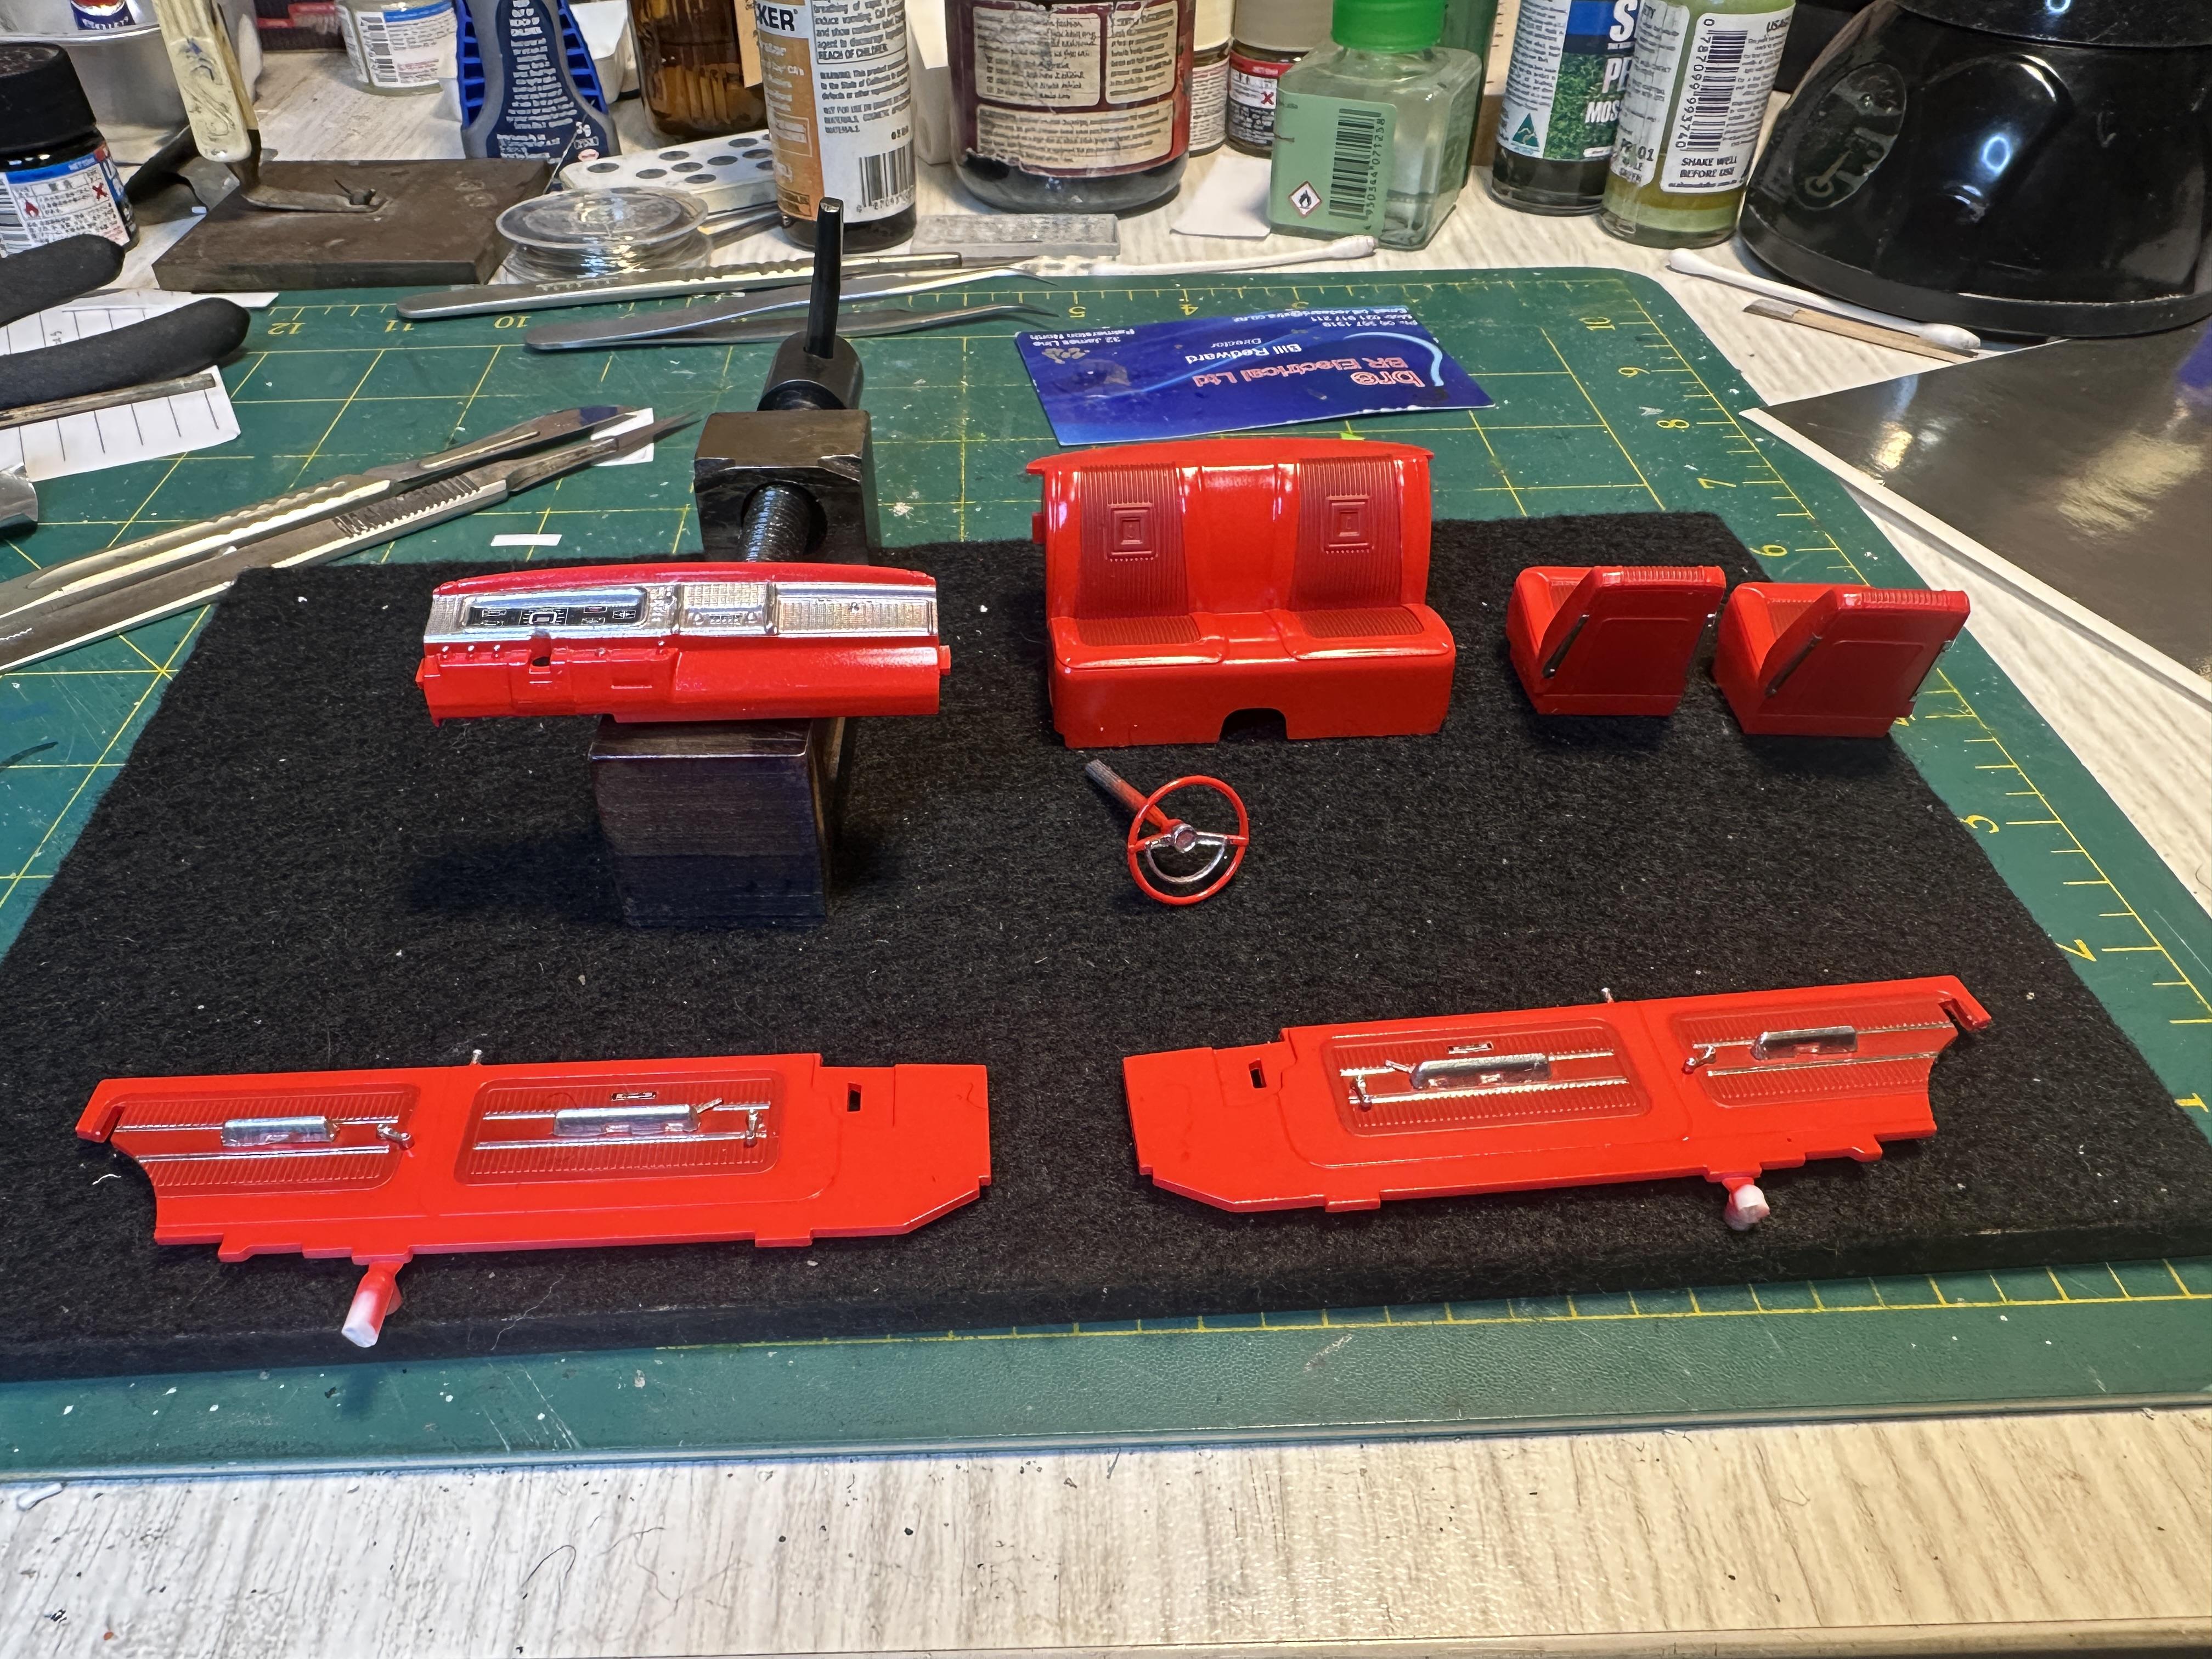
Checked the reference pix and found I needed more chrome on the doors. I have added the two chrome strips on either side. The dash has had the decals for the instrument cluster and radio added. The Moebius decals are quite thick and take some effort wit Tamiya Markfit Strong to get them to settle. Aslo got chrome on the front seats
-
What a stunning paint job. @Speedpro is the master! And the whole package is stunning too. - Colour - sublime - Stance - perfect - Wheel/Tyres - spot on - Looks - stunning
-
Revell '39 Chevy hood fitment
bill-e-boy replied to dragstk's topic in Model Building Questions and Answers
And as to the hood differences - I seem to remember the coupe hood has no sides while the SD has. They can be swapped around which is a bonus