bill-e-boy
-
Posts
938 -
Joined
-
Last visited
Content Type
Profiles
Forums
Events
Gallery
Everything posted by bill-e-boy
-
Nice build. Good luck
-
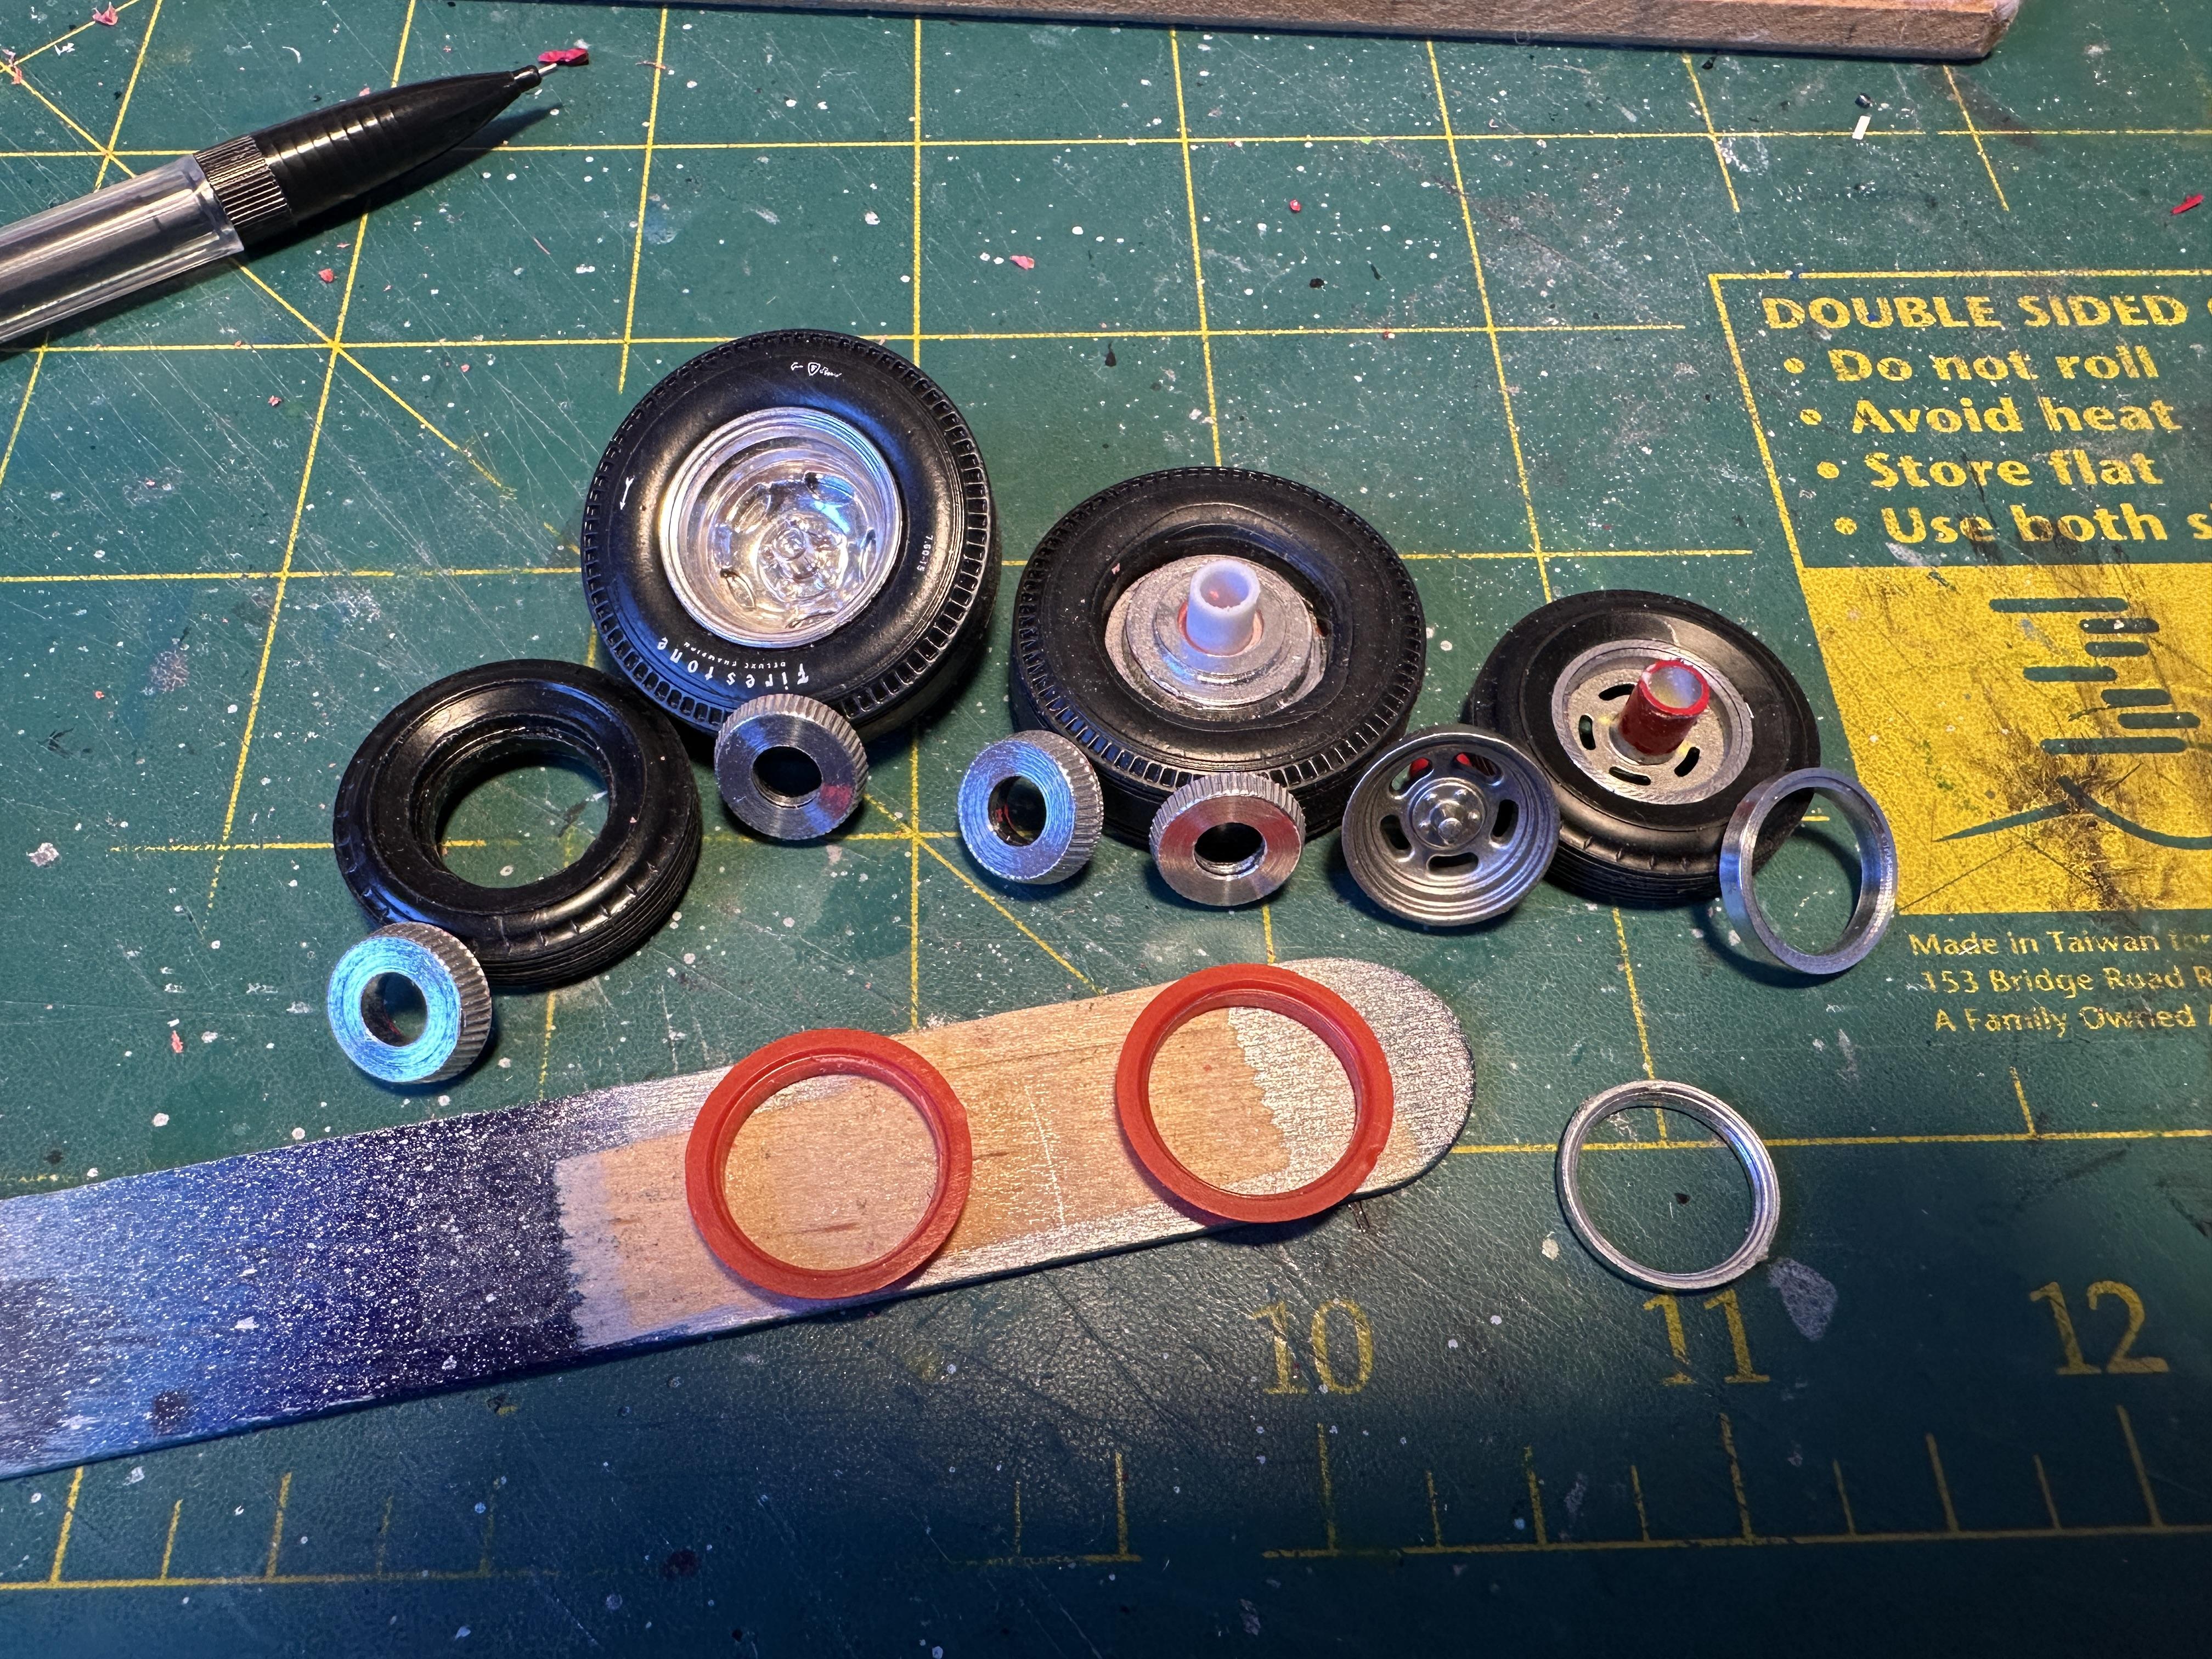
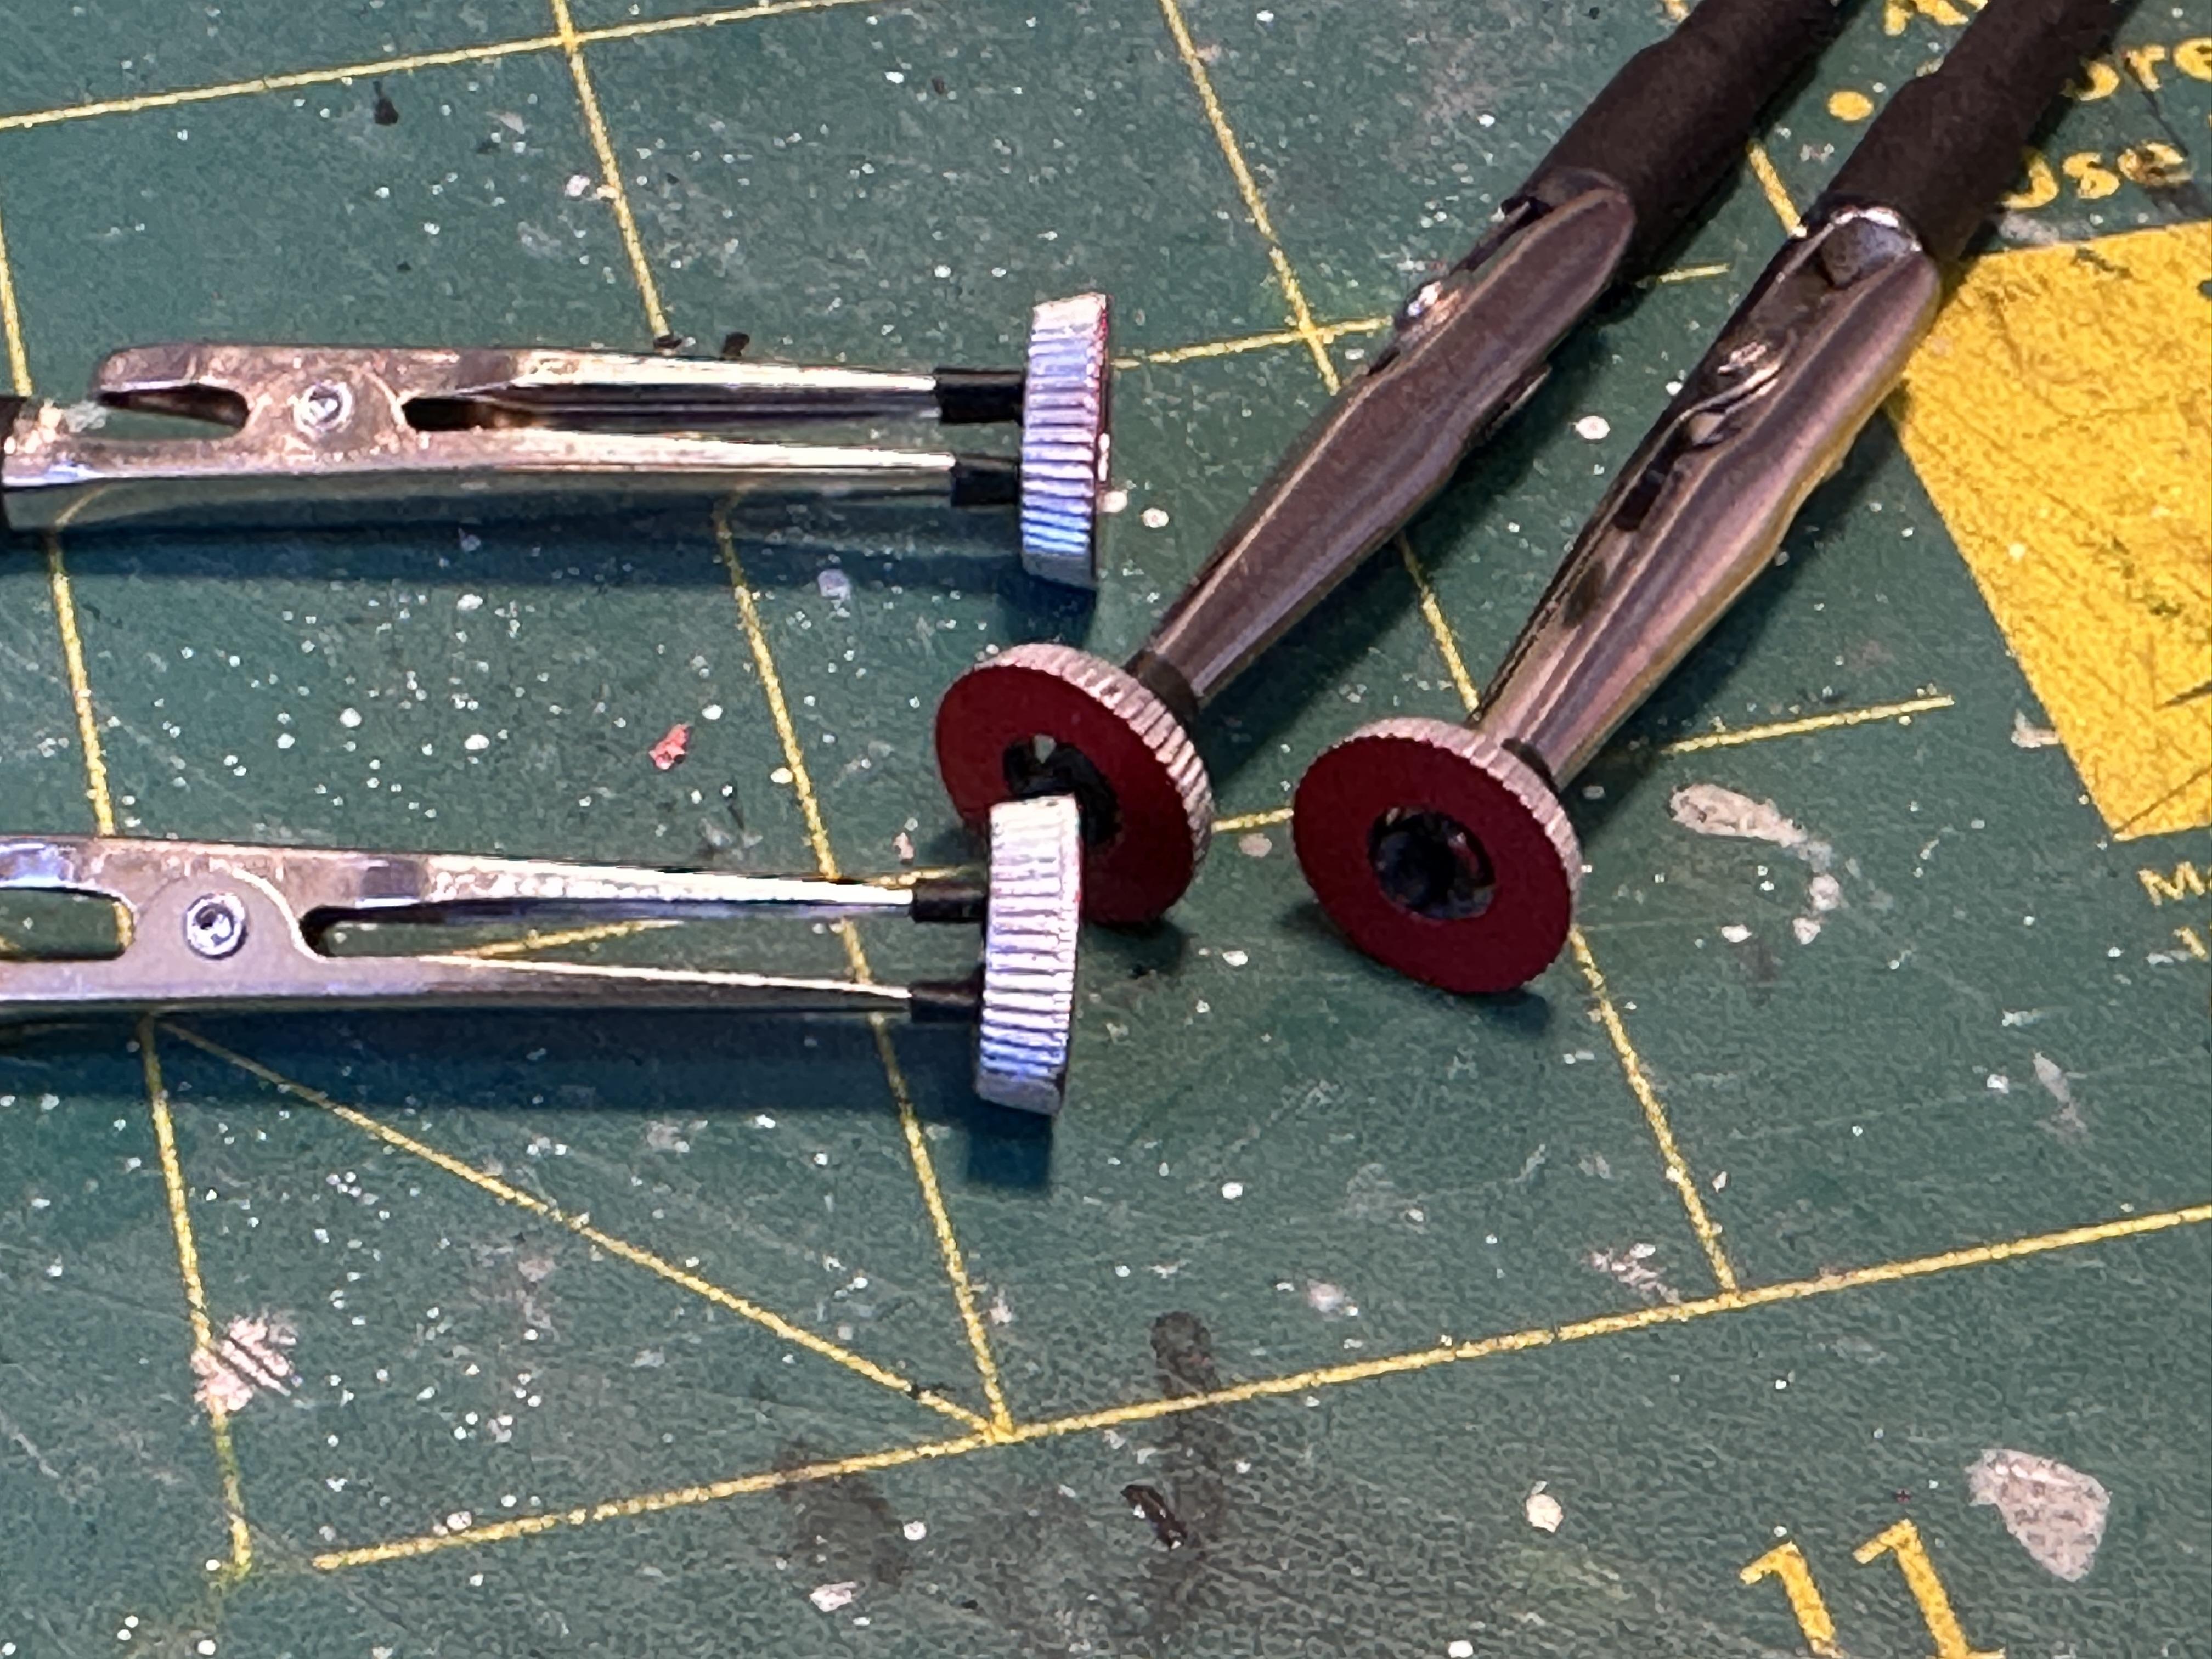
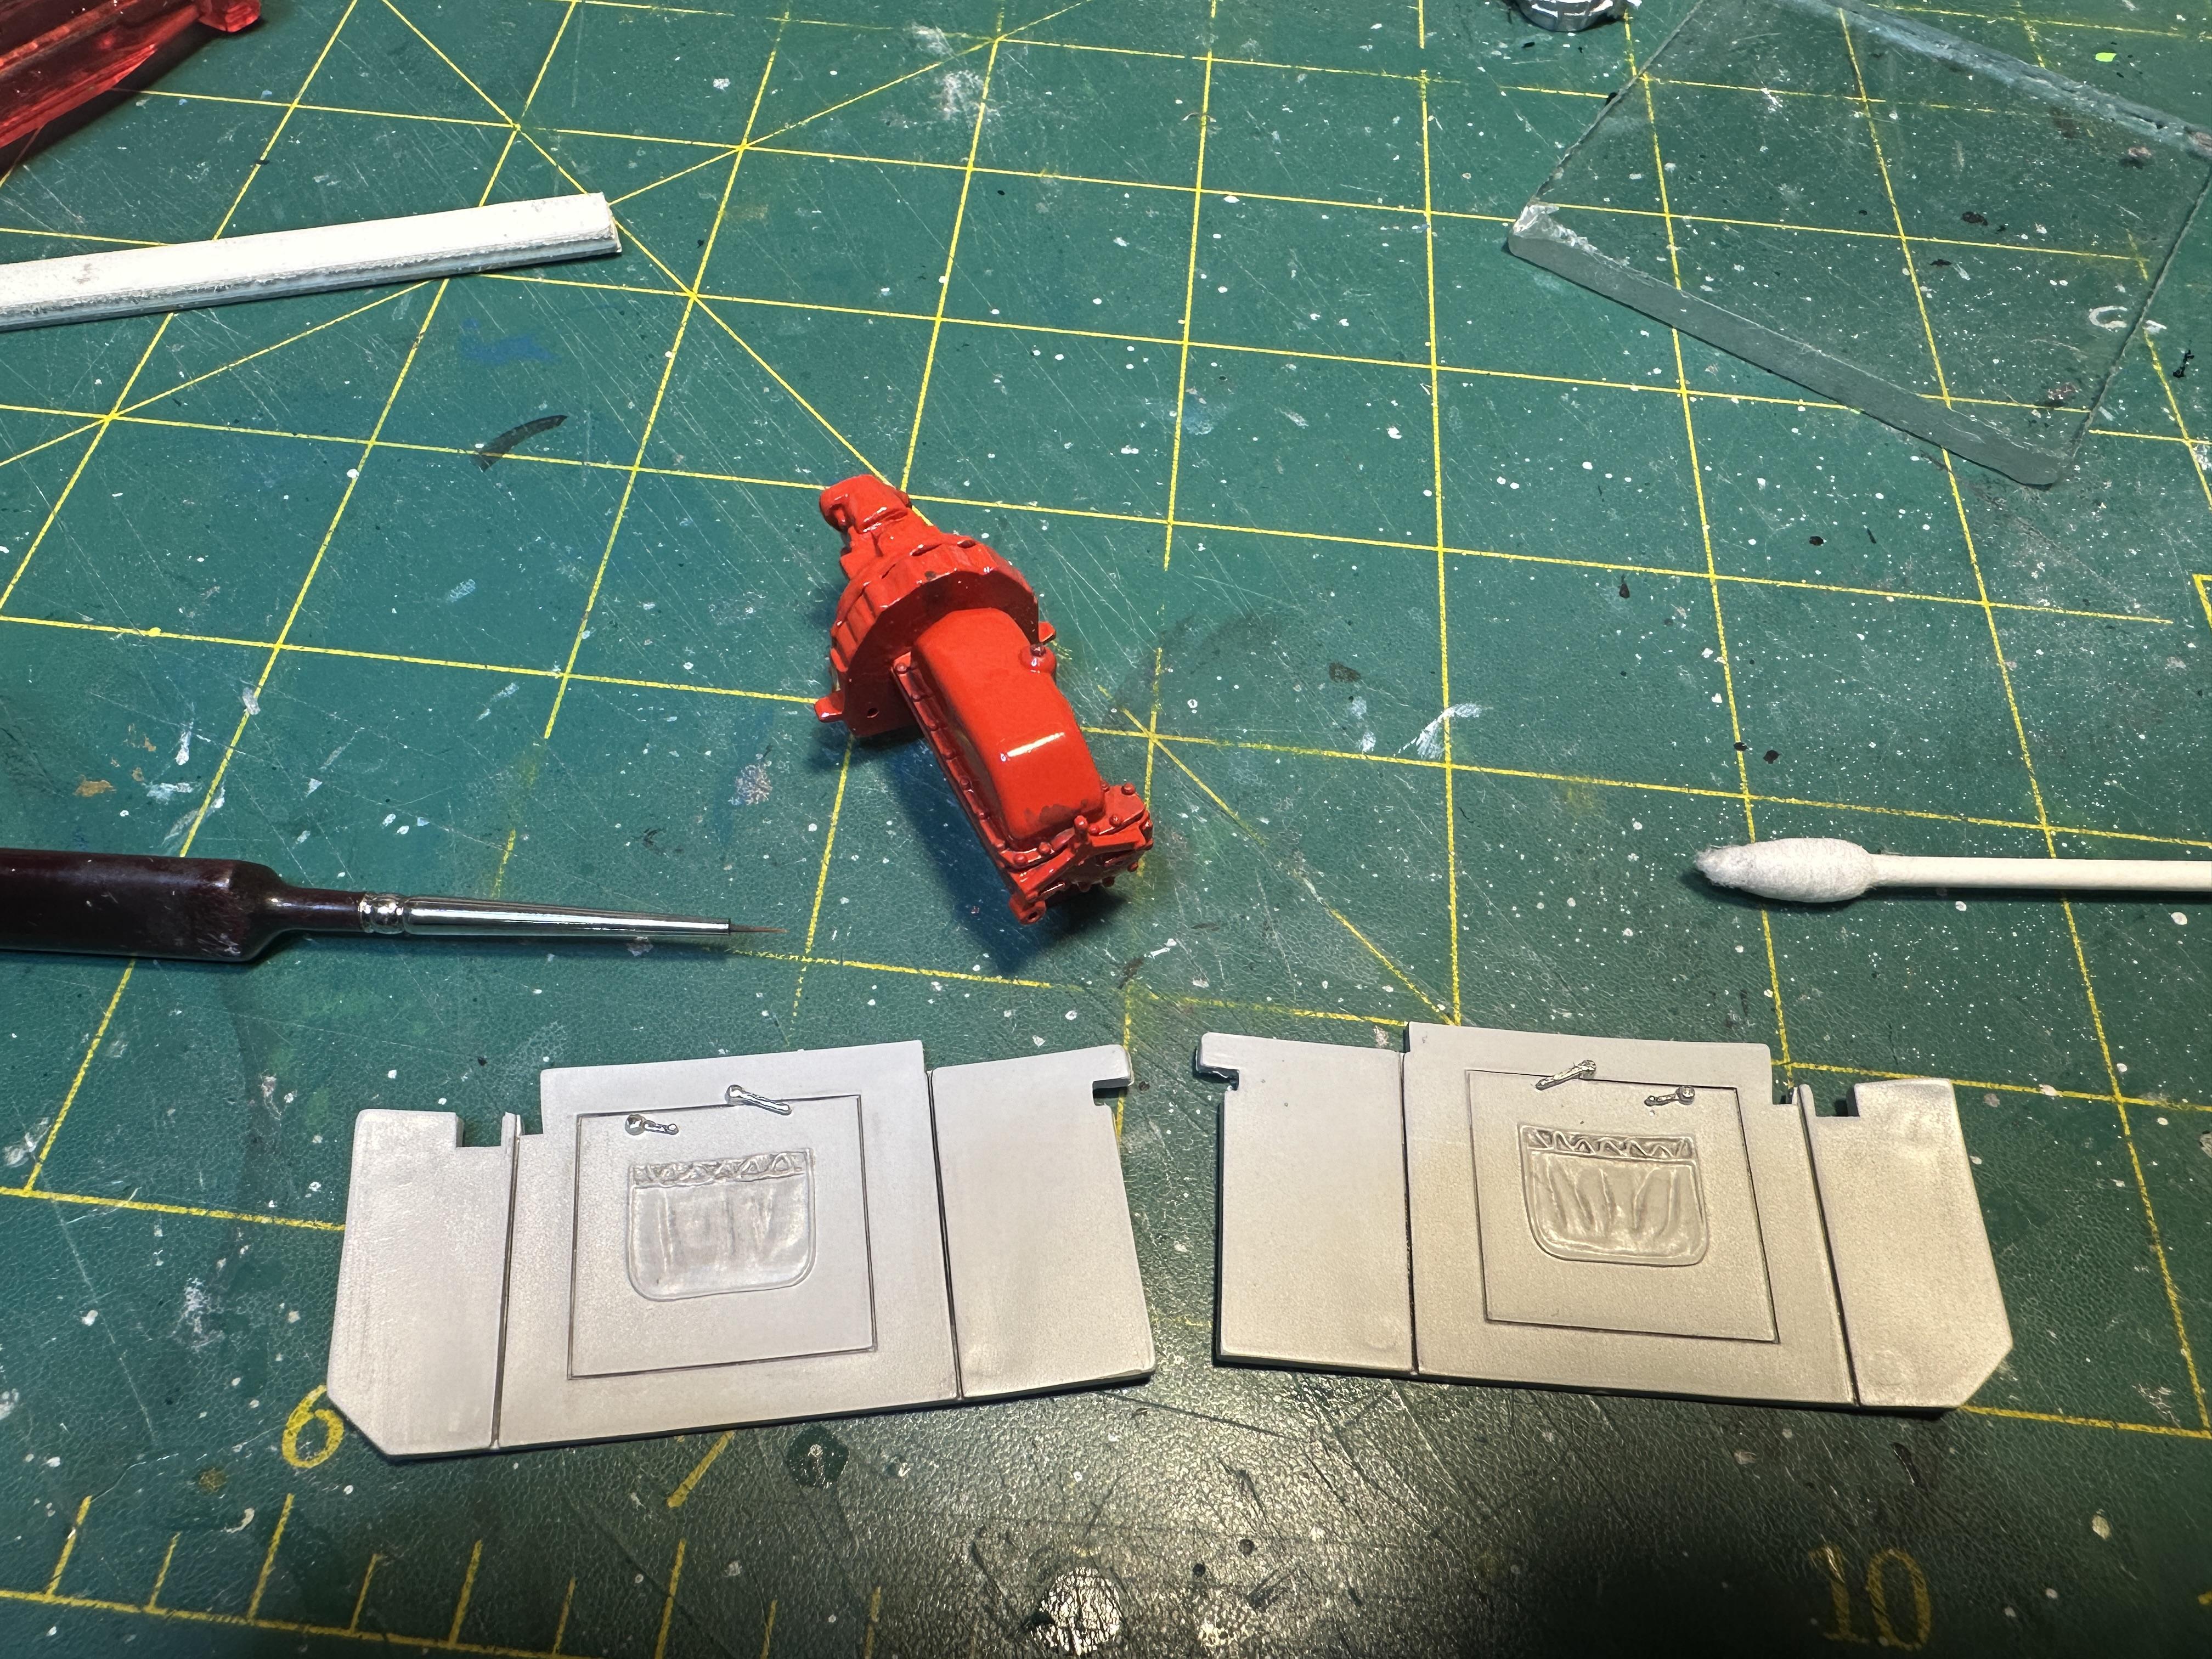
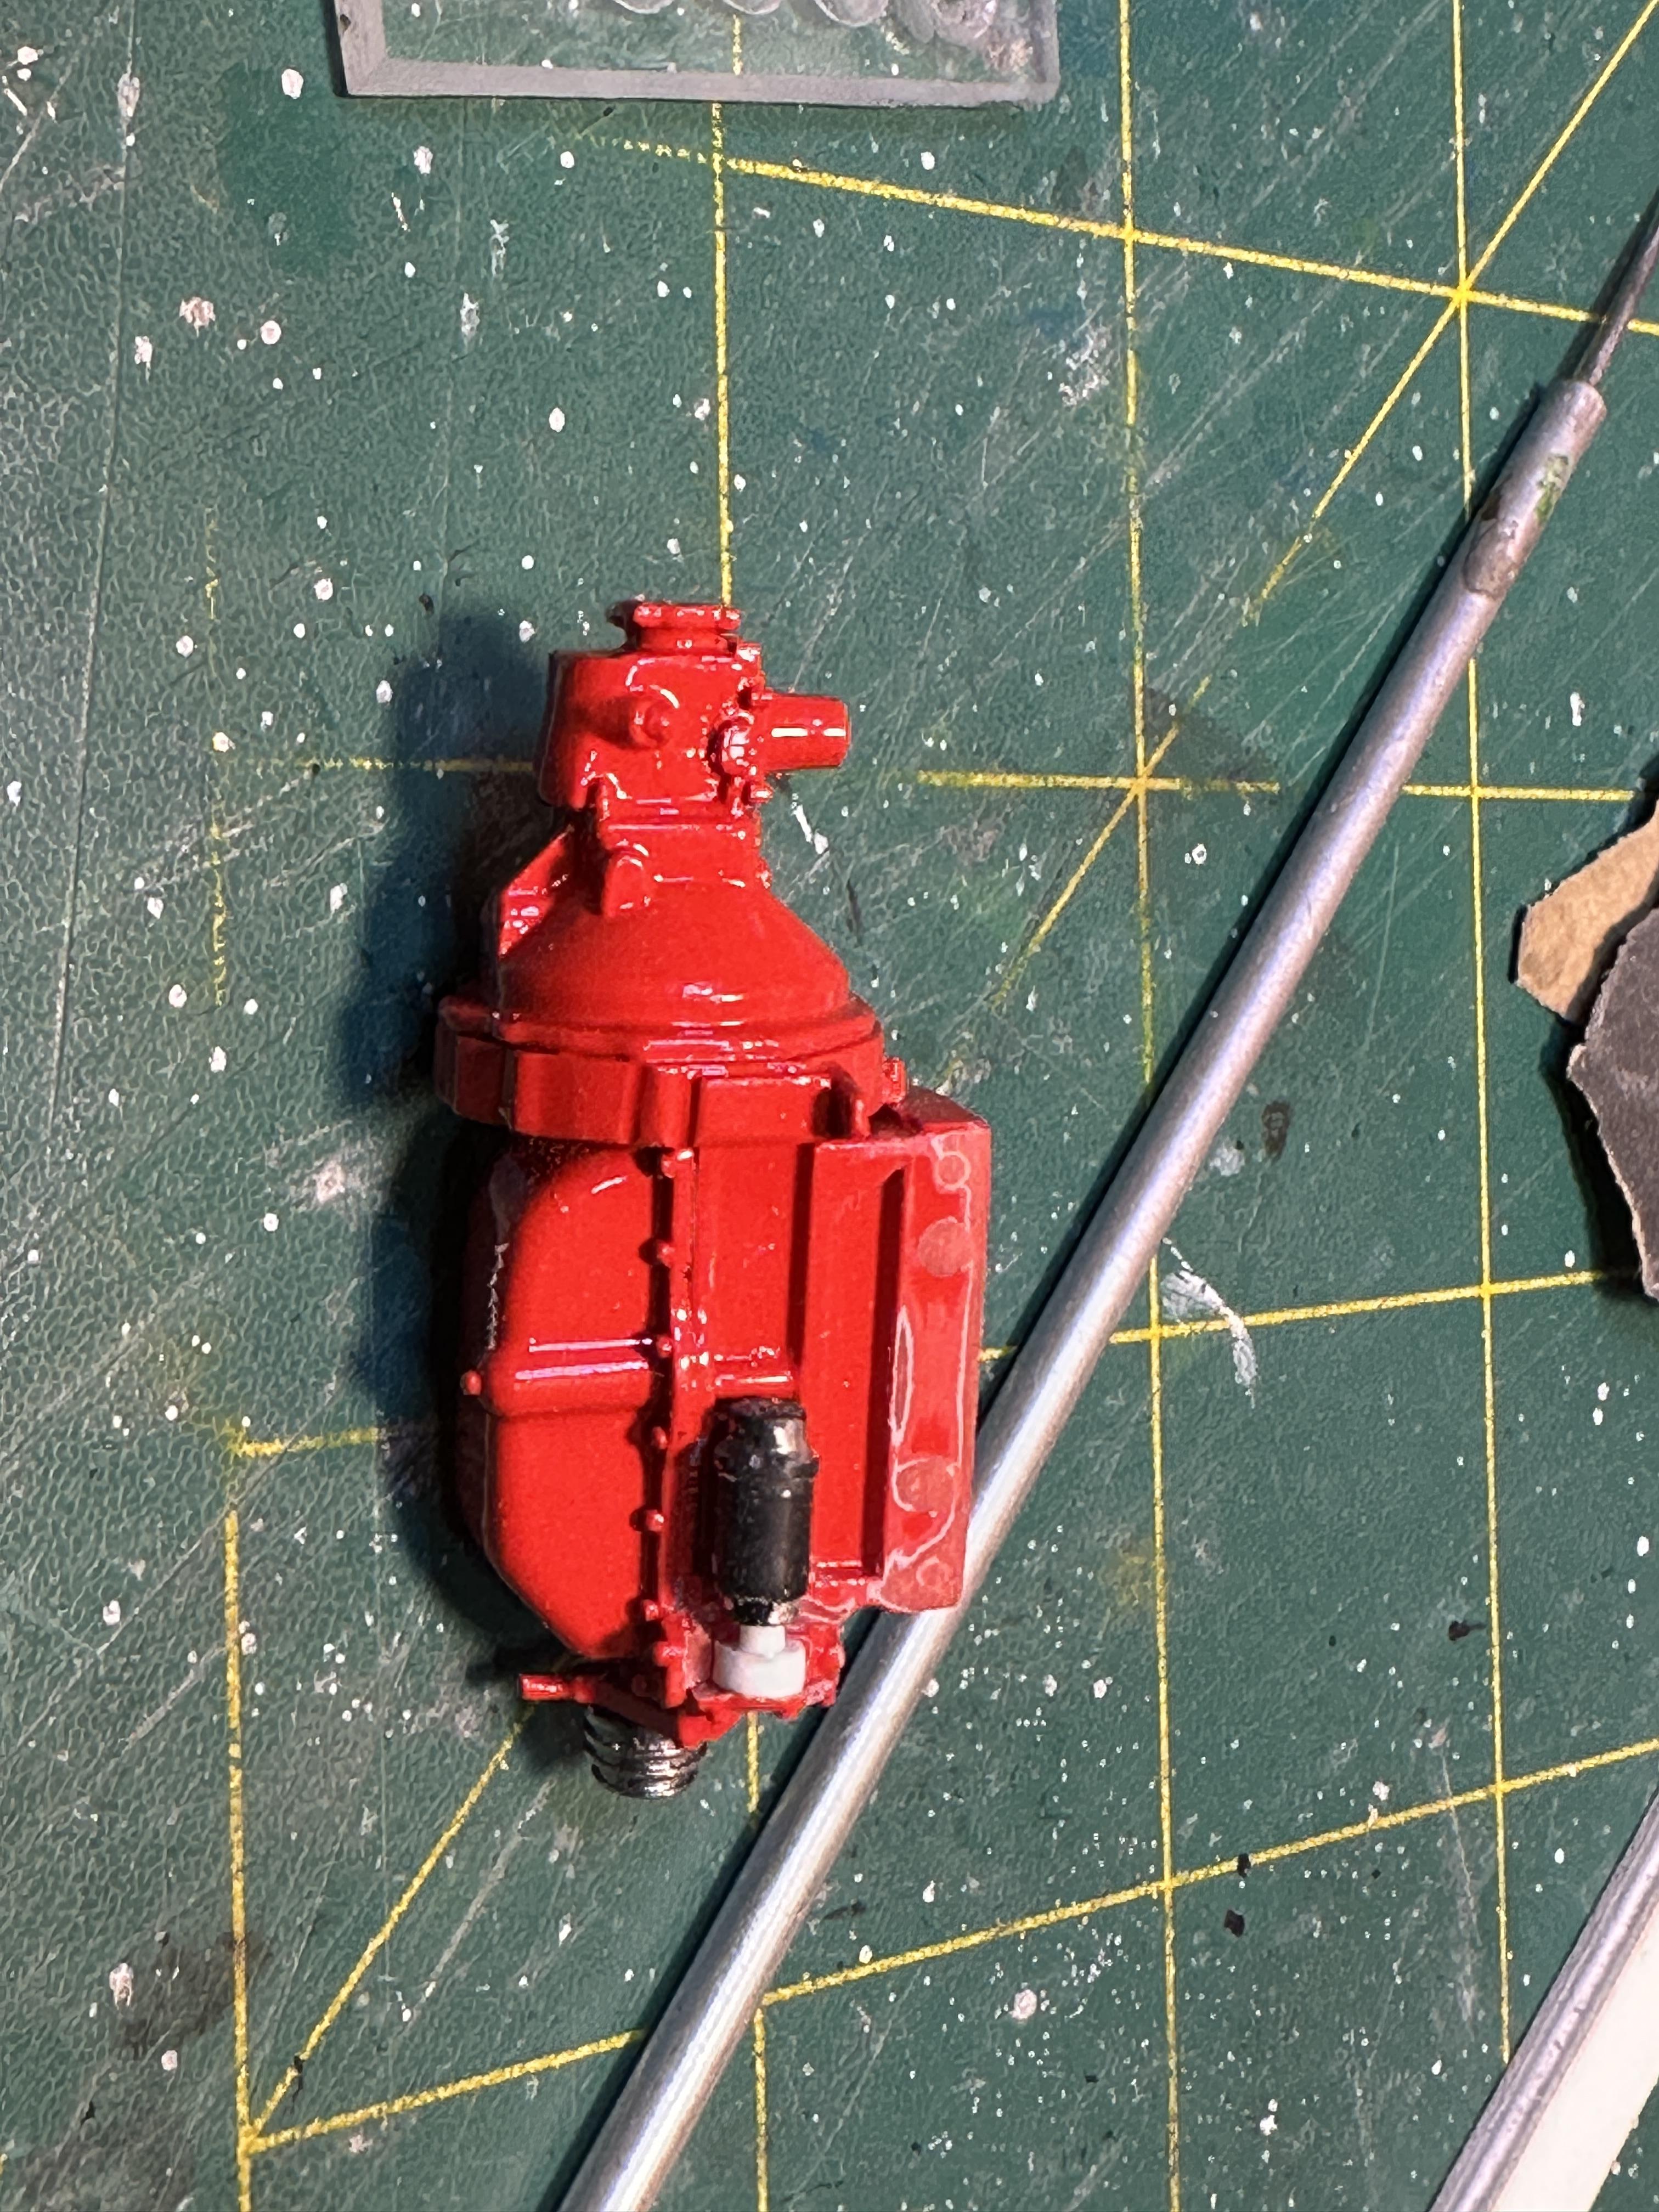
Thanks Rusty On with decals. Got some of the sponsor decals on - some were just too old and fell apart when transferring from the backing paper. Oh well that' what we get whenmessing around with old shite. Just enough to get by IMO. There is one I put on the boot lid but no pix yet Mean time moving on with the wheels. I stripped the chrome from the fronts and painted magnesium. The rears I will leave in chrome - typical old timey mismatched wheels. I machined some rear wheel spacers - altered kit parts for the rear and ally for the fronts. Some more paint then onto assembly. Shown in the above are some finned brakes - I machined on my "big" lathe from ally and straight knurned them. Skinny for the rear and wider for the fronts. The backing plates are painted the red accent colour I am using Thanks for looking

-
Yeah that too
-
A nice method to cut a 33/34 5W top. No need to add a stretch piece between the A-B and B-C pillars which is always hard to get right with a 5W. And it looks more stock than stretching and you can keep the top insert if you want - a lot of the early comp coupes kept them
-
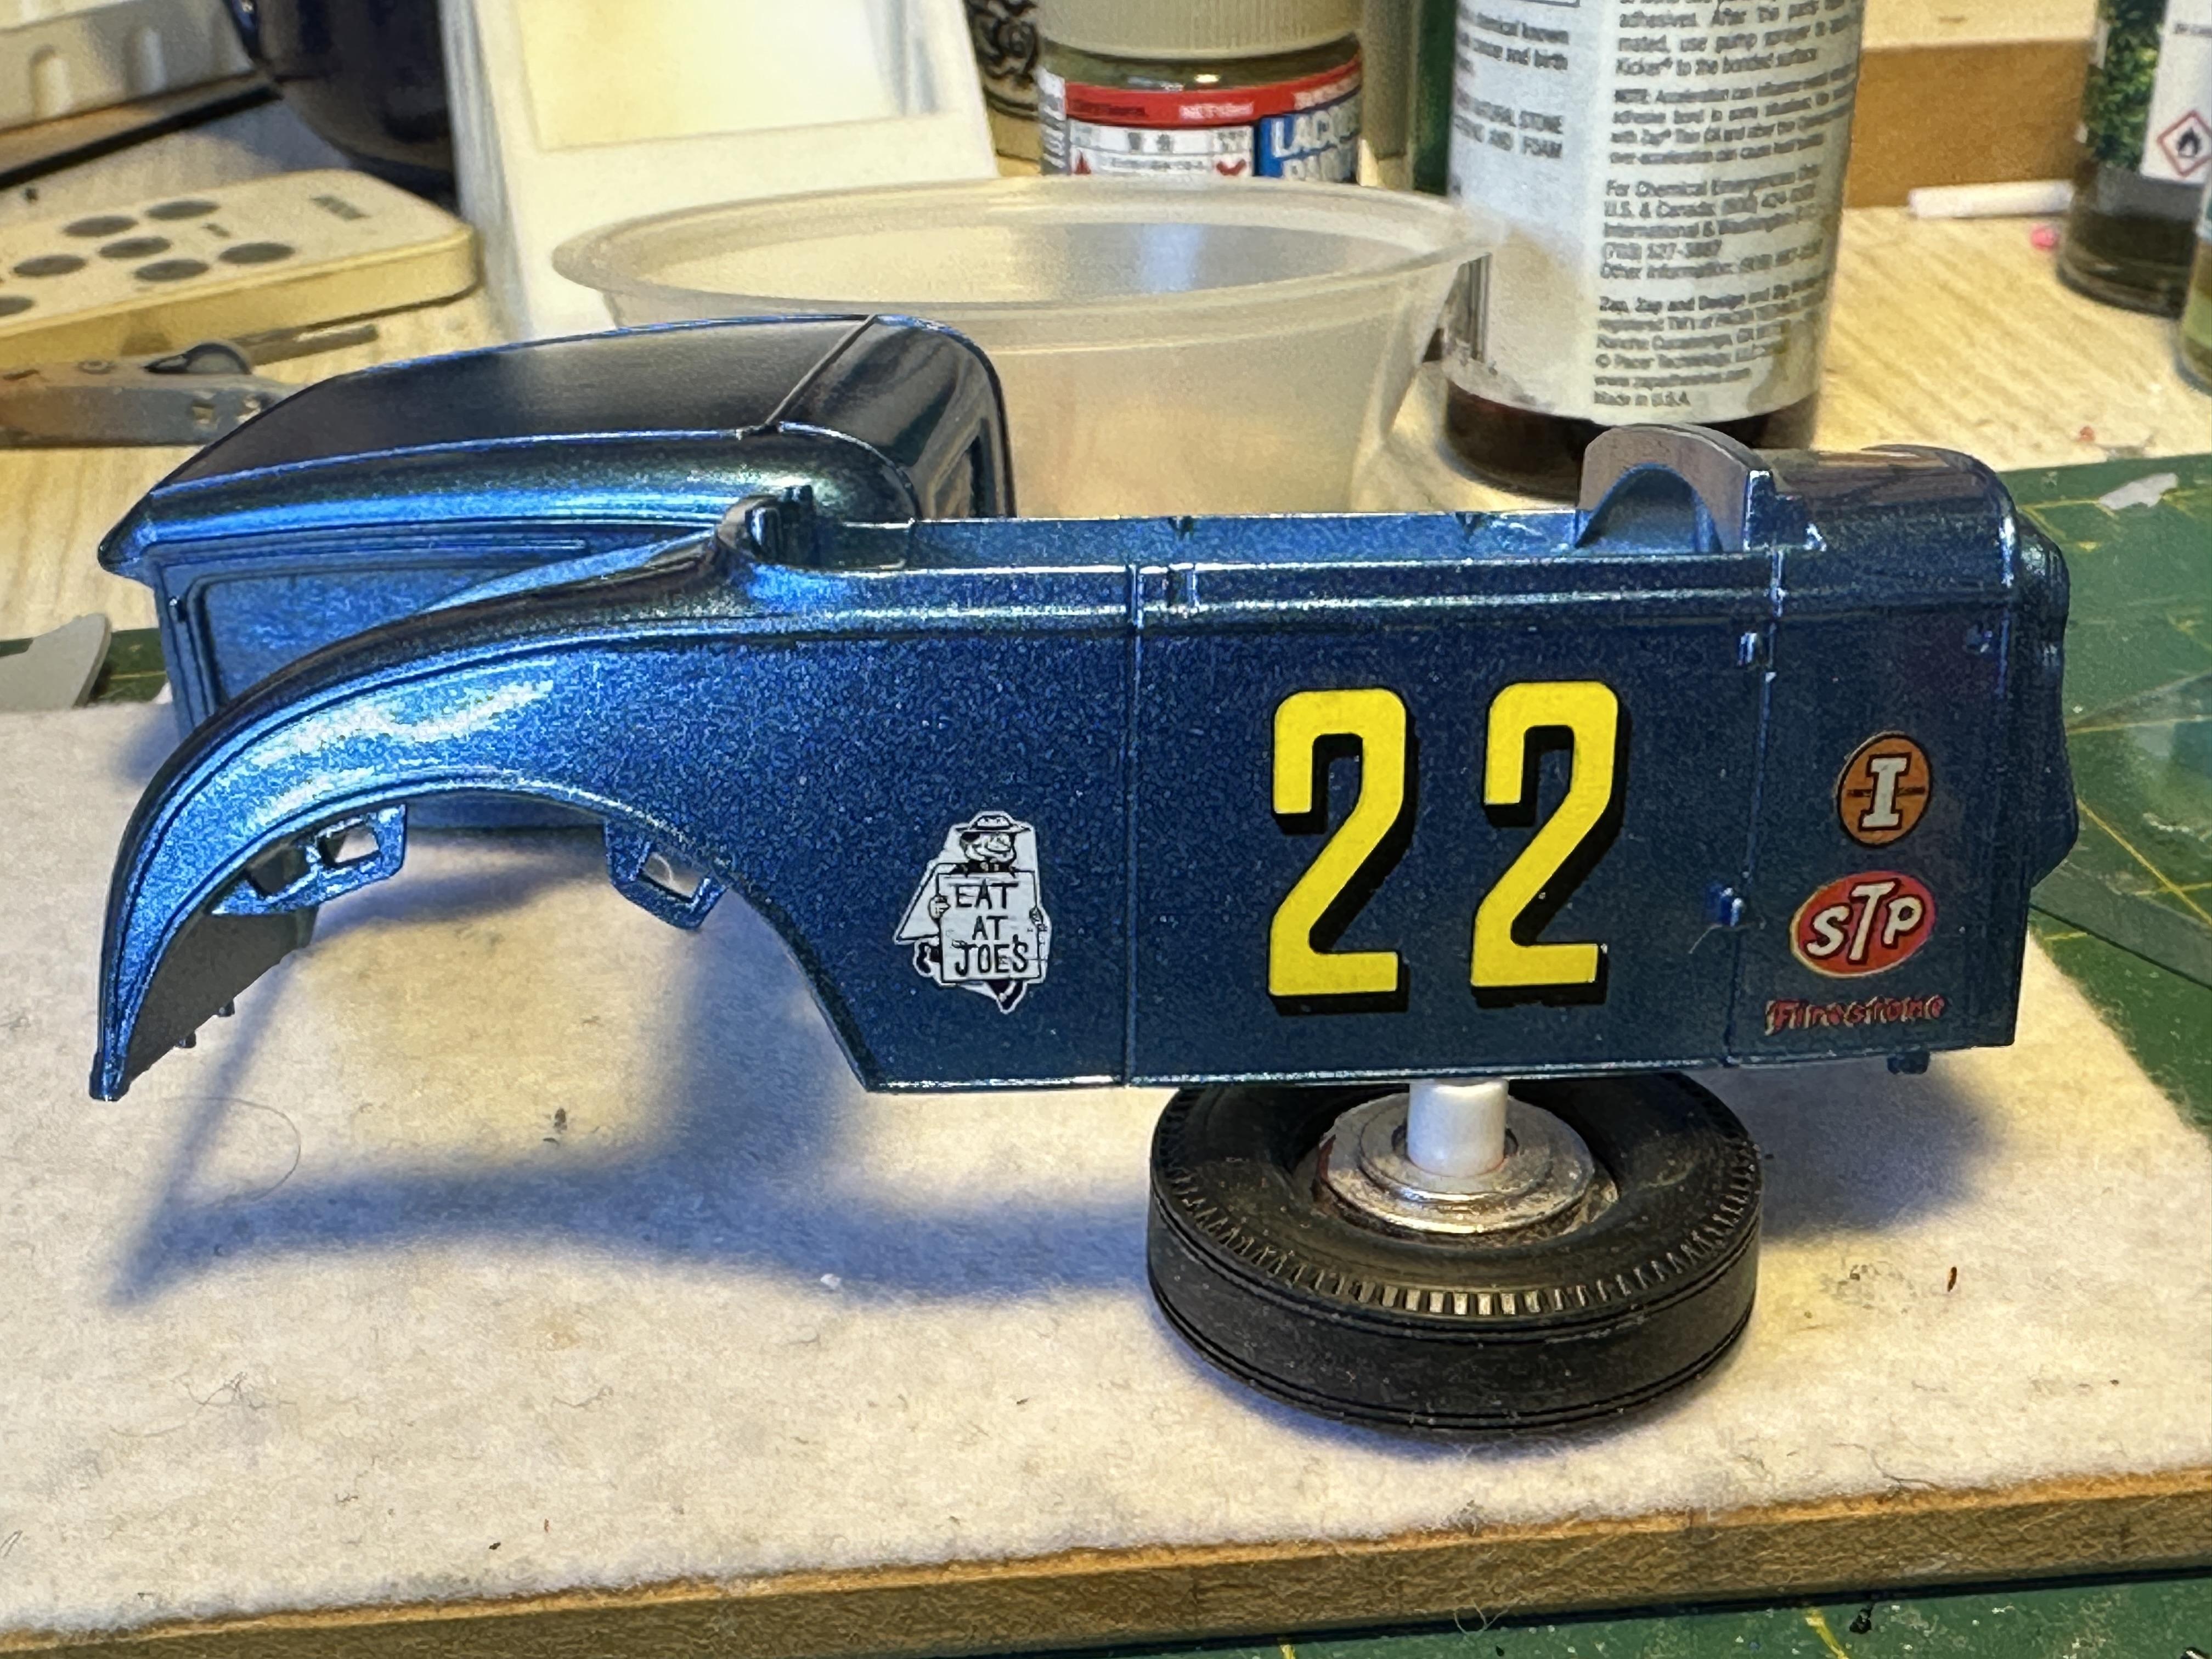
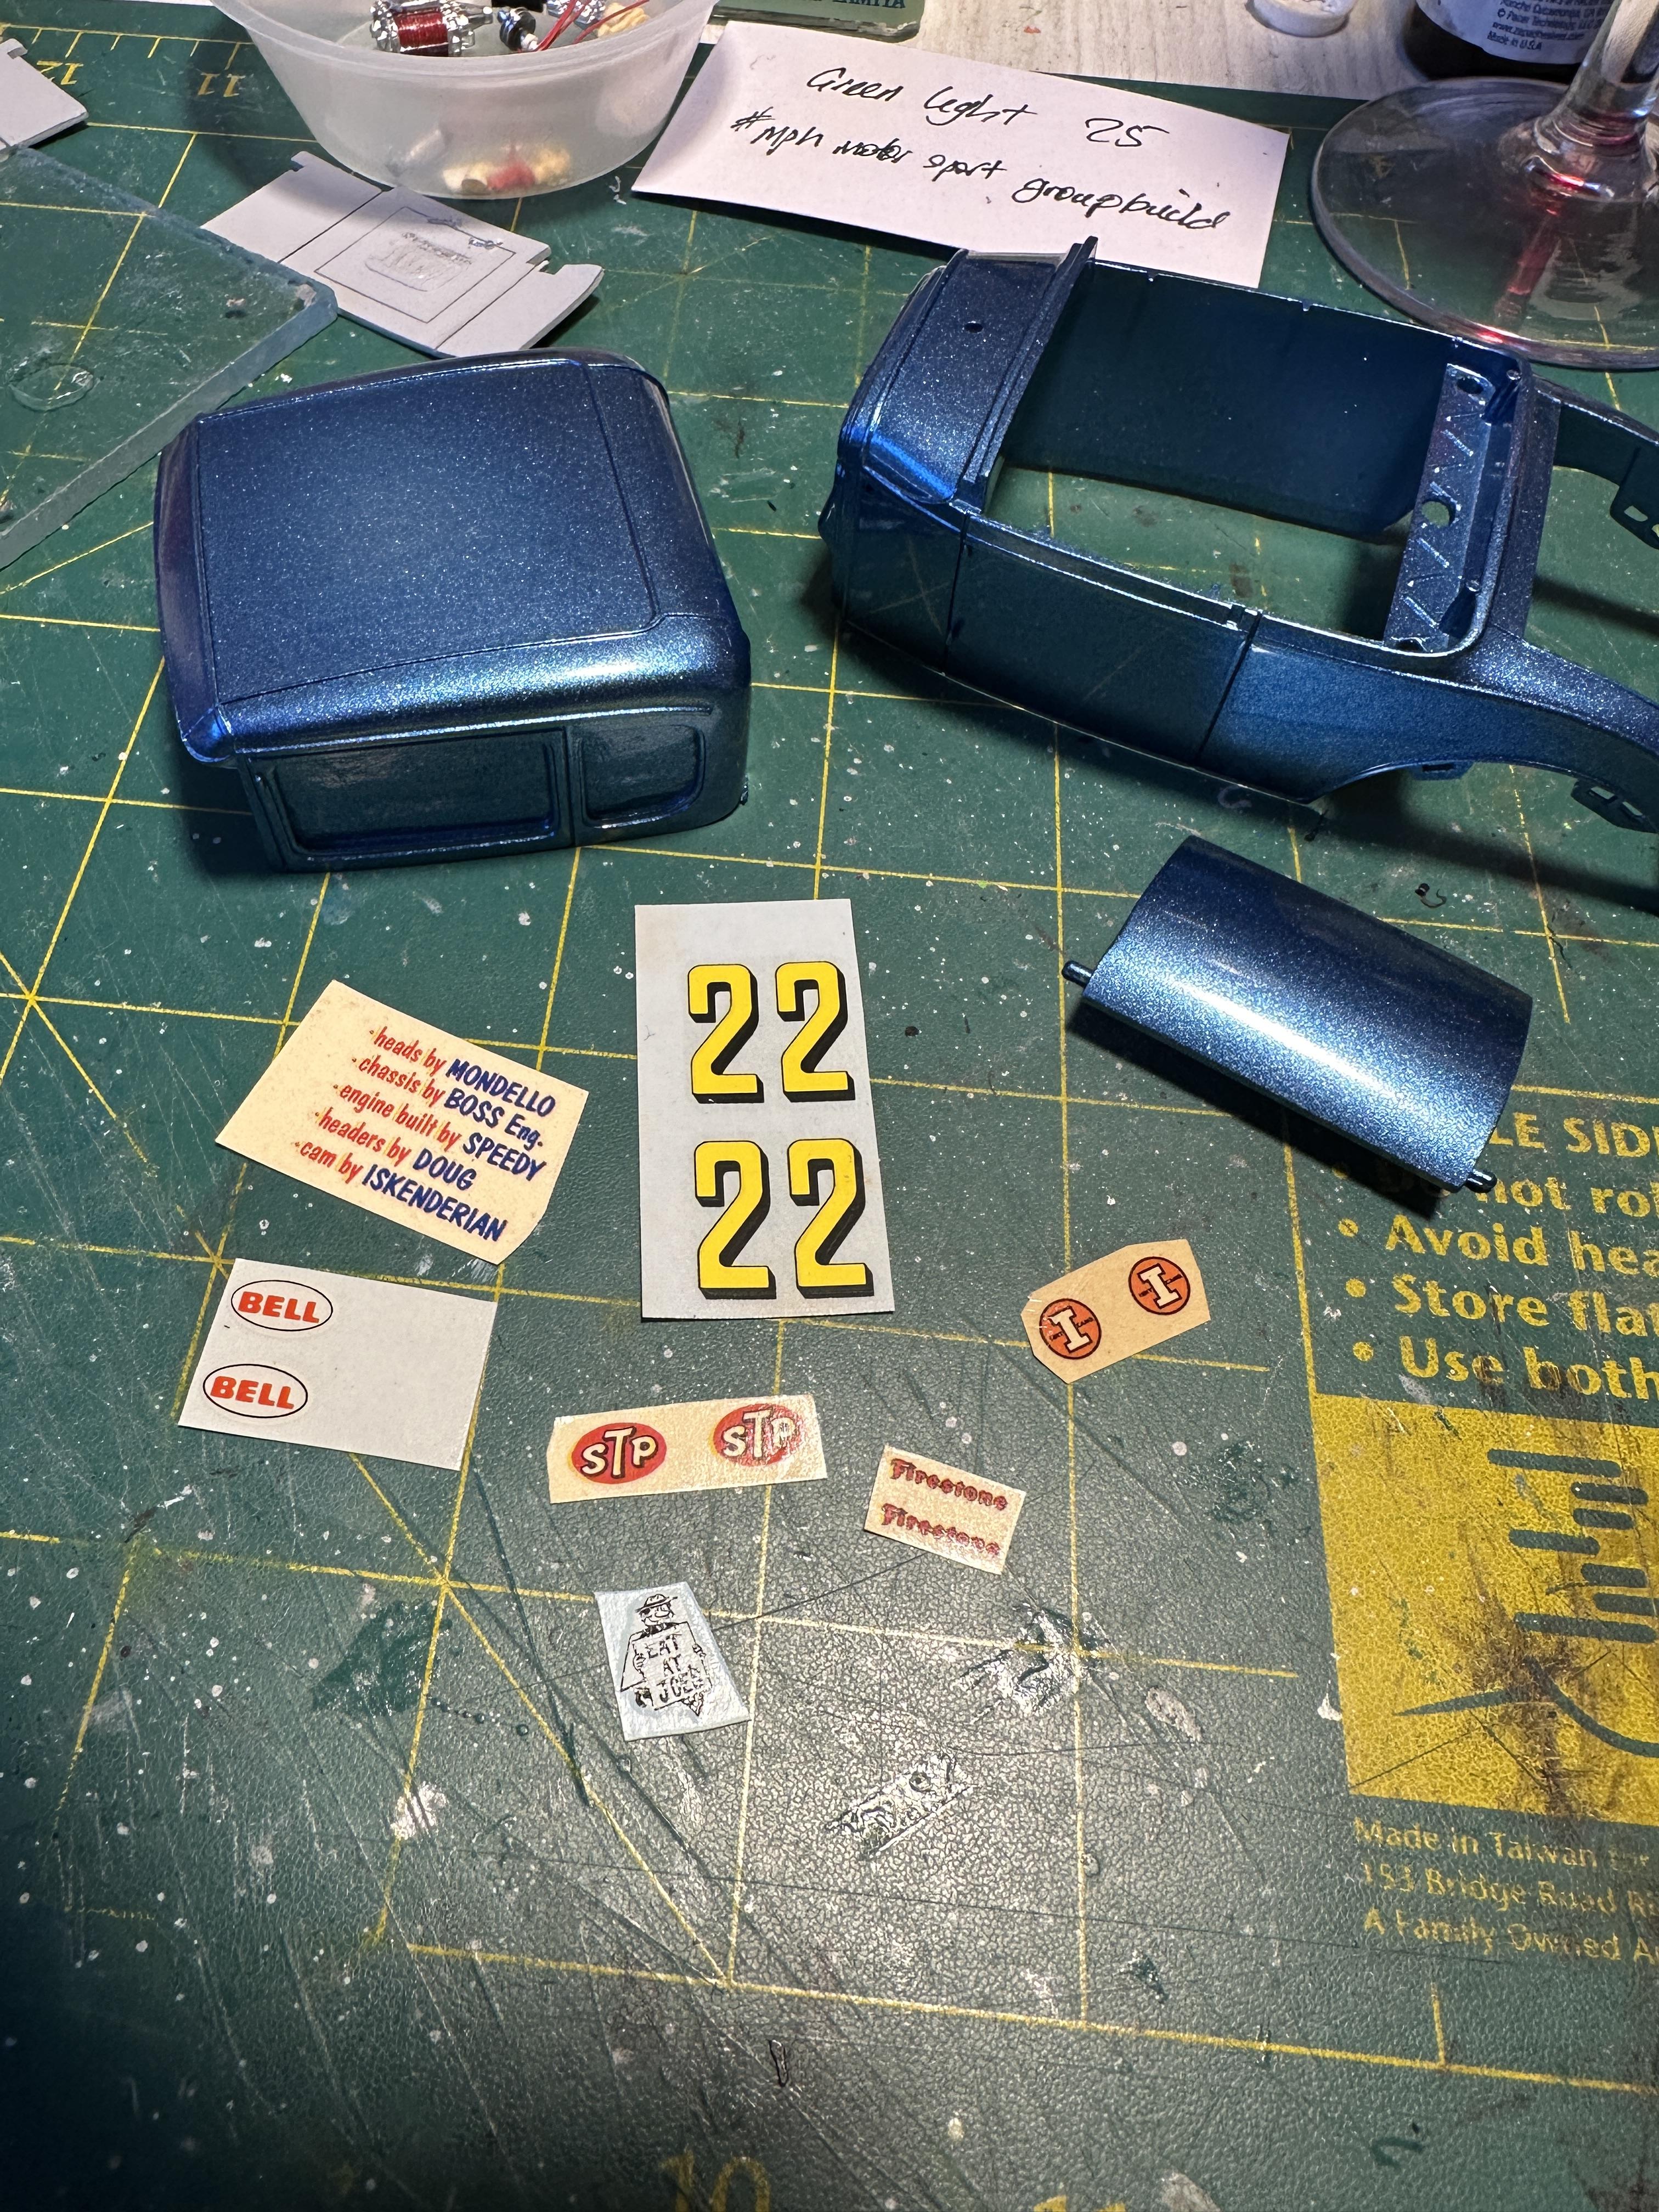
I have sanded to 3200g and squirted another coat of clear ready for decals. Decals gathered together. I raided my decal stash - hard to find as I don't have or build many competition cars. The sources are varied 22 numbers and Bell decals from Johan 69 RR Sponsor decals from vintage AMT Double drag team and 37 Chev. Eat at Joes from Revell 29 Roadster - only modern decals used And getting them on. One of the 22 numbers on the drivers side broke apart and needed some tlc to get it all back together. Used a lot of decal setting solution to help. The carrier film on the old decals id continuous and needs close trimming. Also quite heavy too but that may because they were made here in New Zealand way back when (69-70)
-
Like the blower engine - just a question - how do you mount the dizzy with all the other cool hardware Like the way the whole model is coming together with all the little custom touches
-
This is a kool build - a real old timey flavour that I am liking I have used solder for headers and have found it a lot easier to work with than trying to shape round plastic to fit. I have three or four sizes that I use 1.6mm, 1.7mm and 2mm with some small bits of other sizes if I go digging. I got the 2mm and 1.7mm online specifically for model building - the 1.6mm and a smaller size is what I use at my 1:1 work bench
-
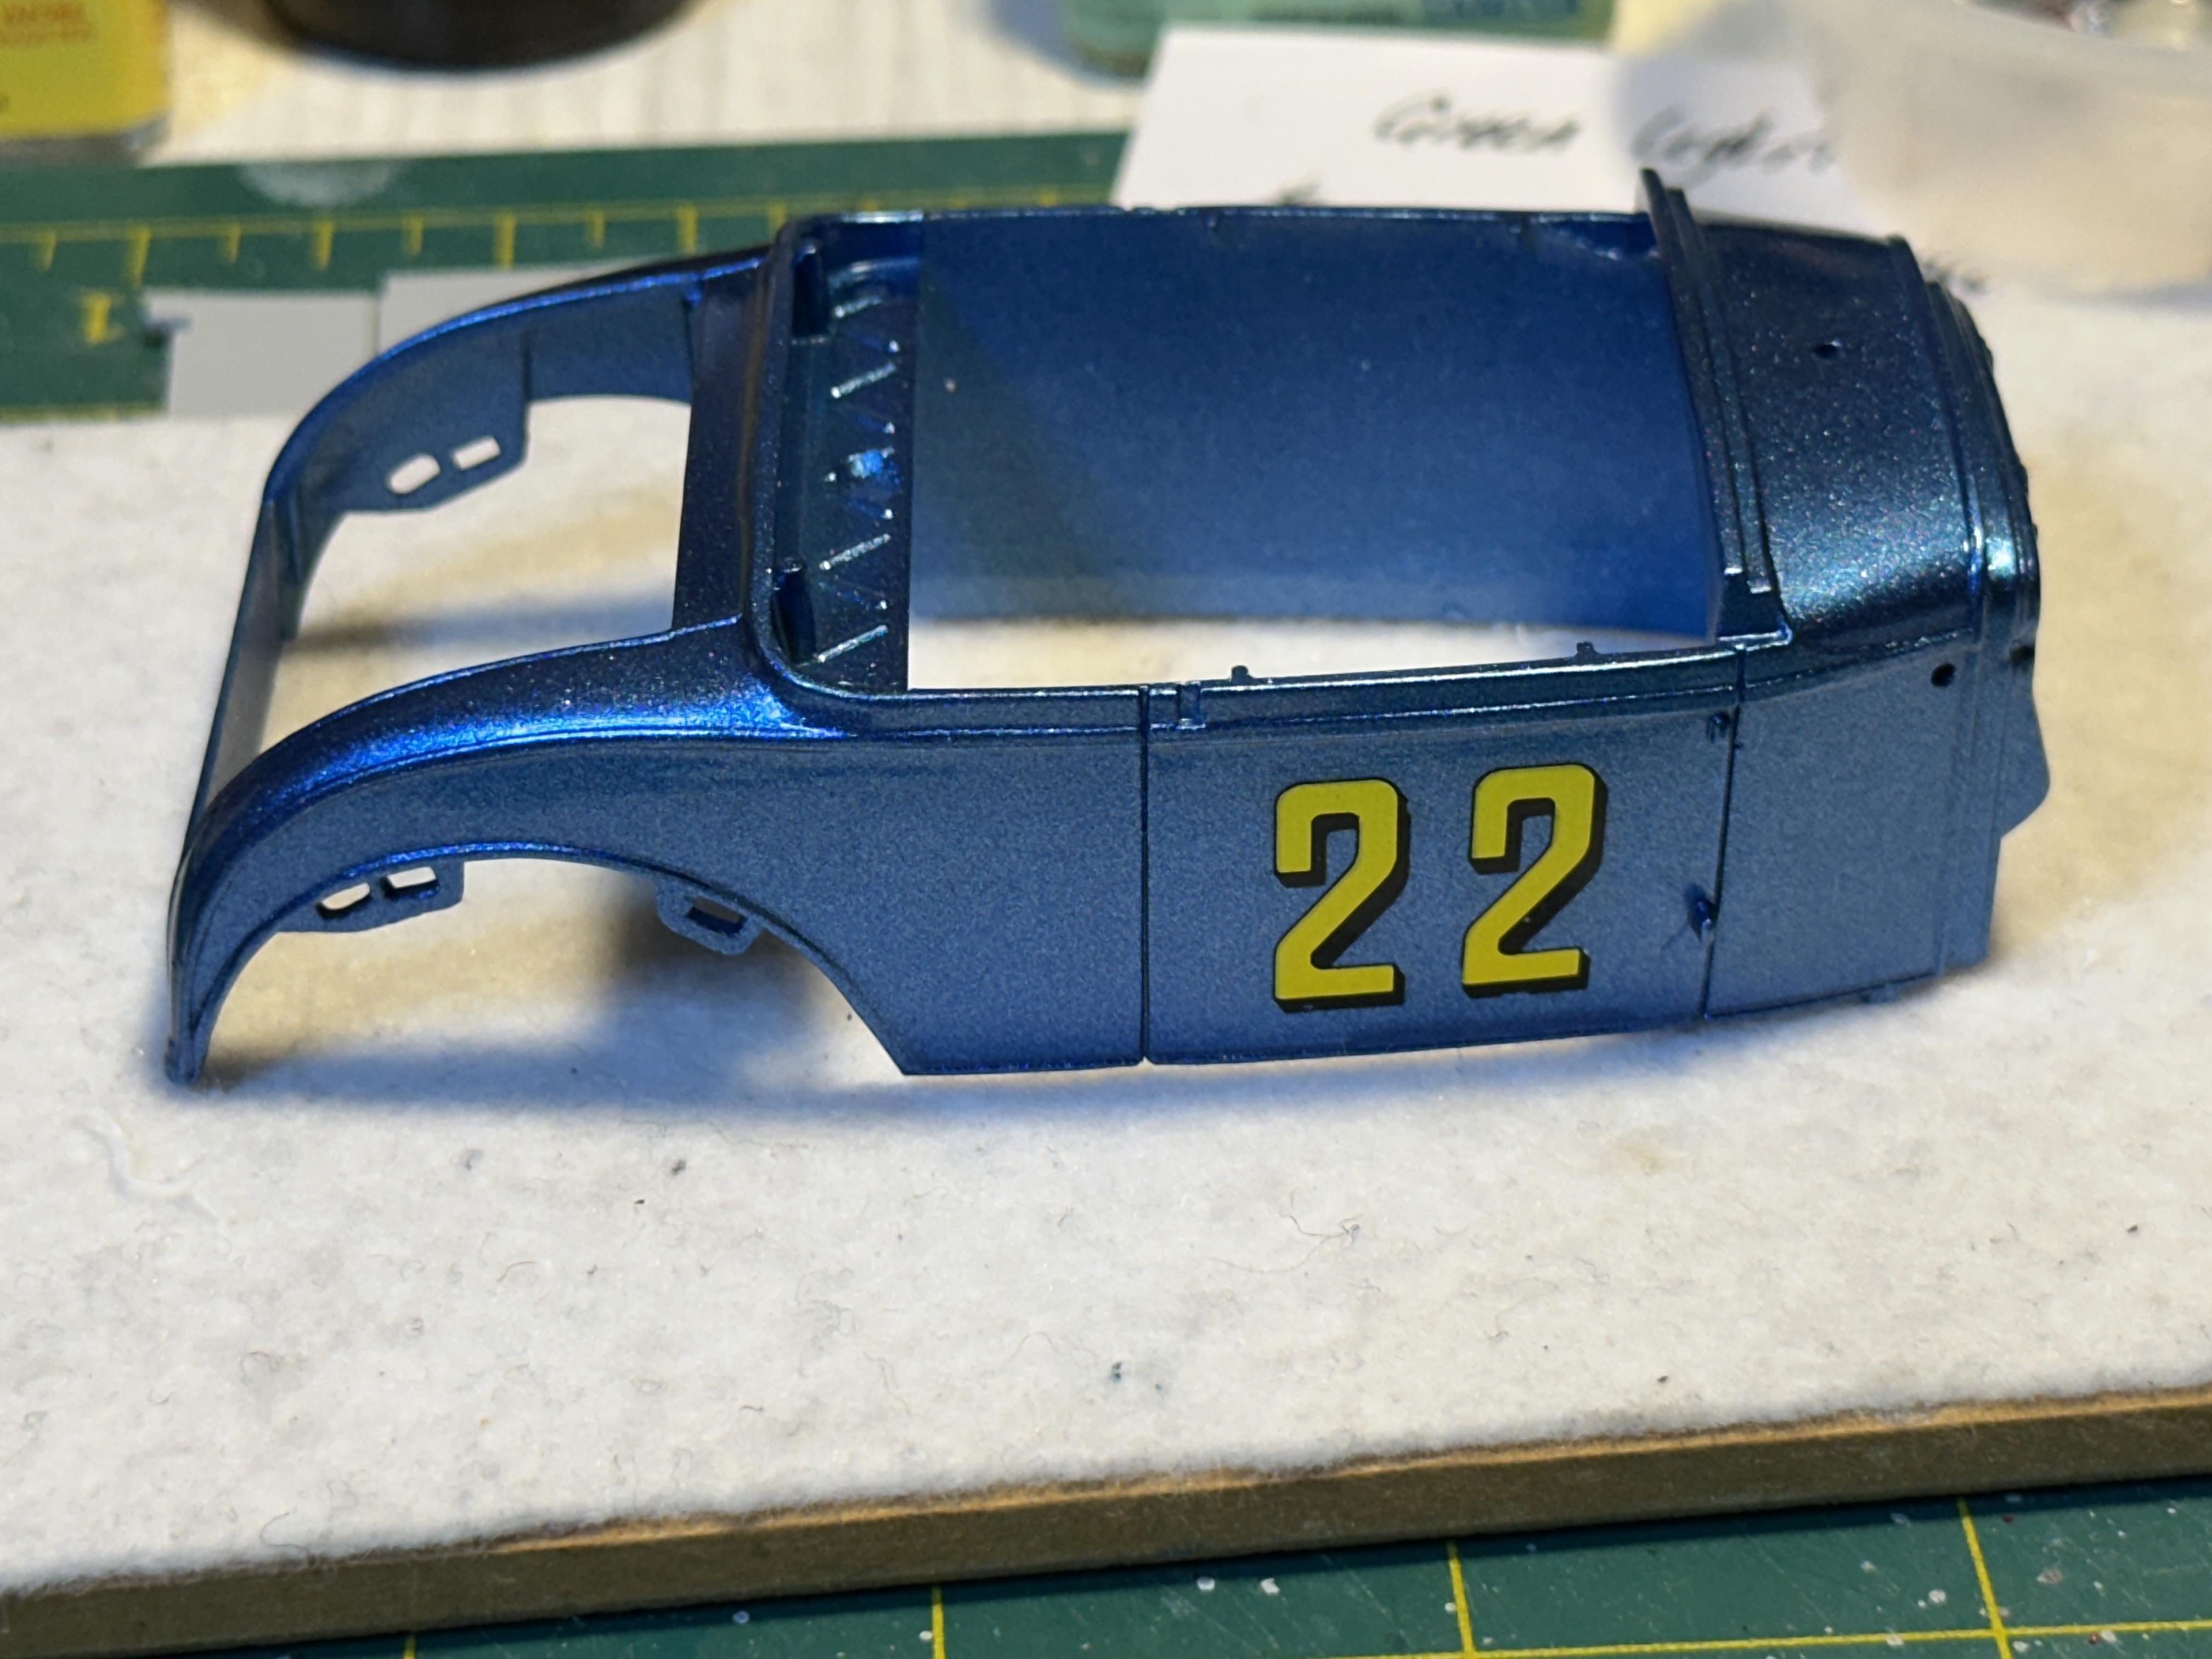
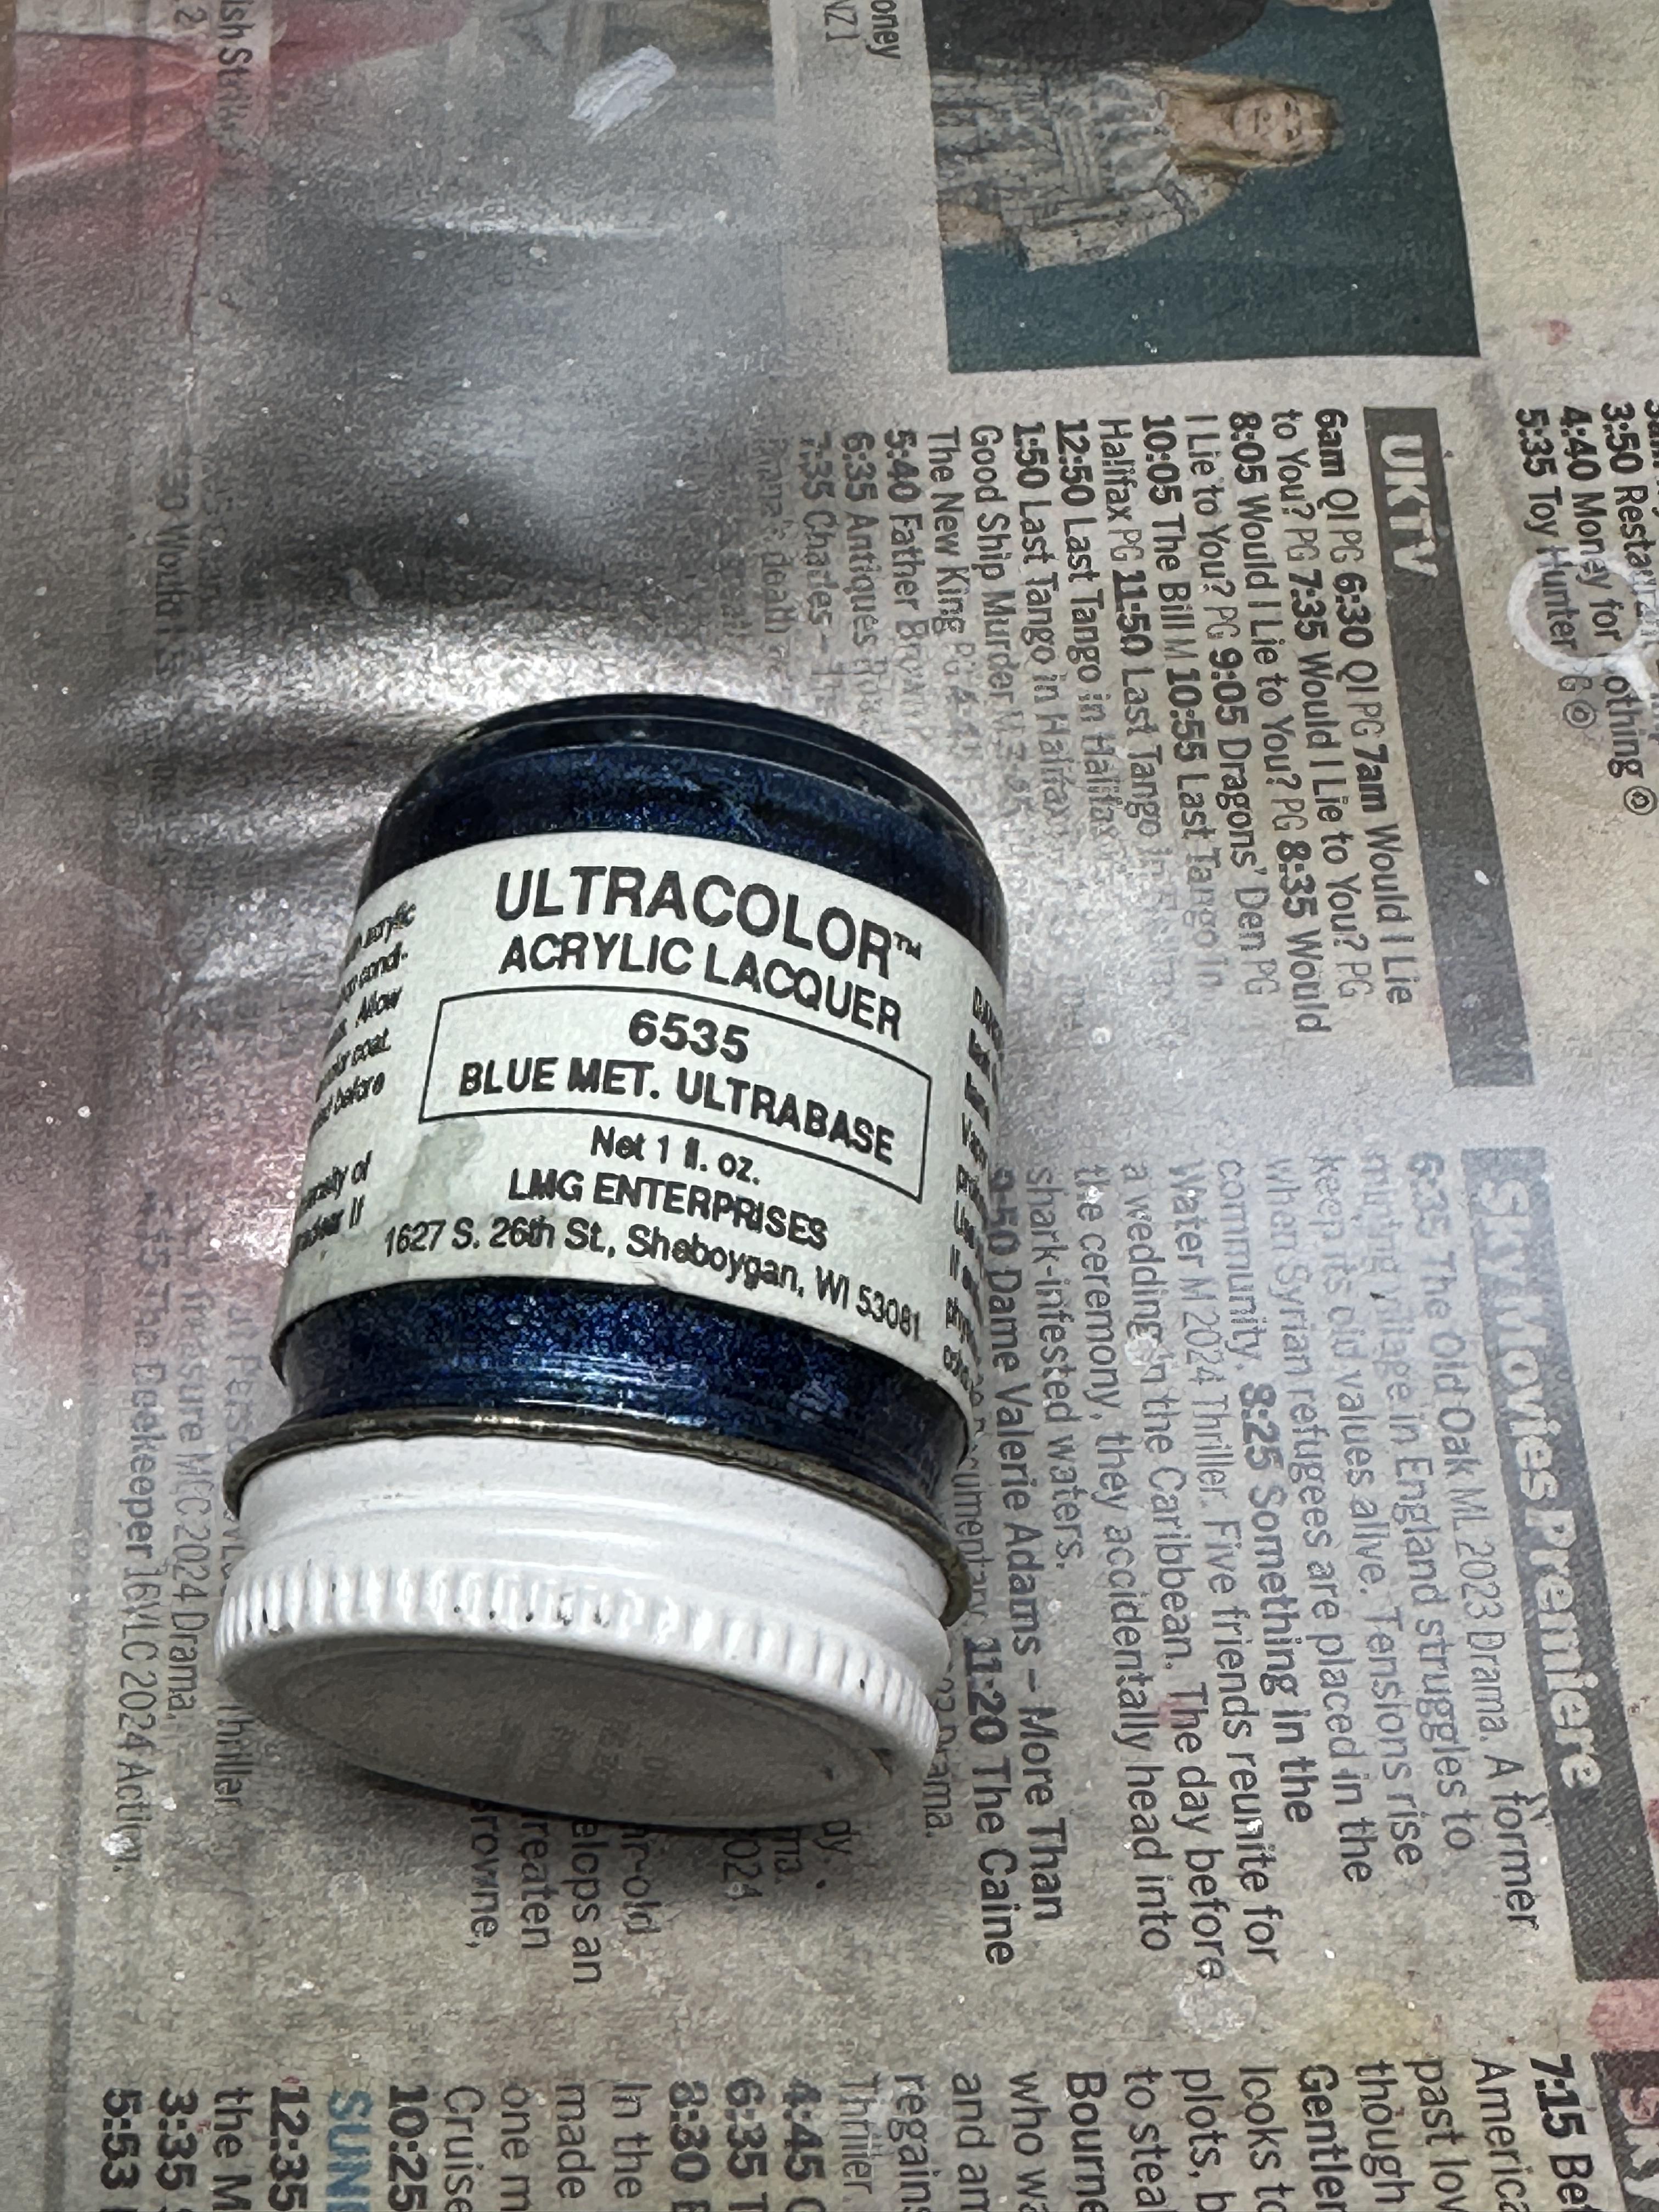
Been away again - it was a long weekend last weekend here in NZ so modelling has taken a back seat But - I have got the body prep done and some colour on before heading off. And clear this week Paint is ancient from LMG given to me ages ago so thought I would give it a go. I was very thick and so spent a bit of time reviving it and thinning enough to airbrush I am using the blue as main body colour and SMS Super Silver on the guards. A typical 50/60's colour combo. I just did not want the hassle of black guards. I used the silver as a base coat under the blue for two reasons - a sealer coat for the green body and primer and as a base coat for the blue. And the result. The clear will get a sand back and another coat before I hit it with decals Thanks for looking
-
It seems on the few replies that the stance on skirts is divided about half for and the other half not. When I built my 48 coupe I spent time prepping and painting the skirts, but as I am 50/50 on skirts and I ended up not using them. I like the stance you have Bil and the method you have used to achieve the look
-
Lookin good. This kit does build up nice - I have done one - box stock I see you are using a "modern" motor and slush-o-matic - are you going to change the prop shaft to open - and that leads to split wish bones and .....
-
Hi Sid I am not sure of where the blower came from - it was with a whole bunch of resin cast flathead stuff that was bequeathed to me. It most probably did originate from RMoM as I know they have one in their catalogue. The same source provided the Ardun head. Ardun and SCoT seem to go together hand in hand and the blower is very detailed Bill
-
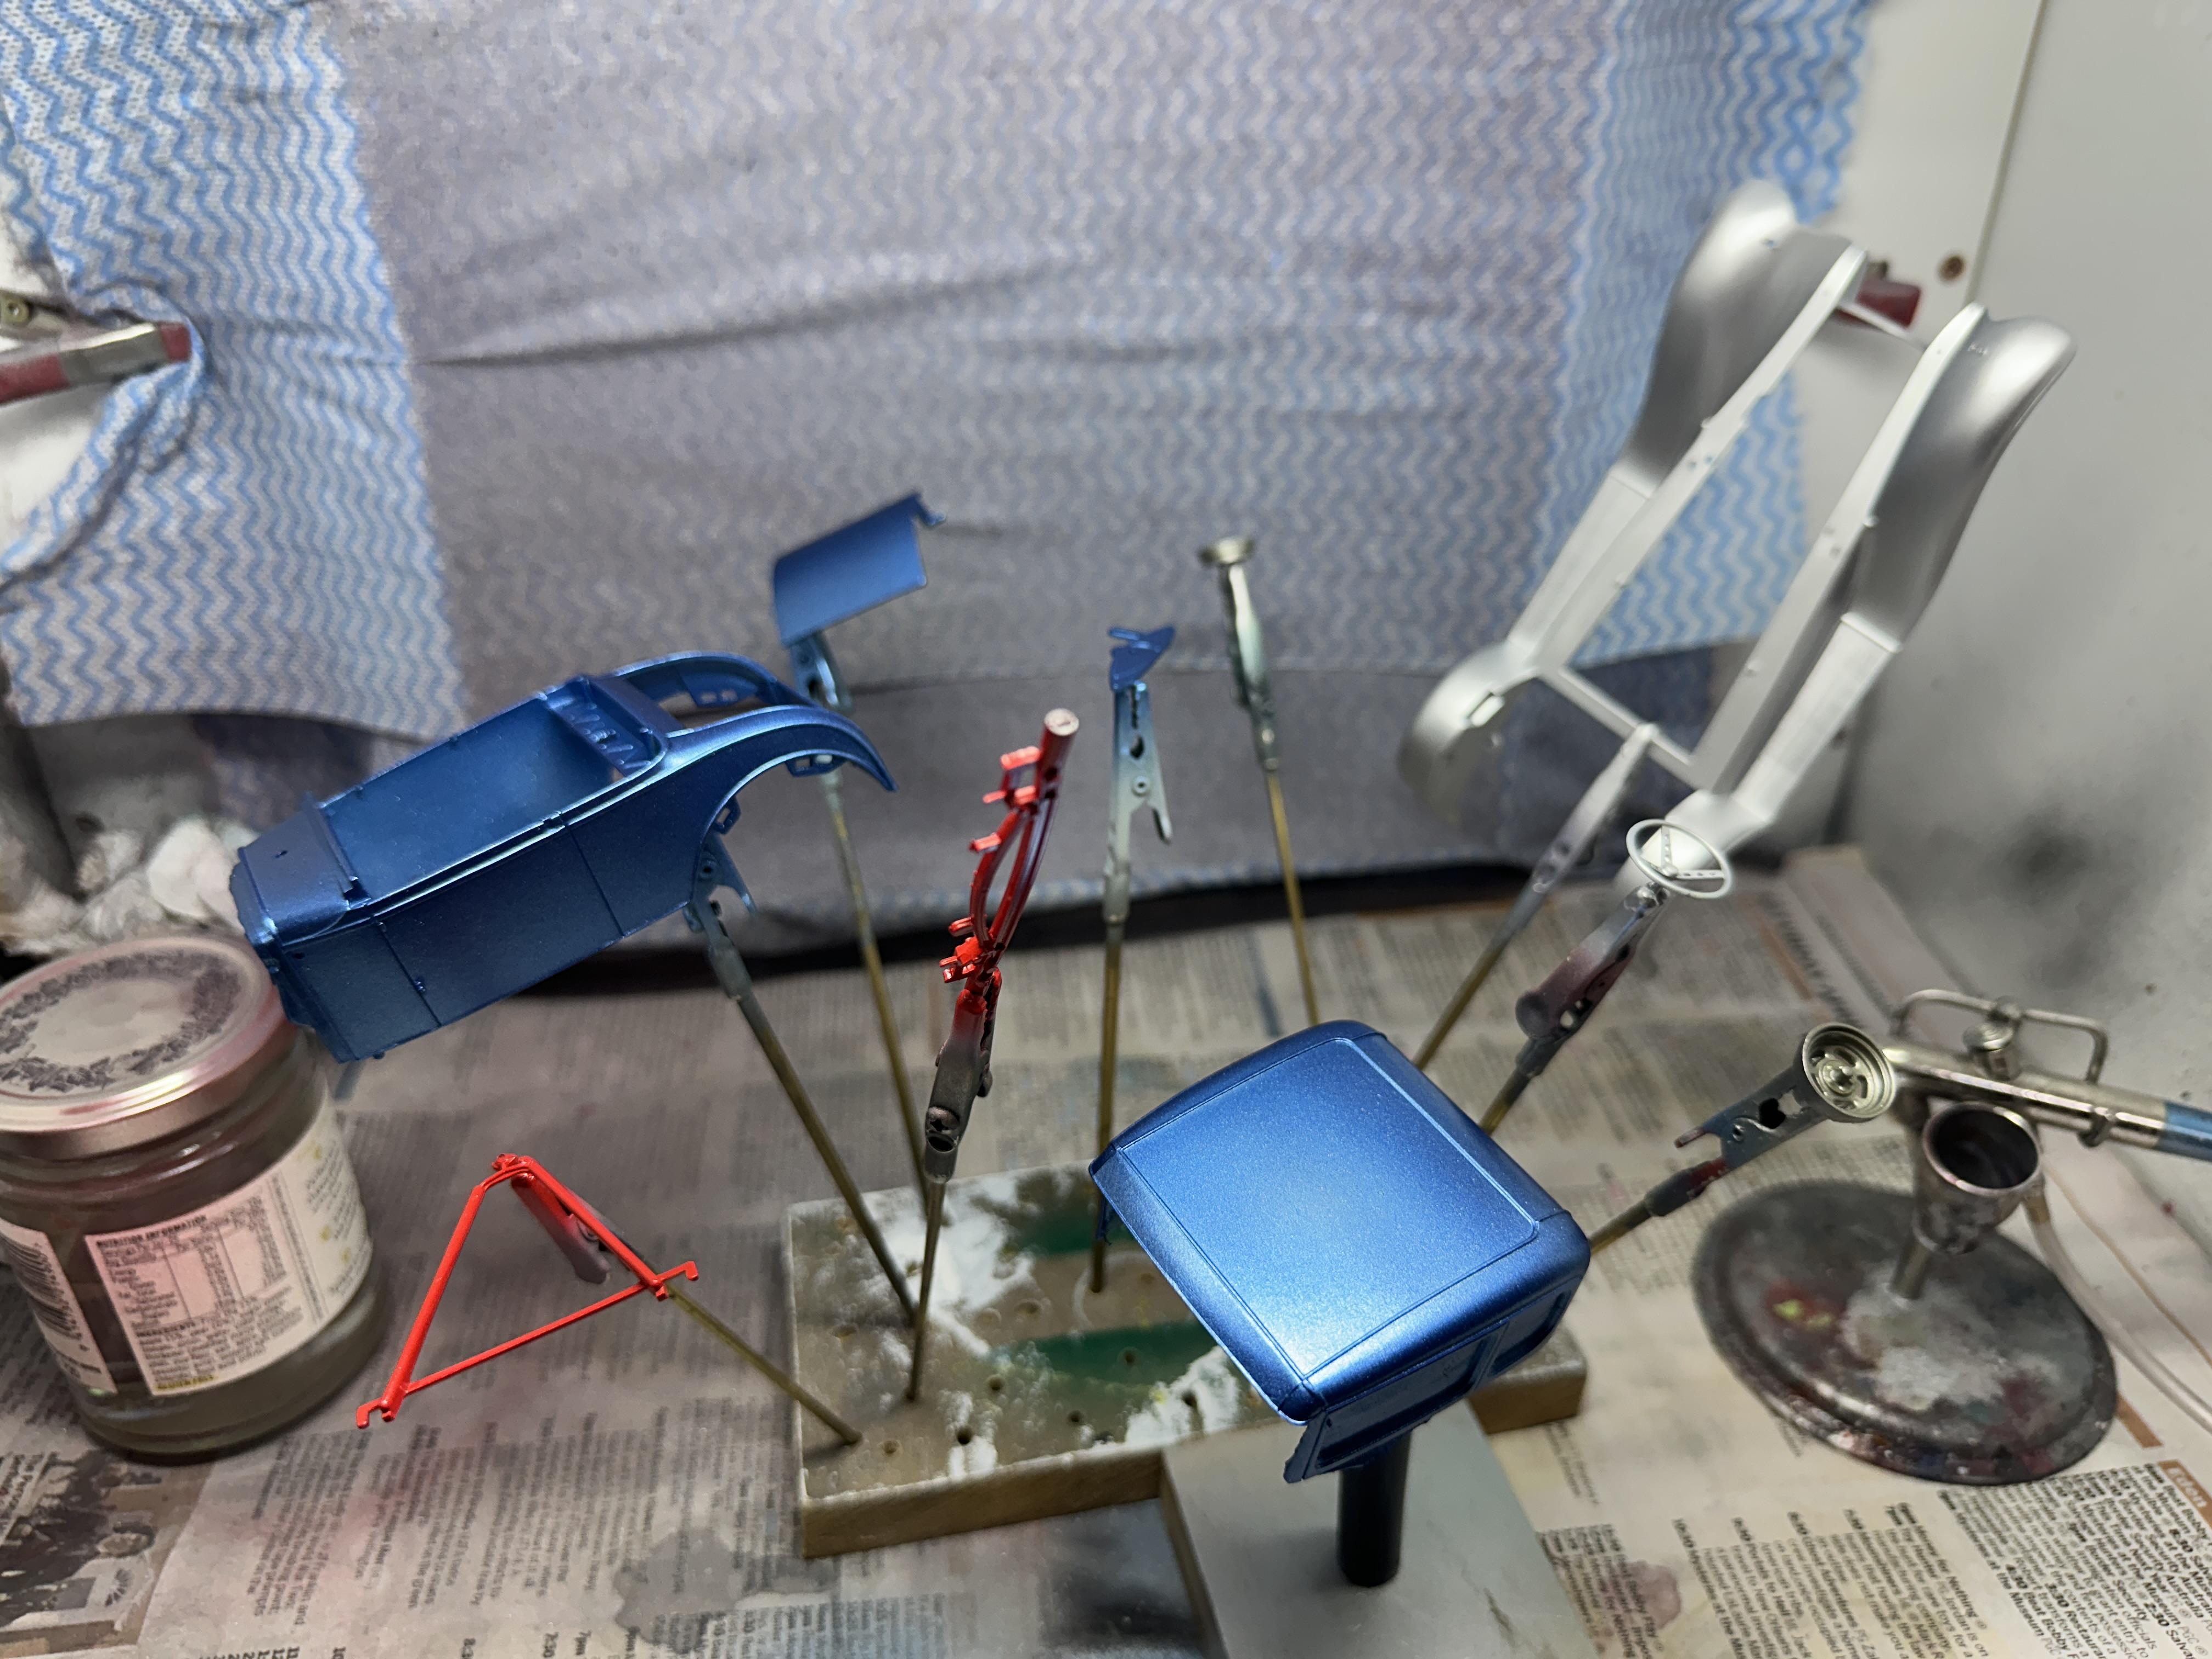
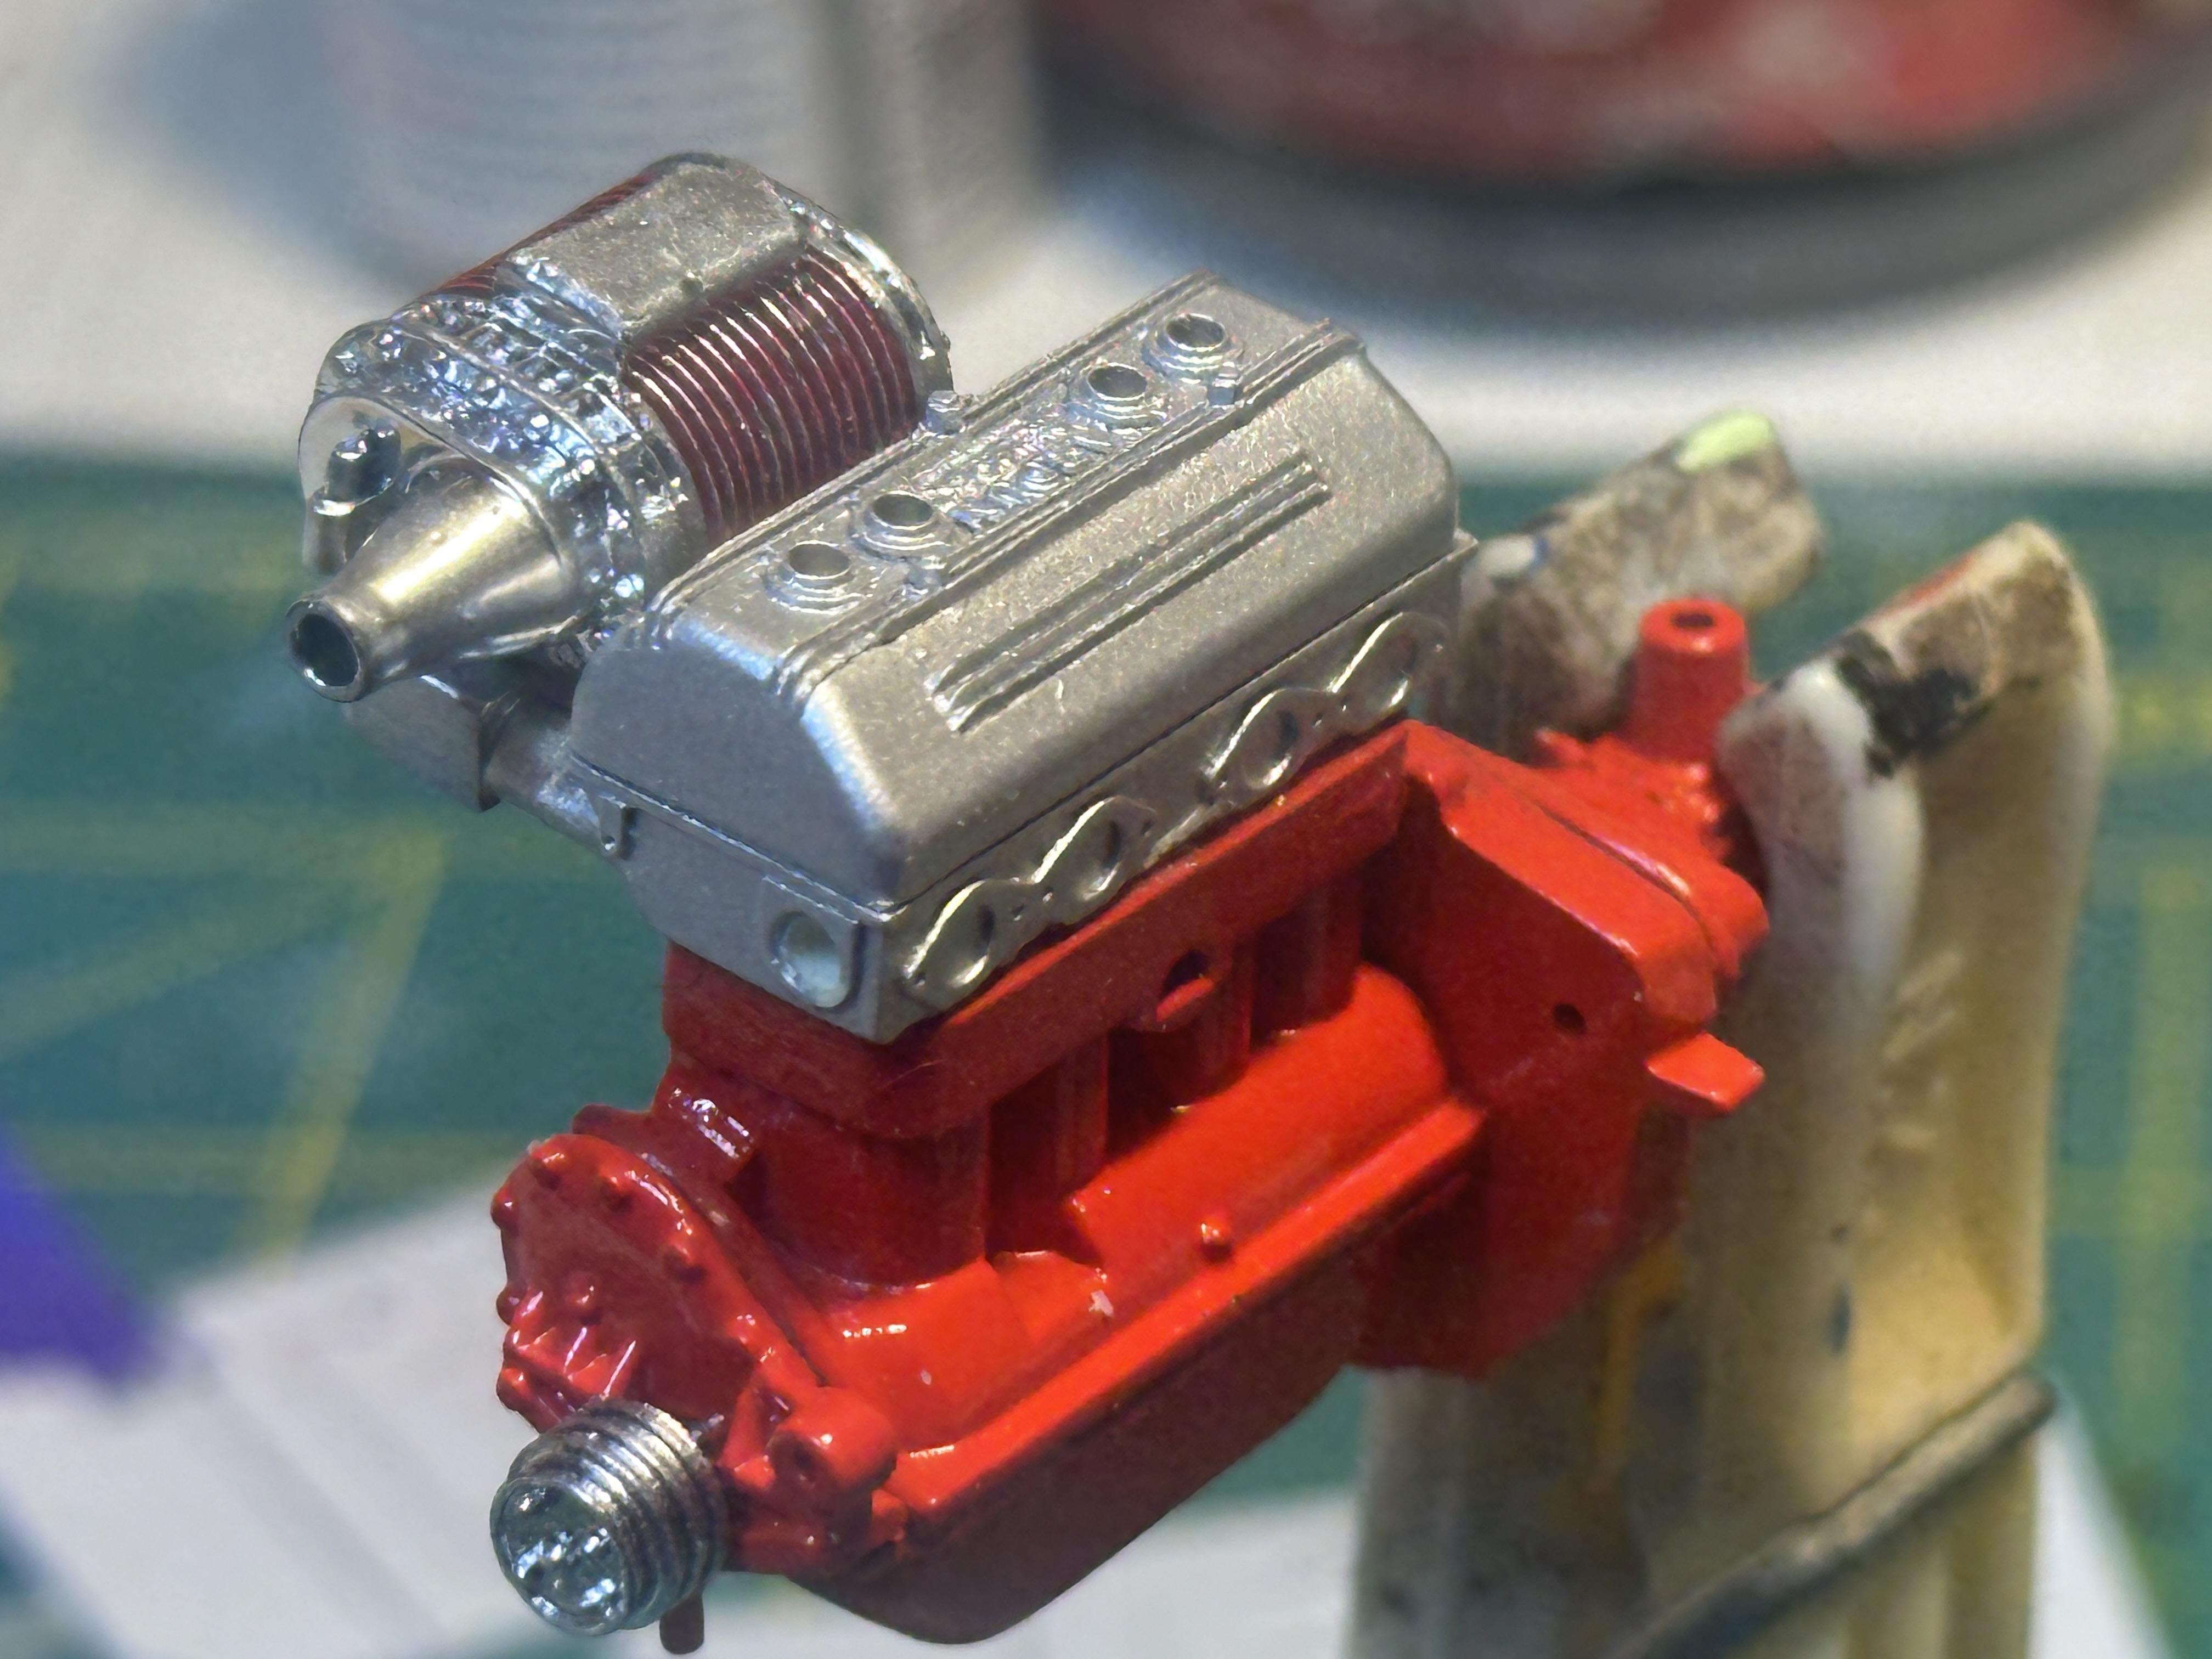
Thanks guys I have been a bit quiet here over the last couple of weeks - been busy with two weekends away with model related events. Most of my bench time in between has been spent prepping for paint but got a chance to start assembling the motor last night. First a small amount of dark grey wash on the motor and gearbox to get the effect of slight oil leaks. I used heavily thinned Tamiya dark grey. I will put a dab of clear at the ends so the oil leaks will look a bit fresher. While I had the was out I ran some in the door gaps of the interior that I have left in grey primer to look like stock grey velour Also added washed around the door pockets I have started motor assembly - starting to look the real deal The body and guards are at the body shop getting some wrinkles ironed out. Then off to the paint shop. Thanks for looking.
-
Pretty much as @StevenGuthmiller says but using an airbrush instead of rattle cans Paint of late has been mostly Tamiya Surface Primer, grey or white dependent on final colour, sanding to 3200g and finally Tamiya LP lacquers for colour coats and clear followed by sanding/polishing process Process is simple - execution is time consuming and should not be rushed
-
I thought you were talking of domestic "domestic tariffs" - now they can hurt the modelling piggy bank LOL
-
Yup a good word - I like it adjective having an appearance of truth or reason; seemingly worthy of approval or acceptance; credible; believable. a plausible excuse; a plausible plot. Antonyms: sincere, honest well-spoken and apparently, but often deceptively, worthy of confidence or trust. a plausible commentator.
-
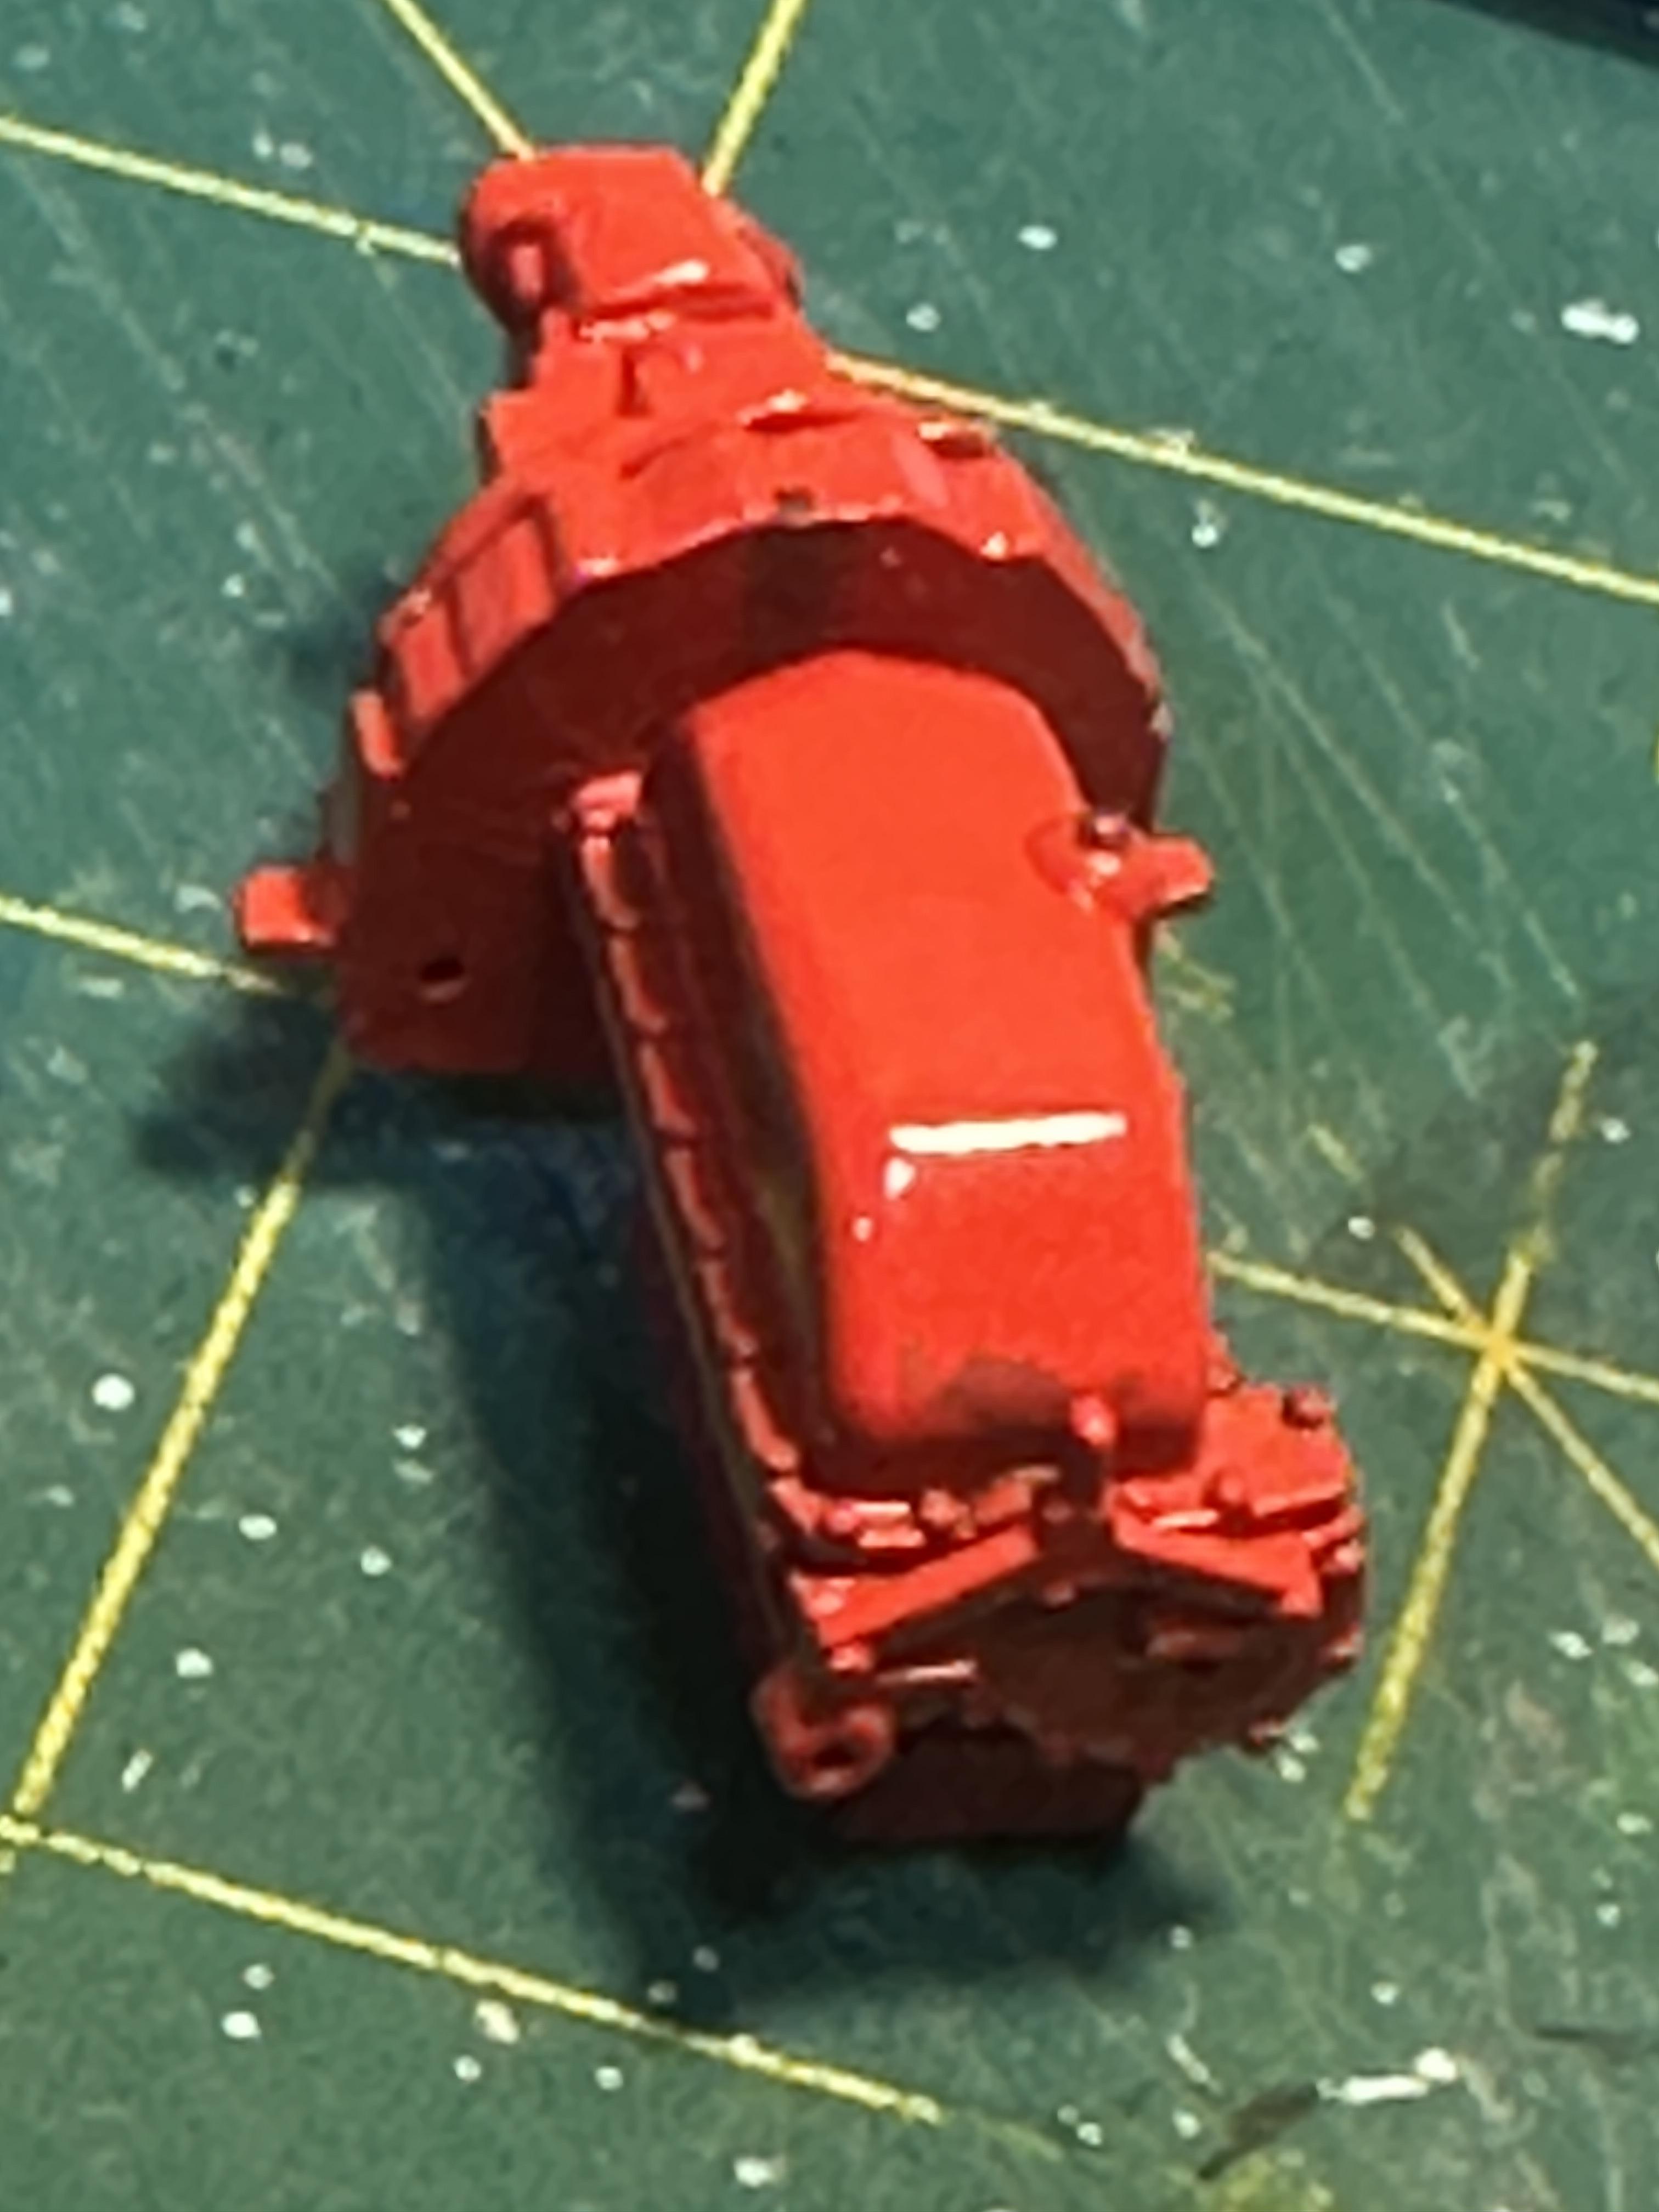
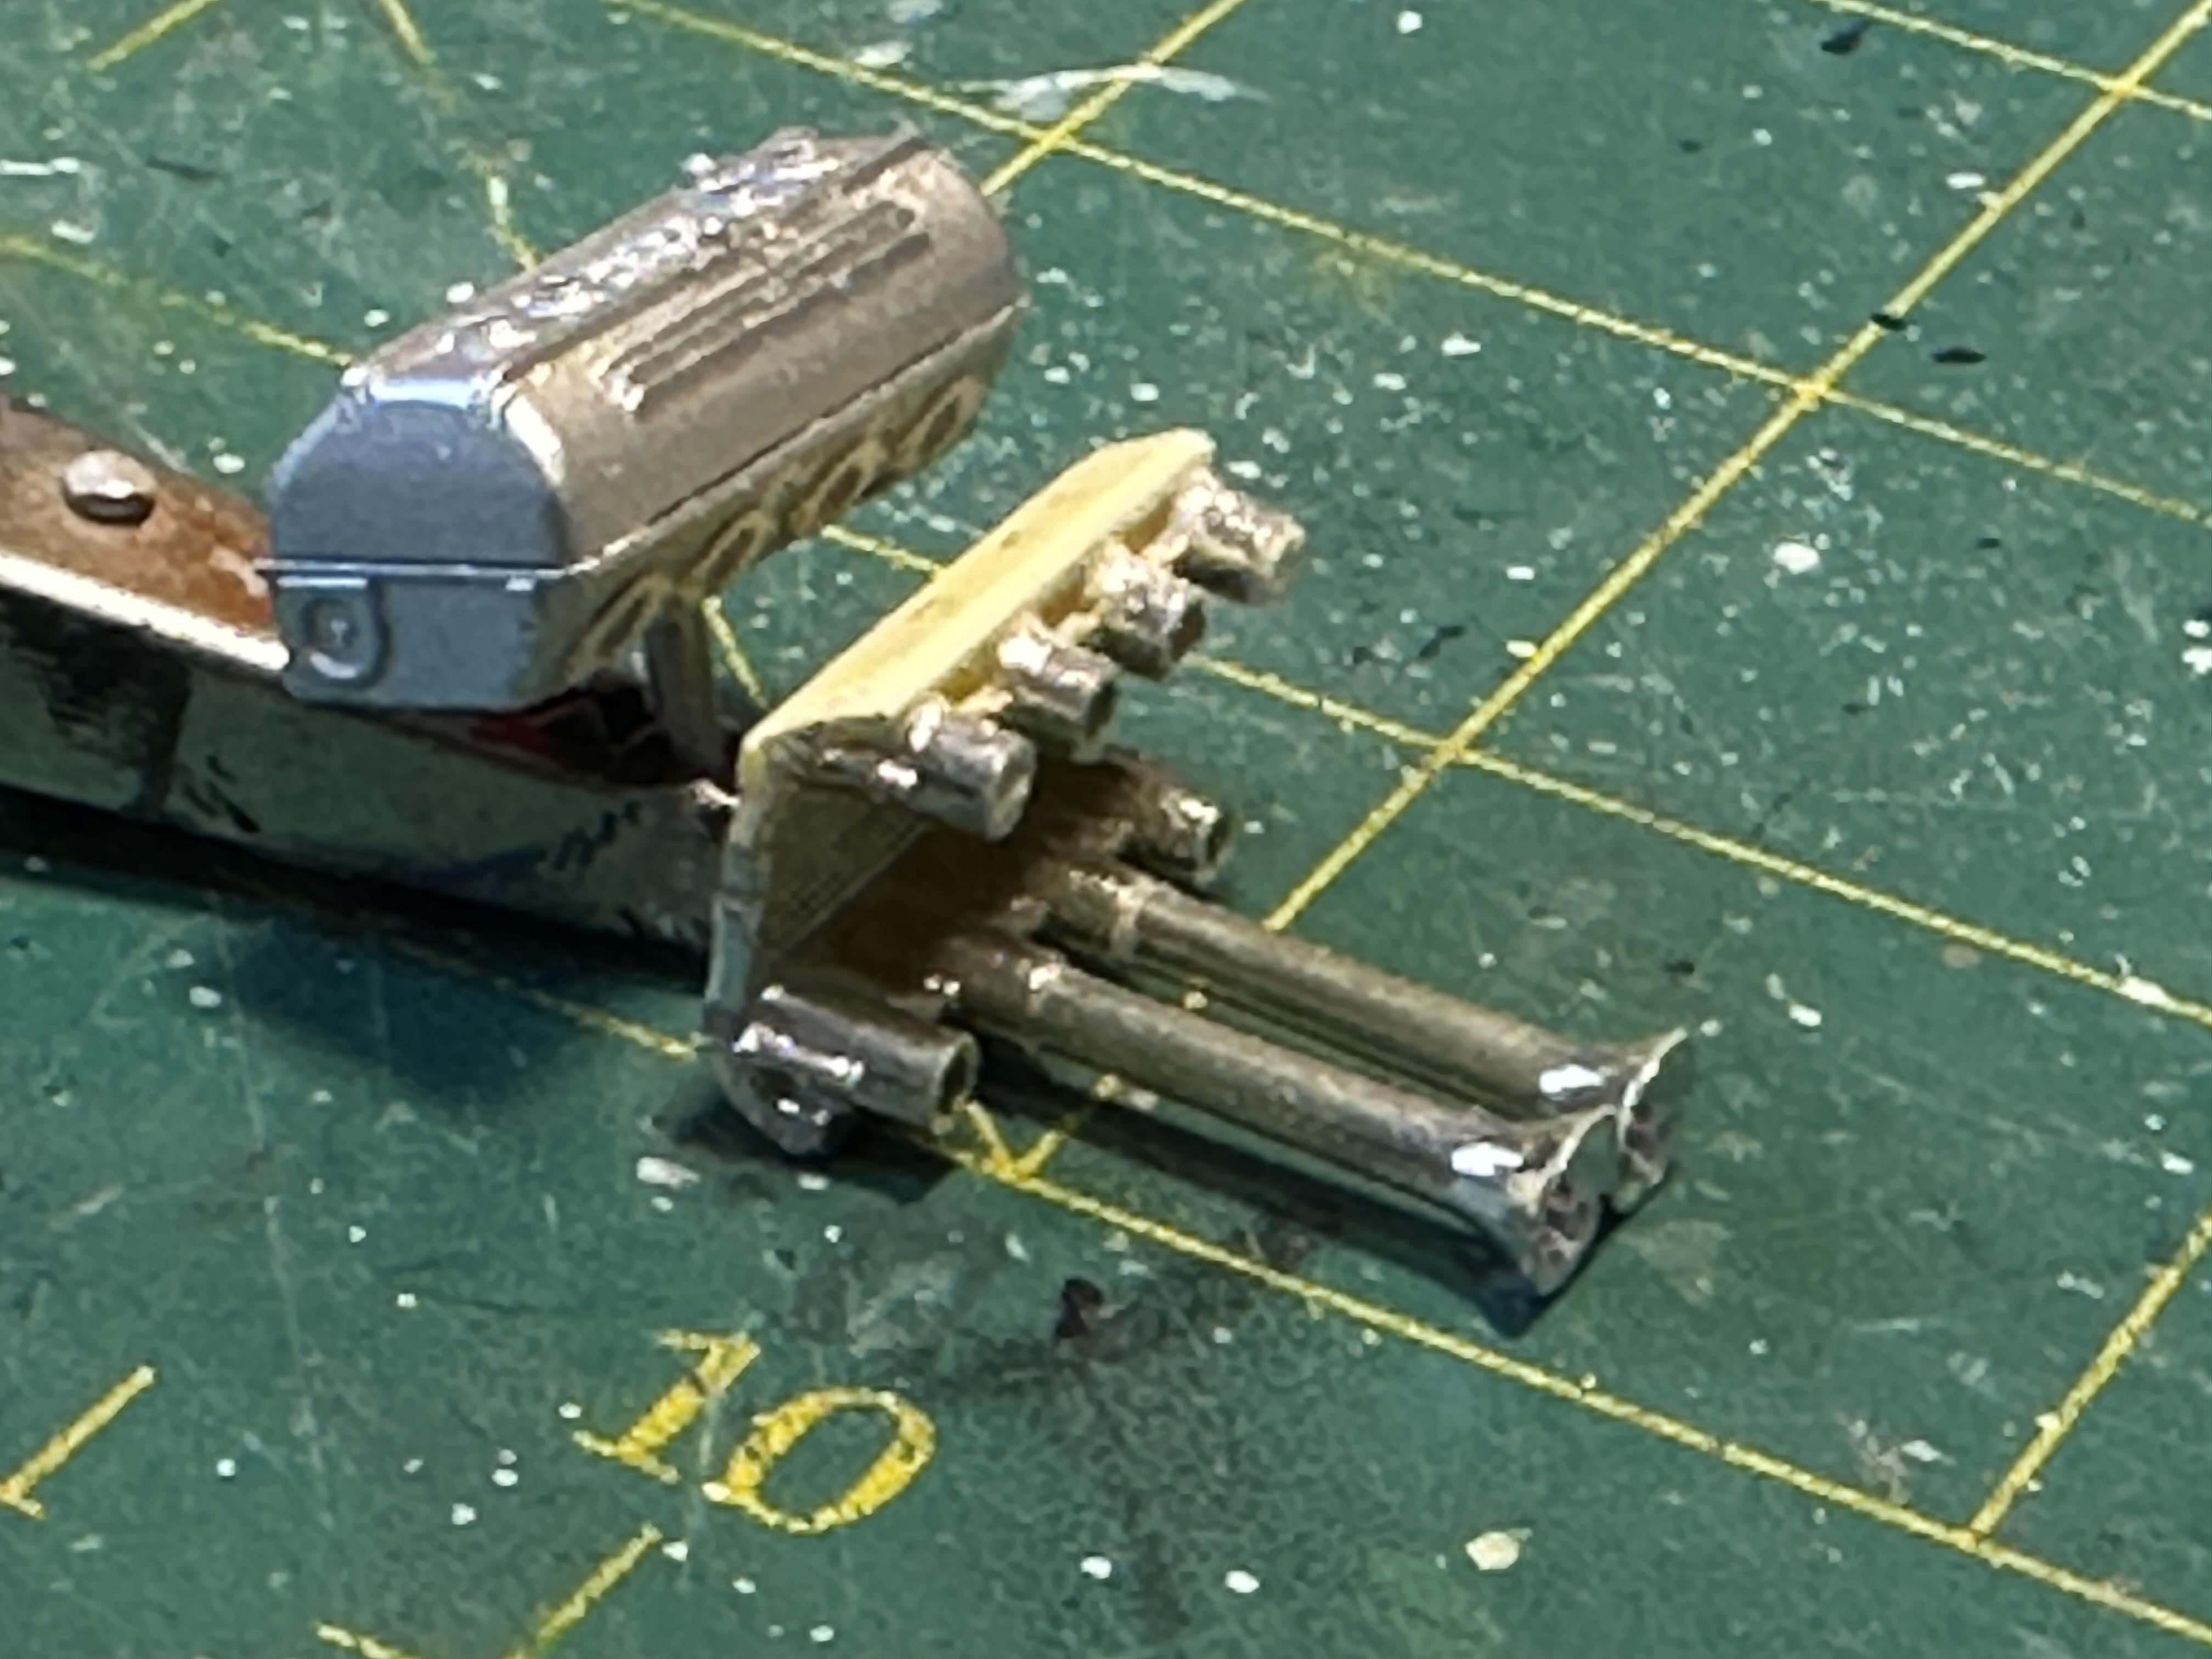
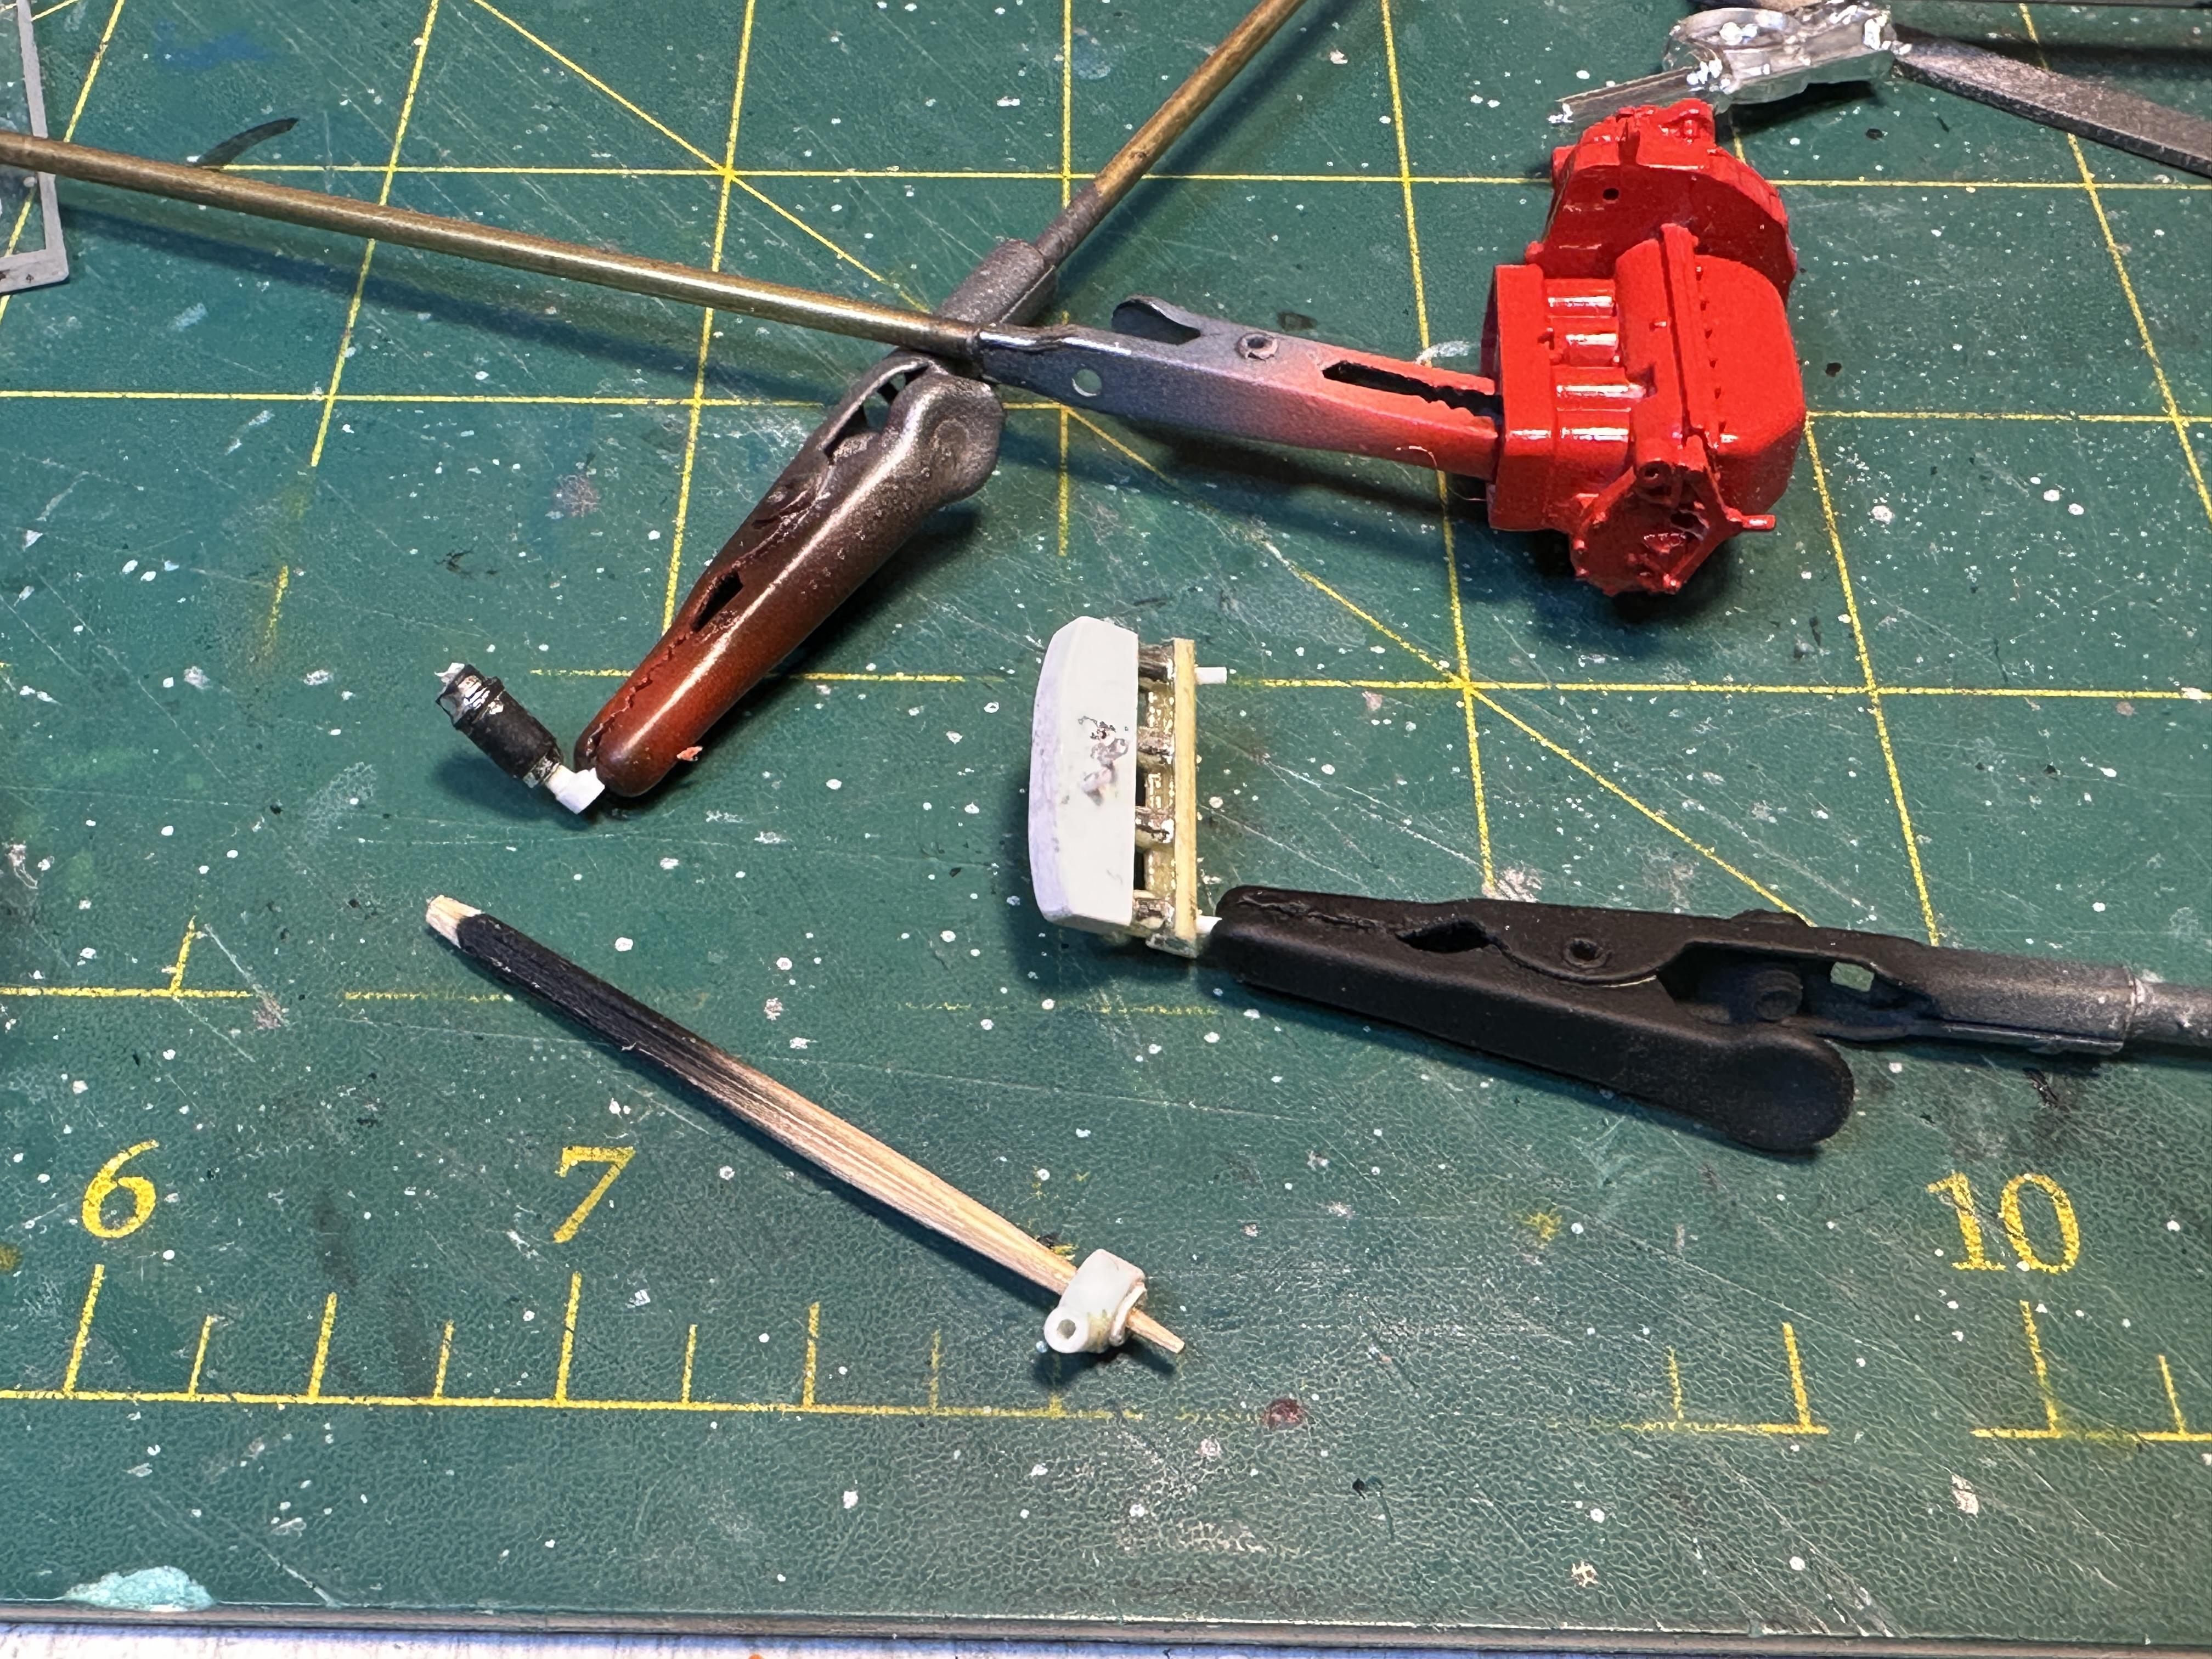
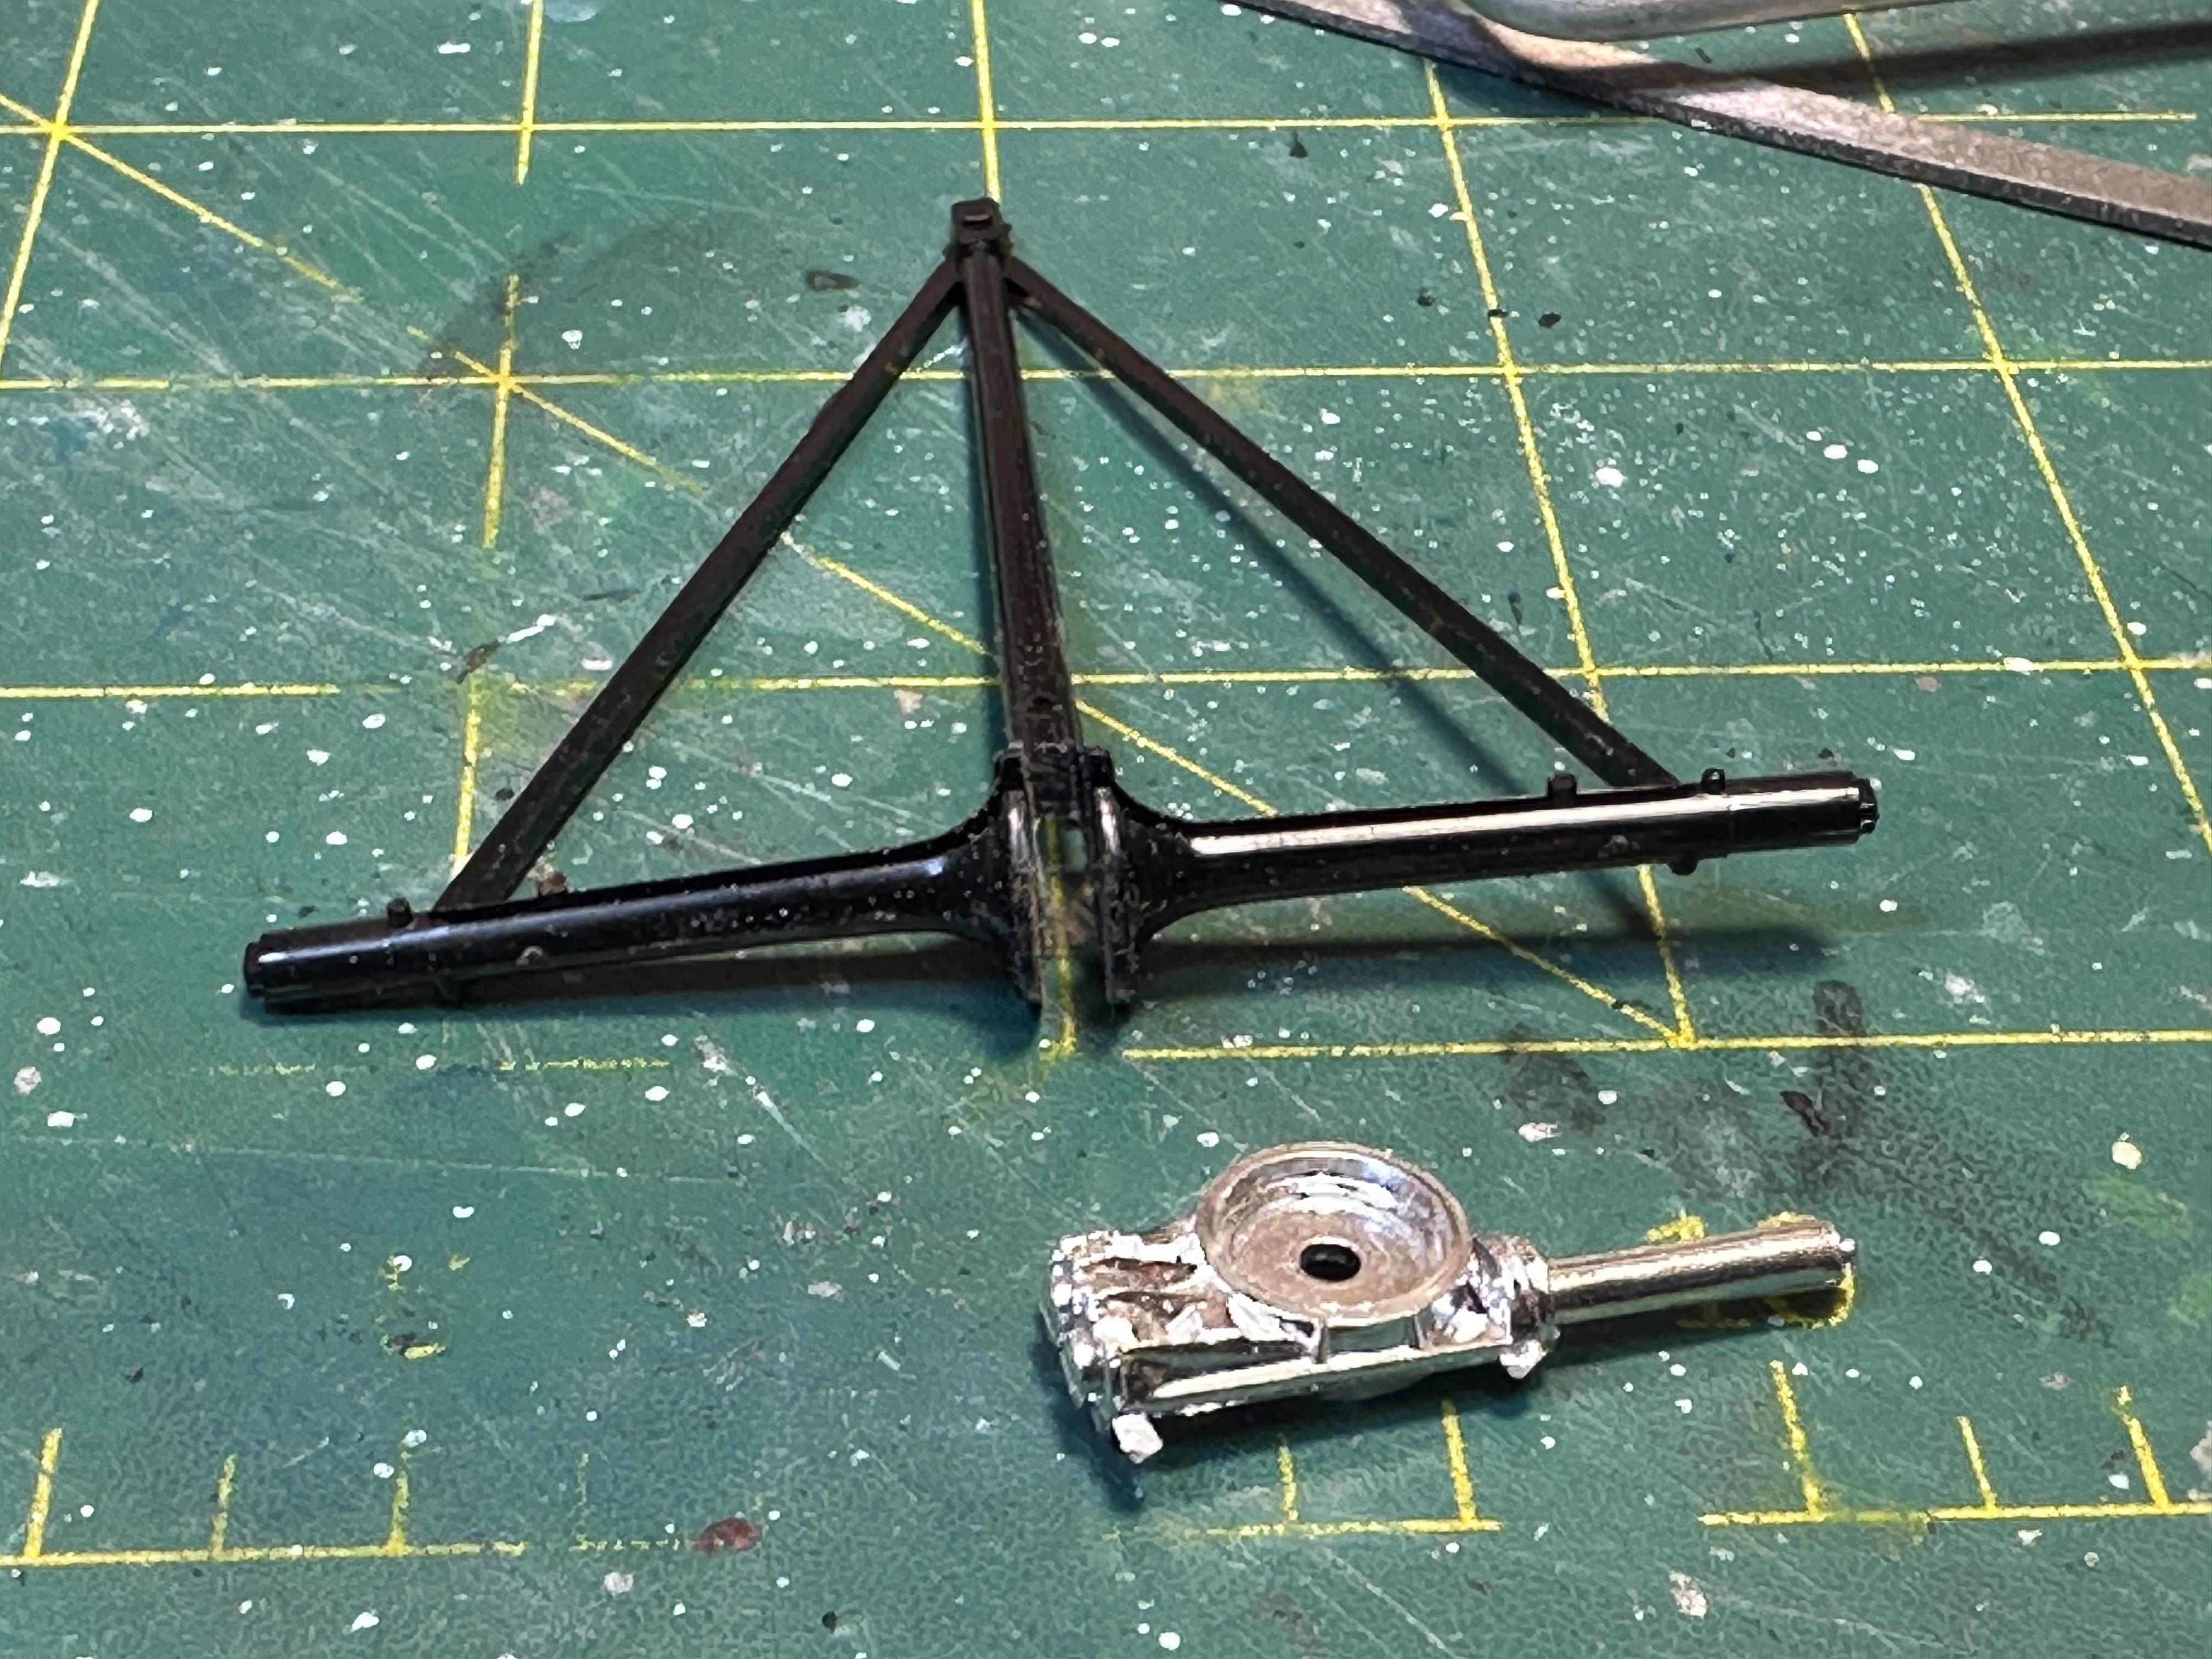
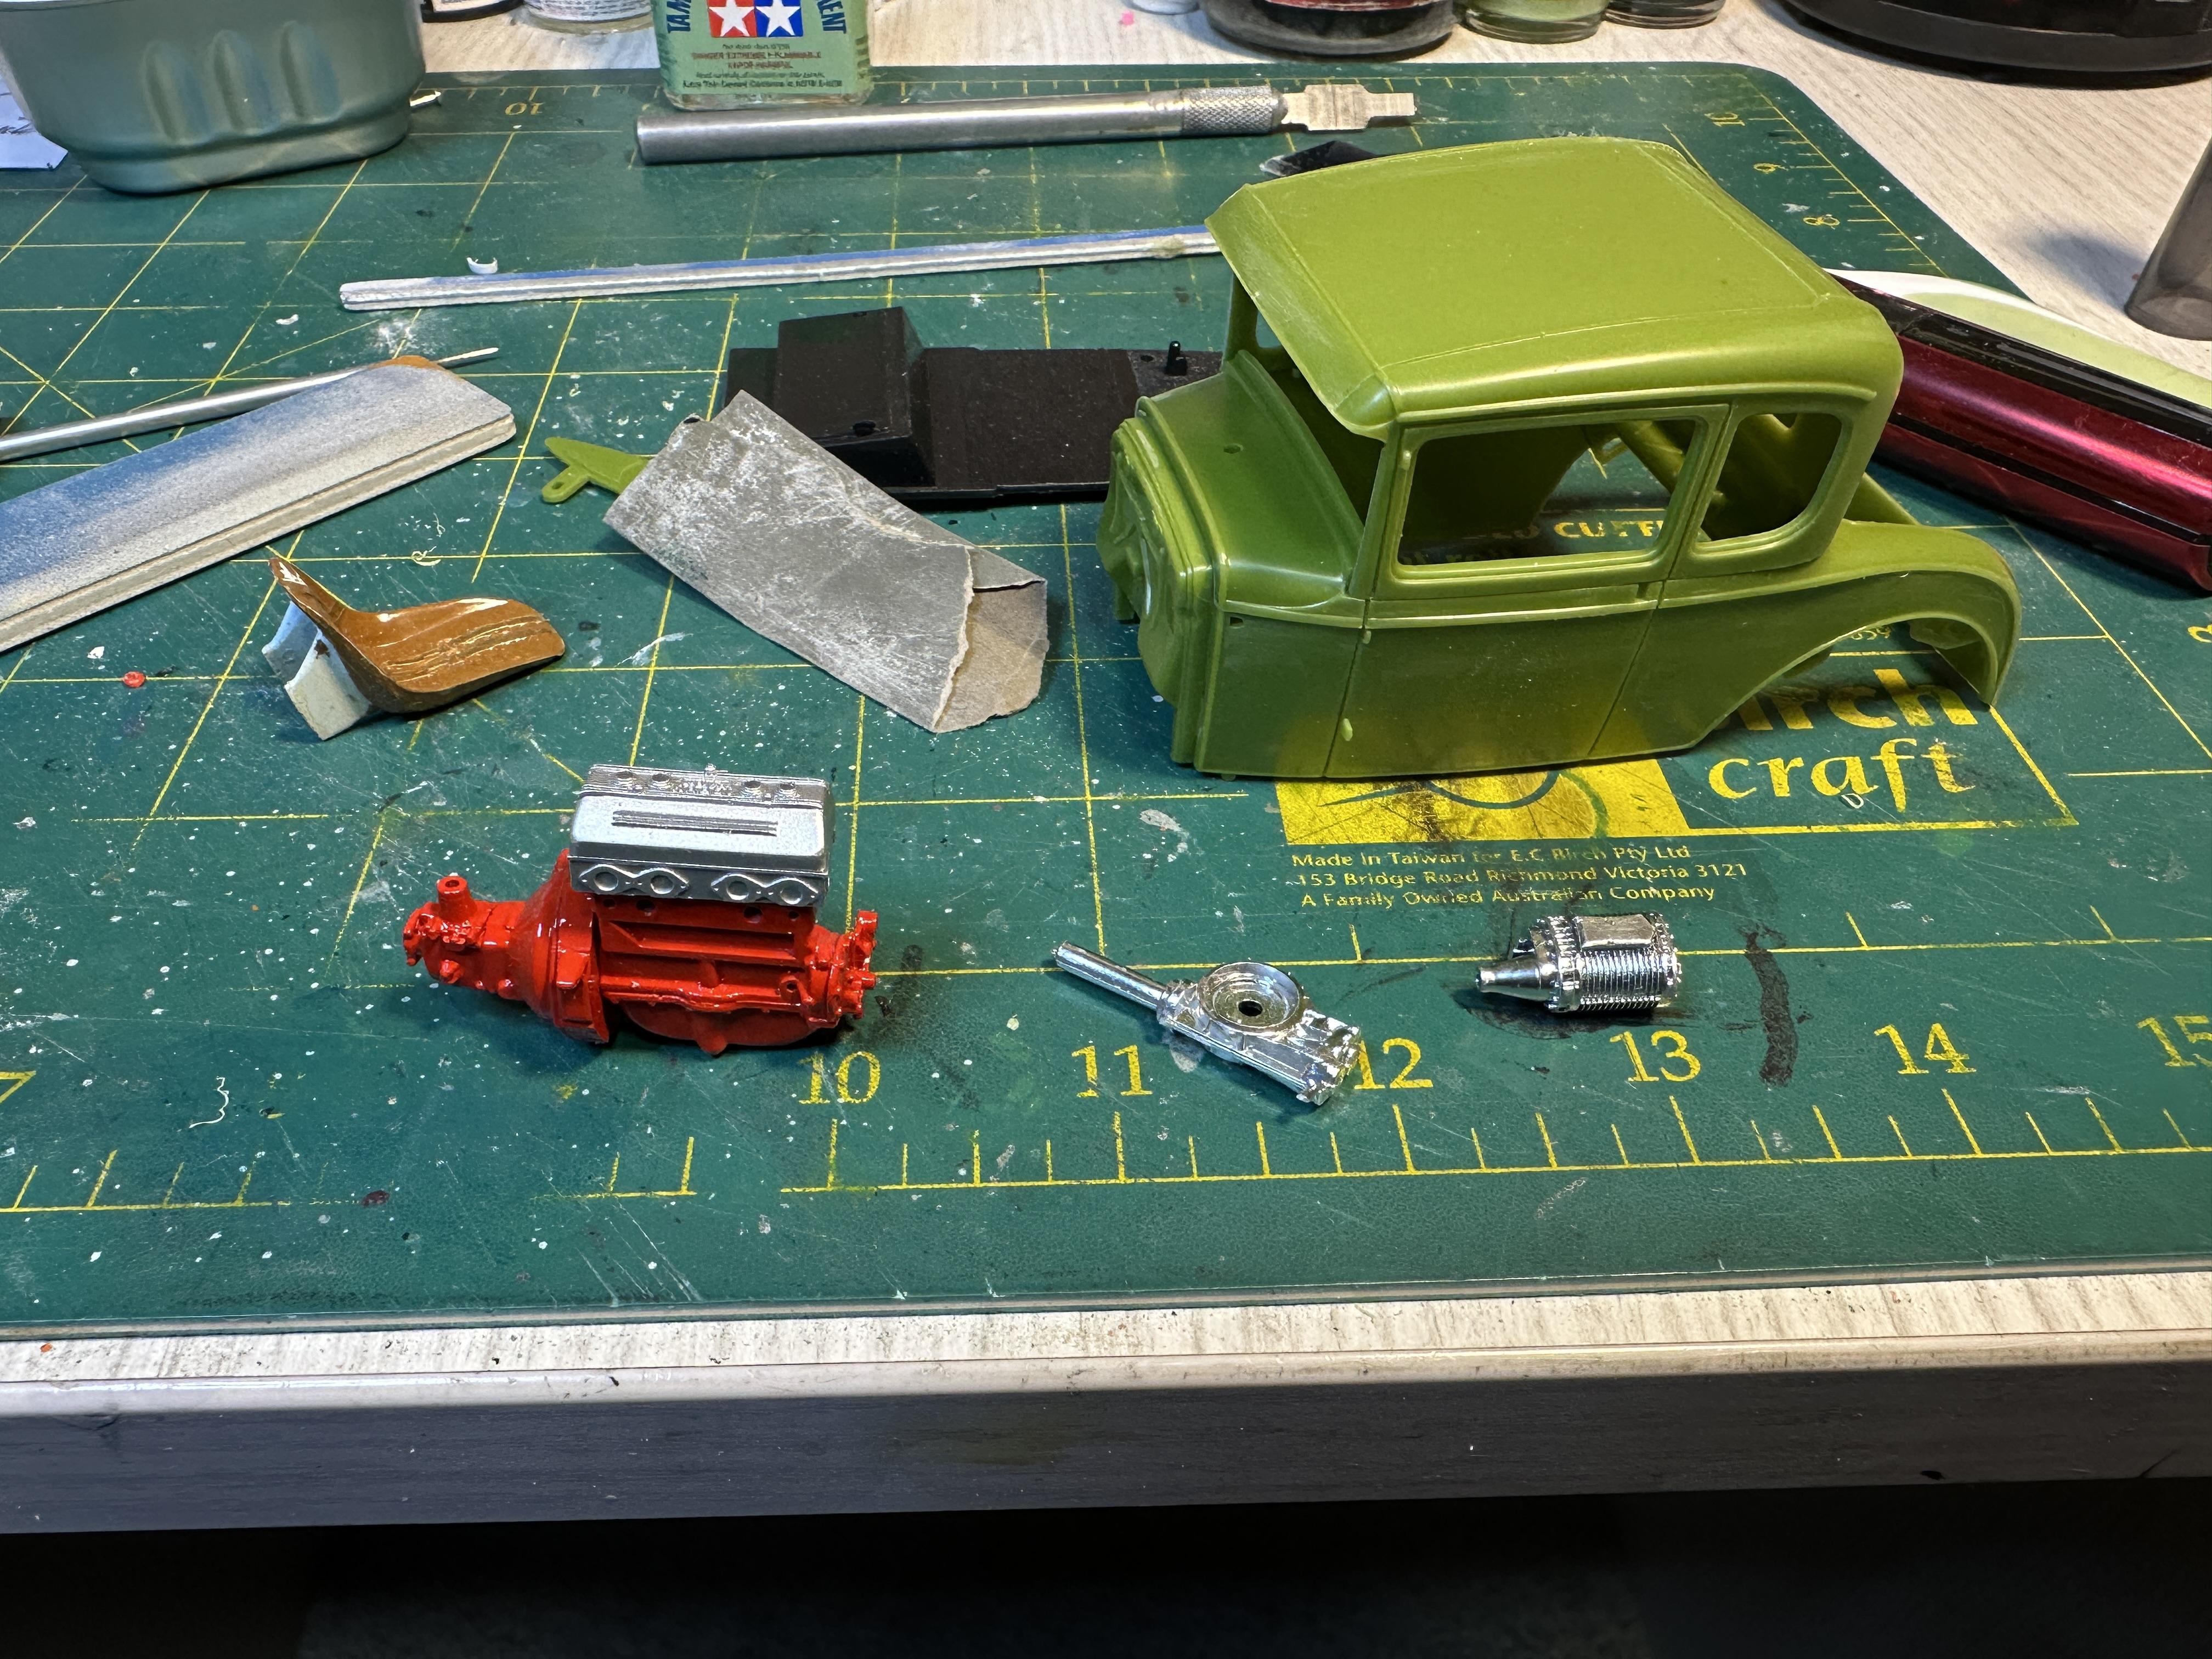
I need a manifold for the blower. I found an injector manifold that I will uses as a basis for the blower manifold I need. I cut one side off and made up a plenum to mount the blower onto. I needed to reshape the angle where it attaches to the head a little and worked fine Using Marks photos gave me inspiration on how to mount the magneto. I will be using the radiator so I do not have a lot of space at the front on the motor so this mounting system will work good. Fab'ed up a drive cover and cut off the bottom of a mag from the parts department and made a new mount for it. I have plugged the obsolete manifold holes in the block. Normally a cover would be made for this purpose but I am time shy on this build I also made up a water pump from plastic tube with an outlet on the correct side for the rotation of the impellor Pix has water pump, magneto, inlet manifold and motor on their way to the paint shop Next up is the rear end. The stingy parts department manager had a perfect quick change rear end squirreled away so I pried that from him when he was not looking. I carefully split the drive tube from the diff head and cut out the banjo to fit up the quick change. A little filing and it fitted a charm. Also cleaned up the flash and sharp edges on the rest of the rear end And test fitted A lot of stuf has been piling up at the paint shop so I better get off to there and do some work Thanks for looking
-
Machine Polishing Question
bill-e-boy replied to DaddyJ's topic in Model Building Questions and Answers
Without hijacking the thread, this is the best piece of advice I have seen in the post. The wait period between steps is crucial between sanding and polishing as it allows the paint to gas out better. The gloss finish seem to slow down the gas out process. It can be sped up with a dehydrator but not by a lot This good advice too although I do all of my sanding and polishing by hand. Too frightened to use a machine. It's bad enough on full size cars let alone doing it on a small scale One other thing is that I have found when using lacquer based paints that a final sand with at least 2400 or even 3600 of the primer will help immeasurably on reducing scratches seen in later stages of the paint/polish procedure. Lacquer just pulls down into sanding scratches loke nobody's business. RRRGH -
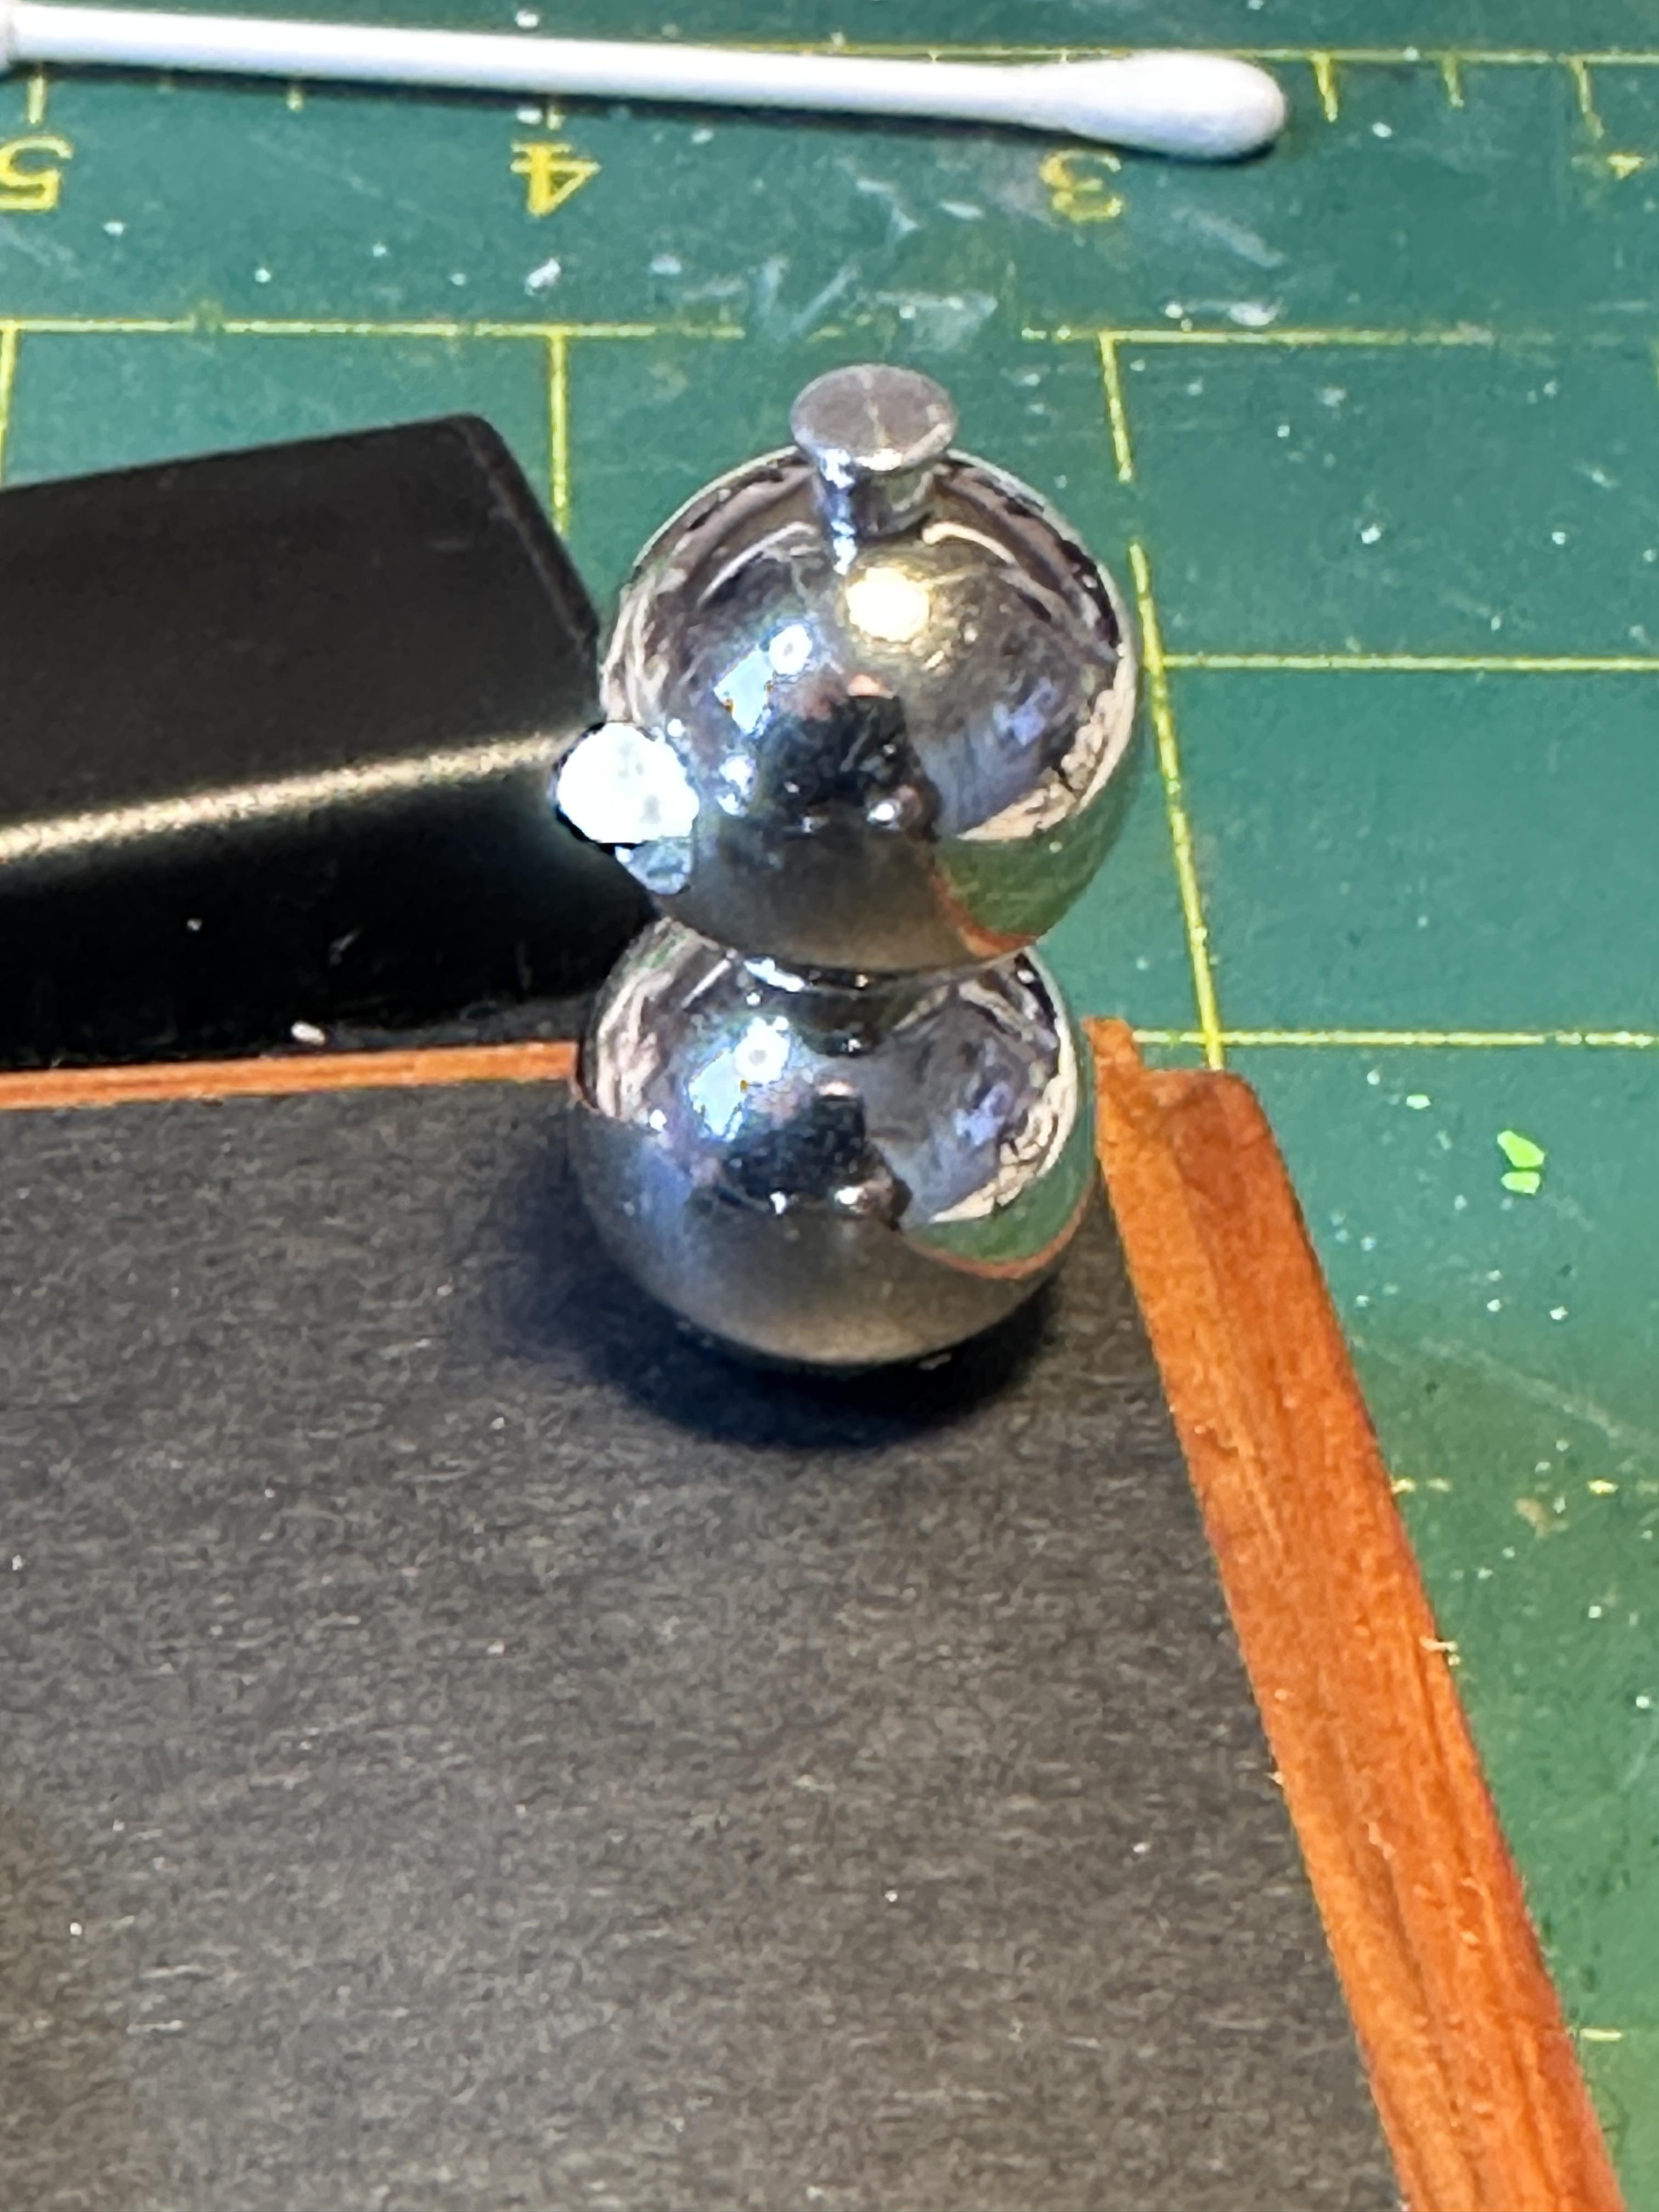
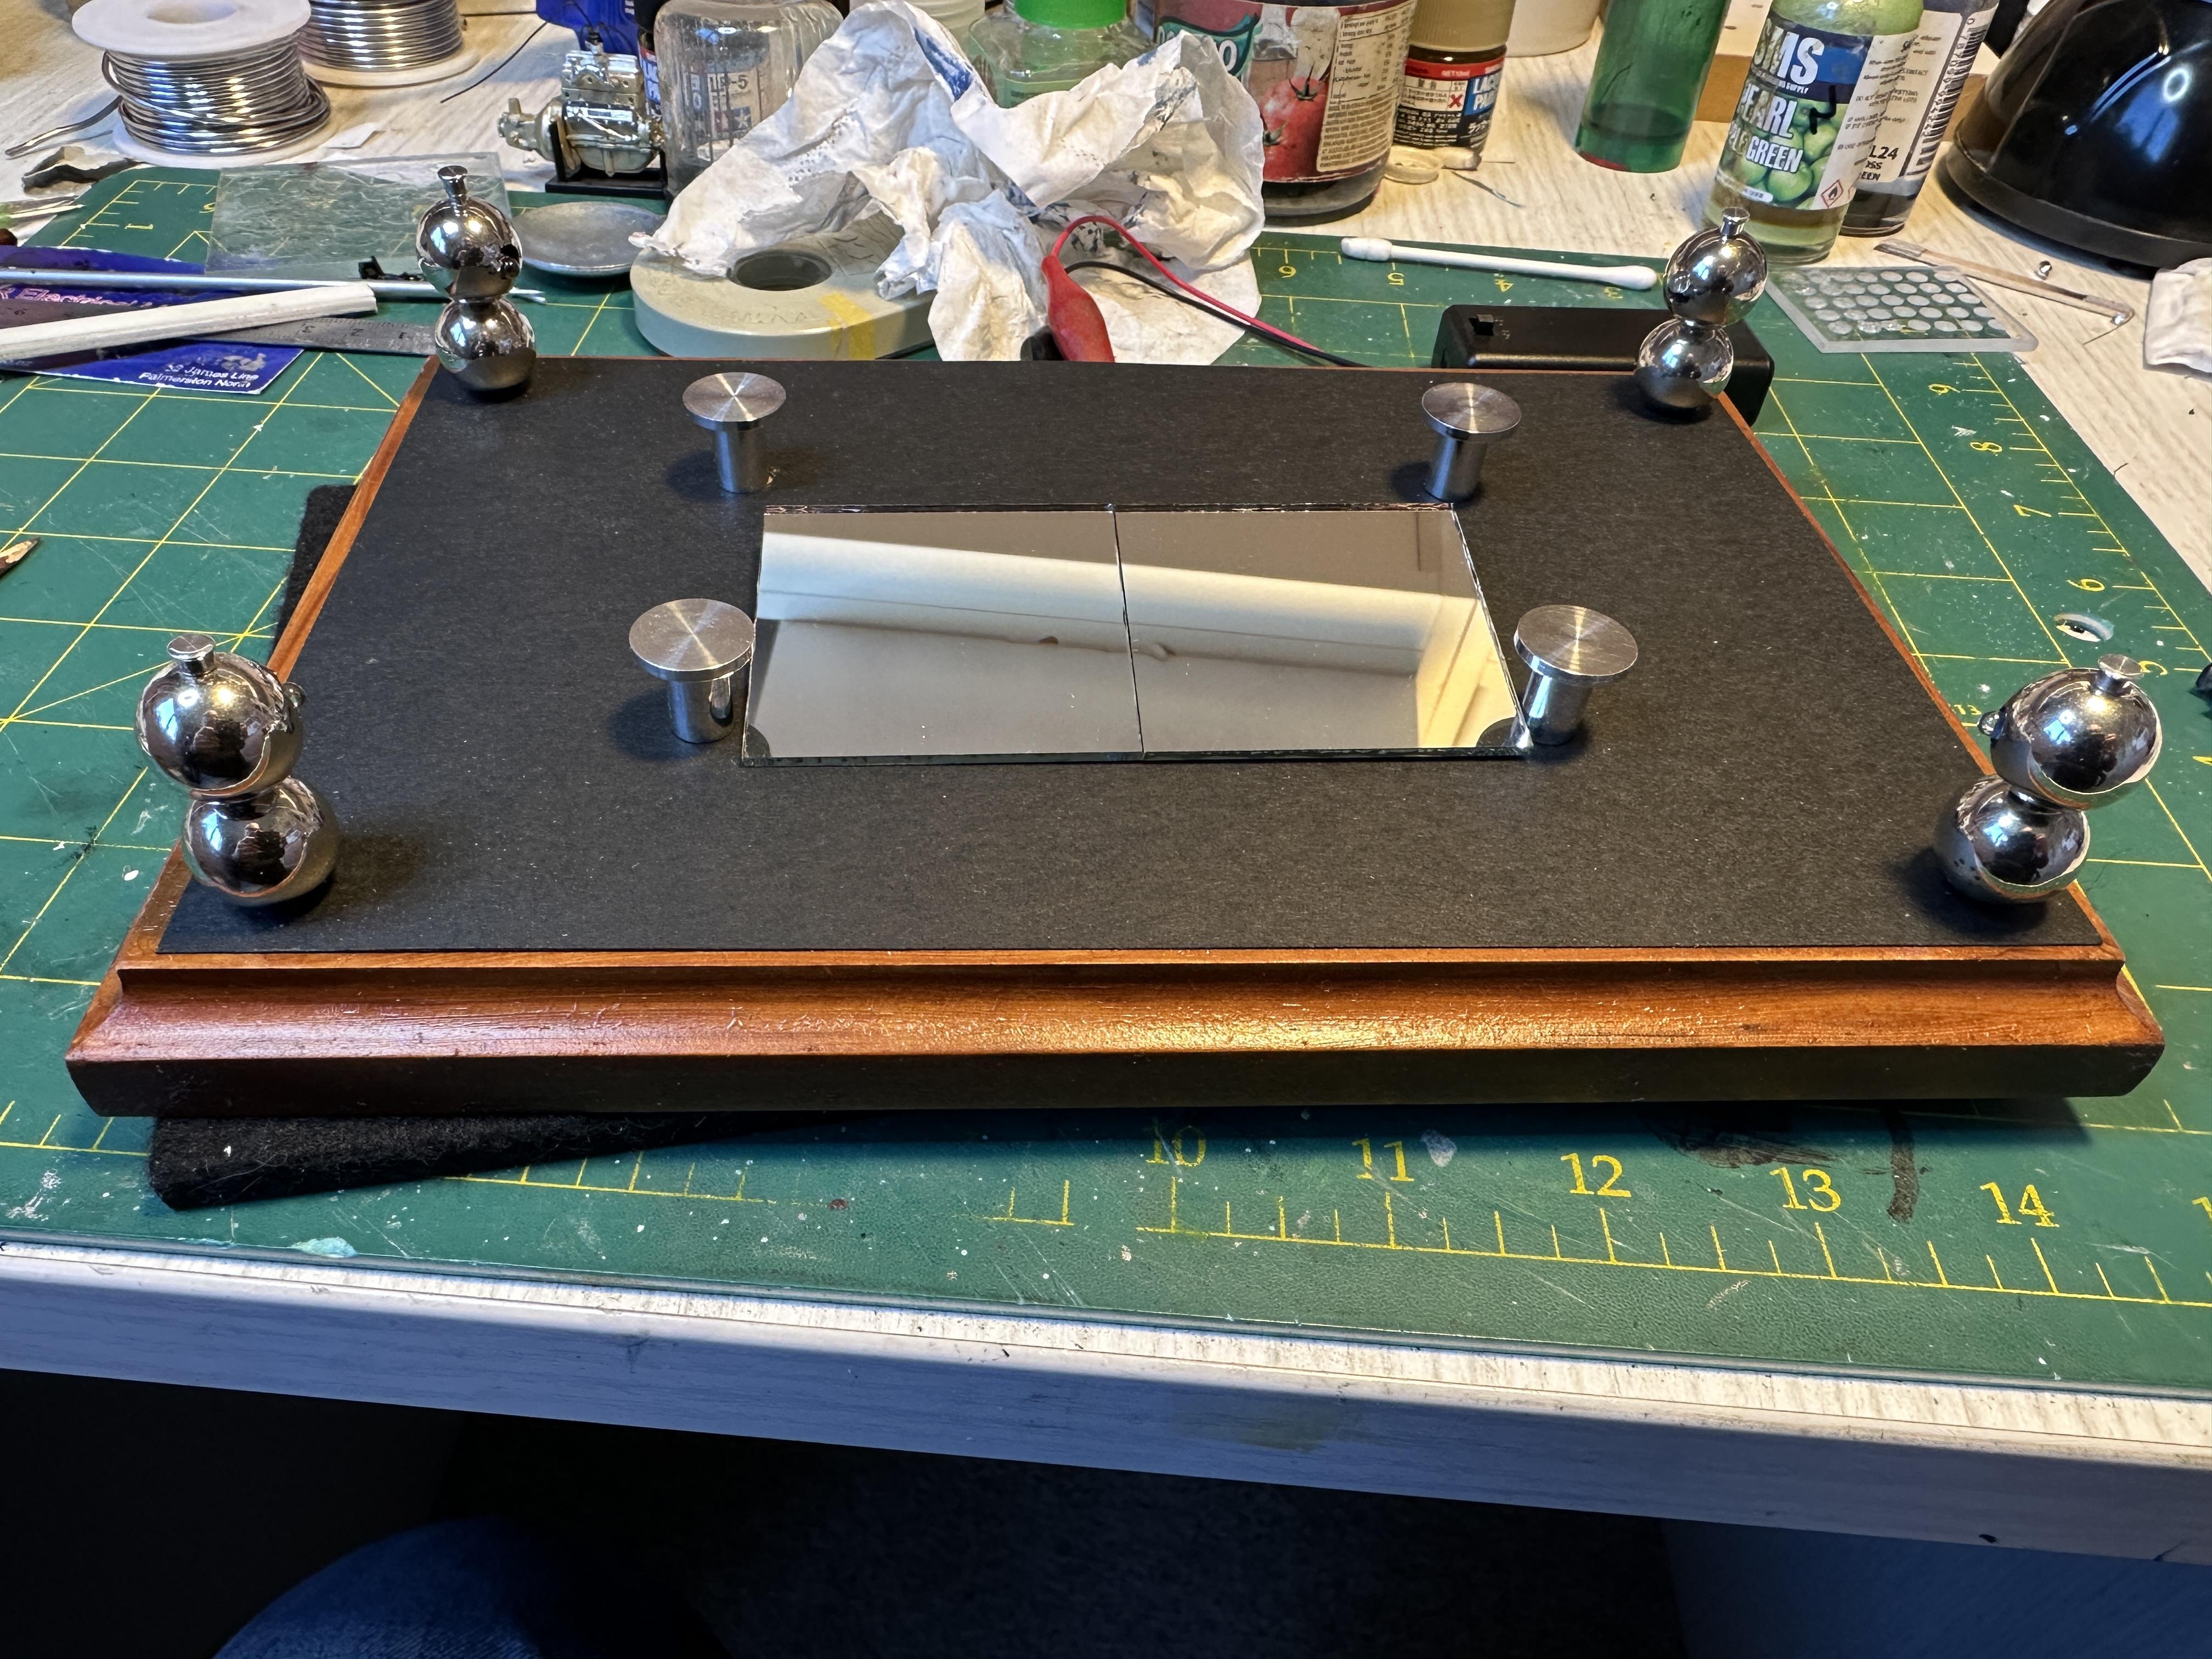
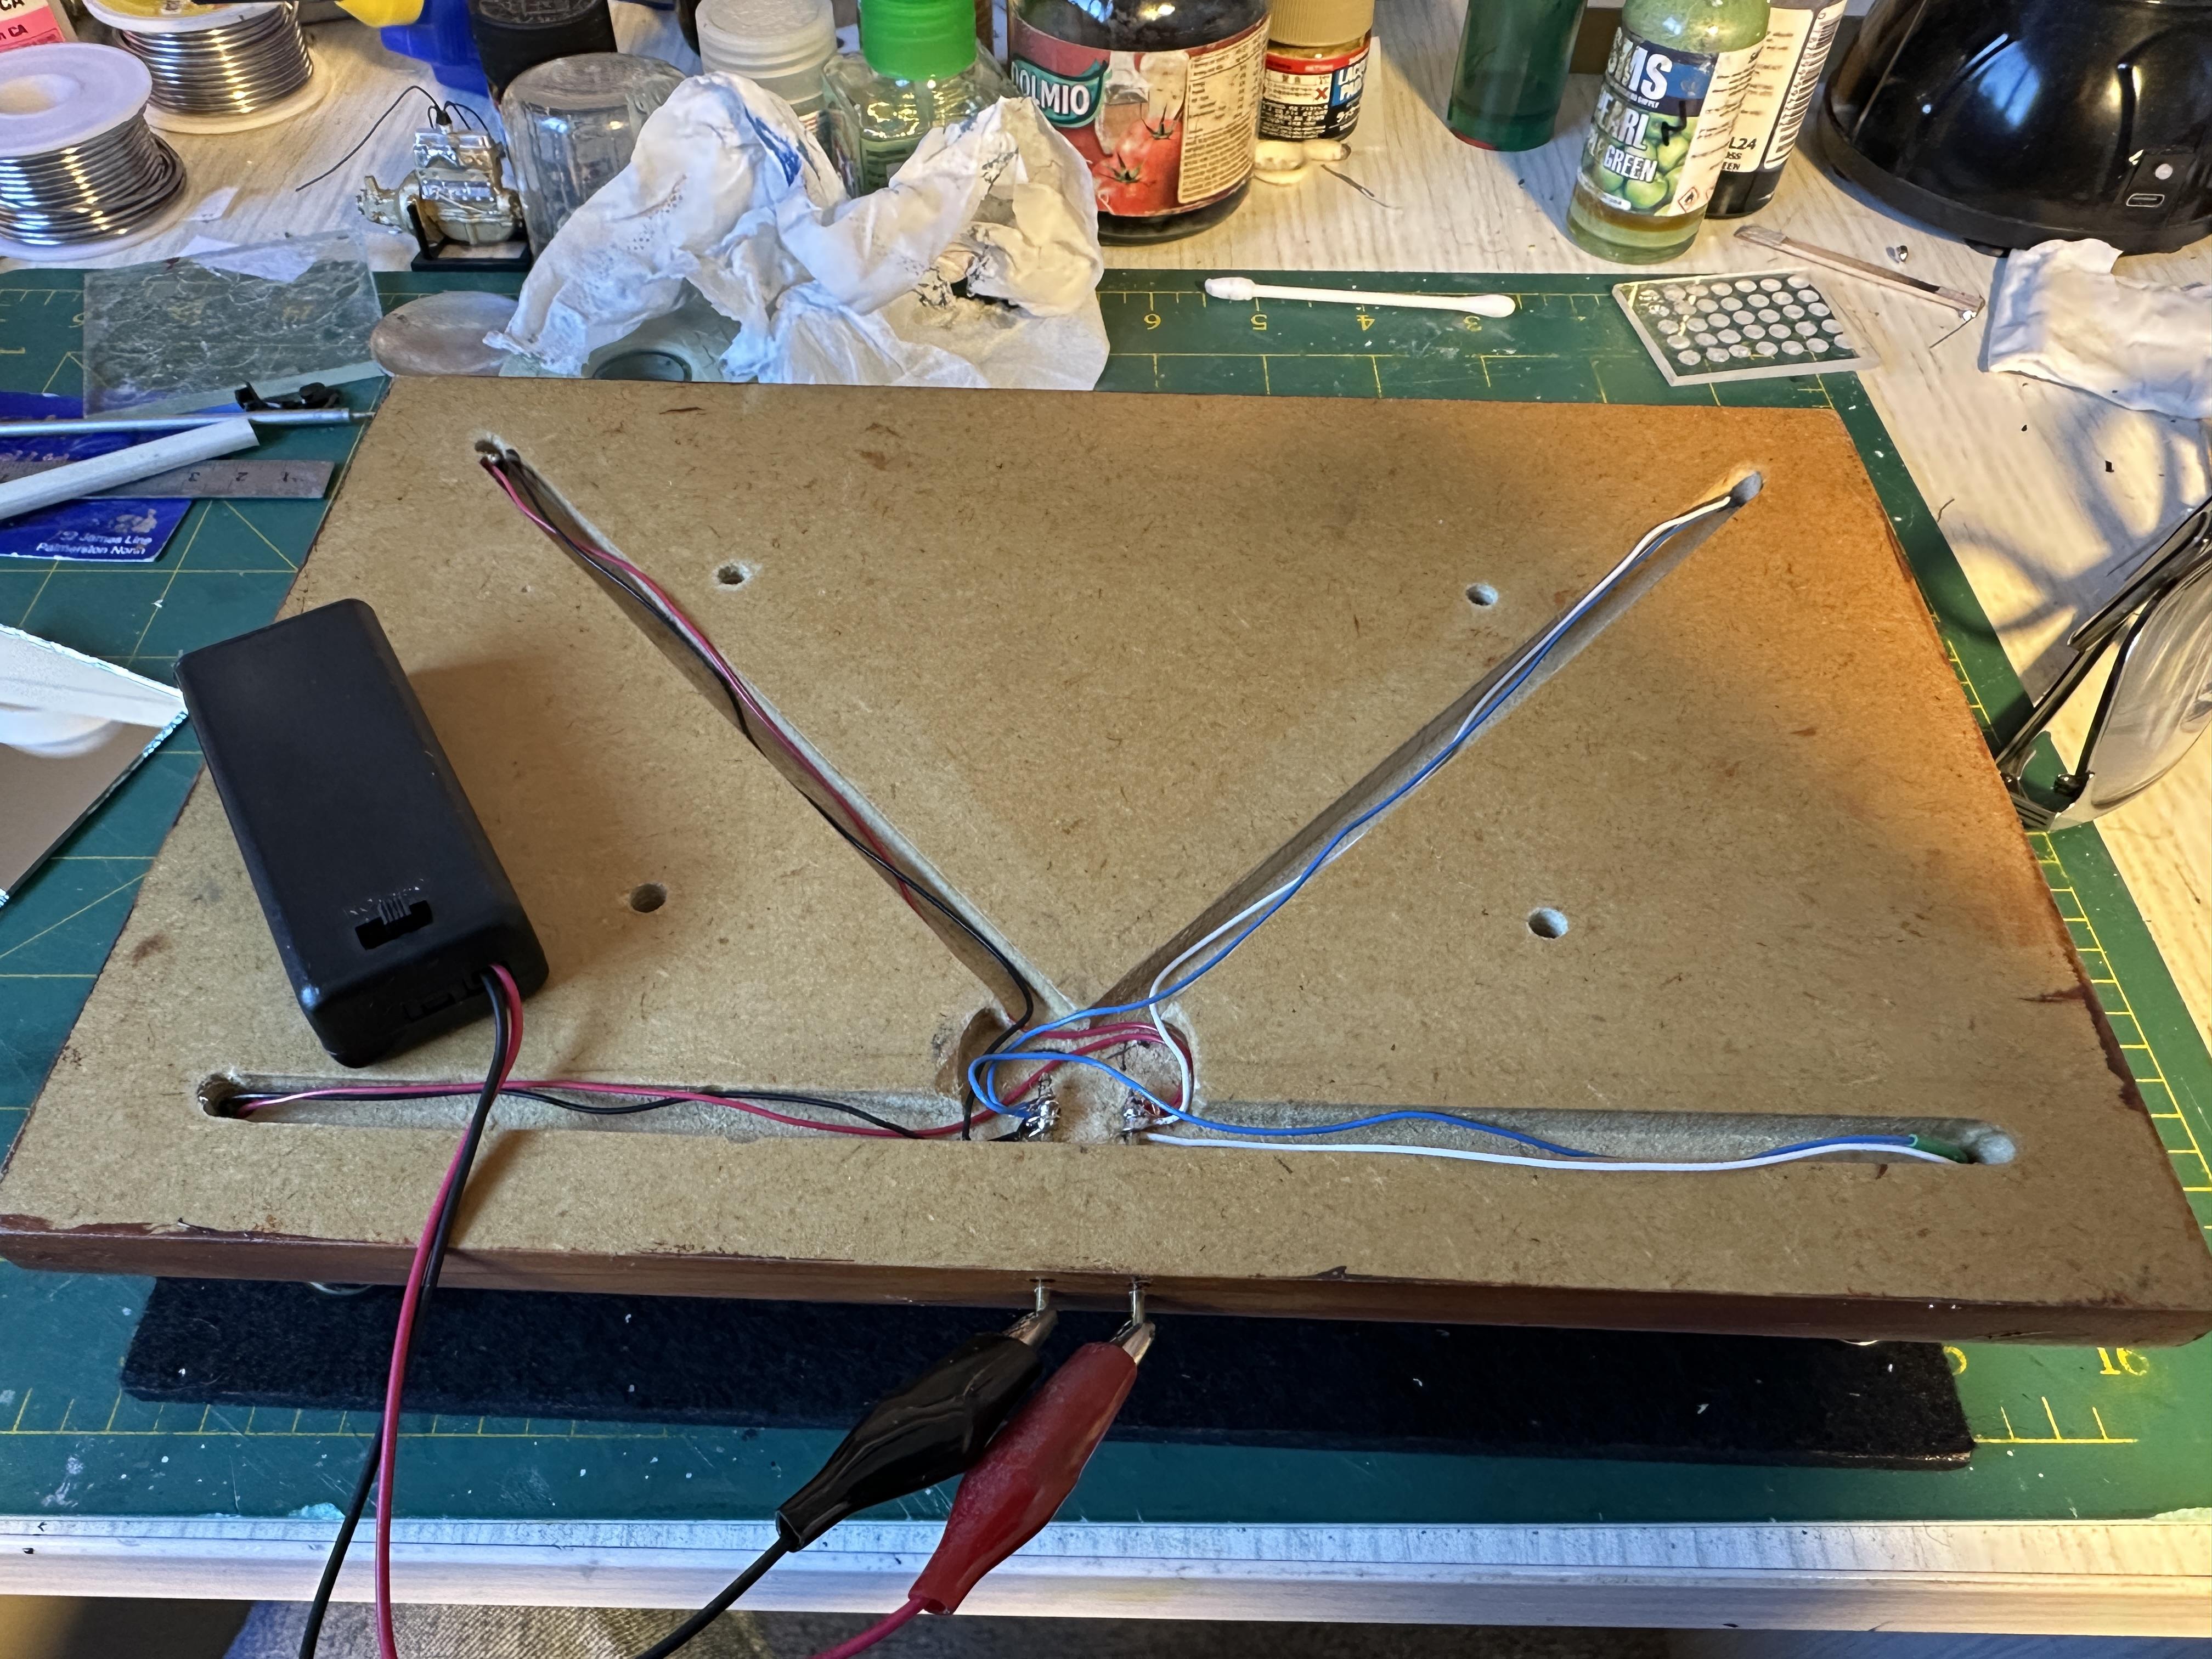
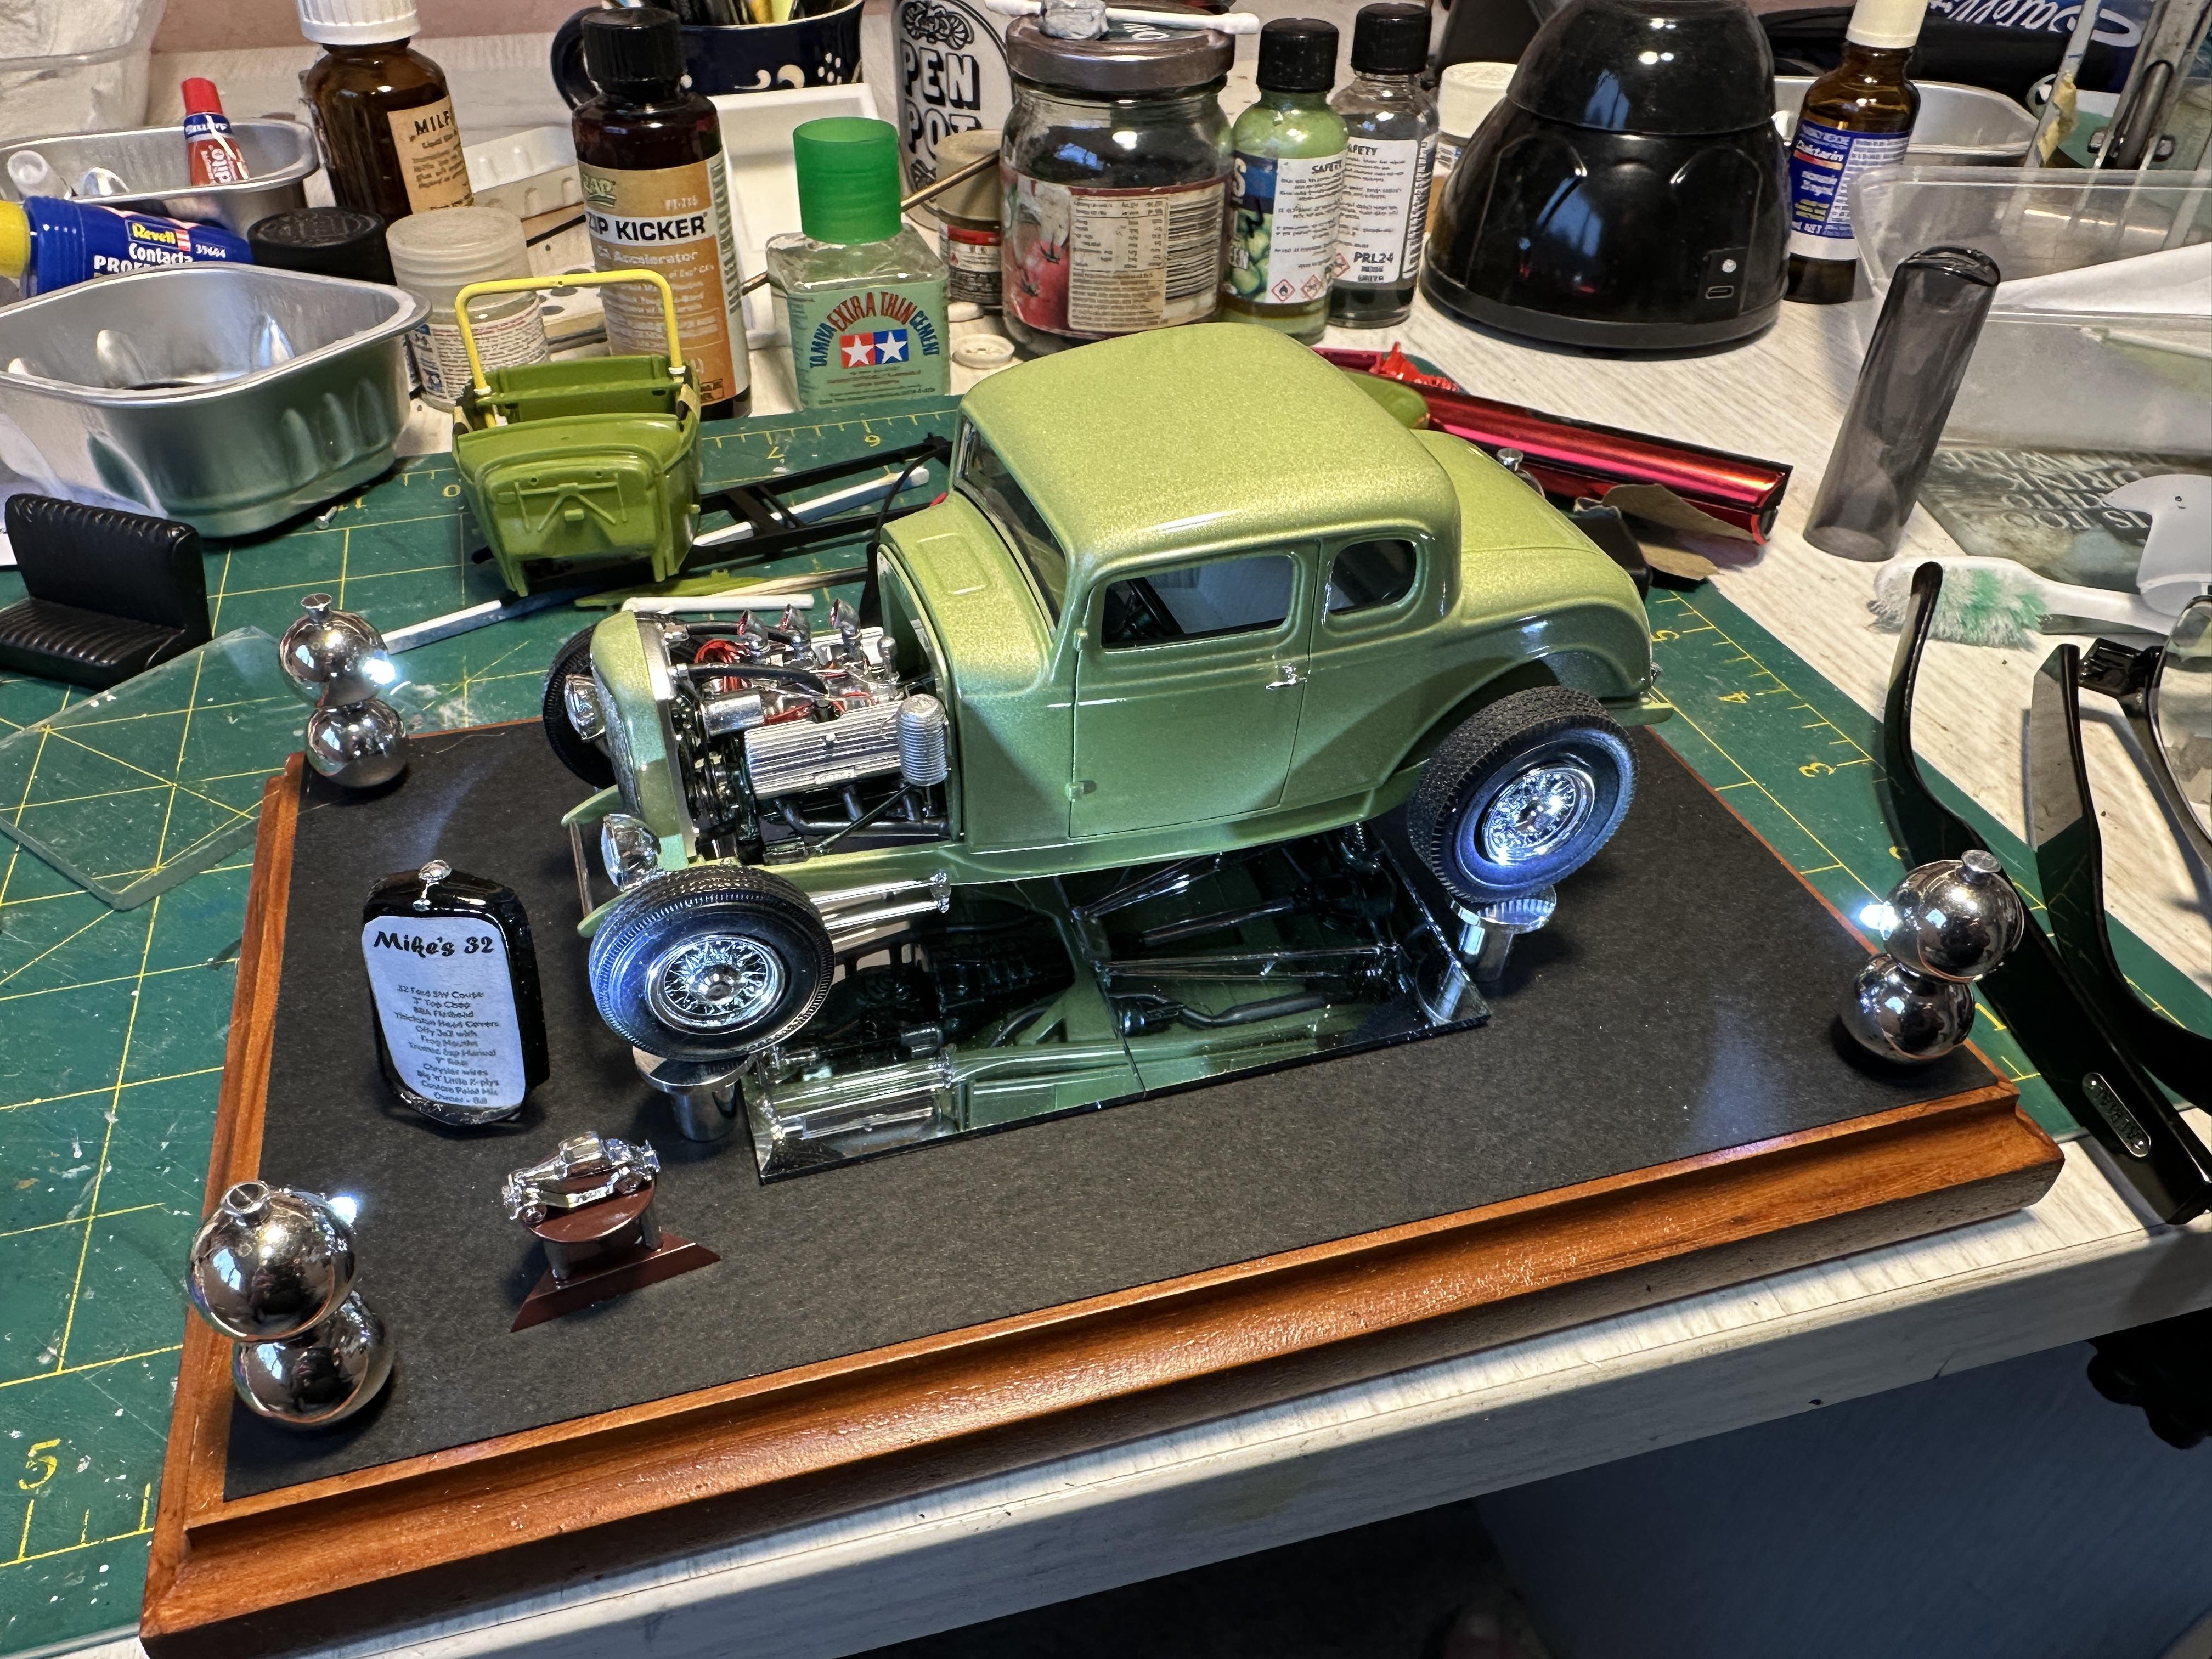
The light housings worked fine so I made up 3 more. To fill the through holes in the beads I turned up a plug that I thought I could use as a bollard for a rope if I can get the kinks out of the string I bought for the job The mirror needed to be angled up a tad for best viewing so a carefully cut out a wedge with my table saw. And I mean carefully as working with small suff and very fast and sharp rotating parts are scary. To make it safe I glued up some blocks of customwood and cut what I needed from the block. I then painted the edges black. The base is customwood again that I made slightly larger than my mockup piece. I shaped the edges with a router and shaped cutter. All was then sanded and sealed with clear lacquer from a rattle can. I applied woodgrain effect to the edges with oil paints. This was moderately successful. The whole lot was sealed with clear. The black is card from an A4 pack of black card from the $2 shop cut to size and holes to suit the drillings for the light fitting and the wheel stands. The wheel stands are some ally bar I turned down to a flat headed mushroom shape so that I can use the base for a number of different models although this is being made for a specific model. The wheel stand positions were moved around to suit the gap required by the mirrors This pix shows it all assembled The LED wiring on the under side is via slots routed into the base. I use two short lengths of bronze filler wire to make connection point for the 3V battery pack and to have something to solder the LED wires to. The LED wires are some cores from some alarm multi-core cable I had to hand And the money shot. I found a small trophy when looking for parts for another build in one of the AMT 32 kits. The chrome trophy is a 32 5W coupe - just perfect. The info board is a 32 grill shell that I found in the parts dept that was already painted so I polished it up a tad and replaced the chrome bars with a photo-reduced sign board that I whipped up in PowerPoint, photographed and imported it back into PP and then shrunk to size. I used the chrome grill insert as a pattern for cutting to size. It was than sealed with clear lacquer Thanks for looking
-
Thanks Mark - that is another 3000 words😁 Thanks for slicks source Michael - I don't have that exact kit but will look out for it for future build. The narrow slicks I now have are fine for this application and I have invested time in making the rims fit so will stay with them.
-
Round 2 Announcements as of 9/12/25 from Stevens Intl.
bill-e-boy replied to Justin Porter's topic in Car Kit News & Reviews
Hi Mark - you are on the money. All of the AMT "Trophy" series 32's bodies have the wedge section. -
Being doing some work on the interior - paint stripped and painted a fibreglass racer bucket seat and added a roll cage. The down tube is loose and will be connected on assembly of the top to the body. I just need to extend the roll bar to reach the floor.
-
Thanks for the pix of the real deal Mark. A picture is worth a thousand words. I have been scouring the inter web looking for pictures of an Ardun headed banger. Lots of words mentioning a Frick head - good and bad - but alas no pictures. Your photo answers some of the gray areas I have like how to implement the ignition and water pump. I had in mind to fit a pump to the front of the head where a water outlet already exists similar to what you have done. But I was heading down the thought road of a front mounted distributor or magneto on an angle drive but space is limited as I need room for a blower drive set up and your pix shows a mag mounted off the rear of the cam drive - perfect I do like your headers and the mana-free inlet manifold too. And yup Sid - three two's are what I have in mind and I will need to Neanderthal build an adaptor to fit the blower. I need to scratch build an intake manifold too.
-
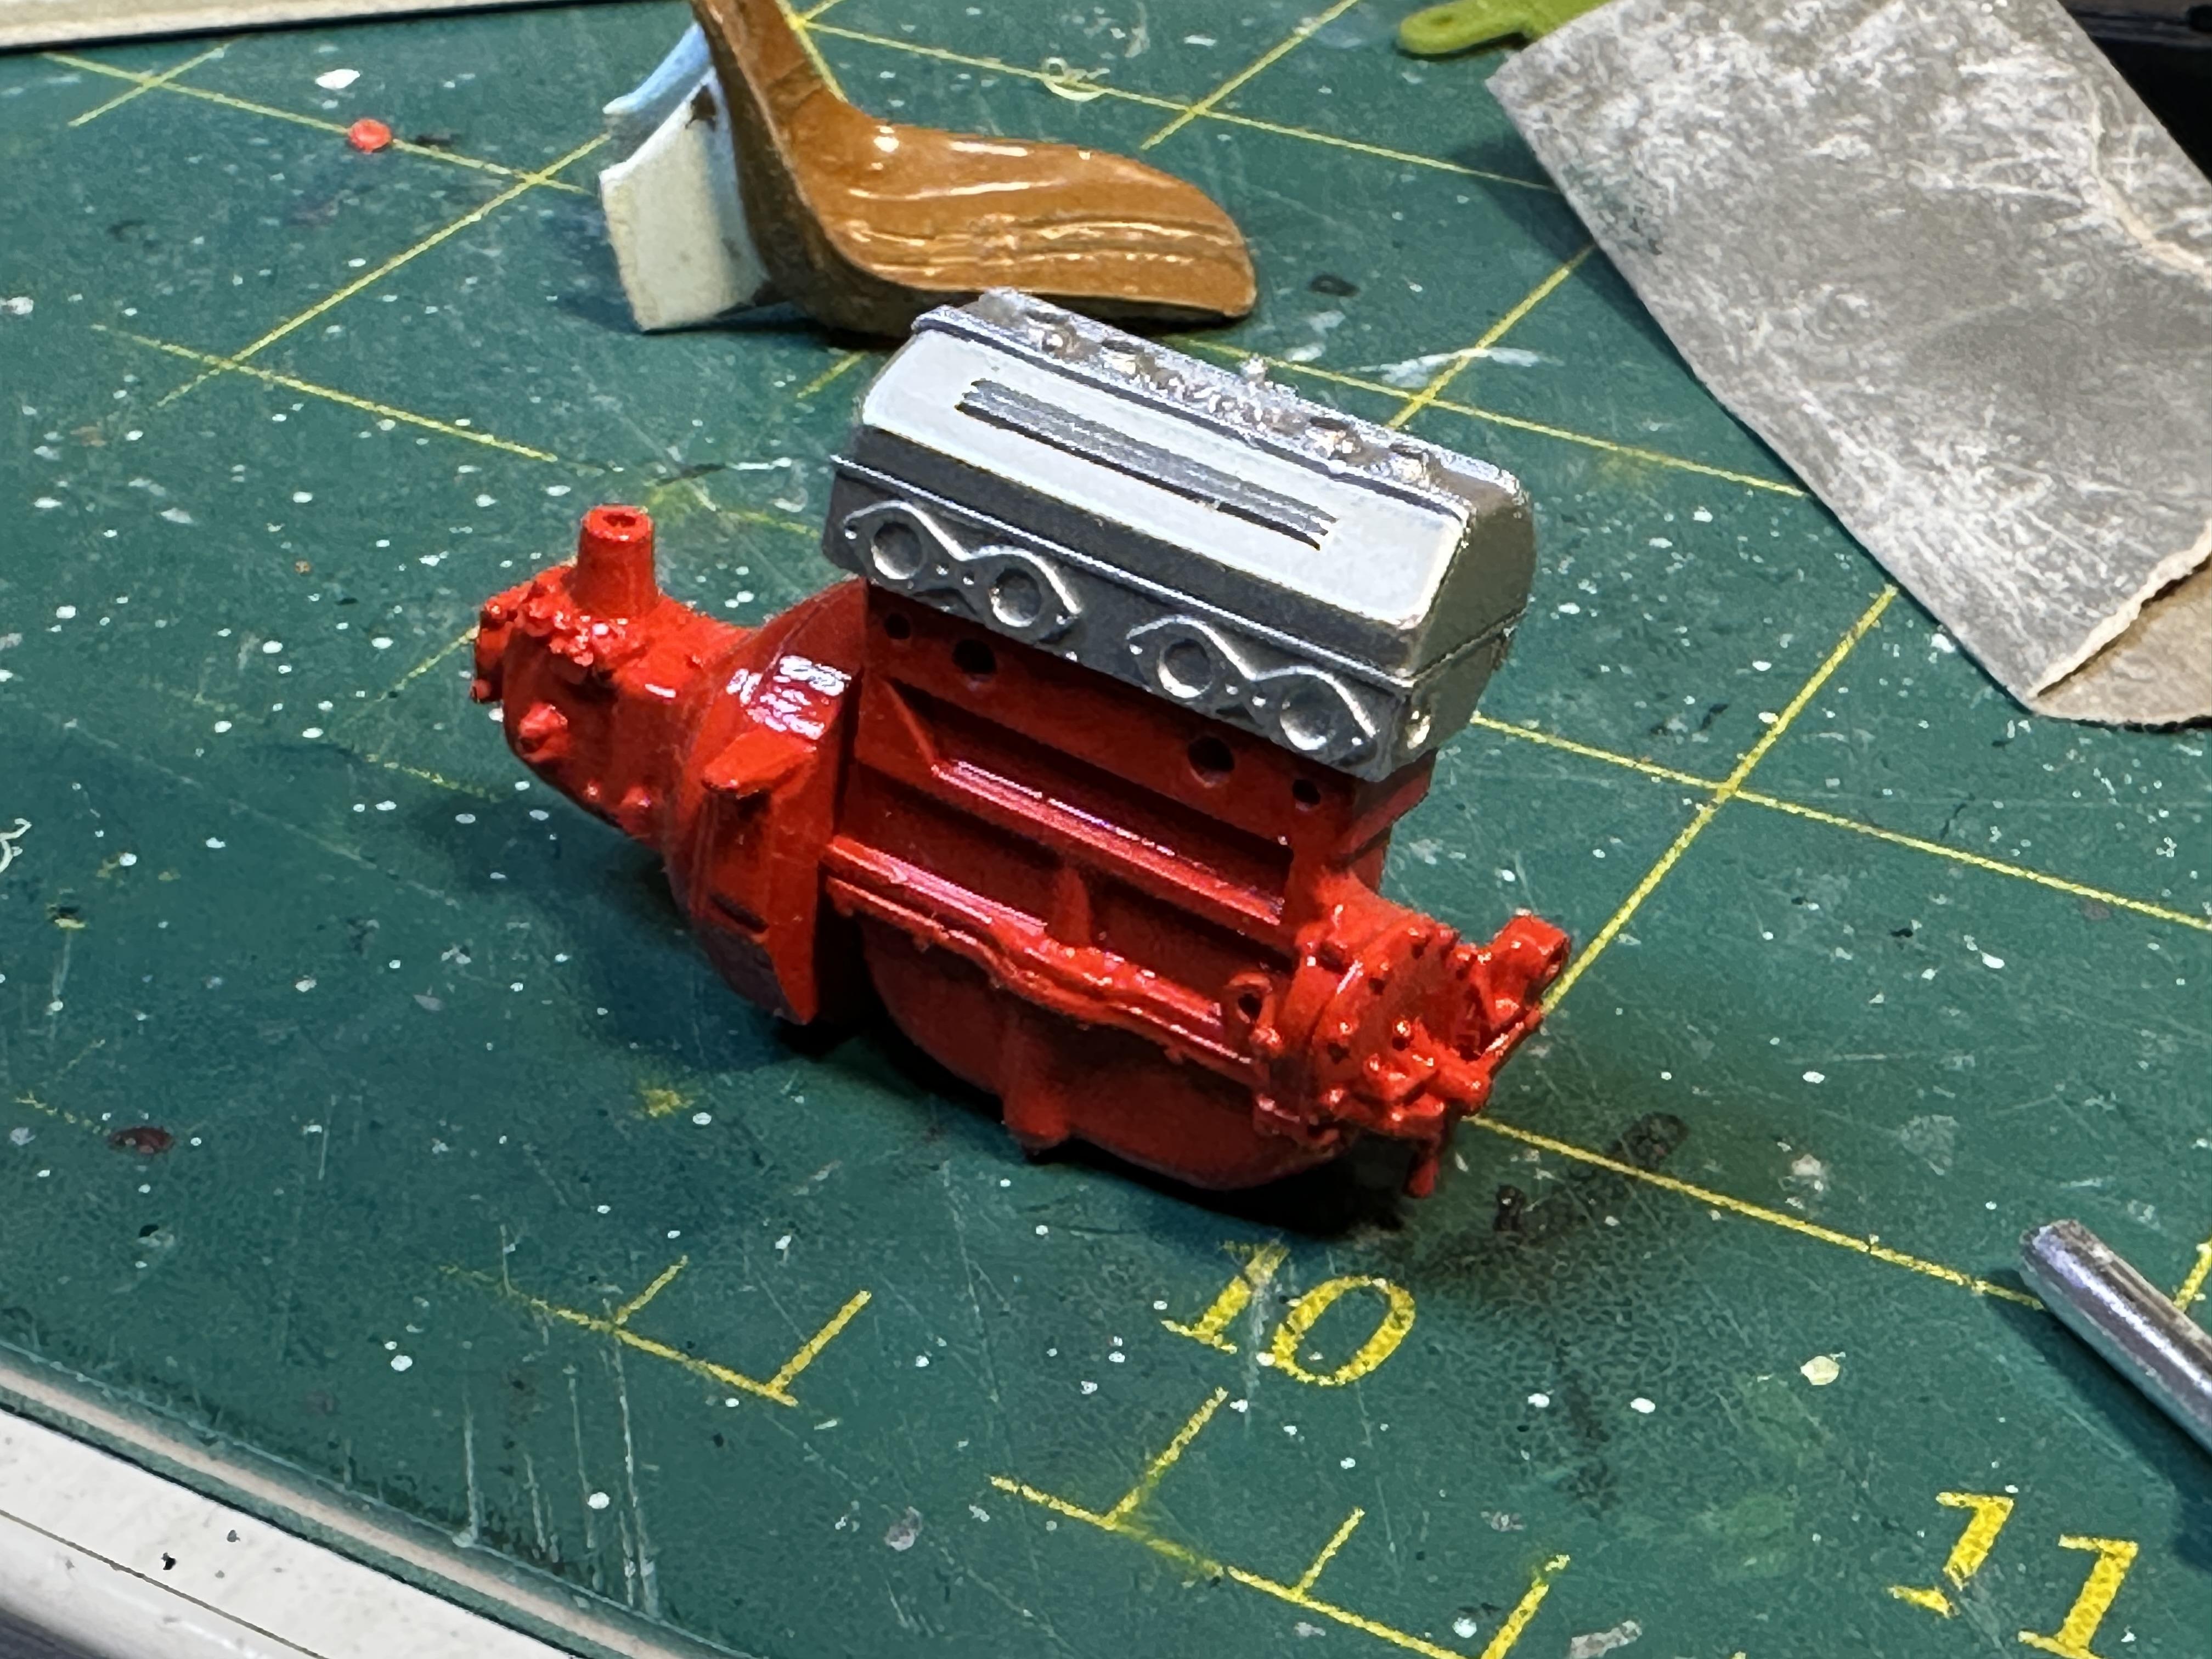
A little bit of progress on the banger. I have turned down the rear wheels to fit the slicks - sorry no pix. I have cleaned up the Revell motor/gearbox and painted them Tamiya Pure red that I will be using on the drive train too. The head is SMS aluminium The head on siting the wrong way around as the valve gear on A motors is on the RH side of the motor so the push rods for the Ardun will need to be on that side as well along with the intake. I have also been doing prep on the chassis, guards and body. The chassis was in the paint shop when this was taken Thanks for looking
-
Round 2 Announcements as of 9/12/25 from Stevens Intl.
bill-e-boy replied to Justin Porter's topic in Car Kit News & Reviews
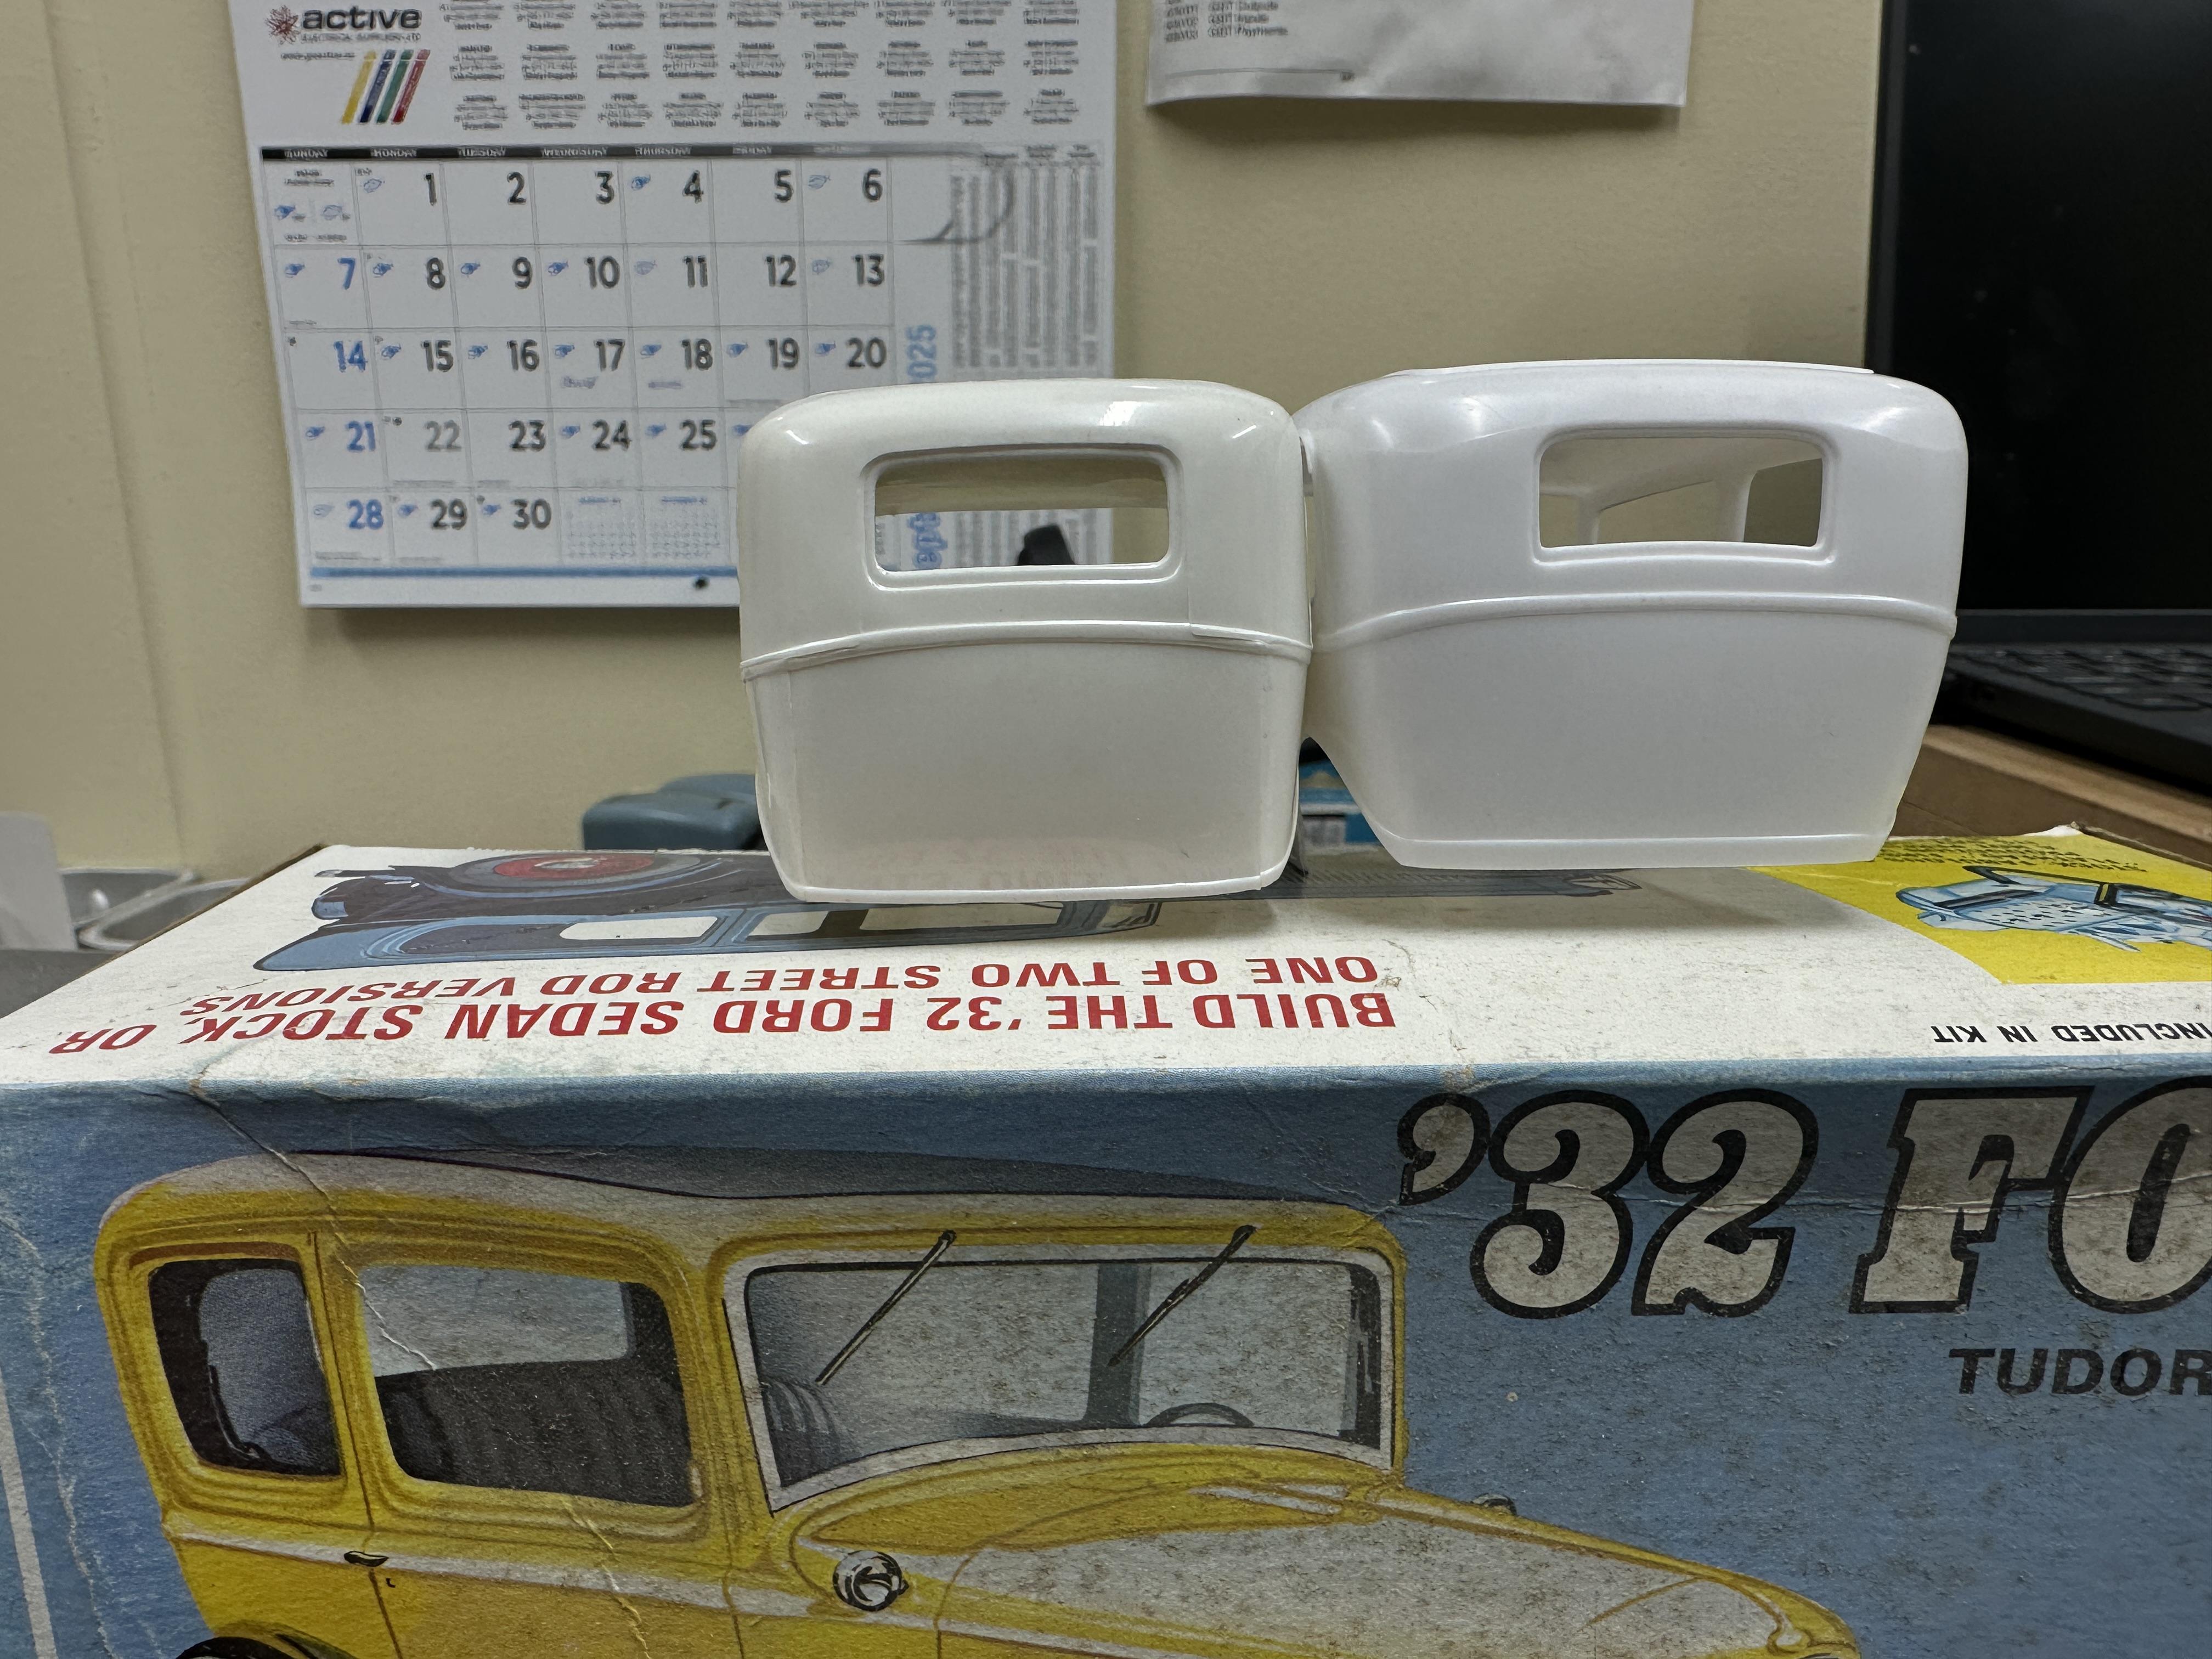
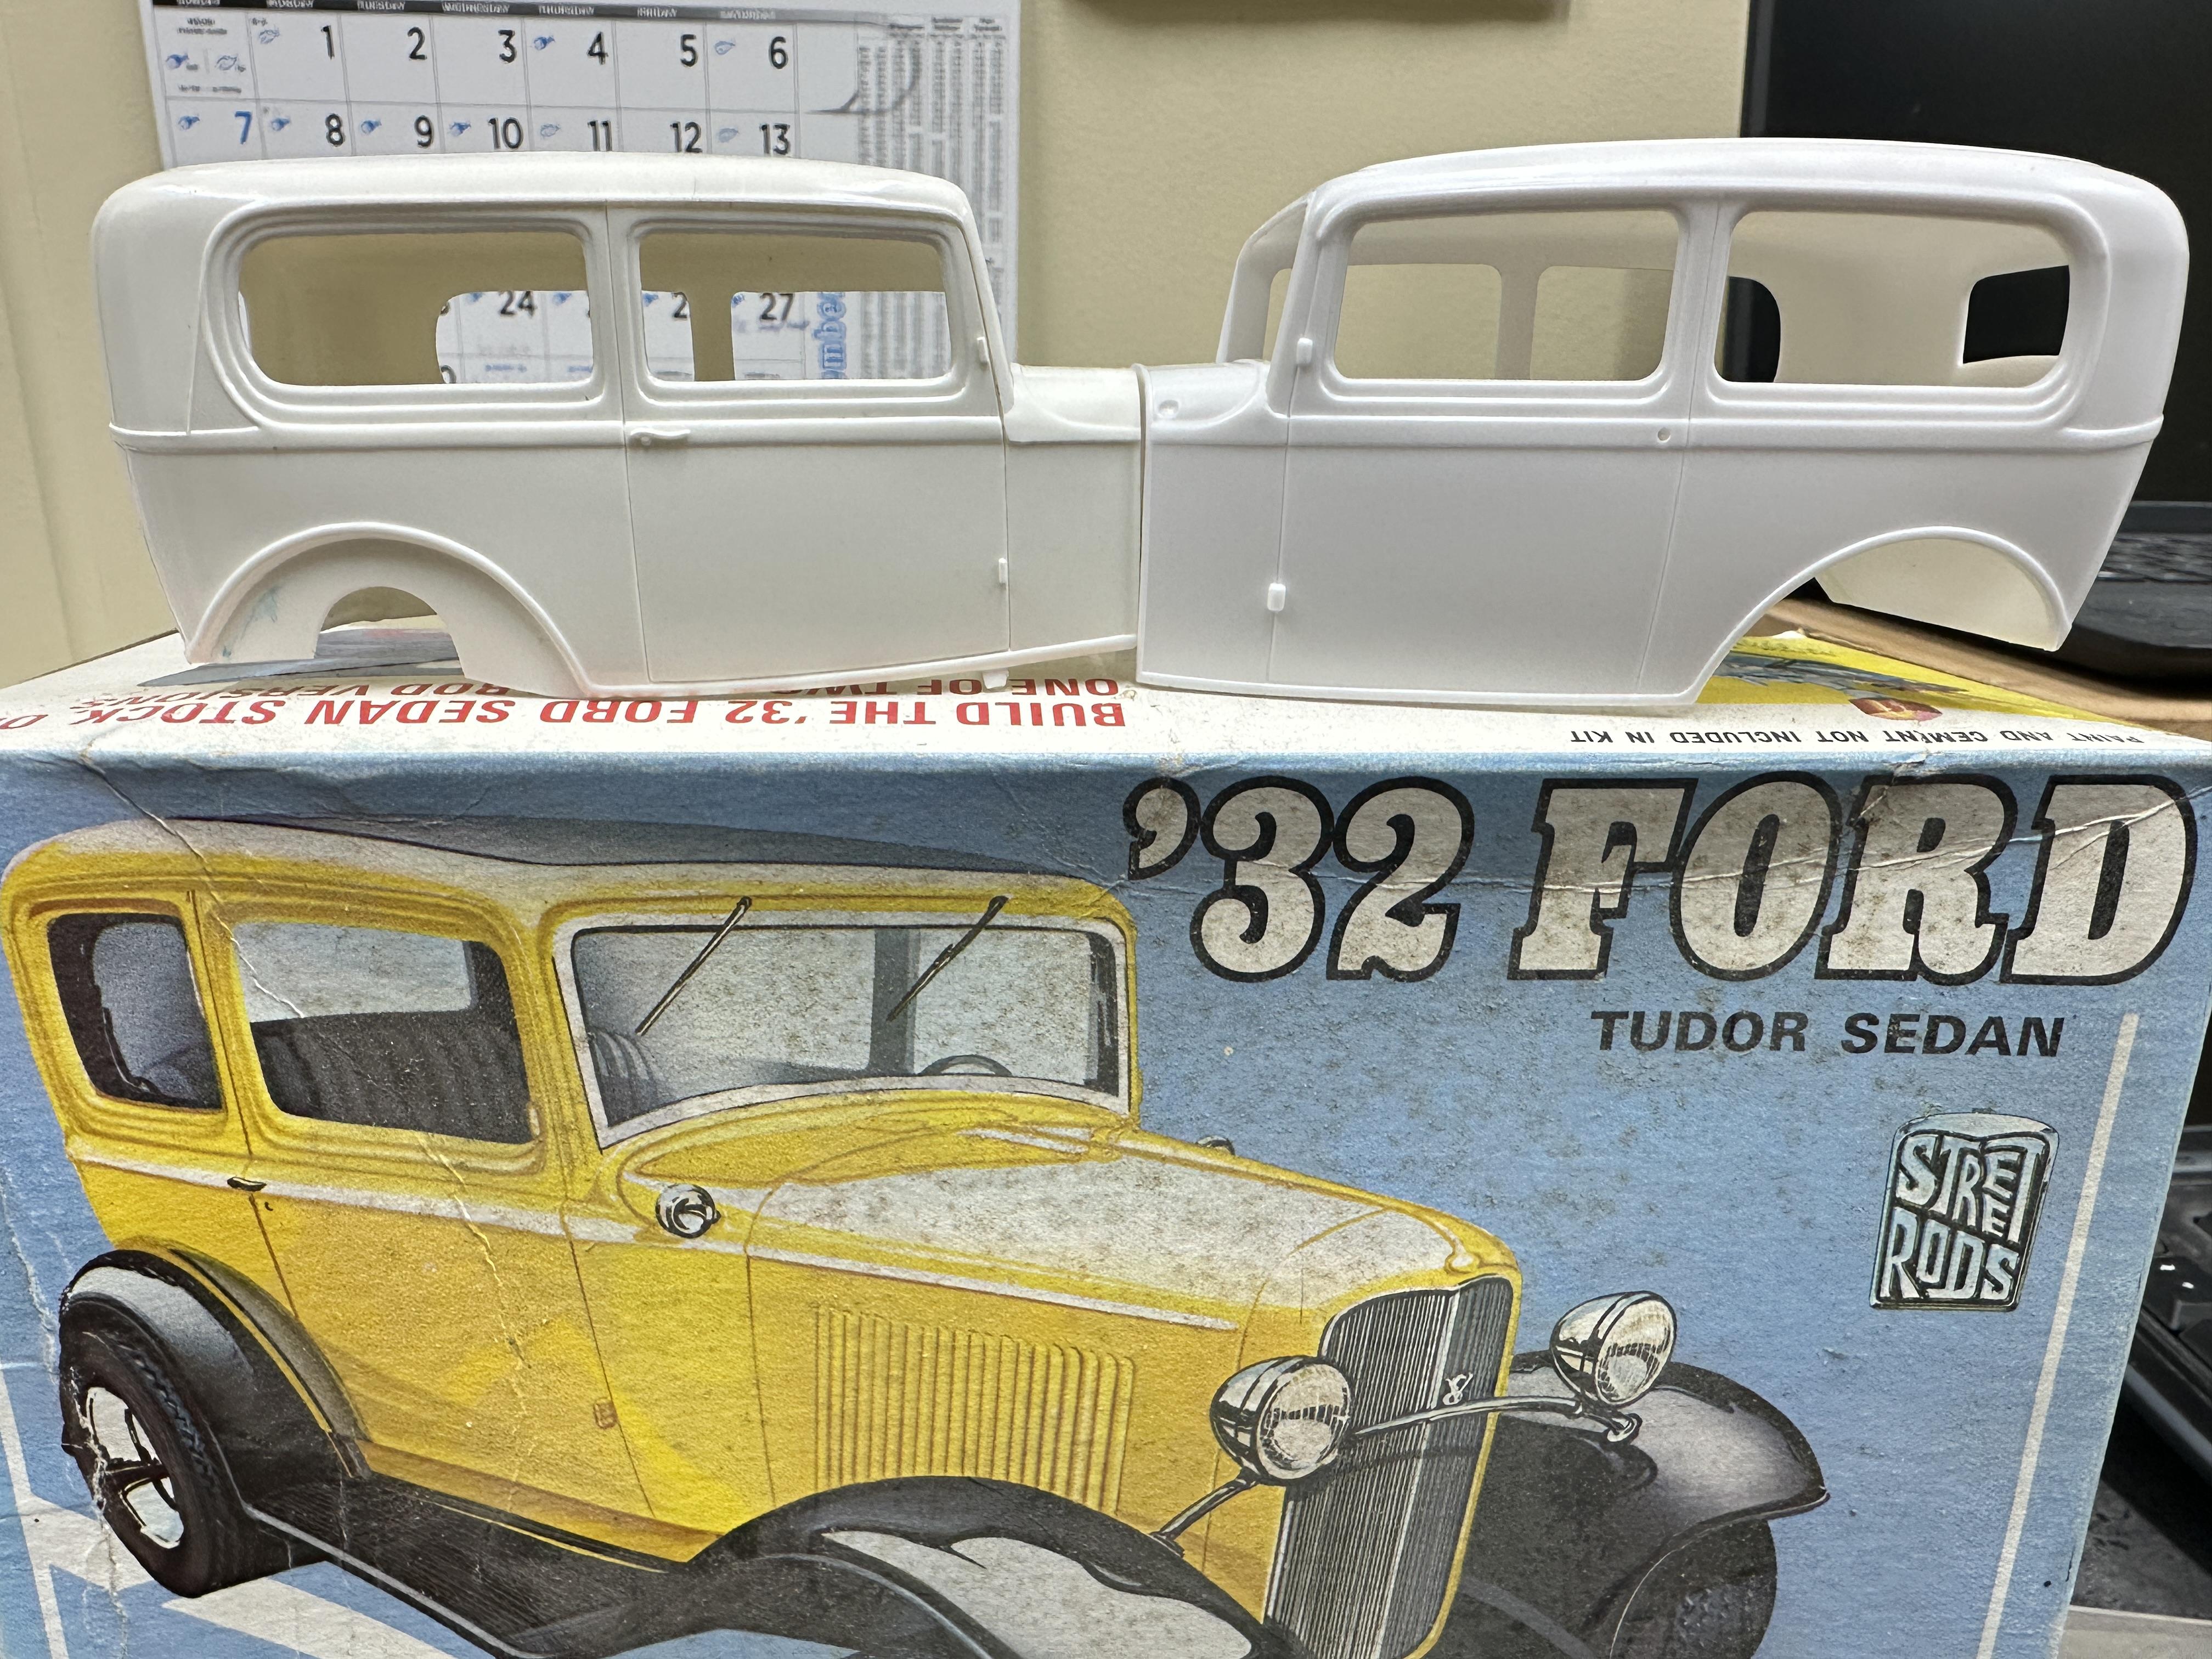
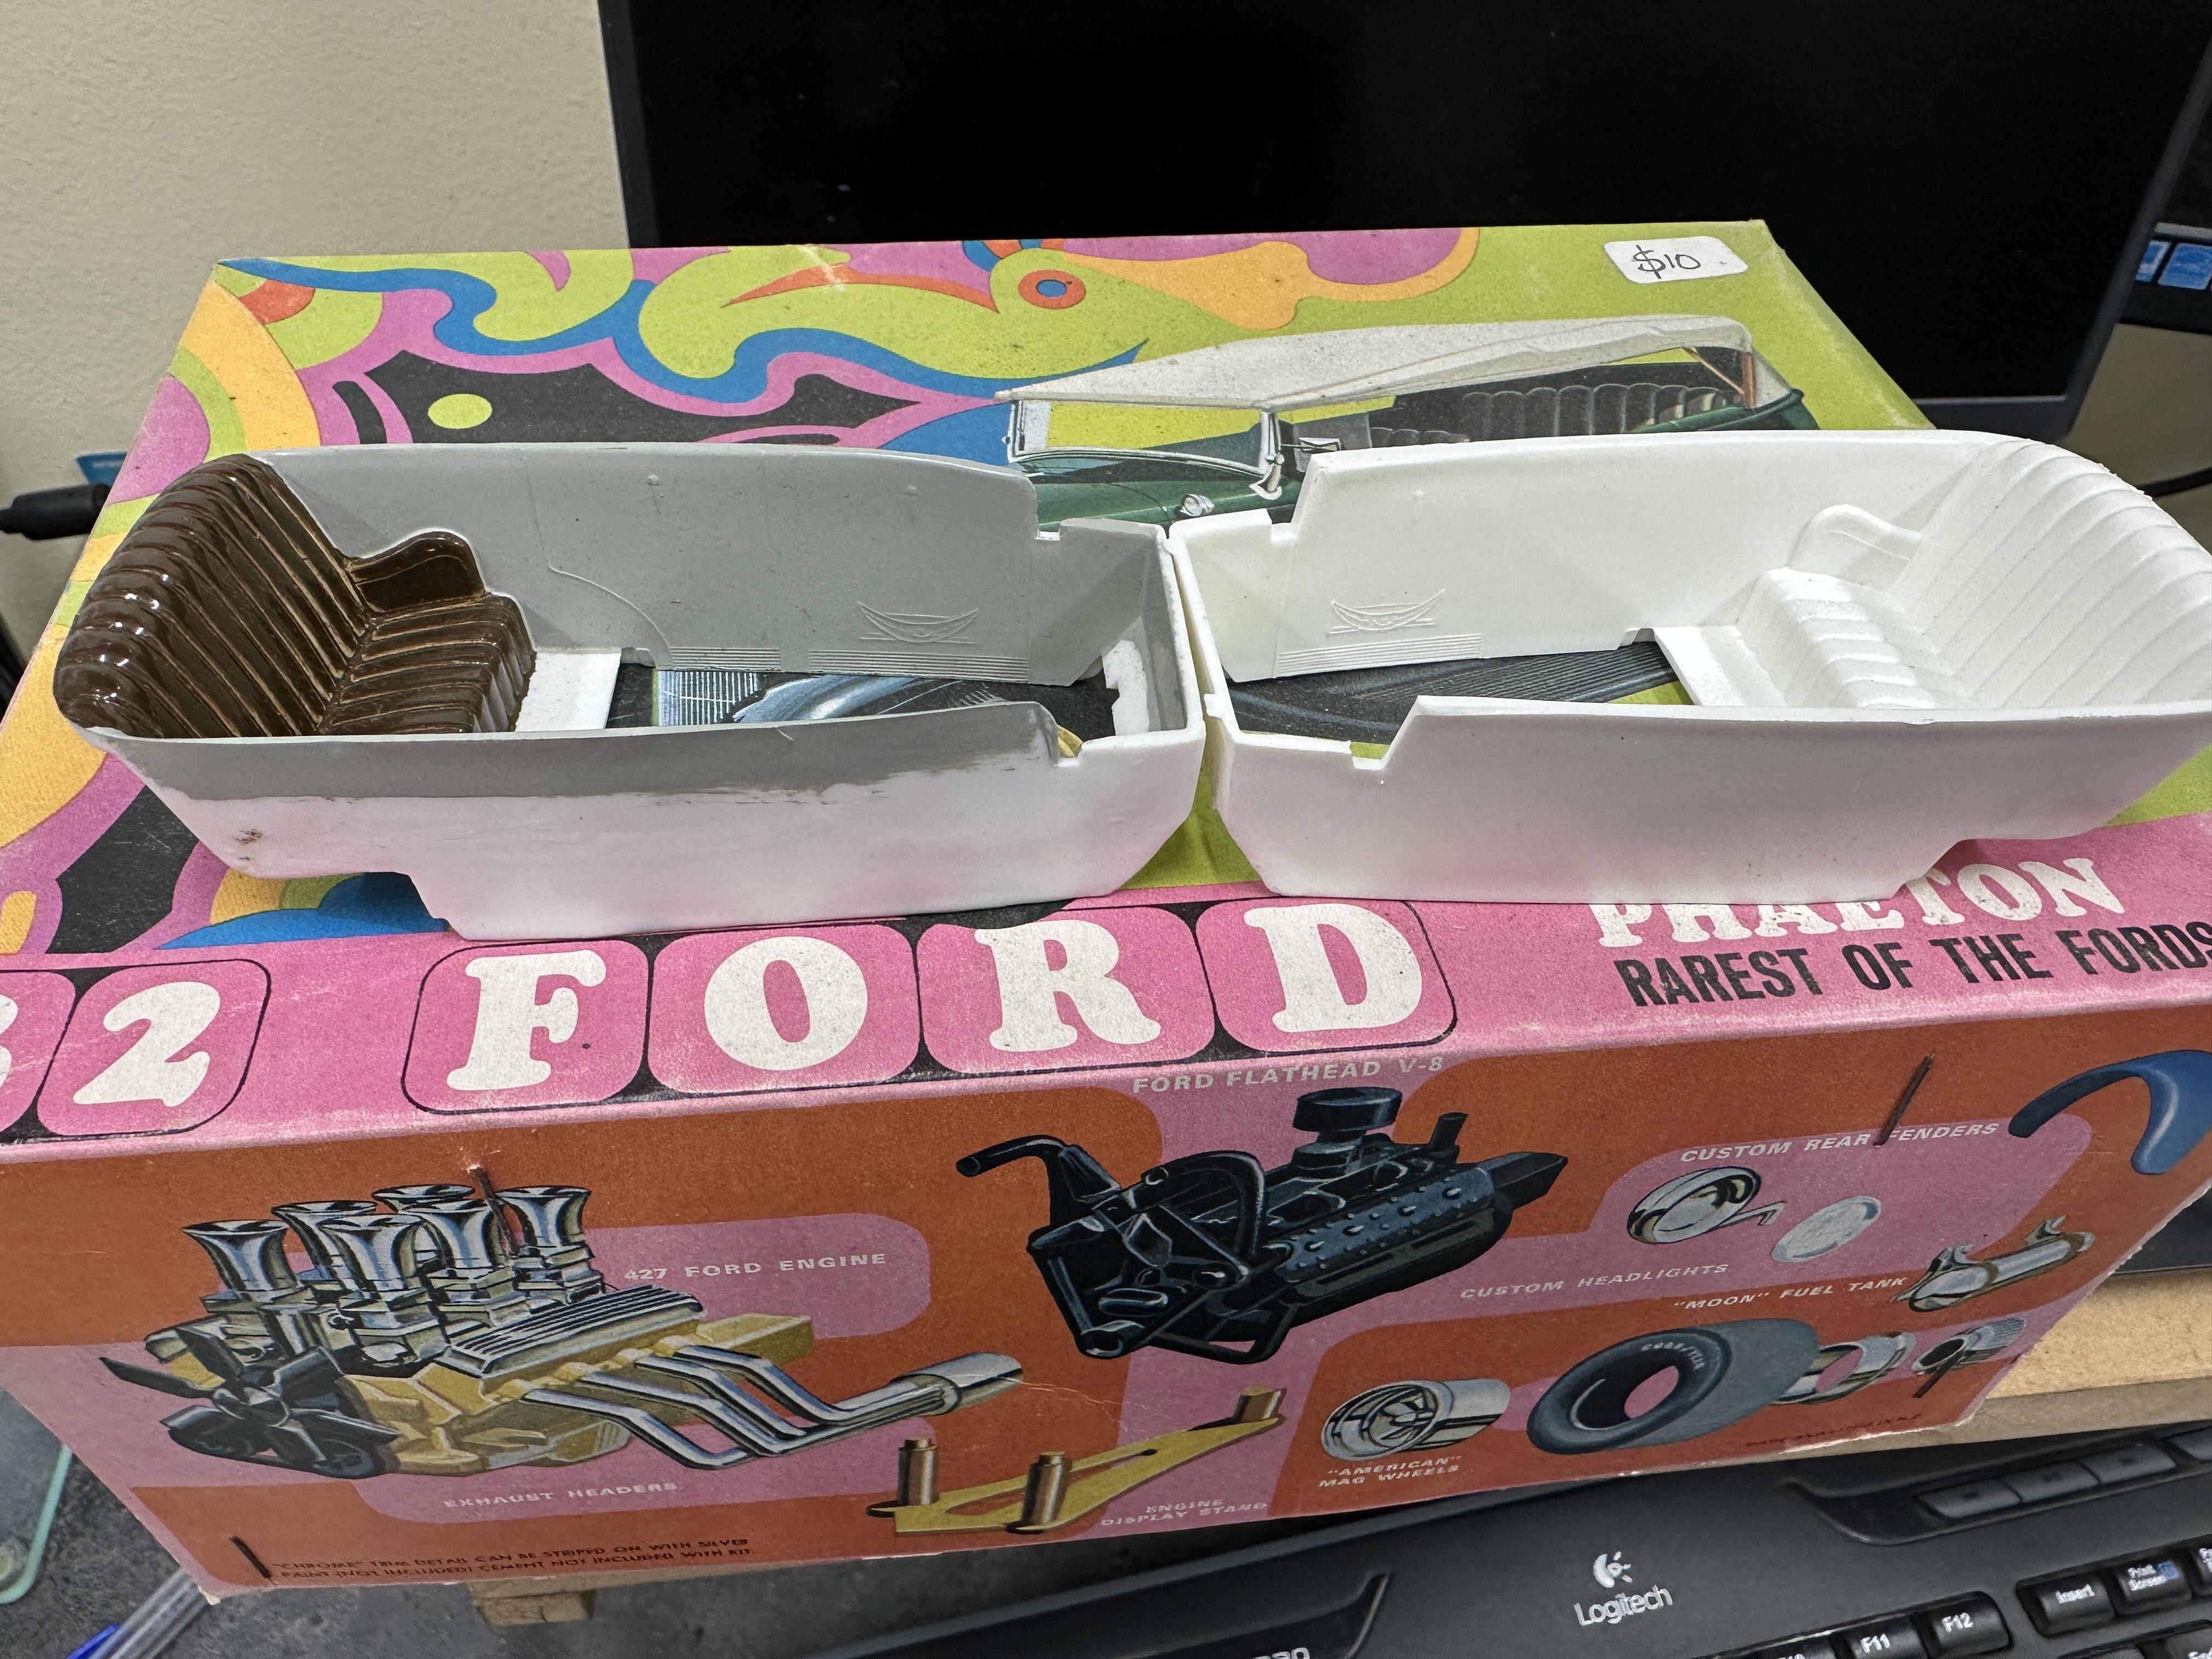
More on the 32 Tudor. I dug out my one from the stash and compared the body to the revel Tudor. At the rear there is little difference in body height between the two. Although this shows that the Revell has an incorrectly shaped rear window opening and the body swage at the bottom may be a little too wide - it is a hot rod after all and can be build as a Hi-boy so you need that extra depth there. When I put them firewall to firewall the infamous wedge section is all to evident. The funny thing is I have compared grill shells and both makes are very close to being the same size Rear view Firewall to firewall There is about 6mm difference in height at the firewall Others have mentioned that the interior may be shared with the Phaeton. Well I think they used a modified Phaeton interior bucket where the rear door detail has been blanked out. It is very hard to see as the engraving is very feint. Phaeton is on the left As far as I can make out the Phaeton and Tudor shared the majority of parts. I will need to dig out a Victoria to see what is different as I have not looked in one of those boxes for a while. Aa an aside - the Phaeton kit shown was made in New Zealand by Tonka circa 69-70. The moulds and litho plates were leased to Tonka along with a bunch of other kits that were produced under license to AMT. NZ at the time had very restrictive import rules and a way around the issue was to make stuff under license and to have a high local material input. The Tudor was released after the NZAMT releases as there was some relaxing of import rules by then. The brakes did not come off until the mid 80's
-
Round 2 Announcements as of 9/12/25 from Stevens Intl.
bill-e-boy replied to Justin Porter's topic in Car Kit News & Reviews
I thought the 32 Tudor body mould had disappeared/broken?? Good to see it back in production and I most probably stump up for one even at the exorbitant prices we have to pay here in New Zealand. I have a 1975 issue in the stash and a poor resin repop of the body The collectors may be a bit miffed as there were some big dollars being asked for them before the Revell Tudor arrive I wonder if the new parts will be a new body and if they will stay with the wedge section like the original. More accurate than the MPC Switcher effort but it's not as good as the Revell imo. Still it builds into a nice shelf model even with all its inaccuracies. This was built late 70's early 80's