Rich Chernosky
-
Posts
2,107 -
Joined
-
Last visited
Content Type
Profiles
Forums
Events
Gallery
Everything posted by Rich Chernosky
-
1/12 tamiya RA 273
Rich Chernosky replied to Brudda's topic in WIP: Other Racing: Road Racing, Land Speed Racers
Bruce , this kit was my first introduction to the world of 1/12. I still have my original build from 1969 but it is getting a little old not to mention dated. I have a re-issued kit in the wings and have always planned on re-visisting this kit. Your WIP will be very interesting. I like what you have done so far. Wheels are cool. -
-
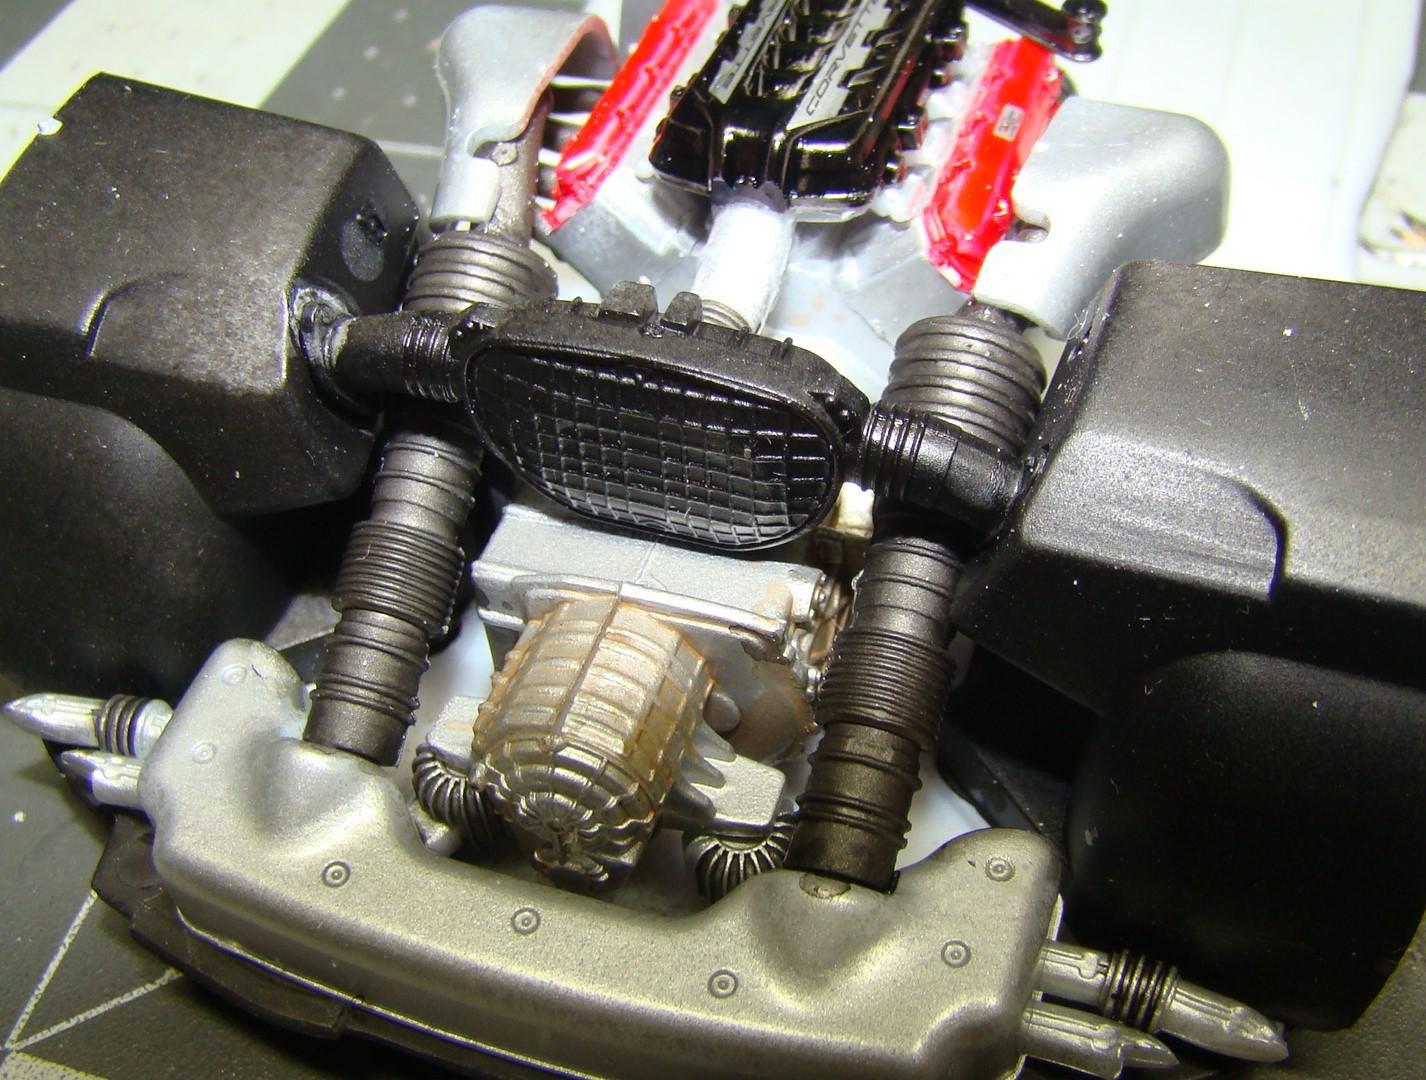
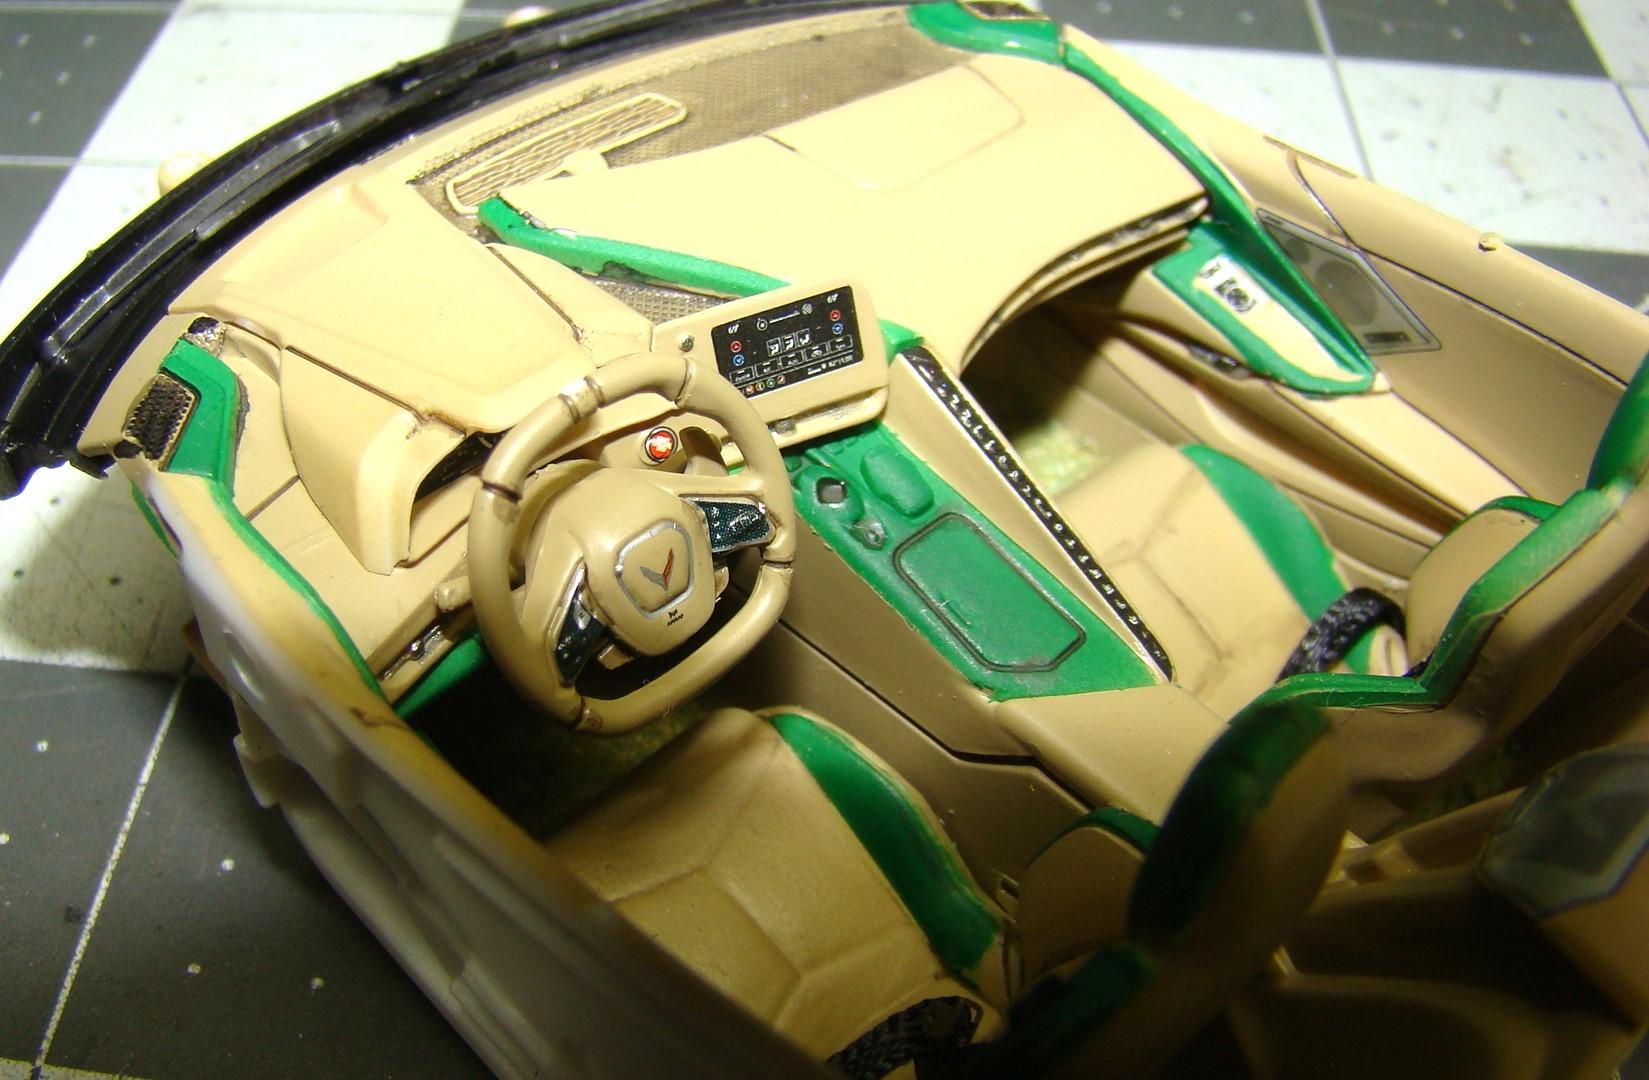
Sometimes when you get a new kit you are just so excited that you have to tear into it. This was the case with this recently aquired 2022 C8 Corvette. As a matter of facrt the kit was so nice IO just had to finish it as well. Color is Model Master laquer Fathom green metallic. this color was so dark and there was almost no hint of green. Afew coats of Mr Color #138 clear green with a few drops of gold cured that. Topped it off with Mr Color GX100 clear. Interior was a combination of Tamiya LP73 Khaki and LP55 Dark yellow. I found an old bottle of Testors flat green that I liked for the accents. More build comments in the picture captions. Thanks for looking and feel free to comment. Revell did such a nice job on the engine and everything fit well. Too bad most of it is hidden under the bodywork when completed. So this picture was a must. Interior on this kit was very well detailed. I added some seat belts and dark brown Tamiya accents. Decals were a nice addition. Getting the rear deck to open properly took some trimming of the panels and the hinge pivot. Otherwise the rear deck was a nice fit. Lots of wonderful detail on the back end too. Here's a pic with the top in ( I prefer it out) Wheels fit on this kit nicely and are not likely to fall off in the future. They are sprayed AK Stainless steel. In retrospect I think I would like to see the front lowered just a tad. I was in such a hurry to get this done I failed to do a proper mock-up. Still its not all that bad. Wheels steer quite nicely so there was one thing I didn't have to bother with. Overall I really liked this kit and construction was completed with only the usual problems associated with Revell.

-
Revell 2001 Chevrolet Corvette C5.R
Rich Chernosky replied to Jim B's topic in Other Racing: Road Racing, Salt Flat Racers
Nice Job on this one Jim -
Tamiya 1/24 Alfa Romeo Giulia Sprint GTA
Rich Chernosky replied to Justin Porter's topic in Model Cars
Justin...that turned out great and looks good on the shelf with your other masterpieces. -
Why do you model?
Rich Chernosky replied to Matt Bacon's topic in General Automotive Talk (Trucks and Cars)
I was into models as early as 4-5yrs old. Mostly military (ships, planes,tanks) But by age 13 my attention turned to cars. The sight of , at then, a brand new XKE Jag on the street and then a Ford GT at Watkins Glen definetly turned my head. Haven't looked back since. You might say that I also build for most of the above reasons. But the main reason is when I am at the workbench, the world and all its troubles just fades away. I often call my workbench and display area my "sanctuary". Our hobbies and pastimes are what keeps us sane. Works for me. -
Anton...I have considerable experience with your Corvette build having built several including the one you are working on now. Here is a link to one of my builds and I hope some of the info helps you:Two Racing Corvettes, C5R, Bad Boy C6R - Other Racing: Road Racing, Salt Flat Racers - Model Cars Magazine Forum. I like what you have done so far and you are definetly on the right track. Are you going to open those hood vents? I made all the wheels poseable on mine (a pet peeve ) ...it was easy and I can send you pics if you like. I painted mine Tamiya TS38 Camel Yellow and did so to match a previous build. Looking at most photos I think this is too dark and Tamiya makes a lighter and brighter yellow TS8 I think. I did not think the body was too tall. Don't pay too much attention to stuff like that. It looked OK to me. Was more concerned with how it fit on the chassis. Enjoy the kit...it nice and I am sure you will do a great job. Look forward to its completion.
-
Porsche 917K
Rich Chernosky replied to yellowsportwagon's topic in Other Racing: Road Racing, Salt Flat Racers
Very nice. Those white stripe decals were a real terror for me but you handled it like a master. -
Michael...now you have gone and done it. Was at my local hobby shop a couple days ago and this kit just managed to leap into my hands. You are responsible for creating this monster. All kidding aside it really is a nice kit and your WIP will help tremendously. Mine is on the workbench and all the parts are sorted into painting bags. Paint hits plastic tomorrow. I will be working much along the same lines as you although I will be using some different techniques and materials. Should be interesting. Yours is coming along great BTW.
-
1/20 Ferrari 641/2
Rich Chernosky replied to Rich Chernosky's topic in Other Racing: Road Racing, Salt Flat Racers
-
This is a continuation of my previous post of the Ferrari F1 90. I had both kits and thought they would be a little different but they turned out to be exactly the same. Doing the same kit twice had its advantages and this project went much quicker and easier. I did make changes to differentuate between the two models. Specifically I went with the other driver Nigel Mansell. Colour on this one was also changed to Tamiya TS-8. There were more changes and they bare pointed out in the picture captions. Thanks for looking and please comment . Completed chassis. One of the big changges I made was the exhaust. This 16 piece assembly was a nightmare on the previous build. I deviated from the instructions and did this first using the engine block and chassis plate as a mock-up. Gluing the collectors together was the key and then fitting the pieces in that way. Once everything was glued in place I nserted this assem,bly in the engine and chassis and let dry overnight. These pipes were also the last thing assembled on the chassis. Made things a lot easier. Putting the exhaust on last made assembling the water pipes and other accessories a lot easier. Note the heat staining Interior has different seatbelts. These are made from silk thread and the hardware came from extras I had. I also changed the finish on all the carbon fibre and it was smoother and glossier. Tobacco decals were sourced from extras. Wheel color was changed to Tamiya burnt iron. Bodywork on this kit also had to be pinned on andI I did this first before painting. All the pieces on both kits fit very well. The exhaust and water pipes were an amazing piece of engineering when assembled properly. Thanks for looking.
-
I also spray a lot of water based acrylics like Tamiya. Most acrylics will dry to the touch within 20min. But that is not curing. Curing is when the paint fully gases out. In the case of water base paint this can take upwards of two months depending on the humidity. It will stay soft and handling will leave marks. On the plus side when they do cure out they dry rock hard...harder than most solvent base paints. There are many ways to speed the cure process up as previoulsy mentioned in this post. Hope this explanation helps.
-
1/20 Ferrari F1 90
Rich Chernosky replied to Rich Chernosky's topic in Other Racing: Road Racing, Salt Flat Racers
-
Definetly one of the better Cobra builds. Great job Bruce.
-
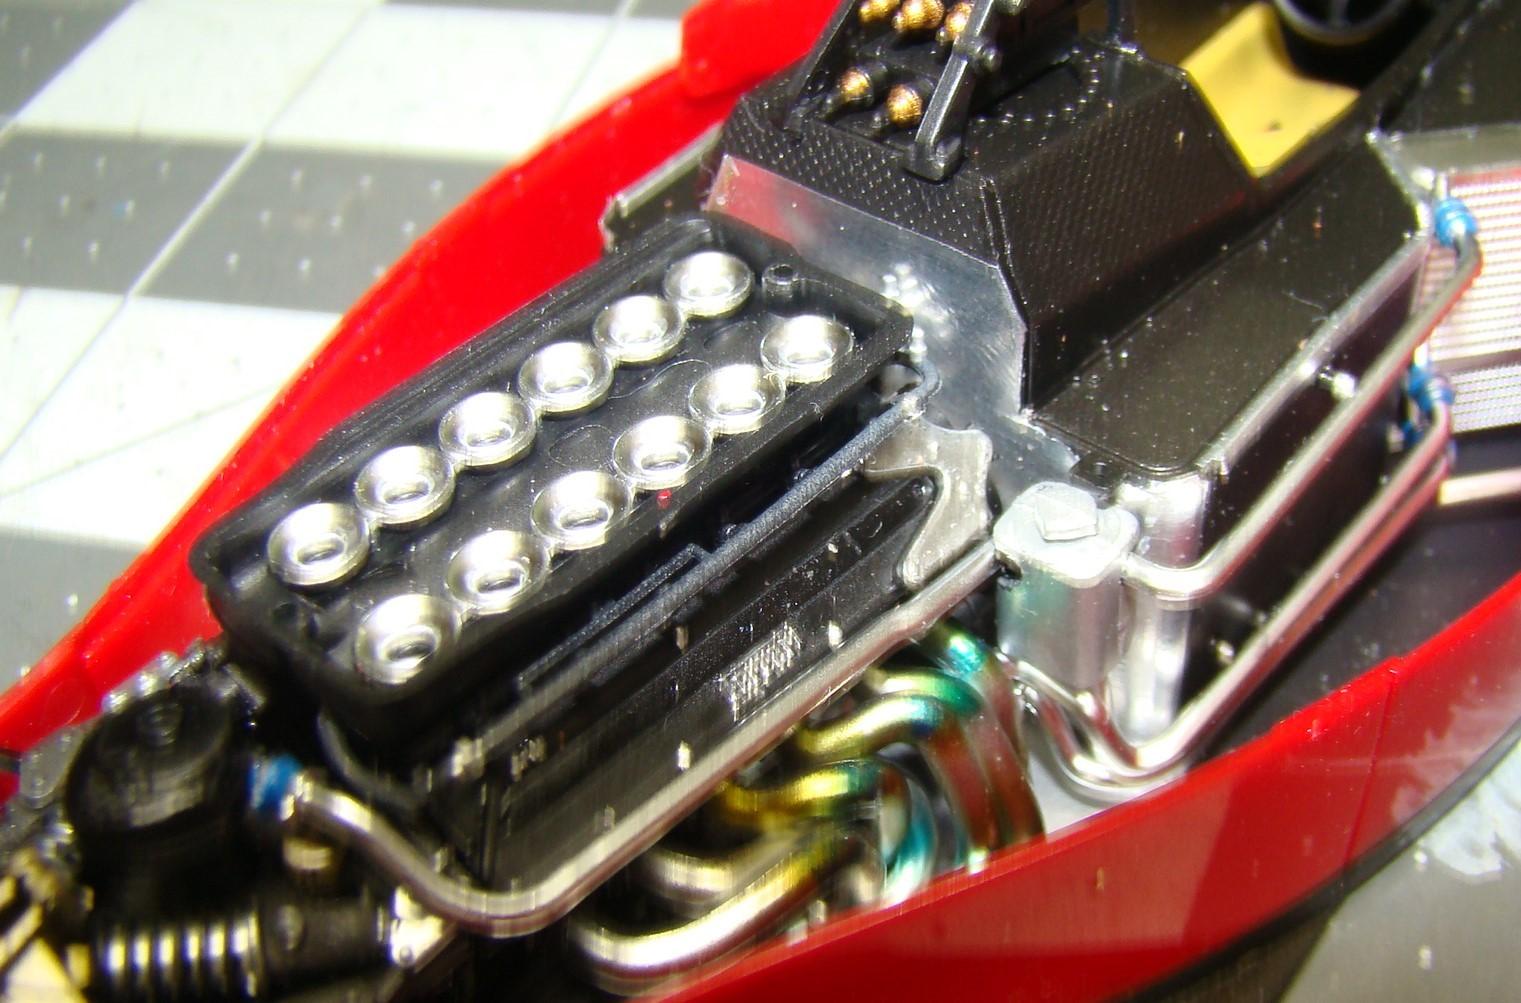
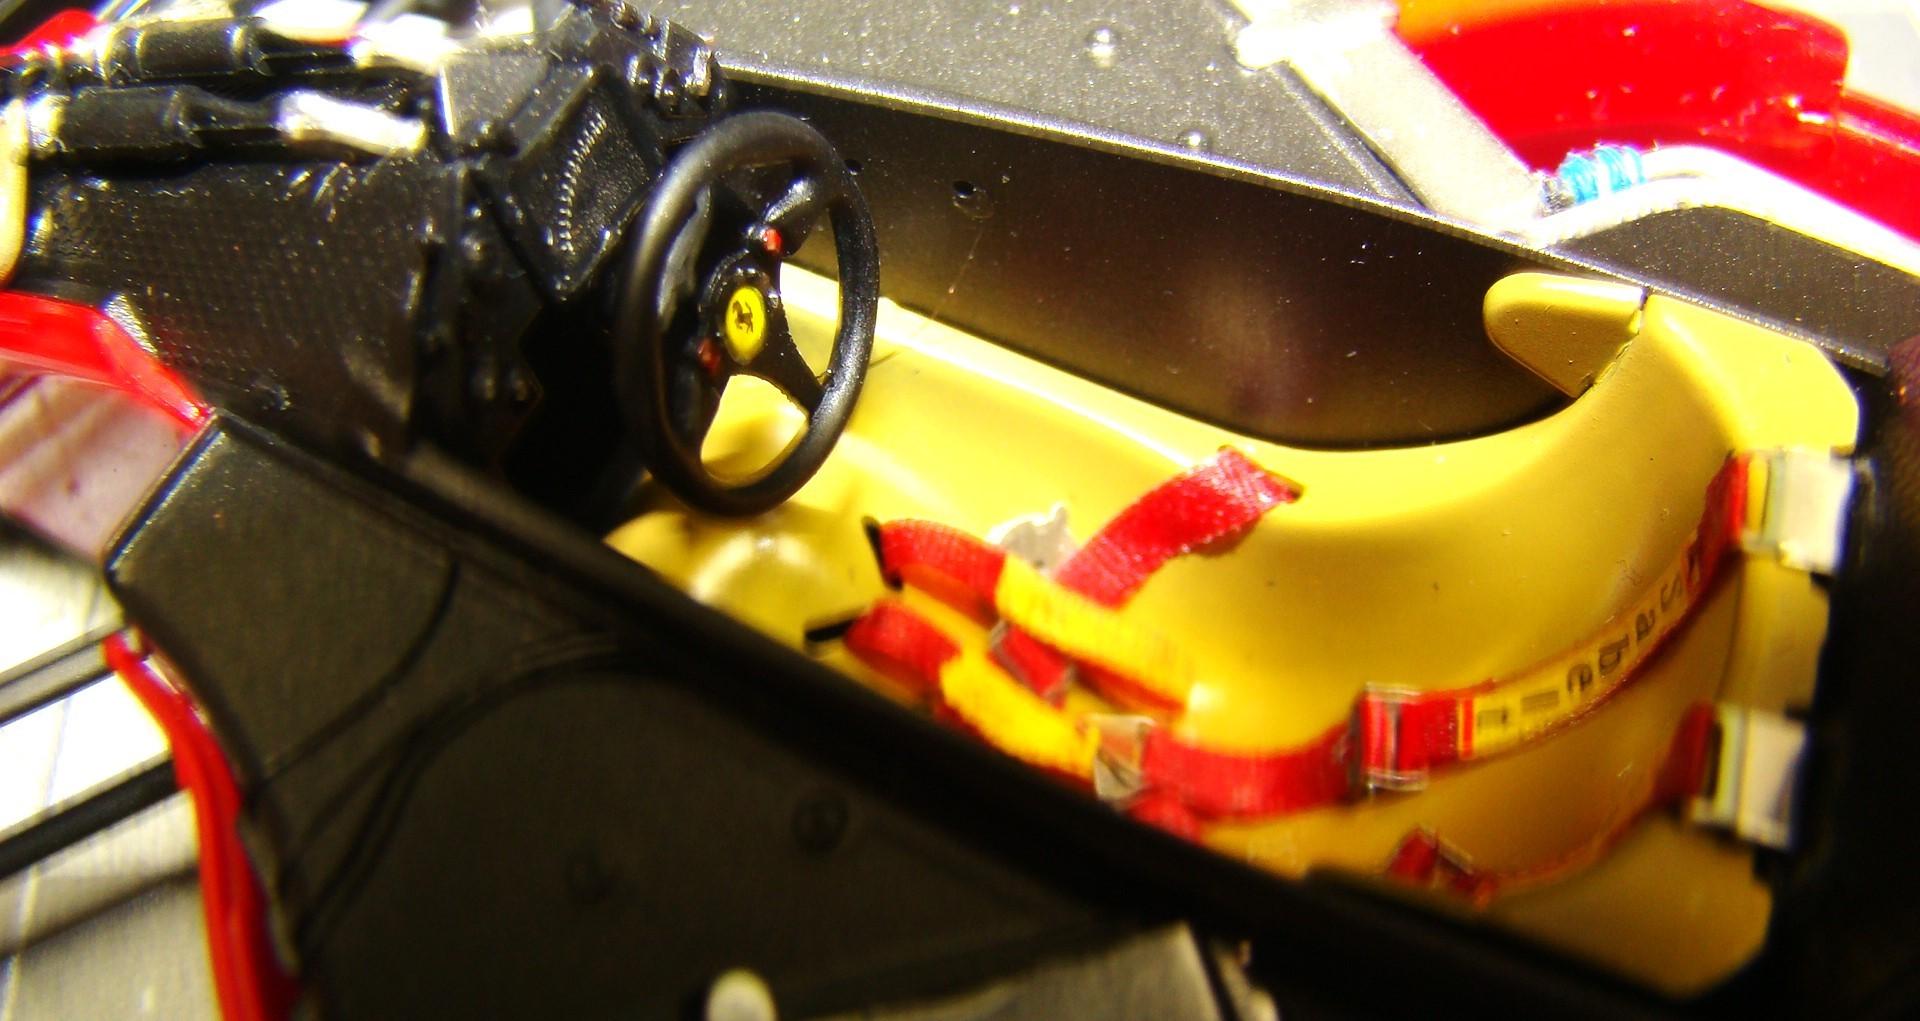
Hot off the bench is this Fujimi 1/20 Ferrari F1 90. This car is a continuation of the 641 series with a few changes. Car was raced in 1990 by Alain Prost and Nigel Mansell. They won 6 races, Prost 5, Mansell 1. Car had a v-12 engine that was only slightly underpowered than the Honda and Renault V-10. But it handled better and had some refinements like traction control. Season ended in controversy when Ayrton Senna ran Prost off the road in the last race and robbed him of the championship. Color on this is Cobra colors 0313 Rosso Corsa. This was a recent purchase of mine and I didn't realize it at the time that it dried almost flat. Several coats of clear later it came up on color. The rest of the details of this build are in the captions. Thanks for looking and please comment. Chassis before installation of the upper body. Fujimi didn't miss out on too many details and I like ot have this shot before buttoning it all up and never to be seen again. That wonderful V-12 engine. I added the satin chrome pipes last but should have done it according to the instructions as they were a pain. Seatvbelts did not come with the kit. These are a Tamiya item. Interior was decent. Front suspension may look delicate but it went together well and the steering worked like it should. Body fit was exceptional although I used the Dzus button locations to pin the upper body in place. Its removable if I ever want to add more detail. Like that is ever going to happen. Rear veiw. The rear wing went together easily and secured in place nicely. Rear suspension also fit well and was sturdy. Fujimi had a unique way of attaching the wheels that allowed the disc brake assembly to turn with the wheel. Car sits on all four wheels. Pays to take you time with the suspension on an F-1 kit. The helmet and trophy were part of the kit but the helmet decals had to be sourced out of the archives. Same for the tobacco logos. I have a large notebook filled with extra decals from other kits and this saved some time. Thanks for looking.
-
Cyberpunk Toyota MR2
Rich Chernosky replied to StokeModels's topic in Other Racing: Road Racing, Salt Flat Racers
AS a former MR2 owner I couldn't help but smile at this one. The creativity and craftsmanship on this project is way over the top. Detail everywhere. Now who are you going to get to drive this beast. -
Michael...thank you for the well thought out review. Very informative. I have been on a Revell kick myself lately and it is nice to see them step up their game. The only problem I see is now I may want one myself <G>
-
Questions about decanting paint
Rich Chernosky replied to Monty's topic in Model Building Questions and Answers
Since I spray a lot of older paint I find thinning is generally necessary. Newer paints like Tamiya will spray unthinned but I like to thin my last coat anyway. Adding thinner will also help to gas out the de-canted sprays. The Testors laquer line in my collection is about the only ones that leak out the seam. I think it has to do with the run of cans Testor used at the time. I understand from my LHS that it was a problem through out the line. -
Questions about decanting paint
Rich Chernosky replied to Monty's topic in Model Building Questions and Answers
Peter..you are right about that. Some of the pigment does settle to the bottom...especially in older cans. That is why I rip the can open and stir that stuff back in with thinner. Most decanted sprays have to be thinned anyway. BTW...for some unknown reason I save all those glass marbles. I have a quart soda bottle almost full of just the Tamiya ones. -
Questions about decanting paint
Rich Chernosky replied to Monty's topic in Model Building Questions and Answers
Peter..you are right about that. Some of the pigment does settle to the bottom...especially in older cans. That is why I rip the can open and stir that stuff back in with thinner. Most decanted sprays have to be thinned anyway. BTW...for some unknown reason I save all those glass marbles. I have a q -
When I owned a business, I had my workshop in the basement. When business was slow I would sneak down to the bench and just putter. No sense getting involved because sooner or later I would hear someone come in and have to quit. I often looked longingly at my stash and would say to myself that "someday" I am going to tear into all those. I sold the business 3yrs ago and retired and hit the bench with a vengeance. Often spending 10-12hr a day. I get 1-2 projects done a week and sometimes work on a few more at the same time. A recent move sowed that down but now that we are all set up and I have a better set-up I am back at it. I have slowed down only slightly to about 8-9 hours a day but I have not forgotten all those times when i was prevented from doing something I have done for the past 60yrs. Its great to be retired and when someone asks me if I miss the store my answer is NFW. A great discussion BTW. Thanks for starting it Carl.
-
Questions about decanting paint
Rich Chernosky replied to Monty's topic in Model Building Questions and Answers
I decant and airbrush almost all of my spray paint. Most of it is stored on a rack next to my paint booth. I find the very small neck 2-3oz bottles the best. BTW a full 3oz spray can holds exactly 3oz of paint. I use baby jars for this while it de-gasses then transfer it to my bottles. There are two ways to decant spray paint. The easiest way is to take the spray nozzle and pry the center out. Insert a tube into the hole and spray into your chosen container. If the can doesn't spray then it has to be punctured. An almost empty can has very little pressure left so this is not much of a problem. A full can....well that's different. In both cases do not shake the can. Lay it on its side and take a very sharp awl and very slightly poke a hole near the top. Fold over a paper towel and punch through that while squeezing the towel. Very slowly pull the awl out while releasing the pressure. The paper towel will catch most of the extra paint. When it stops hissing you can open the hole more and then punch a hole through the bottom at an angle. Bend the awl backwards to create a rip in the can. Now you can pour the paint out. Open up the rip and squirt thinner in the can. There are solids that collect around the bottom of the can and the thinner and a stir stick will help get them out. This takes some practice so start with an empty can first. There is still enough paint in an empty can to do a 1/24 car. The tube does not pick it all up. I collect all the empty cans from my fellow modelers and have enough now for a lifetime. I still buy paint though...go figure. -
-
Harry....straight acetone thins it the best. Nail polish remover has other additives in it. Yes its kinda thick so it has to be thinned a lot. A heavy nozzle on the airbrush is recommended especially for the pearlescents. Spraying the pearl over a dark base also brings up the color faster. Spray at the lowest pressure possible. The more air in the stream the quicker it dries. I have had it dry so quick in the airstream that it spider-webs. You are right...ex-wives and girlfriends was a very expensive hobby. Model cars is much cheaper which is all I can afford now.
-
Harry...now that made me smile. Nooooo...I don't. I usually do a test swatch over white cardboard. I will lay down a variety of base coats then spray over all of them and pick the one I like best. Most of my nail polish has come from ex-girlfriends and ex-wifes of which I have a few. I have a lot of extra and you are welcome to it as most women never even come close to using it all. This will save you the embarassment of having to go to the store and buy it.