Rich Chernosky
-
Posts
2,107 -
Joined
-
Last visited
Content Type
Profiles
Forums
Events
Gallery
Everything posted by Rich Chernosky
-
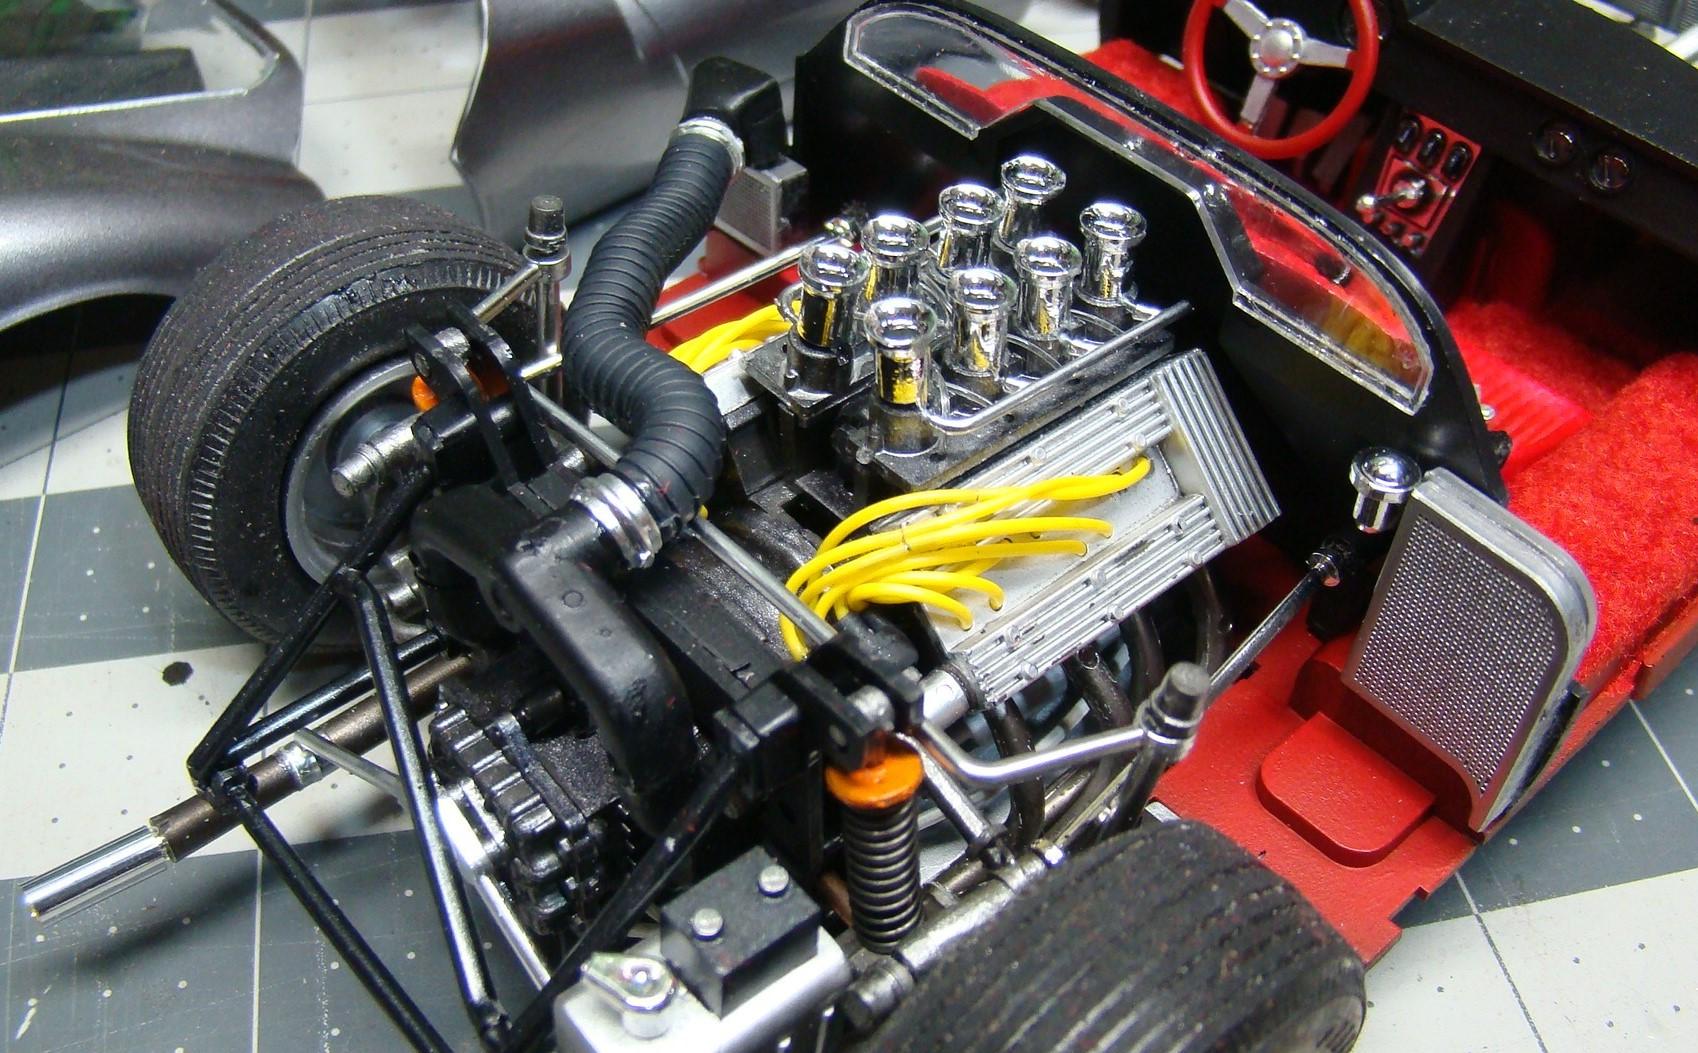
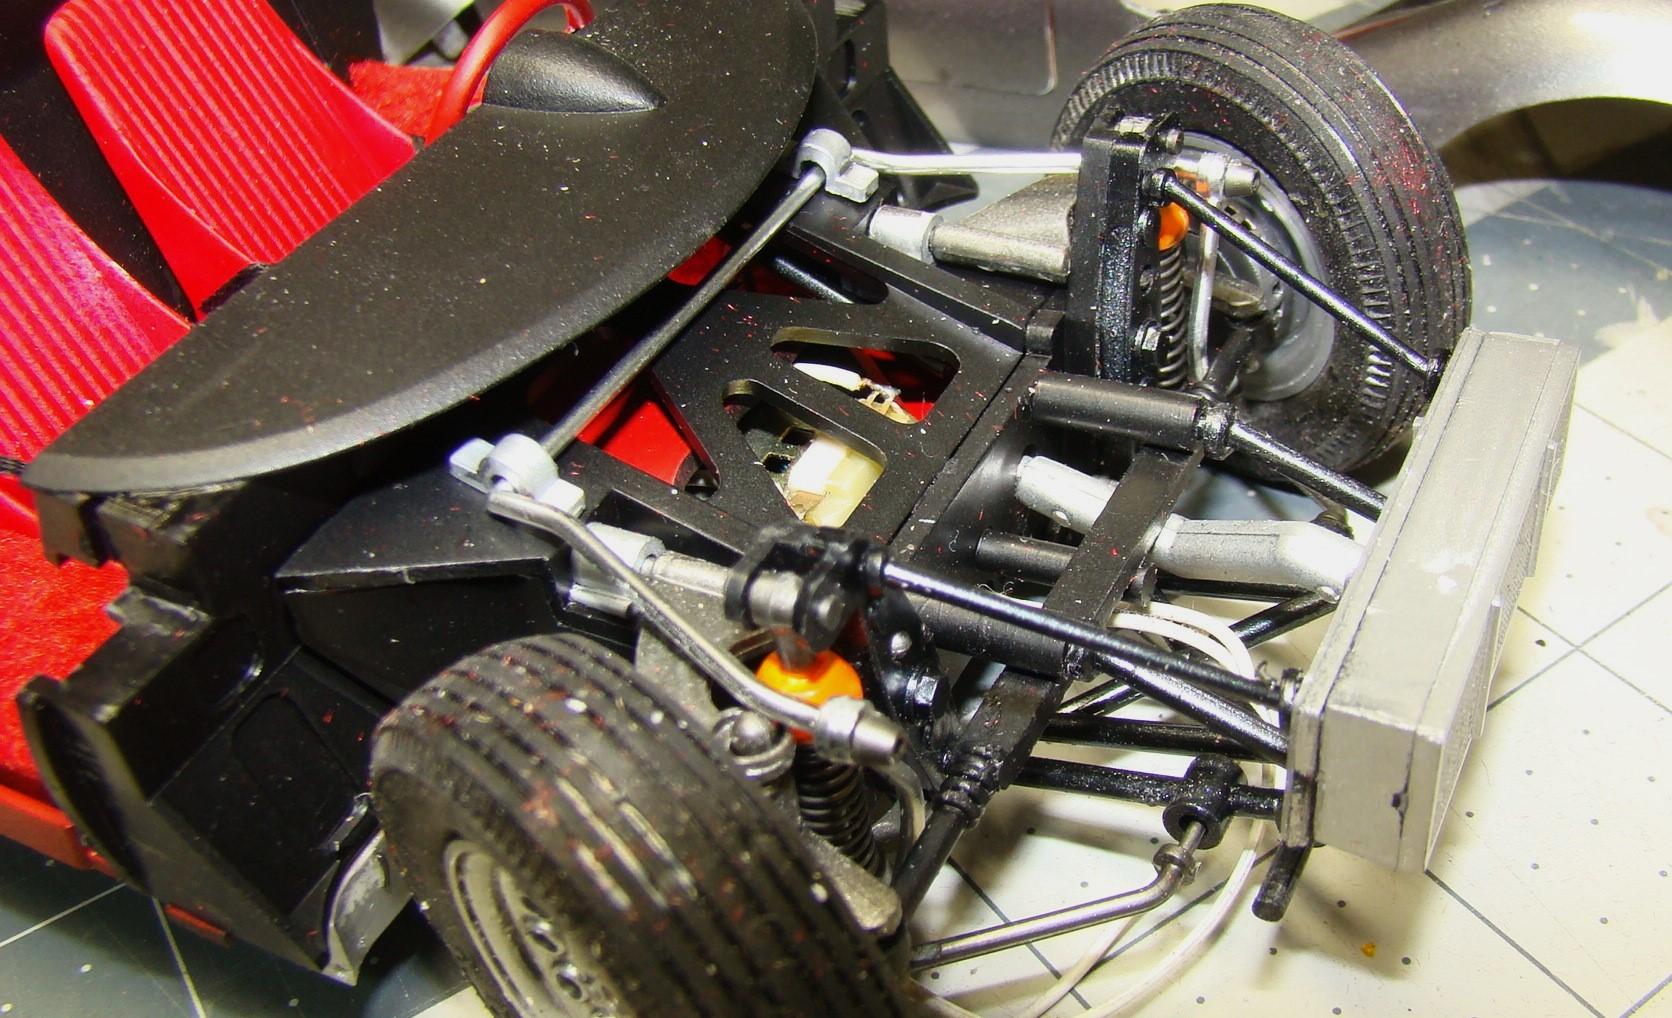
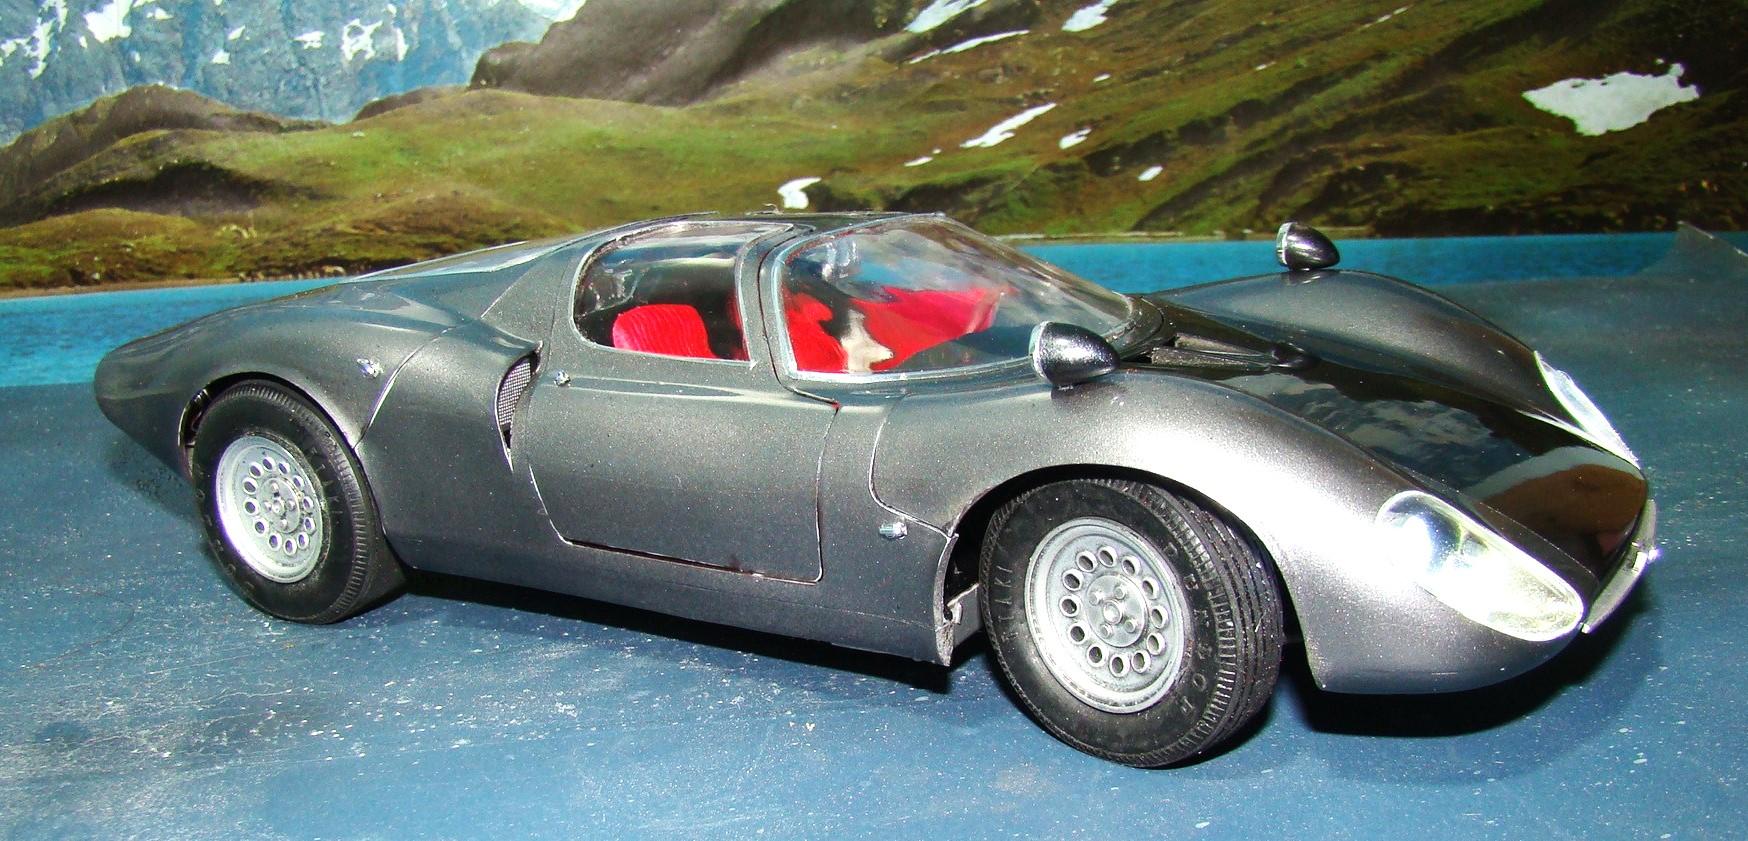
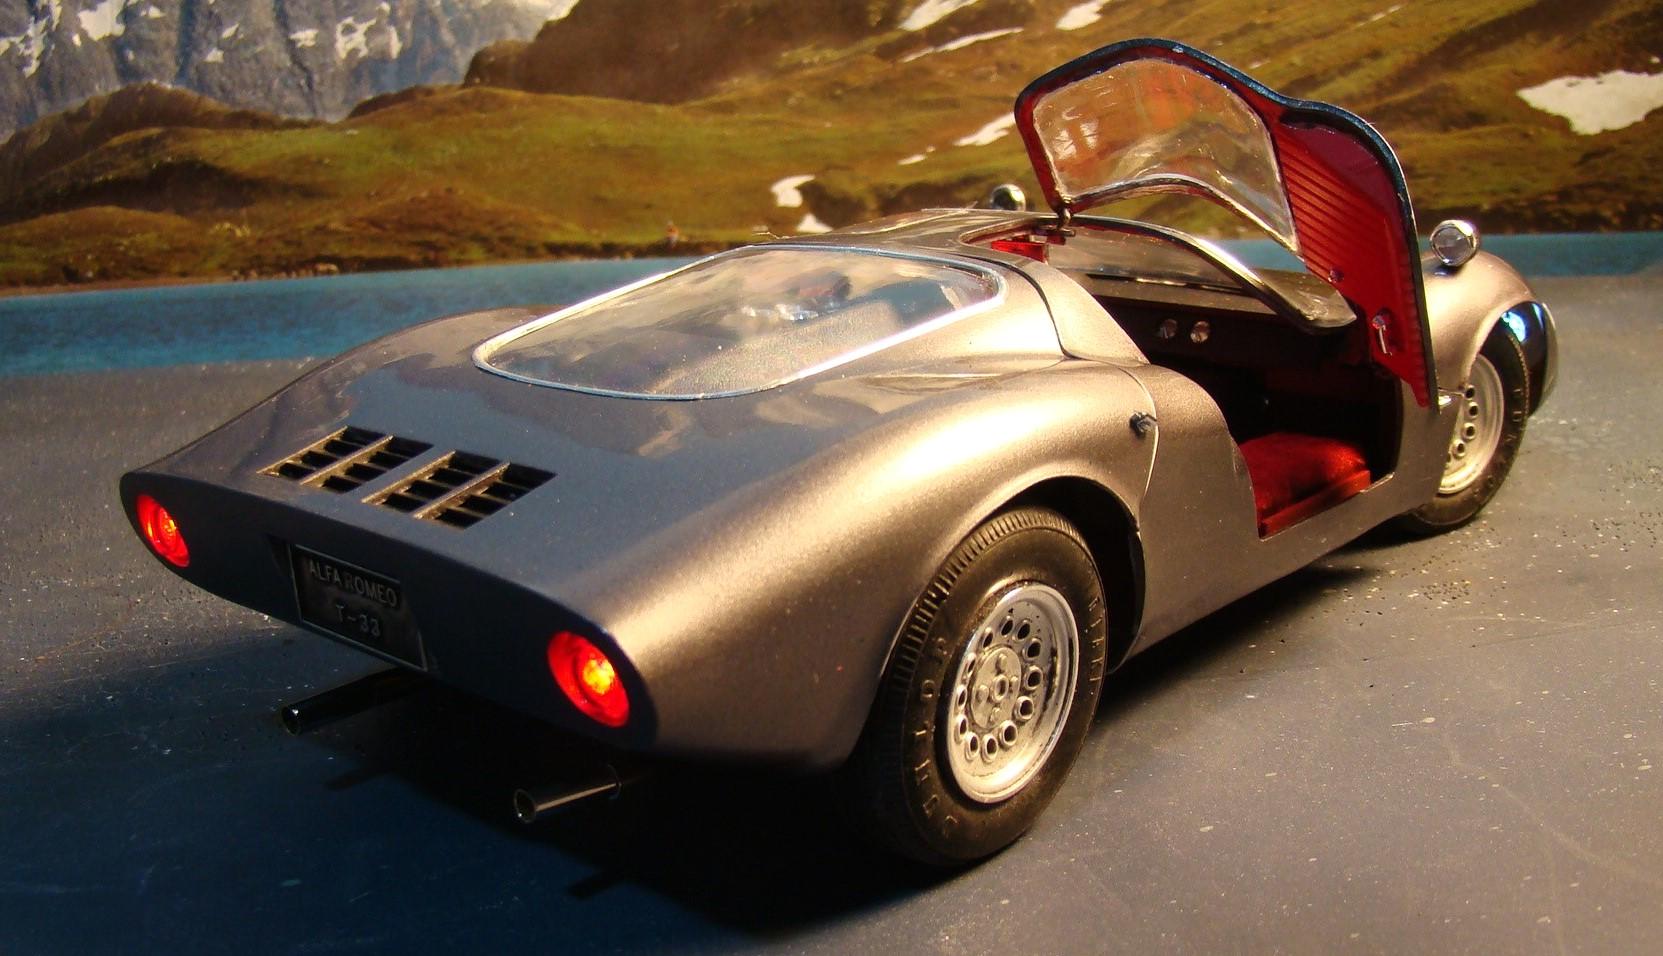
This is Otaki's 1/16 scale version of the Alfa Romeo 33. I have had this kit for quite awhile and recently did some of the bodywork mods and painted it. Color is Tamiya TS42 Gunmetal. Hood center is a combination of TS38 silver, Ts71 Smoke and TS13 gloss Black. This was all clear coated with Krylon latex clear. This is an interesting clear as it dries very hard but takes a long time to cure. I recently sanded and polished it out and once that was done it was the incentive to finish it. And interesting and now rare early Japanese kit that had many features I enjoy. These include all oipening doors, engine cover and front bodywork, working steering and suspension and working head and tail lights. Kit was also motorized and the motor was well hidden and allowed some good detail on the engine. more details in the picture captions. Thanks for looking and comments welcome. Chassis ready for the completed bodywork. I re-engineered the cockpit sides, removing them from the chassis and attaching them to the upper bodywork. This allowed me to fill the seam in for a smoother body. Engine was quite detailed for a motorized kit. The motor is in front of the dash and is connected to the gearbox with a long shaft. I added fuel lines and ignition wiring. The tail pipe ends are chrome tubing from a radio antenna. Yes, the suspension works and the motor runs. Front end aslo had some good detail and was fairly true to the real car. It all fit and works quite nicely. Interior was fairly well detailed. Interesting placement of the gear shift. Seatbelts came from the spares. Carpet is red flocking over flat red paint. Color is Tamiya LS79 flat red. Finished car on its wheels. Can't say I was too happy with the tires and wheels in this kit. If I ever find a replacement they are removable. I replaced the grain-of-wheat bulbs with LED's. Much better. The bodywork fit quite well, especially the doors. Rear veiw with the passenger door open and tail lights on. The body actually fits tighter than this photo. Moving it around for the pictures loosened them up. I like the stance of this car and no adjustment was necessary. A cool kit and a nice addition to my Alfa collection. Thanks for looking.

-
Interesting take on one of Ferrari's best selling cars. Nice color and cool mods.
-
Tamiya 1976 Porsche 934 RSR Turbo
Rich Chernosky replied to Jim B's topic in Other Racing: Road Racing, Salt Flat Racers
Great job there Jim. Amazing photo of the dash. -
Bruce...really like your rendition of this car. It looks super sharp. Followed you WIP and can relate to some of your struggles. But you came out on top and that is what counts. well done.
-
A lot of effort there Andy. And very well documented too. All well worth it. The model is a masterpiece.
-
Some really great modeling here Helmut. Followed your WIP and the result is amazing considering what you started with. Congratulations on a job well done.
-
1/12 tamiya RA 273
Rich Chernosky replied to Brudda's topic in WIP: Other Racing: Road Racing, Land Speed Racers
Bruce...looking real good, like a race car should. It nice having all that extra stuff when you run into a problem. Years of accumulating that stuff really pays off sometimes. Glad the exhaust fit and that seat looks very realistic. -
Fujimi 1/20 Lancia Stratos
Rich Chernosky replied to dougwintz's topic in Other Racing: Road Racing, Salt Flat Racers
Doug...very nice job on this cool looking racer. Yah....I've had to do that to get decals off the release paper. you made it work though...congrats. -
Very cool
-
Gunze Sangyo 1/24 Austin Healey "Bugeye" Sprite
Rich Chernosky replied to Justin Porter's topic in Model Cars
Justin.....this was just a fun little kit to do and I think you did a great job of it. Nothing wrong with out of the box when it is this well done. -
-
Thank you David. That color just looked right for that car.
-
-
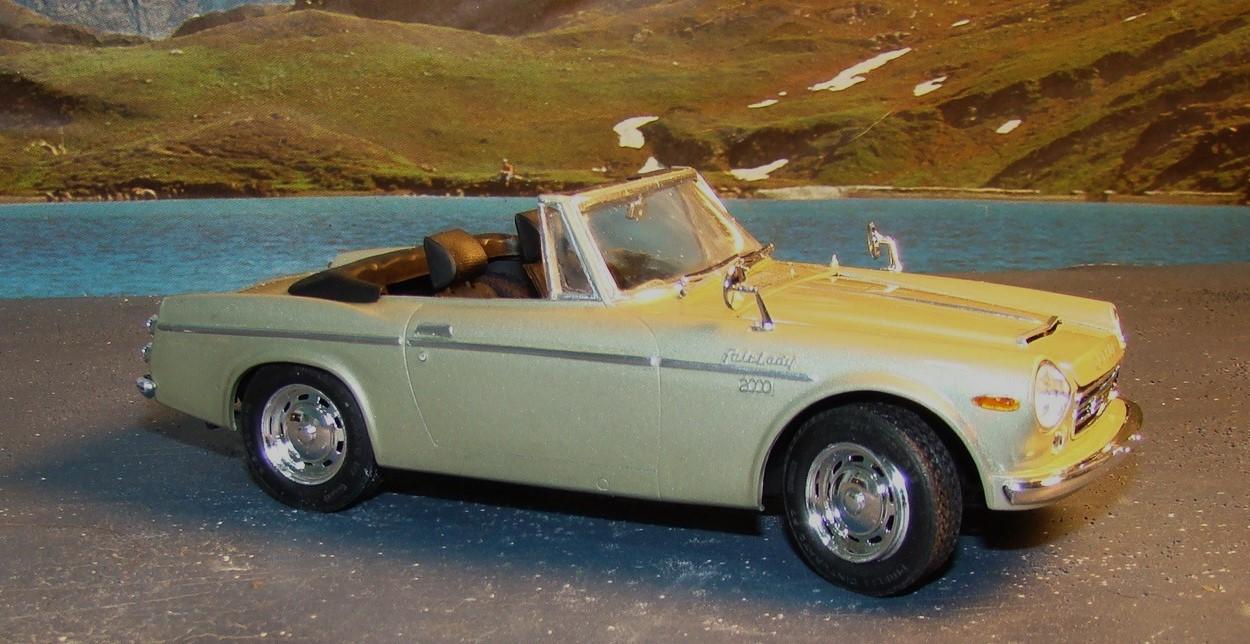
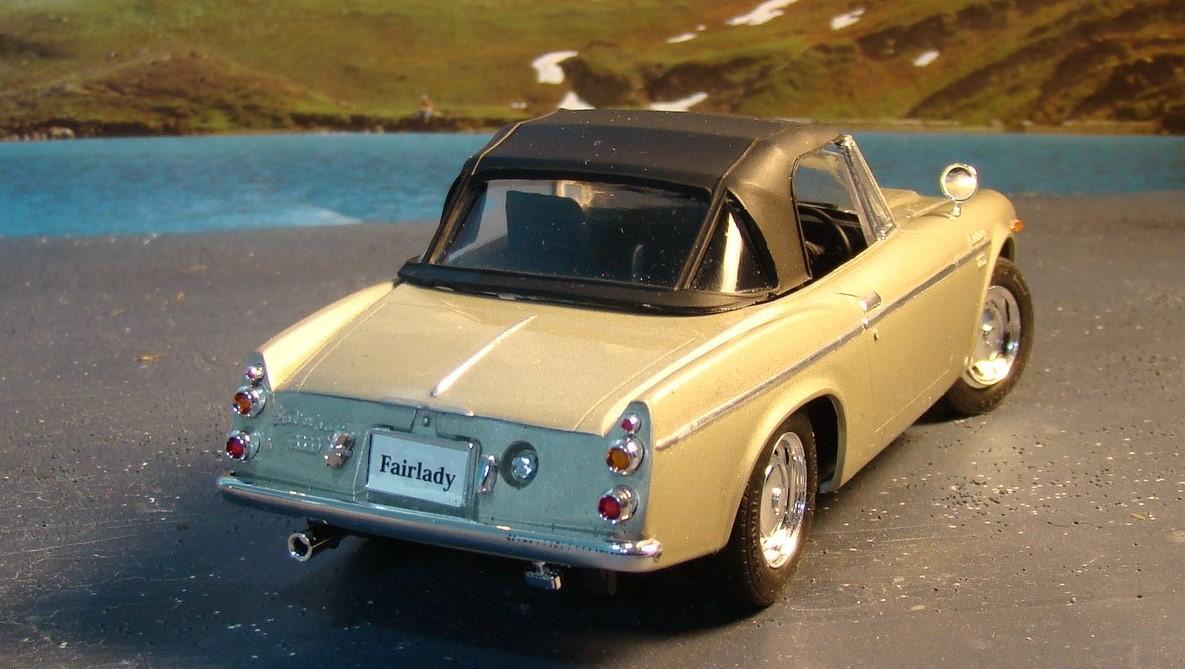
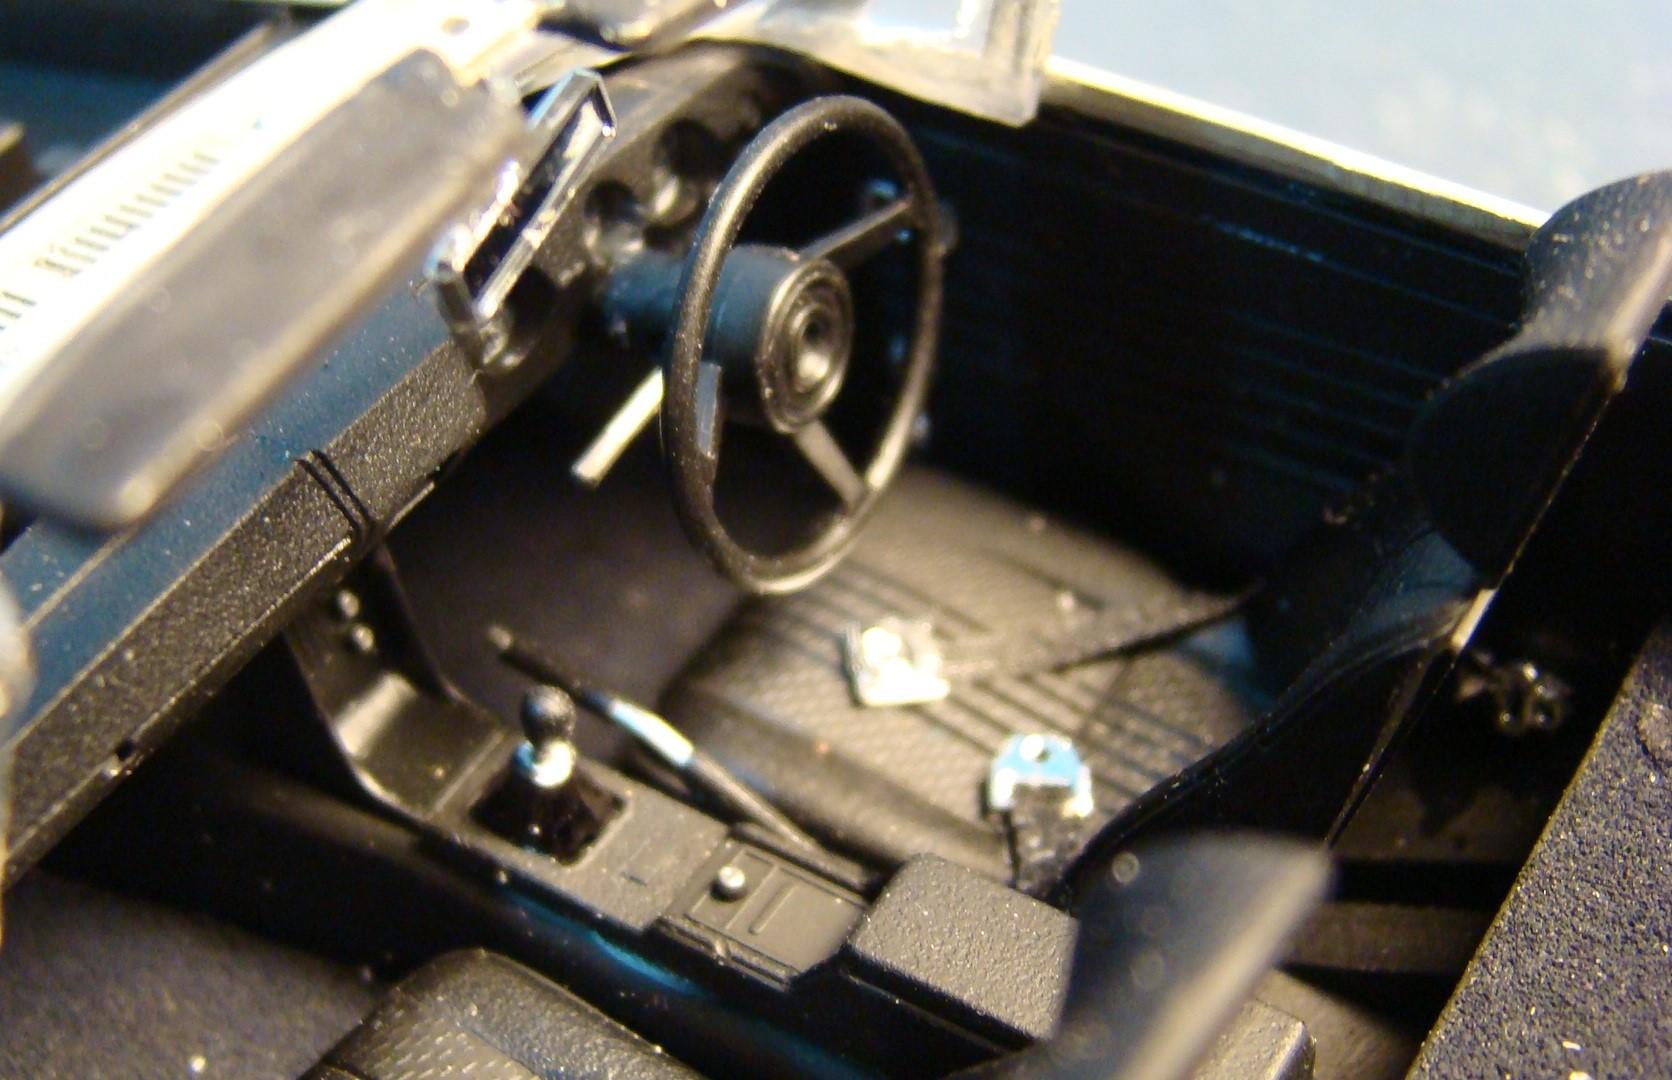
After my exhaustive 1/12 build I need a quickie project to return my sanity. This Nissan Fairlady 2000 that was painted January last proved just the ticket. Color was Tamiya TS-75 Champagne Gold with TS13 clear. Paint was very smooth and took little polishing. Kit was pretty straightforward and there were only minimal fit problems. Radiator hose proved to be the worst and making a new one out of soft tubing was a no brainer. I liked a lot of the little detail Fujimi provided. See picture captions. My Nissan collection was incomplete without this one. Finished kit on its wheels. They steered but finding a place to run the tie rod was troublesome. I have seen of few of these around and from talking to some of the owners i understand this was a zippy little sports car. It was also heavily raced in some fo the SCCA's lower classes. This pic with the top down and supplied boot. rear veiw with the optional convertible top in place. I liked all the little chrome doodads from this kit. Rear bumper fit was a little questionable. Side veiw with the optional hardtop. This kit has a lot of chrome so bare metal foiling was fun. The emblems were foiled before painting and then exposed with a hard Q-tip and thinner then clear coated. A cute trick I have been using quite awhile now. Yes this kit had an engine but some of it was molded in place. I added some wiring and detail painting and of course that pesky hose. Most of the engine chrome was coated with different combinations of flat clear and smoke. Interior ws well detailed and Fujimi supplied the seatbelt hardware. I made the belts out of silk thread. Carpet is embossing powder applied over flat black Testors. I like embossing powder but it doesn't come in as many colors as flocking. Gotta find me some more. Thanks for looking.
-
1/12 Ferrari 641/2 (F50)
Rich Chernosky replied to Rich Chernosky's topic in Other Racing: Road Racing, Salt Flat Racers
-
NuNu Porsche 935 K3
Rich Chernosky replied to Technics's topic in Other Racing: Road Racing, Salt Flat Racers
Nicely done 935 K3. The weathering and lighting are a great touch. -
Really great collection, thanks for sharing Gary.
-
1/12 Ferrari 641/2 (F50)
Rich Chernosky replied to Rich Chernosky's topic in Other Racing: Road Racing, Salt Flat Racers
-
Well I just couldn't stand it. Had to remove the upper bodywork and get it into the right position. Not as much work as I though but it was still a pain. Now it fits correctly and I am much happier. Finished model on the bench. Car now appears in the Under Glass section and as per request from Ian and Mark here is a link to the post: 1/12 Ferrari 641/2 (F50) - Other Racing: Road Racing, Salt Flat Racers - Model Cars Magazine Forum. A little more info under the pictures. Body work all fitted and no more gap at the front. Kit decals went on no problem. Marlboro decals had to come from the spares. The metal plaque was part of the Perfect Parts package and I painted the red to match the body. There are 10 of these working Dzus fasteners holding the upper bodywork on. This is in addition to the 4 screws that go through the top of the body. These were made from small pins and machined down. Base plate for these were decals from the spares.
-
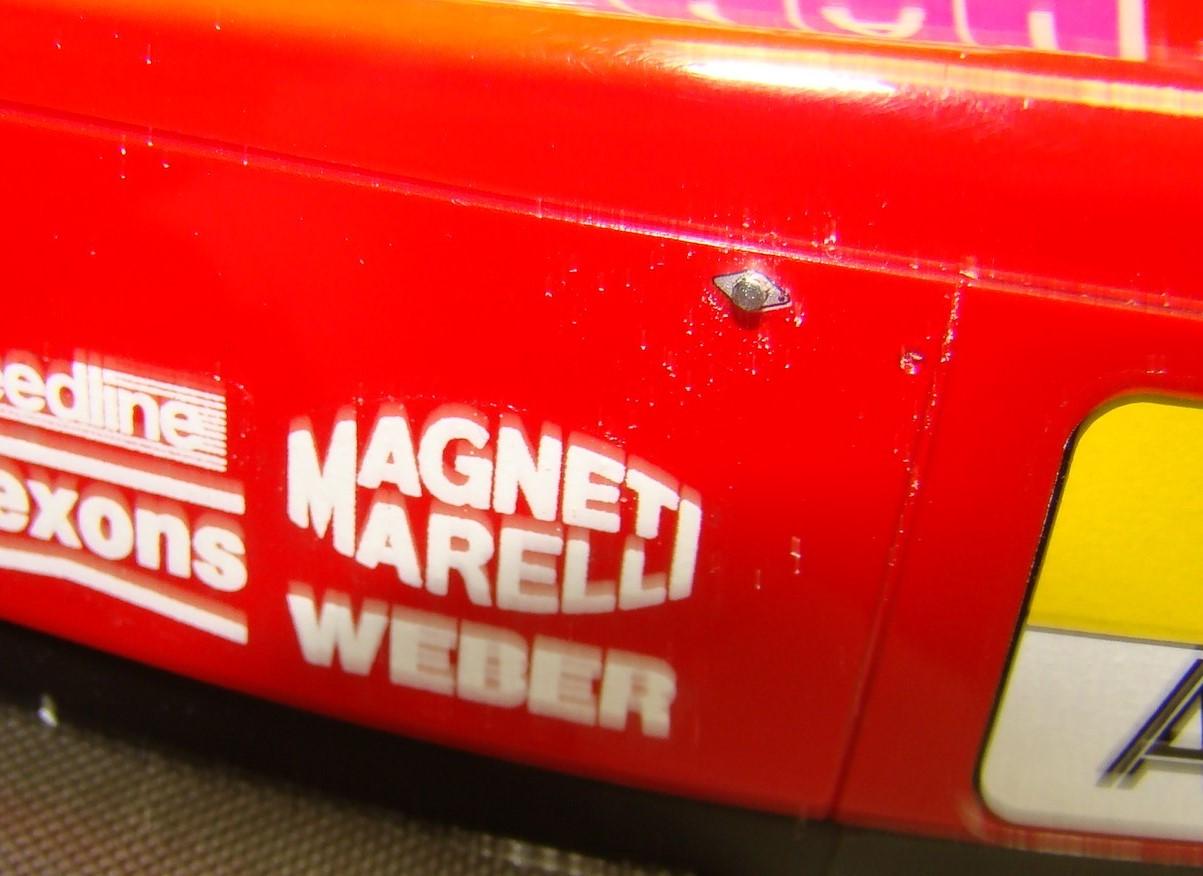
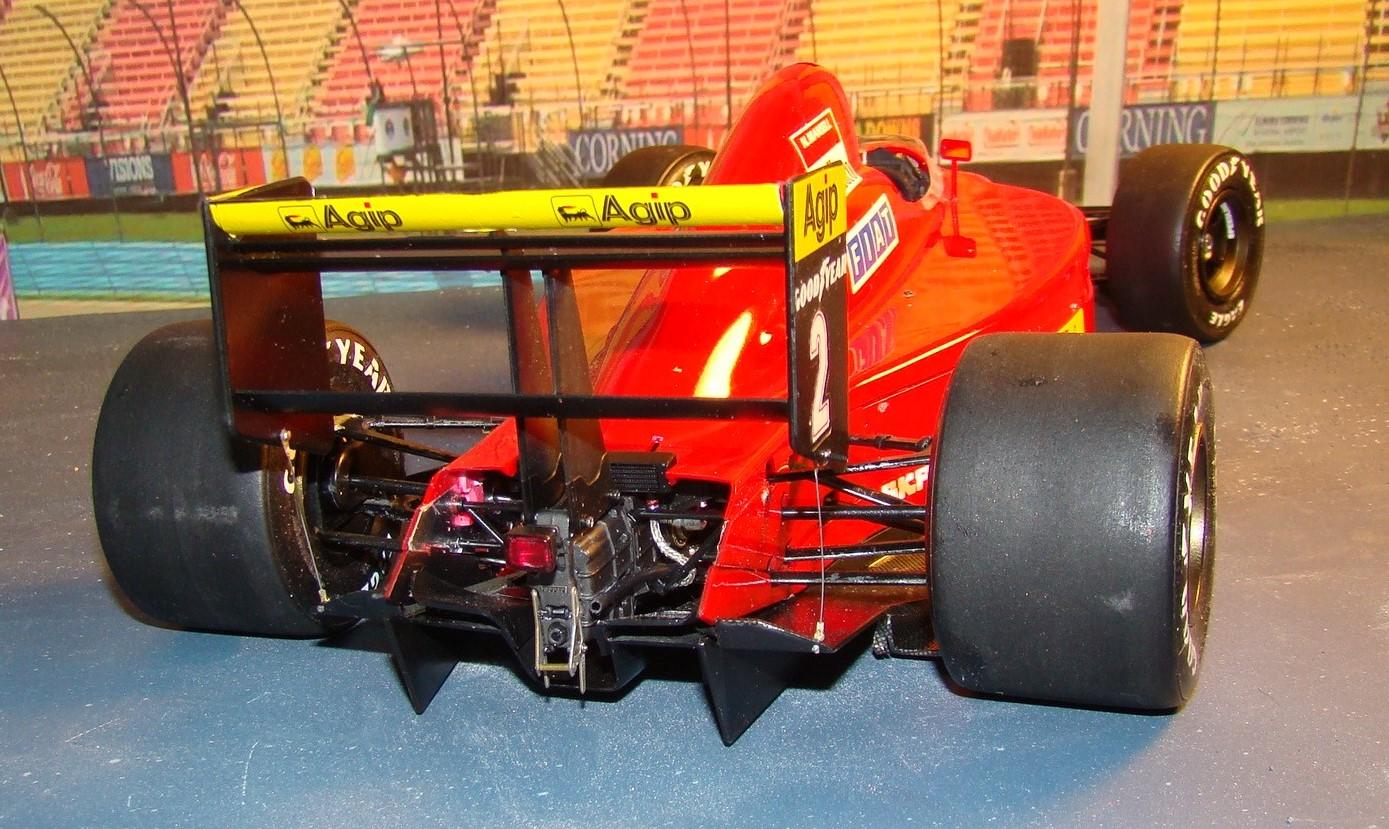
Been awhile since I did a 1/12 car. Although I have done a few and there are more in the stash aIl have avoided them due to all the work involved. This one occupied the better part of two months. This is Tamiya,s 1/12 hi detail kit of the Ferrari 641/2. I also purchased the Perfect Parts set when I bought this kit in late 1992. Color on this is Tamiya LP21 Italian red which is very similar to TS-8. There arte many working features on this kit and they include working steering, removable nose and engine cover, removable wheels/tires and all the cooling, electrical, oil and fuel lines and lots of tiny photo etch nuts and bolts. I have included some pictures from the WIP to show off some of the detail. Here is a link to the WIP: Tamiya 1/12 Ferrari 641/2 - WIP: Other Racing: Road Racing, Land Speed Racers - Model Cars Magazine Forum. More3 information below the photos. This kit went together very well. It would have been a joy to do if I had just wanted to finish it box stock. Kit had many working features and I enjoy making things work. Business end of the Ferrari and the view competitors got to see 6 times during the 1991 season. Wing is held on with two screws and made this assembly a joy. Not so much for the wire wing stays though. Wheels steer through the steering wheel...a kit feature and well engineered. Marboro decals were not included and came from the spares. A lot of the kit parts wound up as spares as I fabricated many of them. The WIP gives more info on this. Seat fabric was part of the kit...a very cool feature. Seatbelt hardware came from the Perfect parts packet. Some of the extra detail on the left side. All the wiring and boxes are hand made. Those hose clamps and connectors were fun. Steering wheel is covered in embossing powder. Note all the tiny PE fasteners. Detail of the working front suspension and steering. Those shock strut units comprised of some 30+ seperate pieces. Completed chassis temporarily on its wheels. This was a major milestone and i took a couple days break before fitting the upper body. Thanks for looking and I hope you enjoyed this post. There is lots more in WIP. Feels free to comment.
-
1/12 tamiya RA 273
Rich Chernosky replied to Brudda's topic in WIP: Other Racing: Road Racing, Land Speed Racers
Bruce...have really been enjoying your WIP. Your brake fix was amazing. Like you I just want a model to look good and try not to get all mired down in it being accurate. That's just me. I want it done too. It just doesn't matter to the casual observer. I have taken many an F-1 car to a model show, only to have people say...nice Indy car. Aaaargghh!! -
Welcome to the Forum Josiah. Luv that Muira
-
Bodywork is now complete. Didn't go exactly as planned but we all run into this from time to time. All that's left is decals and the mirrors. About a half days work. This will be my last post in this section as the next time you see this it will be in Under Glass. See captions. Upper bodywork wound up a little too far forward on the chassis. There are two screw holes on either side of the scoop and this is for some small screws to secure the body from the top. They missed the holes. Instead the body is secured with ten machined pins where the Dzus buttons on the real car are. Note the slight gap in the front of the nose. This can be fixed but I am not sure I want too . We'll see...?
-
Heller Renault R8 Gordini
Rich Chernosky replied to Nacho Z's topic in Other Racing: Road Racing, Salt Flat Racers
John....I think this is a very cool project. Luv the wheels. Yah...there are some flaws but they are hard to spot and the average observer would never notice them. Don't be so hard on yourself....I think it turned out great. Now....when I get to mine.......??? -
Gary...that's a shame they missed all those important details. I have an Exoto MKIV ( the yellow Sebring version) so I would probably never bother getting a cheaper version. I got mine when the getting was good and was able to purchase it wholesale from my friends up in Vermont. Could never afford it now that I don't have a business. Hope you can fix some of those details.