Rich Chernosky
-
Posts
2,123 -
Joined
-
Last visited
Content Type
Profiles
Forums
Events
Gallery
Everything posted by Rich Chernosky
-
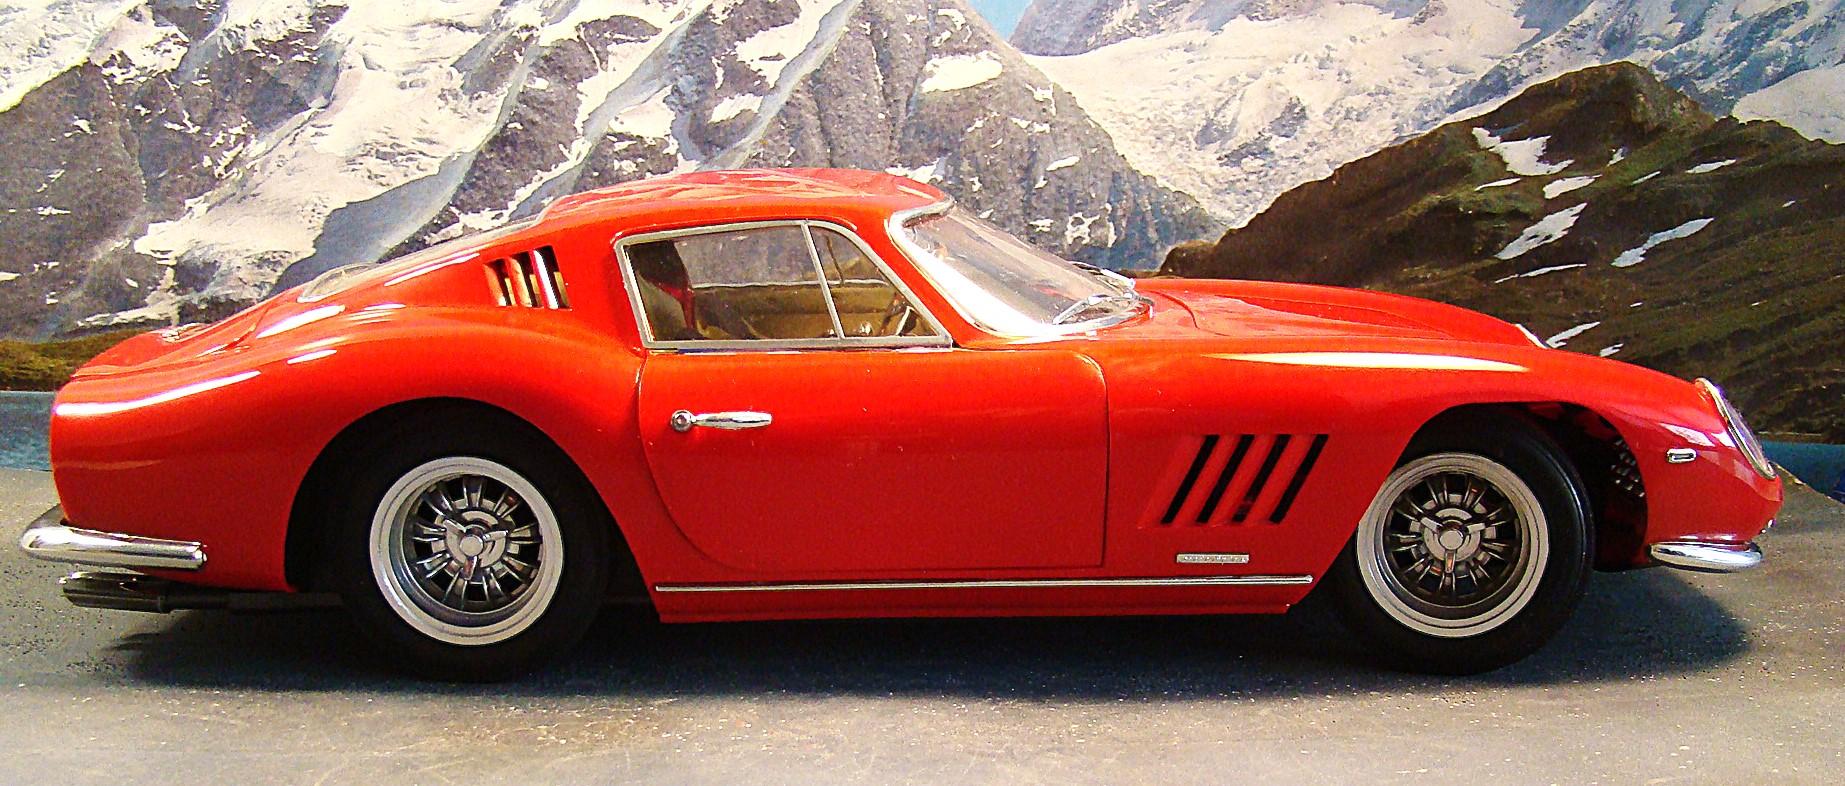
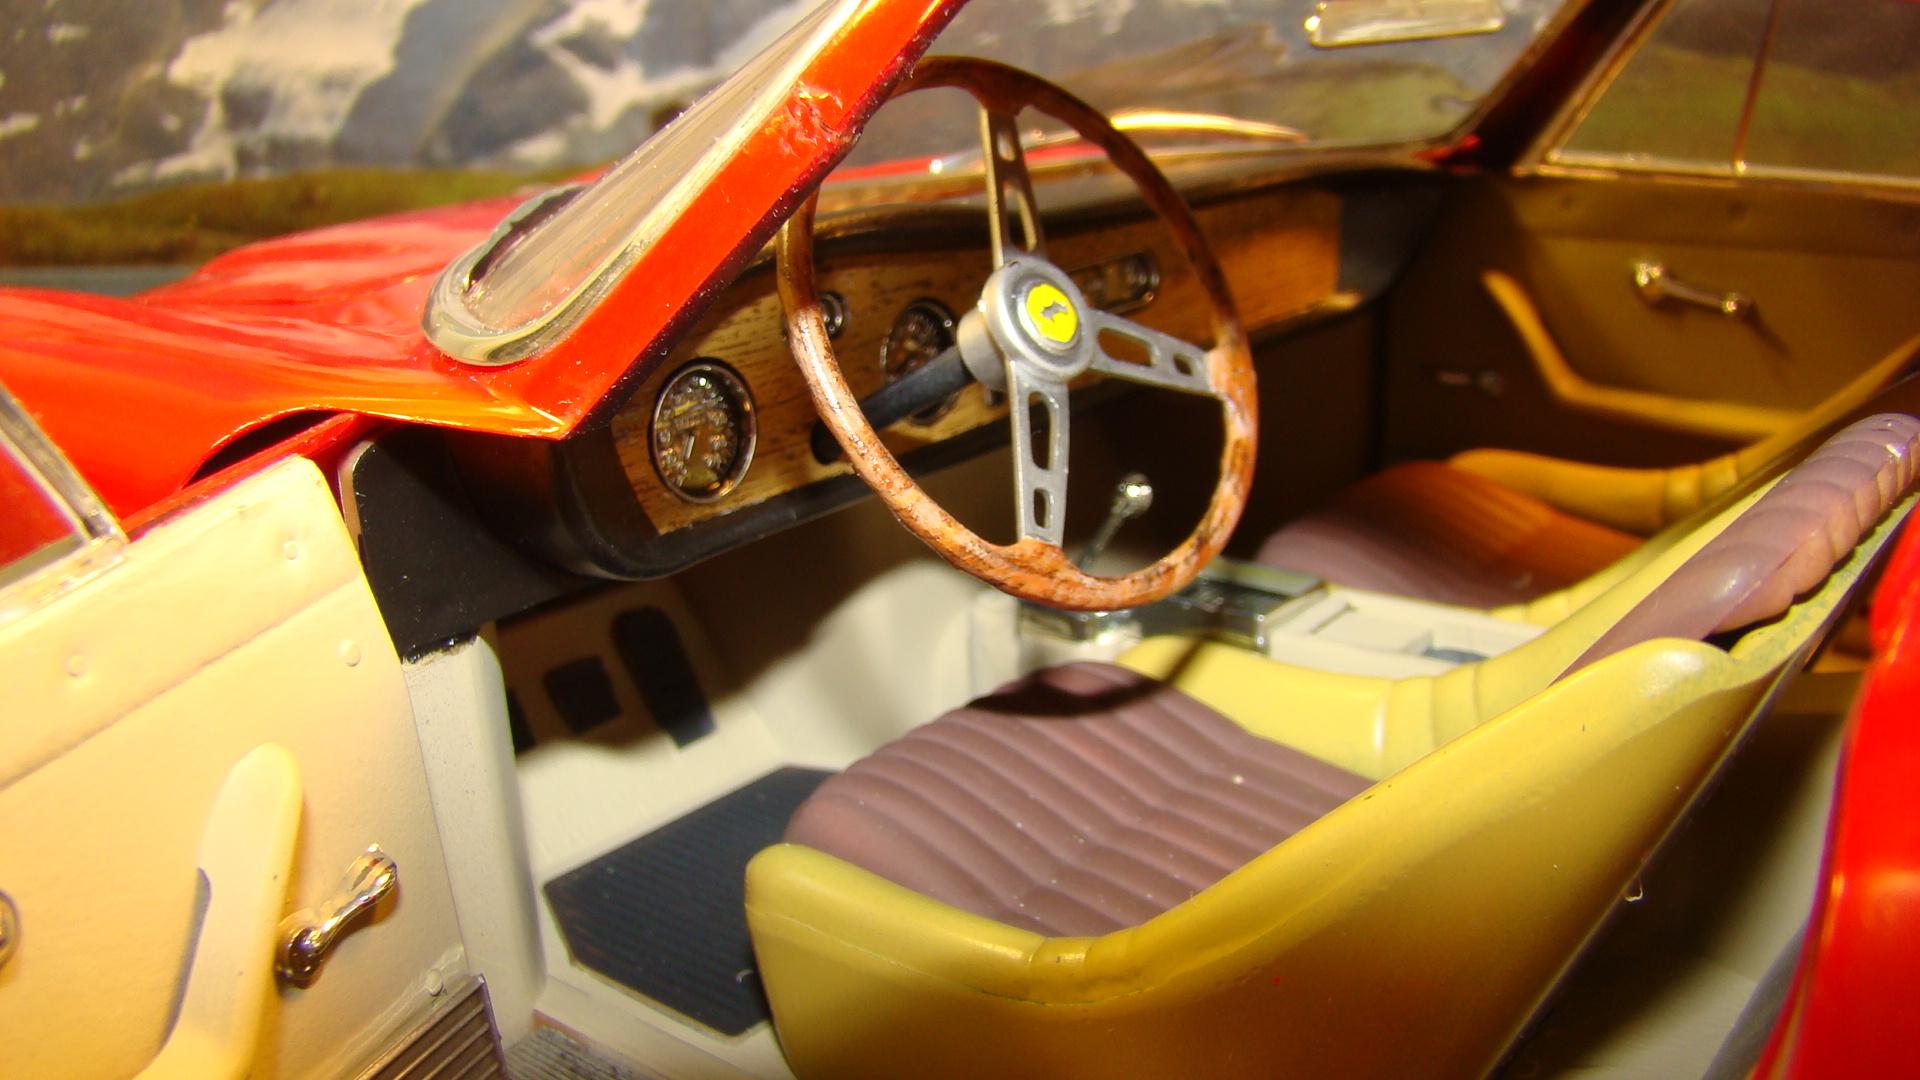
I dug this body out of my display case where it has been sitting for the last 35yrs. It was all polished and the front and rear windows were installed. I originally purchased this kit as a Renwal and my intention was to super detail it with working suspension and every concievable detail. I had lots of reference as I had spent some time with a real one and even got to drive it. But that was a very long time ago and I am over that now. I just wanted it finished. I have three of the kits so there was no shortage of parts. One of the biggest problems with this kit is the roof either caves in or is warped. This is usually from having something sit on the box. All three of mine had this problem. It was solved by breaking the window posts and gluing the windshield securely in place. The rest of the kit is mostly box stock. Color on this is Testors 1103 red with their clear over top. More details below. Getting the body over the chassis was way easier than I thought it would be. All the body pieces open and fit well but the doors were a little tight. Rear veiw has some nice detail. Raised Ferrari script was real cool. Bumper is held in place with epoxy and poster tack. This model is quite large (as is the real car) and surprisingly heavy. Hollow rubber tires were nice but had to be filled with urethane foam to prevent collapsing. Original kit has two piece hard vinyl tires that were horrid. I threaded the axles and threaded the wheels on so if I ever find a really nice set of wires they get changed. Interior is done is several shades of Tamiya LP. Woodgrain on the dash is decals from the stash. Doors attached nicely and opened well. Renwal (the original issue of this kit) molded the Ferrari logo on the steering wheel upside down, Go figure. Steering wheel operated the front wheels. Had to take a shot of that big v-12. Its really a lump of plastic but it had real nice valve covers that I sprayed with a combination of smoke and semi-gloss. All the chrome was srayed with this or just semi-gloss. Thanks for looking. Comments welcome.

-
1993 Mclaren MP4/8 F-1
Rich Chernosky replied to Rich Chernosky's topic in Other Racing: Road Racing, Salt Flat Racers
-
John...really like your take on this kit. Followed your WIP. That liquid blue turned out spectacular. Congratulations on an excellent completion.
-
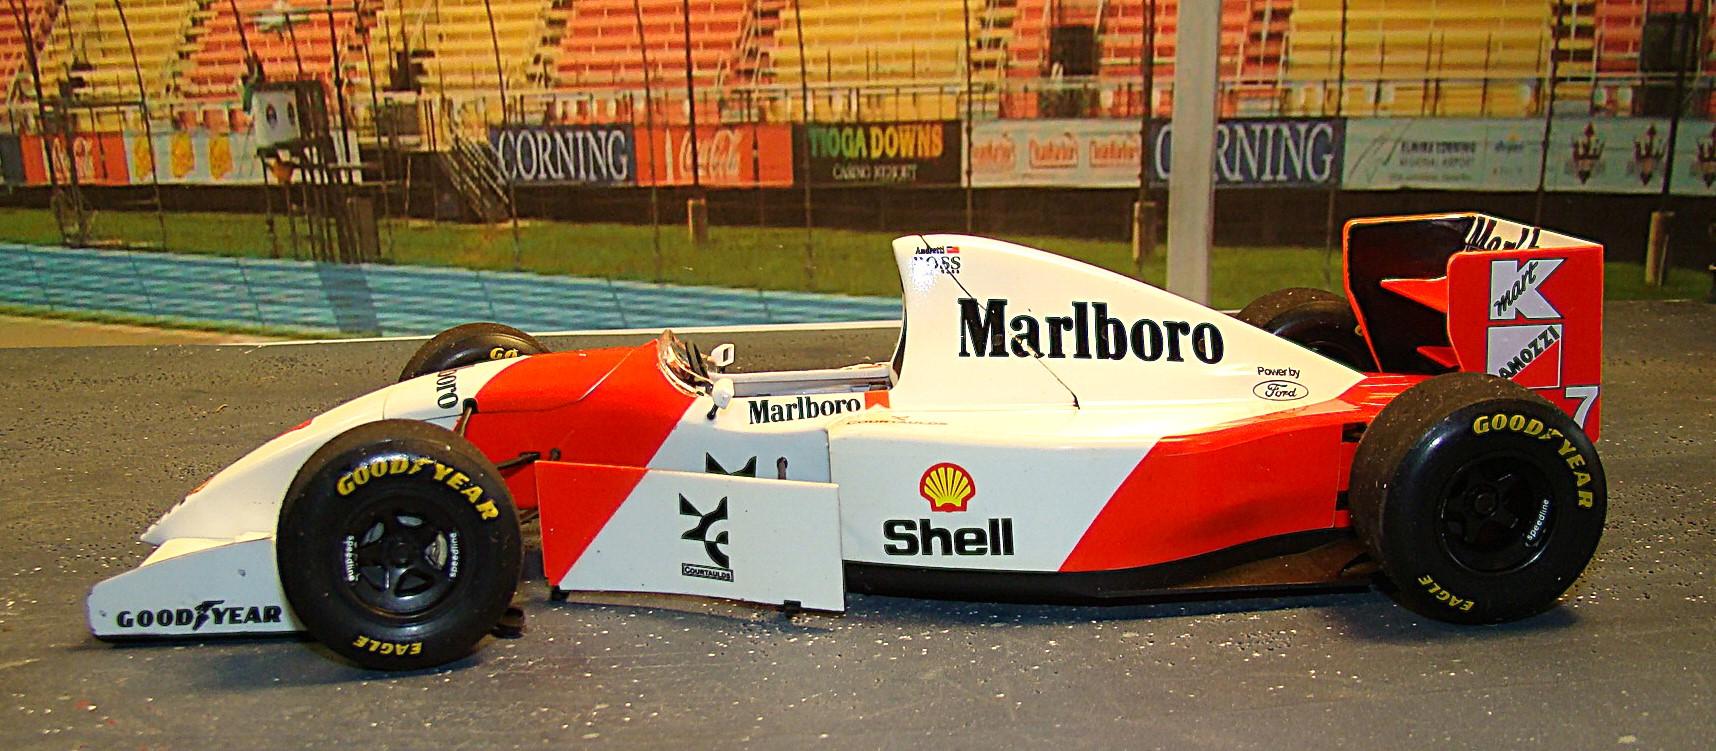
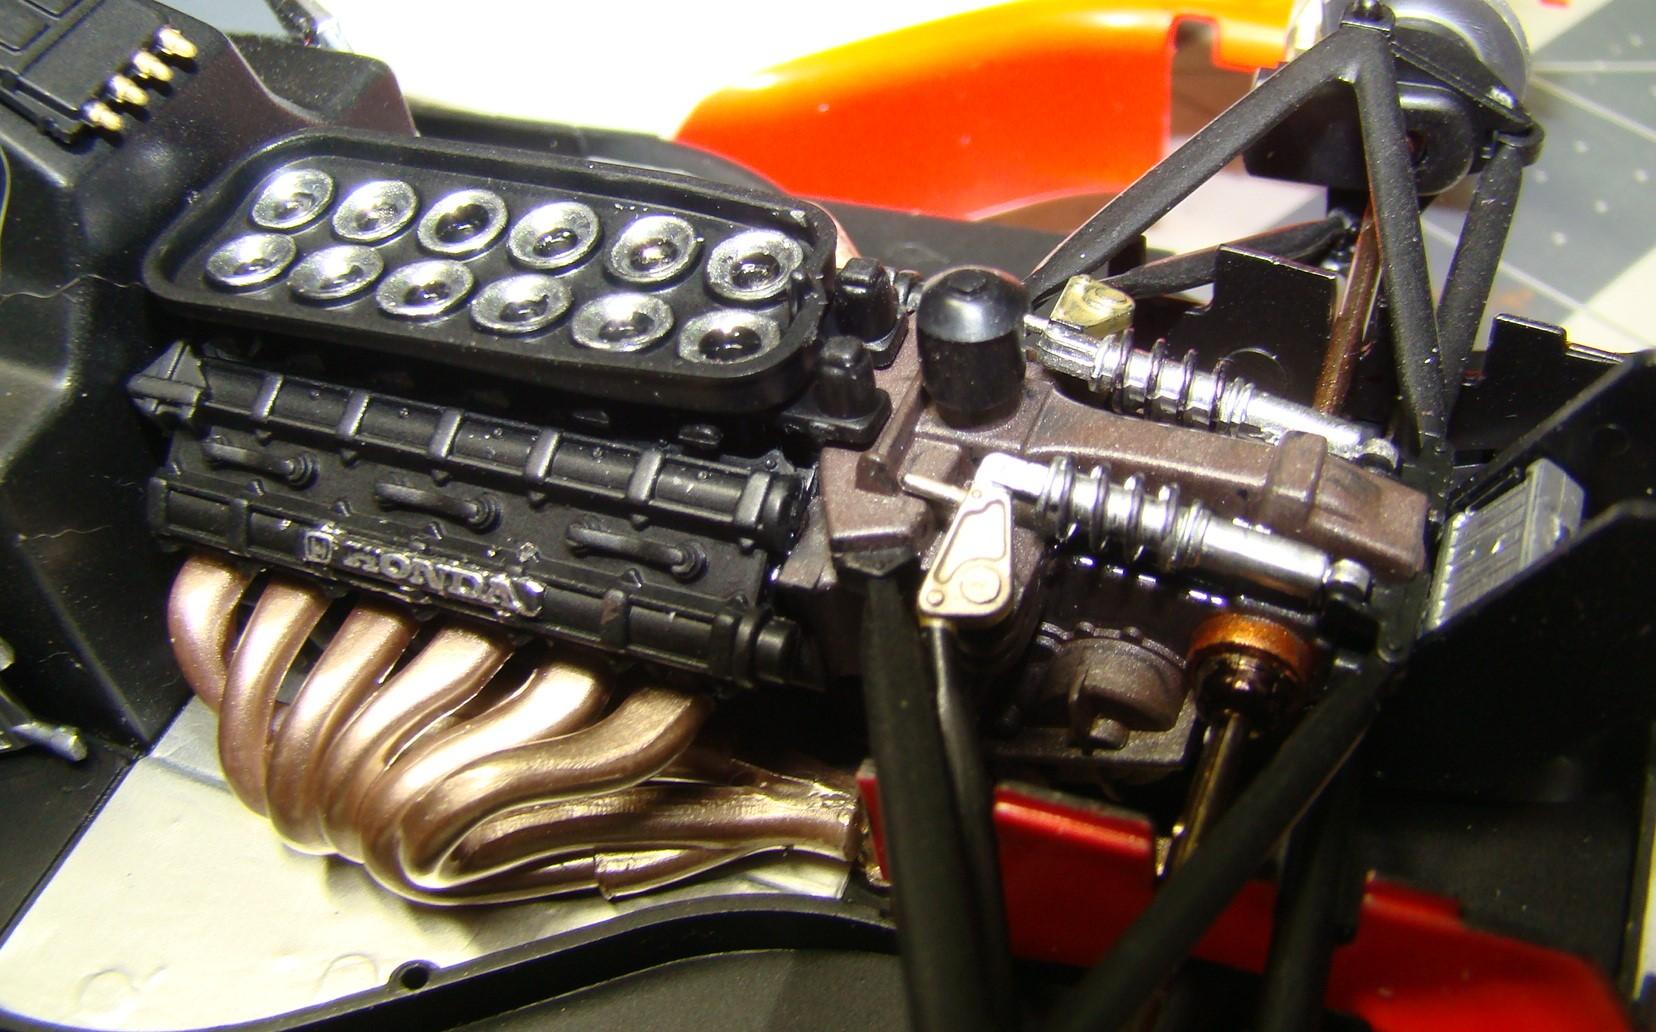
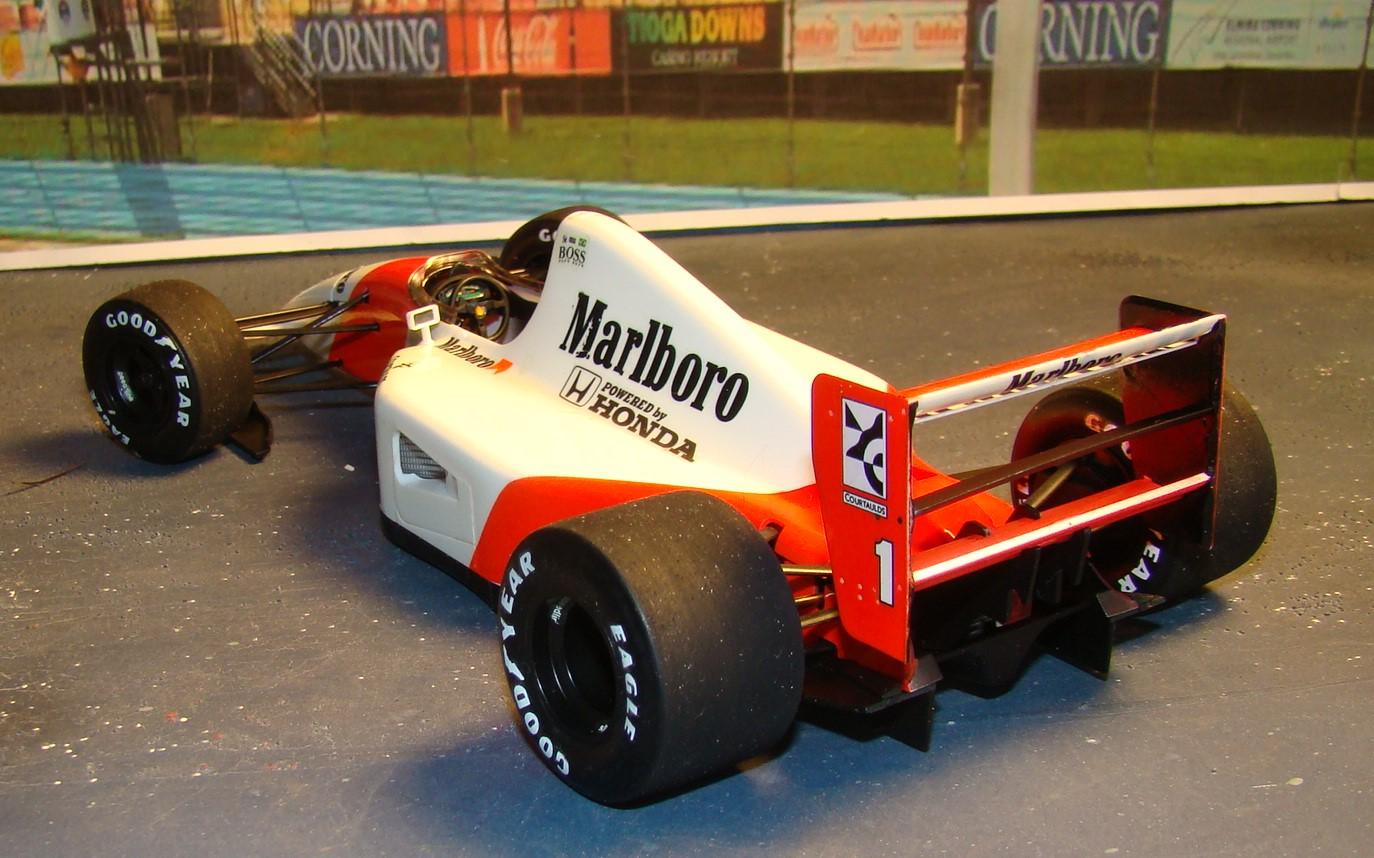
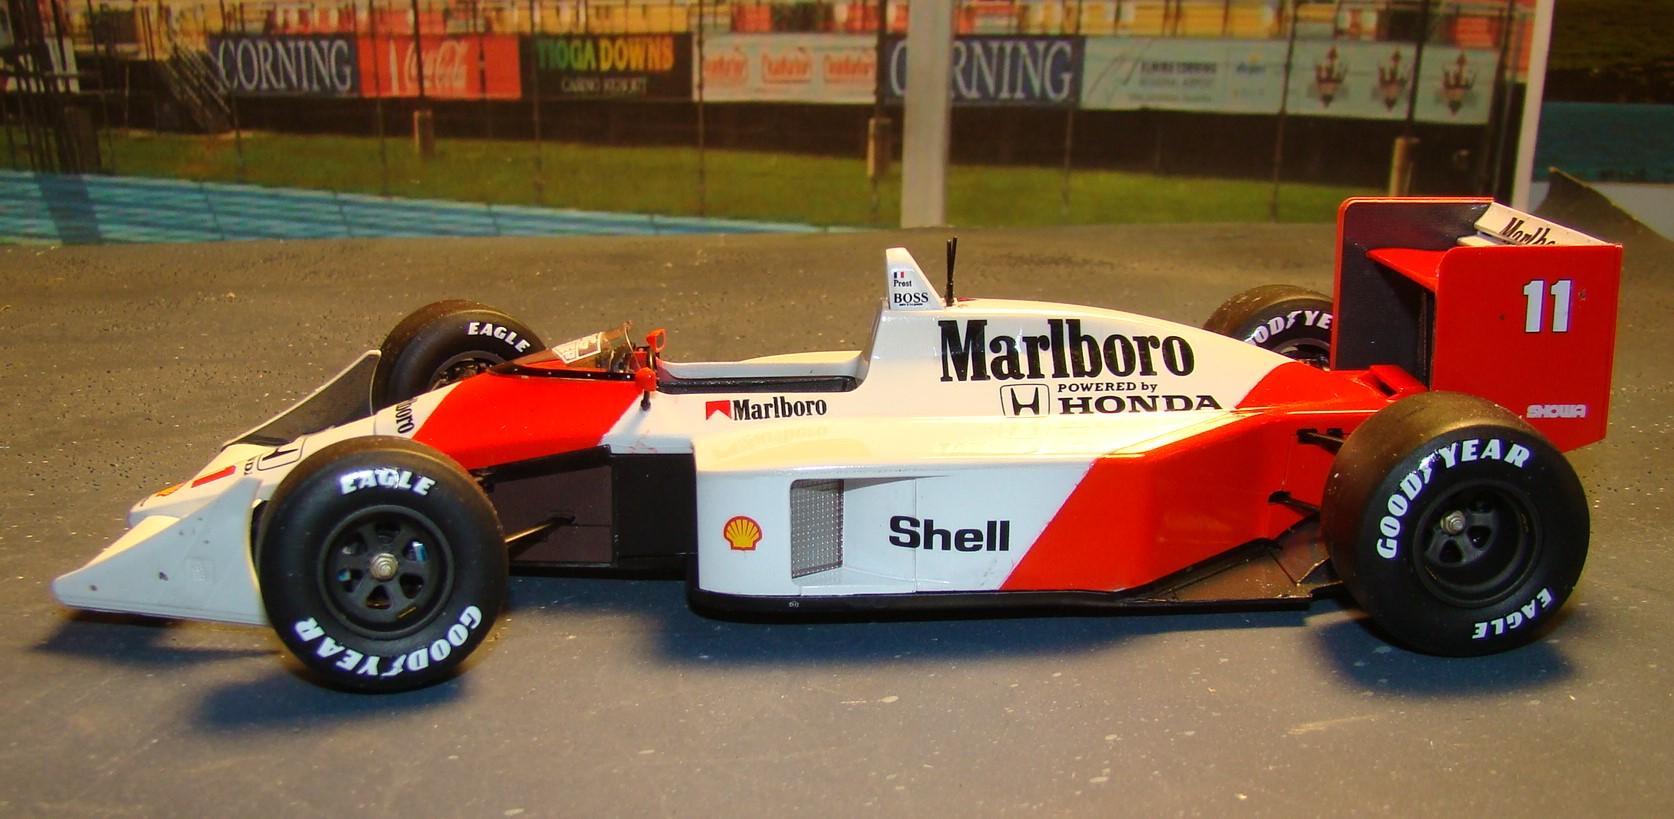
Continuing on a finishing tear is this Tamiya 1/20 Mclaren MP4/8. A relatively simple kit this one went together quick in only 3 days. Color on this model is Tamiya TS-26 white and Pactra Odds N Ends Flourescent red. Once again this was clearcoated with a latex clear and was done some time ago. More details in the picture captions. Thanks for looking and comments welcome. All the finished pieces ready for final assembly. Engine detail. Very simiar to my last post but a different engine. Mclaren had to switch to the Ford Cosworth 2.5 litre customer engine when Honda pulled out at the end of the 1992 season. Engine was down on power compared to the Renault and Ferrari engines but was more compact and lighter. Fished car on its wheels. This was a fun build and went together quickly and easily. It was also very similar to the MP4/7 that was done before. Rear veiw and once again the wing attached nicely. Bodywork also went down nice and snug. Once again I pinned it down. All four wheels sit flat on this one too. Side veiw. This is the first Mclaren to feature these side barges. Careful assembly here and they went on without glue. Mclaren won five races with this car due to its outstanding handling but once again they came up short in the drivers and manufacturers championship. This is Michael Andretti's car. Andretti had a lacklustre season in his only try at F-1. His best finish was a third at Monza. He was replaced by Mika Hakinnen
-
1992 Mclaren MP4/7 F-1
Rich Chernosky replied to Rich Chernosky's topic in Other Racing: Road Racing, Salt Flat Racers
-
-
Its back to the bench as i continues my finishing spree. This is Tamiya's 1/20 Mclaren Mp4/7 that competed in the 1992 season. This one was painted some time ago and recently sorted and bagged into painting lots. I have many kits sorted this way so it is relatively easy to just pick one out and finish it. Most of the planning and hard work is already done. Color on this model is Tamiya TS26 white and Pactra Short Cuts flourescent red. Clear finish is a latex clear. This finish dosen't distort the flourescent color but takes a long time to cure. But when it does it is rock hard and polishes to a nice high shine. More info under the pictures. Thanks for following. Finished chassis ready for the bodywork. This fit very well. There were four attachment points that i drill through on the floor pan. I inserted wires into the bodywork and when lined up with the floor pan I bent them over. This is what holds the bodywork securely with out gluing, which cabn get messy. Nicely detailed front suspension with working steering. Engine detail. exhaust fit well and is sprayed with a combination of silver and copper. Honda letters were bare metal foiled then sprayed semi black. The letters were then exposed with some thinner on a tightly folded over paper towel. All this went together cleanly. Finished model on its wheels. This is a nice kit but was not without its problems. The plastic in the center of the wheels was very brittle and two of them had to be very carefully glued back together. Many of the decals had to go on in several pieces as well and that included the after market set of tobacco sponsers. Nice detail in the rear as well. The wing went on easily and in the correct position. Careful assembly of the suspension and this sits on all four wheels. This version was very similar to the MP4/6 that it replaced. But many refinements were under the skin. An automatic transmission, traction control and a lot of electronic upgrades. The team had some success, winning five races but the championship fell to the all dominant Williams team. Gerhard Berger and Ayrton Senna were the drivers and this represents Senna's ride. This is the last car to win with Honda's V=12 engine. The next year Mclaren had to switch to Ford for the MP4/8 and that model is next in the cue. Thanks for looking.
-
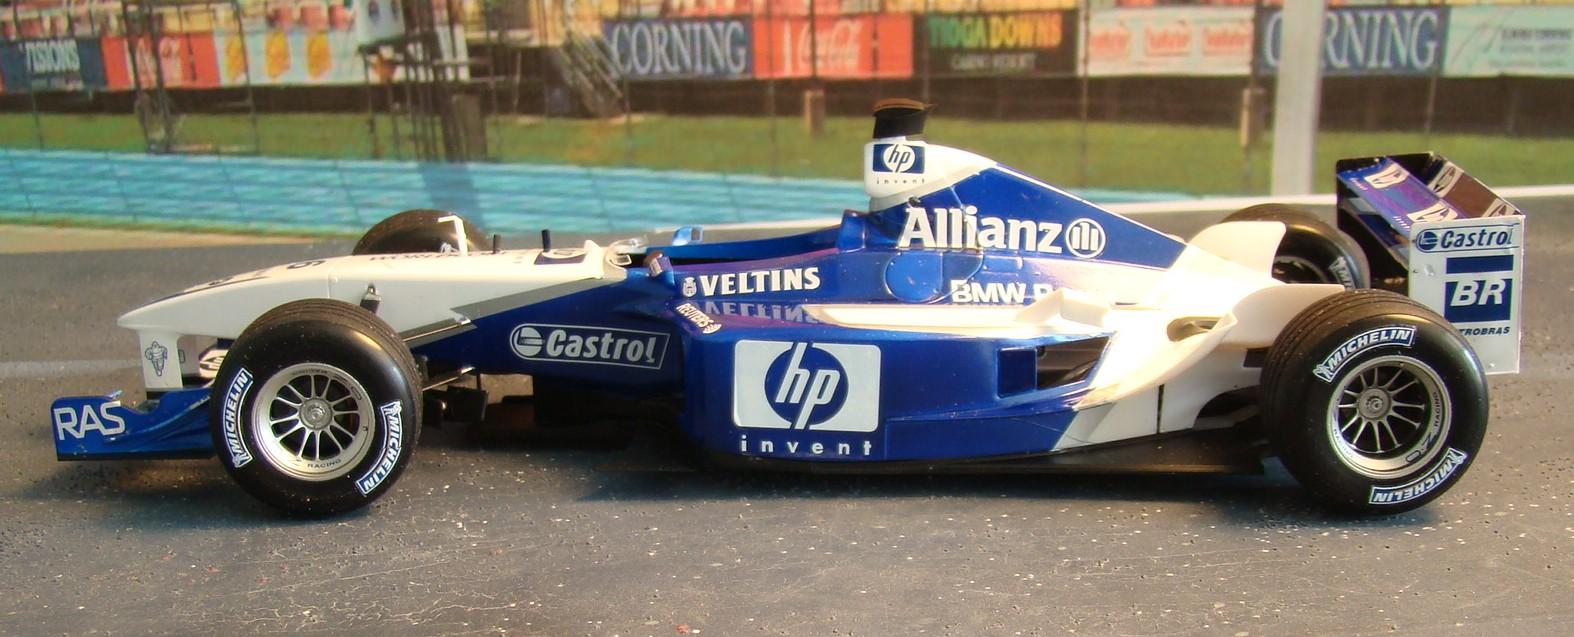
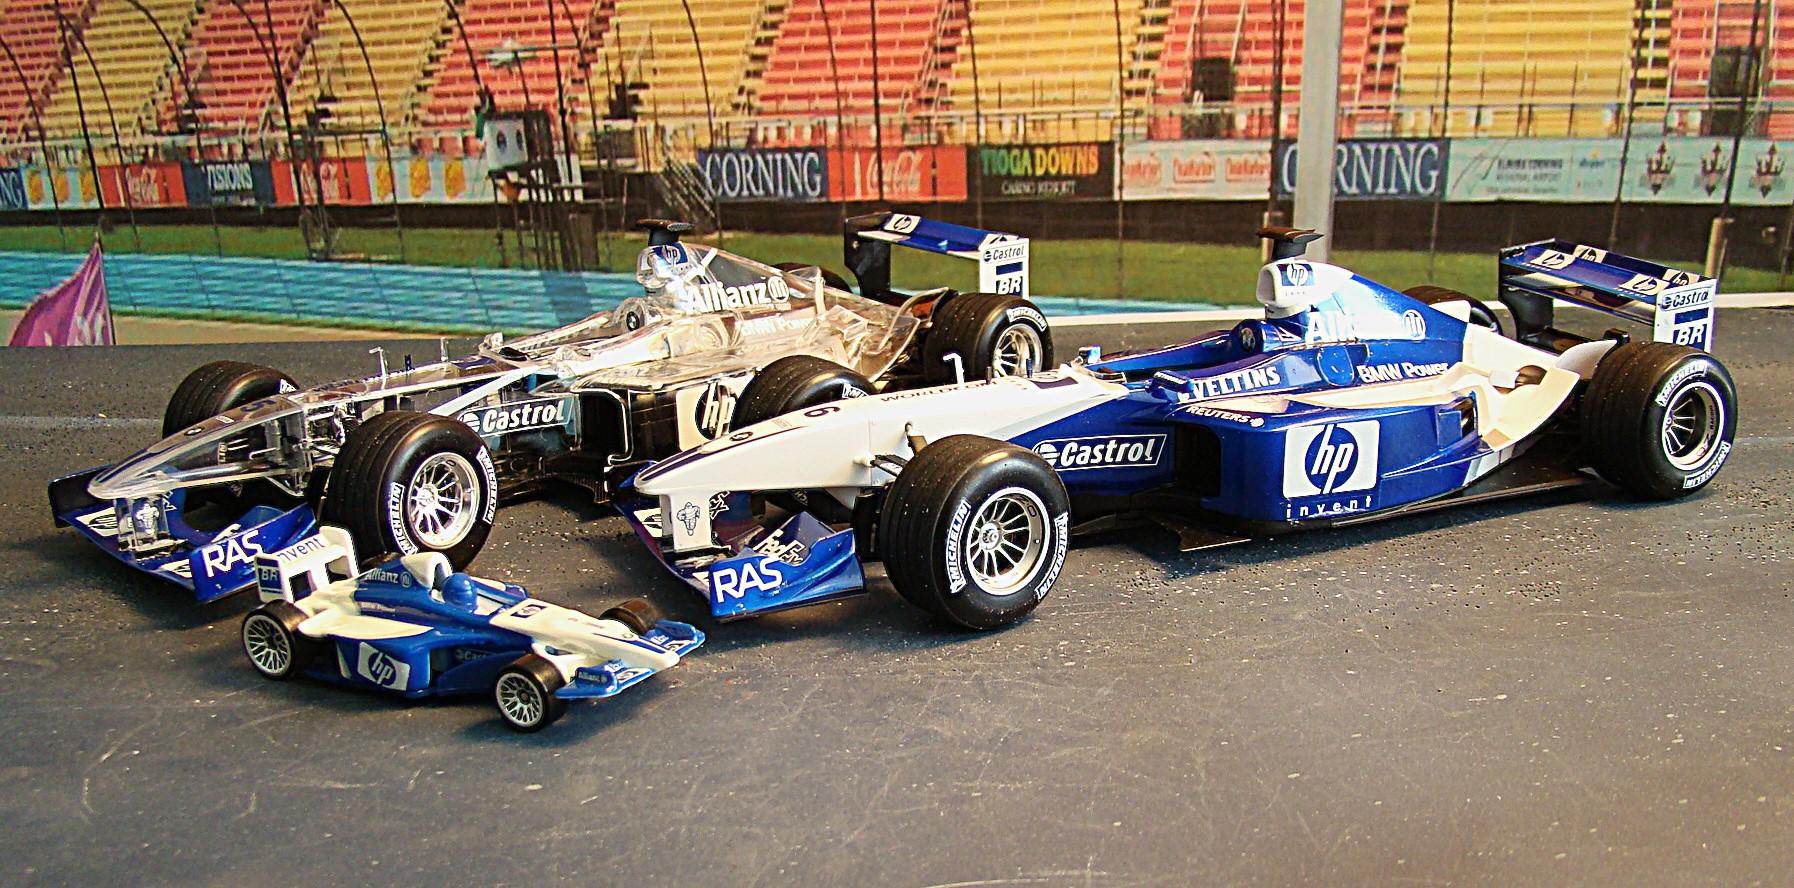
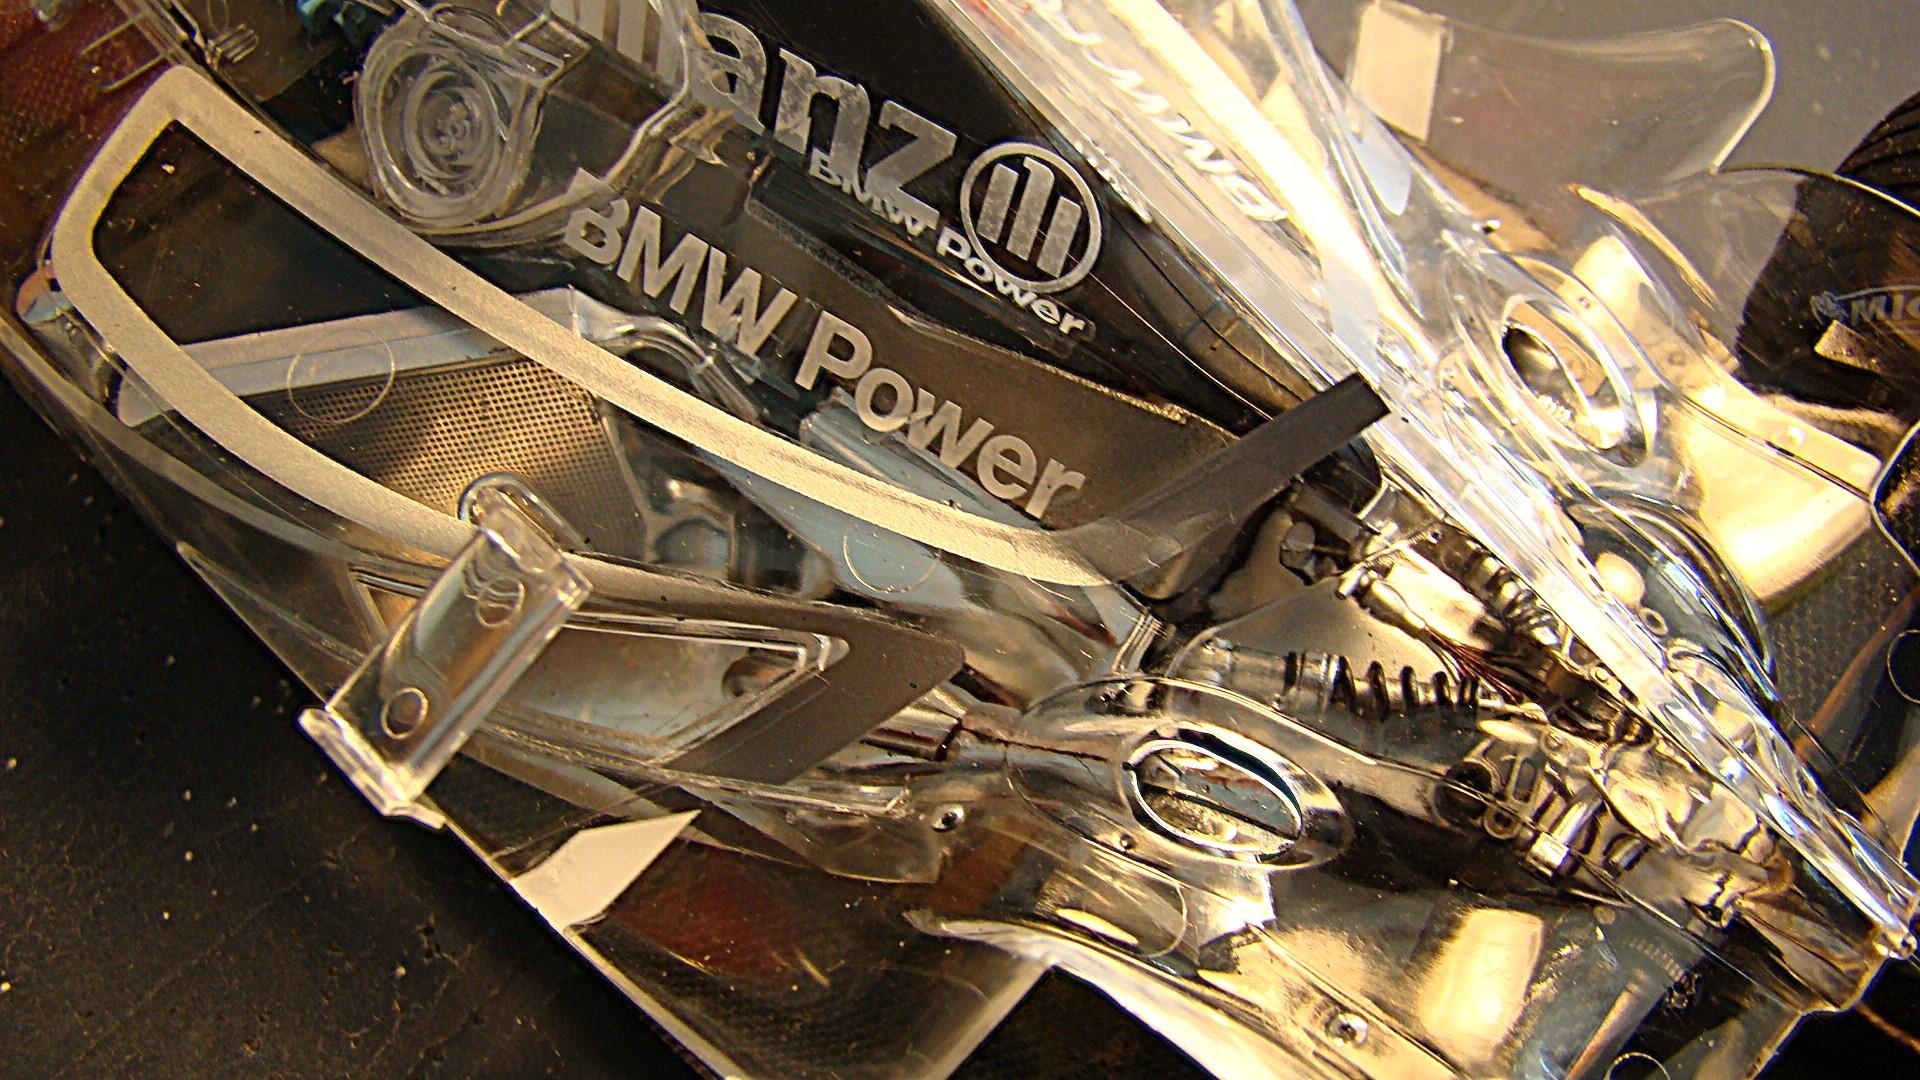
Hot off the bench. Another double project. I remember buying both these kits at the same time. Looked at them many times but always felt a little intimidated by the scope of all the work. Finally took the plunge. Color on both these is Tamiya TS51 blue and TS26 white. Doing two kits at once is not new to me. It does save some time but can be a little frustrating keeping them seperate. While both kits are basically the same there are some differences . Of course the obvious is the bodies but there are also differences in the wings and the clear version has a lot of extra detail parts. Still, it was a fun project and I am pleased with the results. More information in the picture captions. Regular version on its wheels. Really like this paint scheme. Silver decals were a real terror though. Rear veiw. Lots of detail back here. Wing was a real pain to get right. Wheels and tires went on easily and all four touch. Side veiw. I like this body style. This is just at the beginning of adding all those little winglets and doodads. Rear view clear version. Note the different rear wing. This is the German Gran Prix car of Ralf Schumacher. Regular version was done for the Italian Gran Prix as Jaun Montroya. Williams had some sucess this year winning a few races but came up short in the championship. Both models together. The clear version had a lot of extra detail with it. Extra interior parts, carbon fibre decals, photo etch and chromed parts. 1/64 diecast is a Hot wheels. Some oif the detail through the bodywork. Tamiya did an excellent job on the chassis . All the bodywork fit very well although the clear parts take some sopecial handling and gluing. Plastic glue crazes the parts. Revell clear parts cement (in the bottle) was my glue of choice.
-
Still getting the message to manage attachments to free up space. How do I do this? Is it necessary? Can't upload photos as there is no box to do so. Got some cool stuff to post . This is frustrating.
-
Nice conversion Pierre...very well executed.
-
1/24 Meng Mclaren MP4/4
Rich Chernosky replied to Rich Chernosky's topic in Other Racing: Road Racing, Salt Flat Racers
Thank you Helmut. I kinda knew that would happen but I am glad you figured it out and got to see it. And , as always thank you for the kind words. Got a couple more F-1 builds (Tamiya) in the works so be on the look out. -
John......you are not alone on starting kits and getting them going only to put them away. I have boxes and boxes of them and lately been on the warpath to finishing a lot of them. I built this one but am really digging your take on it. That liquid blue is going to be stunning and i know you will do it justice. Keep at it!!
-
1/24 Meng Mclaren MP4/4
Rich Chernosky replied to Rich Chernosky's topic in Other Racing: Road Racing, Salt Flat Racers
-
Sauber Mercedes C9
Rich Chernosky replied to kensar's topic in WIP: Other Racing: Road Racing, Land Speed Racers
Cover the wire for the brake ducts with heat shrink tubing. That should do the trick. Got this one in my stash too so i will be following along. -
Man...does that look fast in red or what!! Nice job.
-
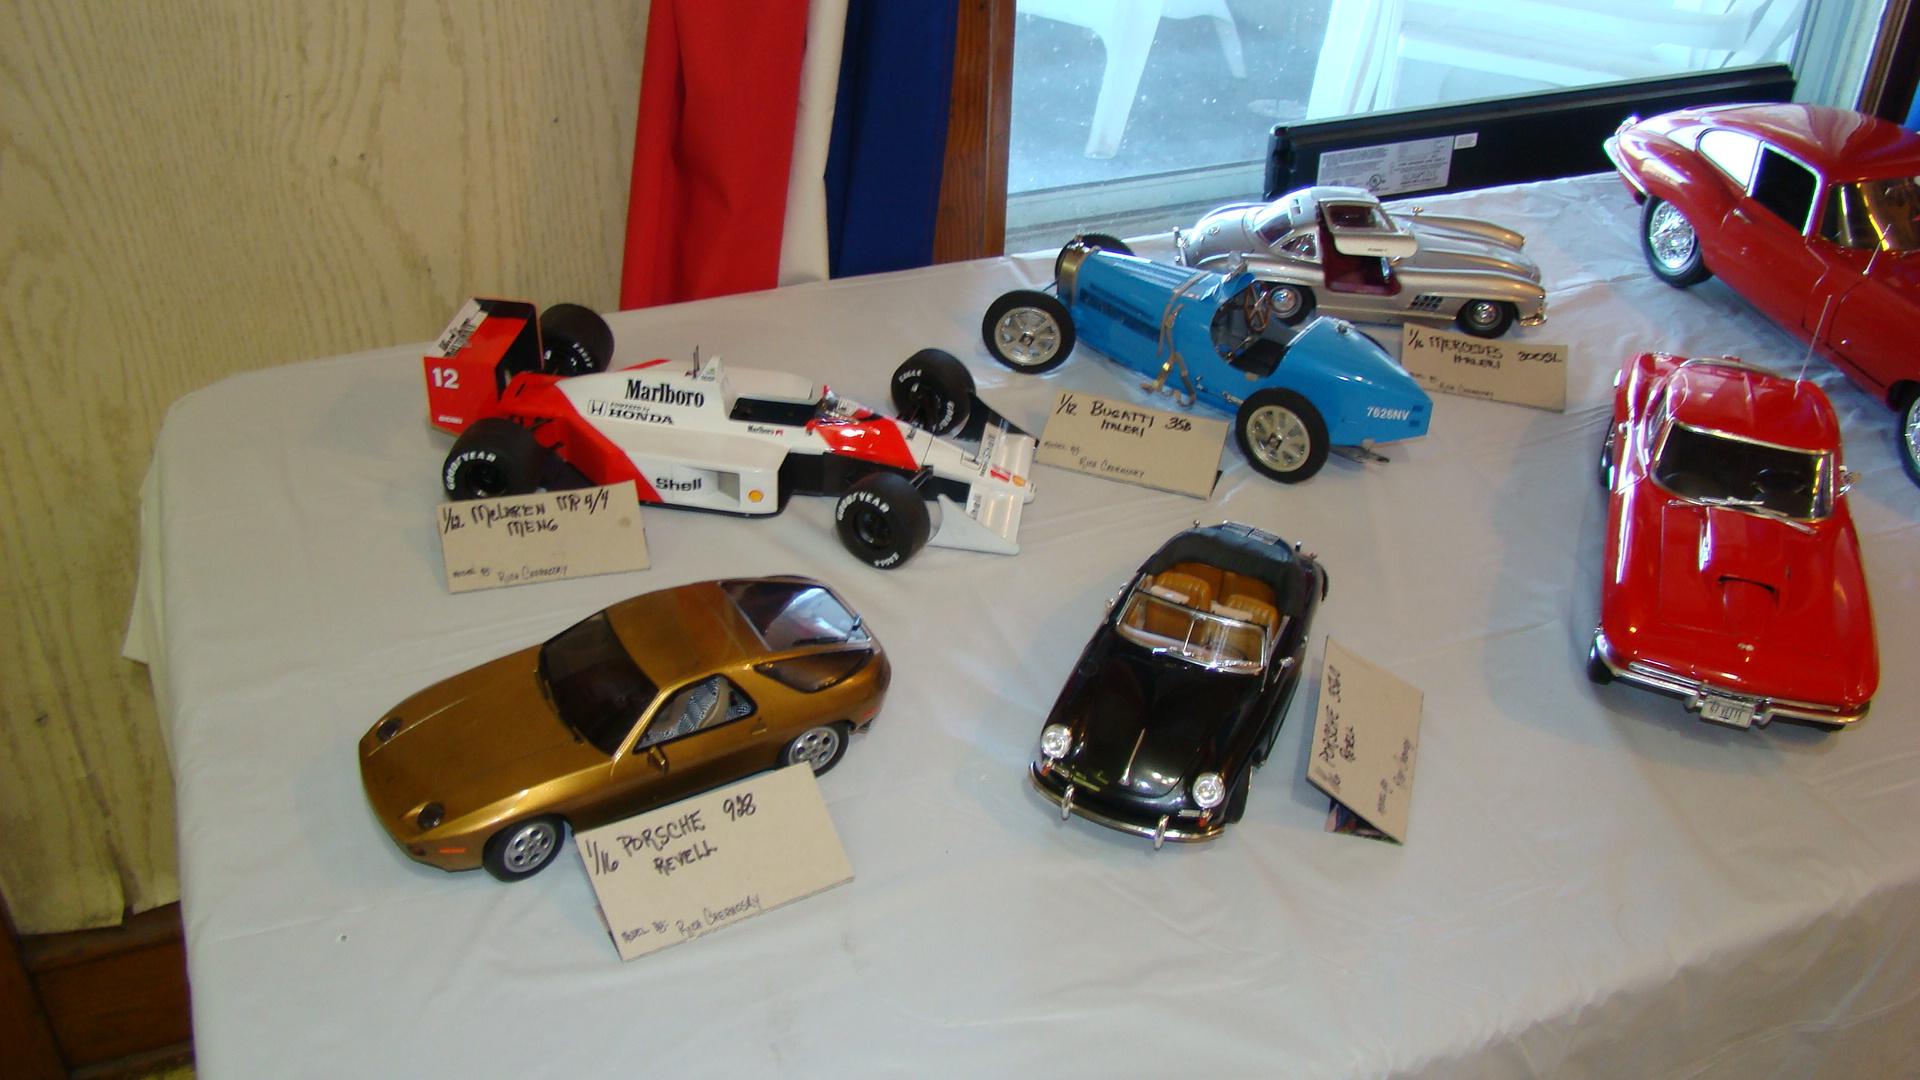
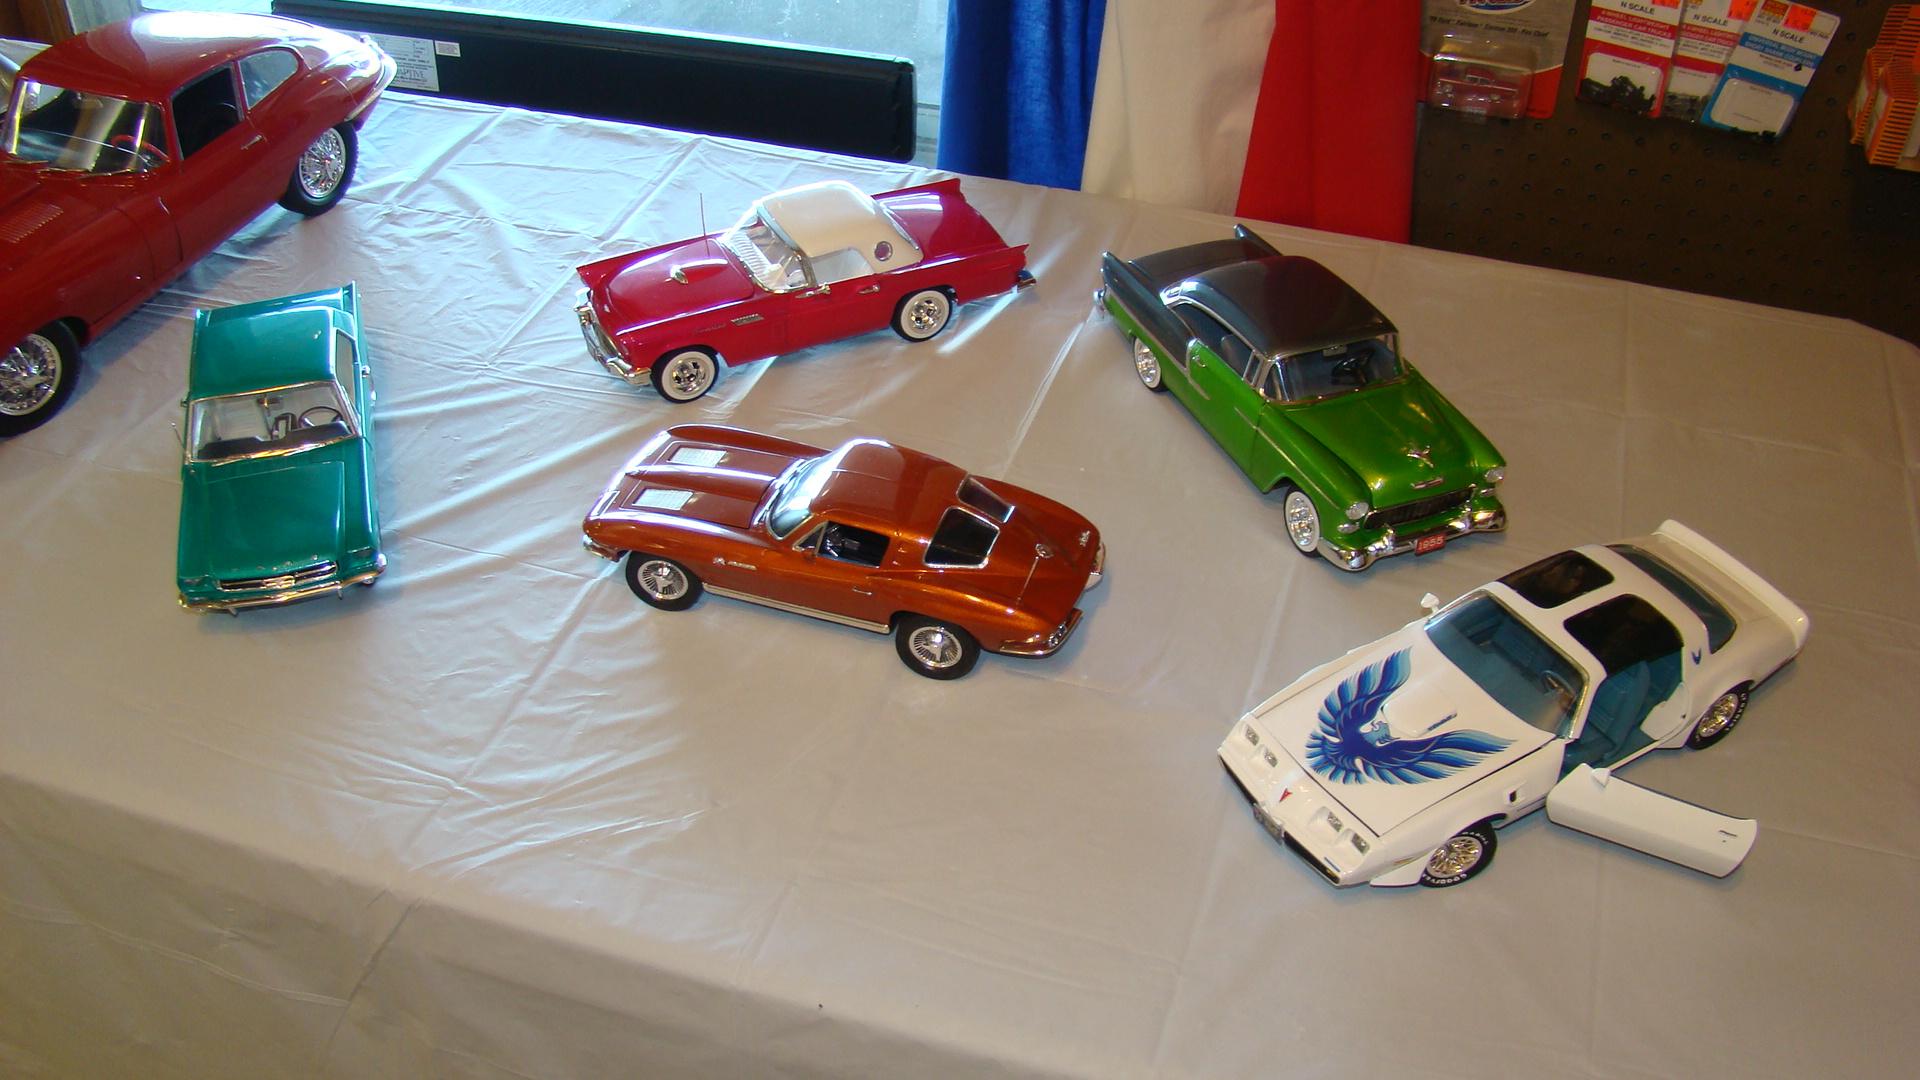
My local hobby shop put on a "Big Scale Challenge". Starting on Jan 2, we had til Mar 6 to finish and display a kit that was 1/16 scale or larger. This was held at Barber Pole Hobbies located in Sayre Penna. Thre of us modelers rose to the challenge and managed to complete 12 models. Quite a feat considering the complexity of some large scale models. Below the pictures are more details. All of the entries on display. These were my entries. I was amazed at how much I was able to accomplish on such short notice. All of these were well under way and painted prior to the challenge so you might say I had a head start. The 1/12 Mclaren and 1/116 Mercedes were featured on this site in Under Glass. 1/16 models completed by modeler Larry Schitel. Everybody really liked the firebird except Larry. The 1/8 scale Jaguear was done by hobby shop owner Loren Frantz. It was his first. 1/12 Corvette by Larry . This was a fun project. Thanks for looking.
-
1/24 Meng Mclaren MP4/4
Rich Chernosky replied to Rich Chernosky's topic in Other Racing: Road Racing, Salt Flat Racers
-
1/24 Meng Mclaren MP4/4
Rich Chernosky replied to Rich Chernosky's topic in Other Racing: Road Racing, Salt Flat Racers
-
NuNu Audi R8 LMS GT3
Rich Chernosky replied to dougwintz's topic in Other Racing: Road Racing, Salt Flat Racers
Doug, really like the job you have done here. Calling this a decal challenge just might be an understatement. Looks like you were up to it though. -
Recant builds
Rich Chernosky replied to Peter Lombardo's topic in Other Racing: Road Racing, Salt Flat Racers
Peter...very impressive group of models. Lots of decal work there all done to perfection. I, too, am a big fan of road racers so I can appreciate what you have said and like your work. -
1/24 Meng Mclaren MP4/4
Rich Chernosky posted a topic in Other Racing: Road Racing, Salt Flat Racers
Just couldn't resist doing this one even though it was the most recent aquisition. Having just finished its 1/12 counterpart It looked simple enough given that I already had done most of the paint. It was also quite expensive and I was curious as tol why. Found out quick enough. This is basically a shruink down version of the 1/12 kit and had many of the features found on the big one. Not as easy as the larger scale as many of the details were quite tiny. Color is Tamiya TS 26 white. Red is TS36 Flourescent red over TS43 Bright Orange. More details in the picture captions. Engine bay is just as crowded as its big brother. Fit of the pieces was a little bit more fiddly but it did go together well. Carbon fibre came with the kit. Cockpit was also just as detailed and the seatbelts also came with the kit. Completed chassis waiting for the body pieces. This was a lot more work than I expected. Finished car on its wheels. Body fit was just as good although I had to add four metal pins to locate the upper portion to the chassis pan. Thjere were four attachment points that were way too small for a good attachment. I drill out the posts and added wires. Then drilled through the pan. When the body was fitted I bent these wires over and that is what holds it all together. Much cleaner that glue and removable if I want. Rear veiw. Suspension went together well and all four tires sit flat. Wing attached easier that I thought it would. I use tiny wires drilled through that attachmnet points on the wings, then glue them from the bottom. I use Revell window cement as it is clear. Gives a nice assembly without the usual struggle. Couldn't resist a photo of the two of them together. Gives a nice comparison of the size. I used two different techniques on the red but they still match nicely. Once again the Marlboro decals were not included and came from the spares.
- 15 replies
-
- 10
-

-
Williams Renault FW19
Rich Chernosky replied to bbowser's topic in Other Racing: Road Racing, Salt Flat Racers
Bruce...this turned out quite nicely despite your struggle with the decals. I have most of the Revell F-1 kits from this era and know they can be a real handful. Looks like you were up to the challenge. Nice job. -
1988 Mclaren MP4/4 F-1.
Rich Chernosky replied to Rich Chernosky's topic in Other Racing: Road Racing, Salt Flat Racers
-
1988 Mclaren MP4/4 F-1.
Rich Chernosky replied to Rich Chernosky's topic in Other Racing: Road Racing, Salt Flat Racers