Rich Chernosky
-
Posts
2,123 -
Joined
-
Last visited
Content Type
Profiles
Forums
Events
Gallery
Everything posted by Rich Chernosky
-
1964 Ferrari 275P
Rich Chernosky replied to Phildaupho's topic in Other Racing: Road Racing, Salt Flat Racers
Always liked this model and this one is a beauty. Great Job Phil -
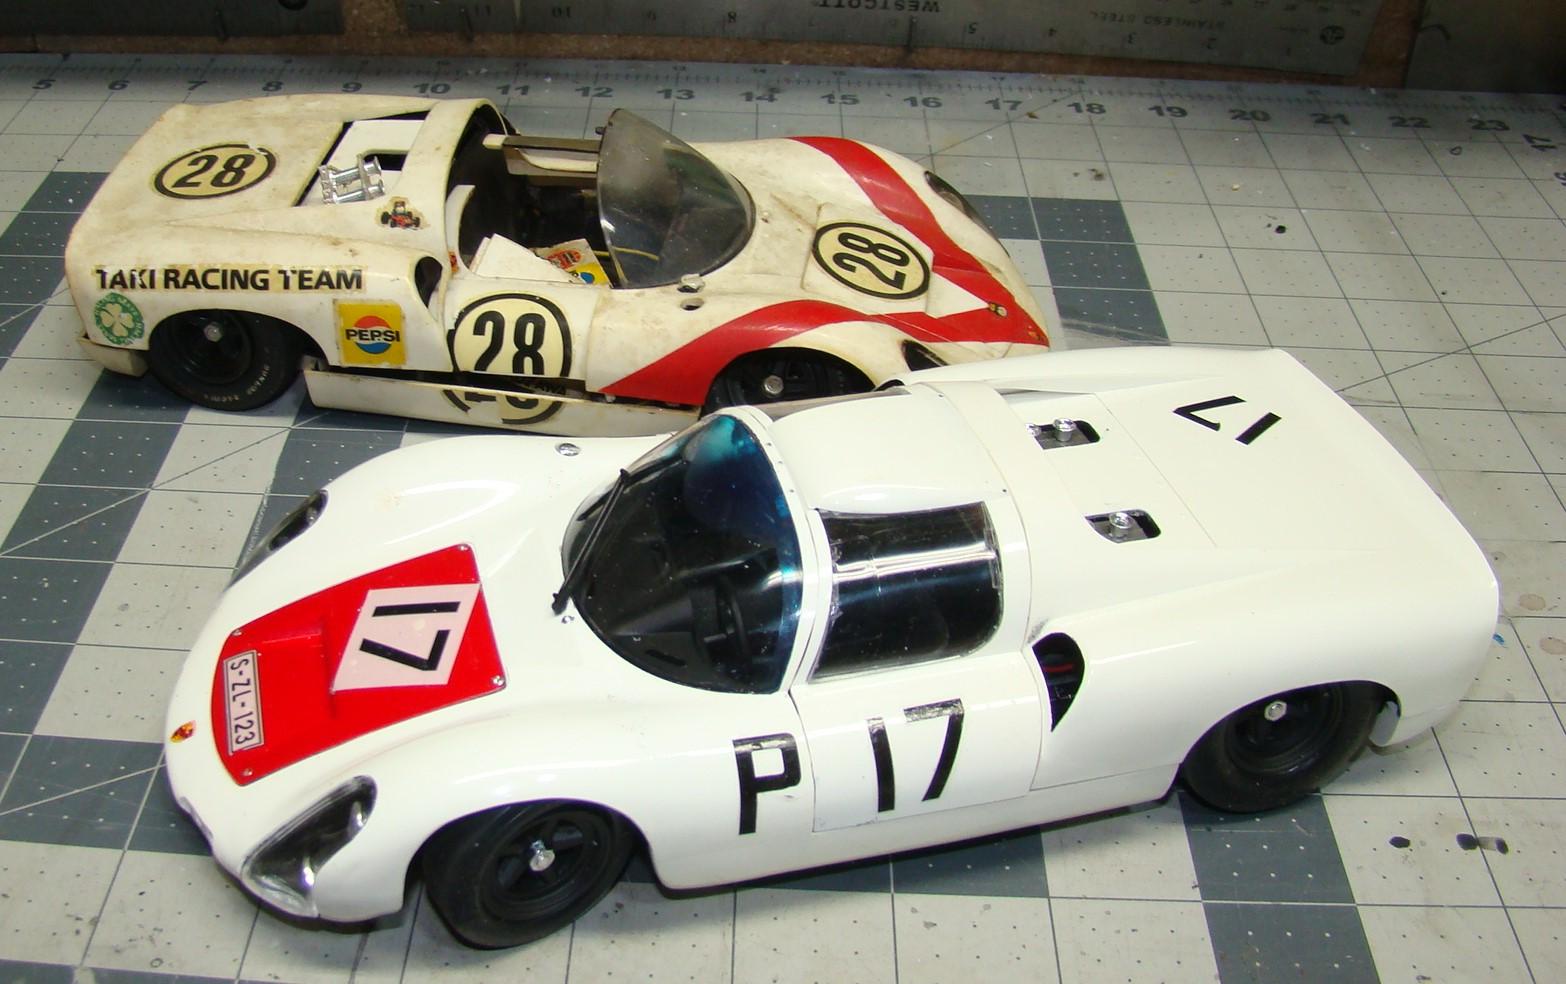
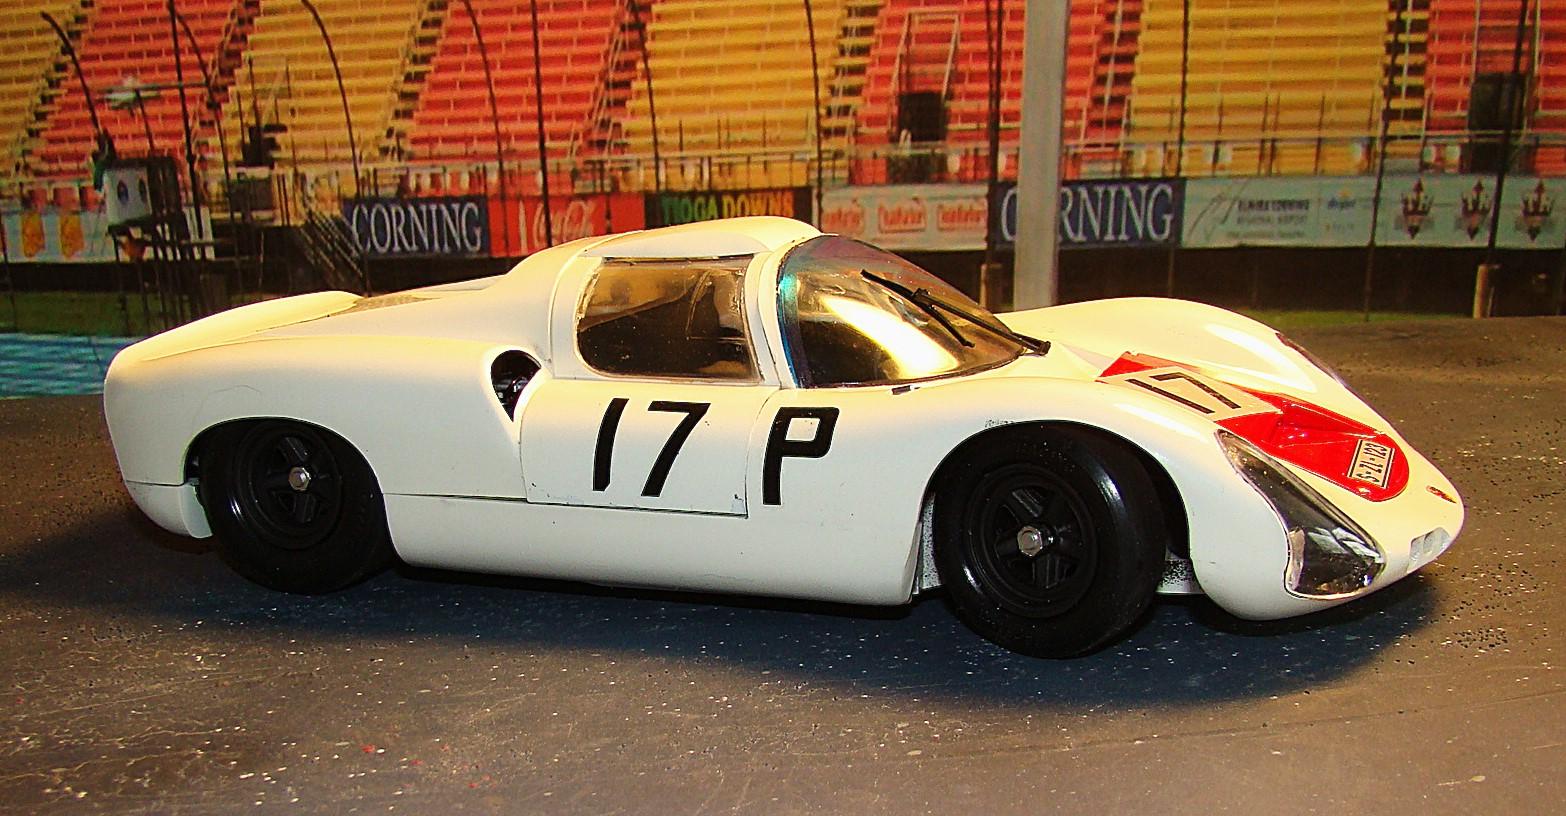
Here is the latest off the bench. This is a re-visit of an earlier Tamiya kit I did sometime in the mid 70's. the original kit was lighted and motorized but the new one was not. As a result there is a lack of detail in the engine compartment as this was probably more of a motorized toy than a model as was the custom back then. I did wire and plumb the engine (it looked like fun) but neglected to include all the other details. I have an Exoto 1/18 version of this car and that has the details. (pictured) Plus I wanted to do it like I originally had but this time make everything fit better. Color is Testor 1145 Insignia white and was sprayed some time ago. Rest of the build details in the picture captions. Thanks for looking and feel free to comment. Engine detail on the flat six. Had to change out the distributor as the kit one was for an 8cyl. Extra wire goes to the coils installed in the cockpit. Comparison of the two engines and details. Exoto was much better detailed. Completed car and whats left of the model it replaced. They build so much nicer when you know what you are doing and have all the materials and tools. This view. The wheels steered and the suspension worked in the kit. Doors, rear engine cover, and front cover are all workable. The stance of this car is v-e-r-y low and if you have ever seen a real one it is about right. The actual car is way lower than a Ford GT and very cool looking in person. Didn't realize I had so many models of this particular car until I dragged them all out of this pictures. In the back is a Tamiya 1/ 12. 1/16 version to the right is an Otaki with full detail. To the left is the Exoto 1/18. Center and partially hidden by the feature model is a 1/64 by an obscure Italian company. #8 is 1/24 Arii and a very nice kit with metal wheels and mirrors. Front center is an unknown (probably Japanese) 1.24 version. 1/64 #17 is a Mini Lindbergh plastic body on a Jag TR3 slot car chassis. Its fast. The #17 car was driven to victory in the 1967 Nurburgring 1000KM by Schultz and Buzzeta

-
-
Certainly a wicked looking Lambo, Steve. All the small detail shots are great. You did an awesome job.
-
-
1963 Alfa Romeo Giulia Tubolare Zagato (“TZ“) Road Car
Rich Chernosky replied to Plastheniker's topic in Model Cars
What a cool looking car and very well built. Can't wait to find out more. Who's kit, paint and build notes ?? -
Time to start getting them done. This kit was painted and polished on 1/11/11. Color on this was Testors Laquer 1845M and clear coated with their Wet Look clear. I go throuigh phases where I paint a lot of cars and them put them back in the box. I have a lot of these after all these years. Sometimes i will do 8-10 of them at a time and this one of these. So here it is. Build info is in the picture captions. thanks for looking and feel free to comment. Lots of ooooh/aaah factor here. Revell put a lot of effort into this 5litre V8. So much detail but most of it is hidden. Red letters on the engine cover was done by bare metal foiling them before painting with Tamiya x-18 Semi blk. Then the letters were exposed with a paper towel and some solvent. Finally a red magic marker provided the color. Kit was done mostly box stock except for my signature steering wheels. Body fit was exceptional. Polished paint attracts dust like a magnet. I keep and dust brush on the photo stand but in this case it was to no avail. Rear veiw had some nice detail. Tailights and markers were cast in red plastic. Interior is Tamiya LP Nato Black. Stance on this kit was very good so no adjustments were necessary. The C5 Corvette was a landmark car and featured many new innovative features. The car was almost totally re-designed and marked the beginning of making the Corvette into an American super car.
-
Matt...after finishing my first Autokit I understand how tough these are to do. You did very well and the driver figure just makes it even better. Your WIP was great too and it will help me greatly with mine. Thanks for putting it up and keep up with all the great work. Very much enjoyed.
-
Beautiful model of a beautiful car. Very well done. Color suits it well.
-
-
Donald...I am familiar with this kit and I struggled many years ago just to get it completed. Yours, on the other hand, is a masterpiece of engineering and good ole persistence. Luv the lights but most of all the steering....a pet peeve of mine. I have made the steering work on just about everything I do, from resin kits to domestic hunks of plastic. Glad to see I will not be alone now. Good post BTW.
-
Welcome to the forum Ingo. That Ferrari GTO sure is a looker. Spectacular work. Look forward to seeing more of this.
-
Honda Civic Si coupe and Civic Hatchback
Rich Chernosky replied to Rich Chernosky's topic in Model Cars
-
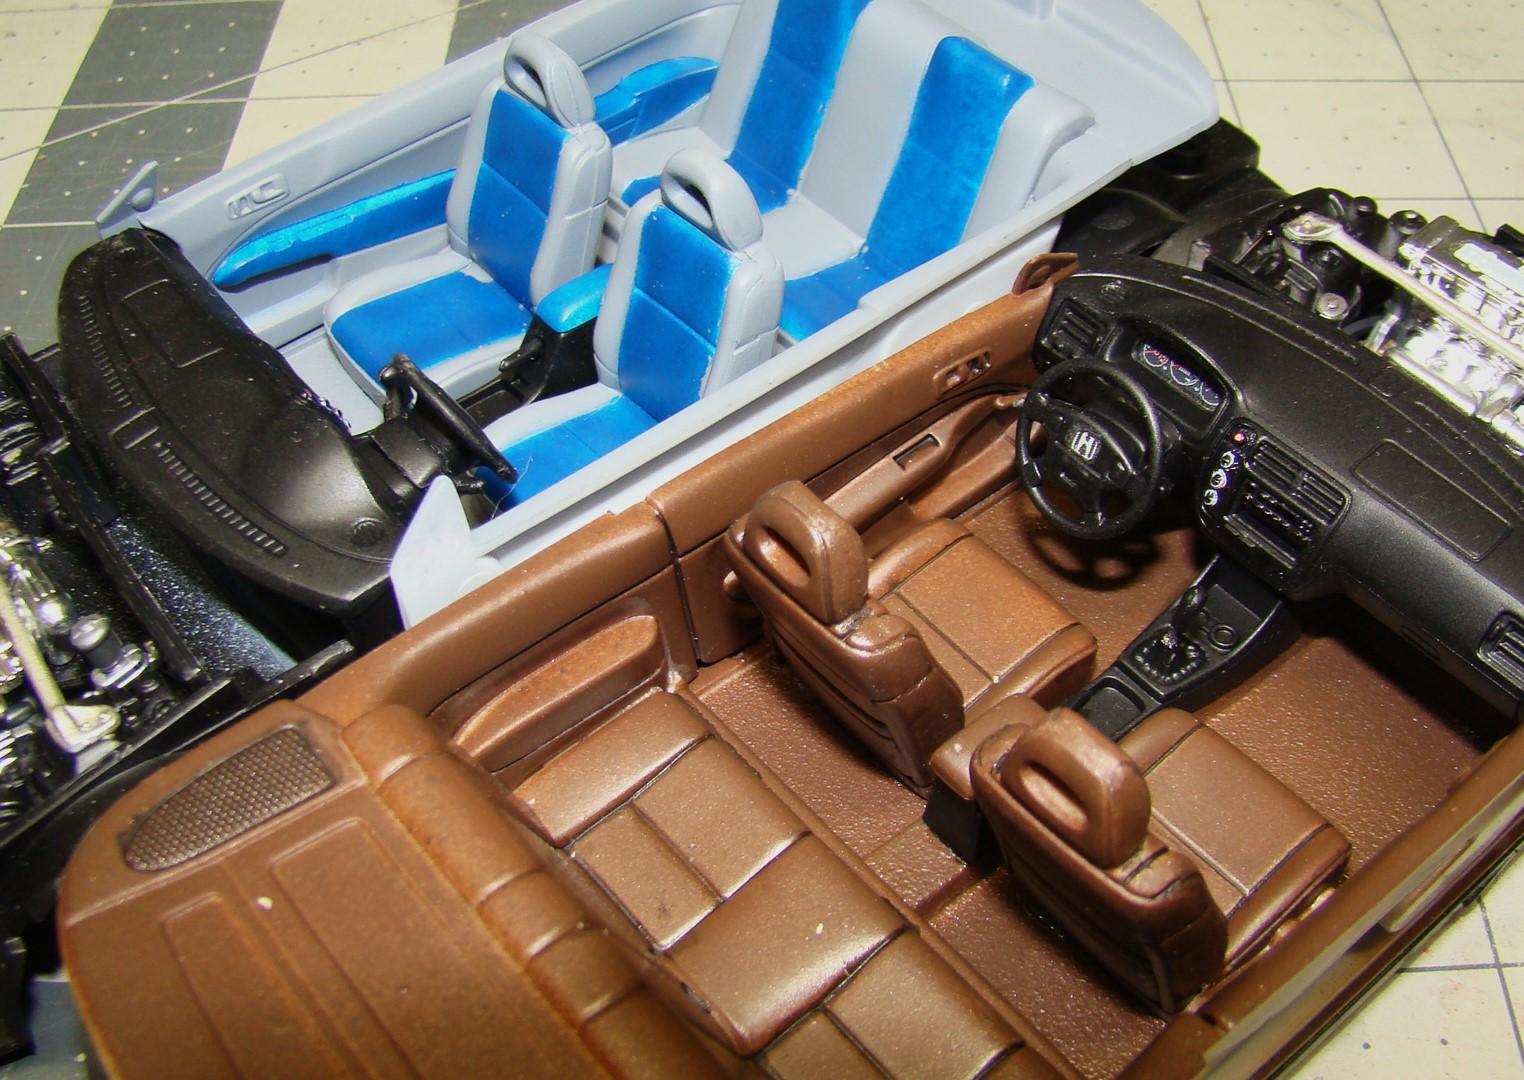
Discovered these two lurking in the stash. They were sprayed in 2003 shortly after they were aquired. Since both kits shared many parts I decided to finish them together. Althopugh the hatchback required another coat of clear both paint jobs were acceptable. They were sprayed with nail polish over a black base. Mostly box stock but I made the wheels steer and added some of the kits custom features. I have a large collection of Honda cars and these fit right in which is why I bought them in the first place. More comments below the pictures. Thanks for looking and comments welcome. Interiors were basically the same but I sprayed them to better match the exteriors. Brown is Tamiya X9 with clear flat and panel liner. Blue car has a flat grey interior with flat blue inserts. Both were from theTamiay LS line. Good shot of the dash. That is a clear lense with the gage decal reversed applied to the backside. Interior were well detailed. Both cars finished. Bothg recieved a fgogged airbrush paint job with Tamiya clear. Brown car is fogged with Nato black and the blue car with clear blue. cThe fogg extends to include the mirrowrs and wings. Hatchback rear veiw. I decided to use the kit decal for the side graphics,. It went well with the fog paint. Rear tail lights (custom version) did not fit well and had to bwe coaxed into position. Both cars have carbon fibre hoods that were clear coated. Fog on the win is evident here and the wing also has a CF decal. Engines were basically the same with a few differences. Notably the intake manifolds. Some good detail here too. These two kits were part of Revels Tuner Series and quite a few extras were included.
-
-
-
Aoshimas Lamborghini Countach 5000 QV
Rich Chernosky replied to Dann Tier's topic in WIP: Model Cars
Dann...I am always amazed at the great lengths you go to. Your WIP's are so very informative and I have utilized some of your techniques. I can see why you like the white version of this car. Its amazing and so aggressive looking. It will be a spectacular model. I have 3 of the Fujimi kits "in paint" and have for many years now. I did get the doors to work properly though. And I did finish one of them so I am confident I can eventually do the others. Thanks for putting this WIP up...I will be sure to follow. -
First completion of the new year. Was lamenting with another modeler about how many kits we had in paint but never completed. Well....this one was painted in August of 1998. Color on this is a Pearlescent ink called Liqui Acrylic. Color name is #121 Sun Orange. Clear coated with a latex clear. Interesting color that I didn't really like at first but once the model was complete it kinda grew on me. Kit itself was fairly good quality but with the usual fitment issues of a domestic kit. Built mostly box stock with the addition of steering wheels, carpet, some engine wiring and the usual paint details. More info in the picture captions. Thanks for looking and comments welcome. Interior is painted in #1205 Testors flat red which dries very flat. Seats,dash and side panels were treated with "nose grease" which gives it that soft patina of vinyl. Interior had some very good detail and the engraving was very sharp. Making the wheels steer was fairly easy and I used the kit tie rod. Chassis still had to be ground away. Liqui Acrylic had to be airbrushed (thinned with Tamiya X20) and dries very flat with some texture. The latex clear I use is very heavy bodied and fills this in. It dries extremly hard and is even difficult to sand and polish. And it can take as much as two months to fully cure. But, oh boy does it shine up nice. The Liqui Acrylic line of pearl inks is still available at Hobby Lobby in their art section. Rear end had some nice detail. I added chrome tailpipes cut from antenna tubing. According to the kit instructions there was supposed to be cut-outs for these pipes and a chrome surround. Oddly enough there was none and I had to make some. Body had to be forced down over the chassis and pinned in place to get the stance right. Those rally wheels have some panel liner added to bring out the detail. Tires had to be ground out to get the wheels to fit properly. I use this trick quite often. All the logos and emblems were bare metal foiled before painting. A little solvent on a tightly folded over paper towel and the paint rubs off nicely revealing the lettering. Then the model was clearcoated. You can"t see the outline of the foil in person but the camera picks it up in close shots. Almost forgot. The monster 427 engine filled up the engine bay quite nicely and had some good detail.
-
Helmut...I think you had a very good year and produced some very respectable works of art. It was a pleasure for me to follow along and I enjoyed the exchanges very much.
-
Robby Gordon Valvoline Lola Indycar
Rich Chernosky replied to Shunter's topic in Other Racing: Road Racing, Salt Flat Racers
V-e-r-y nice...paint and decals are spot on -
This is a great little kit. You are off to a great start. I did one of these back on July 23 of last year. Will be interested to see your take on this cool looking car.
-
Re-engineering Monograms Lotus Esprit...new update!
Rich Chernosky replied to Dann Tier's topic in WIP: Model Cars
Dann...soooo nice to see this project back on the bench. And nice to see you back as well. A year and a half since you stopped....its more like 2yrs on this one. But don't fret....I haven't touched mine either. Good things take awhile. Can't tell you how many projects I have that are in paint just waiting to be finished. Got one on the bench right now that was painted in 03. Paint might be cured by now...ya think. -
Built 21 this year and bought maybe 5. Still trying to make a dent in the 250+ kits in the stash. 21 is a good year for me considering I lost 4 months early in the year due to a move and setting up my new work area. Did 2 WIP's here on the forum and one of them took over a month and a half. Overall I am pleased with my rate of completion. Will finish one more on New Years Day. Always do.
-
Got this one in the stash (actually have both the hi and low exhaust versions) and recently had it out. Just finished an Autokit so I will be very keen on how you do yours. Thanks for putting this up Matt. You are off to a great start by the way...luv those springs and shocks.