Rich Chernosky
-
Posts
2,108 -
Joined
-
Last visited
Content Type
Profiles
Forums
Events
Gallery
Everything posted by Rich Chernosky
-
1979Porsche 935 K3
Rich Chernosky replied to Peter Lombardo's topic in Other Racing: Road Racing, Salt Flat Racers
Peter, what a fantastic job. I did this kit a few years back and mine was mostly stock with some extra PE detail. But you went way beyond that and turned out an incredible model. Congrats on all the hard work. Yah...I know how the Whittingtons and John DeLorean earned their money. -
Alan Mann Racing F3L/P68
Rich Chernosky replied to Dave B's topic in WIP: Other Racing: Road Racing, Land Speed Racers
Dave...this is turning out to be a real masterpiece. The paint,the shape, the wheels...everything looks spot on. -
Nice color combo for this Beemer. Really like the interior and the color suits this car well
-
1/24 Jaguar XK120
Rich Chernosky replied to Pierre Rivard's topic in Other Racing: Road Racing, Salt Flat Racers
A very nice model Pierre. Up to your usual standards...excellent. Really like the driver figure. You have another talent which is painting figures...an artform all by itself. -
John..thanks for another good "tip". A word of caution. Be careful about combining Tamiya's LP and TS lines of paint. I decant a lot of Tamiya TS sprays. One time I was a little low on TS29 semi black so I added some of the LP semi to it. The resulting gelatinous goo was totally unusable. I have sprayed TS13 over dried LP colors with no adverse effects but I still think some caution is advised. BTW how white is the Zero paints brilliant white? Brighter than TS26?
-
V-E-R-Y nice collection Rex. My favorite has to be that Cougar II. I feel your pain with the move. I did that about 7 months ago. 11 cases with over 1000 models. Took almost a month just to repair all the casaulties. And I only moved 18 miles. The best of luck to you.
-
John..been following this WIP. You picked the right project for a stress free build. I did about 5 of these and they were fun. But wait...I picked up a cool tip from you. Holding assembled wings for painting has always been a problem for me. Never thought of using one of those clamps ( I got a few) to hold them. Thanks and good luck on your project. Its coming along great and should be an awesome model.
-
Like this a lot. Beautiful build. I have this set of decals, got to get around to doing mine. Thanks for the inspiration.
-
How would you tackle this? (NASCAR)
Rich Chernosky replied to SgtForce's topic in Tips, Tricks, and Tutorials
Silvering of decals is when the clear edge of the decal shows. It is supposed to be clear and match the background. Flat paint has a very slight texture and decals don't stick well to it. Kinda like scotch tape on a dusty concrete floor. Silvering most often occurs on flat paint but it can happen on any surface. Depends on the decal and the glue used. -
Excellent work. The paint and decals are very sharp. And welcome to the forum Damien
-
How would you tackle this? (NASCAR)
Rich Chernosky replied to SgtForce's topic in Tips, Tricks, and Tutorials
I would go with Trevors suggestion. The decals will stick better on the gloss. After the flat or semi has dried you can use a very soft camel hair brush and apply Future to just the decals the get them to shine. -
Emre...I really like this project. The car is so sleek and racy looking . You have captured it well. This is a fine piece of modeling...well done. Do the third version by all means. It will be a great set.
-
1965 Honda RA272 F1
Rich Chernosky replied to 1hobby1's topic in Other Racing: Road Racing, Salt Flat Racers
Real nice job on this one. Its a great kit. You should have heard the sound these things made. -
Hugh. Yours turned out great. Mine has sat in its box forever. The Tamiya LS line is great. You might want to try thinning with Mr Color Leveling thinner for your last coat.
-
Belkits MG Metro 6r4
Rich Chernosky replied to dougwintz's topic in Other Racing: Road Racing, Salt Flat Racers
Cool looking car Doug and you have done a great job with it. The beauty is in the details and you nailed it. -
1991 Mclaren MP4/6
Rich Chernosky replied to Rich Chernosky's topic in Other Racing: Road Racing, Salt Flat Racers
-
Steve...all I can say is ...WOW. The paint, the carbon, the wheels, the interior are all great. Really liked the license plate...that was a cool touch matching your screen name. How didja do it?
-
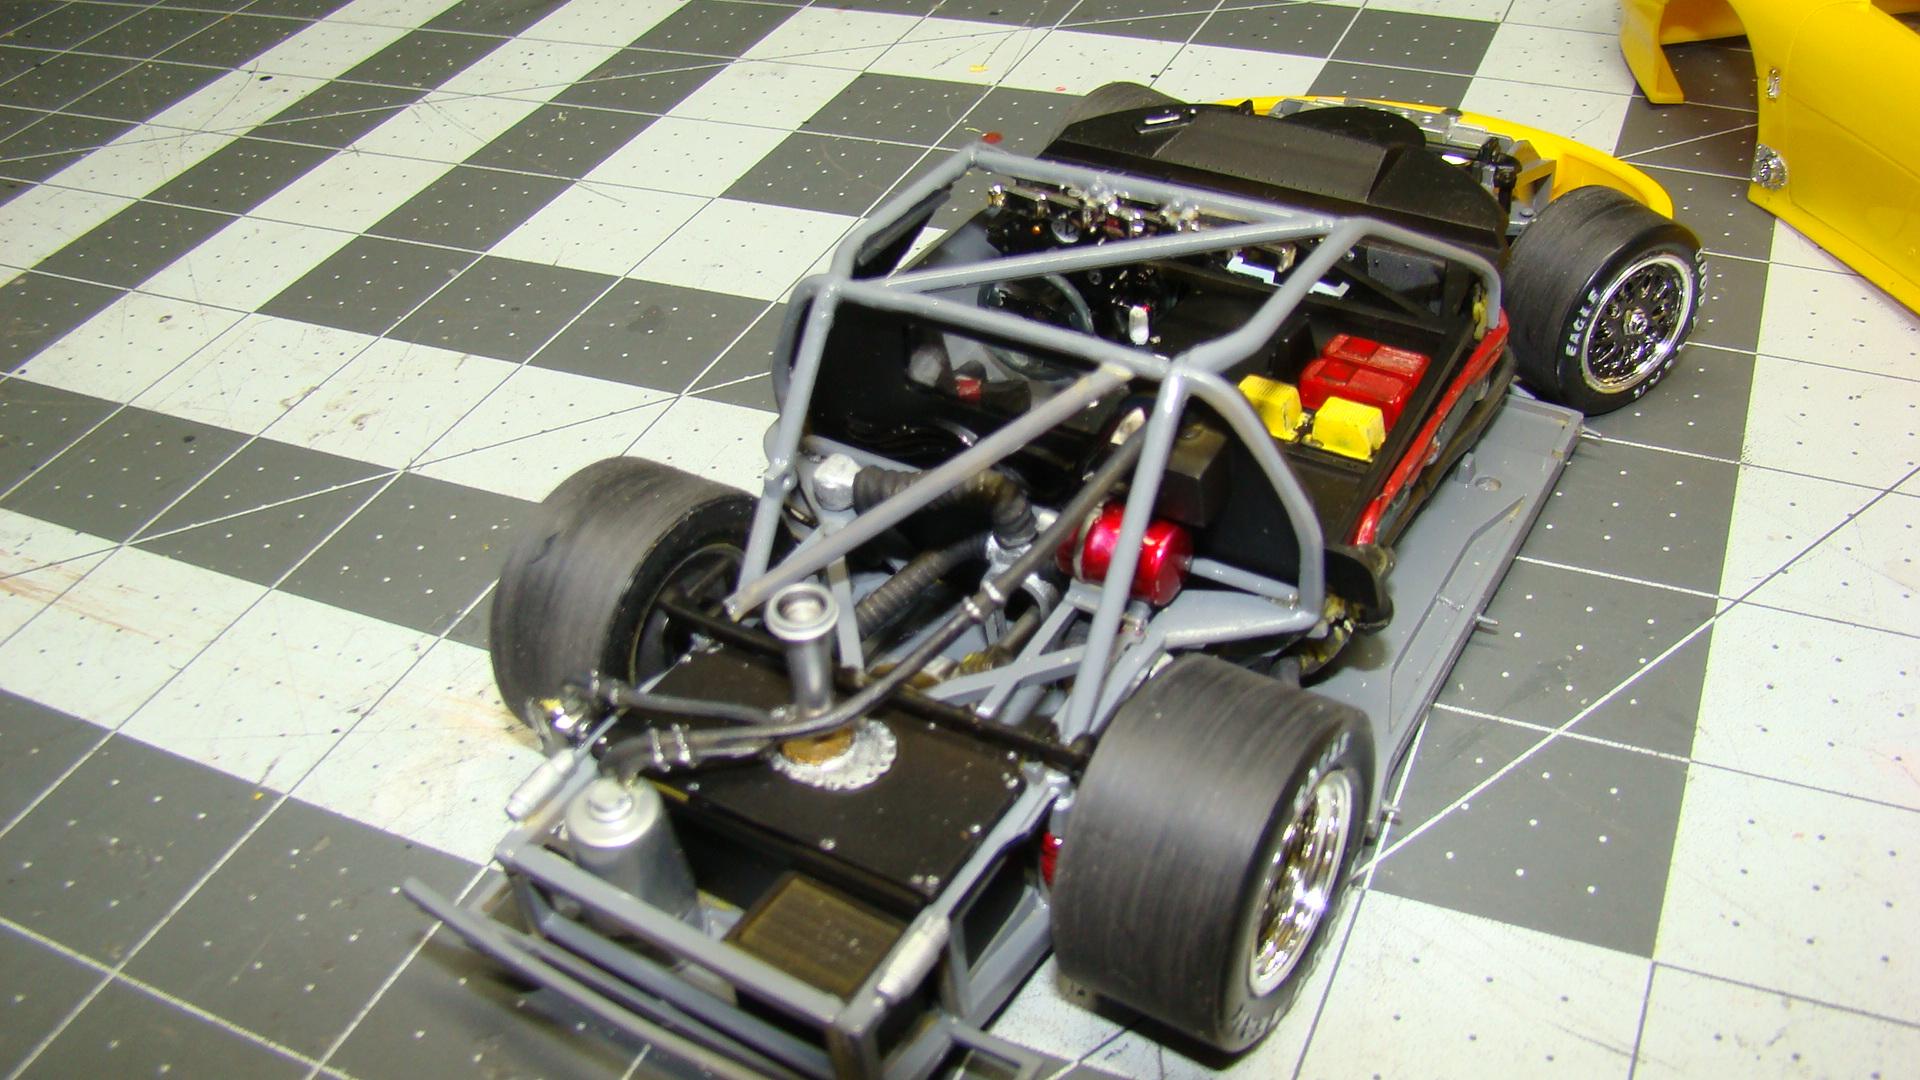
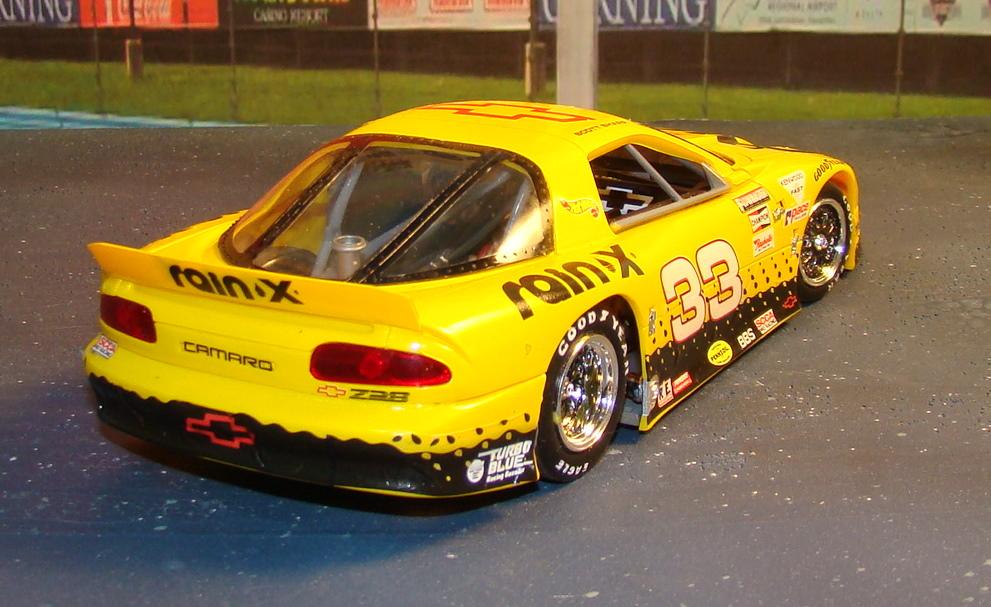
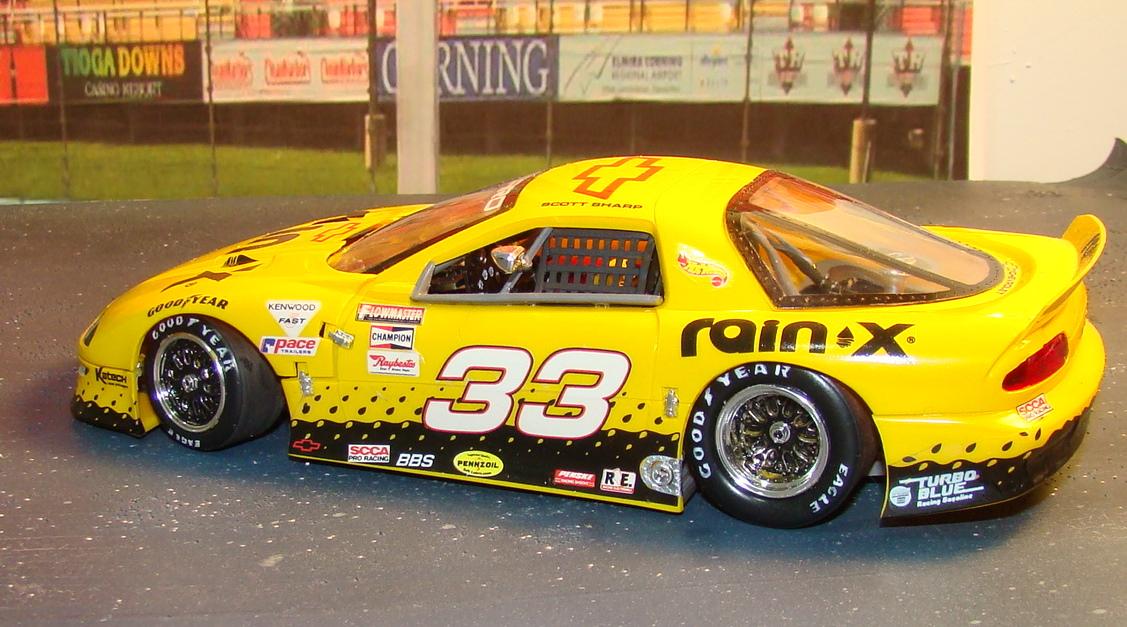
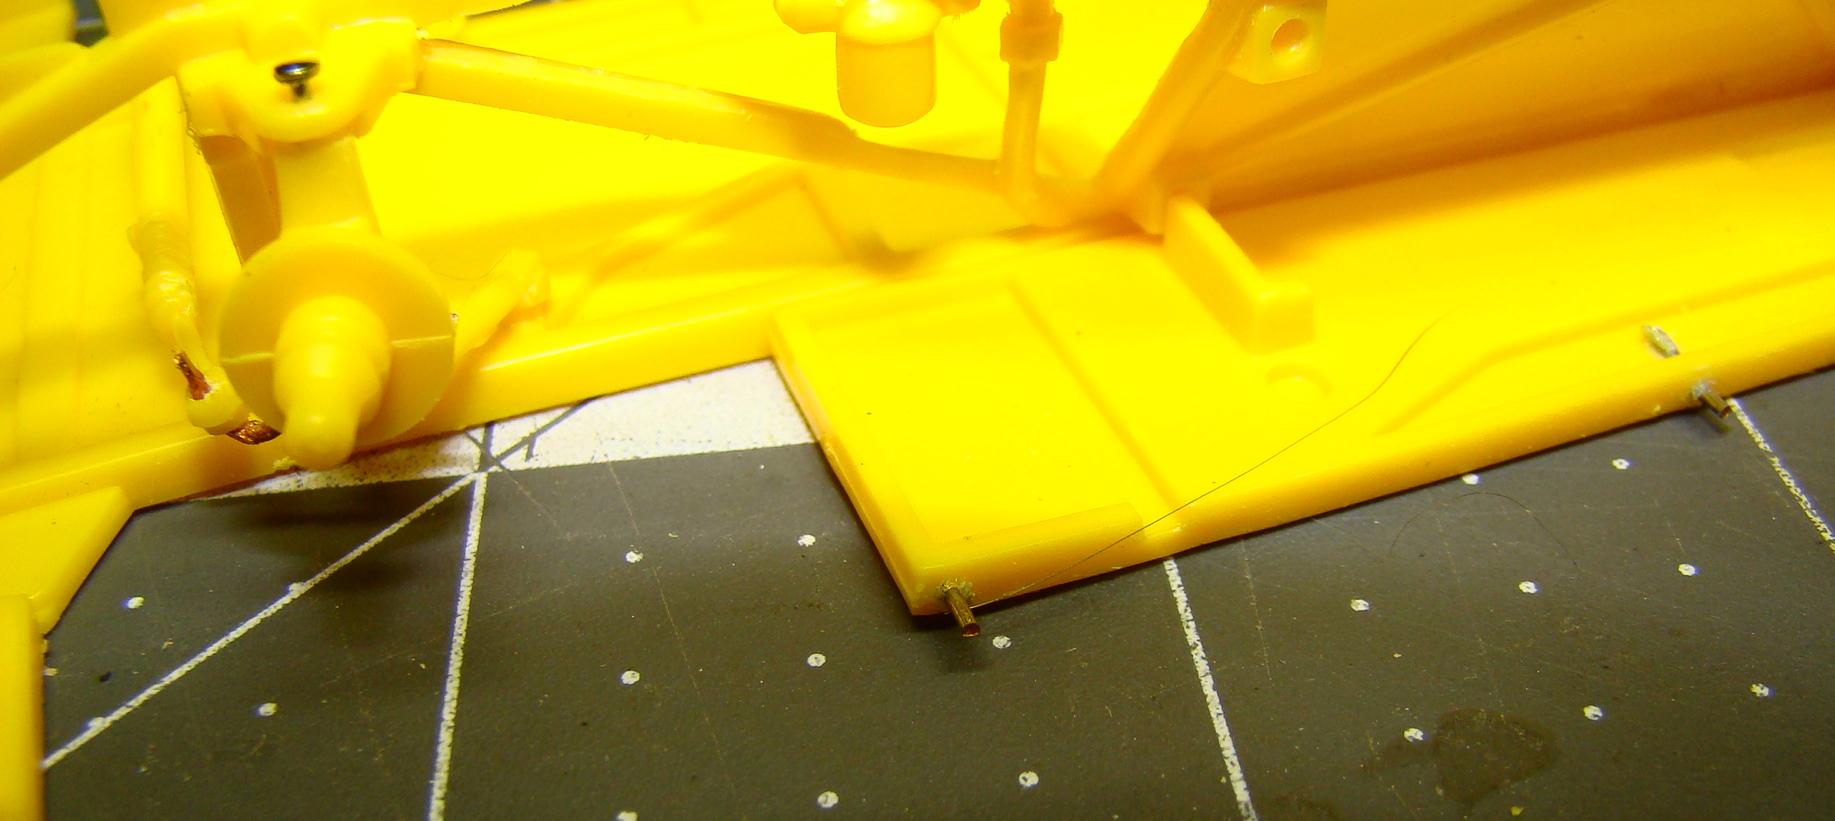
Just off the Bench. Scott Sharps 1993 Championship winning Rain-X Camaro. Color for this is Tamiya TS16 Bright yellow. Kit is mostly box stock with several modifications and additions. More info in the picture captions. Not a bad kit for being 30yrs old. This is first third time around for the Revell Camaros so many of the problems I encountered with the first two were easily solved. Kept lots of notes and this helped greatly. Thanks for looking. Chassis on this kit is very well detailed so only seatbelts and some engine wiring were added. Note the three pins sticking out of the chassis. Also the magnets on the front clip (thanks Mark) These hold the body firmly to the chassis and were done first thing. VBack of the chassis also shows the wealth of detail. Some tricky assembly but all fit fairly well. Uuuhh..except the front firewall and dash. That required some surgery. Finished car on its wheels. Car sits low and mean. Wheels steer with the kit tie-rod. Rear view. Glass fit pretty good. May have to take the body back off and re-position that mirror and side support. Don't think its right. About those decals. They were a real bear. Getting them off the paper was a struggle, moving them into position was a struggle, the front and back had to be cut into 3 pieces just to get them on. Although for 30yr old decals that is to be expected. Once on and in position they dried nicely and conformed very well. Never saw decals that wanted to fold under so easily. Took some work and patience. This completes my set of the three kits Revell issued in 93-94. Cool collection. Thanks for looking and comments welcome.

-
1991 Mclaren MP4/6
Rich Chernosky replied to Rich Chernosky's topic in Other Racing: Road Racing, Salt Flat Racers
Thanks Bruce. The kit was a bit of a bear to do but the bodywork fits so well that in the end I was satisfied. Never was a fan of Senna while he was racing but after seeing the movie about him and the struggles he went through I have changed my mind. He was an incredible driver and his death a great loss. -
SCCA Camaro Trans Am Set
Rich Chernosky replied to Scale-Master's topic in WIP: Other Racing: Road Racing, Land Speed Racers
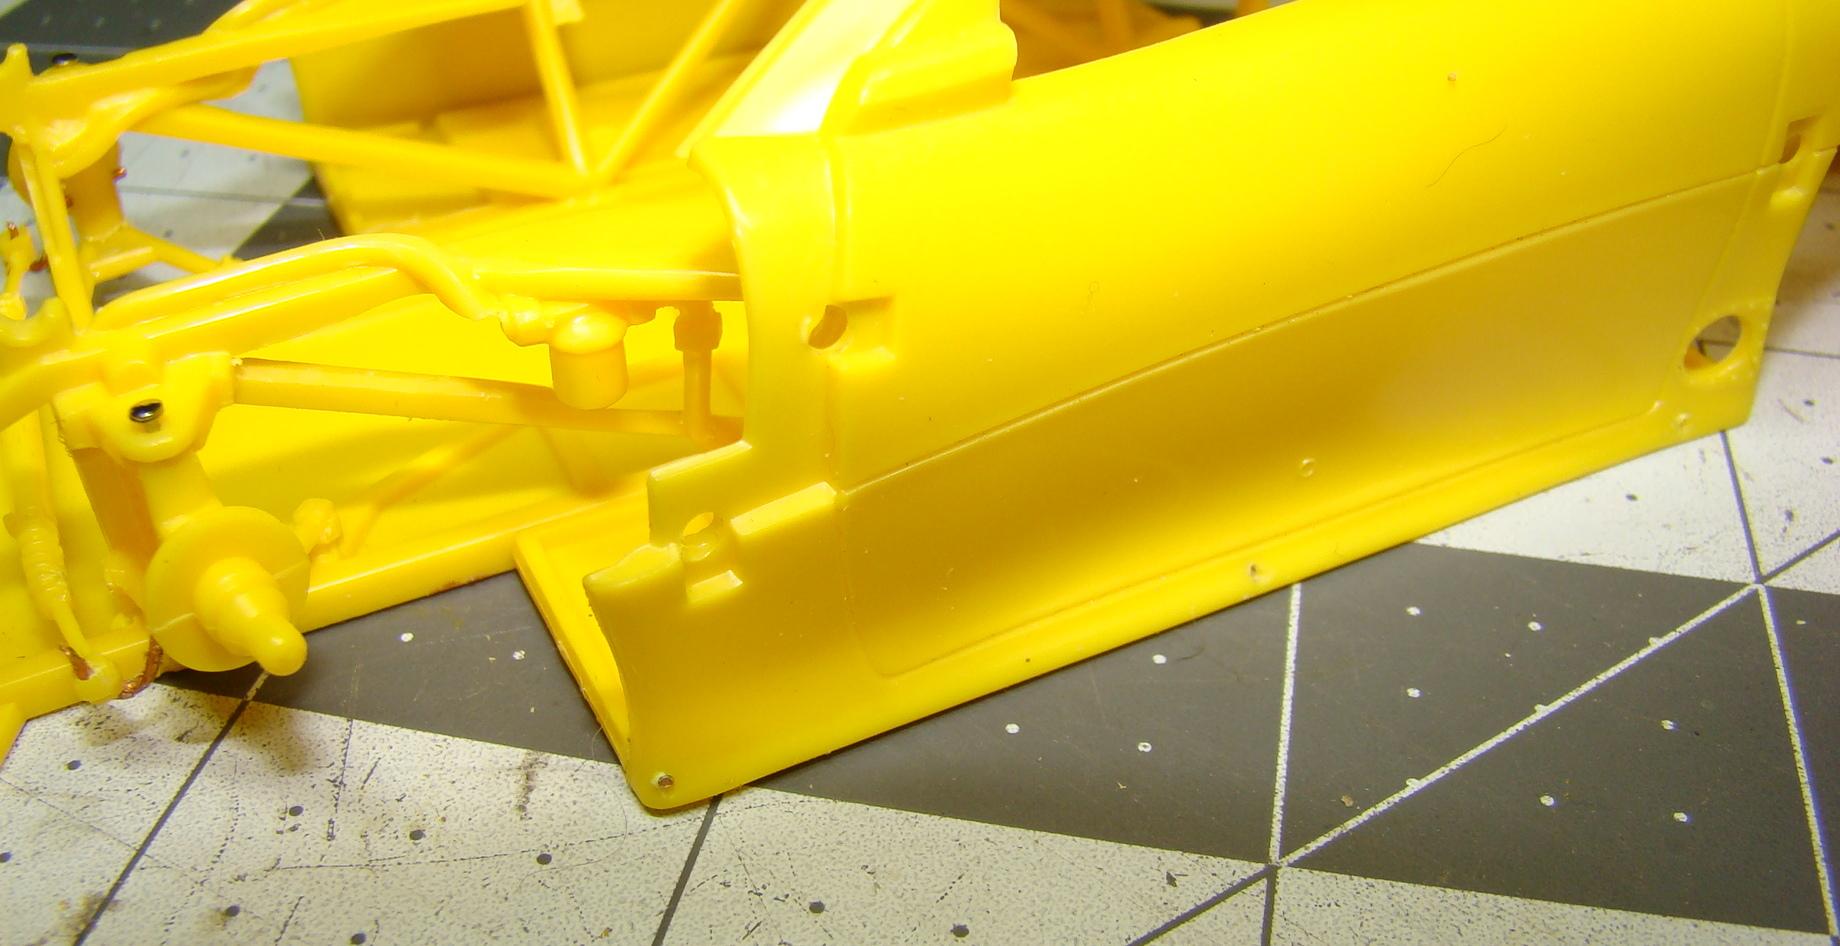
Mark...this WIP really caught my eye since I am currently working on the Rain-X Camaro. I have already completed the Sunoco and Hot Wheels car so this is the last one to complete my set. Really like the magnets for the hood and will incorporate them into this build as the other two are just held in place with gravity. Here is a little trick I picked up from the first two builds. Note the three holes through the body in the first pic. These go straight through into the chassis. 020" piano wire is glued in to the chassis holes and the pin will hold the body in place during final assembly. Hope this helps your build. Its an ambitous project to do three at once (I've done it) but these three kits lend themselves to that. The chassis has to be assembled first then hold the body in place with tape. Drill the holes through the body first then locate them on the chassis. Pull the body off and finish the holes in the chassis getting them into solid plastic. Note the steering wheels. A pet peeve of mine. This is easily accomplished with some careful drilling. The tie rod seperates from the chassis easily. The control arm is copper wire and bends easily to adjust the track.
-
Jim...that's great little kit and you did a good job with it. Like the wheels especially.
-
NuNu BMW M6 GT3 "Jägermeister"
Rich Chernosky replied to galaxyg's topic in Other Racing: Road Racing, Salt Flat Racers
Never would have thought that green and orange would go together but this turned out to be a very striking livery. Well thought out and executed model. Congrats on a job well done.